


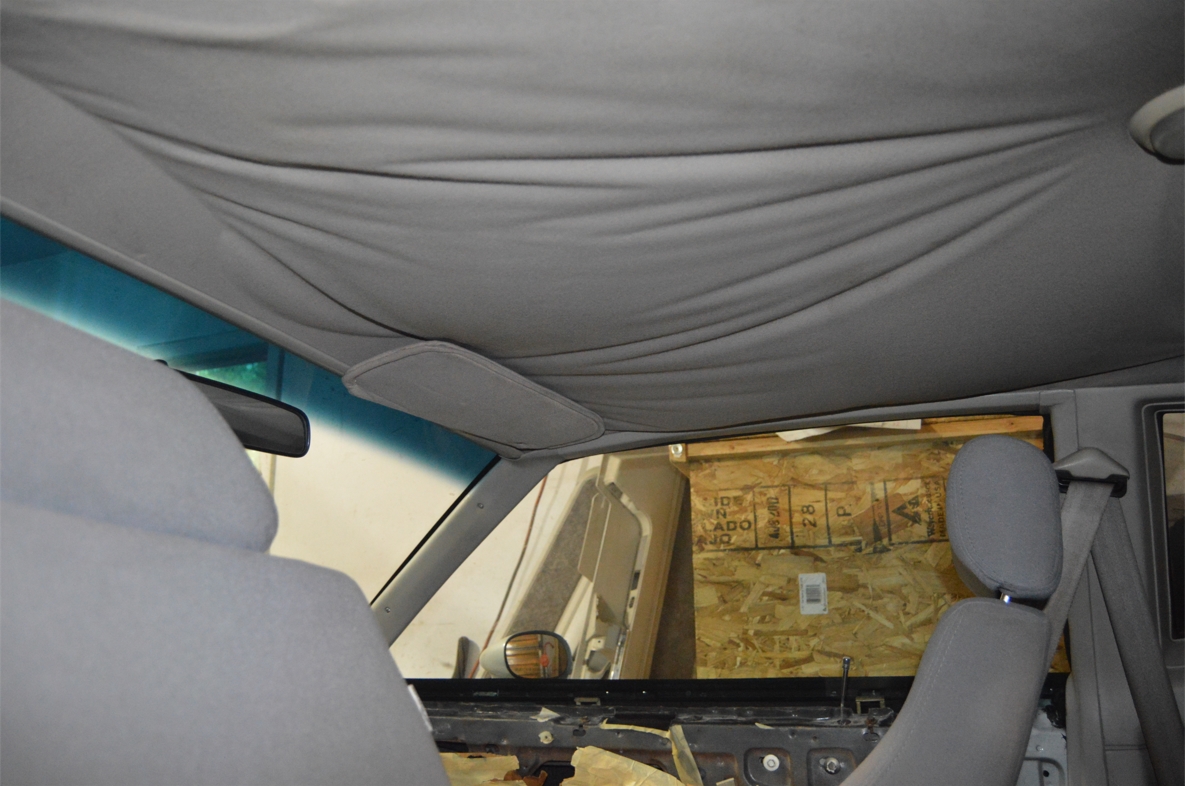
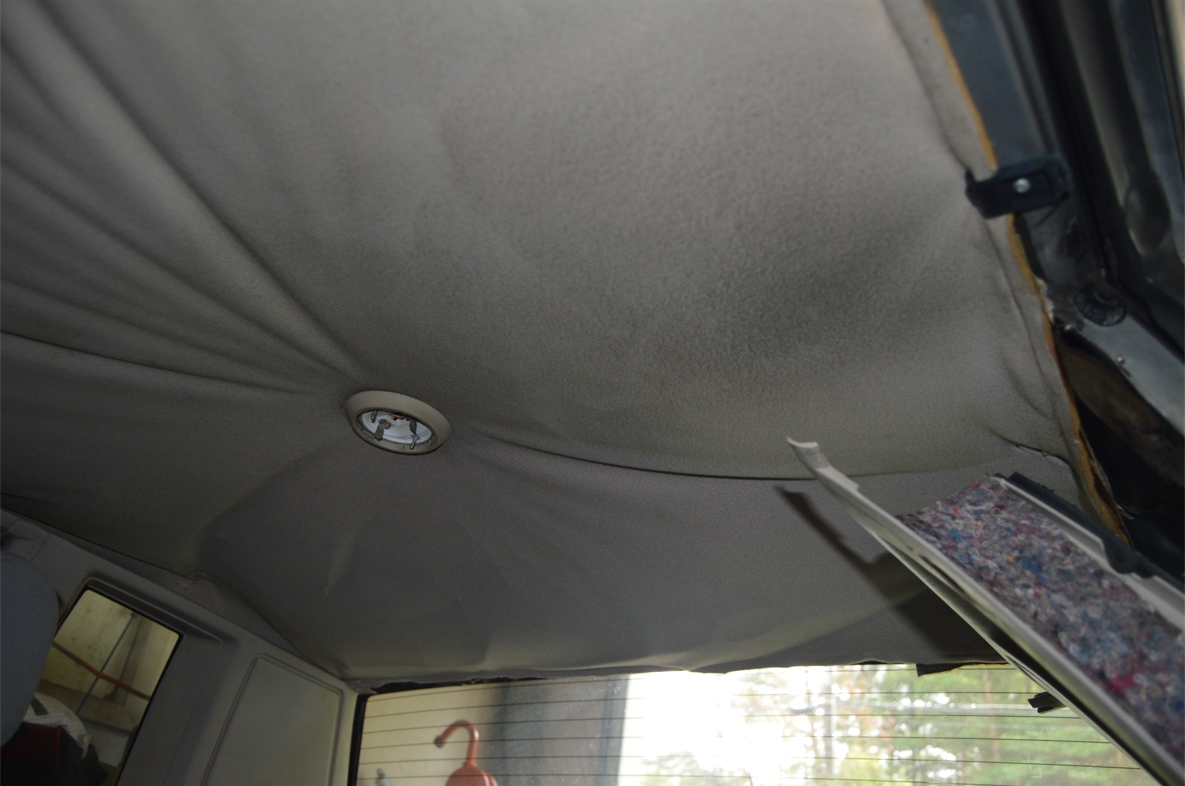
The factory headliner (AKA head pad, roof liner, roof panel) isn’t going to last forever in your Gbody Regal.
Eventually it will start sagging, tearing apart, or actually fall down.
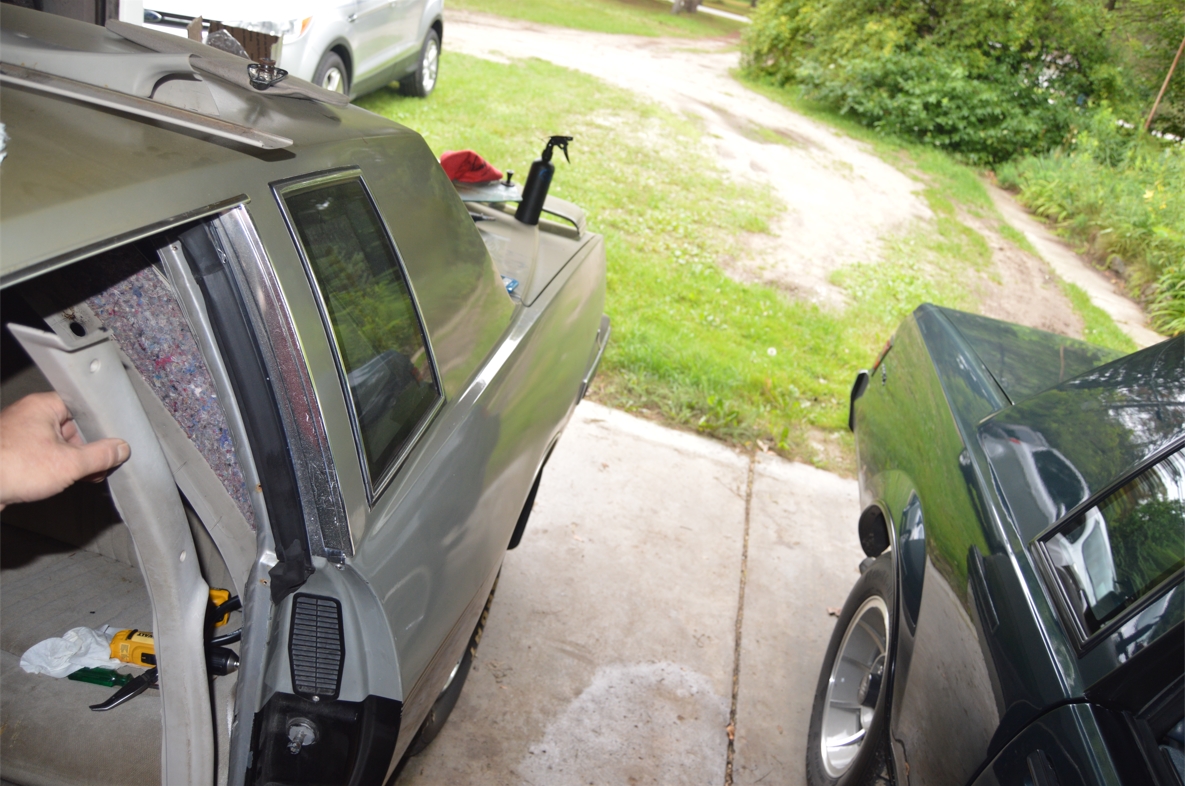
That’s what happened to this GM G-body.
It’s a 1984 Pontiac Grand Prix, but close enough to the Buick Regal that we can look at how and what’s all involved in replacing it, since the parts are almost identical.
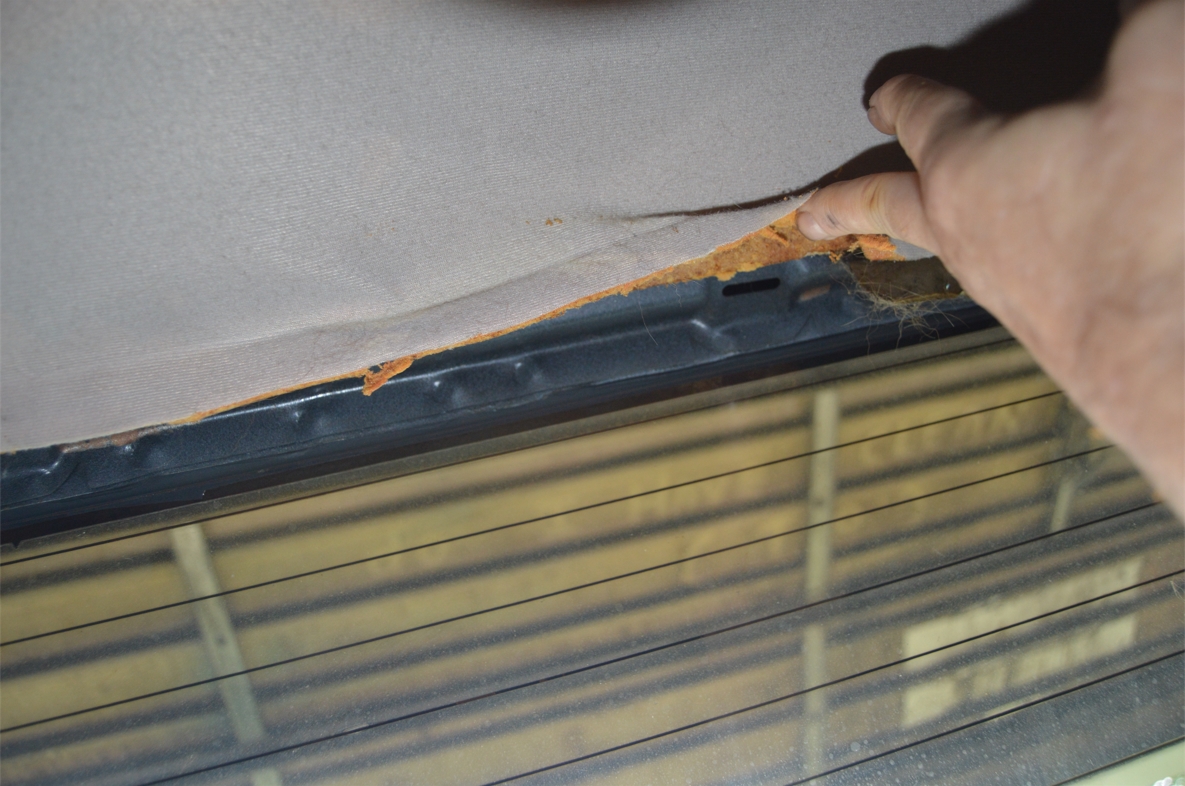
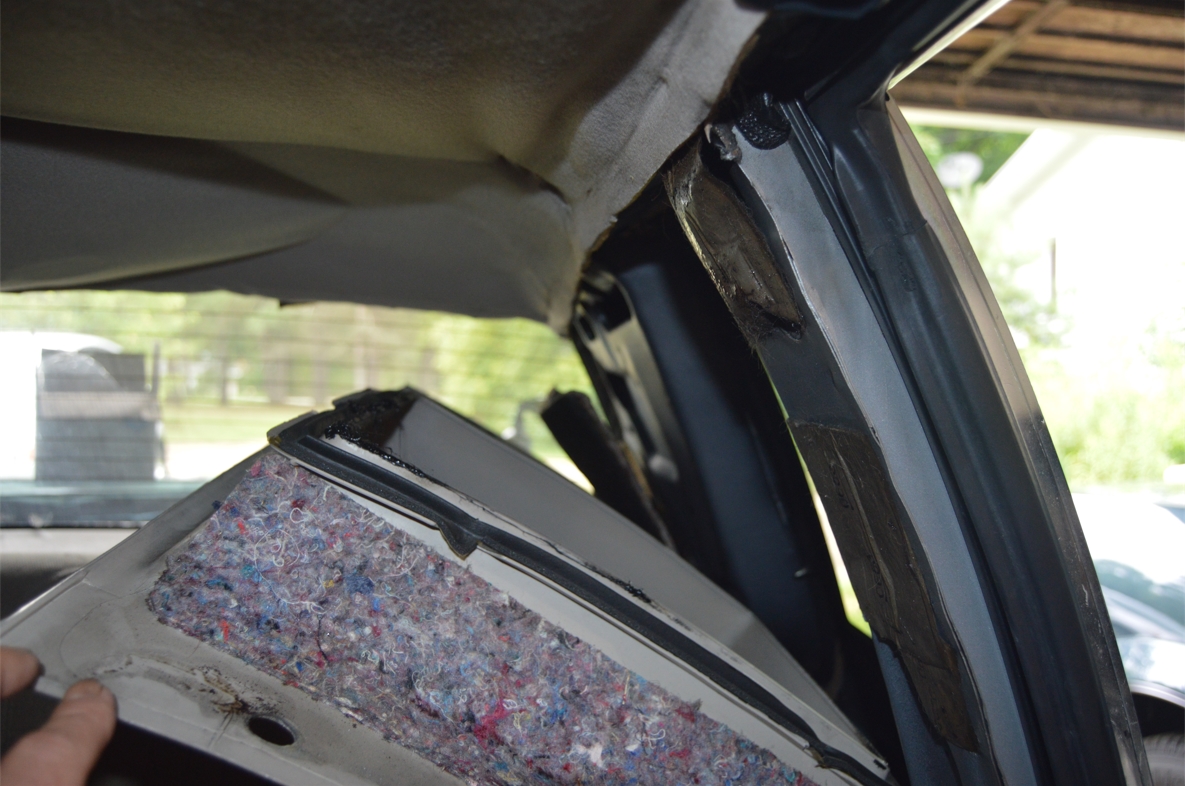
Since the G-bodies are at least 34 years old (and some older), that factory padding (backer board) that’s behind the fabric material you see from the interior, has pretty much disintegrated.
Be prepared when you pull it down for it to make a mess everywhere with all the crumbs and shreds of pieces!
The owner of this Poncho GP chose a different color than stock when he ordered the new headliner.
To keep things in theme, he also bought a new pair of matching sunvisors.
And since all that was new, a set of shiny chrome visor brackets was also included in the purchased bundle.
[The owner of this Gbody vehicle, Kyle’s cool Grand Prix, was shown in the post we did when we attended the CGBG Ohio event]
[as most do it yourself guys do, they research and look into the “how-to’s” available online for accomplishing a task before they attempt the job at hand. That’s what Kyle did for this “replace a headliner” project. There is a bunch of info on the web with small bits and pieces of minor details on how to do this R&R job, but it was scattered, and none of the material he found was an actual complete, start to finish “how to do it” – so we decided to make this post so if you need to ever take on this feat yourself, you’ll have some idea of what to expect!]
.
.
COMPLETION TIME: 3-4 hours
.
PARTS:
– new headliner, sunvisors, sunvisor brackets (about $300 with shipping, from “classic to modern muscle cars” on ebay)
– you may need to acquire new molding clips (for the front, rear, & above door trim)
we had all of them new on hand, but didn’t break any of the old ones while uninstalling the trim pieces, so we just left the old ones in place.
(note that the new replacement clips are slightly different looking than the stock ones are, but should work equally as well as the OEM versions)
(the Pontiac has plastic clips in all spots, some of the Regal ones may be made of metal)
.
TOOLS:
– phillips screwdriver (most of the plastic trim parts, coat hooks)
– plastic pry bar (removing trim)
– 45 Torx (seatbelt bolt)
– pliers (removing dome screws)
.
There’s 3 lengths of screws used within all the trim (all phillips):
the below are for each side or each piece:
3 medium, sunvisor brackets
2 medium (with attached washer), a-pillar
4 medium, door sill
2 long 1 small, b-pillar
1 medium, coat hook
1 long, sail panel
2 medium, on the (entire) rear window trim piece (1 on each side)
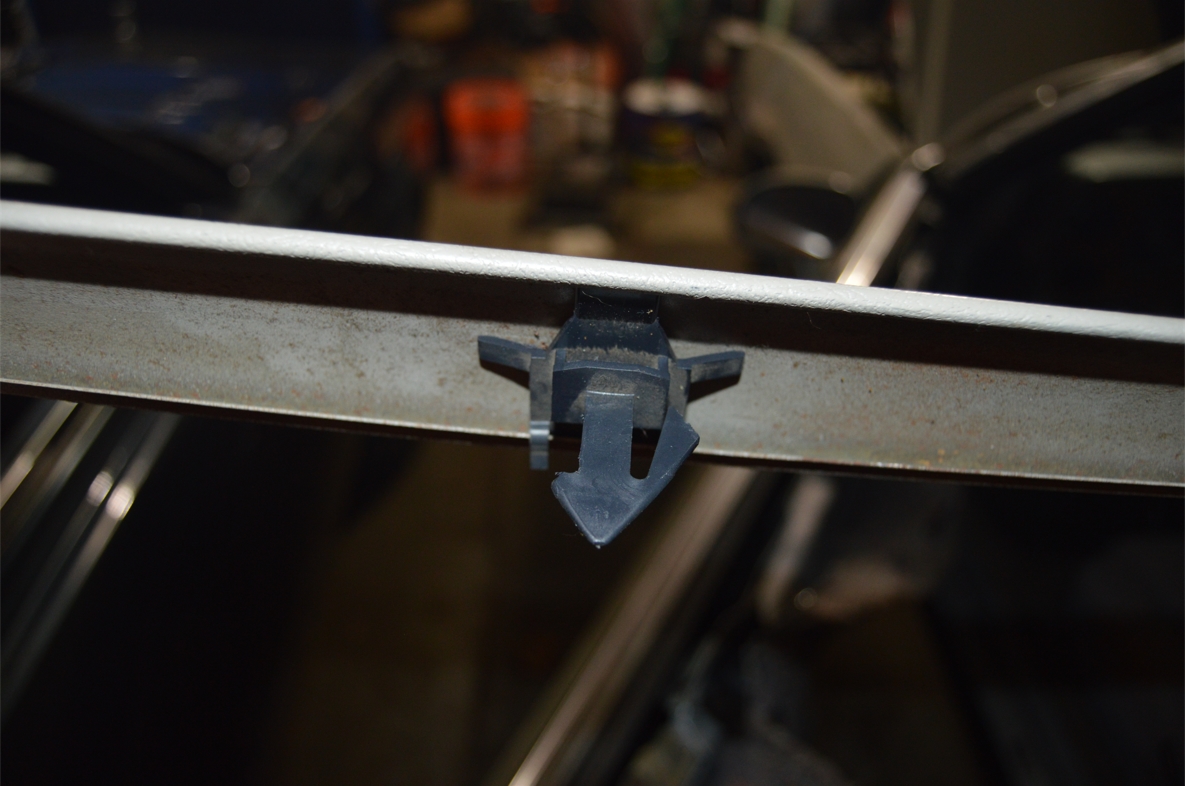
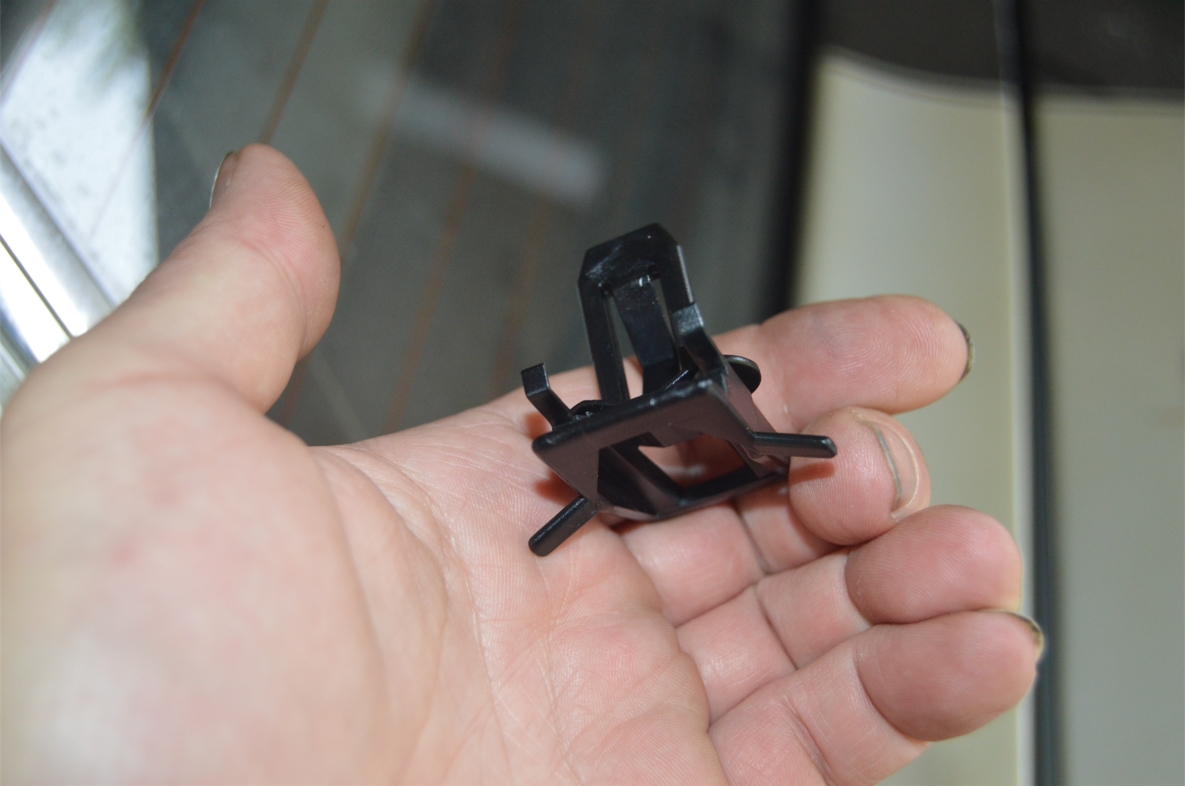
The front windshield trim piece is held in by 5 plastic clips.
The rear windshield trim piece is held in by 3 plastic clips (and 2 screws on the ends, 1 on each side).
The rooftop door pieces are snapped into place, held in by 3 clips (the clips themselves are each held in by a phillips screw).
The front windshield trim, rear windshield trim, rooftop door trim, and doorsills, are made out of metal.
The A & B pillars, as well as the sail panel, are plastic.
.
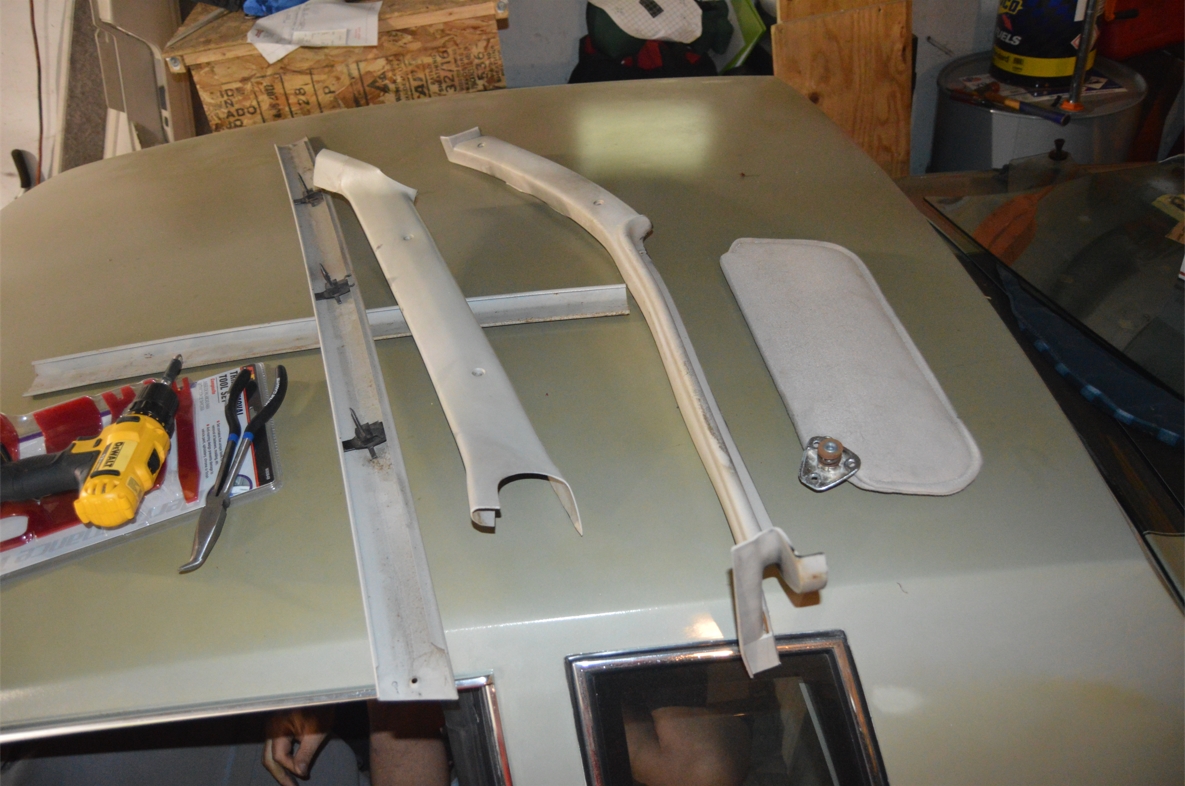
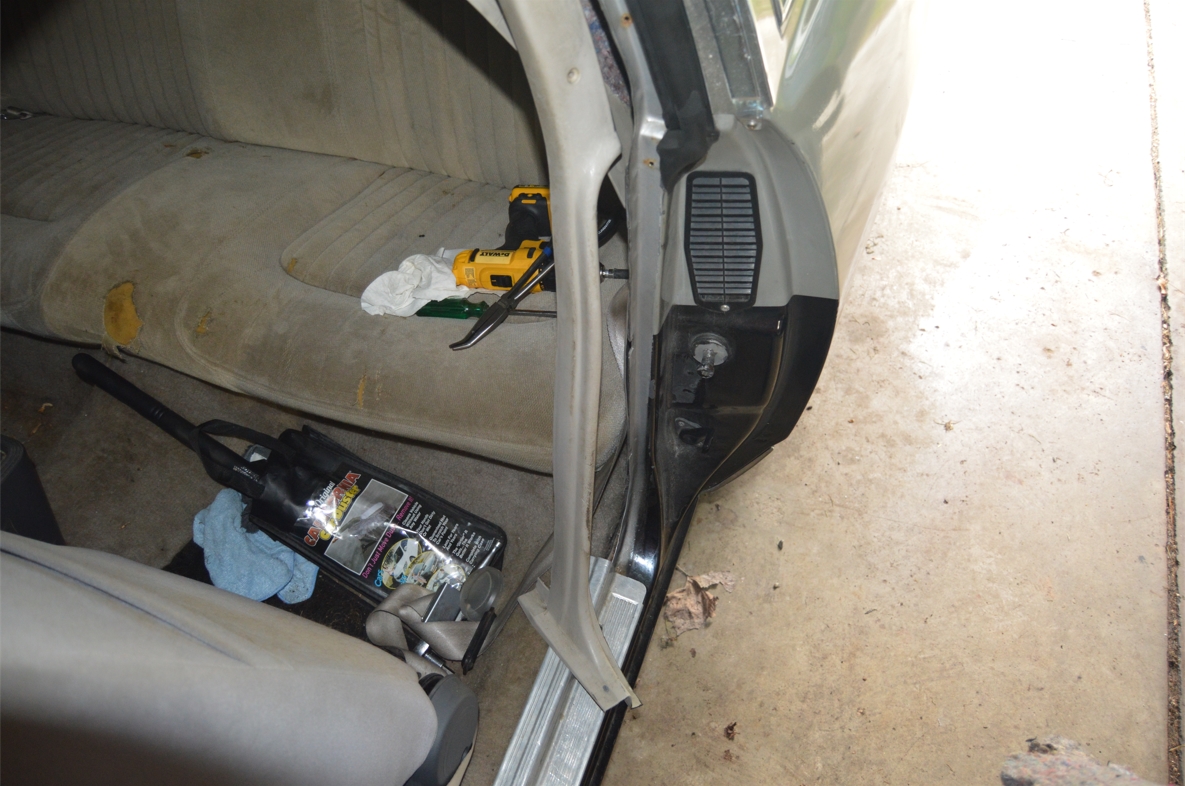
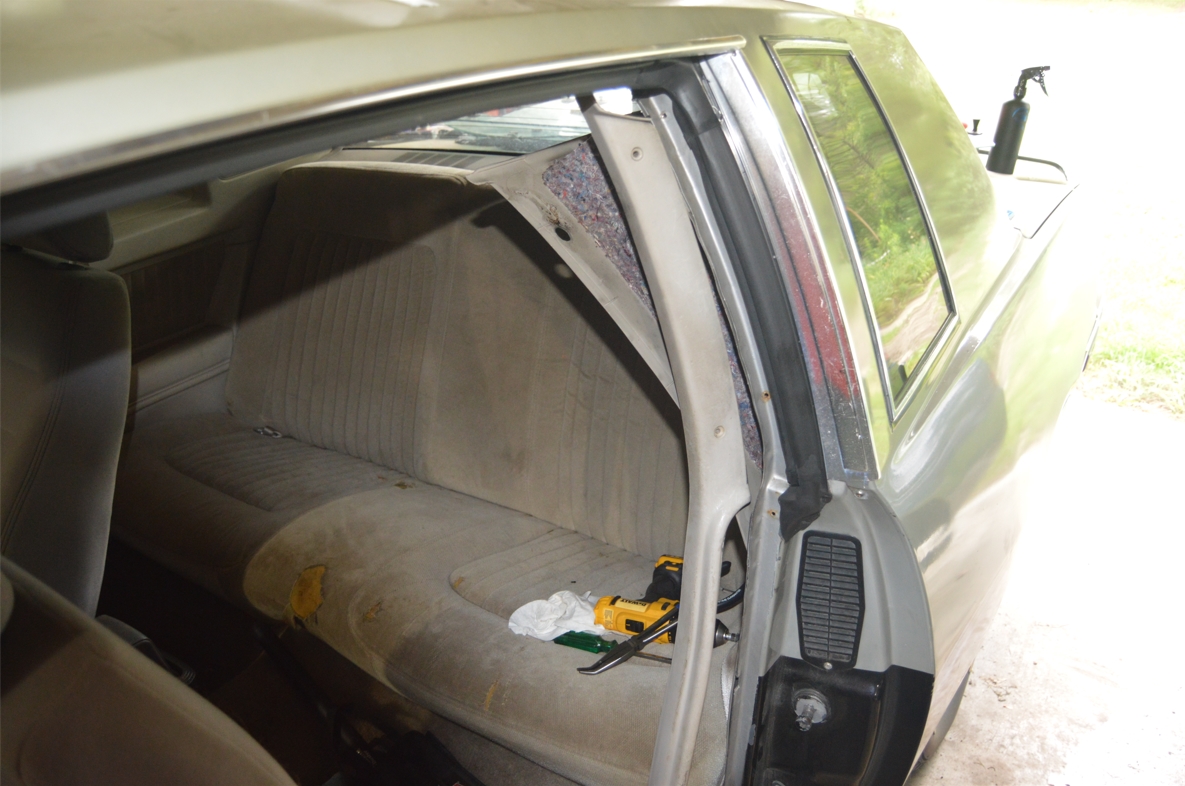
DRIVERS SIDE TRIM PIECES REMOVED:
.
.
An easy way to remember how the trim pieces are installed (when finished), is that they go on from the front of the car, to the rear of the car. So all of the pieces overlap (go on top of) the last piece that was installed.
.
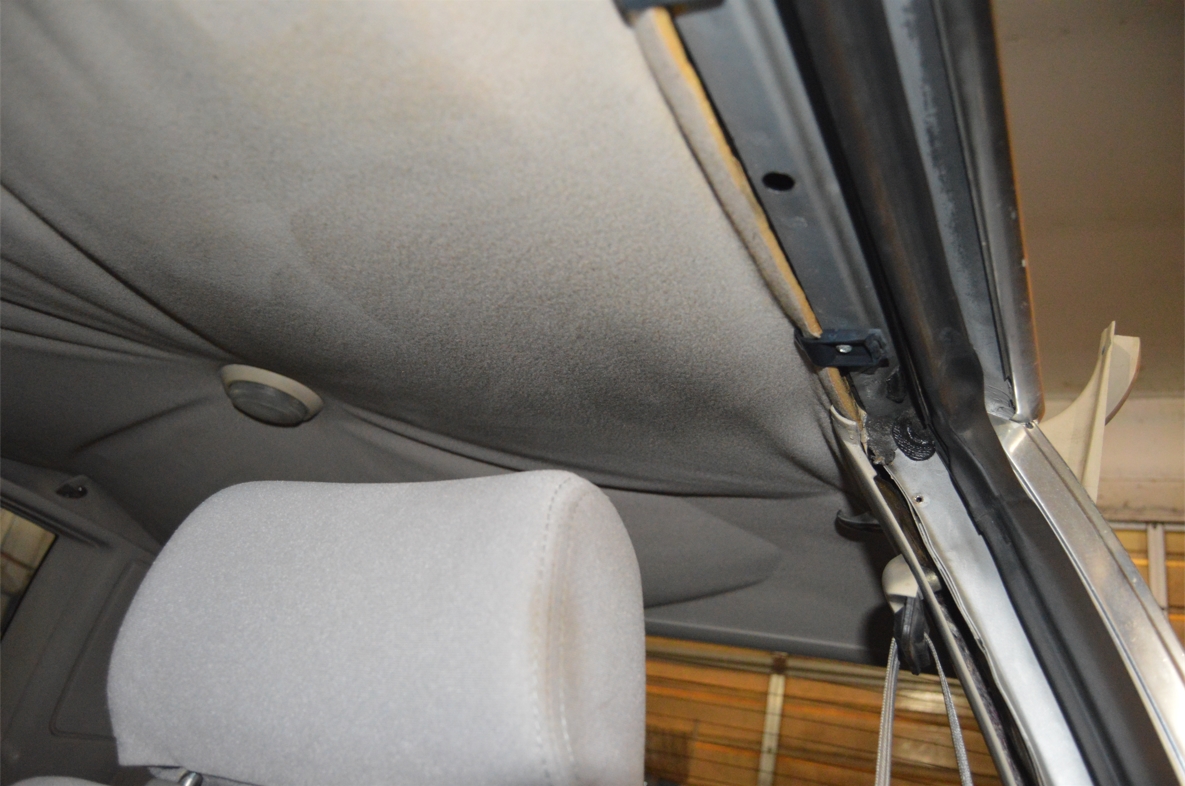
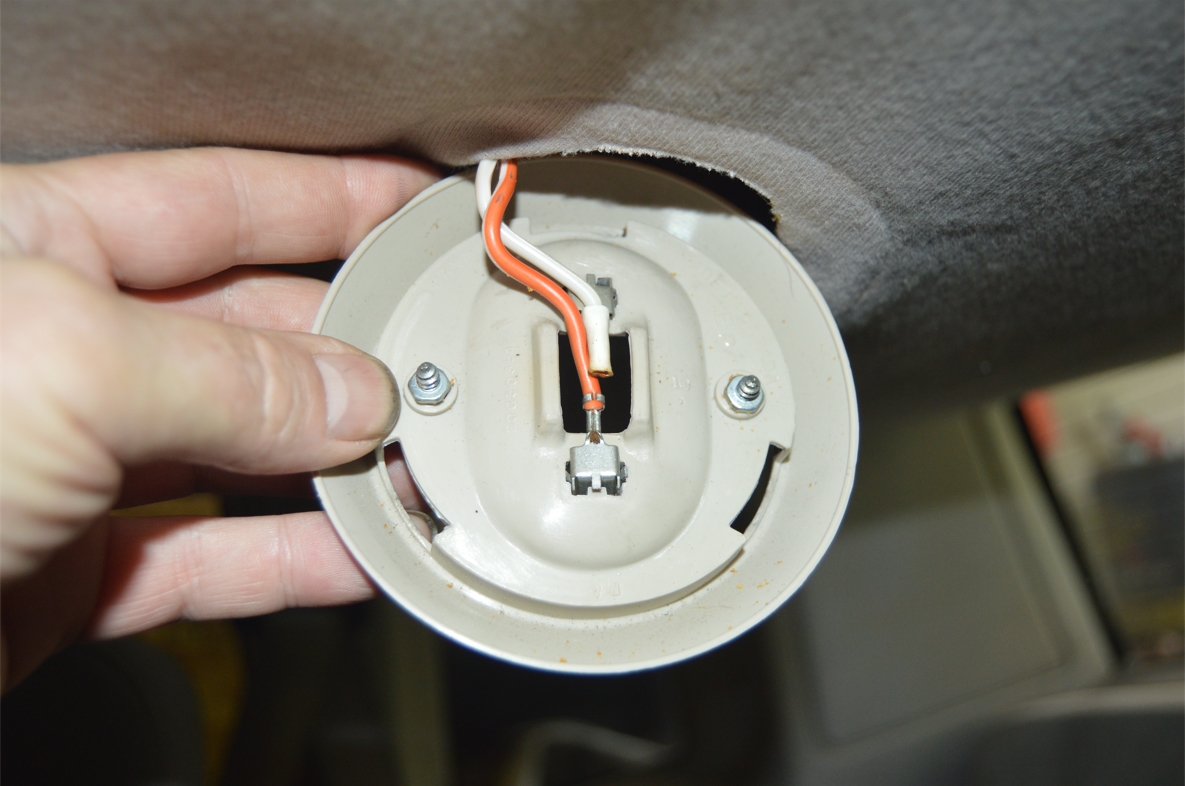
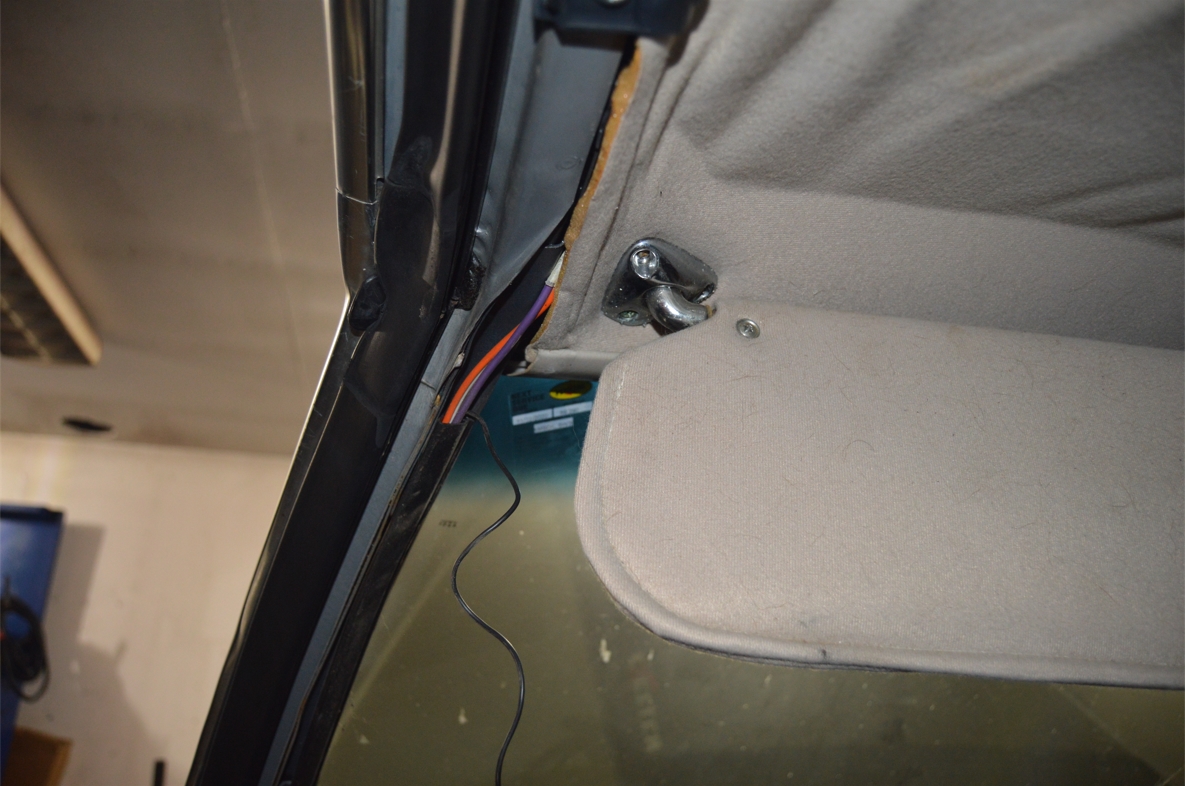
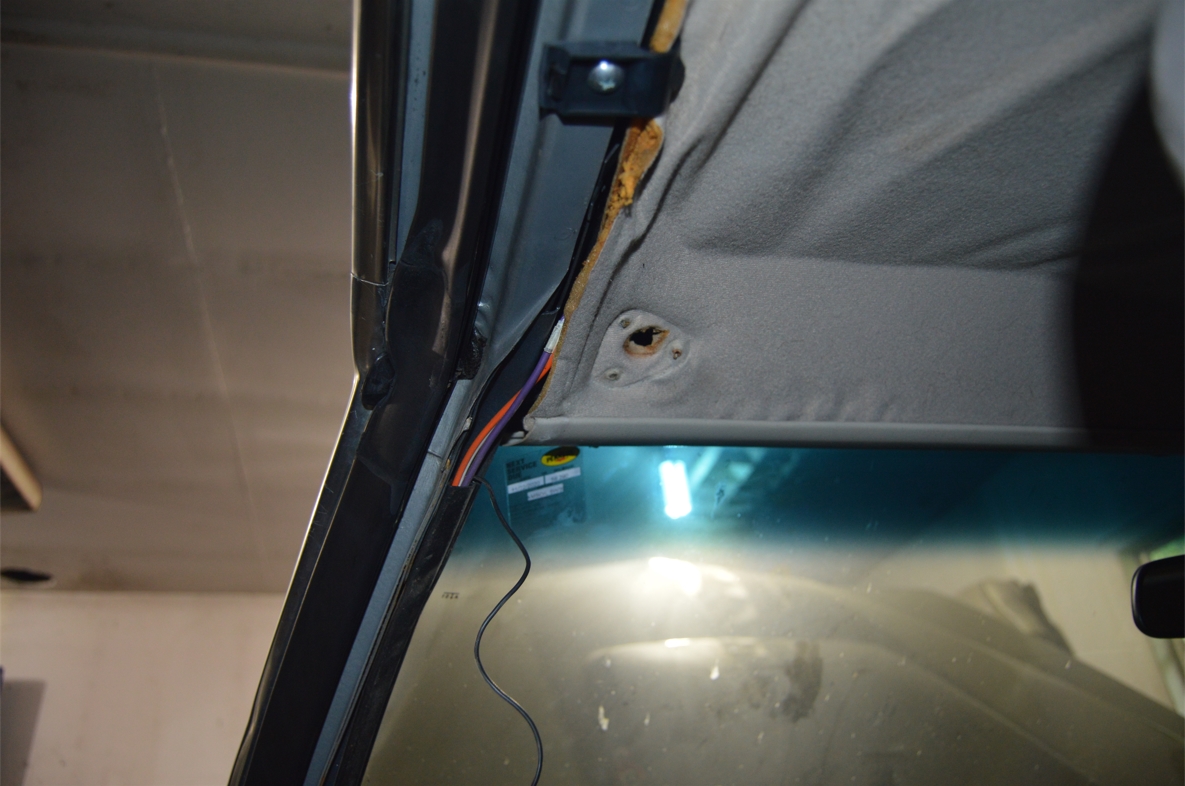
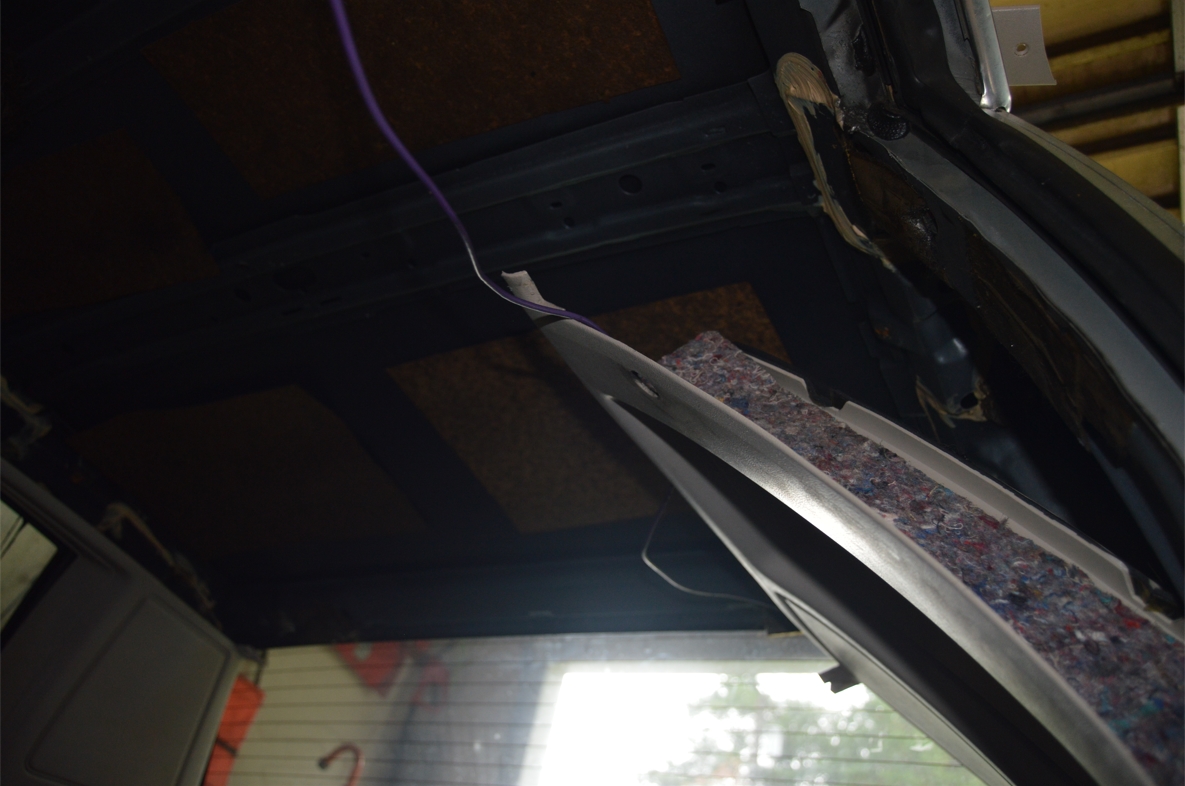
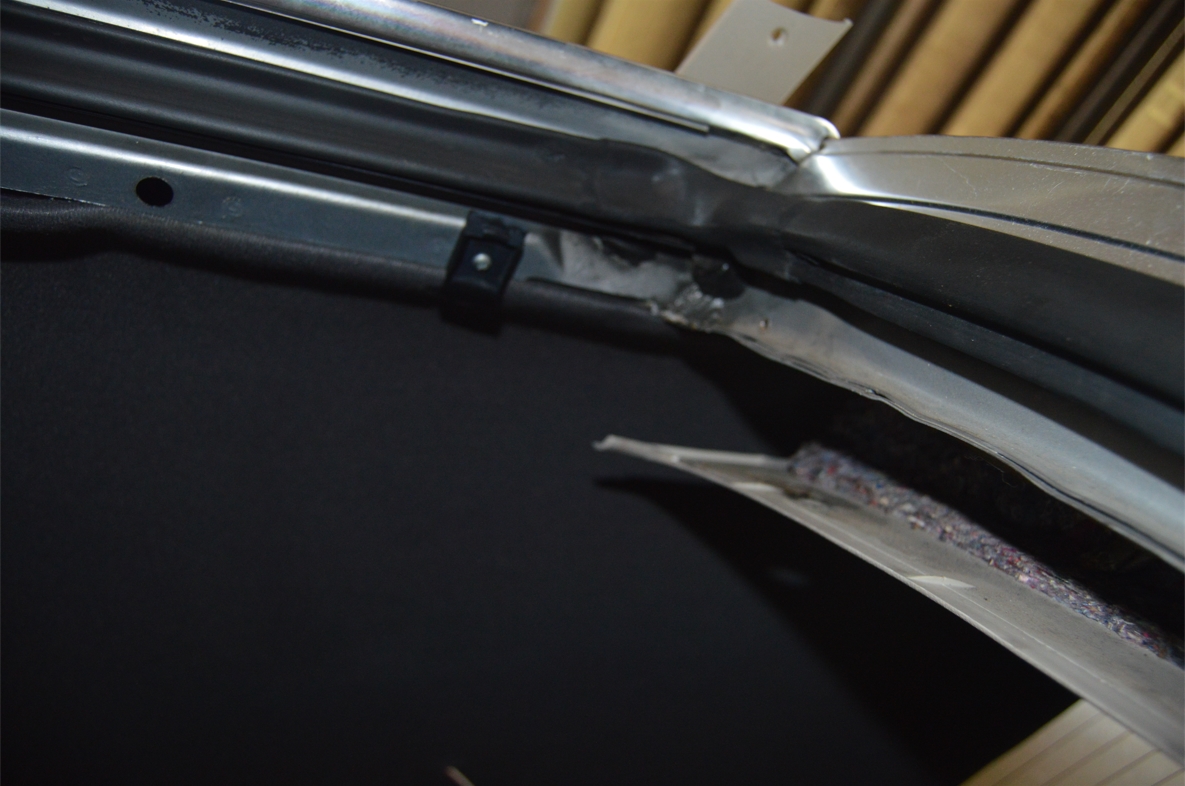
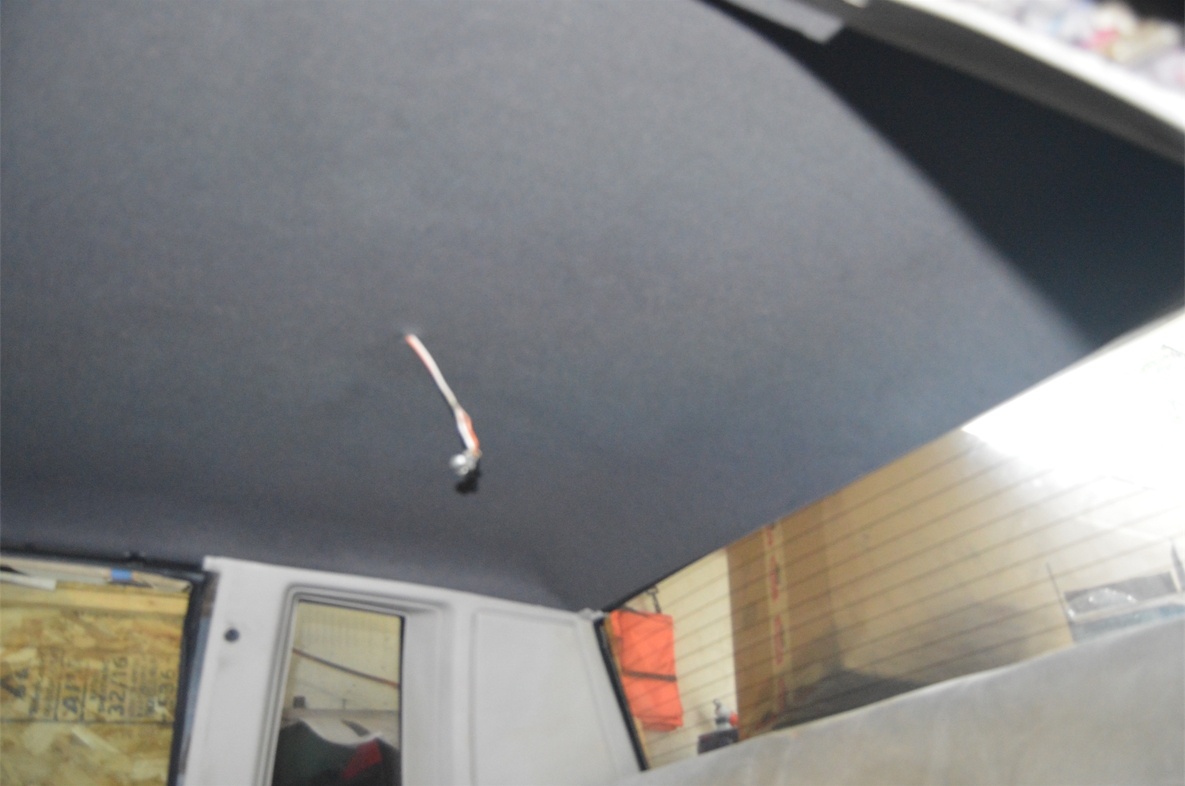
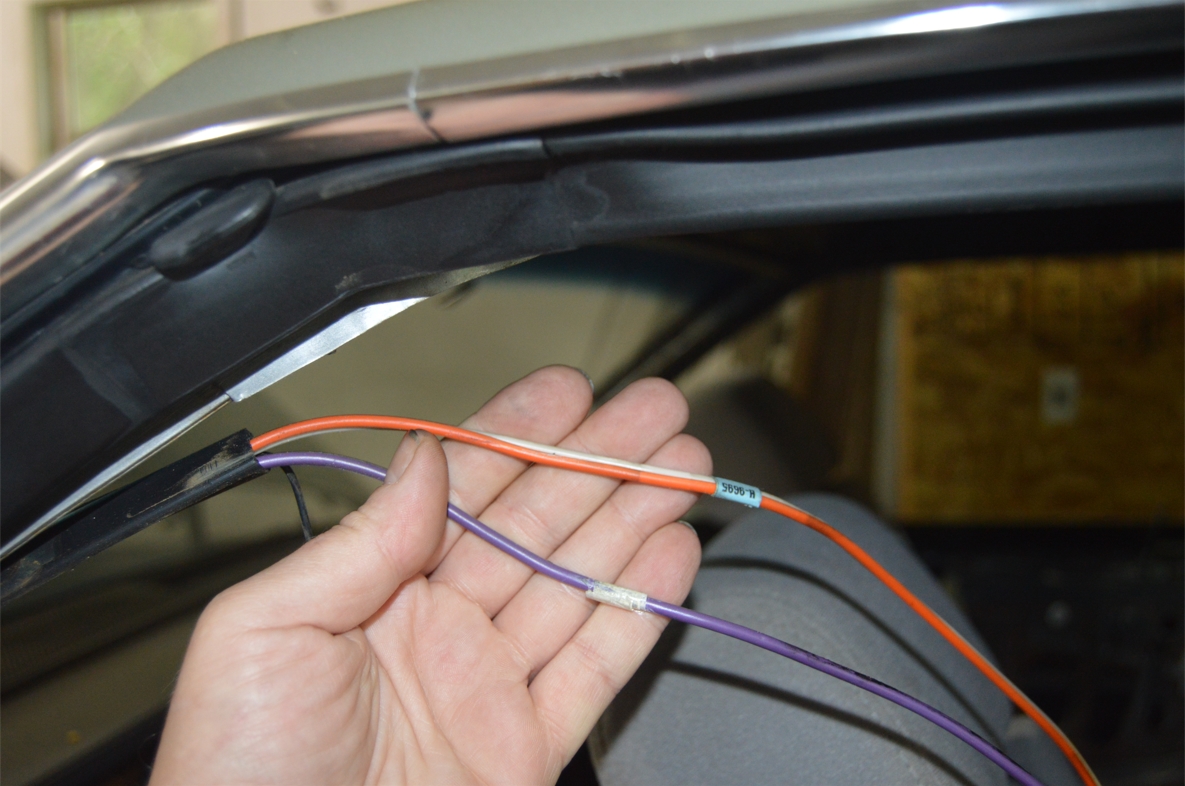 There are 3 wires that run on top of the headliner.
These wires run up from under the drivers side a-pillar trim piece.
The purple wire is for the rear window defogger (may be a different color in the regal).
The white wire and orange wire are for the dome light (on all Gbody cars).
(the white is the ground, the orange is the power. These 2 wires are attached together [they run side by side] along the length of the entire wire.)
(you can see Regal dome light wiring here)
.
HOW TO REPLACE:
.
REMOVE OLD HEADLINER:
.
You will remove everything from the back of the car working your way towards the front.
Work side to side progressing toward the front of car while removing the trim.
1. Remove the door sills. (4 phillips screws)
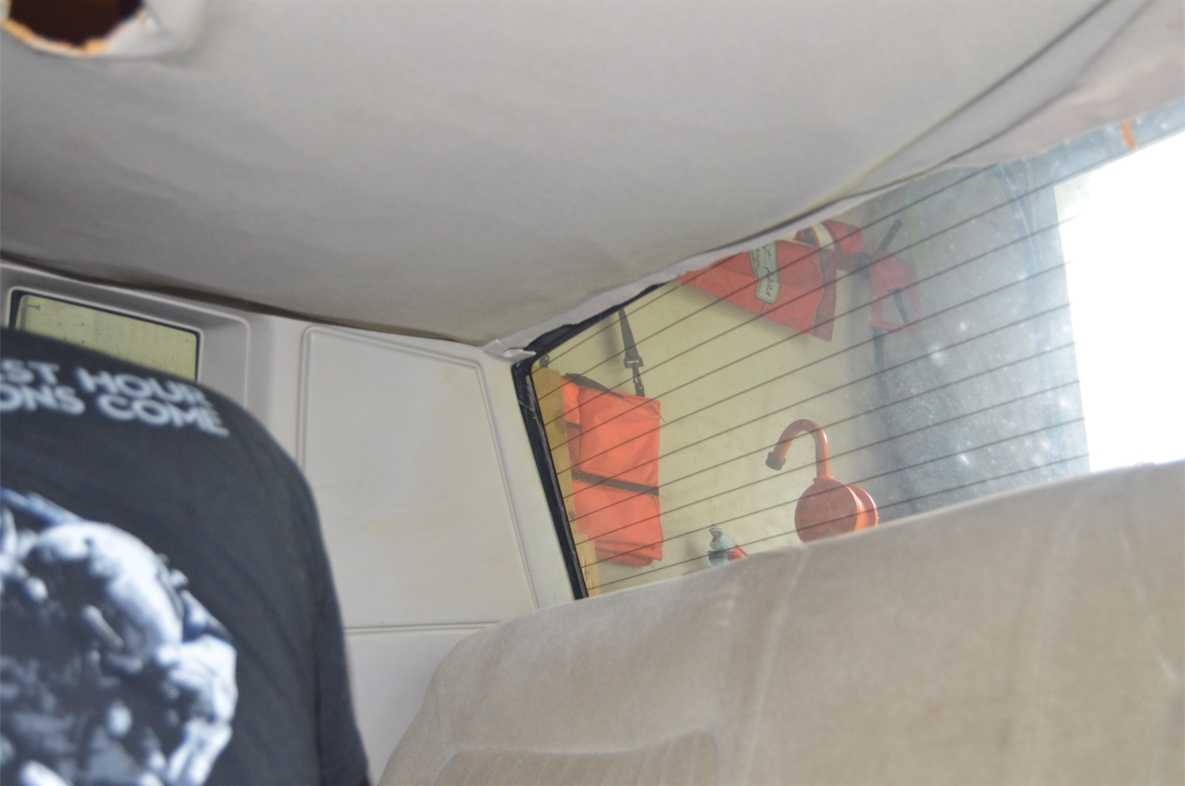
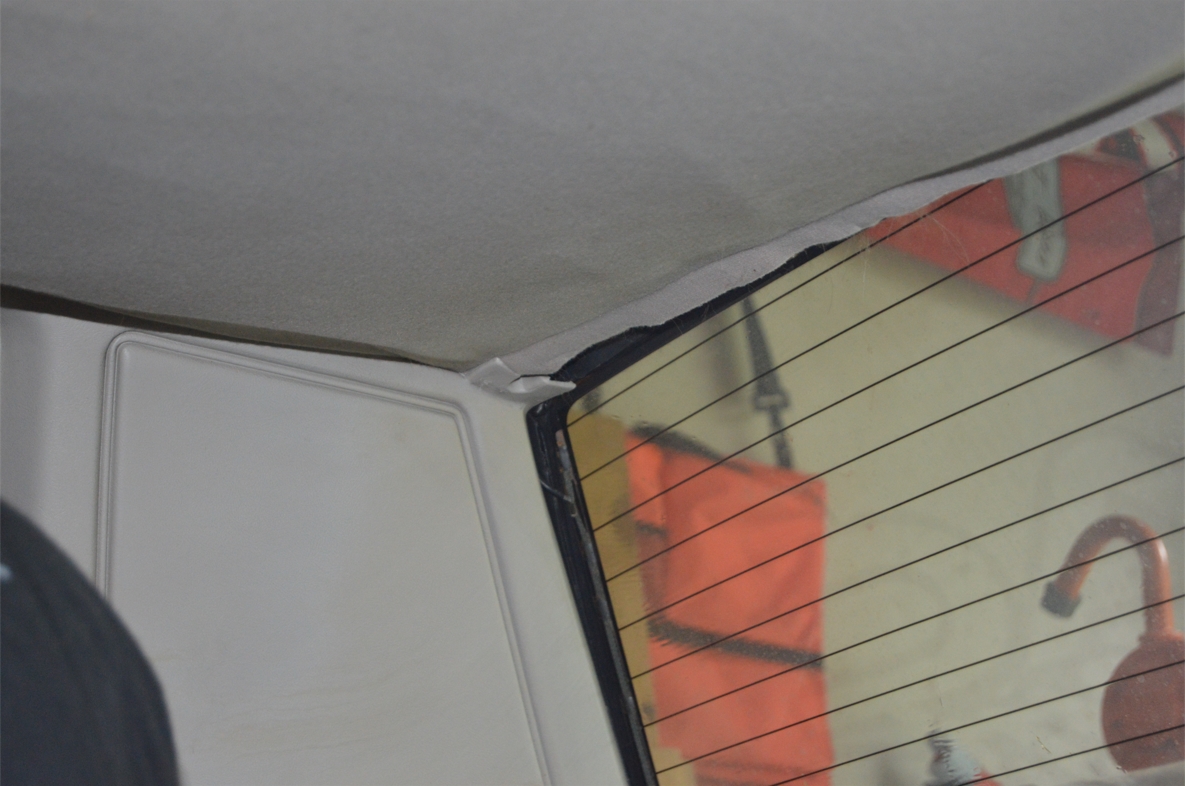
2. unscrew rear window trim on the ends.
3. twist it down from the front side (nearest the dome light), then unsnap it from the window side.
(the clips may come off when you do this. that’s fine, just put them back in place on the trim piece. if you break them however, replace them)
.
REAR TRIM PIECE AND CLIPS:
.
.
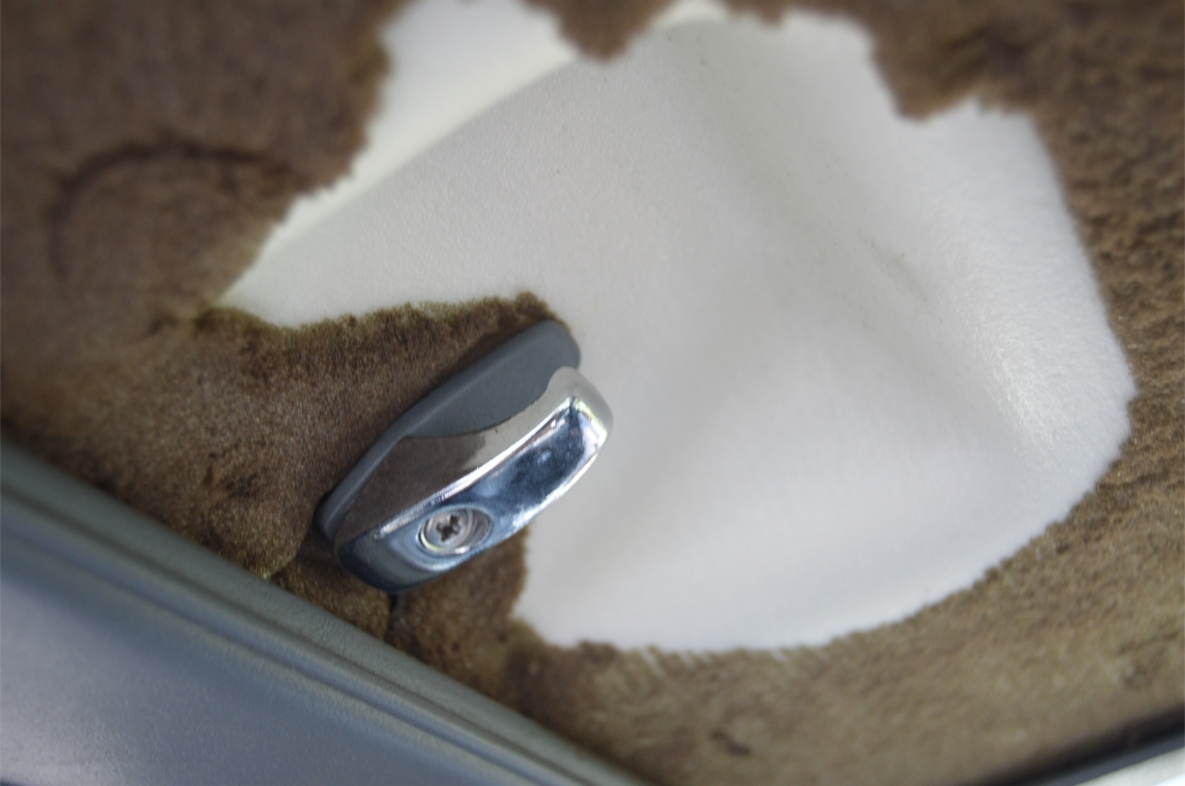
4. unscrew the coat hanger hooks. (located above the sail panels, right about in the middle of the quarter window. 1 screw secures each hook in place)
(the coat hangers help hold the headliner in place)
.
COAT HANGER HOOKS:
.
.
5. Remove b-pillar trim pieces. (3 screws)
.
B-PILLAR REMOVAL:
.
.
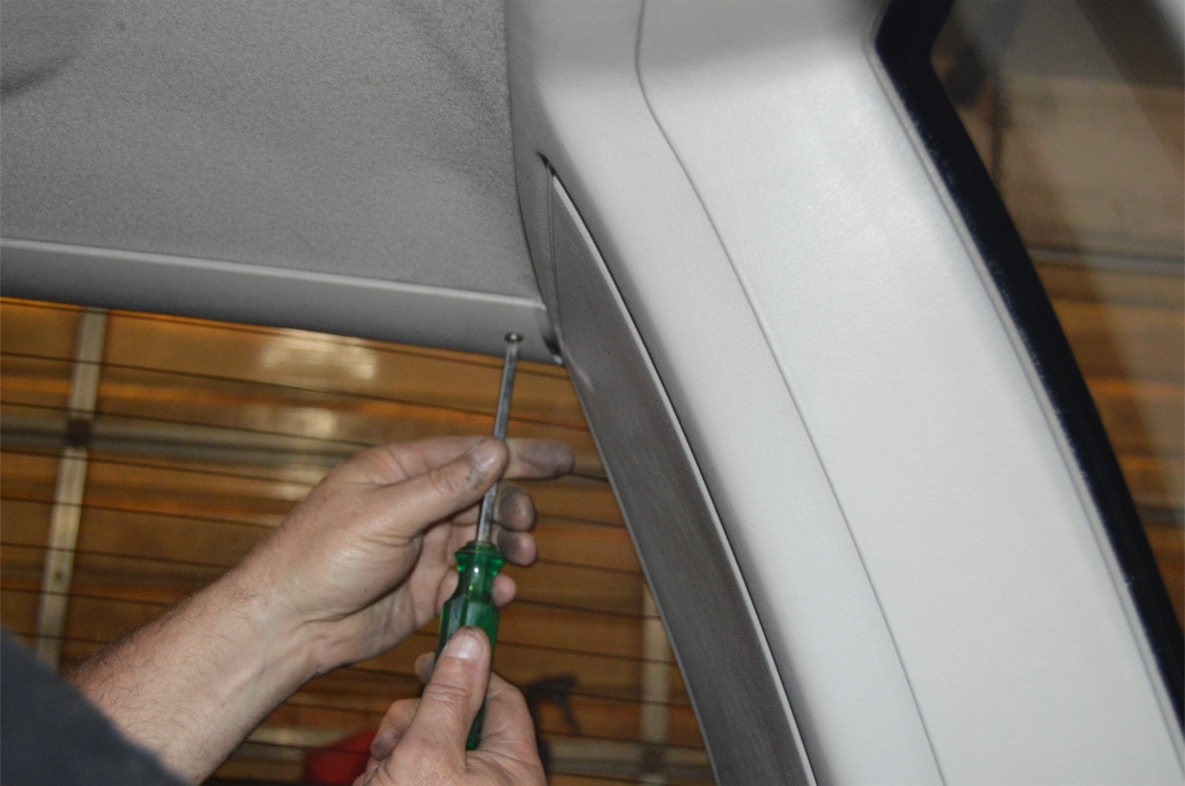
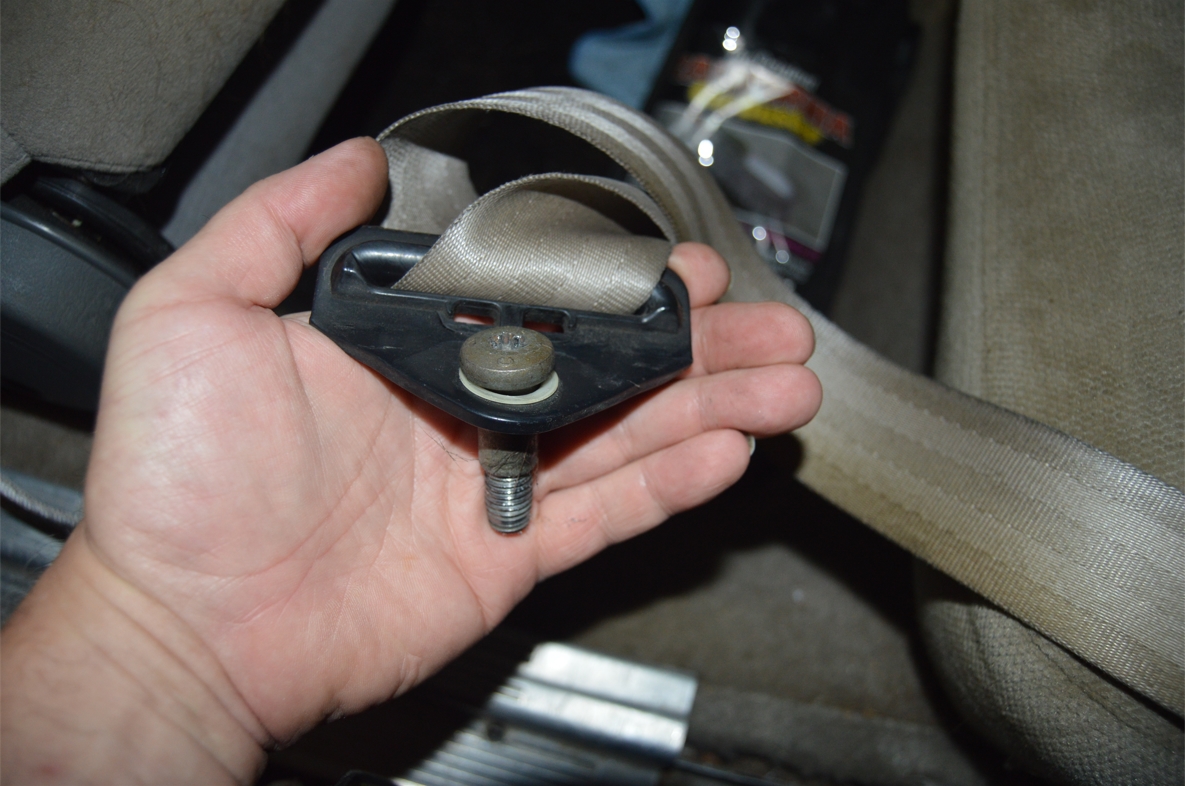
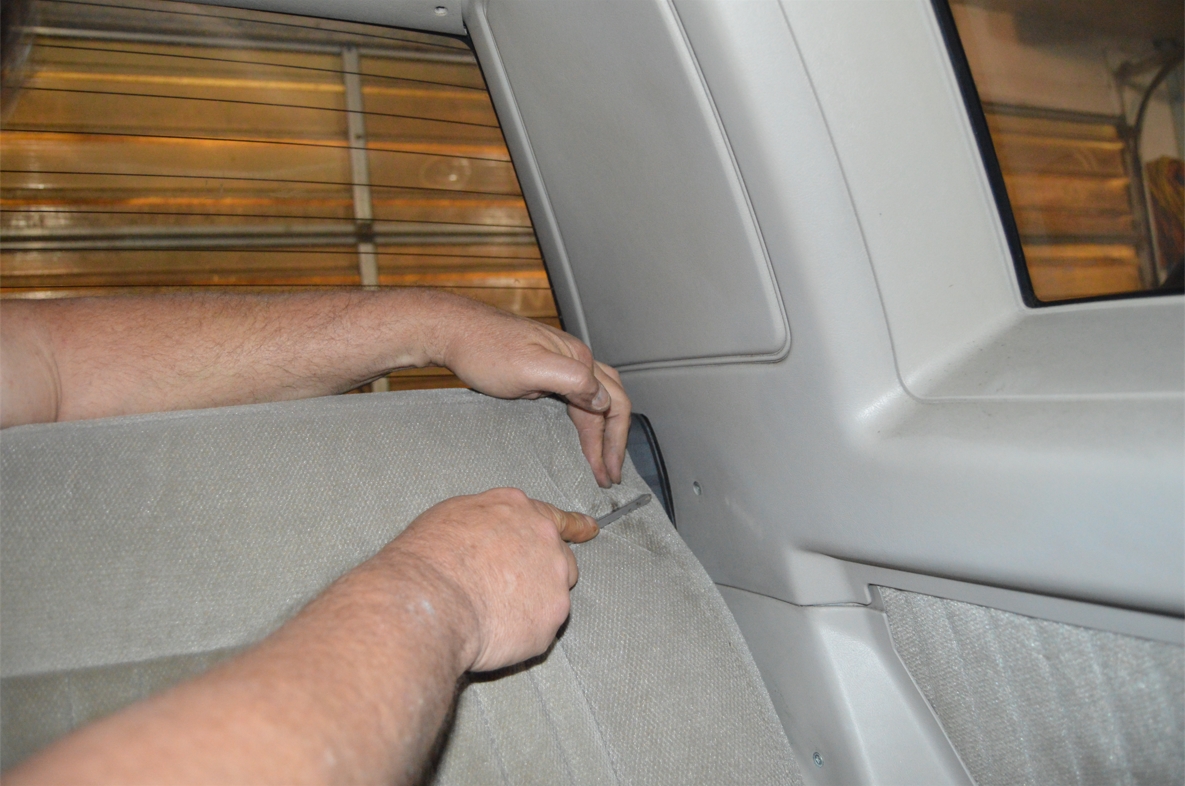
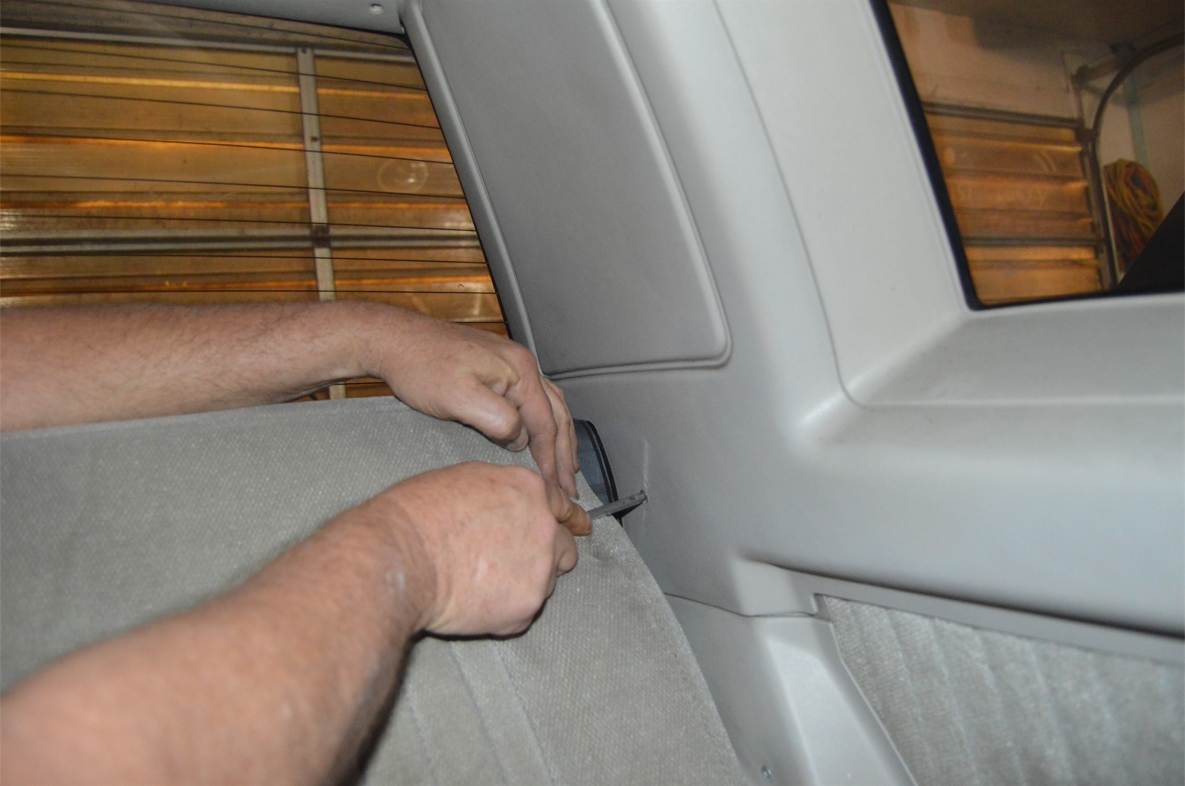
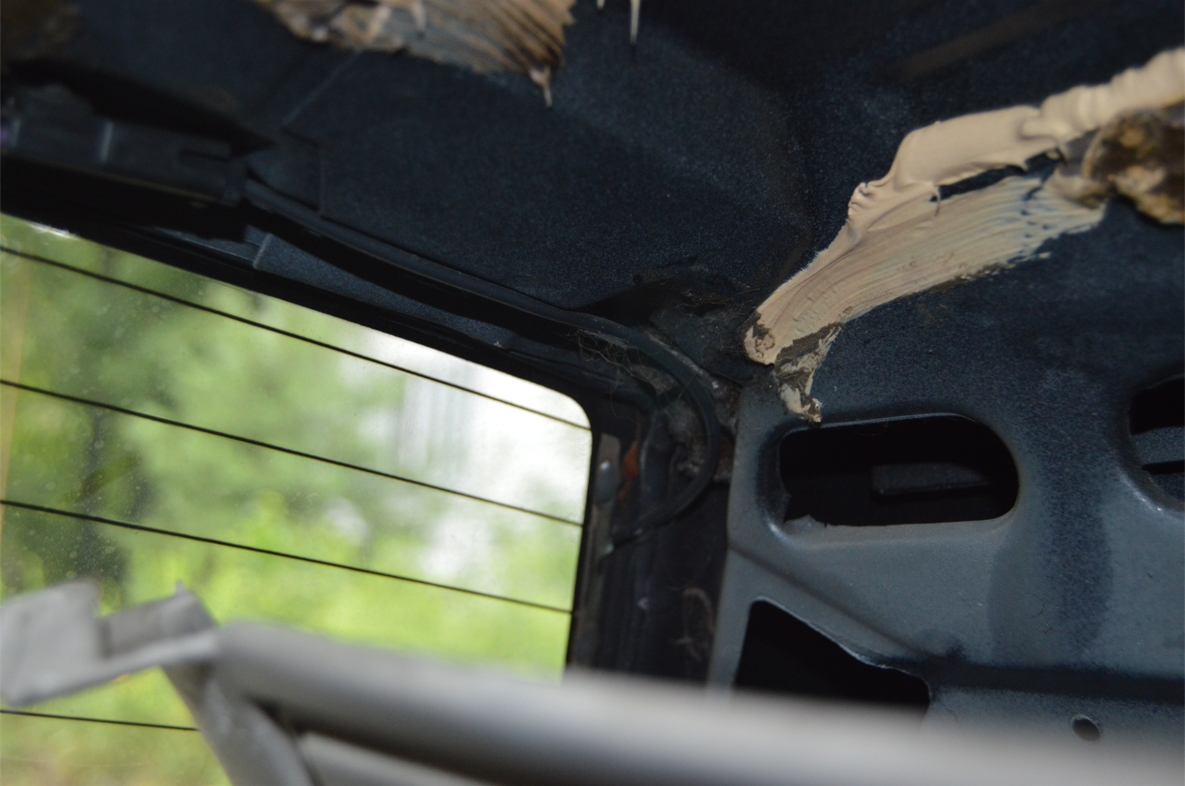
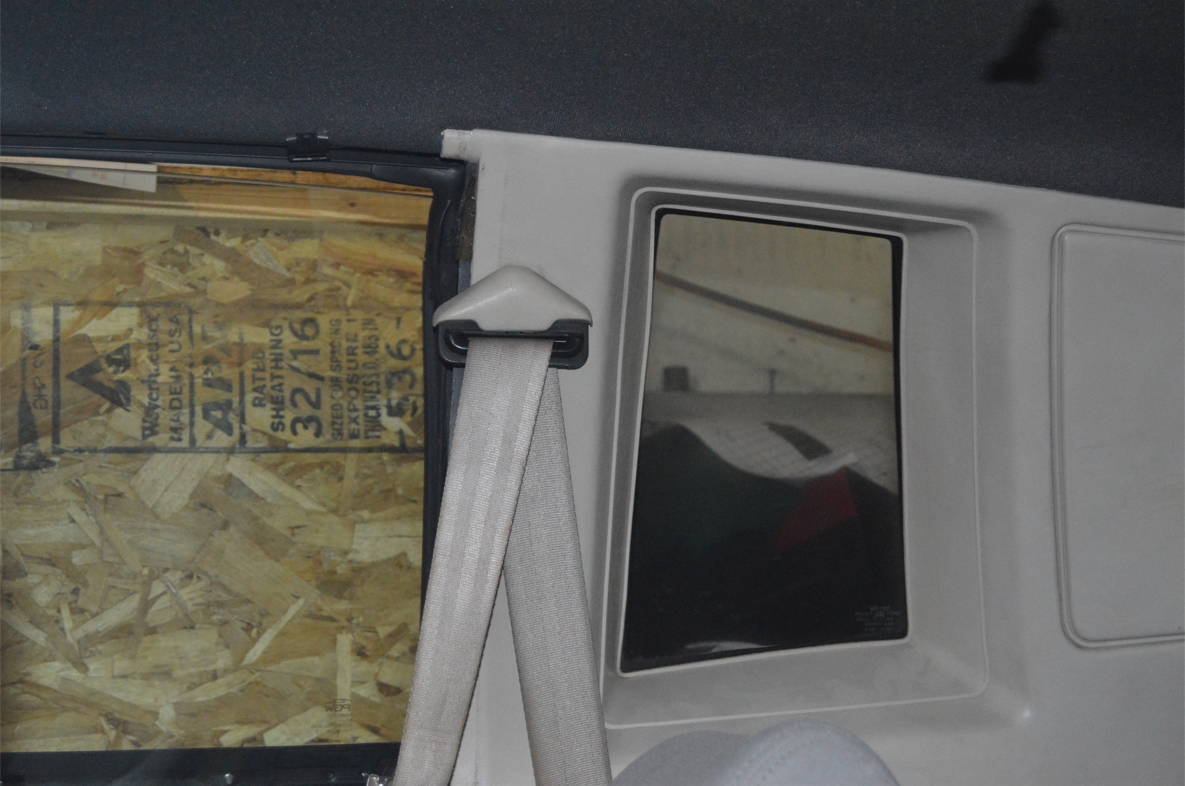
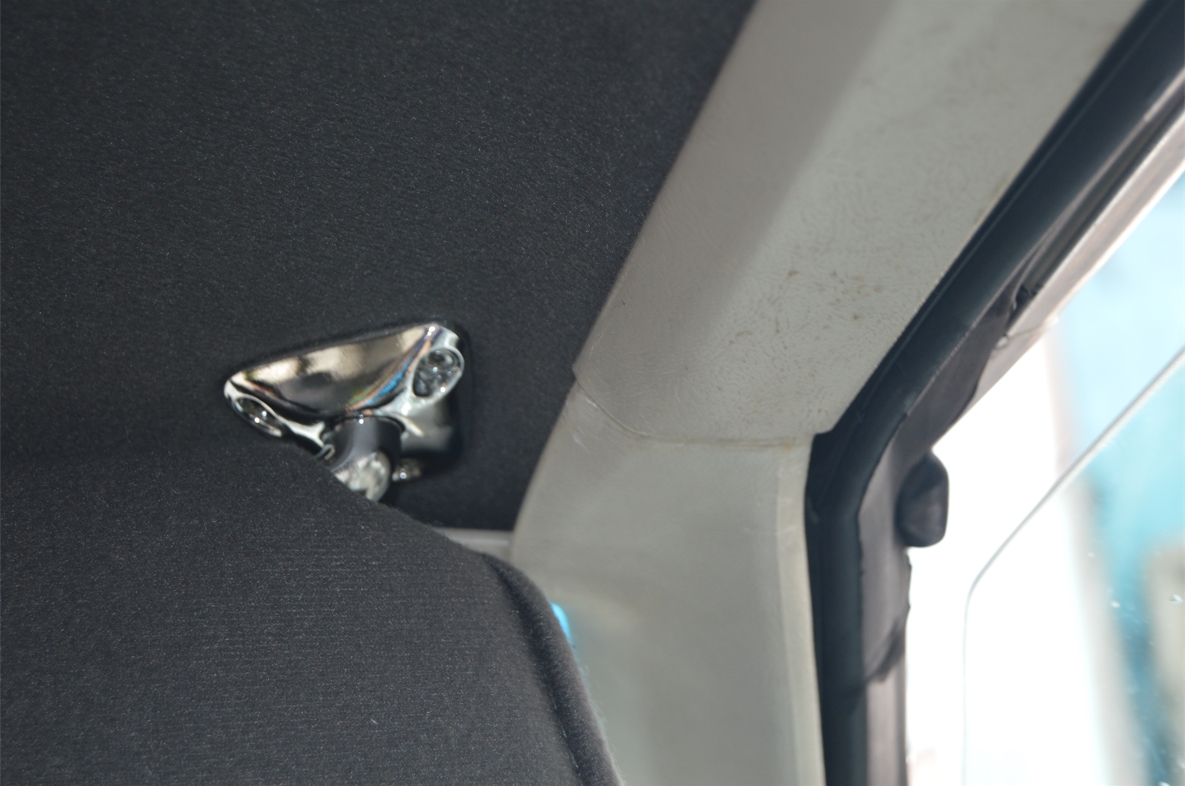
6. on the sail panels (rear quarter trim pieces), pop off the seat belt cover, remove the seat belt bolt, then the screw.
(the screws are kind of hidden because of the seat back, push the top of the seat inwards towards the center of the car and you will see the screws on the sail panel)
from the tops of the c-pillar panels try to pull them down somewhat, giving you some room to be able to remove the headliner later on.
(these top panel pieces will still be attached to the lower parts [on the back sides where you can’t really see it], so don’t yank too hard on them)
The sail panels DO NOT need to be totally removed, only pulled down somewhat (from the top side) so you remove the headliner.
.
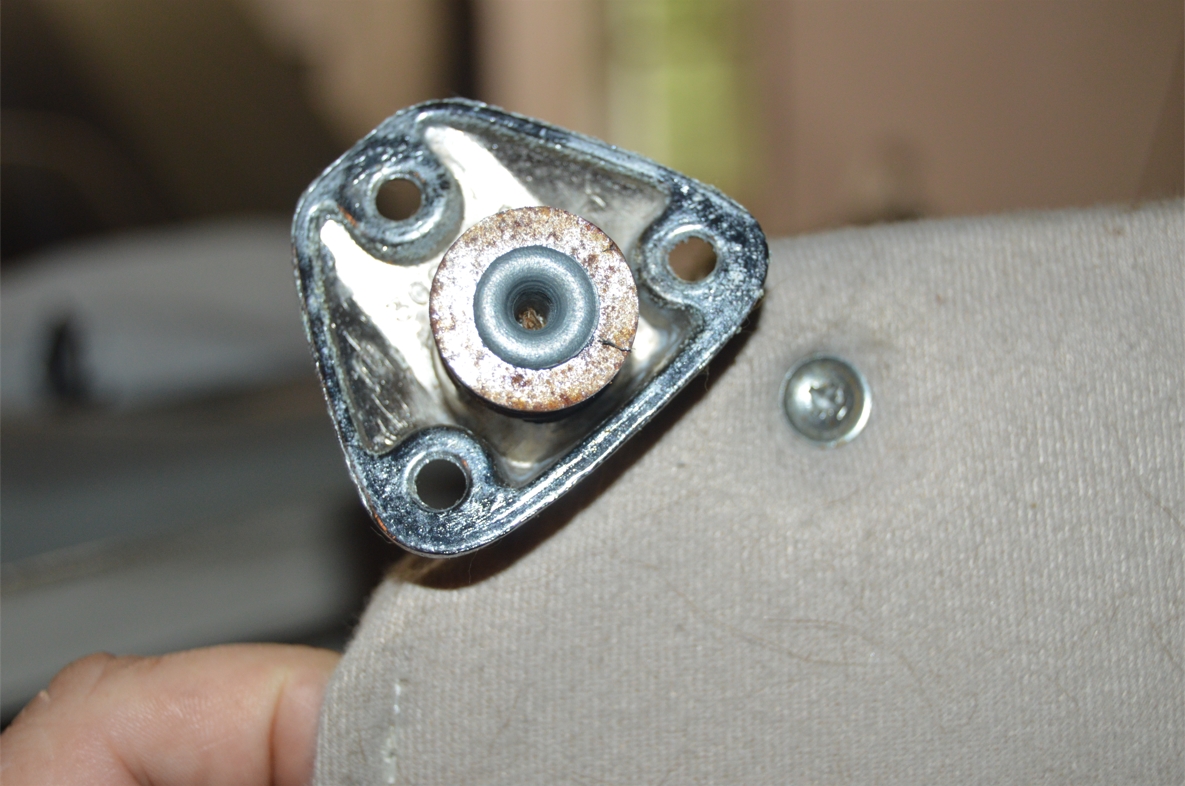
SEAT BELT BOLT BRACKET:
.

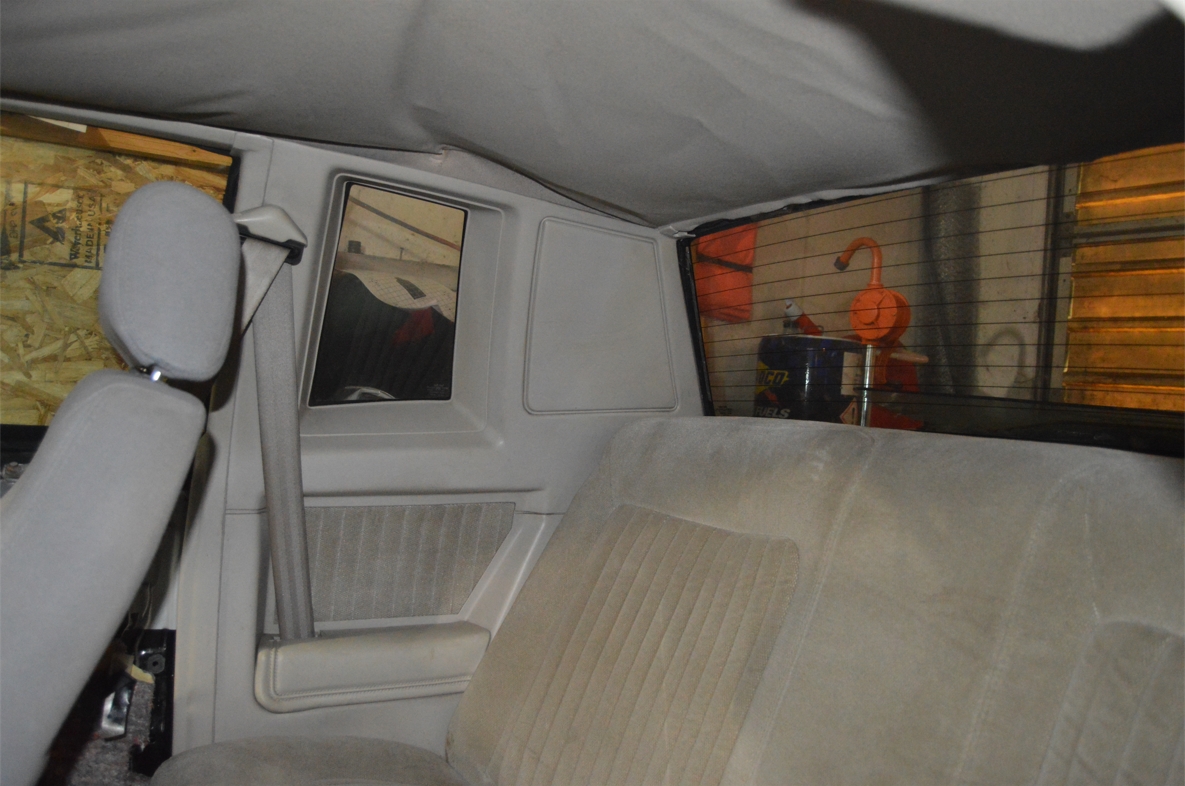
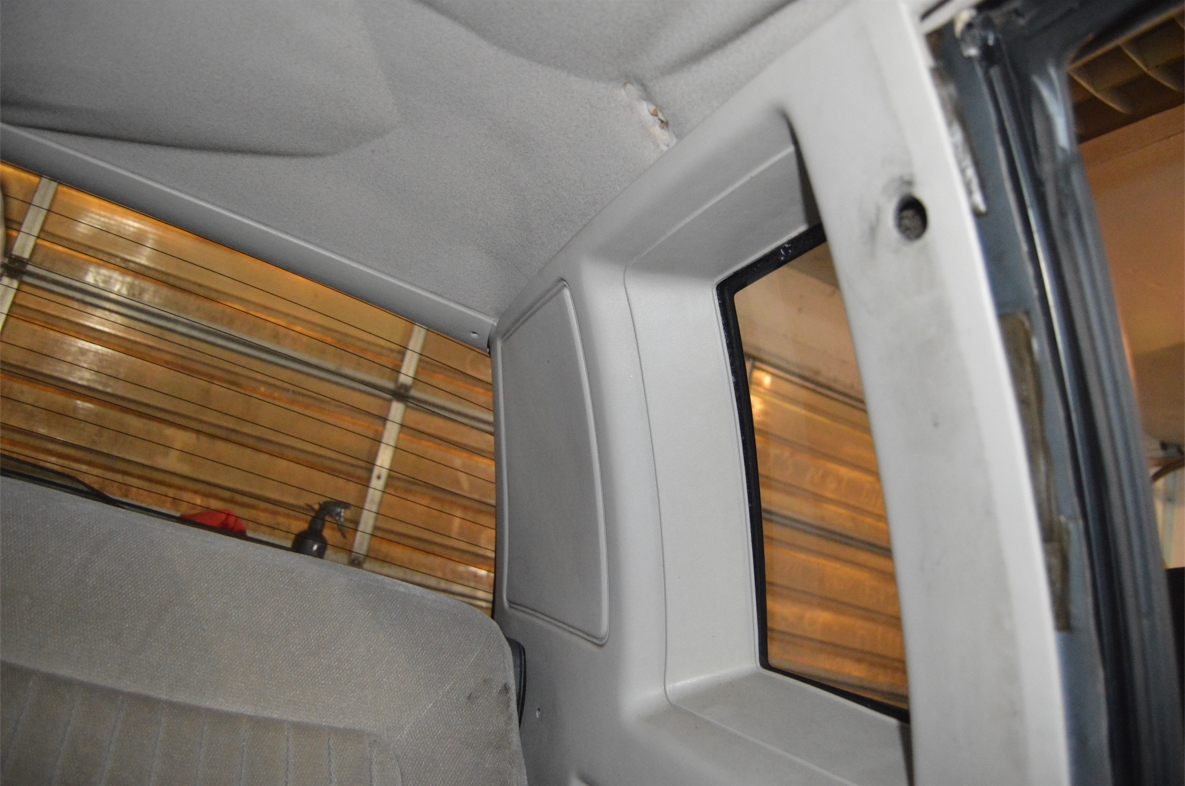
.
SAIL PANEL:
.
.
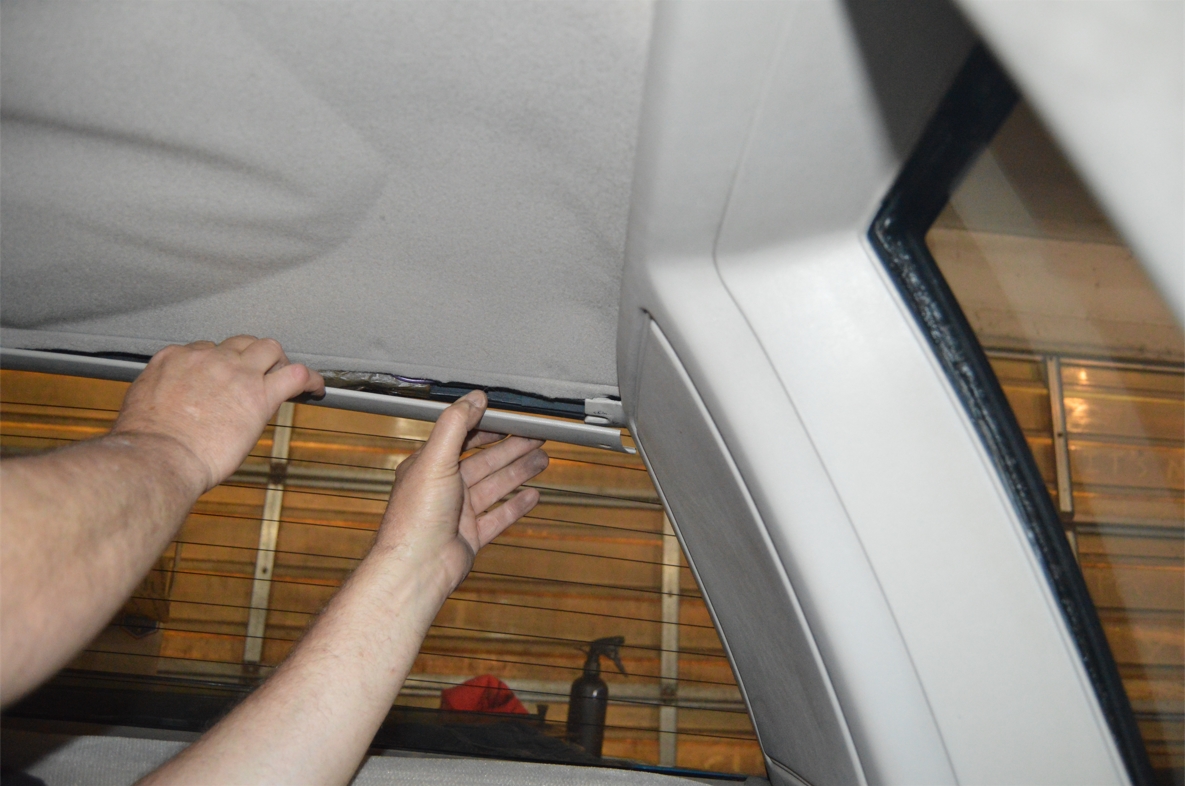
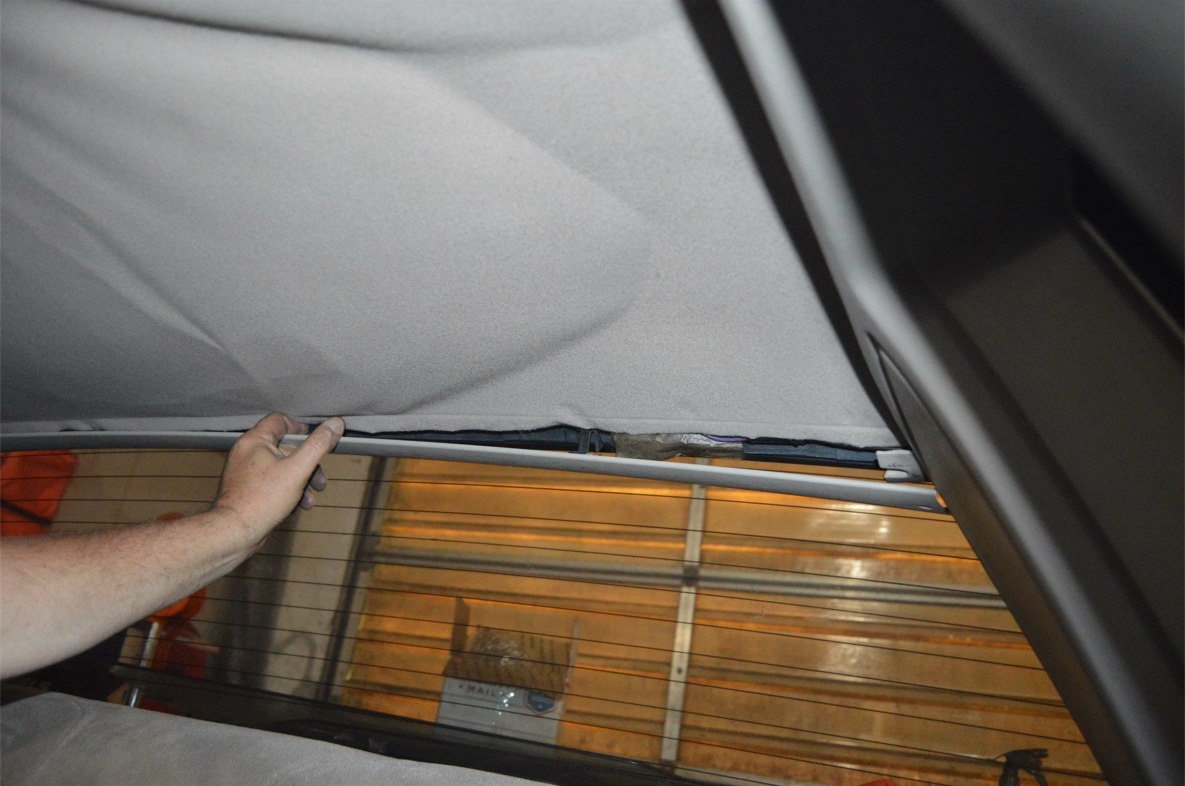
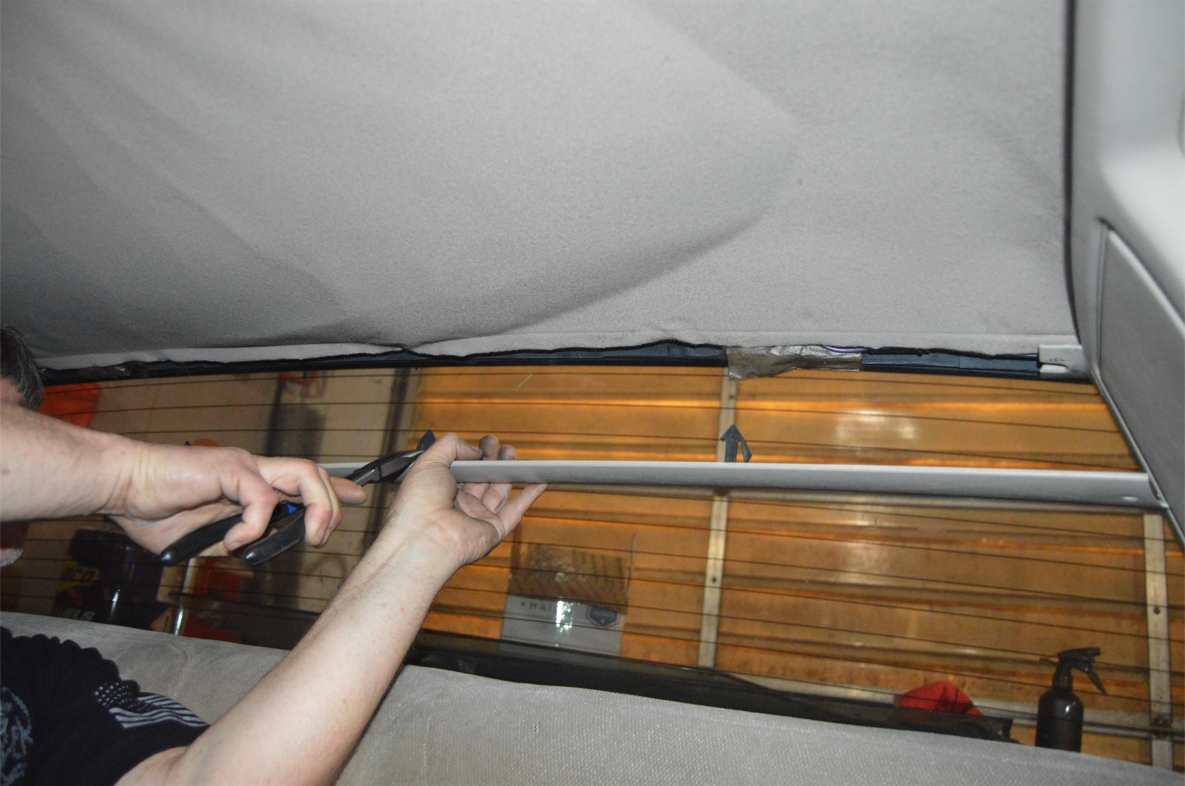
7. the door pieces: from the inside of the car, push them outwards and down to remove.
(meaning the door pieces come off from nearest the outside of the car first)
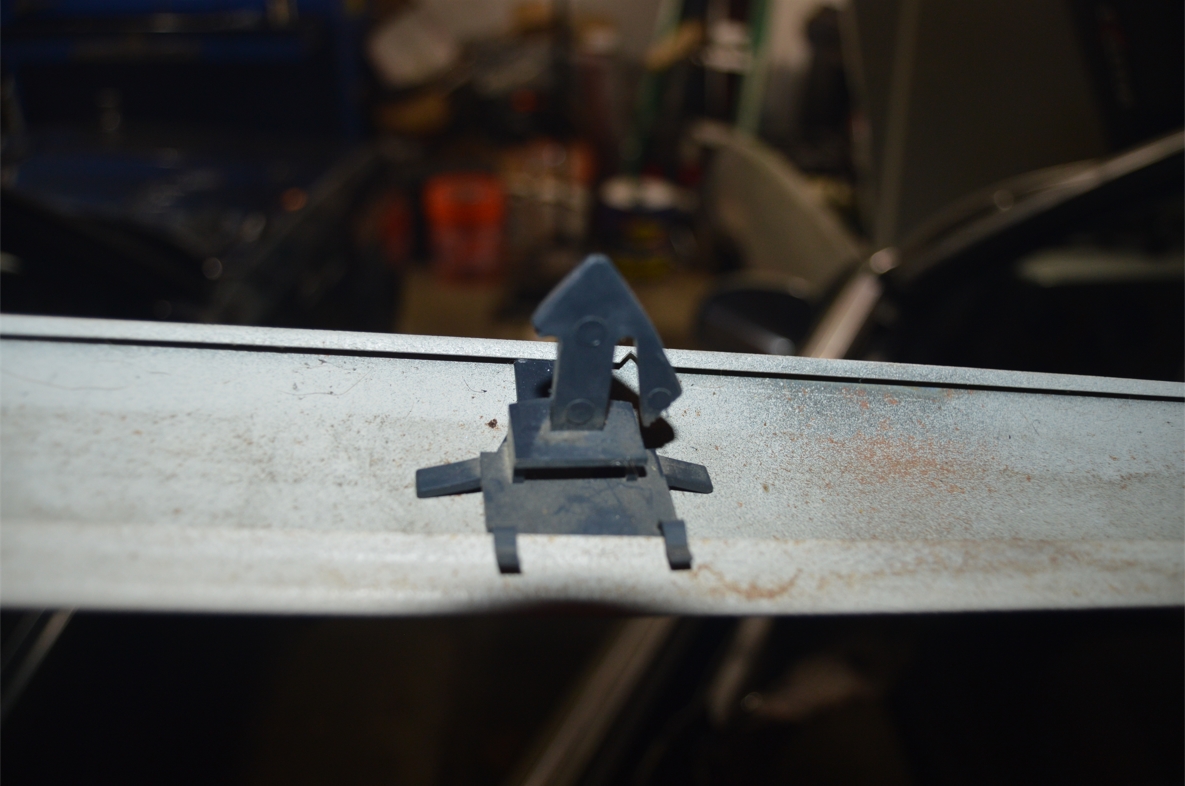
(you can reuse / leave in place, the old clips, as long as you don’t break them upon removing the trim piece)
(when reinstalling, remember: the “hook” side of the clip faces/touches the headliner, that’s what holds the headliner in place)
.
DOOR ROOF TRIM REMOVAL AND CLIPS:
.


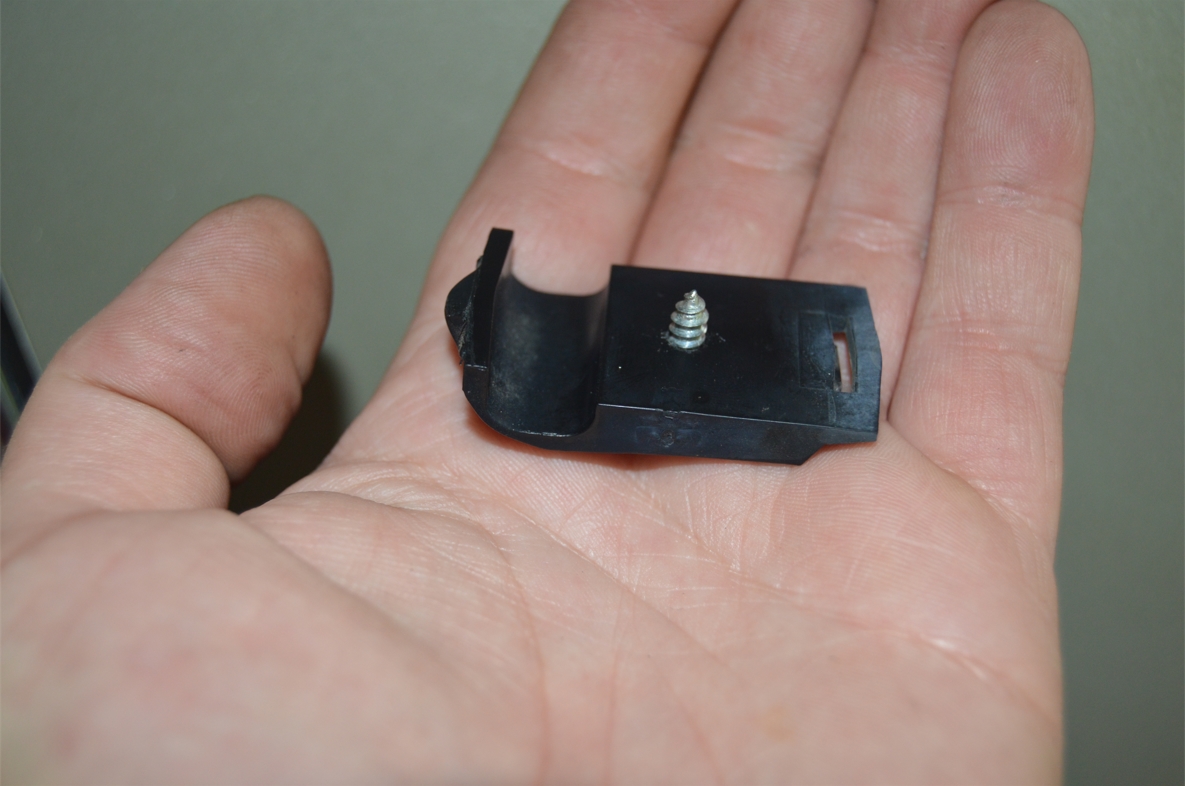
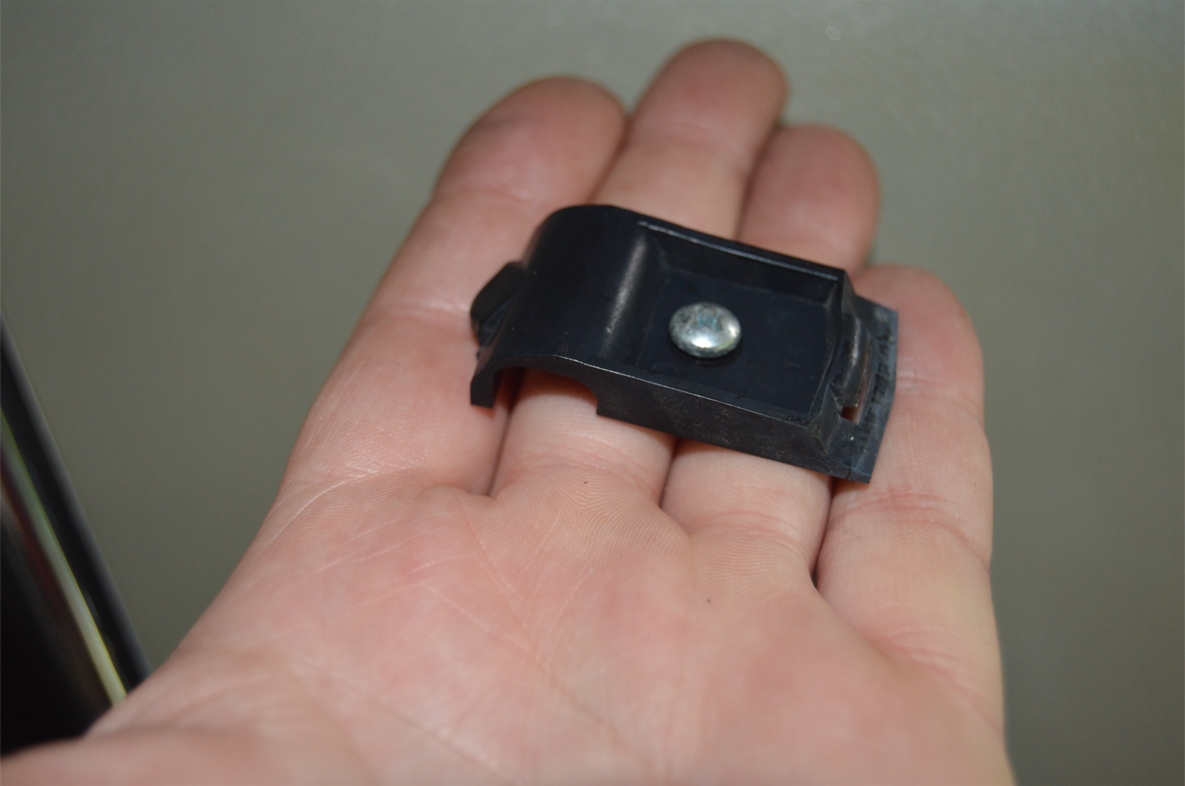
.
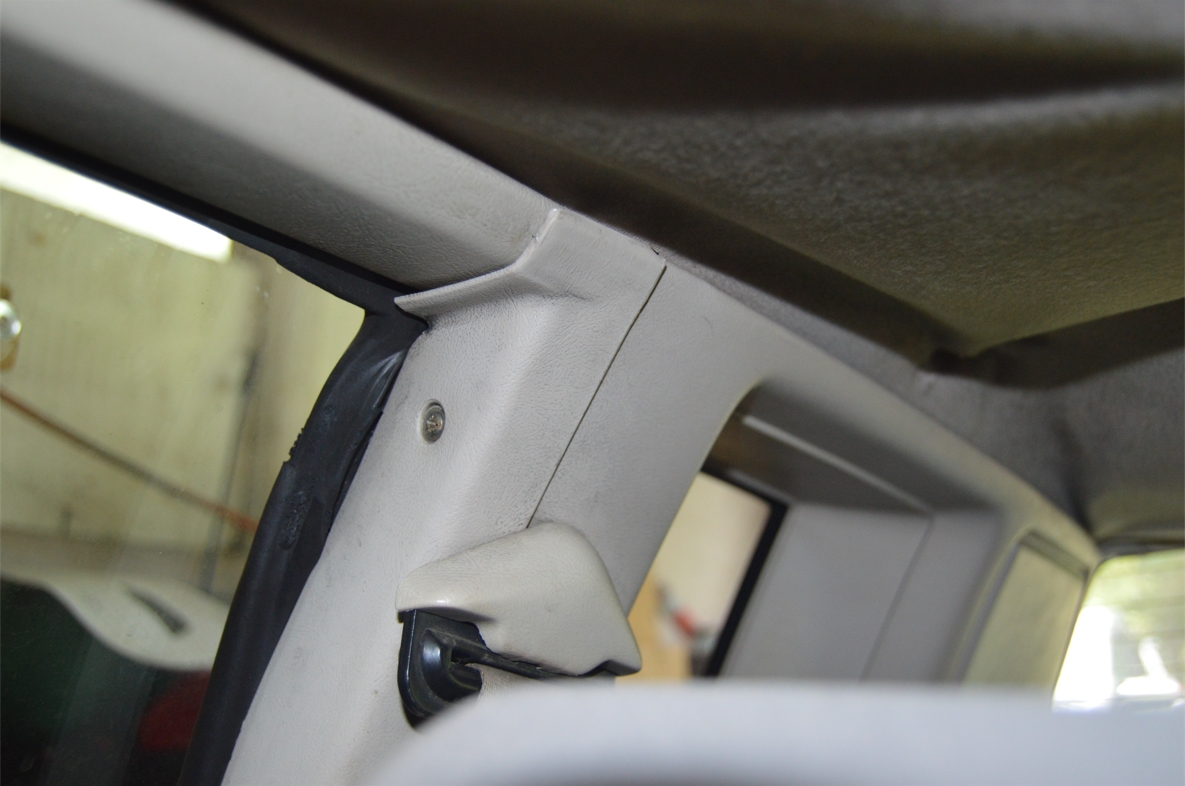
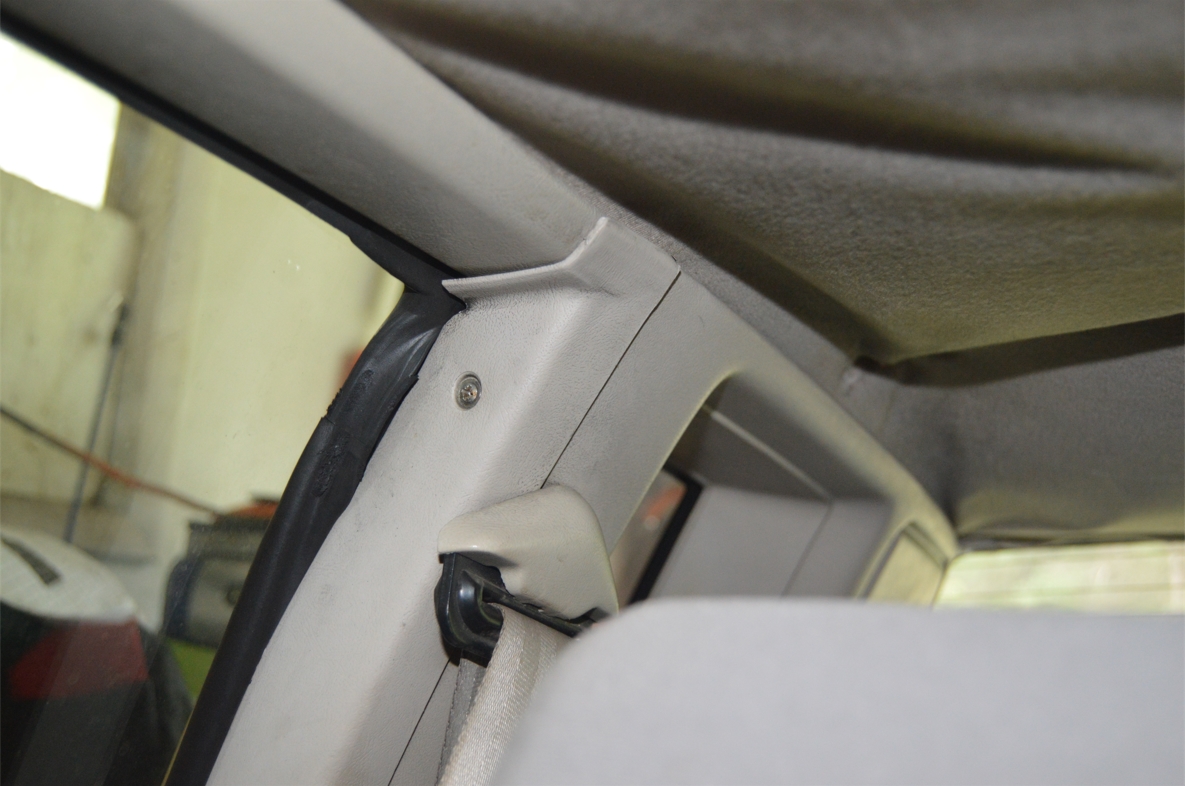
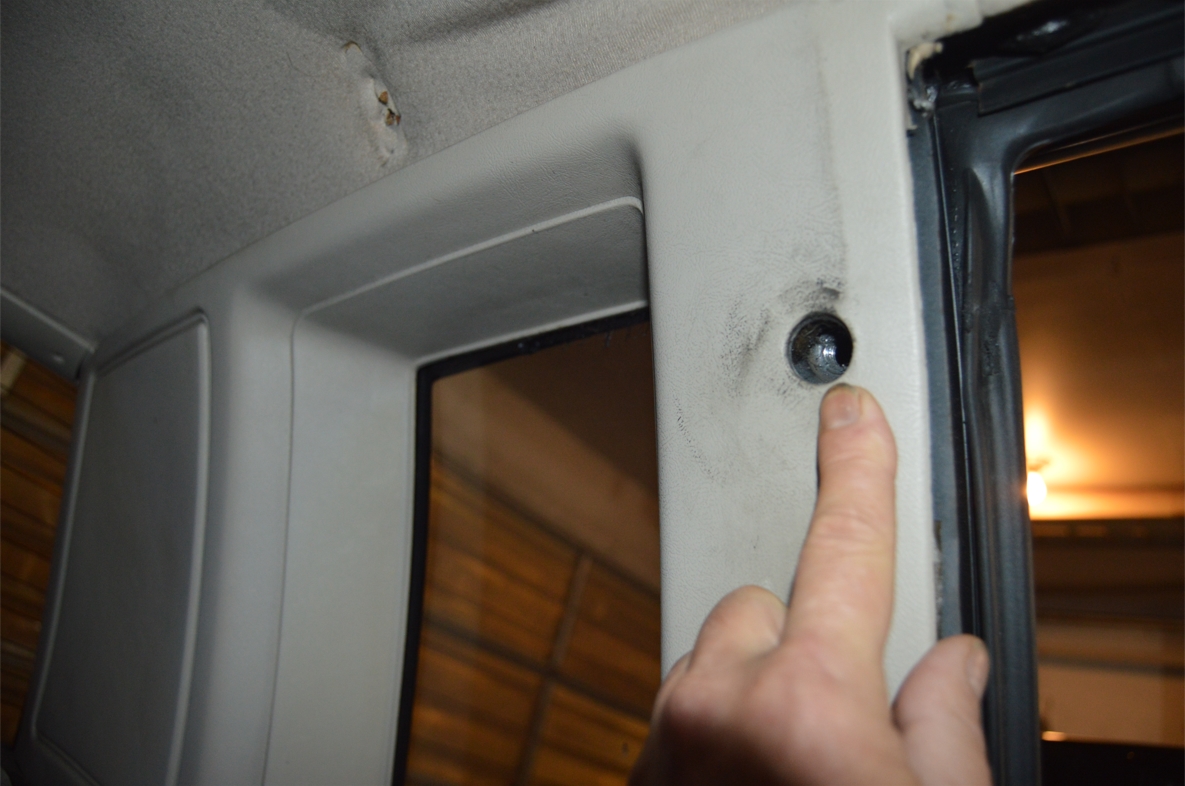
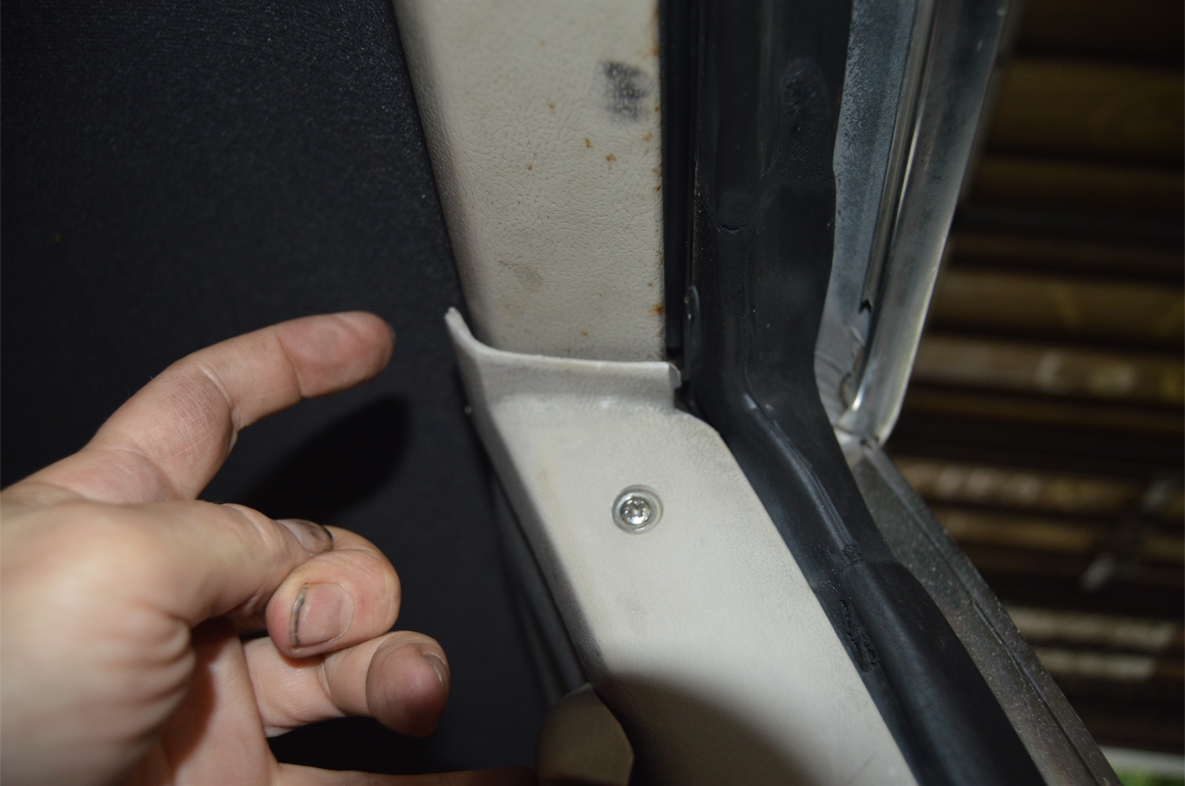
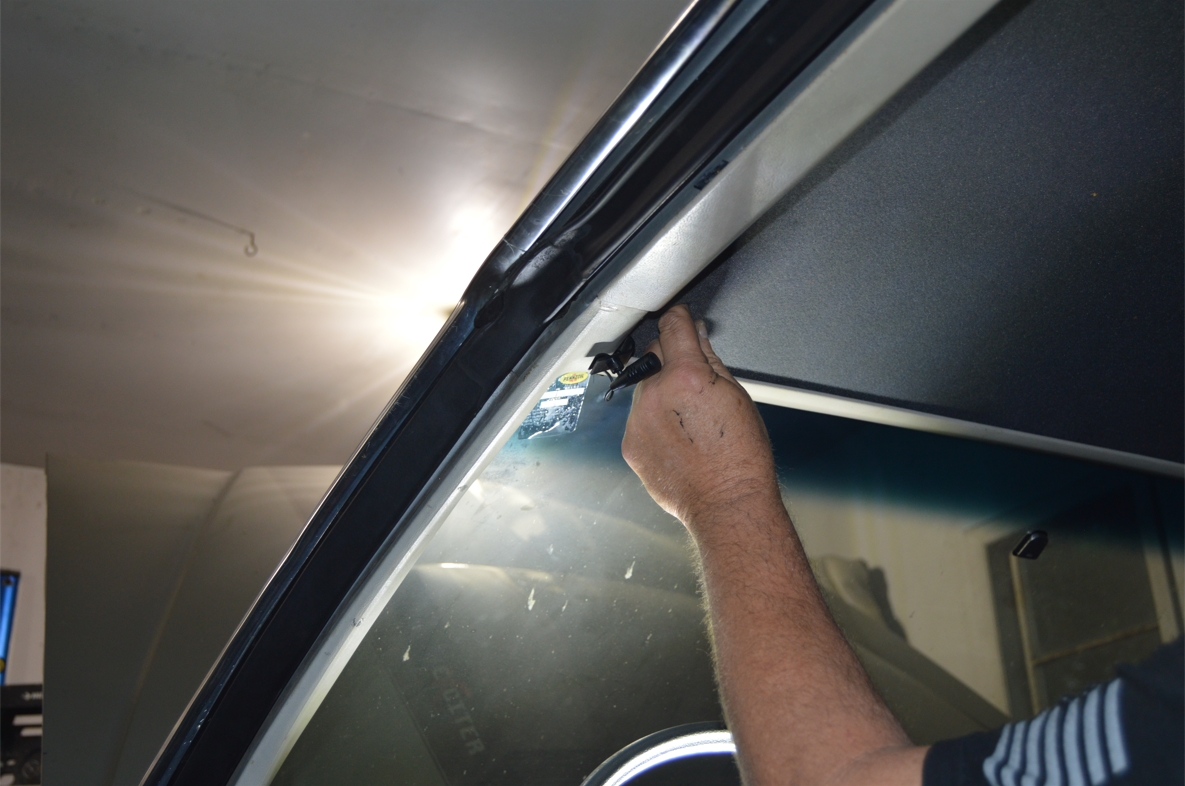
8. remove 2 screws on a-pillars and pull off. (start pulling at top then the bottom)
.
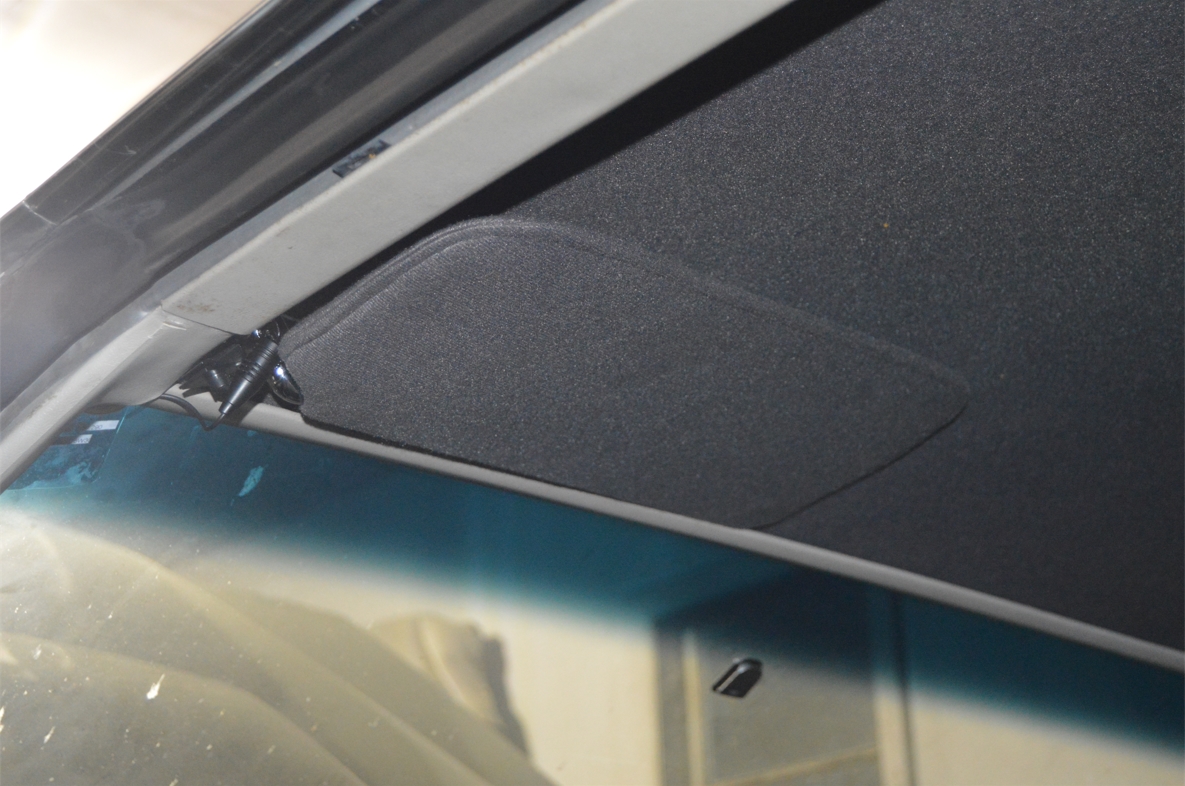
A-PILLAR:
.

.
9. the front windshield trim can stay attached (throughout this entire process).
Just pull it down a bit. Twist the side nearest the dome light down, which gives you enough room to pull out the old headliner, and reinsert the new one.
(if you break any of the 5 clips while trying to pry this down, you will then need to totally remove this piece and install a new clip)
.
FRONT TRIM CLIPS:
.

.
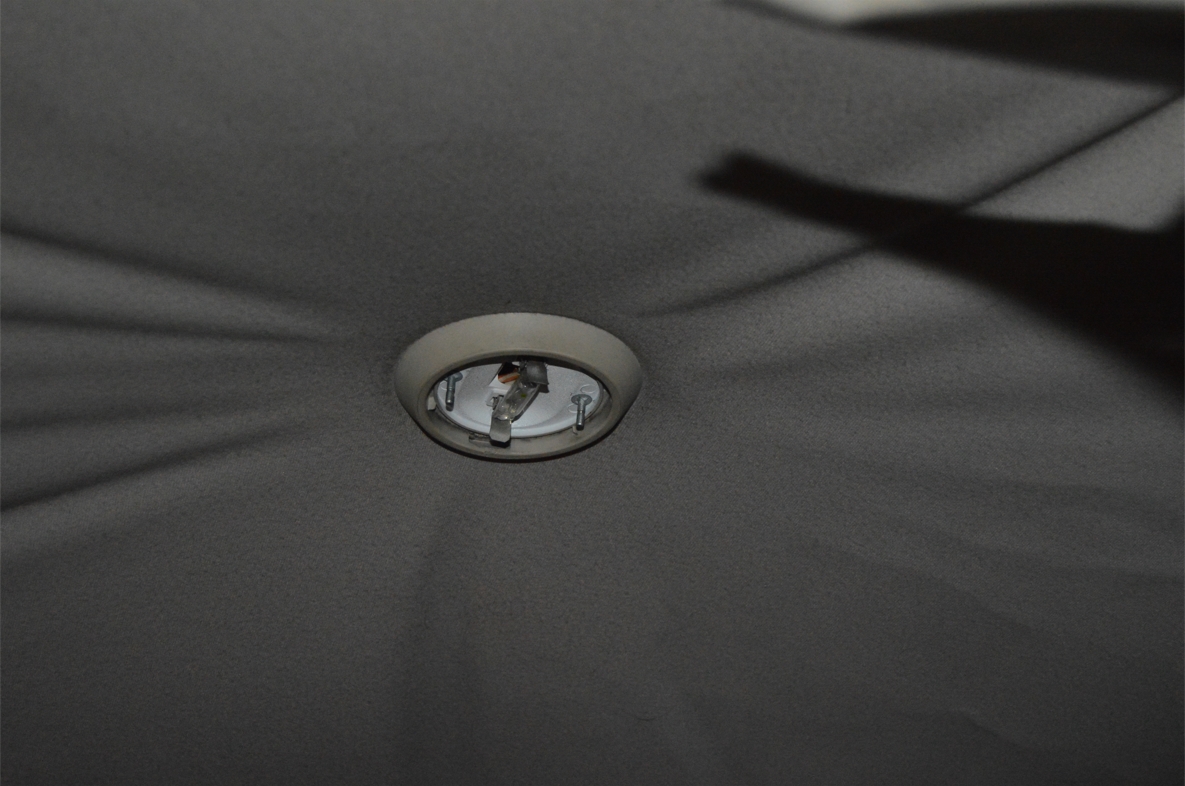
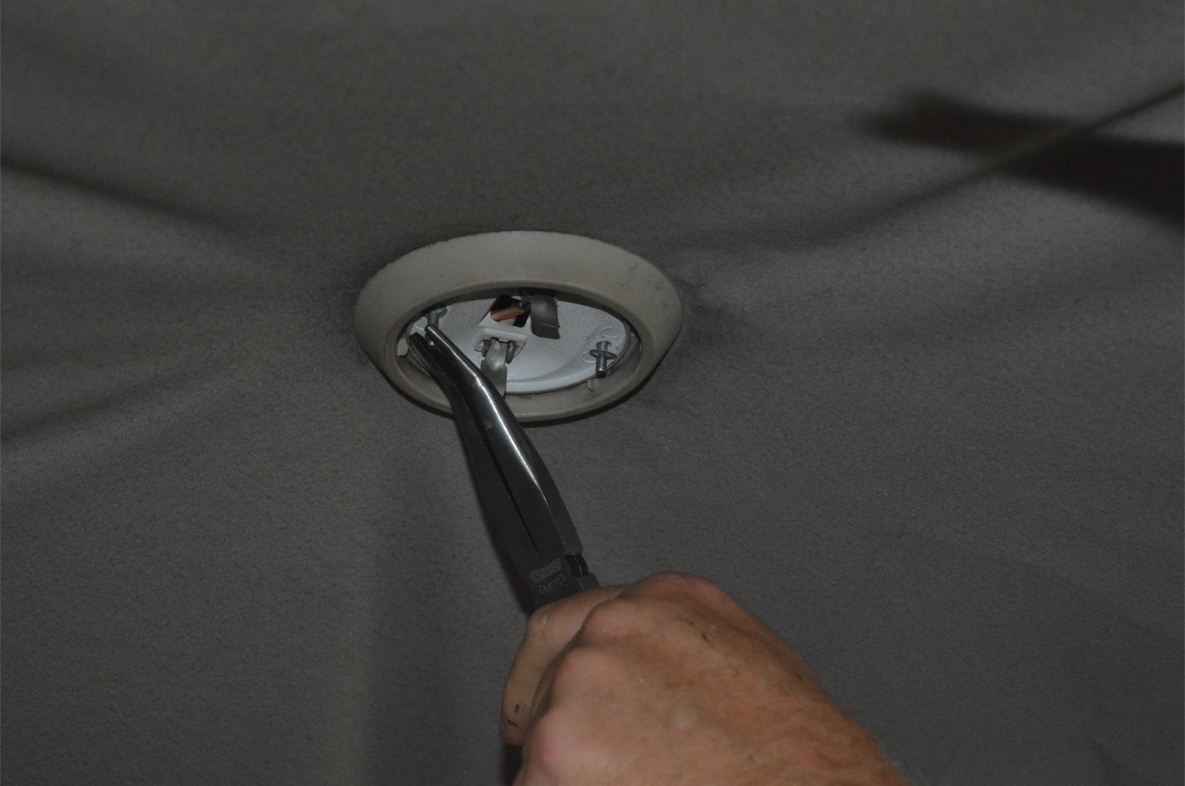
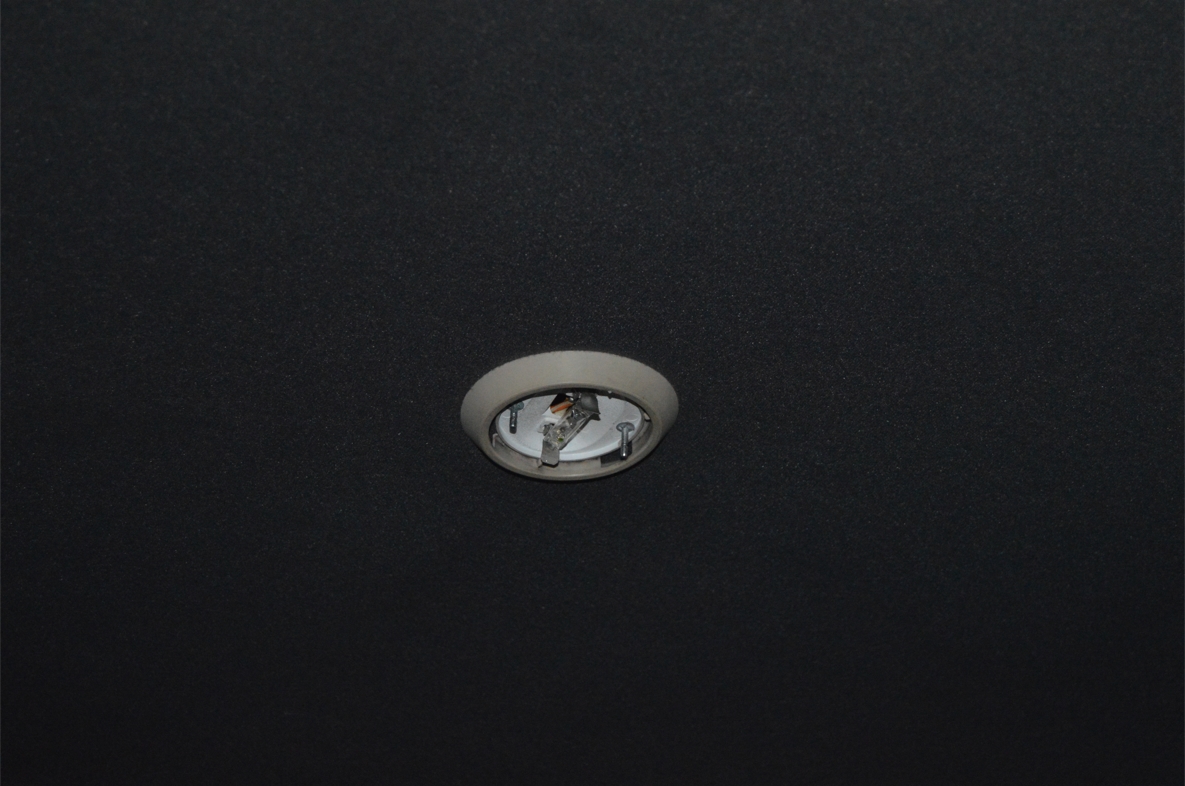
10. remove the dome light. It’s held in by 2 screws that have snap clips attached to them. You DON’T need to try and remove these clips! Just take some pliers and unscrew the whole thing (clips AND screws).
Squeeze the plastic dome lens so you can access the underneath items.
Remove the dome light.
Undo the 2 screws.
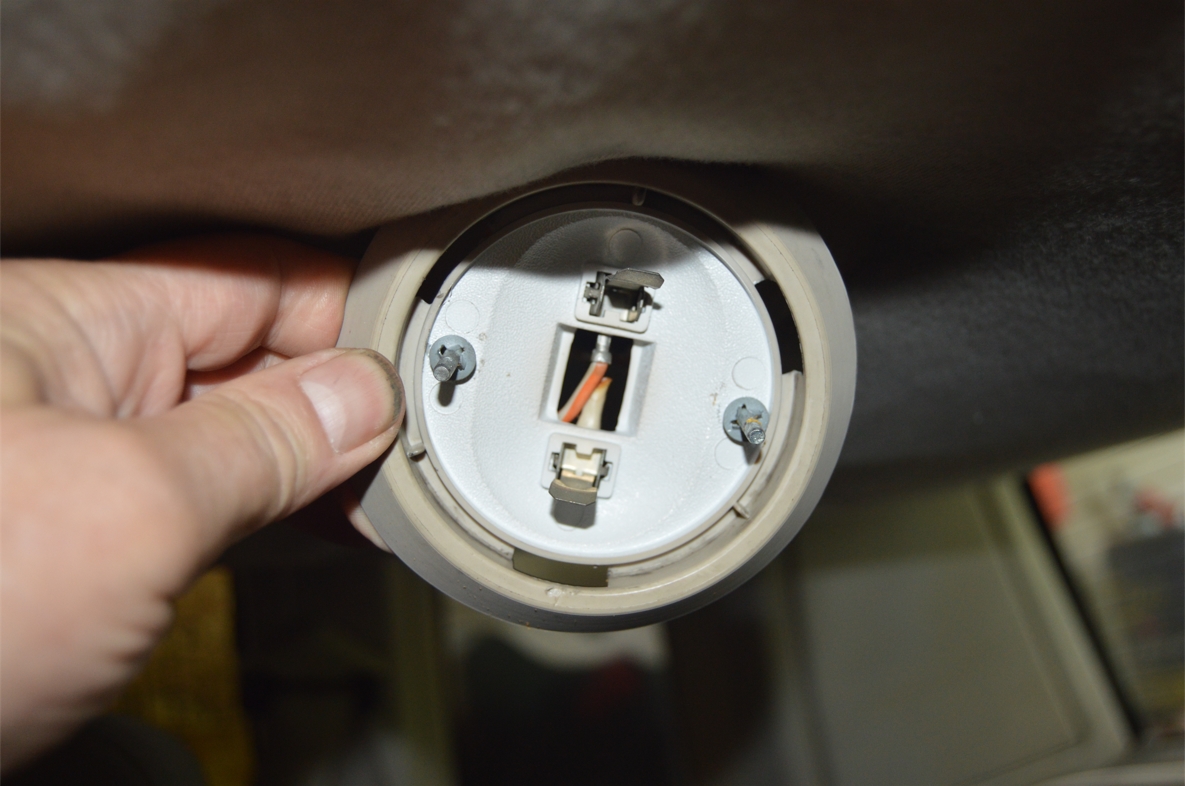
Once you remove these 2 screws, push (twist, wiggle, unsnap) the 2 metal tabs (for the bulb) out of he housing.
You need to get the dome light housing totally removed, leaving only the 2 wires remaining.
(you can’t push the entire dome light with housing thru the new headliner, hence, you have to remove the housing)
[most Turbo Regals have the rectangular dome light, with 2 map lights, and are held in by 2 phillips screws, which you can simply unscrew to remove the entire housing and all]
.
DOME LIGHT REMOVAL:
.


.
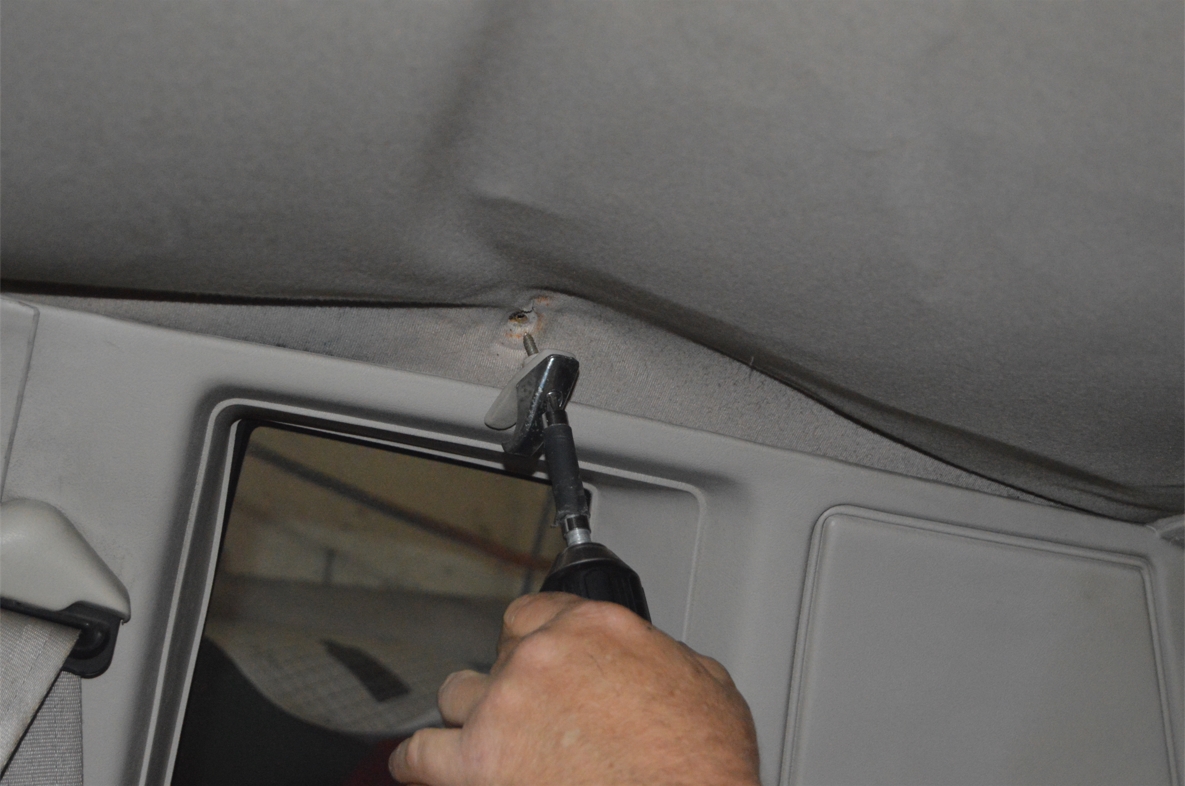
11. remove the sun visors. (3 screws on each one)
(passenger side may have optional lighted vanity mirror, if that’s the case, there will be a plug you need to disconnect)
.
SUN VISOR REMOVAL:
.

.
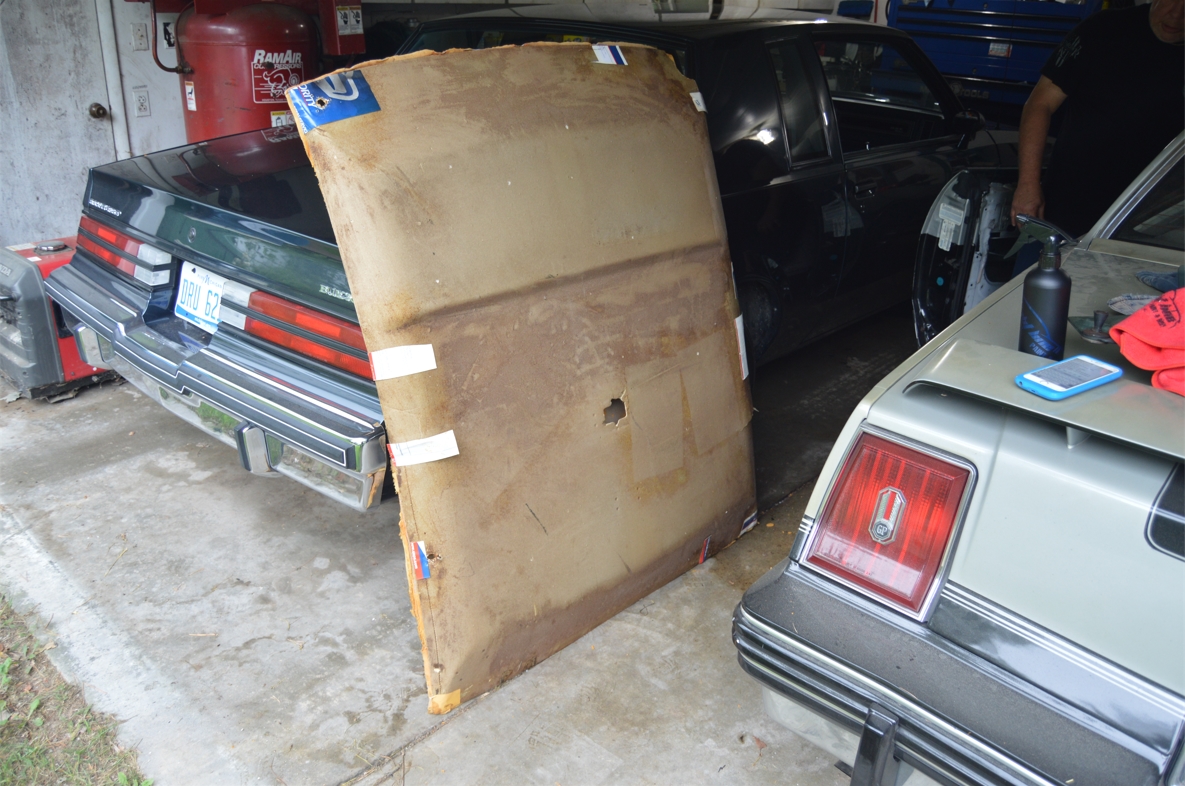
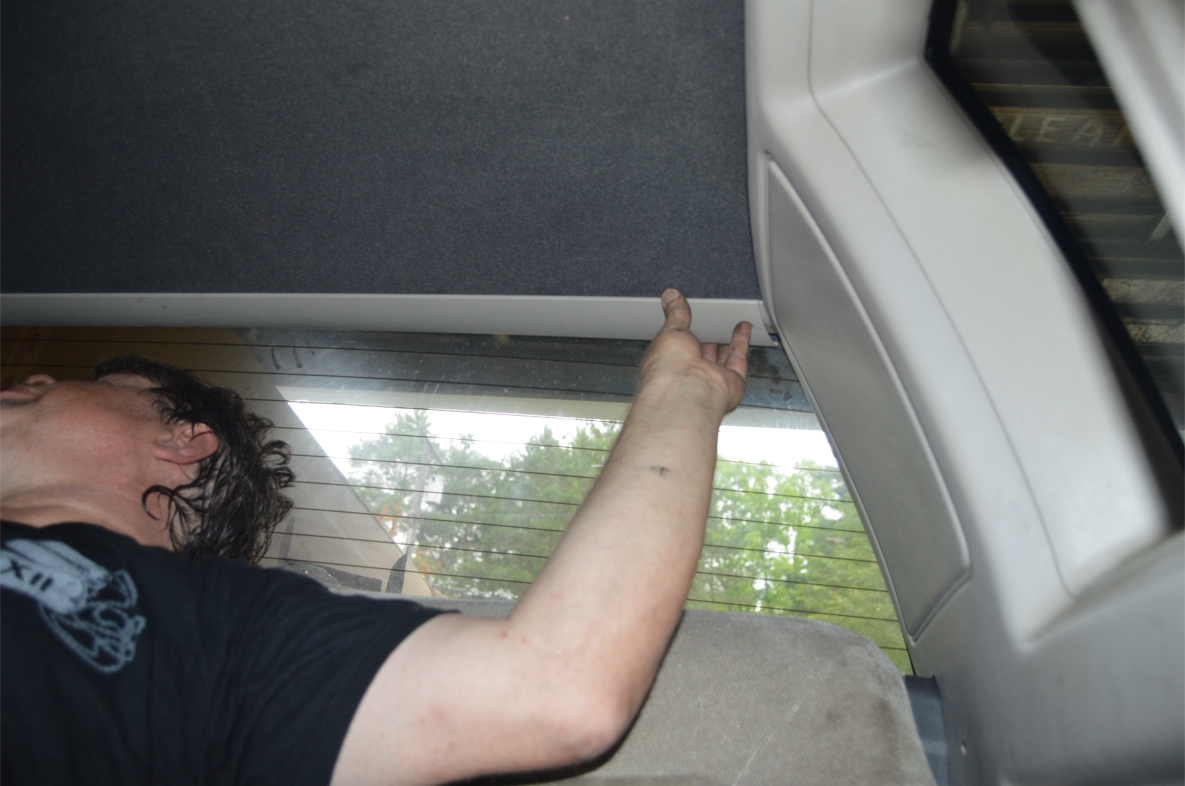
12. Now that everything is out of the way, remove the headliner.
(this will go easier if you have an assistant!)
If you grab it from the dome light hole and slide it backwards (towards the rear of the car), it should pop out from the front windshield piece.
(if not, pull the headliner backwards out of there)
On both sides, above the sail panels, pull the headliner out from this area.
Try to bend it slightly in half (like right down the middle of the car), and have your assistant pull it out of the Gbody.
.
REMOVING OLD HEADLINER:
.


.
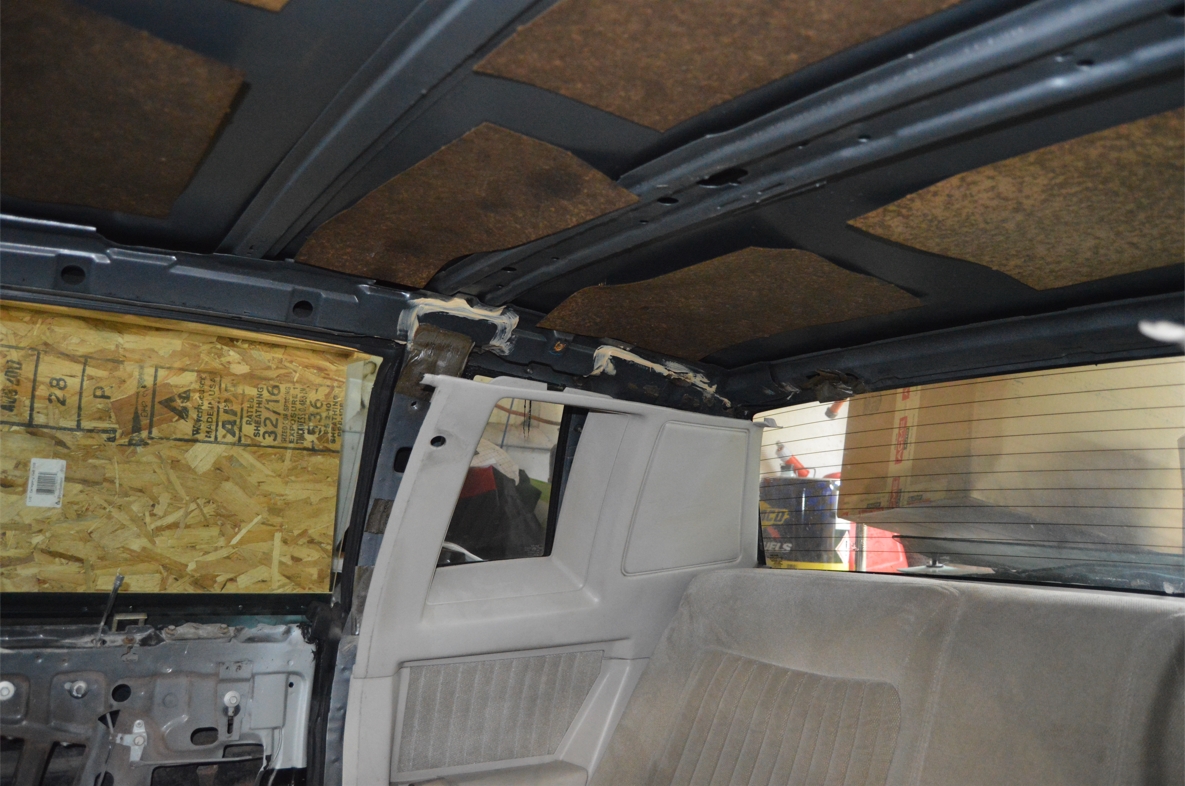
BARE ROOF READY TO INSTALL NEW HEADLINER:
.

.
INSTALLING THE NEW HEADLINER:
.
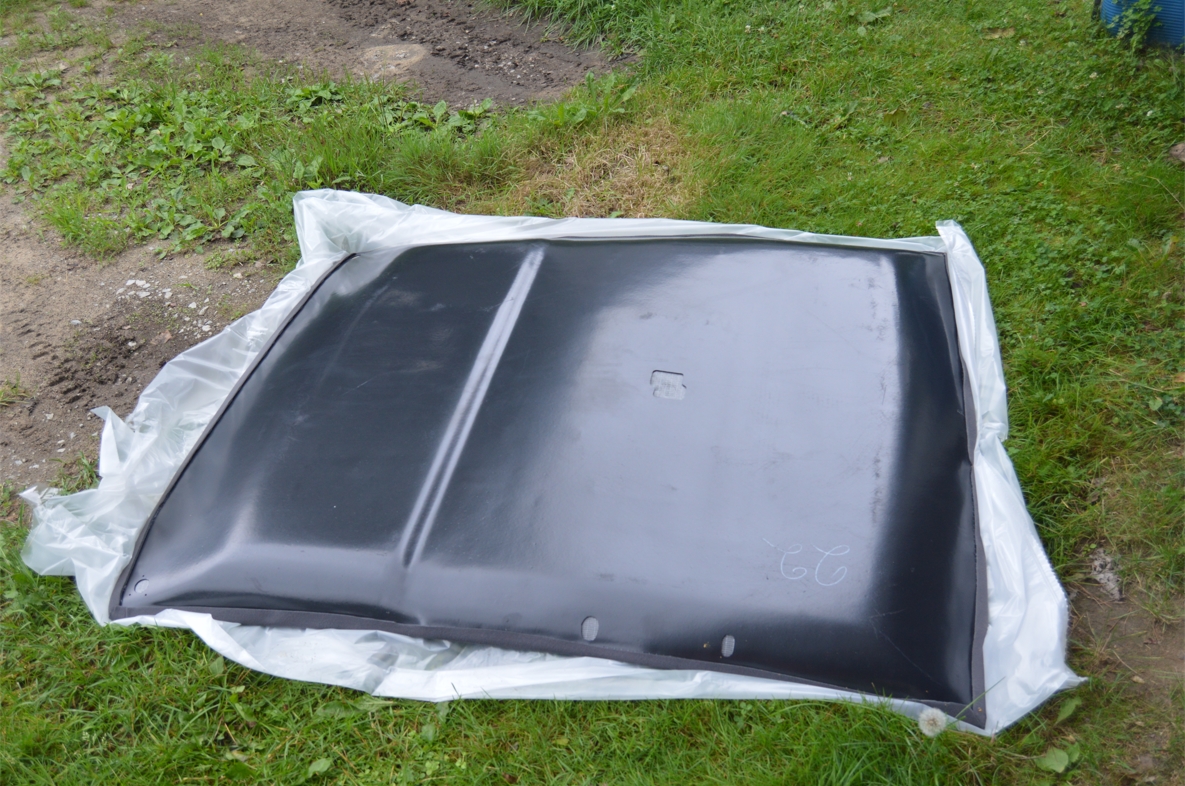
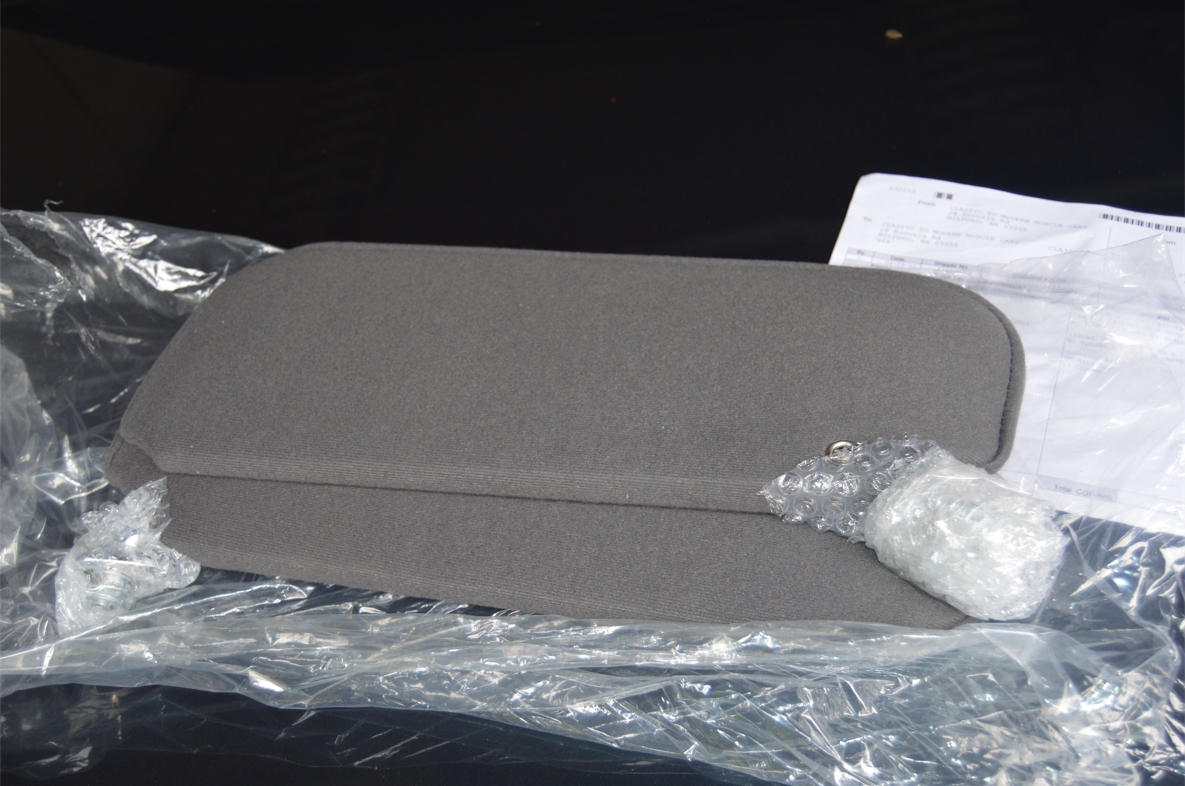
13. Inspect your new headliner, and sun visors if applicable. The sunvisor brackets as well.
The new headliner for this car has a semi-hard plastic backing.
(the OEM versions are like cardboard)
Some are made from a different type material.
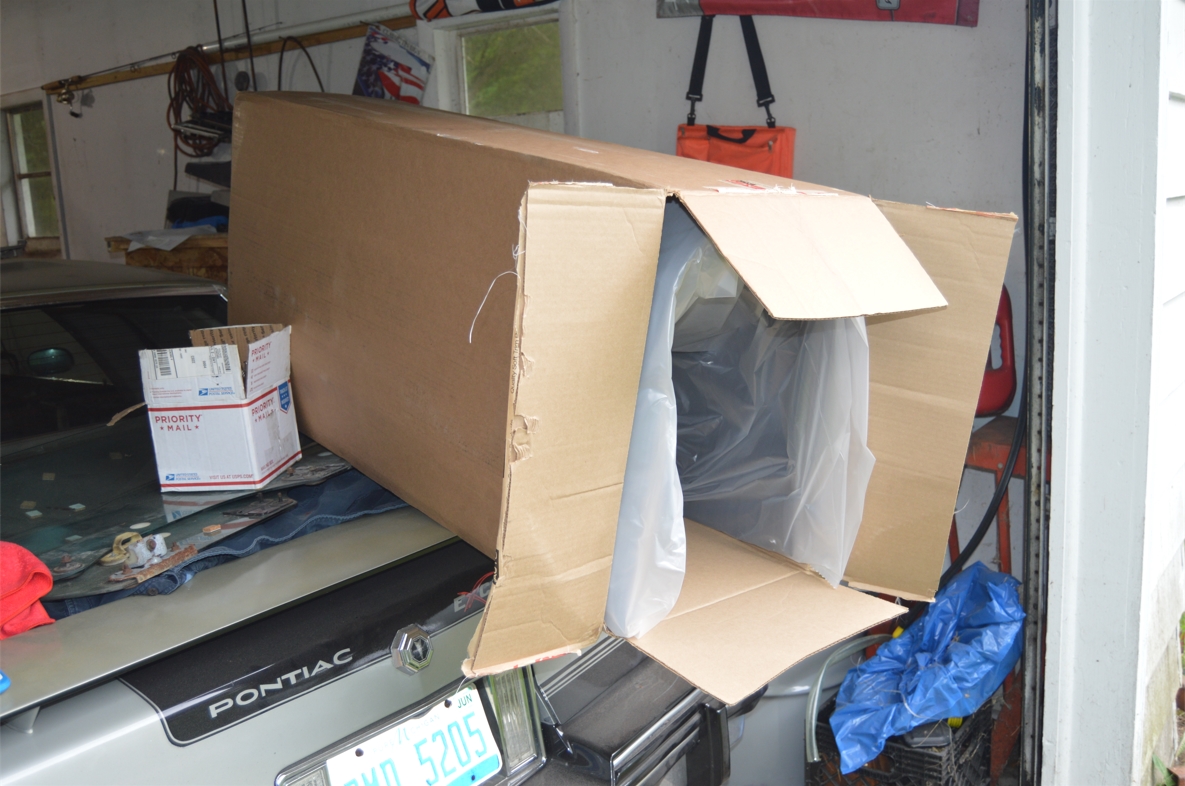
Laying them out in the sun for a few hours will straighten them out from being bent inside the shipping box.
.
NEW HEADLINER:
.
.
14. Bend the headliner slightly to fit inside the car.
You will install the new headliner AS you are reinstalling the trim.
(the trim is what holds the headliner in place, as well as the dome light, the sunvisors, and the coat hooks. They all secure it where it needs to be so it doesn’t move around)
.
REINSTALLING TRIM PIECES:
15. shove the headliner in above the front windshield trim.
16. push the front windshield trim back into position.
17. reinstall the a-pillars.
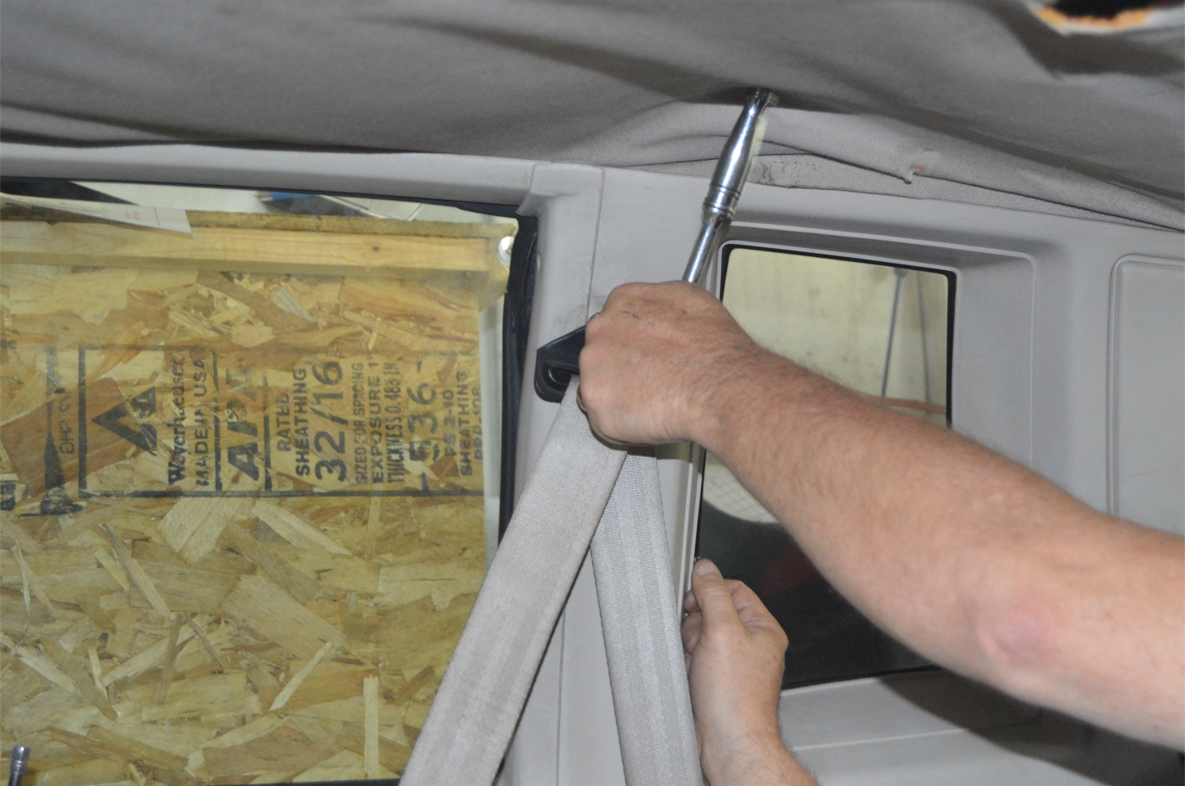
18. reattach the sail panels, including the seat belt bolts, and rear screws.
(this will help hold the headliner in place while you reassemble all the other components)
PUT THE SAIL PANEL SCREWS IN BEFORE THE SEAT BELT BOLT!
Otherwise you won’t be able to wiggle it into the correct position!
The screws are long screws.
.
INSTALLING THE NEW HEADLINER:
.
.
19. reinstall the rear window trim.
(3 push clips & 2 screws)
20. reinstall the B-pillar.
(2 long screws pn the top, 1 small screw on bottom)
21. reattach the above door pieces.
(if you put them on closest to the front of the car, you can then slide them backwards into place, as the rear part of the trim goes ABOVE the B-pillar. The front part goes ON TOP OF the a-pillar)
(these door pieces “snap” into place. Hook them in starting from the center of the car, then snap them into place from the window side, meaning the outside part of the trim locks in last)
22. reinstall the door sills (4 phillips screws)
23. Reinstall the coat hanger hooks.
There is a (separate) plastic backing piece (which goes closest to the headliner) that attaches under the actual coat hook.
(so as you are looking up at the coat hook, you see: screw, chrome coat hook, gray plastic backing piece, headliner)
.
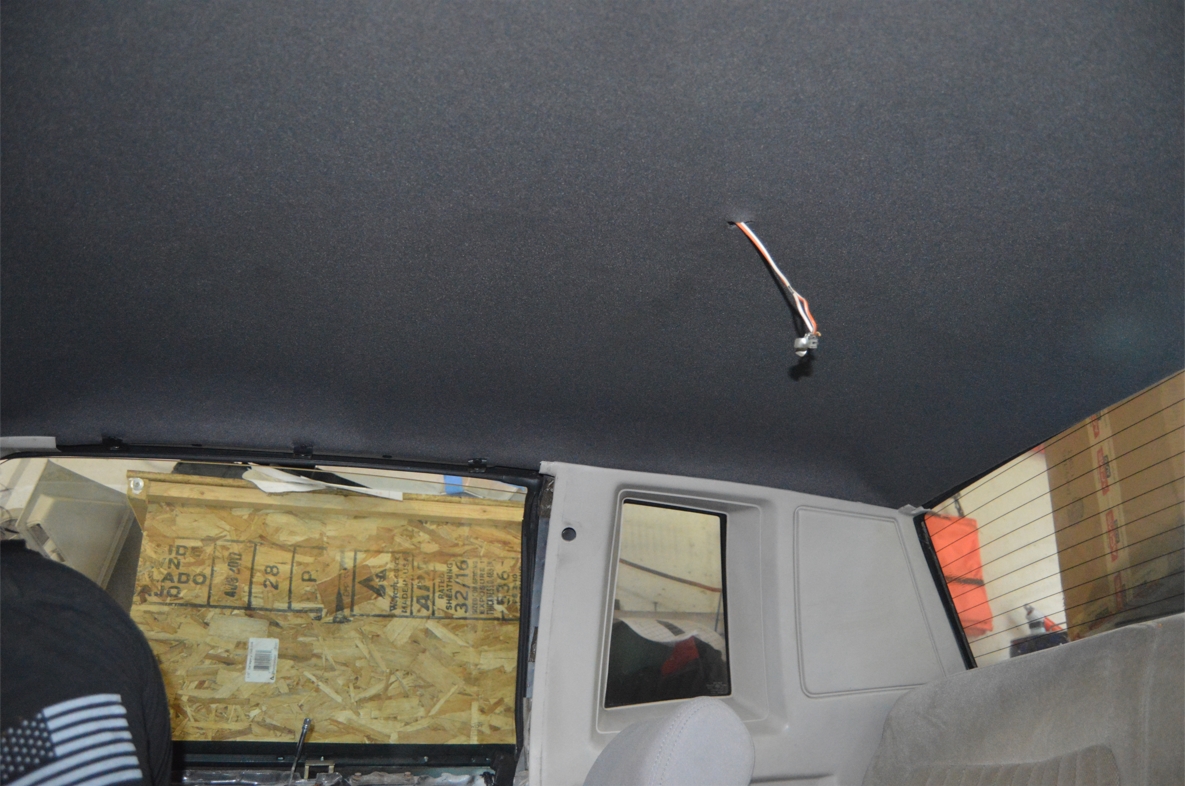
REINSTALLING DOME LIGHT:
(there is a round, standard dome light on this Gbody, so instructions are based on that one, but other dome lights should be similarly done this way)
.
24. on the new headliner, on the plastic backing piece, there should be a cutout area for the dome light. It is in roughly the correct position, but small variations do exist.
The dome is held onto the roof via 2 screws, so you will need to cut a slot in the cloth material to be able to accommodate these, as well as the 2 wires that power up the dome light.
25. On the headliner (cloth) side, start by cutting a small hole so you can run the wiring thru it. Start small, you don’t want too big of a hole, as the dome light housing needs to cover up the hole you are making!
You need to sort of position the dome housing into place while judging where you need to make the cut/slot. make your hole bigger based on these positions to be able to fit it in.
26. Reconnect the 2 wires into the housing. They slide into the back side of the housing, and sort of snap into place. The bulb fits in between these 2 metal tabs that are attached to the 2 wires.
27. rescrew in the 2 screws to hold the dome light in place. tighten to secure.
.
DOME LIGHT INSTALLATION:
.

.
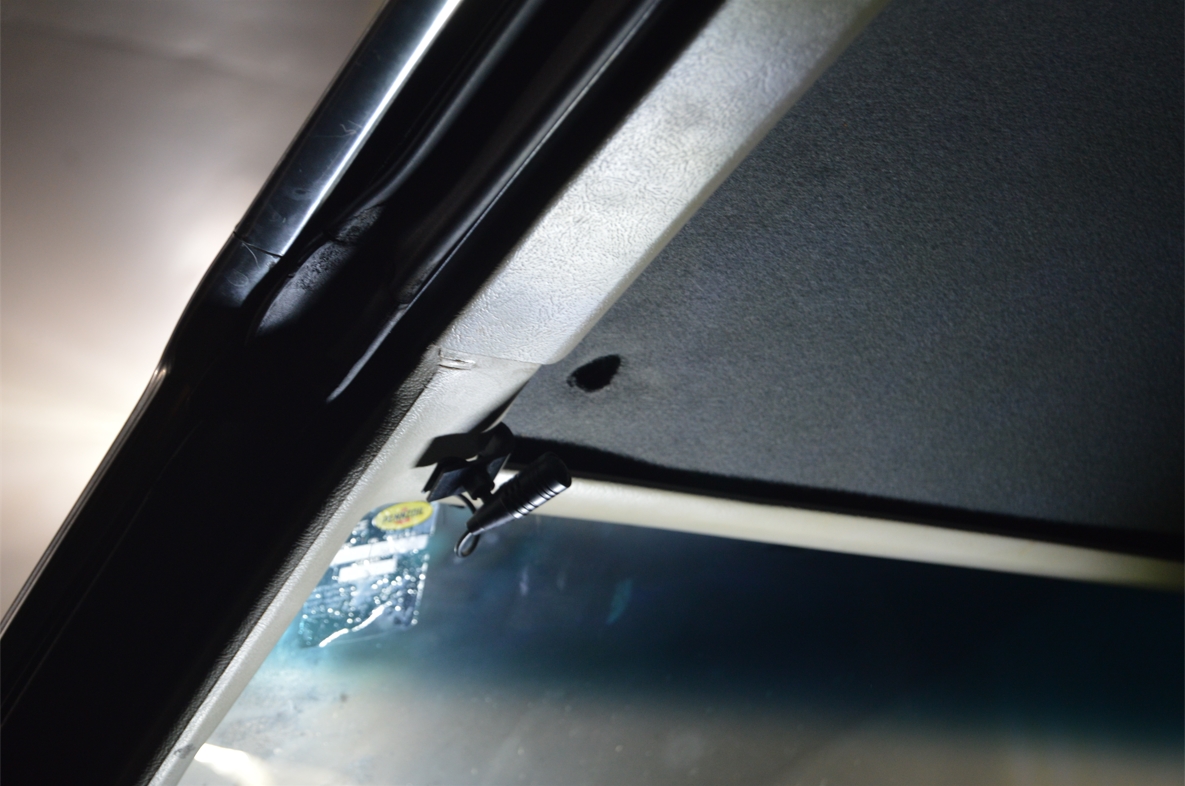
REINSTALLING SUNVISORS:
.
(both sunvisors are exactly alike, they are just flipped for each side. The driver side has the adjustment screw facing up towards the headliner. The passenger side has this screw facing down towards the floor. This is with them in the “not being used” position)
(a tip: when reinstalling, it is easier if you take the visor off of the bracket, it makes it much easier to screw it into the roof. The adjustment screw is what holds the bracket onto the visor, loosen it up and slide the visor off the bracket)
.
NEW SUNVISORS:
.
.
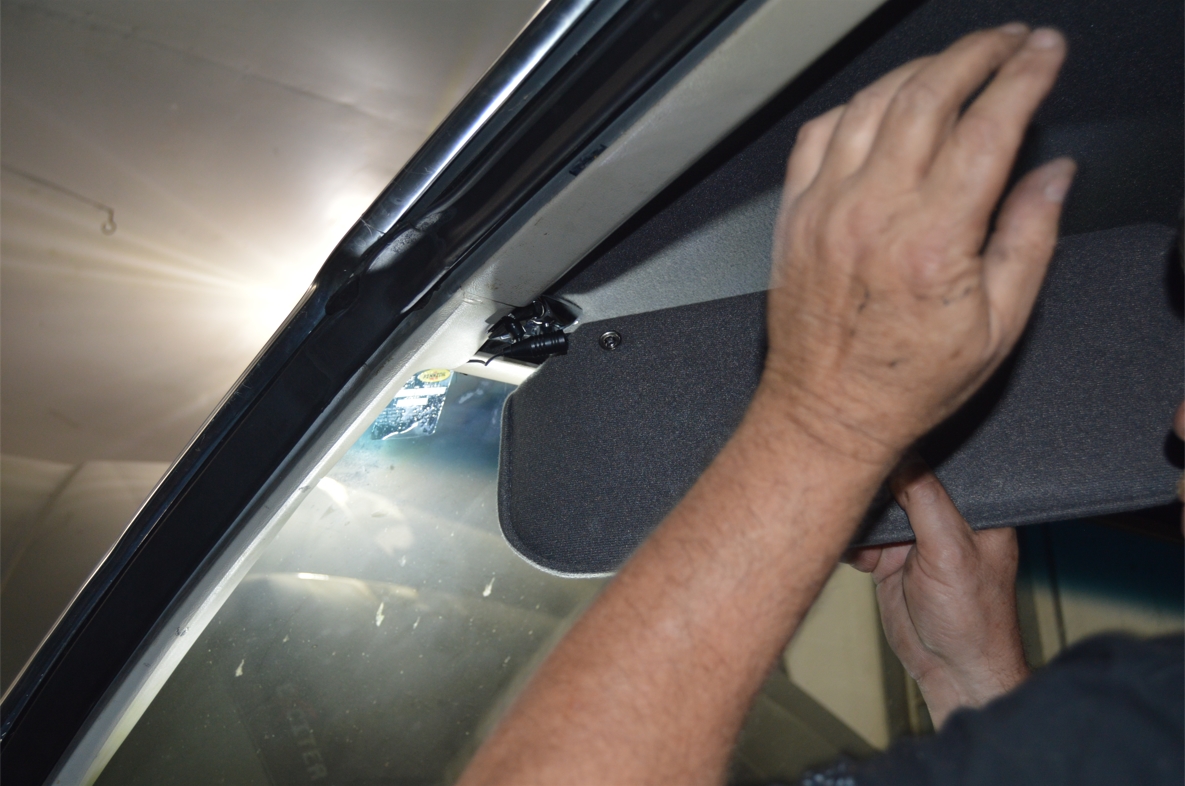
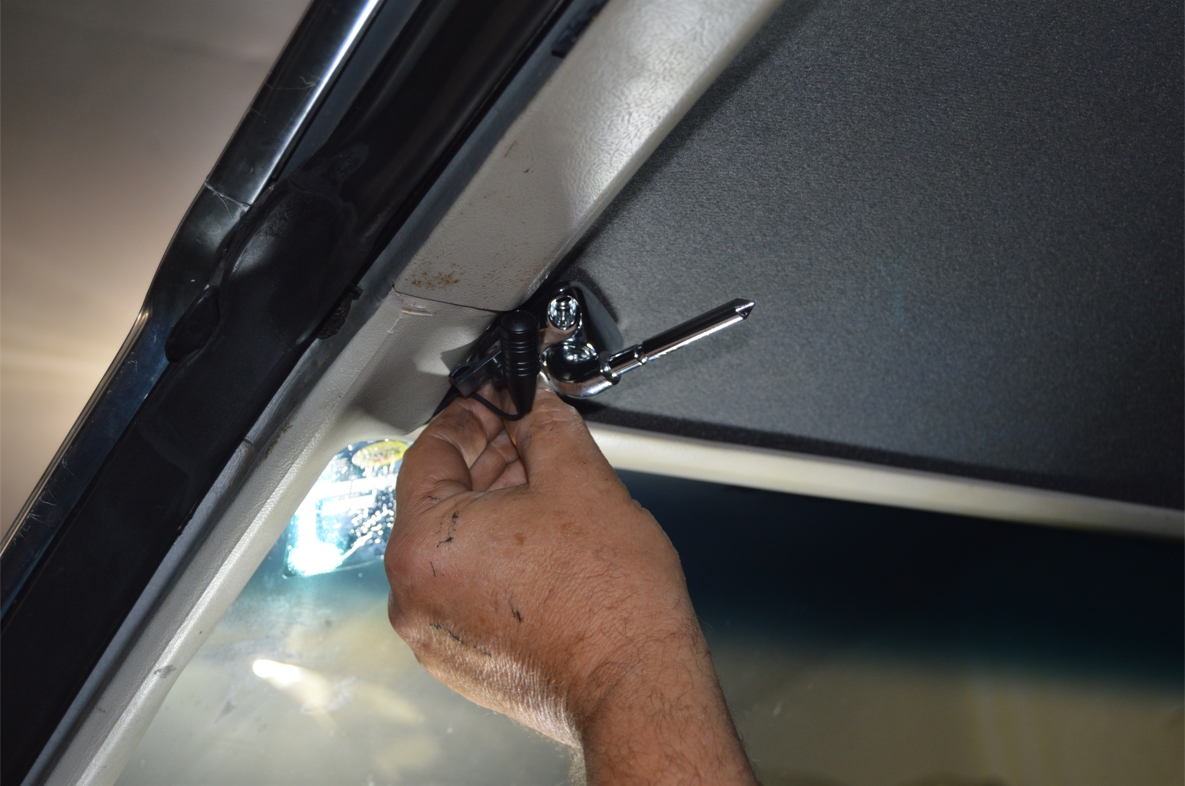
28. This is a bit of a challenge. There’s 3 screws on the bracket, that hold it into the correct position. Feel by hand, pushing your fingers into the cloth, around the big hole where the sunvisors center part goes up into the headliner. There should be 3 small holes (in the plastic backing) pre-cut. Now, this won’t necessarily exactly line up with the 3 holes that the screws go into.
So what we did, (don’t put the sunvisor in place just yet), was find 1 hole in the headliner, and push 1 screw thru the cloth material, then feel it around until you find where exactly it screws into. Once you do, screw it in by hand a few turns to keep it temporarily in place for now.
Do the same thing with 1 of the other holes.
Now that you have 2 of the 3 in place, look visually at them and see how they go in (are they straight? on an angle? etc).
Remove the 2 screws.
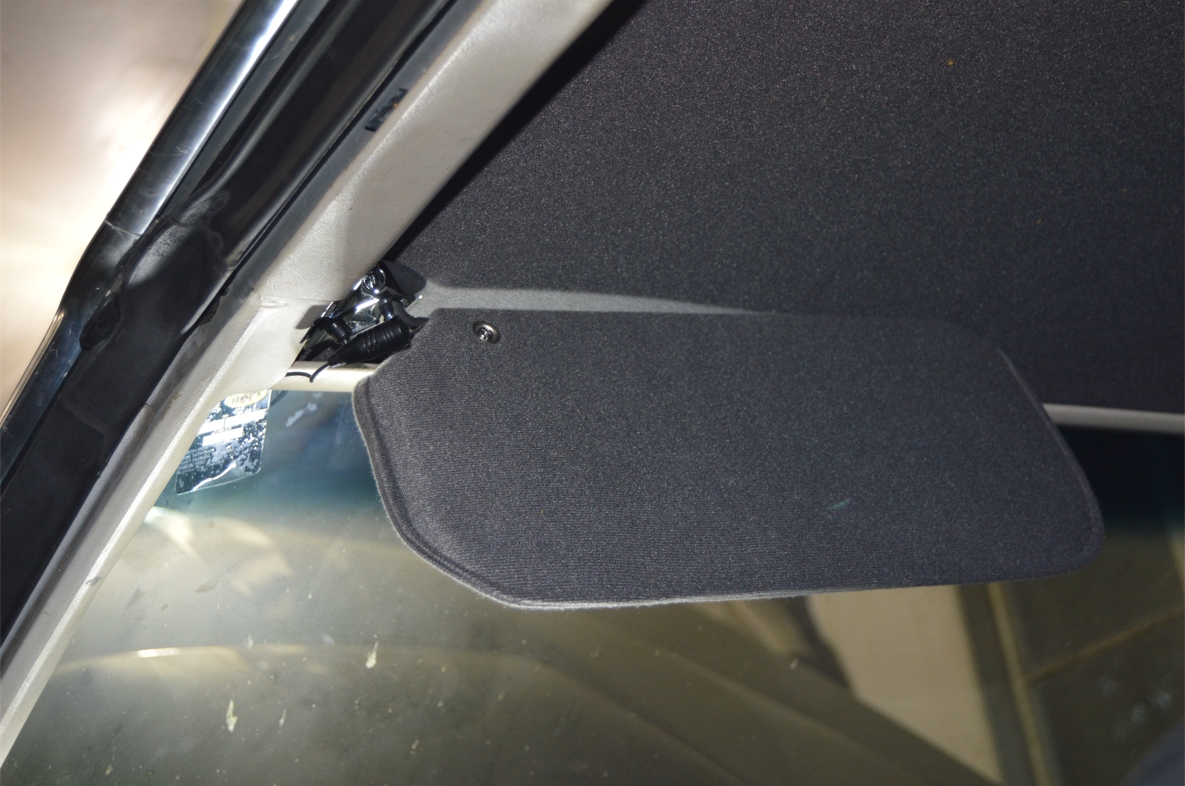
29. cut a smallish slit in the headliner where the center section of the sun visor goes.
30. put the sunvisor in place, and secure with the 2 screw holes you just made.
31. you should be able to now reinstall the third screw that holds it all in place.
.
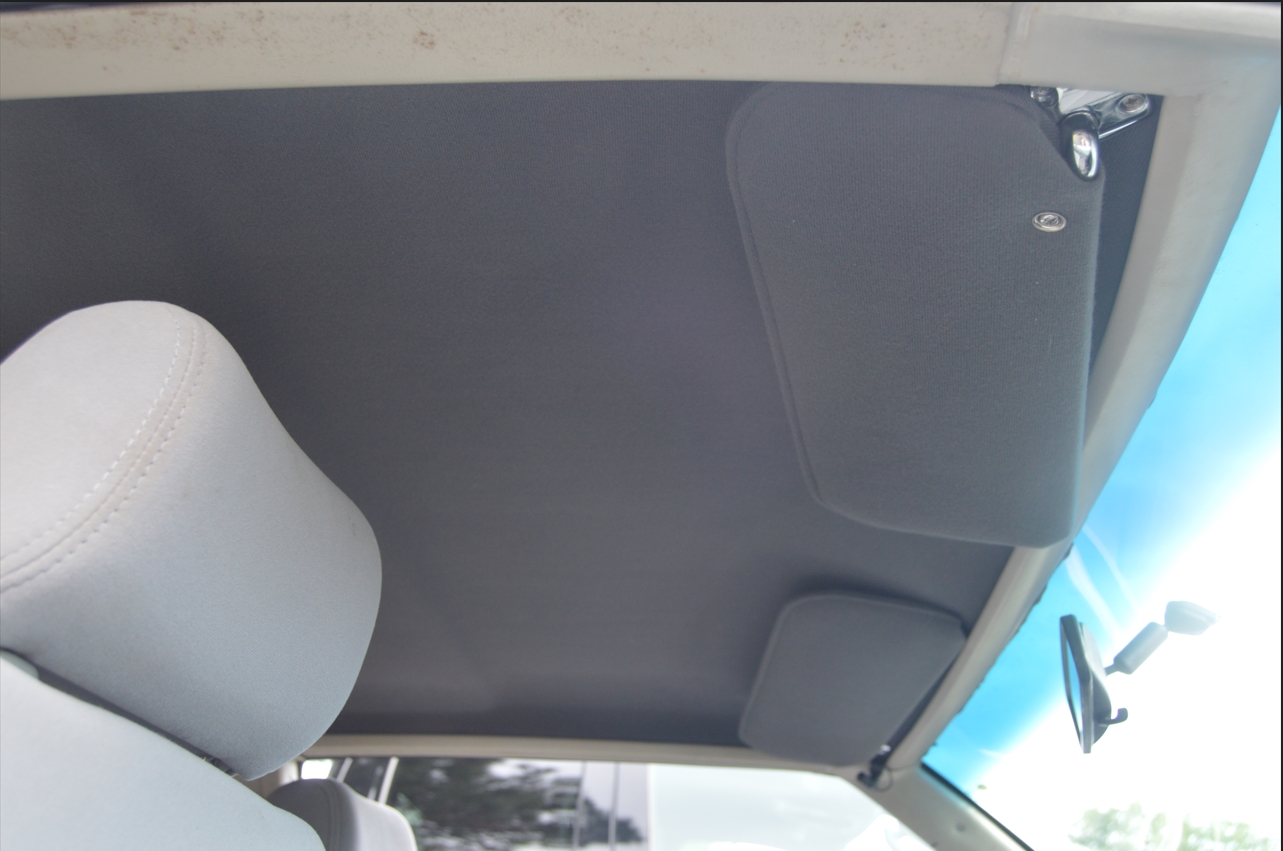
INSTALLING NEW SUN VISORS:
.


.
That’s it!
Fit good? Look good?
Awesome, nice job!
Pat yourself on the back!
.
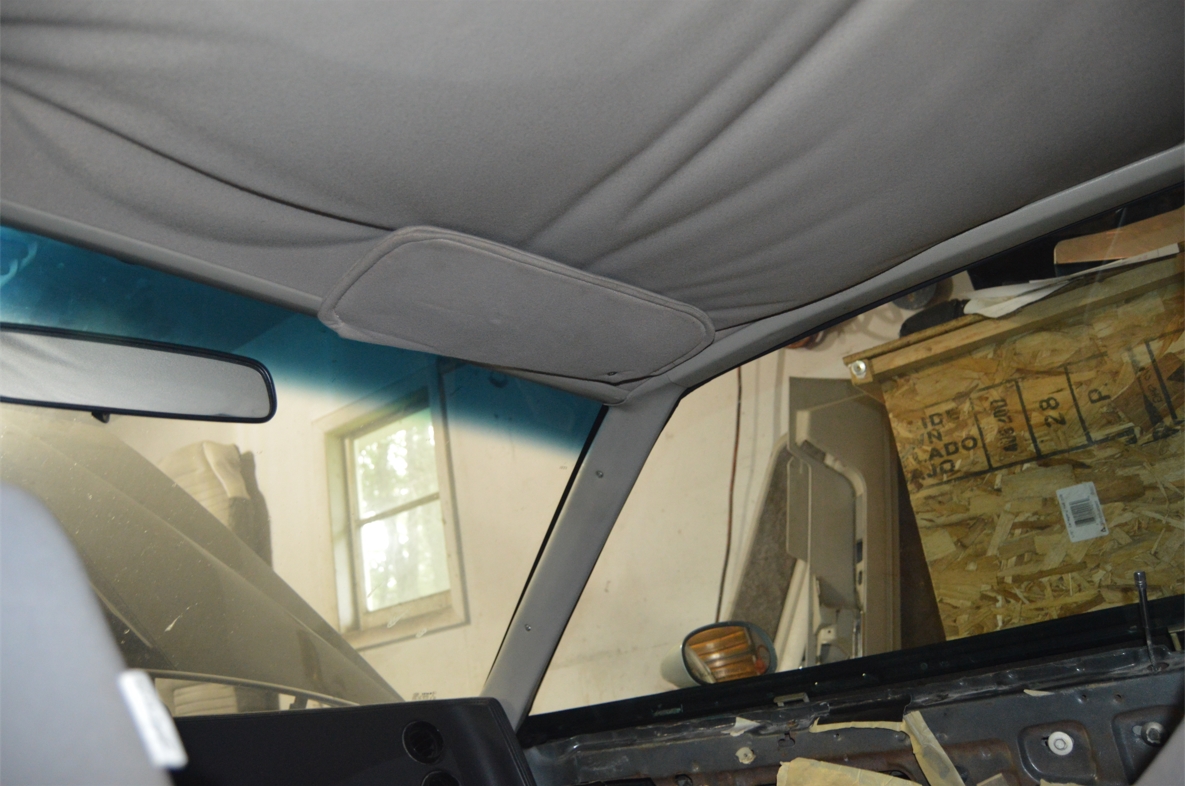
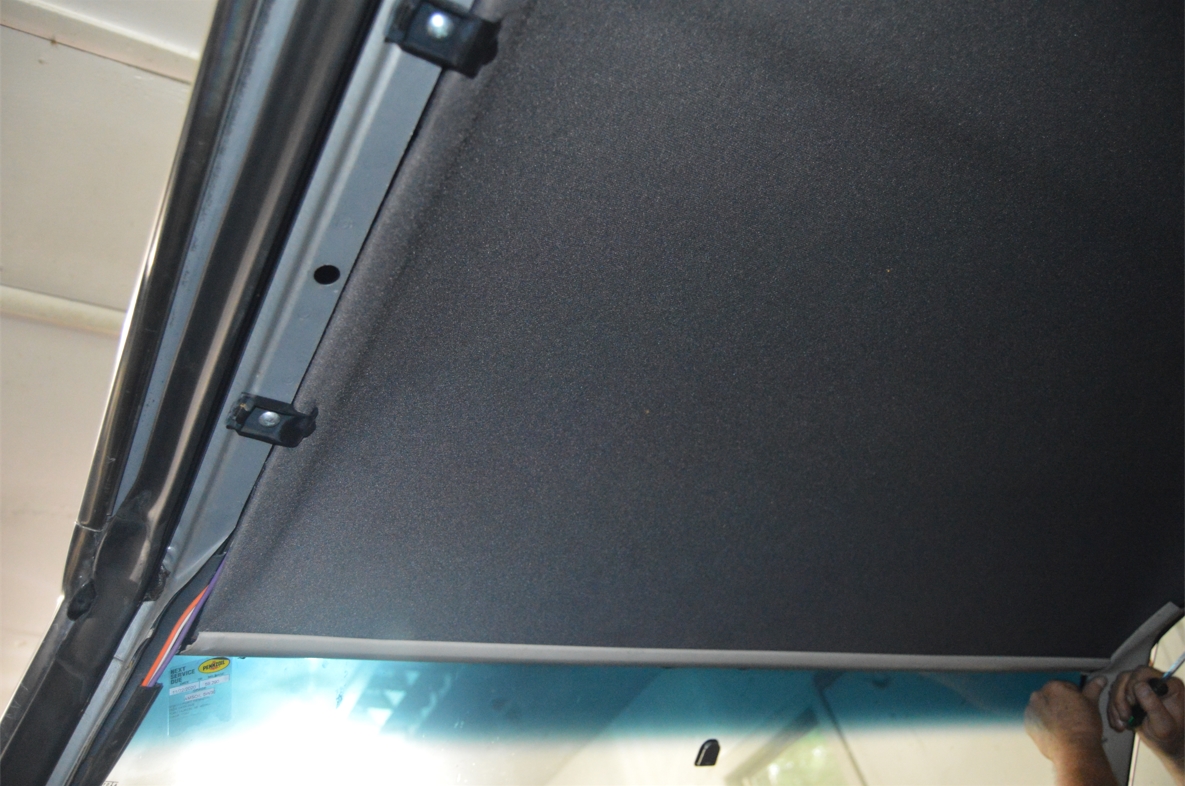
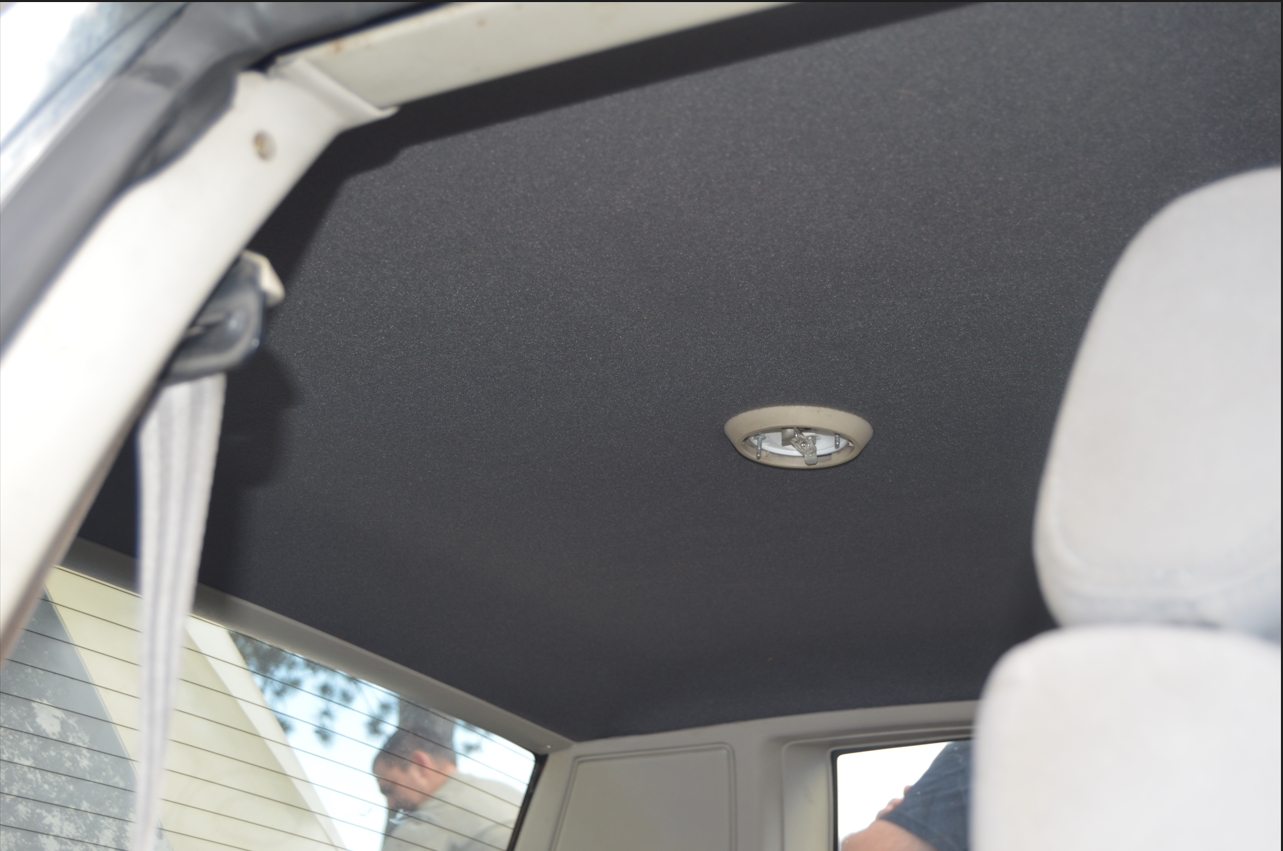
HEADLINER INSTALLED:
.

.


