


Sometimes it’s the little touches that make your car special, and stick out from the rest of the crowd.
This cool little light-up emblem that normally secures to your front grill is one such item.
The seller on ebay (jdm-design) offers these unique emblems that are perfect for any Turbo Regal, regardless of whether it’s a Grand National, Turbo T, T-type, Limited, or even the base model Regal, since it only says “Buick” on it, compiled with the Buick tri-shield emblem.
They’re pretty reasonable priced too, at just ten bucks shipped.
 Installation is easy.
Connect the red power wire into your existing parking lights.
Connect the black wire to a good ground source.
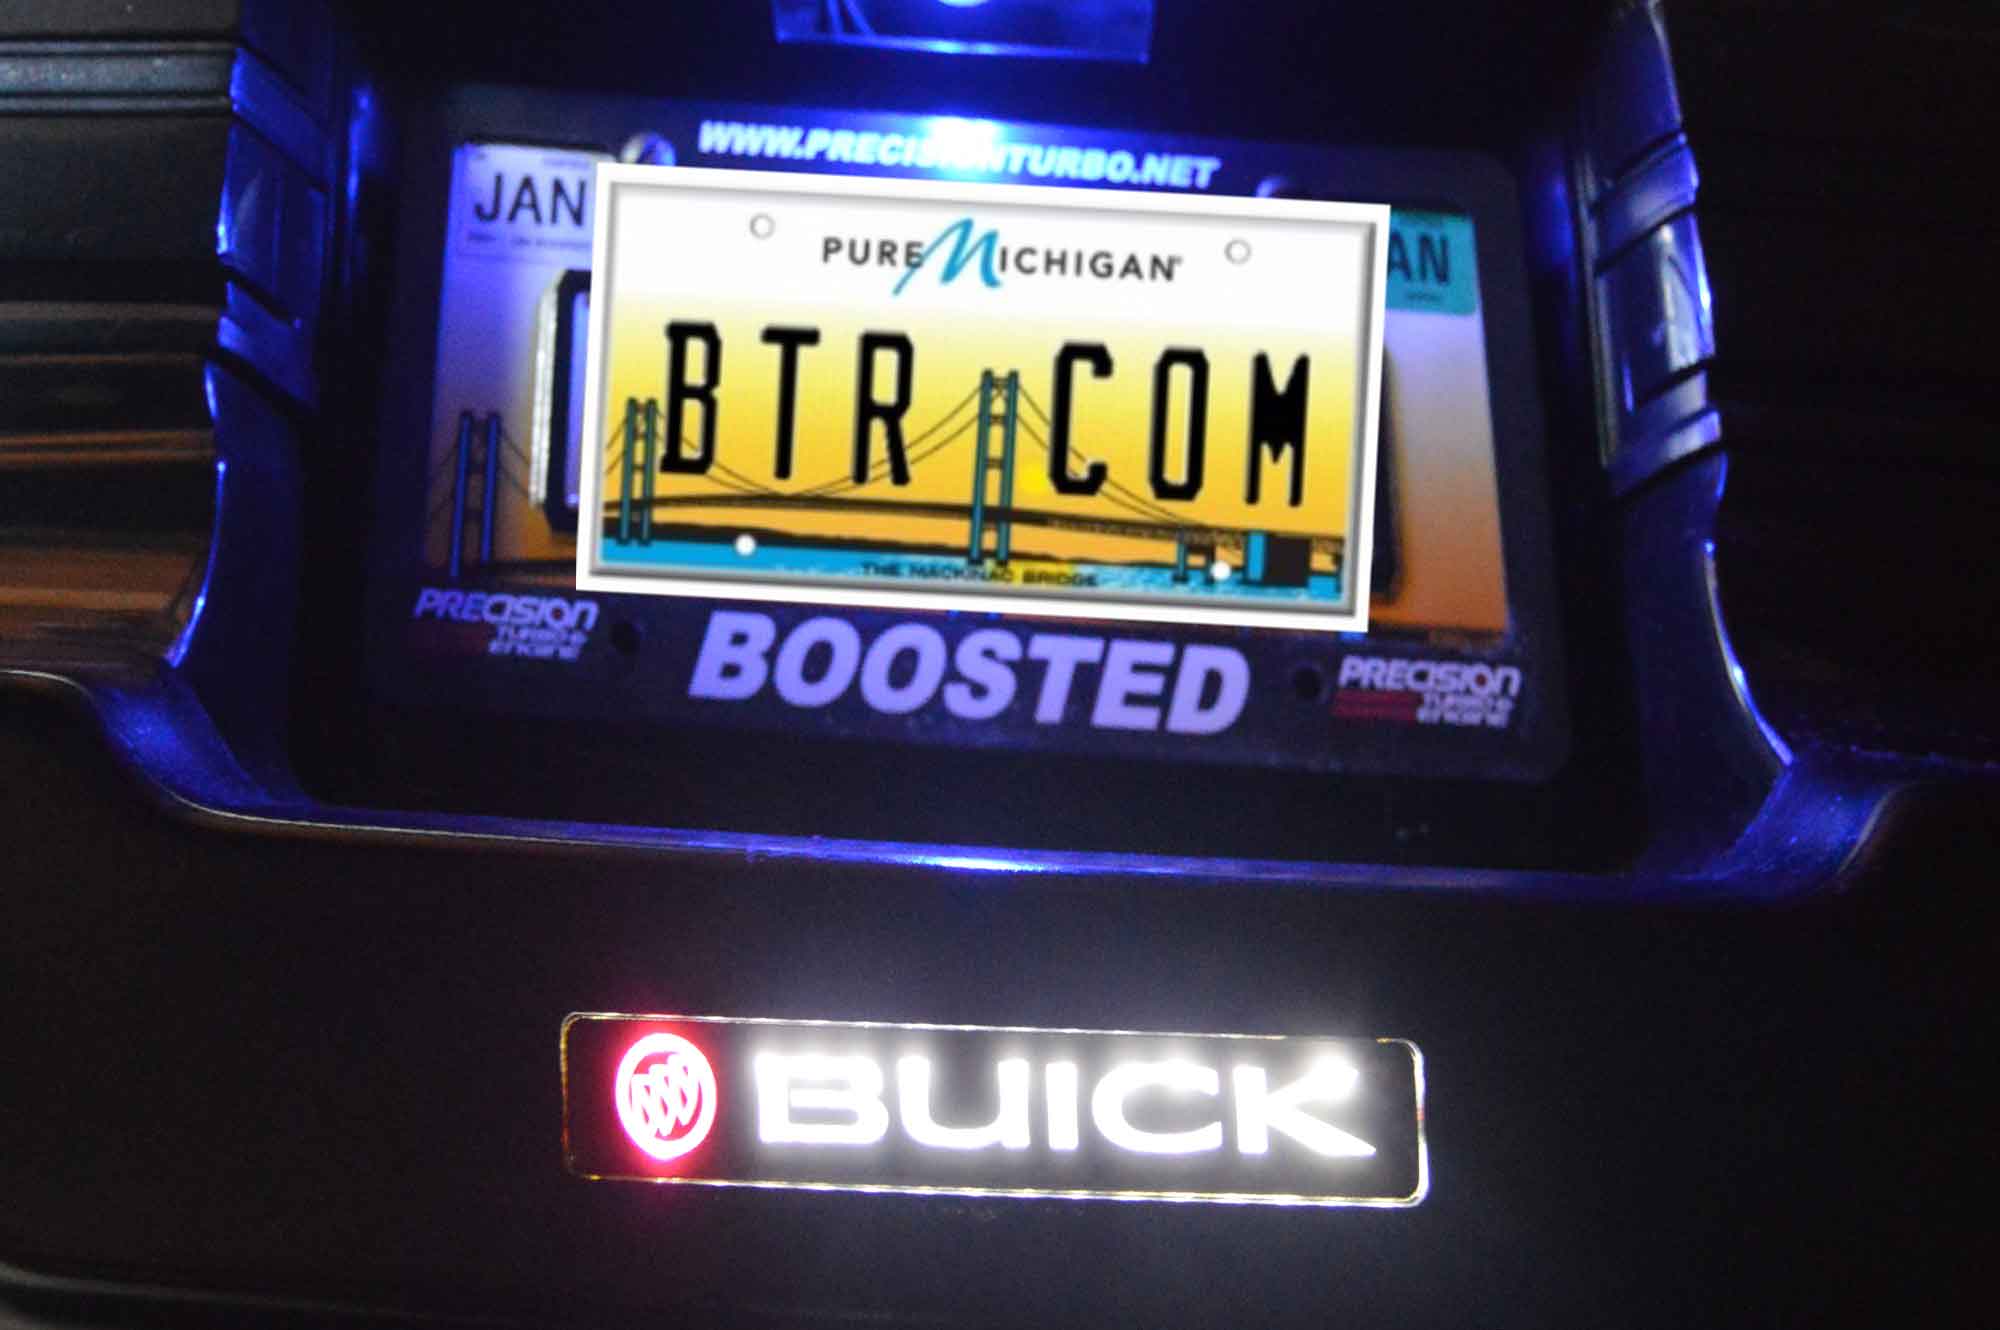
Whenever you turn on the parking lights, this neat Buick grill emblem lights up as well.
Pretty cool, huh?
.
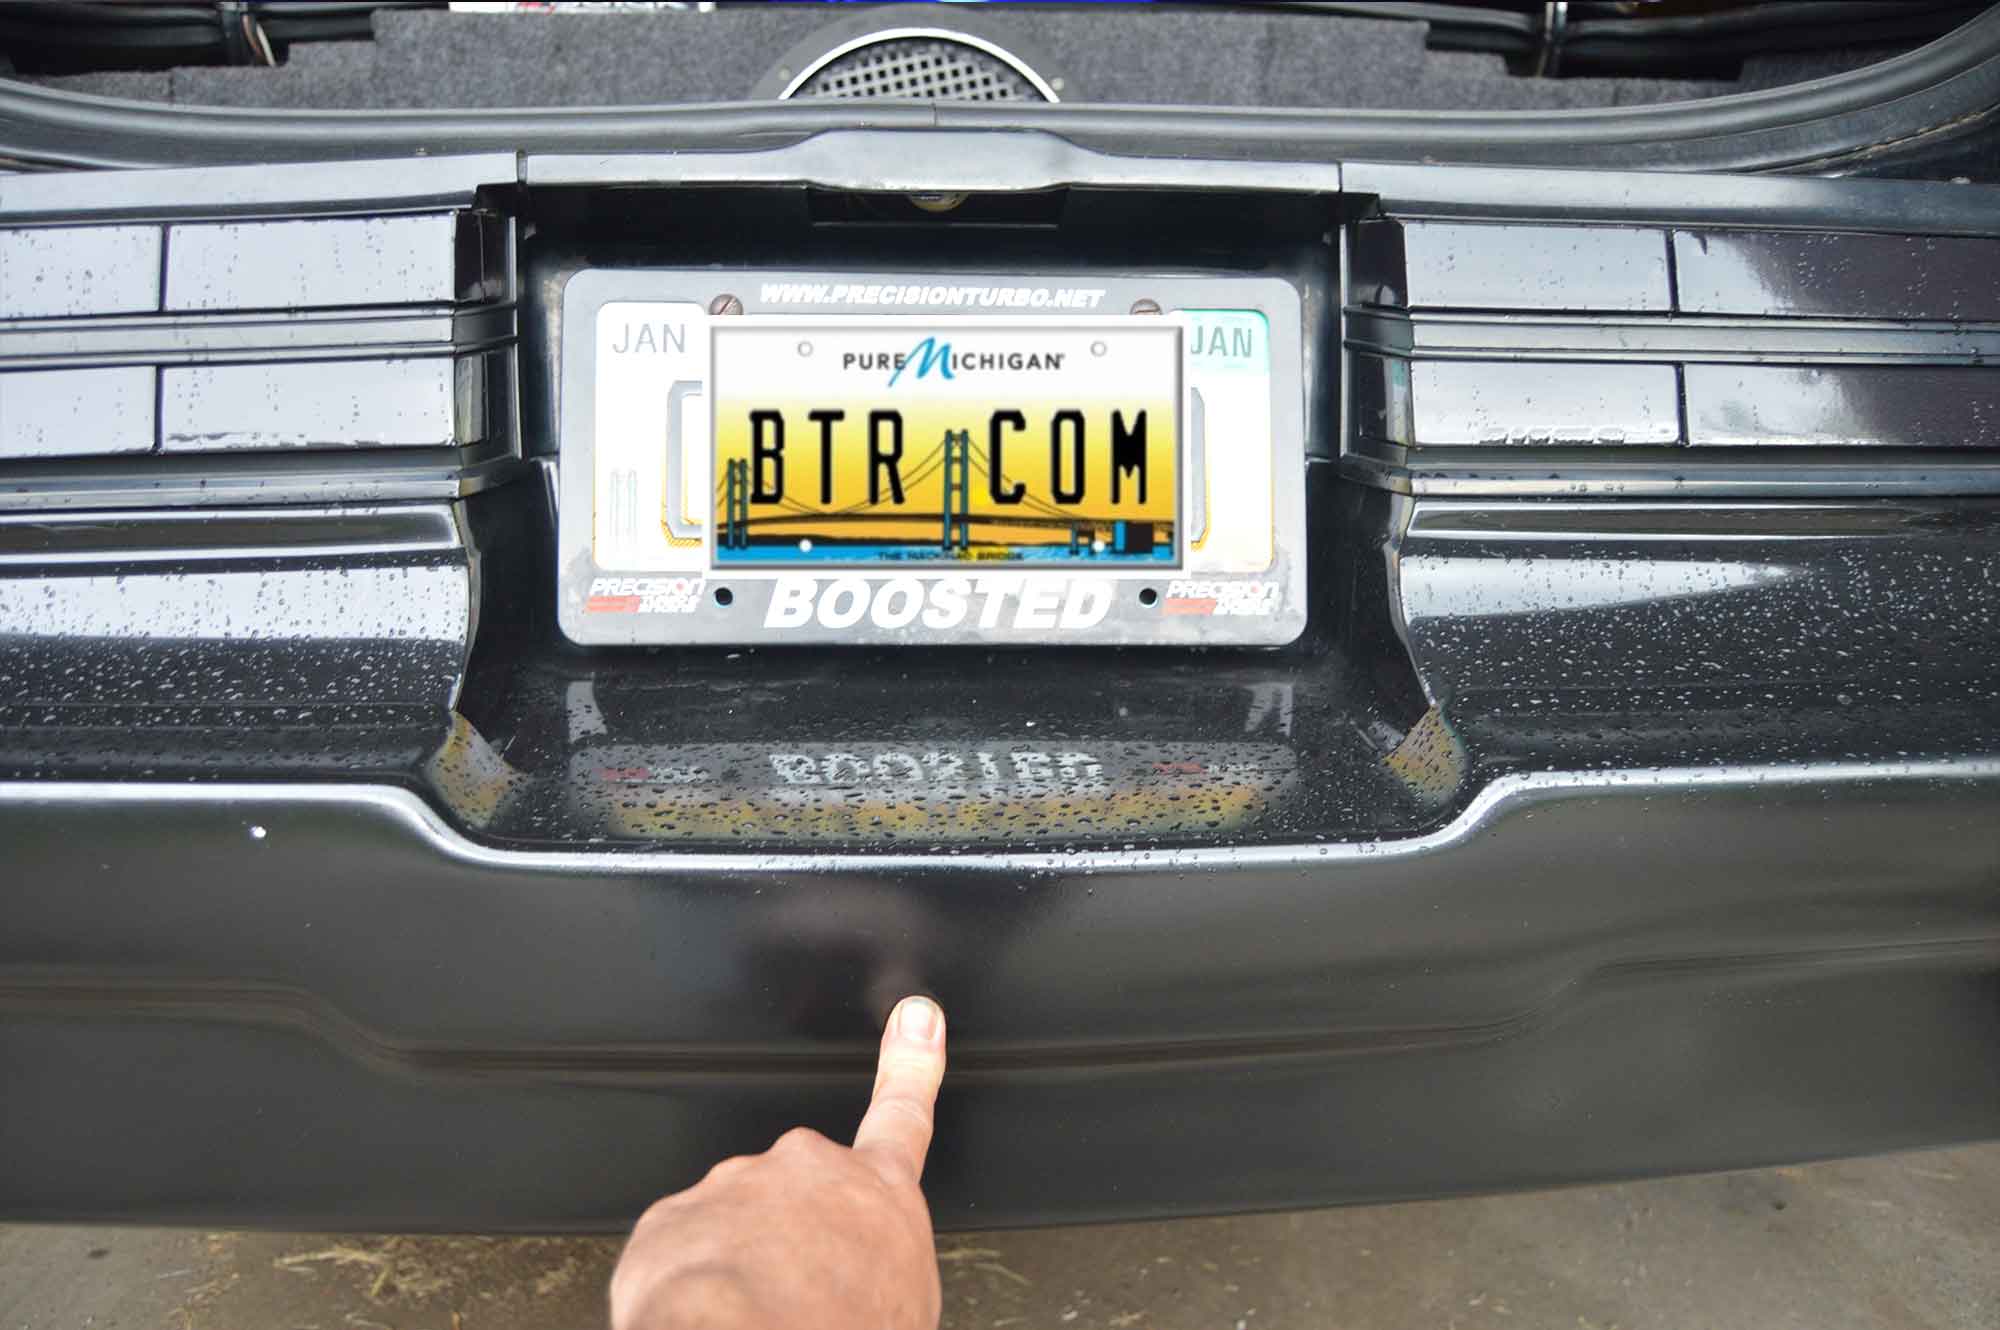
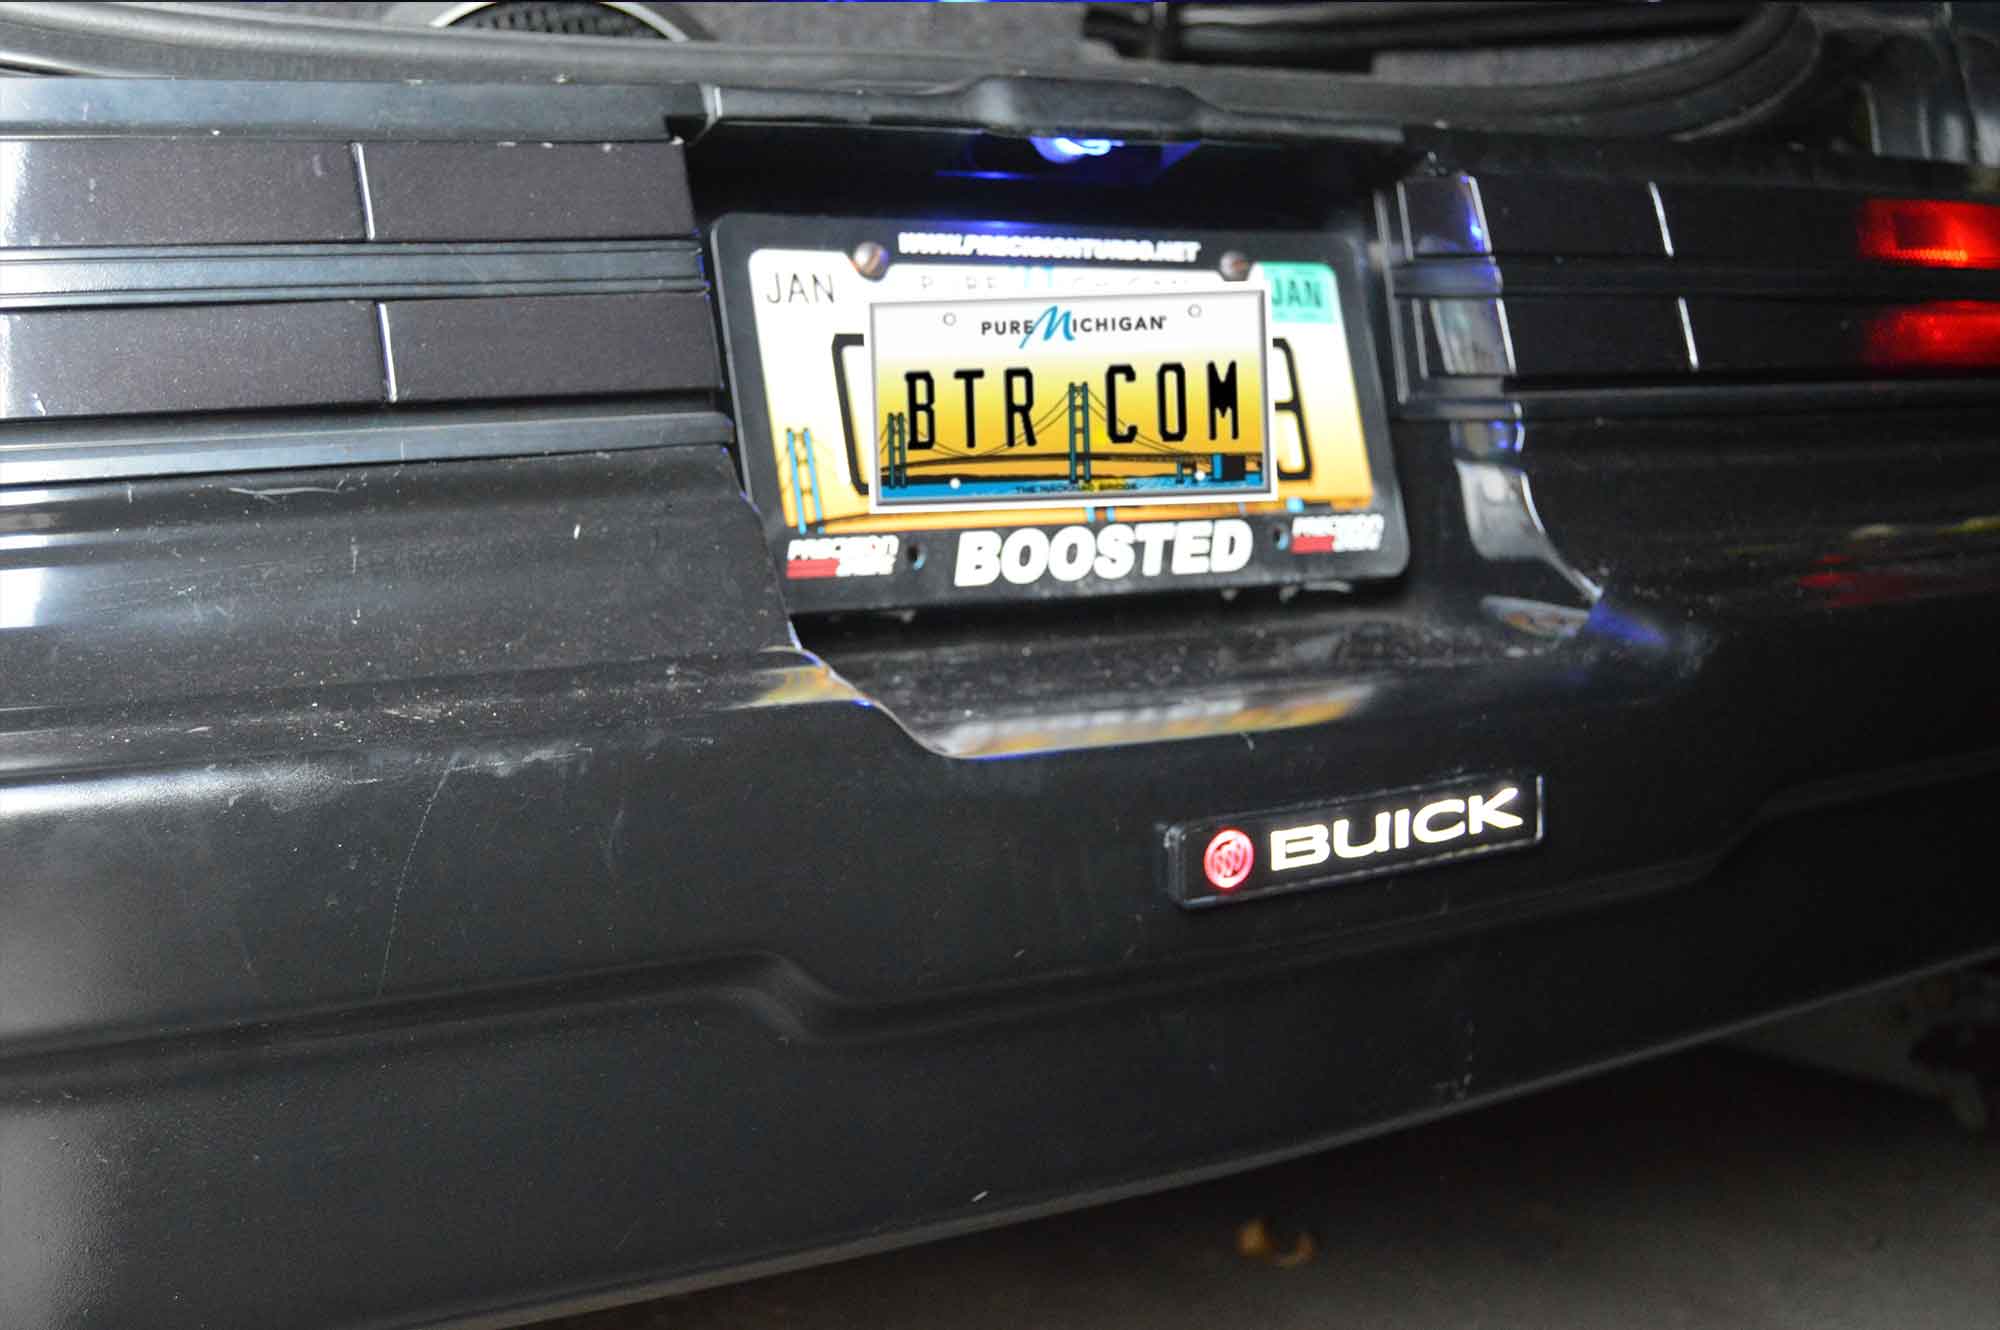
Of course, since we prefer being totally different than everyone else, we wouldn’t have been satisfied by just attaching it to the grill like everyone else is doing.
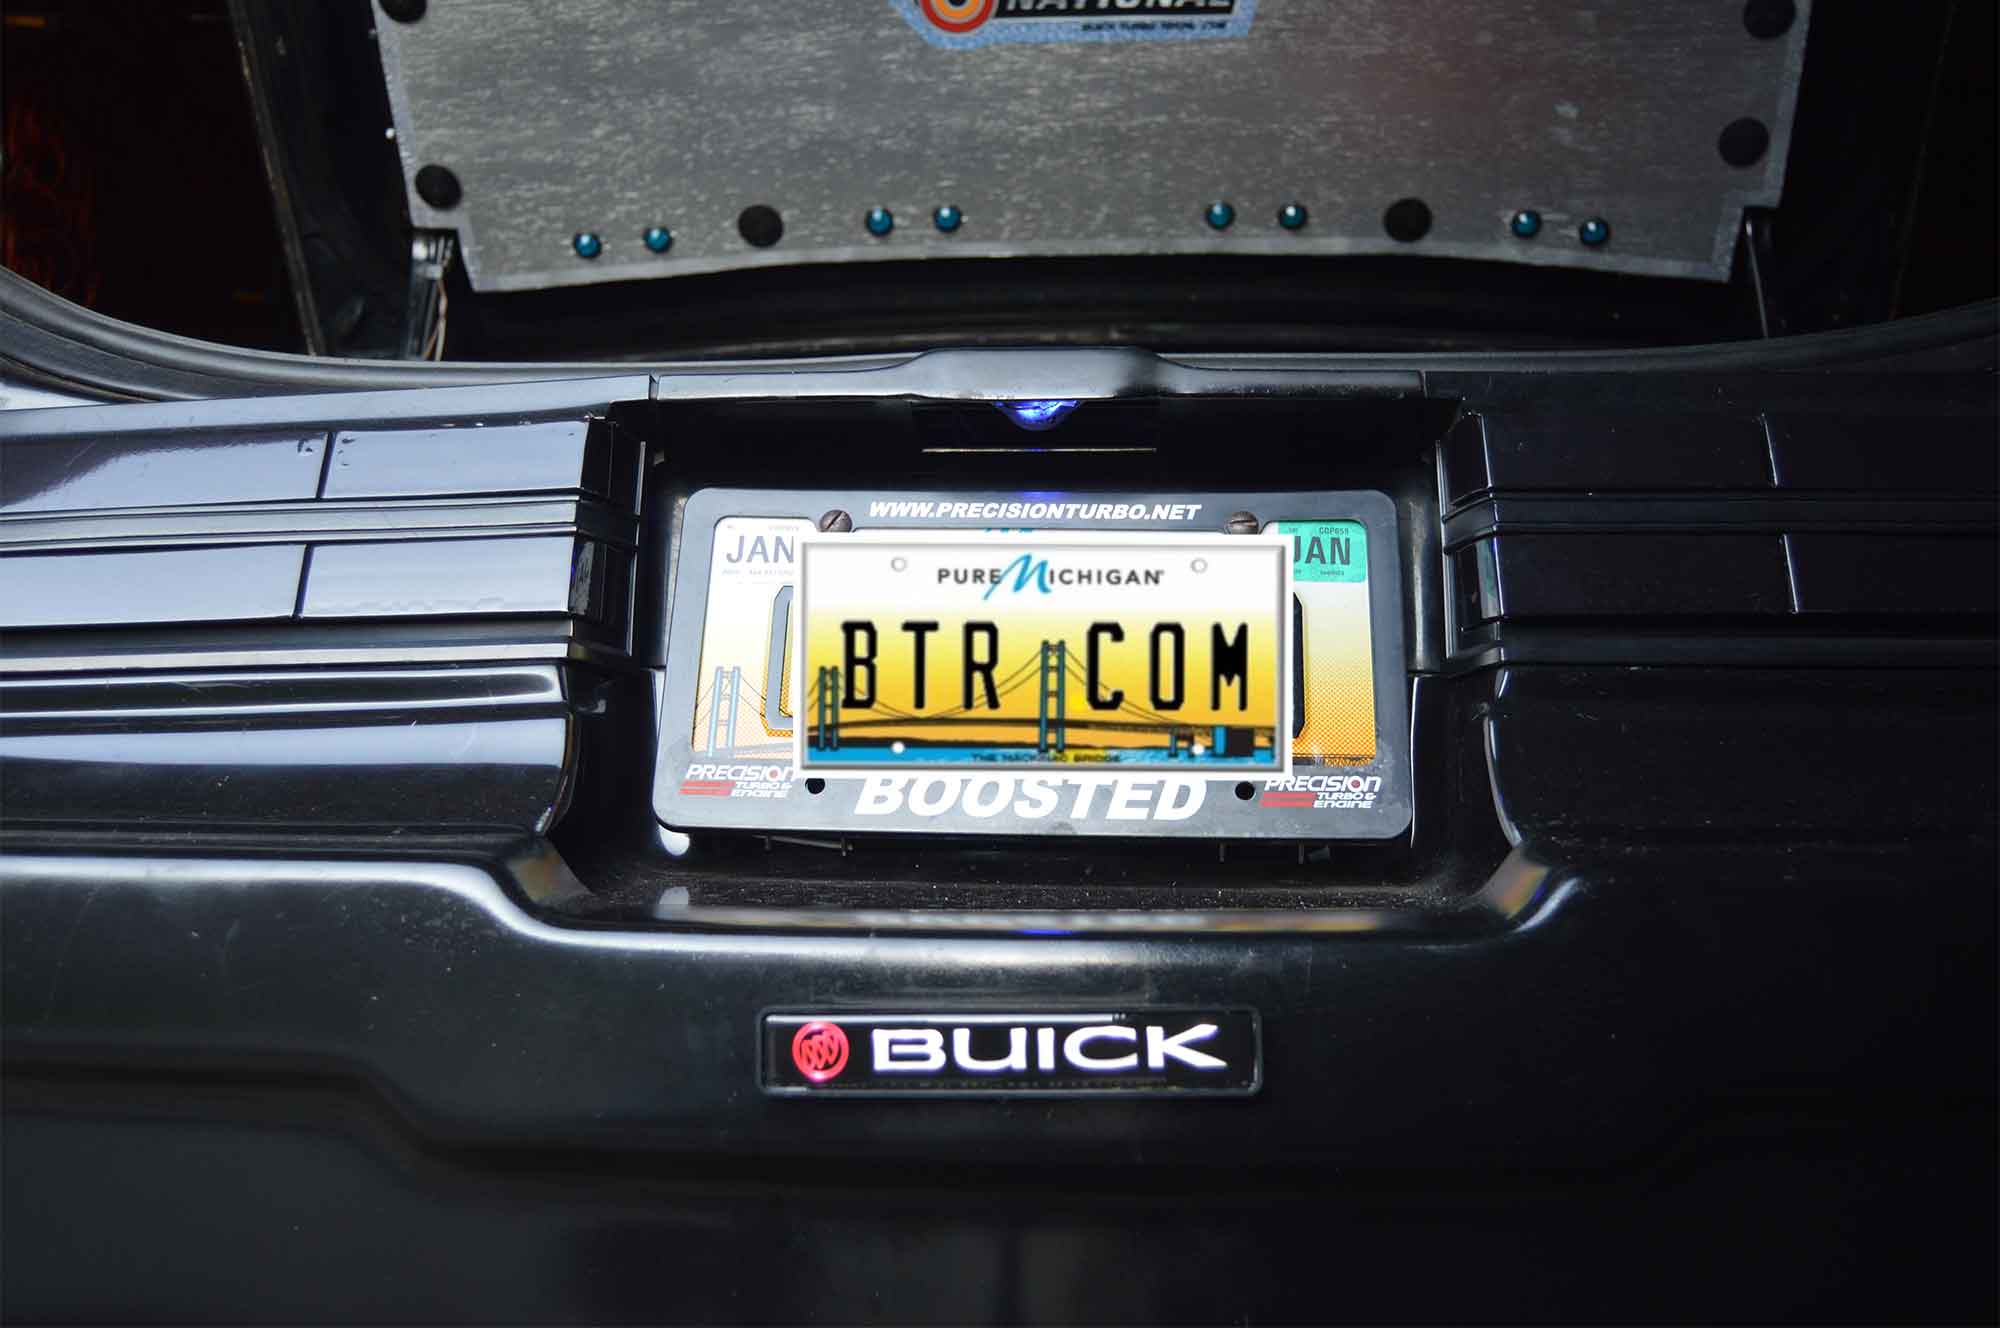
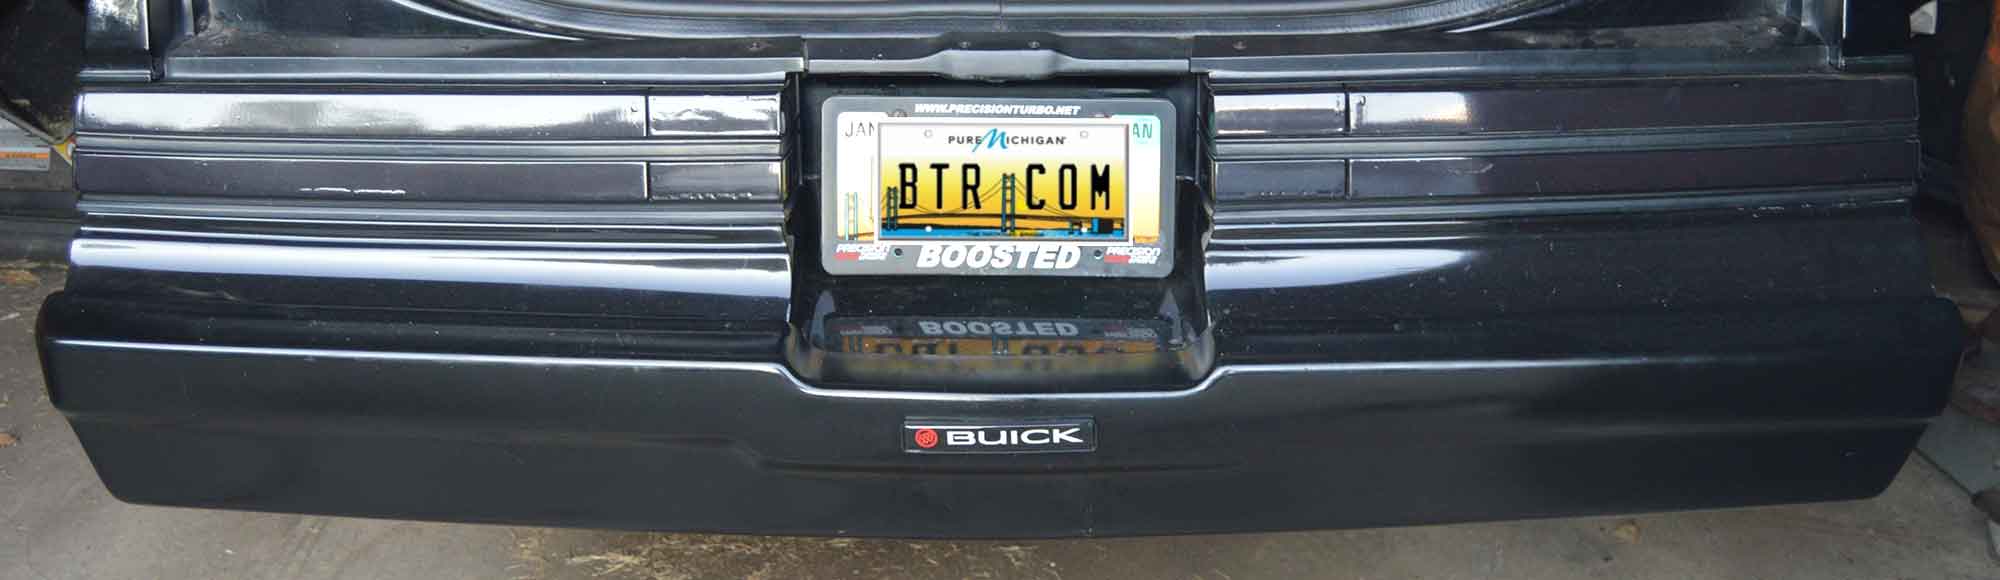
We want to mount it centered in the rear bumper, right underneath the license plate!
Sounds like an awesome idea, one that we are able to accomplish since we installed a fiberglass rear bumper, which will make it super easy to do.
The space we’re putting it in has nothing behind it, so this is basically just drill some holes, wire it up, stick it in, and it’s done.
.

.
.
Here’s a brief how-to. Check out the pics & you’ll figure it out.
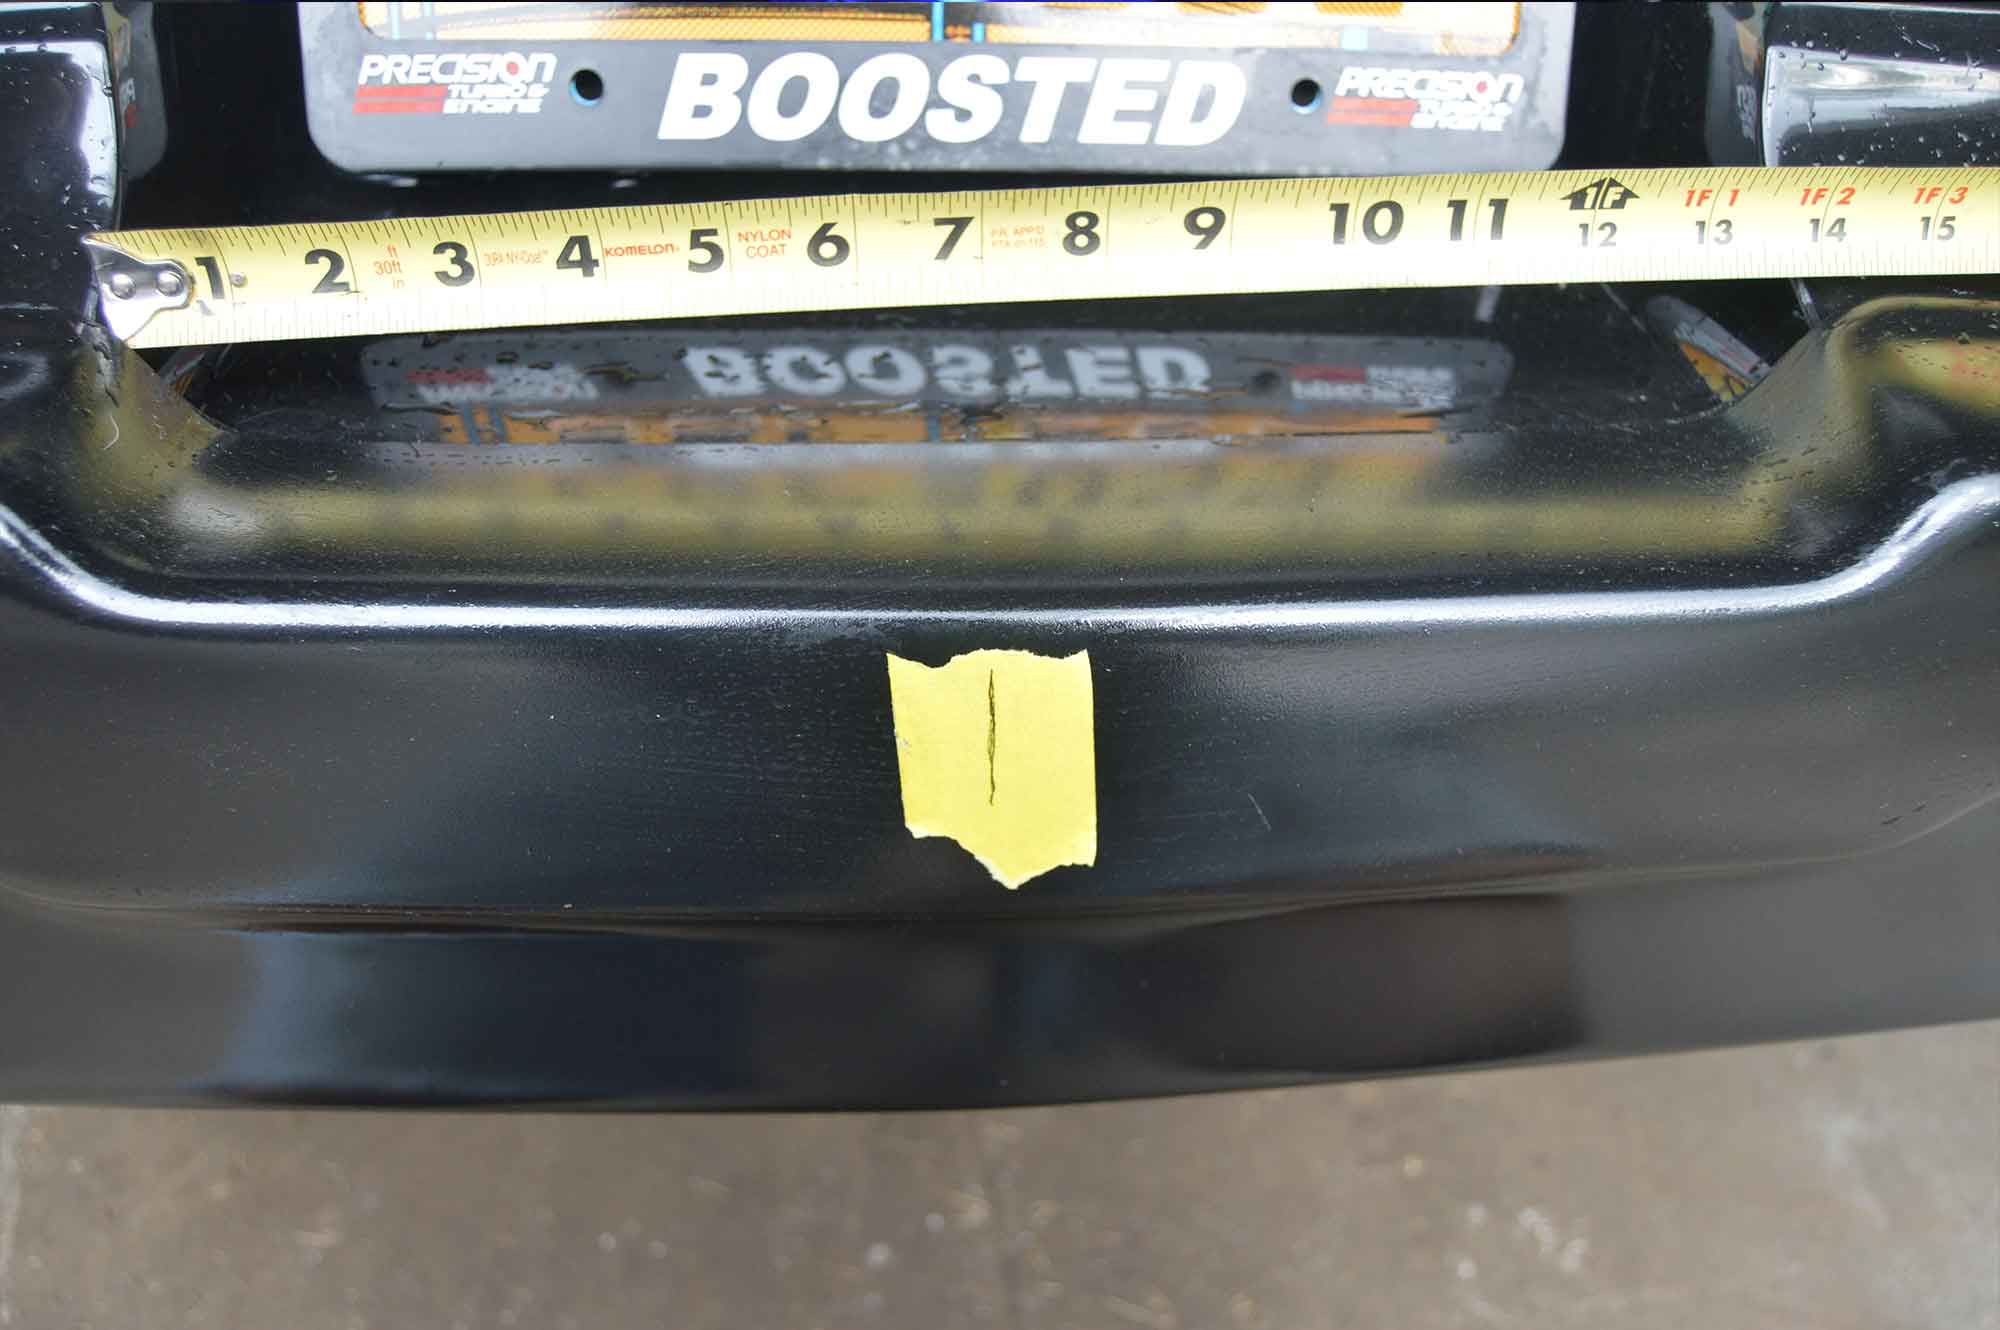
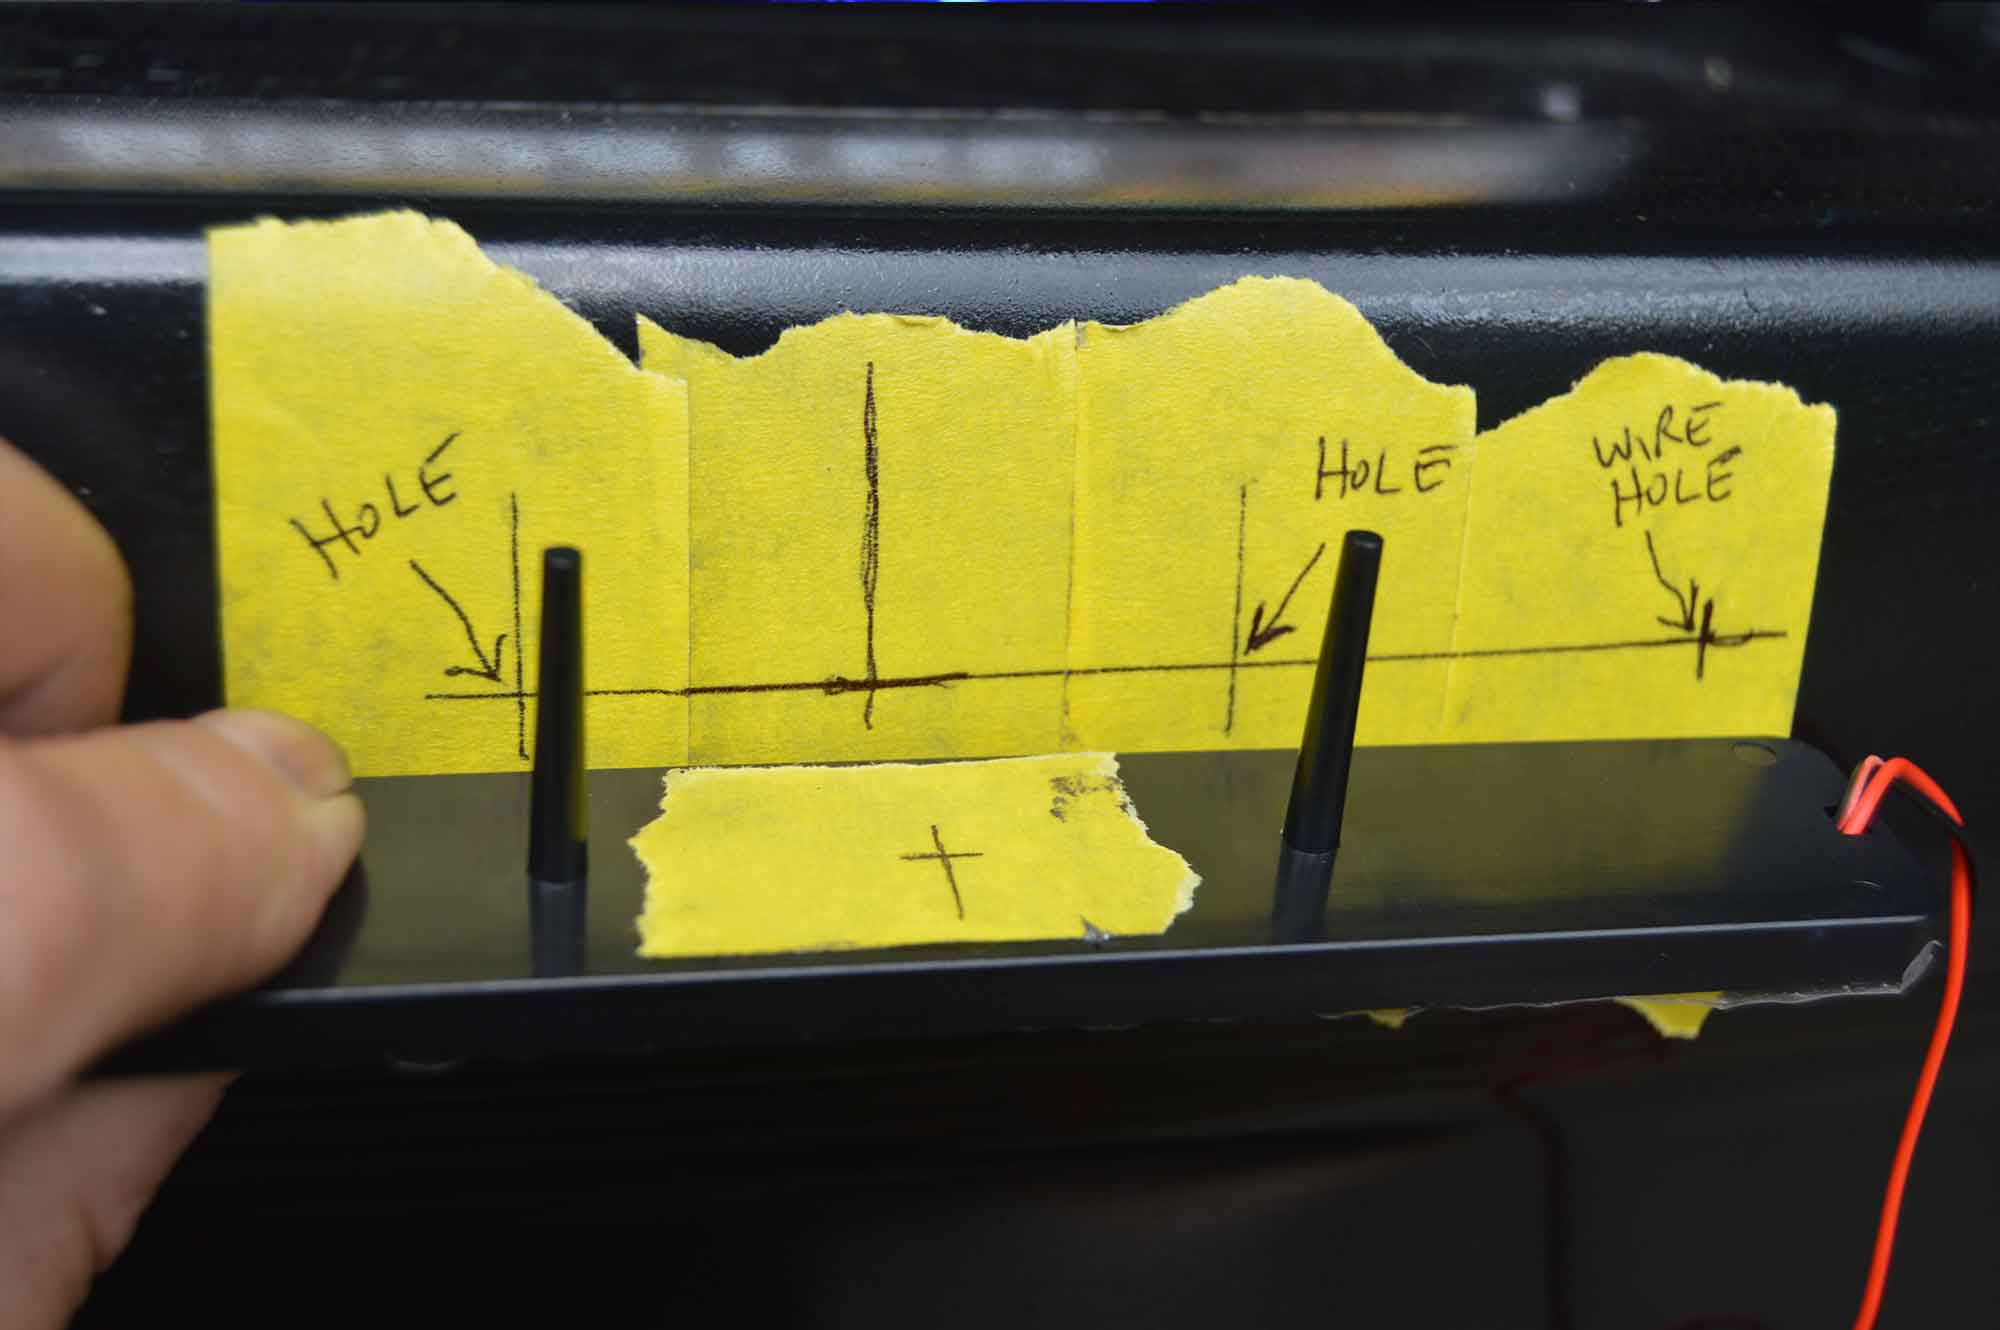
The center license plate area is 14″ wide, so half of that is 7″, make a mark there, that’s where the (width) center of your Buick emblem will go.
The bumper is about 3″ tall in that area, so half of that is 1.5″, make a mark there, that’s where the (height) center of your Buick emblem will go.
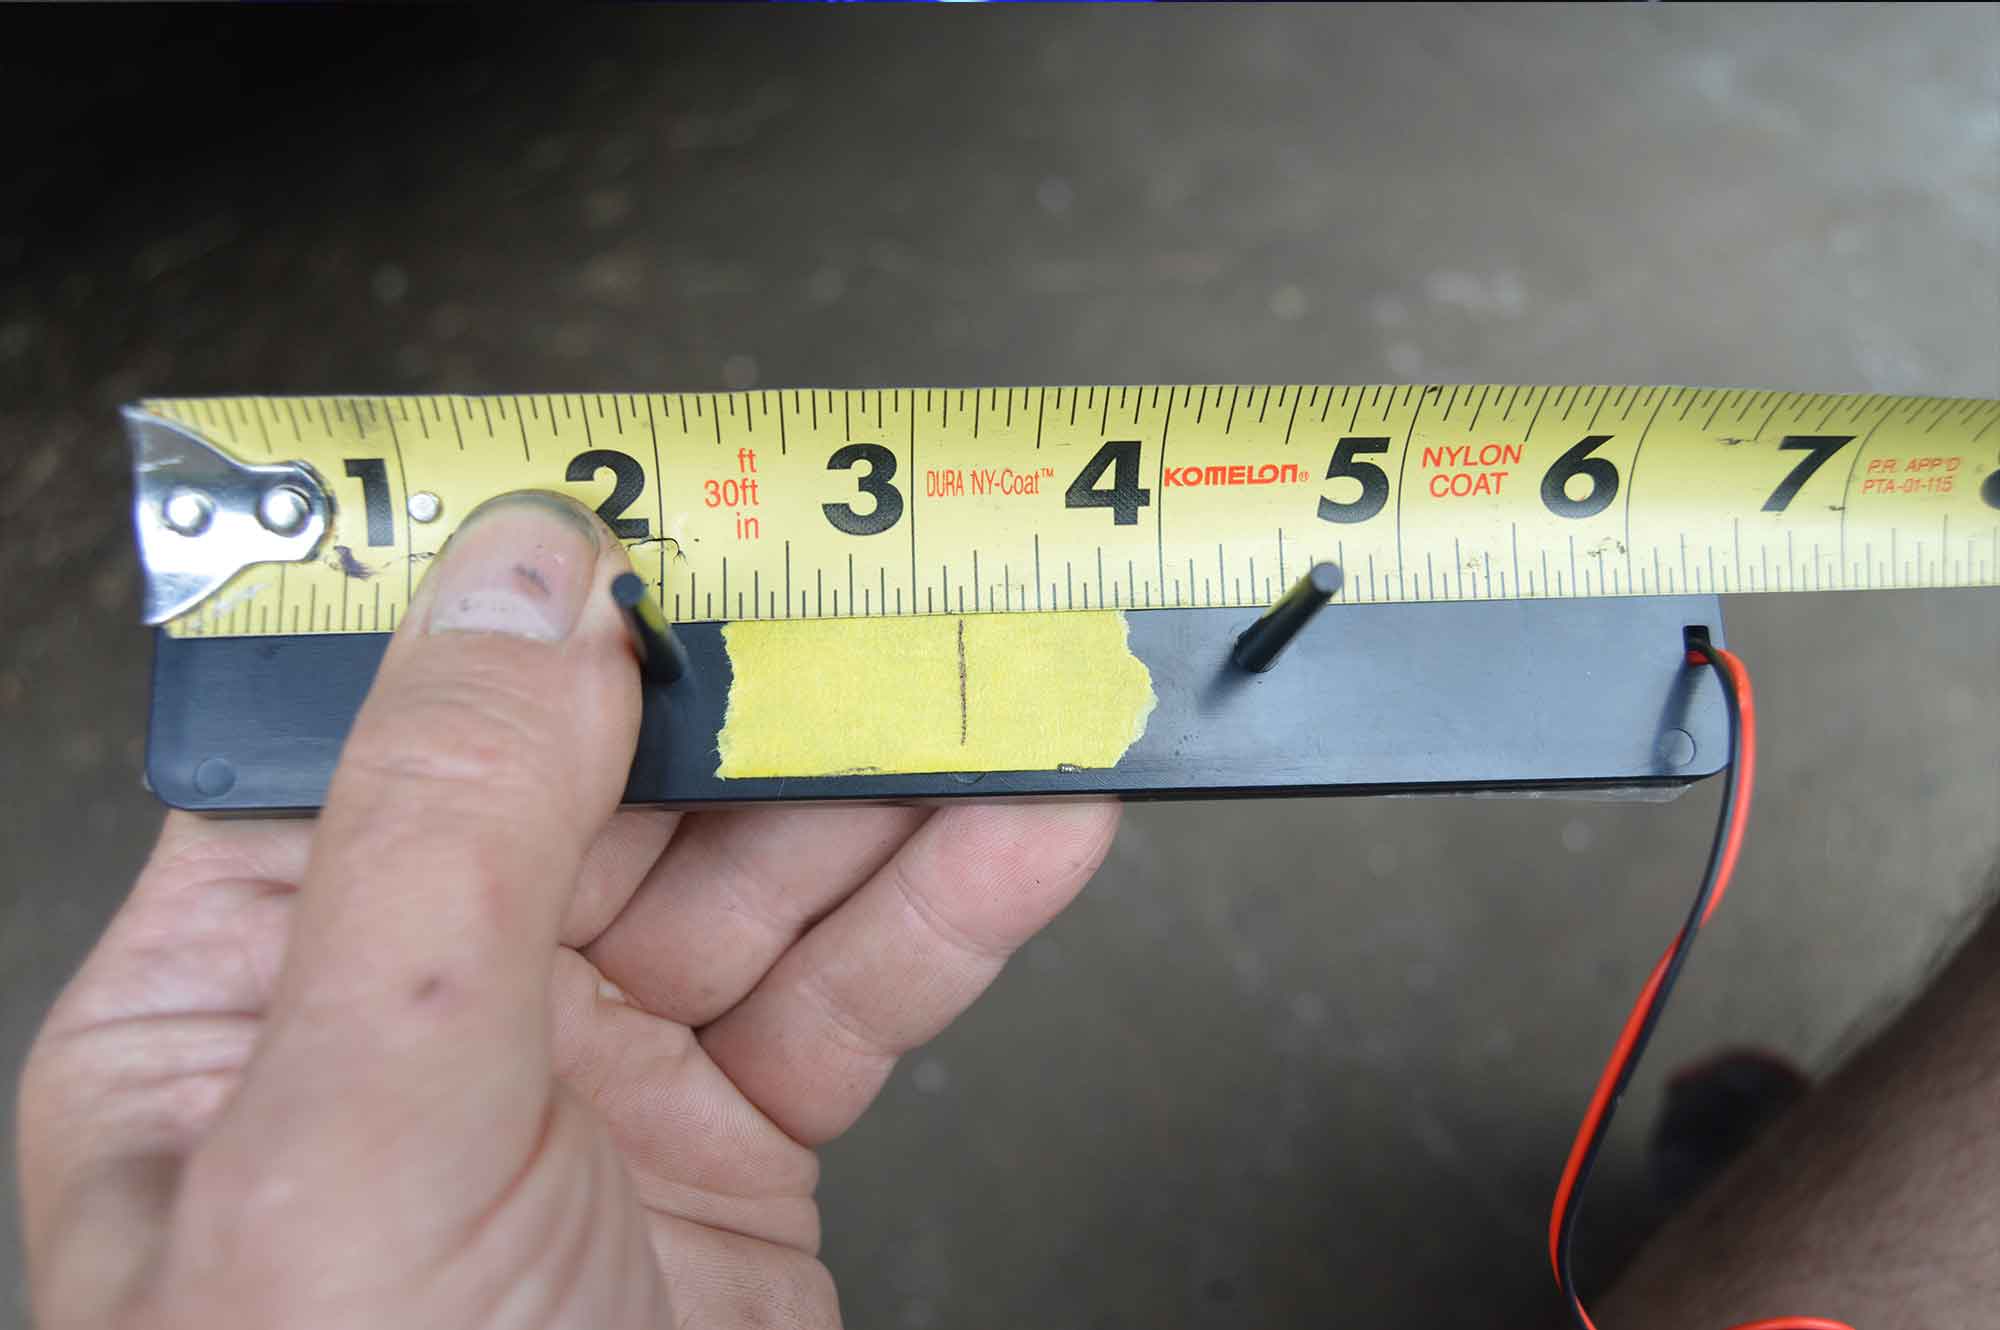
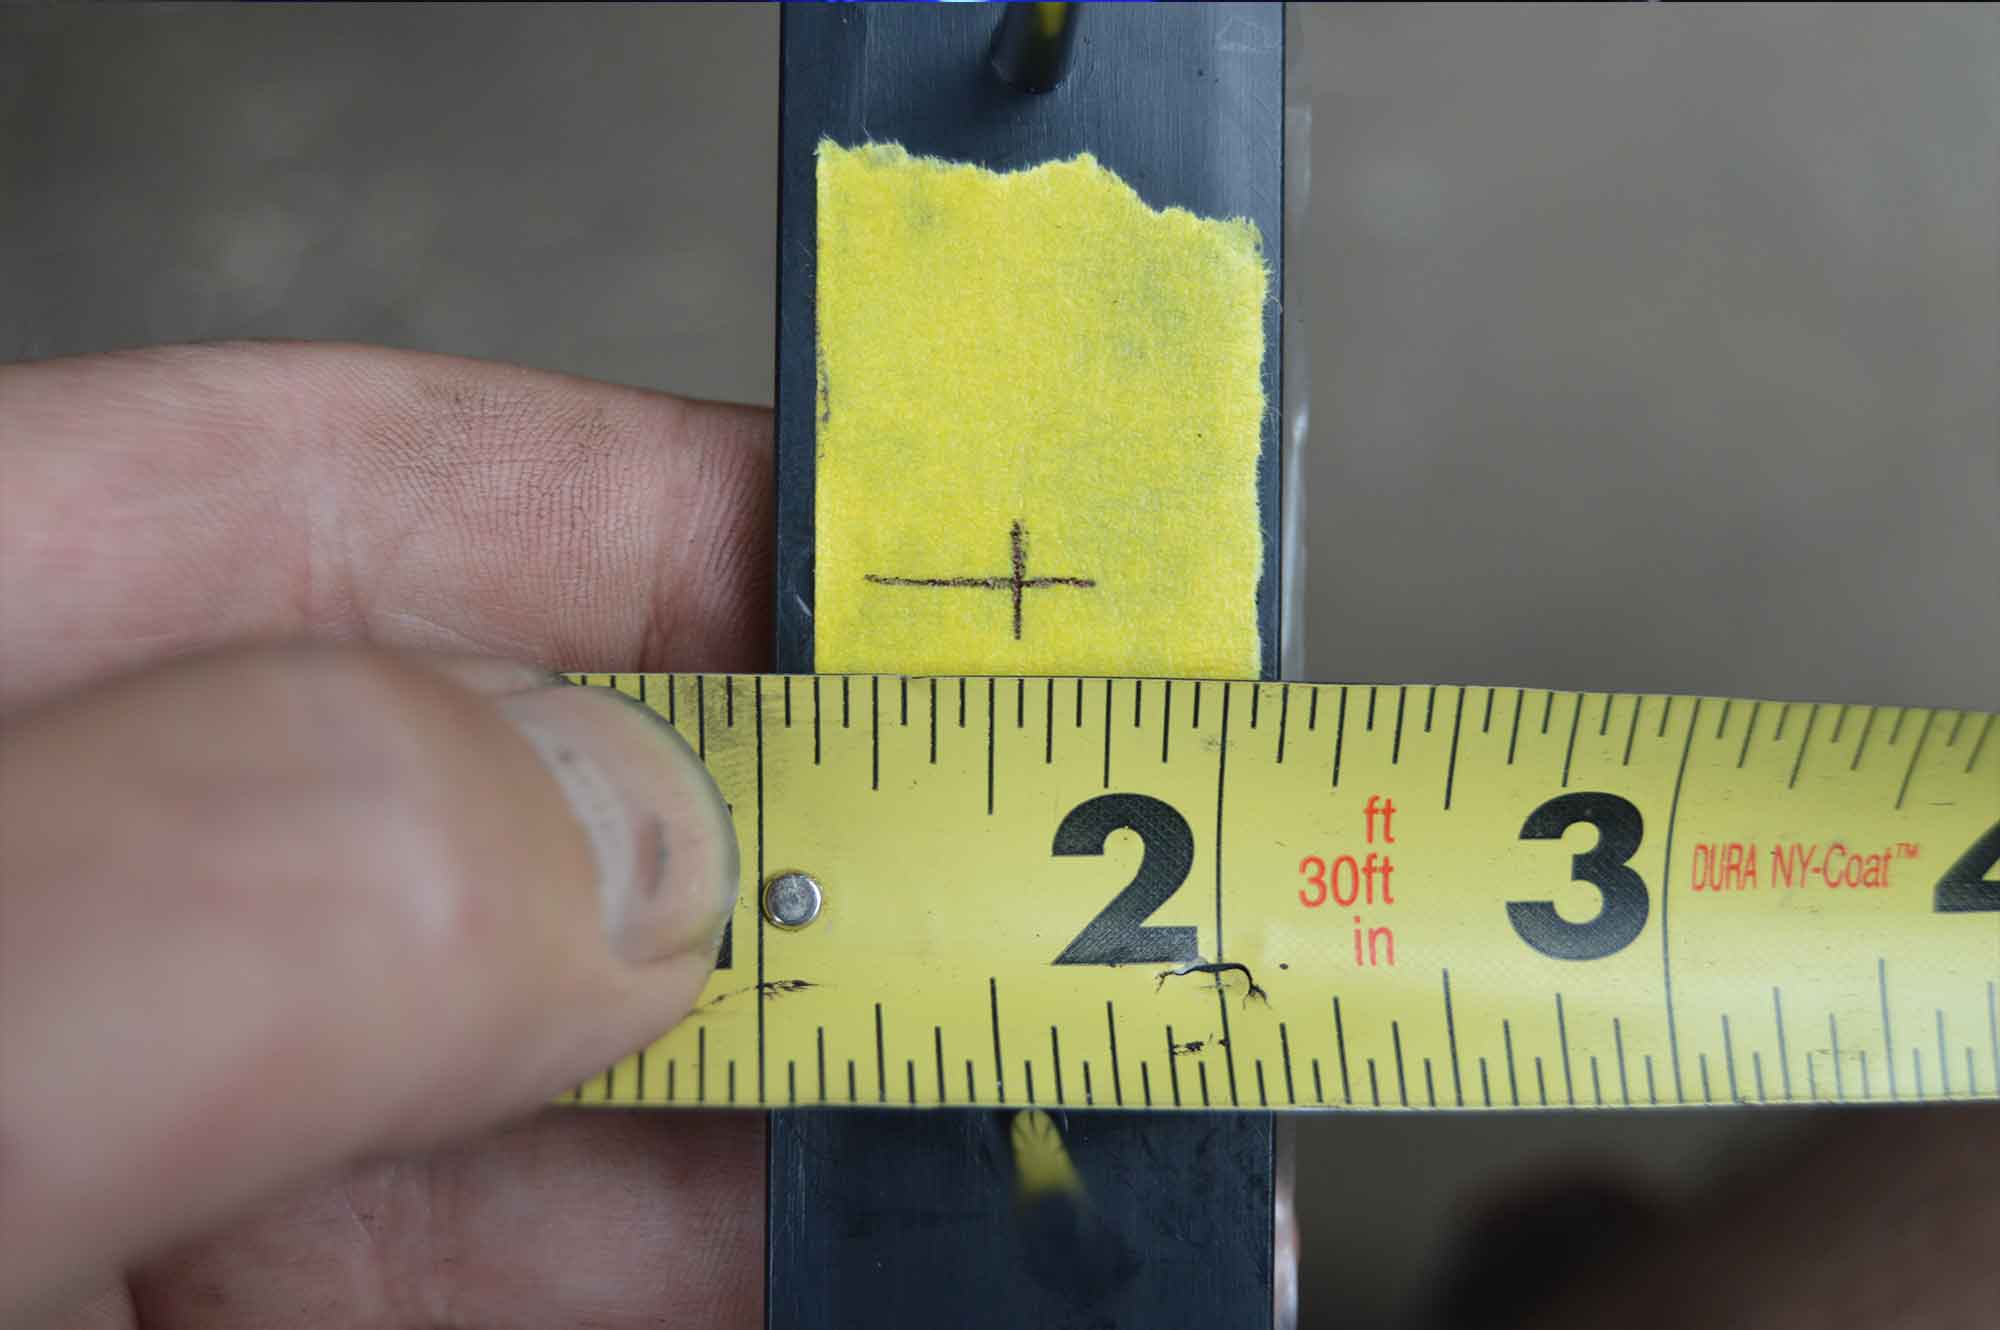
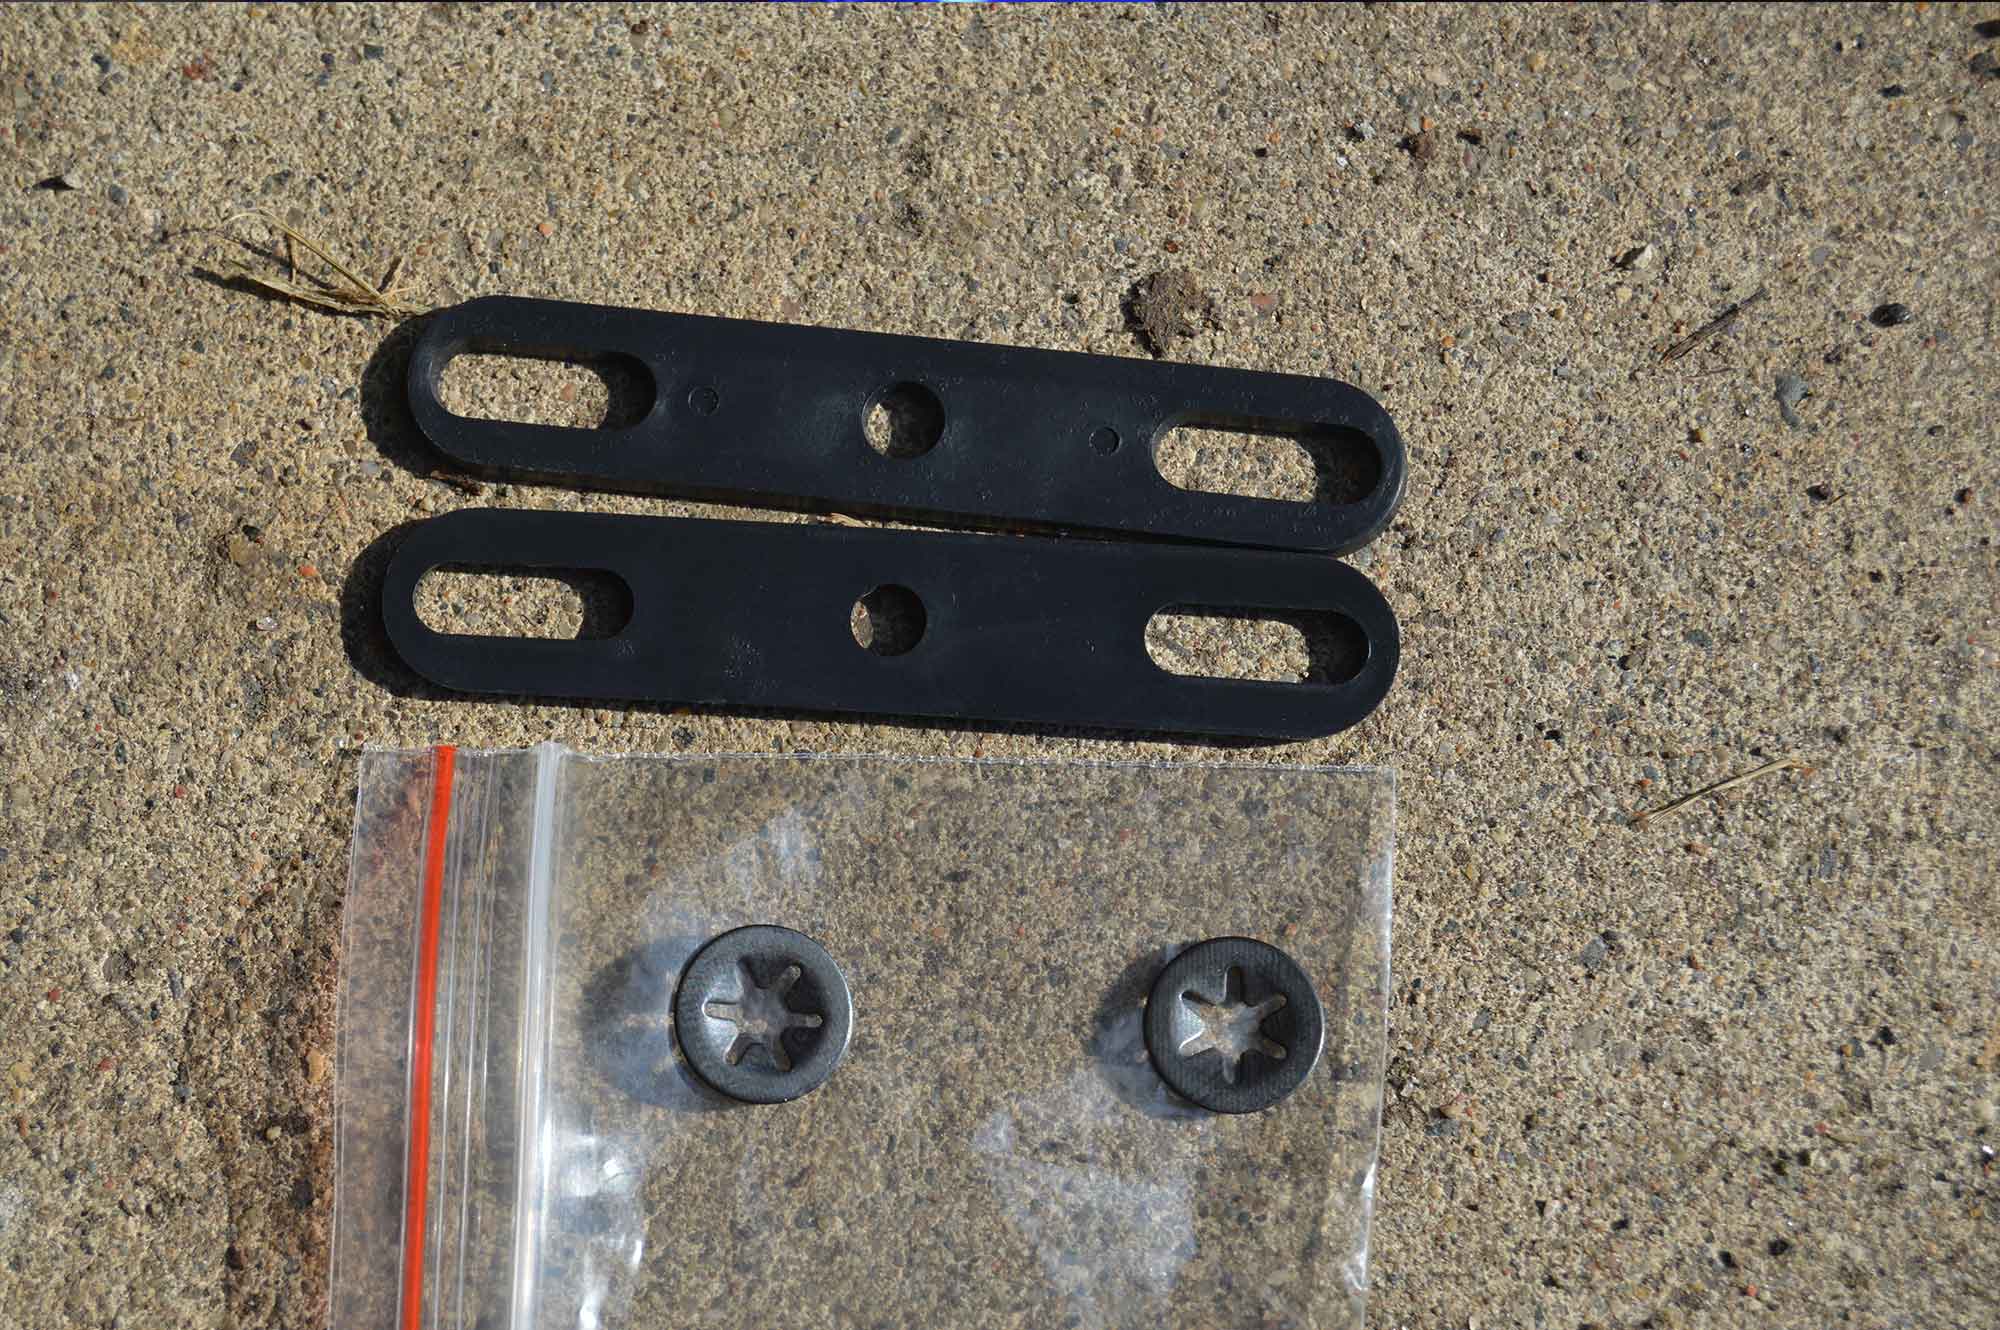
On the backside of the emblem, measure out half width & half height (3 3/16″ & 9/16″).
Hold the emblem up against the bumper & make marks where your holes will go.
2 for the studs & 1 for the wires.
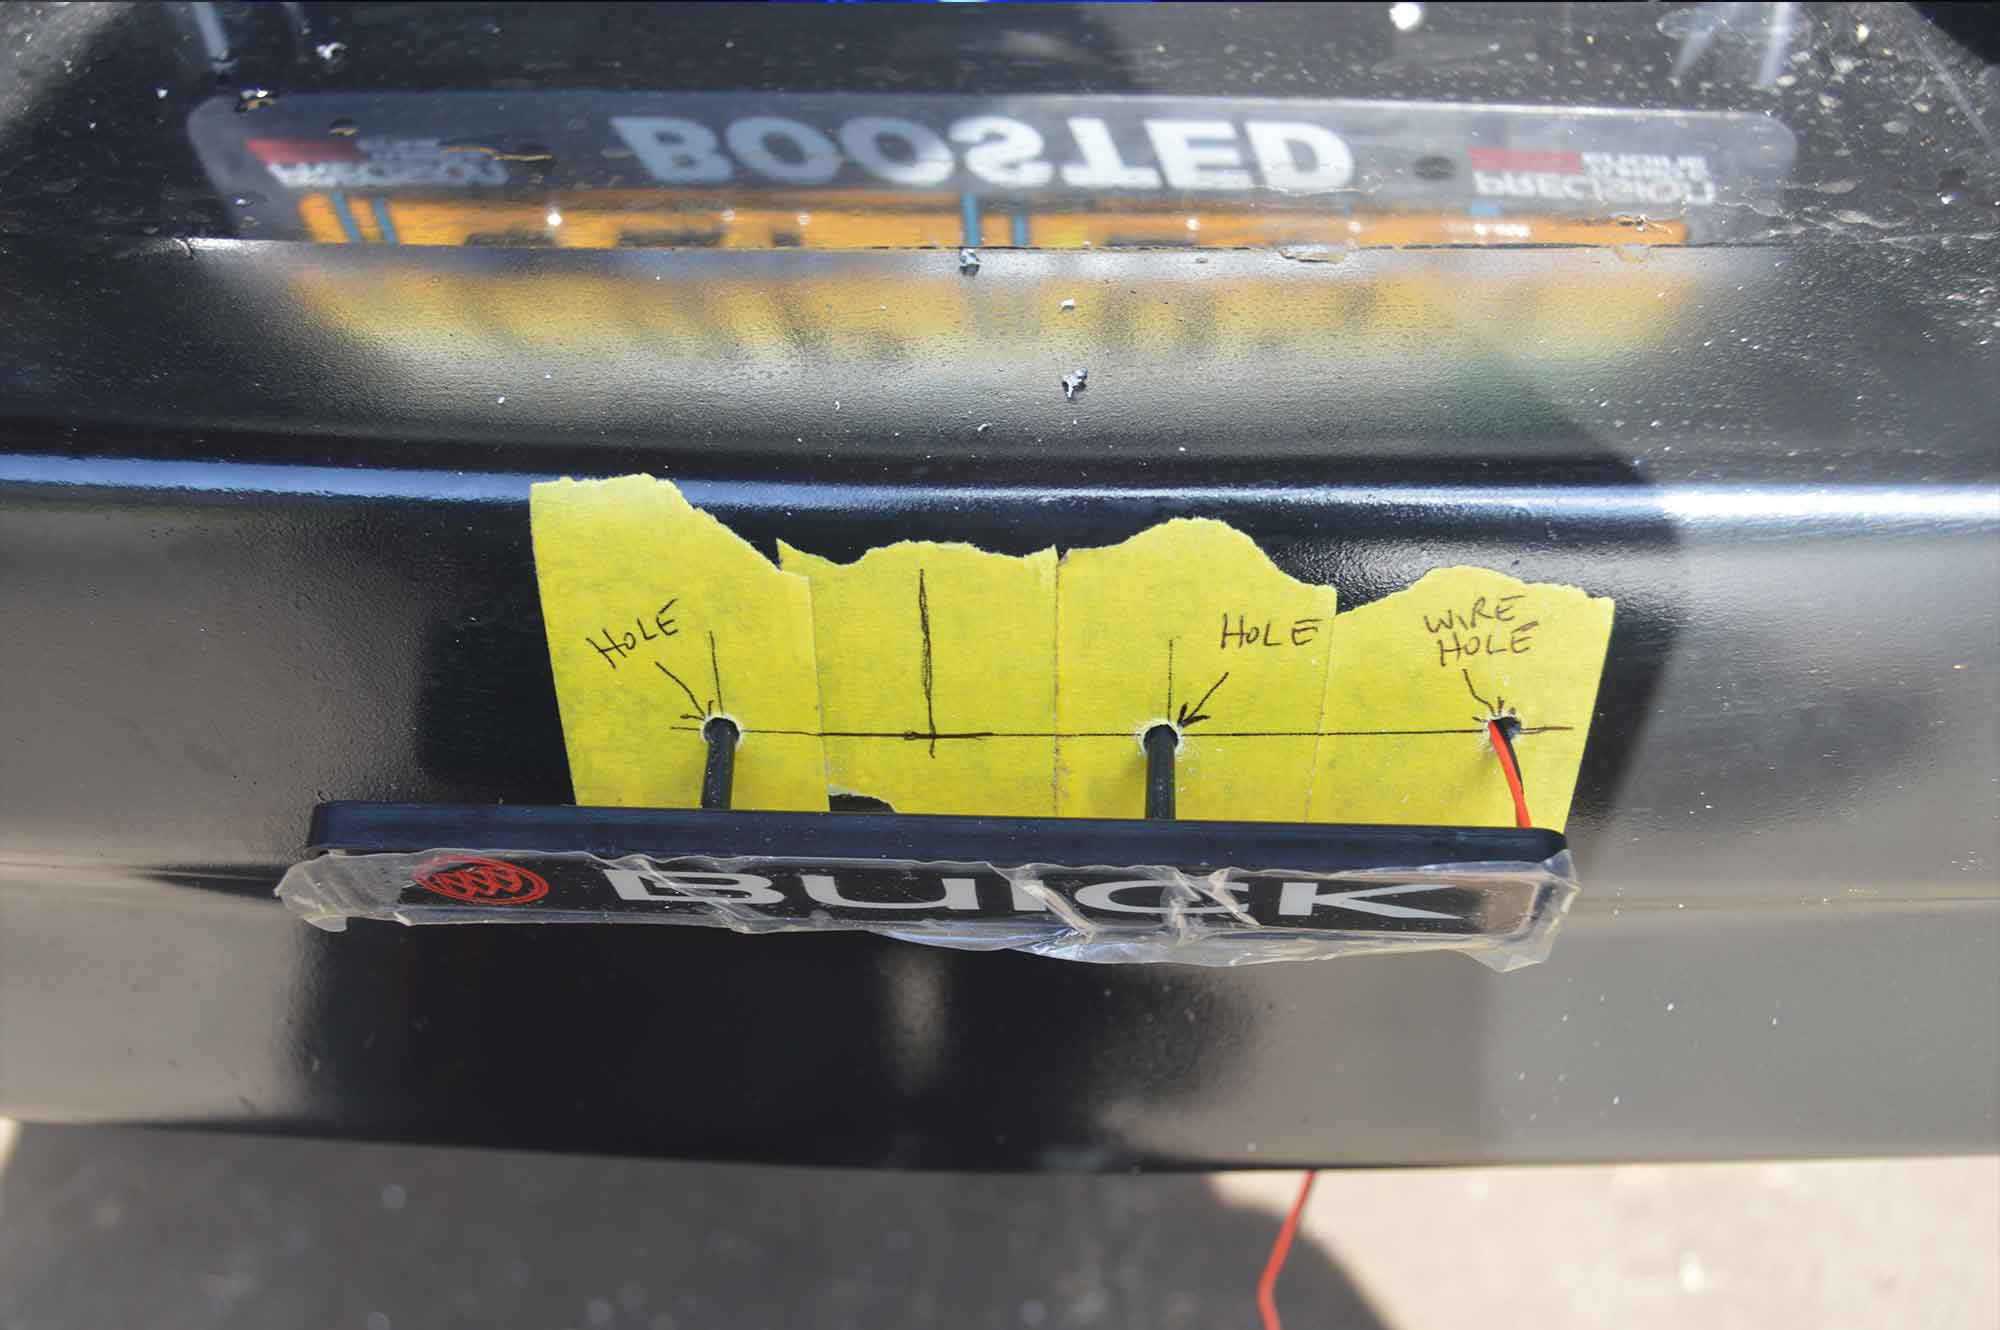
Drill the 3 holes (a 3/16″ drill bit works well).
.
.
.
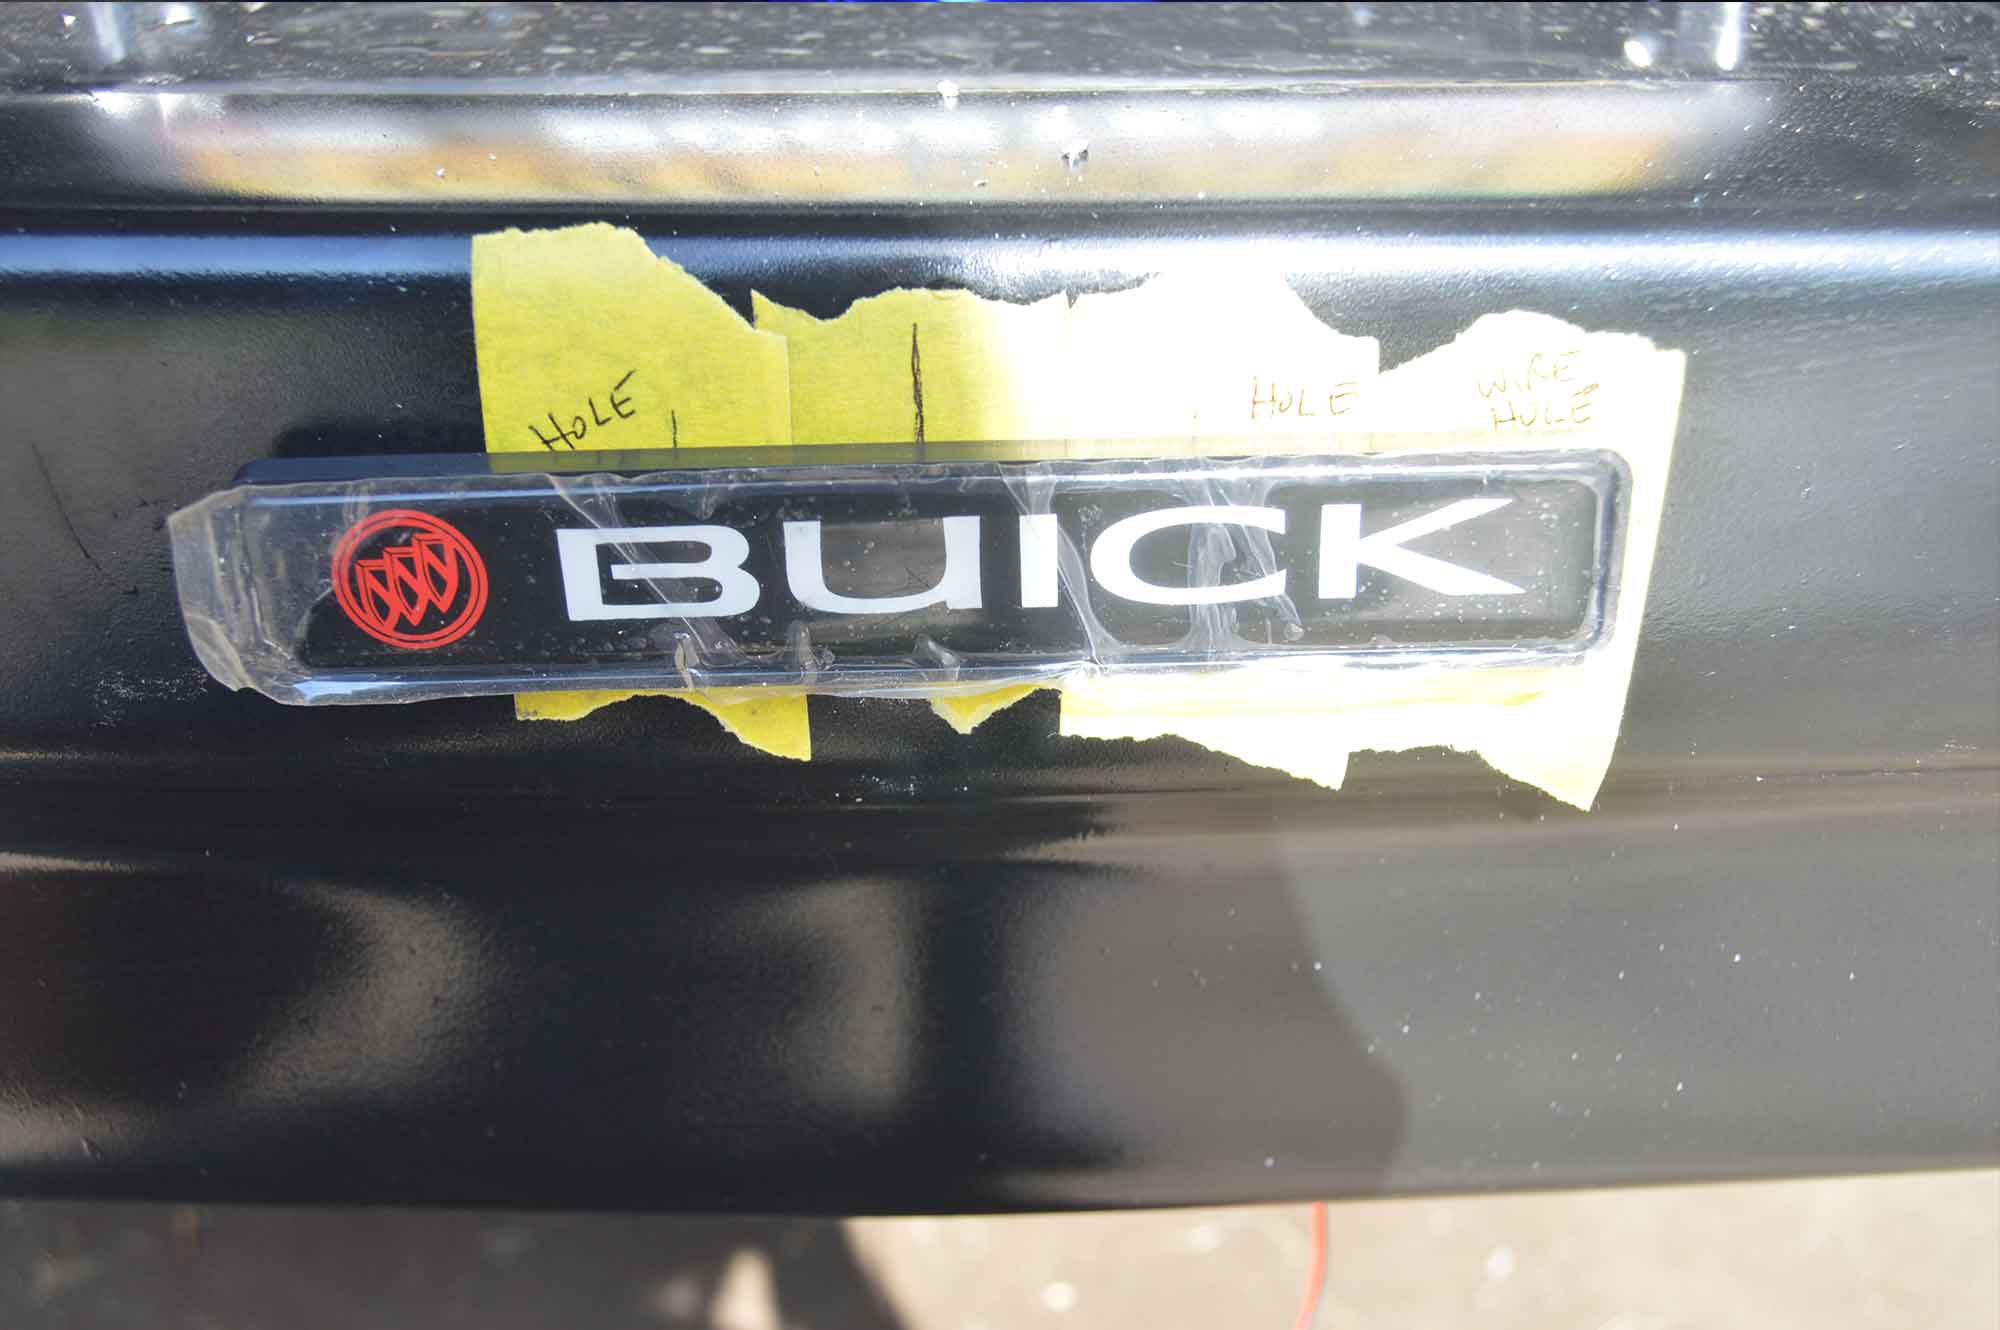
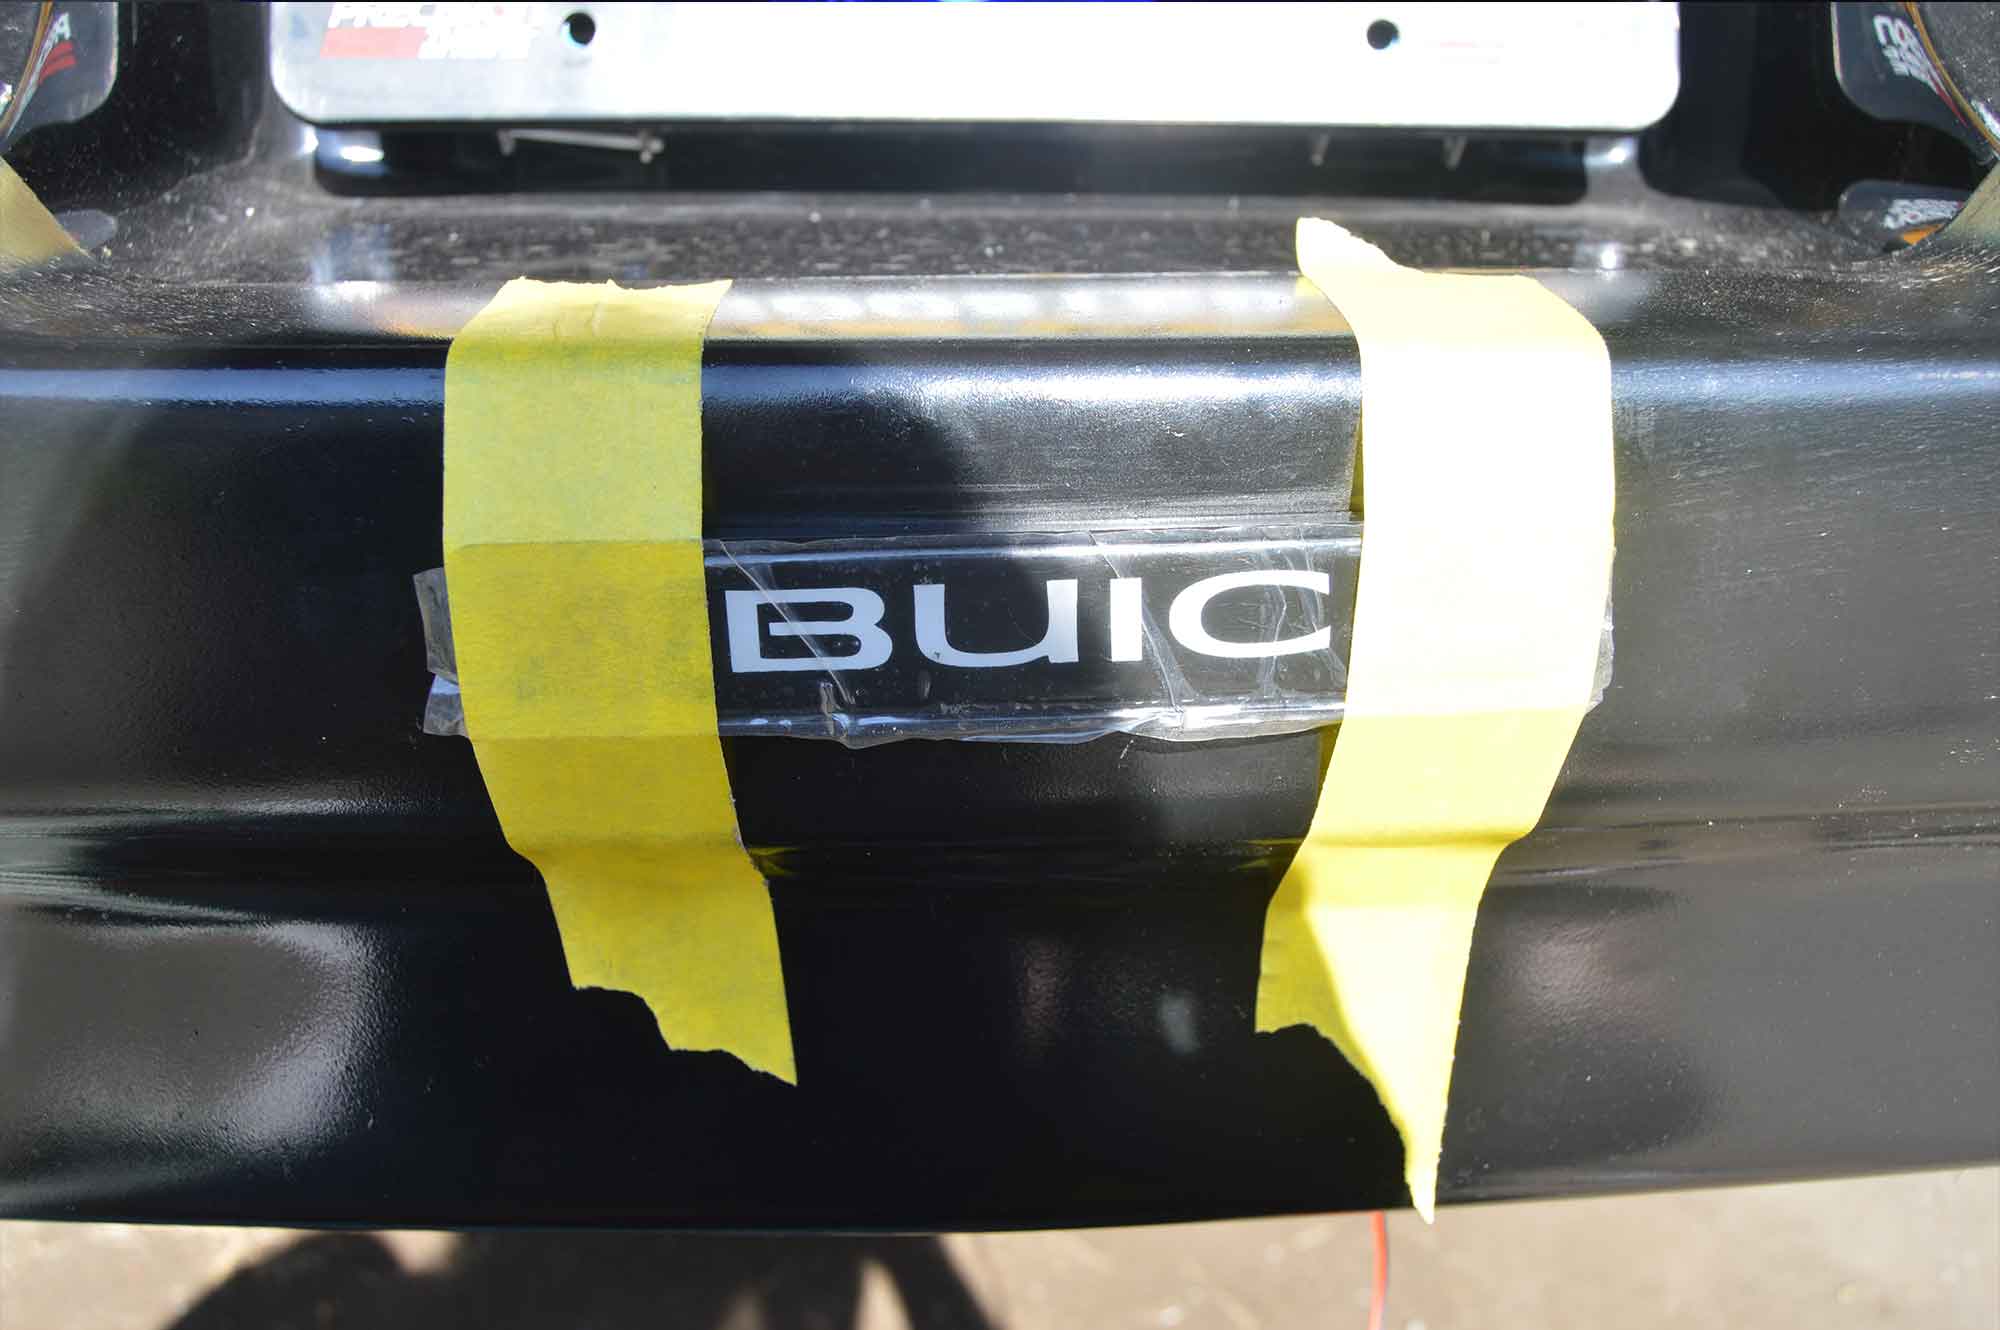
We put 3 dabs of glue on the back of the emblem (1 on each side & 1 in the middle), since the bumper has a slight curve to it (and your emblem will need to be bent slightly as well to conform).
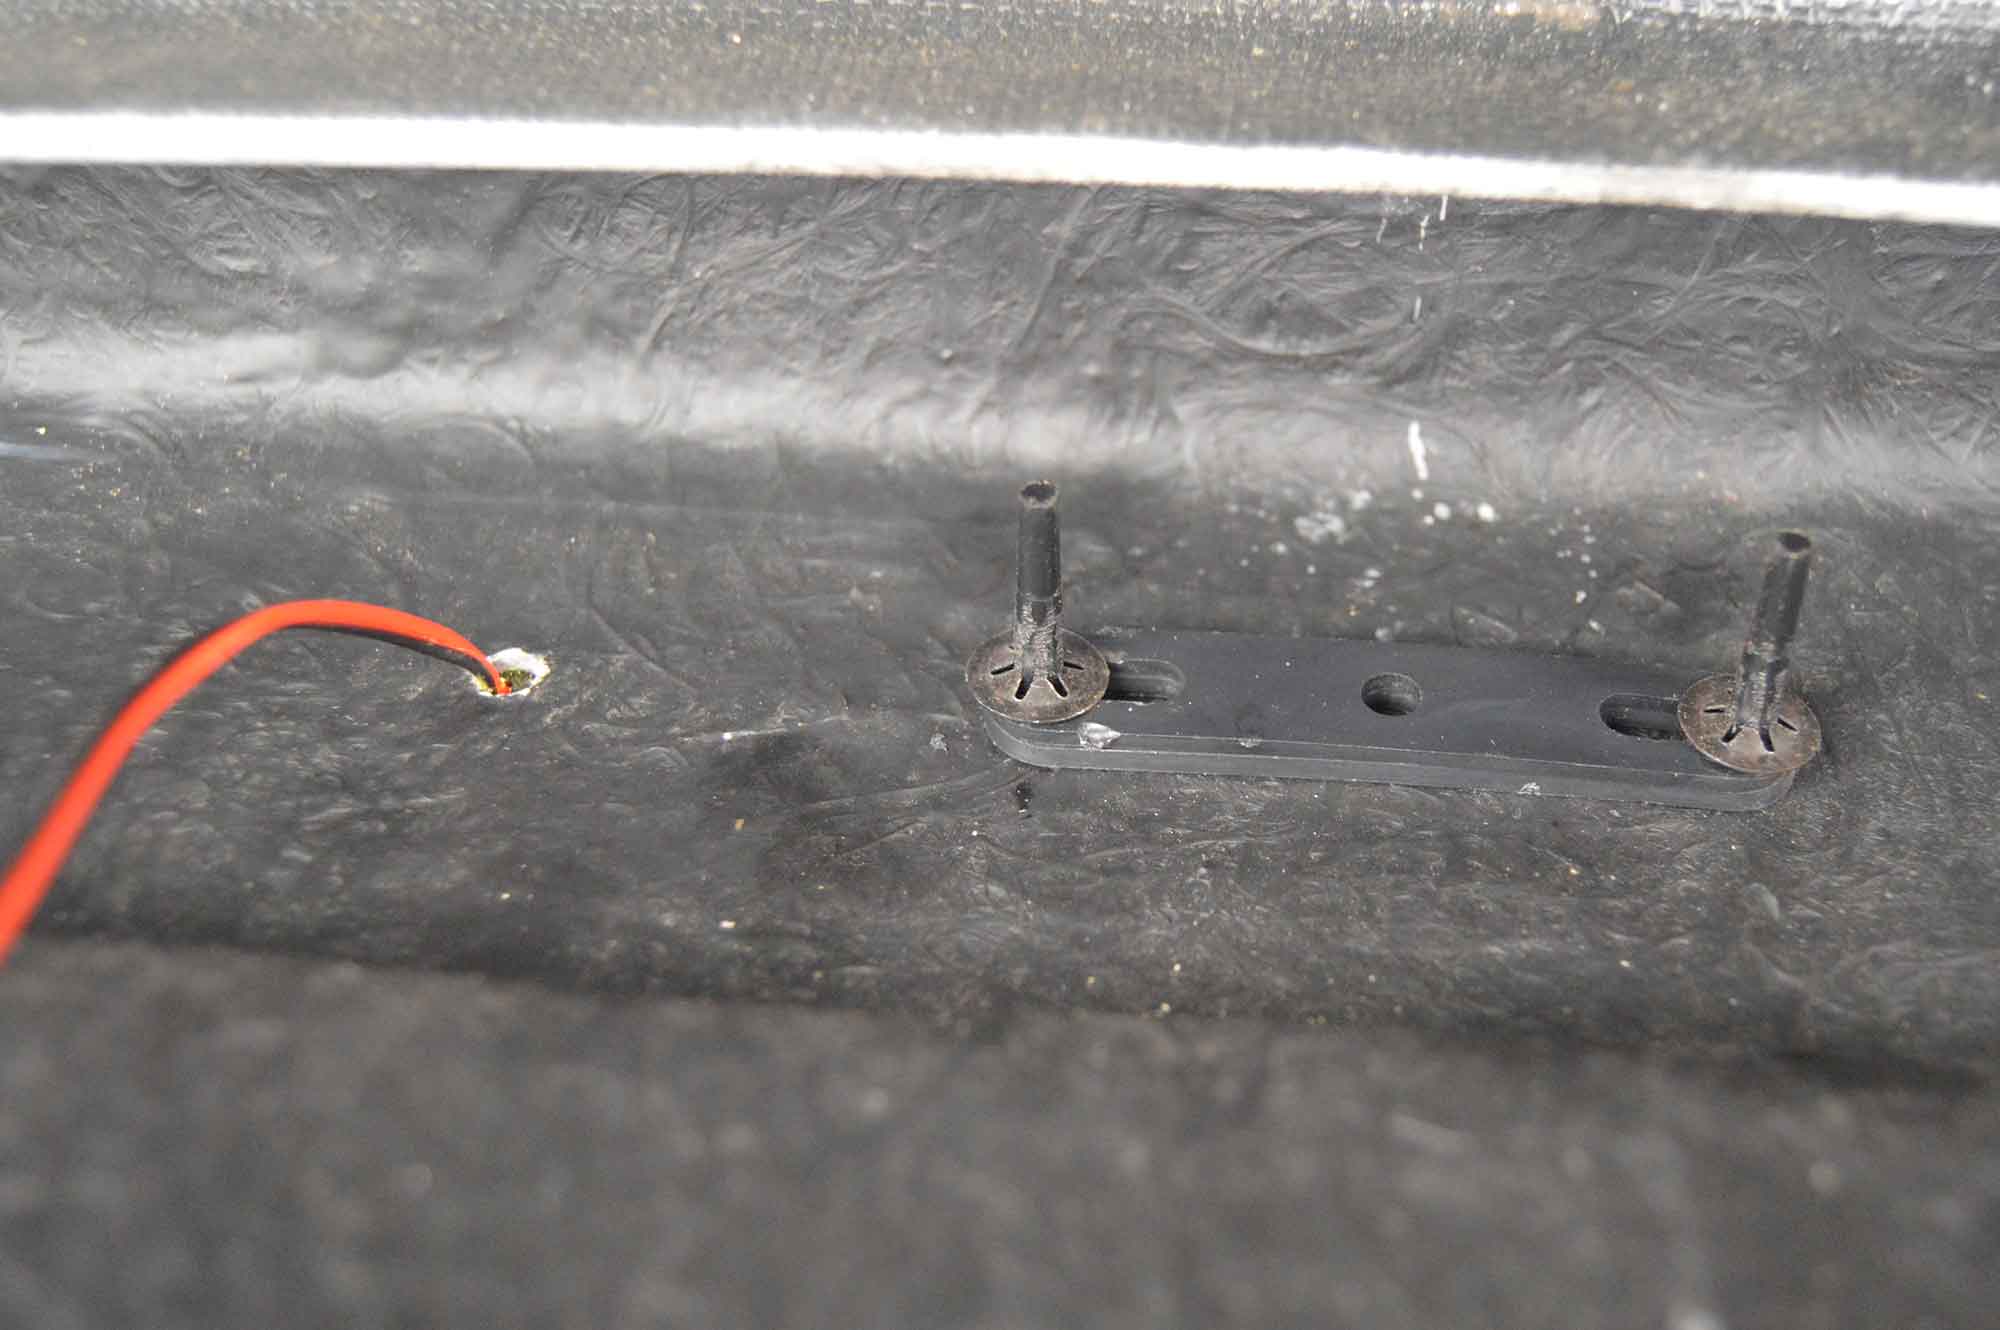
Stick the studs & wires thru the holes & push up against bumper.
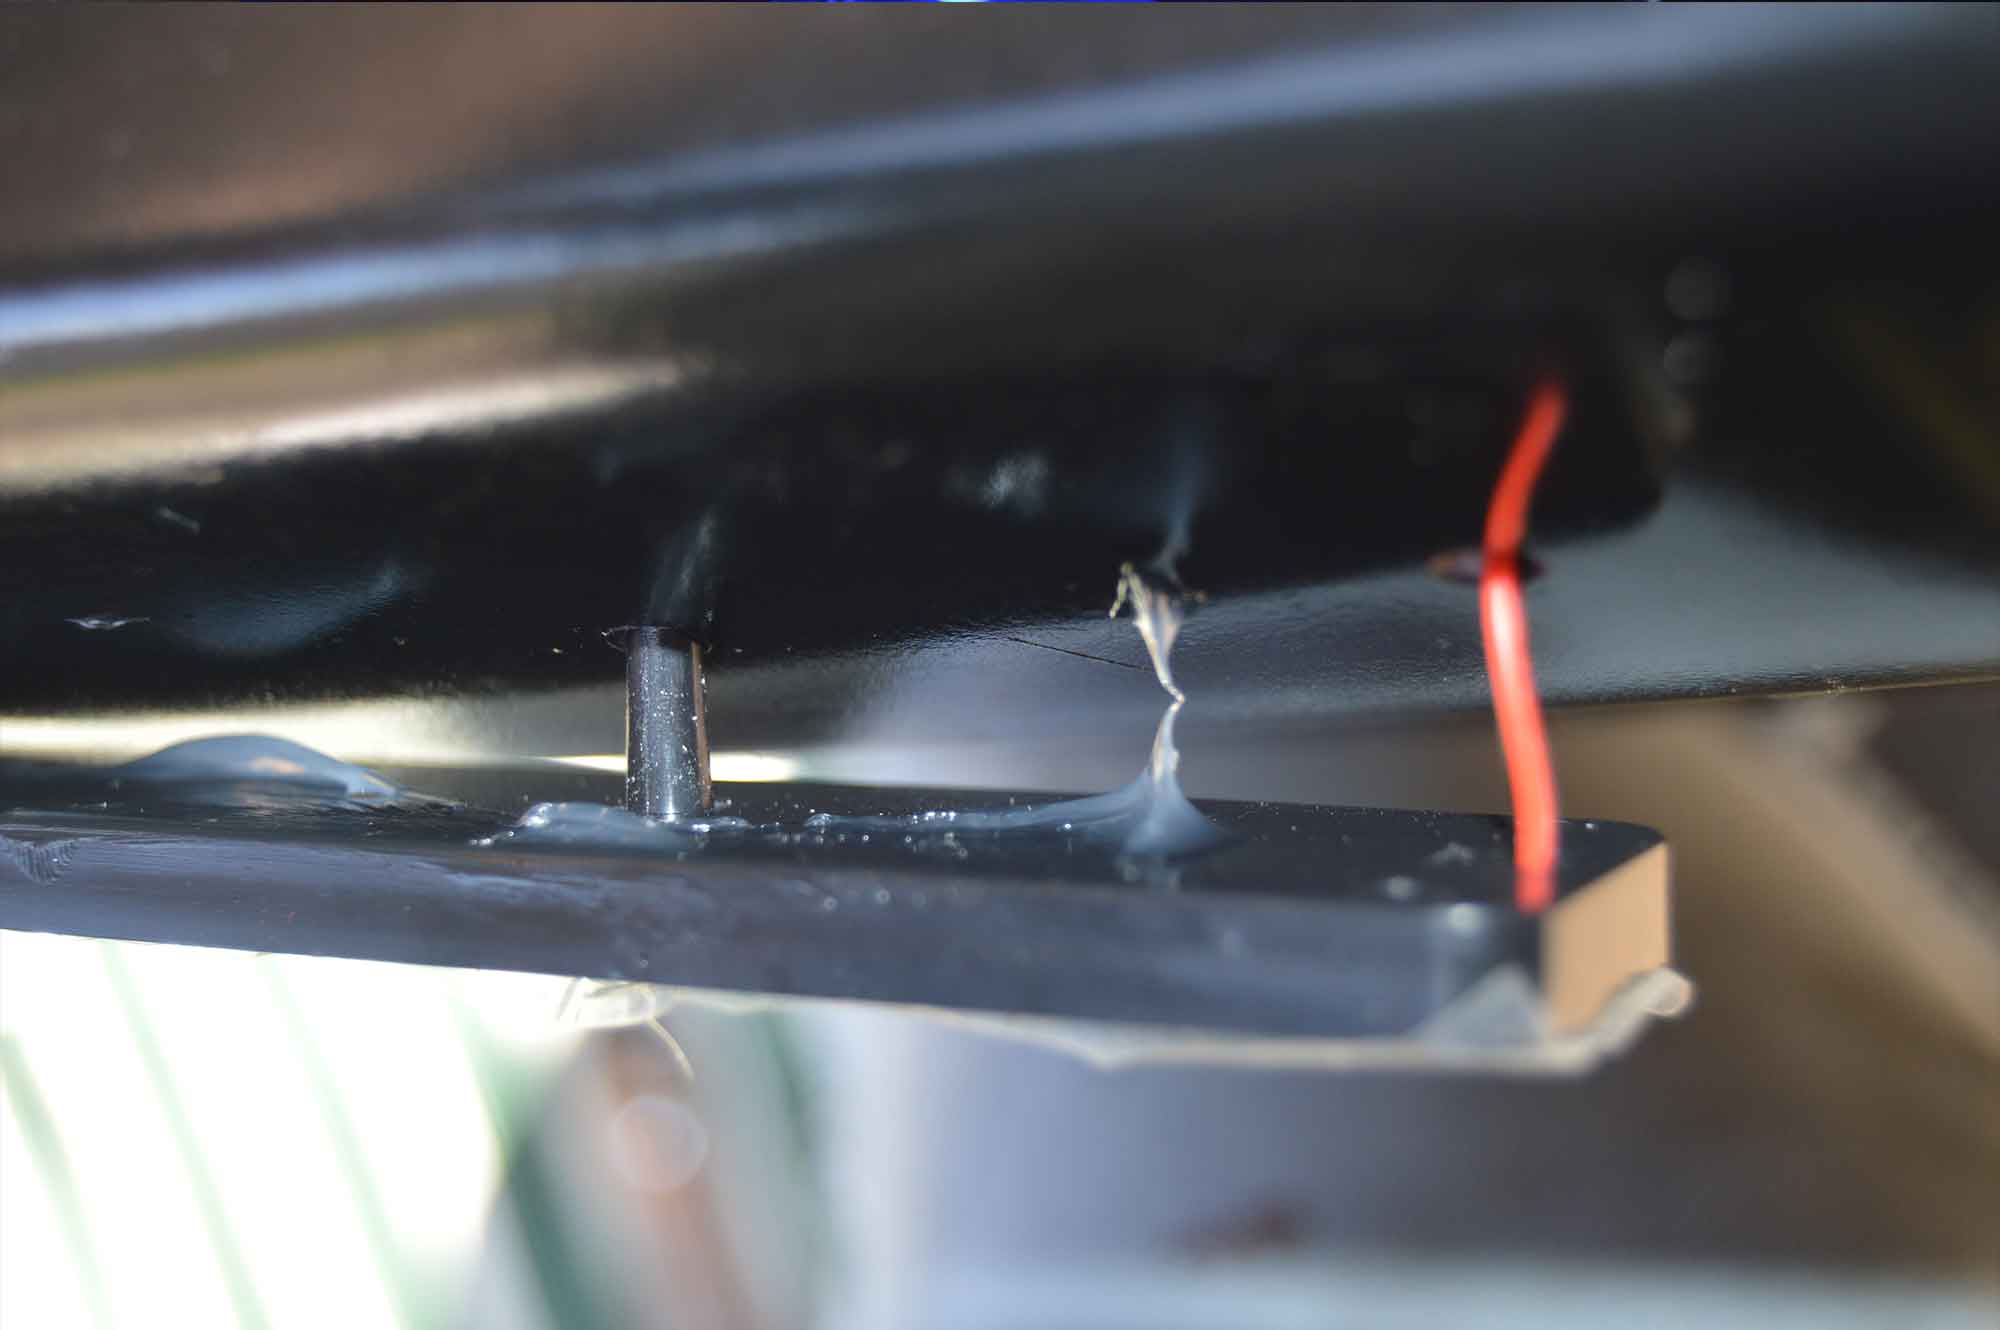
On the backside of the bumper, place the included bracket over the studs, then attach the 2 self cutting clips on the studs. Push them in as far as they will go, this needs to be a tight fit!
[we put a small deep well socket over the studs & tapped gently with a hammer until the clips butted up with the bumper]
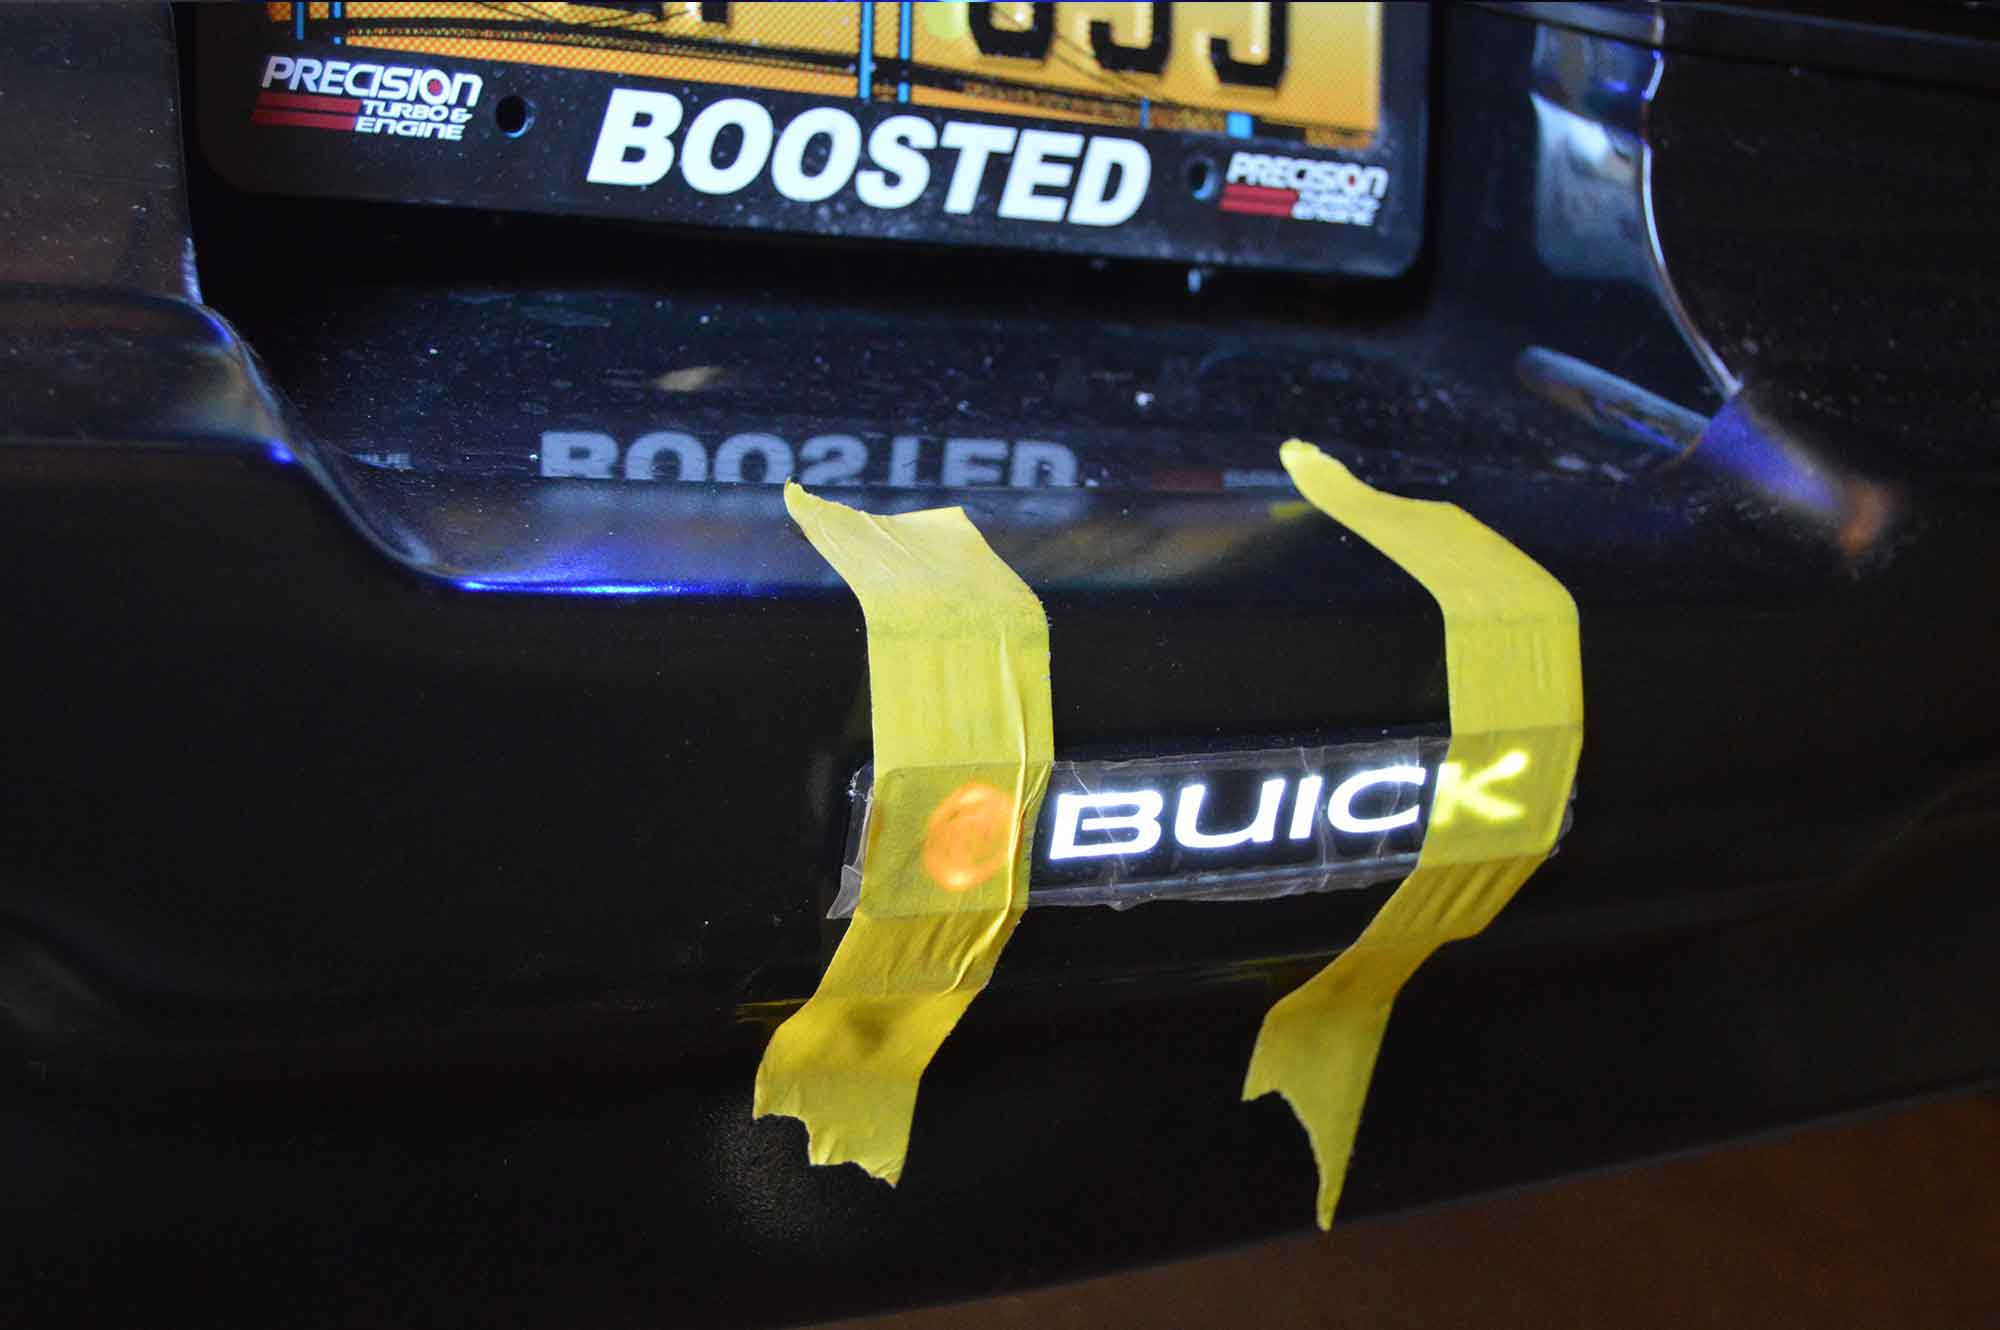
Since we used glue, we temporarily taped down the emblem so it can get fully secured to the bumper (and it helps curve it into place).
The wires are run up to the passenger side tail light harness.
We spliced them into the center (little) light.
Connect black to black, and the red power wire for the emblem gets attached to the brown wire of the running light.
The supplied attached wiring is long enough to reach them where they need to go.
.

.
We used zip ties behind the bumper to keep the wires up where they belong.
Now whenever you turn your regular running lights on, the Buick emblem will light up as well!
Pretty sweet, right?
This was another fast & cool little project we did, 10 bucks & 15 minutes & done!
.

.
.


