


Our friend, Greg Wahl, shows us how he machines an OEM throttle body and plenum on a Buick 3.8 Liter Turbocharged motor and makes it larger than stock specs.
Are you asking yourself why would you need to do something like this?
Performance gains:
* decreases off and low idle hesitation
* depending on setup could reduce restriction
* creating a ram tube increases air speed
And for real high performance applications, the theory is that the more air you can stuff in your engine, the better. Hence, a bigger opening is needed to accomplish this.
[If you’re wondering what a “ram tube” is: it’s just a taper. Based on the Venturi principal, the taper is easier to create yet still a funnel effect. This “funnel” reduces aerodynamic drag, which increases air speed, into the flow of the manifold]
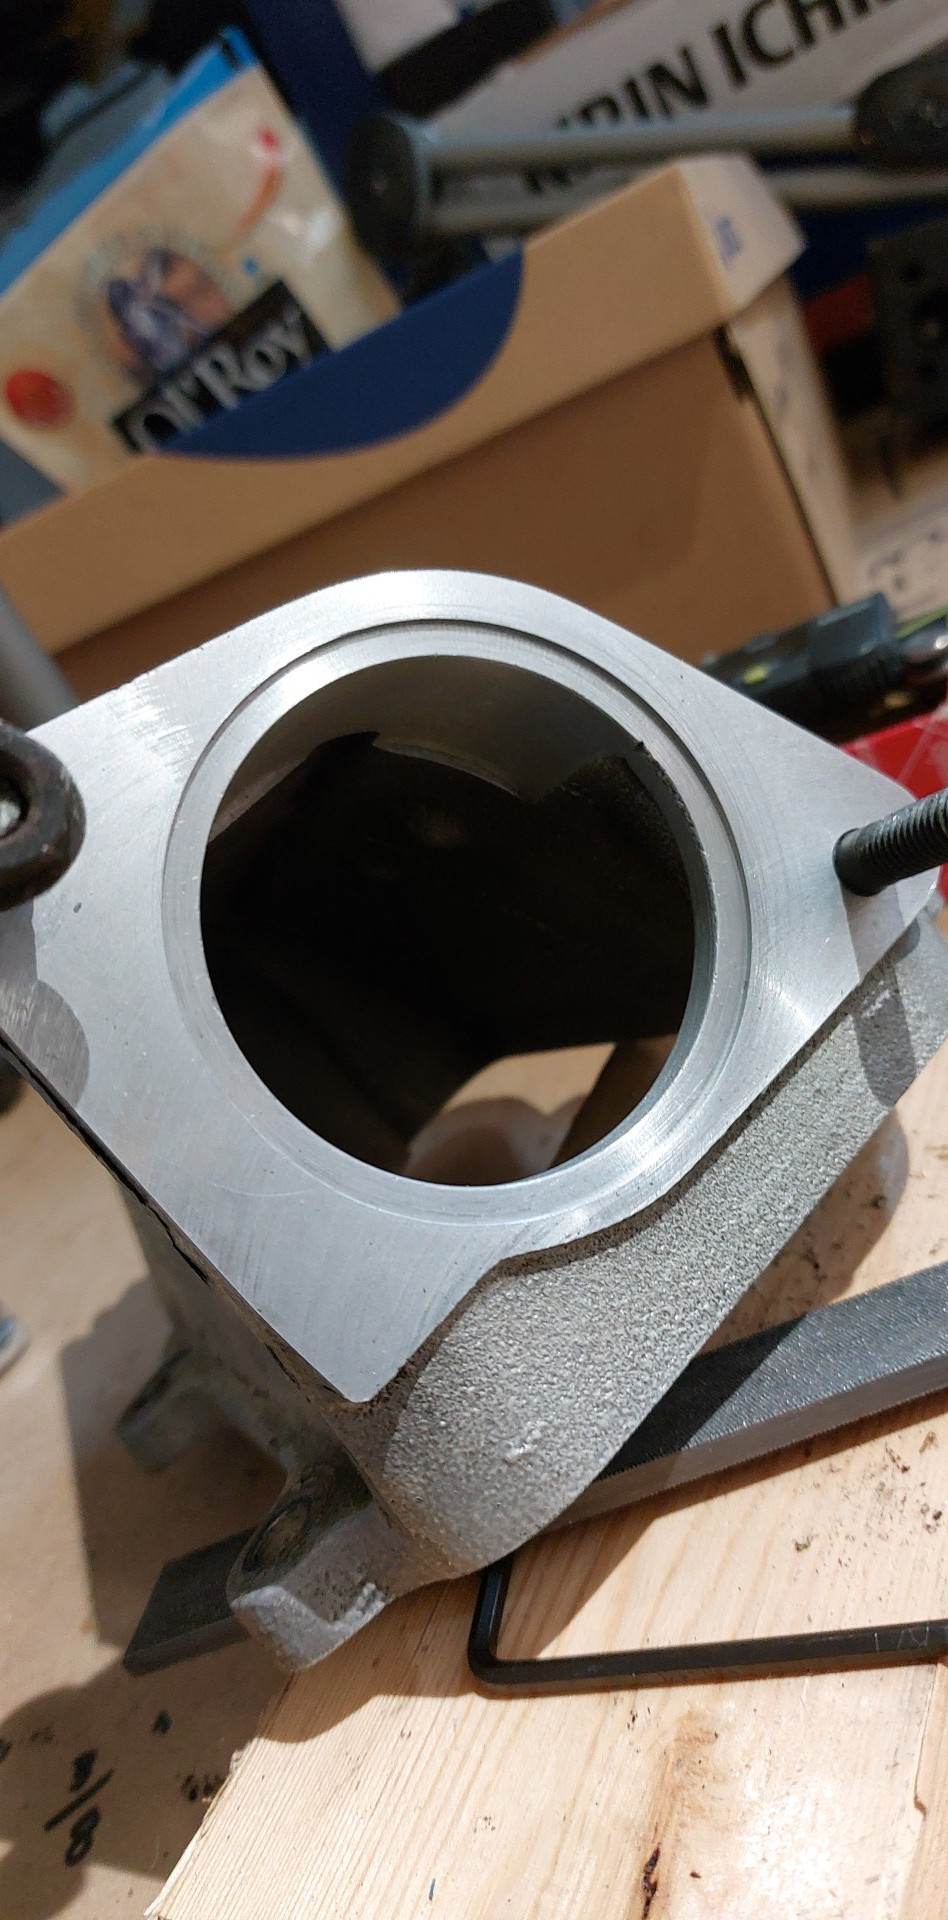
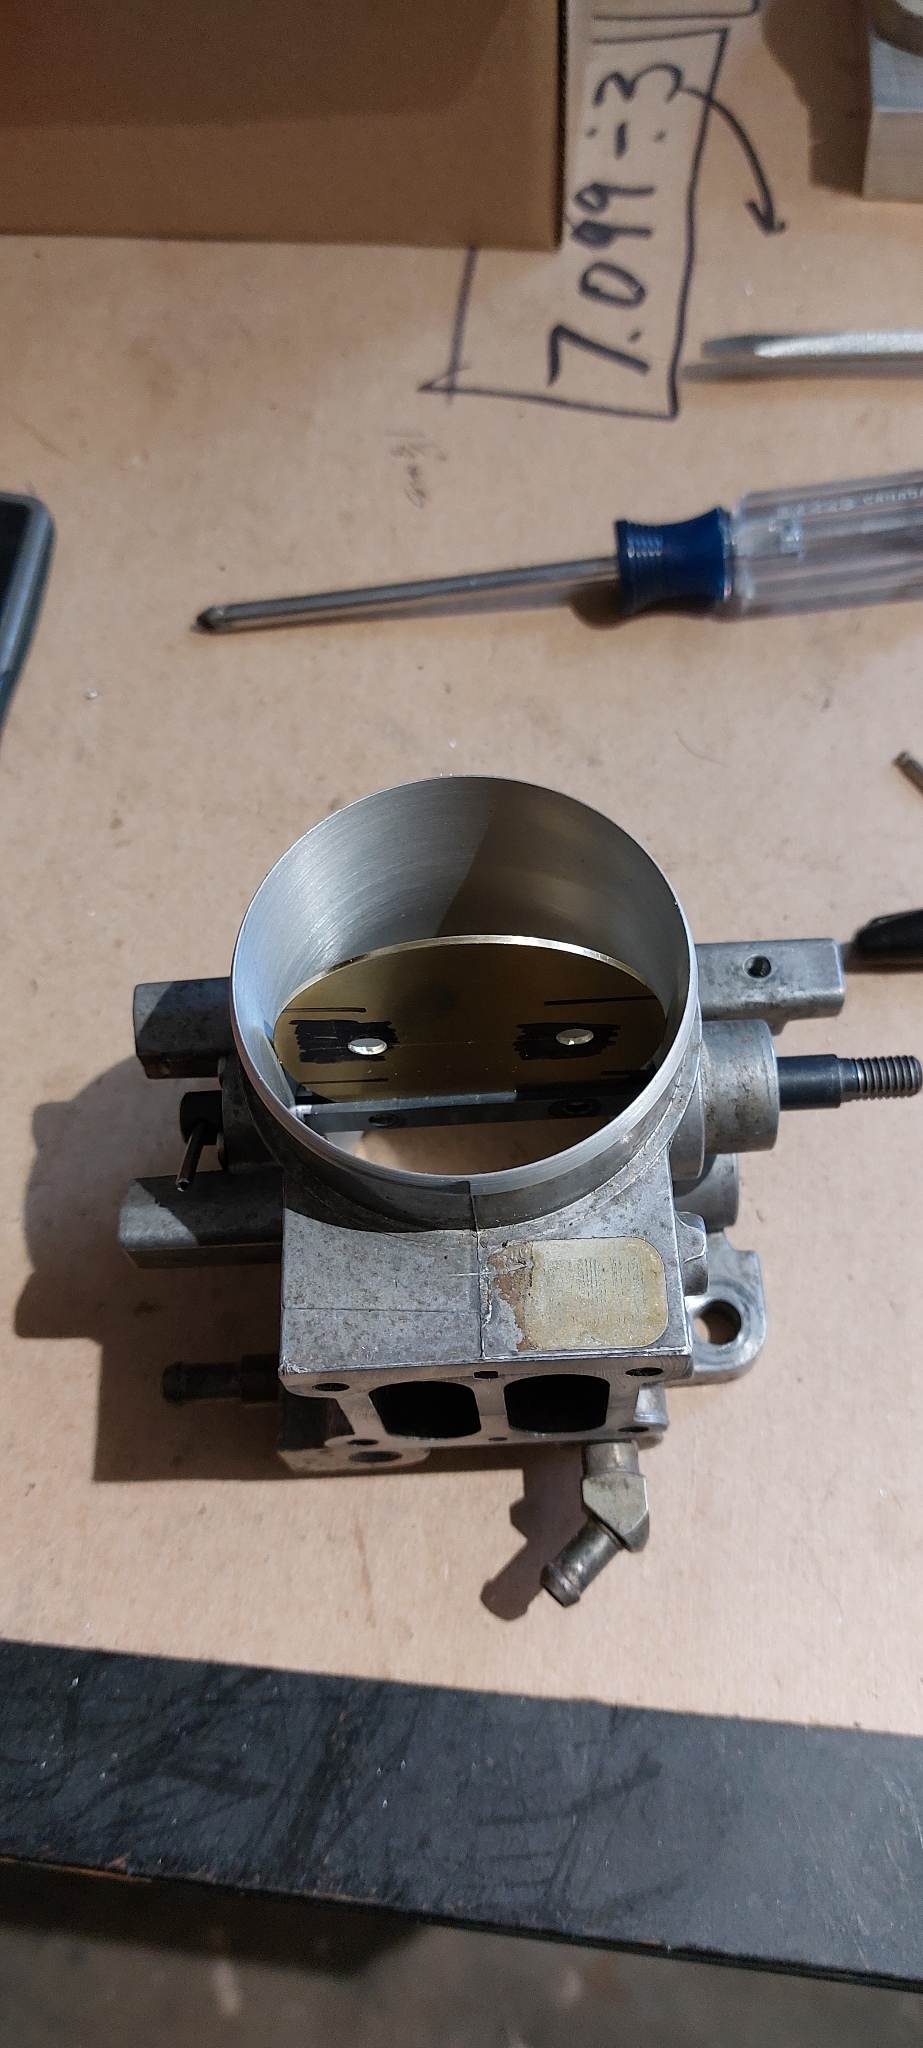
The factory throttle body measures 57mm.
After this procedure, the bore is increased to 61.50mm.
62mm is what is currently out there (aftermarket TB’s) but they always break into the screw holes.
That’s why Greg machines these to 61.50mm.
There’s actually a lot more to this process than you’d think there is.
It actually takes around 5 hours per piece to complete the job!
Not only is the throttle body machined out, but a totally new throttle plate is created, amongst other little custom touches.
Yes, Greg does this modification for others.
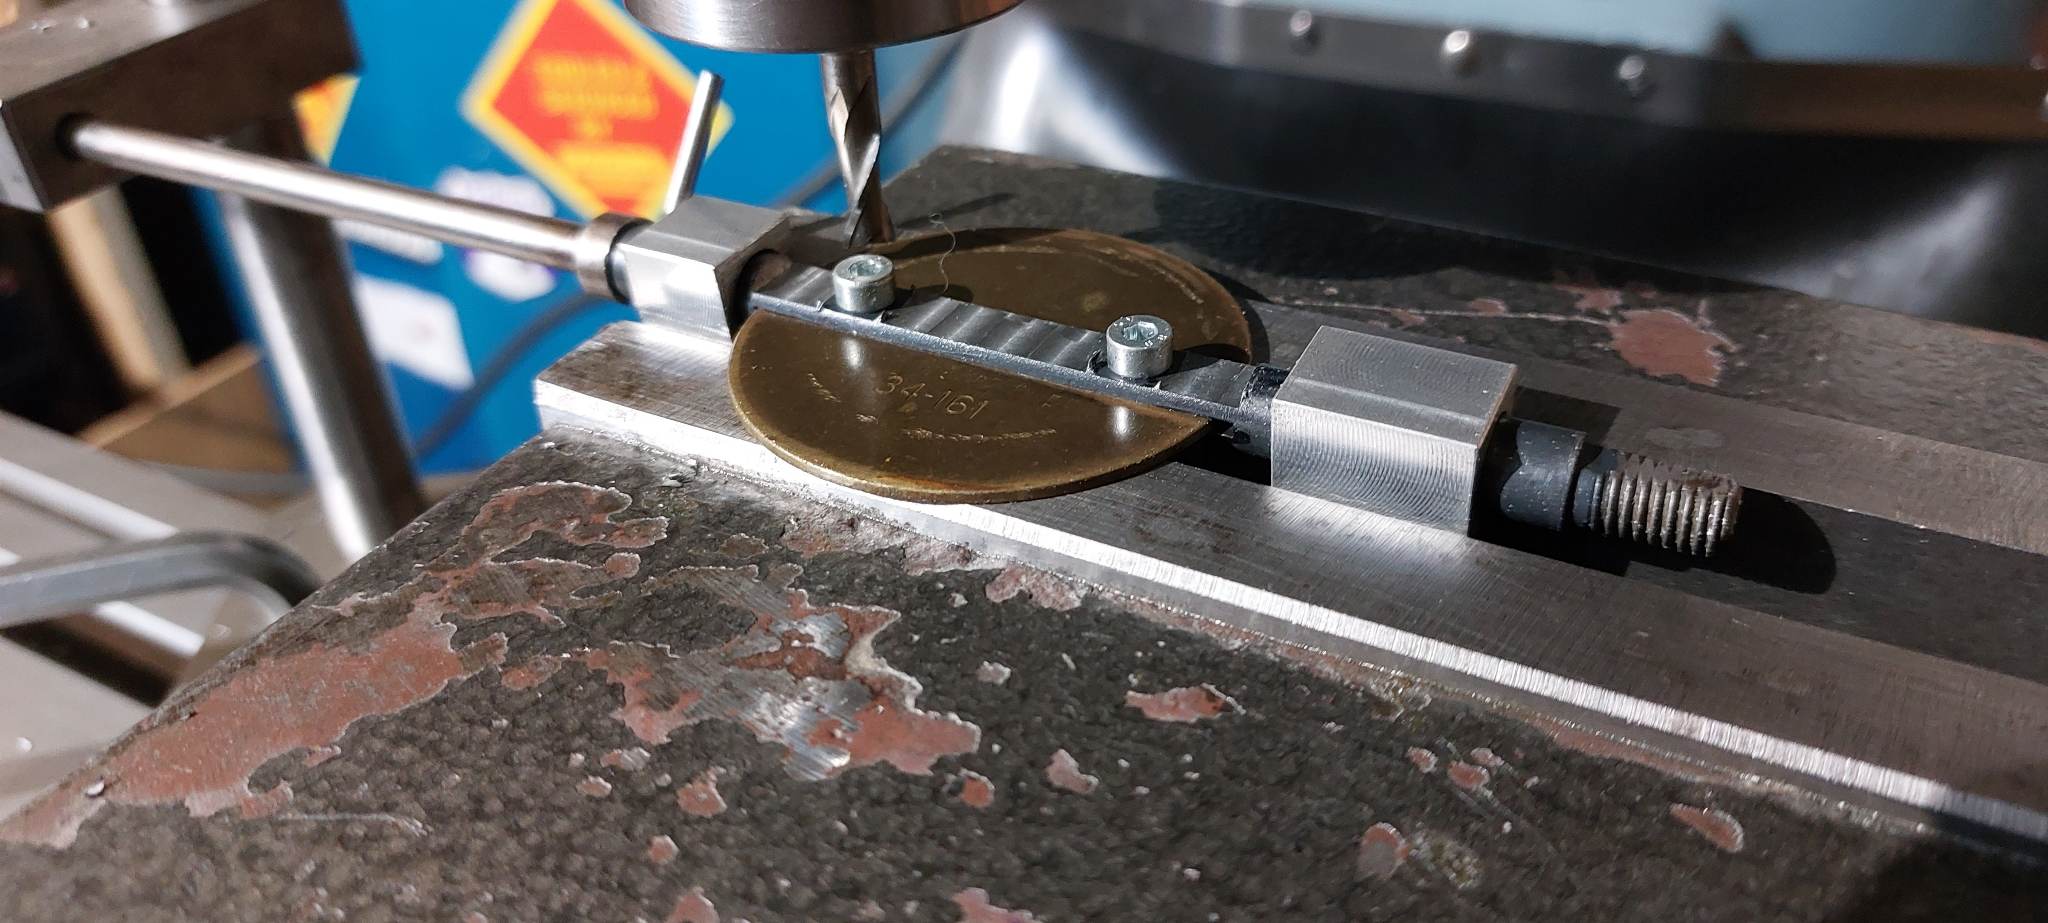
If you’re interested, you can get more info and contact him here (but you should be aware that he lives in Canada):
alteredmachine.com
.
FOR COMPARISON
(original throttle plate on top, the newly made version underneath it)

.
HOW TO:
.
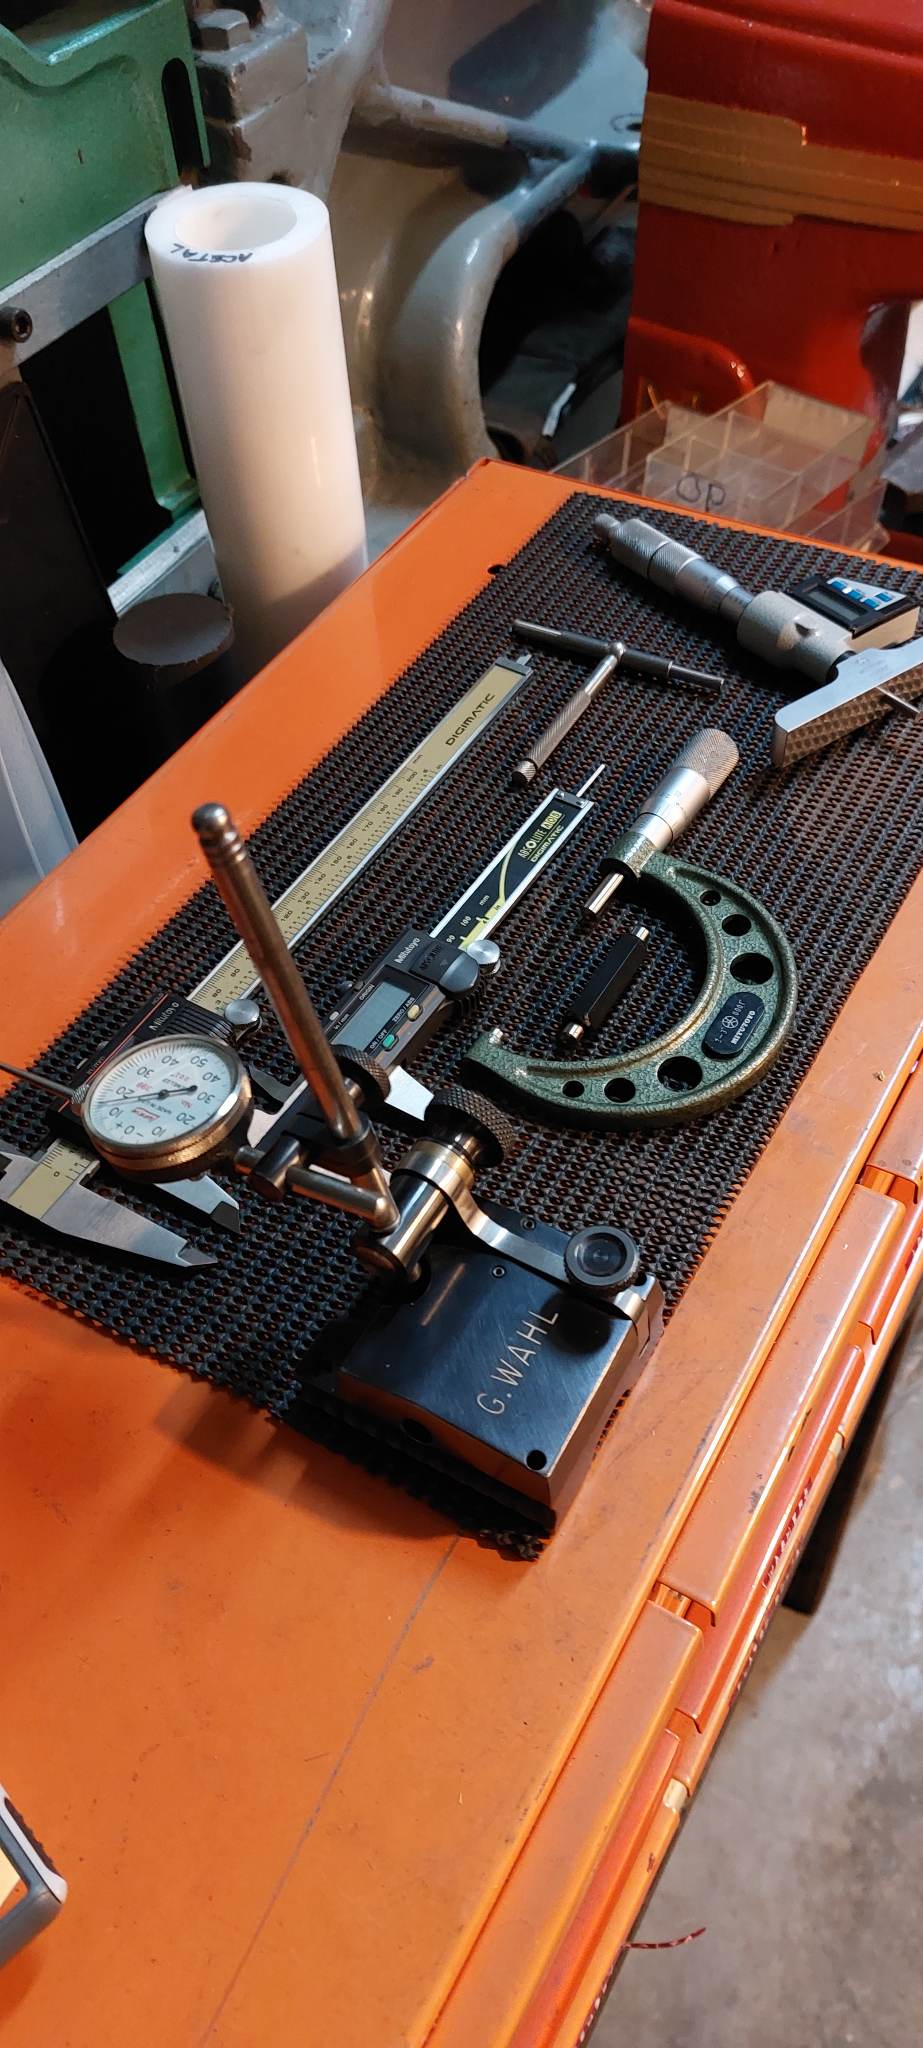
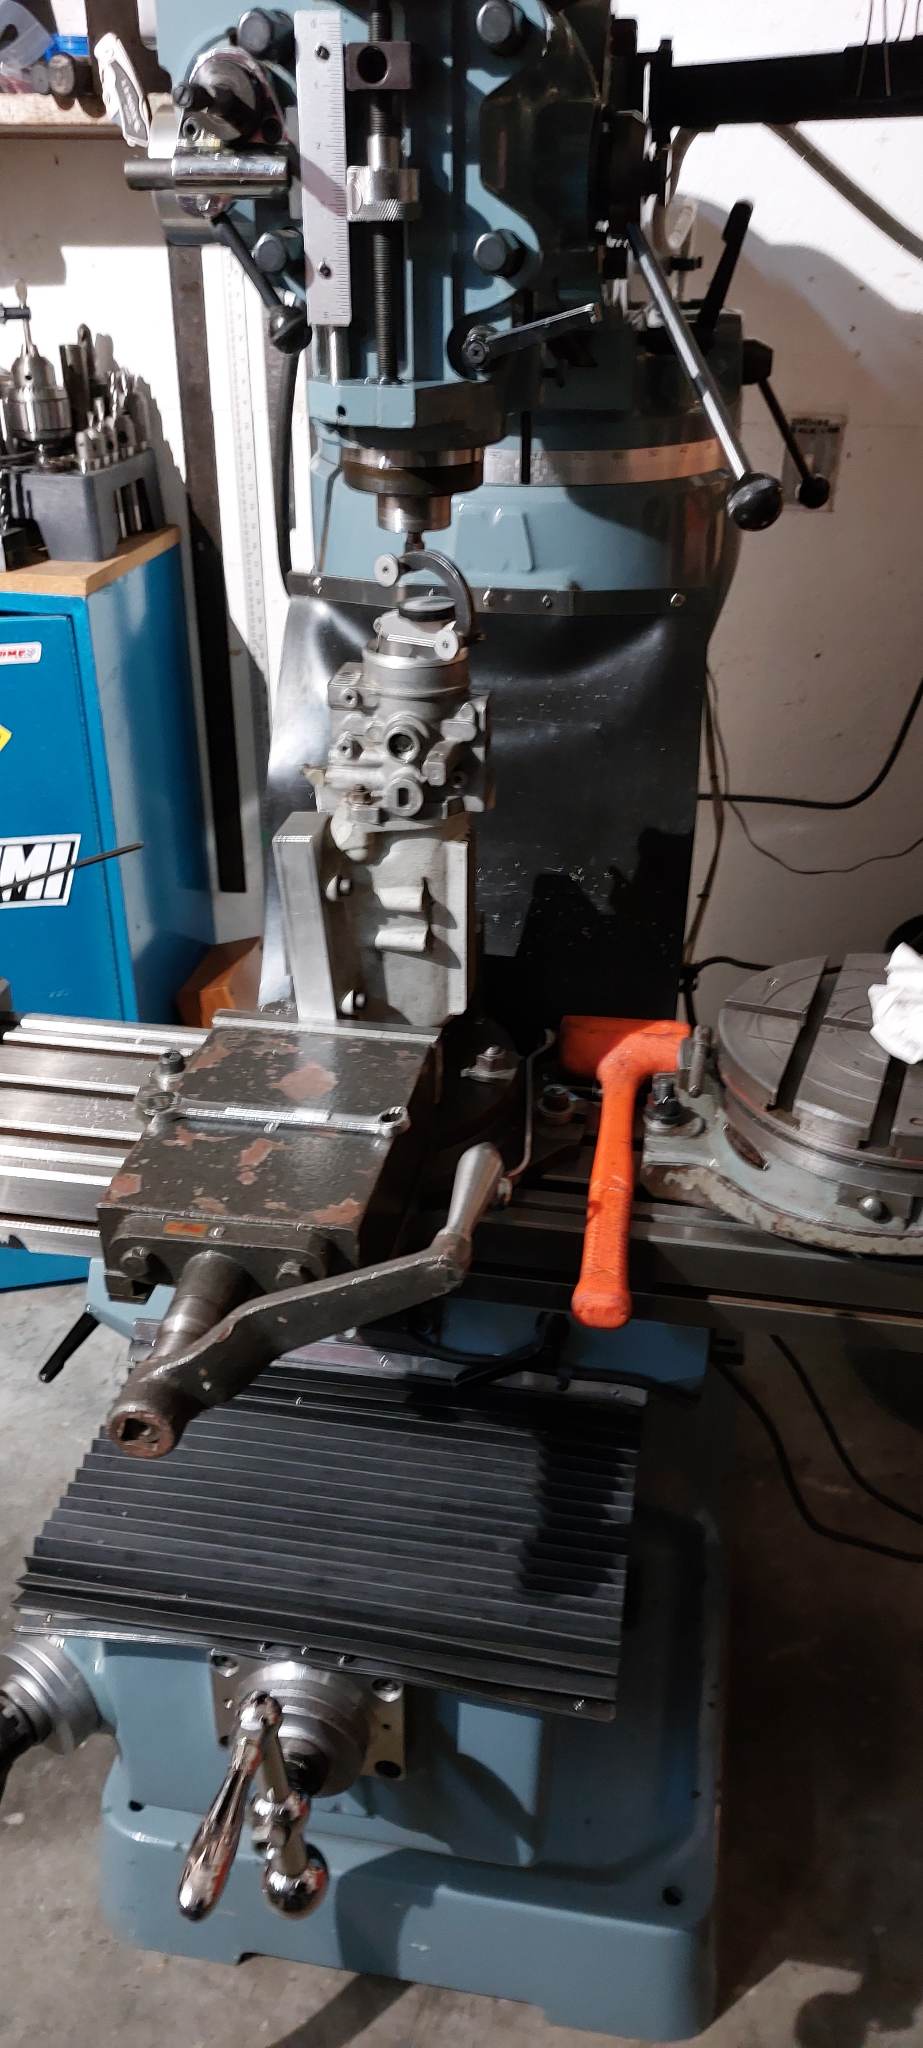
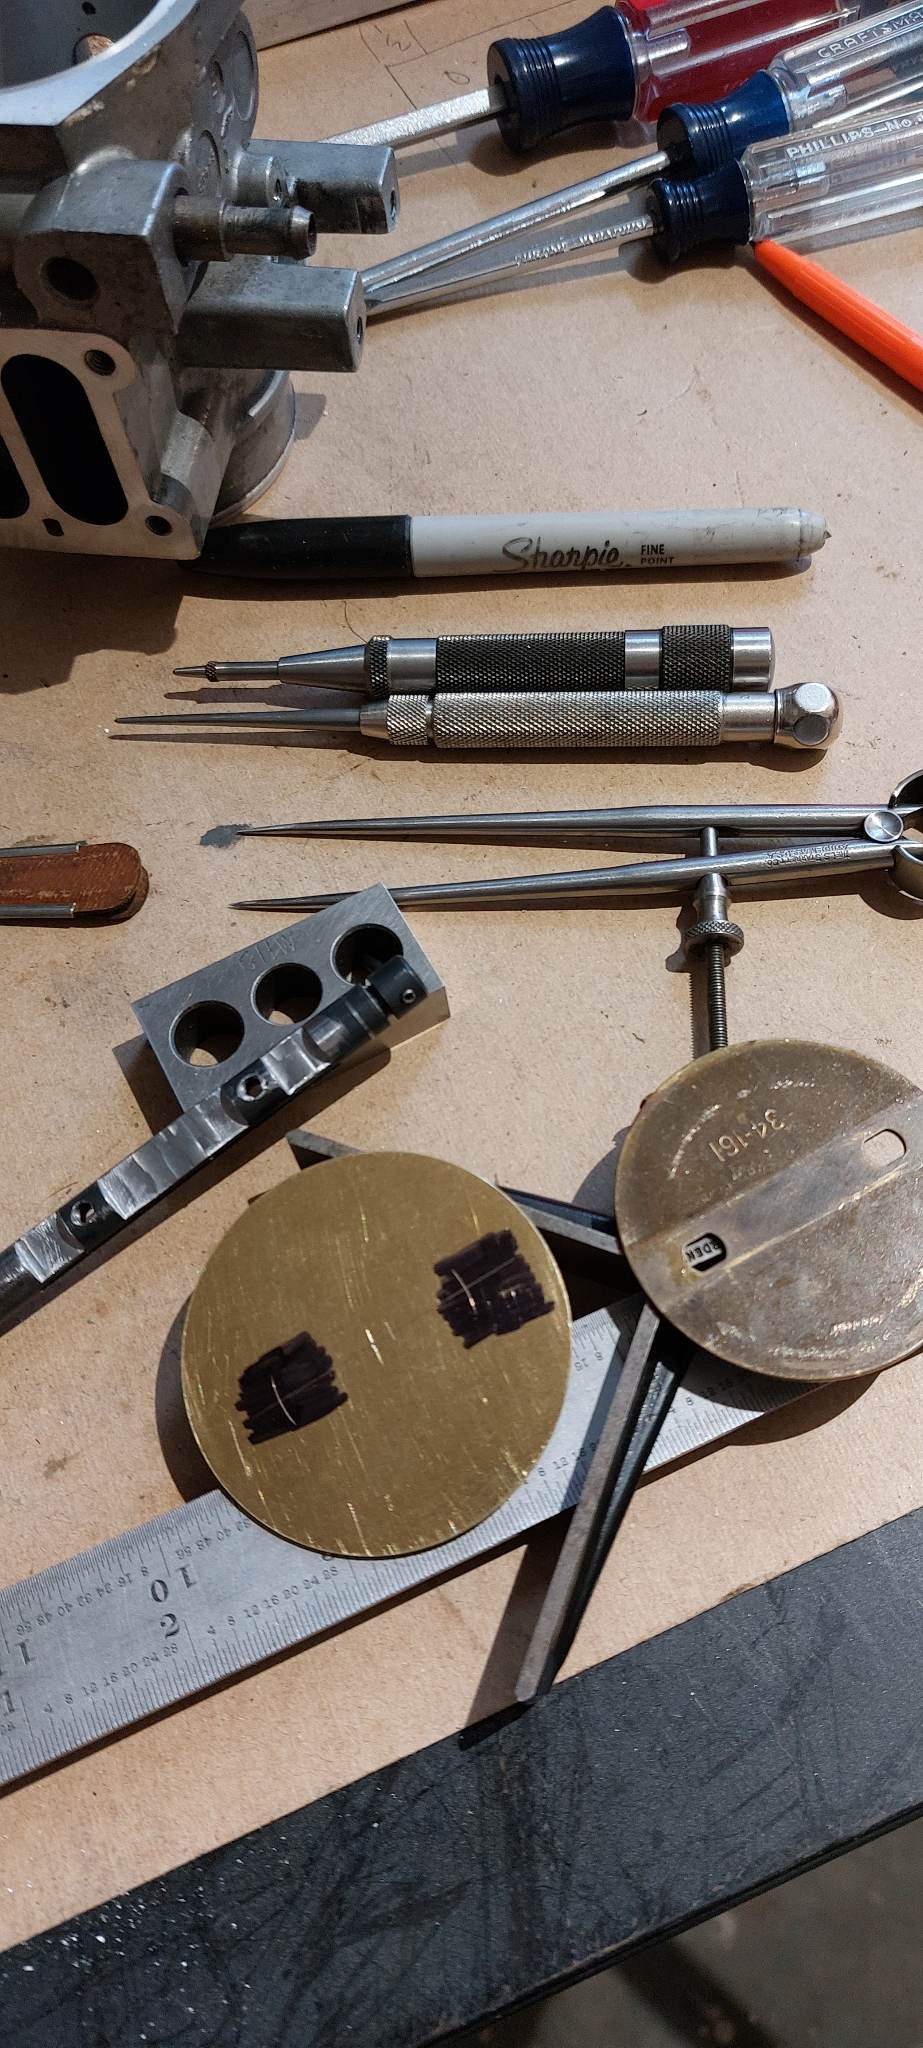
1 organize tooling.
2 calibrate tools.
.

.
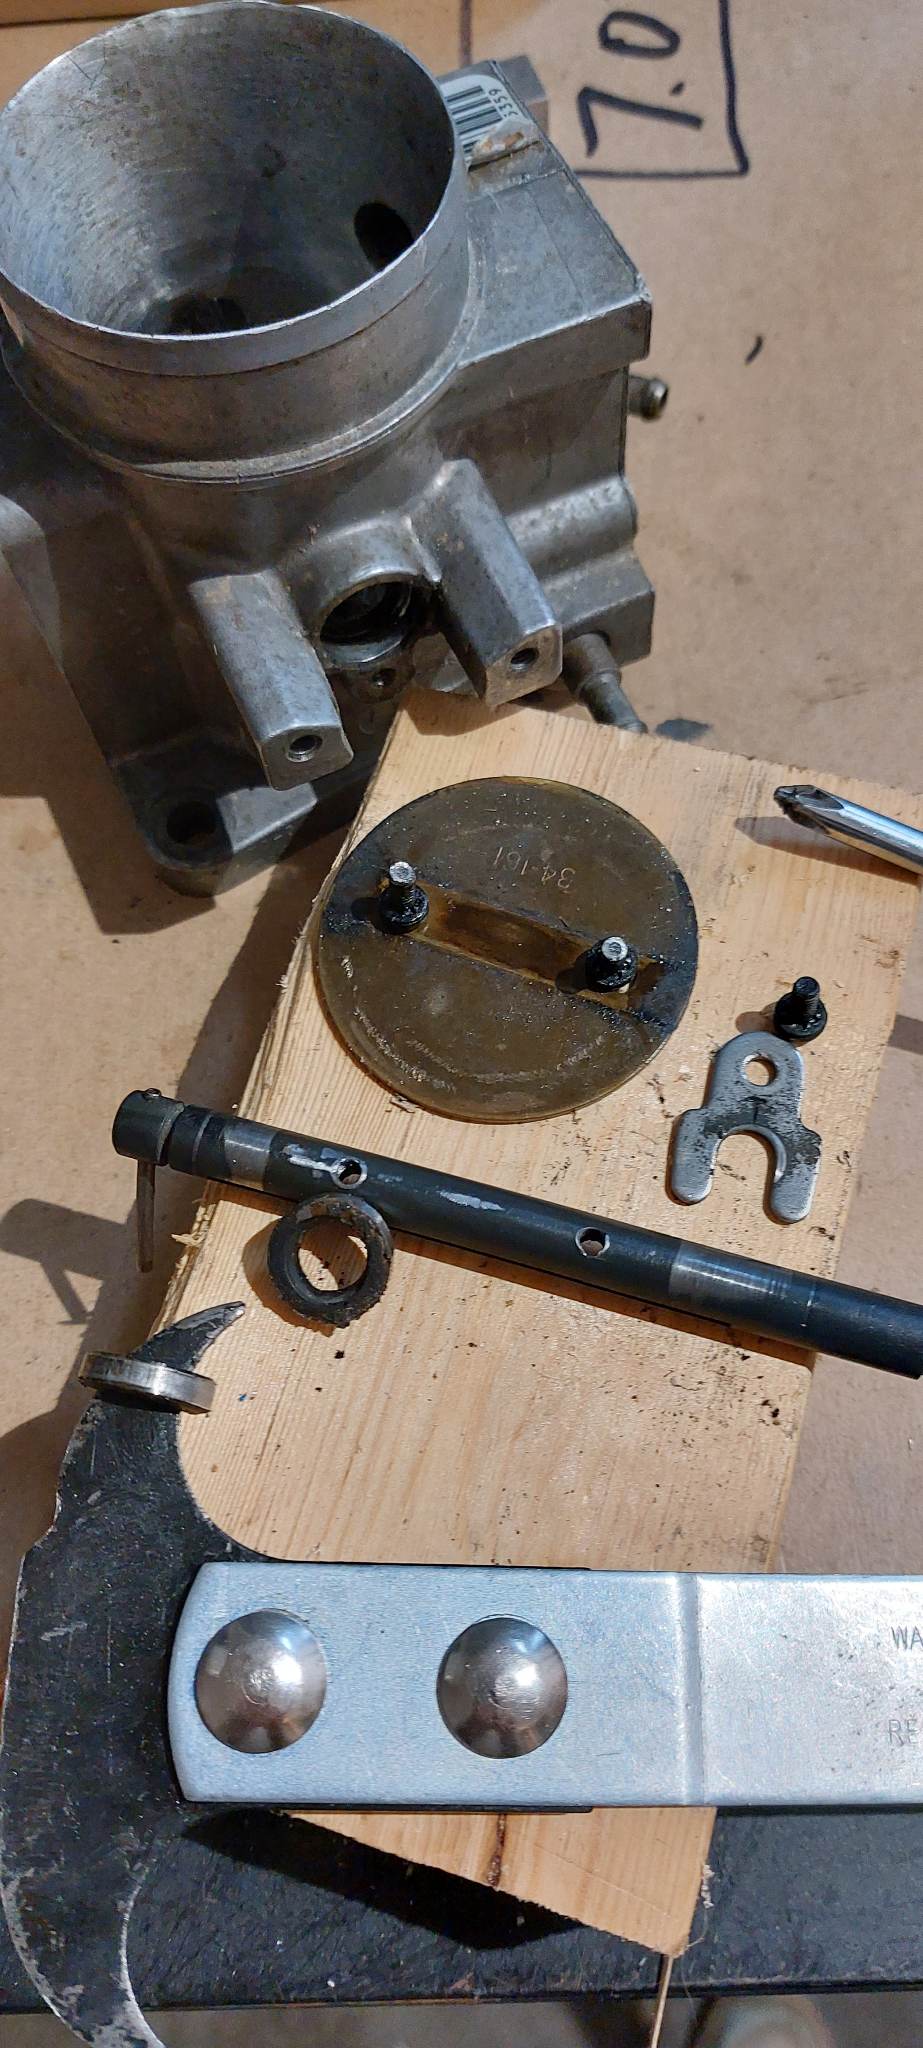
3 Tear down
Make sure to file ends of screws (upset metal) and back of threaded holes (not to score the housing)
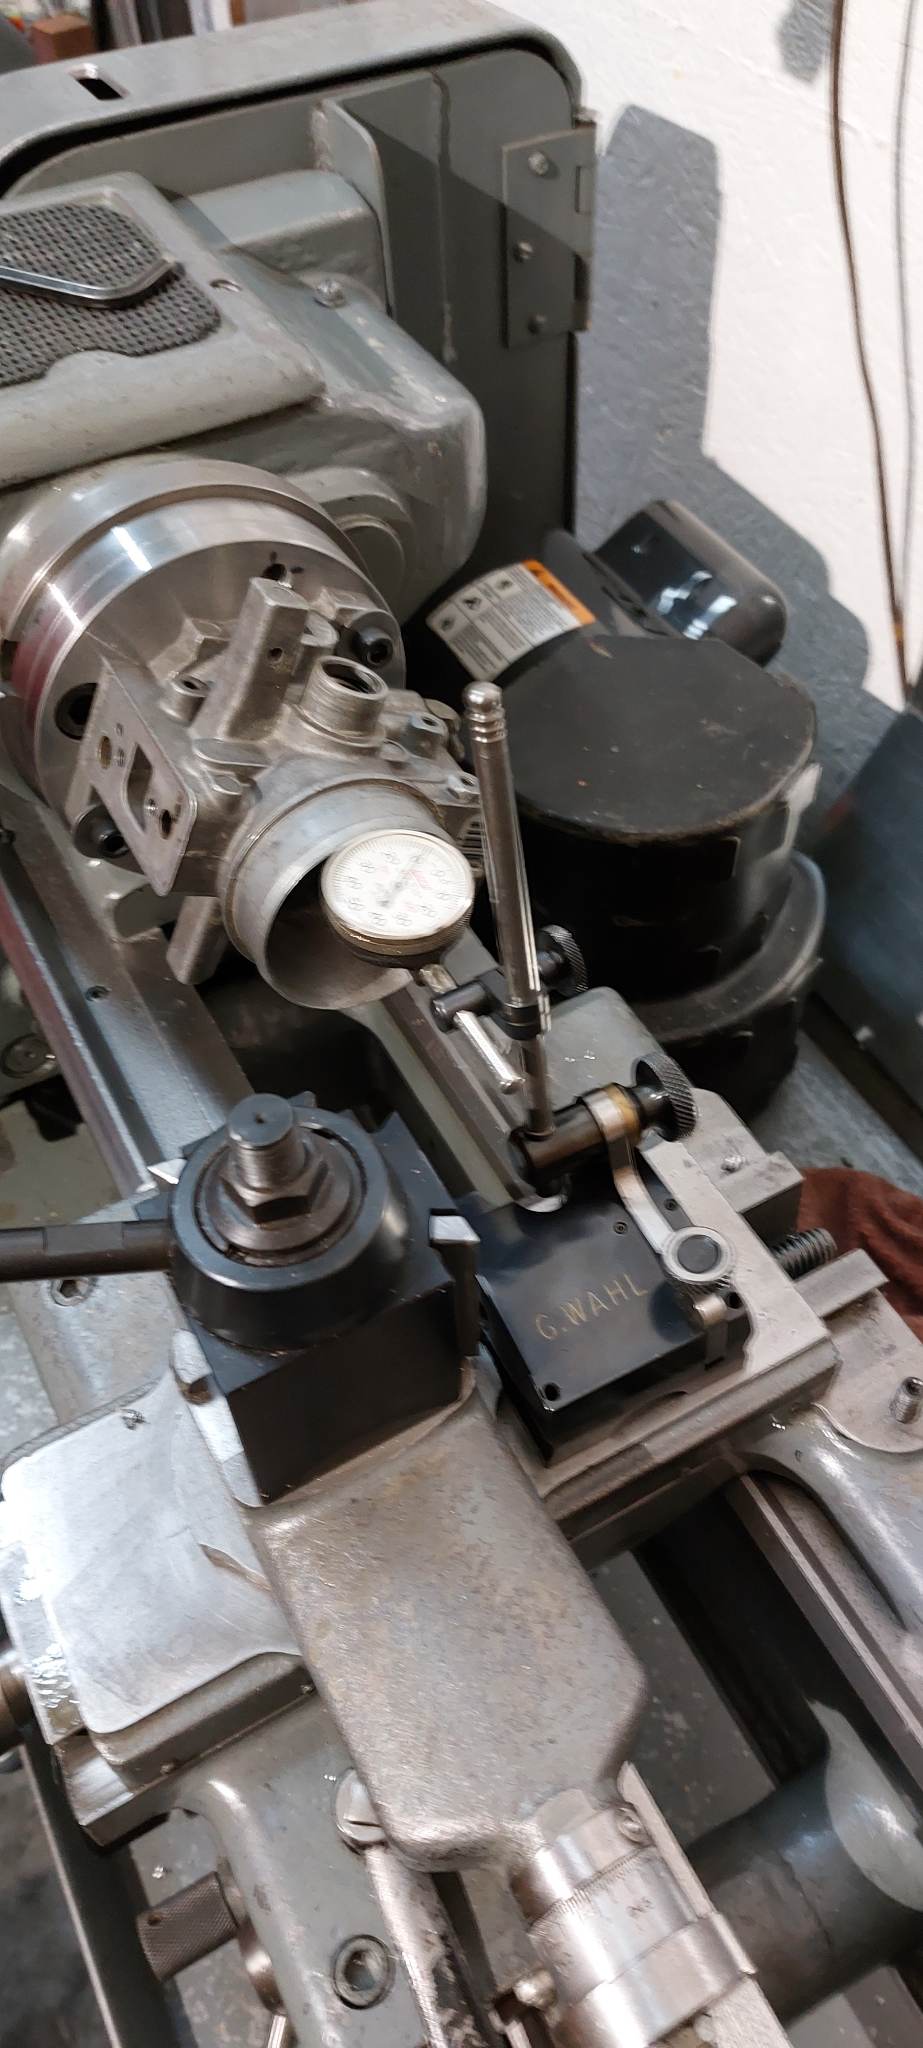
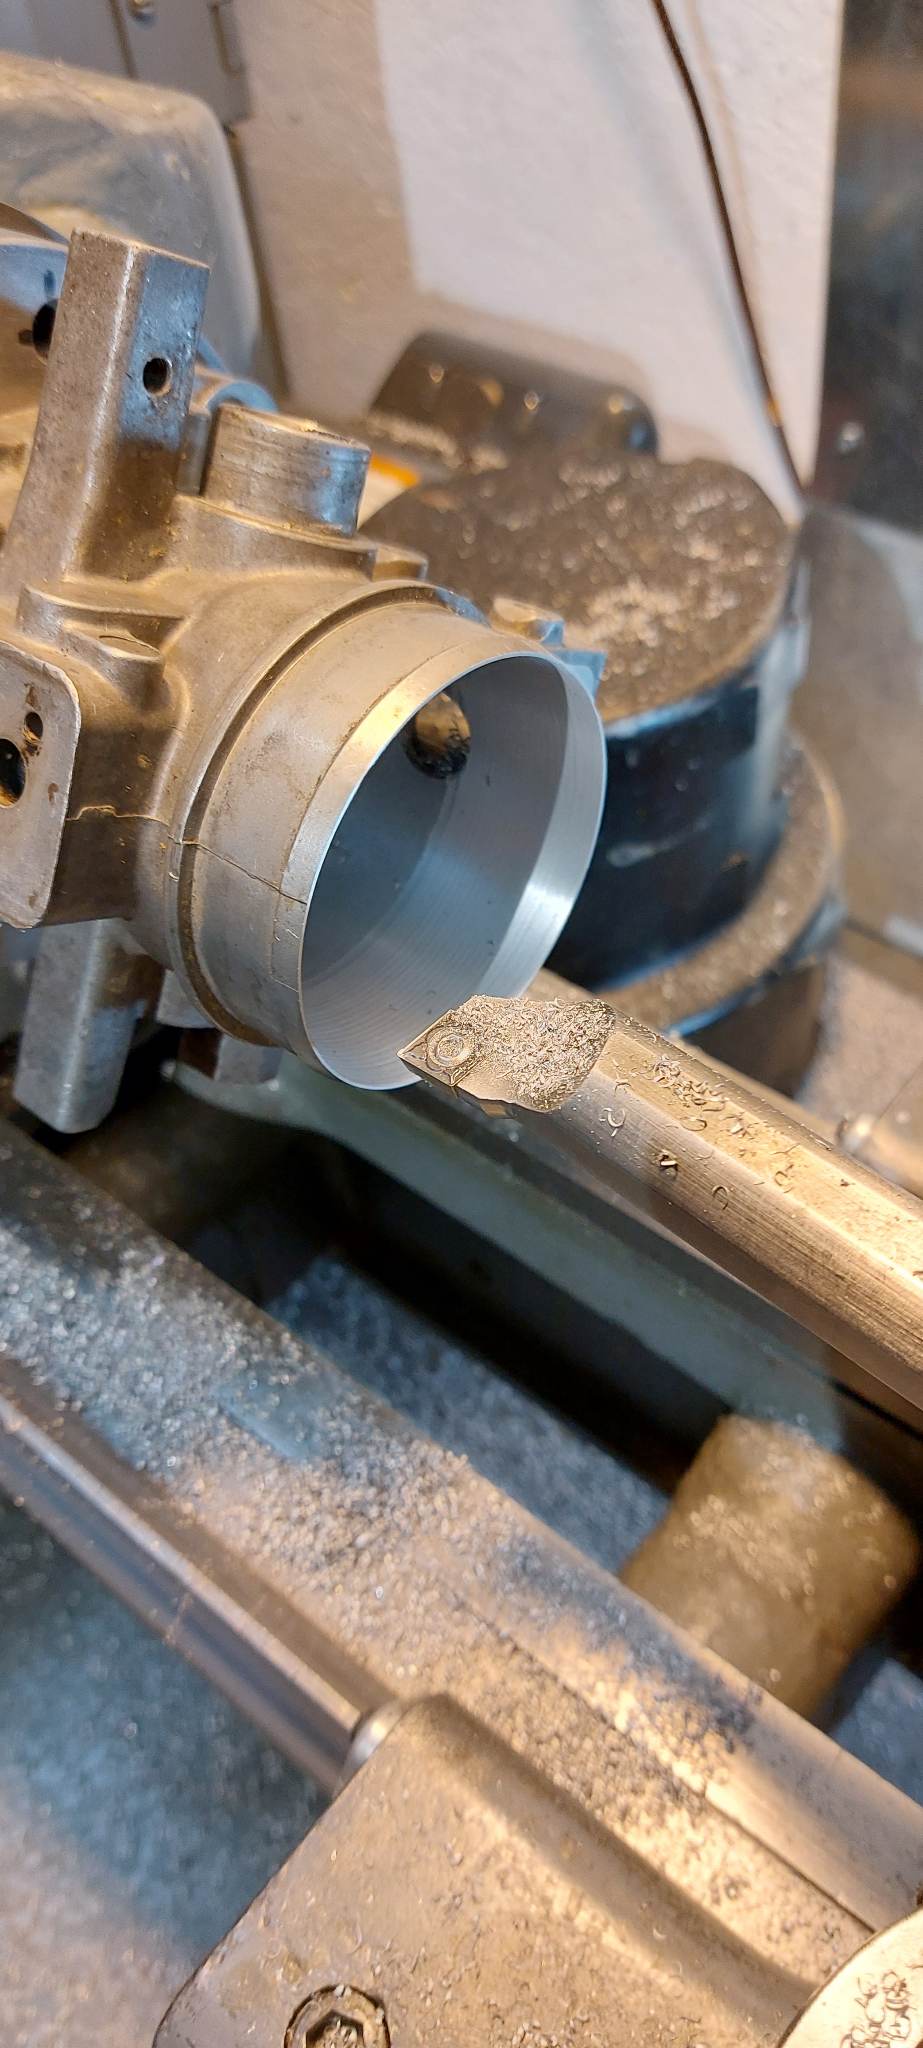
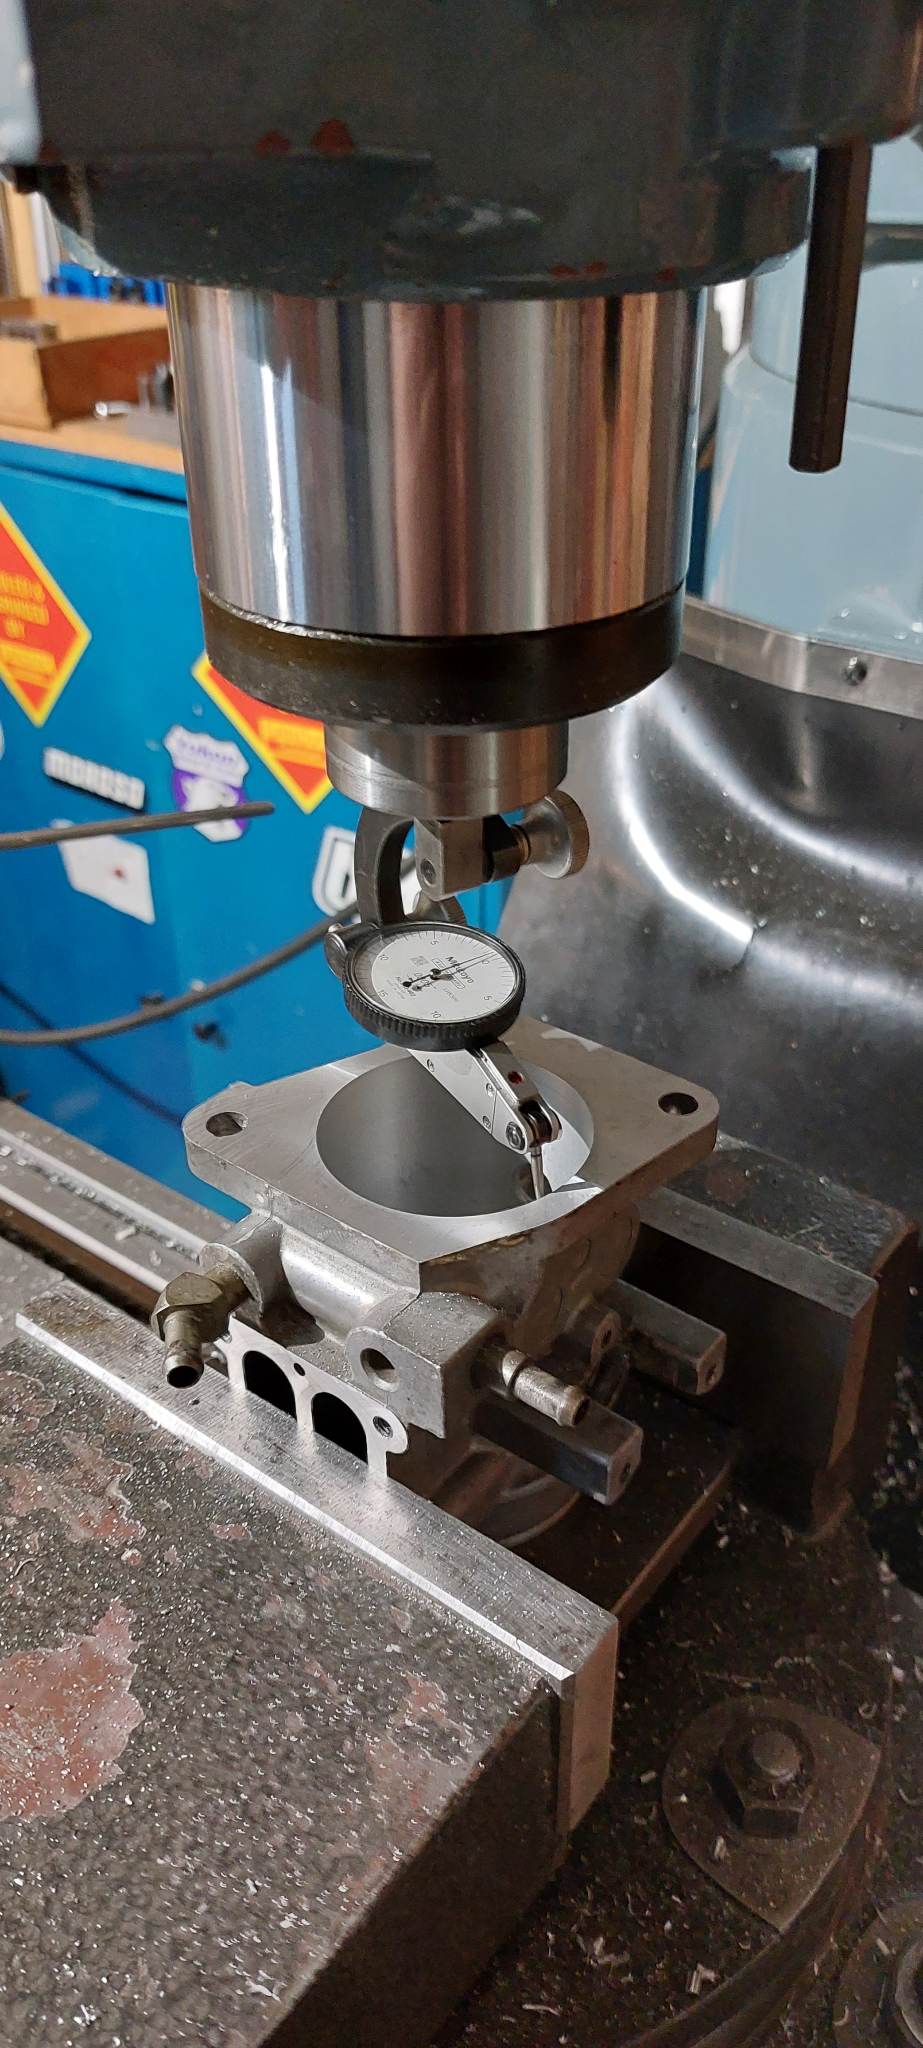
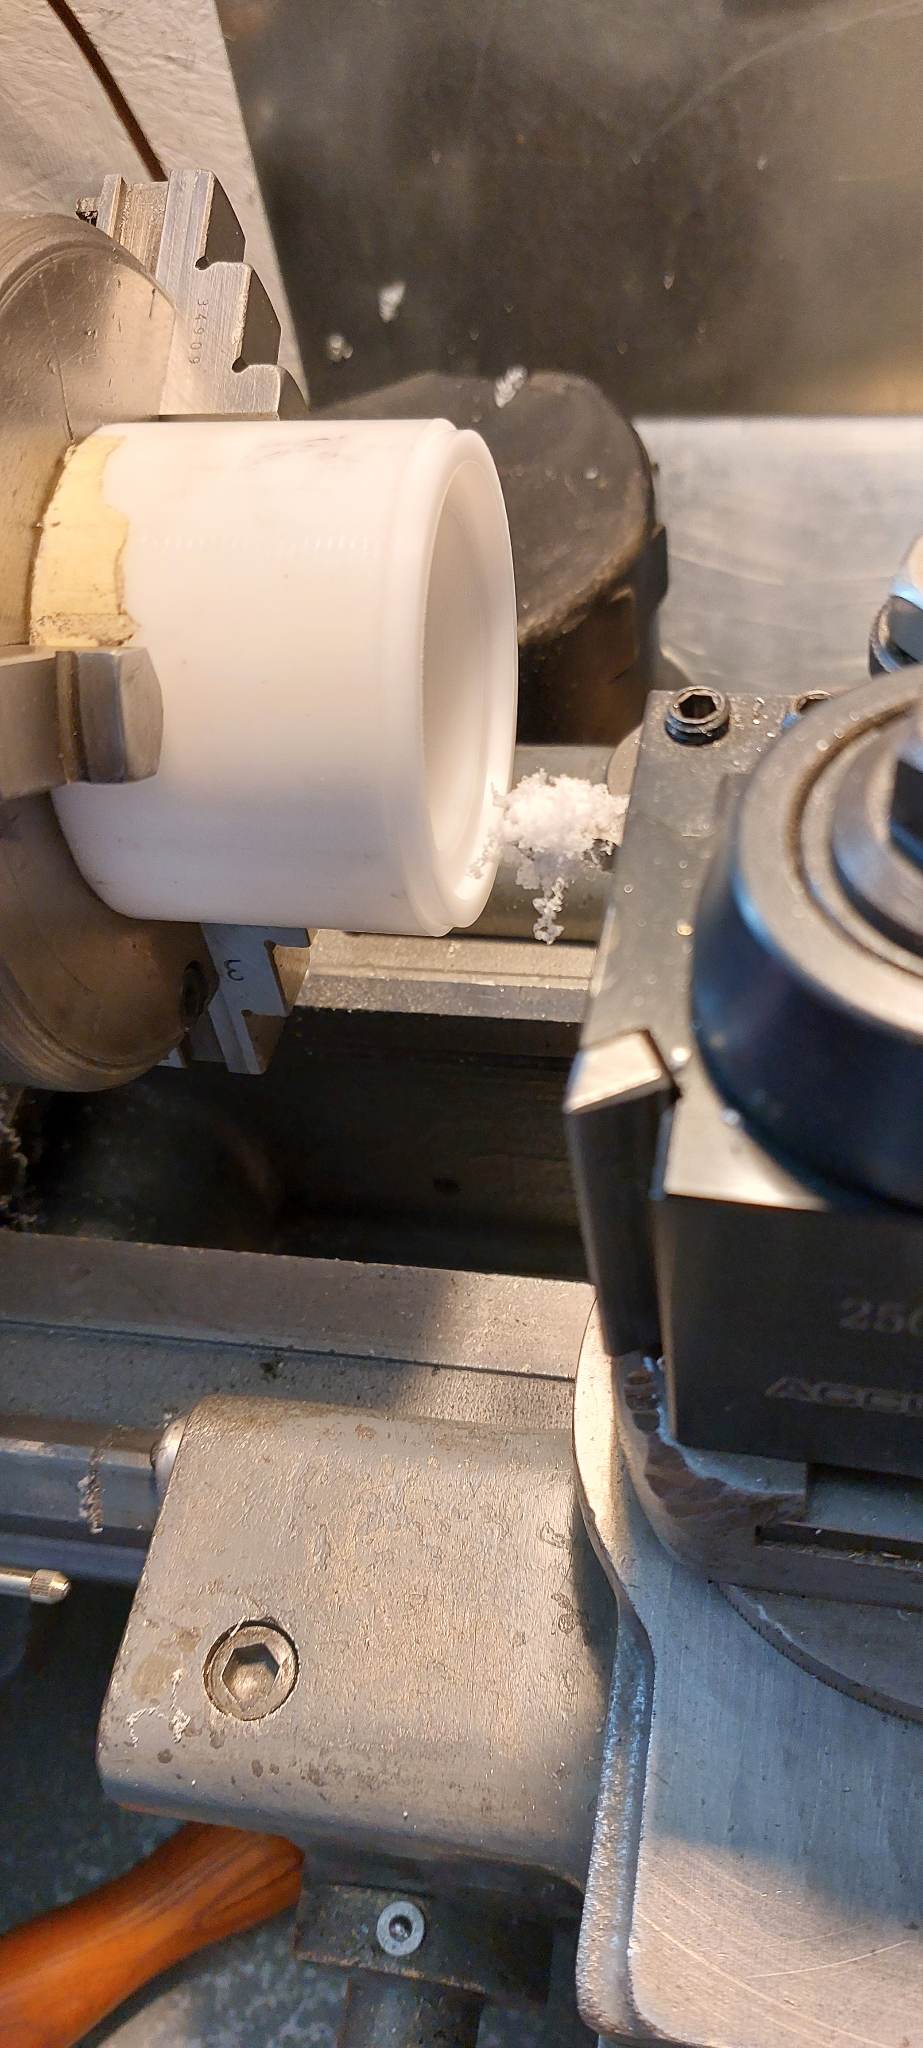
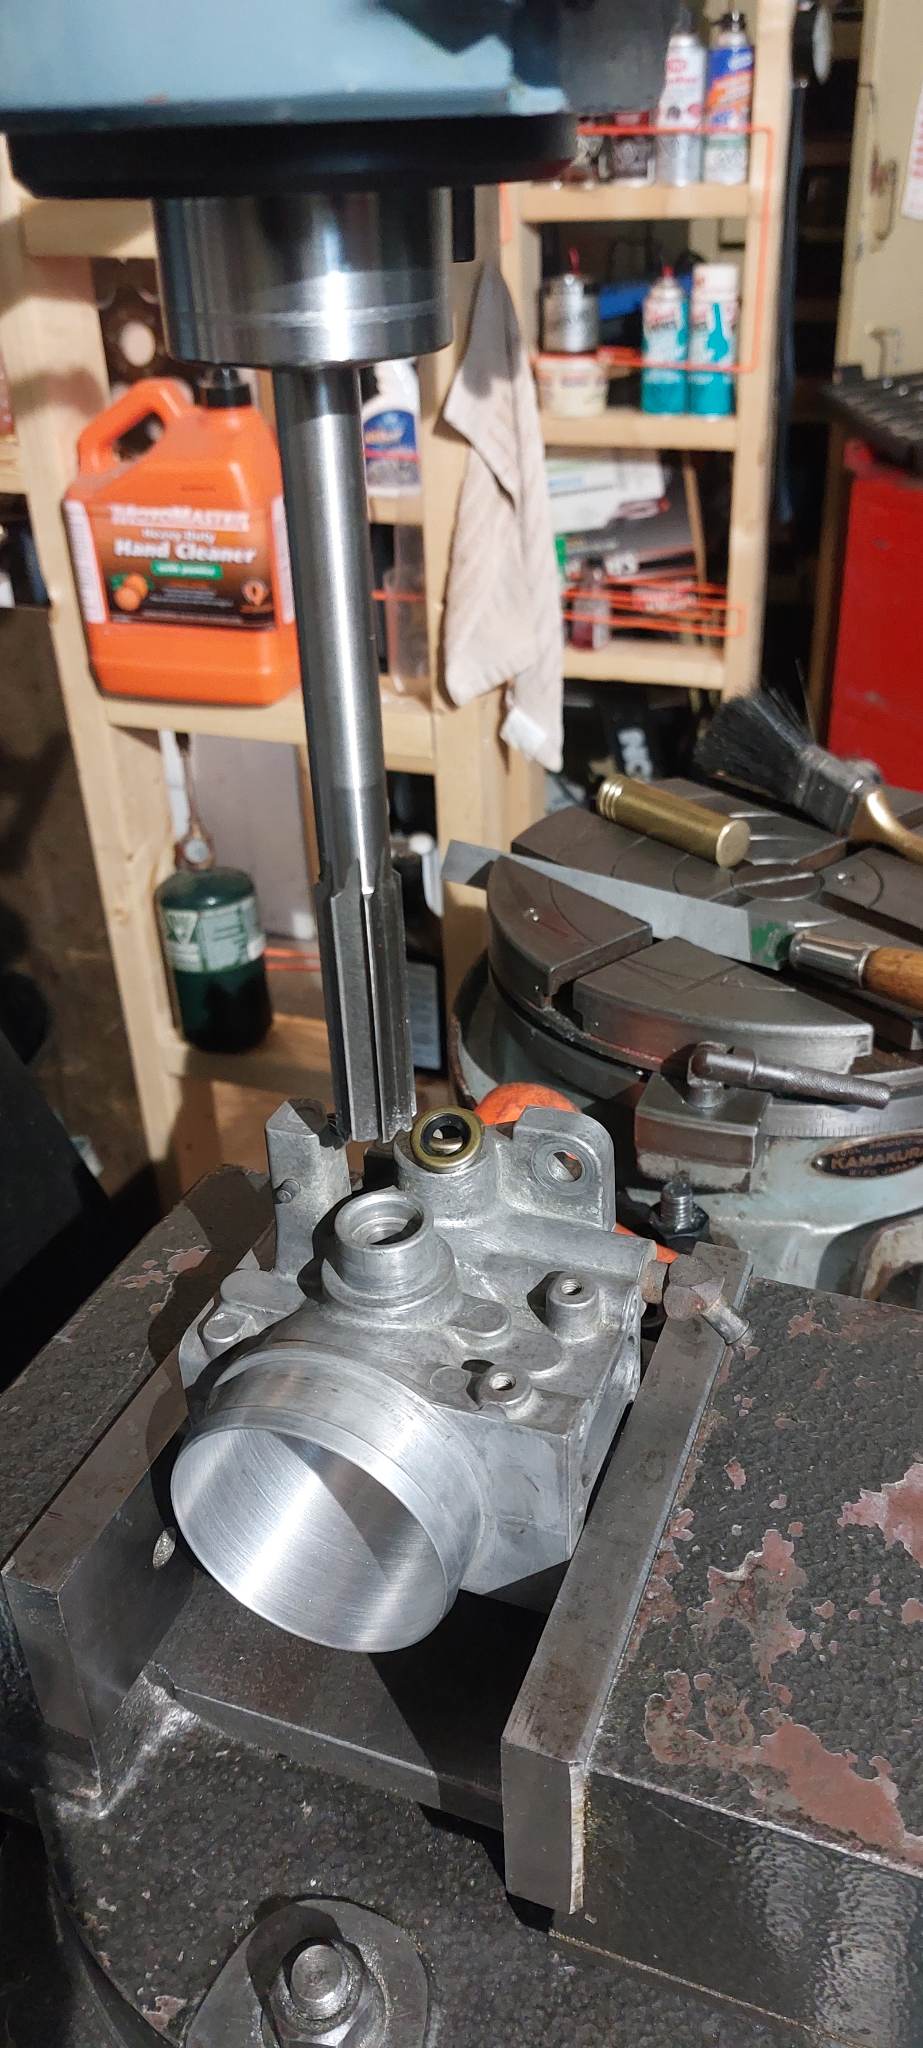
4 Set up lathe and locate the throttle body.
.
.
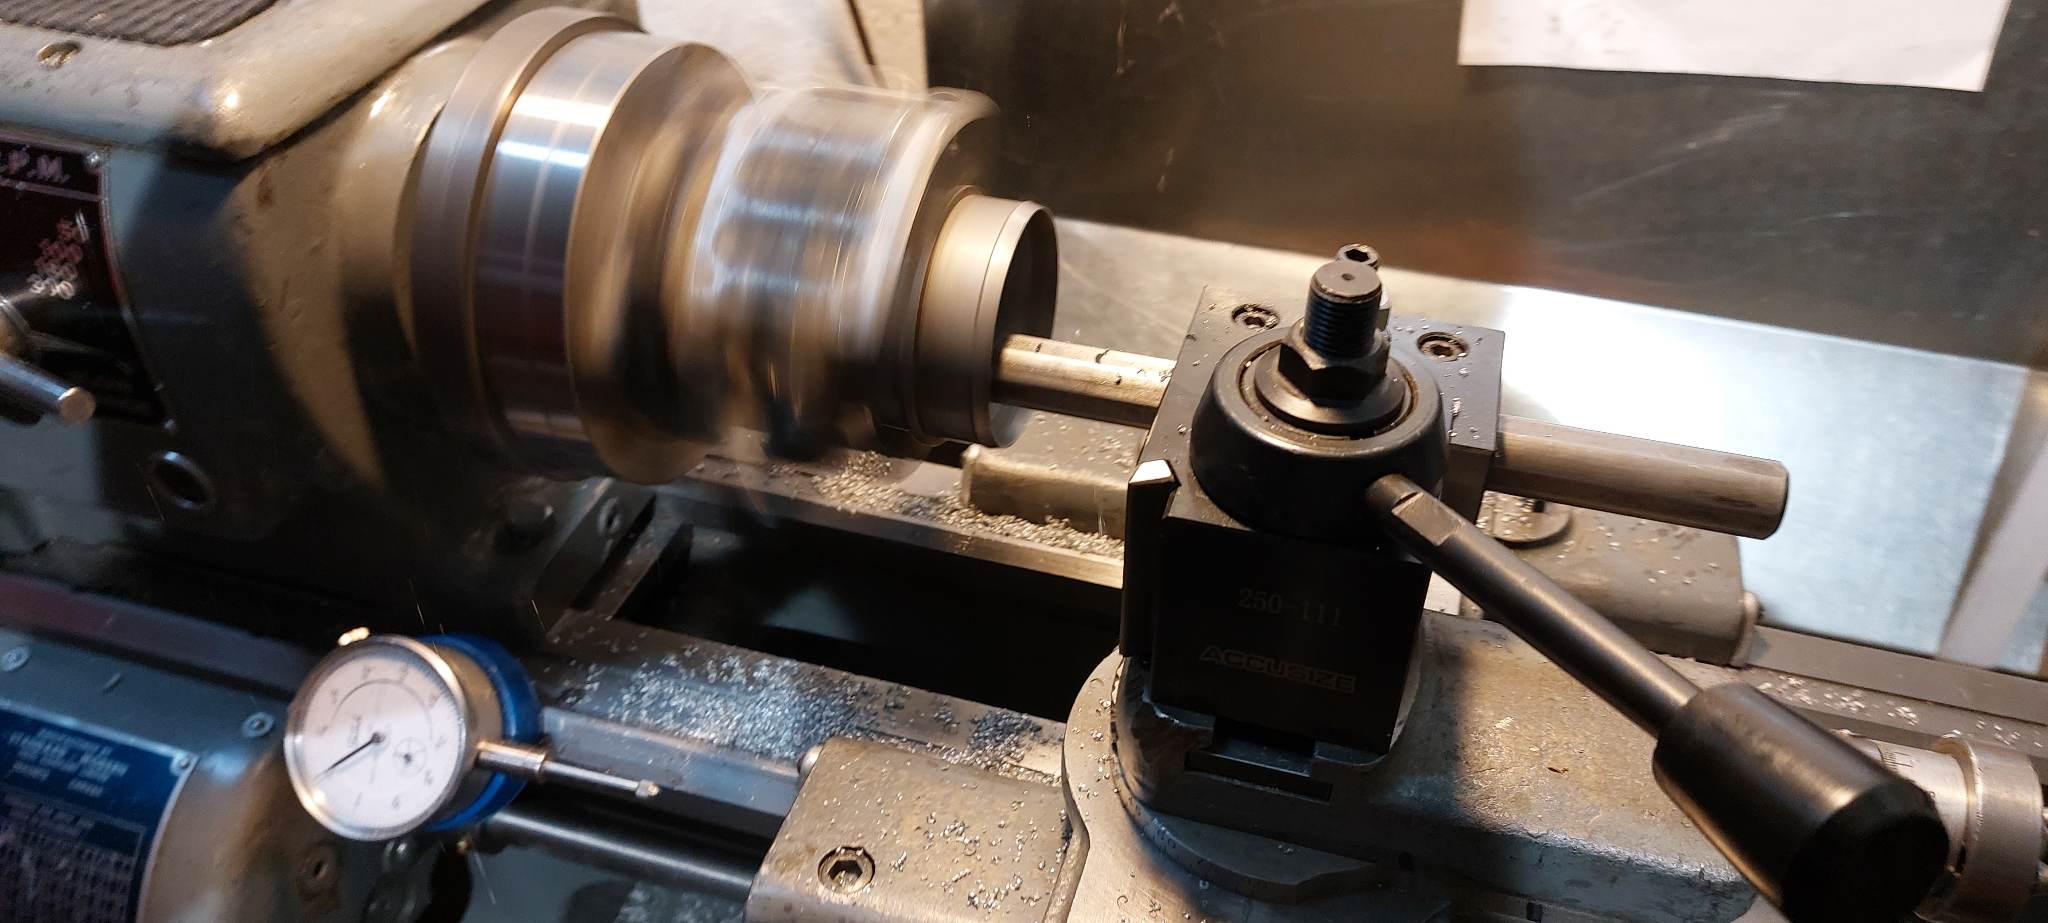
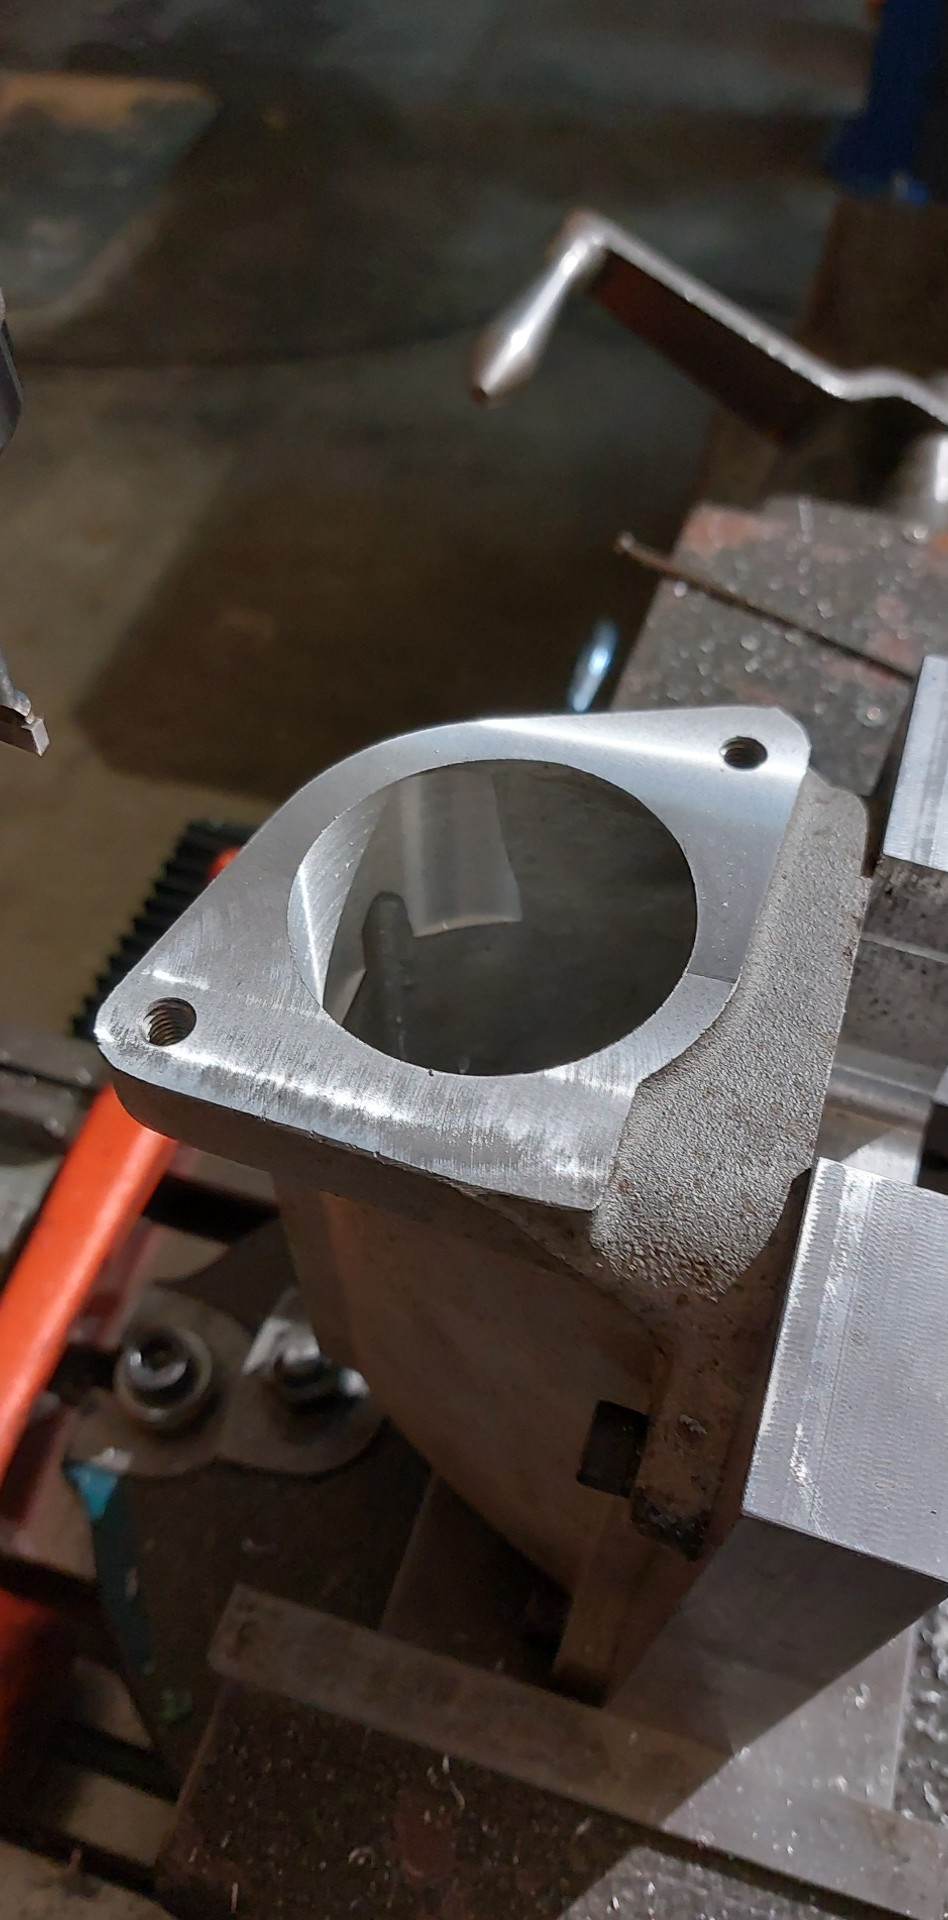
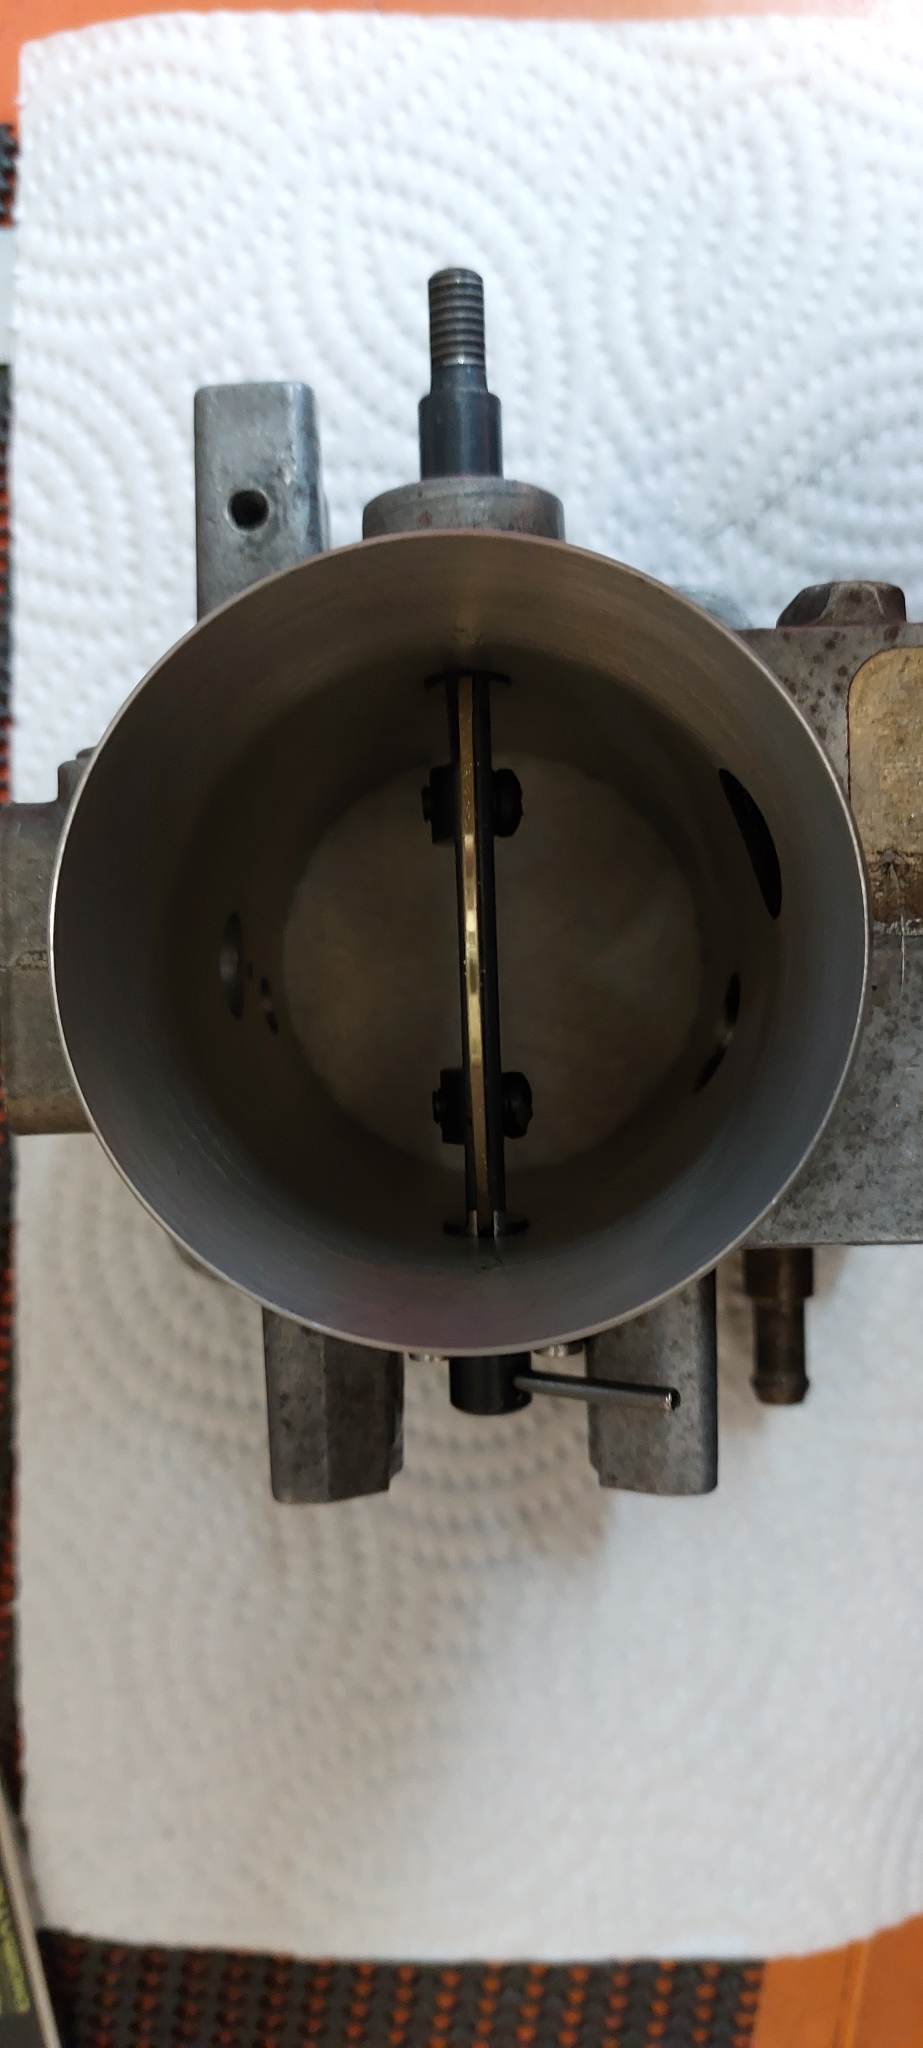
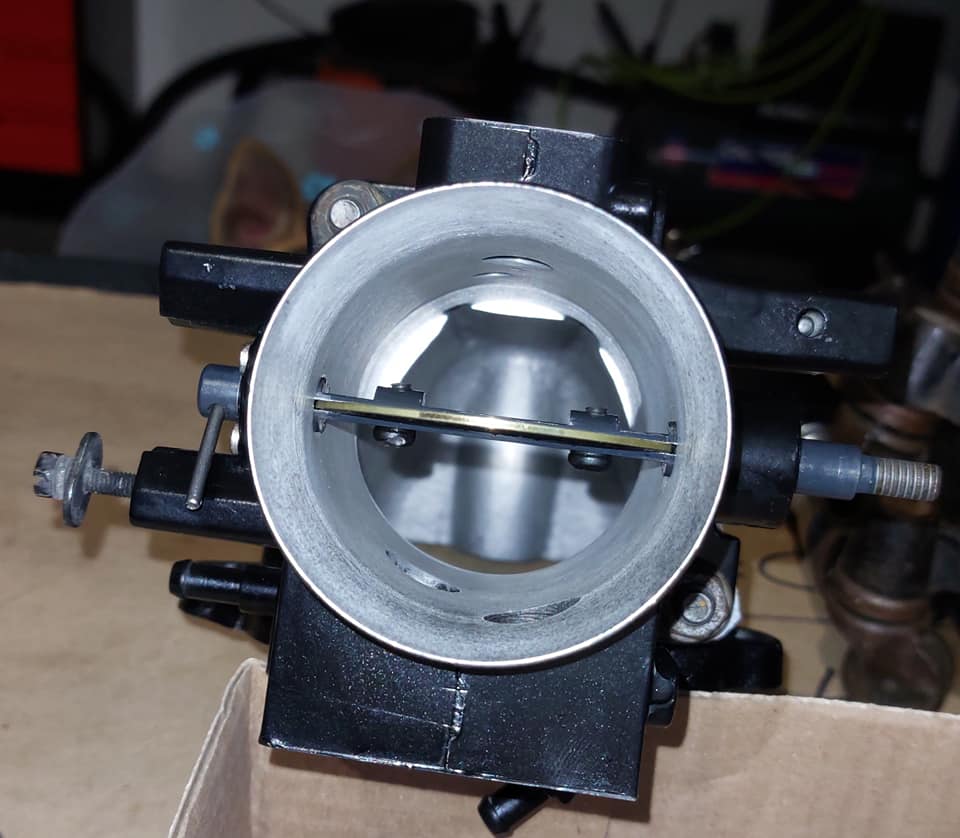
5 Machine bore to 61.50mm
(the current job did break thru into 1 of the vacuum block screw holes, oops, it happens!)
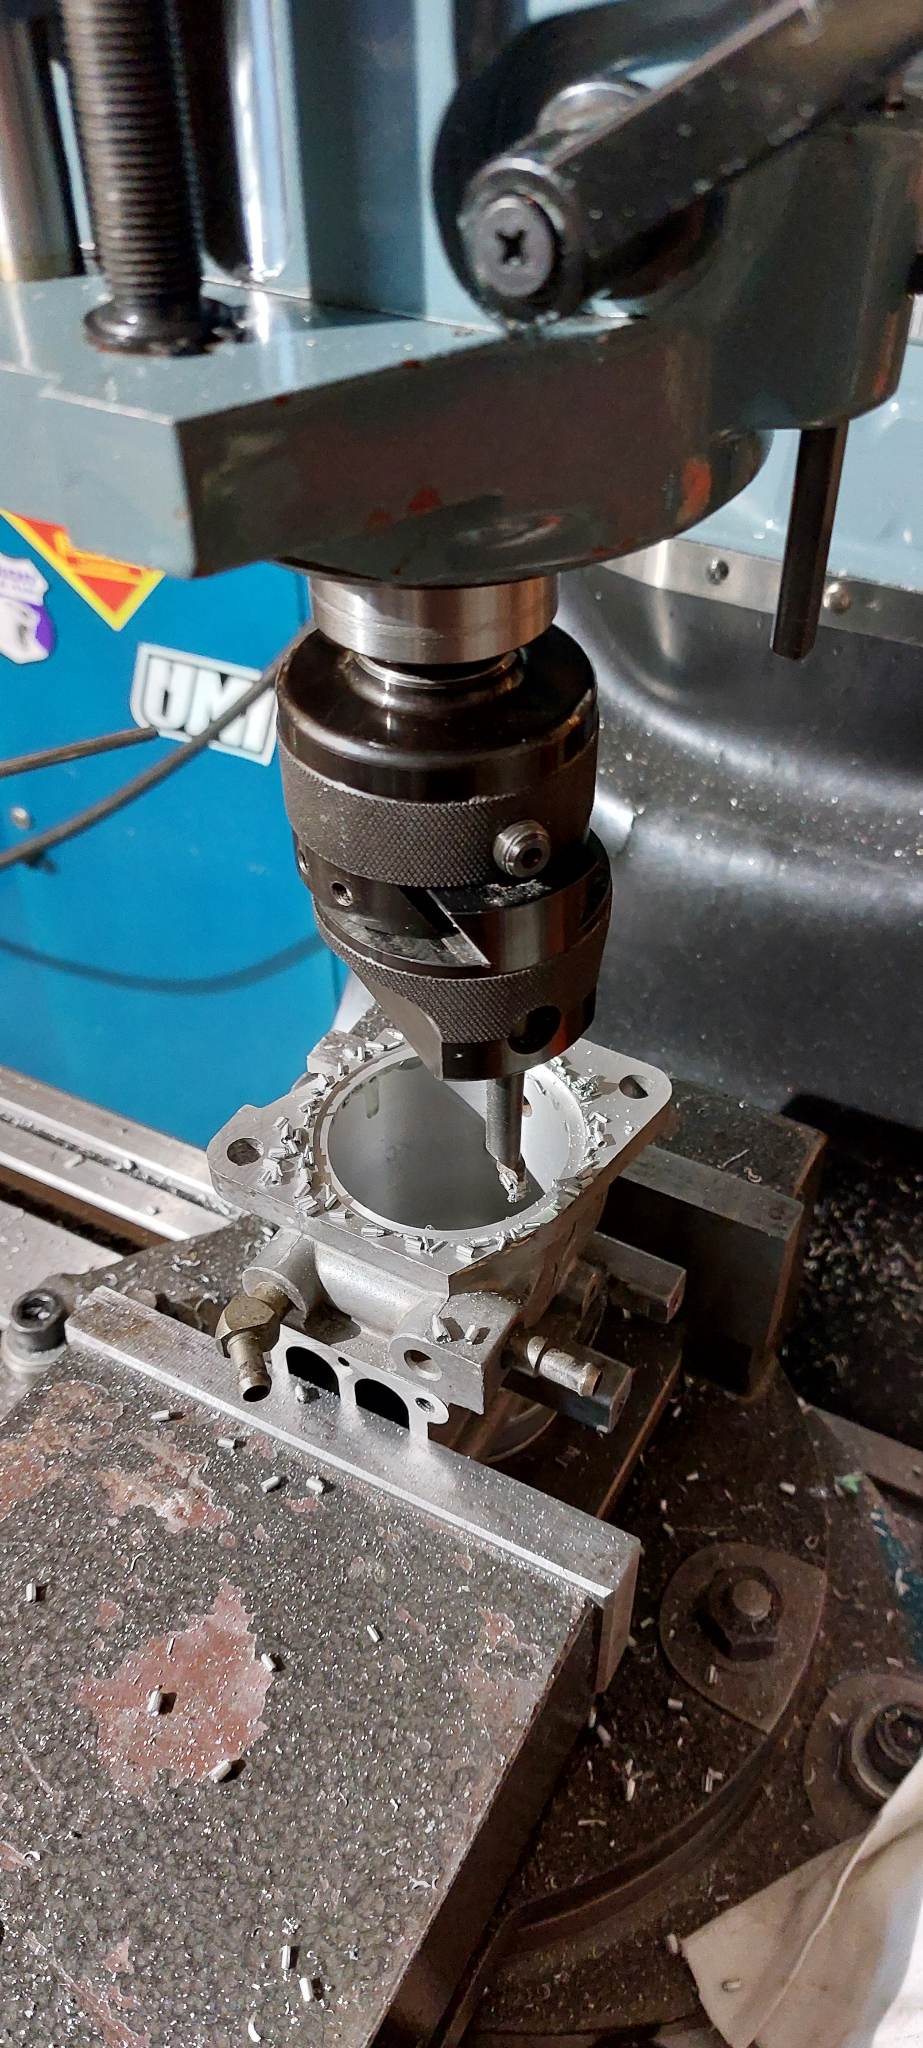
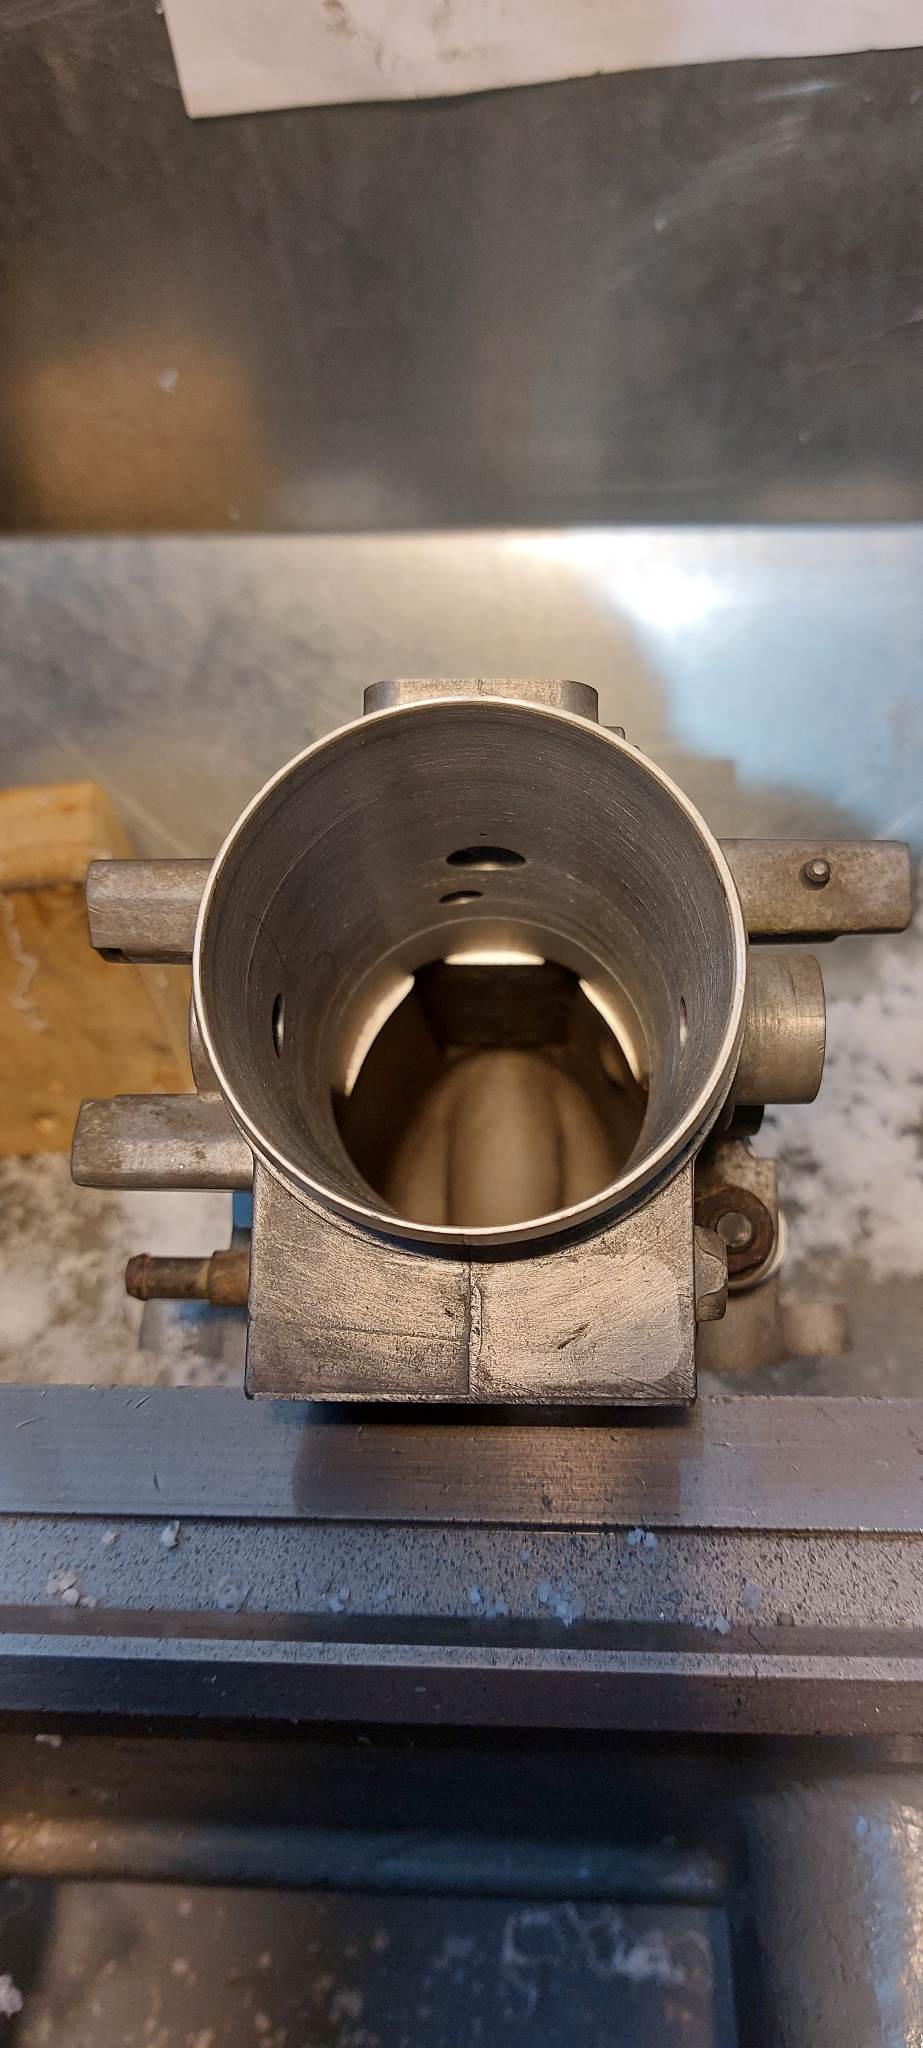
6 taper bore
Create 8 degree ram tube, machined taper to bore size
.

.
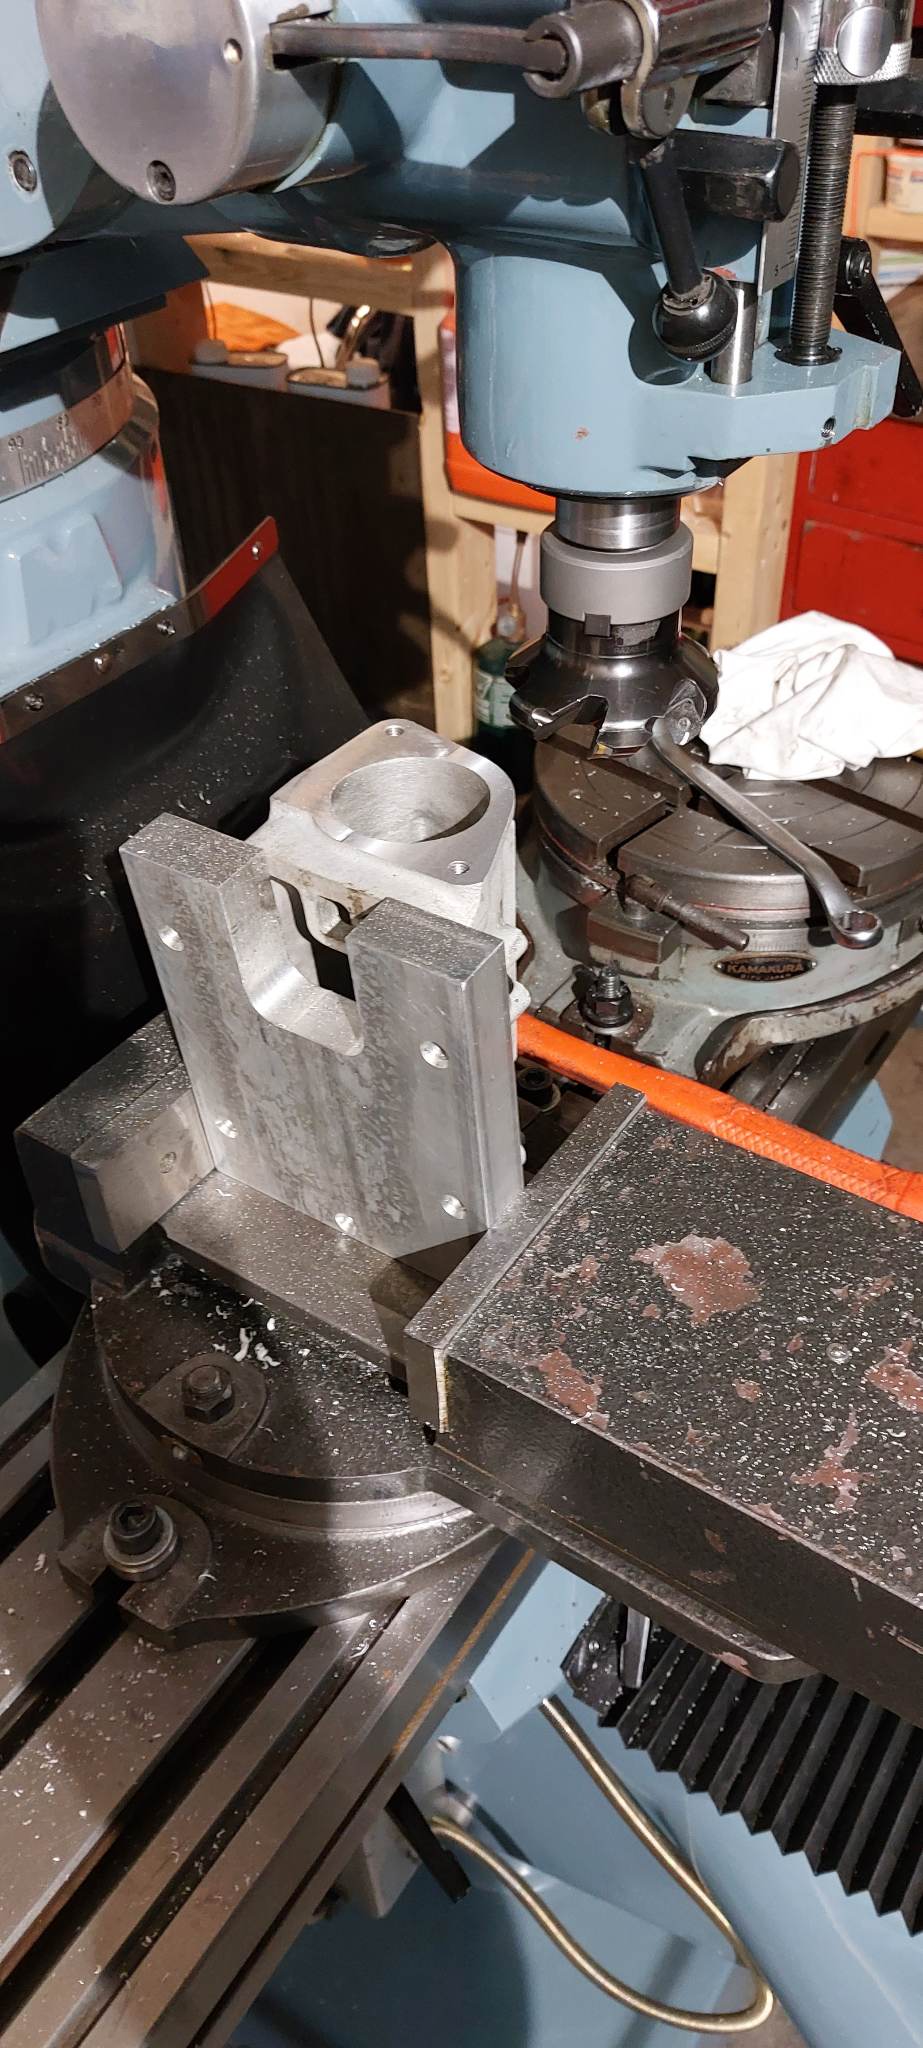
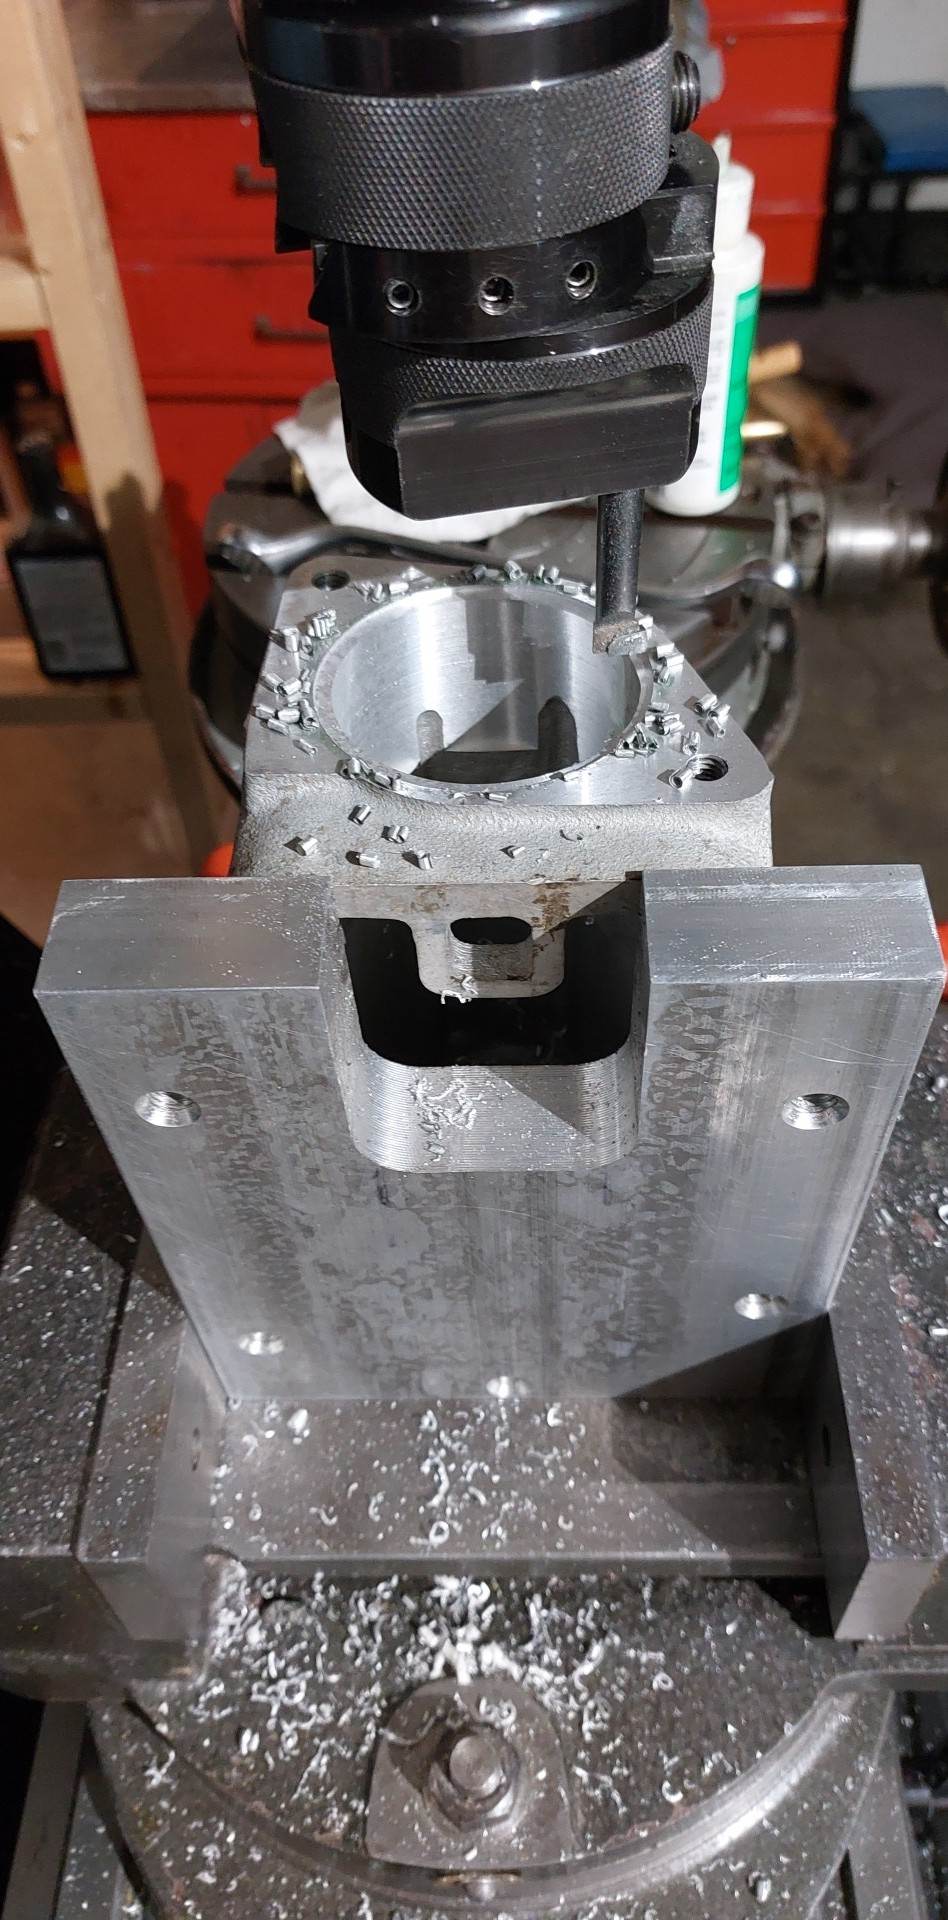
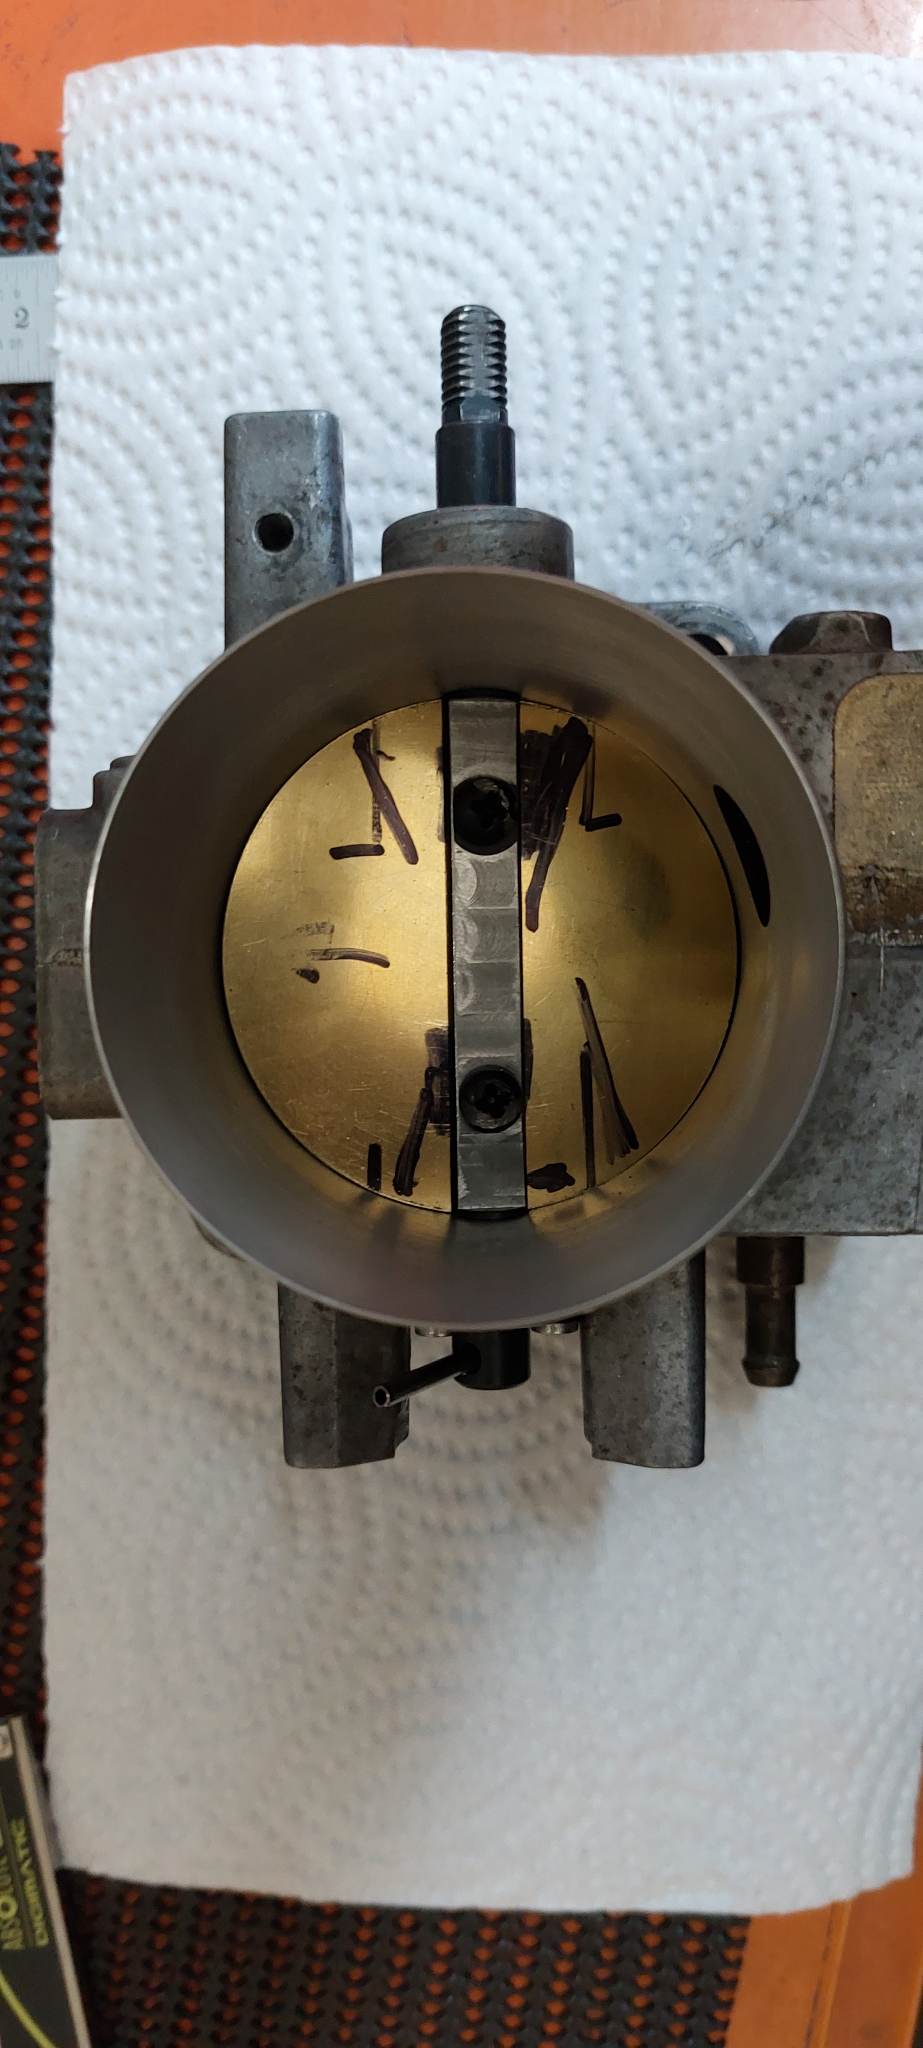
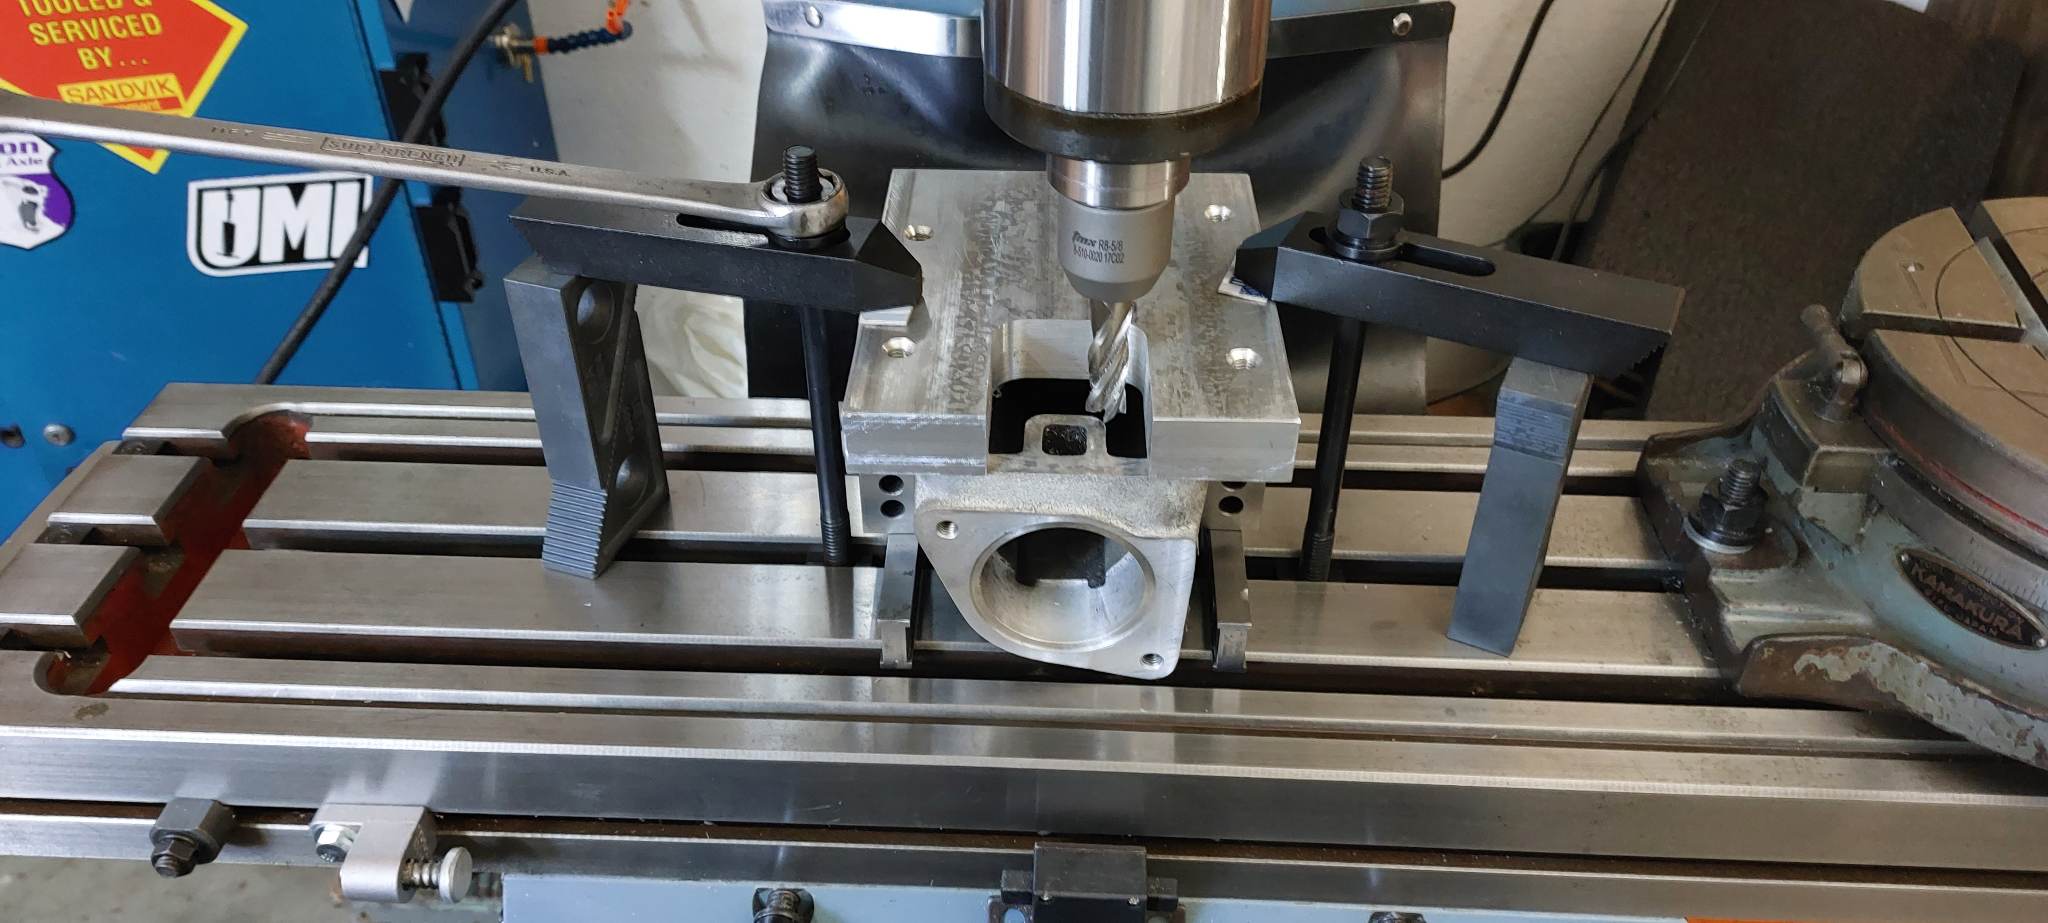
7 align for port matching.
Aligning TB to plenum for Port matching.
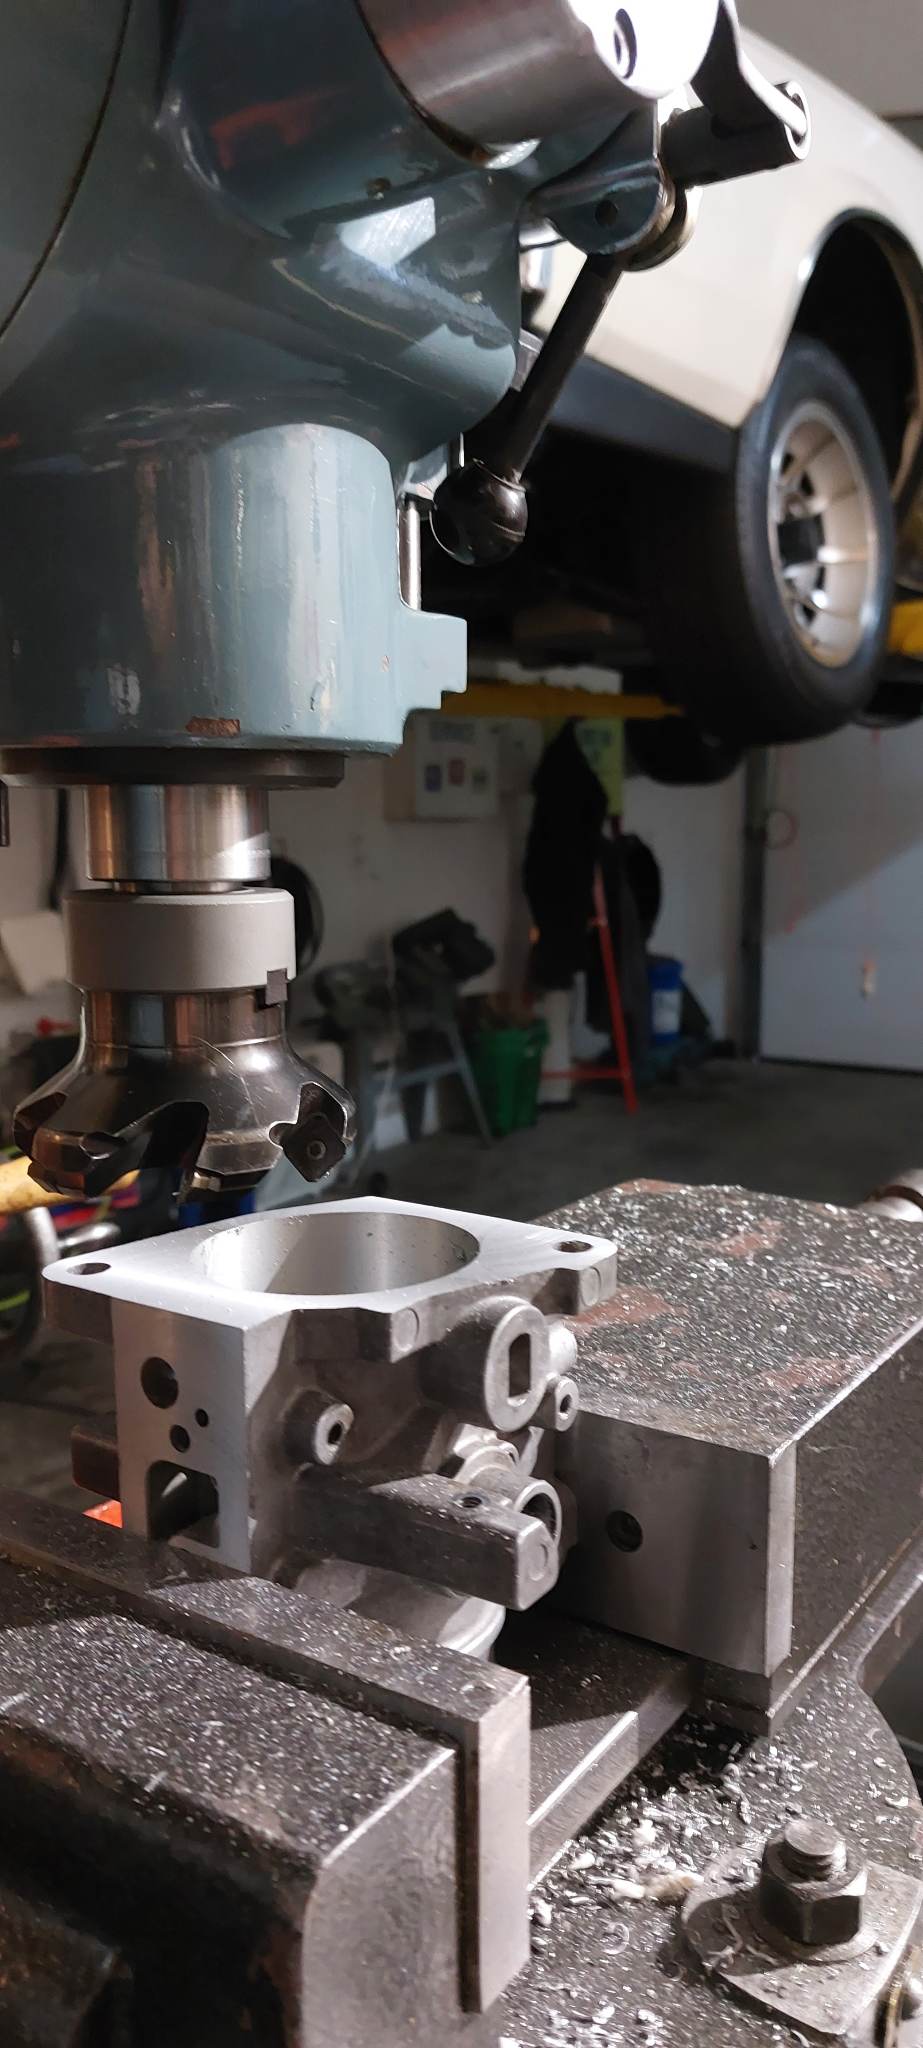
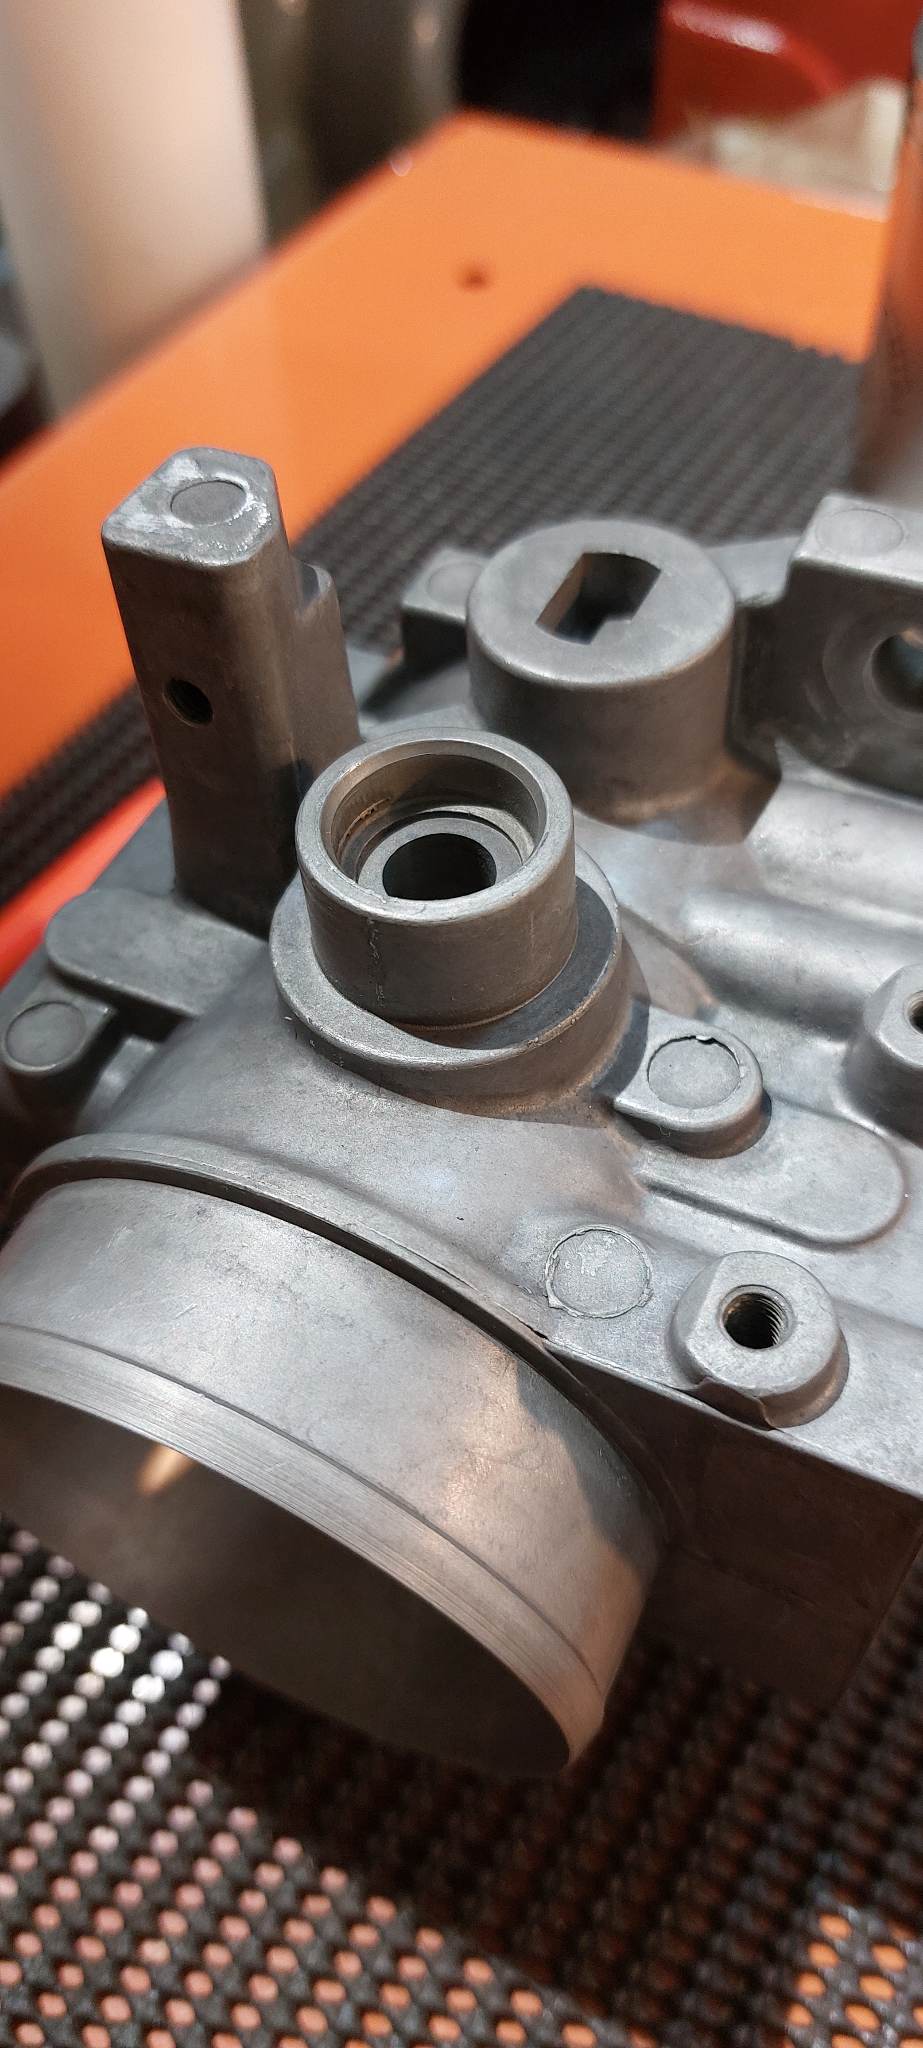
8 Restore flange face.
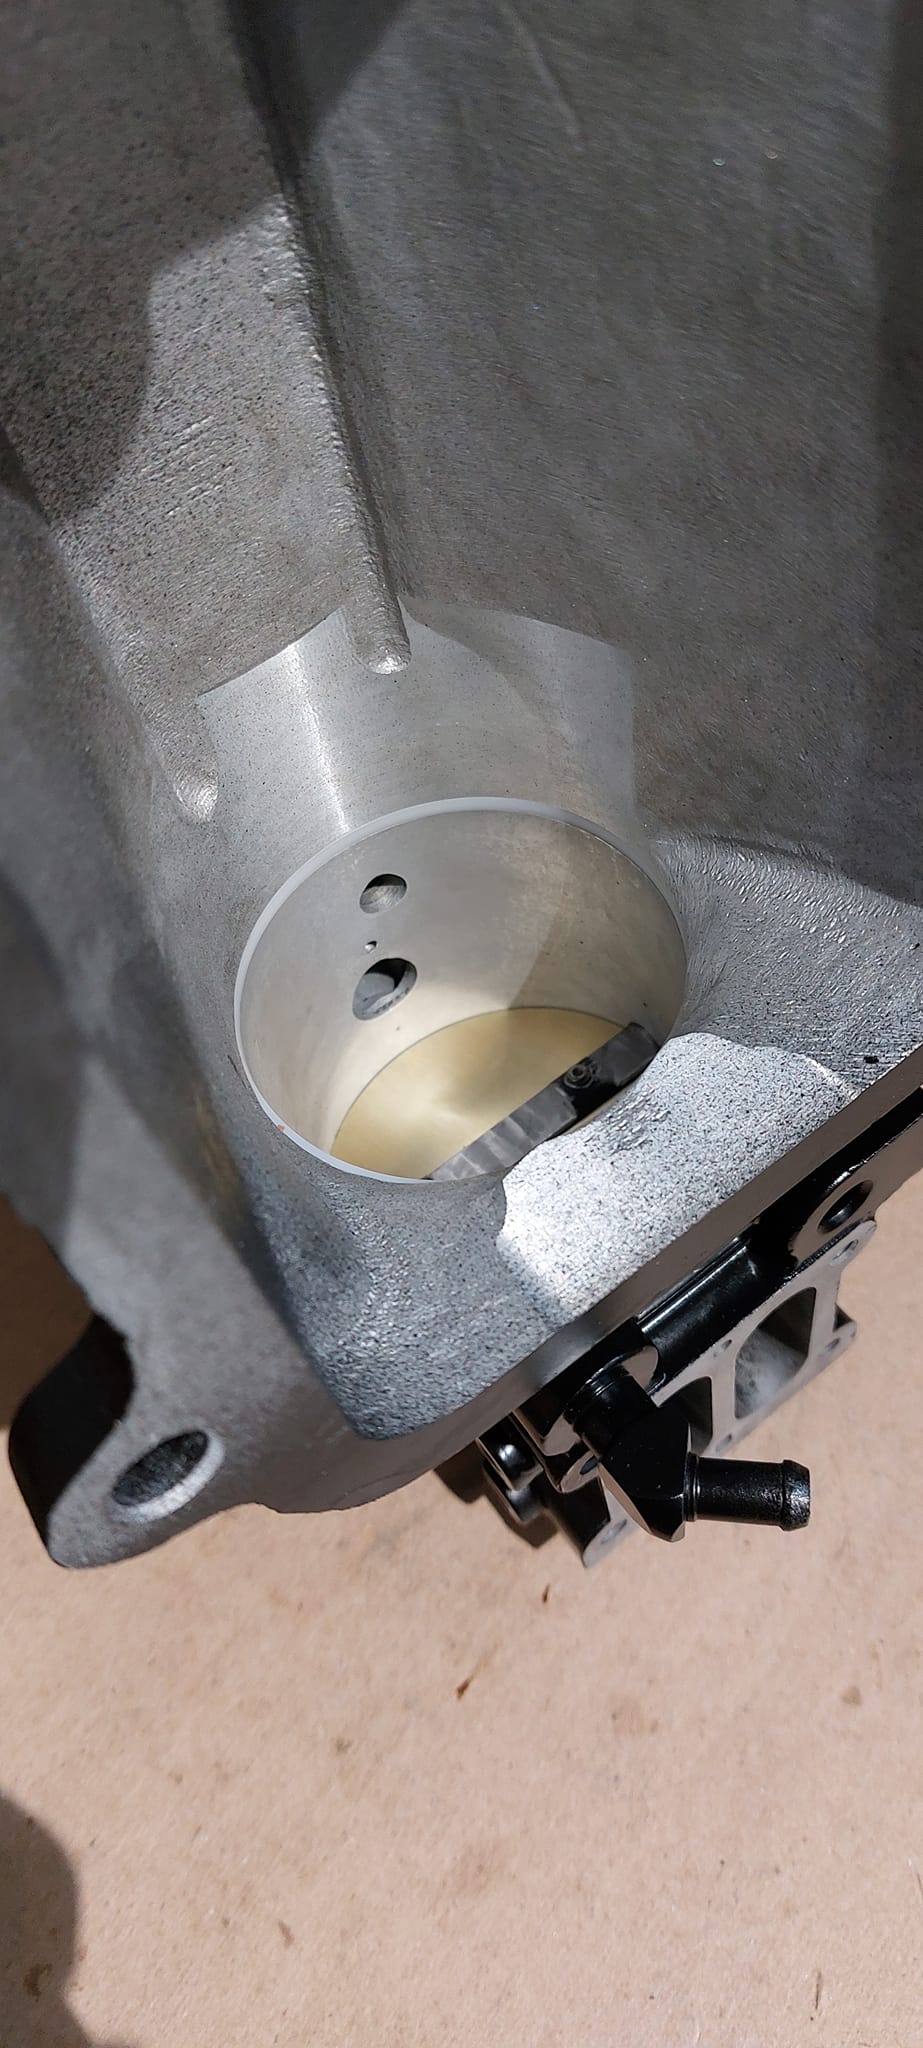
9 already opened up.
This plenum has been opened up (the 3rd pic below)… too bad! It would look nice all machined!!!
.
.
10 his throttle body, nice & good.
11 too much material removed (2nd pic)
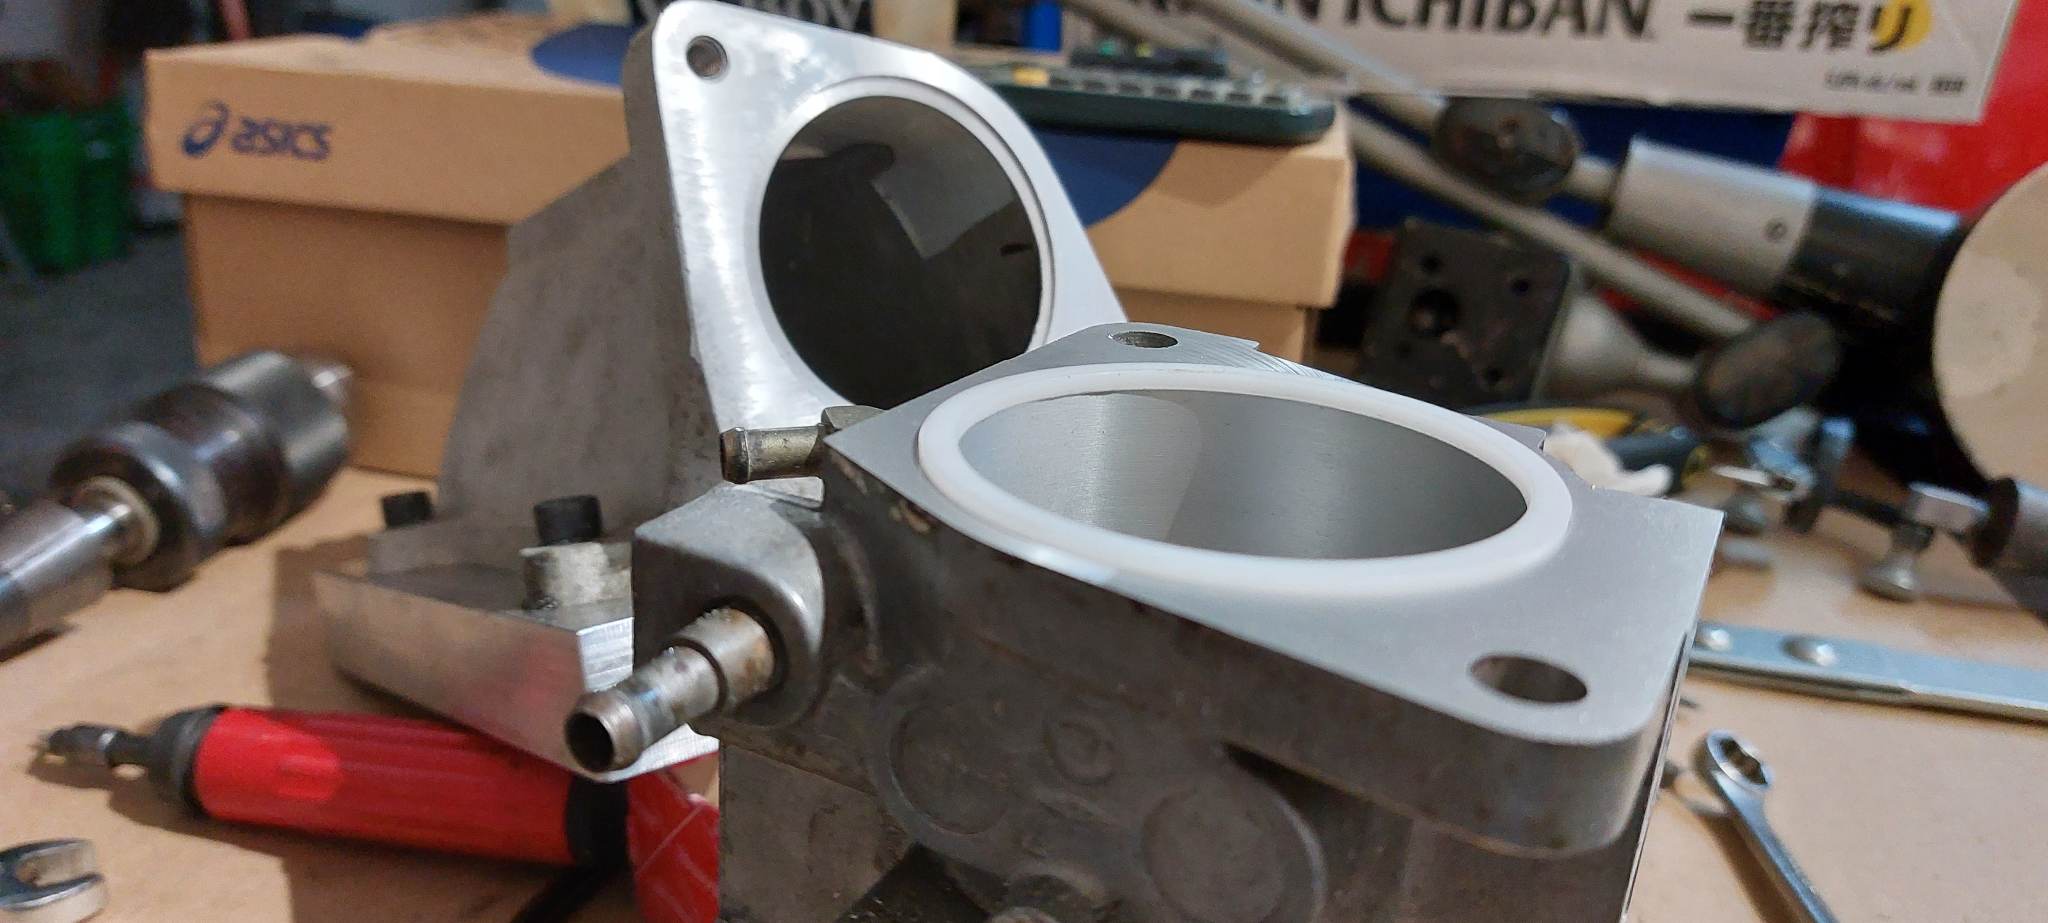
12 alignment seal.
I make an alignment seal that fits both parts (TB & doghouse) and replaces the standard factory gasket
(the new seal is the white nylon ring you’ll see in later pics, that fits into the recessed grooves)
.
.
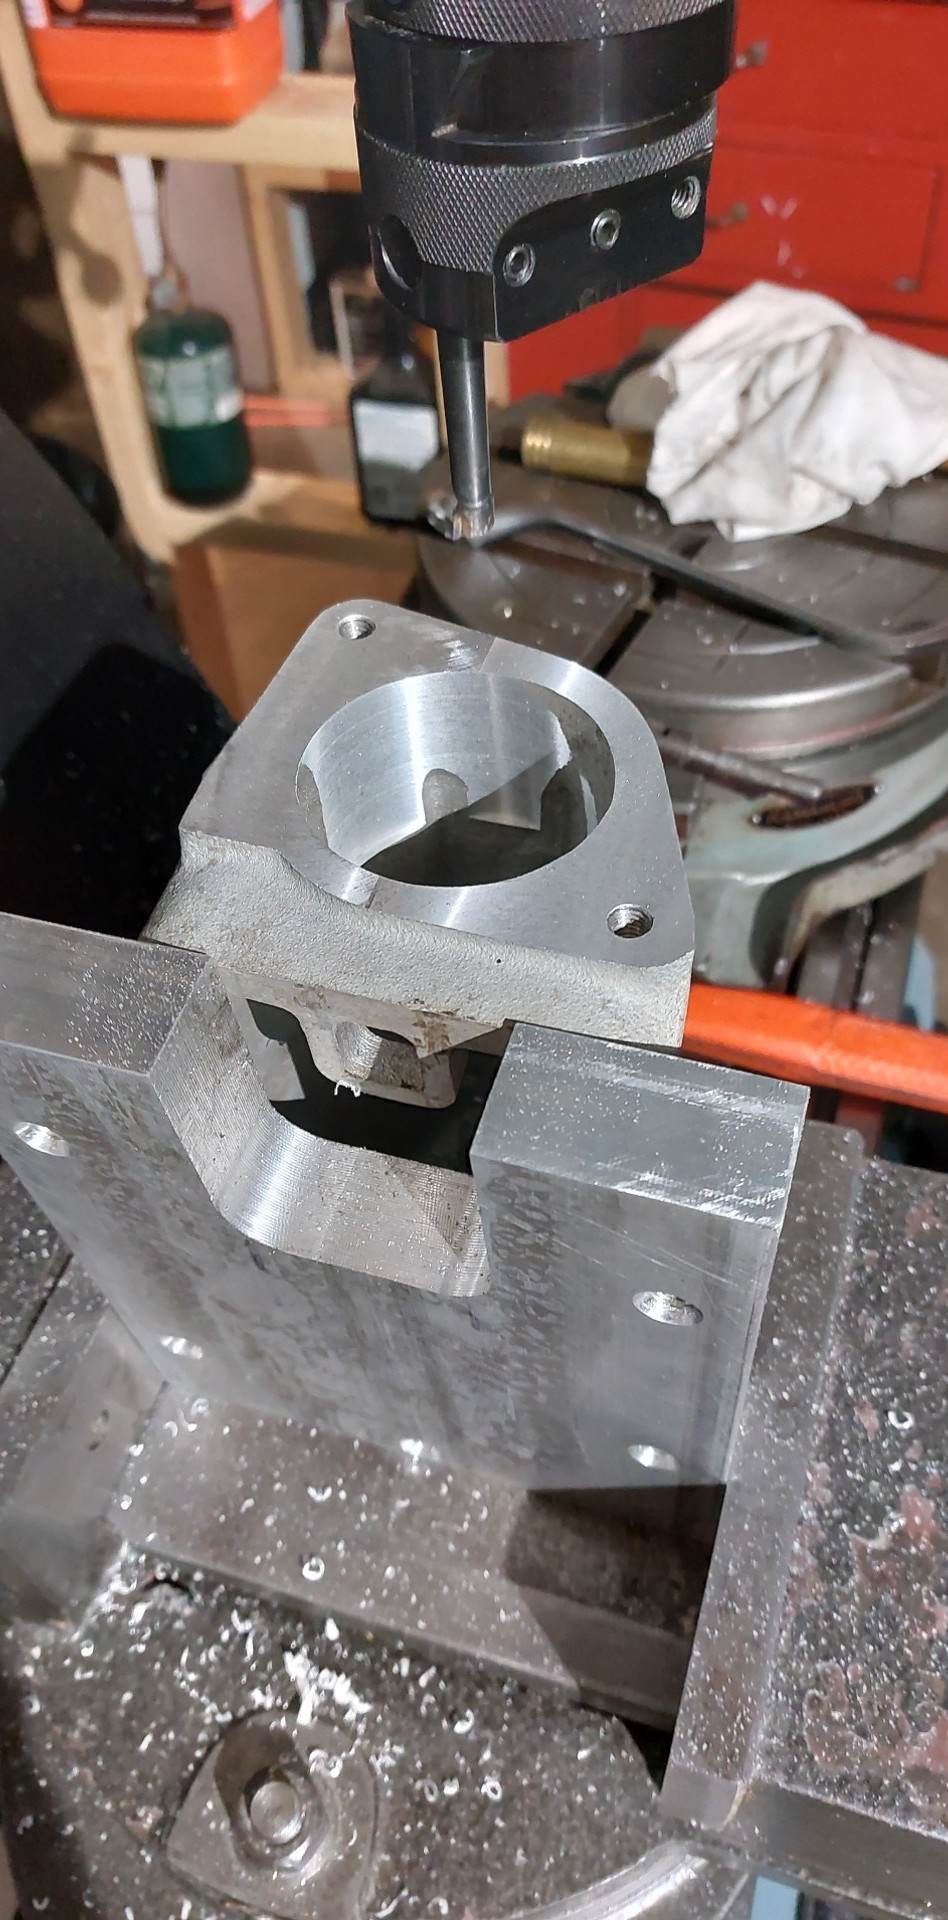
13 All surfaces restored
.


.
14 locate and match
Locate TB bore and colored face to match plenum.
Plus the port matching!
.
.
15 gasketless
No more (regular) gasket! Reuse this one after boiling it in water.
Plus it has a perimeter seal as well as the faces.
This process uses a newly created acetal gasket to seal both surfaces (TB to upper plenum)
[an “acetal gasket” (polyoxymethylene or POM) is a high strength, low friction engineering plastic]
.
.
Throttle shaft and throttle plate plus the seal :
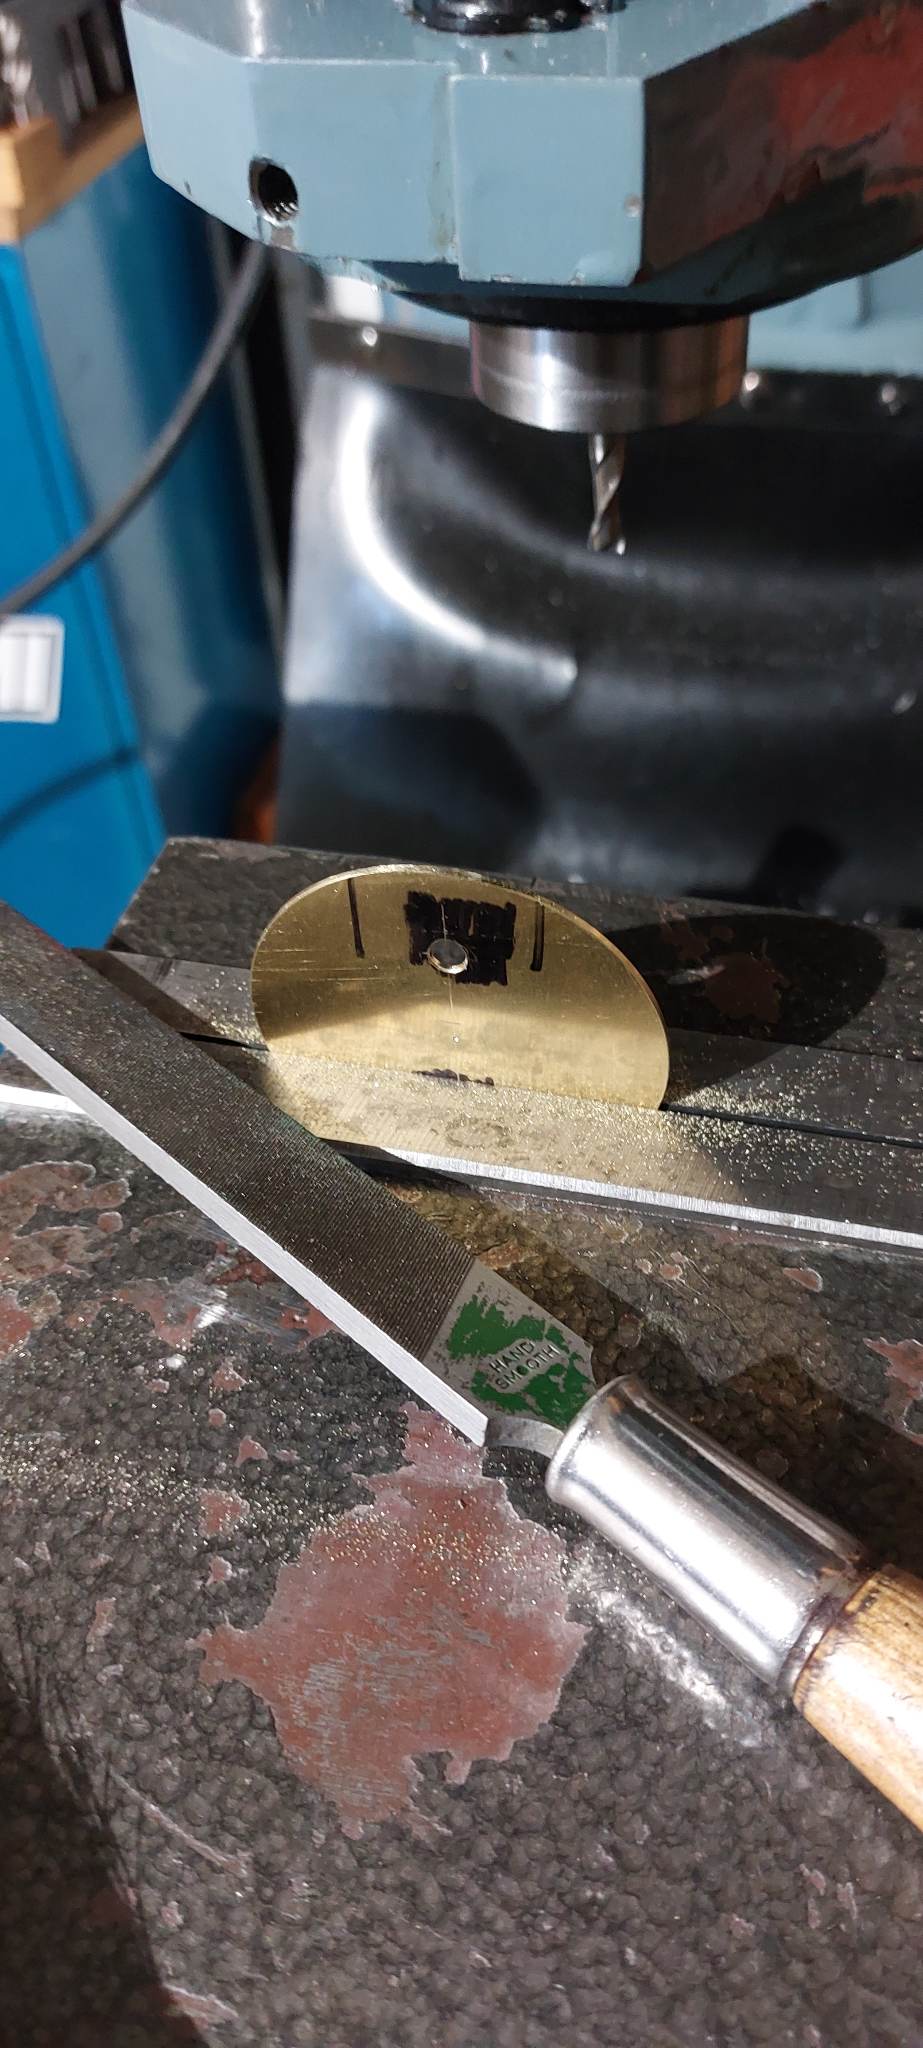
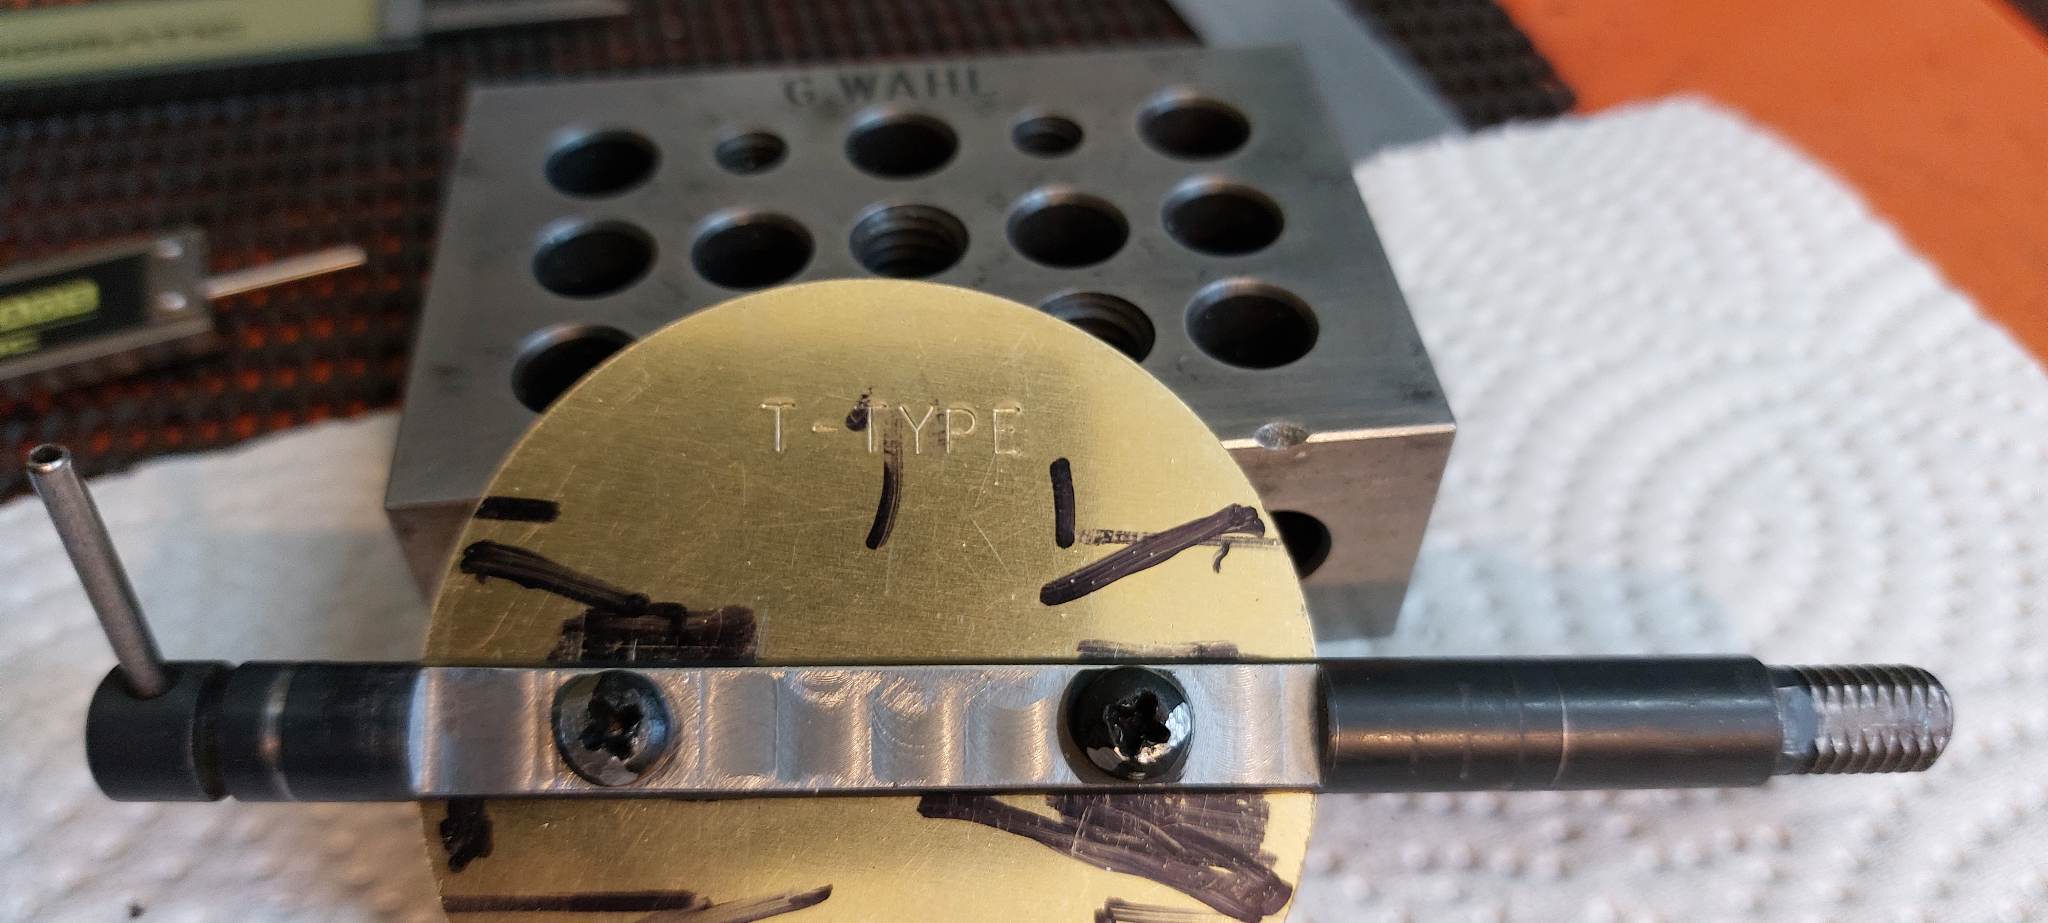
16 square
Turn Square to circle on the lathe by pressure turning
this is used for sizing purposes, as well as to hold everything in place on the lathe (see next step).
{He makes the new throttle plate (circle) out of the squares}
62mm makes it oversize (by .5mm) for hand fitment inside the throttle body later.
17 make new TB plate.
(the silver disc simply holds the gold/brass plate in place to turn it)
(the brass is the final plate – the factory used a brass plate as well for the throttle plate)
(he says aluminum is also used sometimes)
.


.
The next steps:
(stock) Gasket replacement time!
It’s fitted to the newly counterbored surfaces, and provides a perimeter seal in addition to the flanges.
Port matching and sealing the Throttle Body & Plate together.
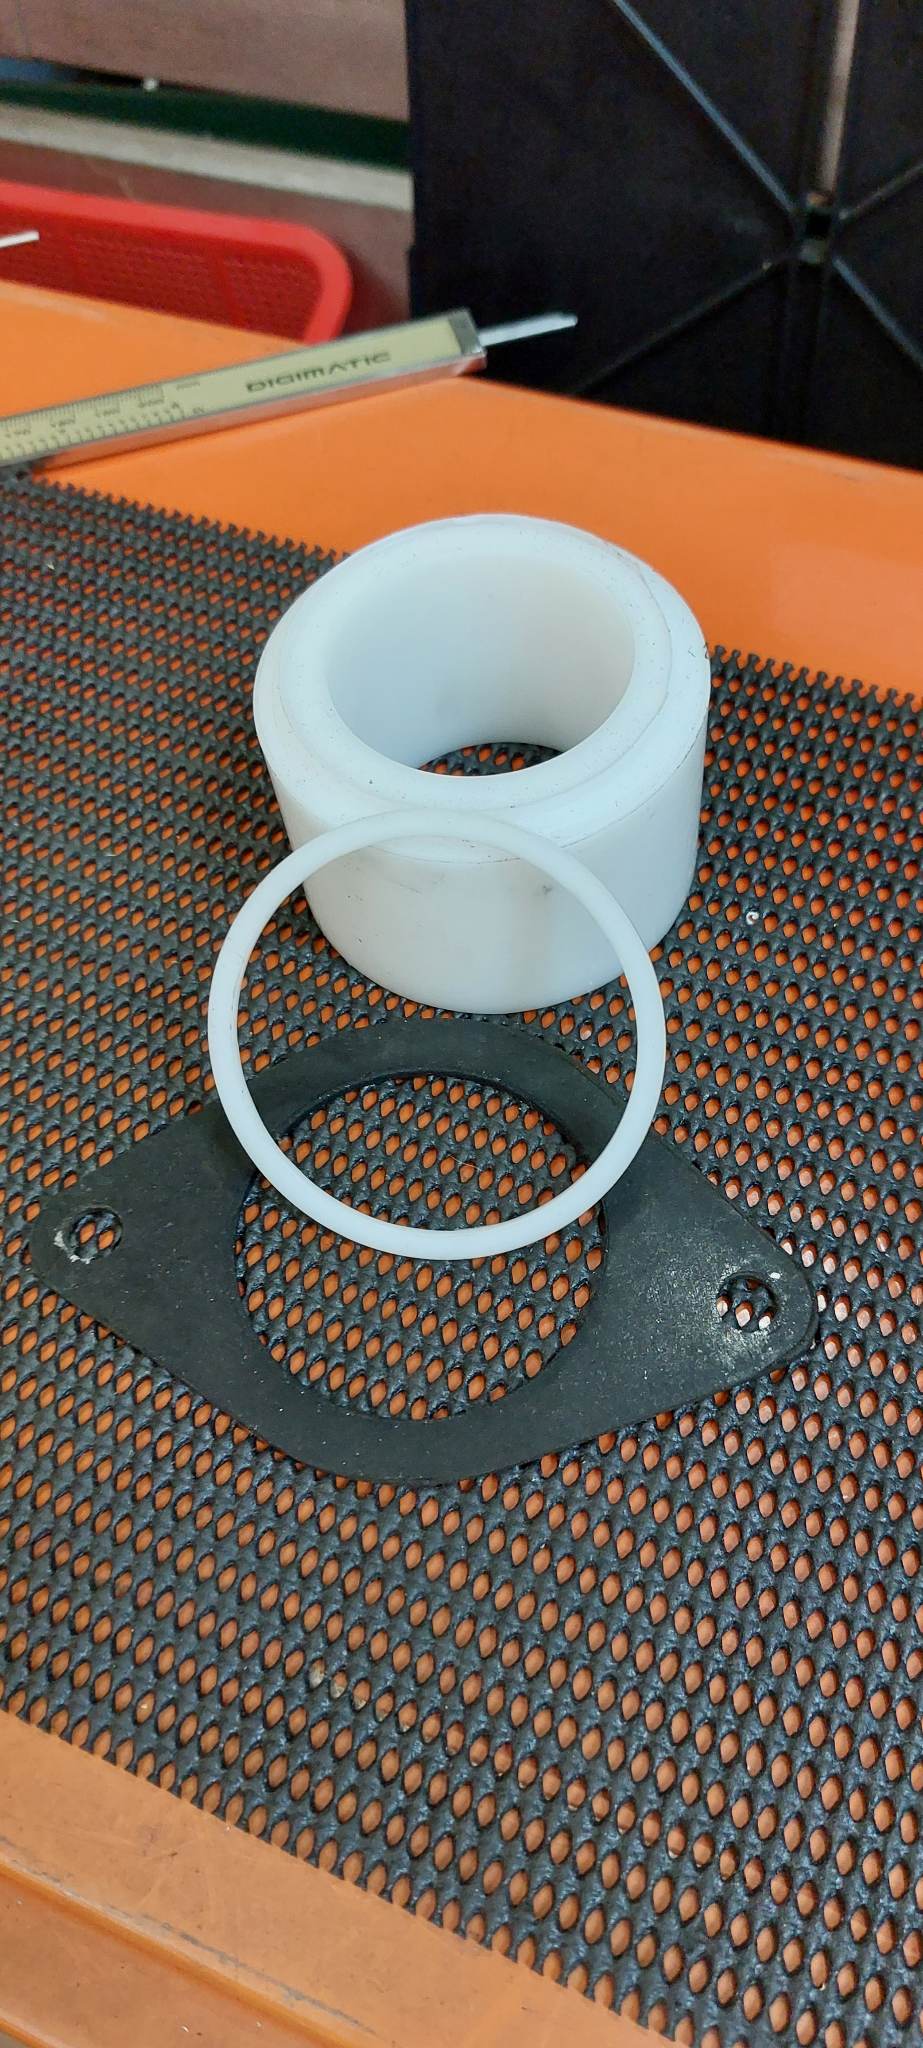
18 create new seal.
This new seal can be boiled to restore it, and use it again.
(the ring is created from the big chunk of material)
.
.
19 fitting the throttle shaft to the throttle plate.
1/2 shaft time, back to the mill.
The original shaft itself is milled down, on both sides for more efficient flow.
(note that the factory throttle plate is still attached to the shaft when this machining is done)
.

.
20 new plate
new 62mm plate ready for screw holes.
21 hand fitting
The new plate is bigger and needs hand fitting, accomplished by just filing down the sides.
.
.
22 throttle plate is fitted!
(note that this specific plate will be painted black when it’s done, not shown. This was a special request by the customer, and is generally not one of the steps performed in this process)
.

.
Just the shaft seals to go
Here is the shaft seal machining.
Line up and ream for new shaft seals:

.
23 final cleanup for best fit.
Just a little clean up now and this job will be complete.
24 Egr delete
.
.
Final assembly:

.
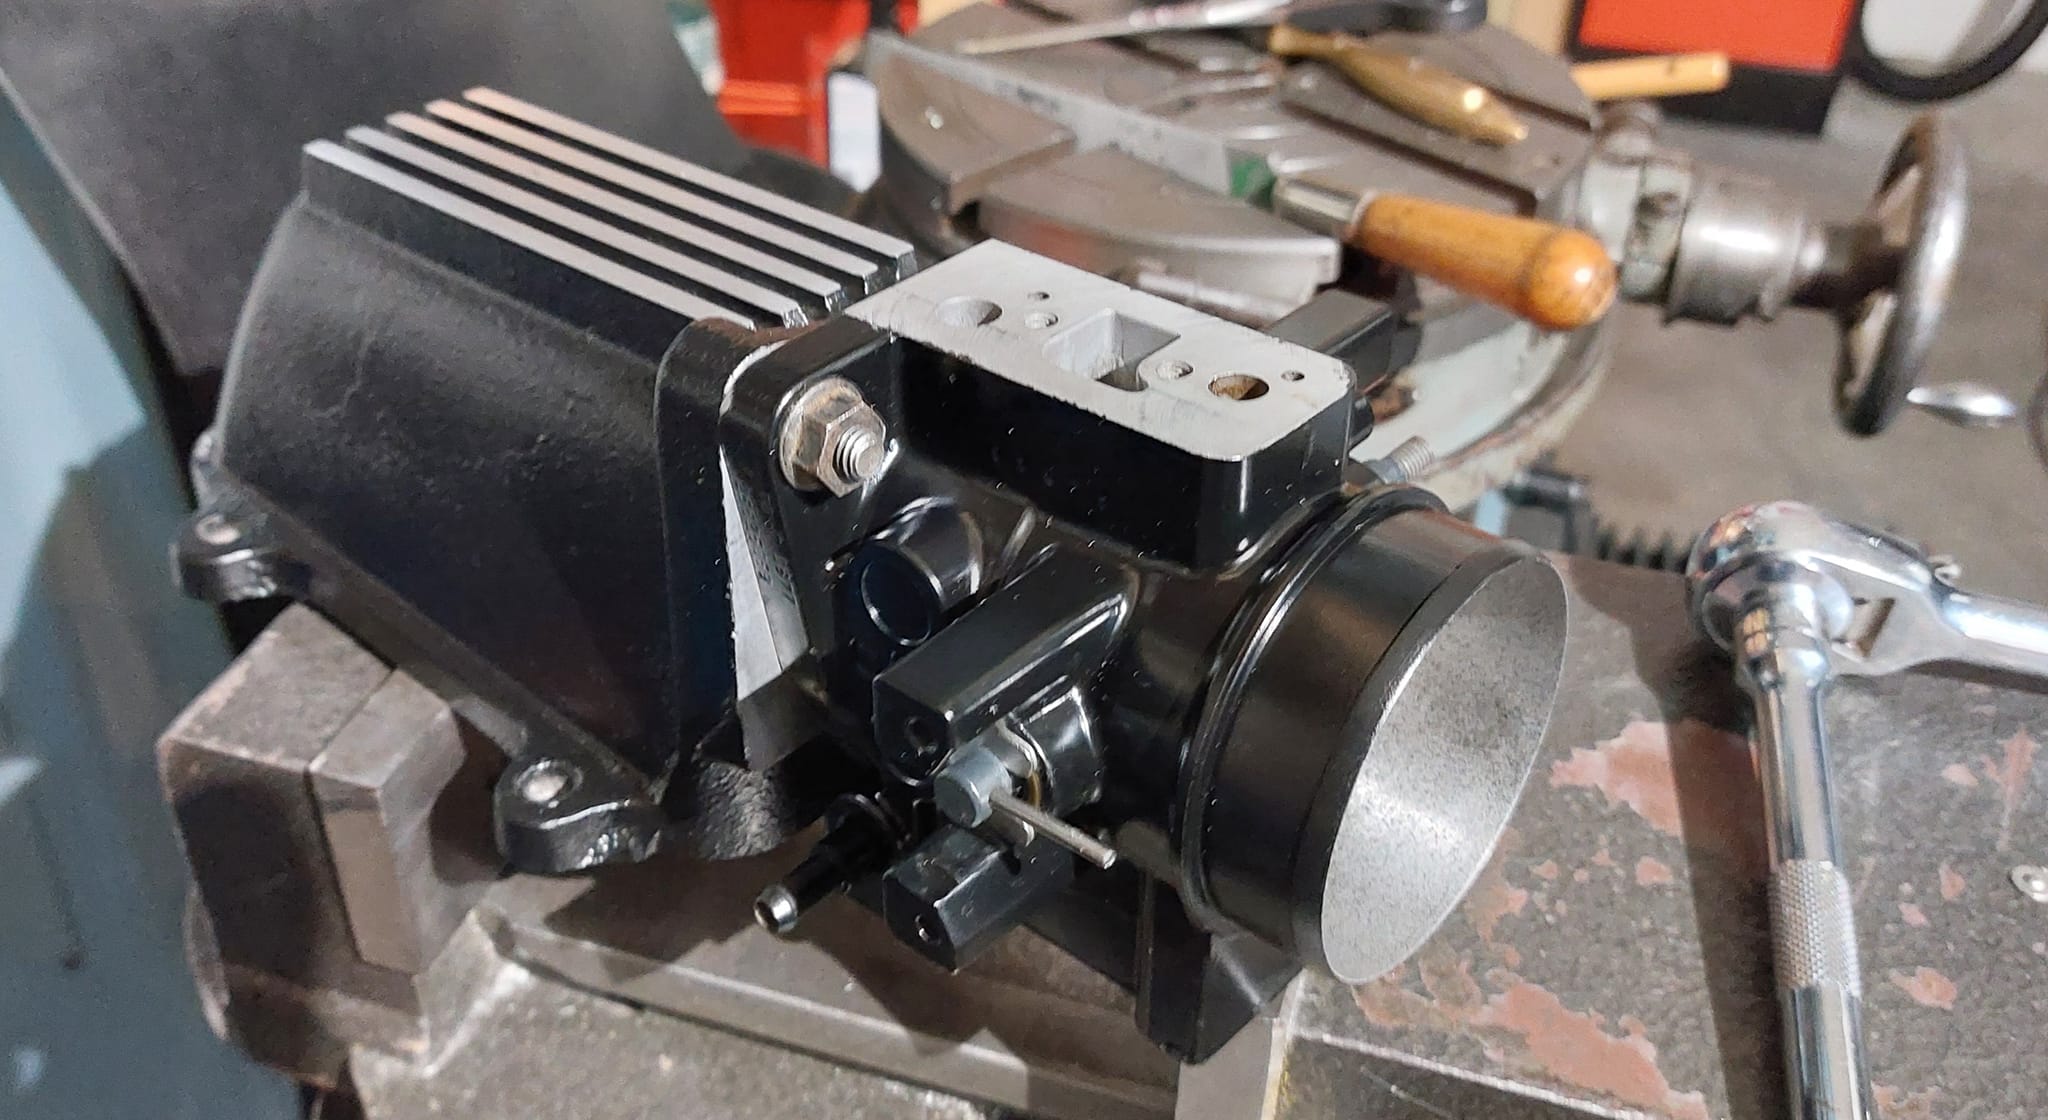
THE FINISHED PIECE, as shipped to the customer:
.

.
And there it is! A newly improved, ready to go, throttle body for your Buick Grand National, Turbo T, T-type, Regal Limited, Buick GNX, or other Buick 231 turbo engine you may have that can probably benefit from this modification.
.


