


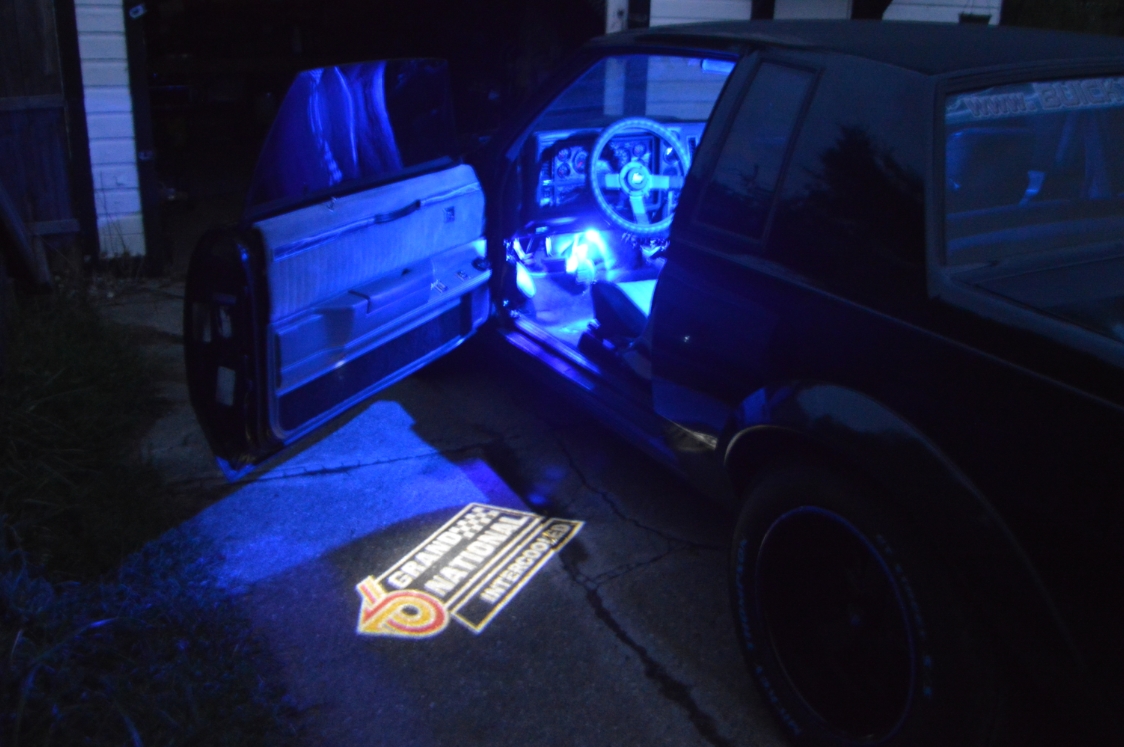
Ghost Lights (AKA “welcome lights,” or “shine down door lights” or “puddle lights” or “projector lights”), are lights that shine down from the door onto the ground whenever you open the doors.
We bought these a few years back and are finally now getting around to installing them.
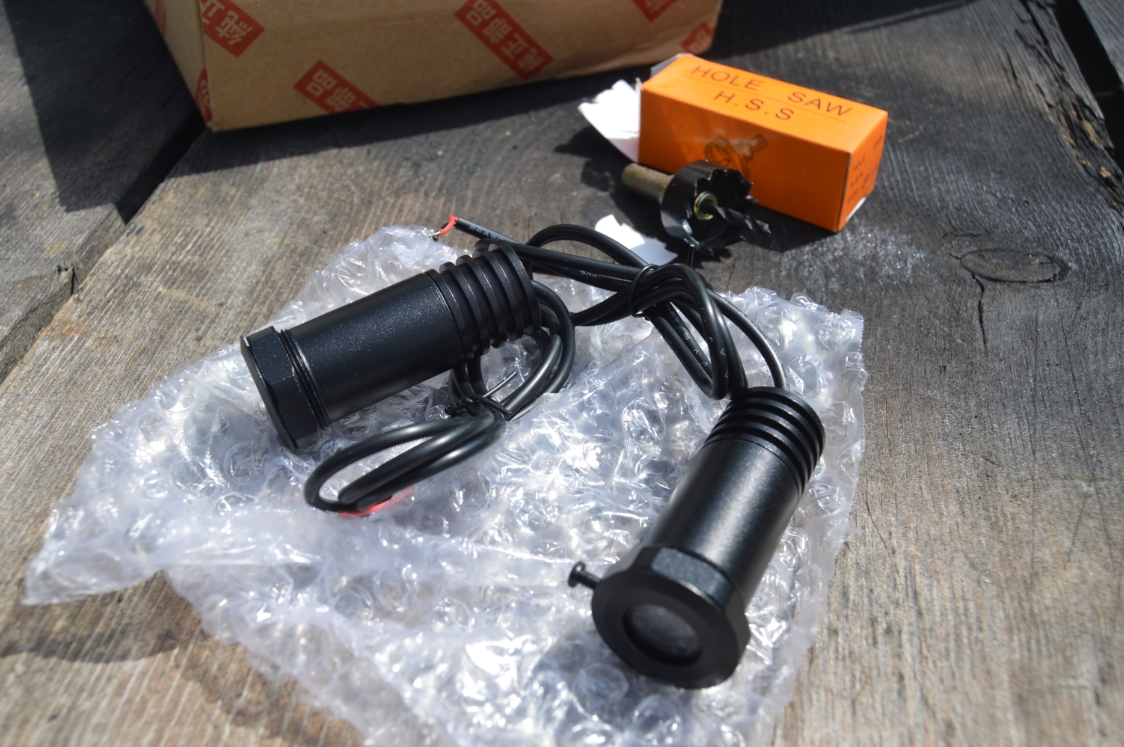
These are the barrel type units, which are about 2″ long & 1″ diameter.
There are newer styles available that attach via double sided tape to the inside of your door at the bottom, but the type we are using today require drilling into the door somewhere.
These have 3 watt CREE style LED’s in them, of which 3 watts really isn’t much, but the CREE type is much brighter than other forms of LED lighting, so they are very sufficient for this purpose.
Bought on ebay for about $25 shipped (direct from China – expect your package in 4-6 weeks!) some are still available if you search (but now cost about $30-$35).
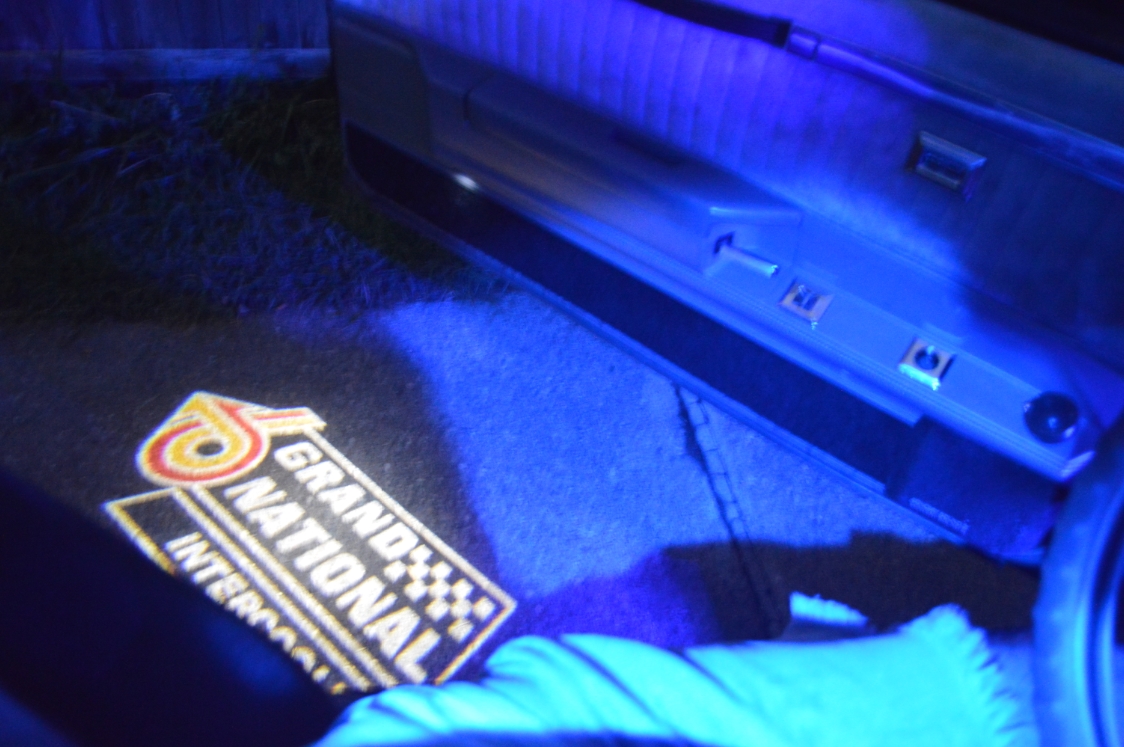
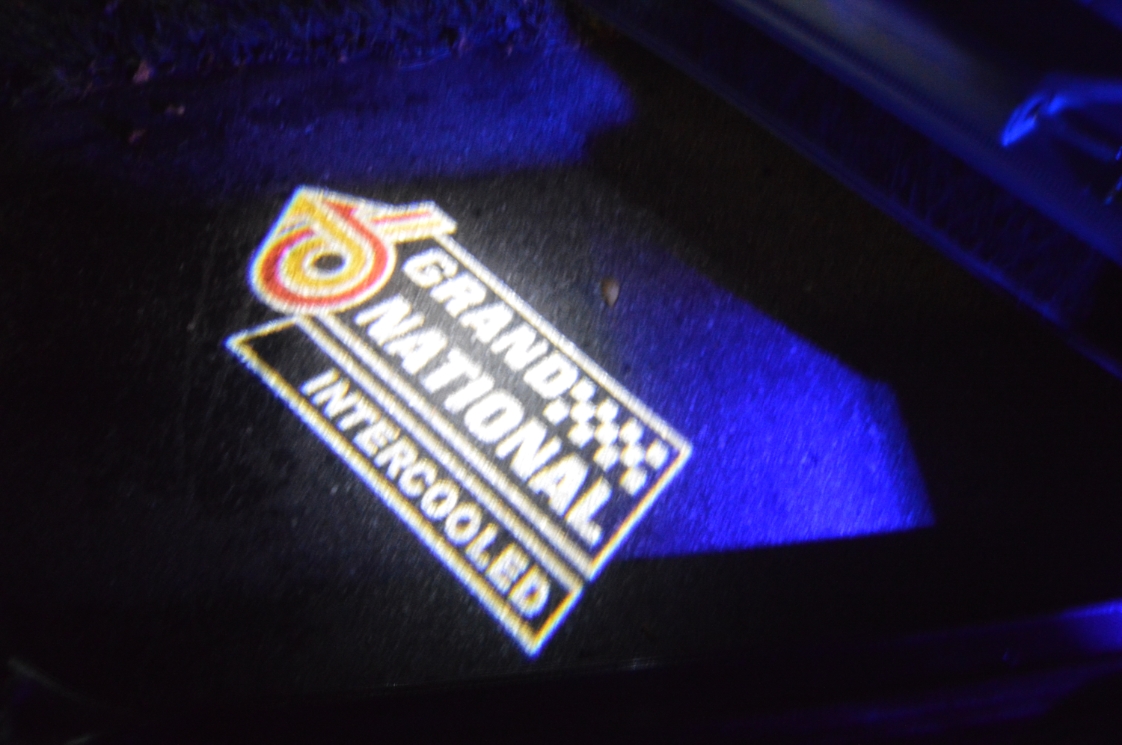
We acquired a set (of 2) with the Grand National emblem on them.
.
.
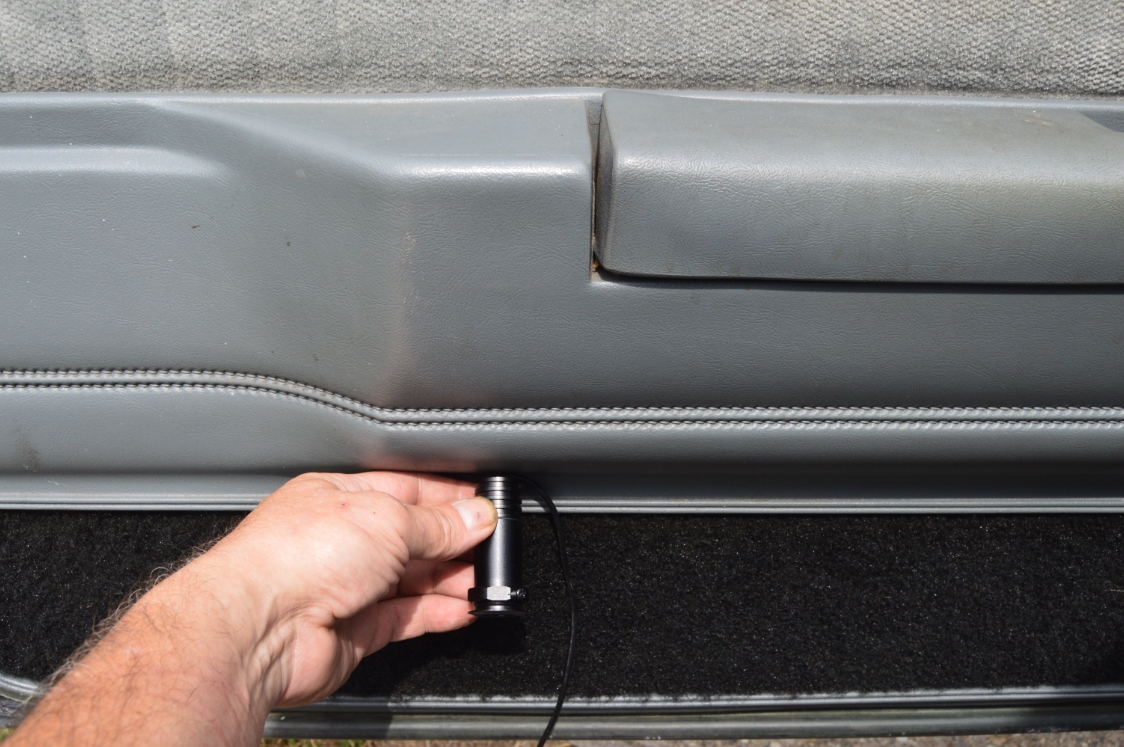
The other examples I have seen from these being installed, are with these mounted to the bottom of the door frame. However, on these G-body Regals, the doors aren’t wide enough to do that at the bottom.
So, we are mounting them in the lower door panel, which might be more beneficial, since the lights will probably shine closer to the body of the car.
(and in the door panel, you can position them somewhat on an angle to get them to shine exactly where you want)
The pics herein are all from the drivers side of the Turbo Buick.
.
TIME FOR COMPLETION:
– about an hour
.
PARTS:
– set of 2 of Grand National emblem ($25 at the time)
– 4 pieces of wire (each about 2′ of 18ga)
– wire taps (or solder or electrical tape)
.
TOOLS:
– drill (a drill bit was included with the lights)
– phillips screwdriver or small allen wrench (to tighten set screw)
– 11mm socket (door jamb switch)
.
HOW TO:
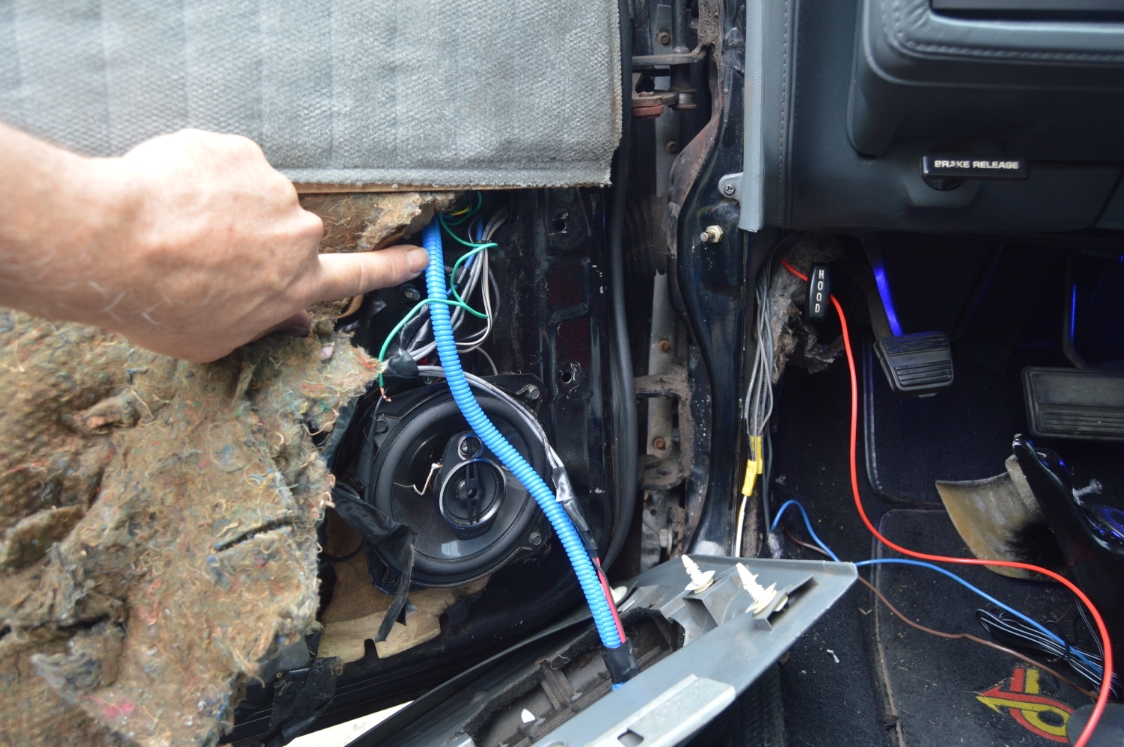
1. remove both lower door panels so you can access the back sides of the door panel. You will also have to remove both kick panels from inside of the car.
2. look inside door panel to figure out where you want to mount the projector lights (if different than where we are mounting).
[make sure nothing hits or is in the way of the light]
[on the drivers door, we put the Buick GN logo ones about 12.5″ from the outer edge (far left side) of the door panel. we did the same for the passenger side.]
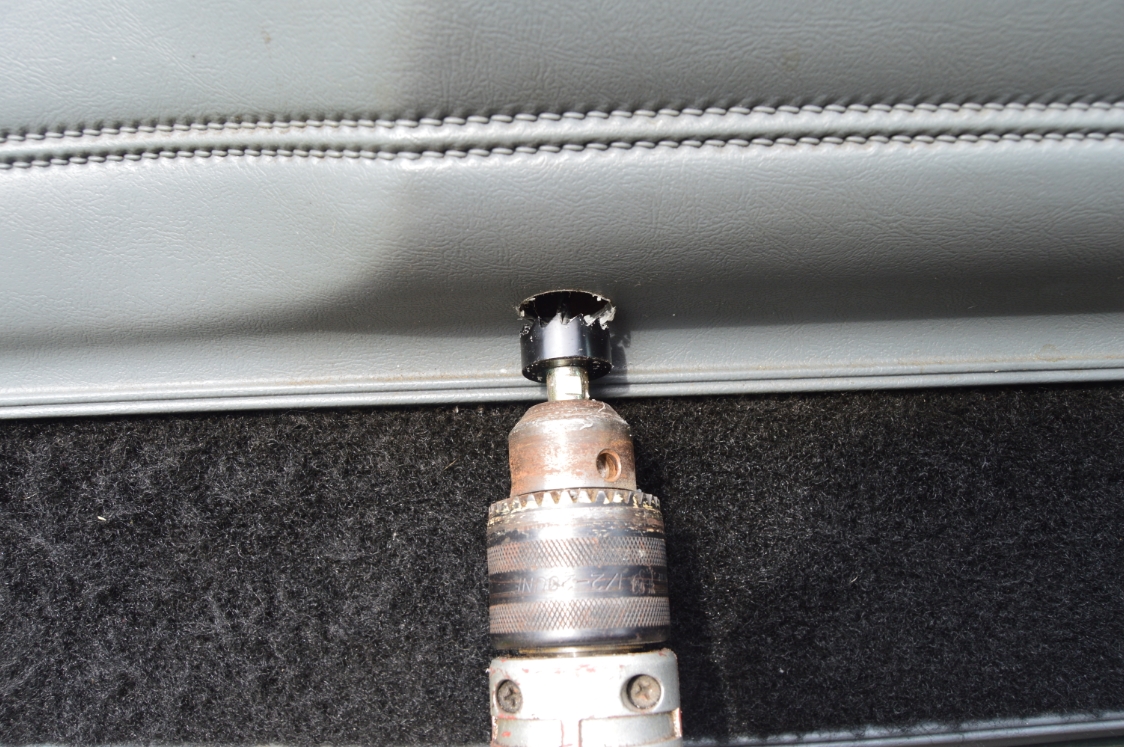
3. drill both holes in door panels.
.
![]()

.

.
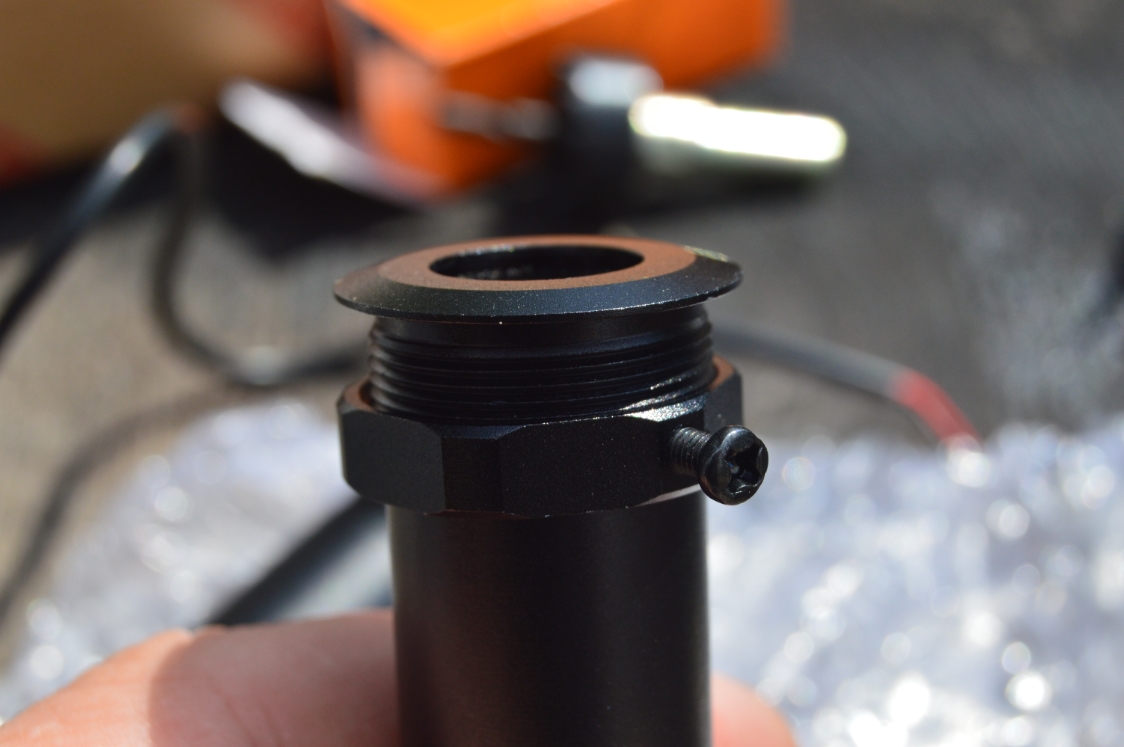
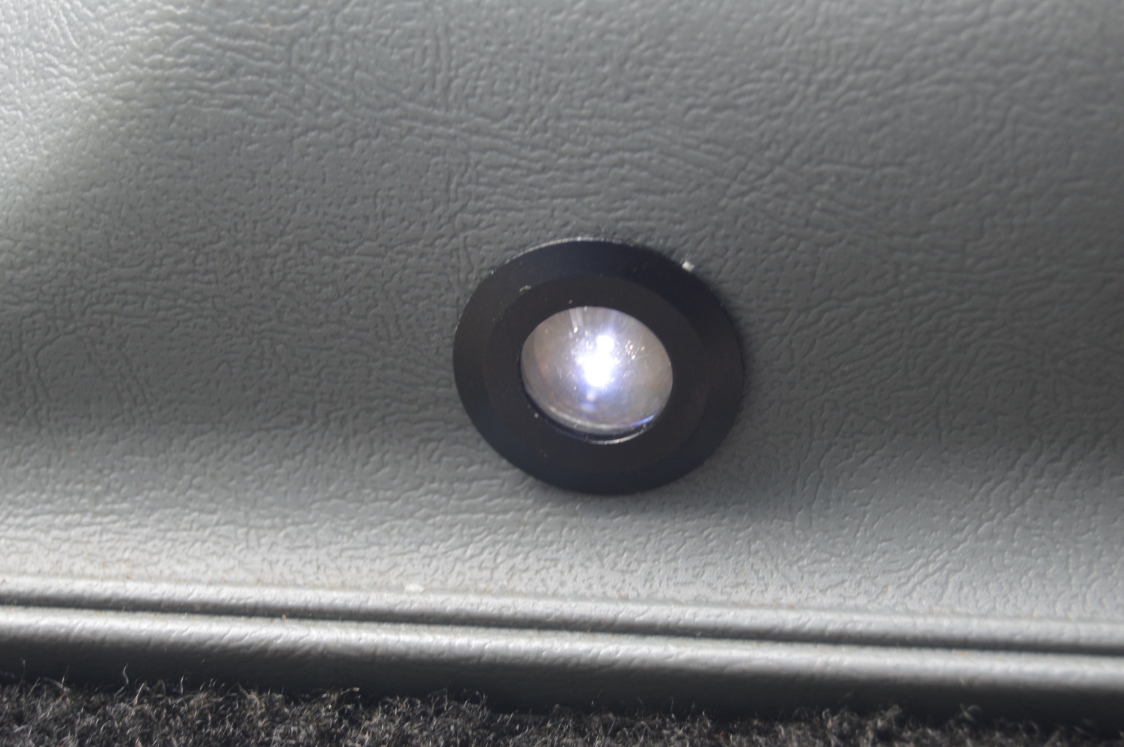
4. insert the light, position the symbol on the ground the way you want it, then tighten it down with the nut. A set screw holds the nut in place so it doesn’t wiggle around.
[you can attach a temporary 9-volt battery to the wires to get them to come on so you can see and position them the way you want]
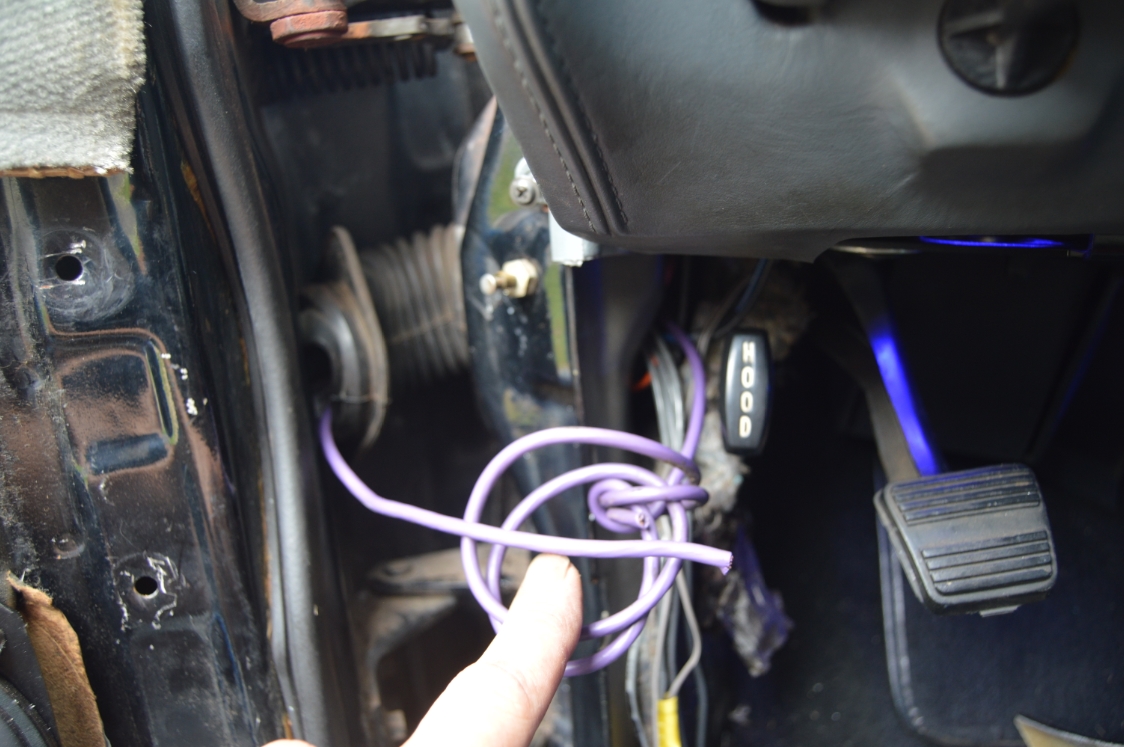
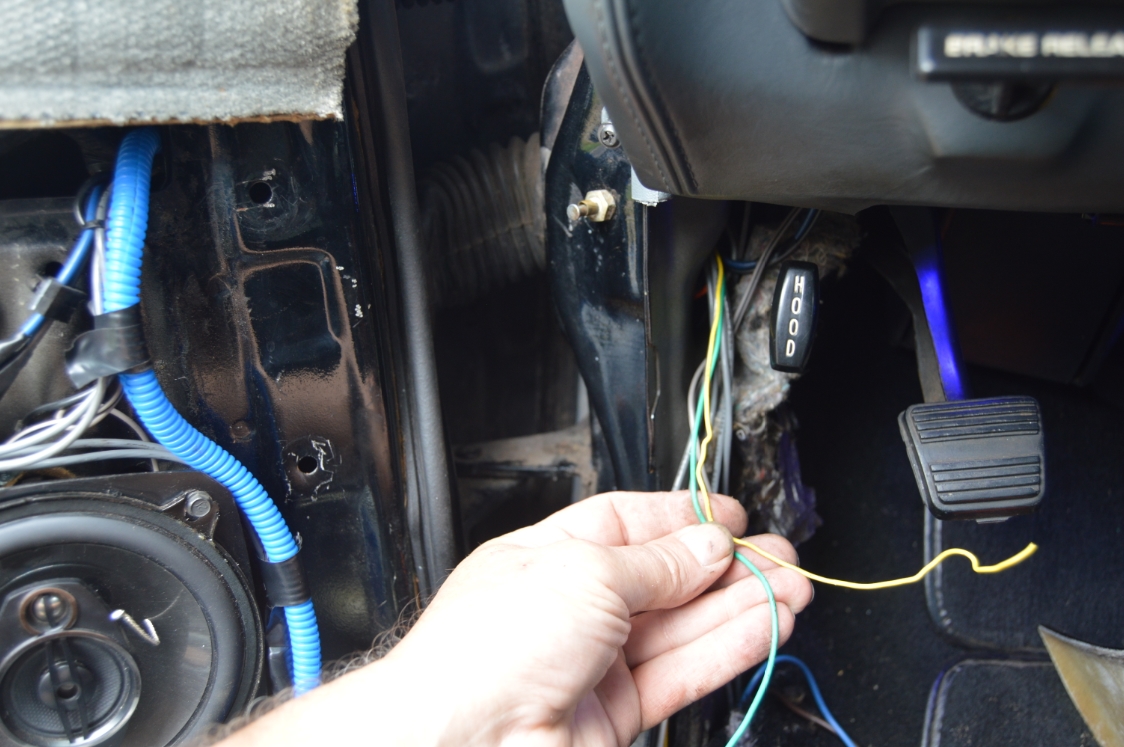
5. connect the wires together with the 2 new pieces of wire (1 for positive, 1 for negative) about 2′ long.
[the supplied attached wires aren’t long enough to reach where they need to go]
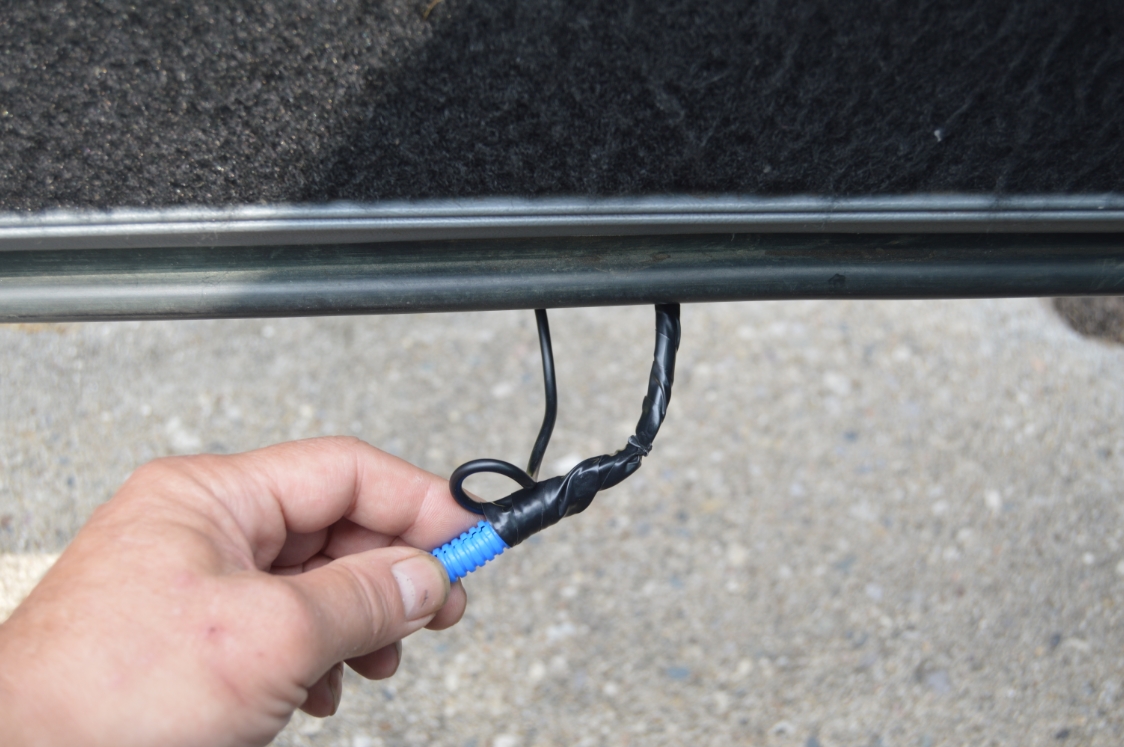
6. run the wiring (between the panel & the door) over to the hinged side of the door, into the door and up and out the boot in the door jam, bringing it to the inside of the Turbo Regal.
[we taped the wiring down to the backside of the door panel, and ran it into the door in one of the middle holes in the door closest to the hinges]
[make sure when you run the wire inside the door you keep it away from the areas that the window travels]
[without a doubt, the hardest part of installing any wiring inside the door, is always having to run it thru that door jam boot! uggg!]
[you may find it’s easier to partially remove the boot, on the door side, to get the wires partially through there, then run them the rest of the way]
[an easy way to run the wire thru the door boot: take a thick wire, like 10ga or bigger, or a metal coat hanger, and from the inside of the Turbo Buick, run it thru the boot into the door. Then take your ghost light wires and wrap them around the coat hanger and pull them back thru the boot]
.
.
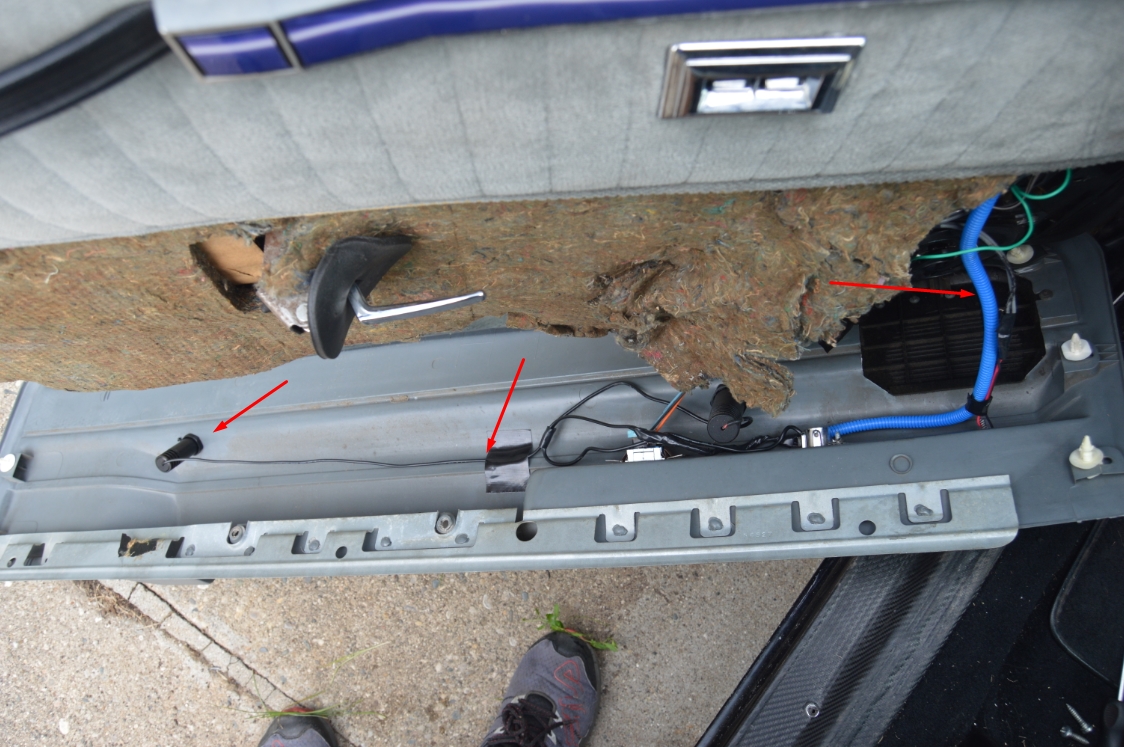
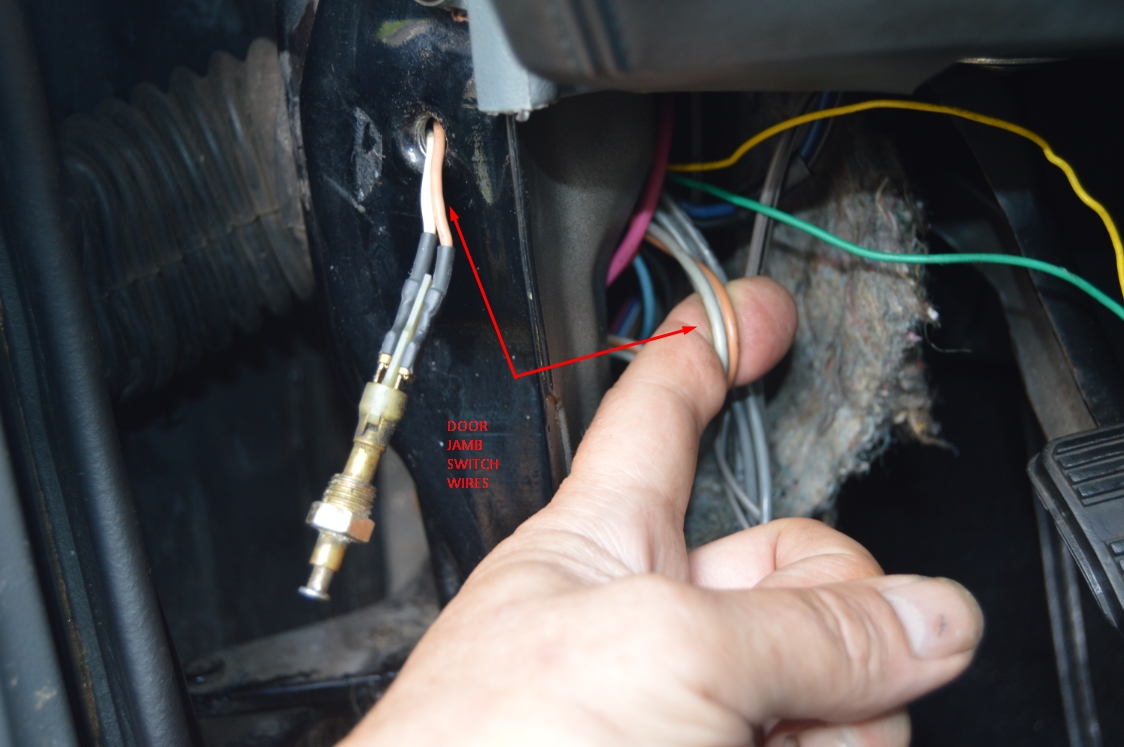
7. connect the black (negative) wire from the light to the door jam switch WHITE wire (on the back side of the switch). This is the ground for your ghost lights.
[the switch is in the door jam in front of each door, on the body side. the ground wire attached to it is behind/inside the kick panel area]
[the drivers side has 2 wires (a white one & a tan one) – you want to use the white wire. The passenger side has only 1 white wire. MAKE SURE you grab the CORRECT white wire on the inside of the car – there’s more than 1 in that area!]
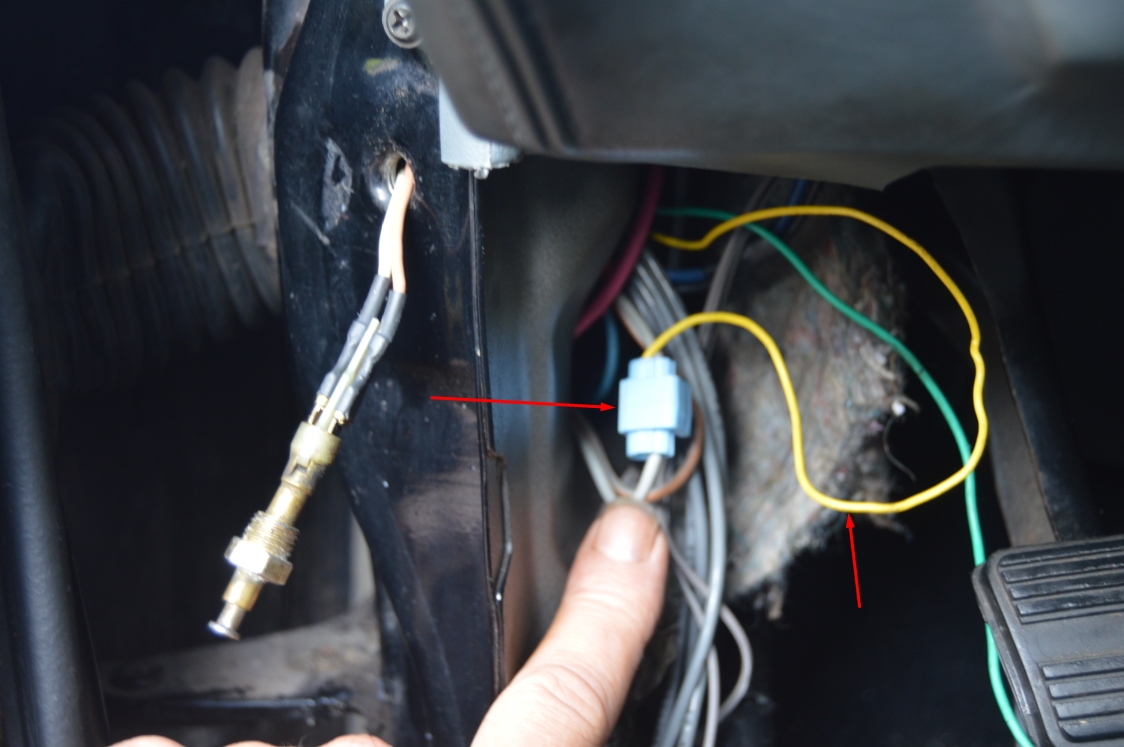
8. connect the red (positive) wire to your dome light circuit. Alternatively, you can connect it to any power source wire (or fuse box, etc.).
(we tapped them into the fuse box directly)
[most pink/black wires are power. the puddle lights will only come on when they are grounded via the door switch. so they only come on when the door is open.]
[note that the lights will only come on, on the side of the car where the door is open. meaning the driver side lights will only come on when the driver door is open. the passenger side lights only come on when the passenger door is open.]
[the ghost lights are wired like the dome light, they are constant hot (but not lit up) until they get grounded, that’s when they come on]
[for the passenger side, we ran the wire behind the dash, all the way across to the driver side, and spliced it into the driver side power wire for the puddle light]
.

.

.
9. once both positive & negative wires are connected, your ghost lights should be on (since you should have the doors open). If they are not on, check your connections.
10. close the door & make sure the lights turn off as well.
11. if the lights come on, and then shut off, as they are suppose to, all is good. reattach the lower door panel.
12. reinstall the kick panels and anything else you removed.
Another job done!
.
.
NOTE:
These welcome lights use a 23mm hole saw and use a phillips screwdriver to secure the set screws down.
Newer ones may use something totally different.
.
We chose to mount these lights near the bottom of the door panels (see pics), You can mount these projector lights anywhere you like, the higher you mount them, the bigger the image becomes.
Also, from that spot we mounted it at, the higher up (towards the armrest) you go, the closer the GN image will be towards the bottom of the car. You can vary this angle to get the projector light to point to where you want it.
If you have the know how with wiring, you could always wire these up to your alarm system so that they come on when you unlock the car (same like your running lights coming on when you unlock it).
.


