


We initially wanted to install “just” a subwoofer for the sound system, which turned into making a complete panel to go across the trunk shelf area, which then snowballed into a “pretty up the complete trunk area” of a Buick Grand National.
And that’s usually how it goes, right? Start small, then you notice something else while you’re doing the first thing, then it continues on from there. Before you know it, you’ve got yourself into a big project!
It’s not really all that big of a project though, if you take things one step at a time.
First we made a sub woofer box & enclosure (Part 1).
Then we continued on with side pieces & the tail section (carpeted trunk kit Part 2).
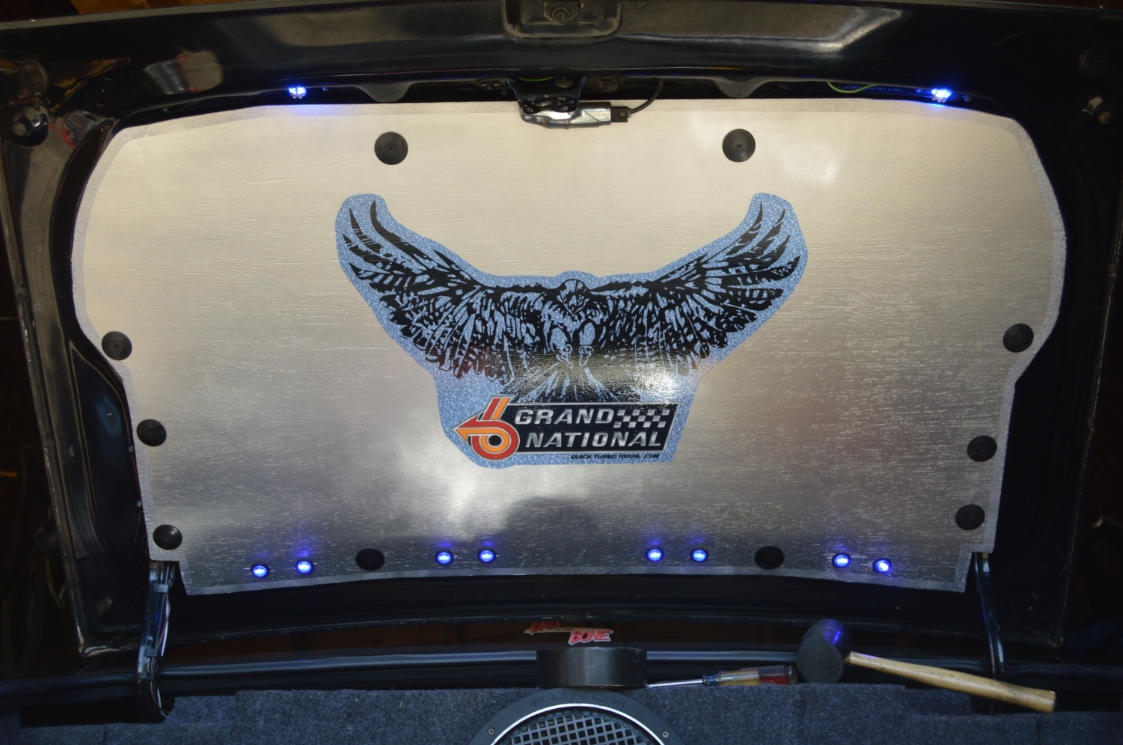
Today, we are completing the total trunk area by creating a trunk liner for the Buick Turbo Regal we’re working on (Part 3).
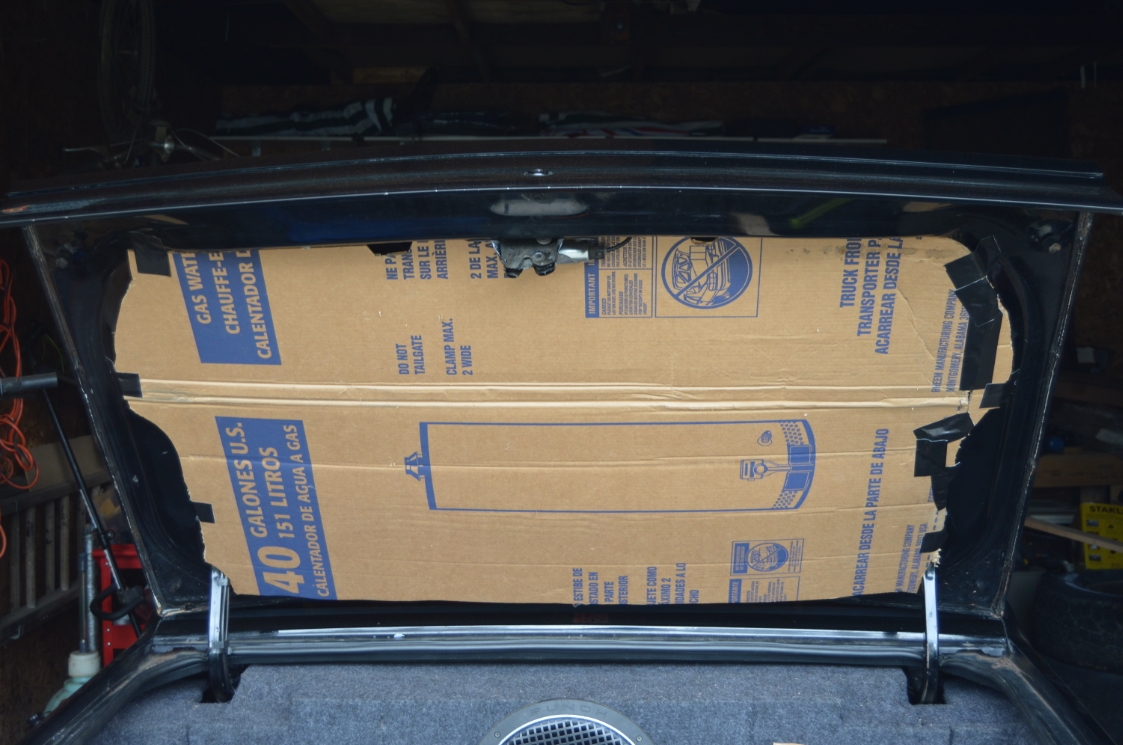
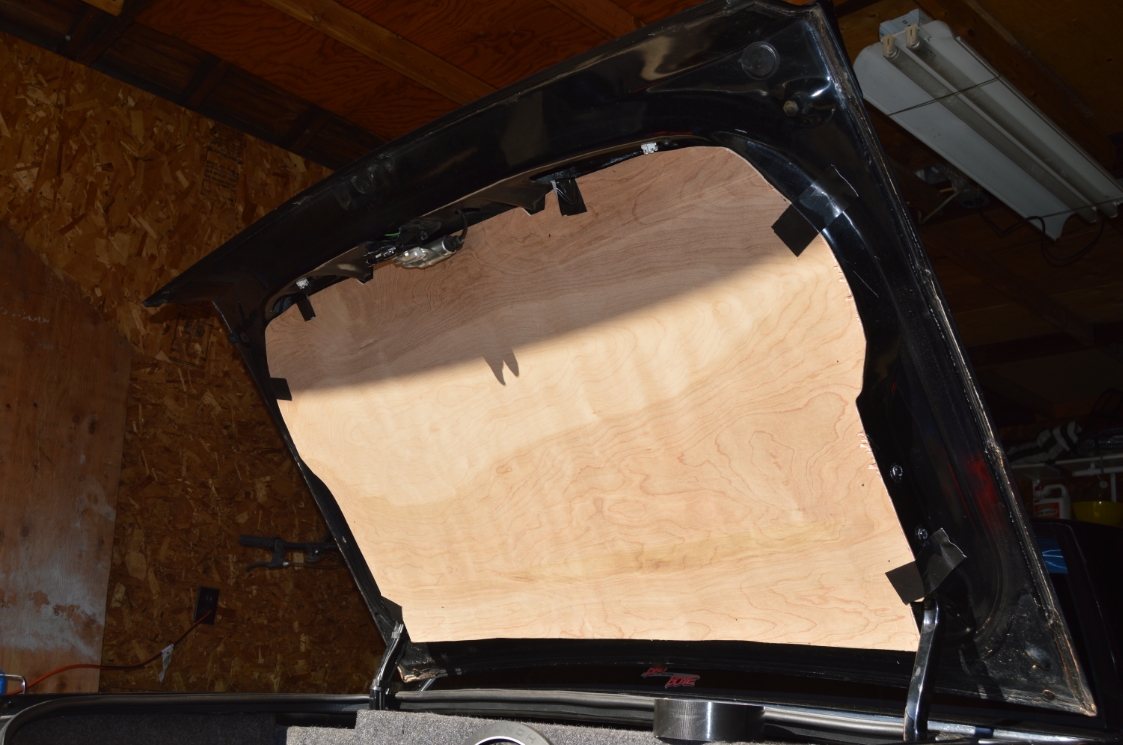
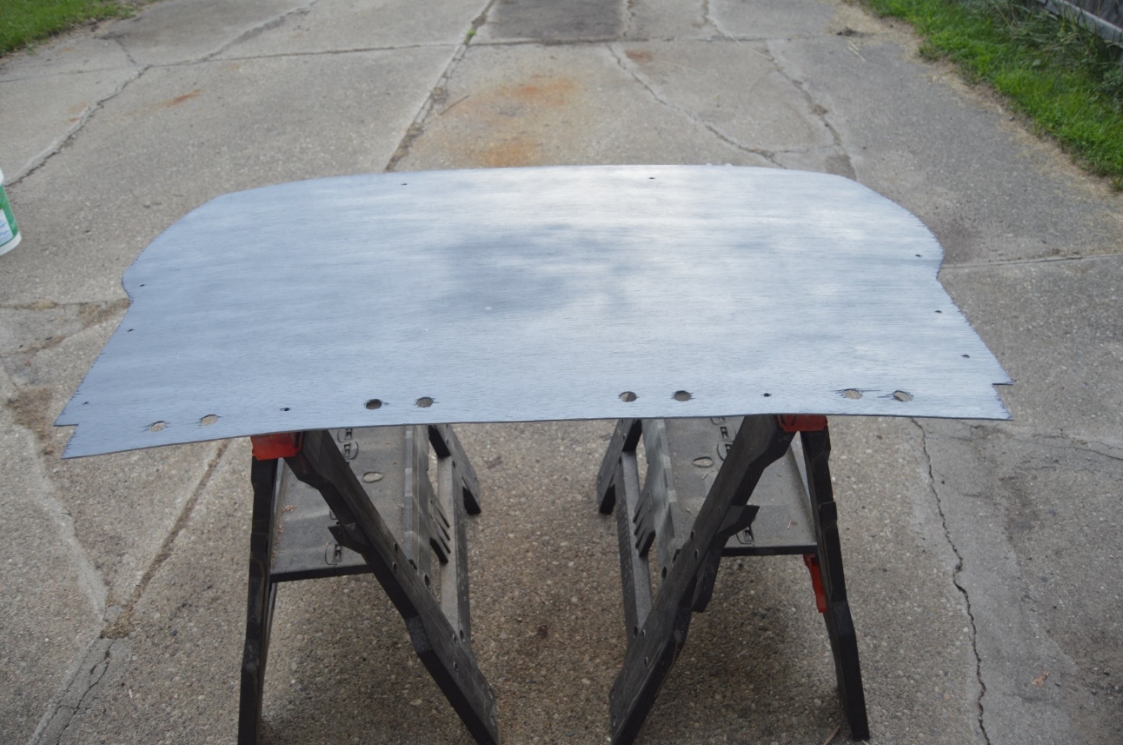
Creating this piece from scratch is perhaps the hardest part to make to complete the trunk kit since it has so many curves, and dips, (created by the frame structure) on the trunk lid.
The sides are mostly a flat plane & you can see the shape (from the inner supports) that you just follow along them to make the trunk panel.
The bottom is mostly the same, just follow the same outline.
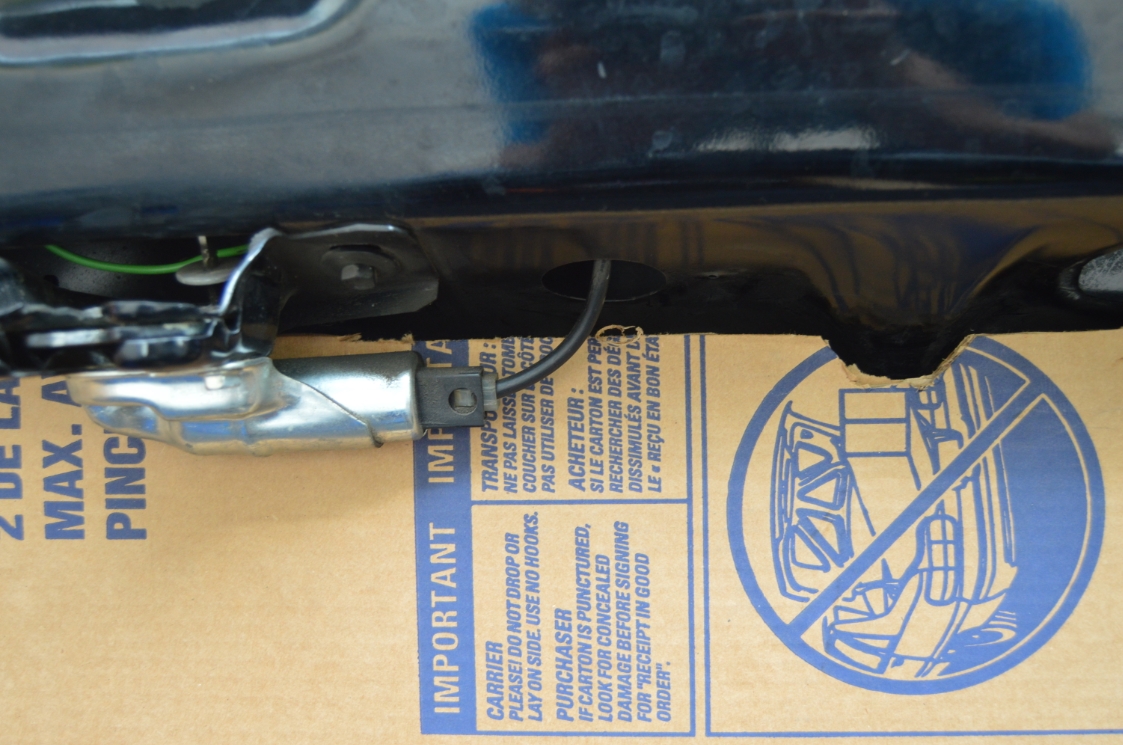
The top part however, (where the light & key lock area is) is not on the same plane as the rest.
Not to mention the inner structure supports have 2 parts (points) that stick out, and there’s holes up there, too.
Figuring out where to stop the trunk liner in this area takes some creative thought.
You have to make sure the trunk light will still shine down.
You have to make sure the trunk lock isn’t covered up, or in the way.
You have to make sure the panel looks “normal” but yet still fits, and blends, into the trunk lid.
We started with a cardboard template taped to the lid, which was slightly bigger than the finished panel will be. It got slowly trimmed down to its final size and shape.
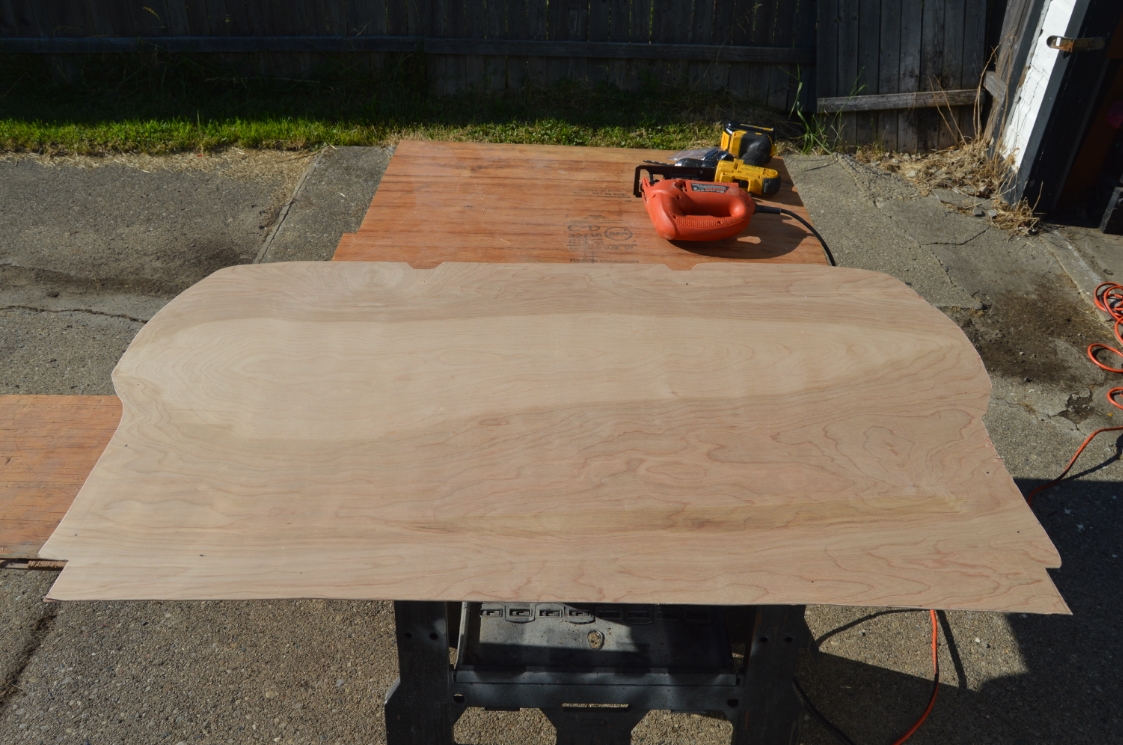
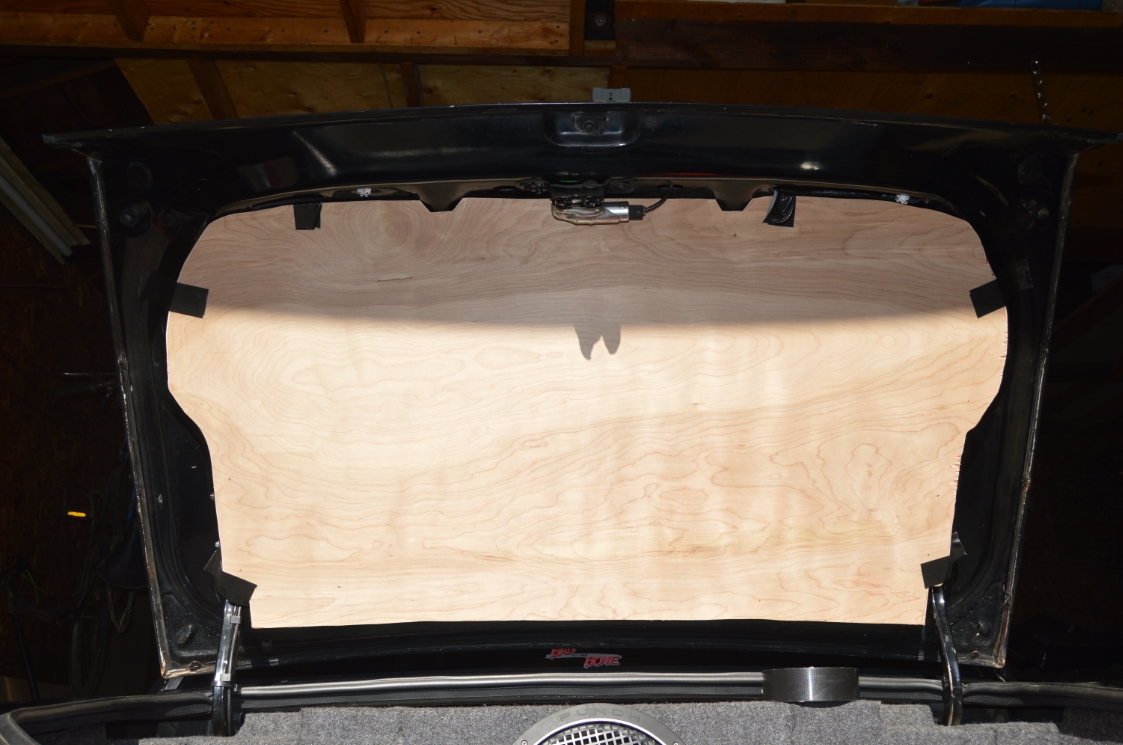
Once the template is done, the outline gets transferred to the plywood sheet.
.

.
[I still have the template, if you want a paper copy, contact me, for $10 I’ll send it to you. Simply place the template on a plywood sheet, trace, and cut out. saves you a bunch of time!]
.
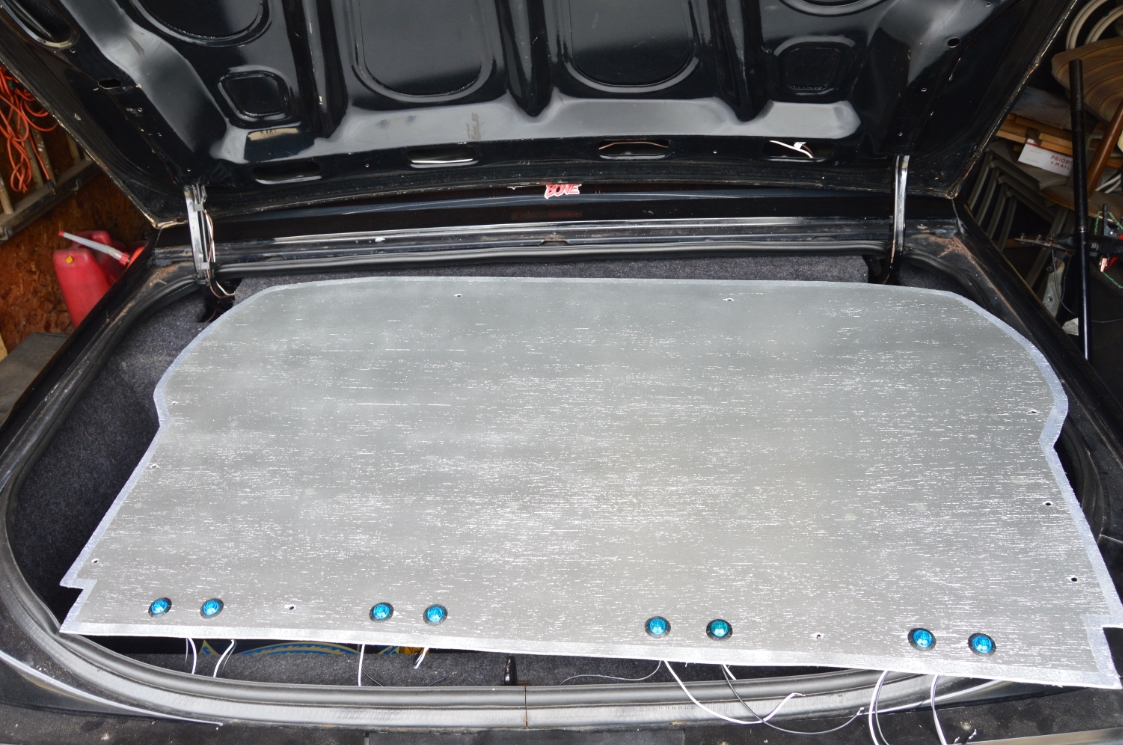
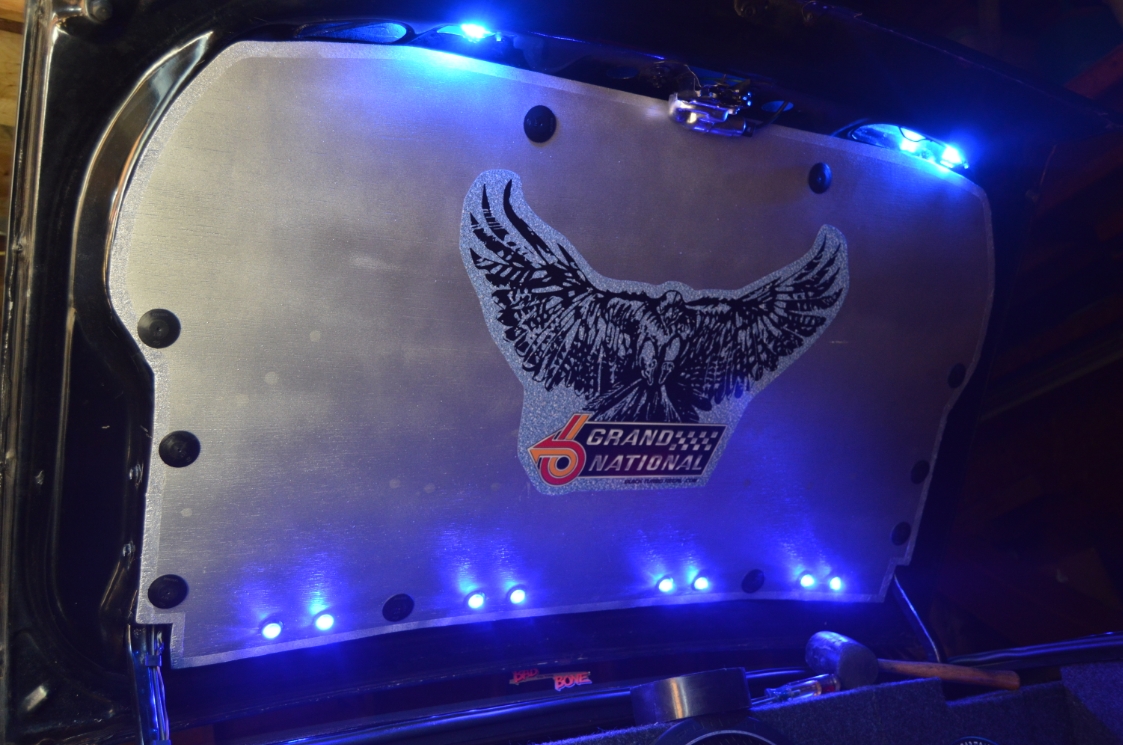
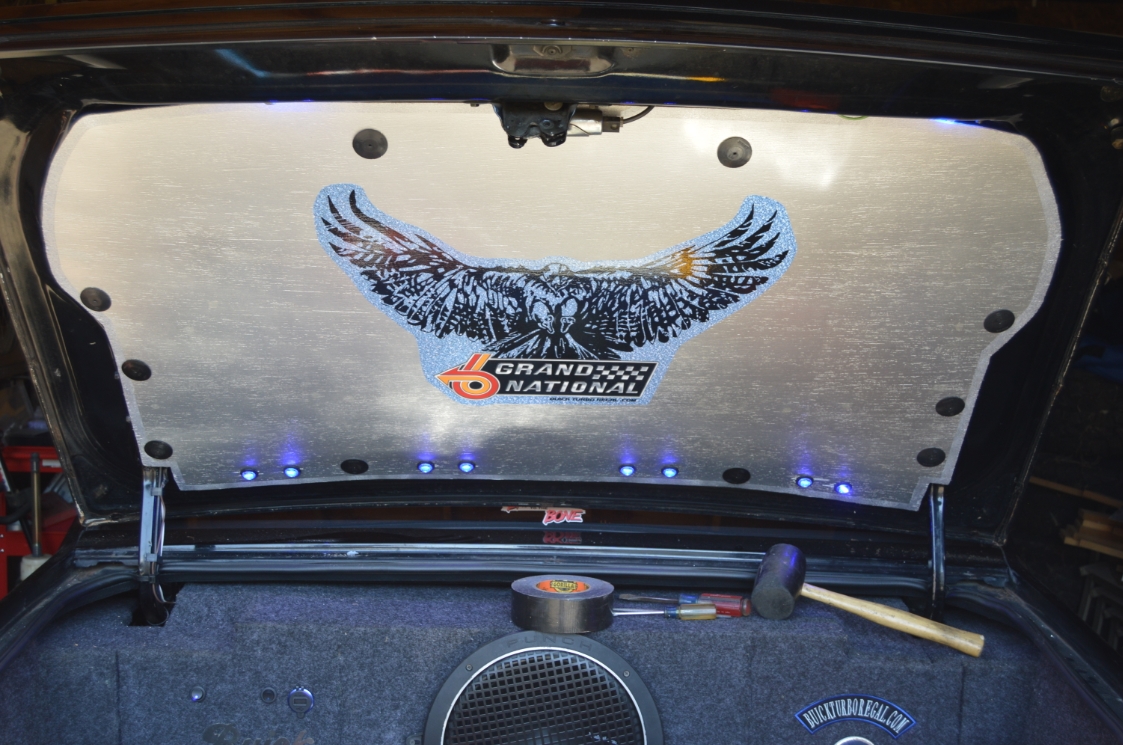
After the plywood panel is cut & finished to size, a few layers of silver paint is applied over the primer coat.
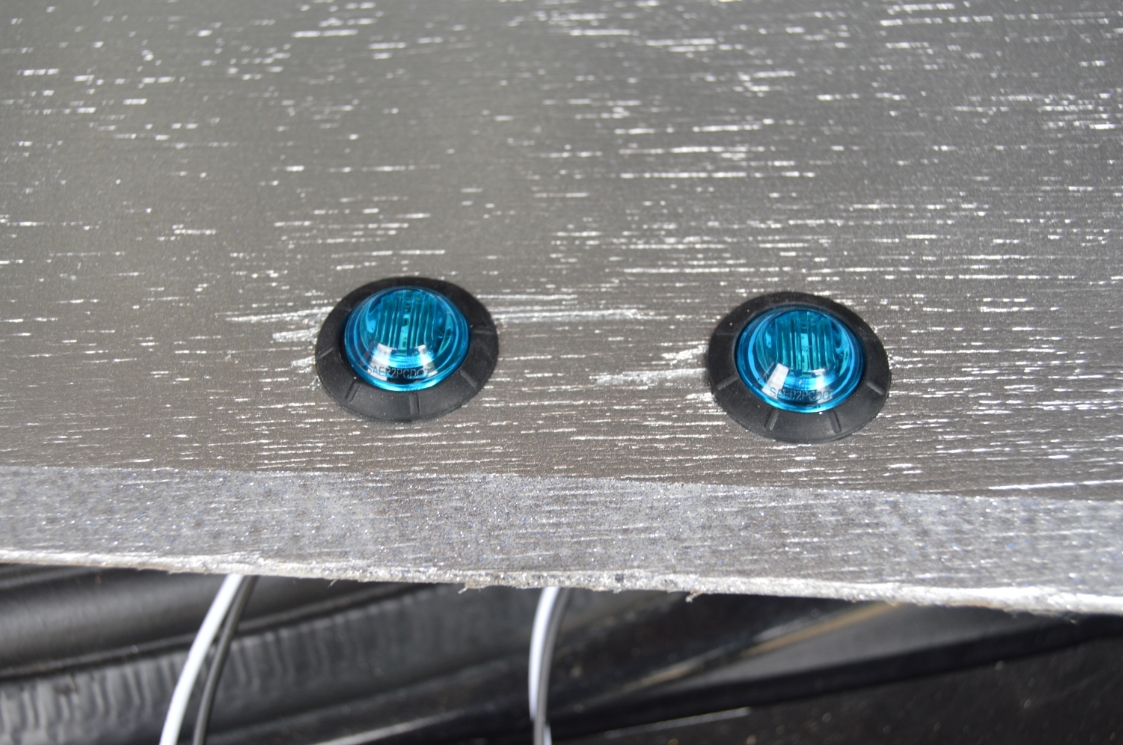
8 cool blue led lights were added to the bottom, just to jazz it up a bit.
(it looks fantastic at night!)
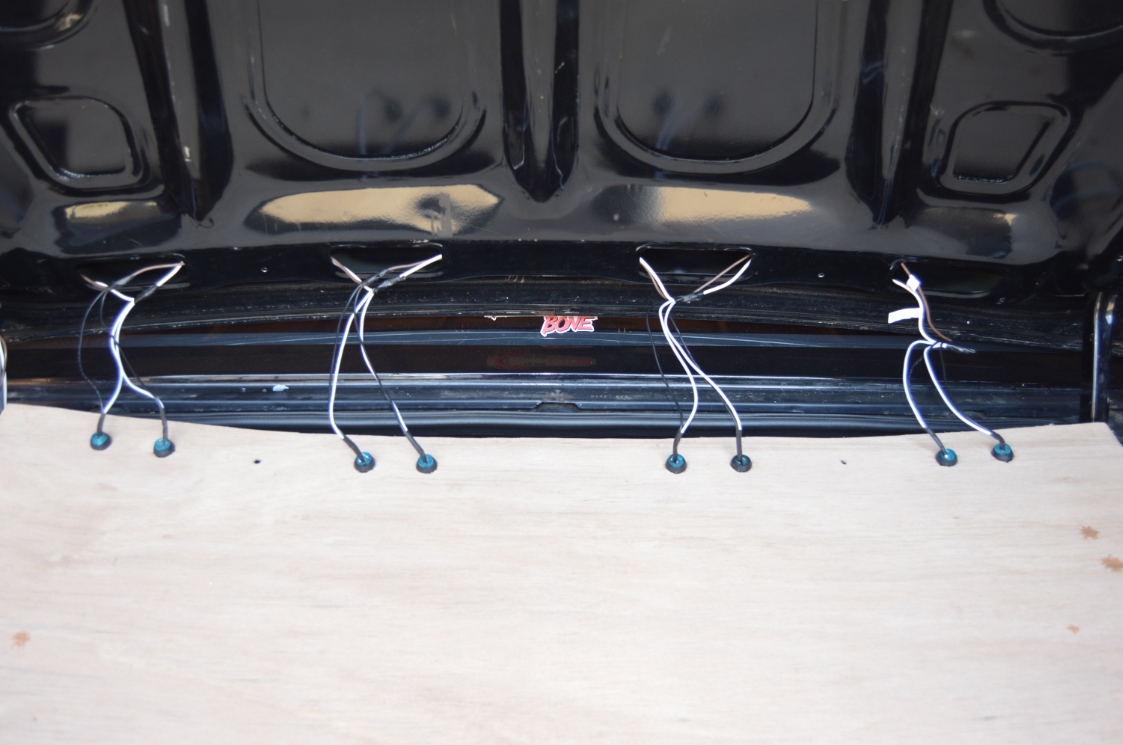
All of the lights are connected together into 1 main power wire which is then spliced into the same switch that the 2 trunk lights use (a neat feature we did awhile back, then rewired a new switch when we built the sub box, great for those times when you leave your trunk open for extended periods), as well as the GN sign on the passenger quarter panel from “Part 2.” The ground wires are also all connected into 1 main wire, which is then grounded at the distribution block from the subwoofer build. The trunk lid structure frame has 4 existing oval shaped holes at the bottom where all these wires run thru, then it comes out on the drivers side where the factory trunk light wire runs at (then down & back behind the subwoofer box).
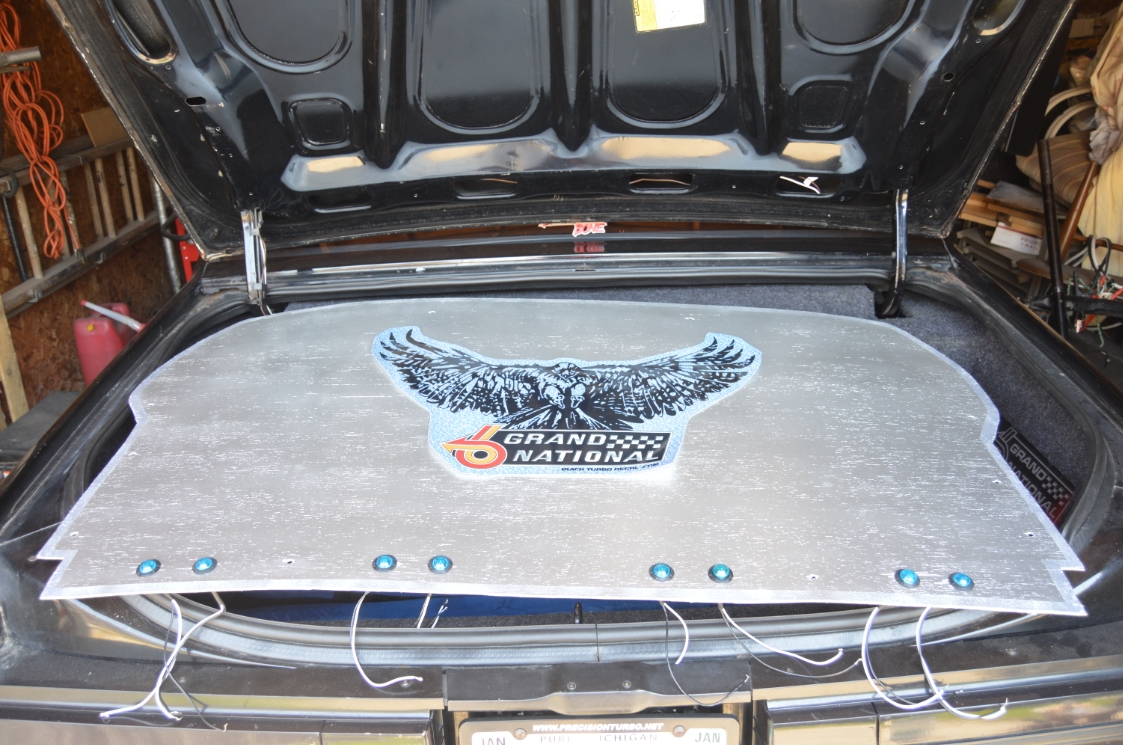
Then there’s the main attraction, a custom Buick hawk image centered in the middle, with the Buick Grand National emblem logo underneath.
An iconic collection of all the Buick logos are now in the trunk: the hawk, the lighted GN emblem, tri shield symbol, a vintage metal Buick logo, as well as the Grand National logo under the hawk.
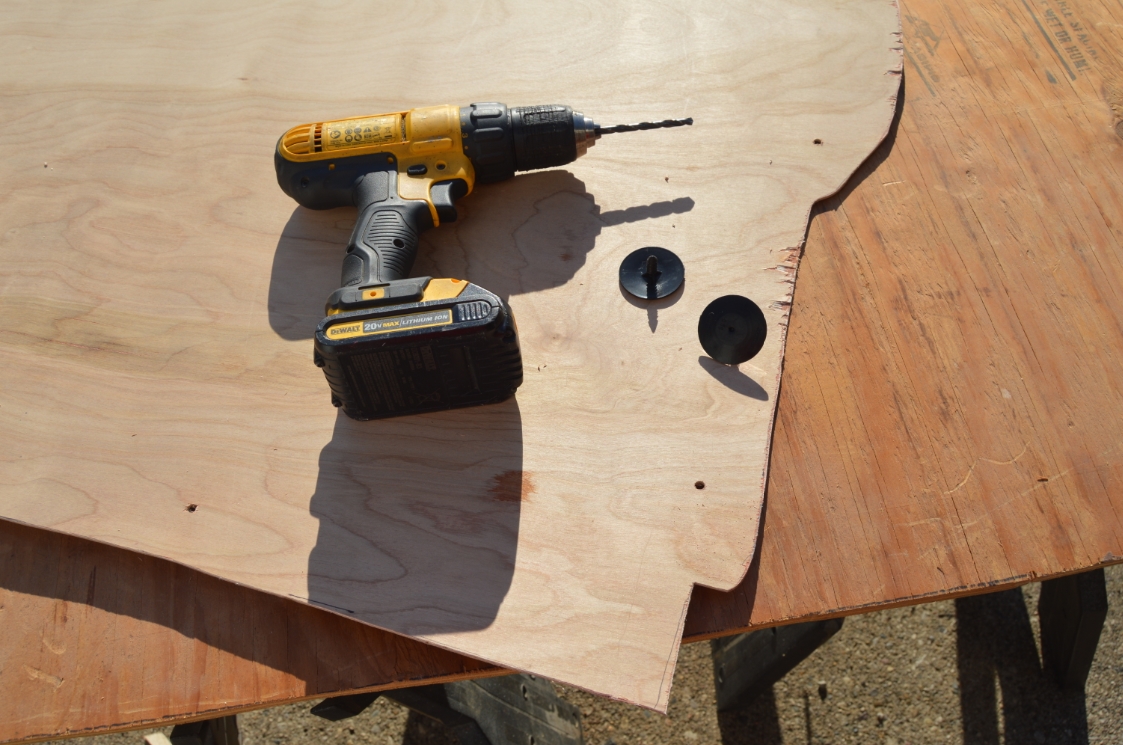
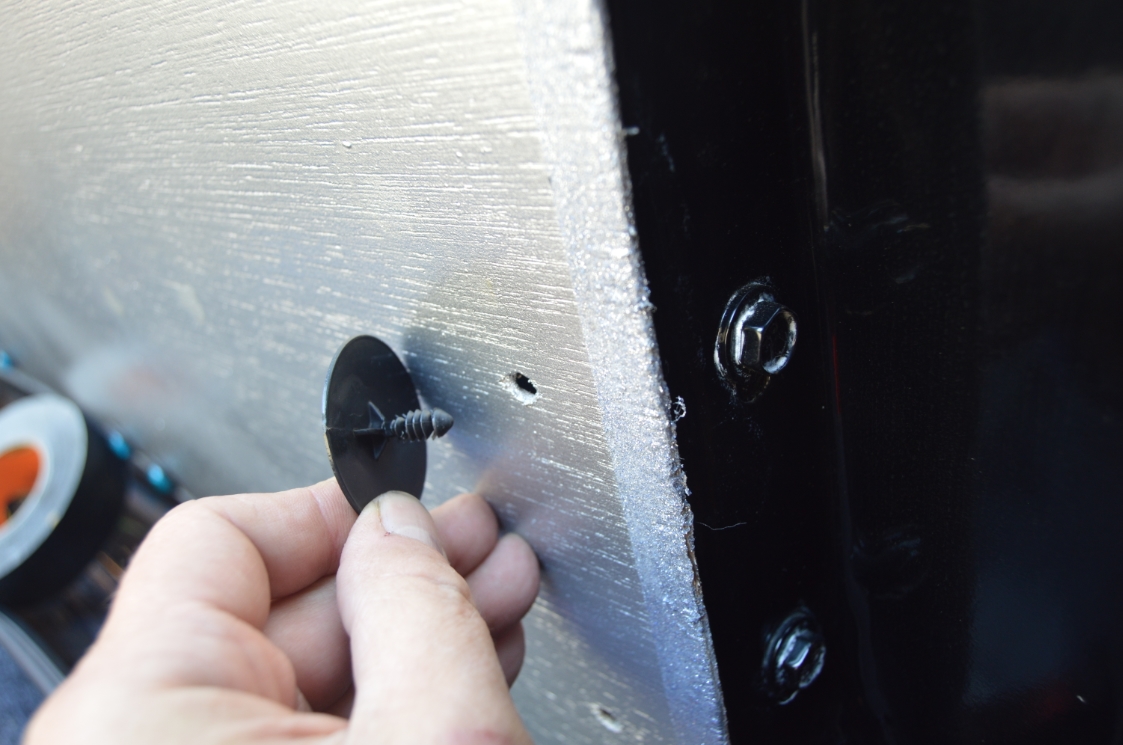
We used 10 hood liner hold-down clips to secure the trunk panel to the trunk lid.
.
.
Total cost for the new trunk lid panel, about $75.
(it would have been way less if we would have just carpeted it, but we like custom stuff, so it’s all good)
.
This new trunk panel took 3 days to create (a few hours each day).
[figuring out the template layout, waiting for primer & paint to dry, transferring the hawk decal, wiring up the lights, and stopping to take pics for this story! At least an hour was spent (spread out) thinking about if we liked the way this was turning out, as we were doing it! We won’t count the multiple minutes we spent nodding our head in approval as we were progressing thru creating it. lol.]
We weren’t in a hurry, you can probably make it quicker.
.
PARTS:
- sheet of ultra thin plywood ($12, 4×8, home depot)
- primer ($5 home depot)
- silver paint ($6 home depot)
- buick hawk decal (custom made, $25)
- blue lights (pkg/10 $10, ebay)
- 2 pcs of 6′ wire to run the lights
- plastic hood retainer clips ($9, ebay)
.
.
NOTES:
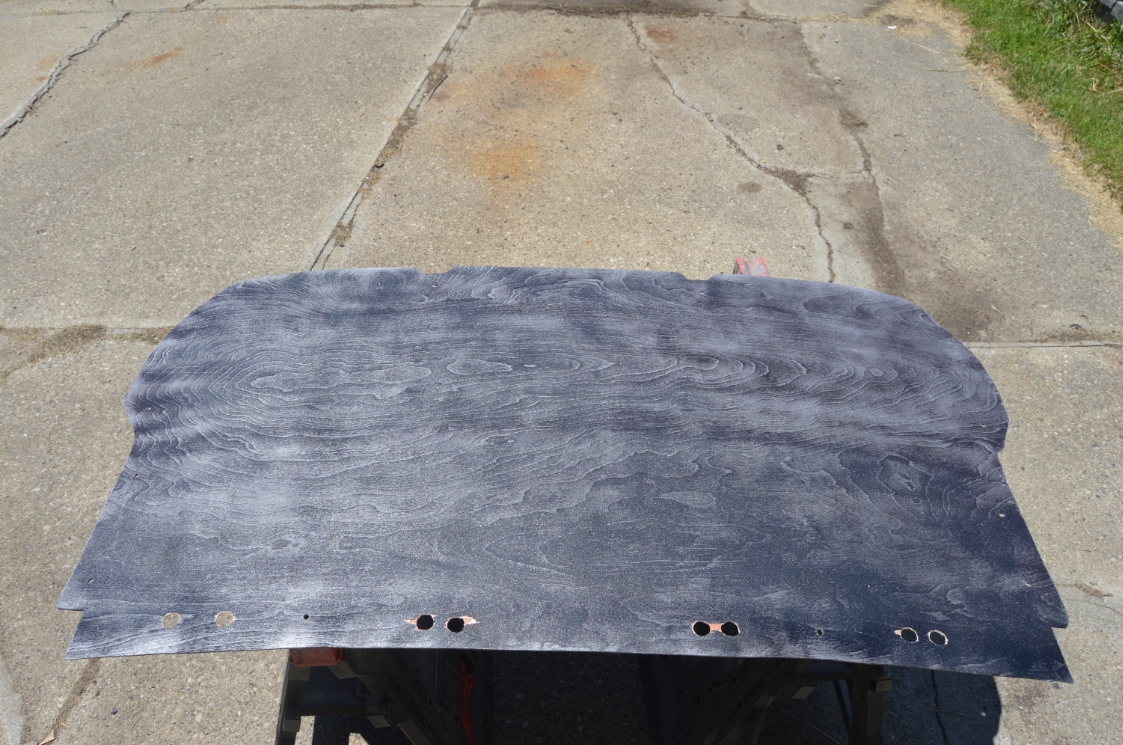
The bottom of the new trunk liner lines up with the 4 big oval holes in the trunk frame structure (the outside bottom lip edge, which is about 1/2″ below the actual oval hole). This is NOT straight across (width-wise) according to the template, it is raised up in the middle, on a curve (meaning the franme structure is not straight across either).
Overall size is approximately 29″ tall x 52″ wide (at the outside most points).
There’s 10 retainer clips holding the liner securely to the trunk lid. 3 on each side, plus 2 on the top & 2 on the bottom.
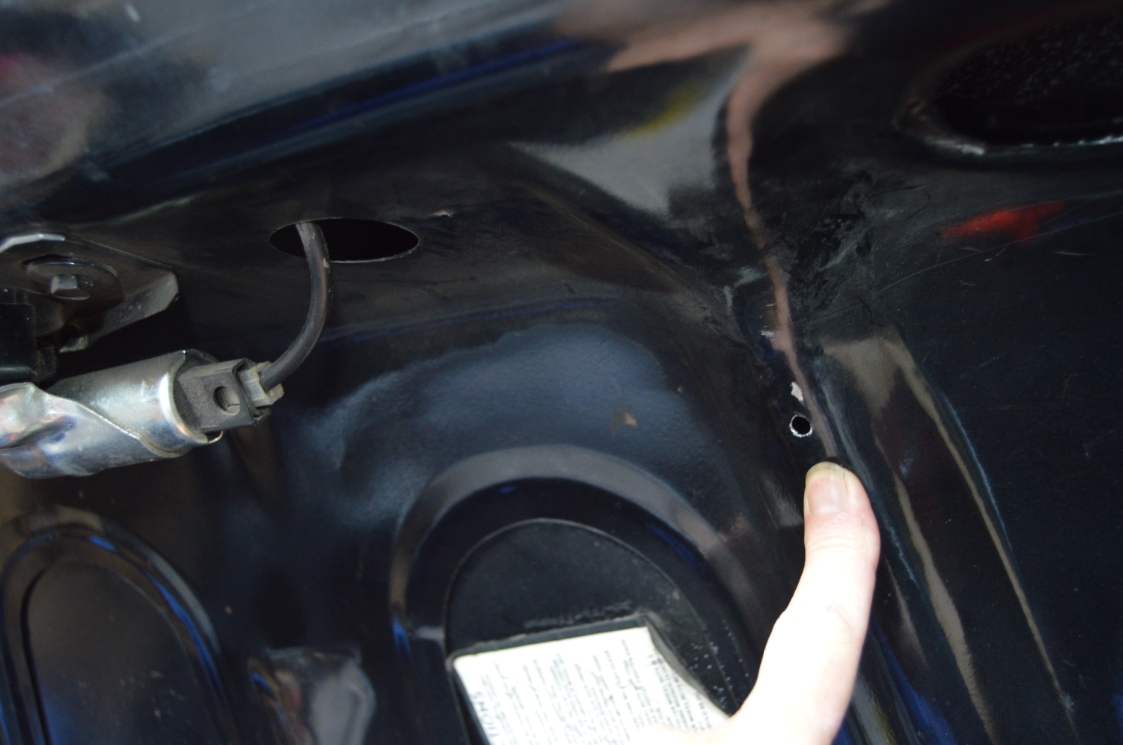
(ten 1/4″ holes were drilled (!) into the trunk frame structure to be able to use the clips)
We initially figured out where the holes were to be on the template, then poked holes in the cardboard and marked the trunk lid with a paint pen. The holes were also transferred onto the new trunk panel when we traced the outline of where it needed to be cut out on the plywood sheet.
(all of the holes are roughly in the middle of the frame structure allowing a secure grip)
Don’t forget to put some touch up paint on the holes you drilled into the trunk lid. Rust prevention. Since you’ll probably not ever go under your new trunk liner again!
With this new trunk lid panel, the trunk area is now finally and completely done, and it’s a great feeling seeing it all prettied up!
(not to mention the cost savings compared to buying a kit, plus the fact that it’s custom made & made the way we wanted!)
.
.


