


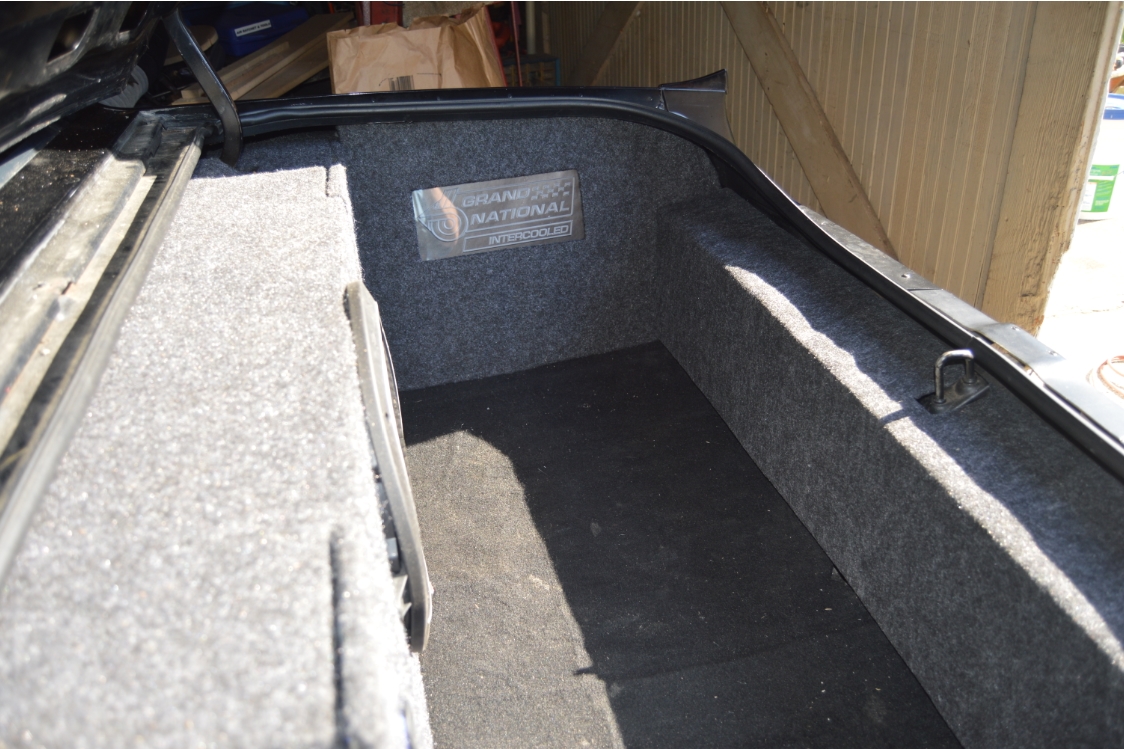
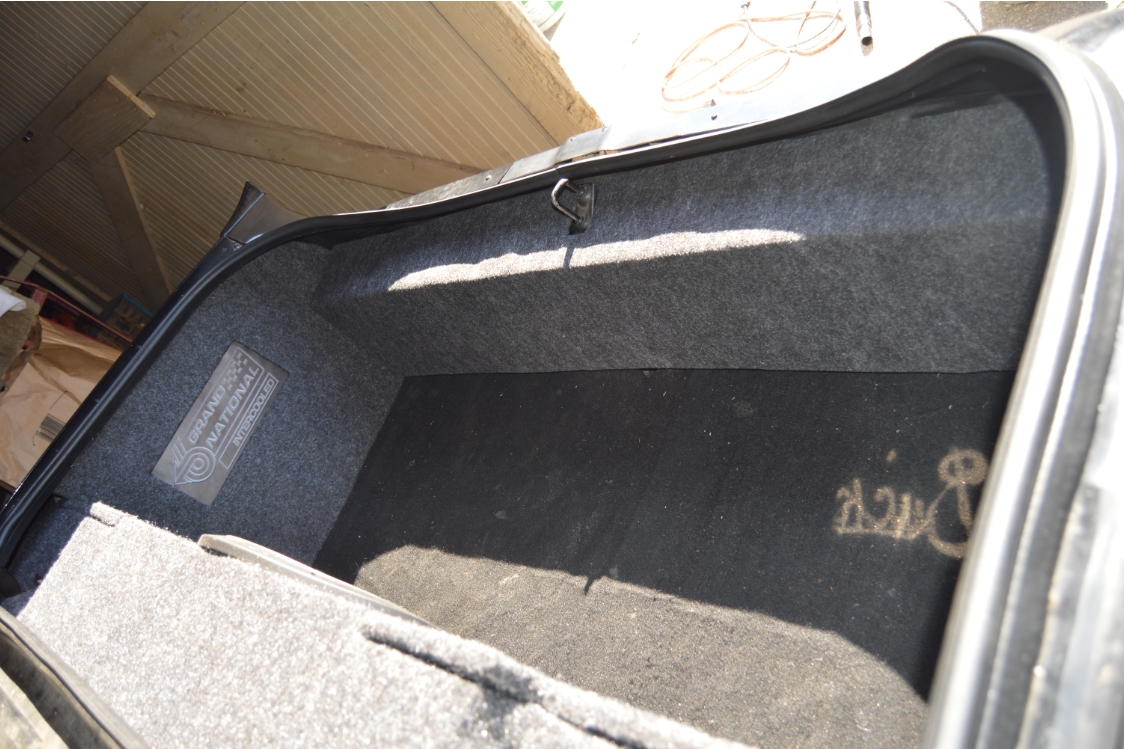
So we’re back at it again on this 1987 Buick Grand National, completing the “pretty up the trunk area” project.
This is part 2, with the subwoofer box build being Part 1.
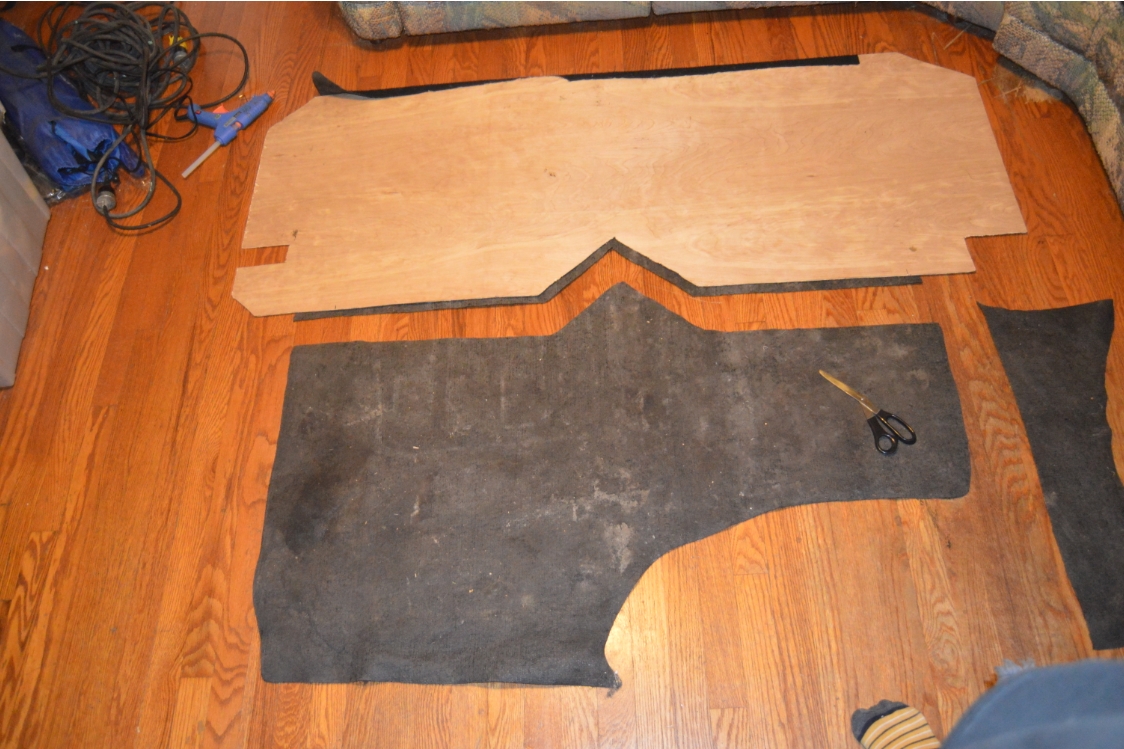
There’s 4 pieces that need to be made to finish off the Turbo Buick trunk.
- a floor piece, which we carpeted (using the orginal OEM trunk carpet, which is solid black in color)
- driver side panel (to cover rear quarter)
- passenger side panel (to cover rear quarter)
- the rear section (where the tail lights are)
[and the above is the order in which you should build these pieces. The floor gives you a good base to work on. The side pieces aren’t really held in by anything, until you add the rear section]
.
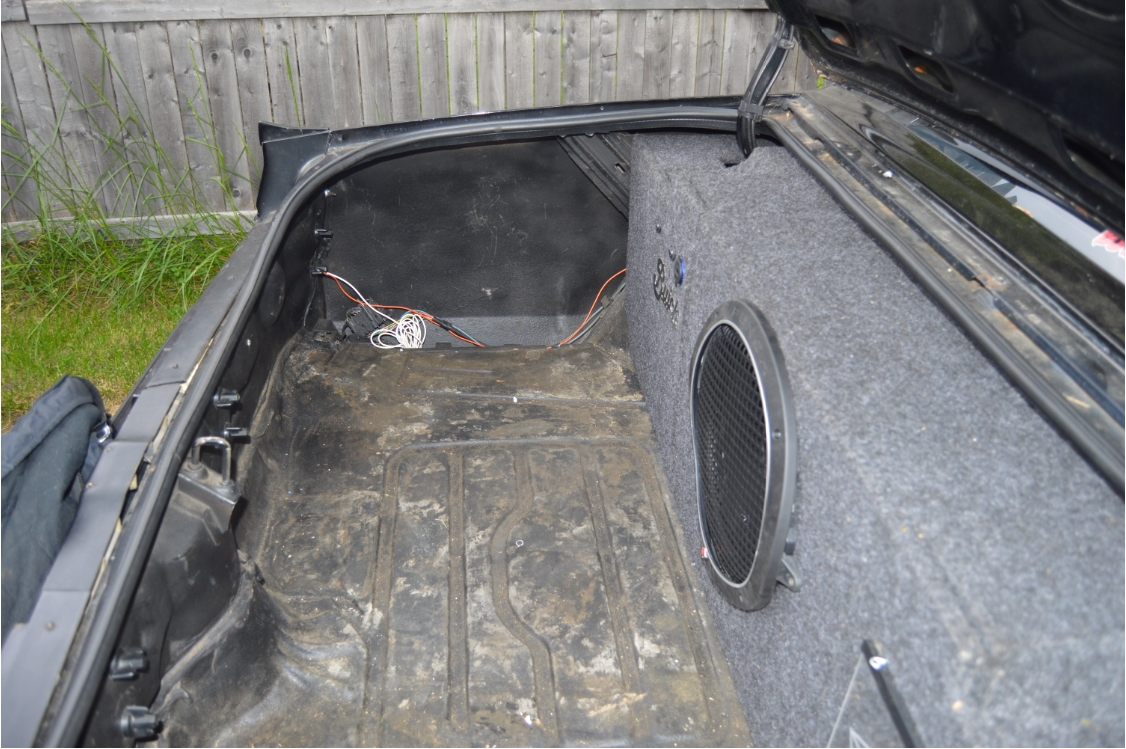
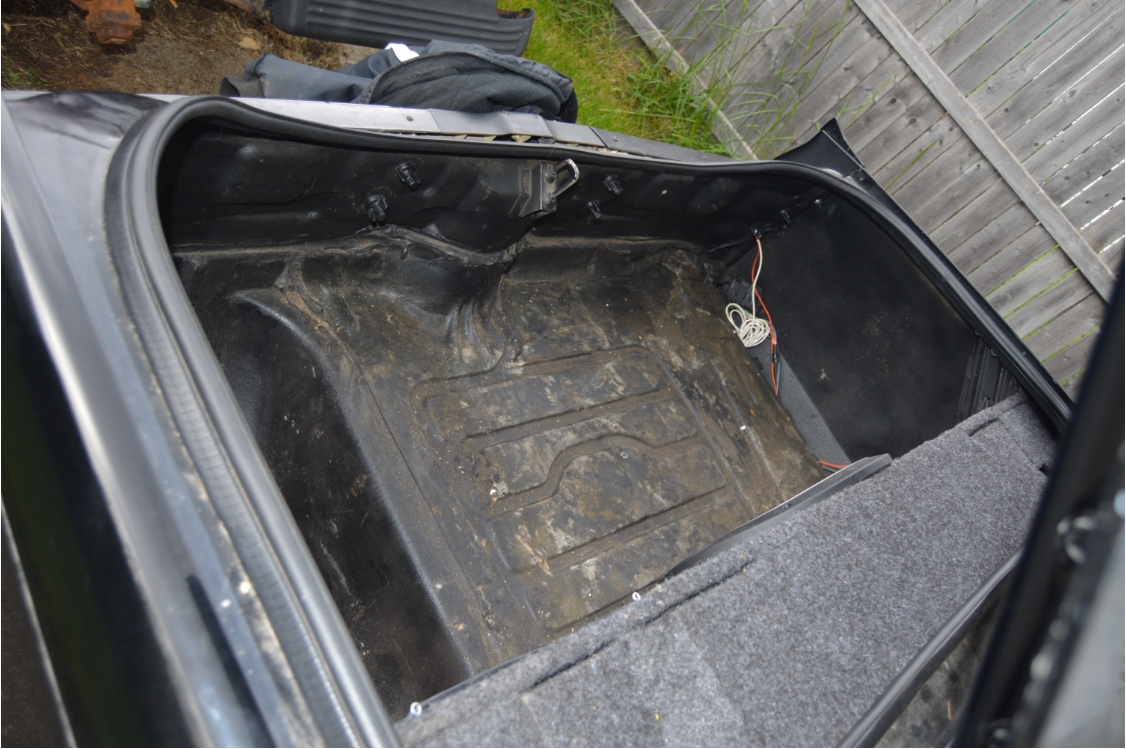
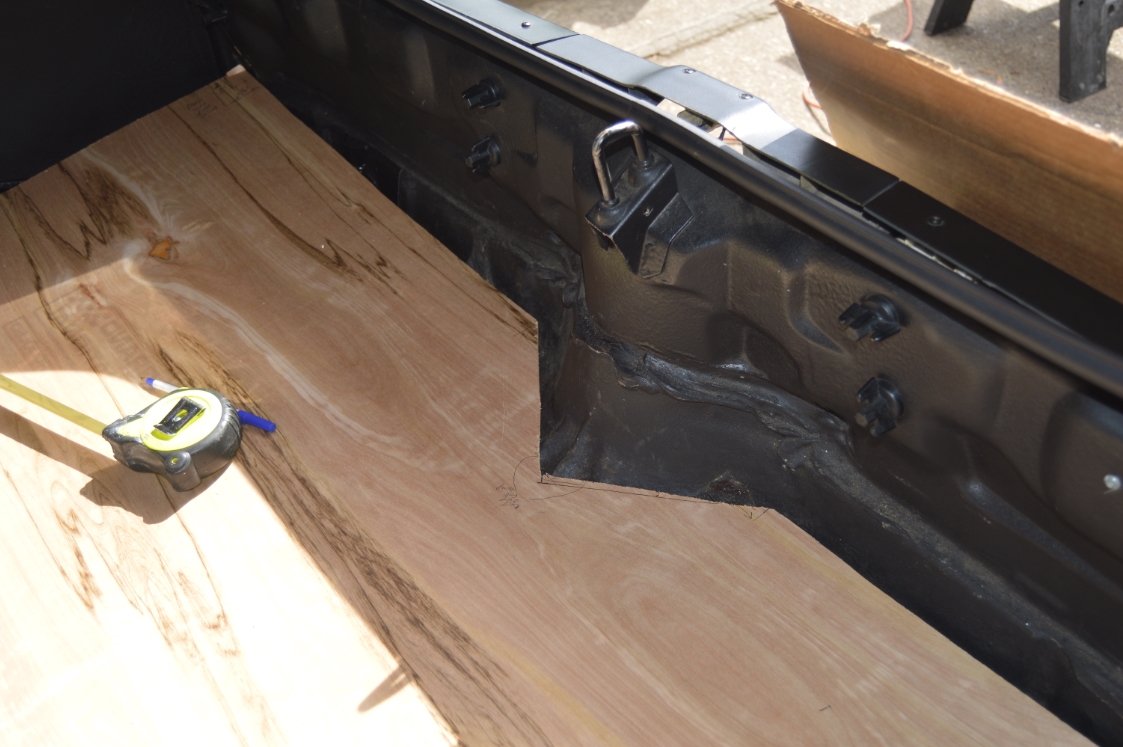
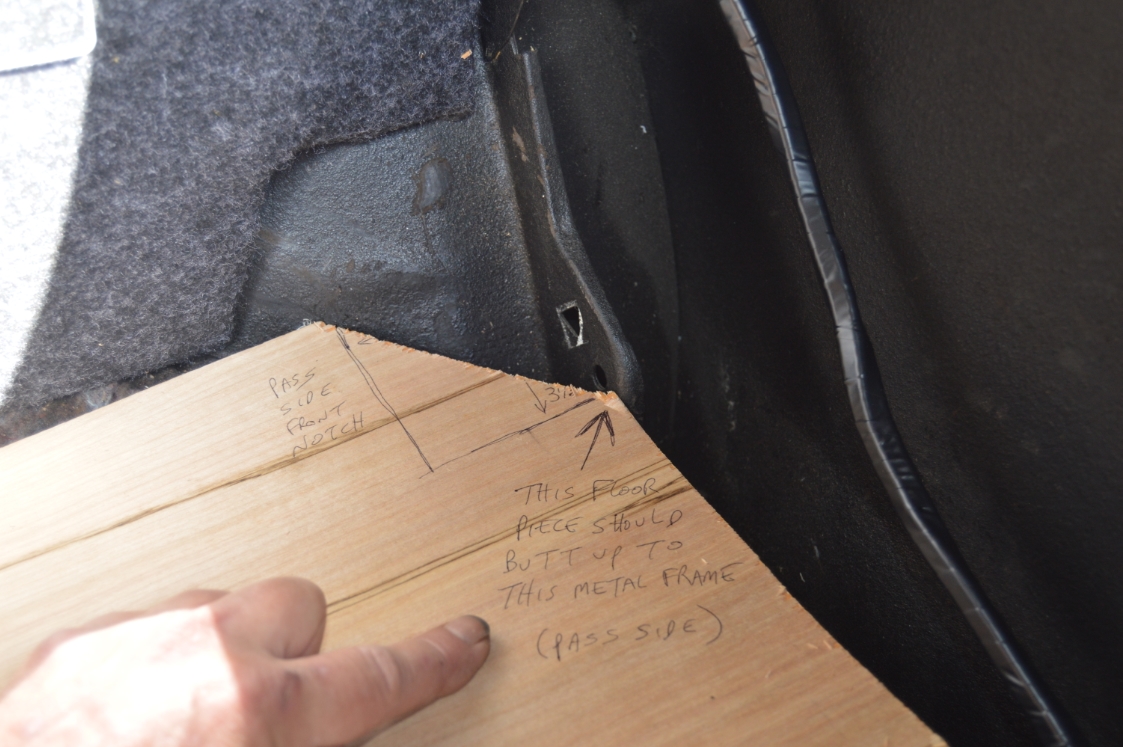
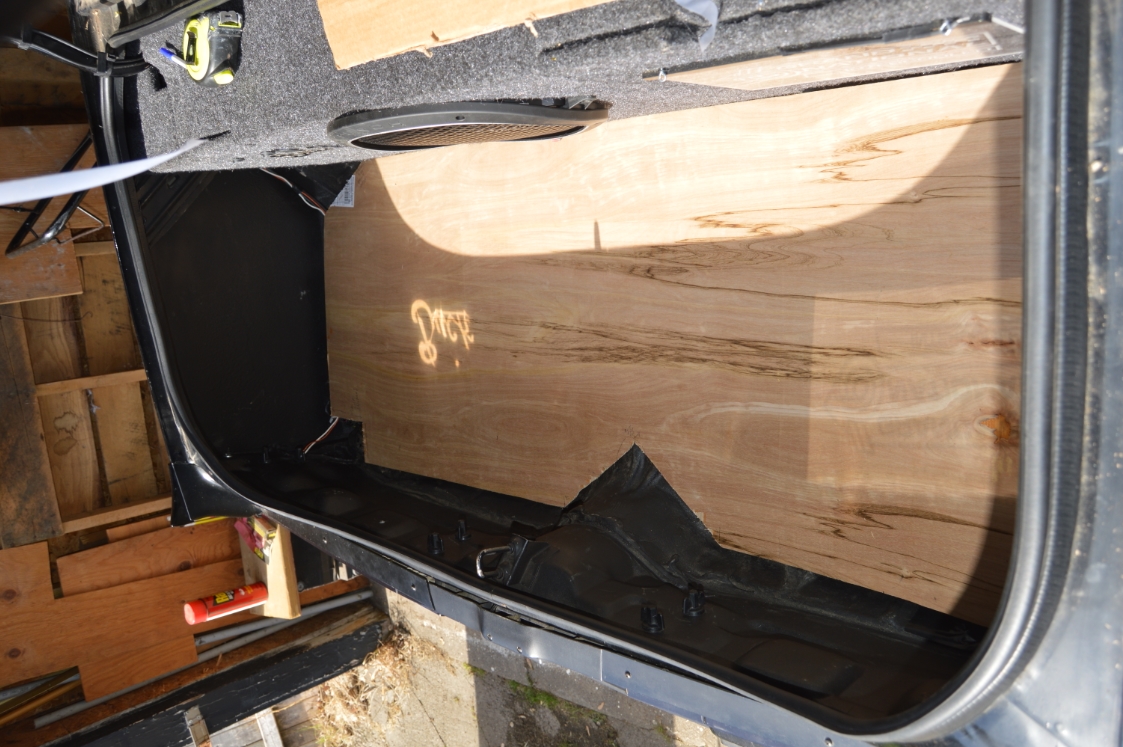
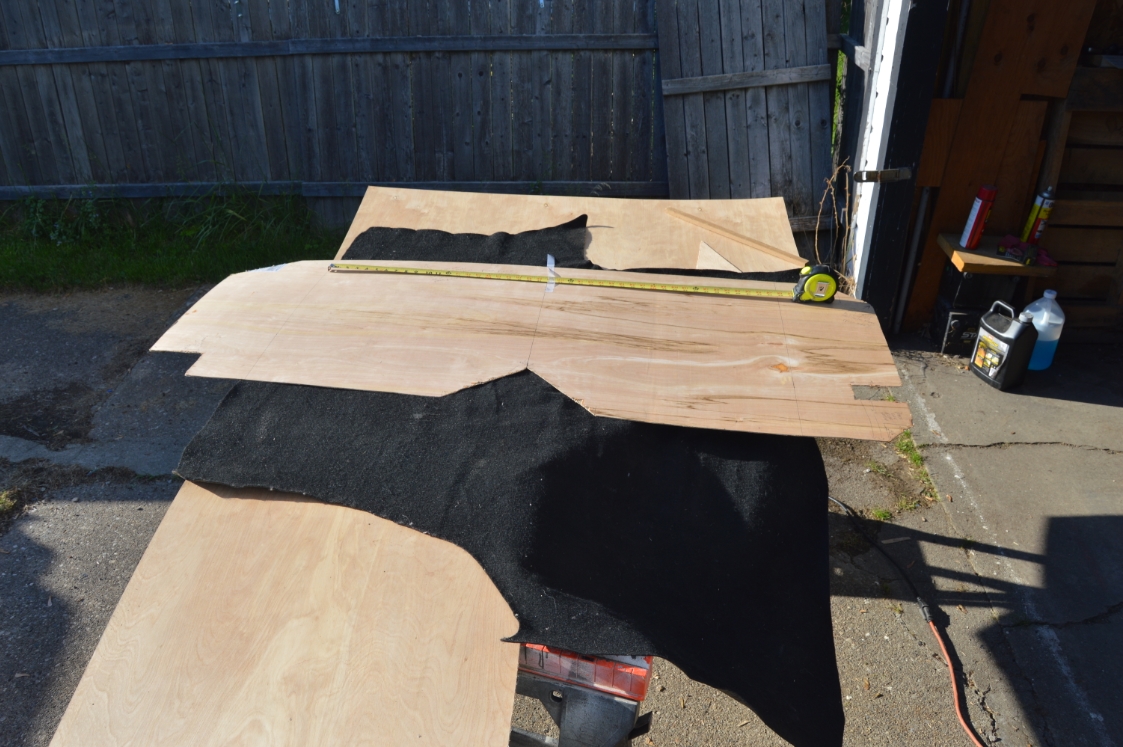
The floor piece was created because we wanted a flat surface all the way across the trunk.
Take note that this eliminates using the spare tire well (as well as the accessories)!
Not that we cut it out, just that this piece goes over the top of it, covering it up.
(I suppose you could always put the jack, etc. in the spare wheel well area underneath the floor piece, but of course, a tire will no longer fit)
[NOTE: We used the Factory black carpet to cover the floor piece because we wanted an overall 2-tone look, since it will flow well with the (eventual) black/silver 2-tone paint job (a la WH1-esque look) that this Buick GN will be getting in the future. And also because we didn’t have enough of the two-tone black/grey subwoofer carpeting left over to do this piece!]
[a decision was made long ago that a spare tire wasn’t needed, but if an issue arose, the car would have to be towed]
[And just think about the weight savings when racing! No spare tire, jack, etc.!! – haha – that was mostly meant to be a joke, as we know its negated by the new weight from the sub box, which realistically, is probably heavier than the weight of the tire & jack!]
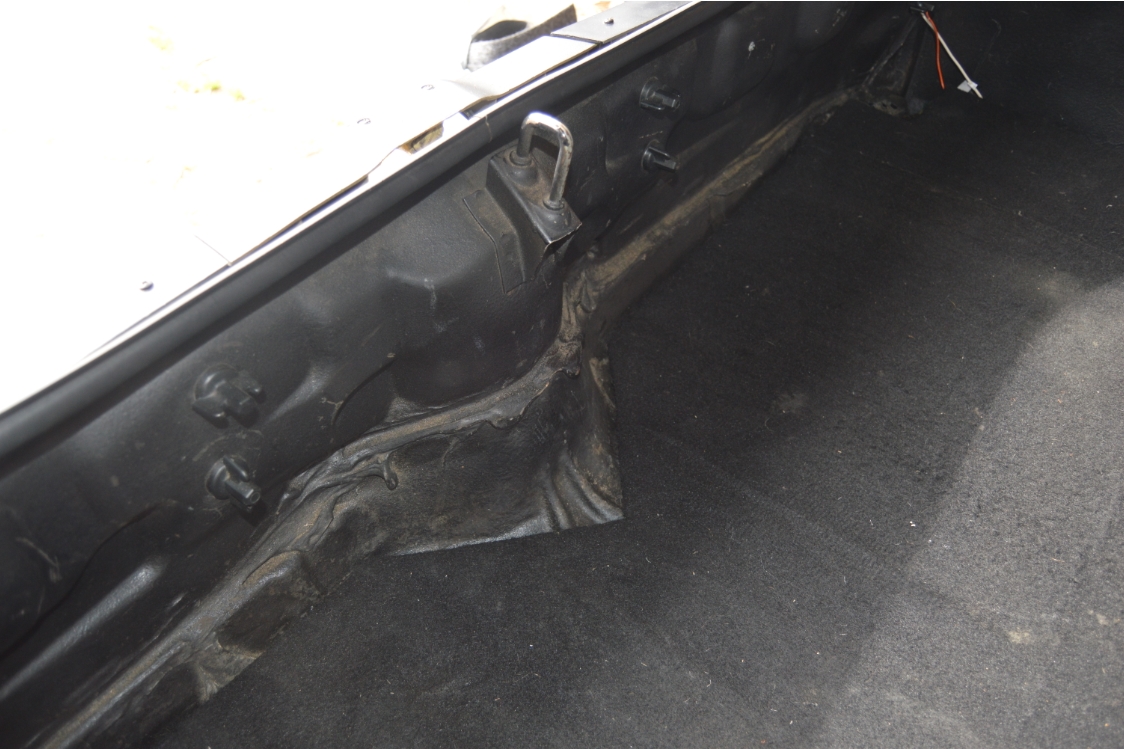
The 2 OEM brackets/mounts for the spare tire jack were pounded down flat (as best we could, they don’t really move much!), as they are raised up (in the way) and would have hit the floor piece we put in.
[and they do still hit somewhat, but we modded the pieces for that]
.
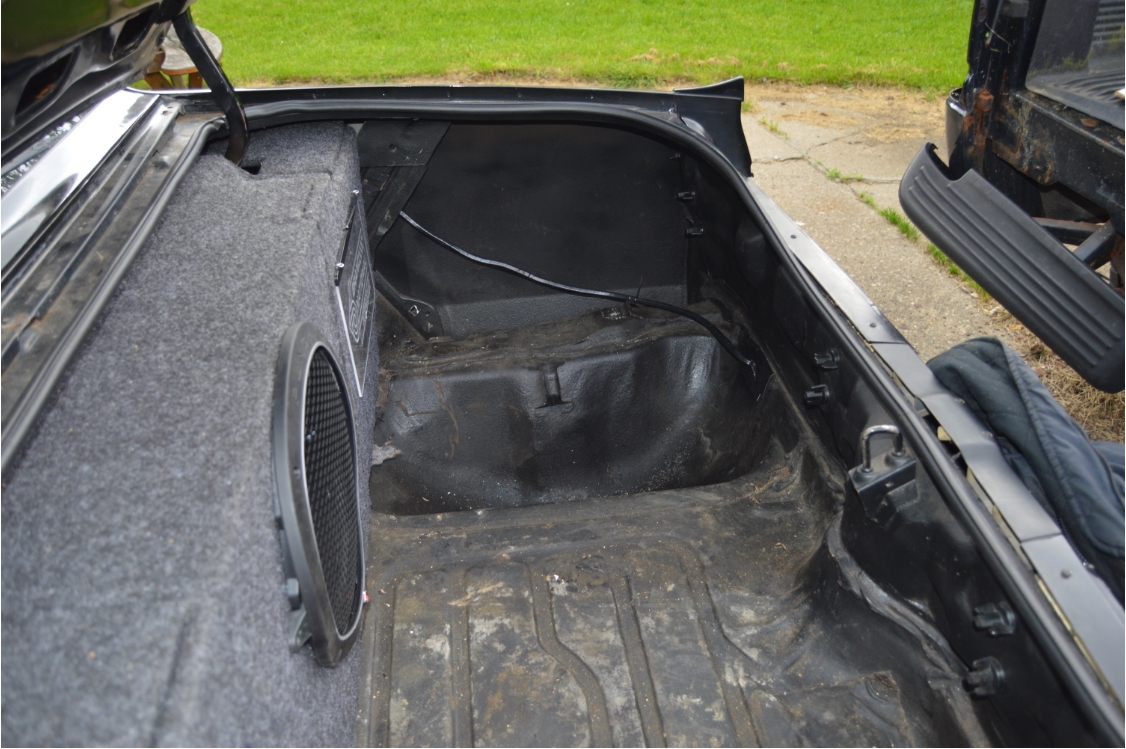
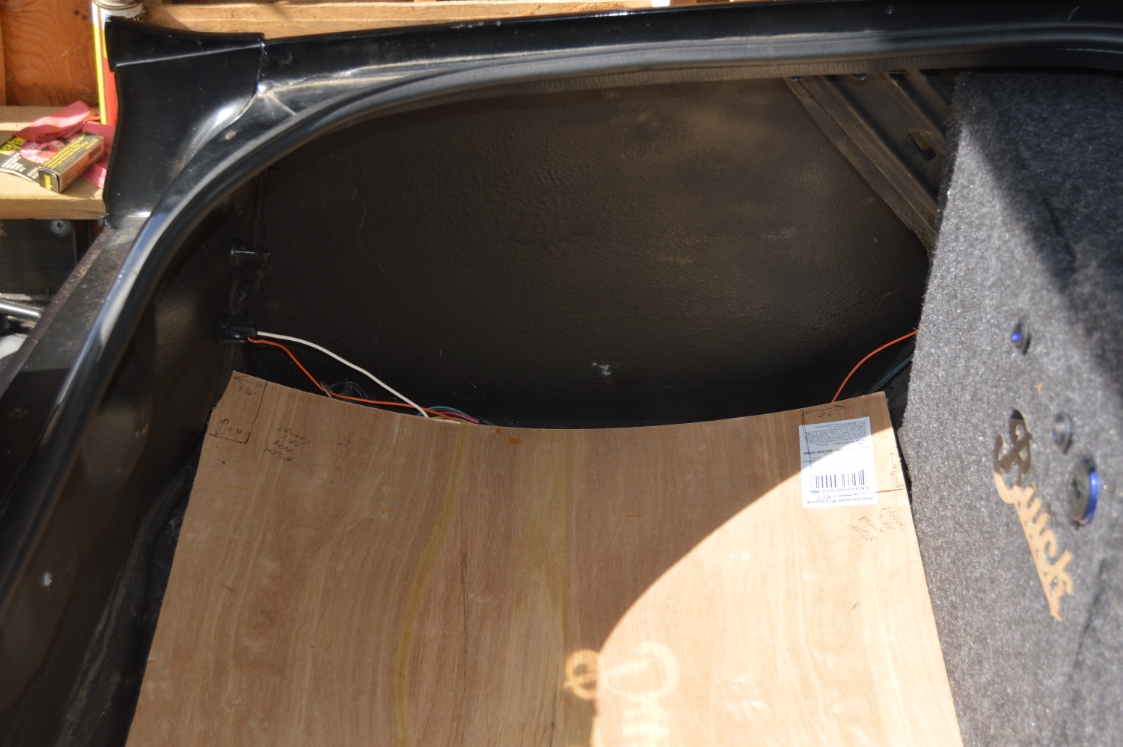
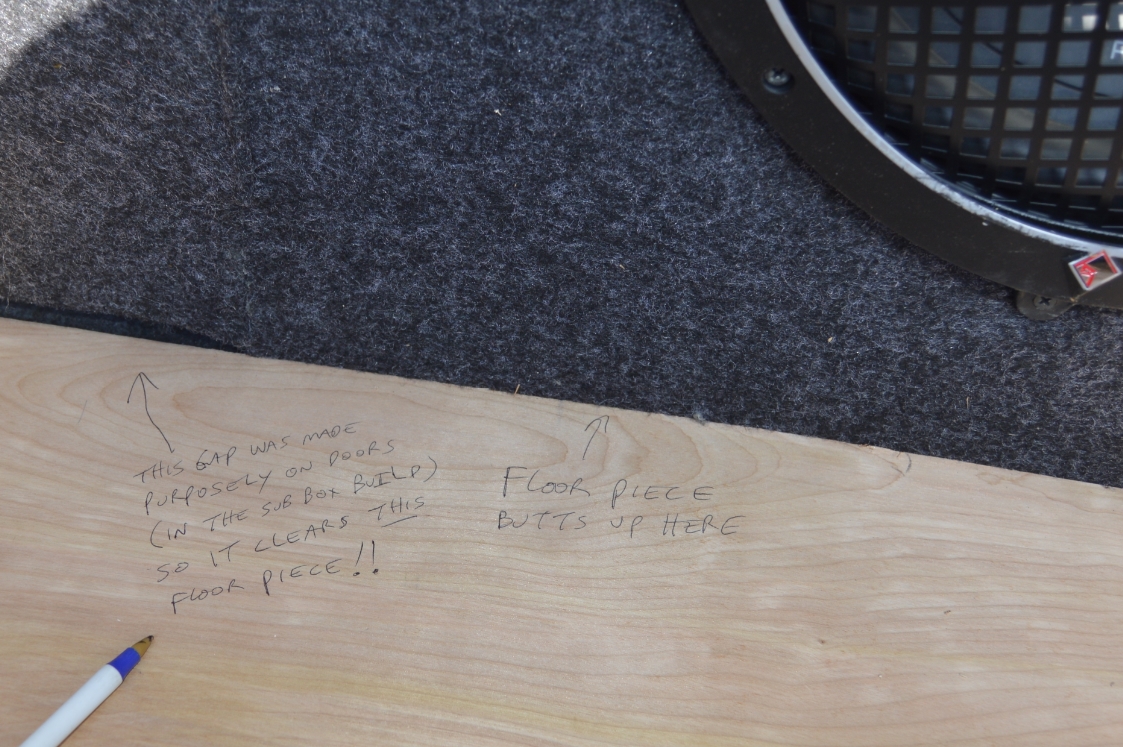
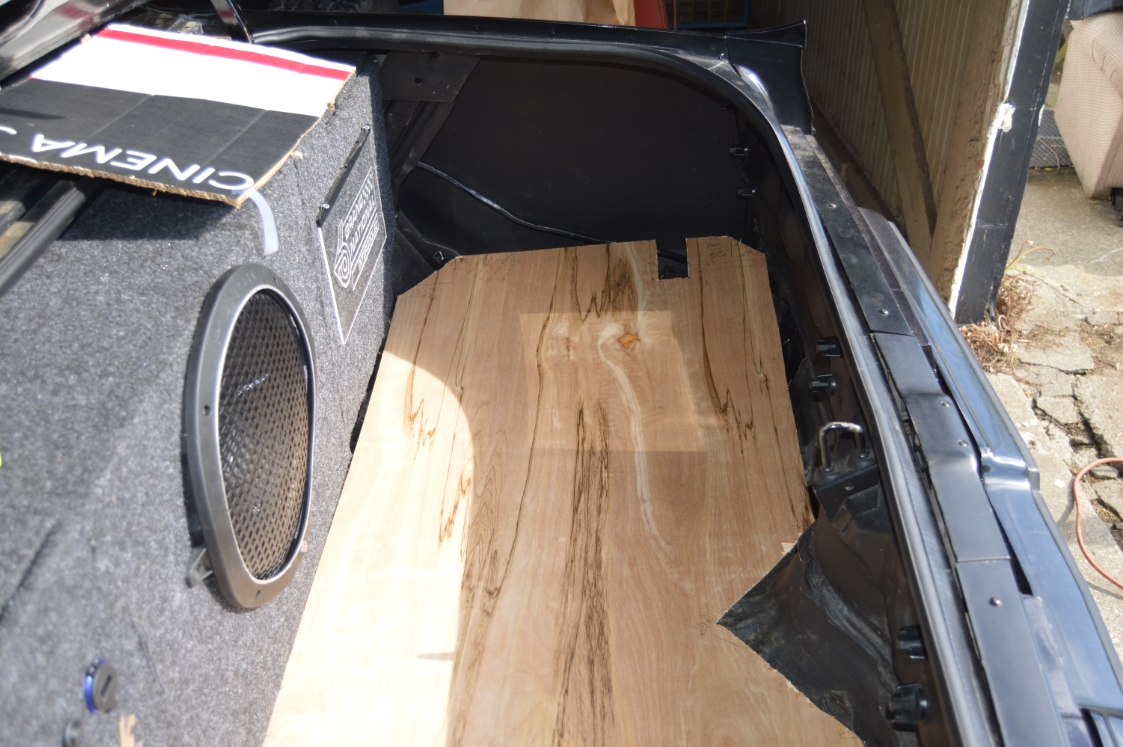
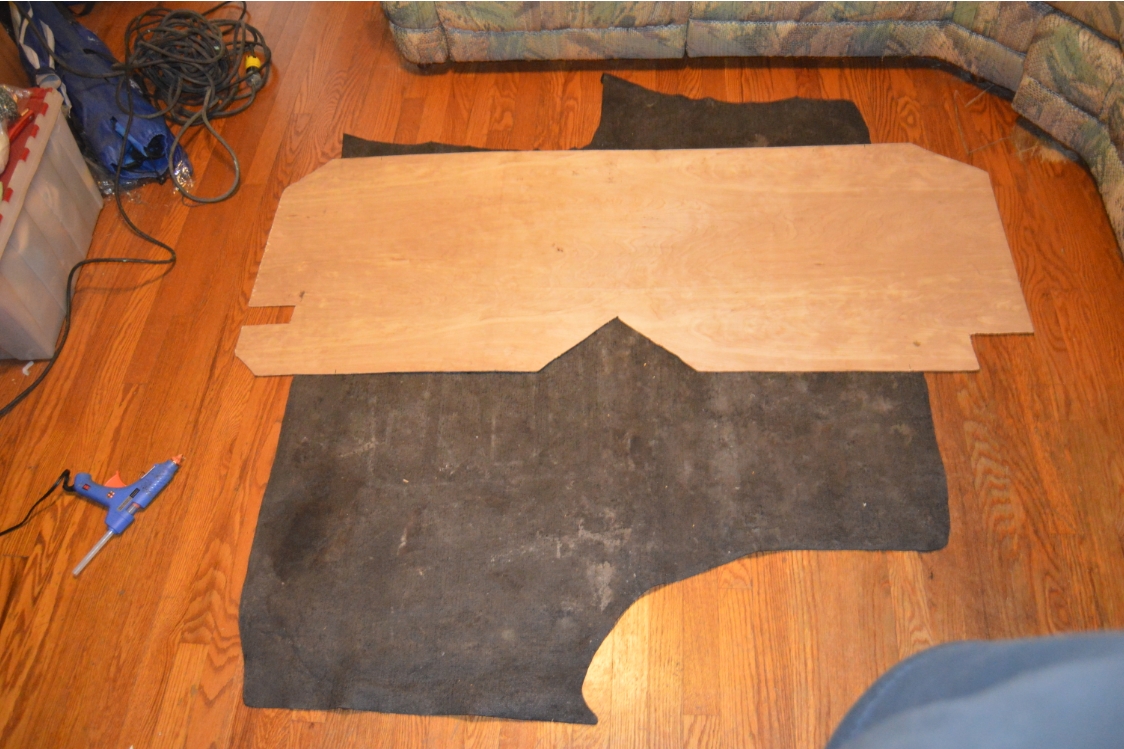
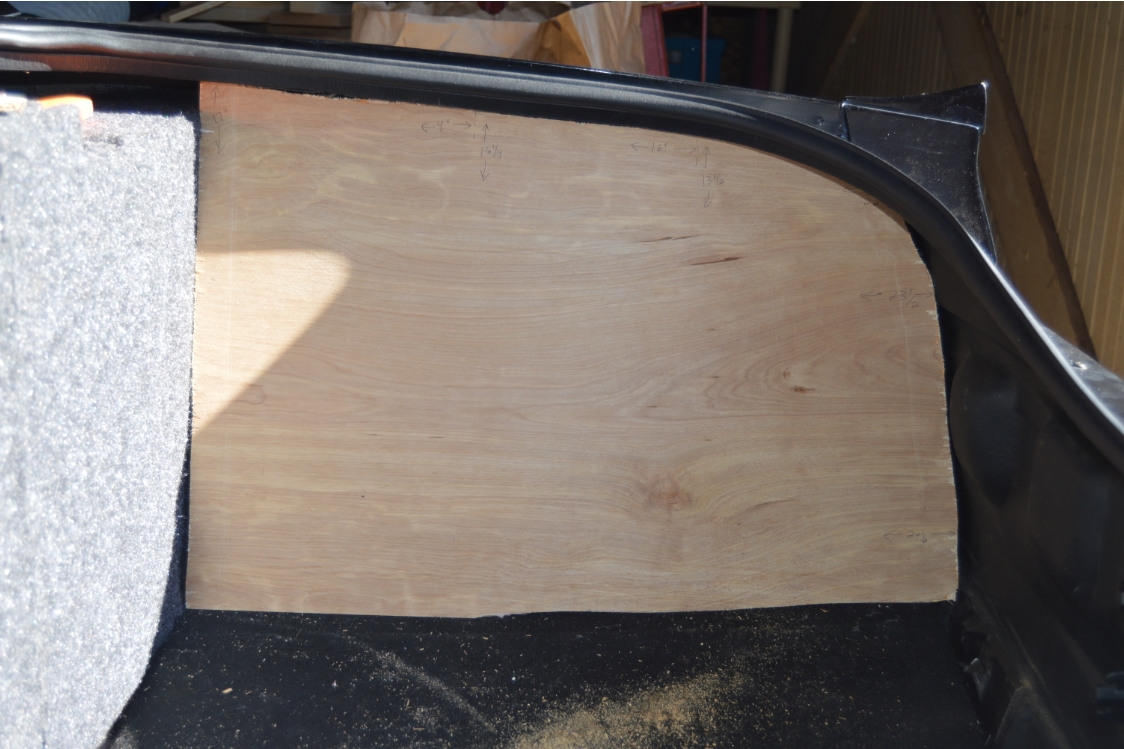
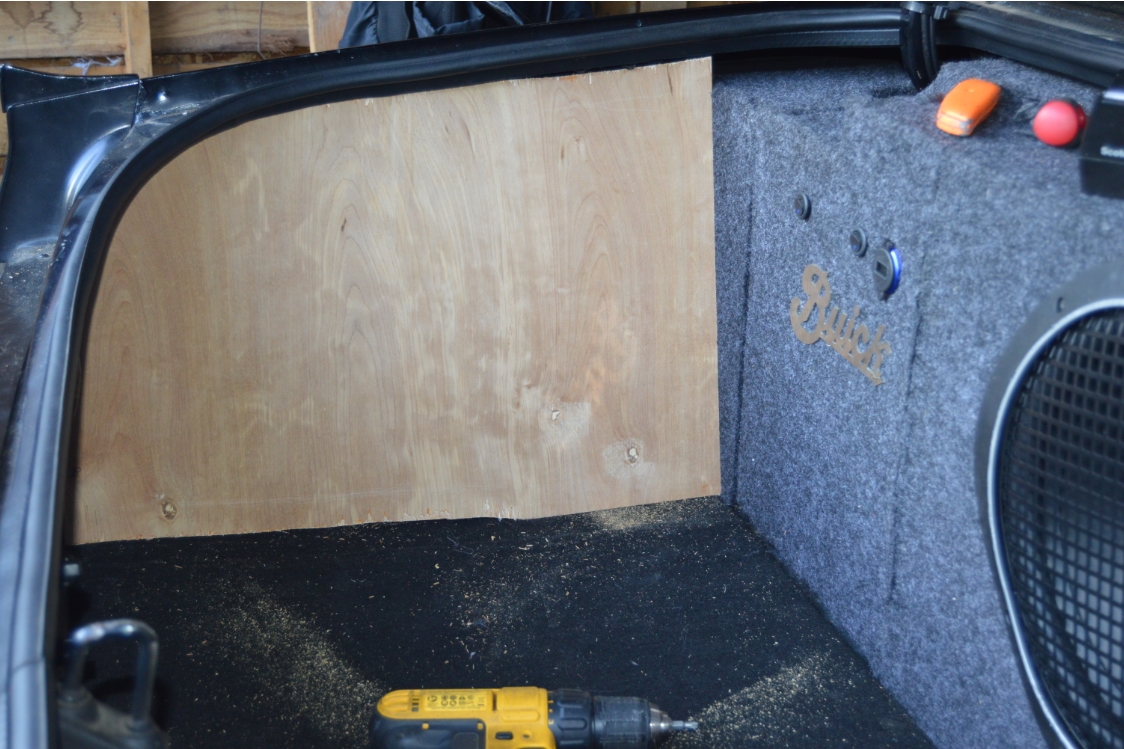
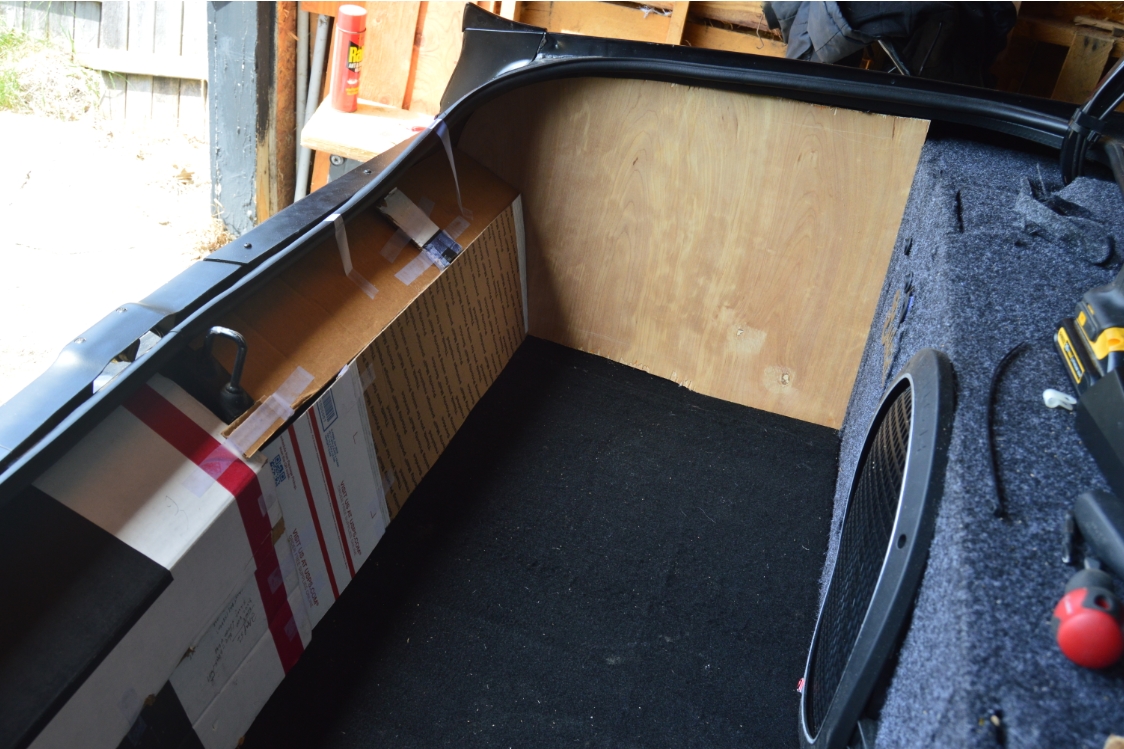
The side sections (quarter panel pieces) are constructed all in 1 piece (basically just a flat panel).
They aren’t really secured down anywhere, they just kind of sit in place there, wedged in by design, on an angle.
Once the rear piece is put into place, that will (sort of) lock the side piece in there.
[on the passenger side, at the top, near the front, there’s a little bump on the OEM quarter panel brace, and the top of this new piece will rest on it preventing it from falling backwards]
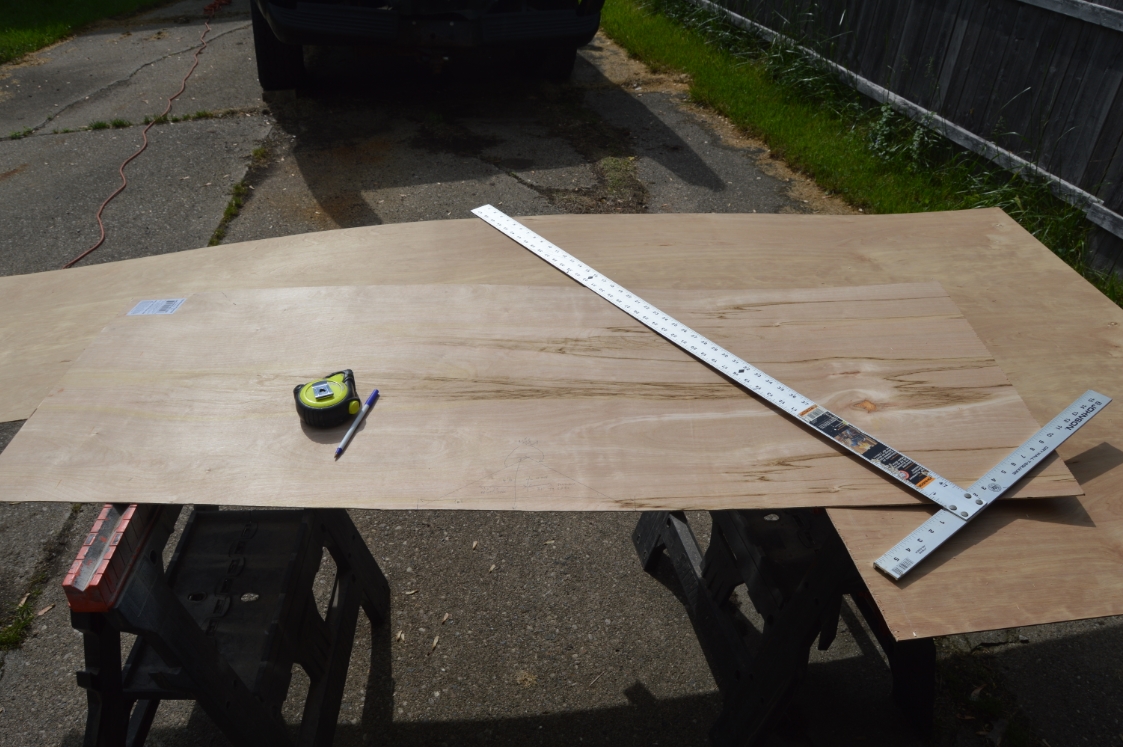
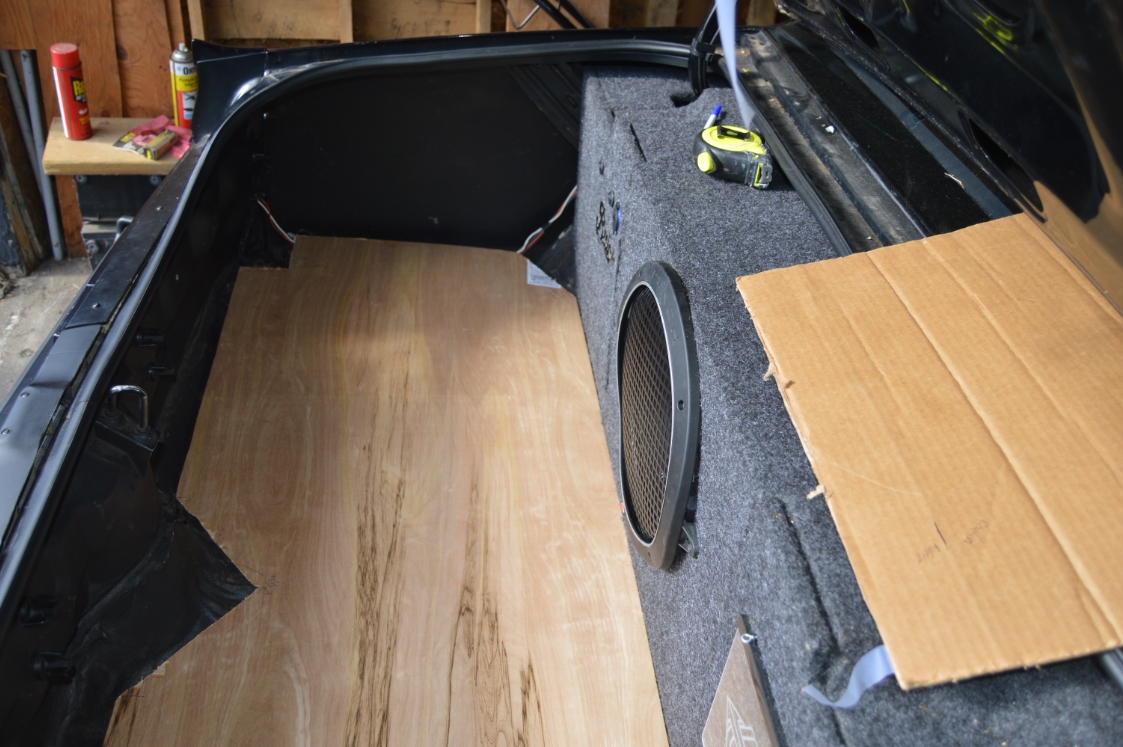
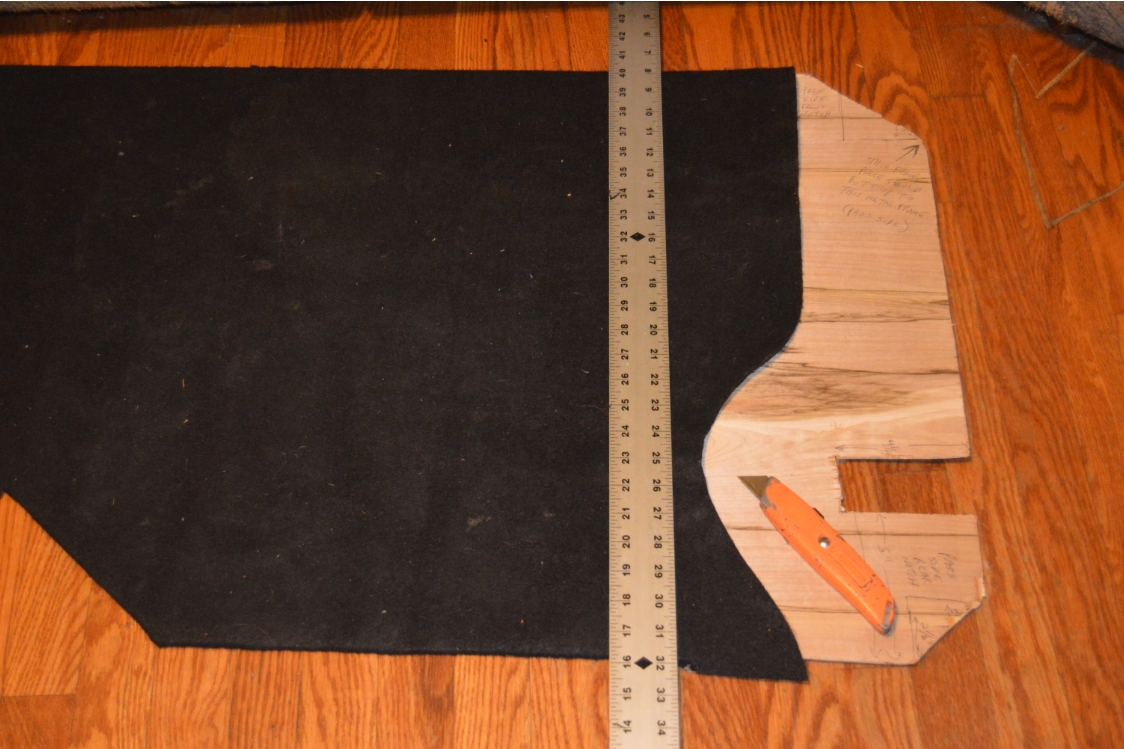
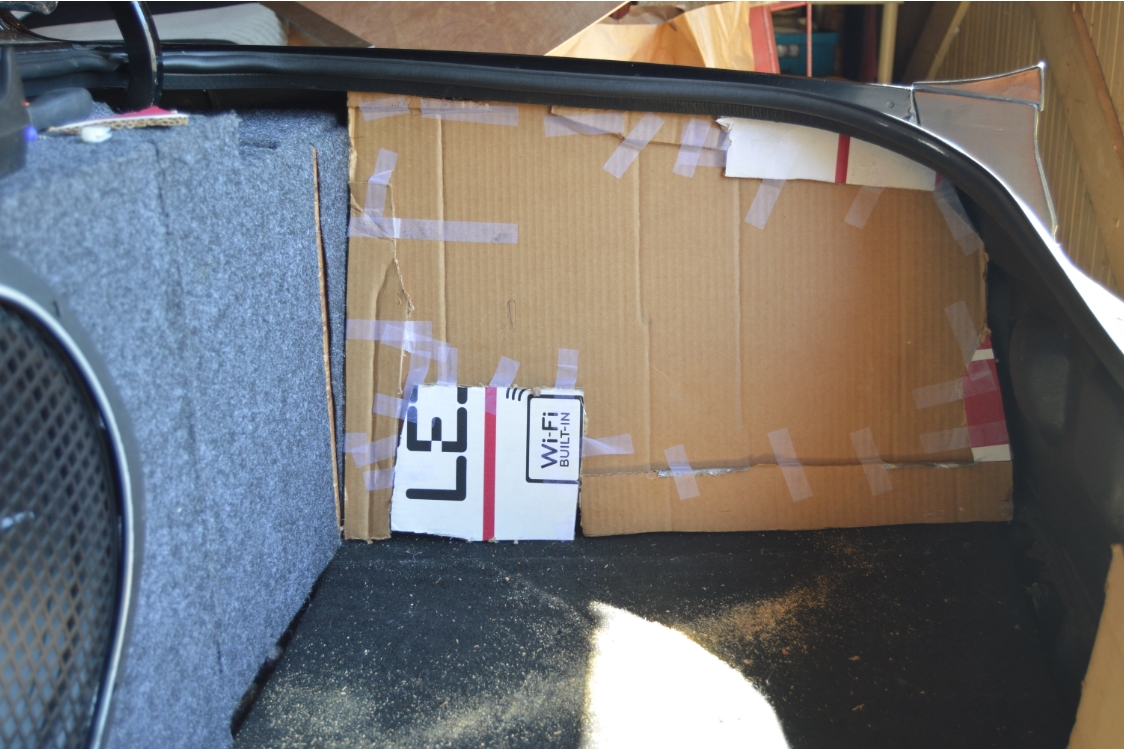
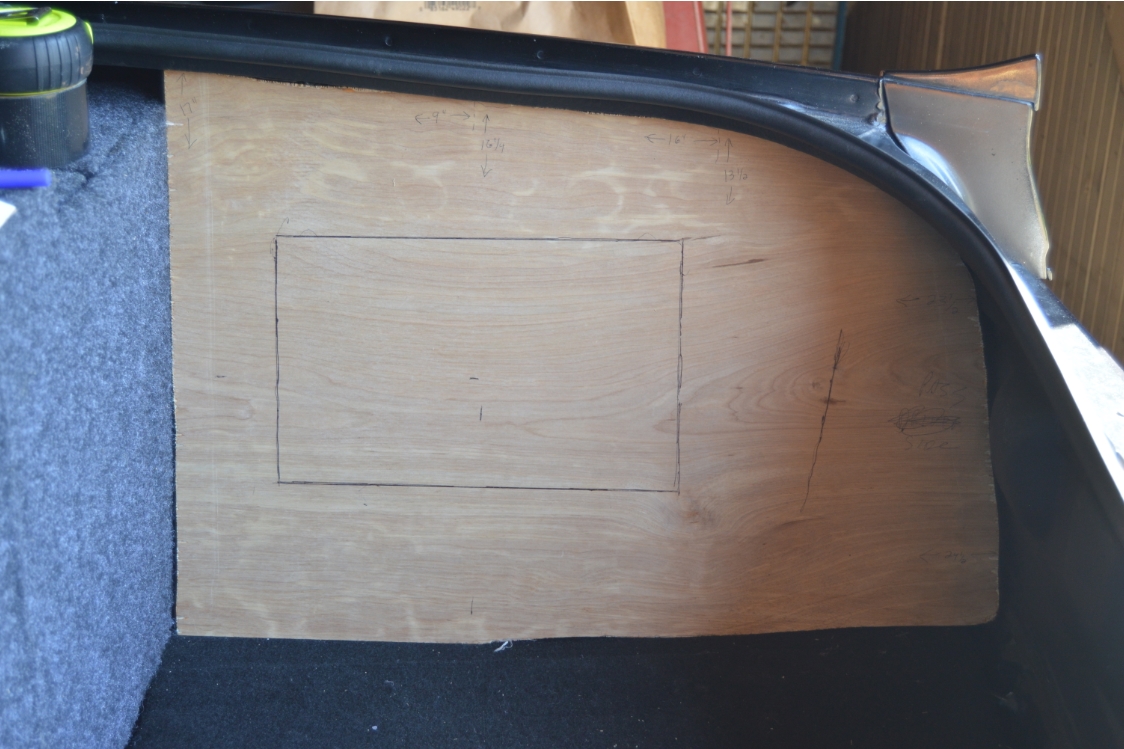
We started with the passenger side piece, mocking it up with cardboard, then traced the design onto the sheet of plywood.
For the drivers side, we used the same mockup & it fit fine!
[we added a small piece of MDF and attached it via bolt & screw, into an existing hole in the Factory quarter panel brace at the top, to hold this new panel in place, to keep it from falling backwards and to bring the top of the panel more towards the center of the car]
.
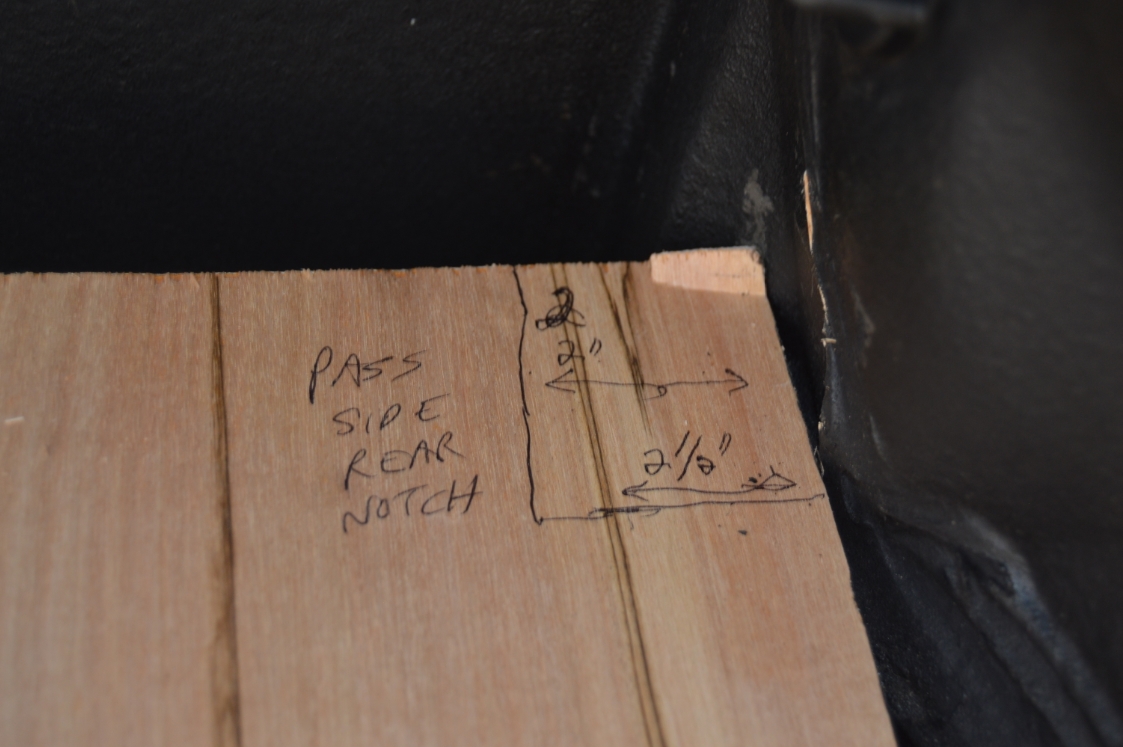
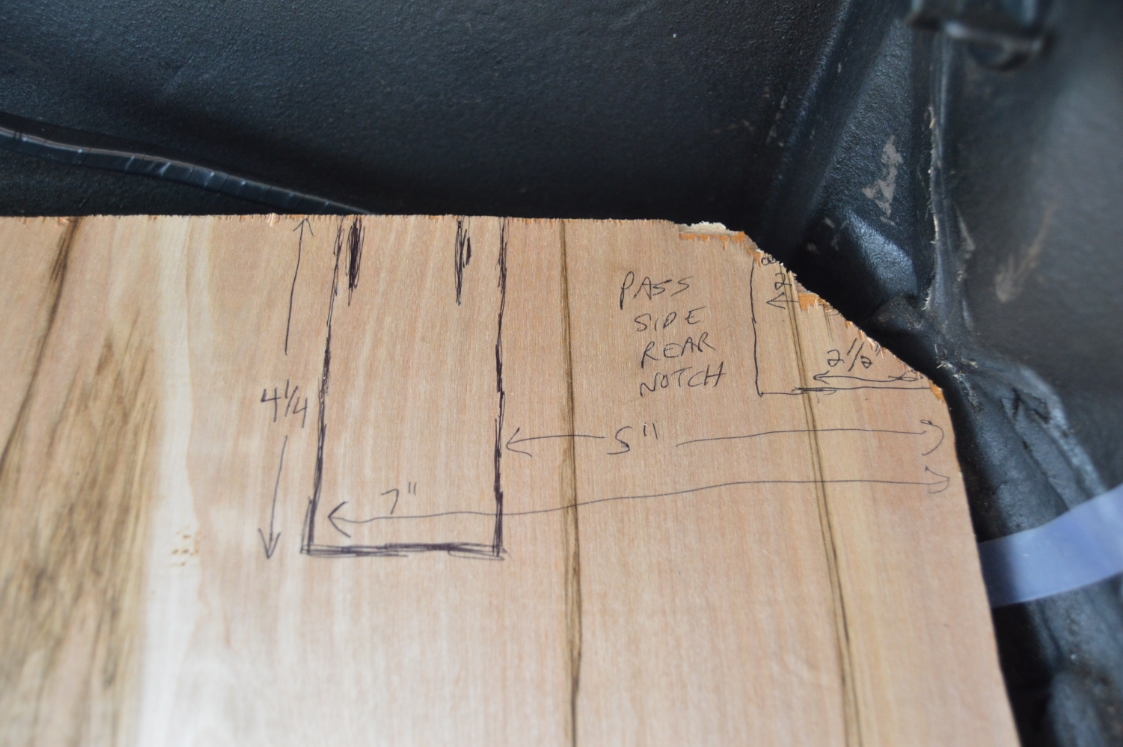
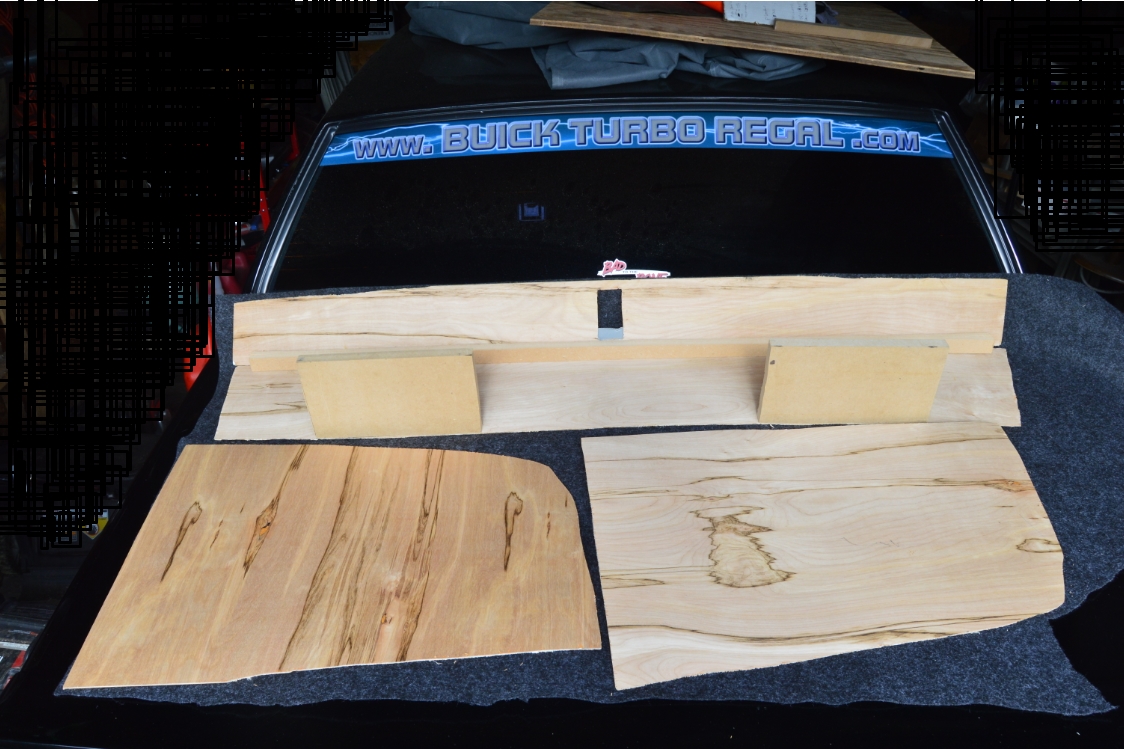
The rear section is made up of 5 parts, the top, the face, 2 small pieces that sit on the floor (used as basically a brace for the face part), and 1 full length brace at the top.
Specs are shown in pics. The top piece has a couple angles plus a cutout for the trunk latch.
The drivers side left edge is on an angle whereas the passenger side is straight (it seemed to just fit better that way for some reason).
.
We haven’t decided what we are going to do for the underside of the trunk lid yet (if anything). We may create a panel (similar to what other carpet trunk kits have in them), leave it as is, or do something else creative for it.
But either way, that won’t be included in todays post here.
Perhaps that may be a “Part 3” for this story in the future sometime. We’ll see.
{ see what we ended up making for the Trunk Lid Liner }
.
Should you be wondering about the extra weight this puts into your Turbo Buick, it’s very minimal, as the entire sheet of plywood that’s used weighs less than 10 pounds! (and you don’t use the full sheet)
.
Cost to build these 4 parts: Less than 20 bucks!
Time to build: took me 2 full days, but remember, I had to figure this all out, not to mention create this story for you guys!
The feeling you get from a fully carpeted trunk area: extreme delight!
[everybody now, say: “ooh” – “aah” – thanks!]
.
PARTS:
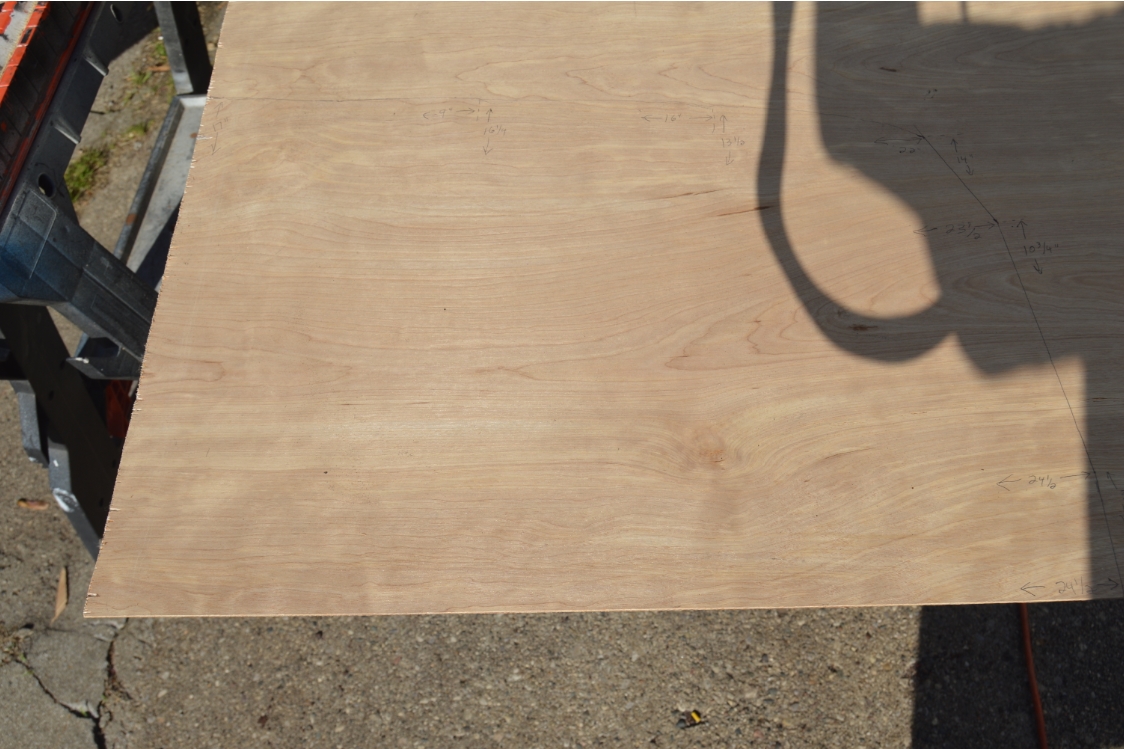
- 1 Sheet (4X8 x 2.7mm) Utility Plywood ($12 home depot)
- small pieces leftover of the MDF (from the custom subwoofer box build, Part 1, to use as braces/supports on the side & rear panels for this current build)
- pieces leftover of the carpet (from the custom subwoofer box build, Part 1)
- some 1″ (course thread) drywall screws (to hold the rear pieces together)
.
TOOLS:
- tape measure
- circular / jig saw
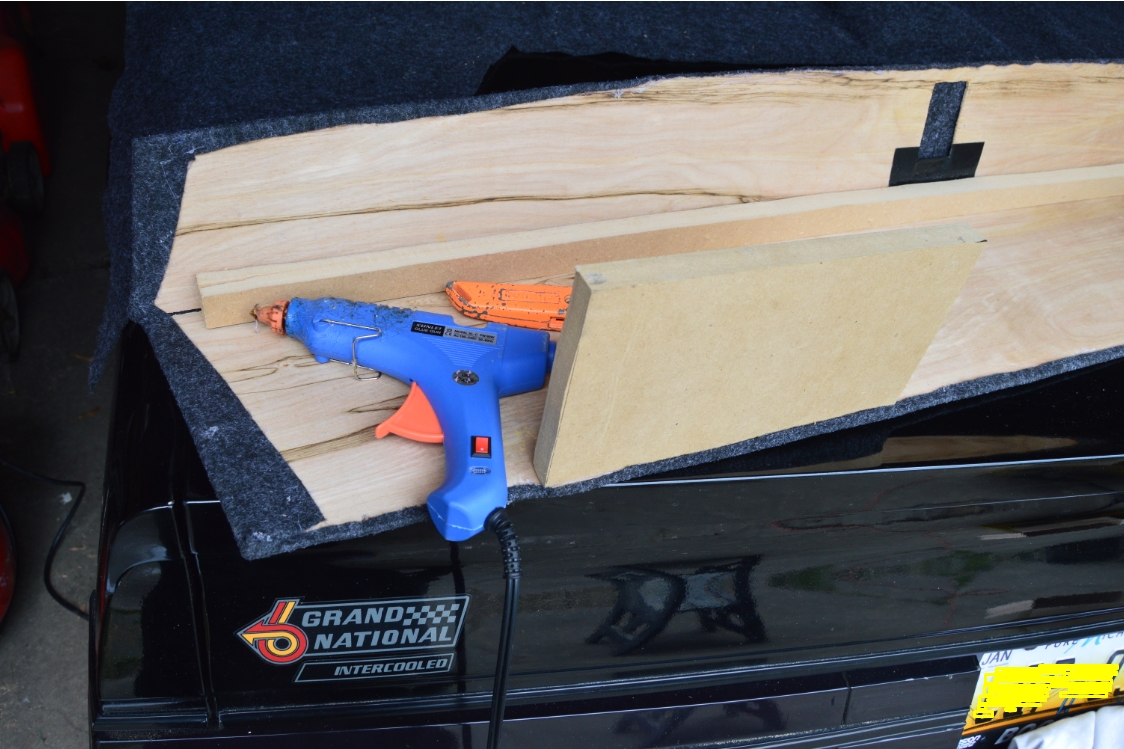
- glue gun (to hold the pieces together & to secure the carpet to the pieces)
.
Just like the sub box build, there’s not really a “how-to” for this one, but we will give you the specs & sizes for the panels in case you’d like to build your own.
.
DIMENSIONS:
.
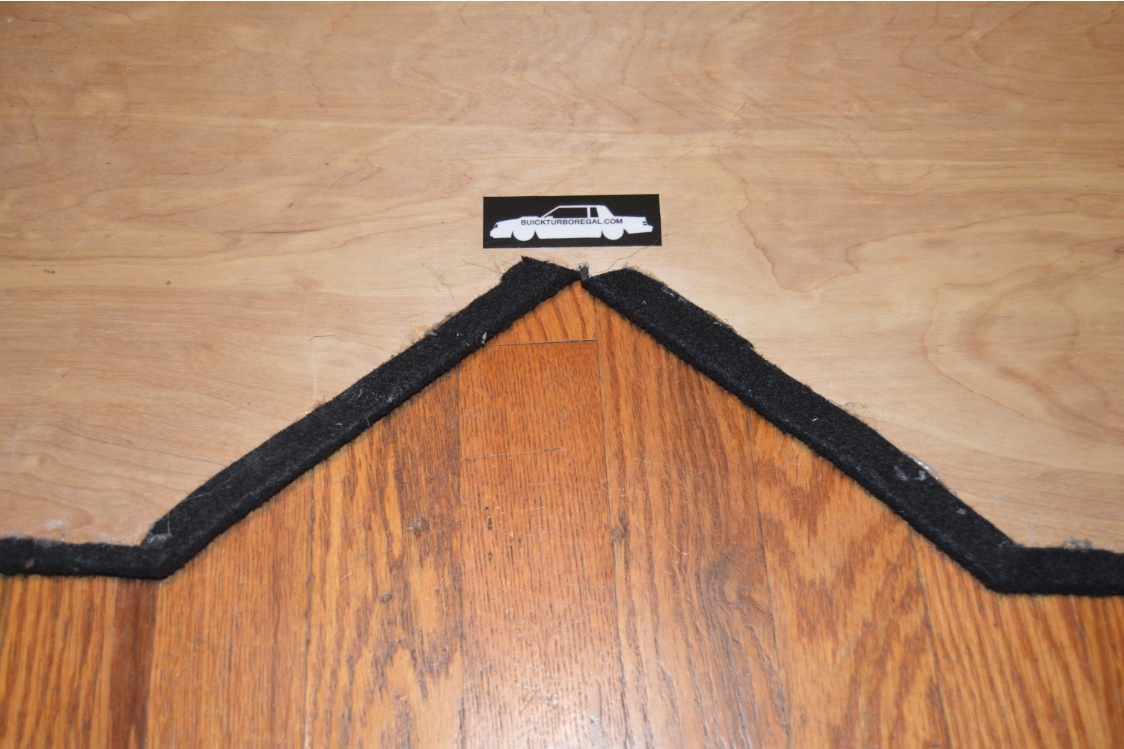
FLOOR PANEL:
63″ x 24″
.
QUARTER PANELS:
PASSENGER SIDE:
17″ H x 24.50″ W (with a bunch of angles, see pic)
DRIVERS SIDE:
the same
.
REAR SECTION:
top : 52″ W x 5″ H (with a bunch of angles, see pic)
face: 52″ x 8″
2 bottom braces: 10″ x 5″ (using the MDF from the sub box build)
top brace: 1″ x 52″ (full width, or as close as you have, using the MDF from the sub box build)
.
Helpful Hints:
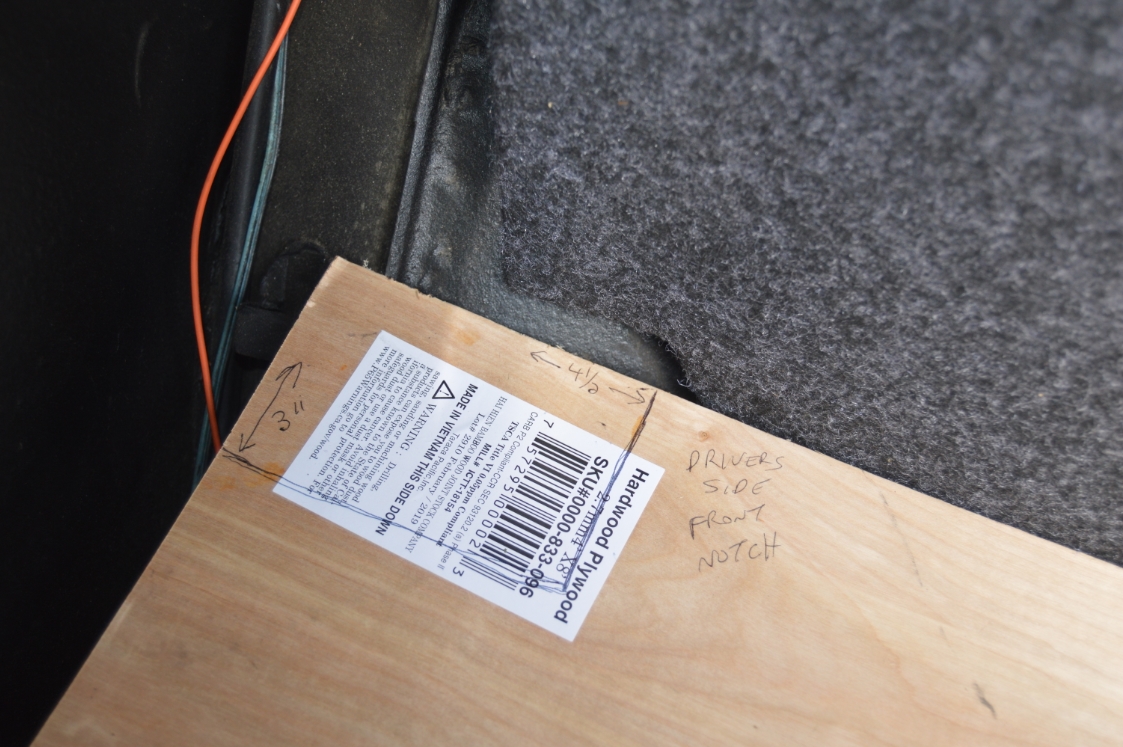
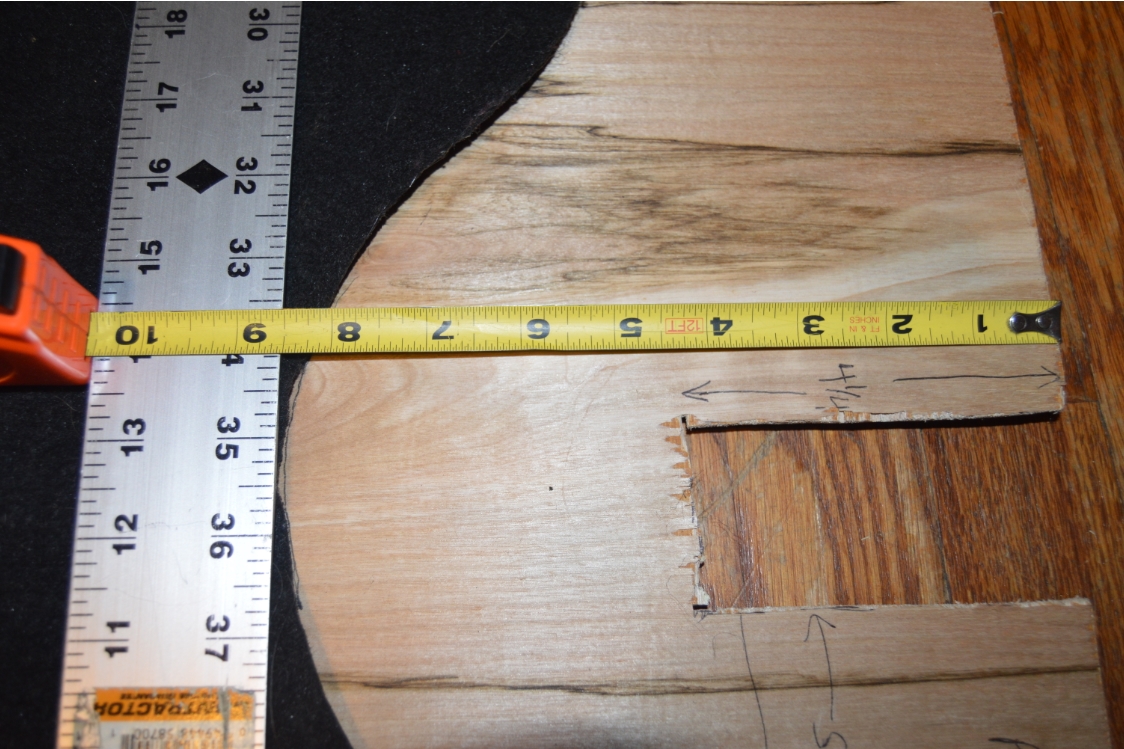
The floor piece needs to notched out at each corner. More of an angle cut than a notch, will clear the stuff that’s in the way (wheel wells, support brackets, etc.).
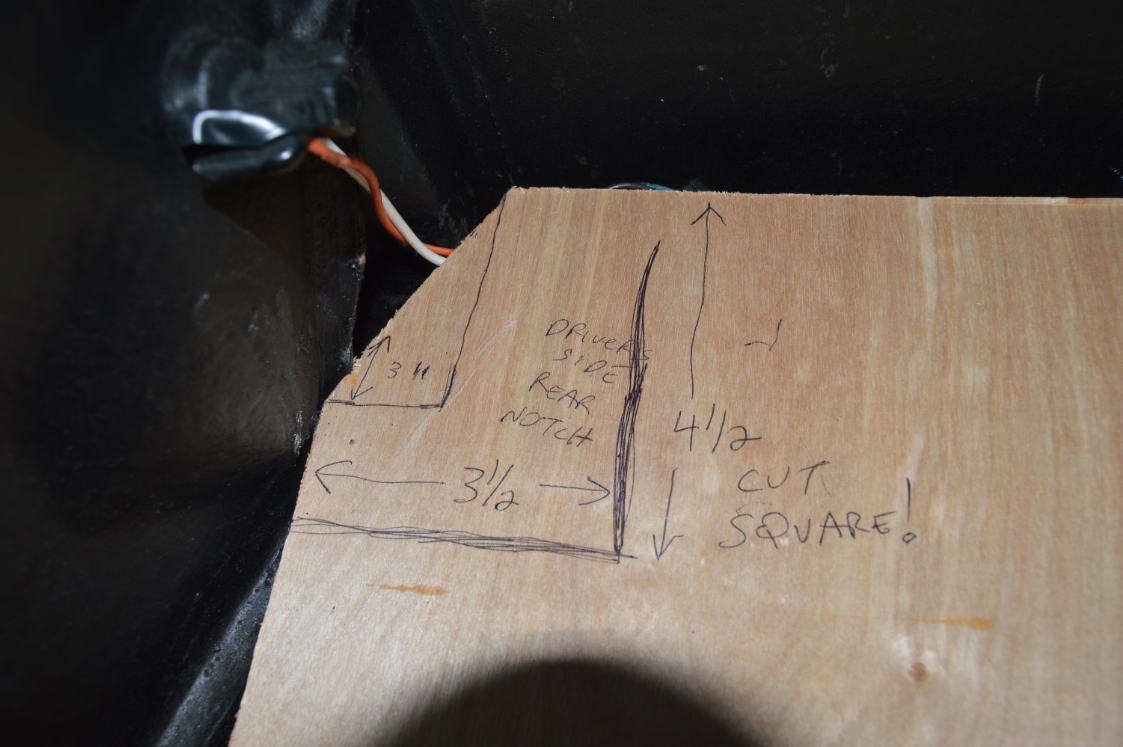
The drivers side rear notch, however – must be cut square otherwise the panel won’t stay flat.
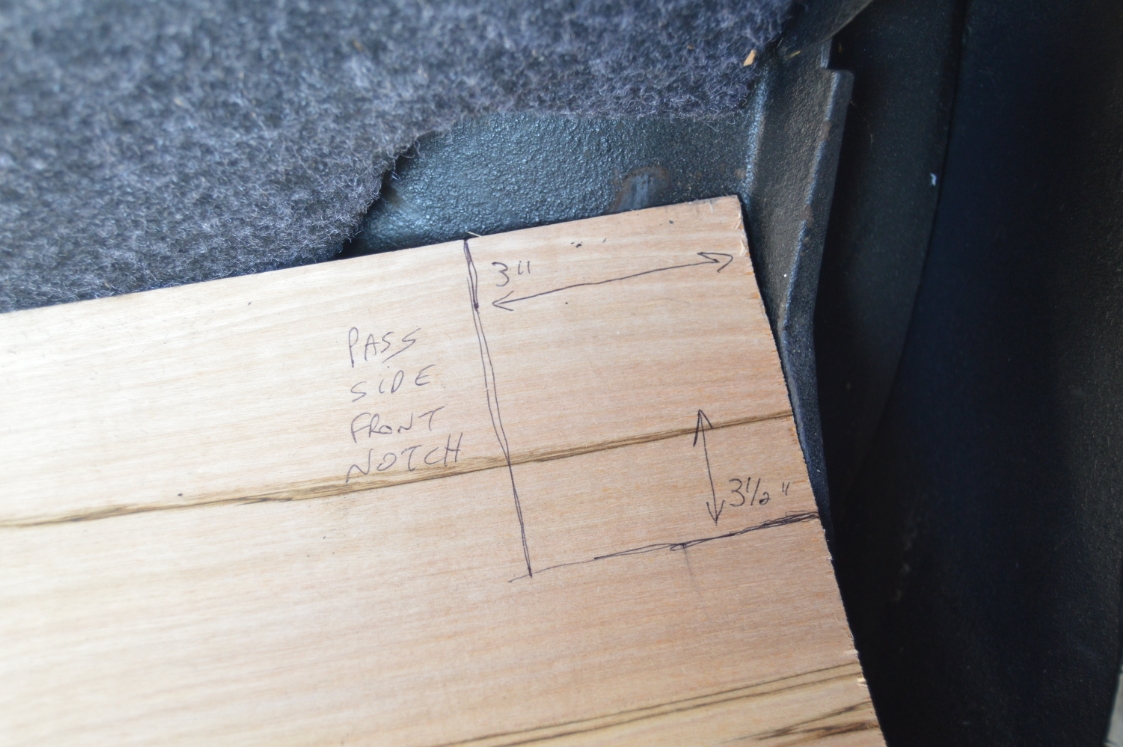
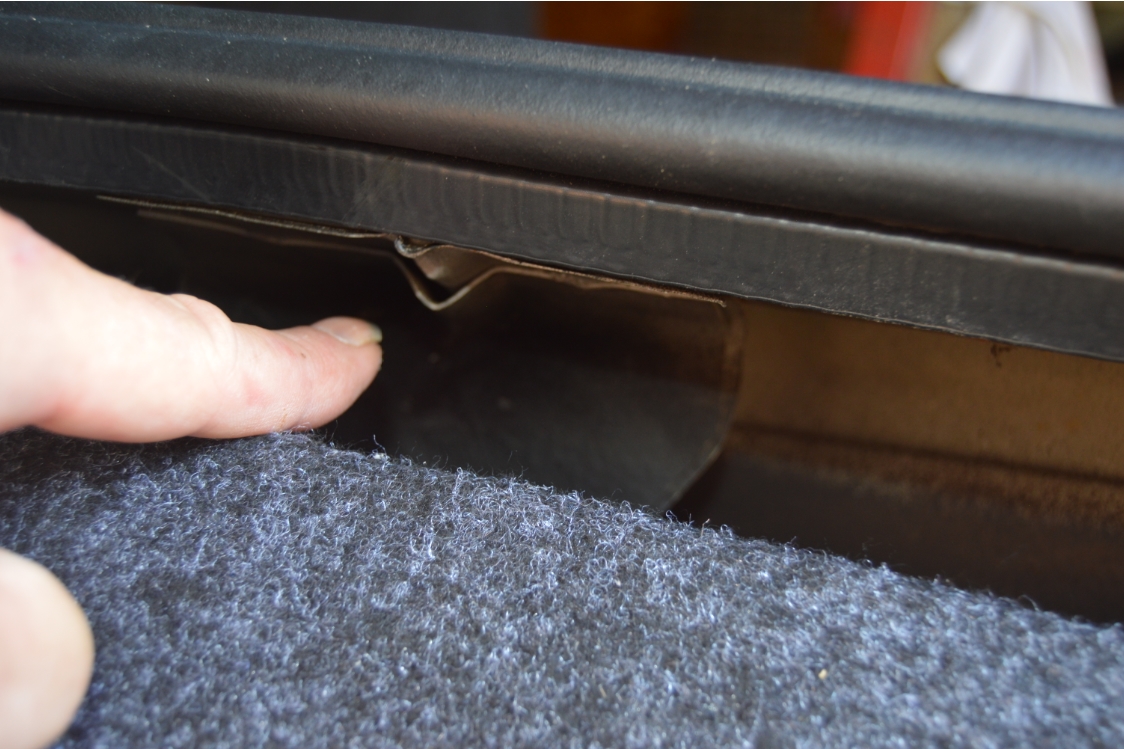
And another cutout is needed on the passenger side near the rear (to clear the jack hold down).
(see pics for all dimensions where cuts need to be made).
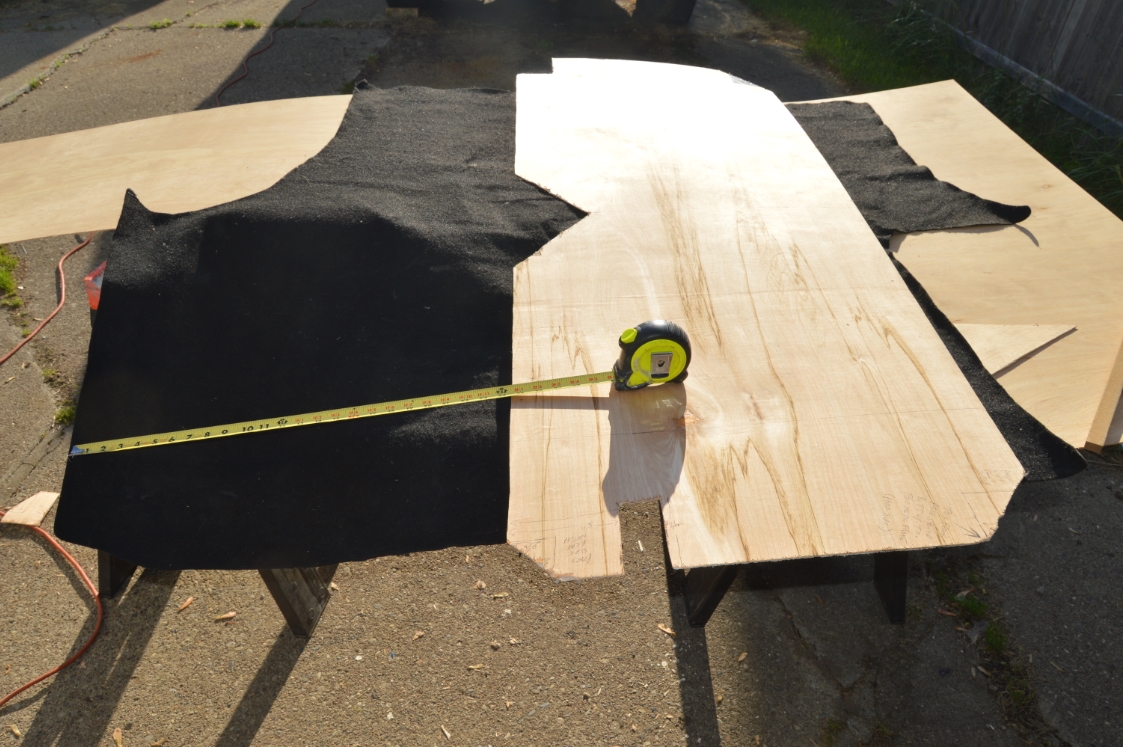
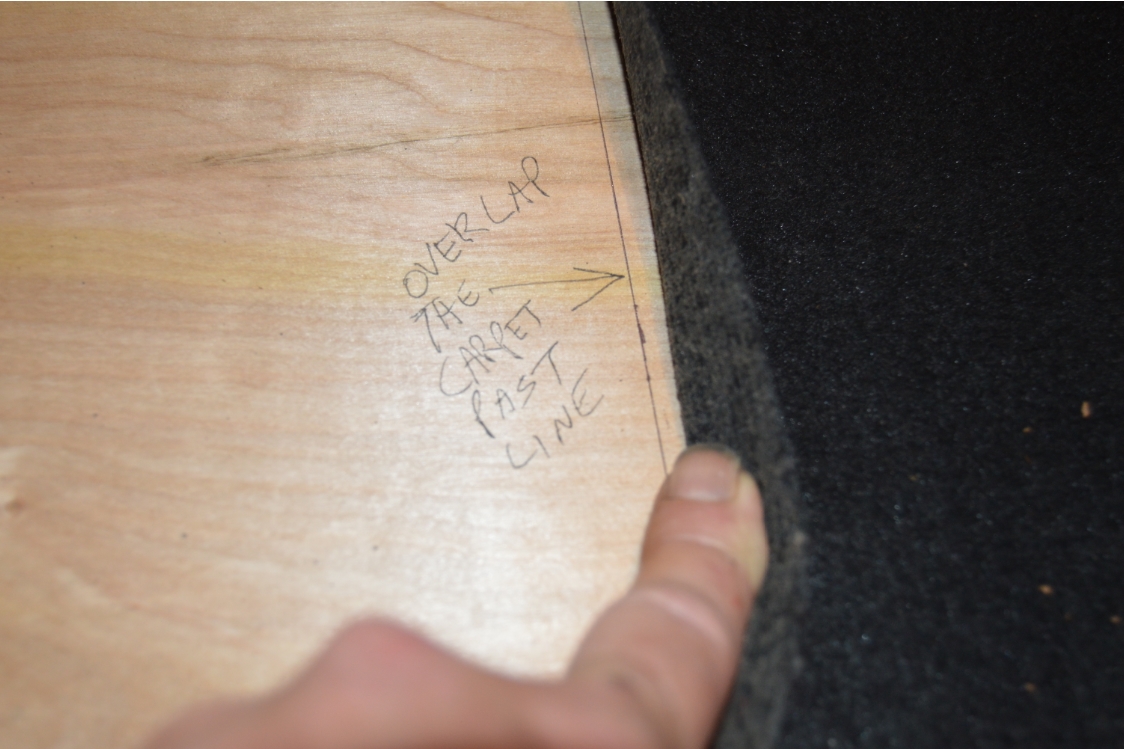
When you go to carpet that floor piece, if you are using the OEM stuff like us, you will realize that the factory carpet is not really big enough to cover the entire thing in 1 piece. So decisions need to be made. You can either go buy more of the matching black/grey carpet (from the sub build) and use that, or do what we did.
Which was install the Stock carpet in 3 sections, and seam it up as best as you can.
Here’s how we did that:
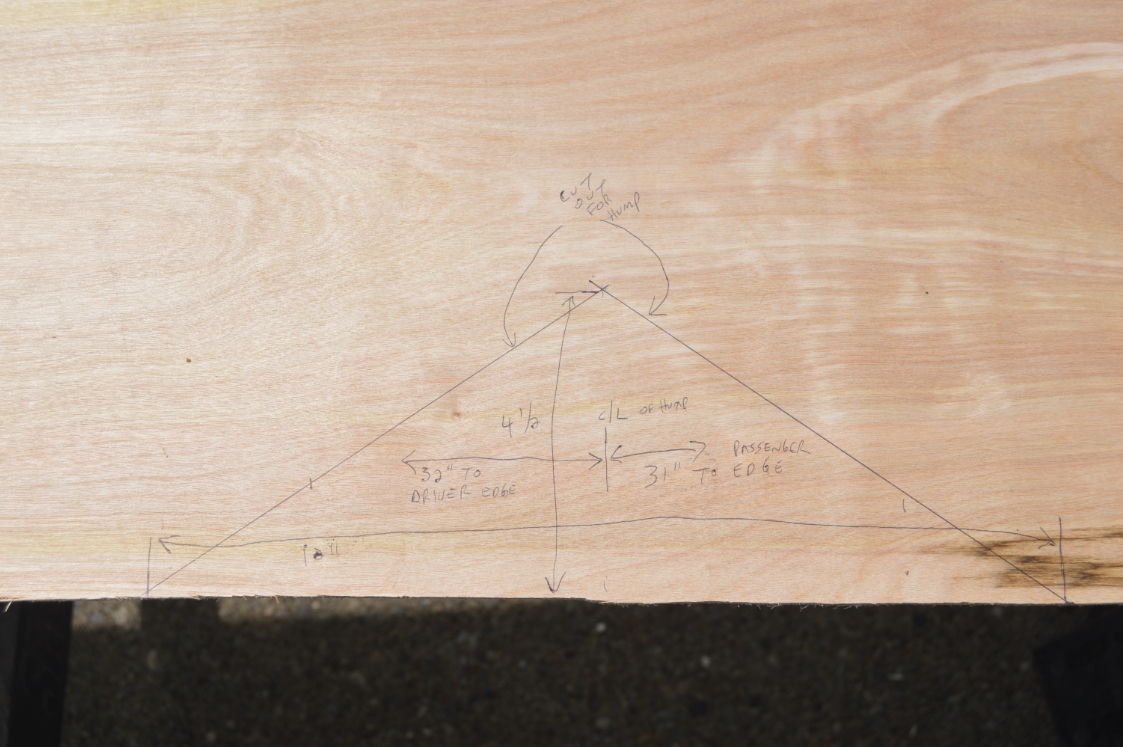
From that center point (at the hump) at the bottom of the floor piece, that is the halfway mark between the left and right sides (even though its not equal on both sides). Make a line. Measure 22″ on both sides and make another line. If you turn the OEM carpet just the right way, there’s a section that will fit between these lines (44″ x 24″).
Hot glue the carpet to the floor piece.
Be sure to wrap the carpet over to the backside (gluing it down as well) by about 1/2″.
Check out the pics for this below.
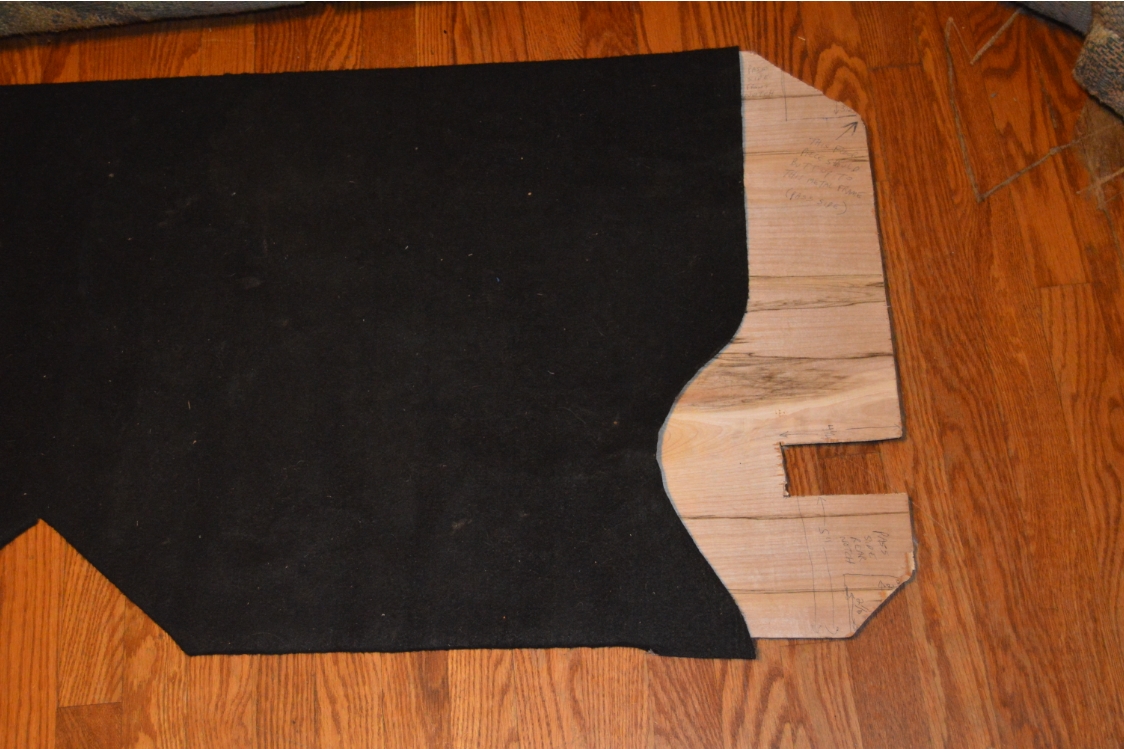
You will have enough carpet leftover to now have enough to do the 2 outside edges of the floor piece (approx 10″ x 24″ each).
We made the center carpet piece about 46″ wide, overlapping the lines.
The end carpet pieces will fit UNDER the center section (butt it up to the lines you made).
Since the ends will be mostly under the quarter panel pieces, the seams shouldn’t be too noticeable and be held down well under them.
.
Make the side pieces and rear section completely BEFORE you carpet them.
We made reference lines on the quarter pieces to line up the face of the rear panel (to be able to set that angle to get all the braces in the correct position).
.
When assembling the rear section, we created the face and top piece first. Then attached the braces to the face panel, so we could see how it was going to lay out in the trunk. The top piece attaches last.
Put the face piece where it needs to be in the trunk, then put the top on.
Makes it easier to line up everything & screw it into place!
Once the rear section is carpeted, completed & ready to final install: That top piece goes into the pre-existing curved area on the rear metal OEM panel – see pic).
.
Be sure when you do all the carpeting, (including the sub box), you use it all wisely (meaning cut it very close to the end of your pieces)! As now that I am down to finishing everything up, there is BARELY enough to do it all (as in 1 piece for every part, without having any seams)!
.
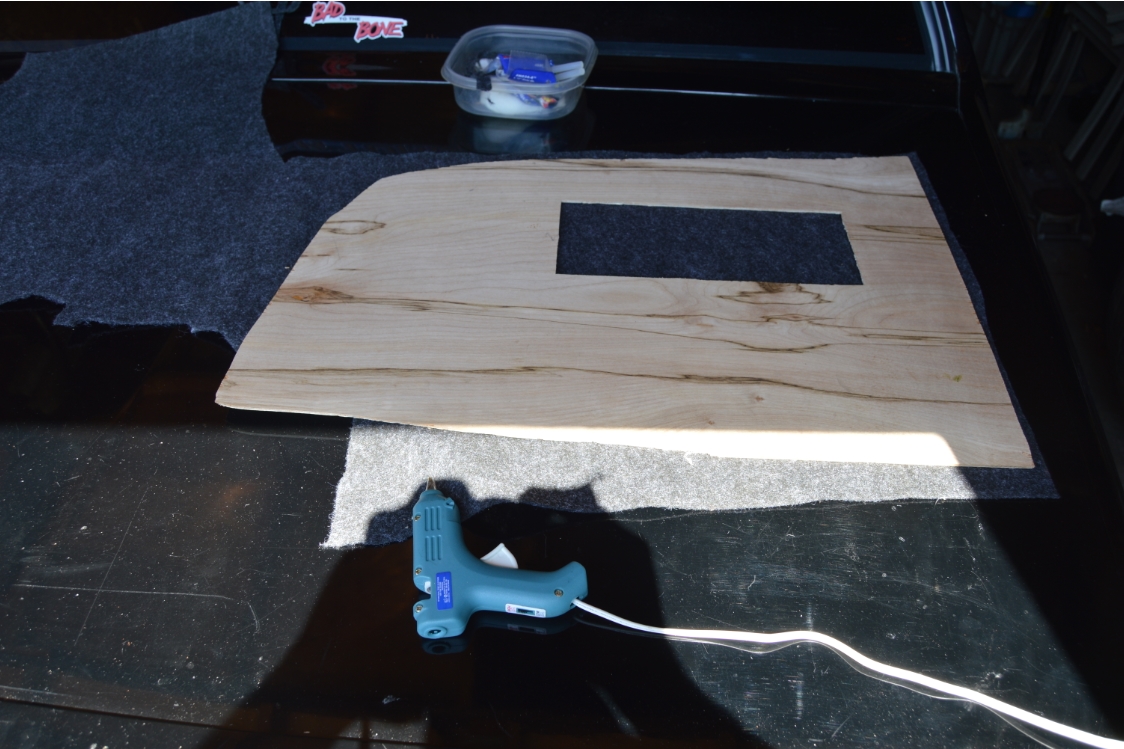
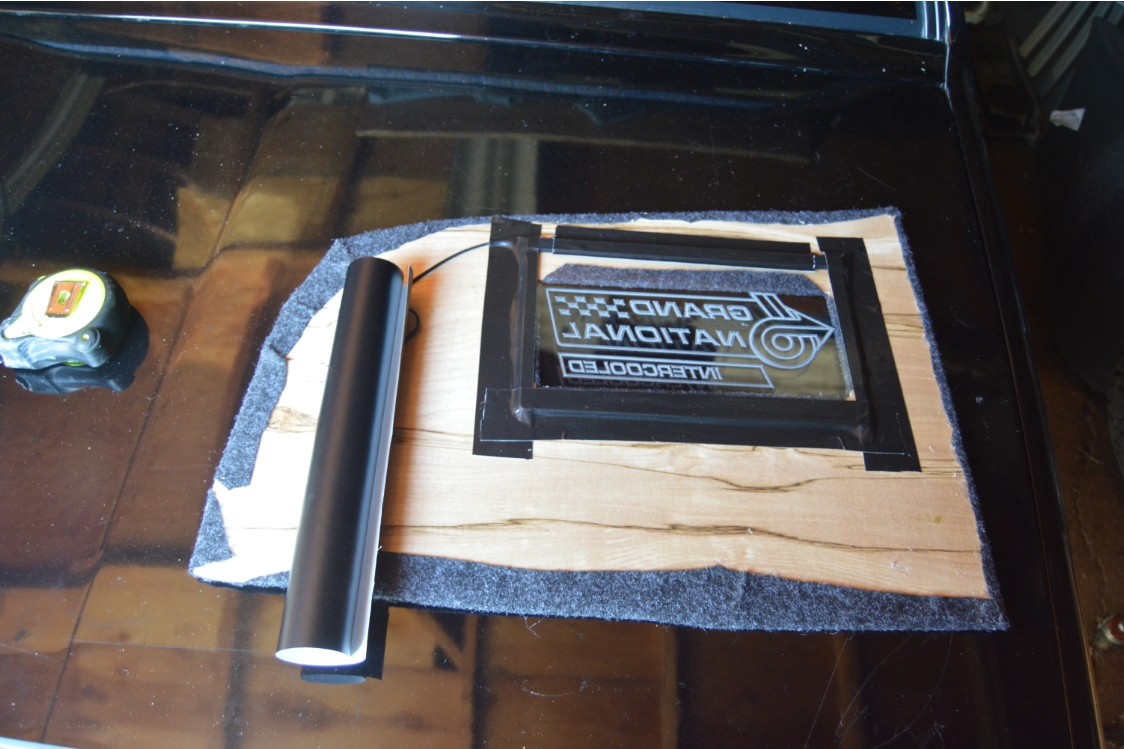
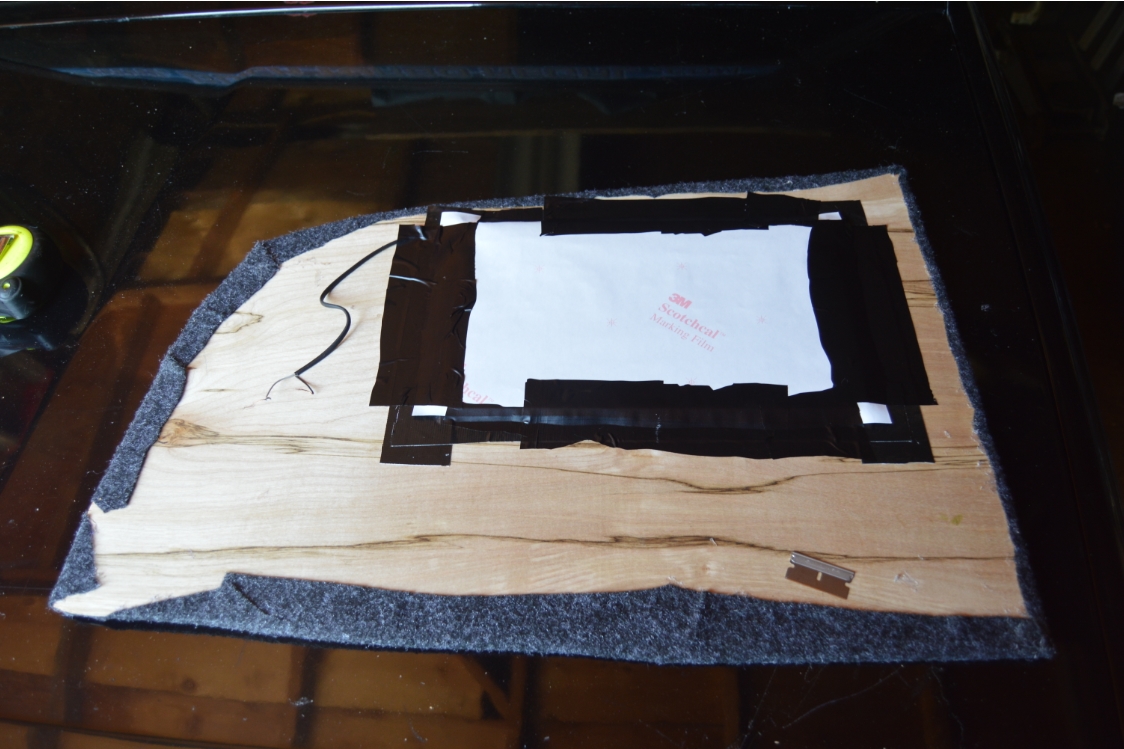
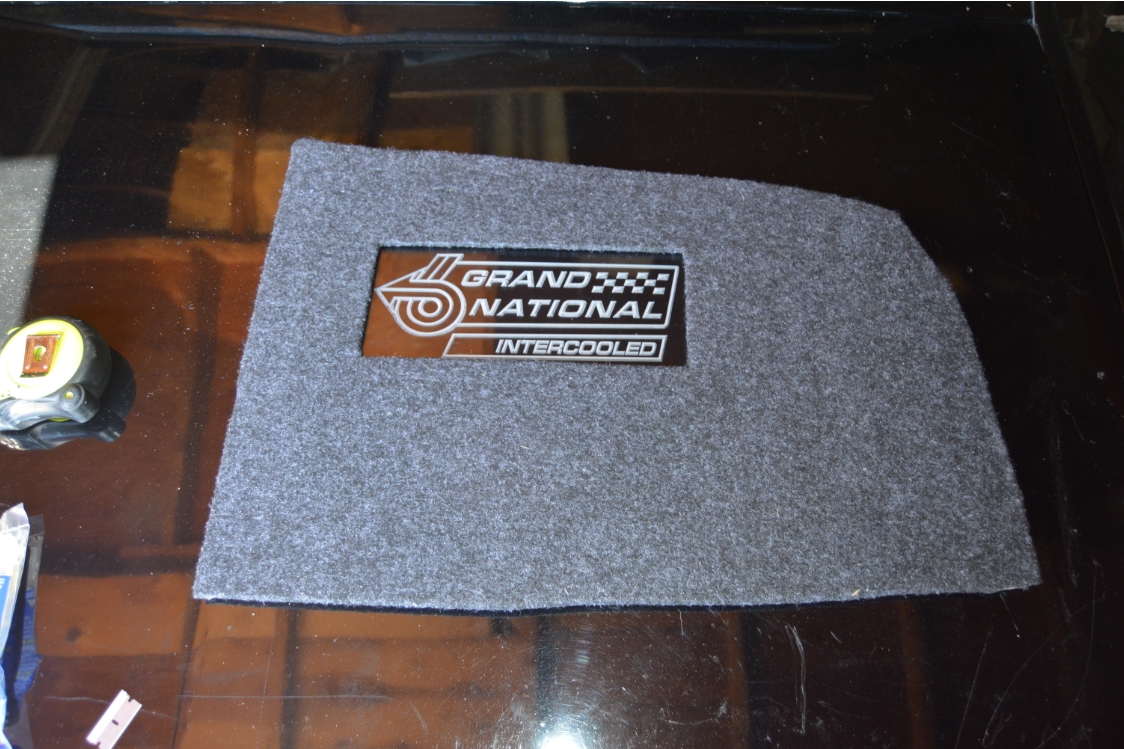
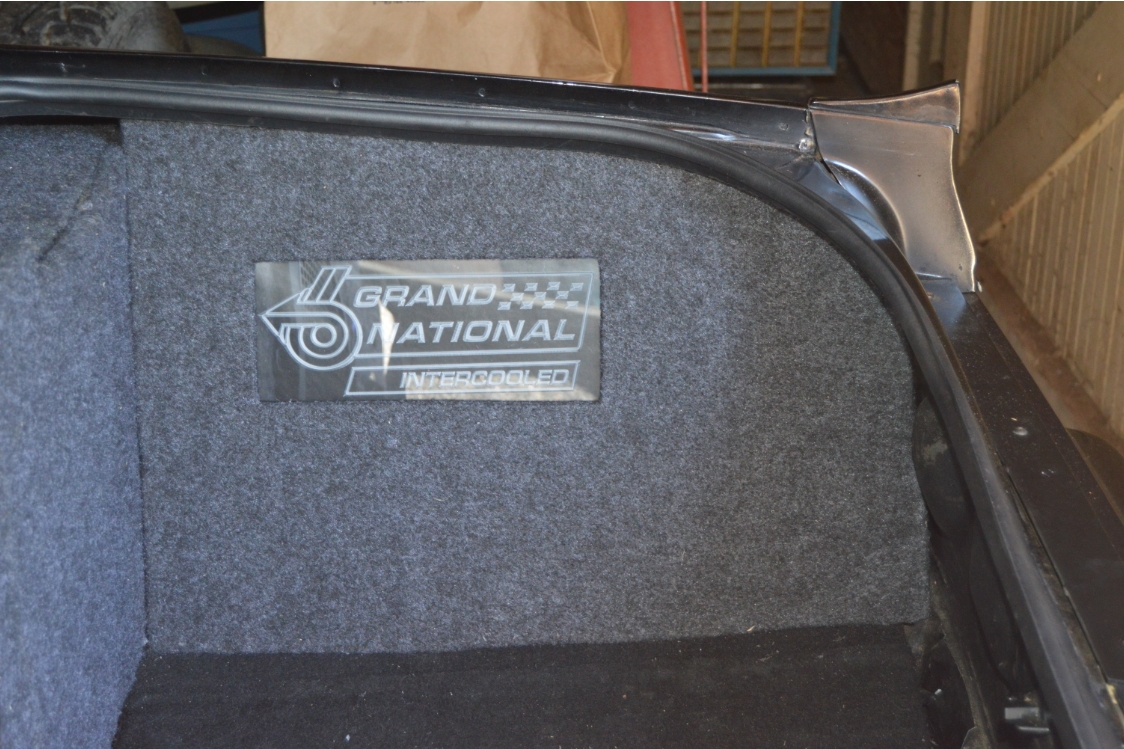
For that cool Grand National sign we had (that use to be on the right side door when we built the sub box, but had to move it when we redid the doors), we put it in the passenger side quarter panel piece.
We figured out where center was (front to back of car, taking into consideration that the new rear piece was already installed, and also top to bottom), and marked a box around the sign (8″x12″).
Then we moved the sign up 2″ (to give some extra clearance for any junk we actually put in the trunk).
We wanted the logo to be (totally) centered within the hole we are going to cut for it.
(the sign has more space on the top & bottom than it does left to right)
Which meant we tightened up that original hole markings of 8×12 to roughy 5×10.
We cut the hole, carpeted the panel, placed the sign on the backside of the panel, then literally duct taped it down.
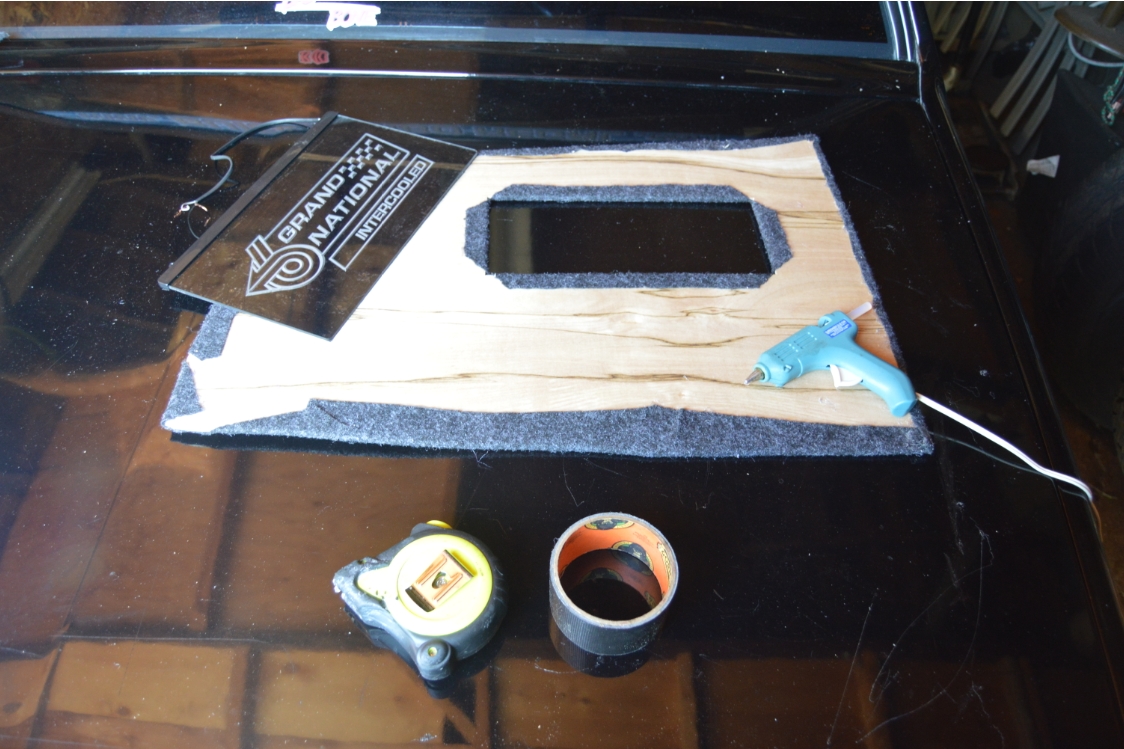
Now considering that the sign is clear, we didn’t want to be able to see the OEM quarter panel thru it, which meant covering it up somehow. We had some black paper material which we placed over the sign. Then we taped that down. It’s perfect! You can’t tell we tell used paper or a sign for this!
We’re pretty happy with the way that all of this turned out!
And you can’t beat the price!
.
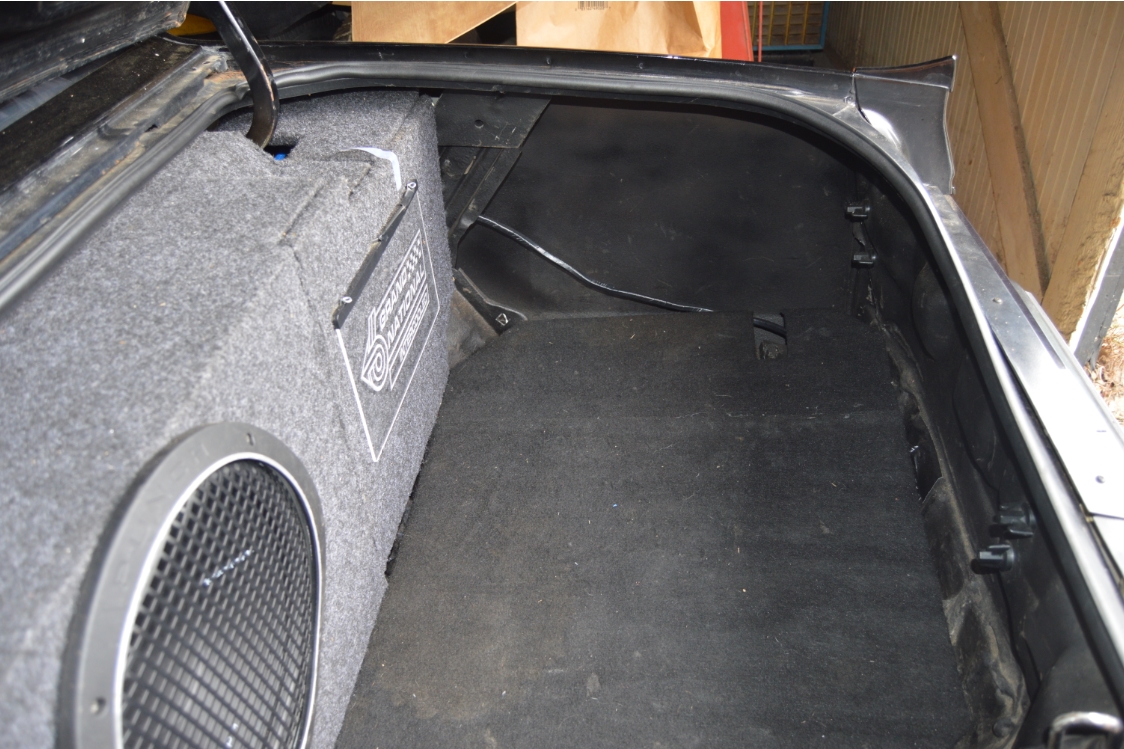
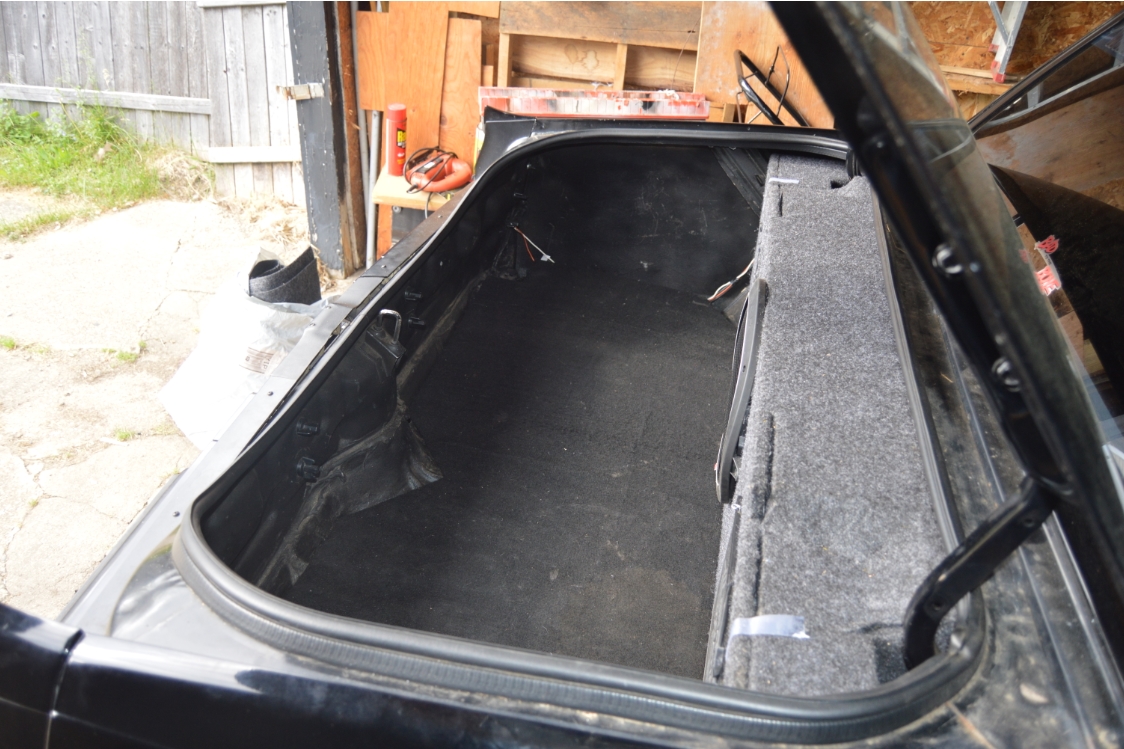
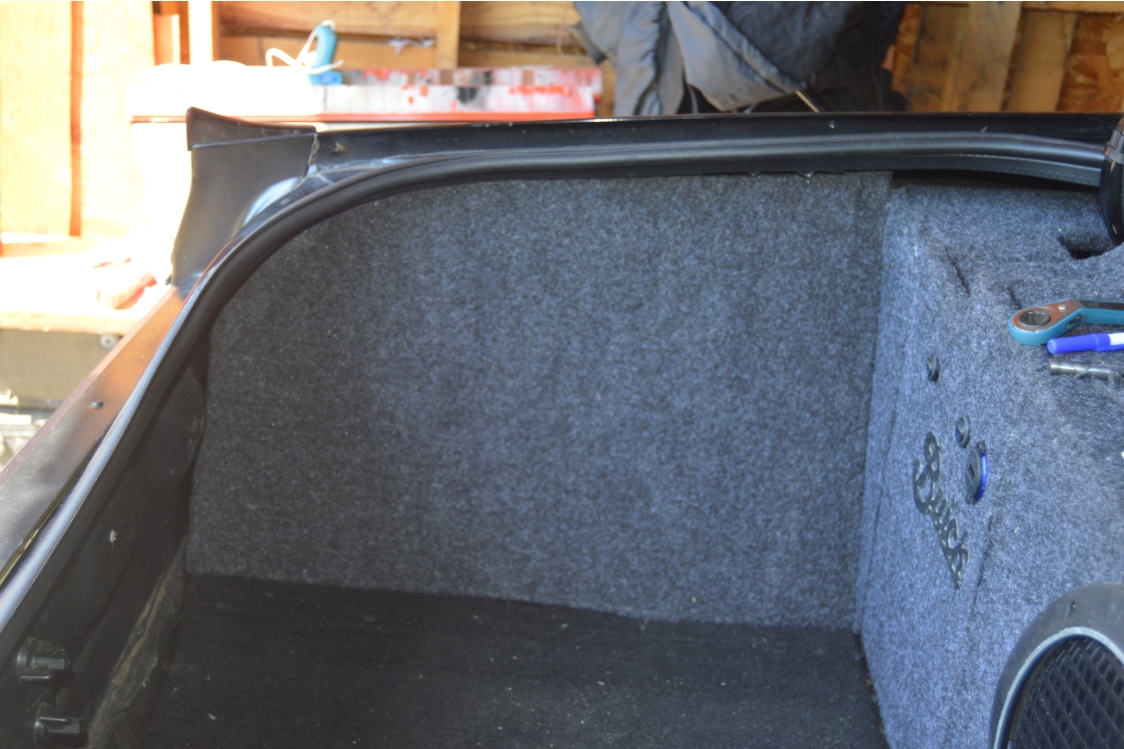
STARTING WITH THE BARE TRUNK
(where we left off after building the sub box):
.

.
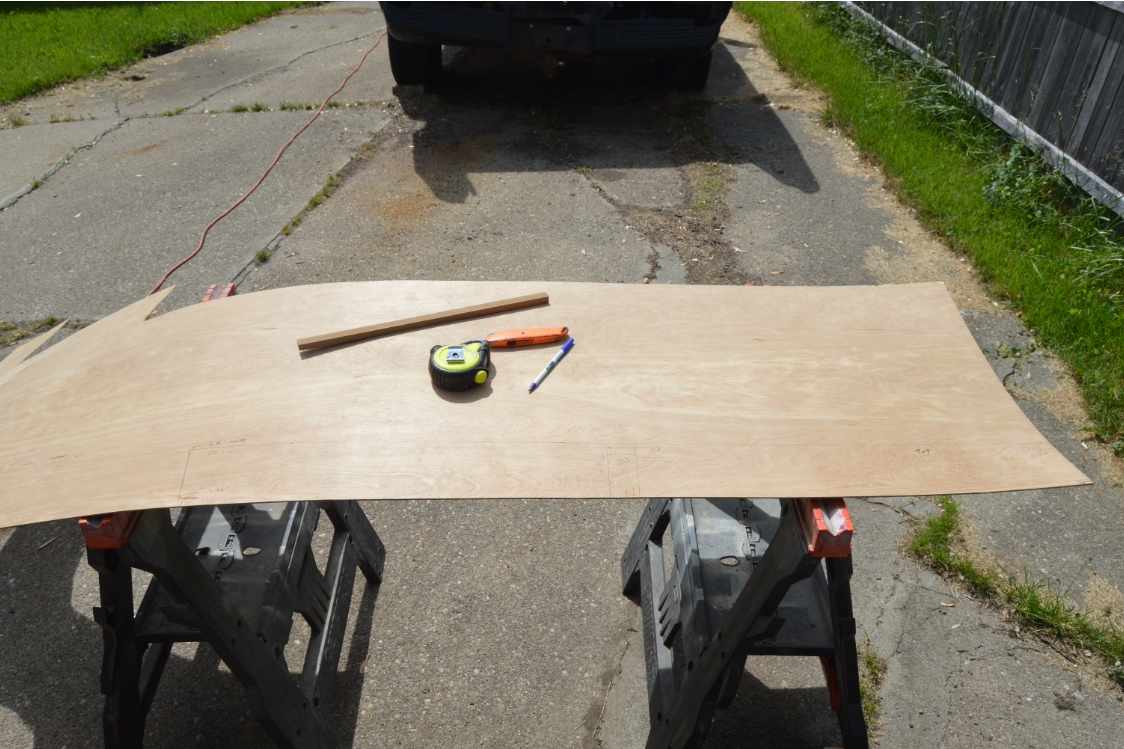
LAYING OUT THE FLOOR PIECE, AND FIGURING OUT DIMENSIONS:
.

.
CARPETING FLOOR PIECE:
.
.
CREATE QUARTER PANEL PIECES:
.
.
MOCKUP & CREATE REAR PIECE:
.
mockup rear 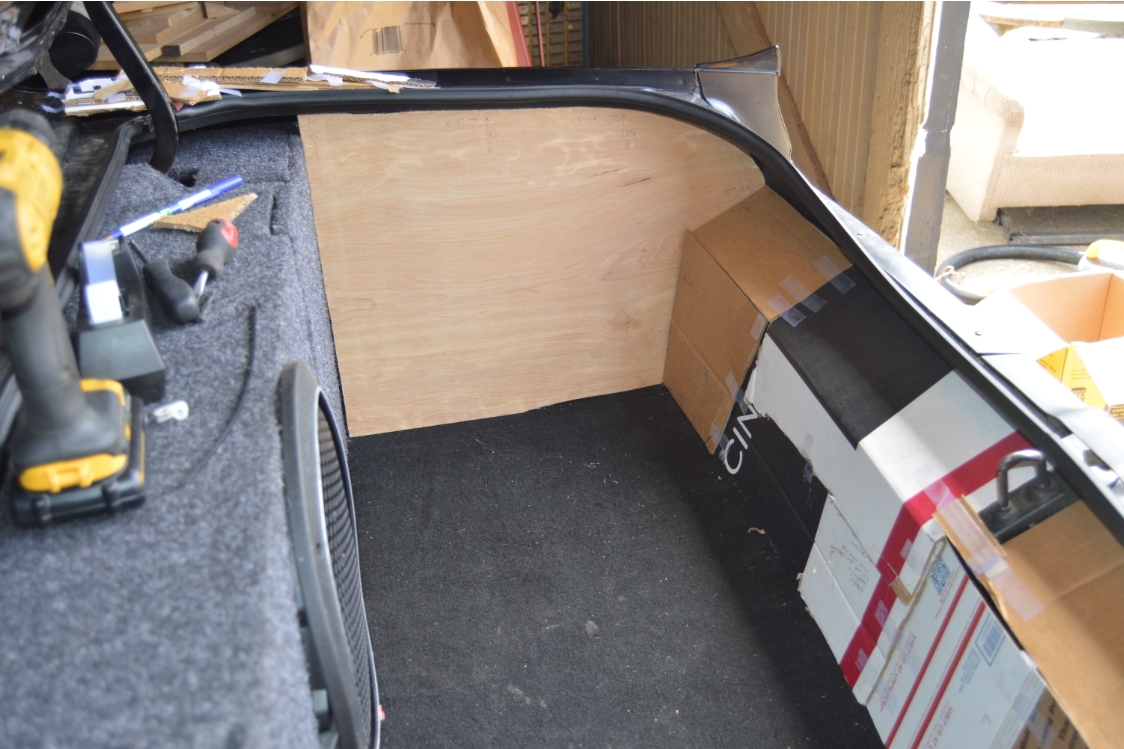
mockup rear panel 
layout & dimensions 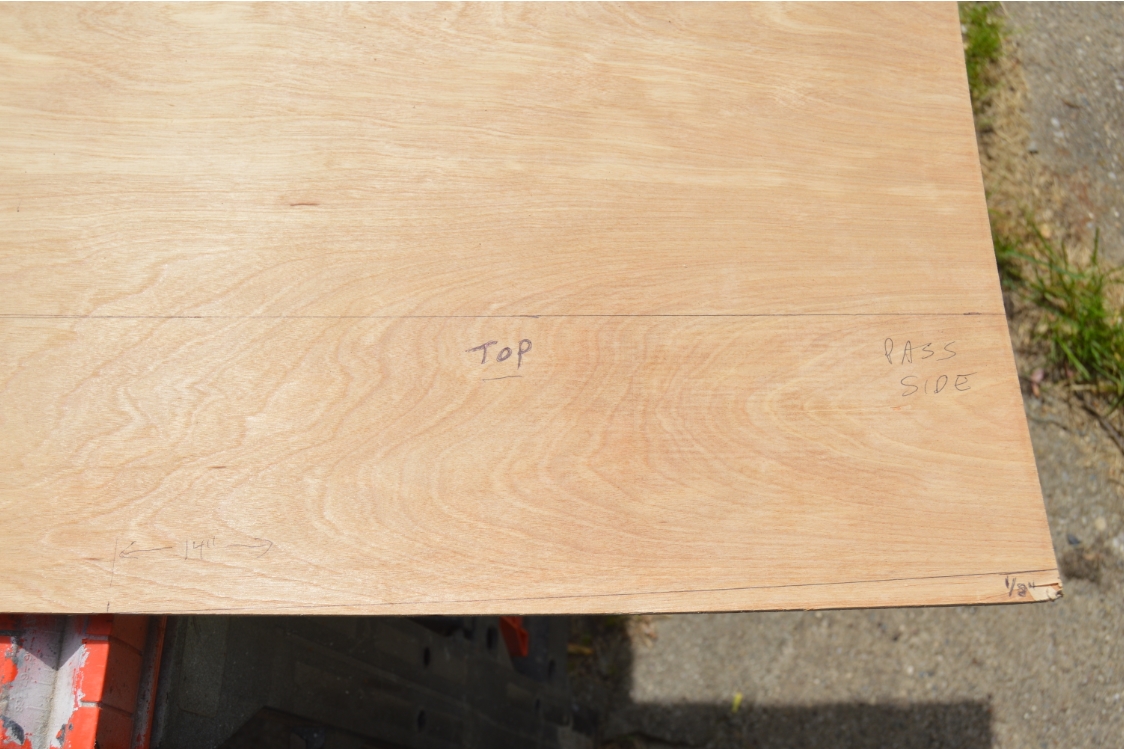
top piece pass side 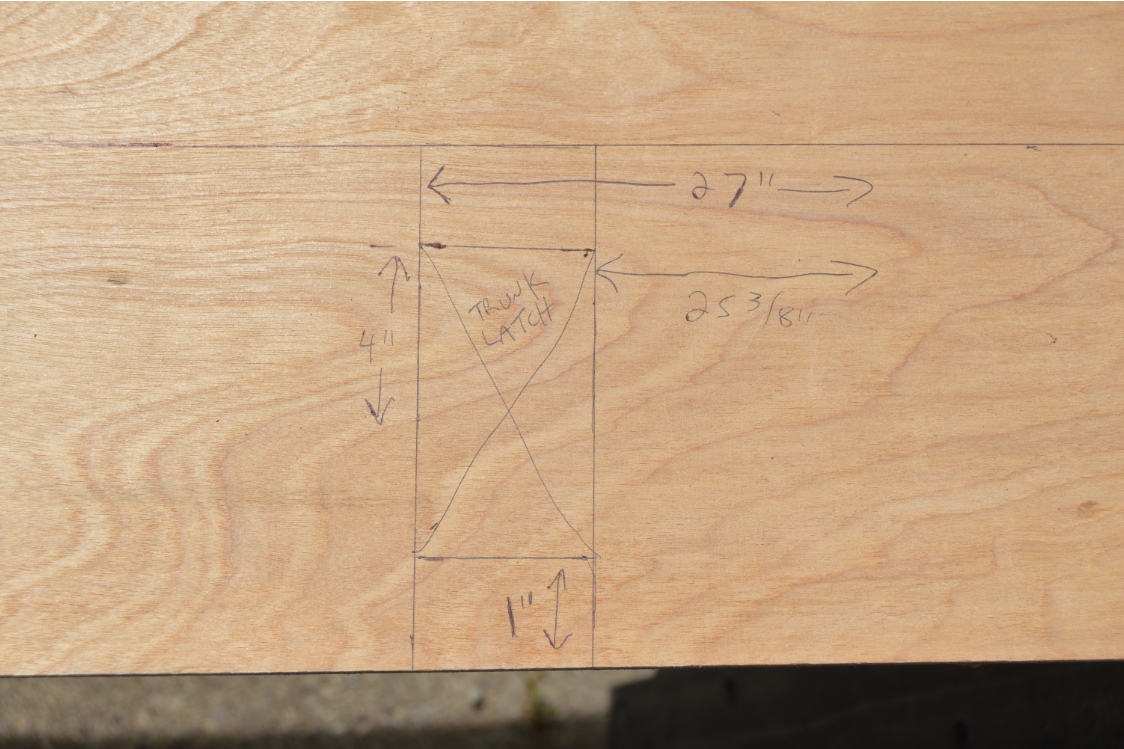
top piece middle 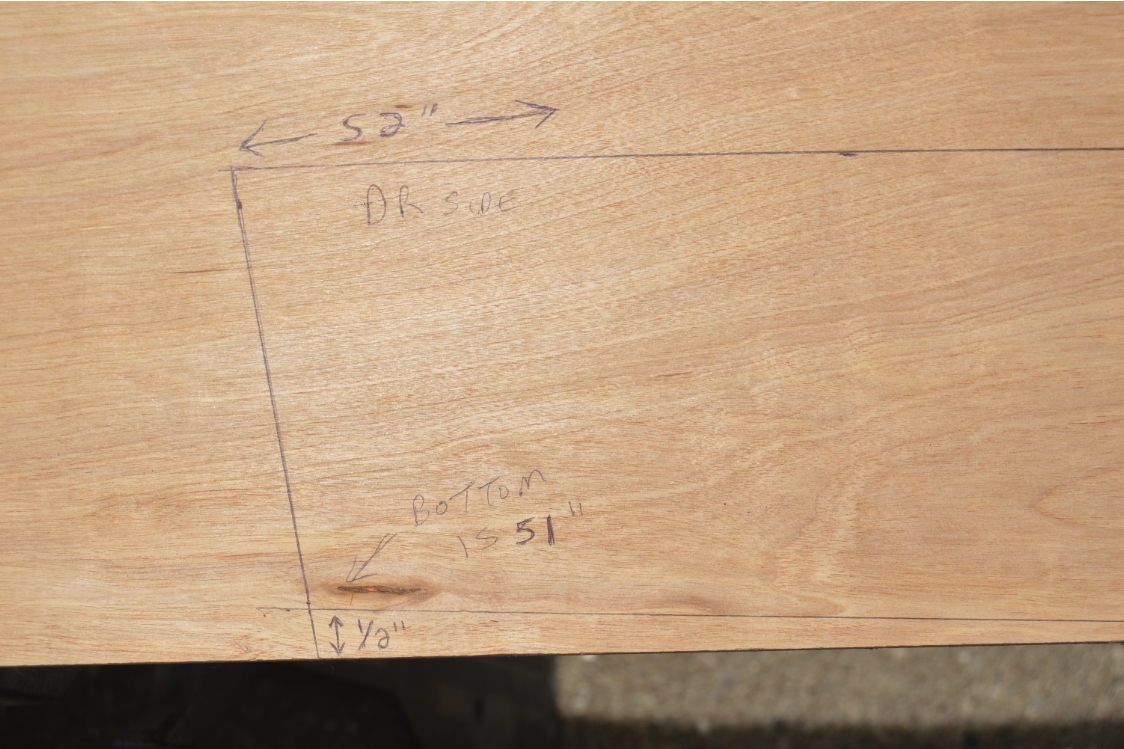
top piece driver side 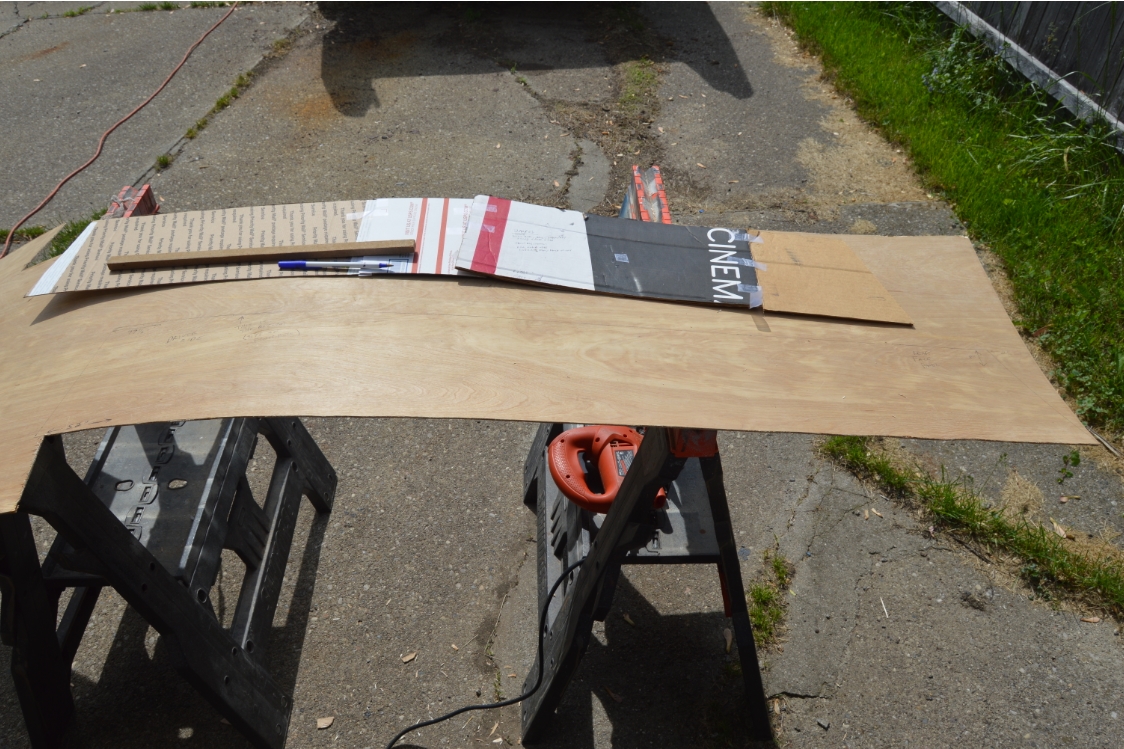
rear face panel 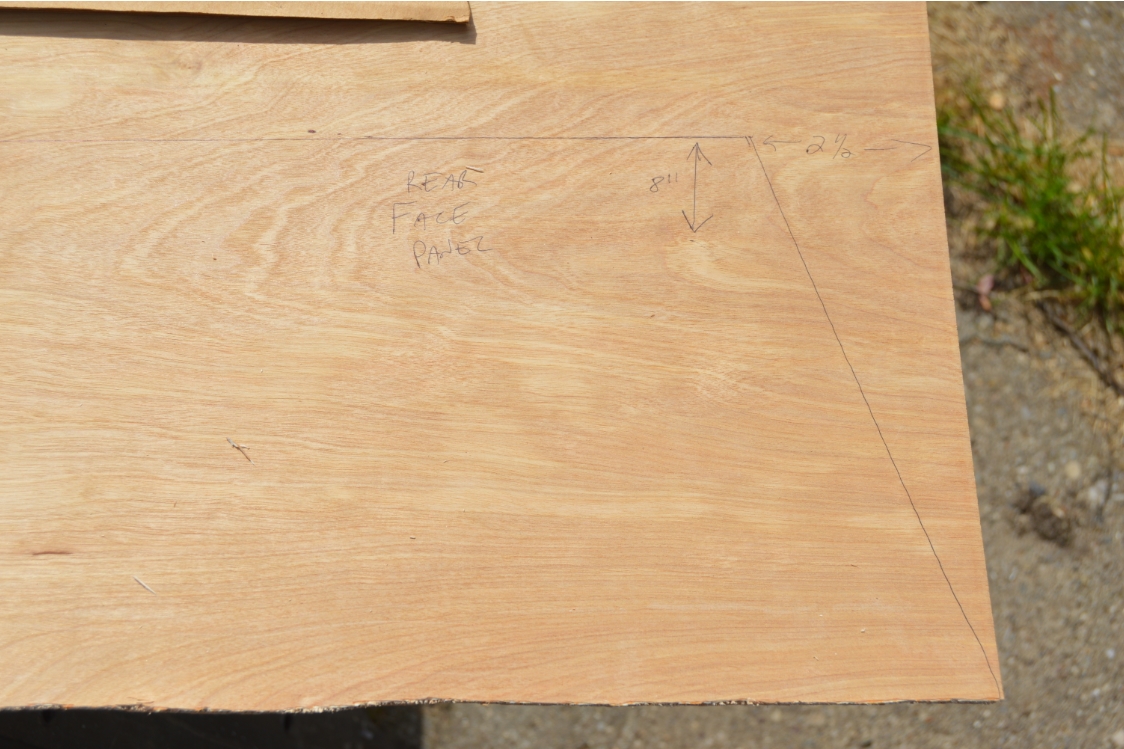
rear face pass side 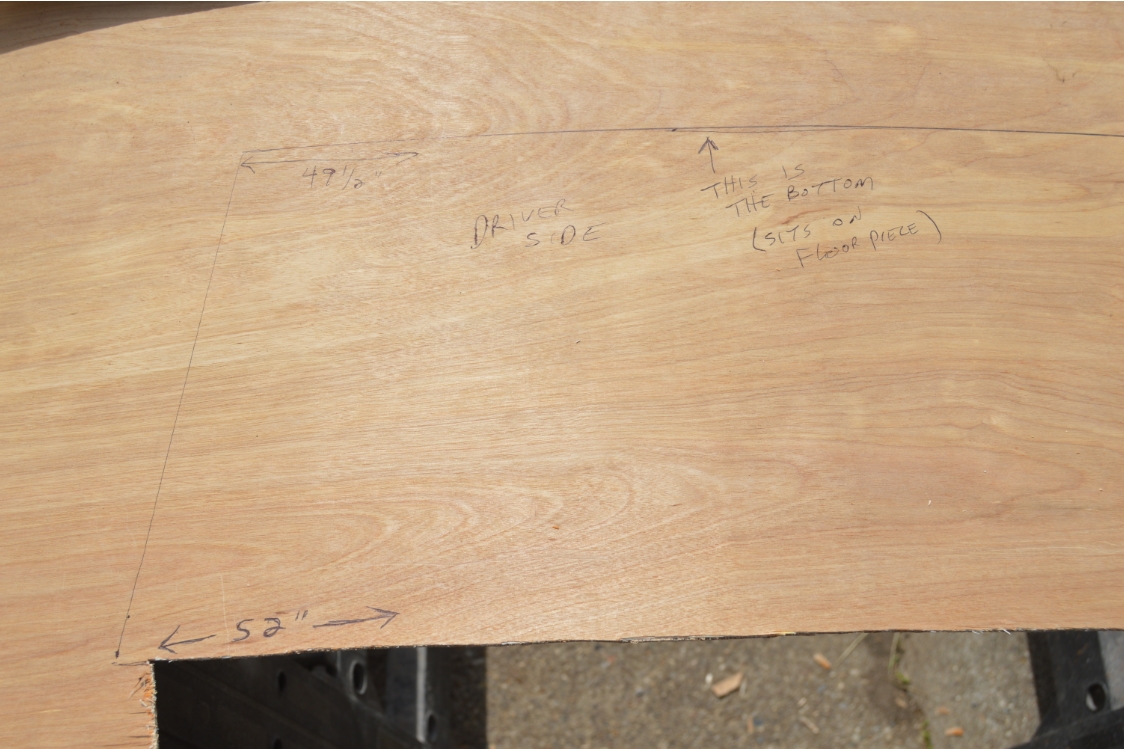
rear face driver side 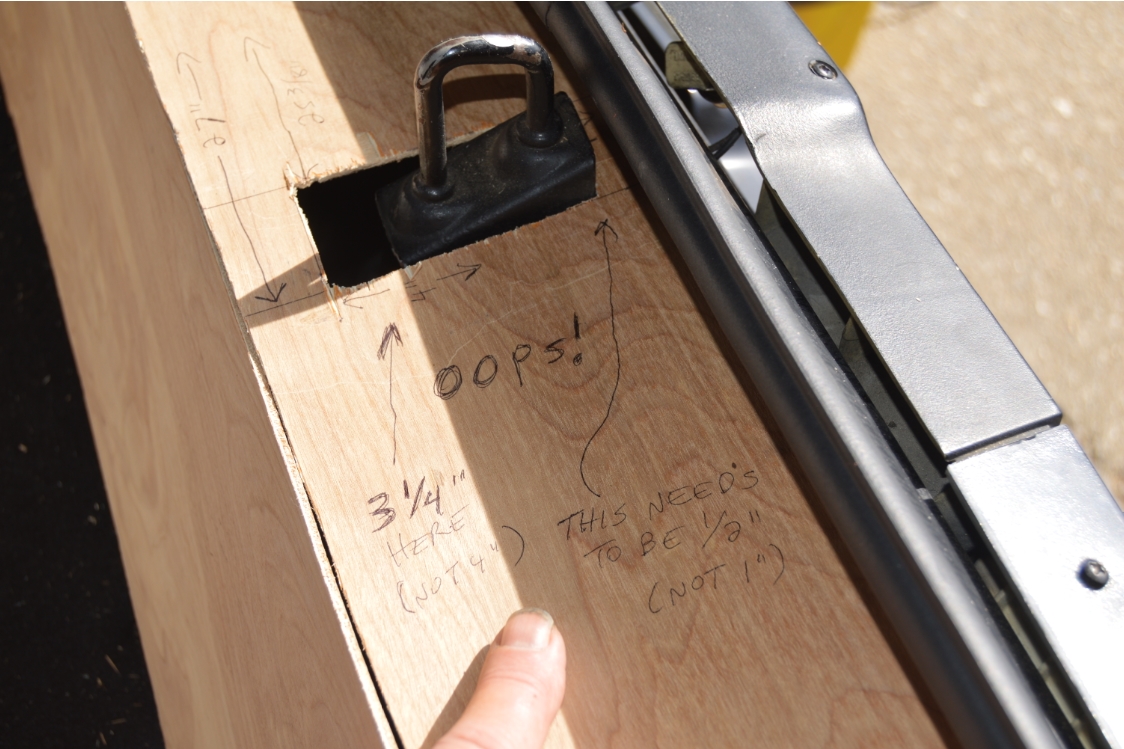
dimension corrections 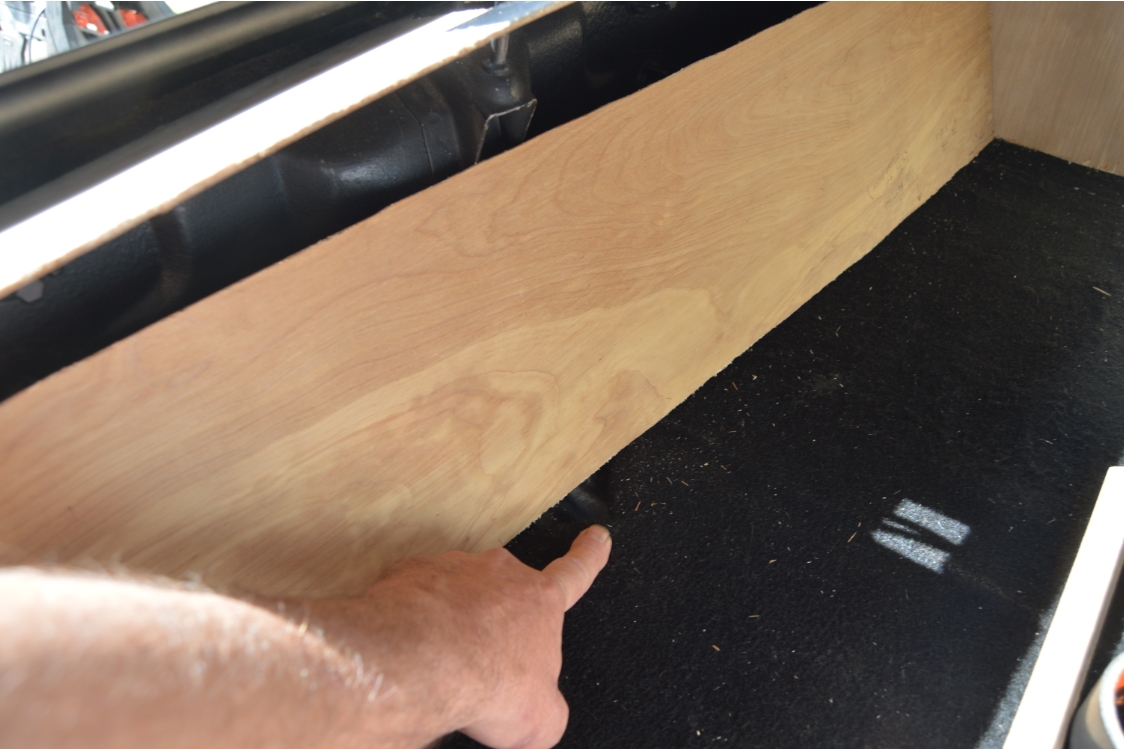
face panel covers hump 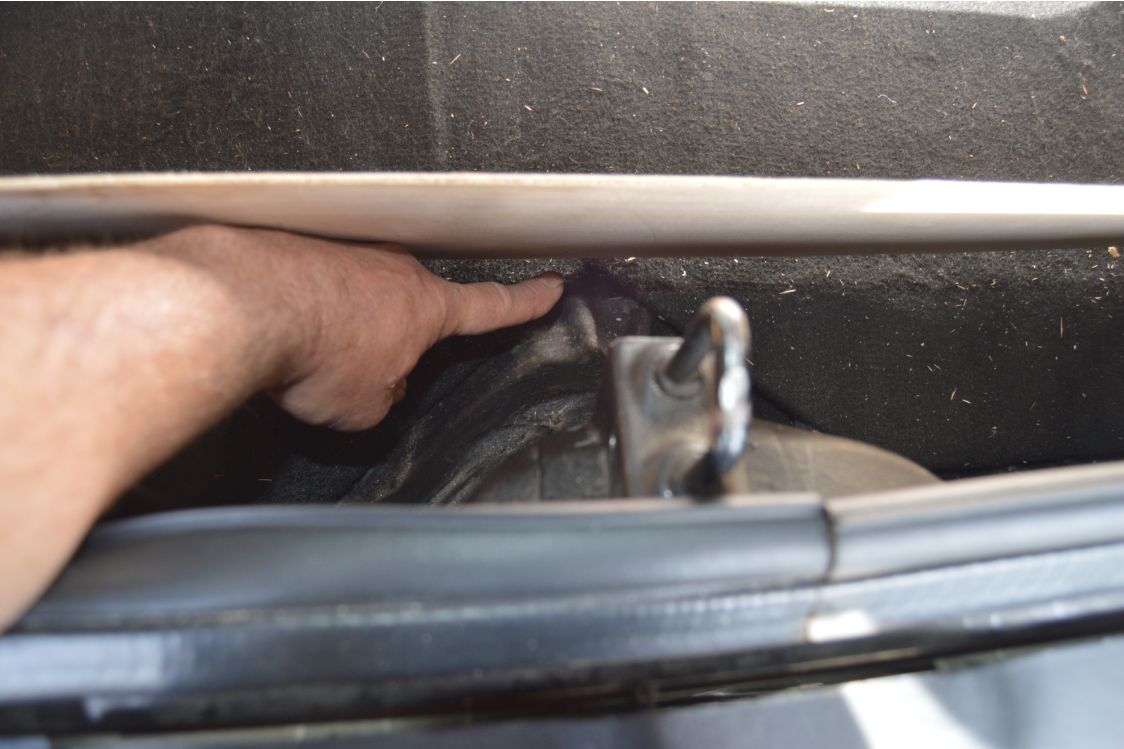
another angle 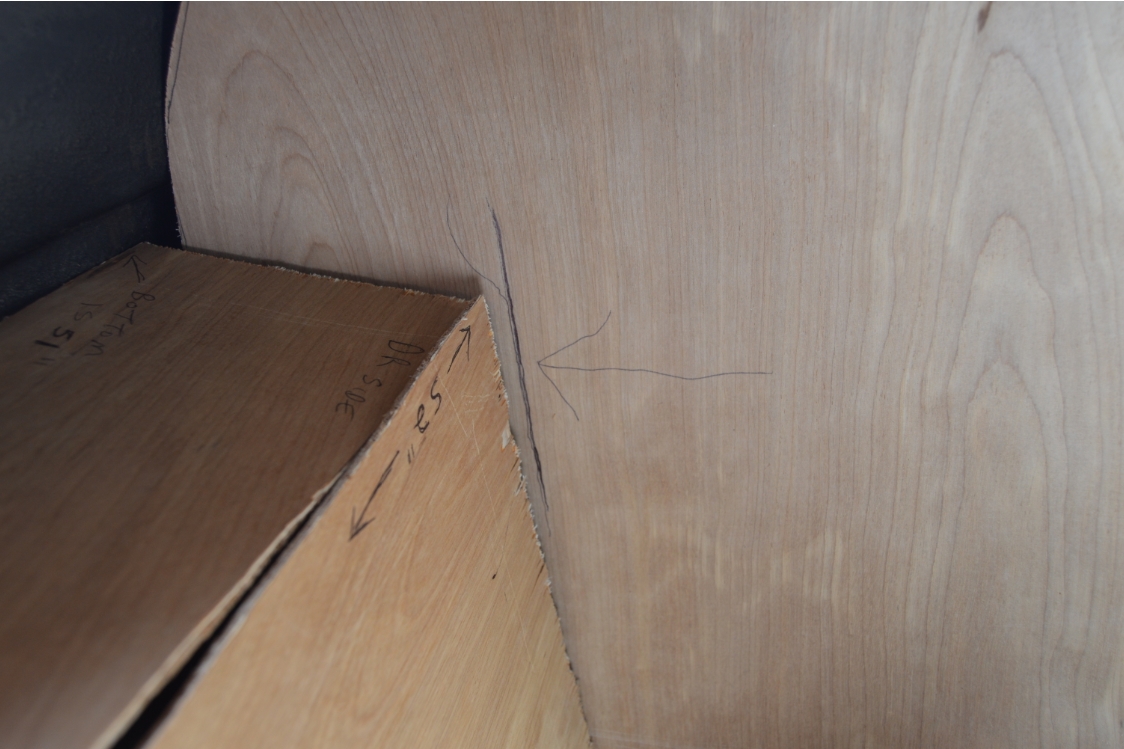
drivers side angle 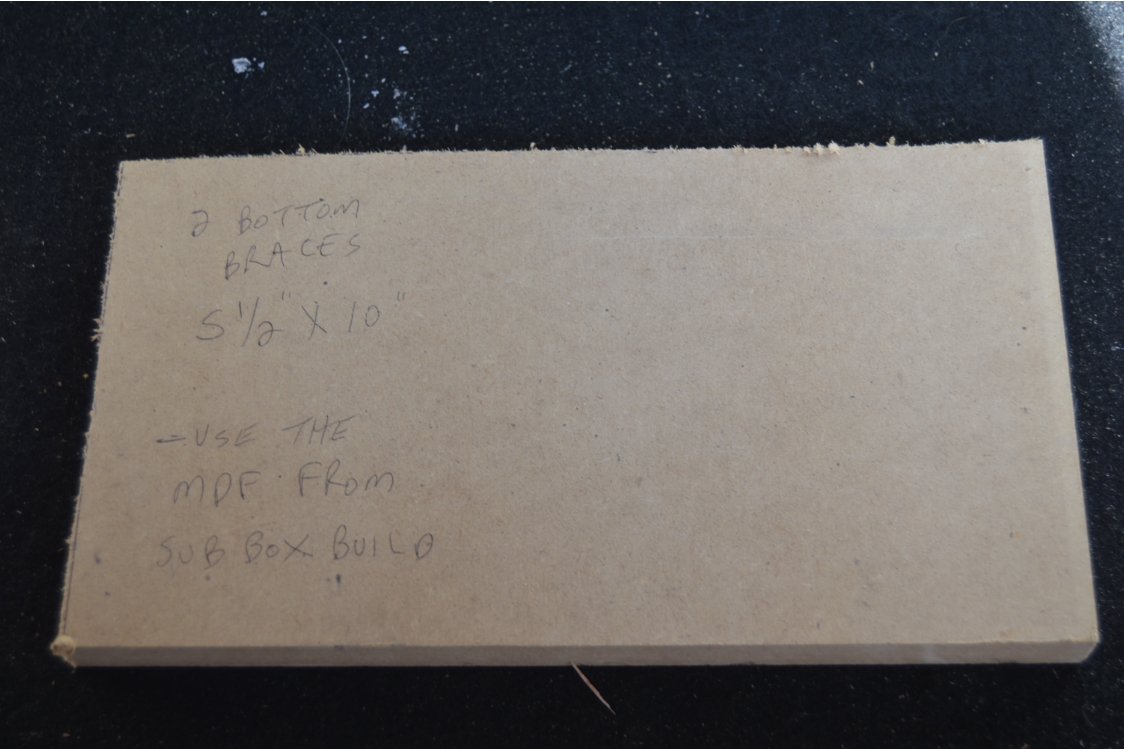
rear piece lower braces 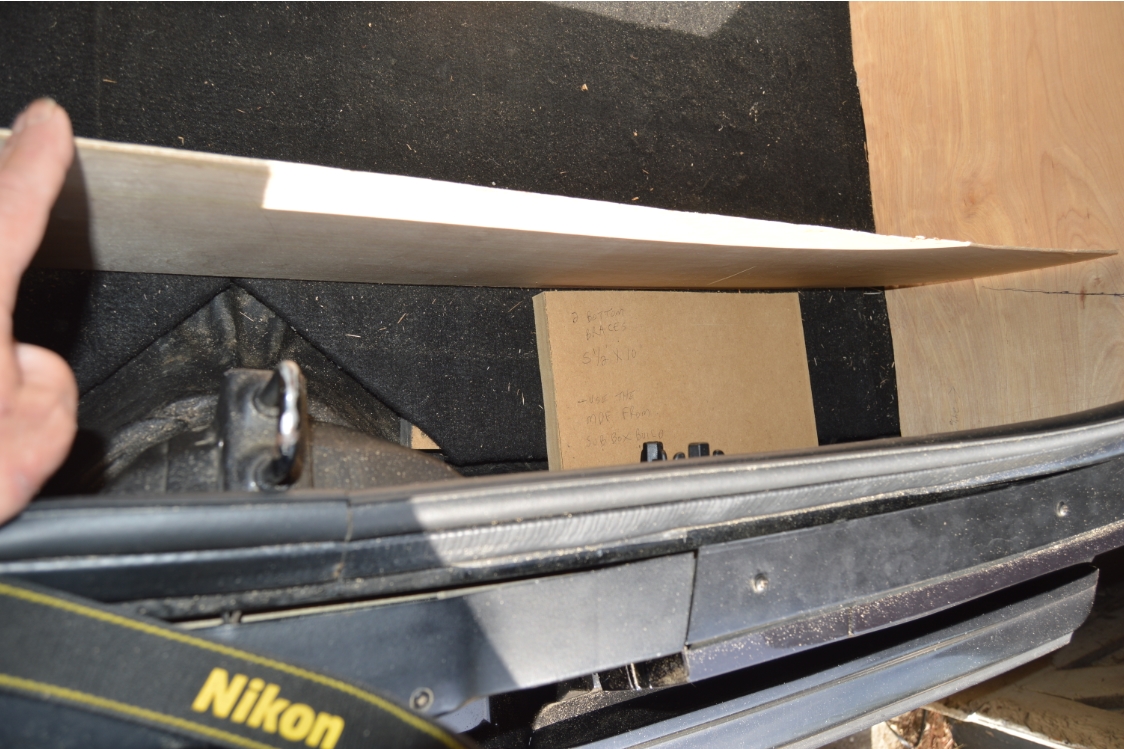
lower brace installed 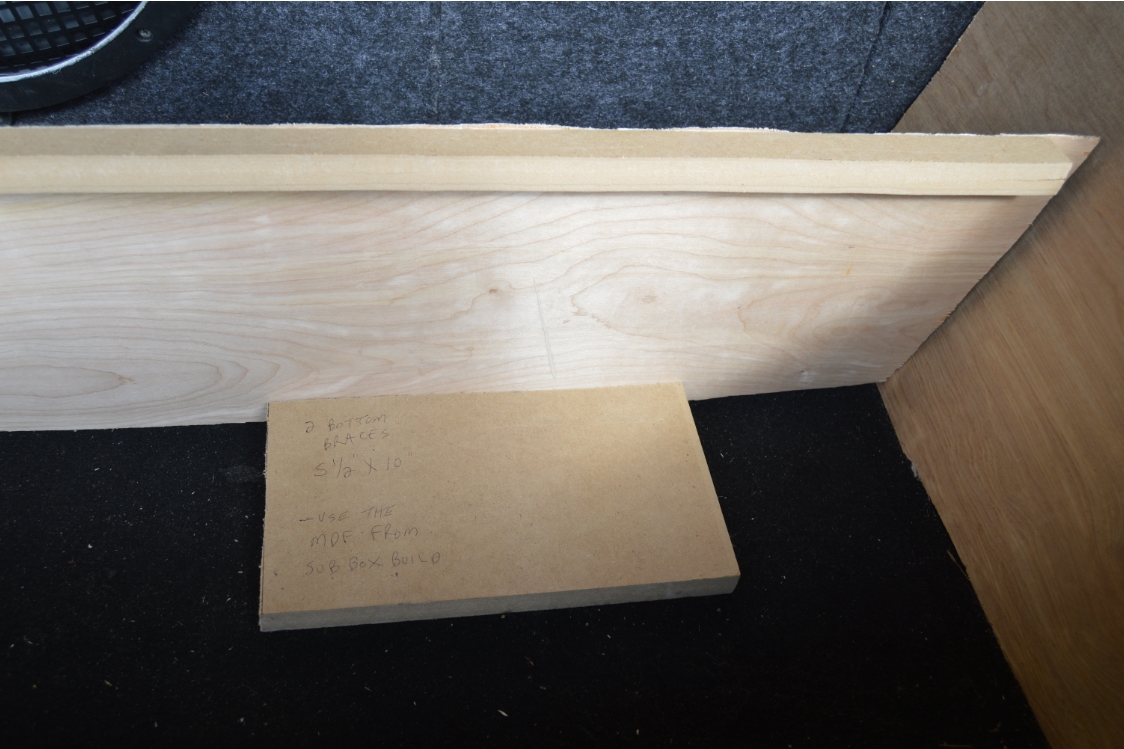
upper brace installed 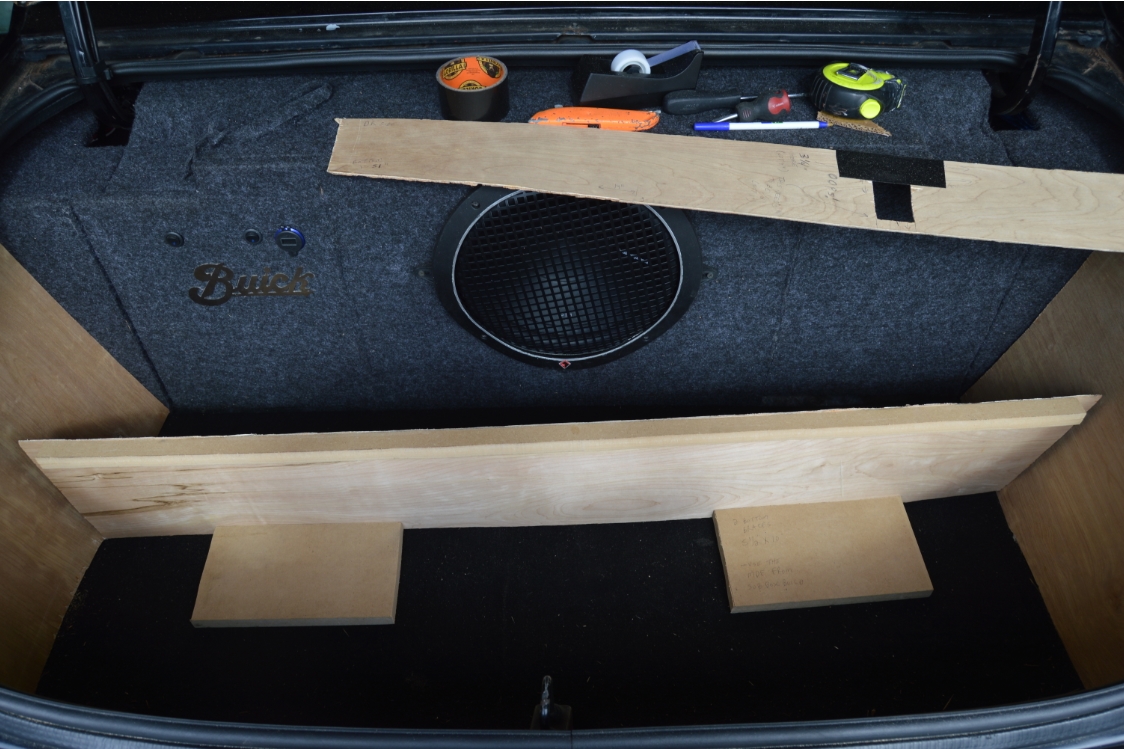
rear piece overall 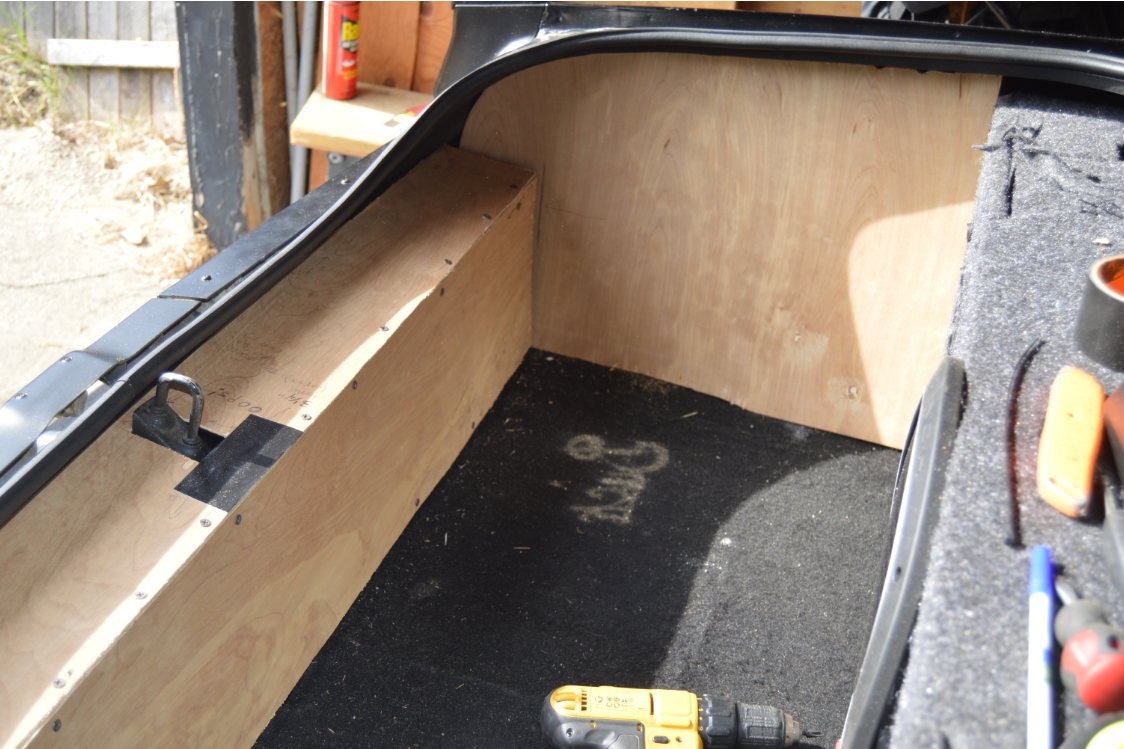
test fit driver side 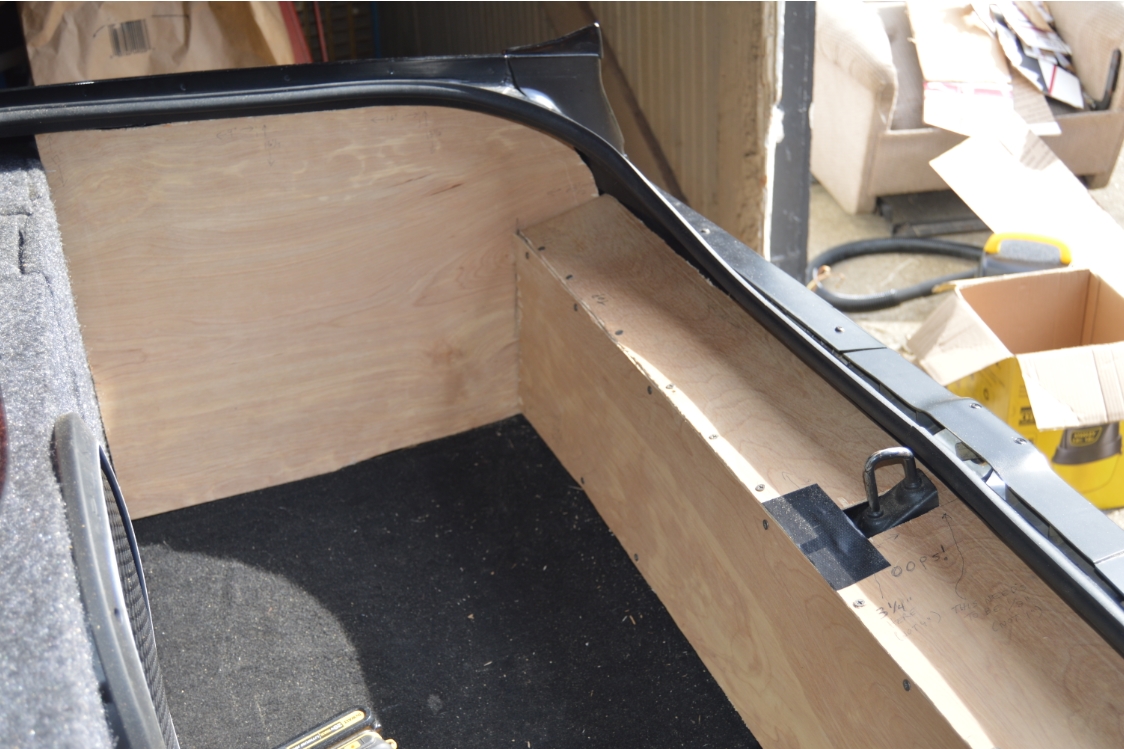
test fit pass side 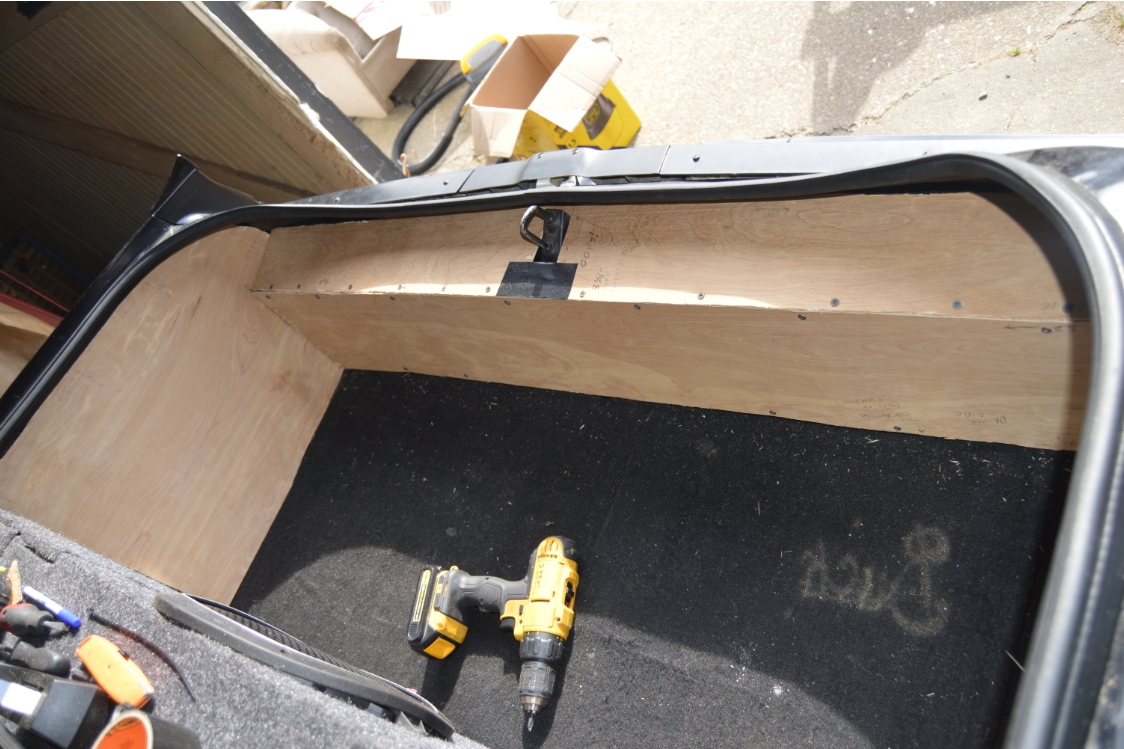
overall looks good
.
CARPET DRIVER QUARTER PANEL PIECE AND REAR PIECE:
.
INSERTING THE SIGN IN PASSENGER SIDE PIECE:
.

.
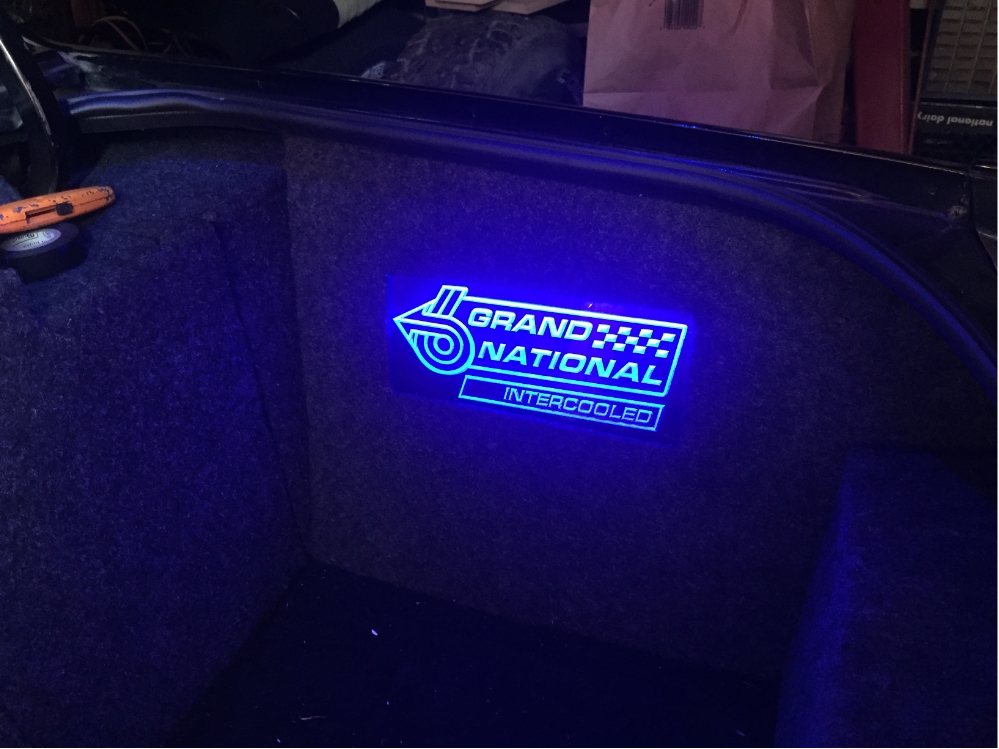
IT LOOKS AWESOME, LIT IN BLUE LED!
.
.
INSTALL COMPLETED REAR PIECE:
.
.
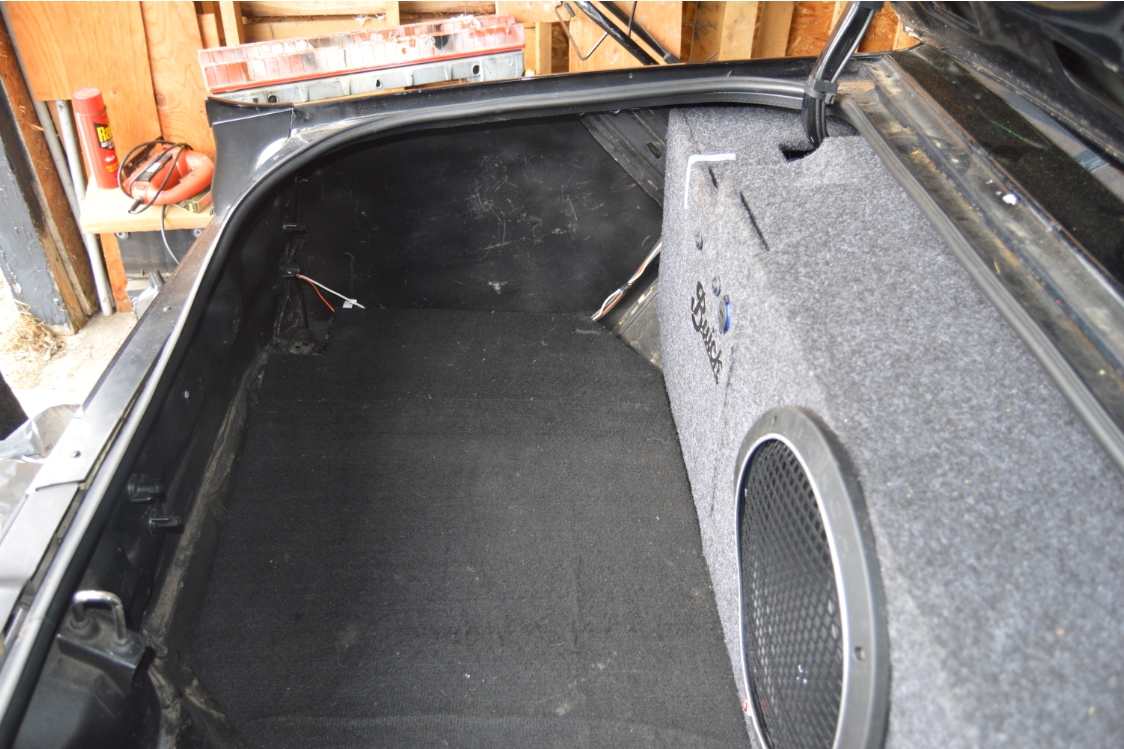
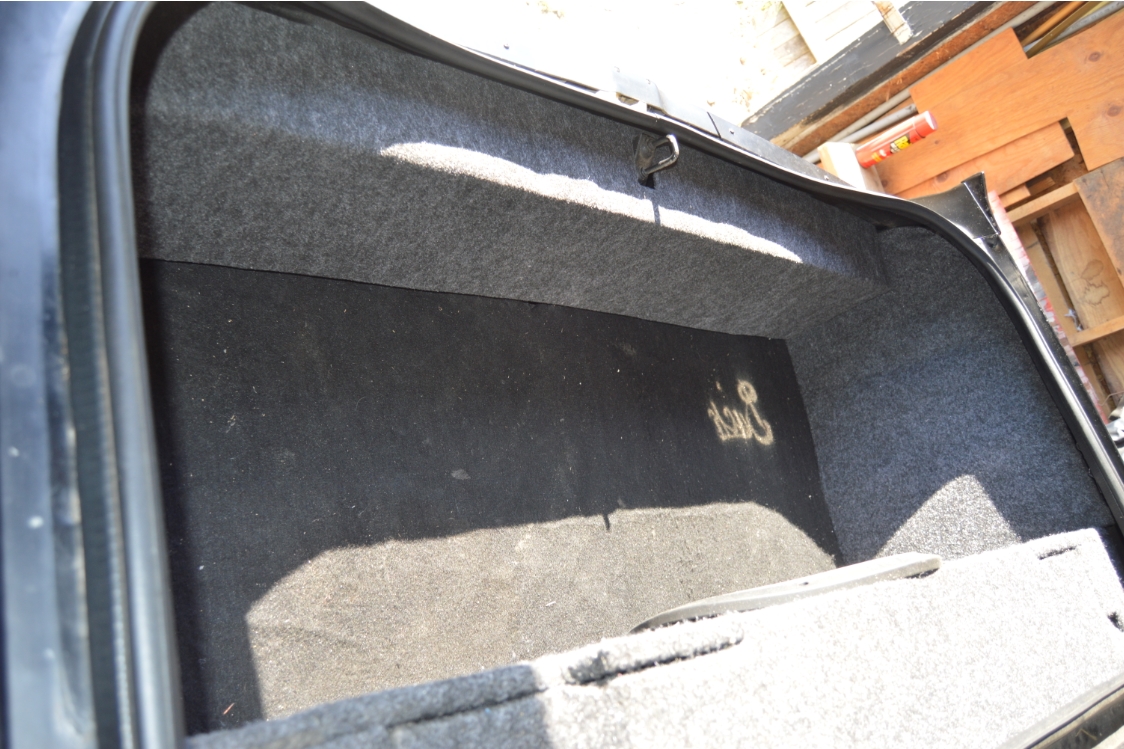
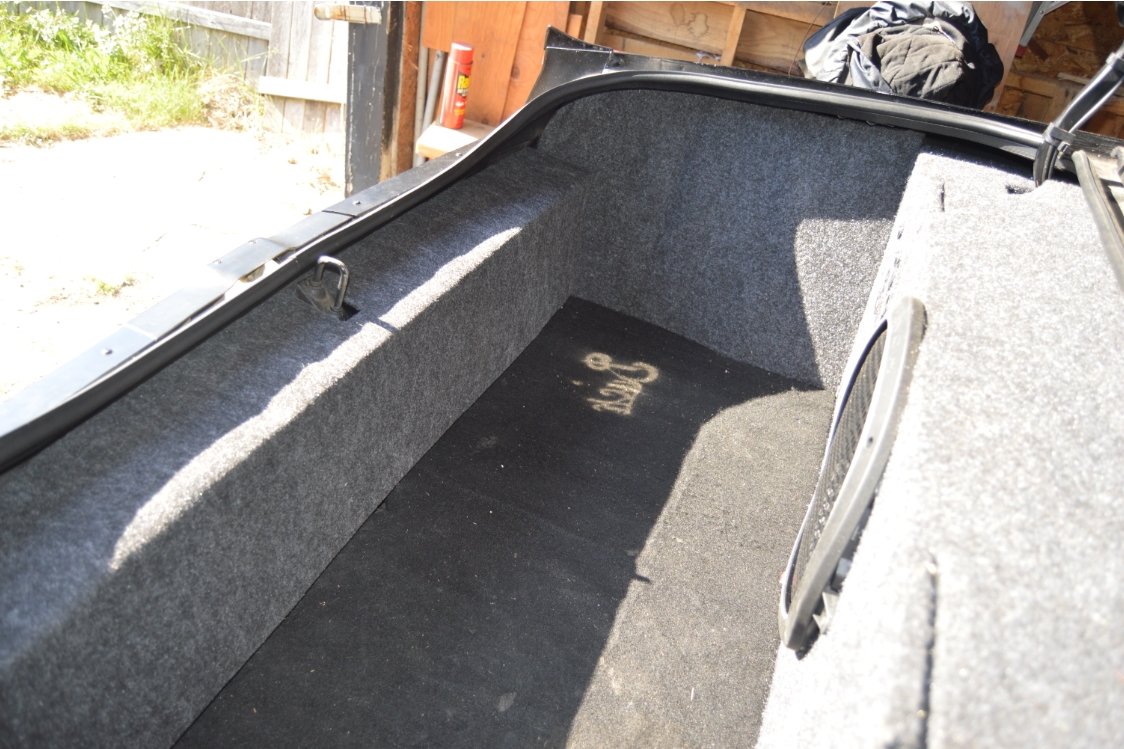
THE FINISHED TRUNK!
.
.


