


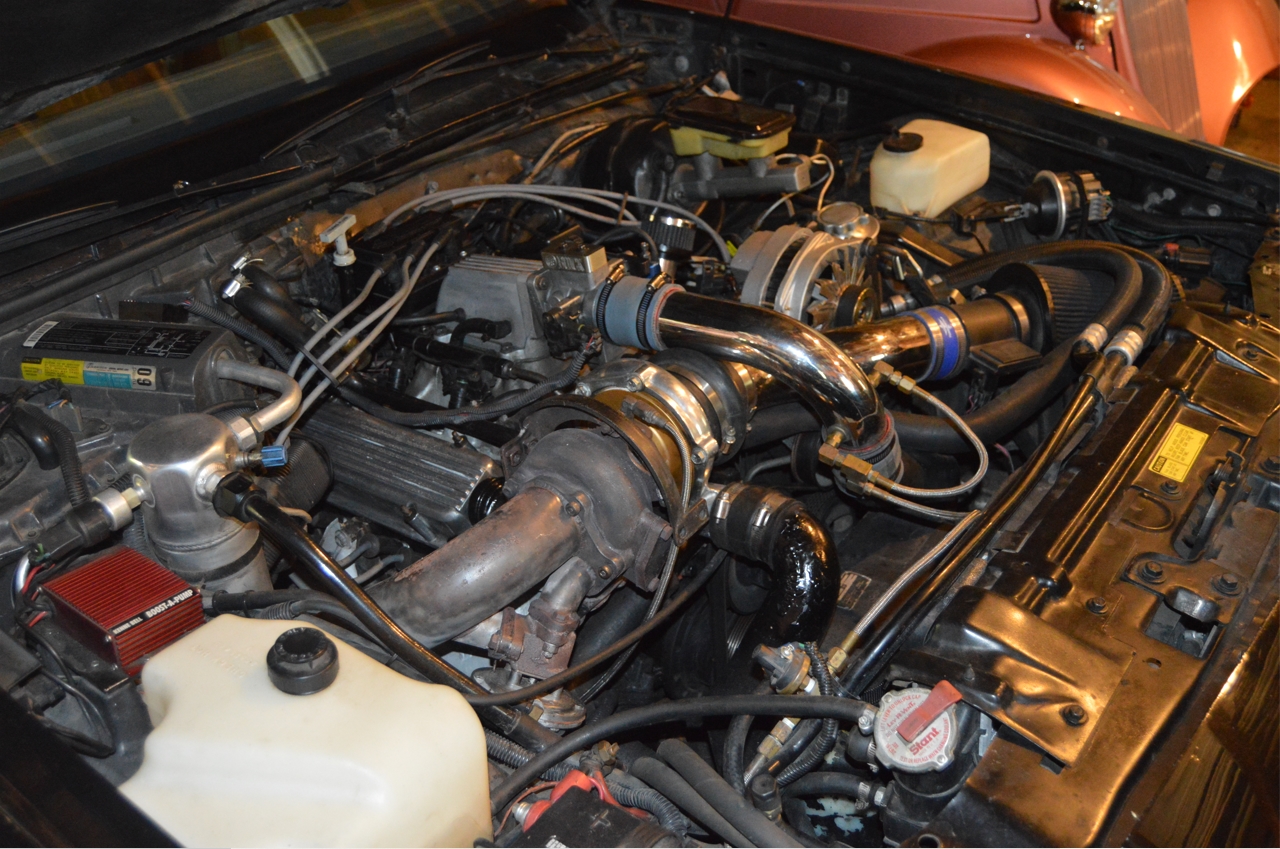
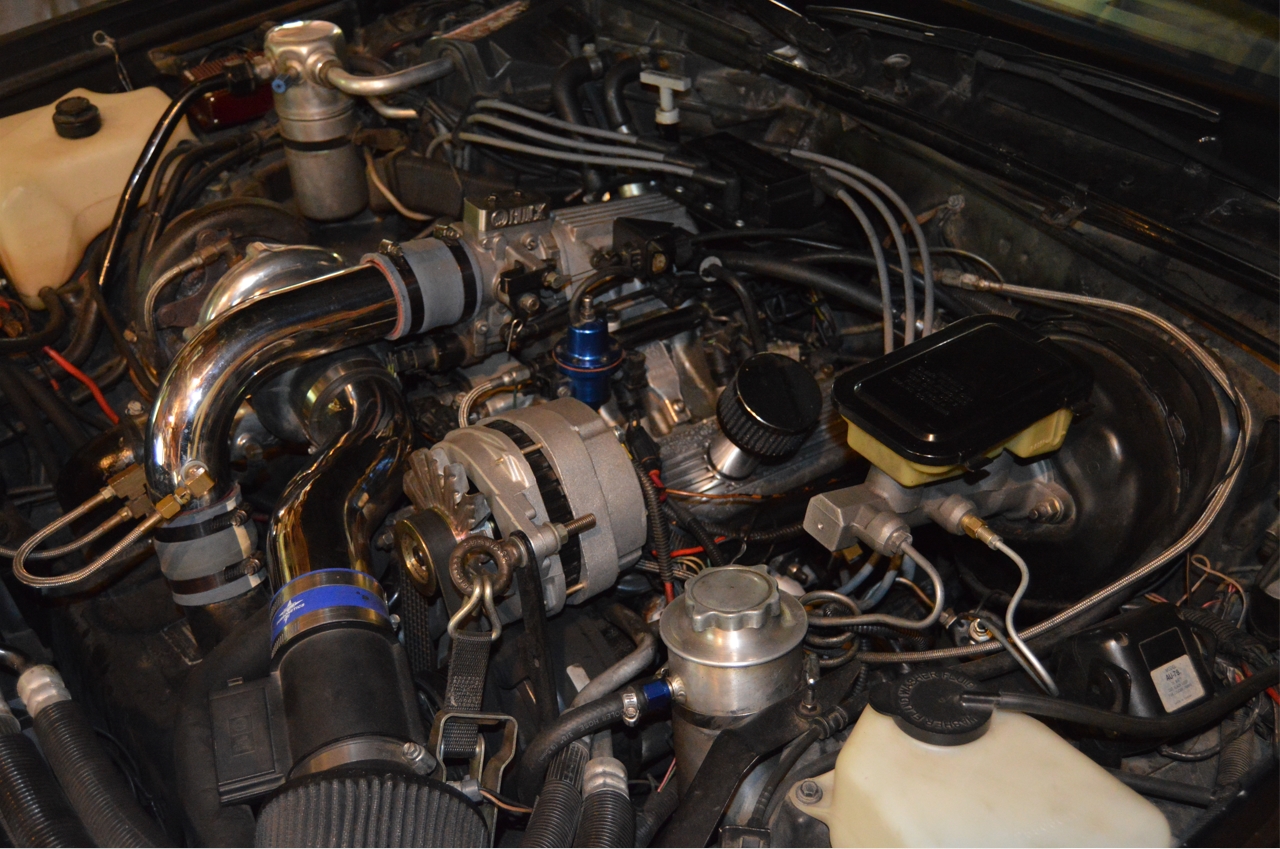
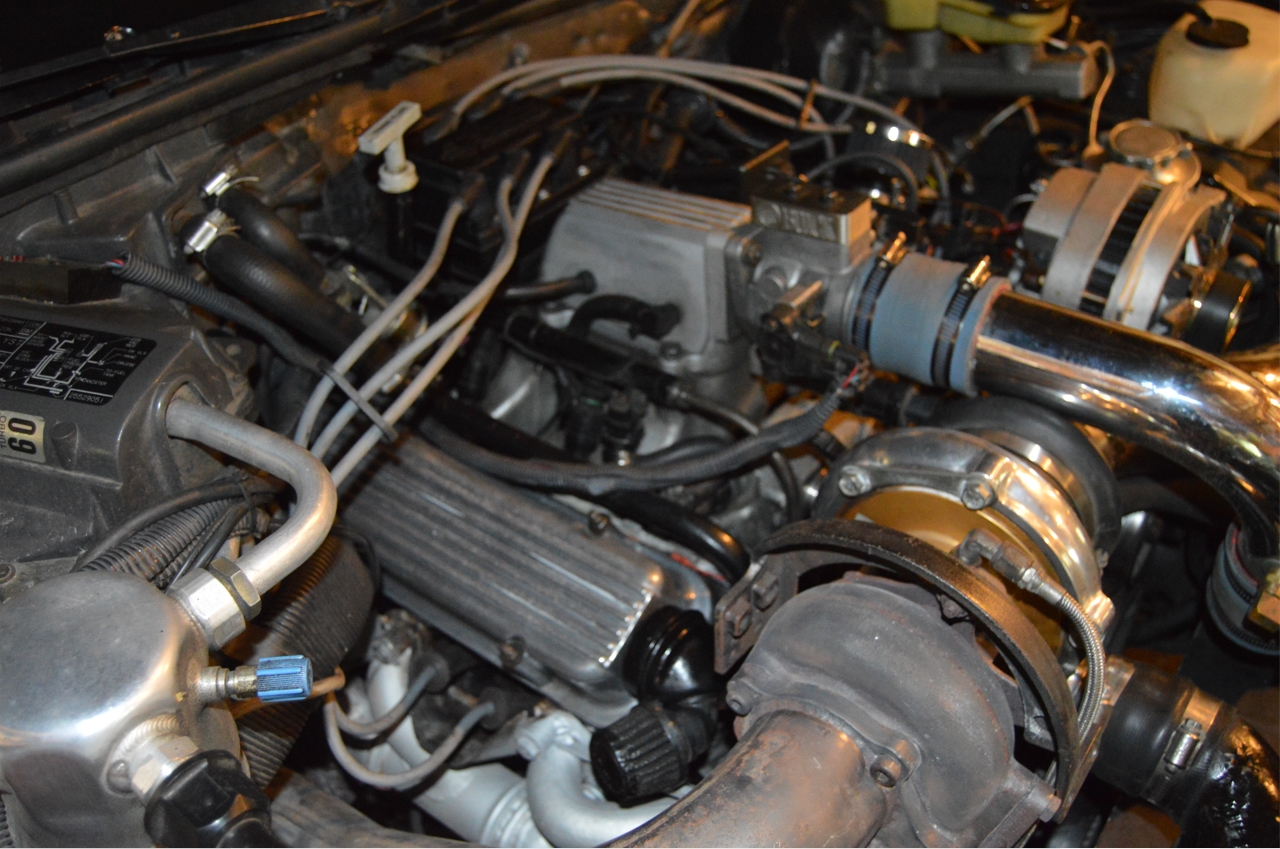
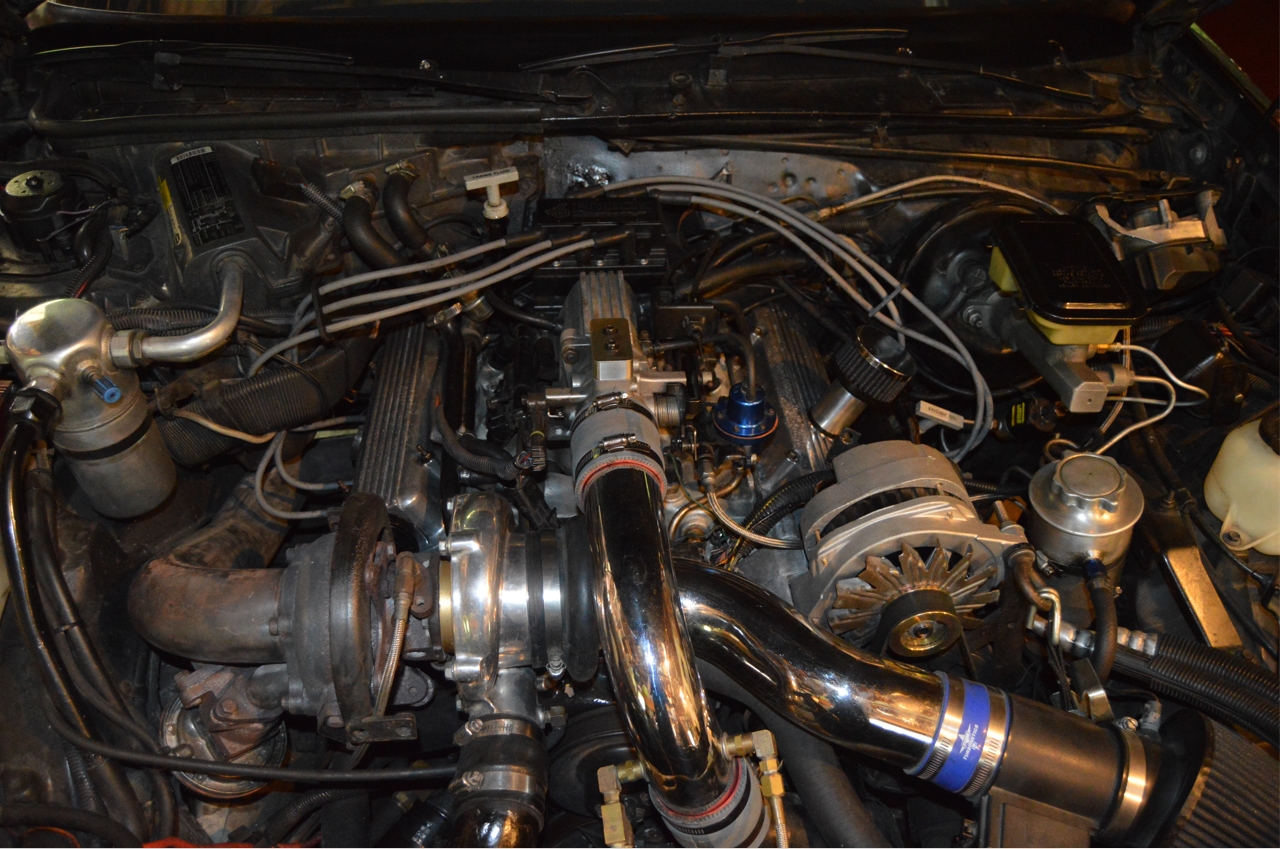
Today we’re visiting our local friend with a 1986 Buick Grand National.
He’s been having some engine issues with his Turbocharged Buick Regal.
Shocker right?
I thought these cars were suppose to run forever with no problems ever?!
lol.
.
.
Anyways, he said for the last few months he’s been hearing a random tick coming from the engine, somewhere…
It didn’t really seem to be a problem, until it was.
One day while pulling into his driveway, after just regularly driving the Turbo Buick, the uppipe blew off, and a bigger kind of tick was heard.
(maybe these were related, maybe not?)
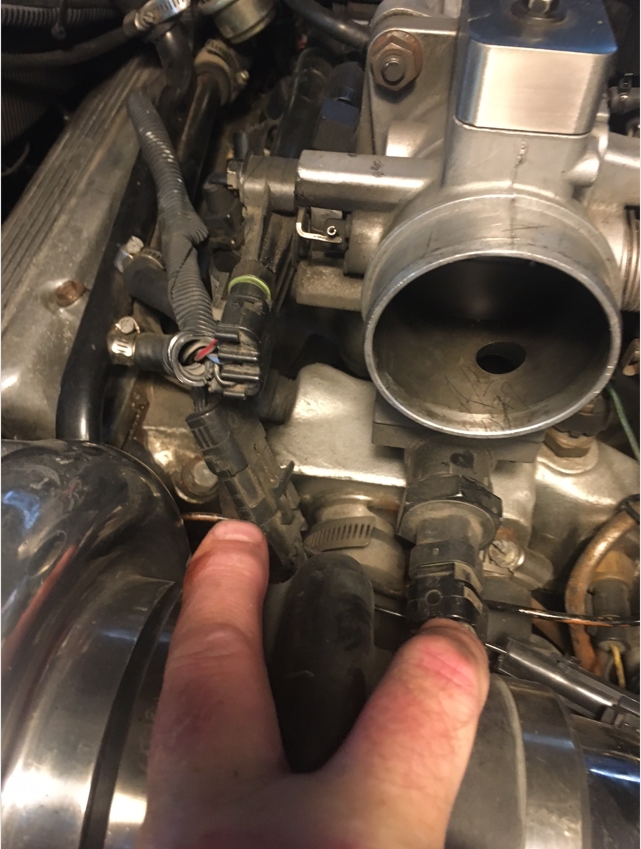
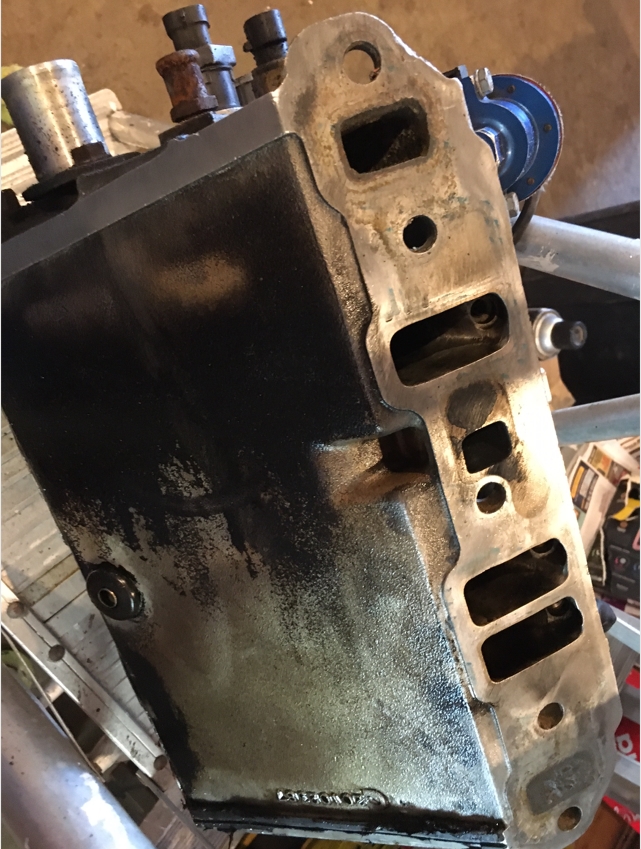
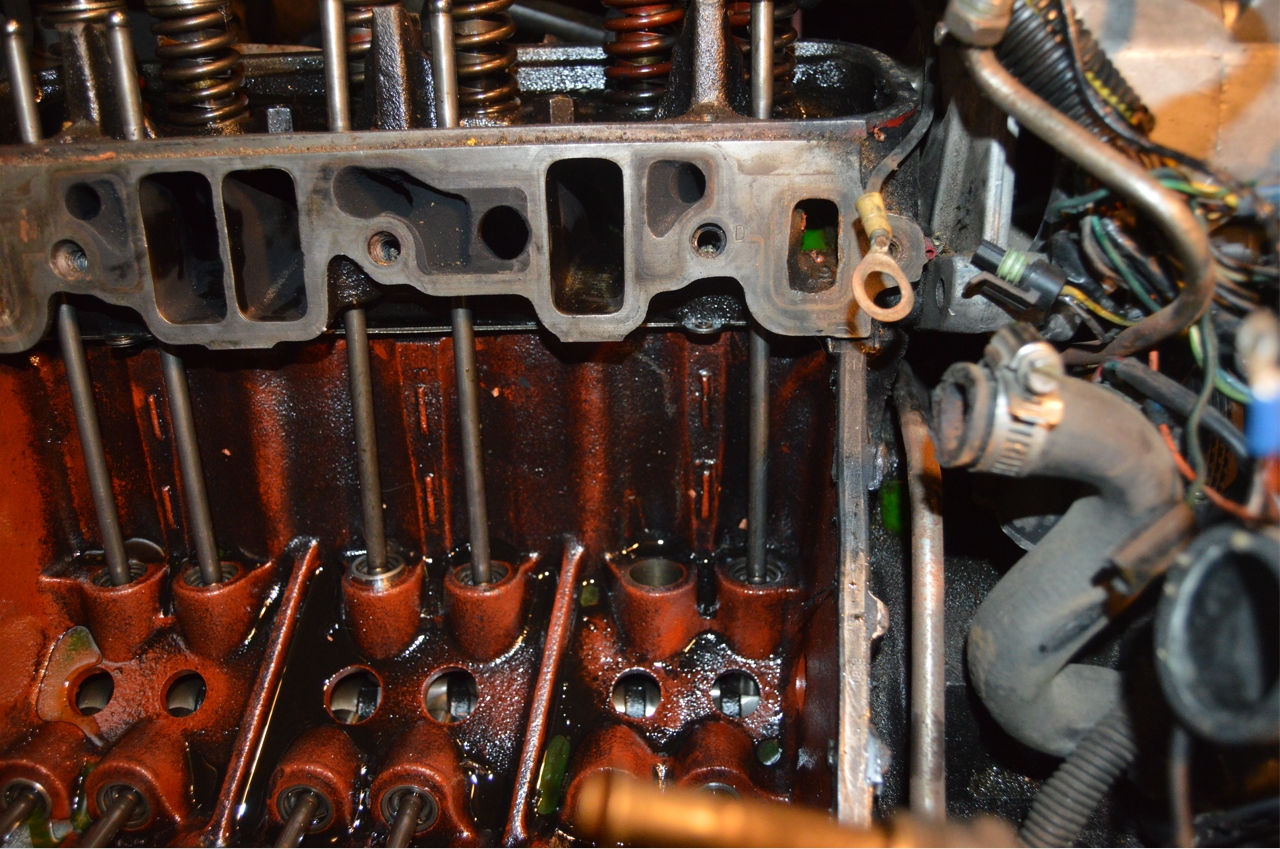
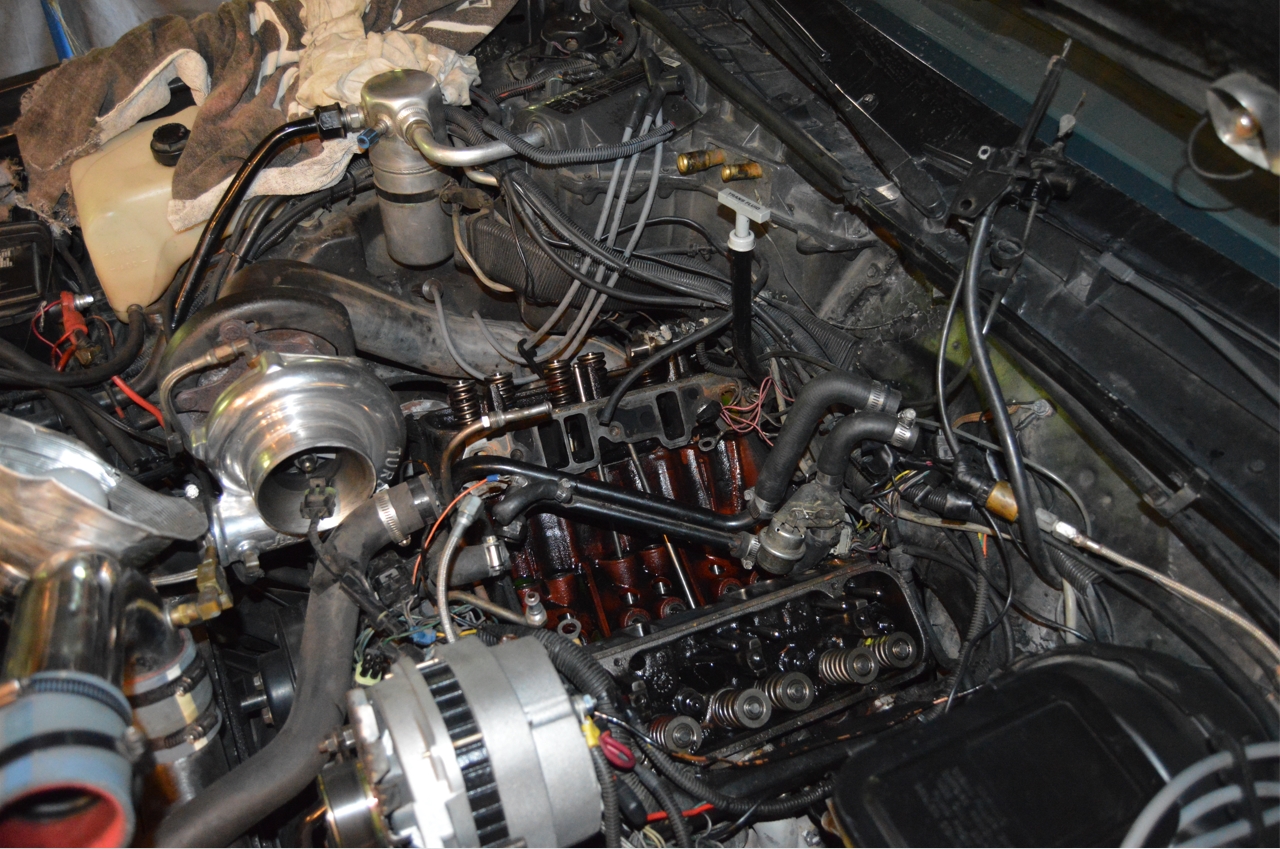
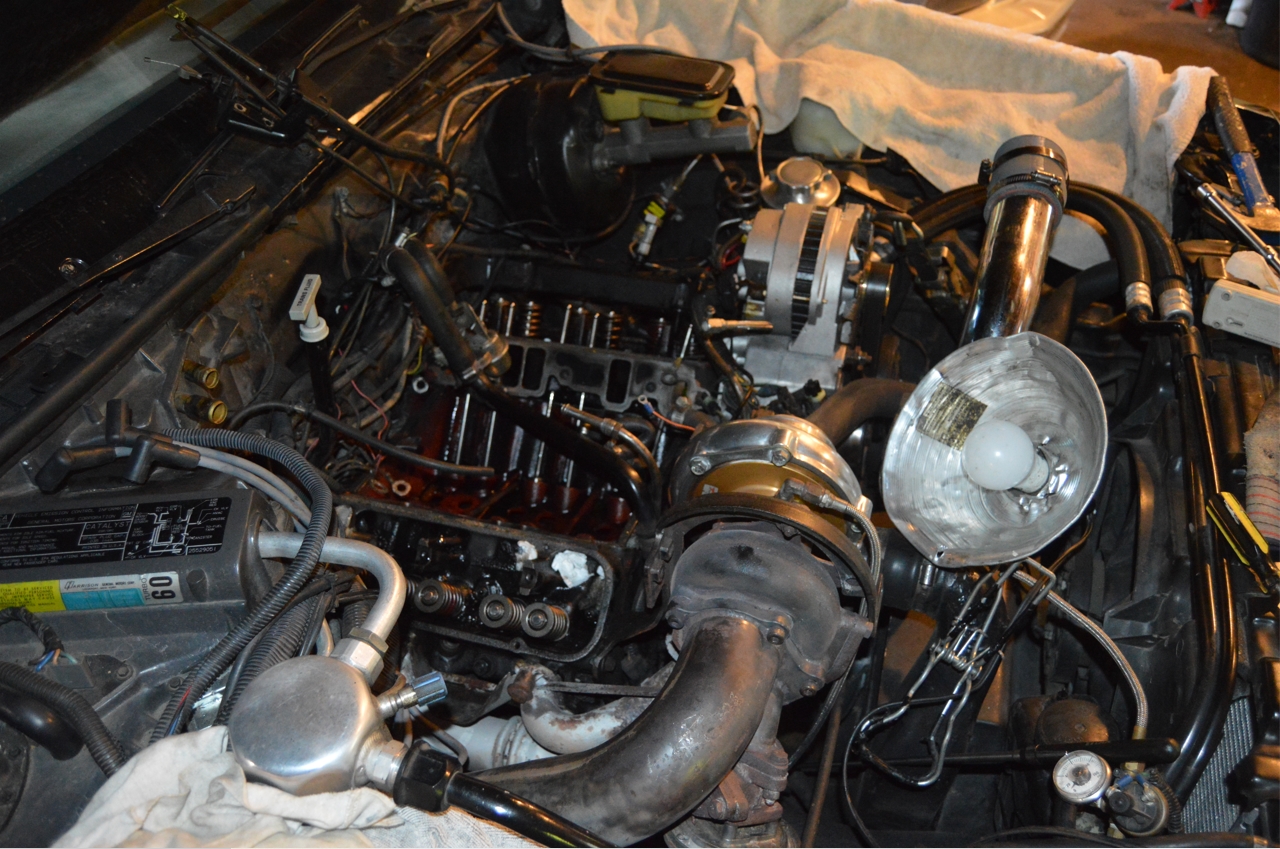
 He listened carefully to both sides of the Buick 3.8 liter turbocharged motor, and determined to pull the drivers side valve cover off for further inspection.
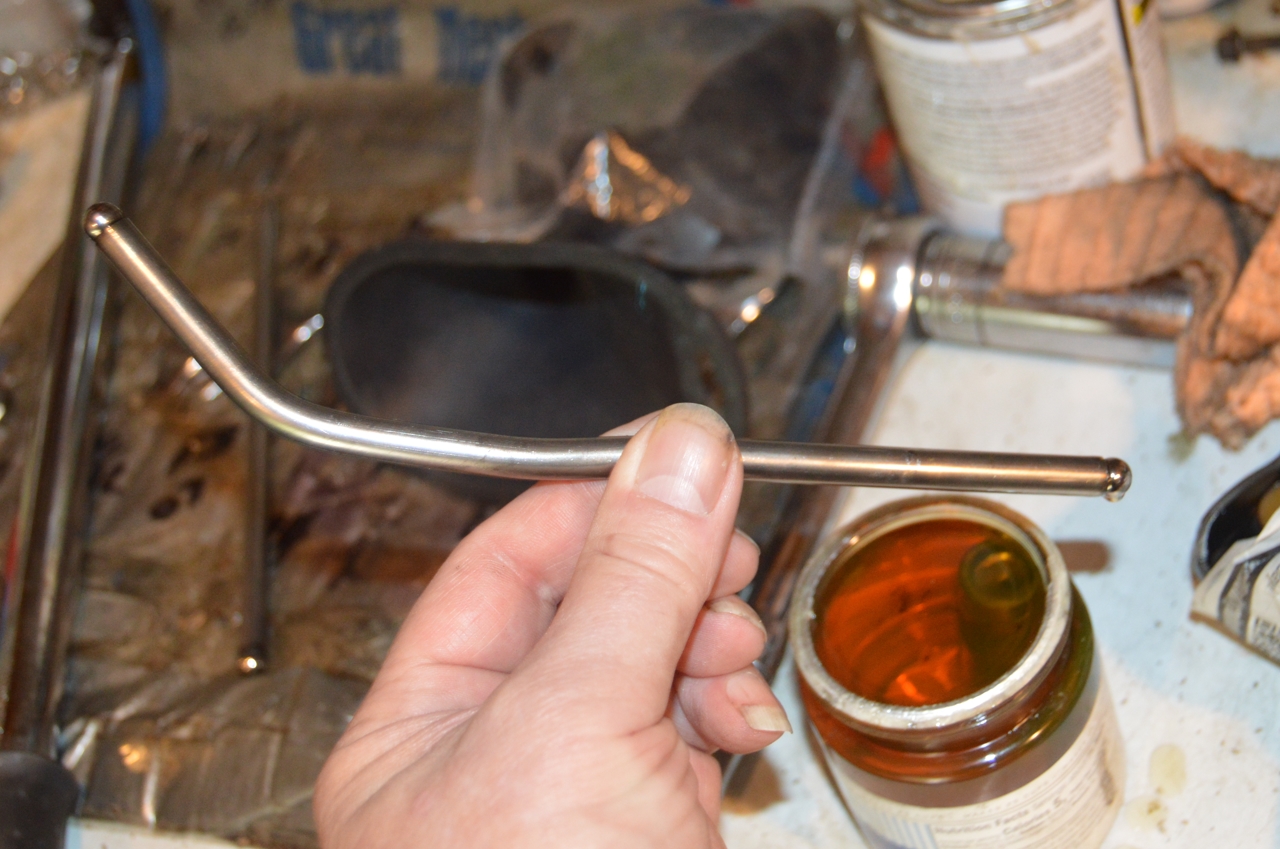
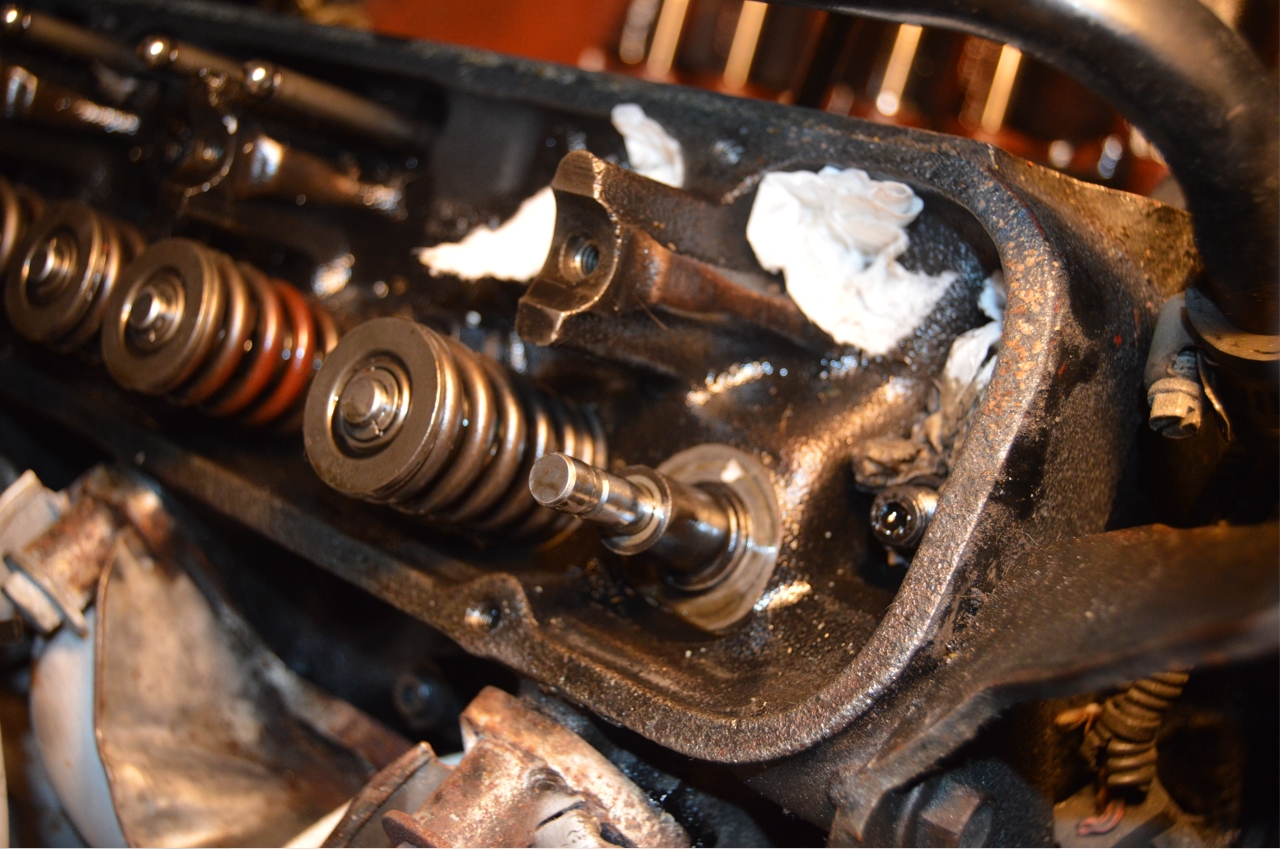
There wasn’t total carnage within, but it was discovered that the pushrod on the number 1 cylinder, intake side, was bent (hence the ticking).
Normally, when something like this happens, it’s 1 of 4 things.
1. pushrod failure itself.
2. wiped cam lobe.
3. bad lifter.
4. bad spring.
This Buick V6 engine was previously rebuilt about 15 years ago.
With all good (performance) parts installed.
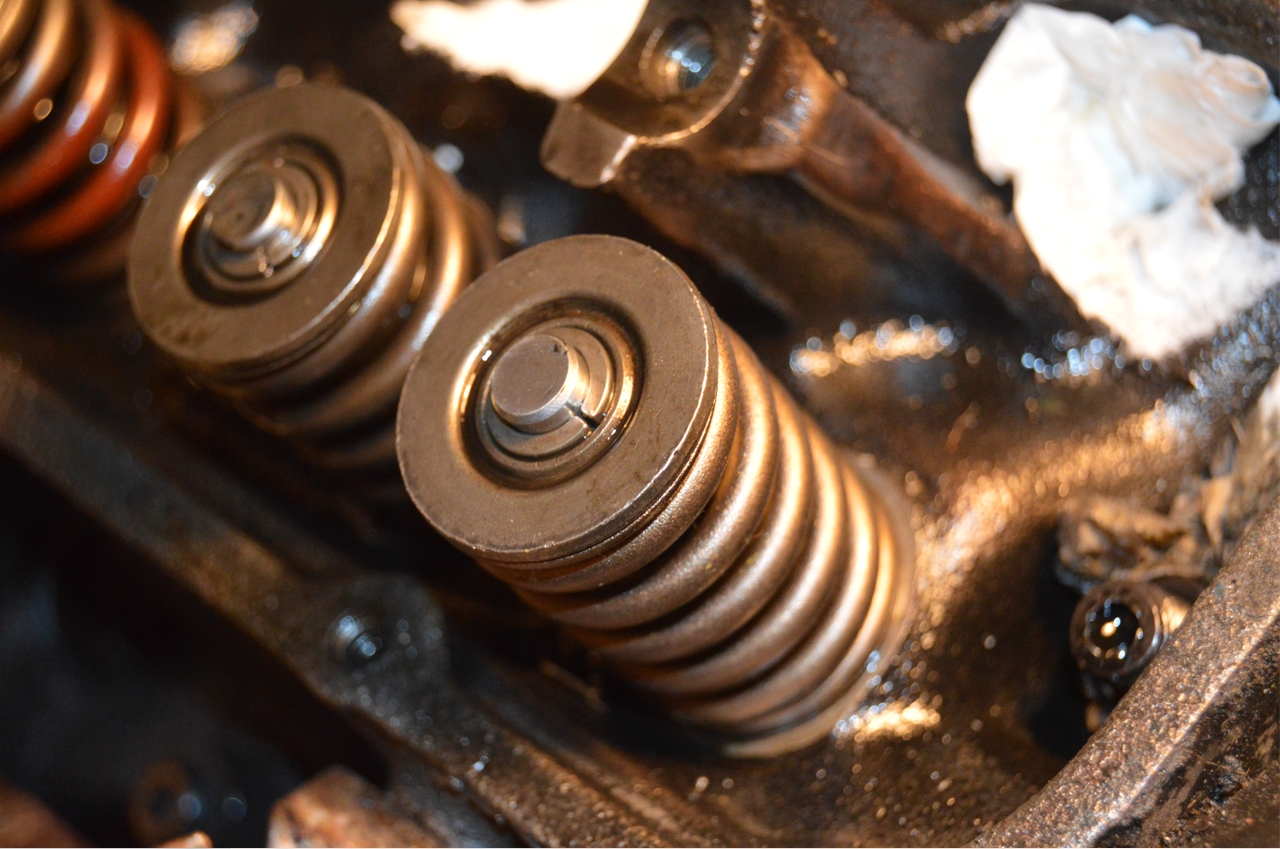
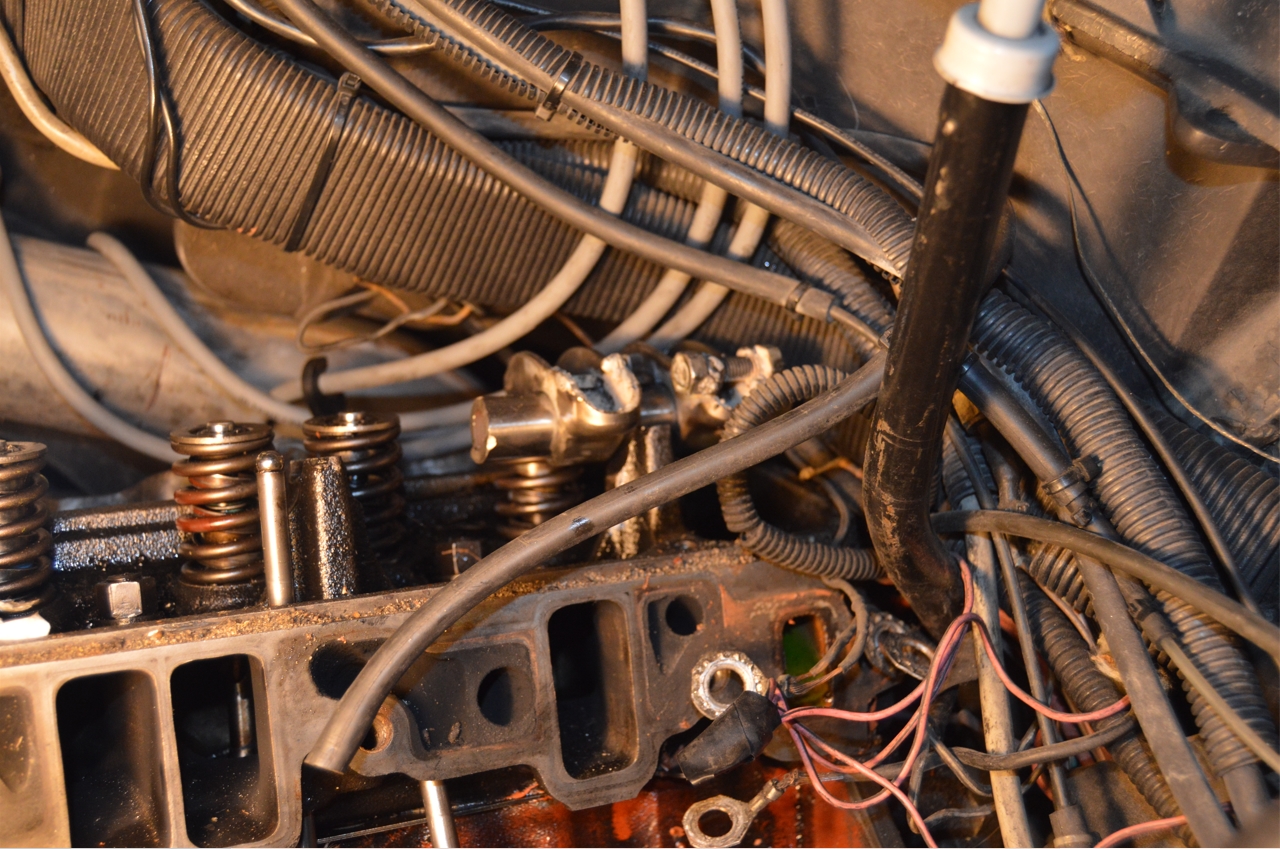
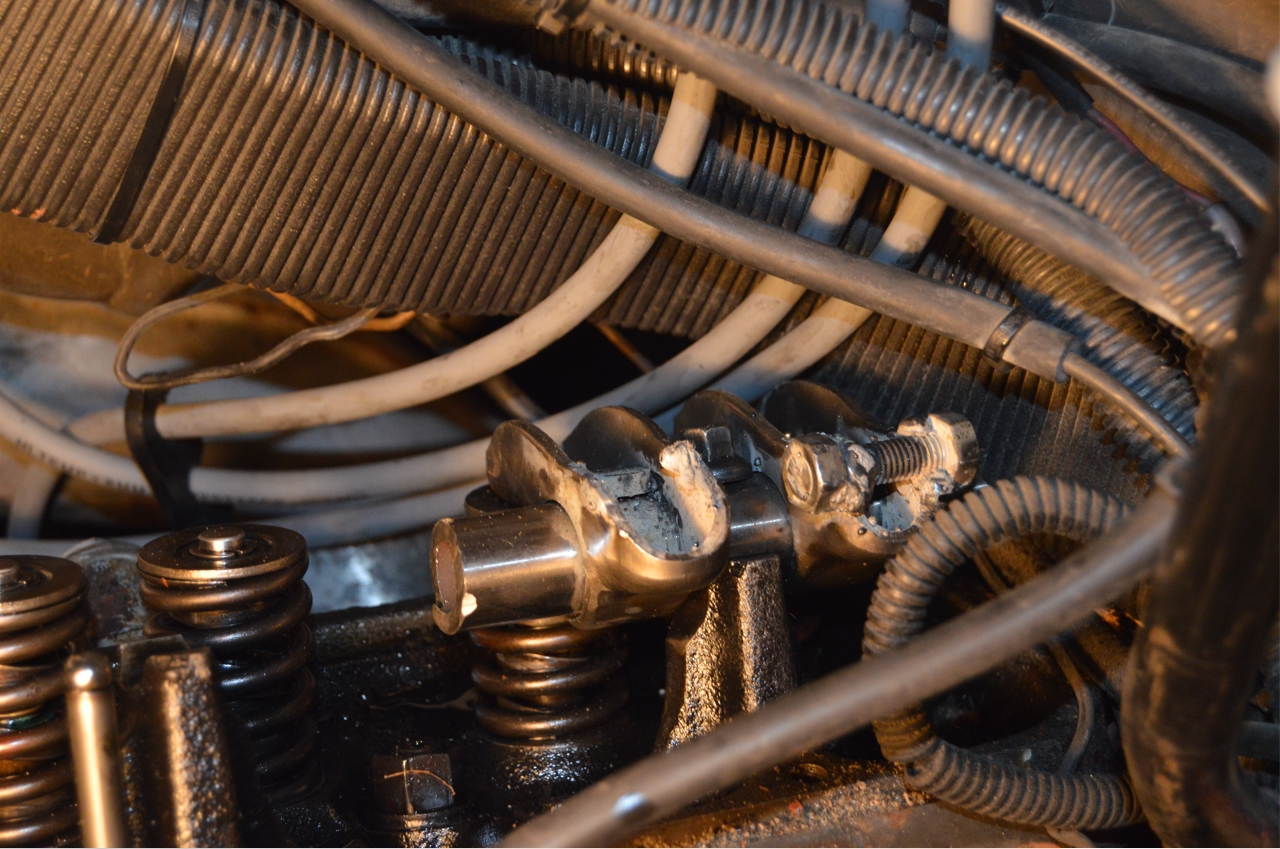
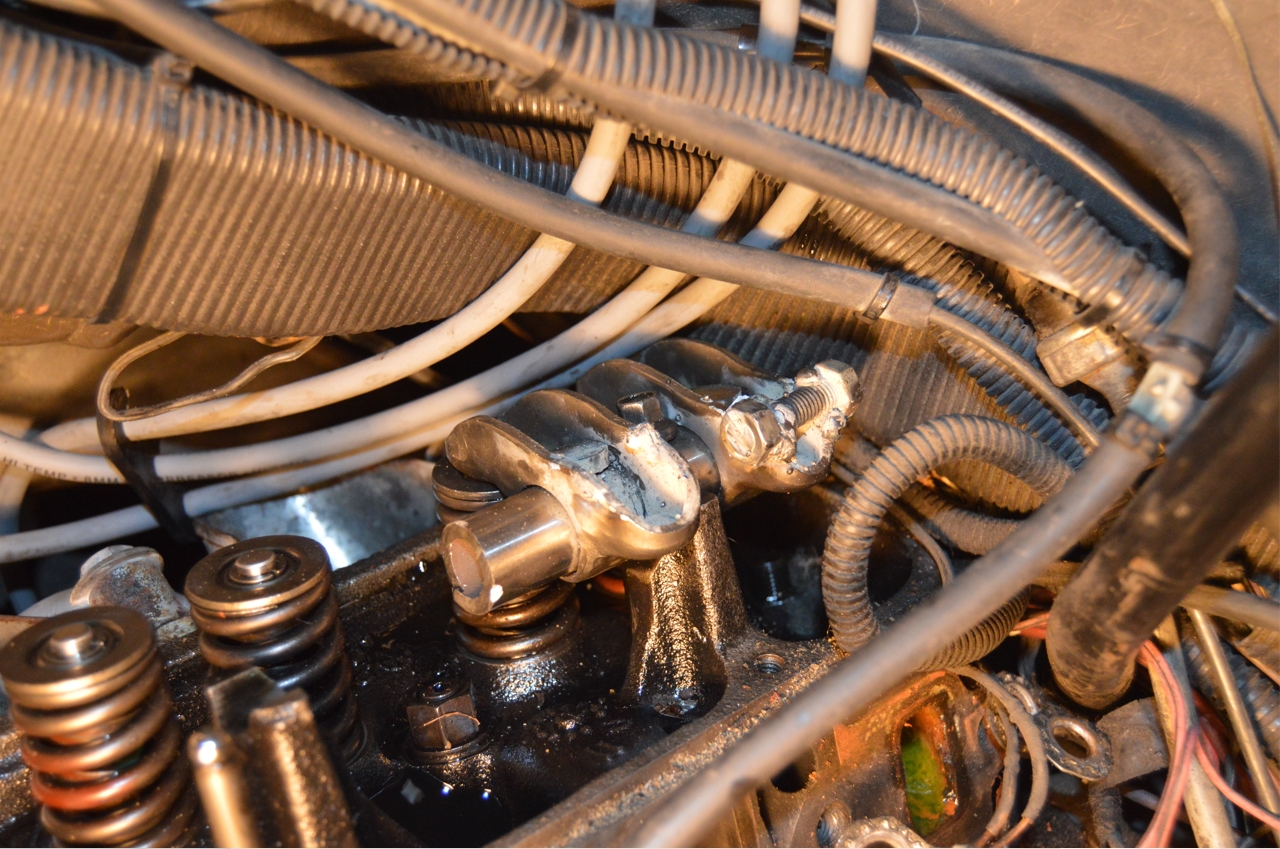
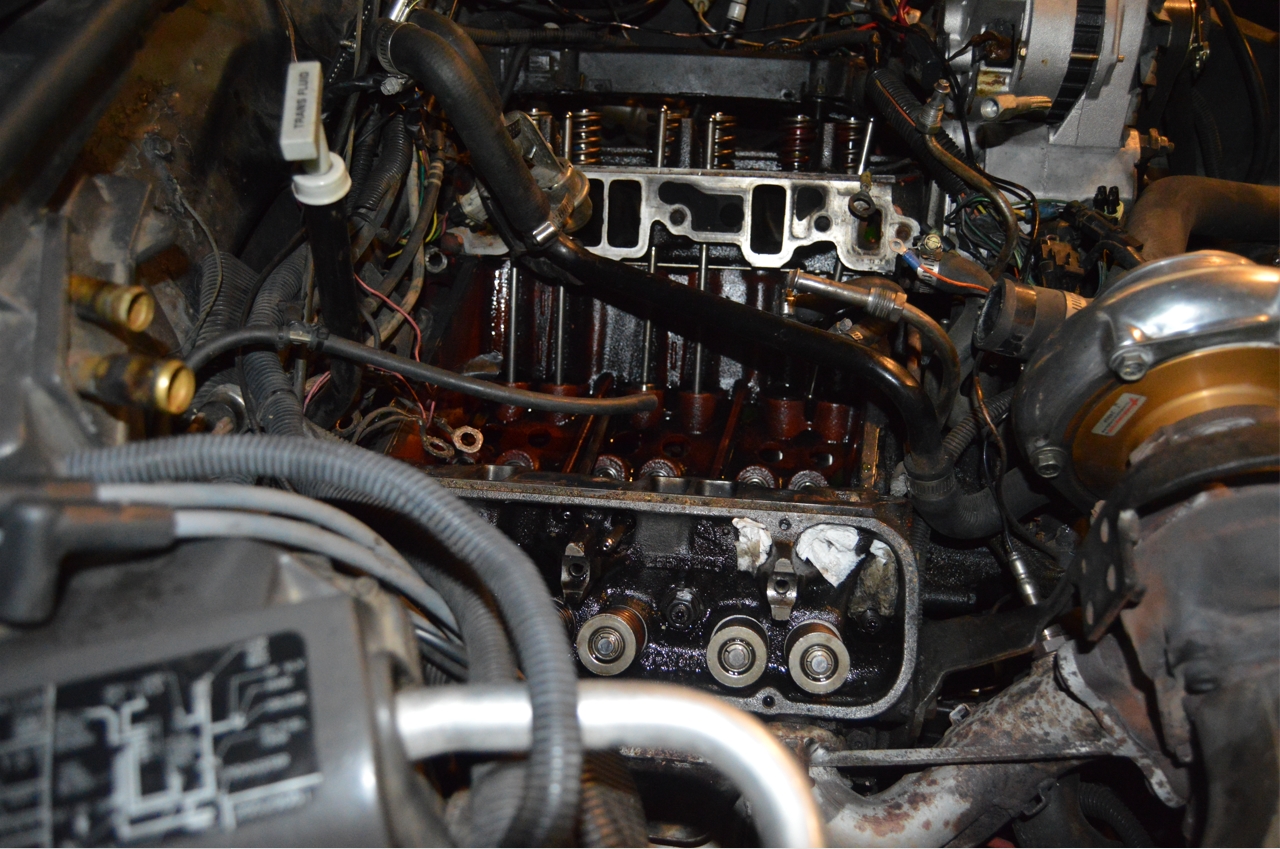
Viewing the other pushrods (with the valve covers off), all looked well (visually and tension wise within the setup).
[even after removing the intake, all of the pushrods still looked ok]
The bend in the pushrod, was unfortunately under the head, with no easy way to remove it.
[we could have messed with it a bit and maybe might have been able to take it out, but when issues like this arise, do you really want to take a chance and NOT see inside the engine? Who knows what might be happening in there!]
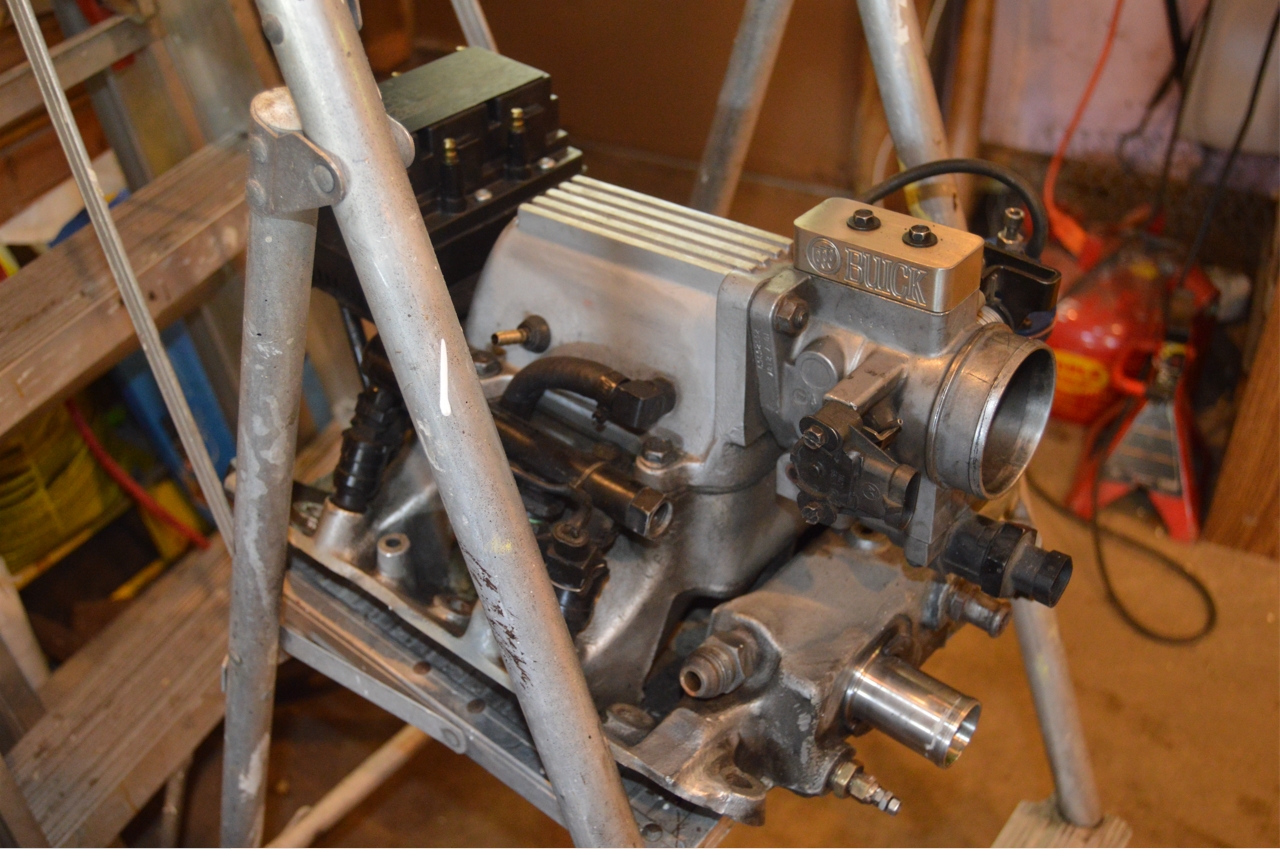
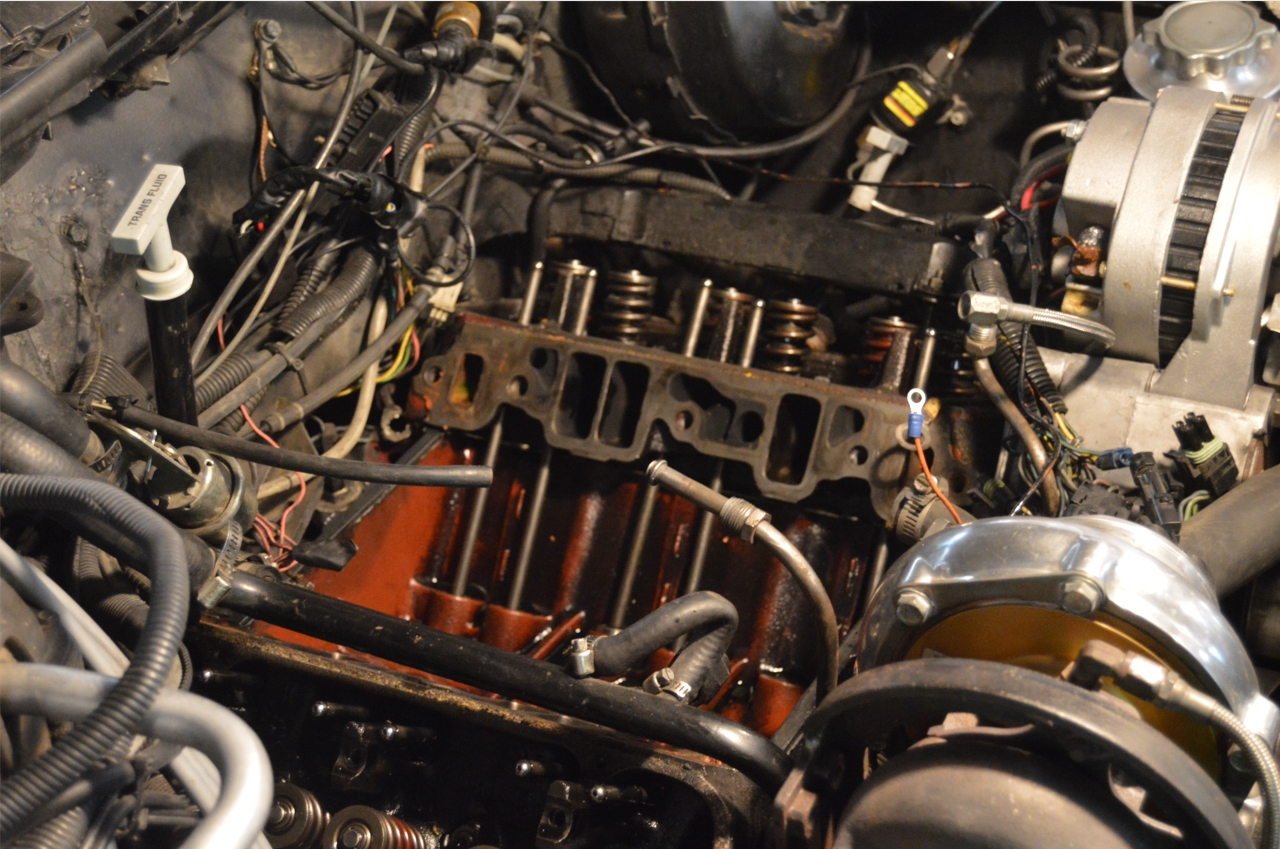
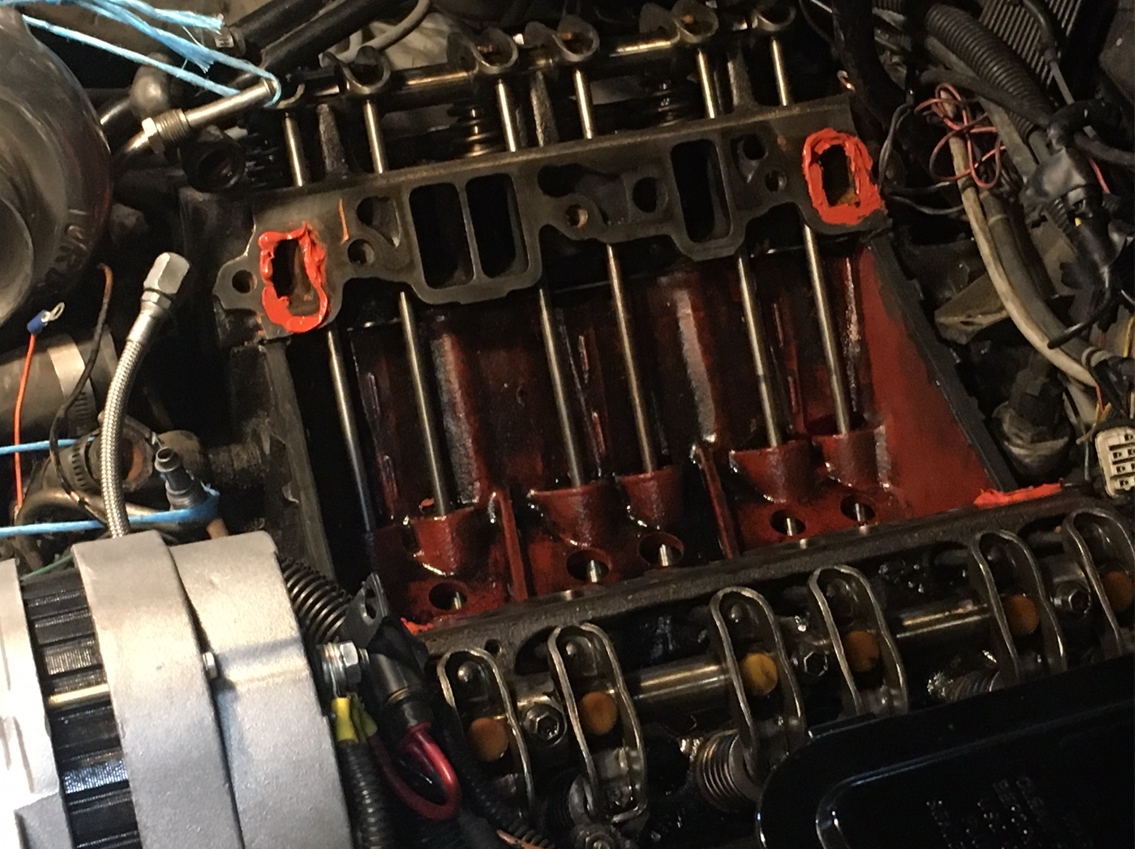
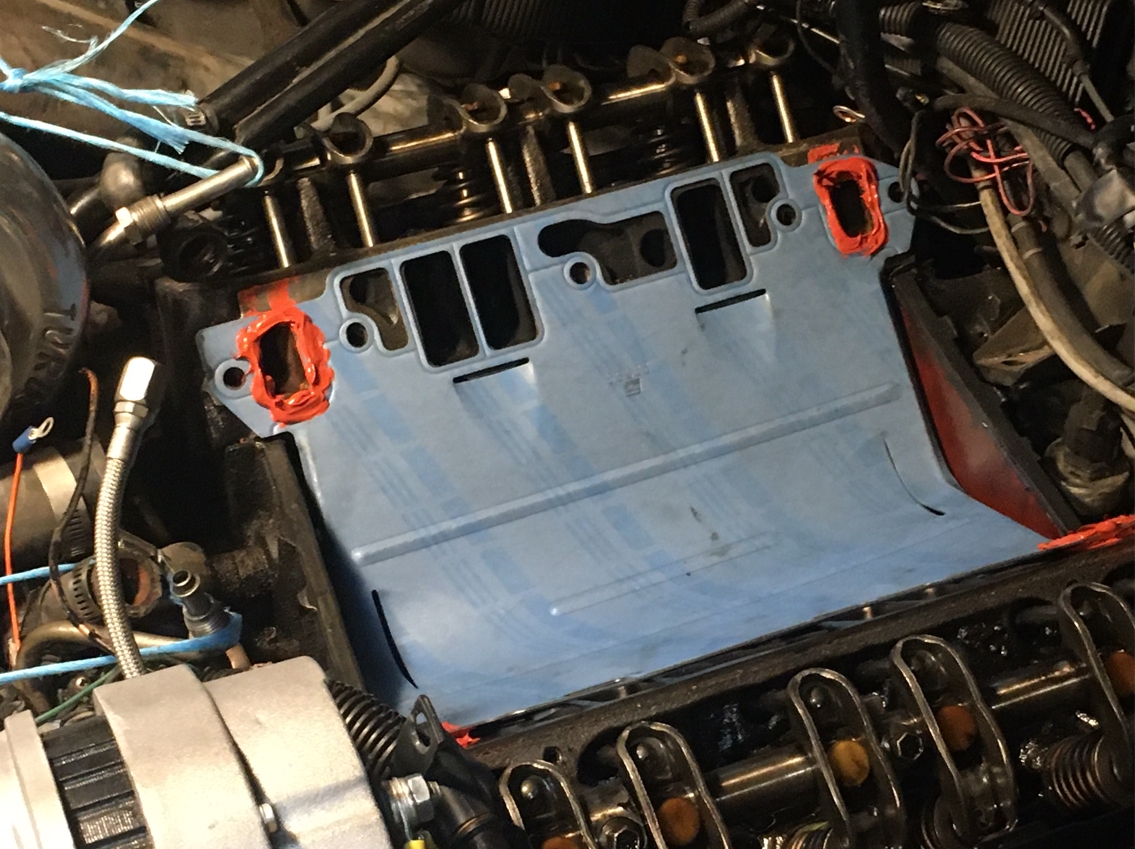
This meant the intake (and everything that’s mounted to it) would need to come off.
Which sucks, but provided an opportunity to inspect the things you can’t see with it attached (like all the internals under the intake manifold).
[this was also a great excuse to examine how some of the rest of the engine parts were wearing after a decade and a half, along with seeing if the pushrod had done any other harm to the Buick 3.8 SFI engine]
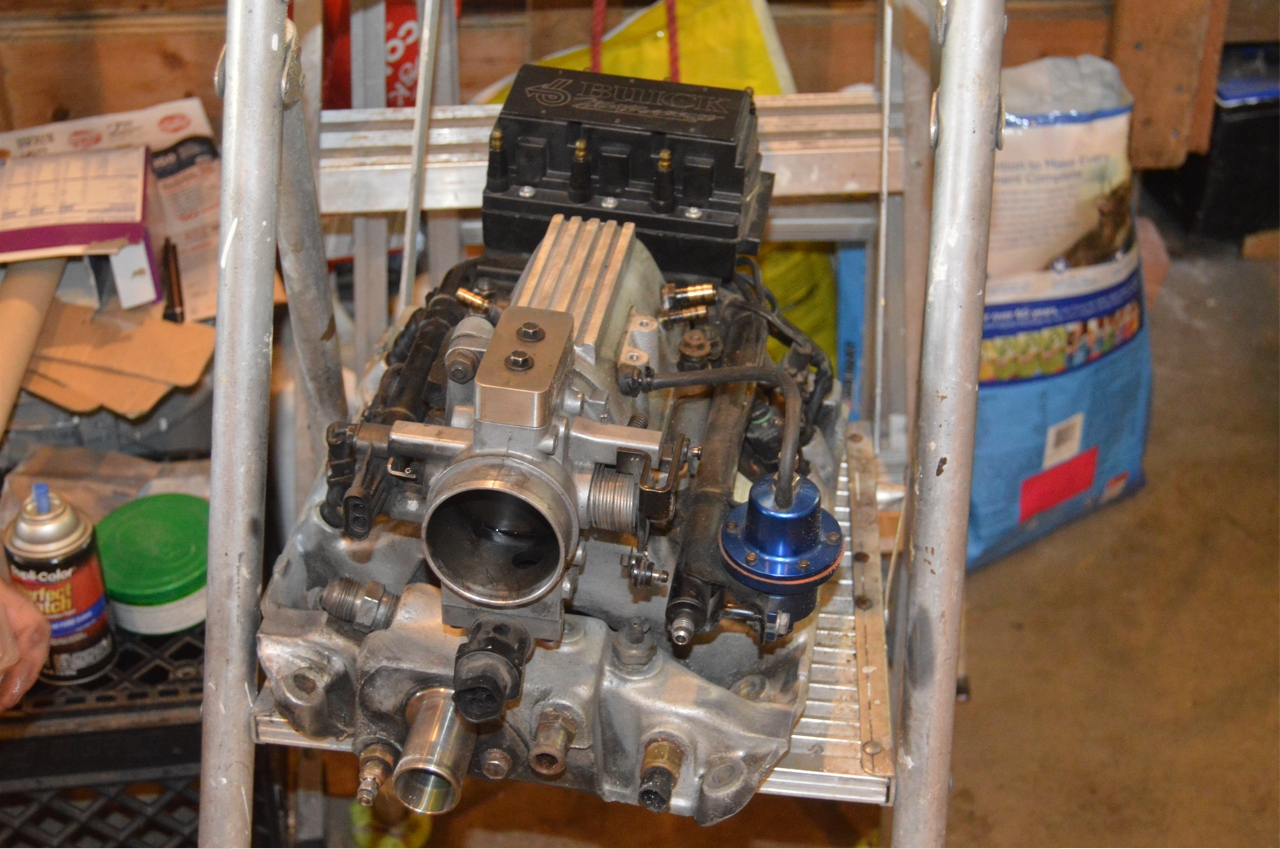
An inspection was performed on all of the lifters, the bottom sides of all push rods, checking to see if the lobe on the cam was wiped or not (which it wasn’t), and everything else inside that area. All looked visually ok.
This just left #3 & #4 from the list above.
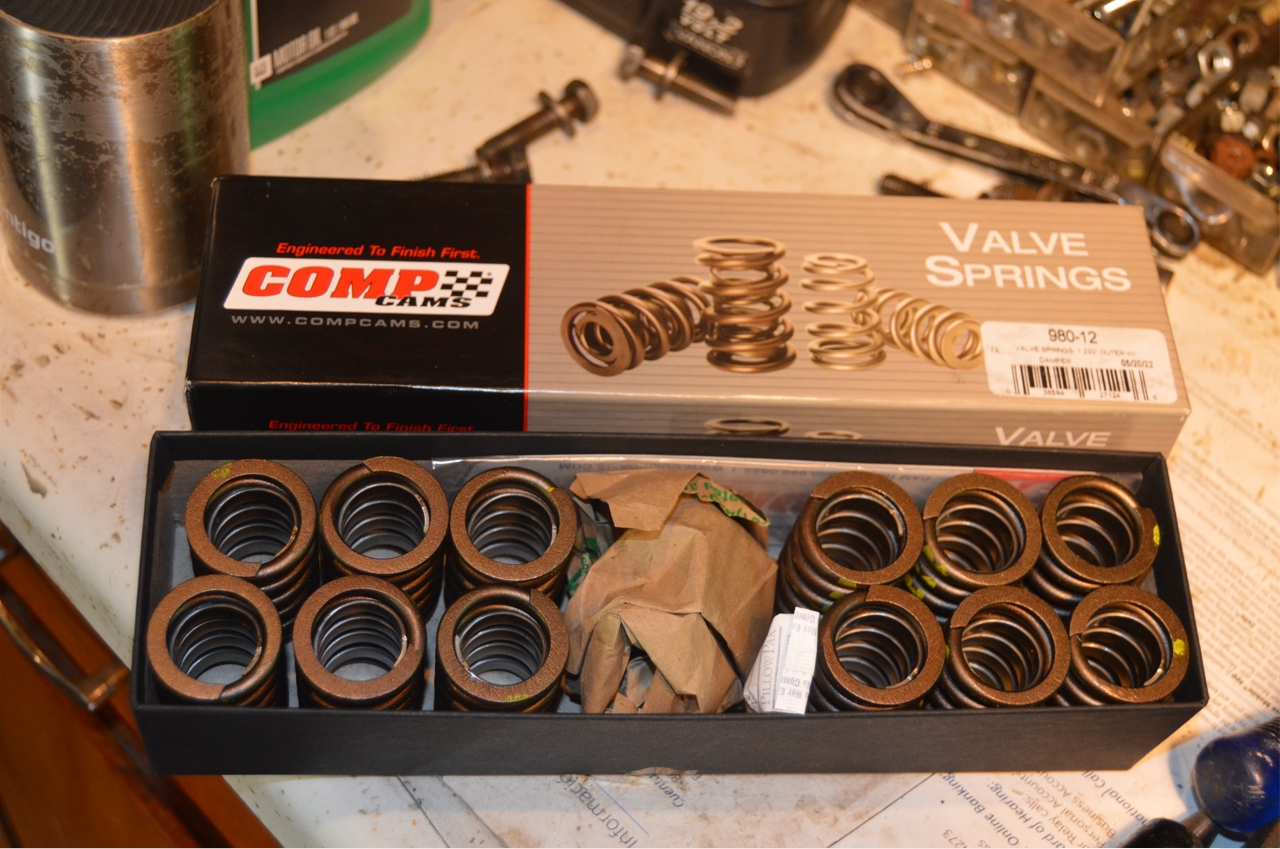
So to be safe, we replaced all (12) of the valve springs (thinking that all of the springs should wear out mostly at the same rate, and why chance only doing the 1 spring on the bent pushrod cylinder), as springs are relatively inexpensive, and stock type valve springs are prone to wearing out.
[not to mention that since all of this was apart already, why wouldn’t you just go ahead and get this all done now? Kind of dumb to only do the one, when the potential for the rest to give out in the near future is high]
[and while it’s all apart, spend another 20-ish bucks and pick up a new valve seal set as well, regardless of how old your current ones are, as the procedure for replacing these is the same as doing the valve springs job. $20 is cheap insurance for a smokeless performing engine]
The single push rod that was bent and the single lifter from the cylinder that broke was replaced too.
[note that ALL of the lifters were removed, inspected, the plungers were checked, etc., and then reinstalled (MAKE SURE if you remove them, that you put them back IN THE SAME HOLE as they were in before you removed them!)]
These replacement parts “should” cure the problem.
(and in the end, they did…)
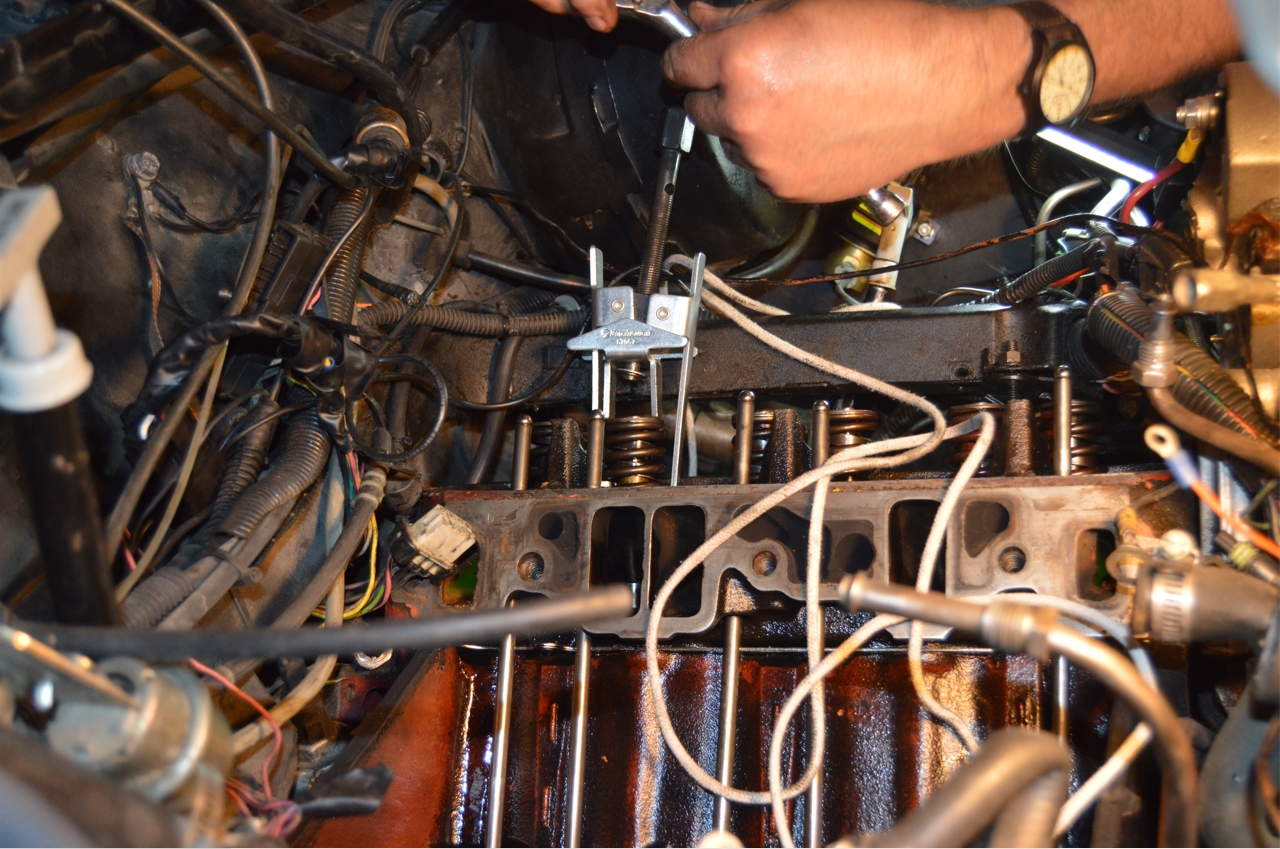
We will be replacing all of the valve springs WITH the heads on.
Granted, it is much easier to do them with the heads OFF, but that also requires removing them, as well as the exhaust manifolds, and a few other assorted parts.
Plus getting new head gaskets, bolts, etc.
[so it’s a kind of a tradeoff. If you’d like to port/polish/mod your heads, this would be a great time to do that! Otherwise, just repair / replace with the heads on]
.

.
Doing (what seems like) a “simple” job like replacing a pushrod isn’t as simple as it sounds. There’s a lot of prep work that needs to be performed to “get to” the pushrod (when it’s bent like this one was)!
Of course, we are replacing all of the springs to be on the safe side too, so it’s more than just popping out a push rod and putting in a new one.
Removing the top end takes about an hour.
Reinstalling it all takes another hour.
Then there’s the 3-6 hours in between to do the actual job of valve spring replacement.
(which is definitely NOT a fun job, how did we get suckered into helping? Ah, the things we do for our Turbo Regal friends…)
.
PARTS:
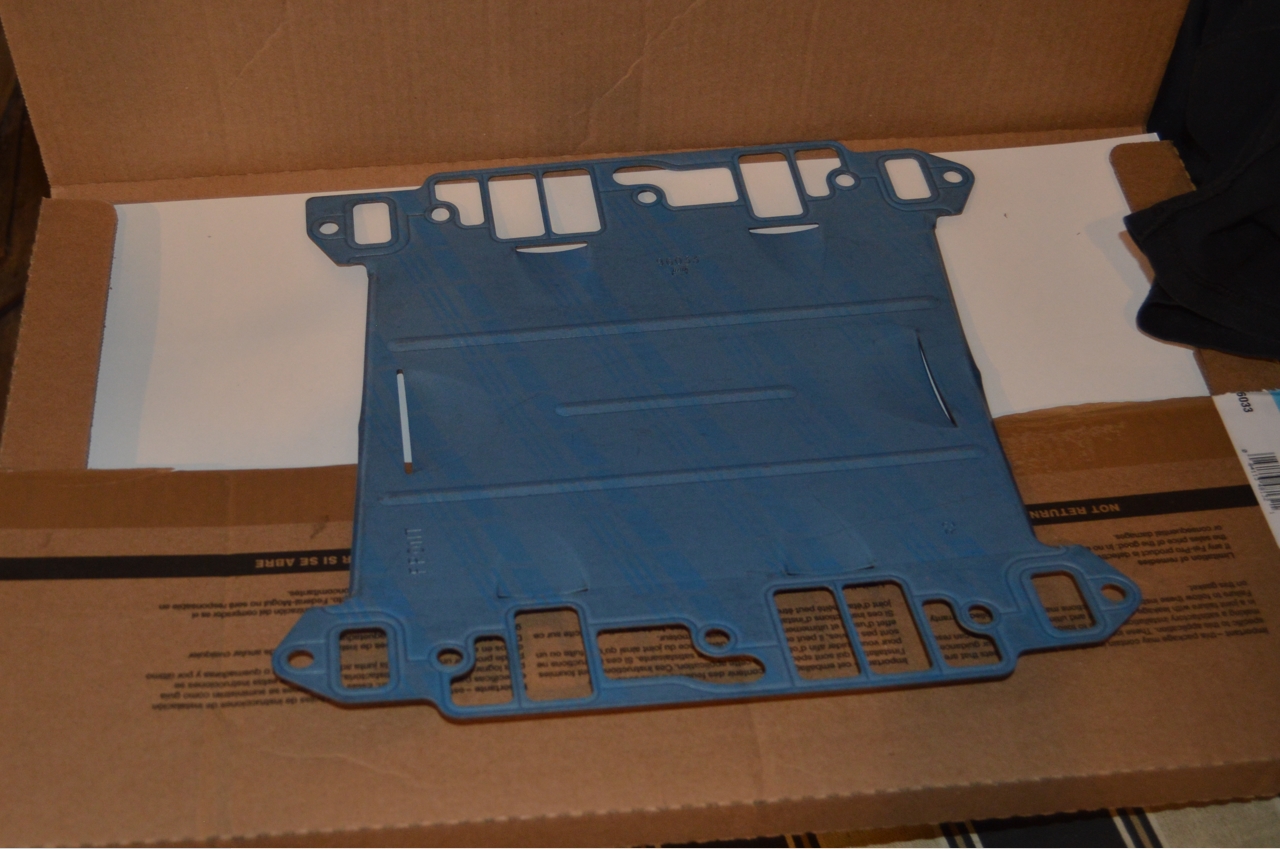
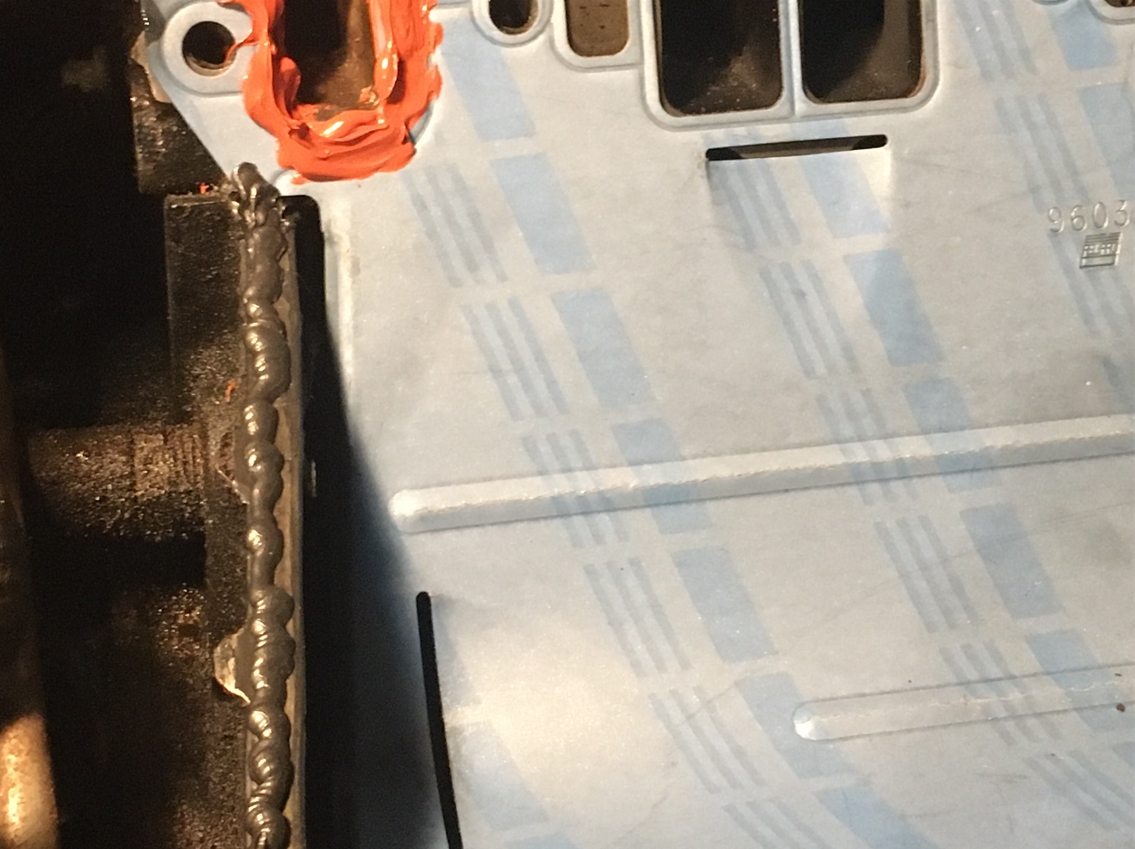
– Fel-Pro intake manifold gasket (MS96033, $25)
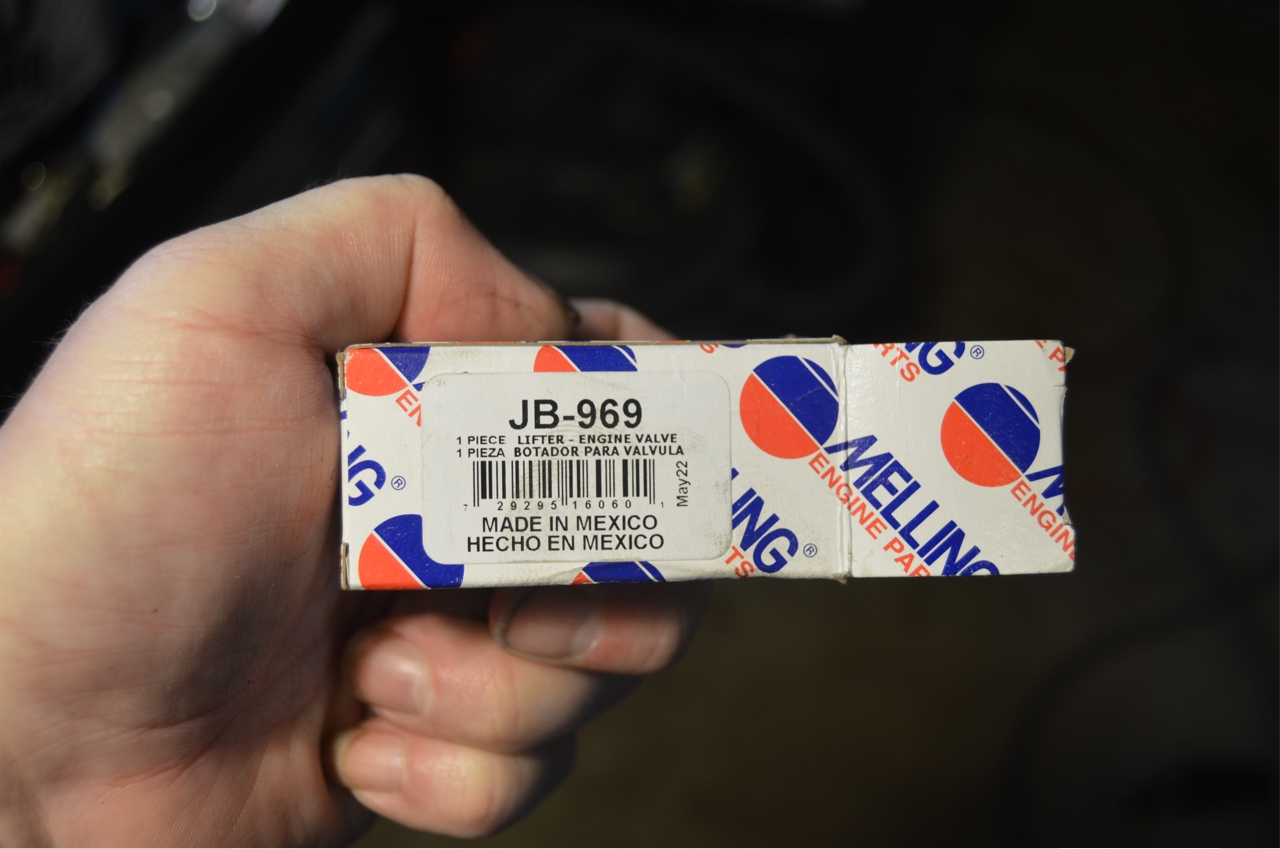
– Melling lifter (JB-969, $6)
– Comp Cams valve springs (980-12, $65)
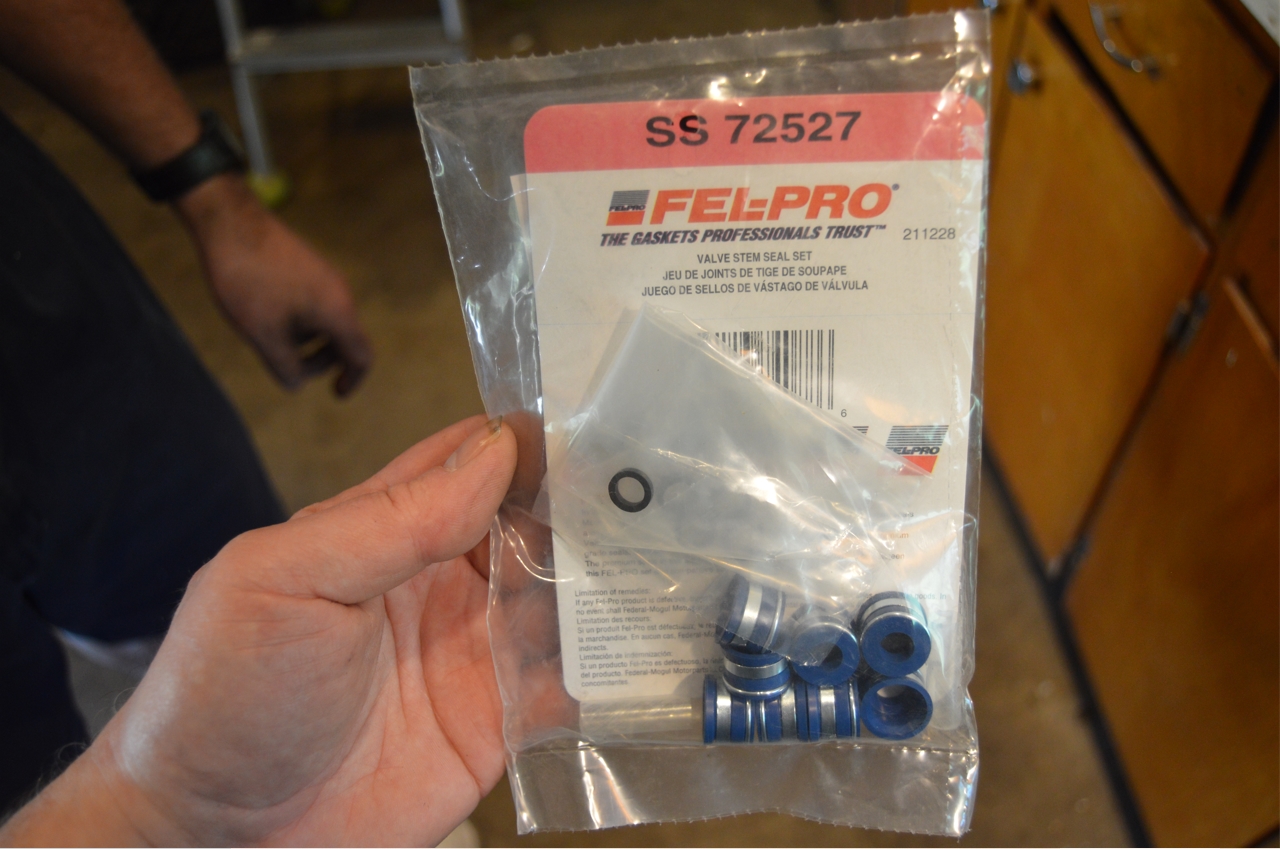
– Fel-Pro valve stem seal set (SS 72527, $21)
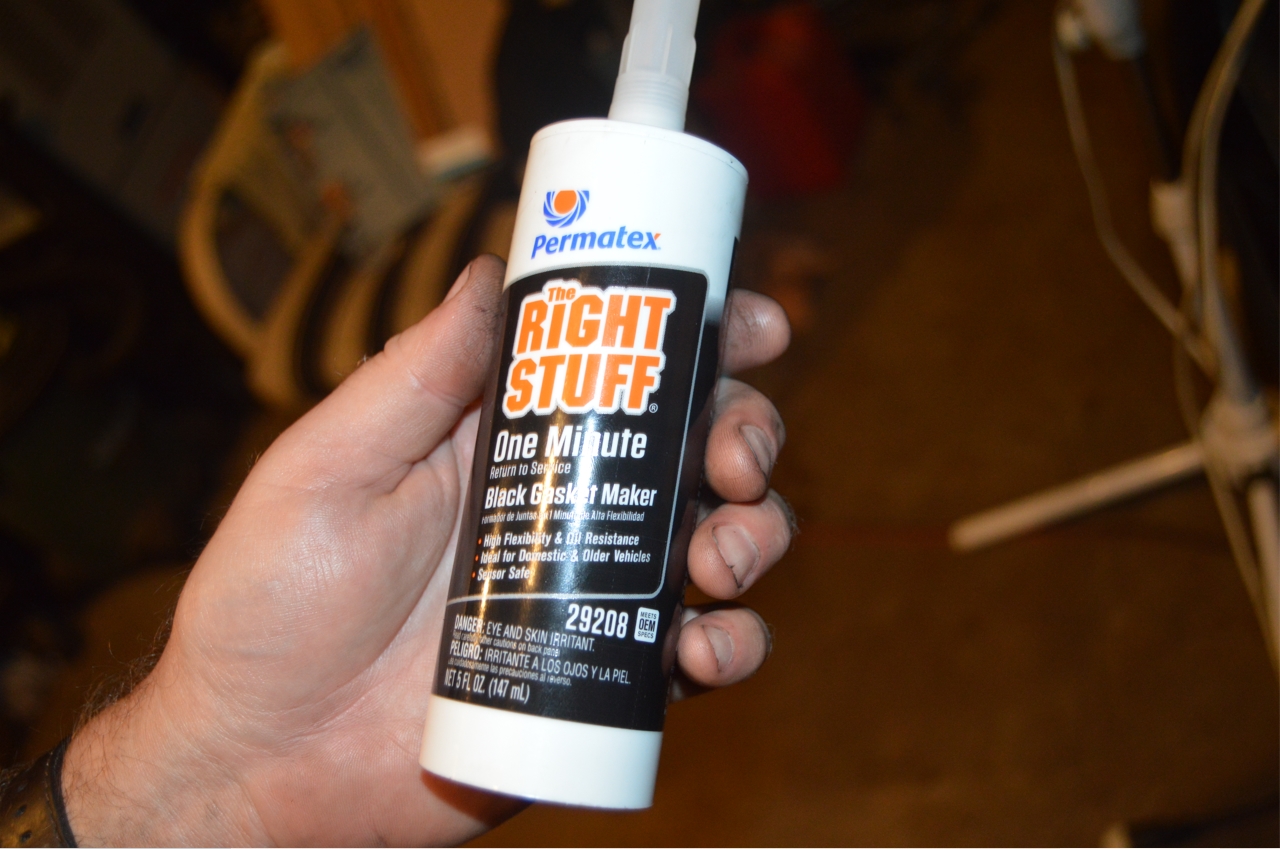
– Permatex, the right stuff (for front/rear edges on the engine block) ($16)
– WD40 (or some type of lubricant, to spray on old keepers to loosen them up from valve)
– 36″ of rope (about 3/8″ wide) – (one method to hold the valve up)
.
.
TOOLS:
– valve spring compressor (2-arm type, free rental from Autozone)
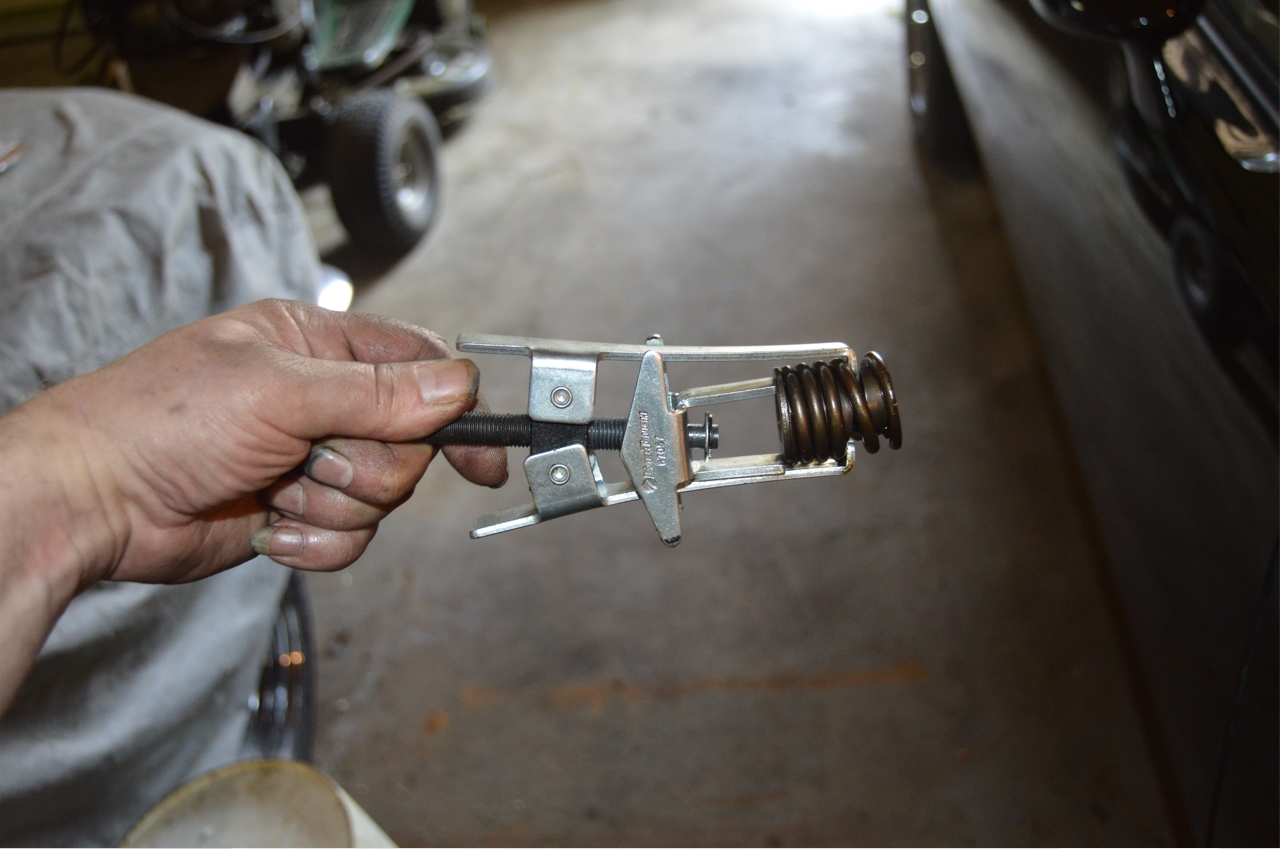
– home made valve spring tool (click link to see how we made it)
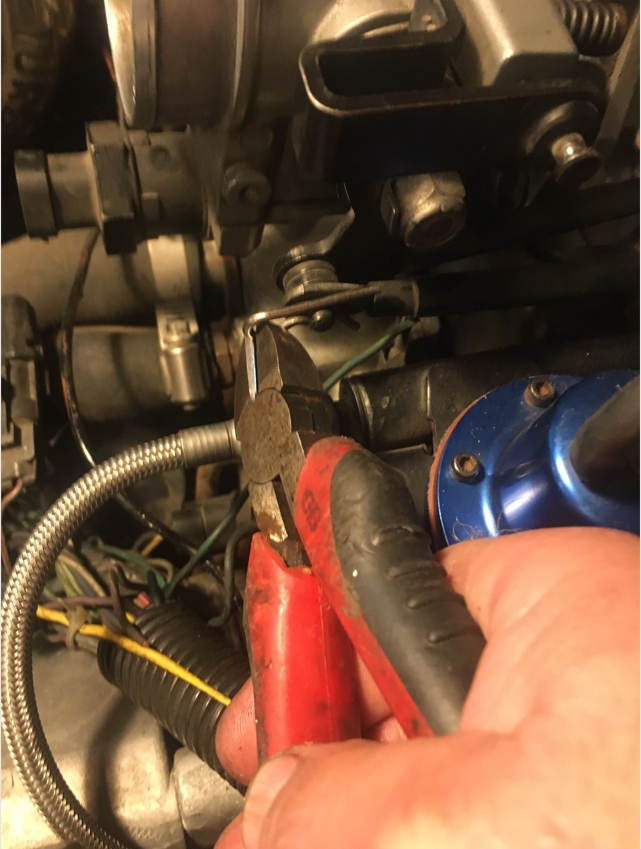
– pliers (old seal removal)
– magnetic pickup tool (to pull out valve keepers)
– breaker bar / ratchet with proper socket to turn motor over (use harmonic balancer bolt)
– air compressor, with fitting for cylinder head spark plug hole (an alternative to the rope trick)
.
Socket / wrench sizes to remove stuff:
1/4″ for ignition module harness.
1/4″ for clamps on water hose lines.
5/8″ for both fuel lines.
10mm for valve covers.
13mm for intake manifold.
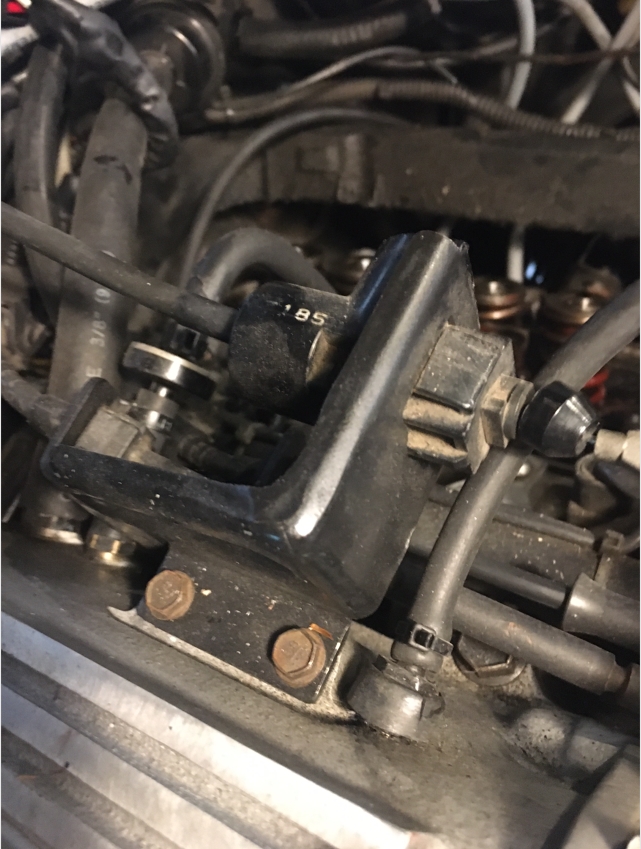
14mm for rocker shaft bolts.
.
Parts to Remove:
up pipe.
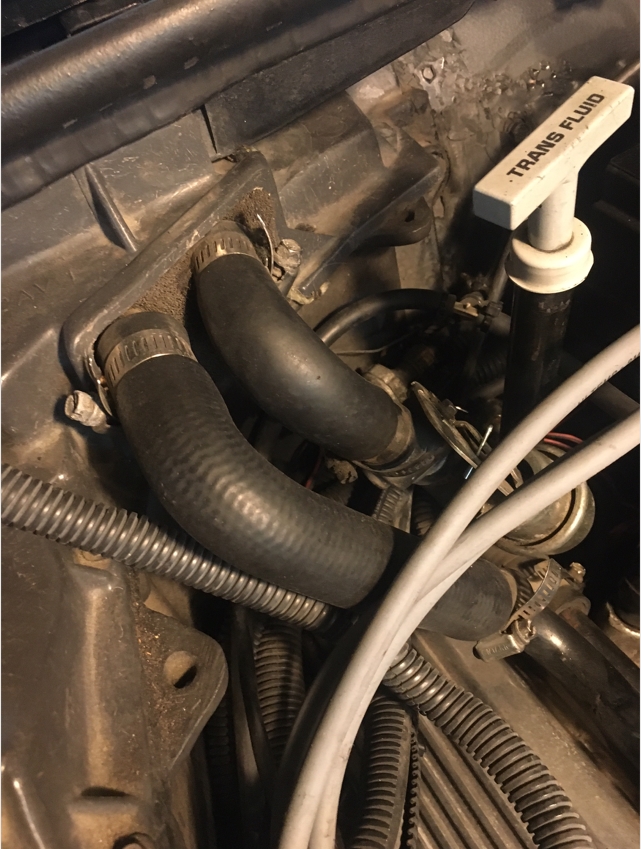
water valve & hard lines (that run over passenger side valve cover).
upper coolant hose (intake side).
2 heater/bypass hoses (on intake).
Valve covers.
spark plugs & wires.
fuel lines.
intake manifold (with all above it attached, careful, it’s heavy!).
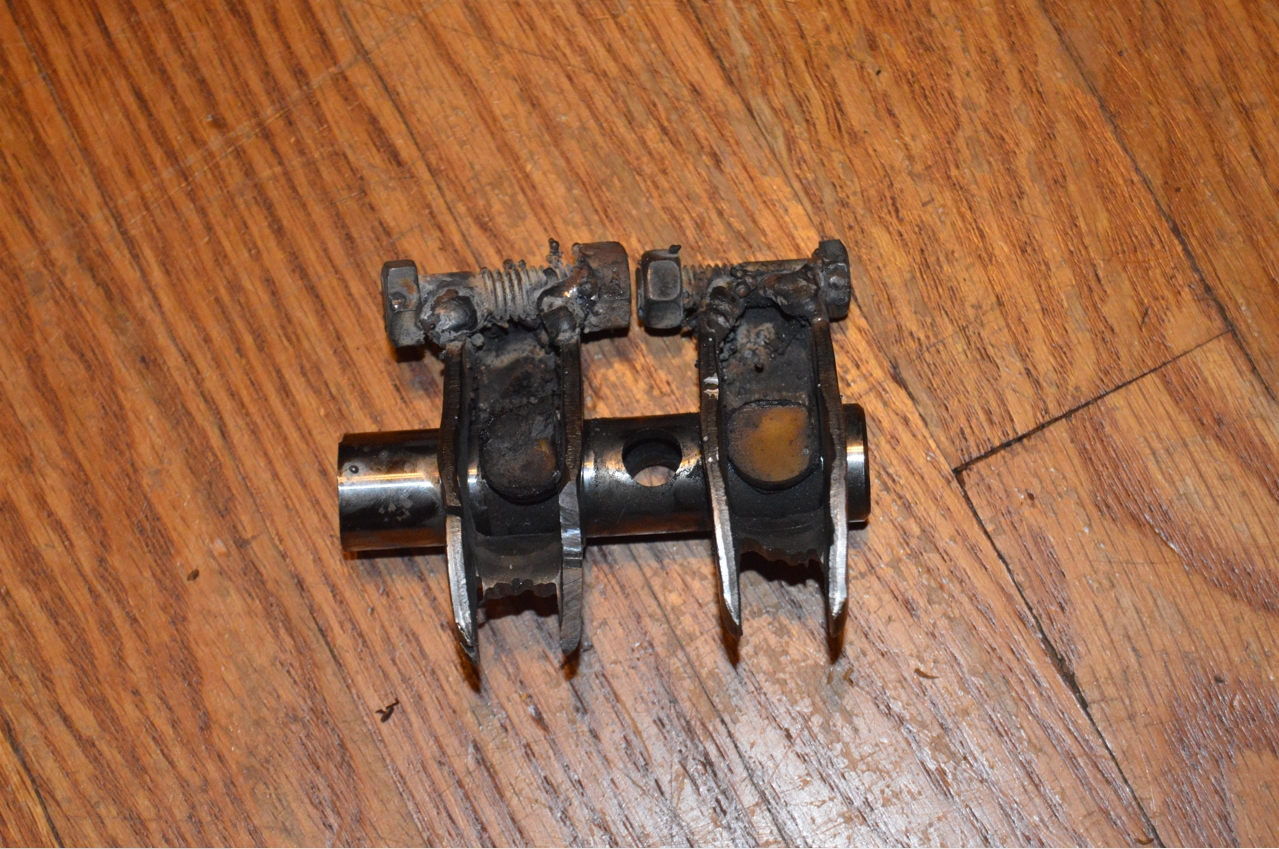
push rods.
rocker shafts.
.
Wiring Plug Connectors to Disconnect:
Ground wires (rear of engine on passenger side, attached to intake).
Main fuel injection plug connector (rear of engine on drivers side).
IAC plug.
Cooling sensor wires (on intake manifold, 2 at front of engine, 1 on top on drivers side).
TPS plug.
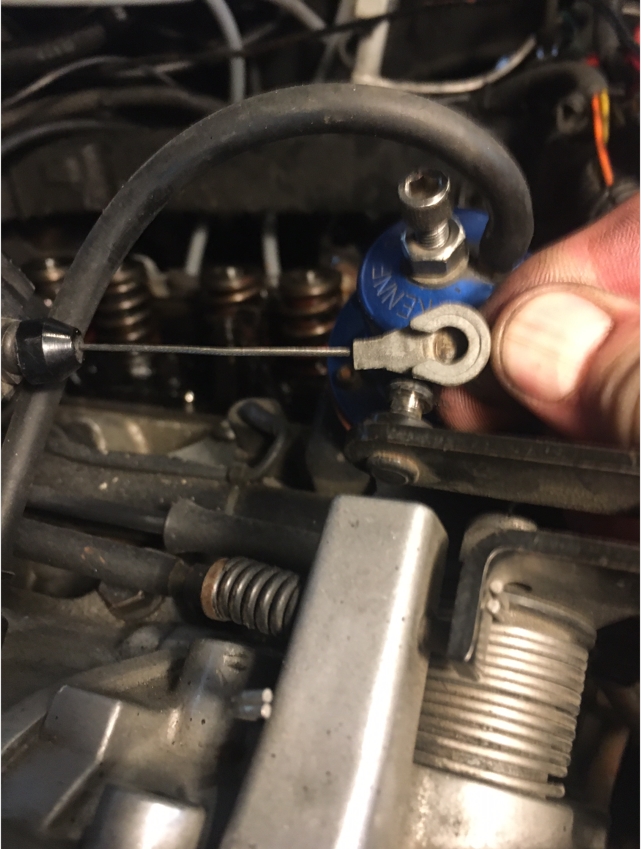
Throttle cable.
.


.
TIPS WHILE YOU’RE DOING THIS TASK:
[while you have the intake off:]
Replace the main (metal) coolant tube (thermostat neck) on the intake, they make a neat stainless steel version now, so you won’t have to worry about future rusting issues.
(alternatively, you could just clean off your stock unit)
You should also replace or wire wheel off the other 2 coolant connections (pipes) on the manifold.
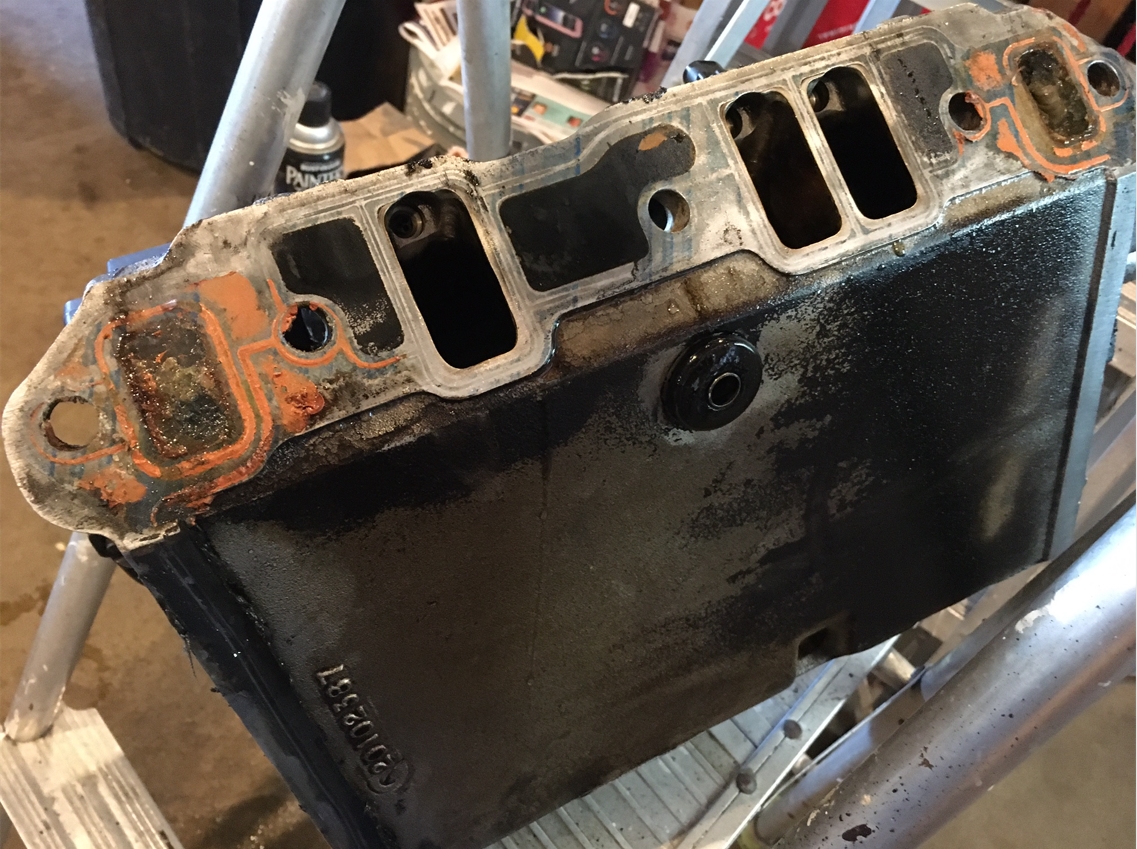
Clean the surfaces on the intake (where the new gasket will sit).
Clean the surfaces on the heads and block (where the new gasket will sit).
.
.
MORE TIPS:
You need about 27″ of rope to jam in the cylinder with the piston at TDC. This helps hold the valve up into place while you are replacing the spring.
(alternatively, you could use an air compressor and blow air into the cylinder. you’ll need a special adapter to screw into the spark plug hole, costs about $10)
Spray some WD40 (etc) on old valve keepers, this will help unstick them from the valve.
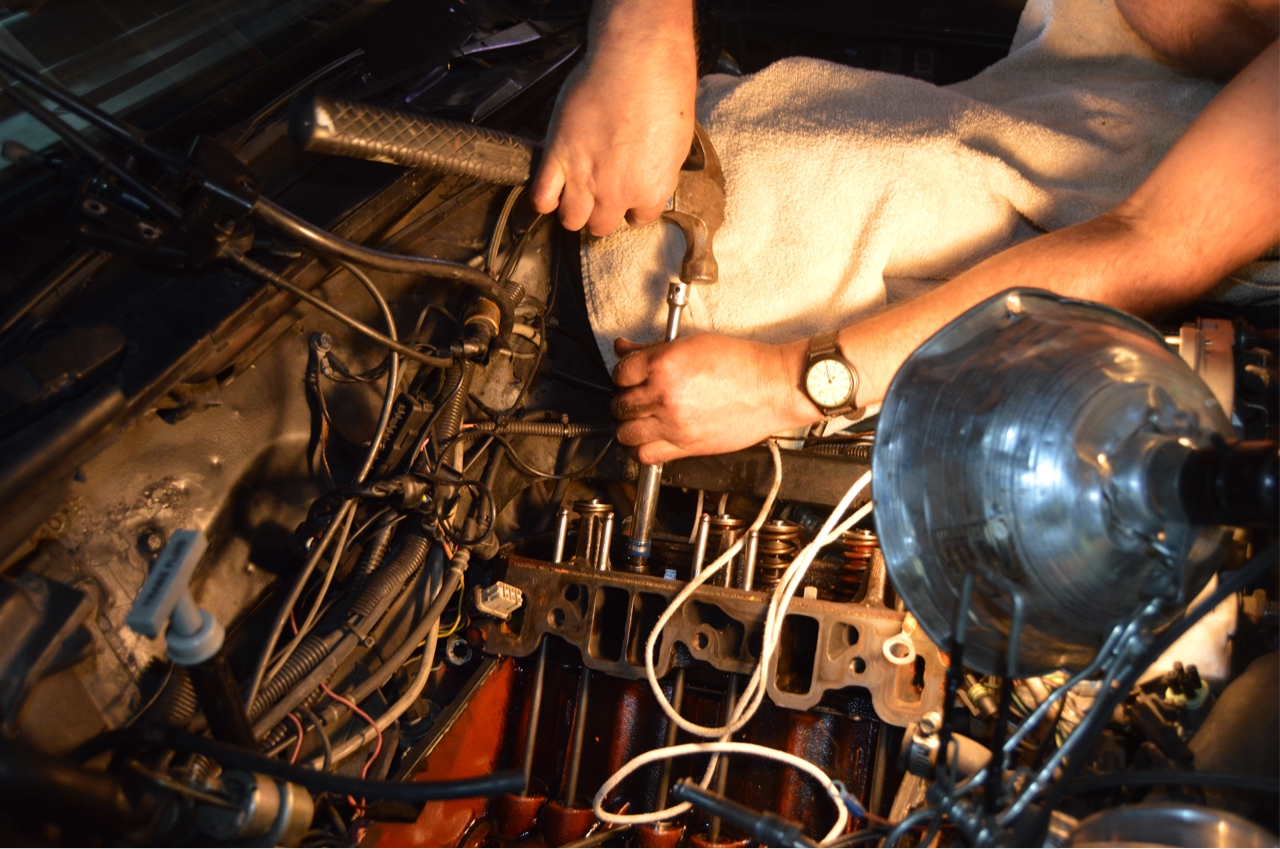
Smack the tops a bit with a hammer to help loosen them up (previous to actually removing them).
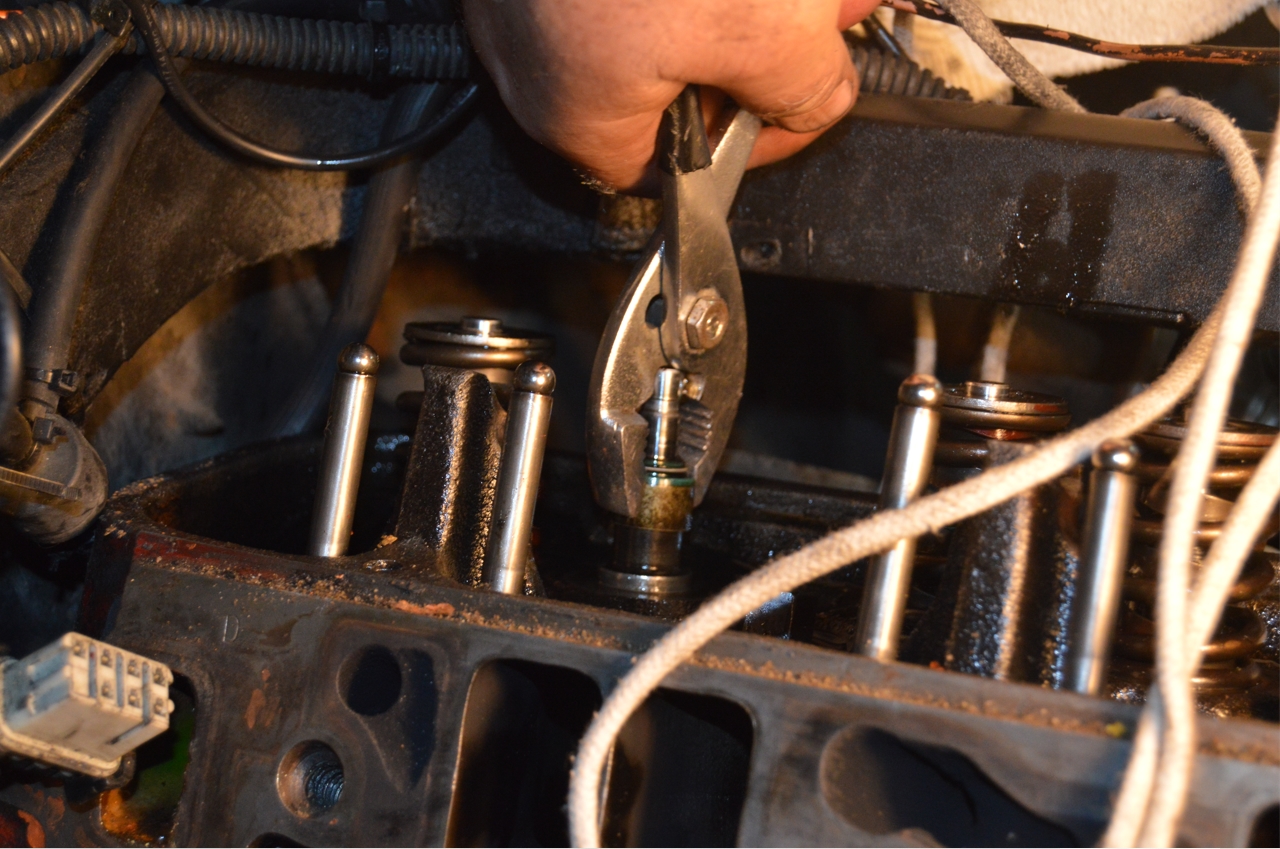
The old seals are on there pretty tight. We used pliers to twist them, then pry them off.
For cylinder 1 & 2, the spark plug hole faces the rear of the Gbody Regal, making it (more) difficult to shove the rope in.
The rest of the cylinders, the hole faces forward, and is easier to shove the rope in.
[we bunched up a few inches and then shoved it in with a flathead screwdriver, repeat until you can’t push any more in]
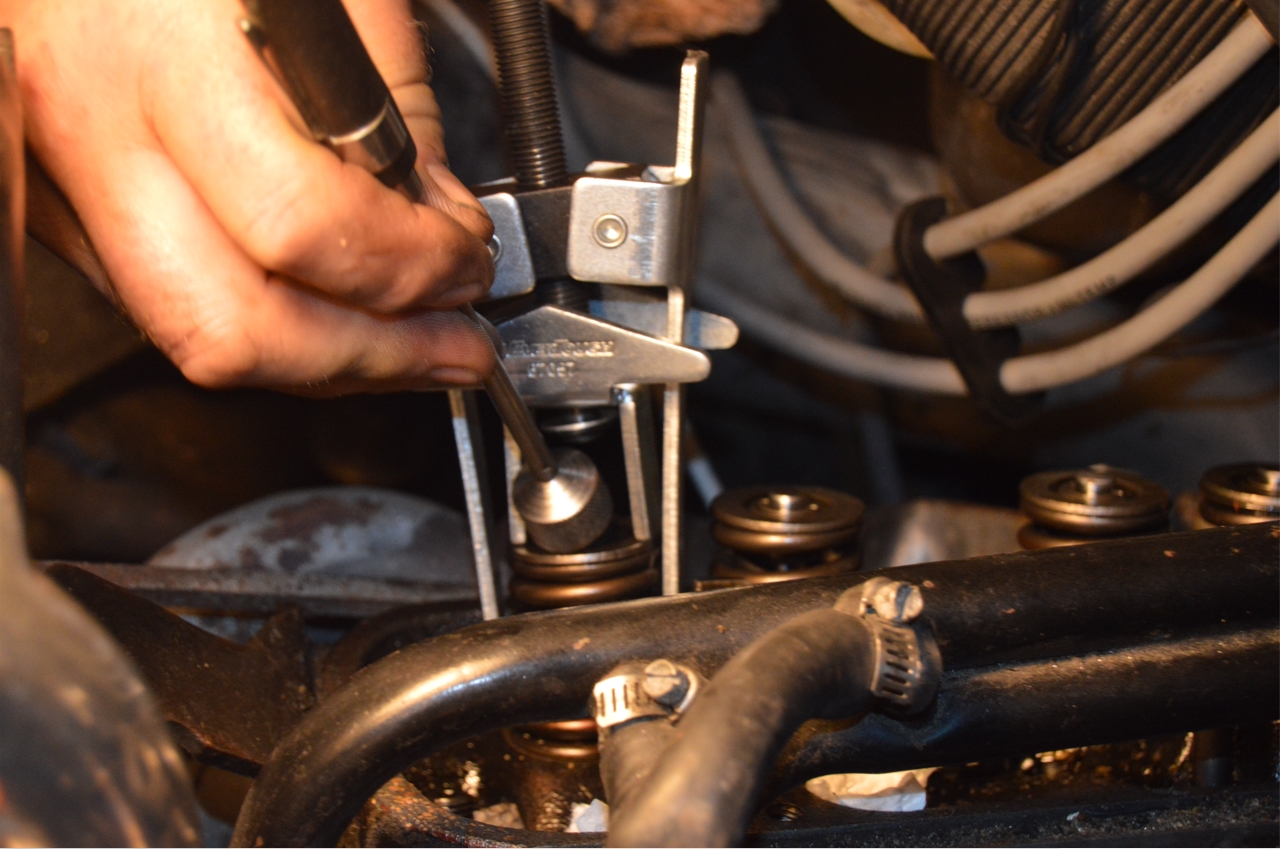
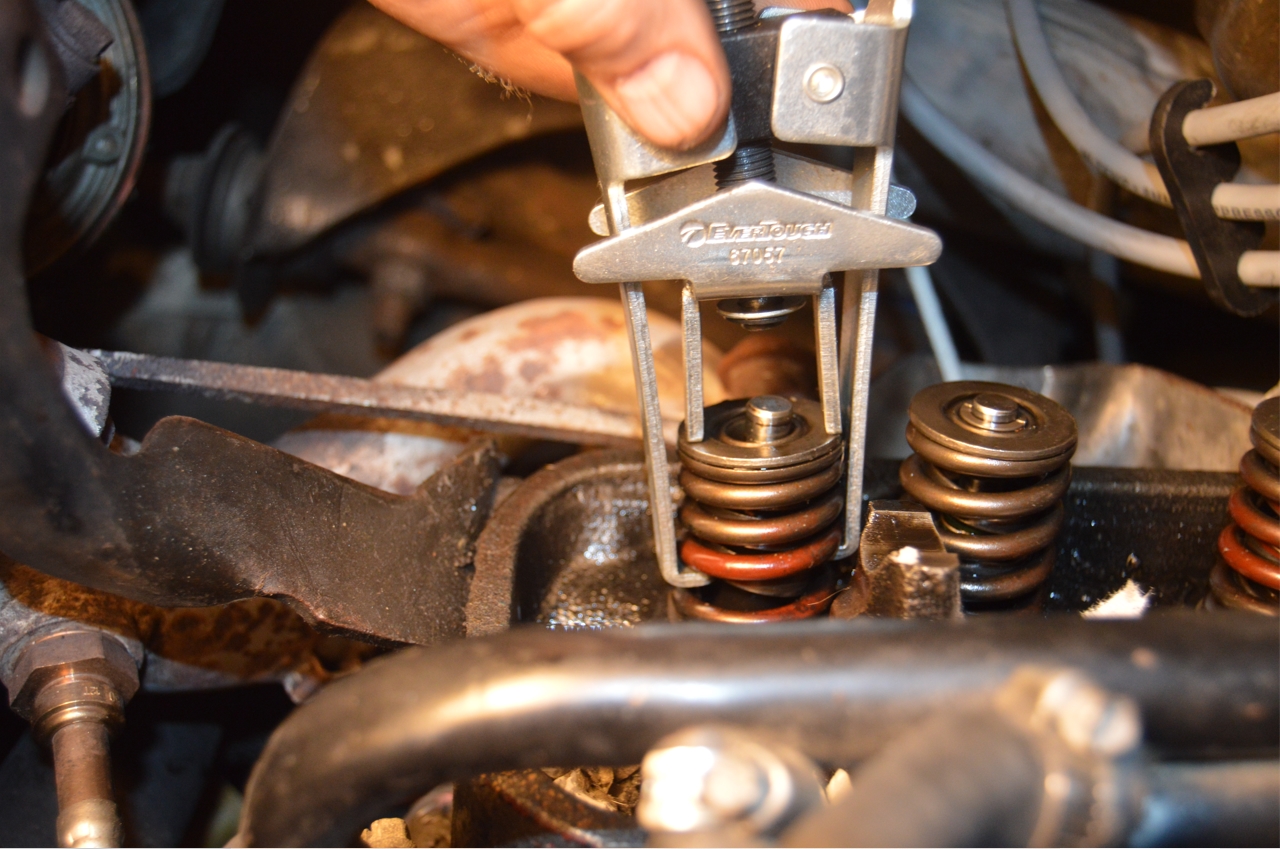
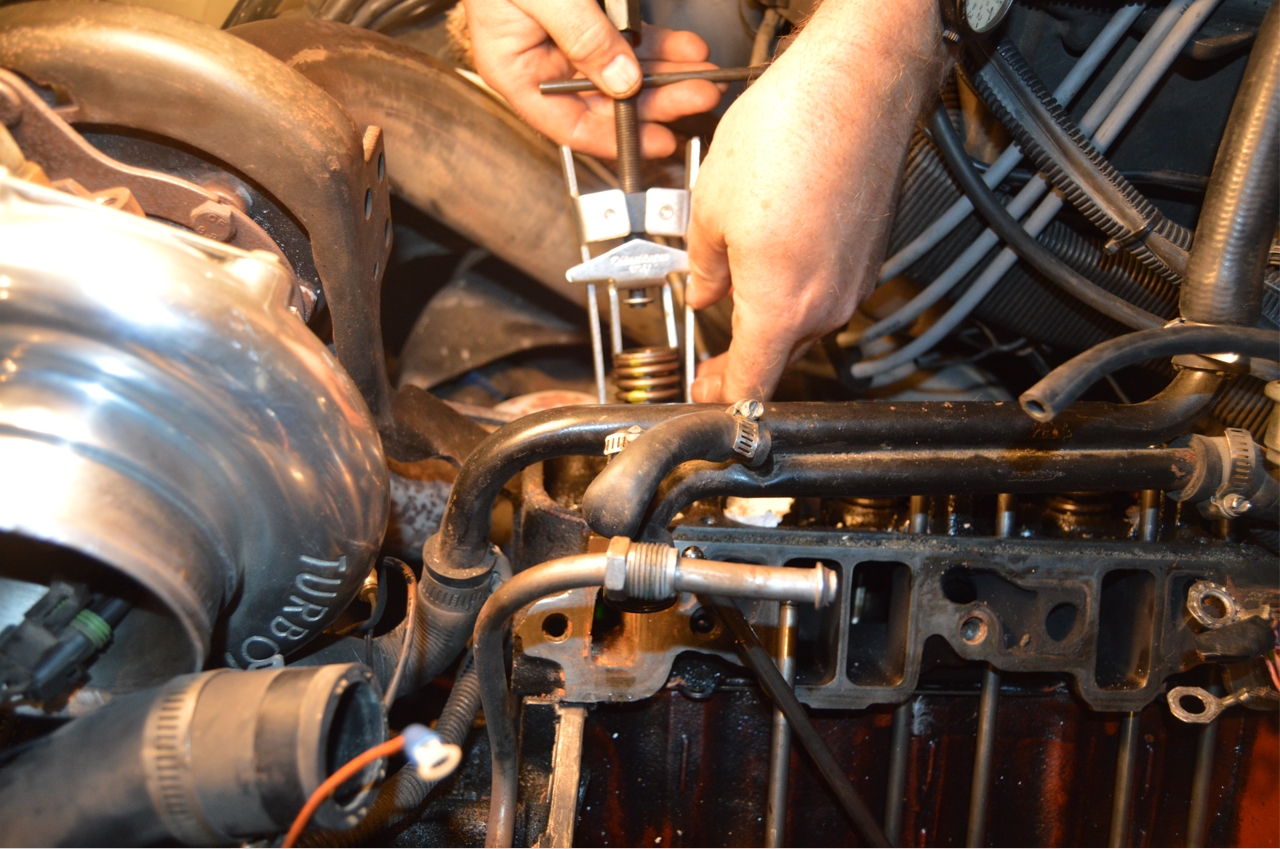
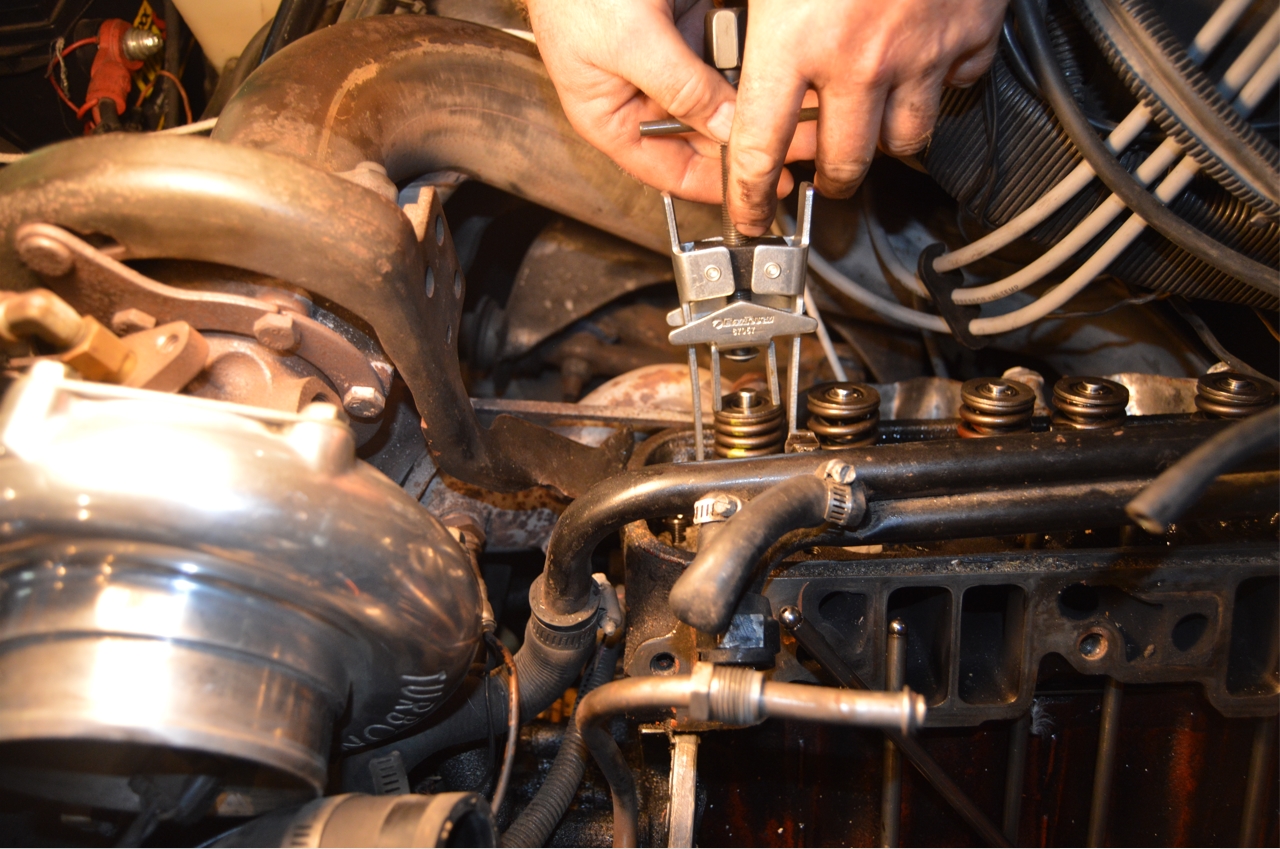
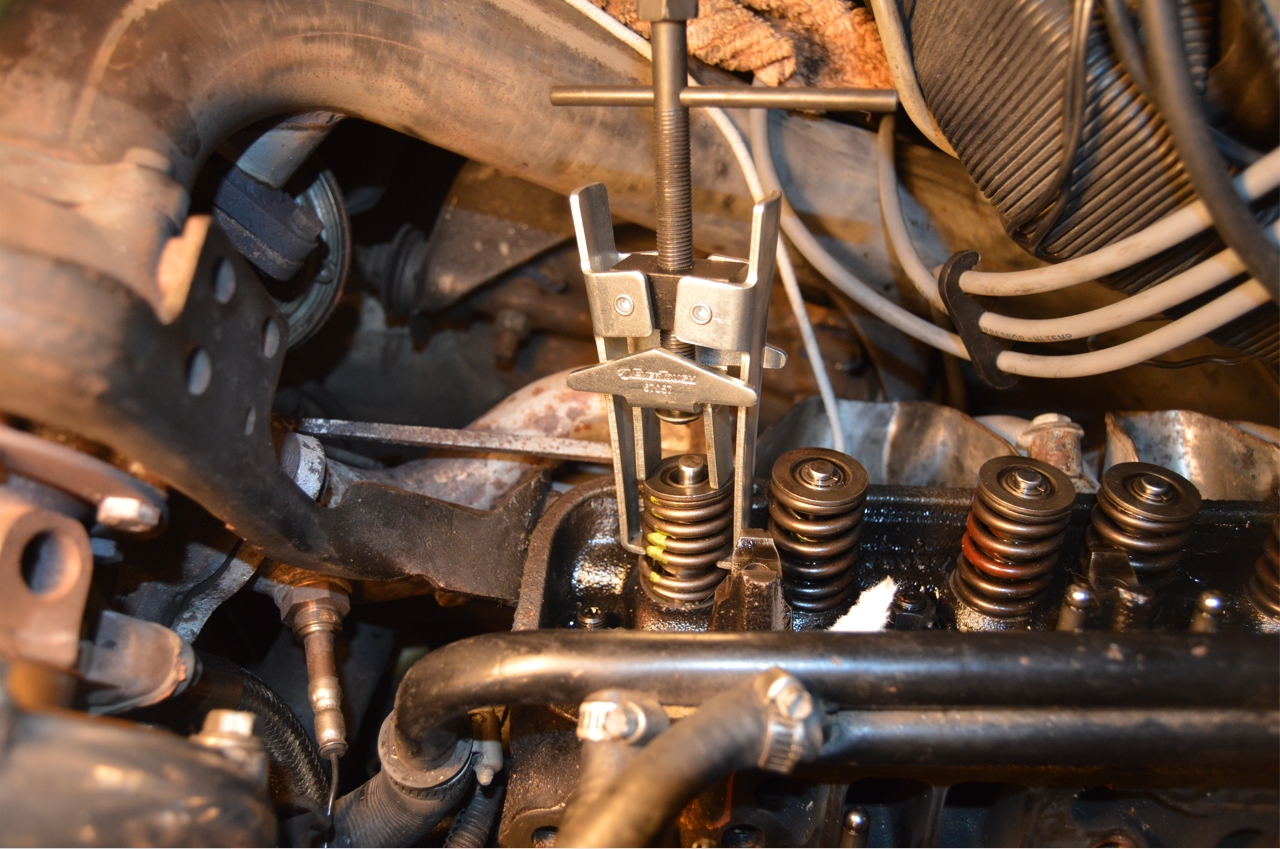
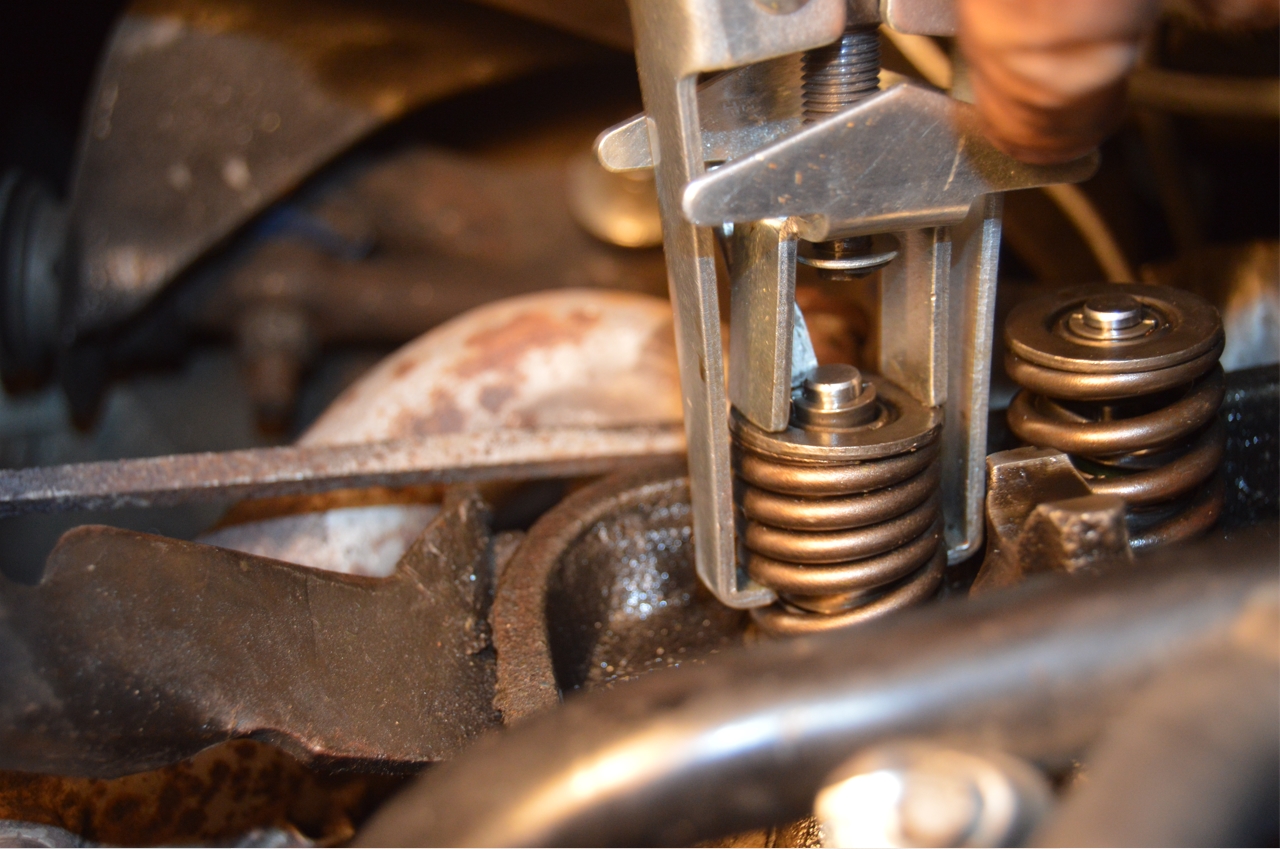
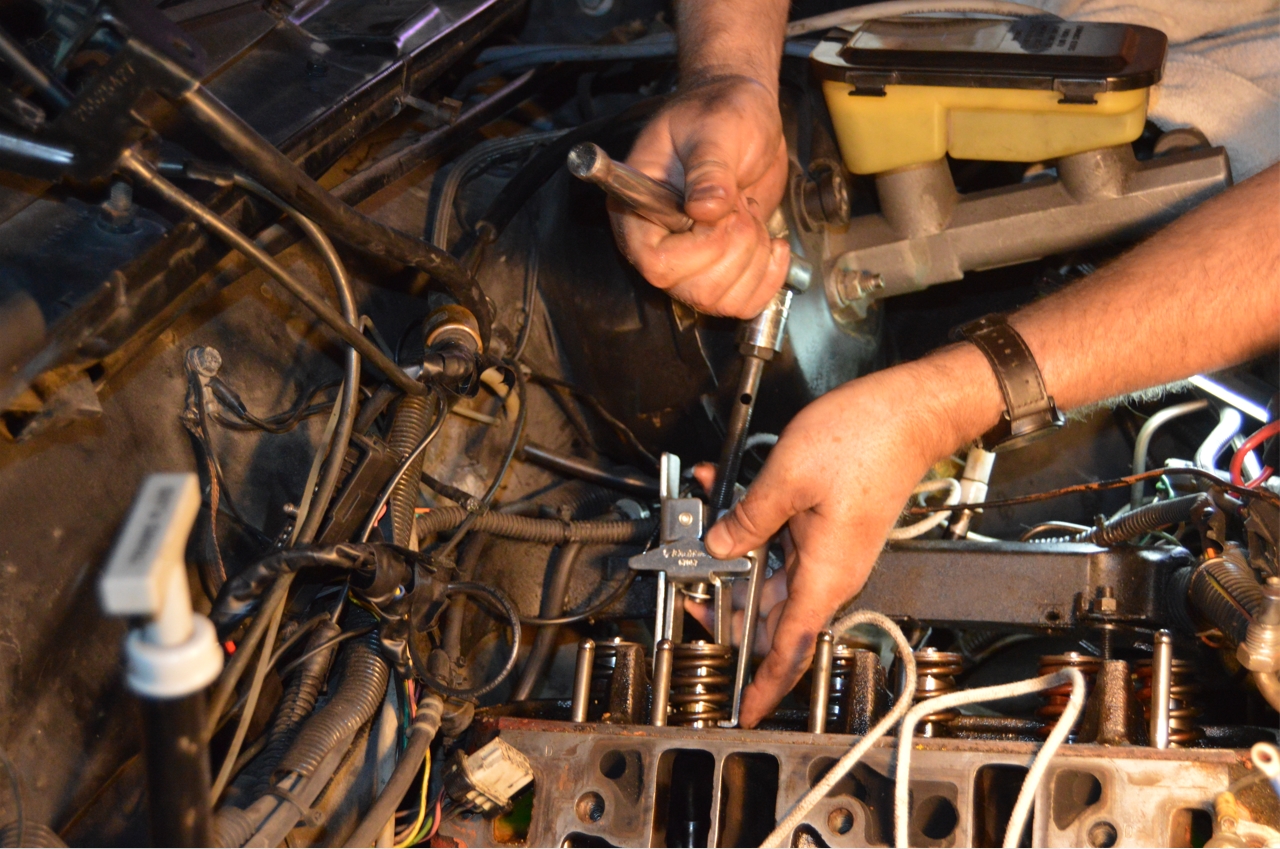
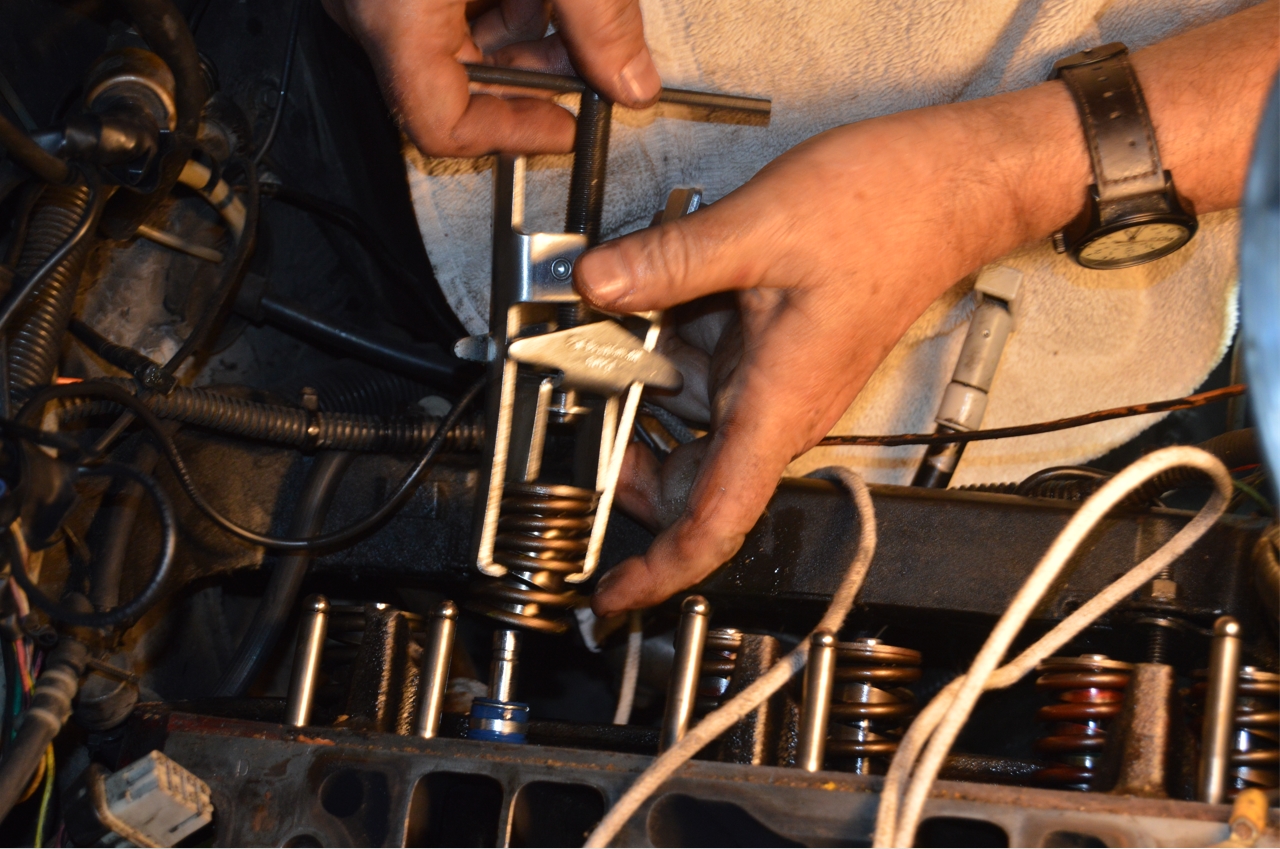
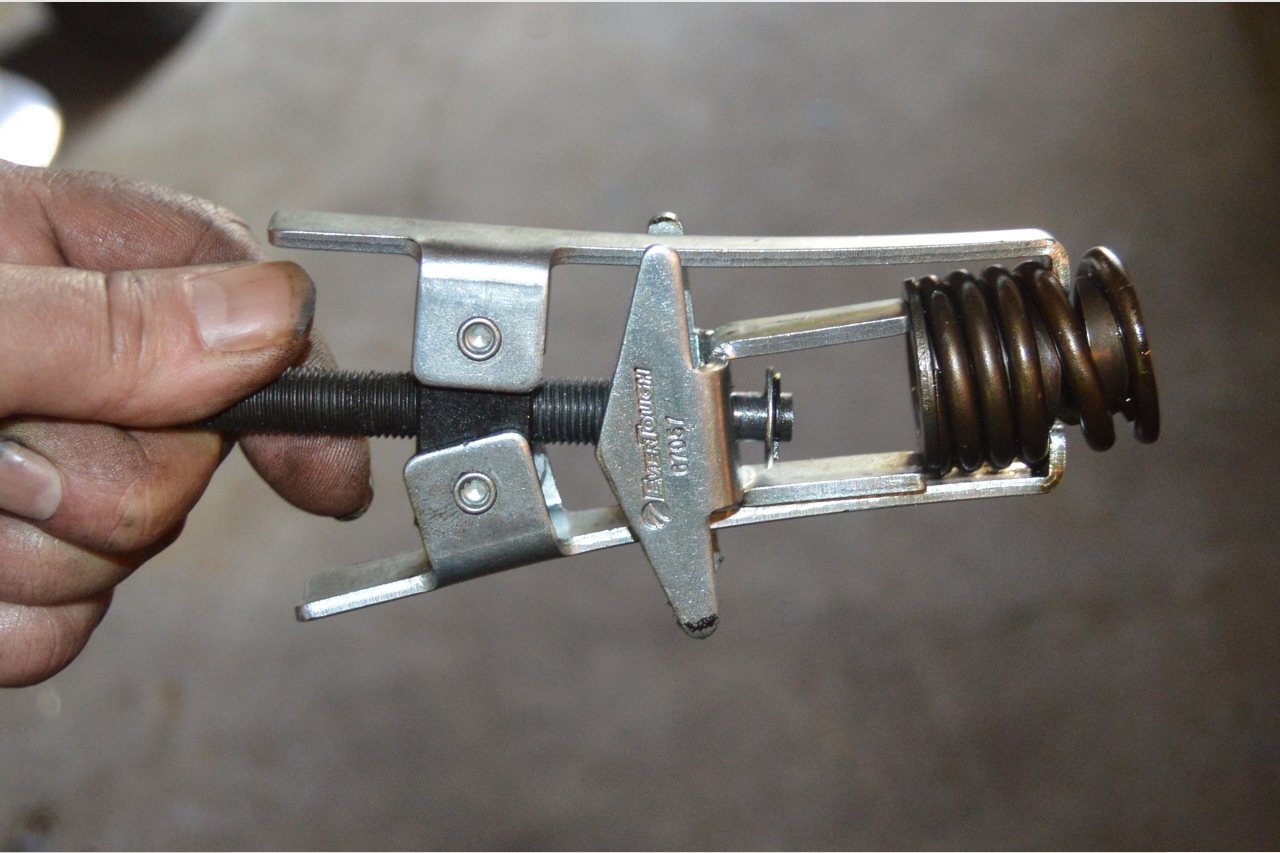 We used a combination of a regular (2 arm) type spring compressor (shown in the pic at right), and the special tool we made to change out the springs (below, right).
For the #6 cylinder:
you must use the special tool, as there isn’t enough room in that area to get any kind of regular spring compressor in there.
 And even with the homemade tool, the very back spring is a mofo to get out!
Well, not so much the spring, as the keepers!
It’s hard to get out, but even more difficult to put back in!
You’ll need to sort of wiggle it (both the keepers and the tool) in there to get the keepers to fit correctly onto the valves.
[be very careful when releasing the compressor, so nothing comes flying off!]
.
For the valve seals kit:
The o-rings go on the exhaust valves.
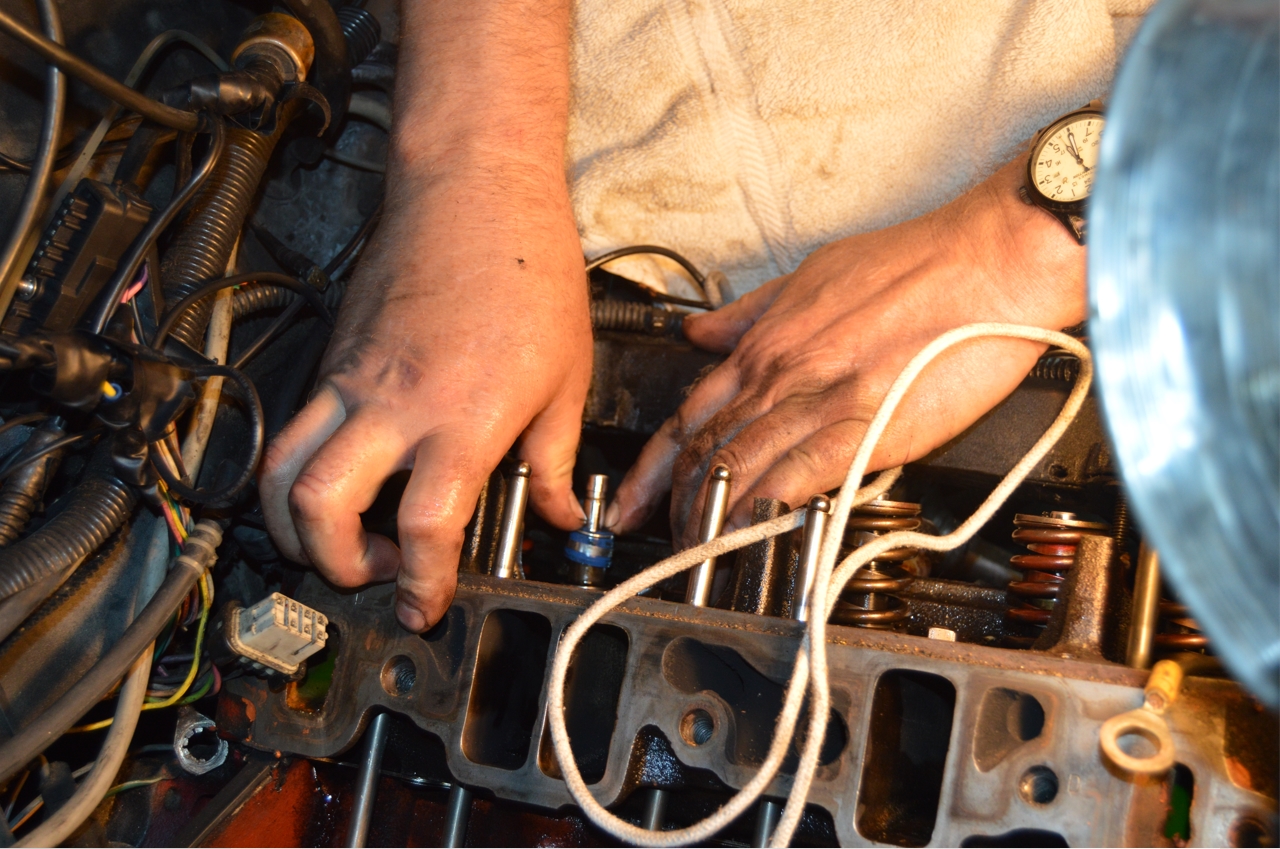
The seals go on the intake valves.
The o-rings (exhaust side) will (for the most part) hold up the valve (in addition to the rope or air) while you replace the spring.
The seals (intake side) will not hold them up, since you need to push the seals down (over the valves and) onto the valve guides.
.
TIPS FOR SPRING CHANGE:
Make sure the piston is at TDC (Top Dead Center) on the cylinder you are working on.
Some of the pistons will be up at the same time (it doesn’t matter if its on the compression or exhaust stroke, the piston will still be at the top), like #2 and #6, so you can work on both at the same time.
You may have to jump around from 1 side of the engine to the other side, doing whichever pistons are up, then rotating the engine to get the next set of pistons to TDC, to get them all done. It all depends on what pistons are up where, as to which ones you work on.
It doesn’t really matter if the cam lobes are up or not, since all the pushrods are out. There isn’t any movement on the valves (at this point), since all of the valves are currently “closed.”
[once you put the pushrods back in however, then try to install the rocker shafts, you may have to bump over the engine to get the cam lobes on the base circle (hence the valves being in the closed positions) to get it all installed]
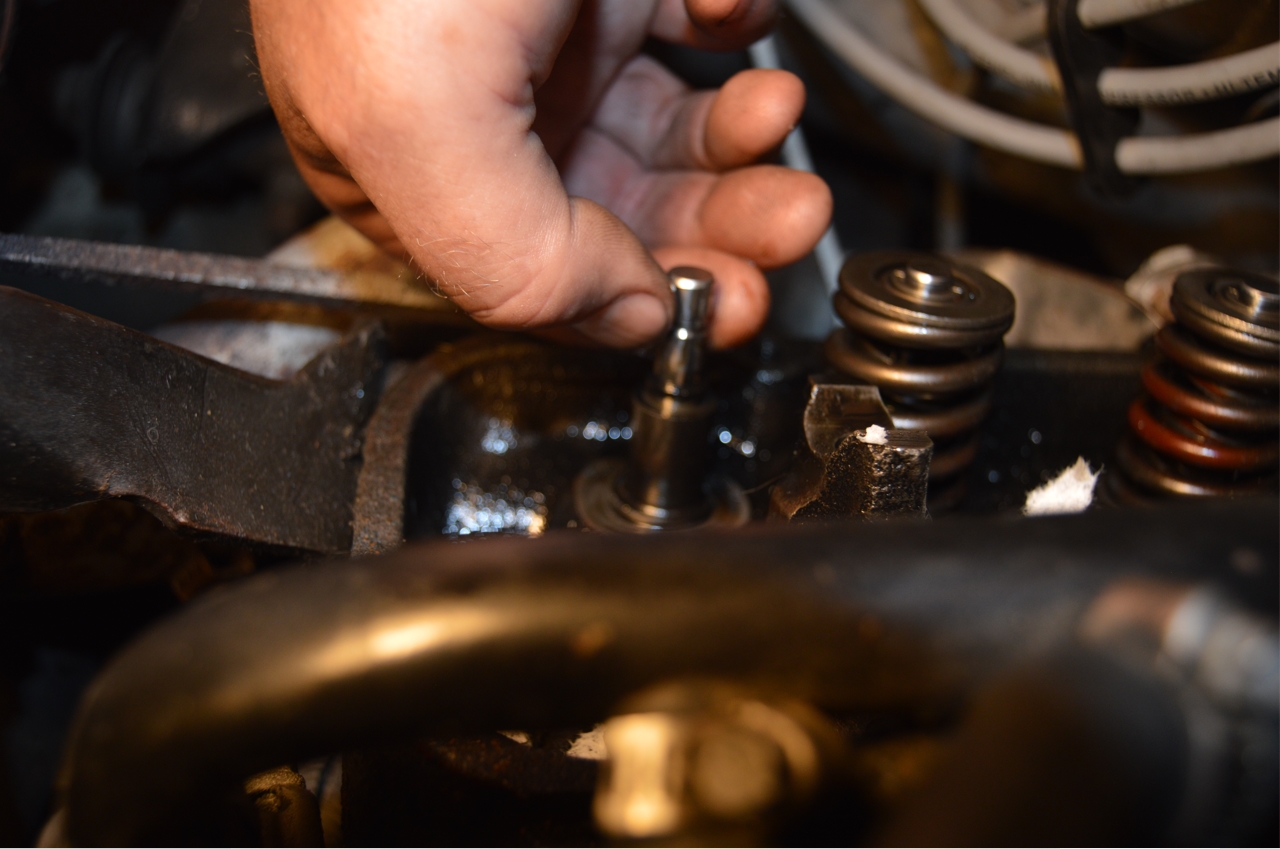
To get the seals firmly seated in their place on the intake valve guide, we used a deepwell socket (bigger than the valves, but smaller than the seals) and (gently) tapped them into place.
.
 PREPPING NEW PARTS:
Pre-lubing the top/bottom of the pushrods and lifters previous to installing them will aid with lubrication upon startup.
(dip the push rods and lifters in oil; use the pushrod and push down on the lifter plunger [several times] to pump it up / fill it with oil)
.
HOW TO REPLACE VALVE SPRINGS:
[you should already have the things disconnected from list above]
1. Remove top half (intake and above) off engine.
2. Remove rocker shafts.
3. Remove pushrods.
4. It helps to spray (wd40, lube, etc.) on all of the keepers to loosen them up off the valves, as well as smacking all the tops of the springs (firmly but not too hard) with a hammer before you begin (this also helps loosen them up so you can remove them when its time).
5. You may want to put a rag or paper towel, etc., into all of the holes in the cylinder head, to make sure that the valve locks don’t fall into the motor!
(covering up where the intake was is a good idea too, so nothing falls down towards / into the oil pan. Might want to put a towel down on the outside of the engine for the same reasons)
6. Make sure the piston is at TDC for the valve you are working on.
Insert rope into that cylinder (or use air compressor).
7. Use spring compressor(s) and remove 1 spring at a time.
Grab the spring from as far down (nearest the head) as you can.
Compress spring as much as possible.
Use the magnetic pickup tool to remove the valve keepers.
You may need to wiggle the spring/tool to get them out.
Decompress tool, remove spring off head.
Remove spring from spring compressor.
Place retainer on top of new spring.
Compress both with spring compressor.
Put spring into place on head.
Insert 2 valve locks, top side (nearest center of engine) first, then bottom side.
Again you may need to wiggle the spring around to get them in.
Decompress the spring compressor.
Tap the top again slightly with a hammer to make sure all is seated properly.
[USE CAUTION WHEN RELEASING TOOL OR HITTING WITH HAMMER! SPRING MAY FLY OUT IF NOT FULLY SECURED WITH KEEPERS!]
Done.
Now repeat with all of the rest of the springs (steps 6&7).
.


.
BE SURE to use some RTV / silicone on the (4) water jackets (2 per head)
[on top AND bottom sides of the gaskets]
(the very first, and very last, holes in the cylinder head, are the water jackets).
We used “the right stuff” on the front and rear walls of the block (between the block and the intake manifold) all the way across (from one head to the other).
[your intake gasket kit may have a rubber seal / strips to use, we ditched them in favor of using “the right stuff” goo, as this is the go-to product to use for this purpose, and seals much better than the rubber strips supplied in the kit, when used properly. Just make sure you let it fully cure!]
.
.
8. Once all the springs are replaced, reassemble everything you removed or disconnected.
9. Job done.
10. after the silicone and the right stuff has dried (usually overnight is plenty), start the Gbody Regal up and verify (visually) all is running well.
No liquid leaks, no air leaks, nothing that looks or sounds out of the ordinary, etc.
Go for a mild (no boost) drive and then recheck everything.
If all good, do a low boost test and recheck everything.
The final test is a full boost run then recheck everything.
If your Turbo Buick is back to where it was before your engine issues started, awesome, happy spooling…
.
.


