


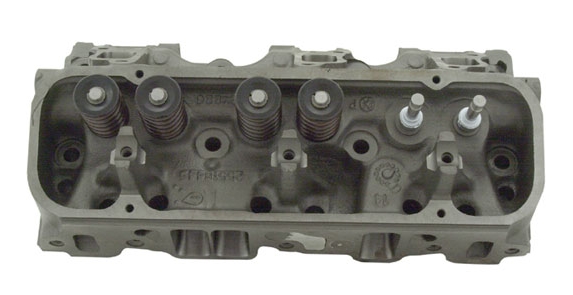
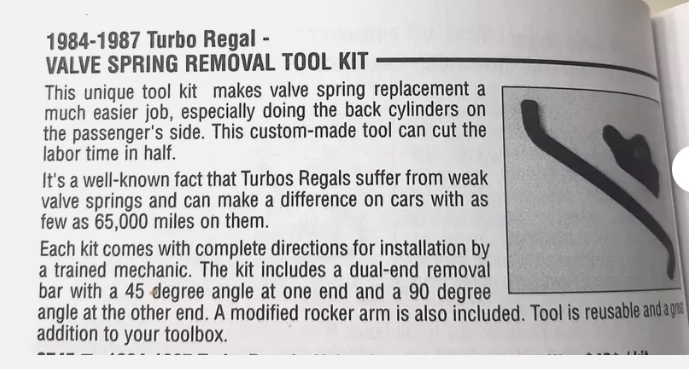
Changing out the valve springs on a Buick Grand National (or T-Type, Turbo T, Limited, or the GNX) requires a valve spring compressor tool.
There’s several different types of these on the market, and which version you utilize depends on IF you replace your springs with the heads ON or OFF the engine.
Changing them out when the heads are not attached to the engine is definitely easier, however, removing the heads requires a lot of work in itself.
So it’s a trade-off.
[extra things to be removed/loosened: exhaust manifolds, crossover pipe, turbo support bracket, intake, etc.]
[when you consider all these parts that need to come off JUST to remove the heads, it’s almost easier to do the job with them on, assuming the heads don’t need to come off for some other reason. You’d also need to replace the head gaskets when removing the cylinder heads]
[but if you do remove the heads, you can clean them up, port/polish them, get bigger valves installed, etc., etc., while you’re at it, so that’s something to consider]
.
For a heads-off tool, they all look like kind of a big c-clamp. You put 1 side of it on the valve, the other on the valve retainer, then squeeze the tool, which compresses it so you can remove the 2 keepers (which holds it all together). Unclamping then releases the springs (and retainers and valves).
For the heads-on type styles:
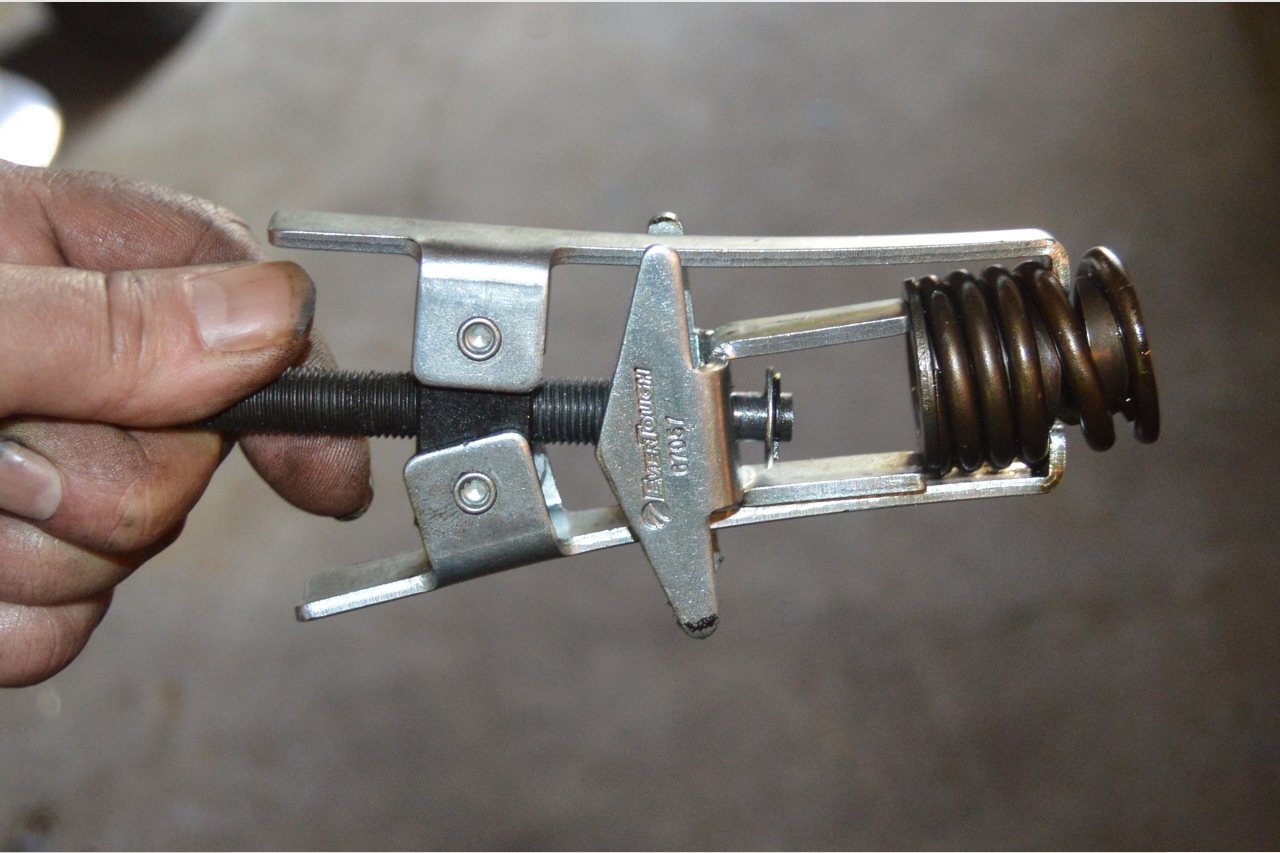
One version of a valve spring compressor is a small 2-arm grabber type, which is available as a free rental from Autozone (or other automotive stores).
[we used this style along with the home made version we made herein]
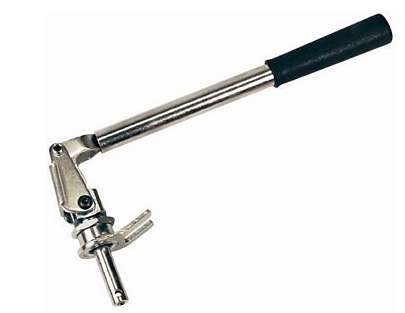
The next is a stud mount valve spring compressor.
(buy it online, or some Buick vendors carry these as well)
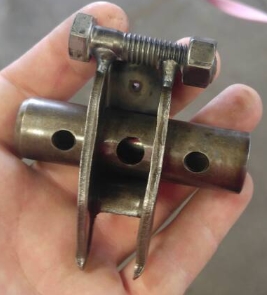
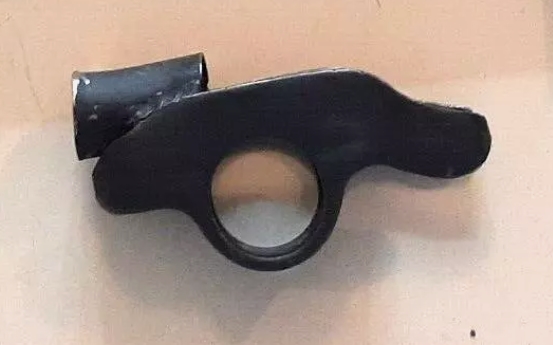
The last is a homemade valve spring compressor, modified from a used, but OEM rocker arm (on the factory shaft).
This is an especially useful tool used on the number 6 cylinder, which is the rearmost passenger side valves.
.

.
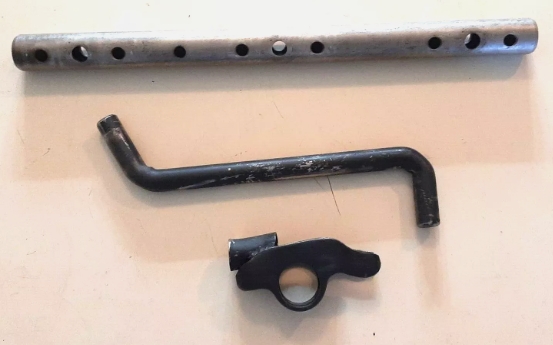
Here’s a special tool made by Kirban’s back in the day. Instead of a nut/bolt attachment like we made (far below), it utilizes a tube welded onto the rocker shaft, and then a rod is inserted into that for prying the rocker up/down.
(gives you another idea on how to make a specialty tool like this)
.
.
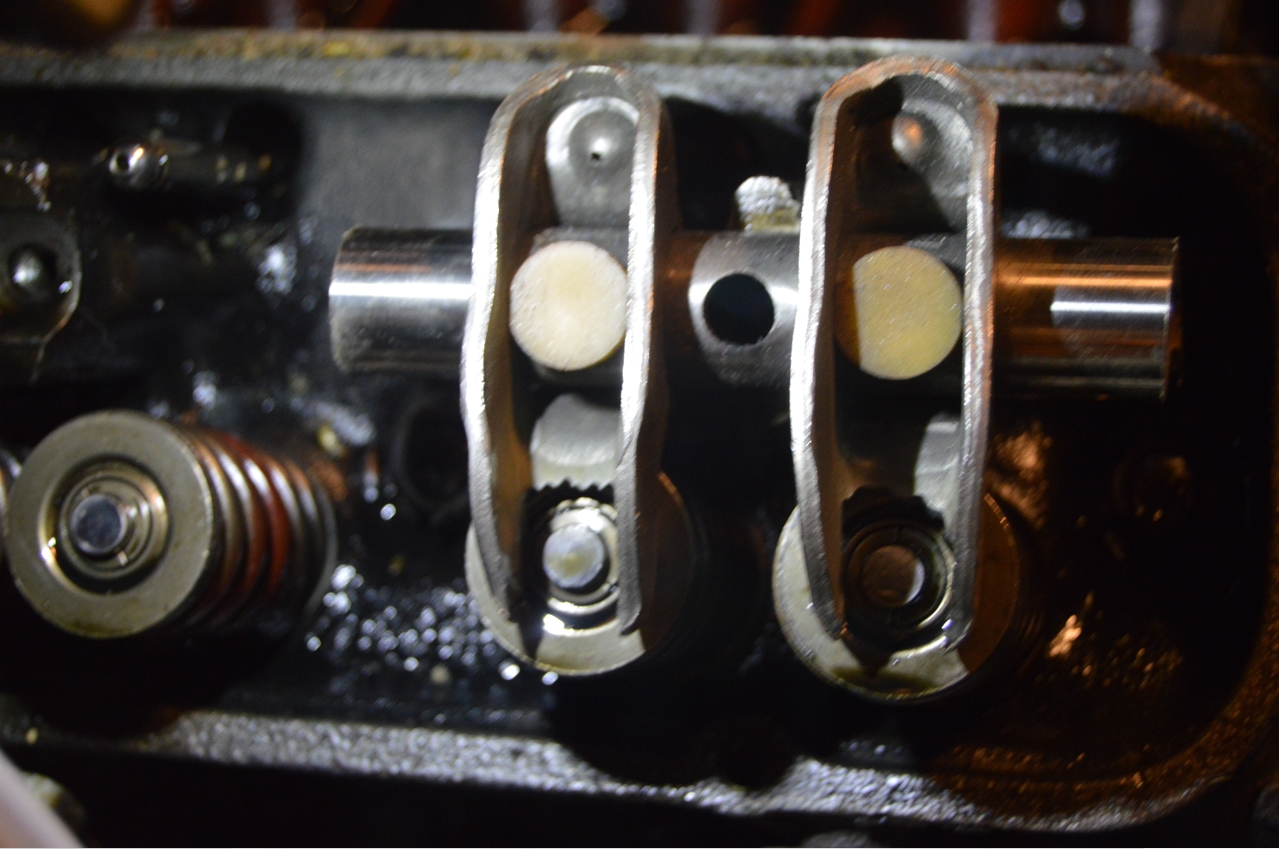
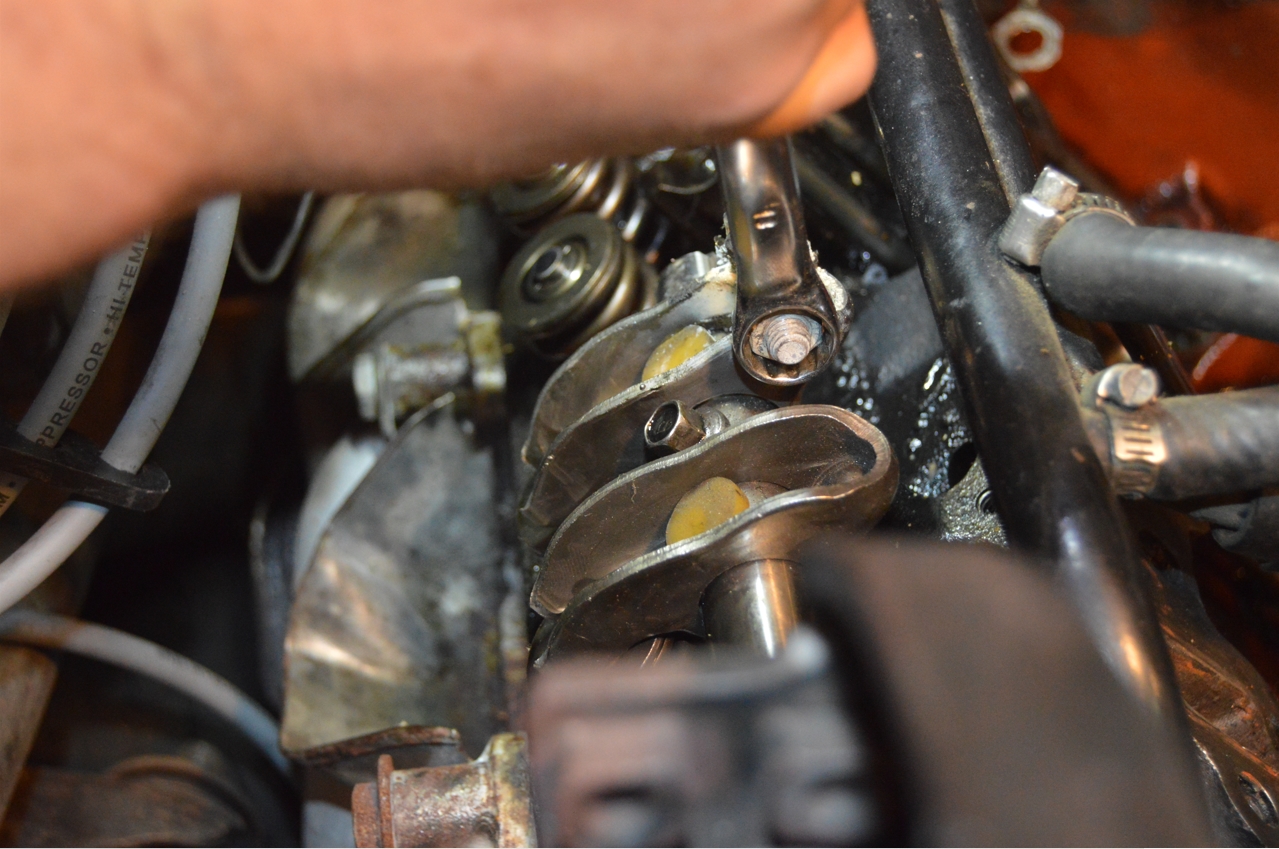
This area around the #6 valves is a tight fit.
There’s a lot of things in the way: The A/C heater box, spark plug wires, oval conduit wire loom, hvac vacuum line, etc.
The angle available here for removal of the springs is minimal, hence not being able to use (tall, large) conventional valve spring compressors.
You almost NEED this custom made spring compressor to be able to remove them.
This home made tool can be used on all of the cylinders, not just the tough number 6 cylinder.
A few Buick vendors have created these custom tools in the past, but they’re not always available, so today we make our own.
It’s not really that hard to make, but it does require a used rocker shaft, a couple bolts with nuts, a grinder, and the ability to weld it all together.
.

.
DO NOTE THAT THERE’S OTHER STEPS TO BE TAKEN WHEN CHANGING SPRINGS OUT BESIDES SIMPLY ATTACHING THIS TOOL AND DOING IT!
(this article simply tells you how the tool is made and how it works!)
.
HOW TO CREATE A CUSTOM HOME MADE BUICK V6 VALVE SPRING COMPRESSOR TOOL:
Note, most of these custom made tool versions we’ve seen only have 1 rocker arm on them, you do 1 valve/spring (off 1 cylinder), then you slide the arm over to the other side to do the 2nd spring (on the same cylinder).
We thought why have to unbolt it, move the arm over, reinstall, and then perform this task again?
(not that it’s difficult, but still…)
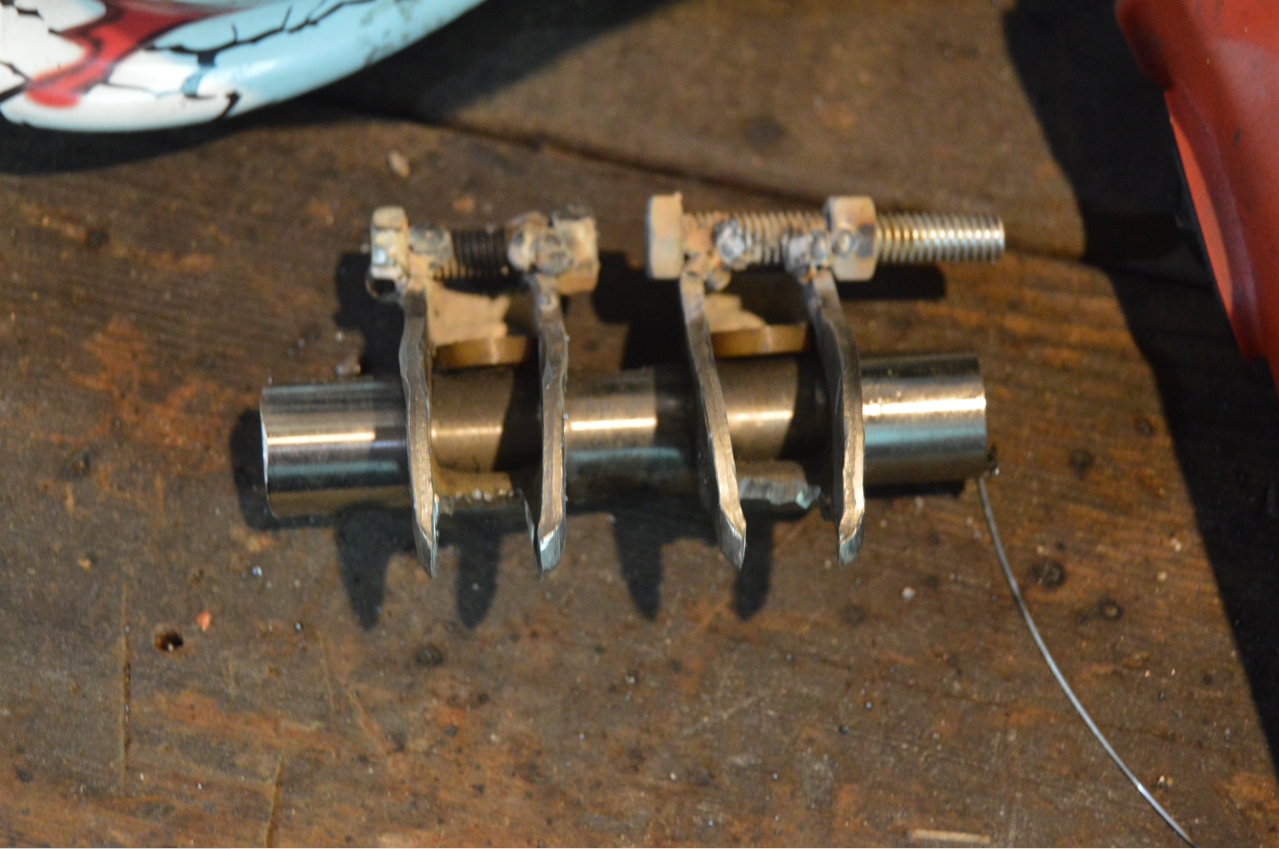
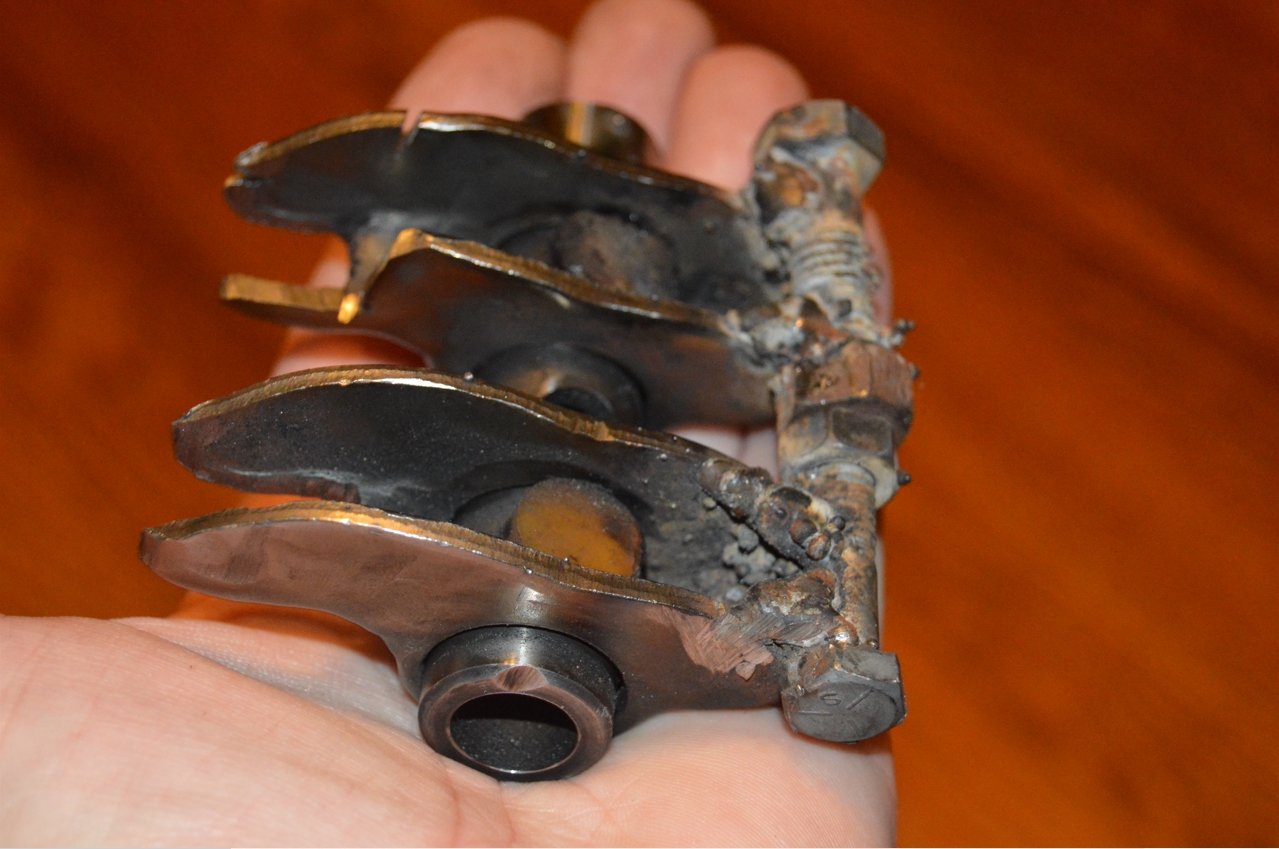
The type we made uses 2 rocker arms (attached to the stock shaft), and you can just bolt the entire tool to the head, and do both springs (on the same cylinder), at the same time (meaning do 1 side, then the other).
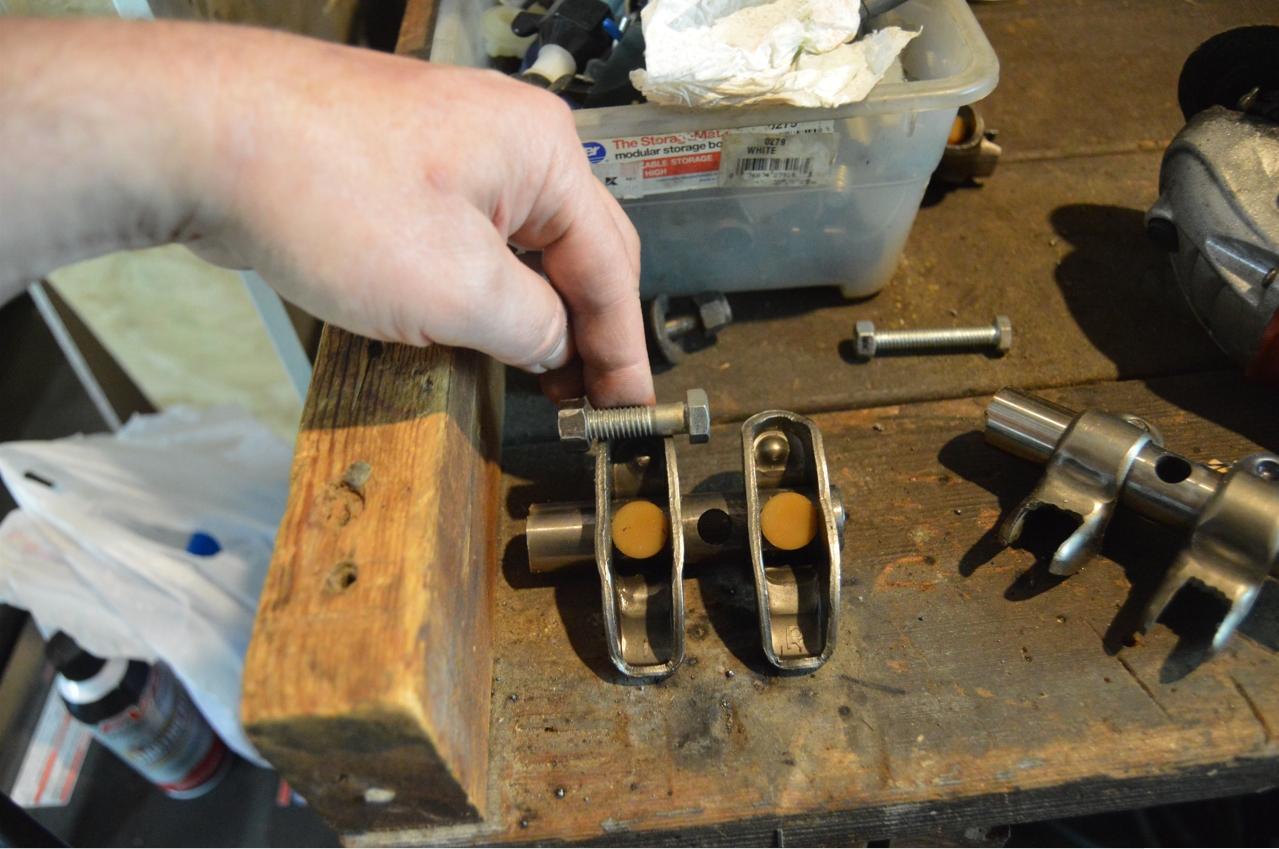
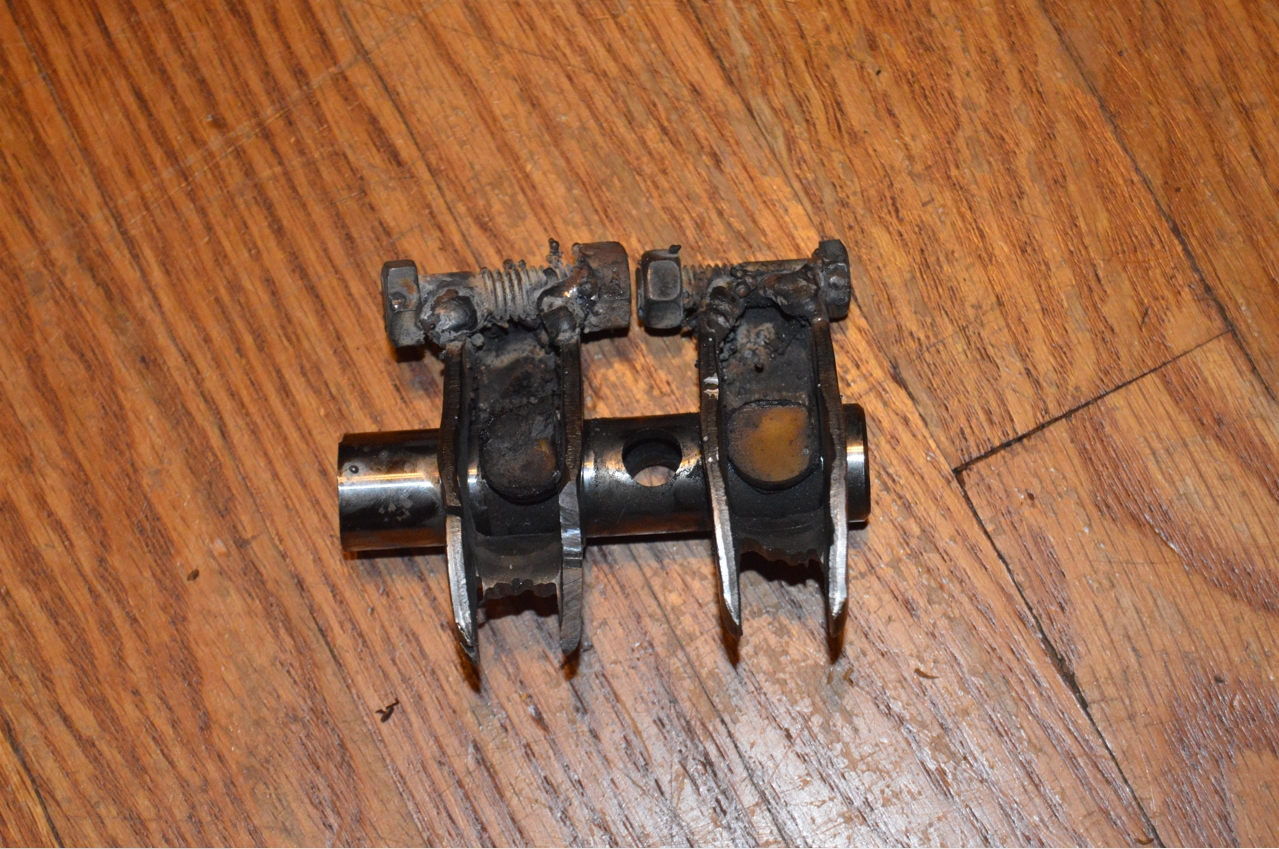
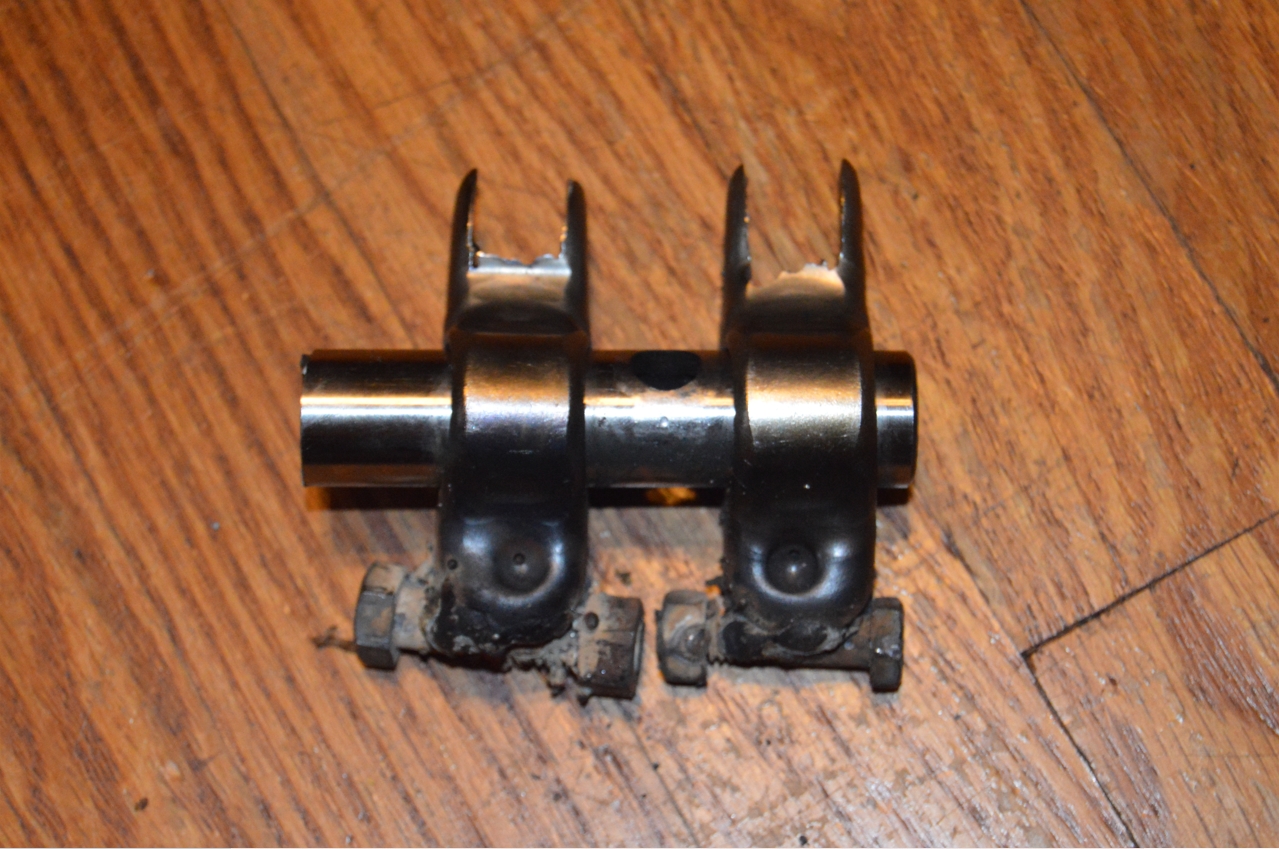
1. start with a used (probably broken) factory rocker shaft.
[we had a stock rocker shaft assembly sitting on a shelf, since it was broken at the first left-hand bolt hole, from cylinder #1]
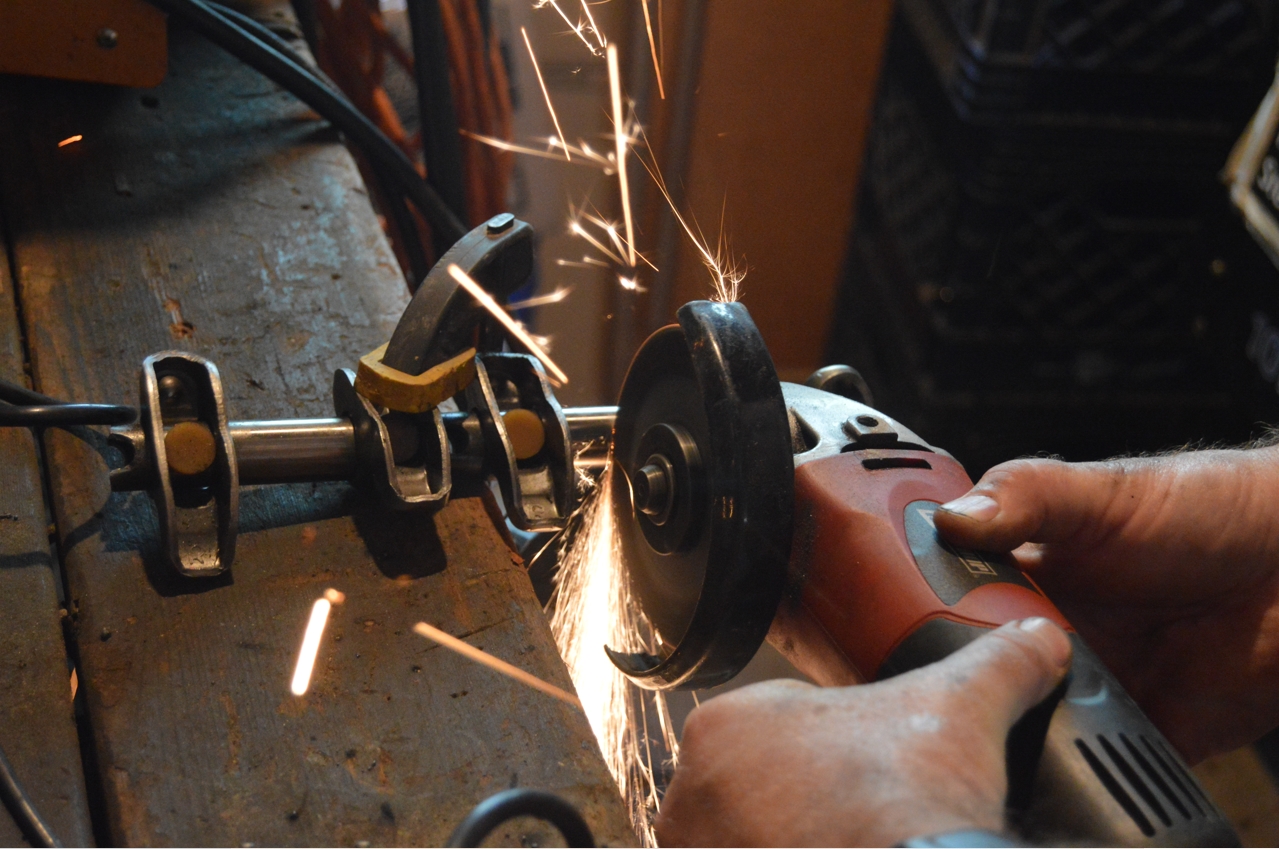
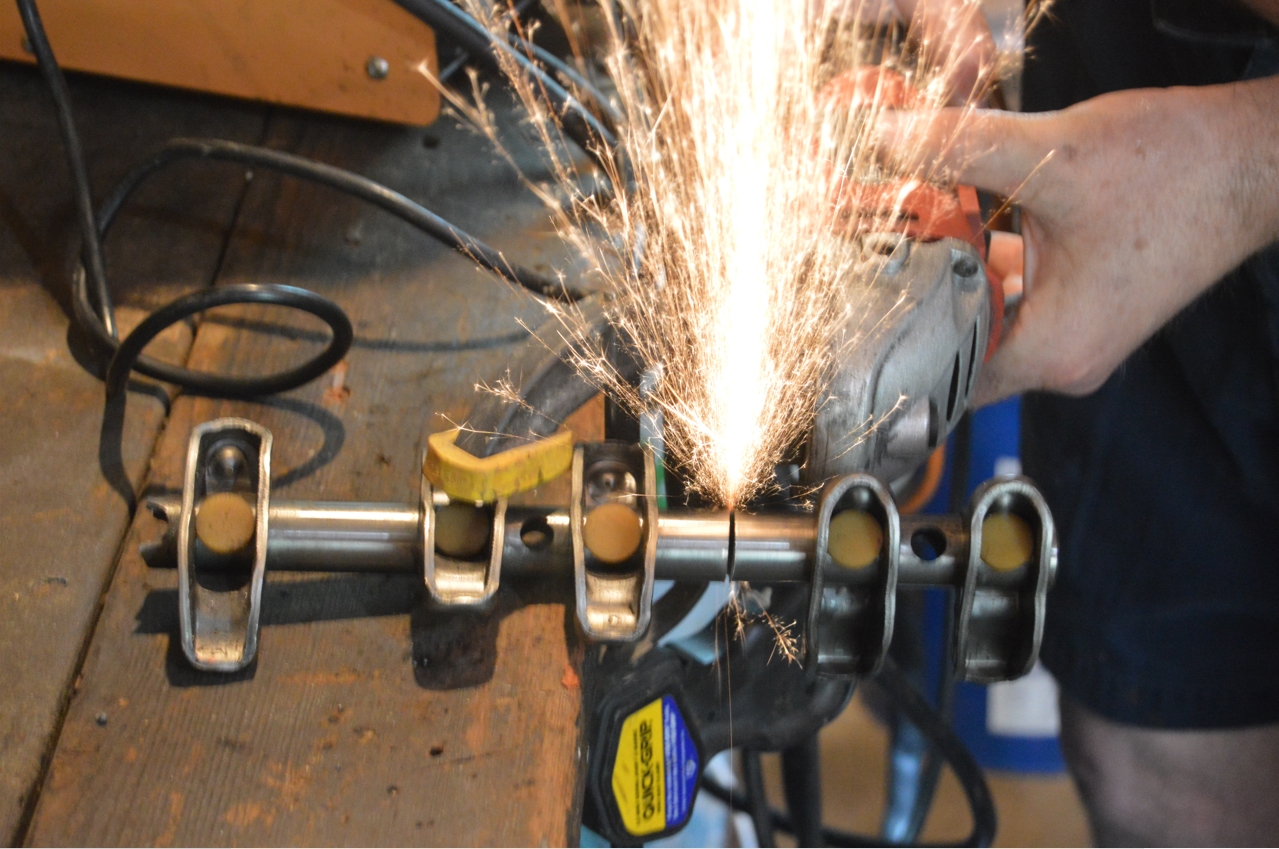
2. cut off the shaft leaving 2 arms (with the mounting hole in between).
[we clamped the shaft to a table, then used a grinder to cut it]
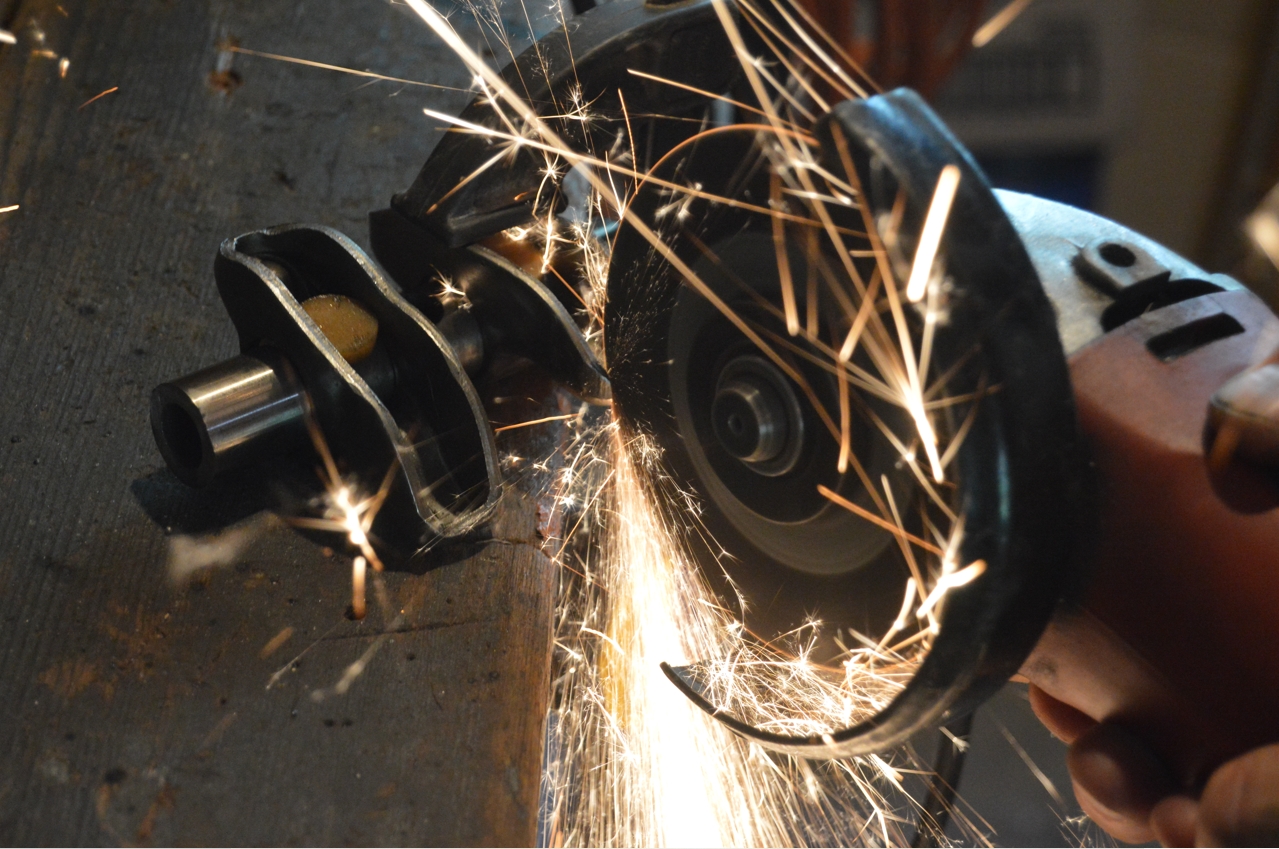
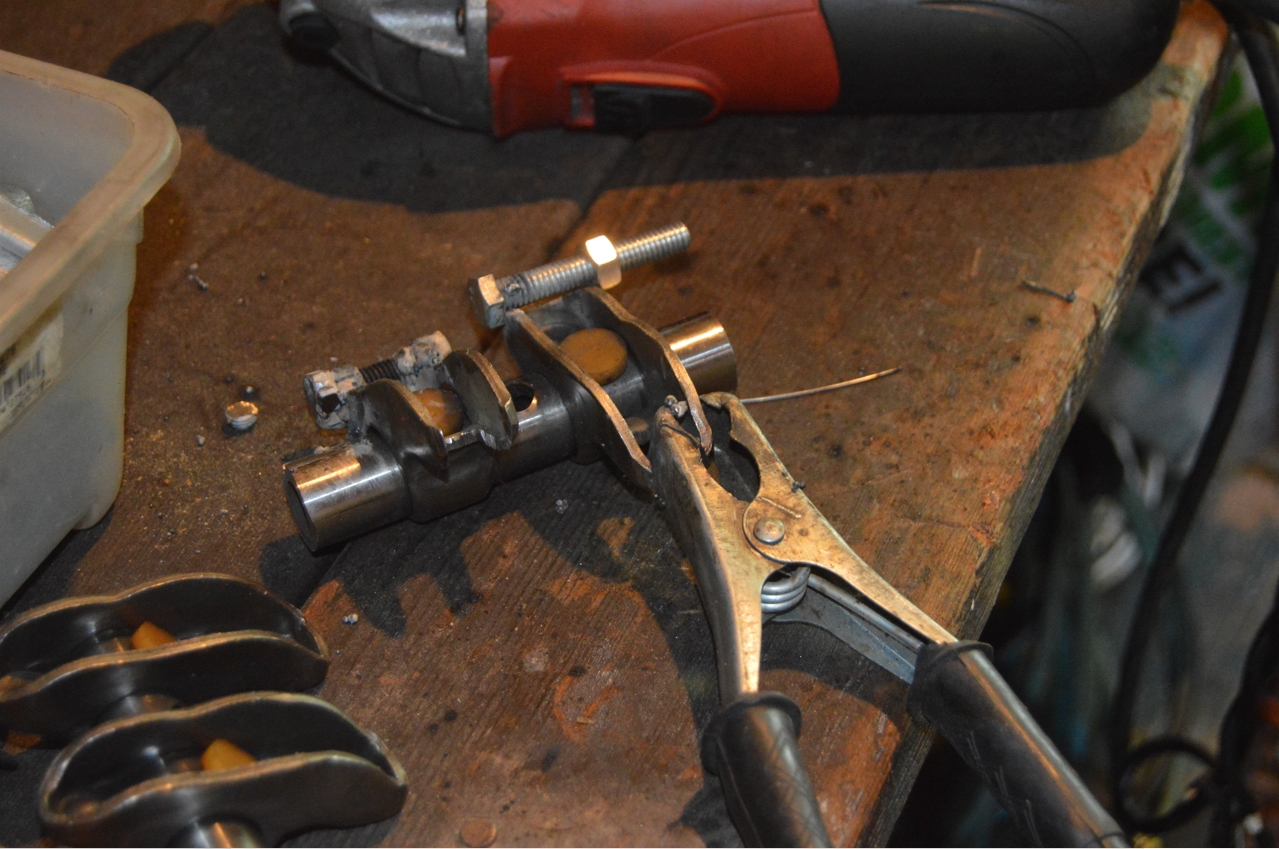
3. on each arm, the side that goes over the spring needs to be cut out (notched).
This cut out area is so you can remove the keepers while the rocker arm is down and the spring is compressed.
4. it may take you several attempts to achieve the clearance needed in this area.
[notch it out, then test fit the tool on the head and visually see if there’s enough clearance to be able to remove the keepers. keep grinding away until there is. you WILL be removing A LOT of material here, so much that you’ll think the bottom/sides aren’t sturdy enough to be able to hold the spring down – but they are]
[see the red box in 1 of the photos]
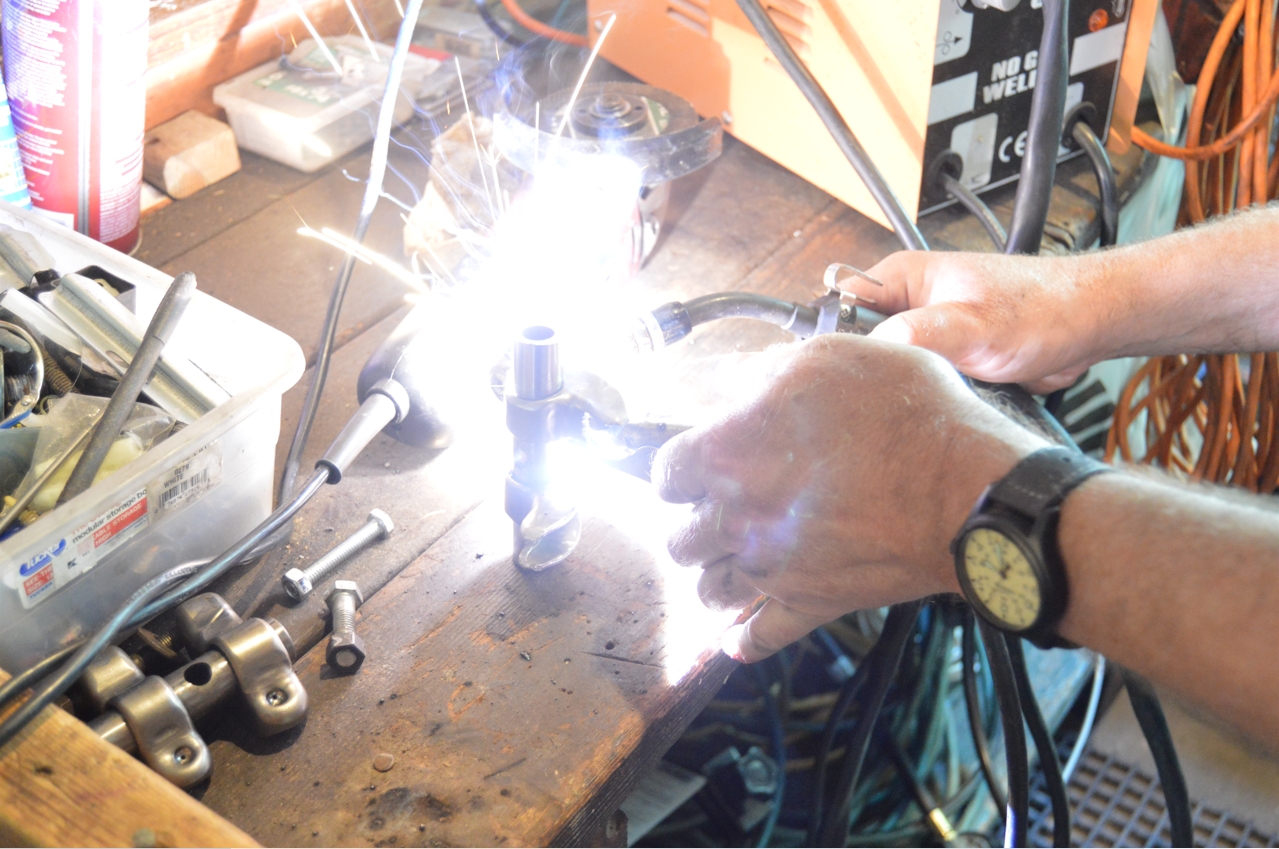
5. once you have enough clearance, you will be attaching (welding) a nut & bolt onto the pushrod side of the rocker arm.
(this is the dimpled side, the one with the domed circular shaped indentation on it)
[your nut & bolt should be a bit longer than the width of the rocker arm, so you are able to put a socket or wrench over the end of it, to be able to turn the arm and compress the spring]
[it doesn’t matter what size bolt head / nut you use, whatever you have handy is fine]
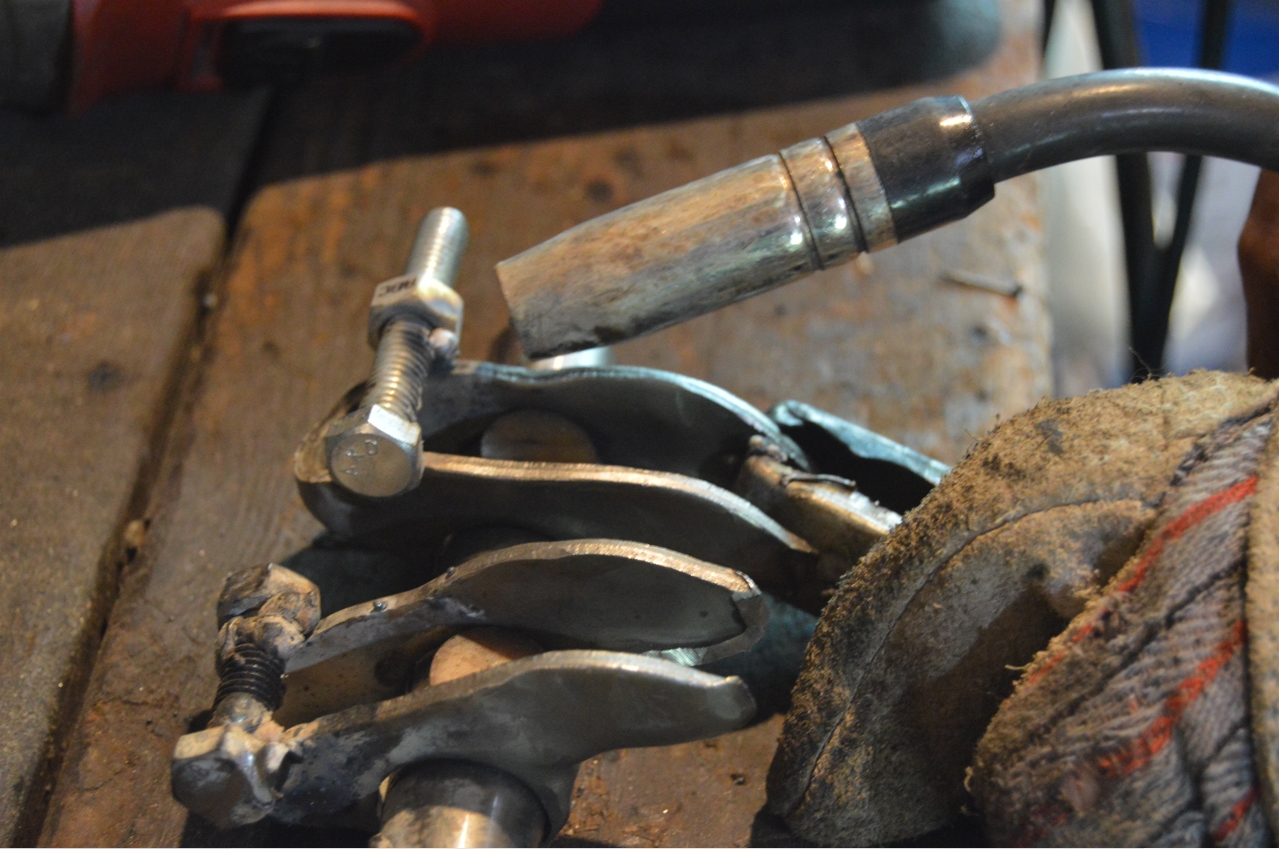
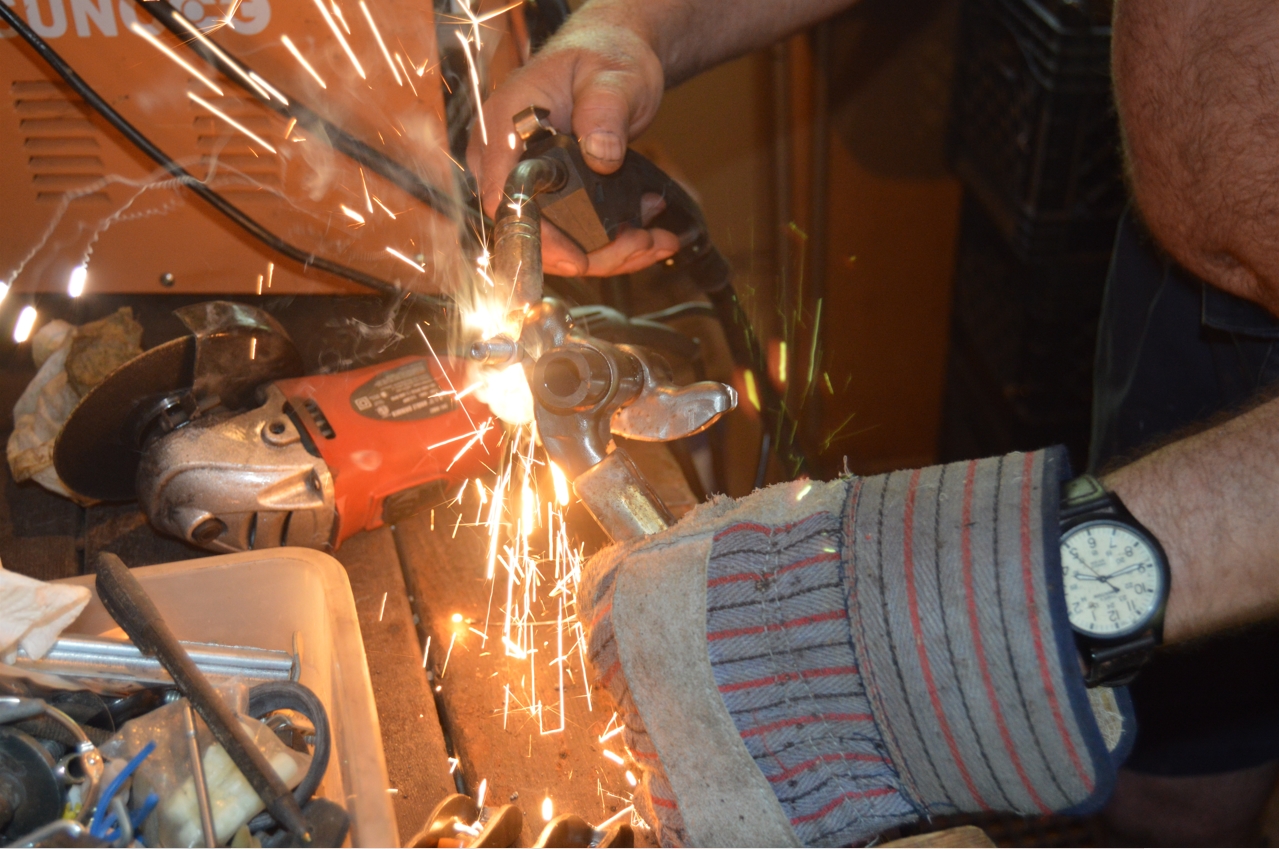
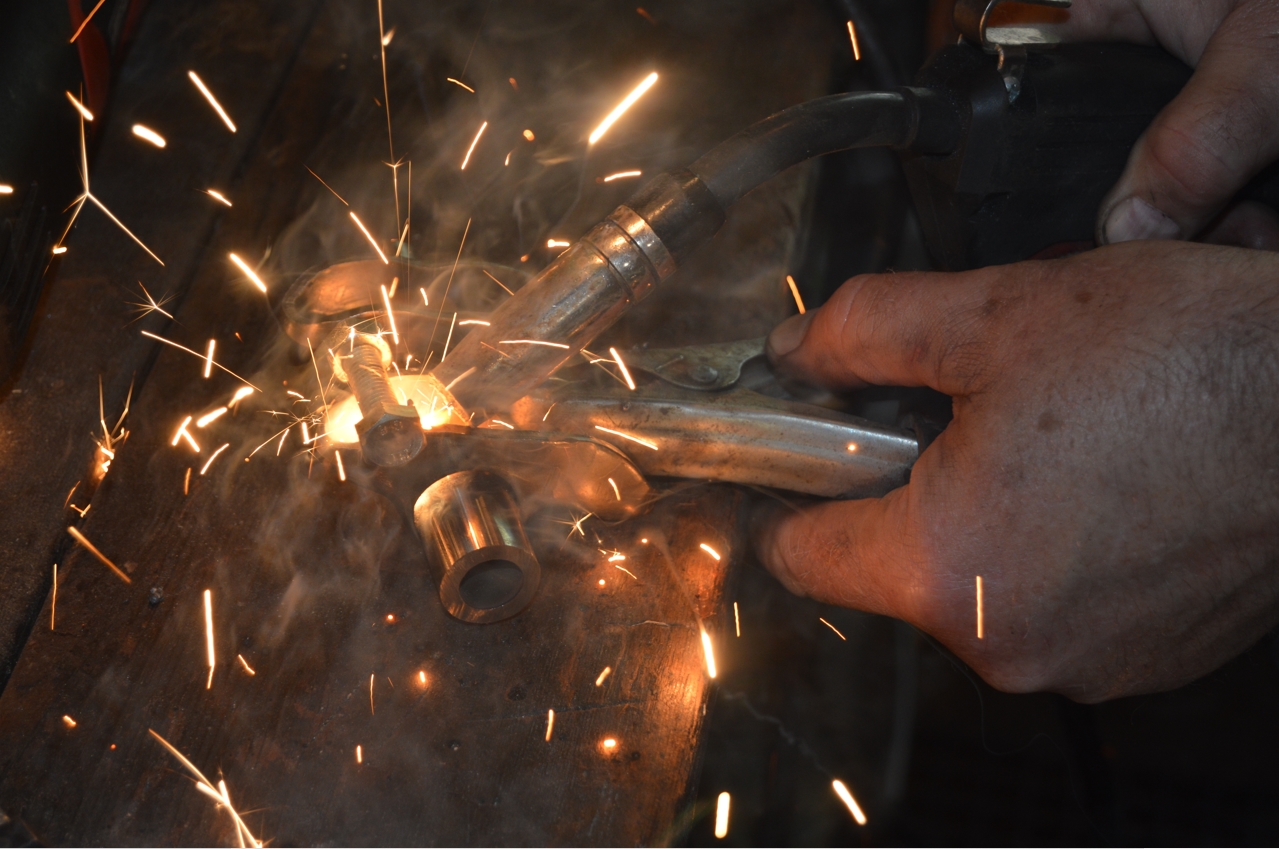
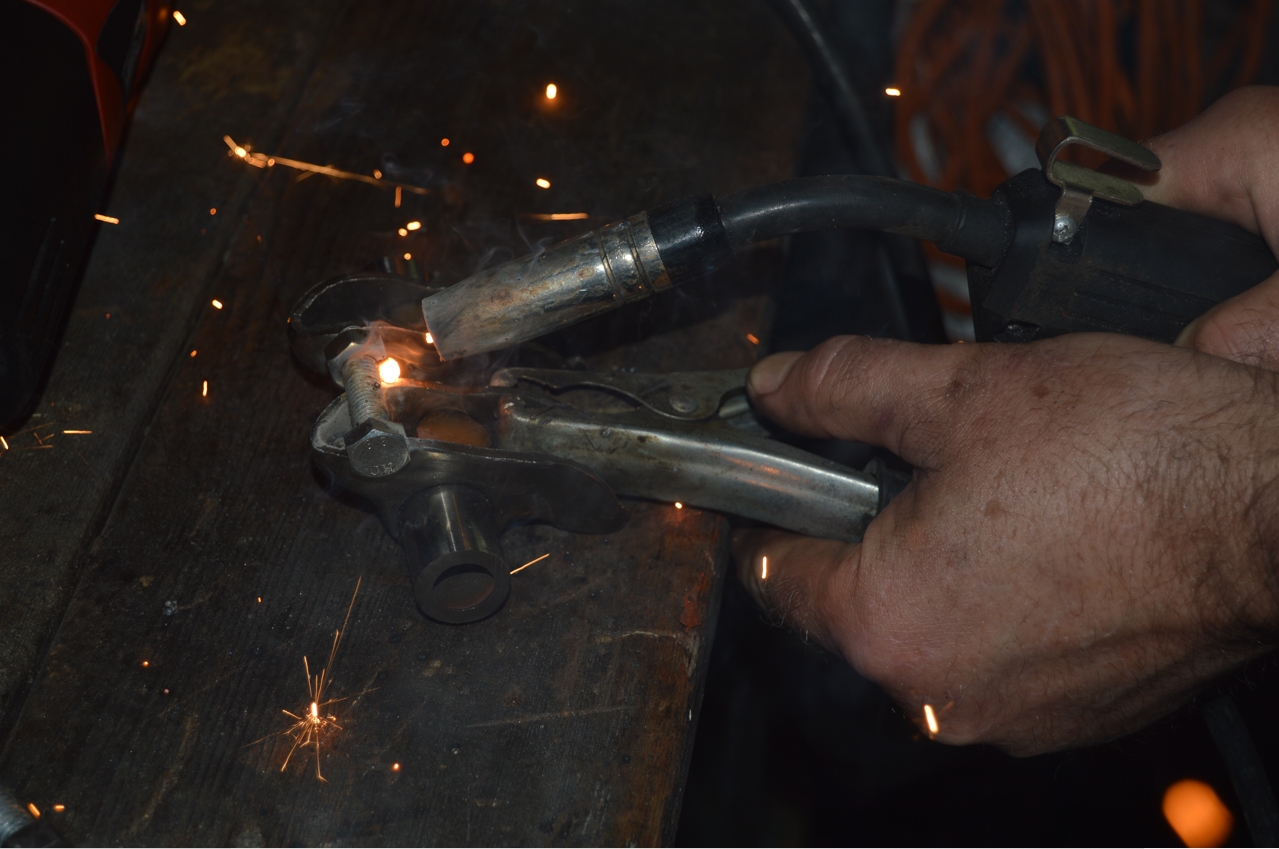
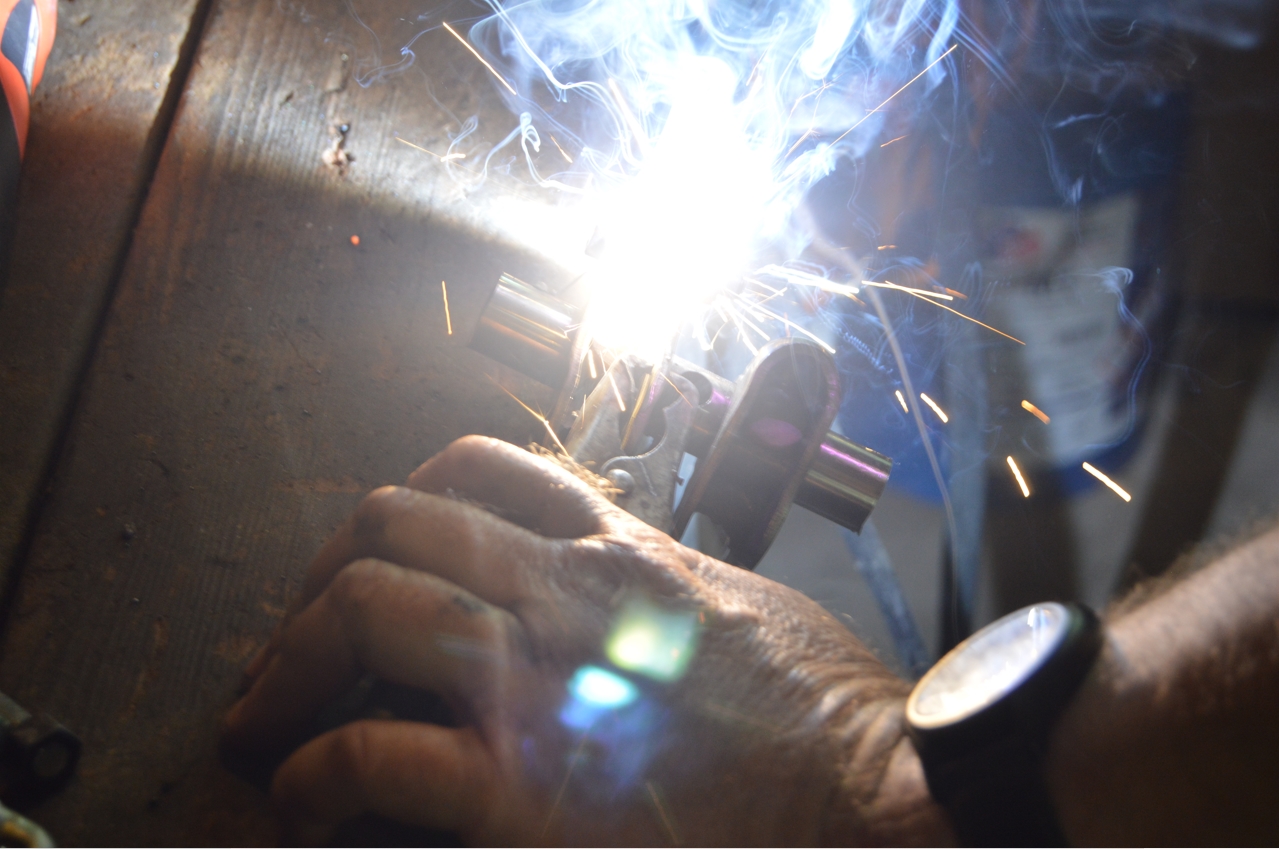
6. put the nuts on the bolts and rest them on the top side of the pushrod side of the arms. first tack weld the bolts onto the arm, front and back. once the bolts are attached, fully weld them onto the arms as best as you can. they NEED to be firmly attached, since they need to be able to leverage the strength required to compress the springs (without the weld breaking off and the bolt coming off the arm).
7. Note, we aren’t professional welders, and most of you probably aren’t either. Just remember, the welds don’t need to look pretty, but they do need to be secure.
And don’t weld ON the head or the nut, as you need these sections so you can put a socket or wrench on them!
(that’s why a bolt longer than the arm width is needed)
It doesn’t matter visually how the welds look, this isn’t a piece that’s going to be displayed on your Turbo Regal, it’s simply a tool to use for the time being.
Strength of the weld onto the arm is more important than looking visually pleasing (even if you have big goobers attaching the two).
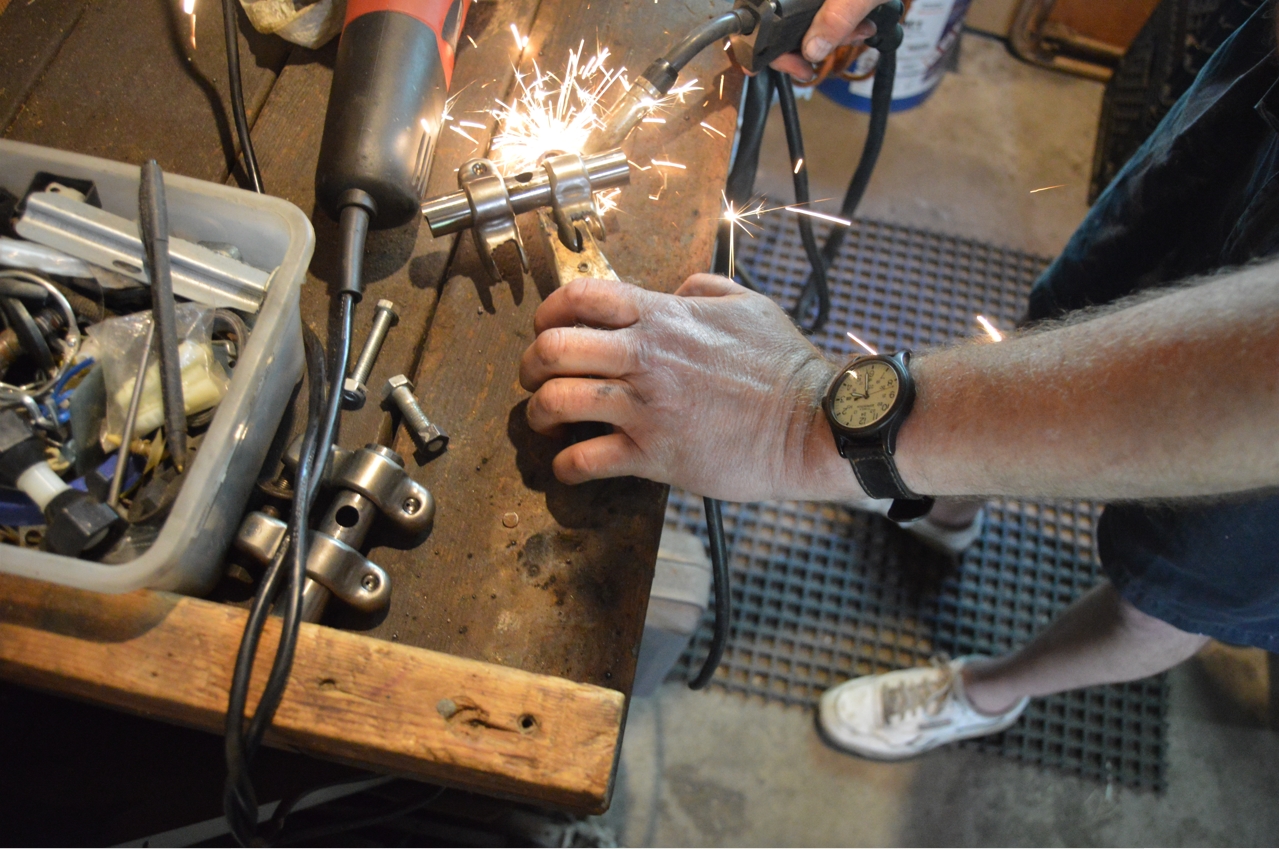
8. Note, the OEM plastic yellow buttons that are inside the rocker arm (secured into the shaft), which hold the arm from sliding side to side on the arm, we left in place while we welded the bolts to the arm. Be careful you don’t burn them up! You don’t really need them since you will be manually moving the arm (unlike when the motor is actually running, and the rockers need to stay in place while they’re moving).
9. once your new tool is complete (and cooled down), bolt it onto the head (using your existing stock rocker arm shaft bolt to secure it down).
10. take a socket/wrench that fits the nut/bolt you used and compress the spring and remove the keepers. When you decompress and remove the tool, the retainers and springs can be removed.
Then do the other side spring.
11. continue with each cylinder until the entire job is done.
[AGAIN, NOTE that these steps are NOT all inclusive on “how to change valve springs” – it just tells you basically how to make and use this tool]
.

![]()
.
Come back tomorrow to watch us actually replace the valve springs on a 1986 Buick Grand National, using this tool, along with the story on WHY they needed to be replaced!
[ see it here: buick v6 valve spring replacement ]
.


