


Wait! What’s that we hear? Oh, it’s the Buick purists getting ready to moan and groan and cringe about this one!
[you should probably just stop reading now…]
[we could also say that we’ll probably never own any type of Challenger, so we’re incorporating a little bit of that into this! That’s almost as good, right? lol]
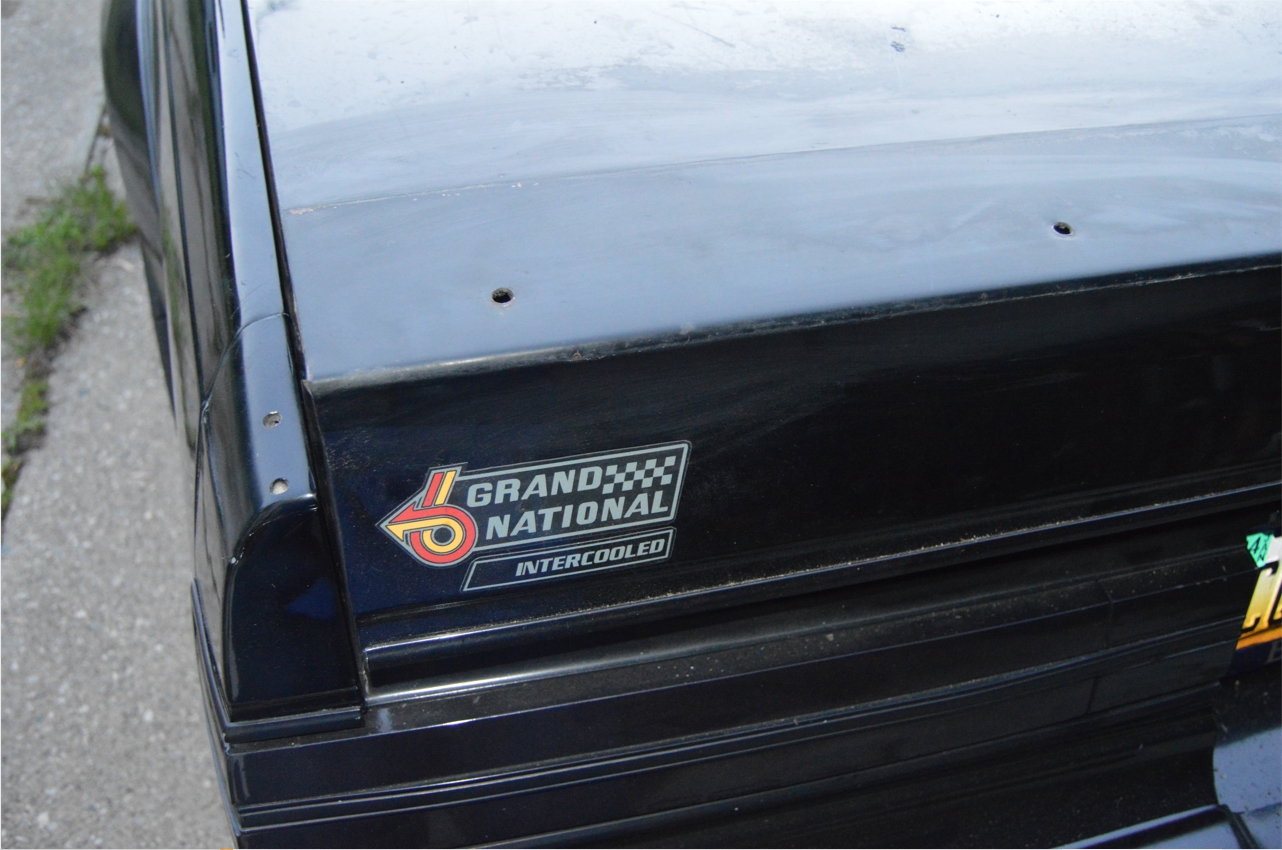
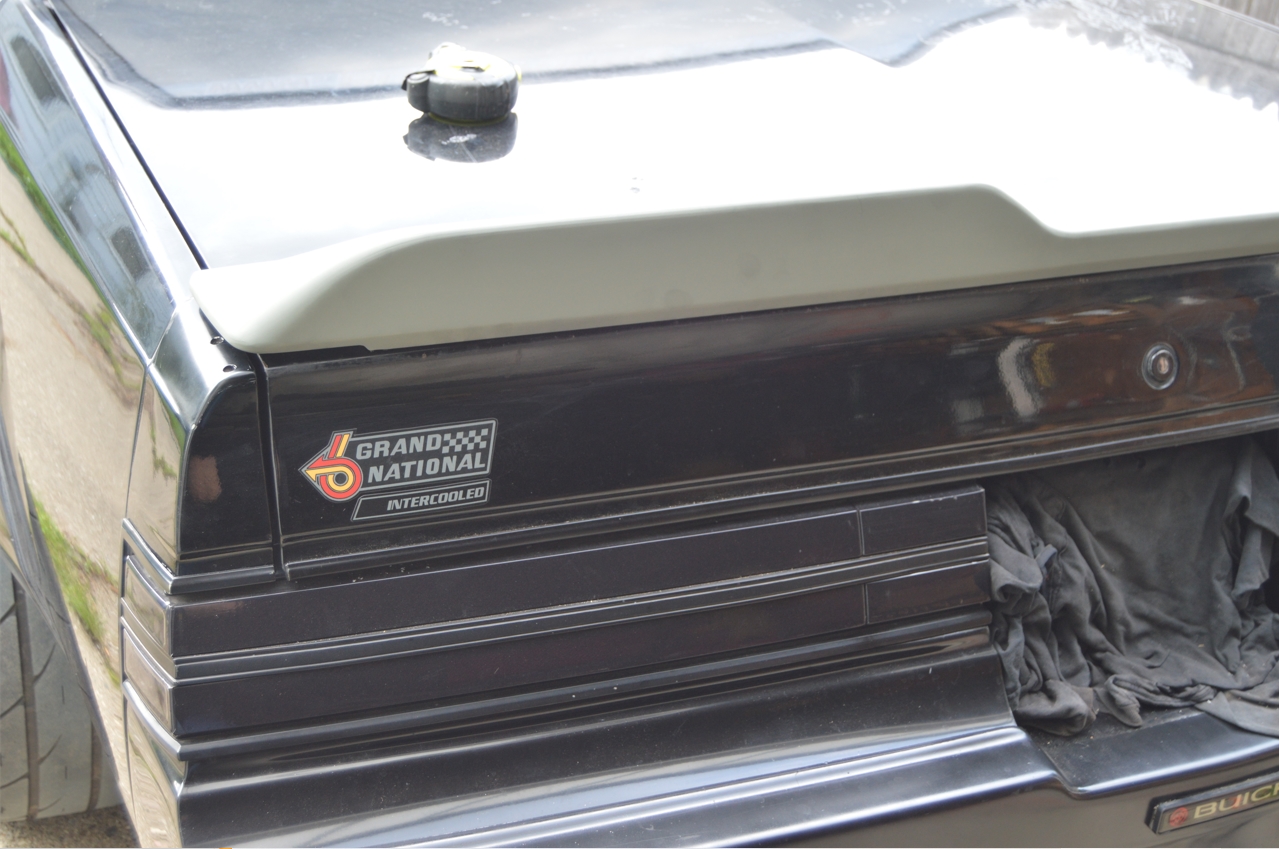
The last 3 days showed you what we were going to attempt to do to the stock 1987 Buick Grand National rear spoiler.
We wanted more height from the factory spoiler than what was originally installed.
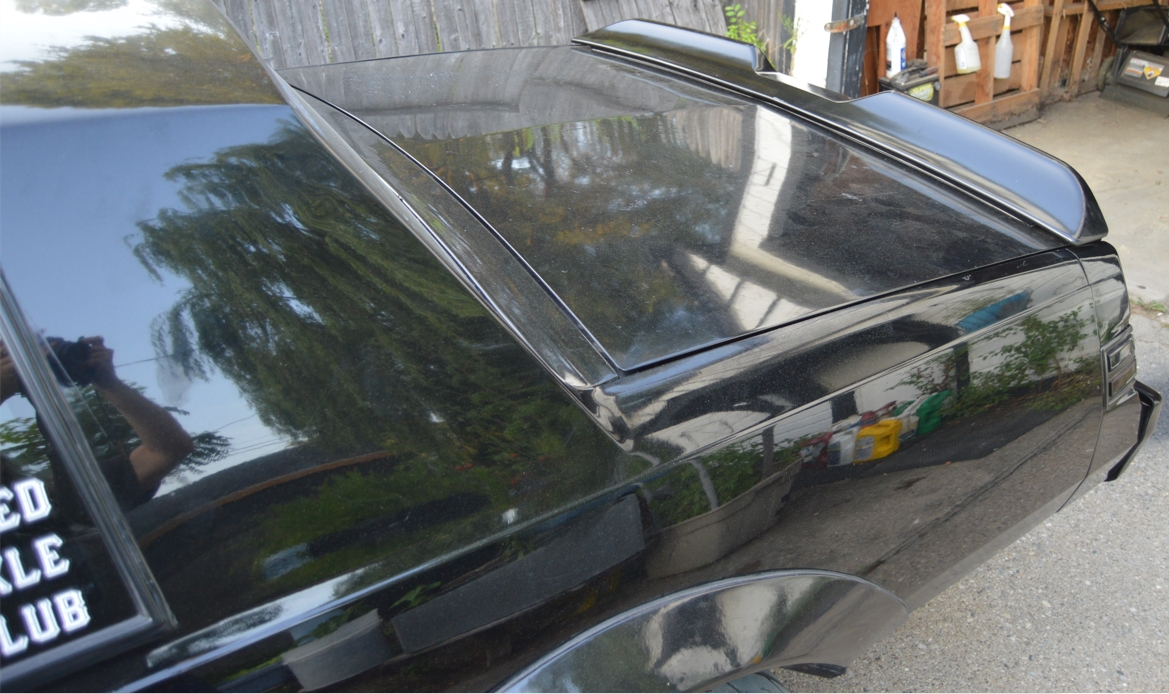
And a cool swoopy dip in the middle.
Something NASCAR inspired (sort of).
Our previous rear spoiler plans were going to give us what we craved.
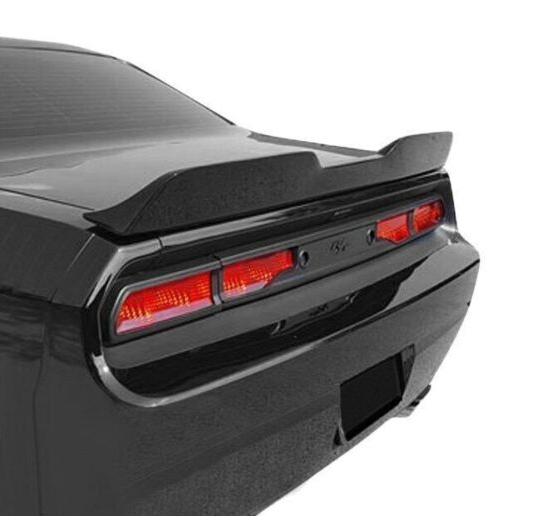
In the midst of planning those steps out (1 piece spoiler and tall rear wing) however, we saw a guy that installed an aftermarket version of a Dodge Challenger spoiler onto his T-type, which we showed a week or 2 ago.
That specific one wasn’t exactly (visually) what we wanted, but it did inspire us to do further research about it, since we have seen a few other Turbo Buick owners that have put these specific pieces on, and they fit rather well, as well as look ok on the back sides of a Turbo Regal (if you can get past the fact that it isn’t a Buick part, let alone not a GM one either, for that matter).
Our ebay search for similar rear spoilers / rear wings revealed something labelled as a “2008-2017 Dodge Challenger ‘Demon Style’ spoiler.”
.

.
[note that on a real Dodge made “Demon” spoiler the dip in the center is not as dramatic as this aftermarket one we acquired]
[but that dramatic part is EXACTLY what we were searching for!]
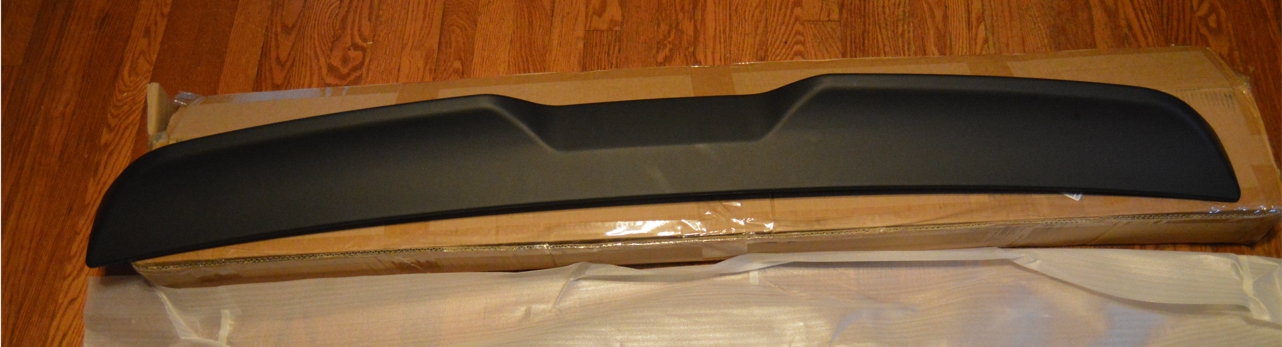
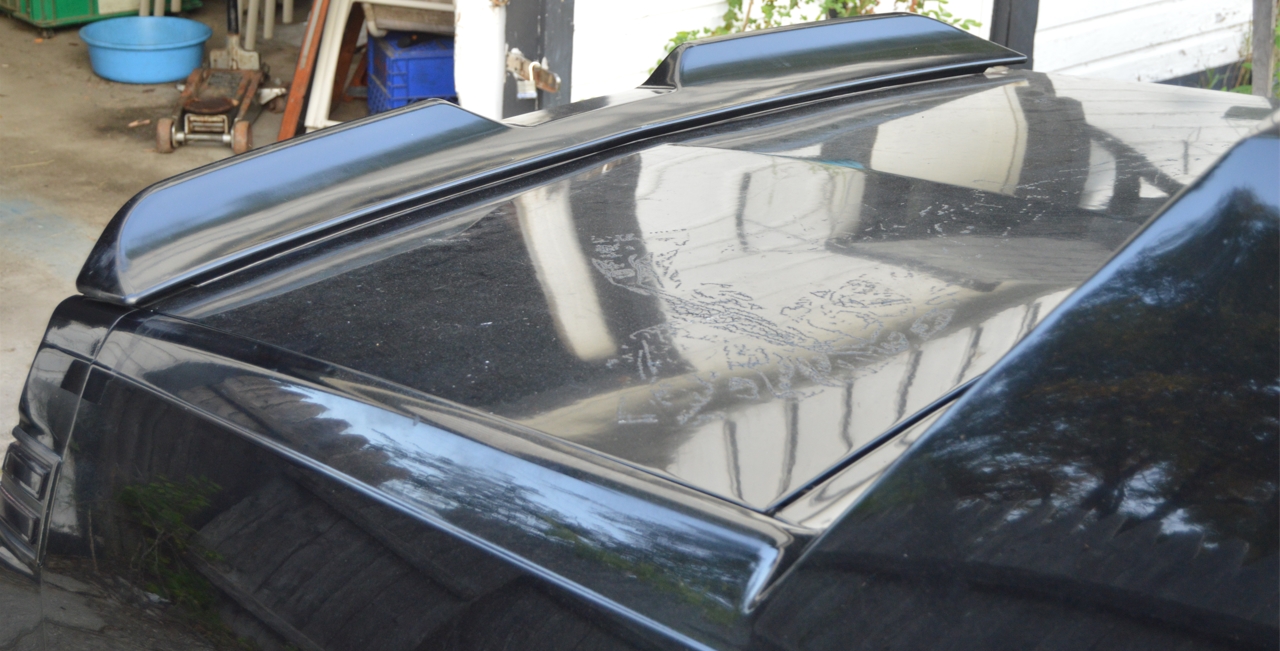
Today we’re going to swap in this Demon Challenger Spoiler on the 1987 Buick Grand National!
.
SPECS:
.
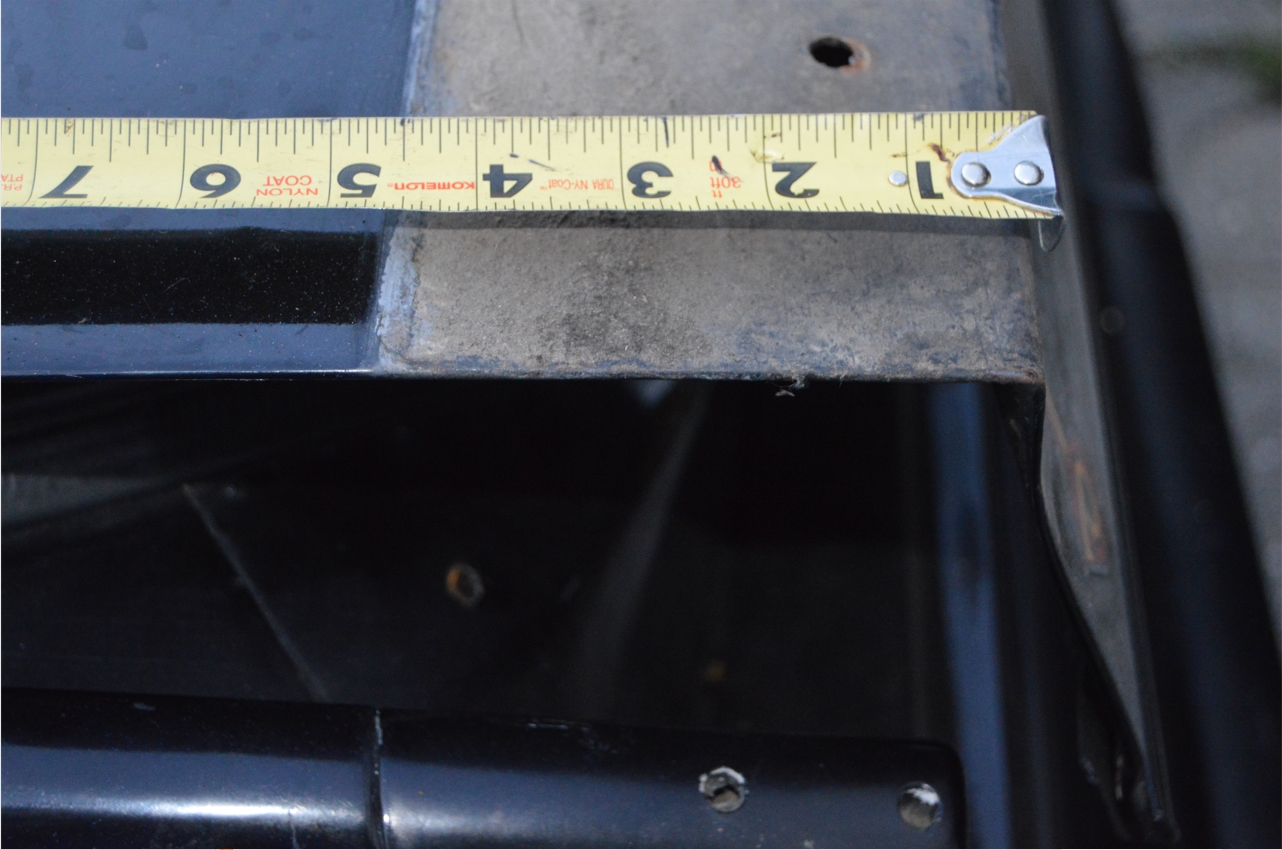
OEM Buick Grand National Spoiler:
58.50″ wide (left to right side of car; just the center section)
4.50 deep (front to back of car)
(just under) 1.50″ tall (bottom to top of spoiler; note this includes the bottom lip of spoiler that goes down further than the trunk lid top)
Challenger Demon Style Spoiler:
60.75″ wide (actual) – (the listing said it was 60.25″)
5.75″ deep
3.50″ tall
[the recess in the middle: 1 3/4″ tall from the bottom of the spoiler to the top of this cutout section, and 1 3/4″ from top of cutout to top of spoiler; meaning the dip in the middle is half as tall as the entire spoiler]
(the center section of this new spoiler is a bit taller than the factory Buick Grand National spoiler’s overall height)
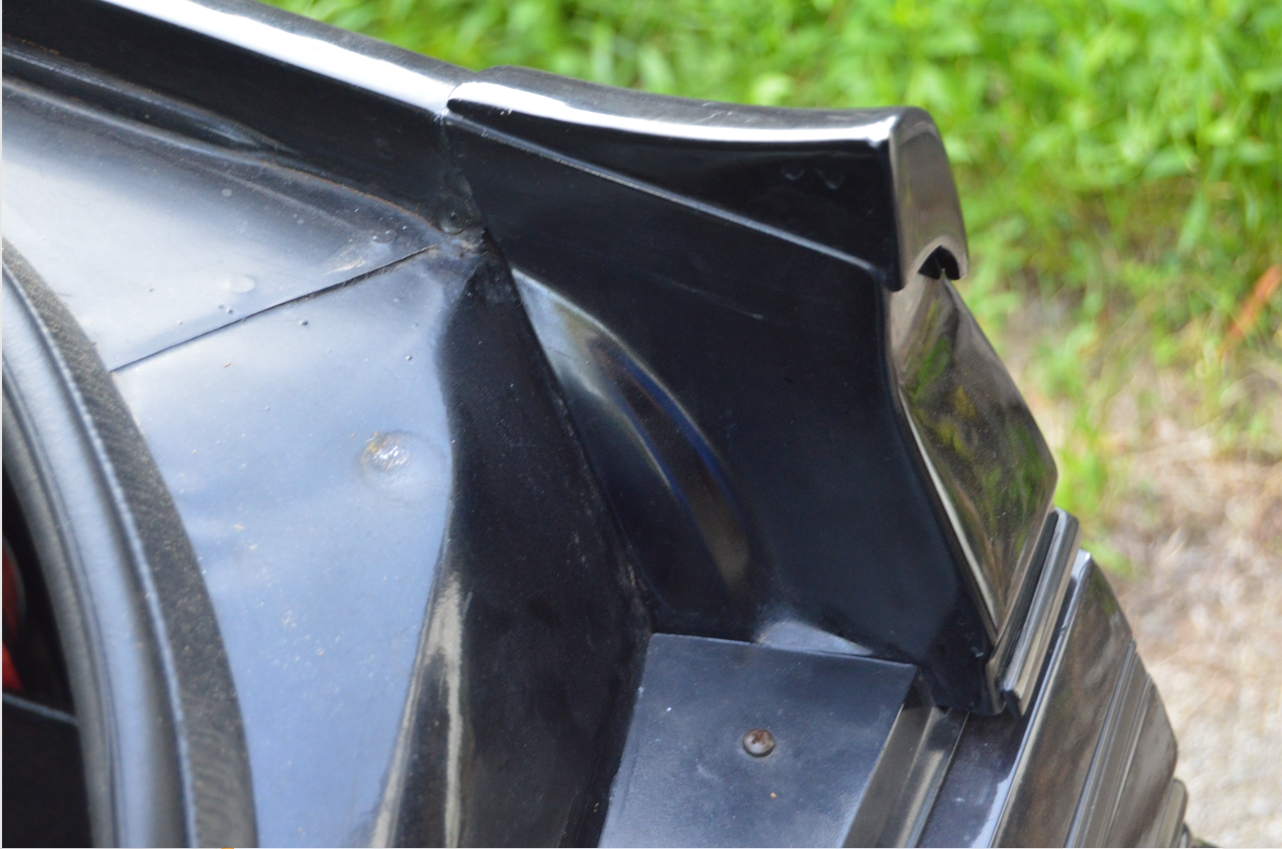
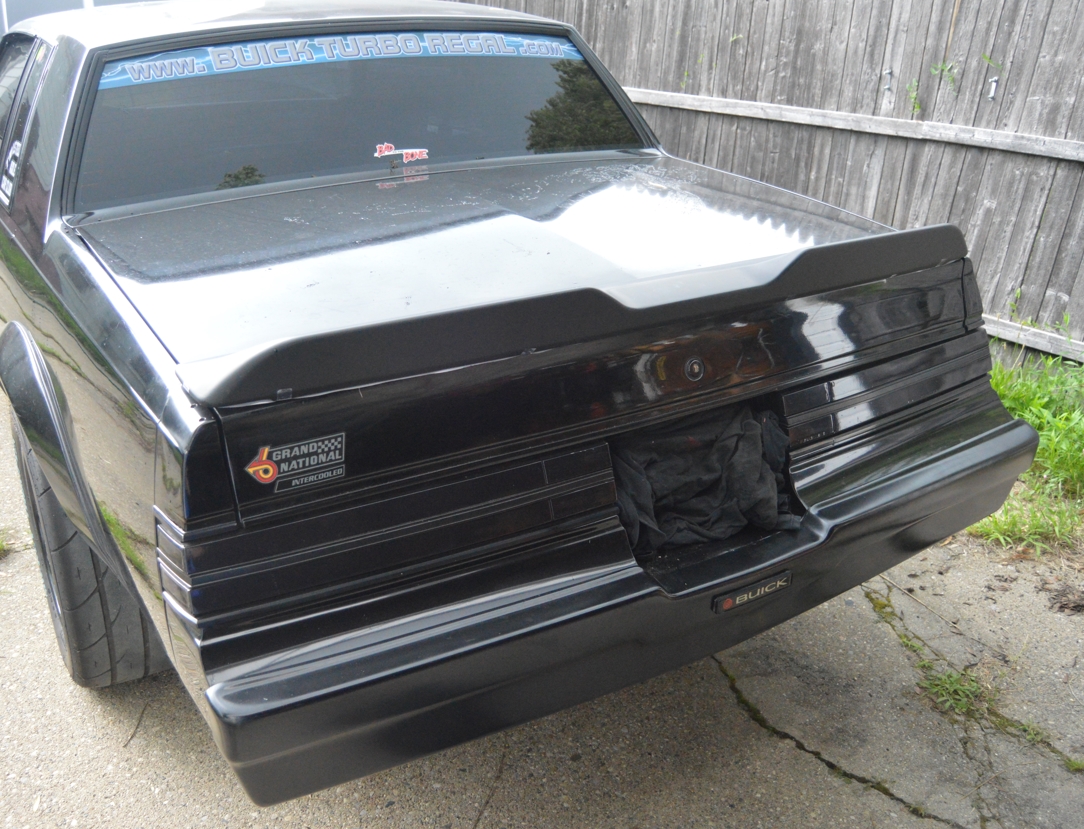
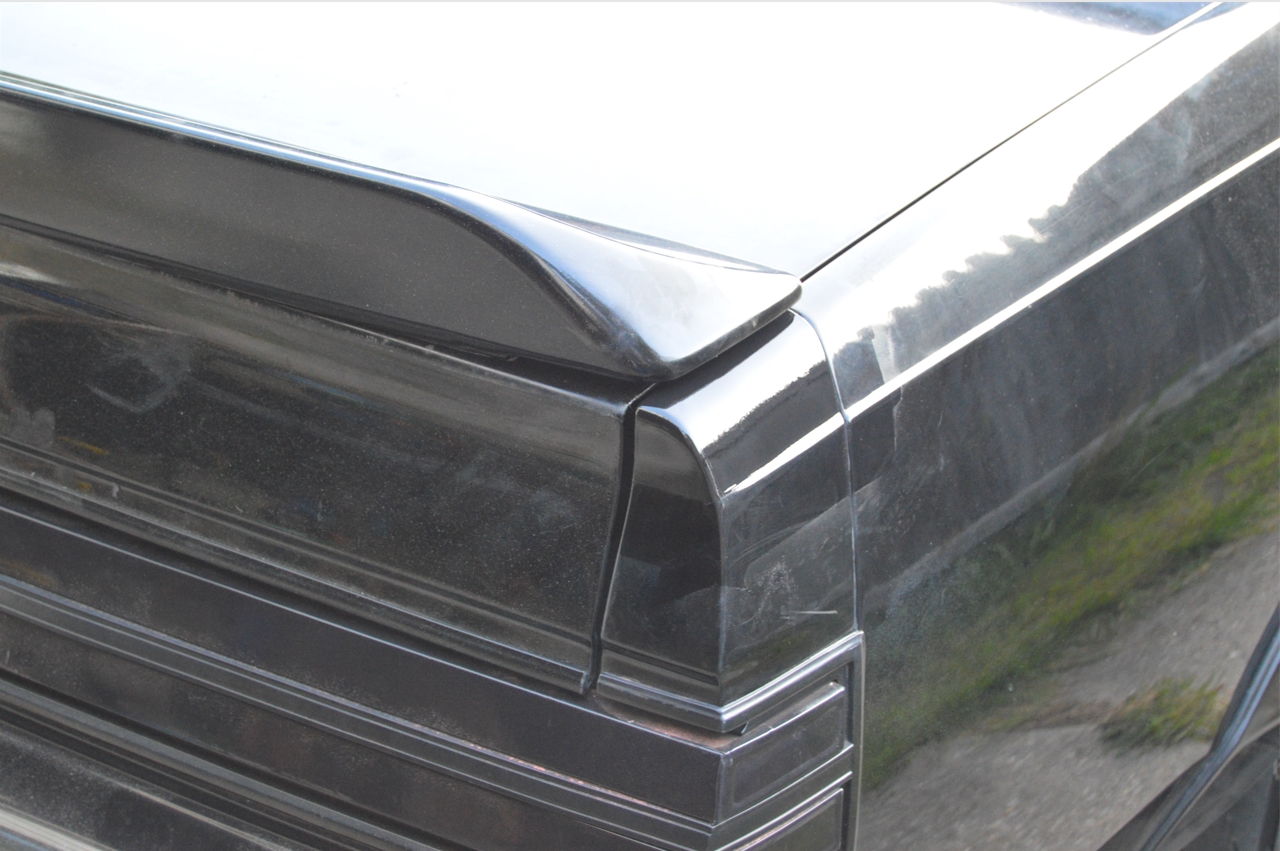
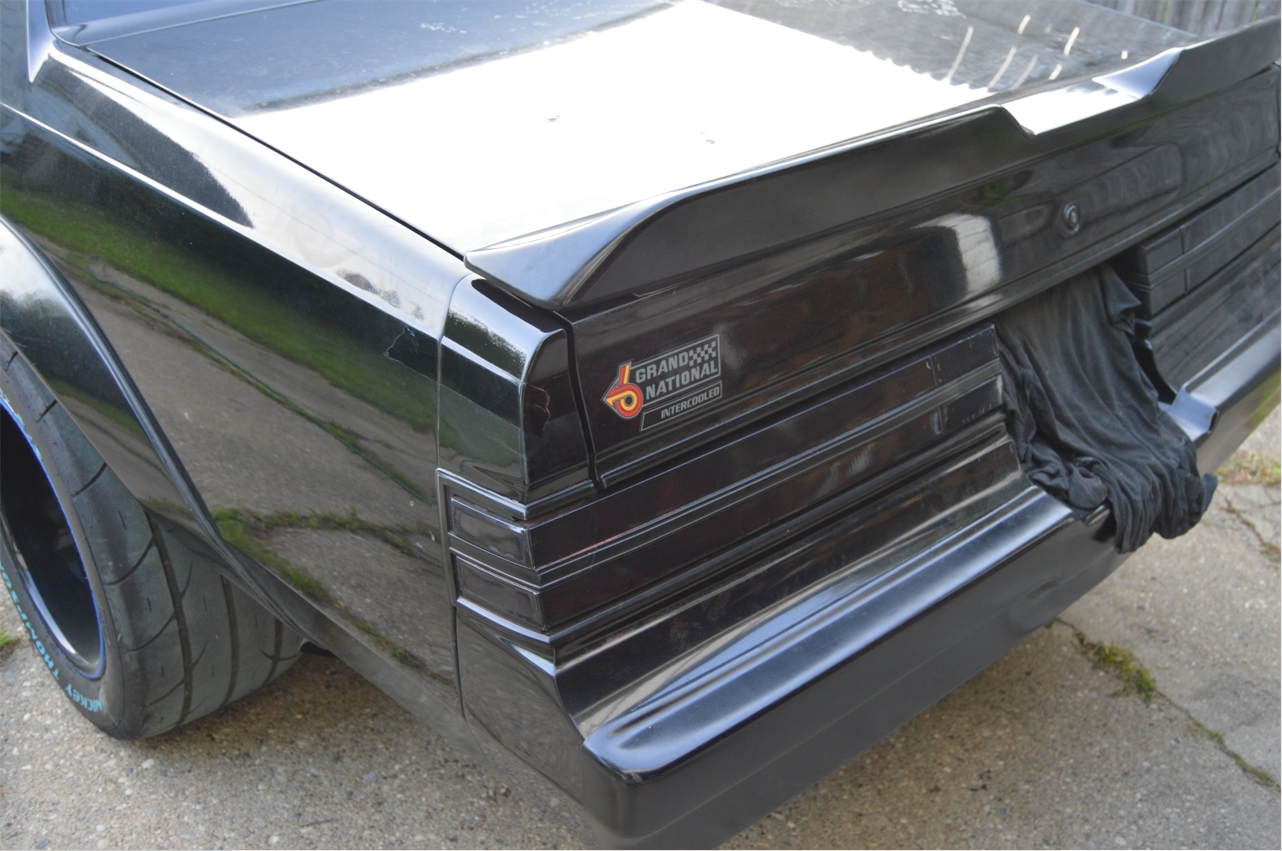
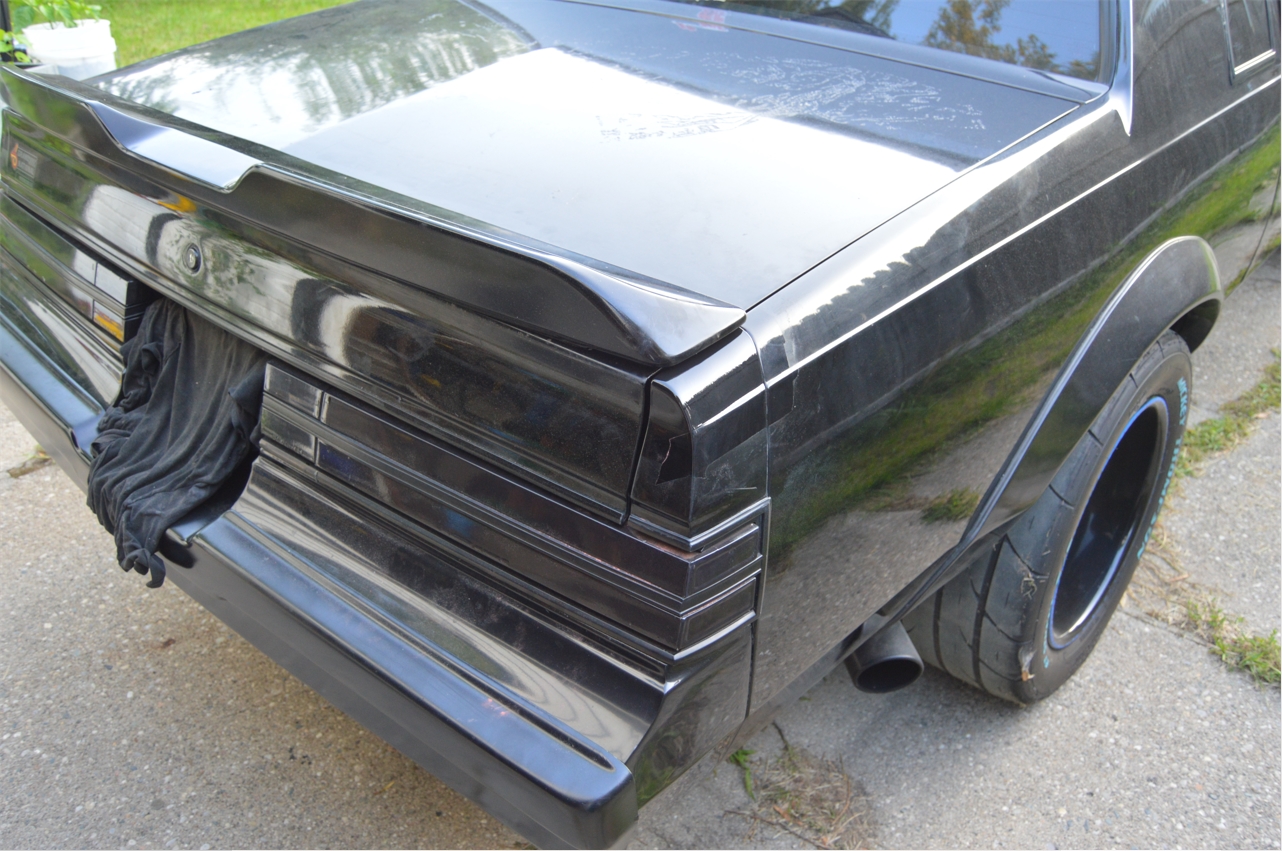
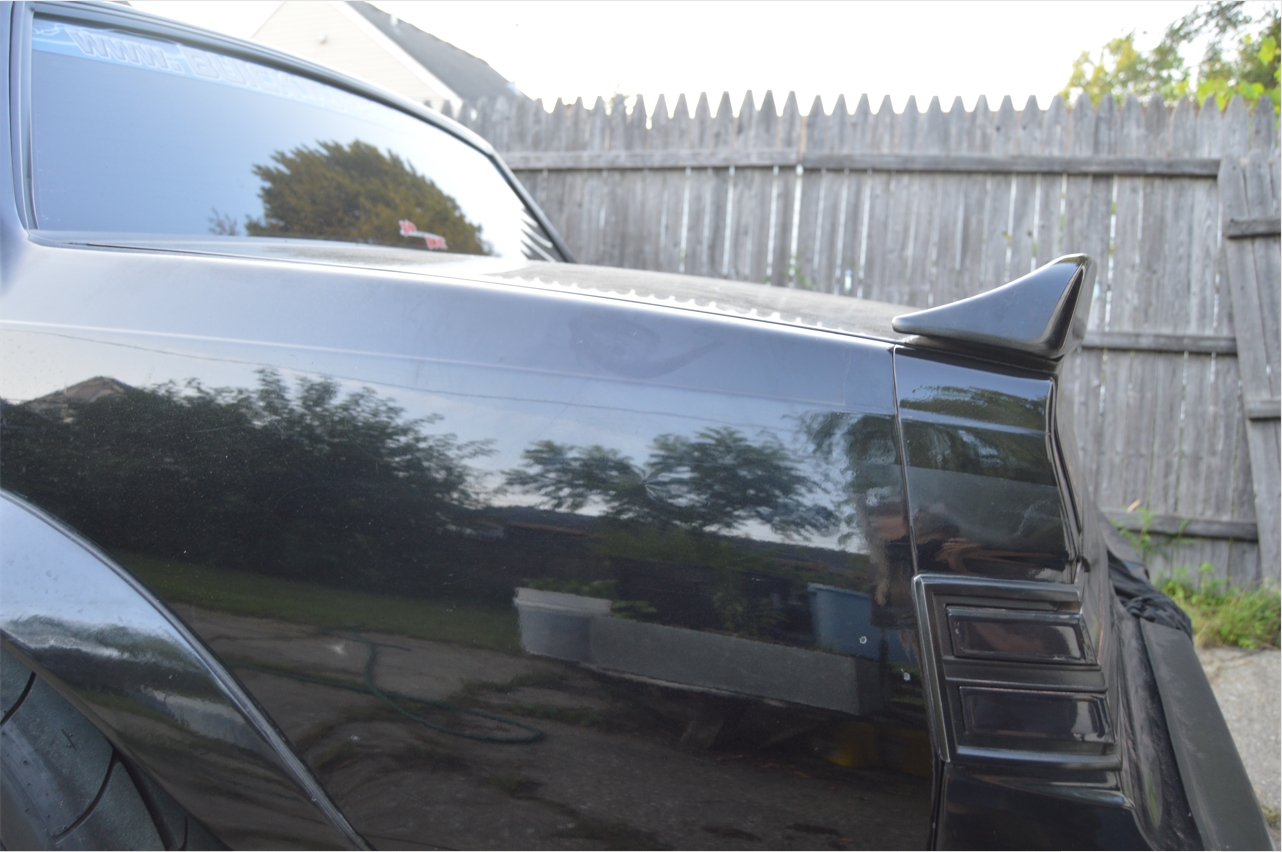
As you can see, the new spoiler is wider than the (center section alone of the) factory one, however, you are eliminating the original spoiler end caps, and the new units outside edges are just about in line with the downward curve of the body.
It’s also 1.25″ deeper than the stock version.
(which gets positioned more towards the rear glass than the stock piece, or hangs off the back a bit, depending on how you mount it, see note in the how-to section)
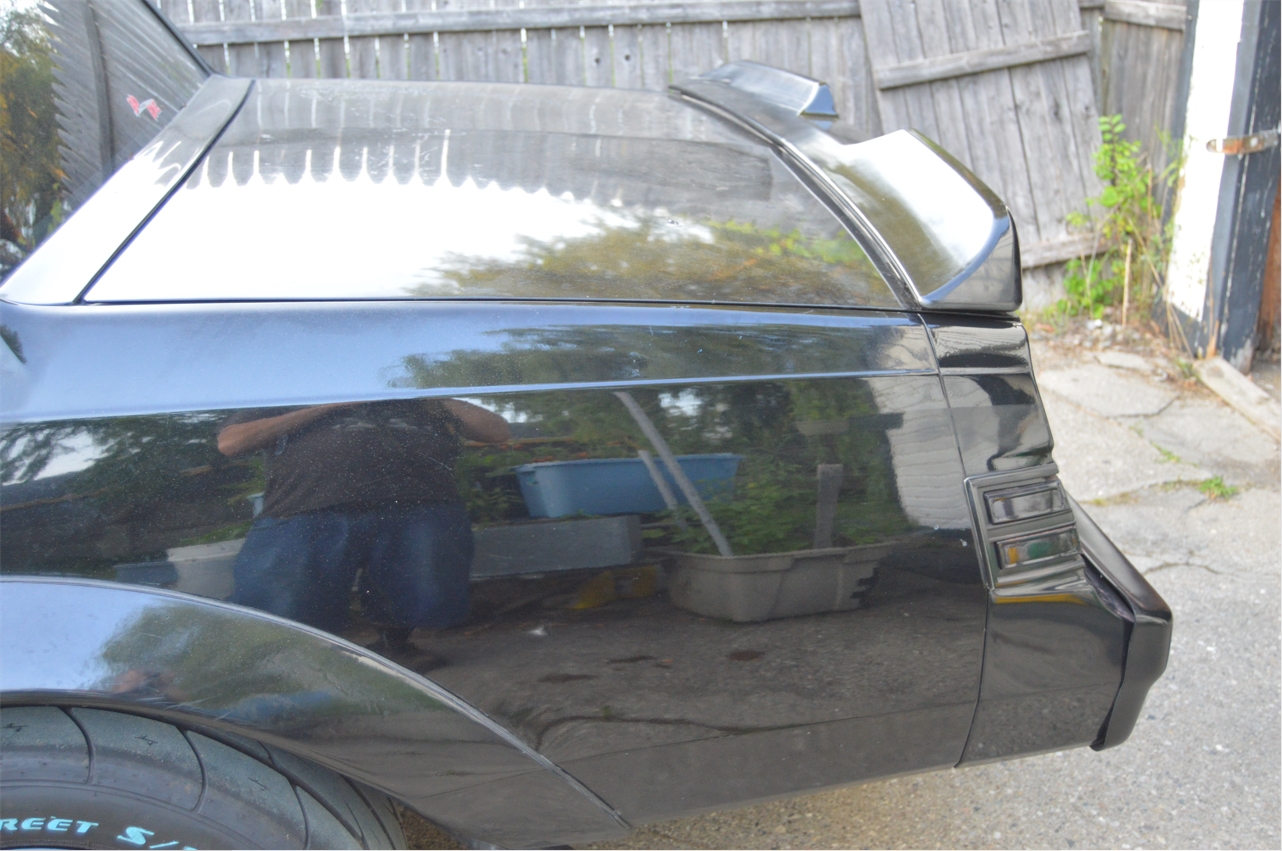
The tallness is where you get the most cool effect.
This new rear wing is 2″ taller than the factory spoiler!
Which doesn’t really sound like a lot, but the lower center section gives it that special look.
(we always thought the stock spoiler should have been a bit taller from the get go)
This new Challenger Demon Spoiler fit all of our criteria we’ve mentioned previously.
Done deal, we bought it!
.
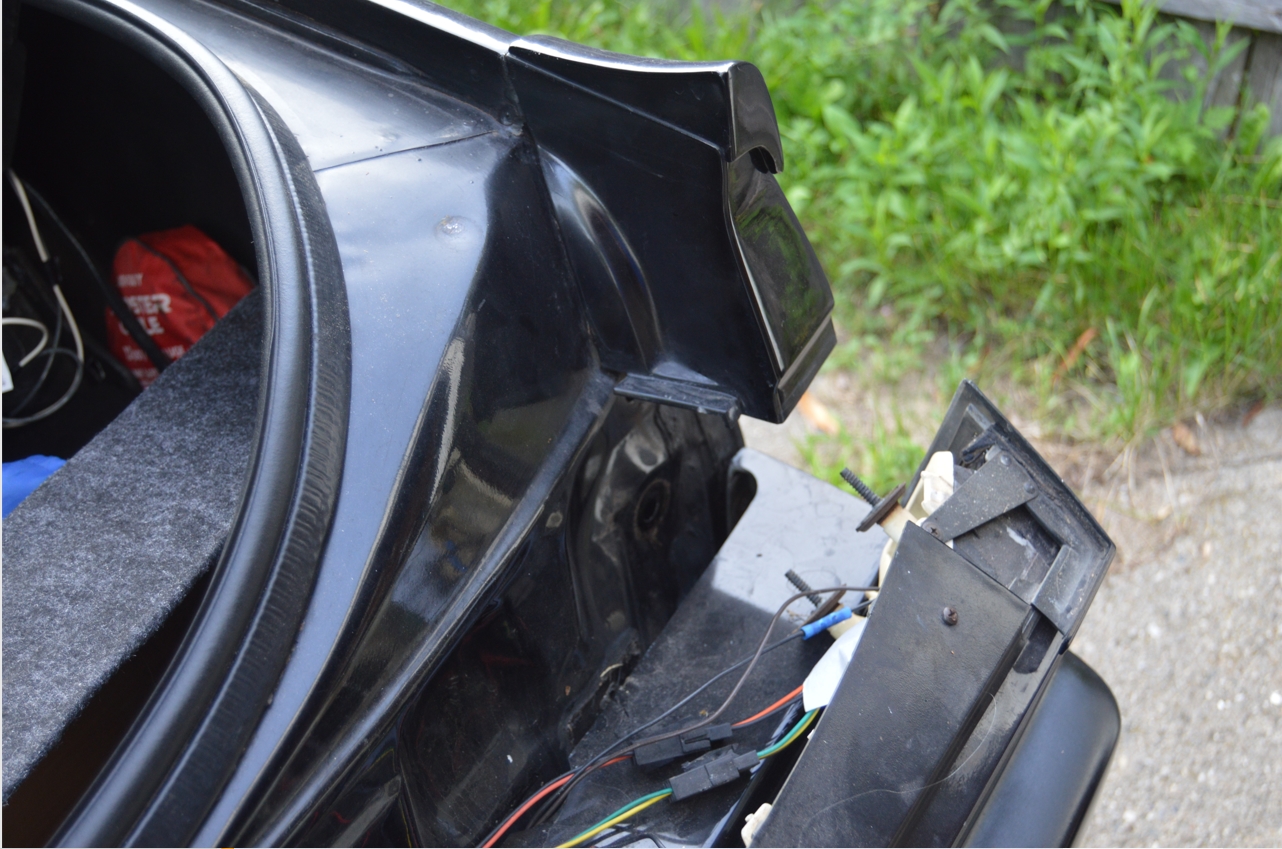
Of course, there’s a few mods that need to be addressed when doing this swap.
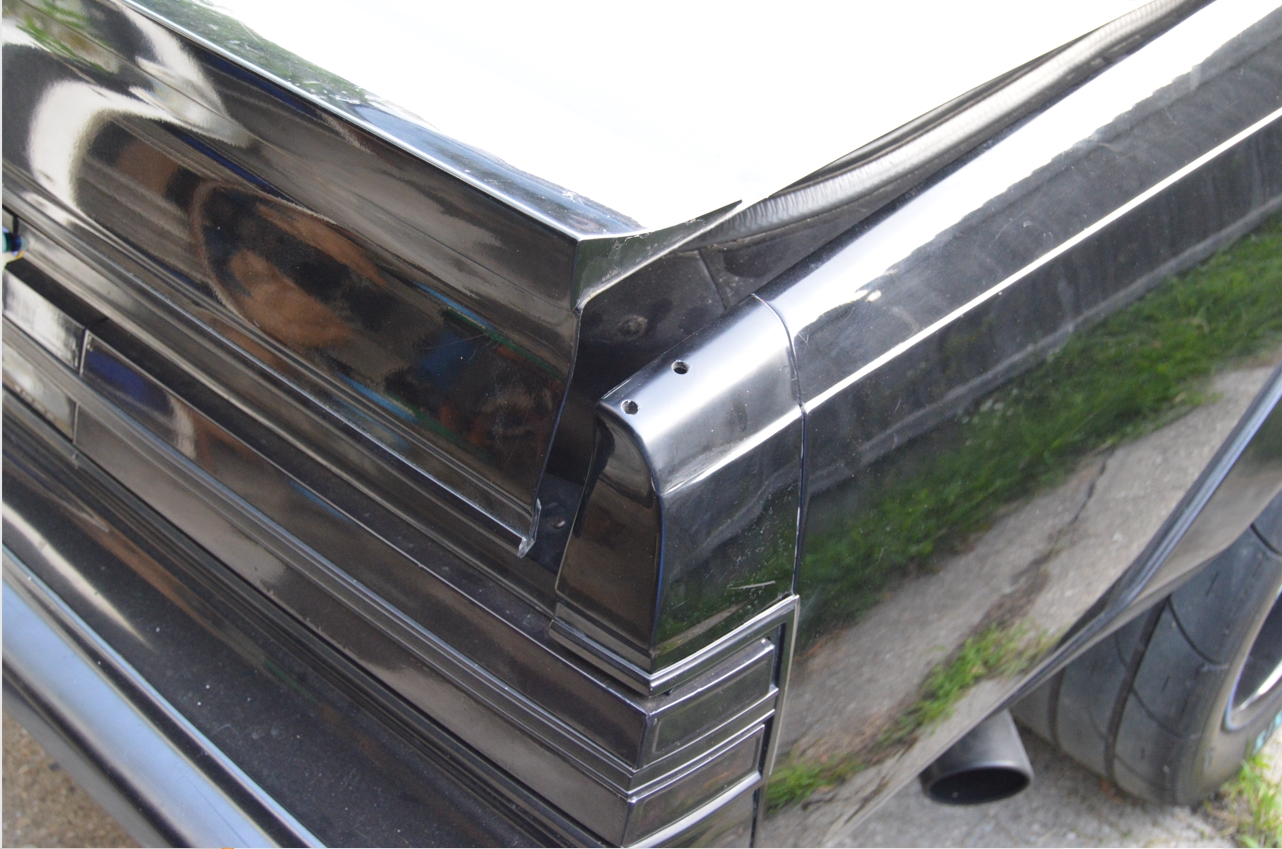
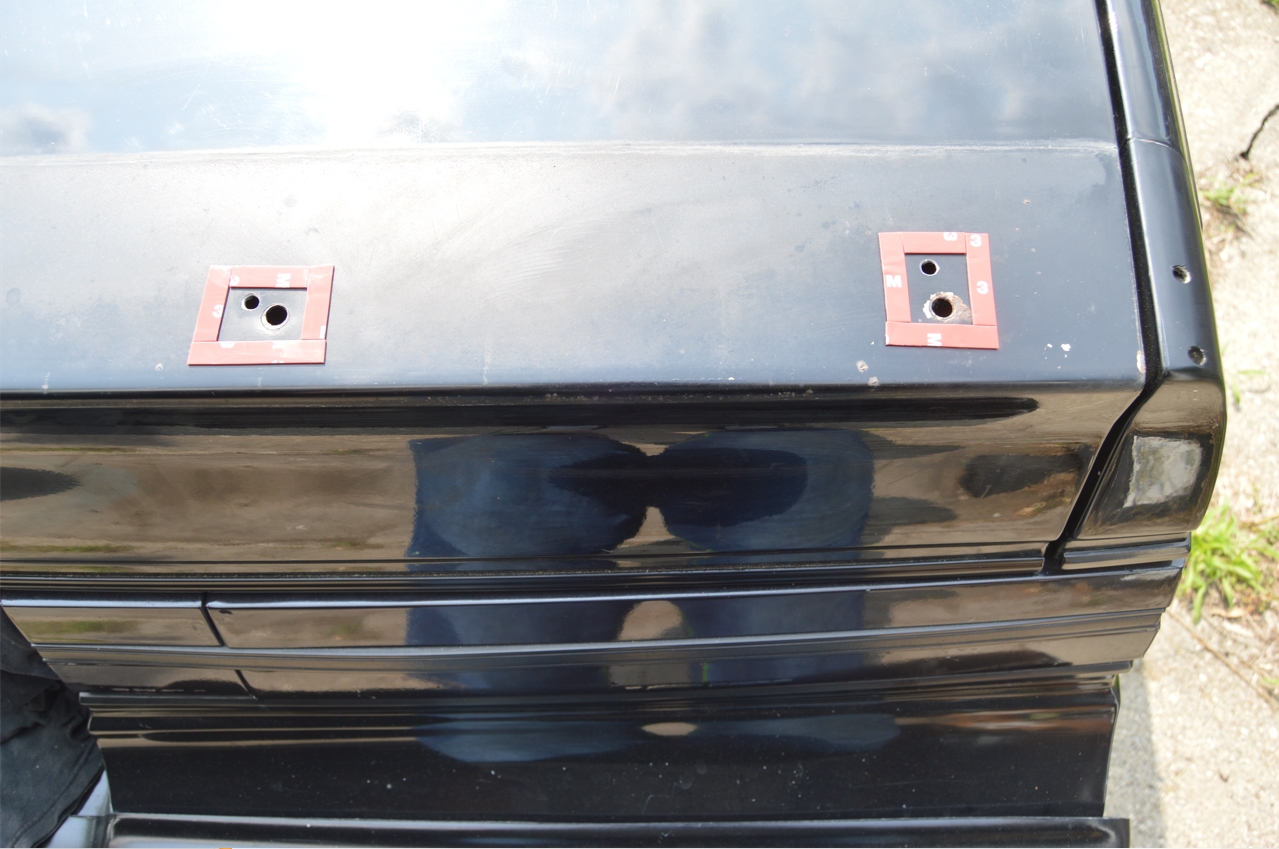
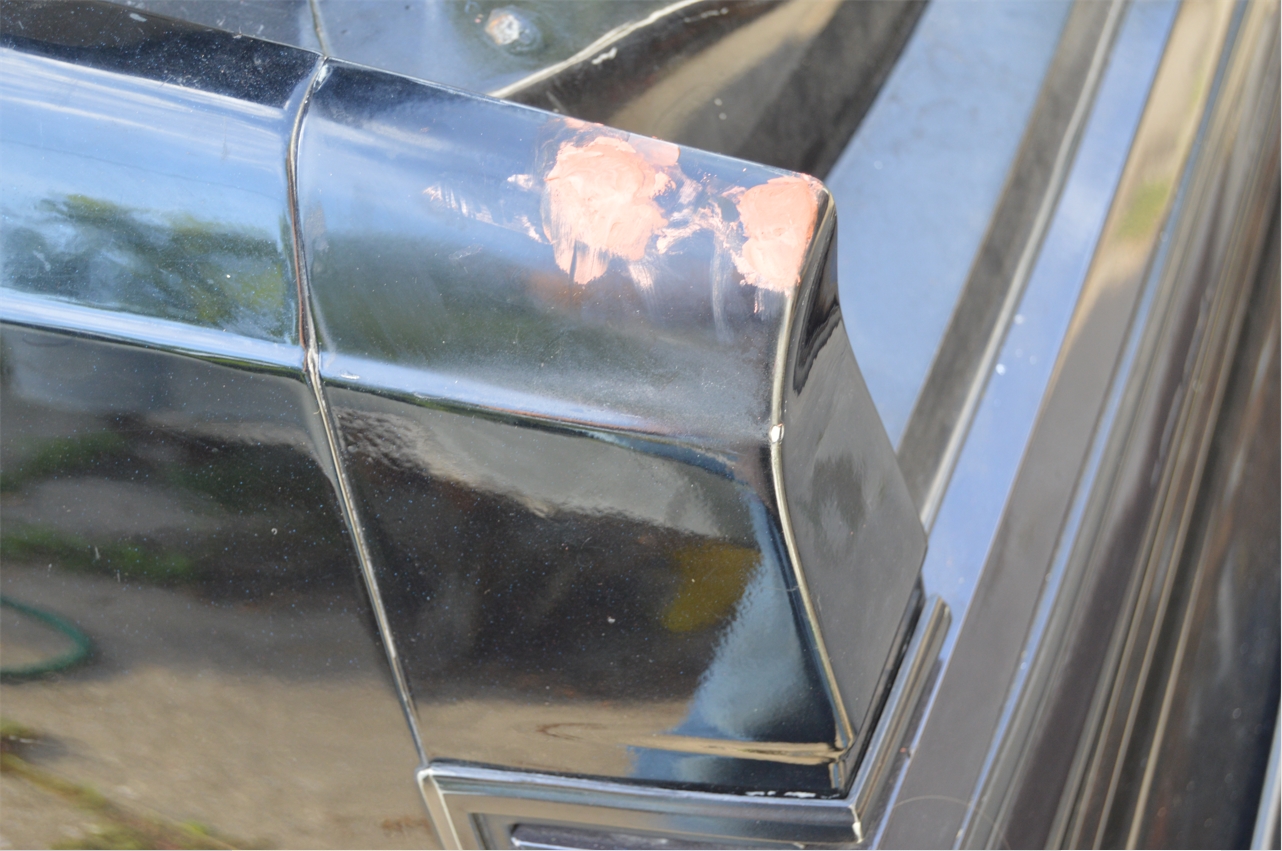
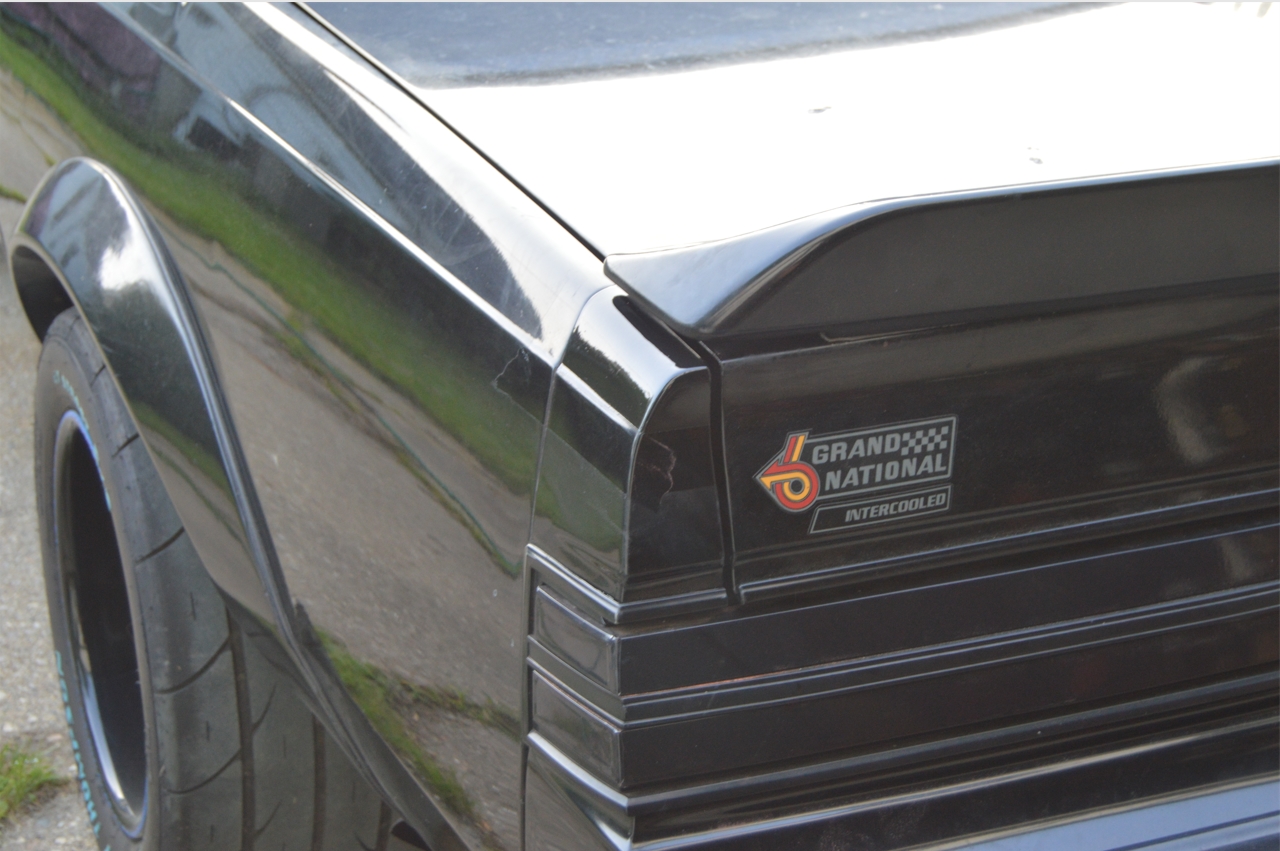
Like mainly, filling the holes left behind from the end caps that were removed from where the original 1987 Buick Grand National Spoiler was mounted.
A little bondo, fiberglass or filler of some type in the holes should cure that issue.
(unless you prefer to just get new quarter panel extensions that don’t have these holes, but then you need to make sure they match your paint!)
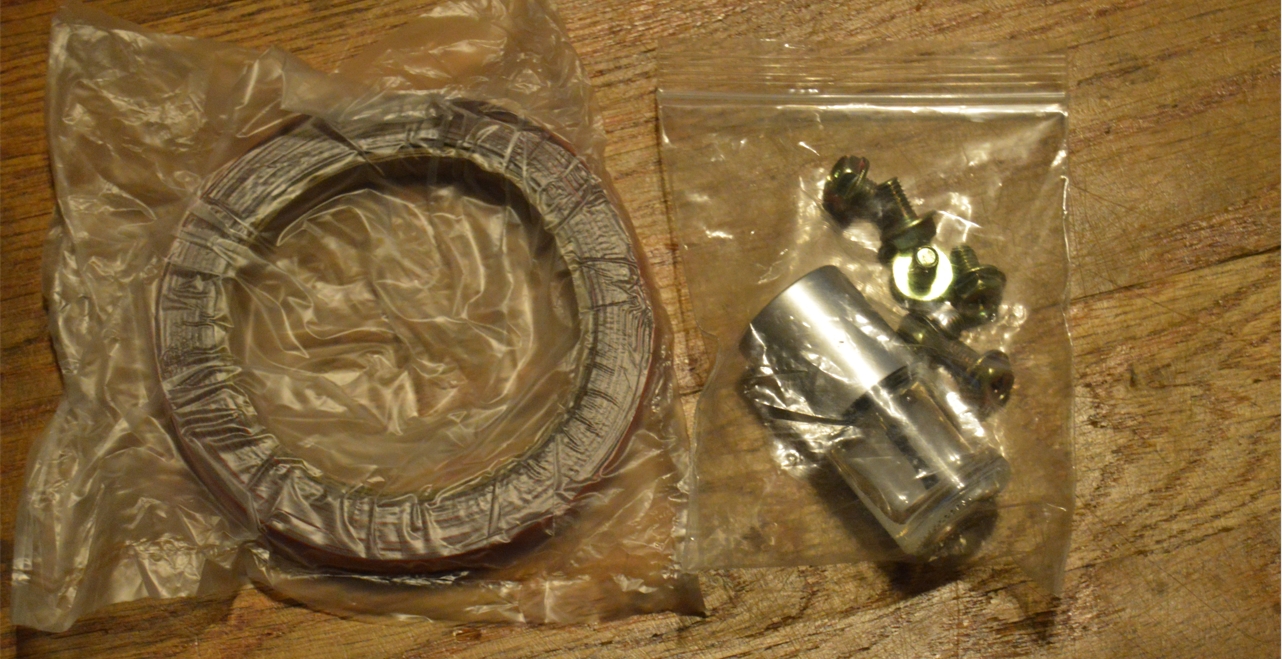
Next up, is that the new spoiler has 6 bolts that secure it down to the trunk lid, and the factory version has 6 as well.
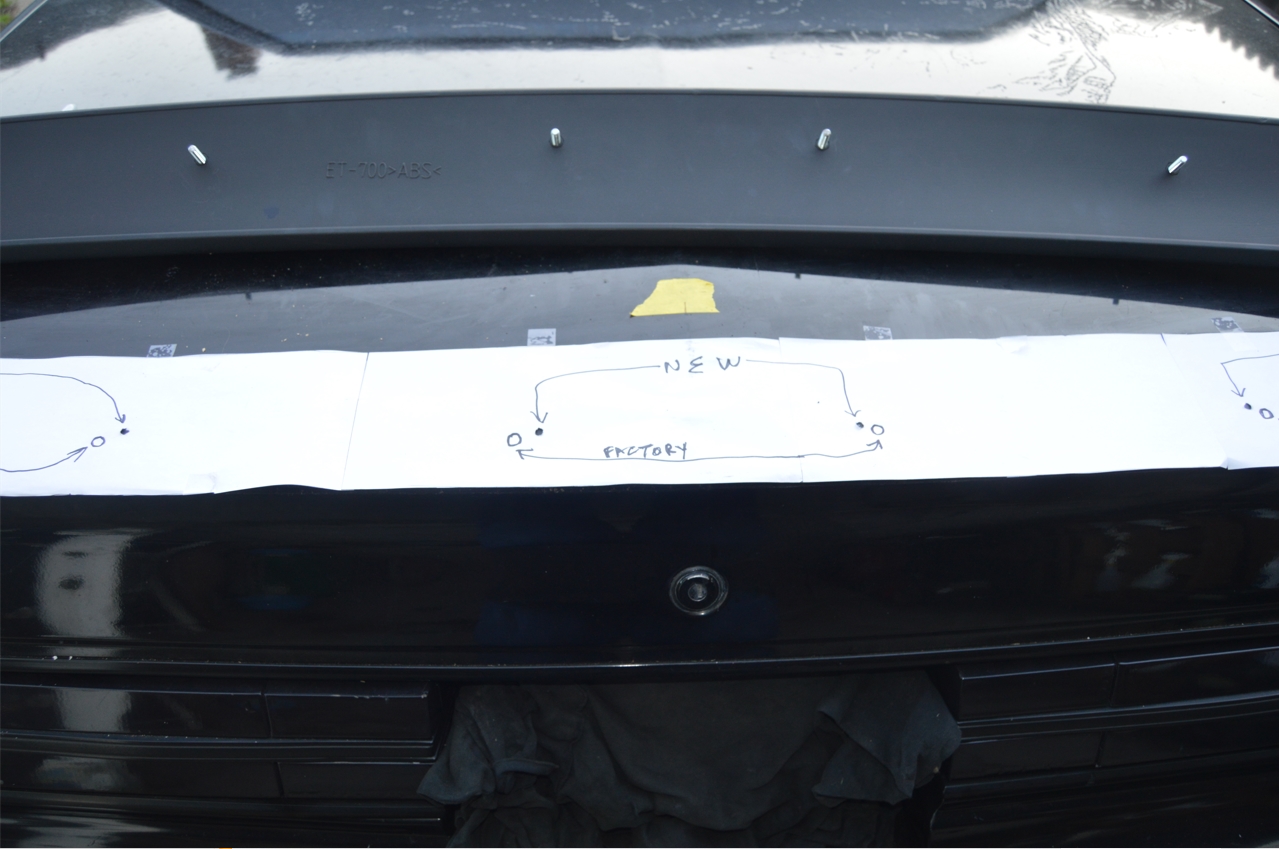
The question is, however, will the 6 new holes needed line up with the existing 6 factory holes in the trunk lid?
Before actually checking, we thought to ourselves, nah, we couldn’t get that lucky.
And we were right, they’re off by just enough to not be able to reuse them (both forward/back and left/right).
No biggie on the existing 6 holes in the trunk lid, as they get covered up by the new new rear wing (although you should think about any water that may drip down into them, so placing some silicone or RTV inside those holes may provide an easy solution to that, or read below to see what we did).
Ok, the 6 new bolts don’t line up with any of the factory made holes.
That means you need to make new ones.
We’ll explain how in the steps below.
.
[3M Tape Primer 94 is an adhesion promoter for use in conjunction with 3M Tape that supports adhesion to critical substrates such as ABS]
.
(the tape is supposedly used if you don’t want to drill holes, but we wouldn’t trust that alone to hold it on at high speeds!)
(or perhaps you’re suppose to use both, which we first thought about skipping, but then ended up using it not to hold the wing down, but for another purpose which you’ll read about in the how to steps)
(note that there are no directions at all with the kit/spoiler)
(we are replacing the supplied bolts with [a substitute] all thread, as installing the new rear wing will be much easier using that instead of the bolts. not to mention that you’ll need to physically push the wing down onto the trunk lid to get it sitting flush and the bolts aren’t long enough to pull the wing down into place. We avoided that hassle and decided to use studs instead of the bolts)
.
PARTS COST:
* Ebay, just under $56 (shipped, with tax) – (it was on sale from reg. $58.67)
* can of primer
* can of black paint (or whatever color you’re going to paint wing)
* 6 sheets of (8.5×11) paper (template for new bolt holes)
* RTV/silicone (to put into the trunk lid holes from stock spoiler)
* some type of filler (we used glazing putty) – (for the holes left in quarter panel extensions from the end caps)
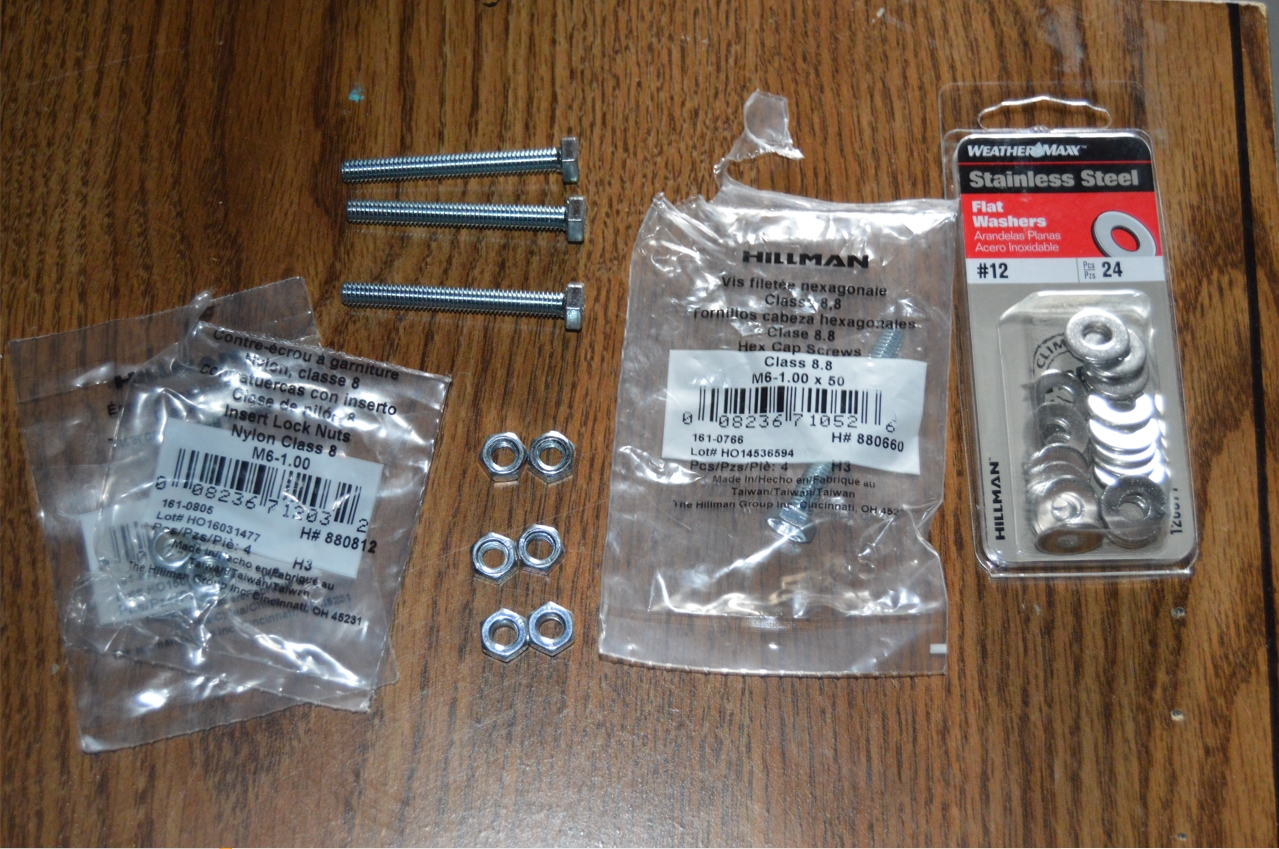
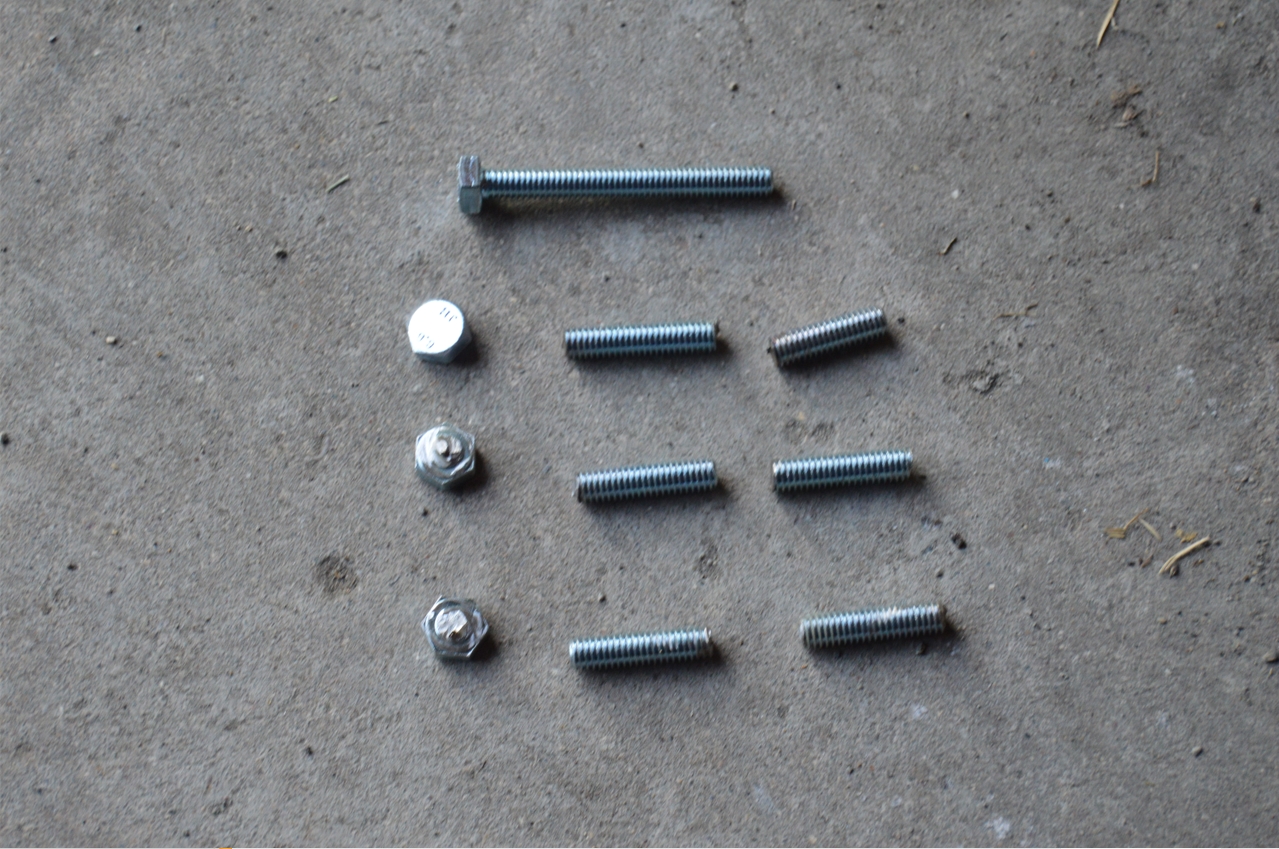
to use in place of the supplied bolts:
[we initially intended on using all thread (acquiring a 6″ long section, then cut into 6 pieces) (instead of the bolts supplied) to secure the wing to trunk, but we couldn’t find any all thread in a metric size! (which is what the bolts are)]
* pkg/4 of M6-1.0 bolts (2″ long each) – (we used 3 bolts, heads cut off, then threaded portion cut in half, to make 6 1″ long studs)
* 2- pkg/4 m6-1.00 size nylock nuts (only 6 nuts needed) – (goes on the studs)
* pkg/24 #12 washers (a couple sizes bigger than the nuts for extra gripping power) – (only need 6 washers, but gives us spares for other projects)
(all 4 items above, less than $9)
.
TOOLS:
* 10mm socket (remove old spoiler center section)
* 10mm socket (install new spoiler)
* 11mm socket (remove quarter extensions & end caps from extensions)
* swivel (for nuts on center piece of spoiler inside trunk lid)
* scissors (etc) – (for cutting out template)
* 1/4″ drill bit (to make new holes for studs, top side of trunk lid)
* 1/2″ (or 5/8″) drill bit (to make new access holes to put nuts on, if needed, on underside of trunk lid)
[or a step bit instead, for both]
[we also used a dremel / cutoff tool to enlarge the existing far outer access holes]
.
COMPLETION TIME:
A few hours (not including dry times for: filler, primer, paint)
.
HOW TO:
.
[We have a carpeted trunk kit, so we had to move some pieces out of the way to get to the tail lights. The trunk lid piece was not in the way at all.
It took 20 minutes to move stuff, remove tail lights, extensions, center piece and end caps, plus clean them and reinstall extensions]
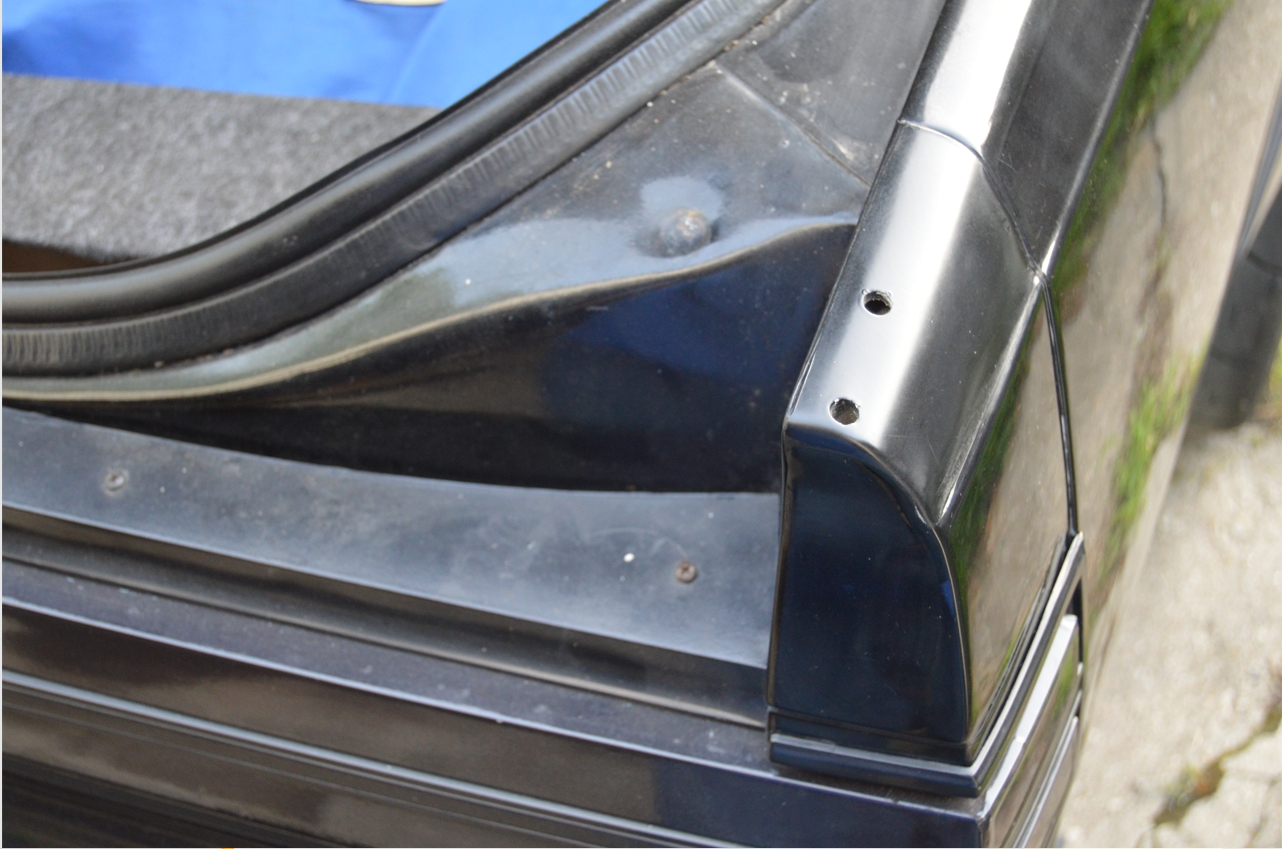
1. remove all 3 pieces of the stock rear spoiler.
The center section has 6 nuts (10mm) holding it onto the trunk lid.
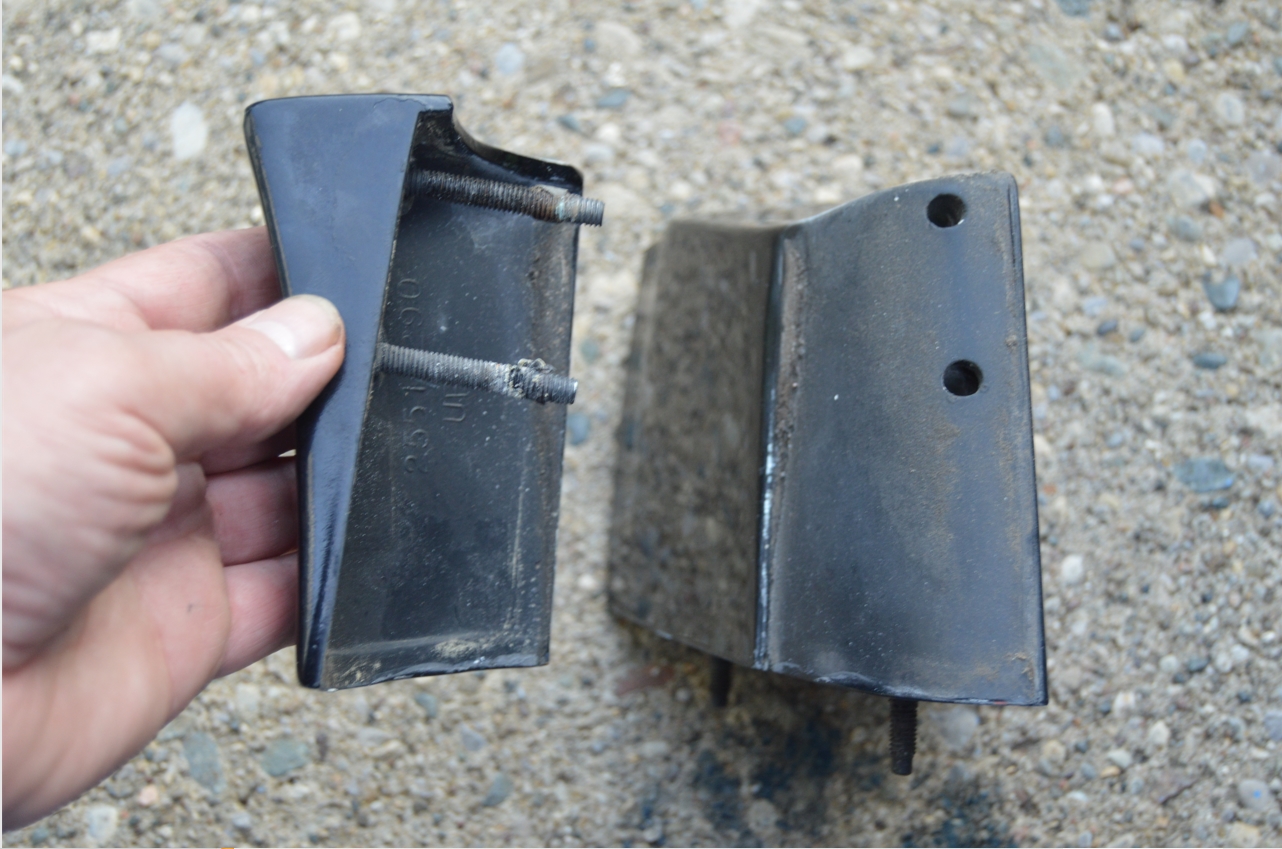
The end caps have 2 bolts (on each side) holding it onto the quarter panel extensions.
[to remove the end caps, you have to remove the quarter panel extensions first. These have 2 bolts accessible from inside the trunk. remove extensions, then from the underside of them, you can unbolt the 2 bolts that secure these 2 pieces together]
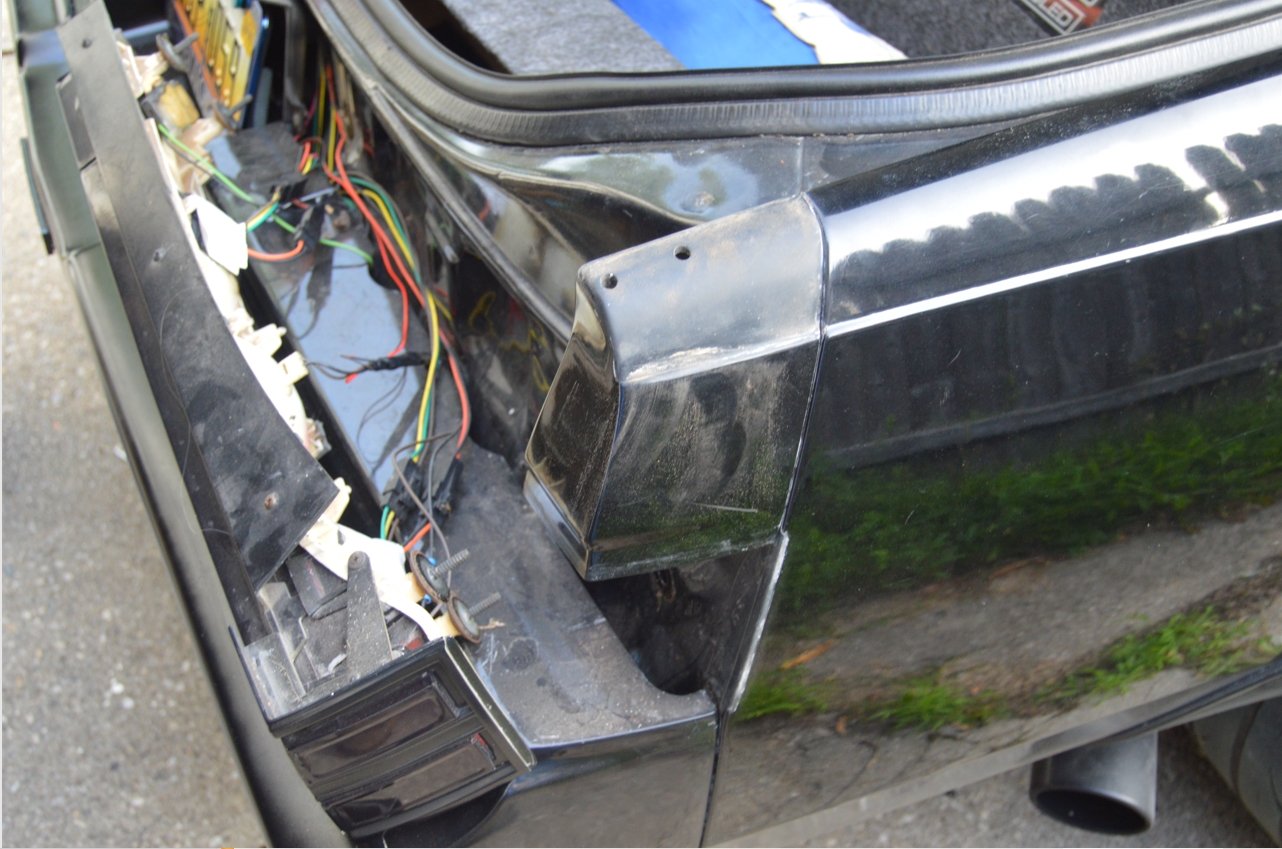
You’ll need to remove the tail lights to get the extensions off.
(hand twist the 4 nuts off [on both sides of car] or use an 11mm socket)
The extensions come off using an 11mm deep well socket.
The 2 nuts holding the end caps onto the extensions are 11mm as well.
[the extensions will no doubt take a bit of effort to remove since they haven’t been off since the Flint, MI, assembly workers put them on! gently push them towards the outside of the vehicle, and that should crack them loose]
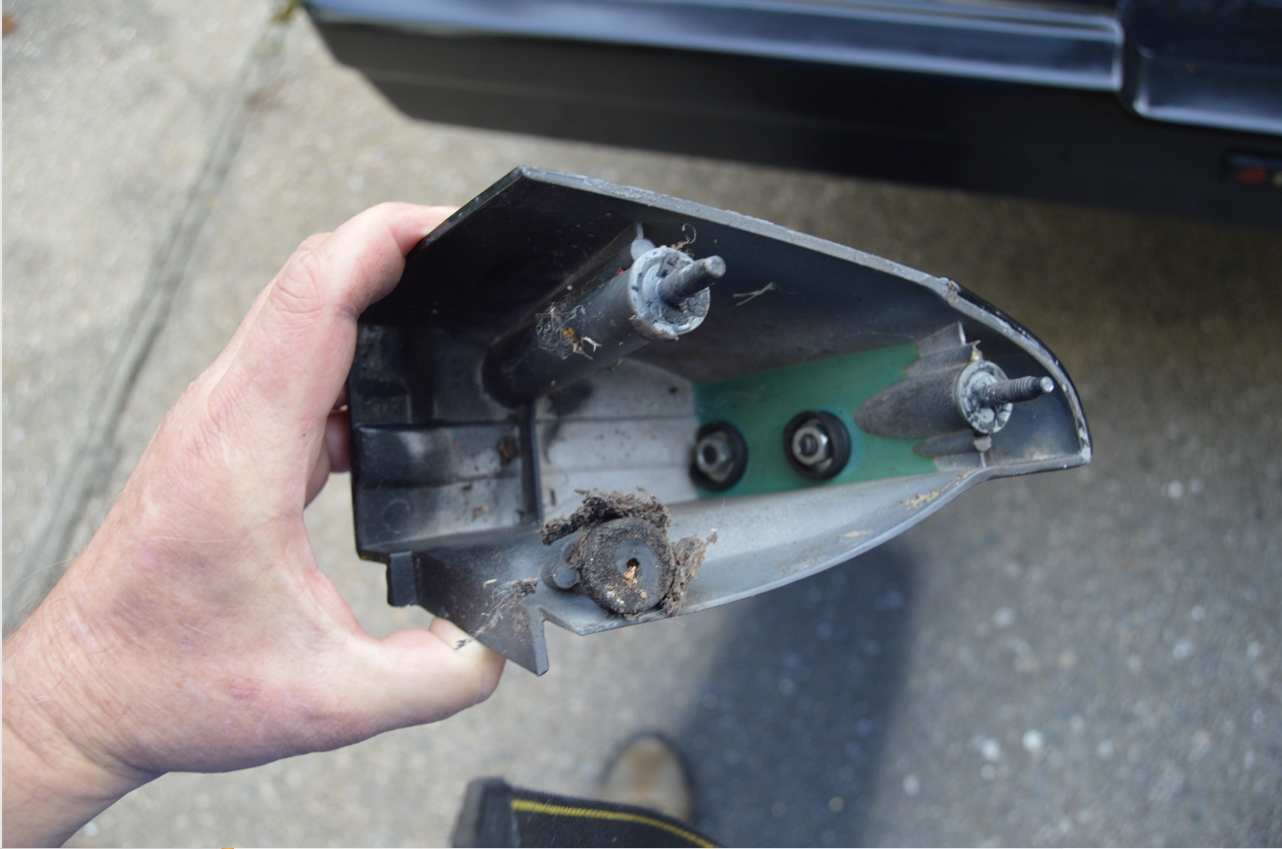
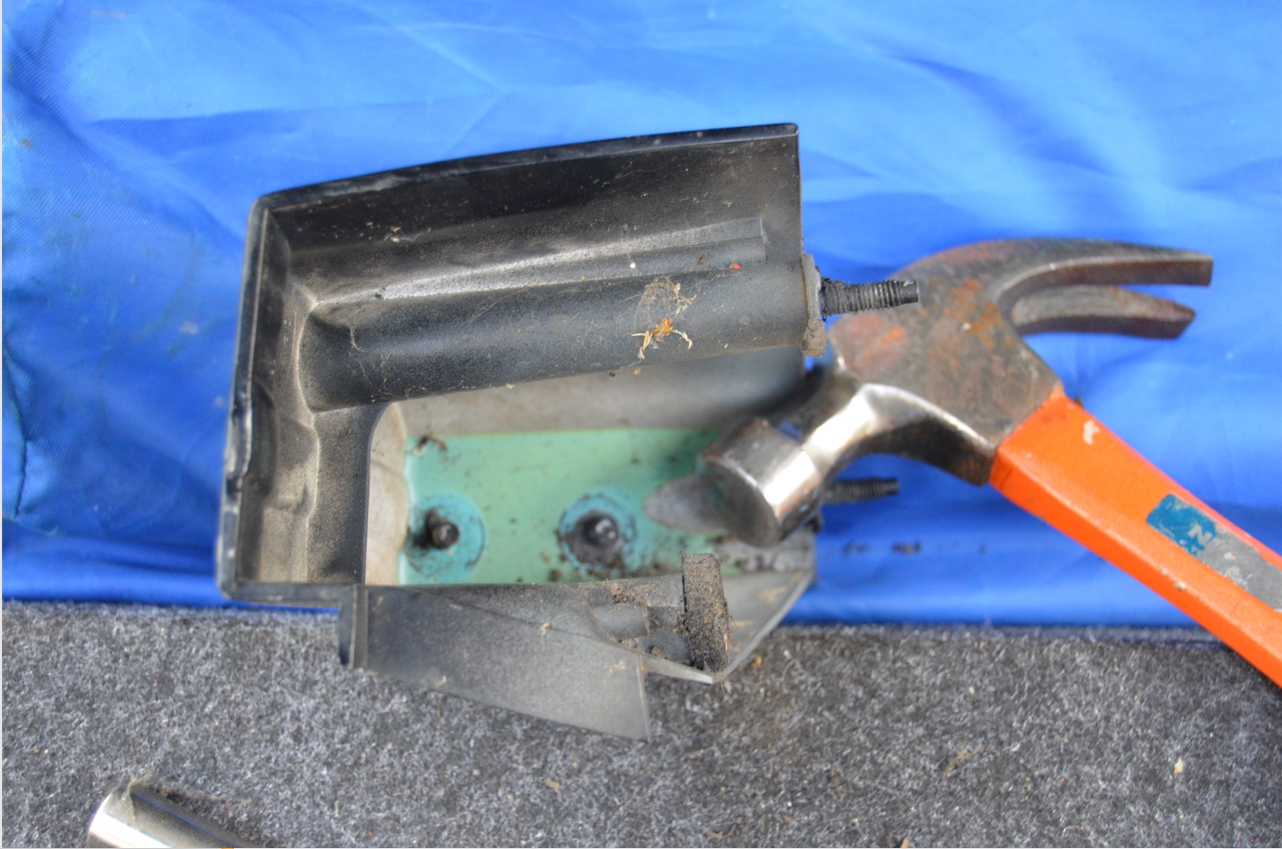
[same like the end caps, they take bit of persuasion to come undone from the extensions. we softly tapped on the studs with a hammer, then were able to pull them off by hand]
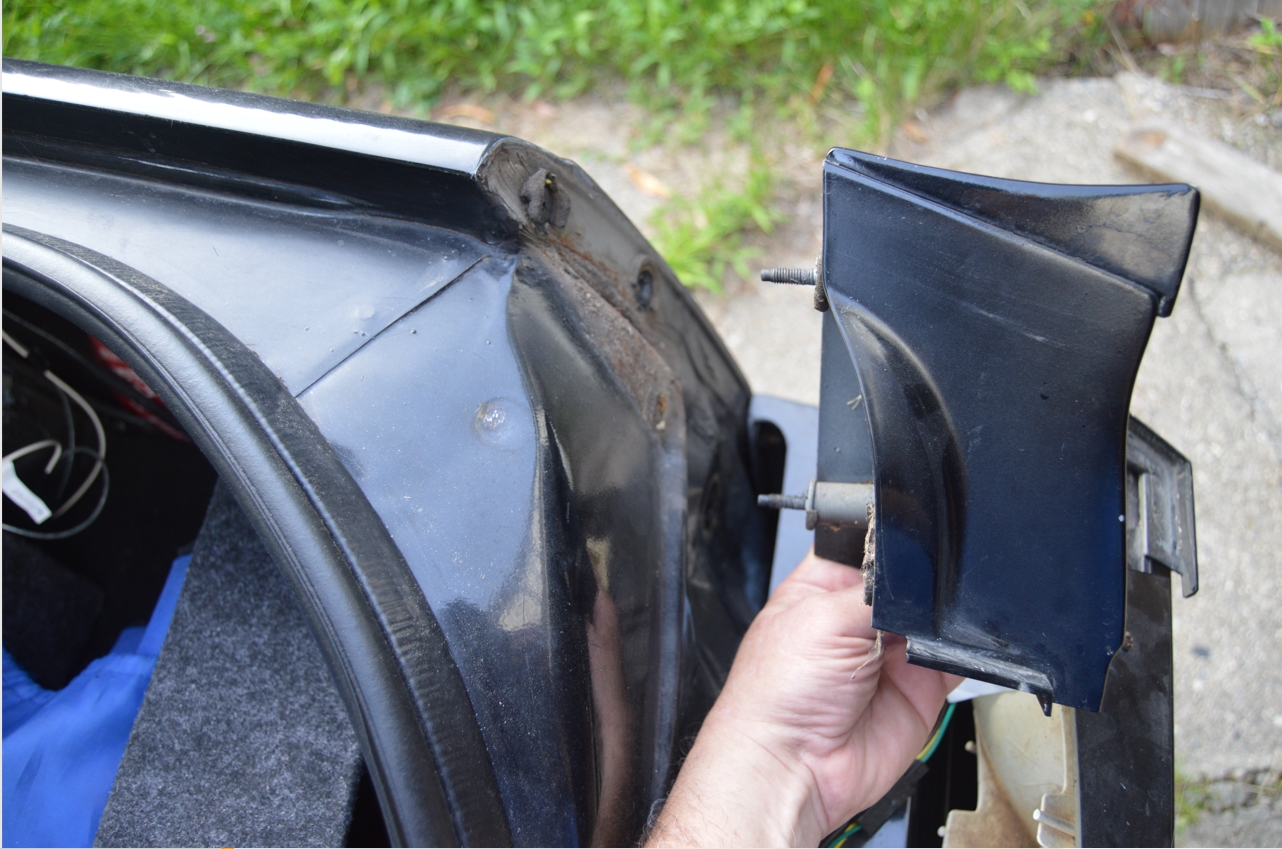
Once you remove the end caps from the extensions, you’ll see how dirty it is under there! WOW!
[once you have the spoiler end caps off the extensions, reattach the extensions to the body]
The center piece is held on by six 10mm nuts.
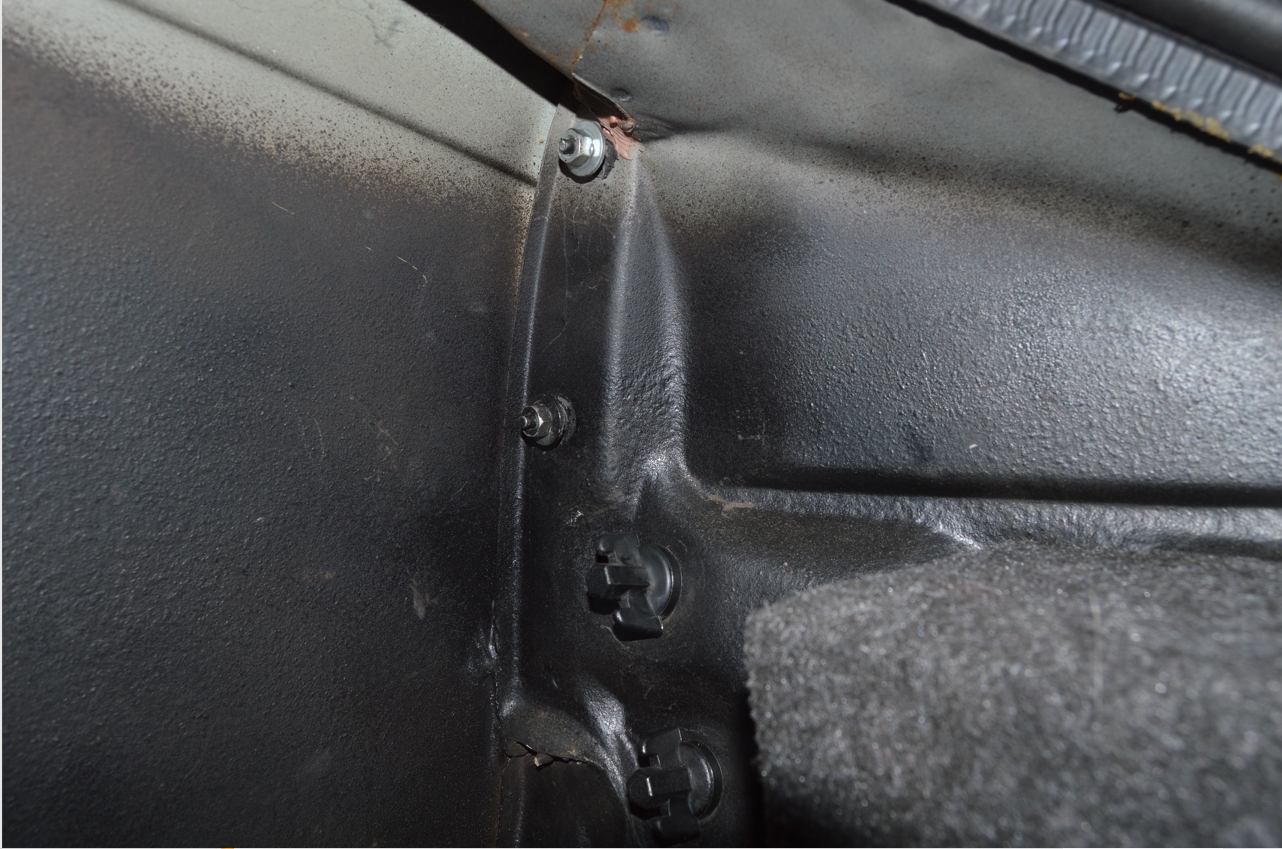
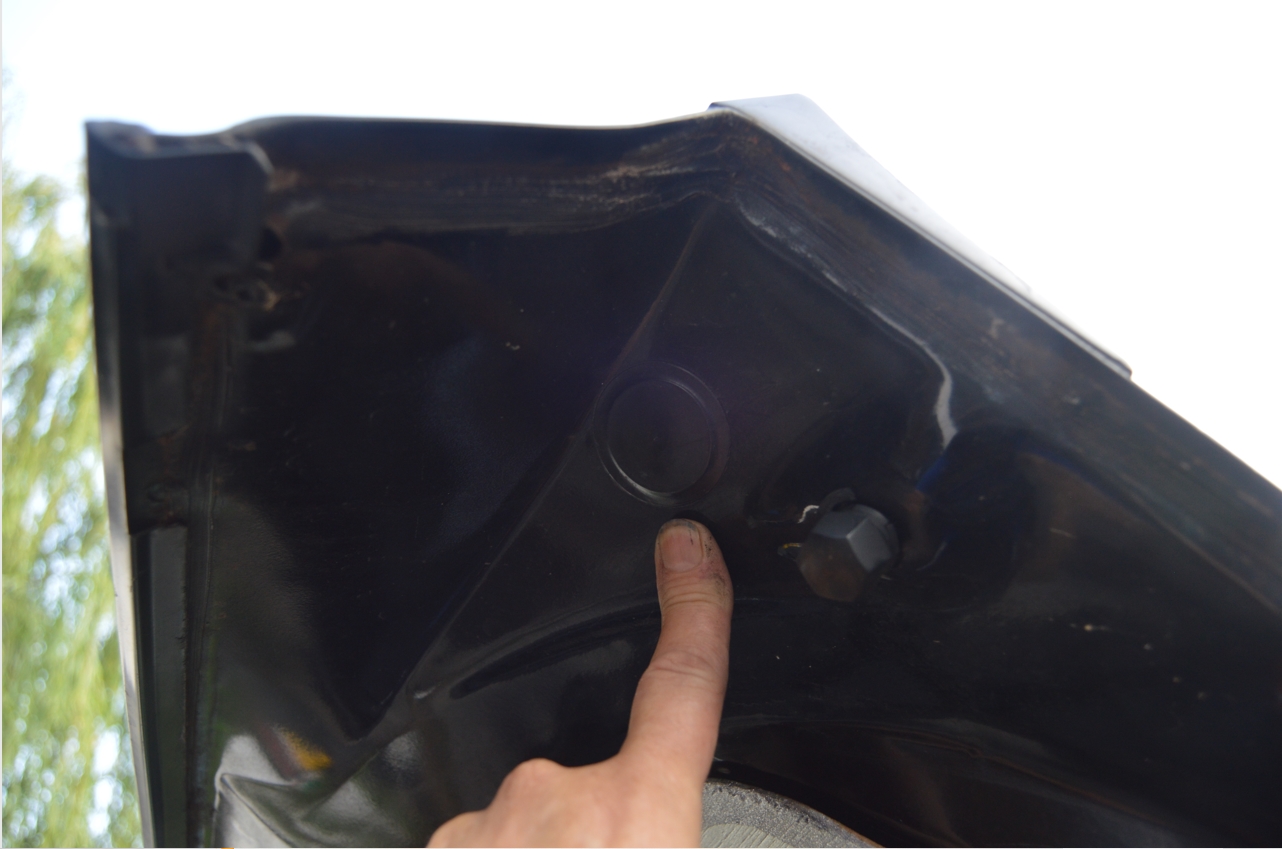
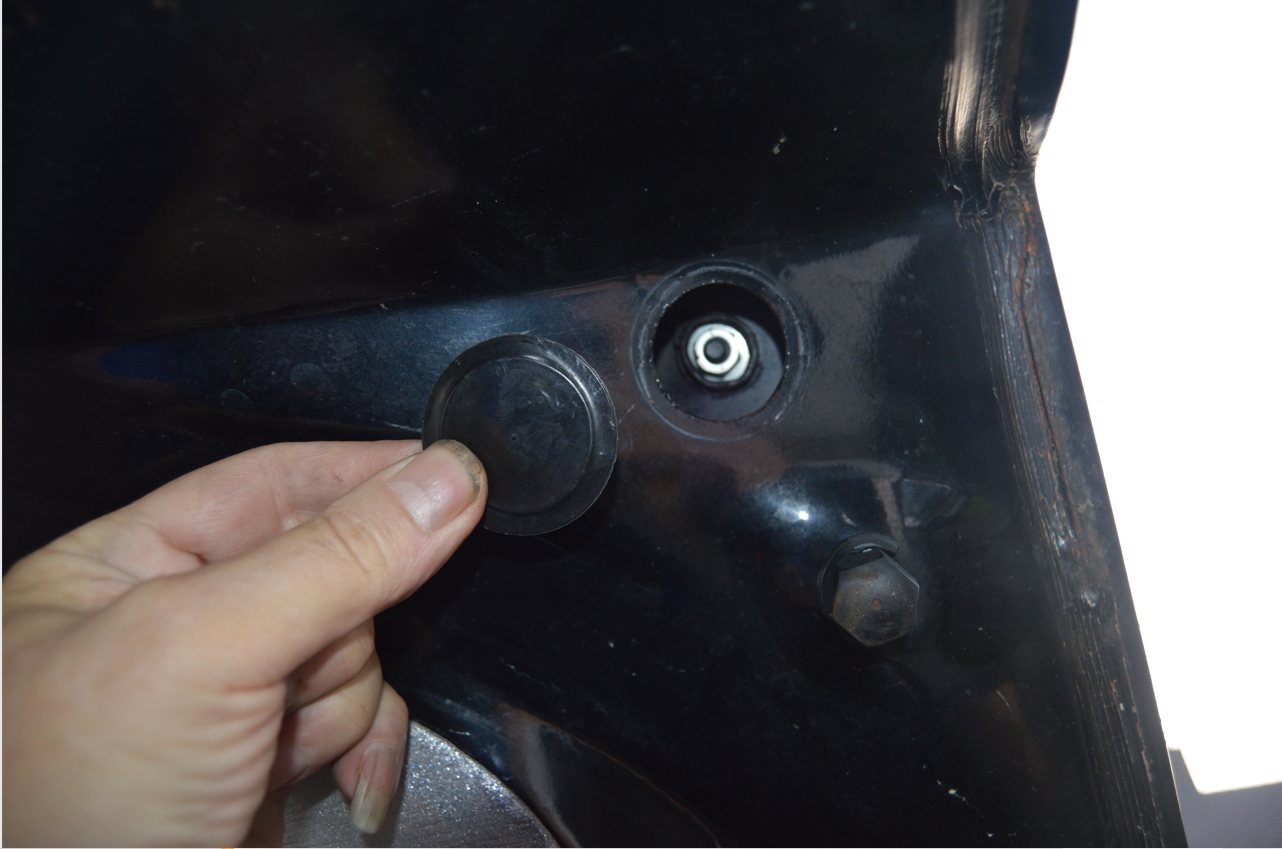
To get the far left and far right ones off, you’ll need to remove the plastic plugs that are on the inside of the trunk lid (and that is why they are there, to be able to remove those nuts).
They’re plastic and 35-something years old, and most likely brittle, so be careful when removing unless you intend on replacing them!
A swivel on your ratchet makes things easier to spin the nuts off.
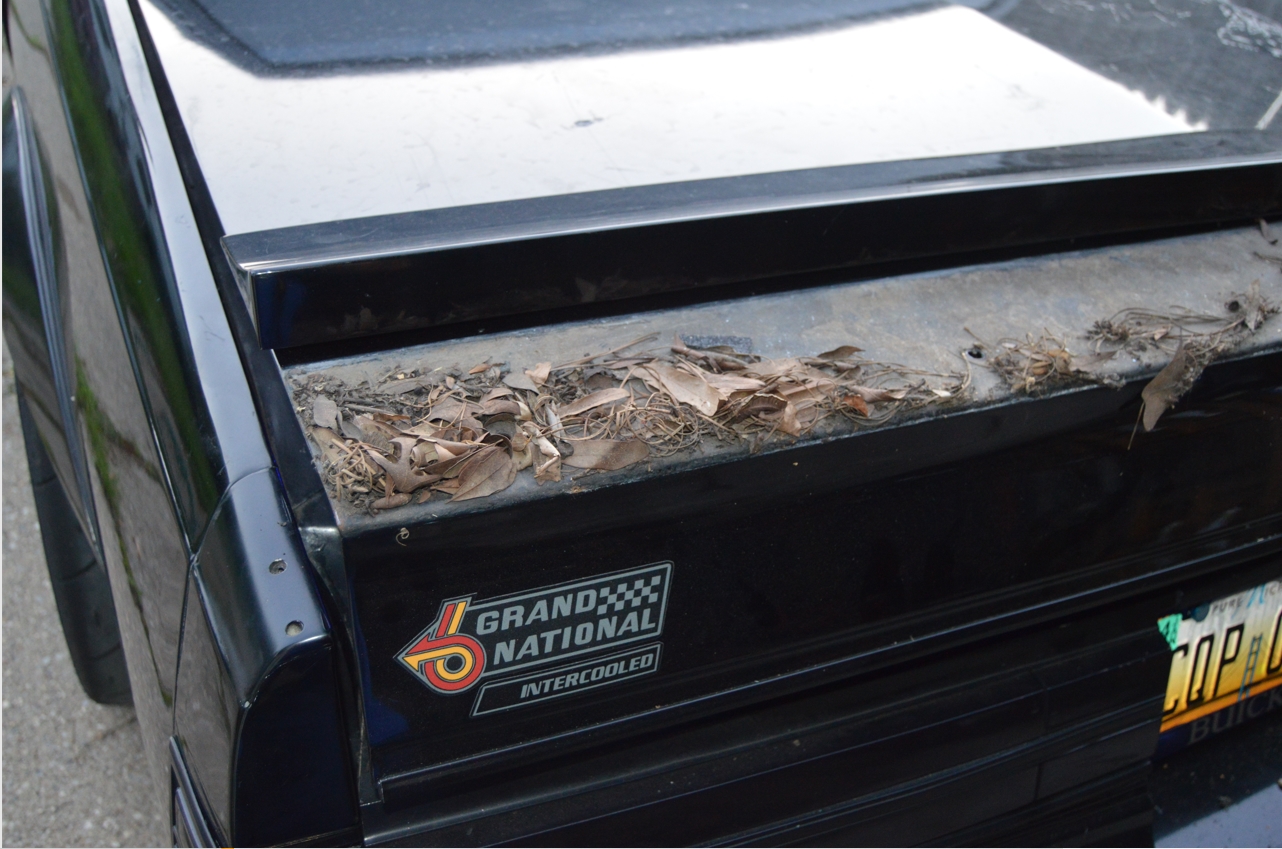
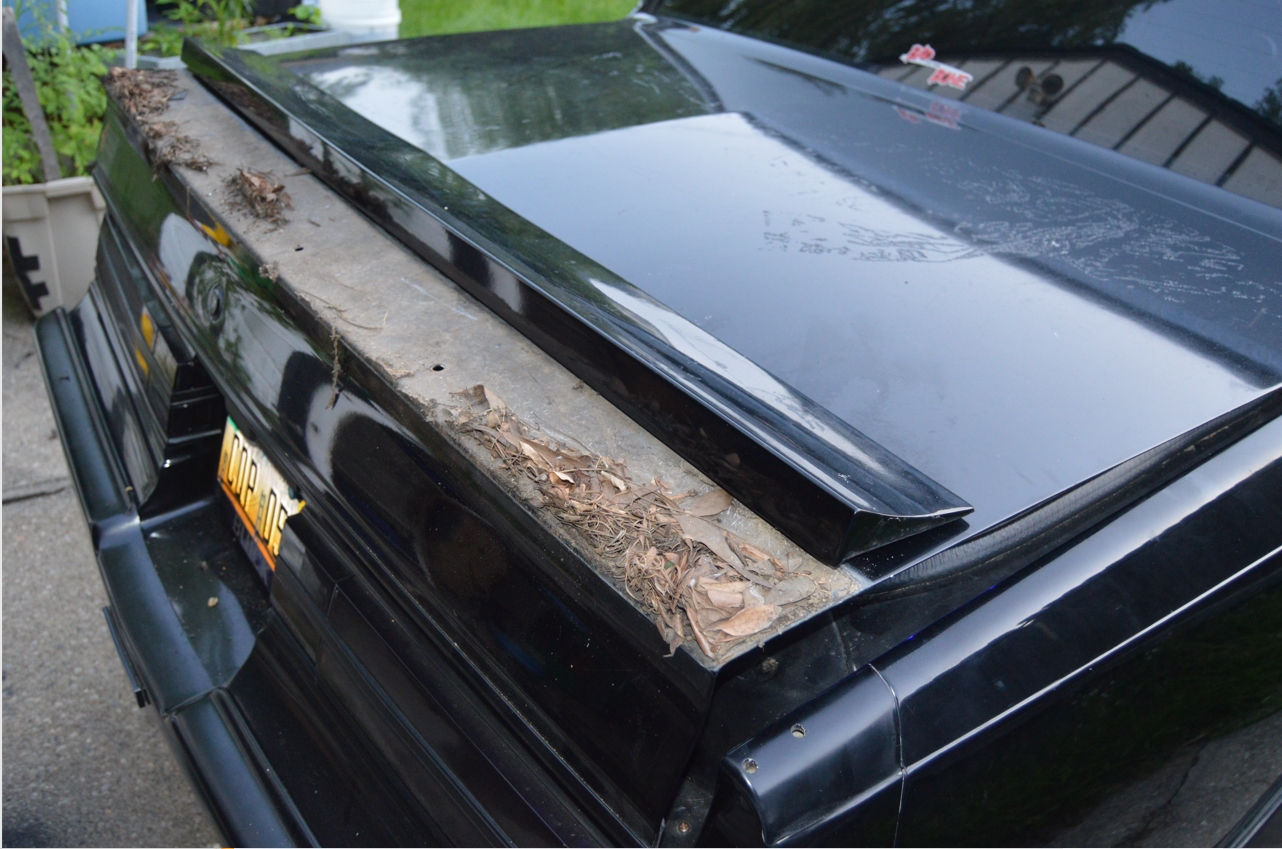
And then likewise, but even more so, the amount of debris under the center section of the stock spoiler is just crazy! But I guess not so unbelievable, as it has been collecting stuff for over 35 years!
Make sure you do a good job cleaning up this entire area before you put the new rear wing on.
(and you won’t have to worry about anything getting under the new one, as it has a completely flat bottom, unlike the OEM spoiler with a huge gap on the underside)
[but you’ll need to really tighten it down good, as the curve across the stock trunk lid is a bit more than the curve on the new rear wing, so snugging it down a lot will mostly seal up any gaps that exist]
[goo gone worked nicely to get rid of the icky parts left on the trunk lid, followed by a quick wash job]
.
.
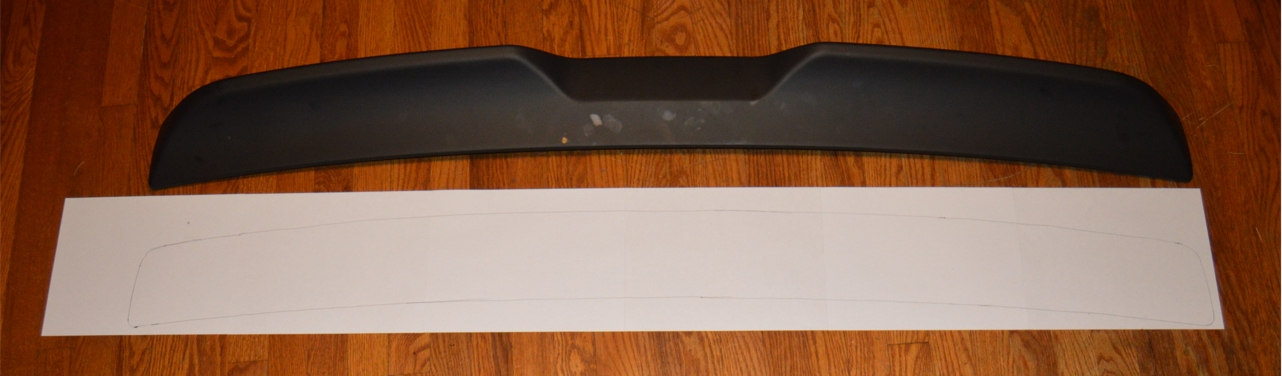
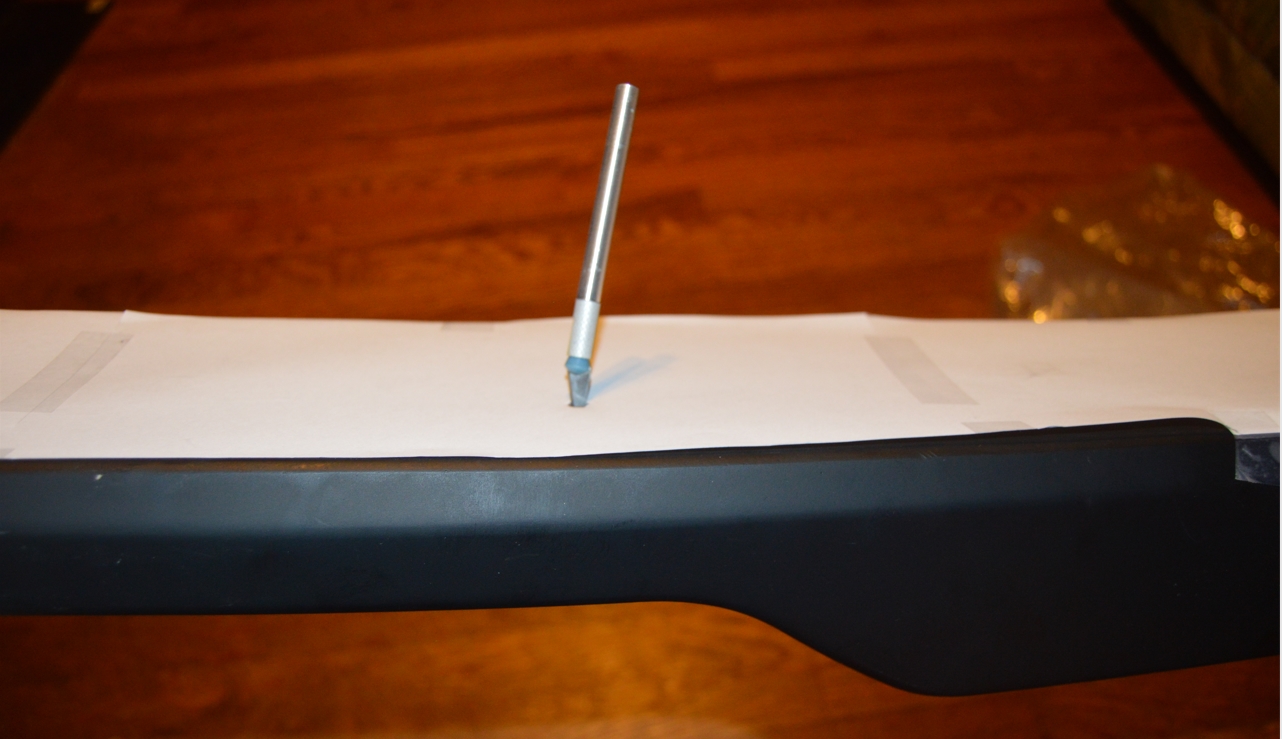
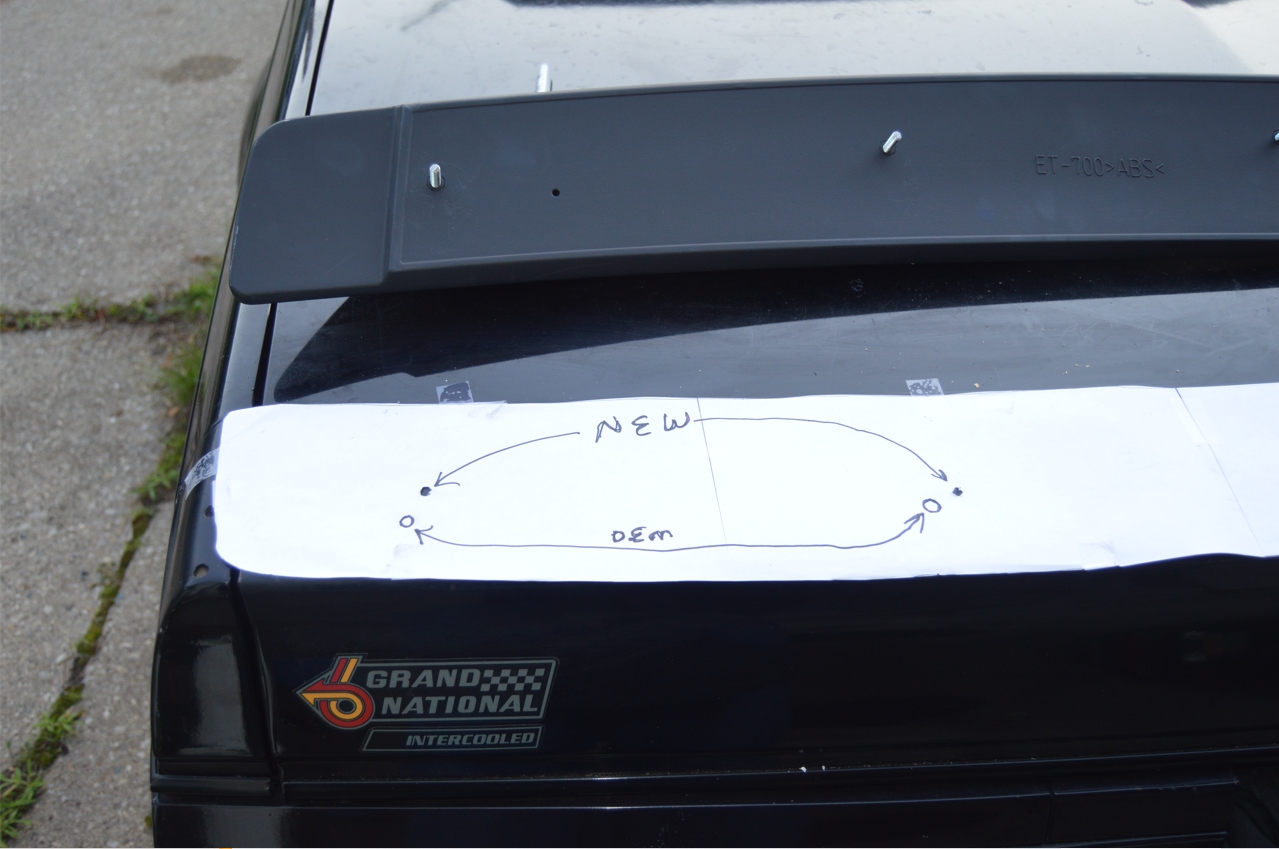
2. take the 6 sheets of paper and tape them all together (using the 11″ sides so you end up having a sheet that is 66″ long).
place the spoiler on top of the paper & trace out the shape of the spoiler onto it.
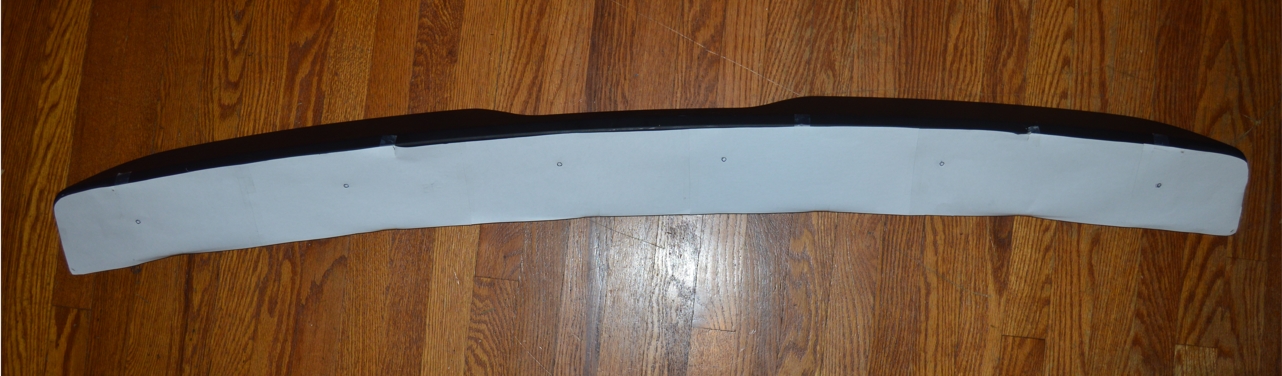
Cut it out. Then tape the paper to the bottom of the spoiler.
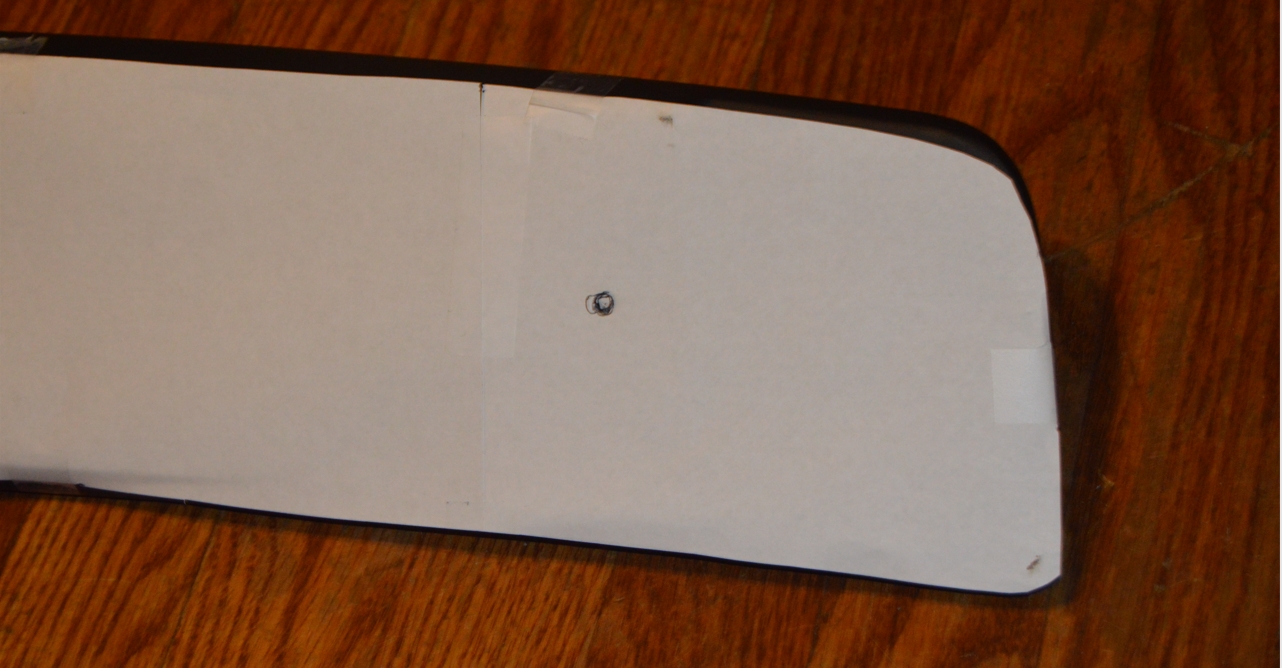
3. you’re now going to cut out the 6 holes the spoiler needs. (we used an exacto knife)
MAKE SURE they are accurate, as you will use this template to drill the holes in your trunk lid!
.


.
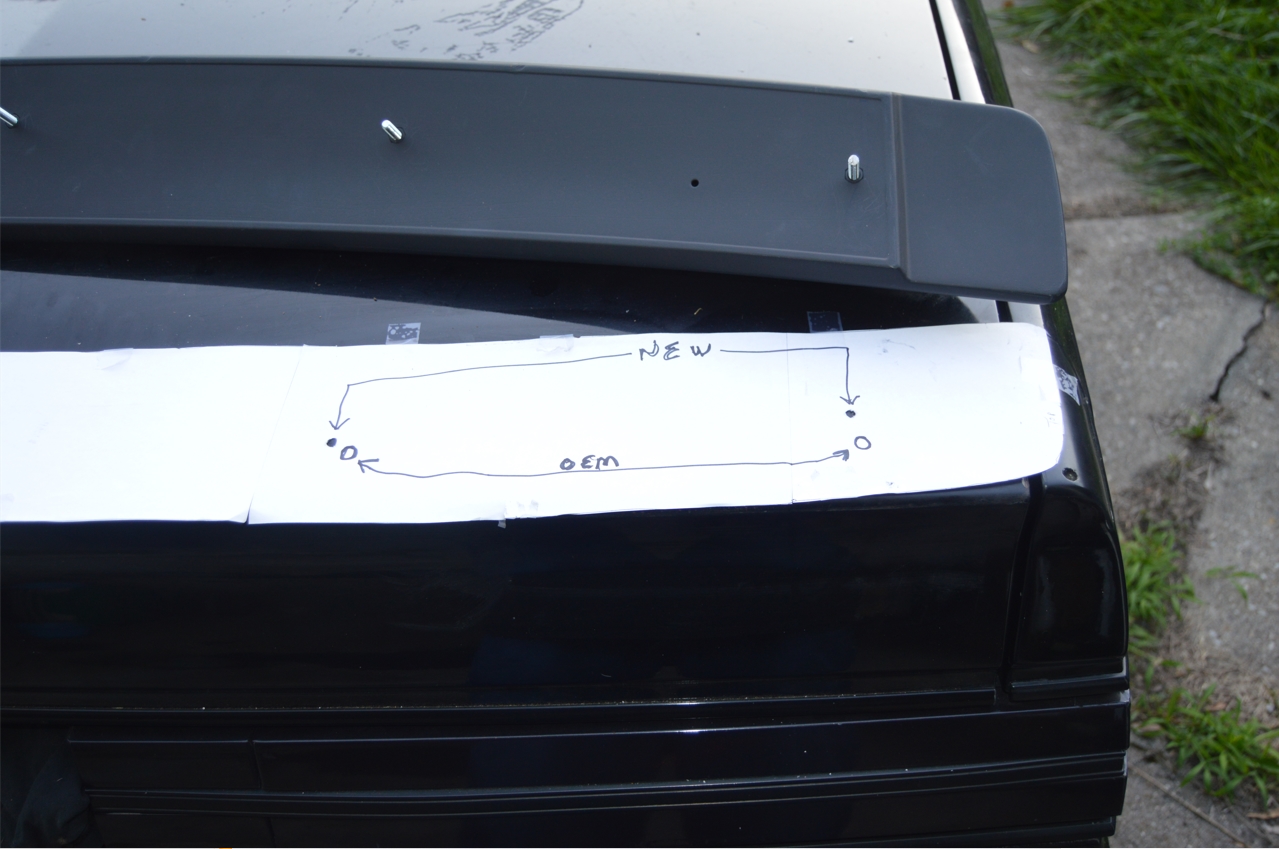
4. we placed the new rear wing (with the template still attached to bottom) onto the trunk lid just to see how it would look, along with getting an idea of where we wanted to position it. then took it off the trunk.
remove the paper template from the spoiler & place it on your trunk lid.
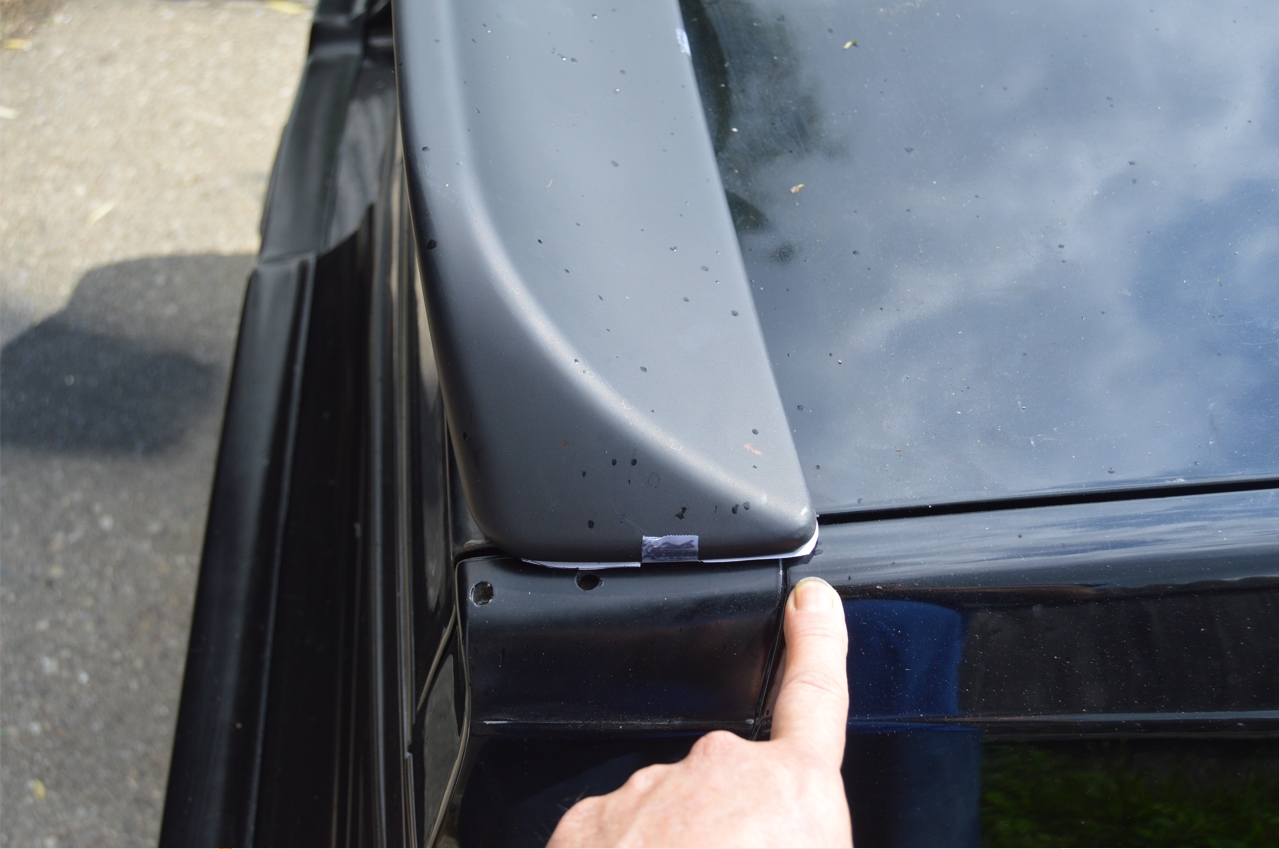
position it correctly! make sure the ends are spaced properly & evenly from side to side, as well as front to back.
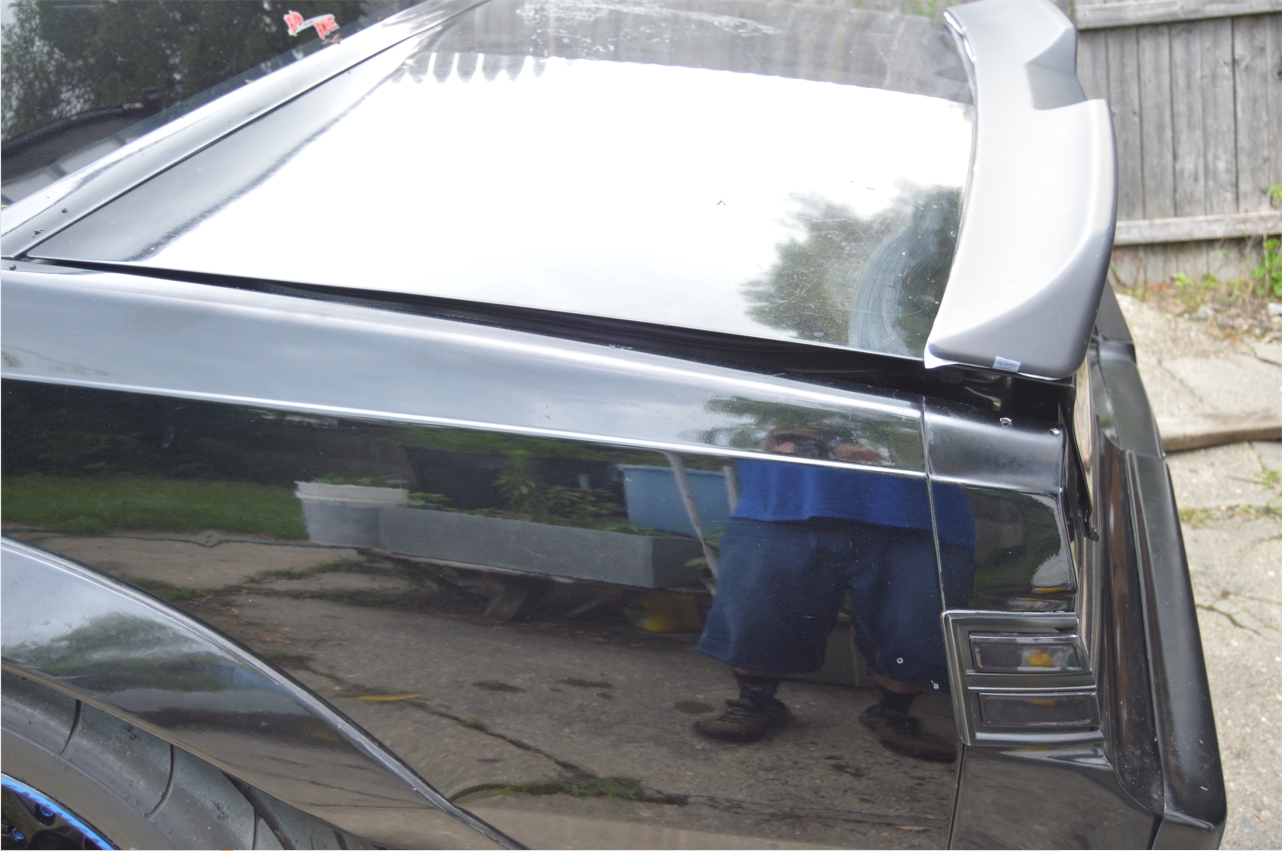
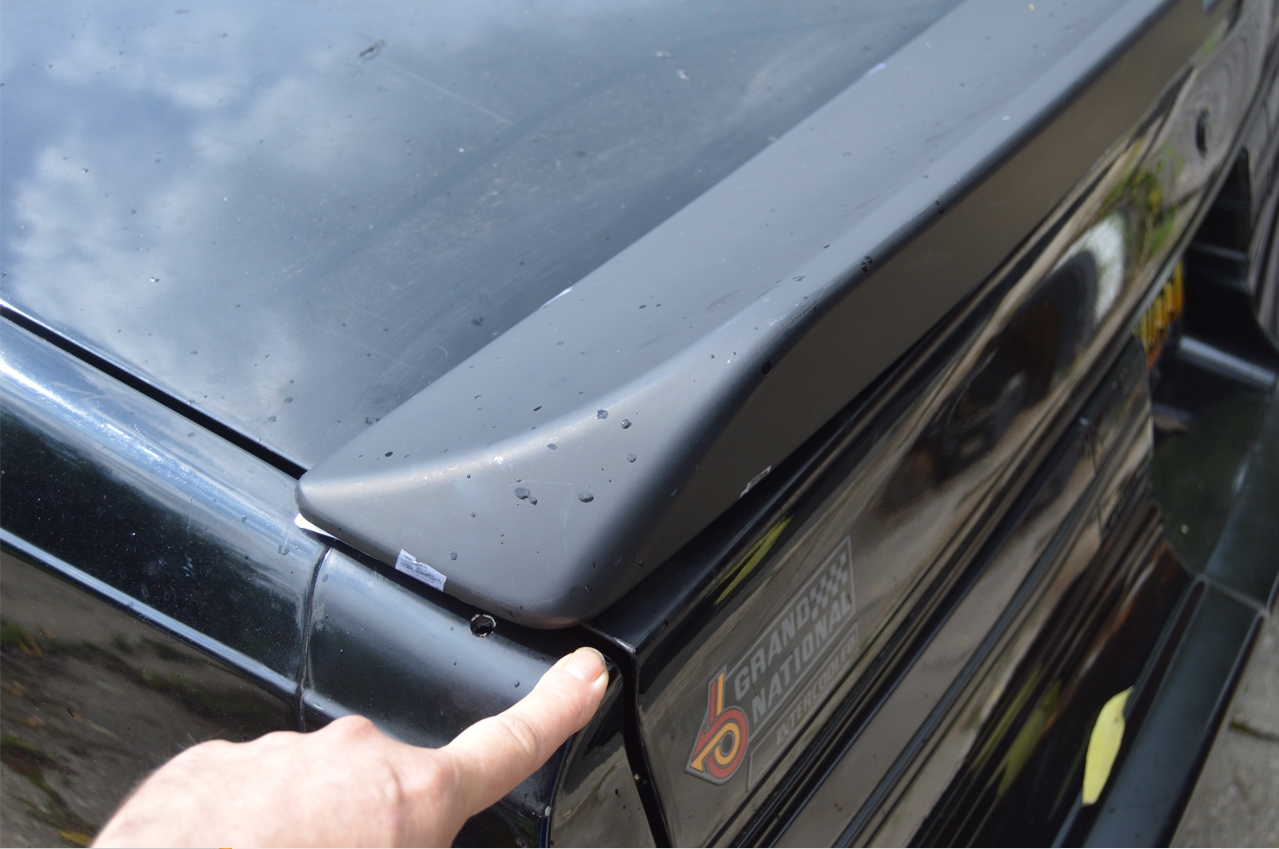
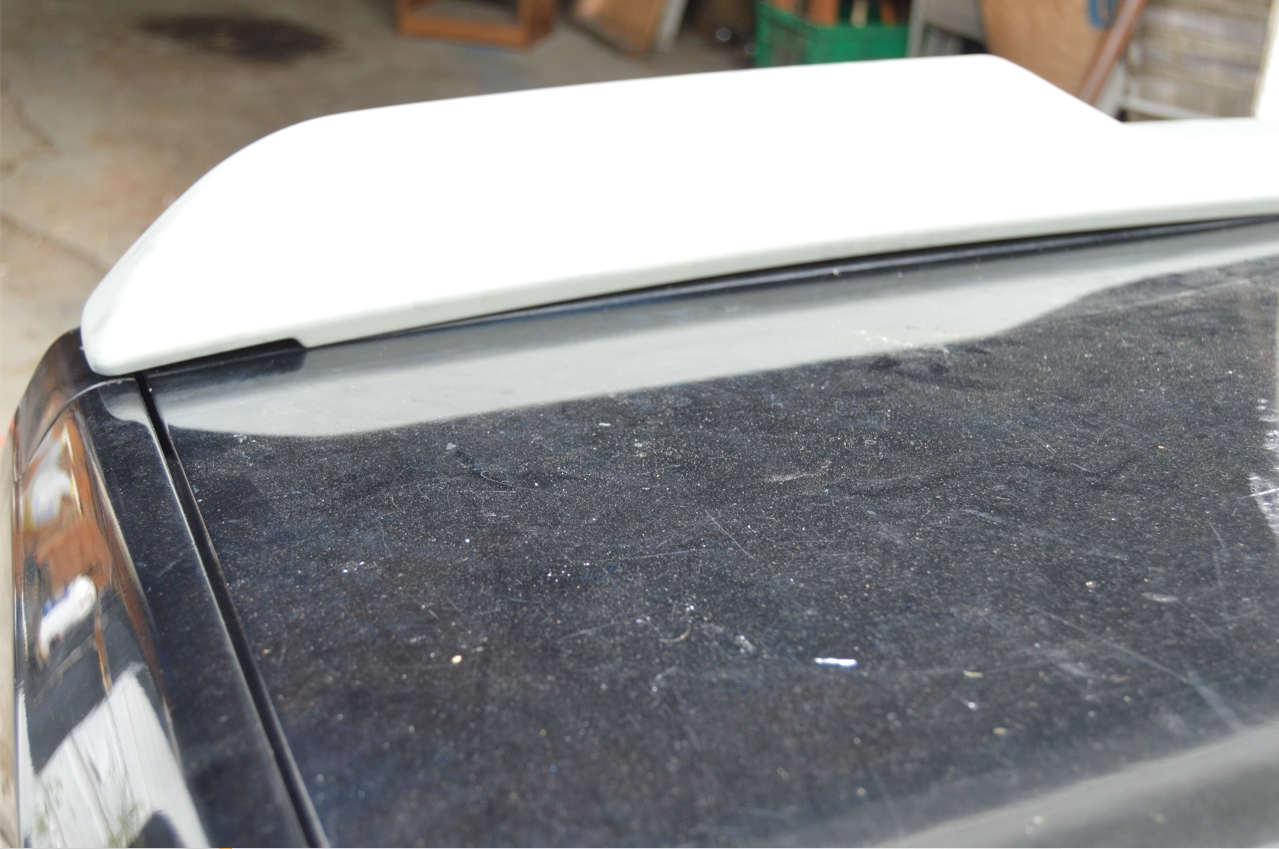
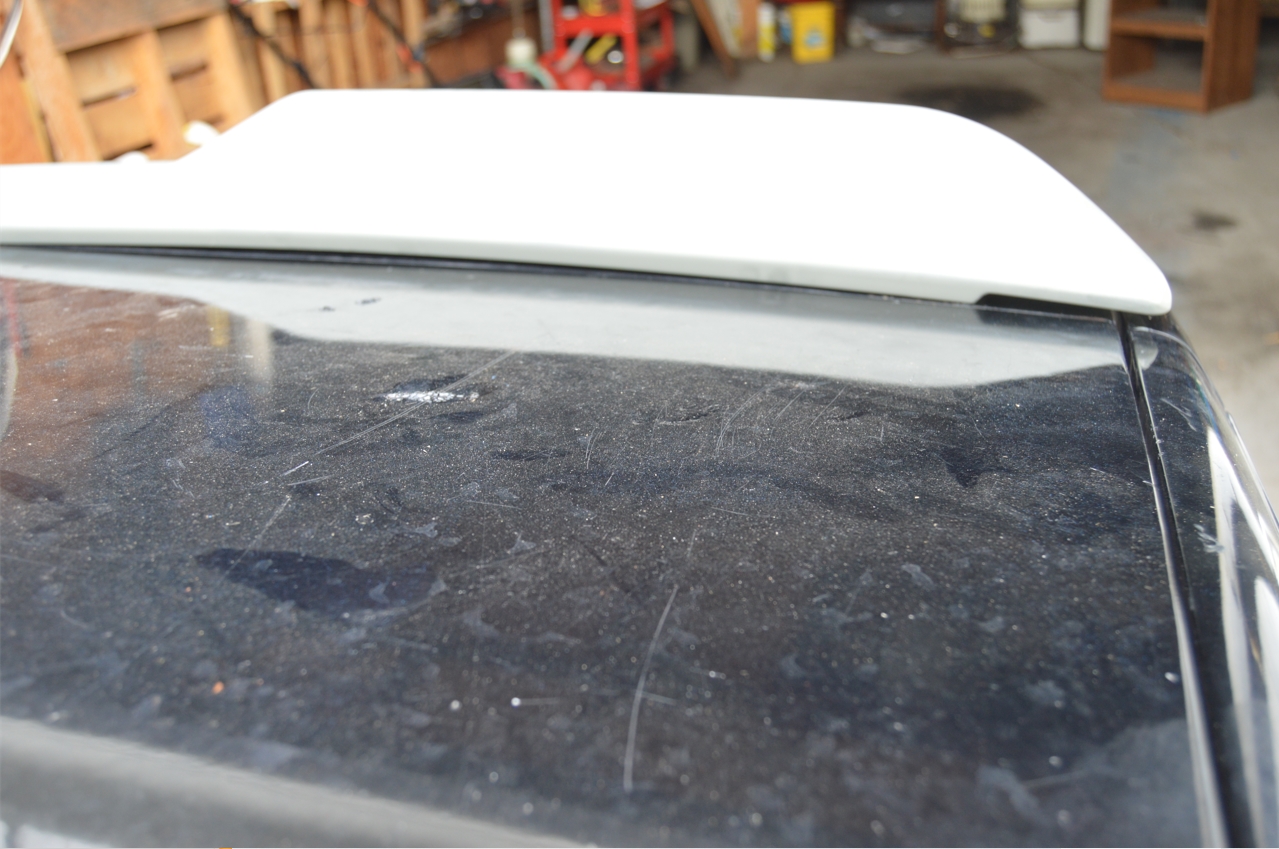
[the new spoiler ends sit just about where the body line (curve) is, which then drops down on the sides of the Buick Regal, shaping the curves out (mostly) properly looking]
.


.
THERE’S A CHOICE when laying this new rear wing out.
The wing is much more curved than it’s stock counterpart.
There’s 2 different options for placement.
[realize the back bottom side of the wing is beveled. the paper template does NOT include (sitting on) the beveled part, so when you read the dimensions below, this is only including where the template sits, not the actual rear of the wing]
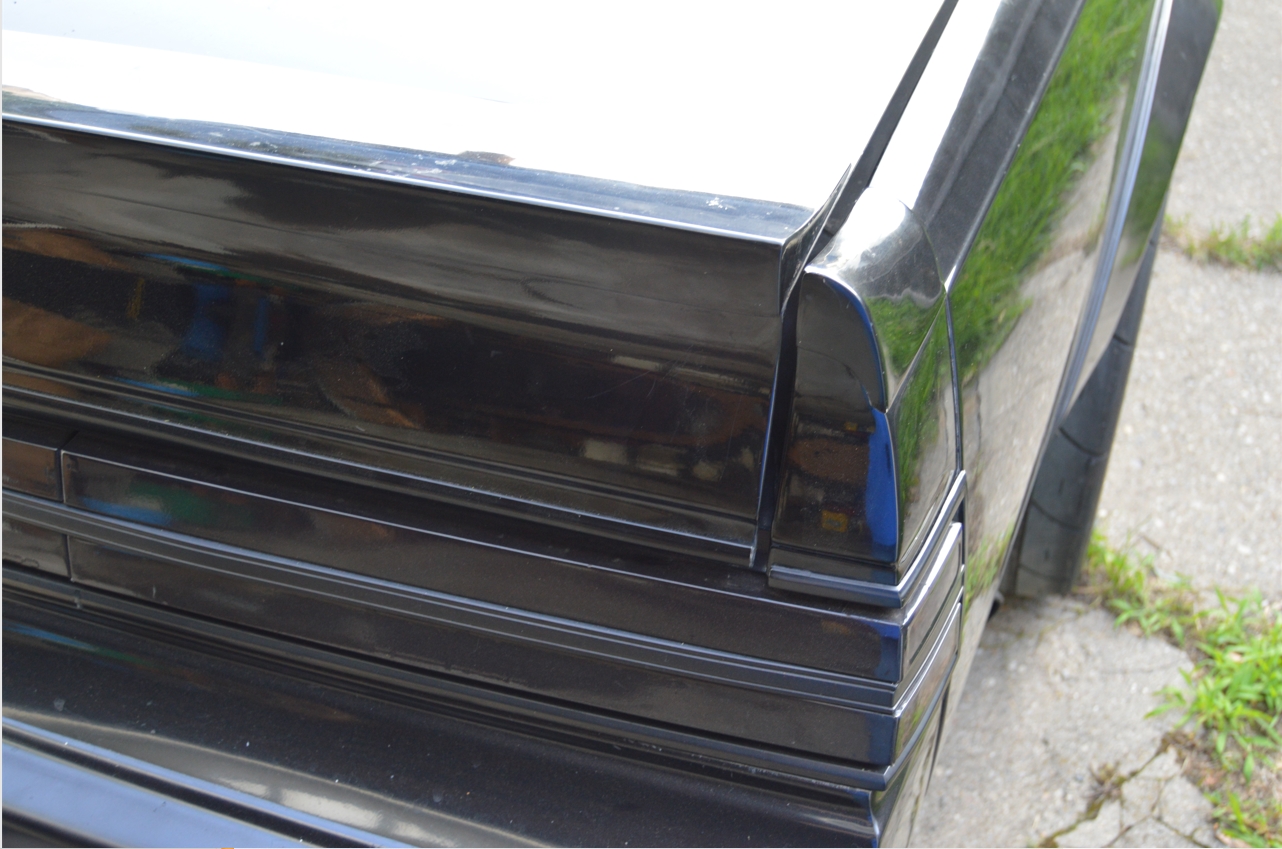
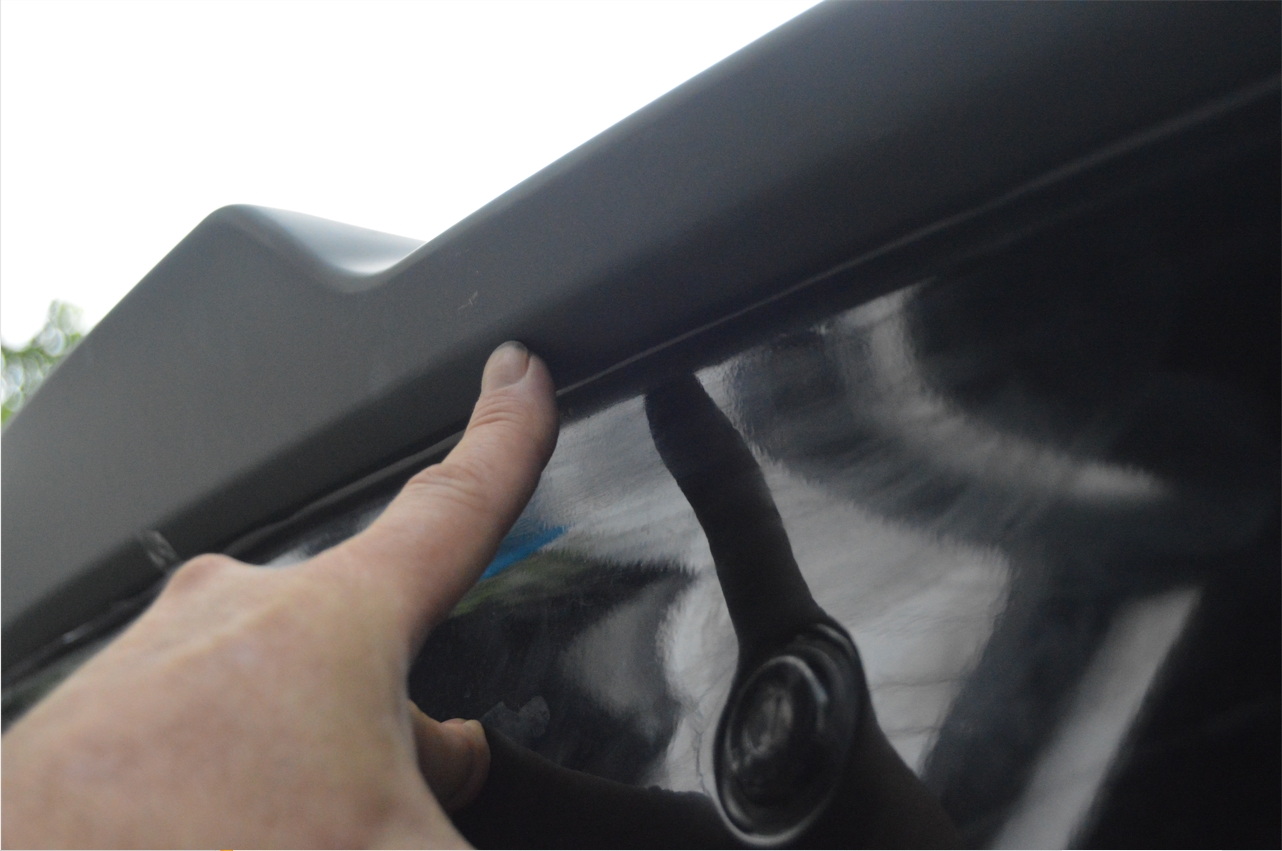
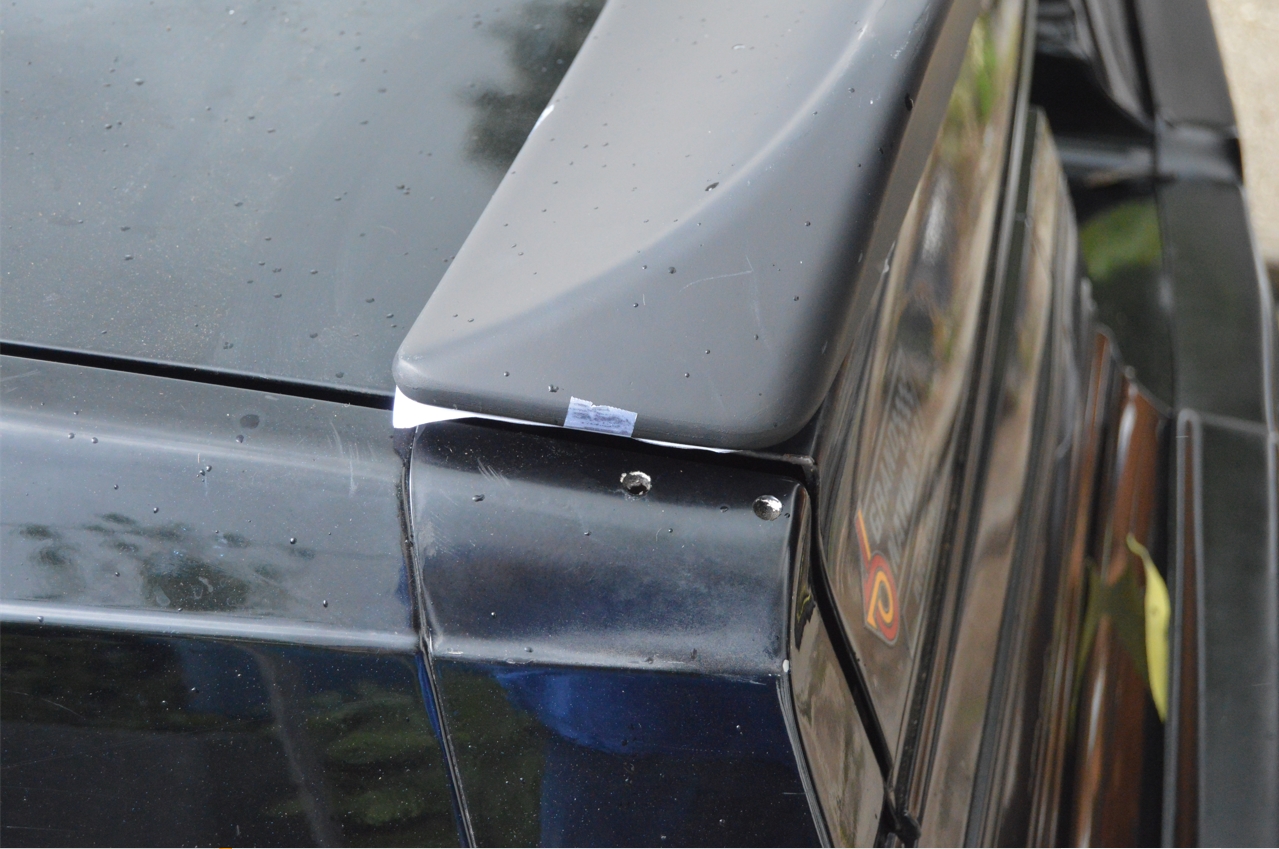
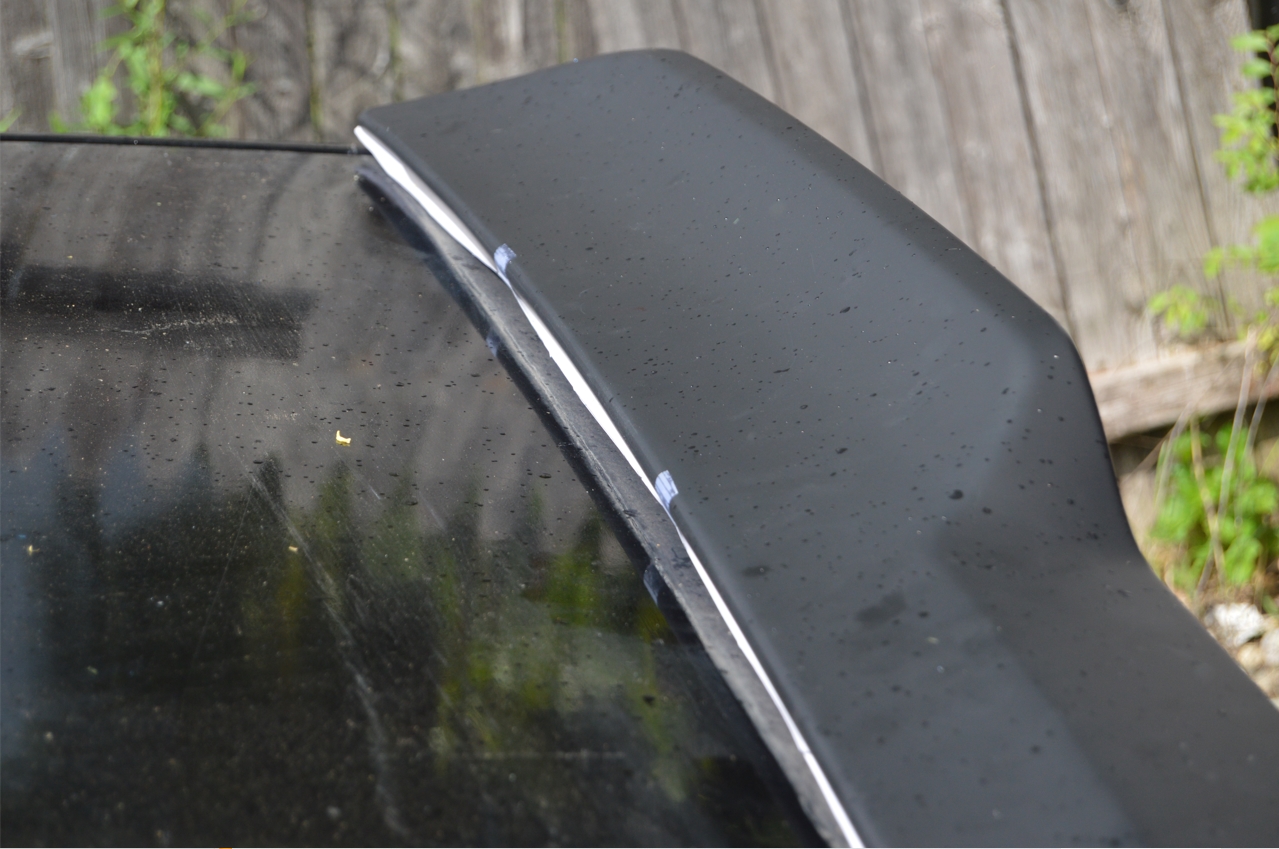
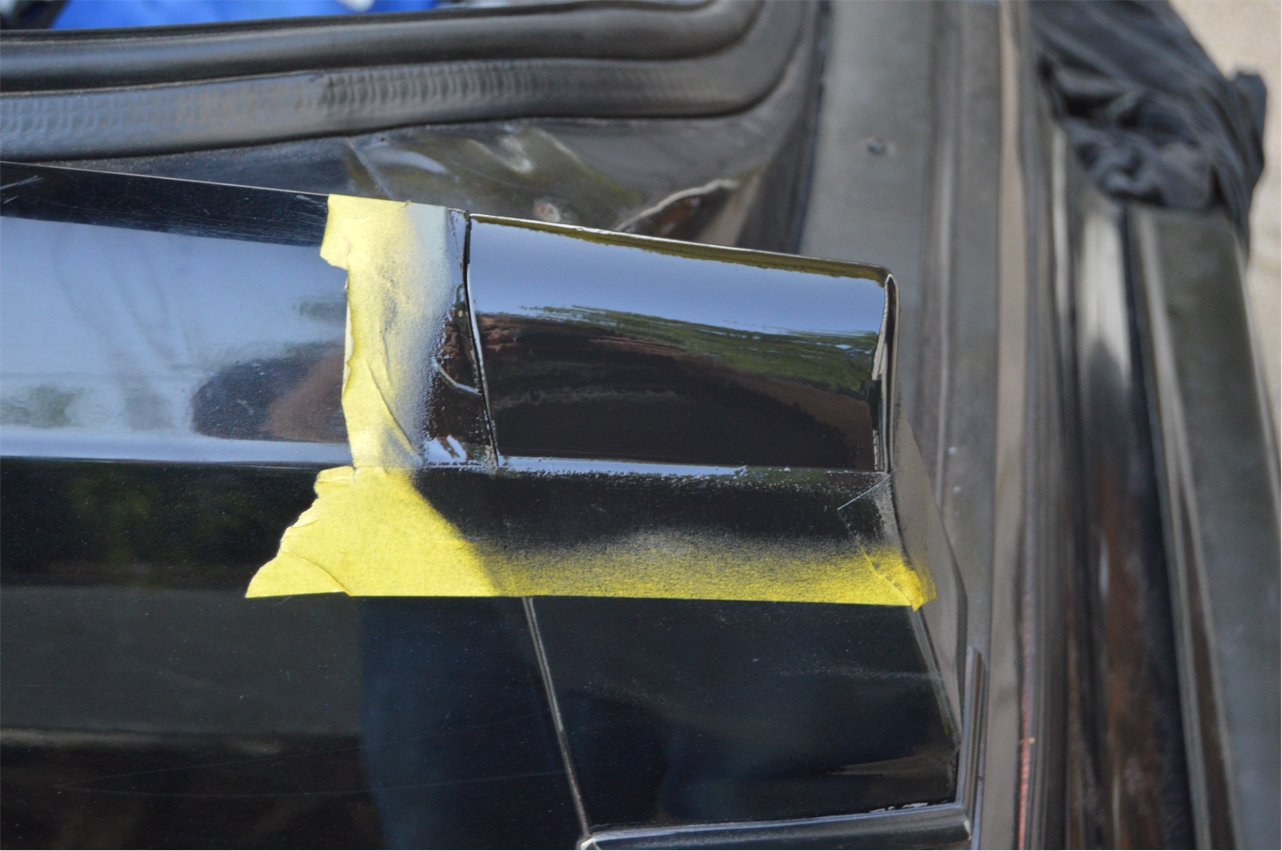
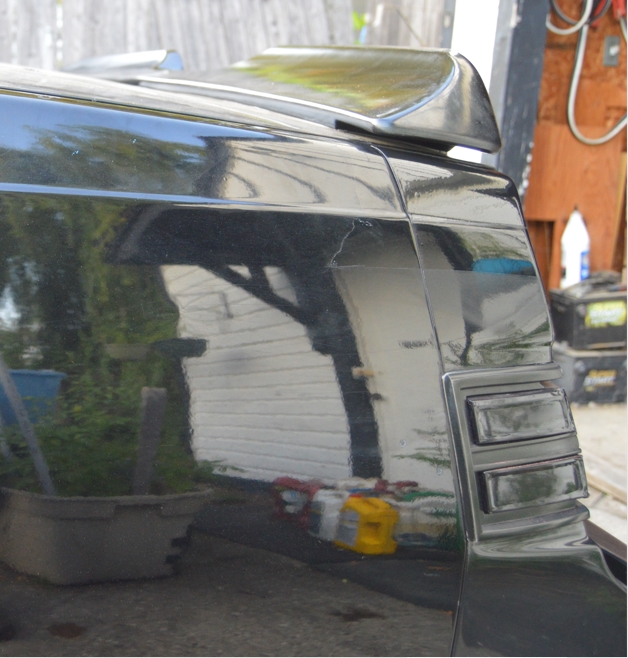
A. line up the outside edges (on the rear side of the spoiler) to the trunk lid edge (see pic).
Doing so means that the center portion of the spoiler will hang off the back of the trunk lid (on the template, by about 3/8″).
[but because of the bevel, actual hang off measurement from trunk lid to outside edge of wing is about 3/4″]
The front edge of the wing, sits right in line with where the quarter panel extensions fit onto the body.
[which makes the front edge of the wing sit almost in the same spot as the front edge of the factory spoiler did]
[and since the new wing is deeper than the OEM version, the difference hangs off the rear side]
[doing it this way also means the bolts that hold the spoiler down will be further rearward than option B, not that it’s a bad thing, just worth mentioning]
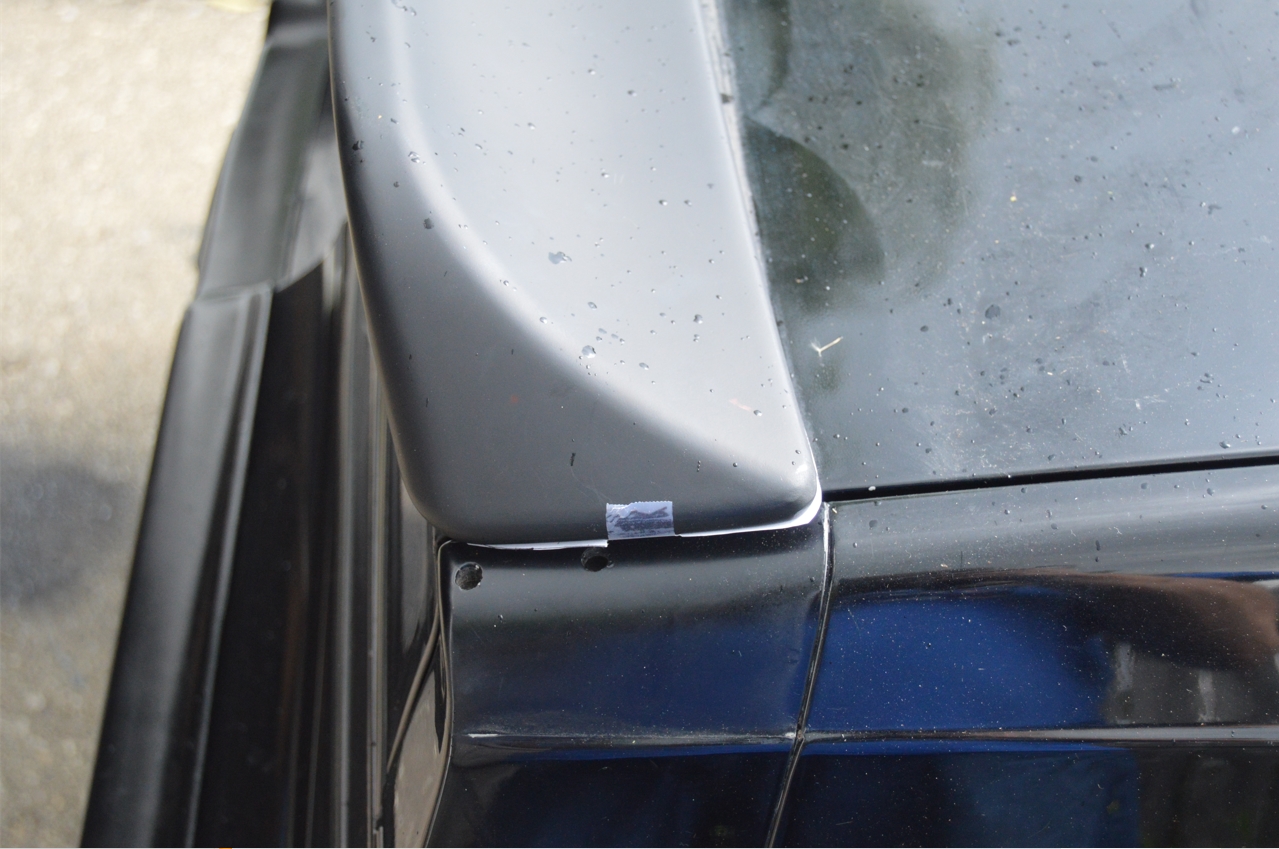
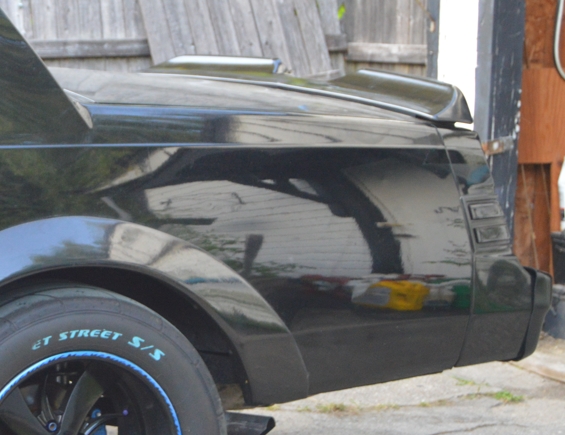
B. line up the center portion (about 2′ in the very middle) of the rear wing to the trunk lid edge.
Doing so means that most of the wing will be in line with the trunk edge.
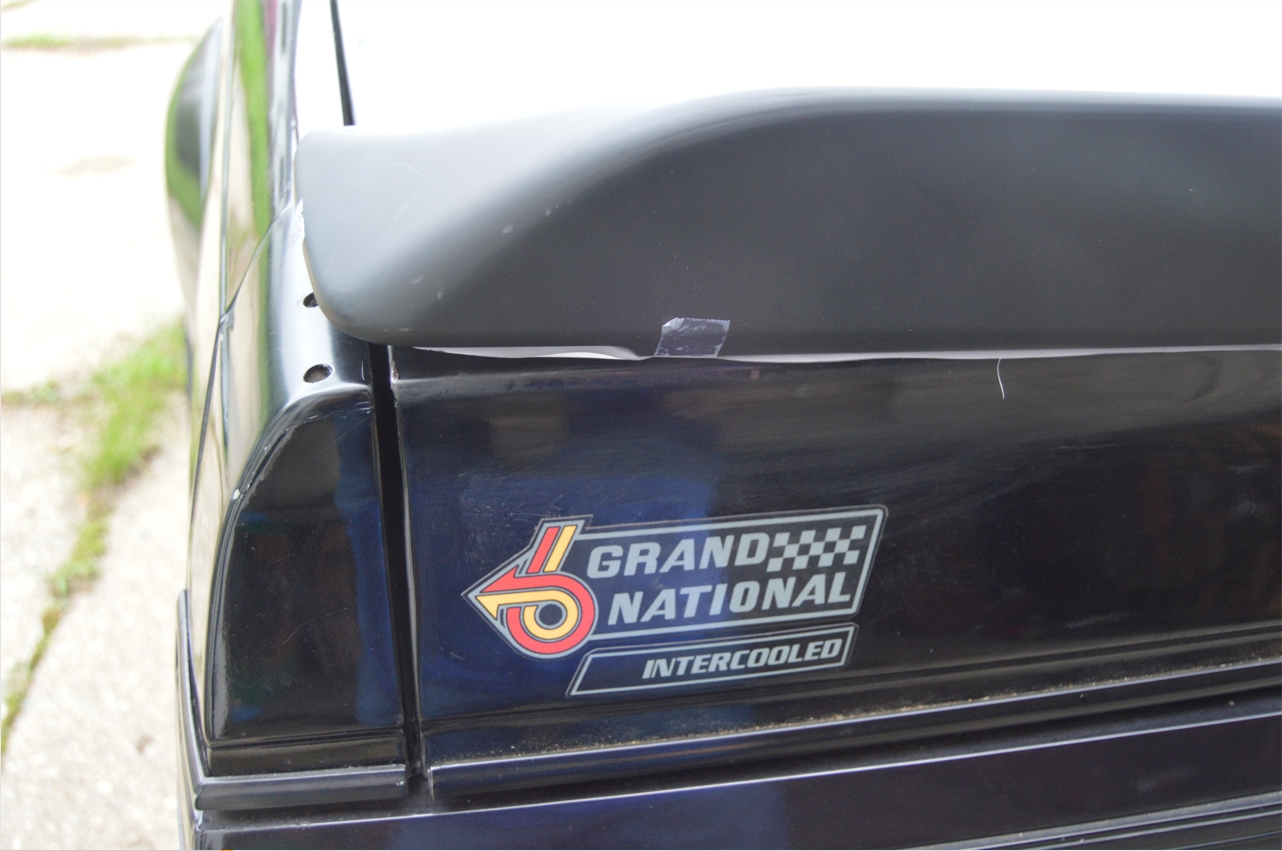
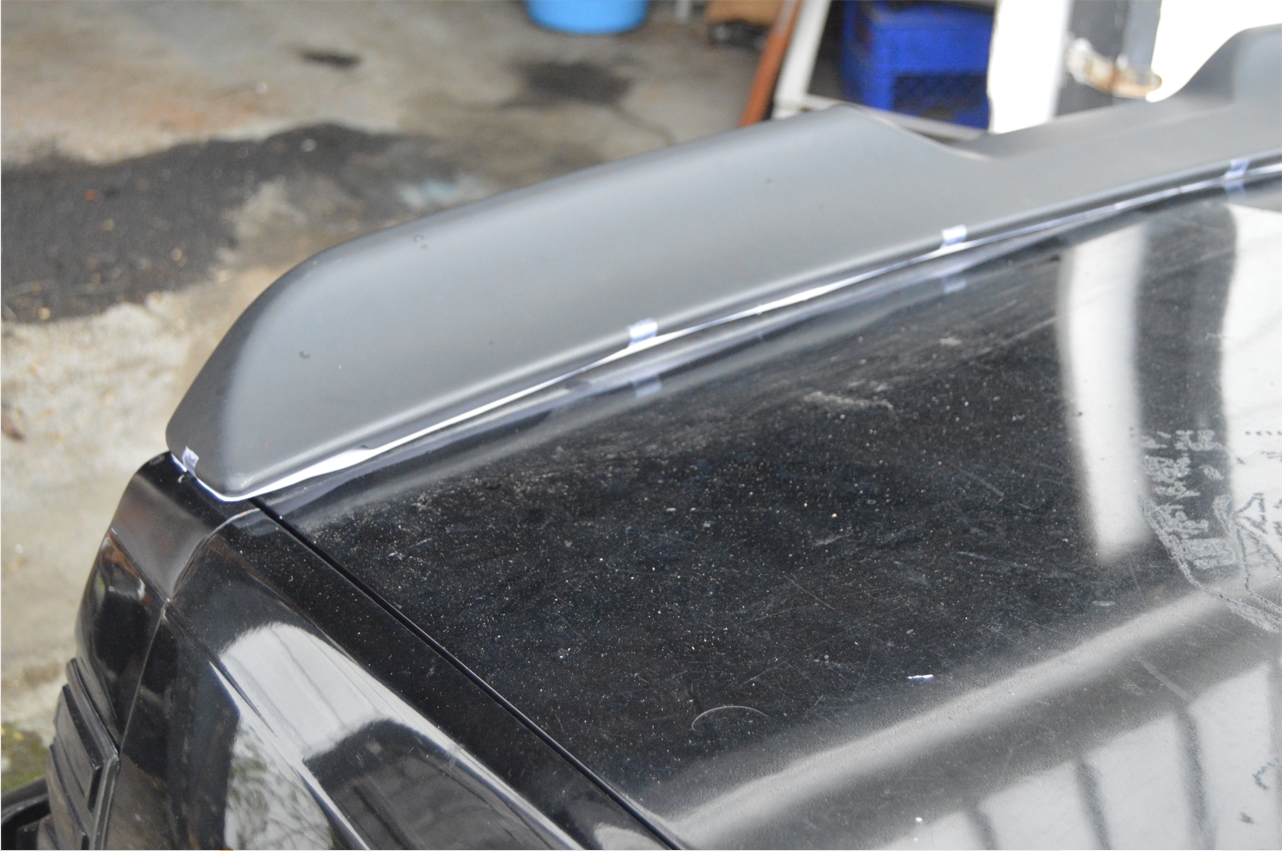
However, the (far left and far right) sides will be pushed forward about 3/8″ (leaving a visual gap on the trunk – see pics).
And the front edge of the wing, sits about 3/8″ forward of the quarter panel extension mounting point.
Either choice is fine, the decision is yours.
[we choose option A]
.
.
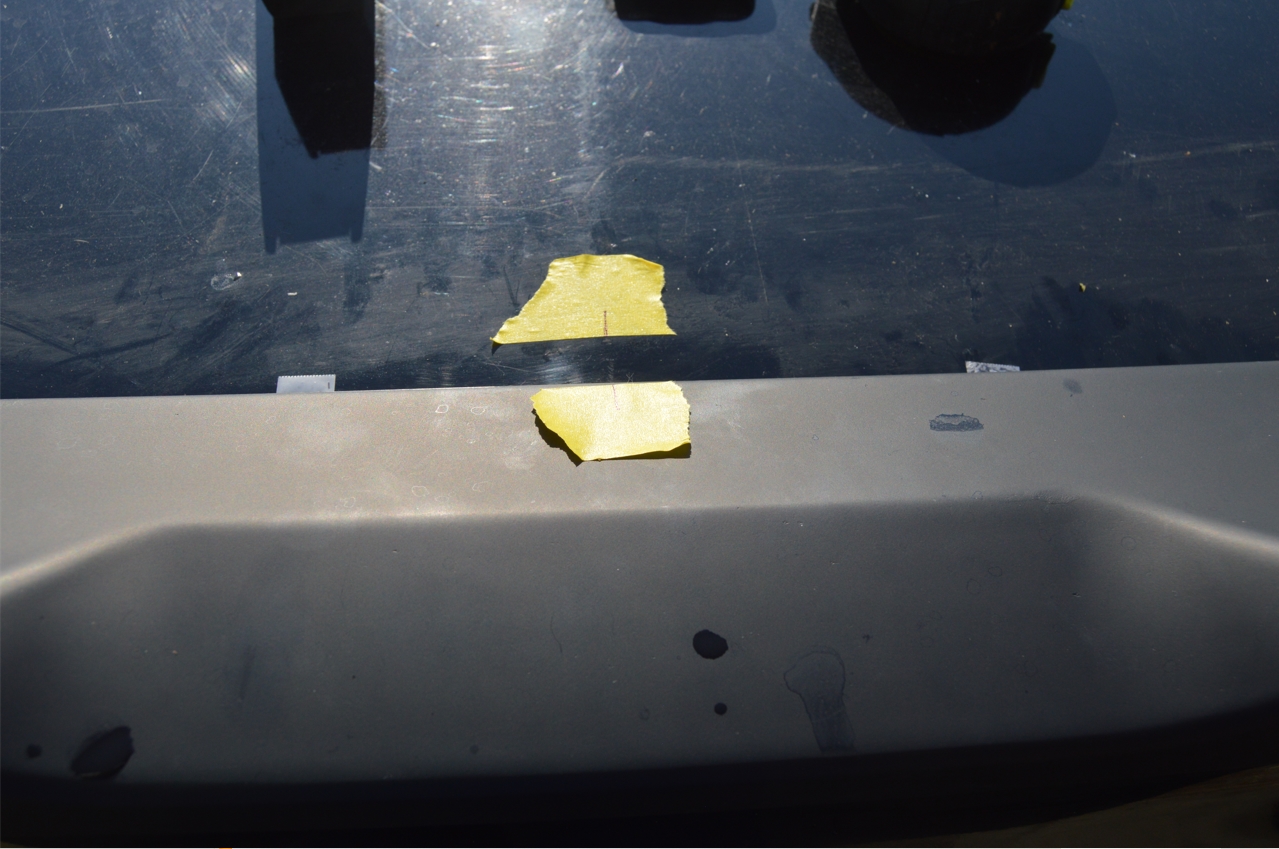
5. once you have it in the needed position, tape the template onto the trunk lid.
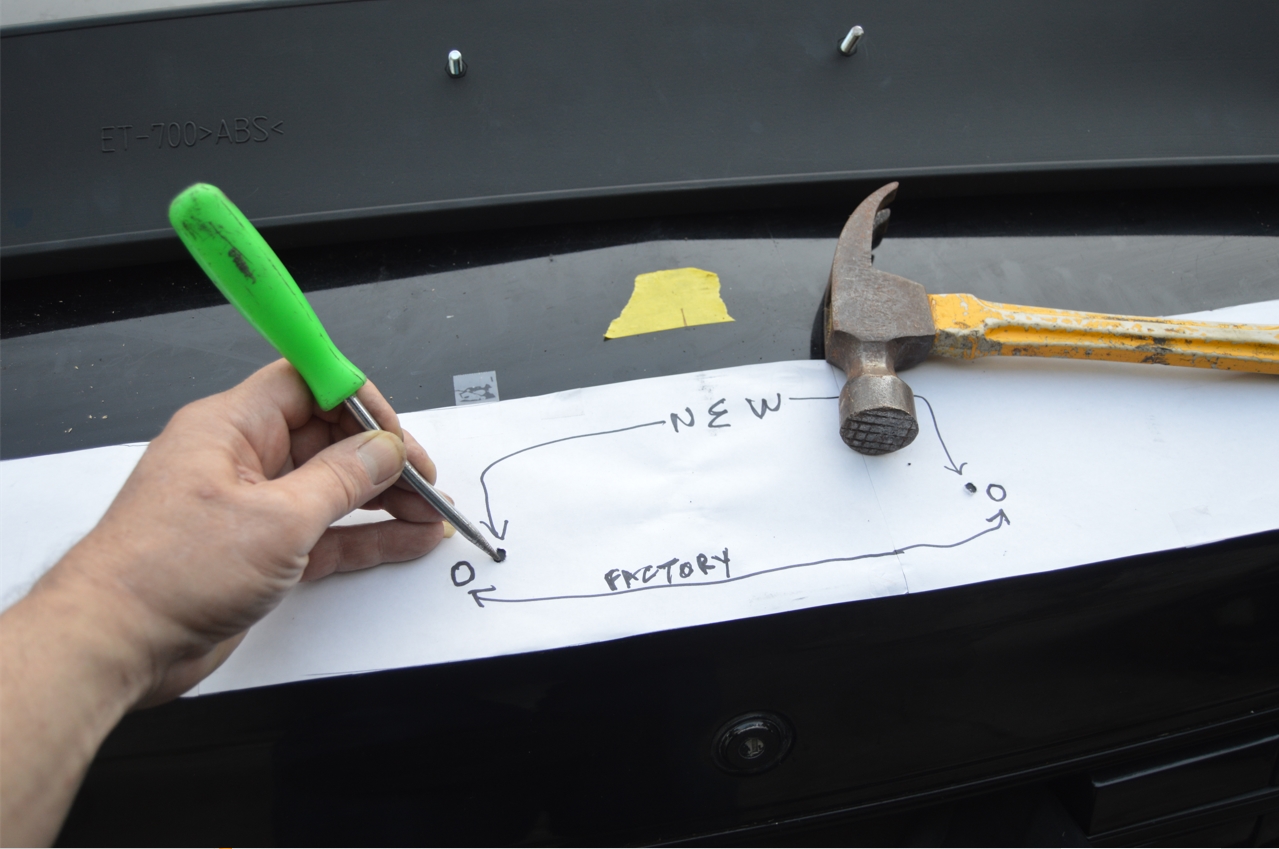
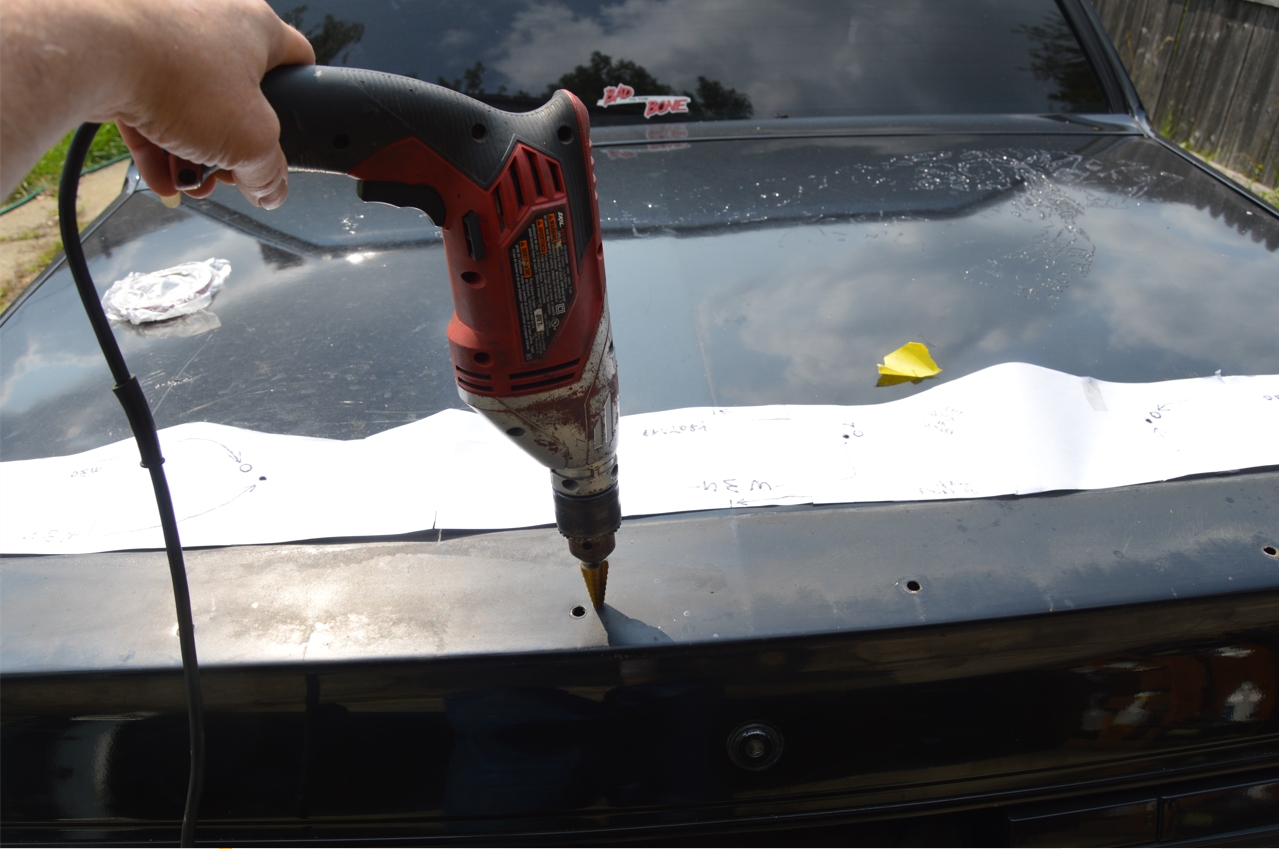
6. proceed to drill the 6 new holes, per the template.
(use a punch to make a small starter indent, so the drill bit doesn’t slide around)
(use the 1/4″ bit on the top side of the trunk lid, or a step drill like we did, which does a nice job of deburring the holes for you at the same time)
(MAKE SURE you’re not hitting anything important on the underside of the trunk lid)
(if you don’t need to, don’t drill too far down, you may not need to go thru the support frame)
.

.
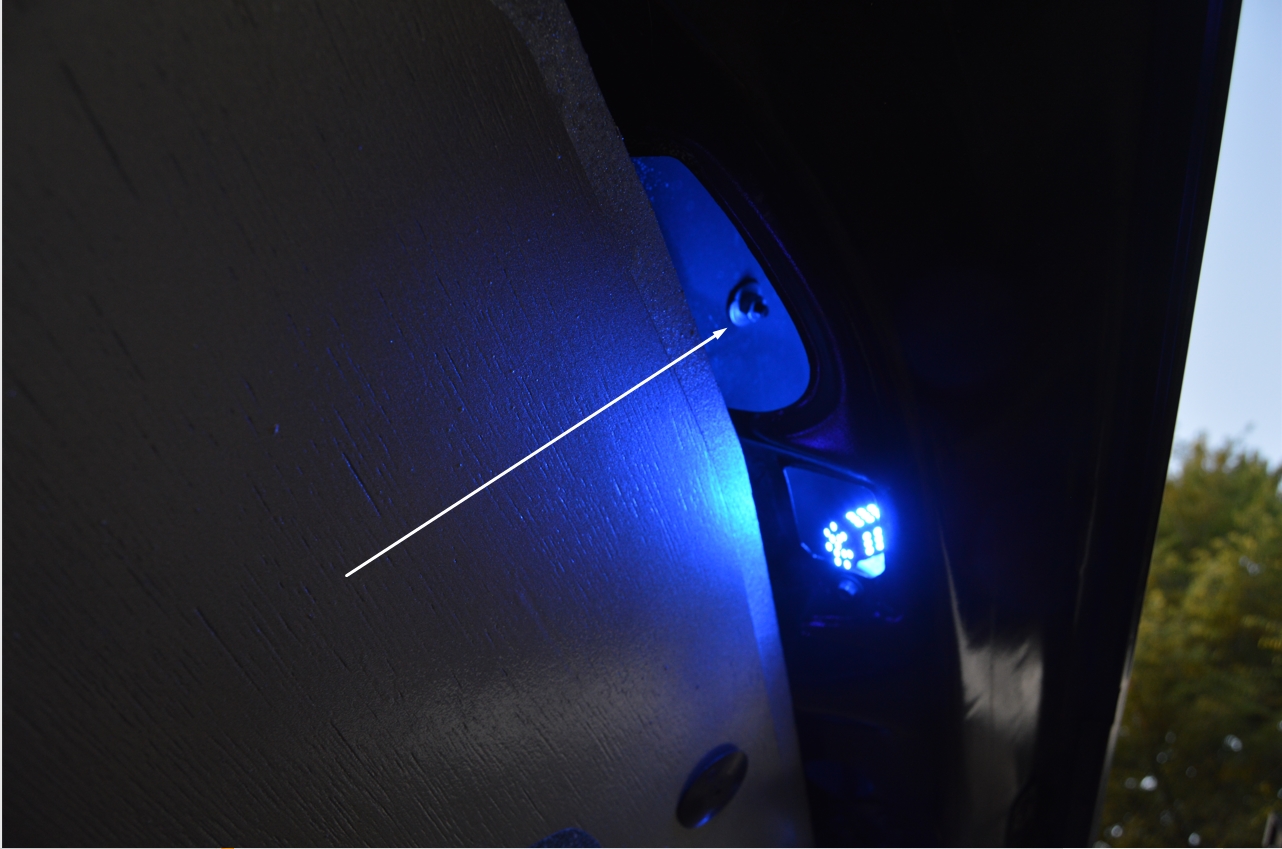
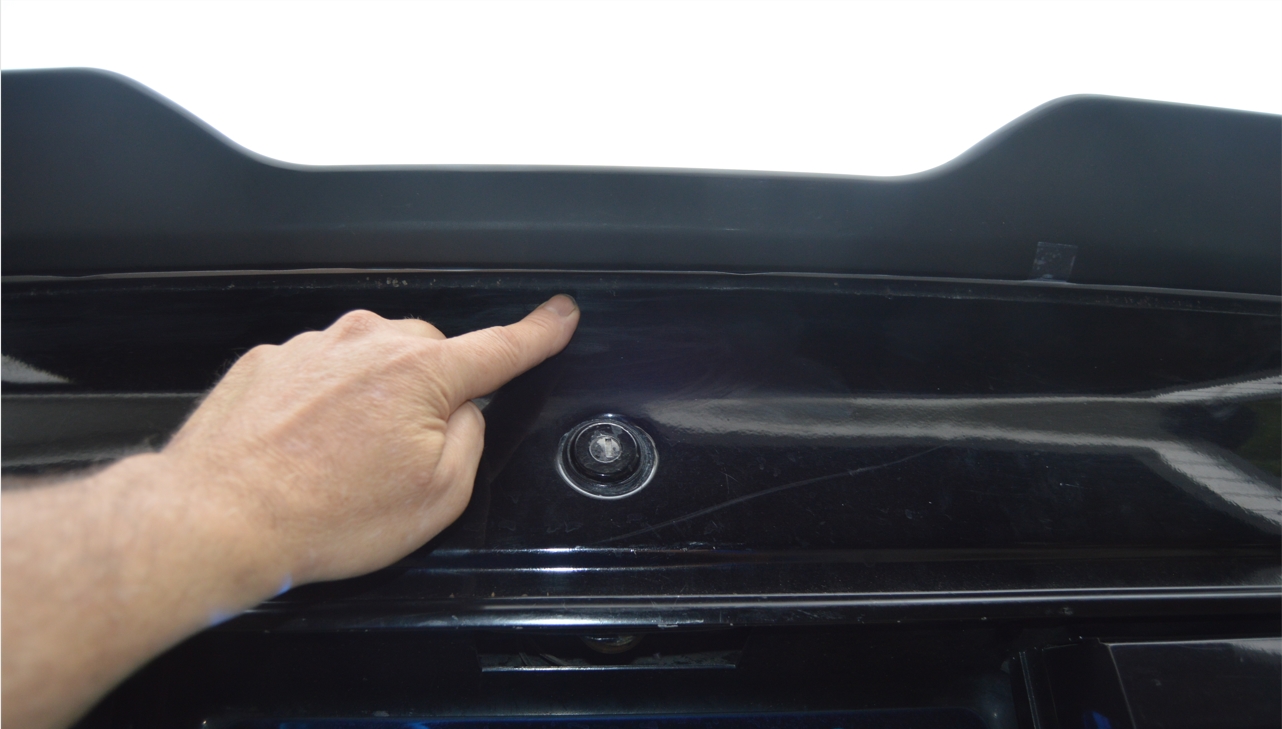
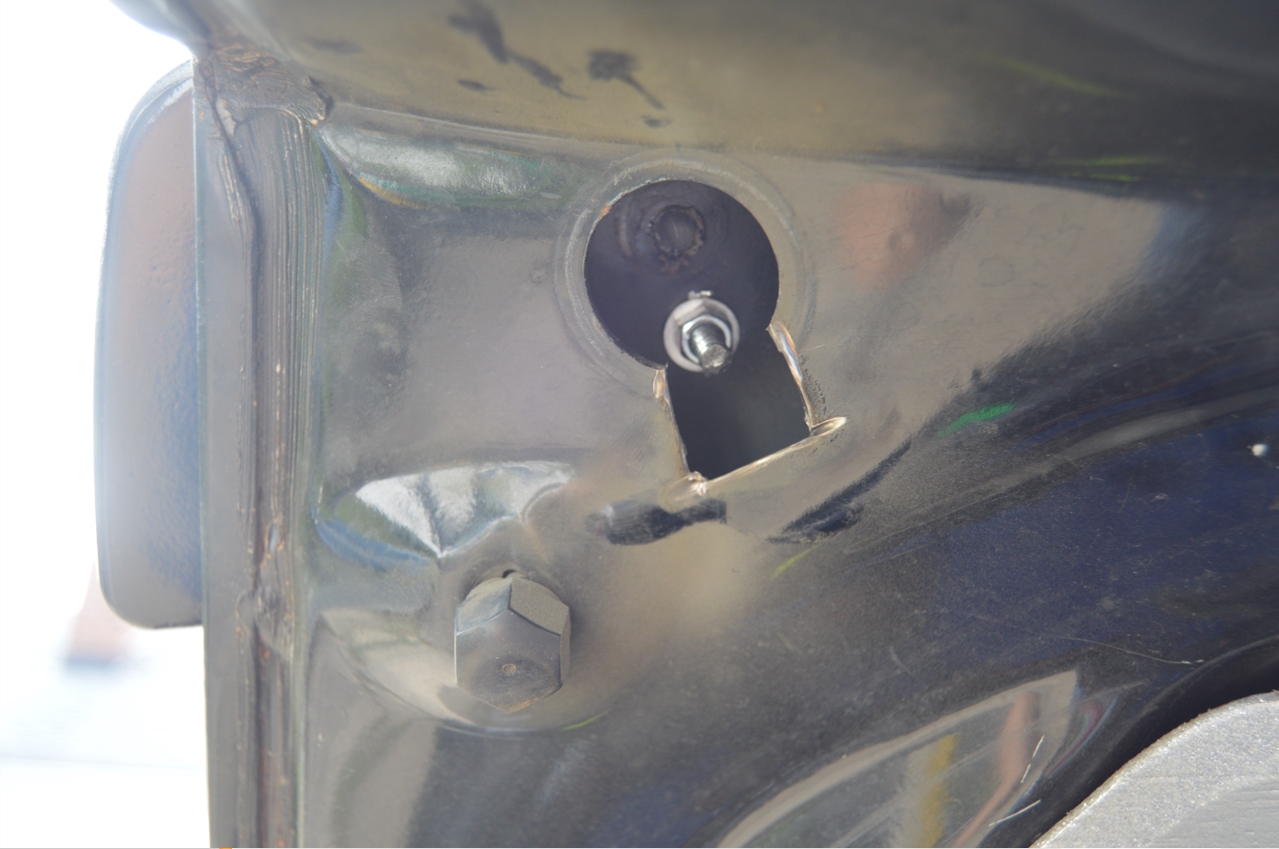
7. find the 6 new holes on the underside of the trunk lid.
you may need to take the 1/2″ (or 5/8″) drill bit and make access holes on this side (in some areas, like through the support frame) to be able to have enough room to put the socket in to put the nuts on the studs.
[we found that most of the new holes were relatively close to the old holes, so no new access holes were needed, you can reach them from the existing access areas on the underside of the trunk lid (although it’s tough for some of them) – EXCEPT for the 2 most outside ones (far left and far right), they are about 1/2″ lower then the factory access holes (and you can’t really get a tool in there), so you either have to make new openings for these 2, or just don’t bolt them down, which is what we did, because we didn’t want to totally mess up the stock trunk lid]
 {ok, another update after we finished this entire task:
the spoiler does need to be pulled down on both ends
(to look correct and seal the gaps),
so we did end up opening those outside access holes more
(into a keyhole type shape)
so we could install the nuts}
.
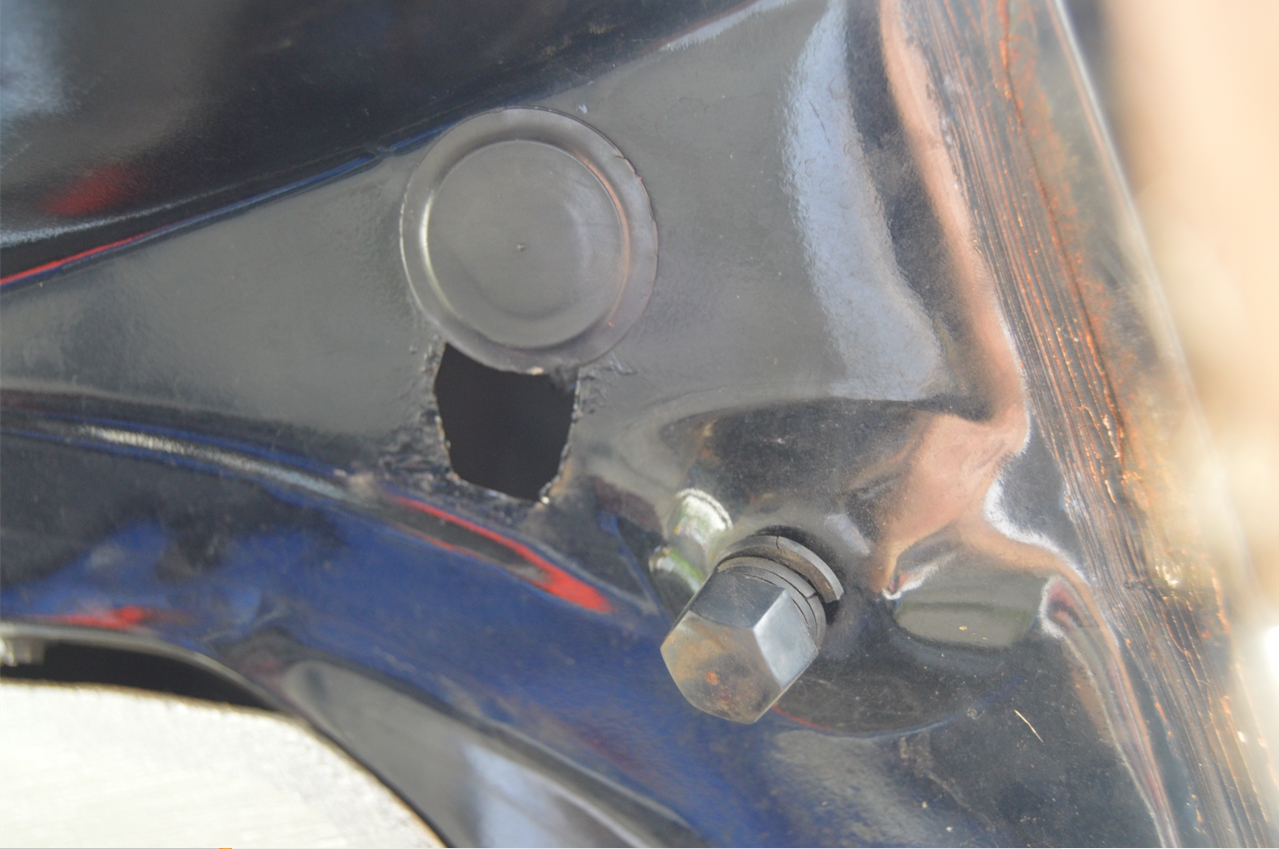 [for the new hole:
it doesn’t look too bad
once you put the plastic plug back in,
but it is noticeable]
[we will figure out something to cover this little extra section up at a later date, perhaps a piece of black duct tape for now, lol]
.
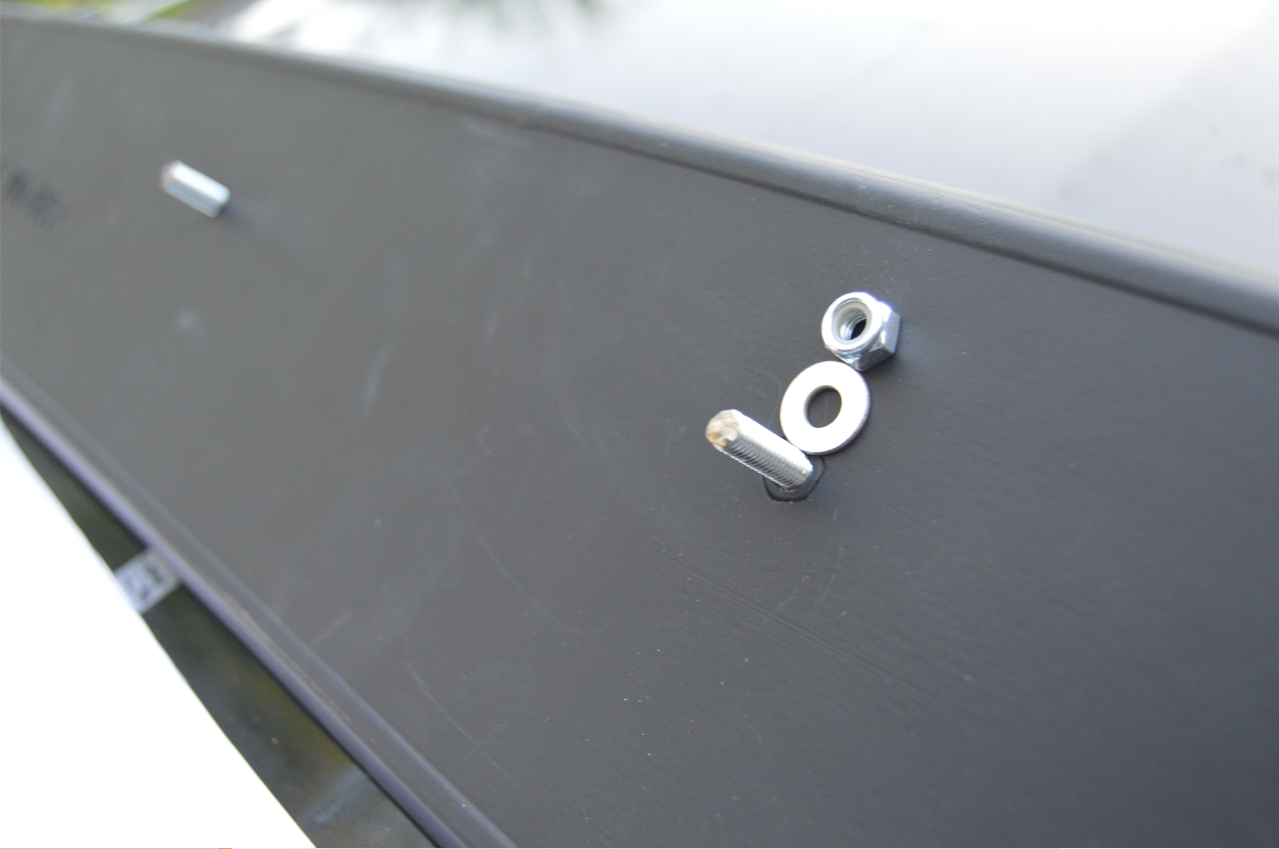
[for putting the washers on, we used a dab of rtv on them to hold them in place while we screwed the nuts on. a great solution to use on those hard to reach areas where you can get a socket OR your fingers in the hole, but not both at the same time!]
8. deburr all of the holes.
9. take a dab of paint and run it in and around the new holes (to prevent future rust).
[you might want to wait for this paint to dry before continuing, but you can do steps 10 & 11 while you wait]
.
10. take the bolts, cut heads off, and cut threads in half to make 6- 1″ long studs.
(you might want to make them shorter, check length after doing the test fit)
11. insert them into the new spoiler.
.
.
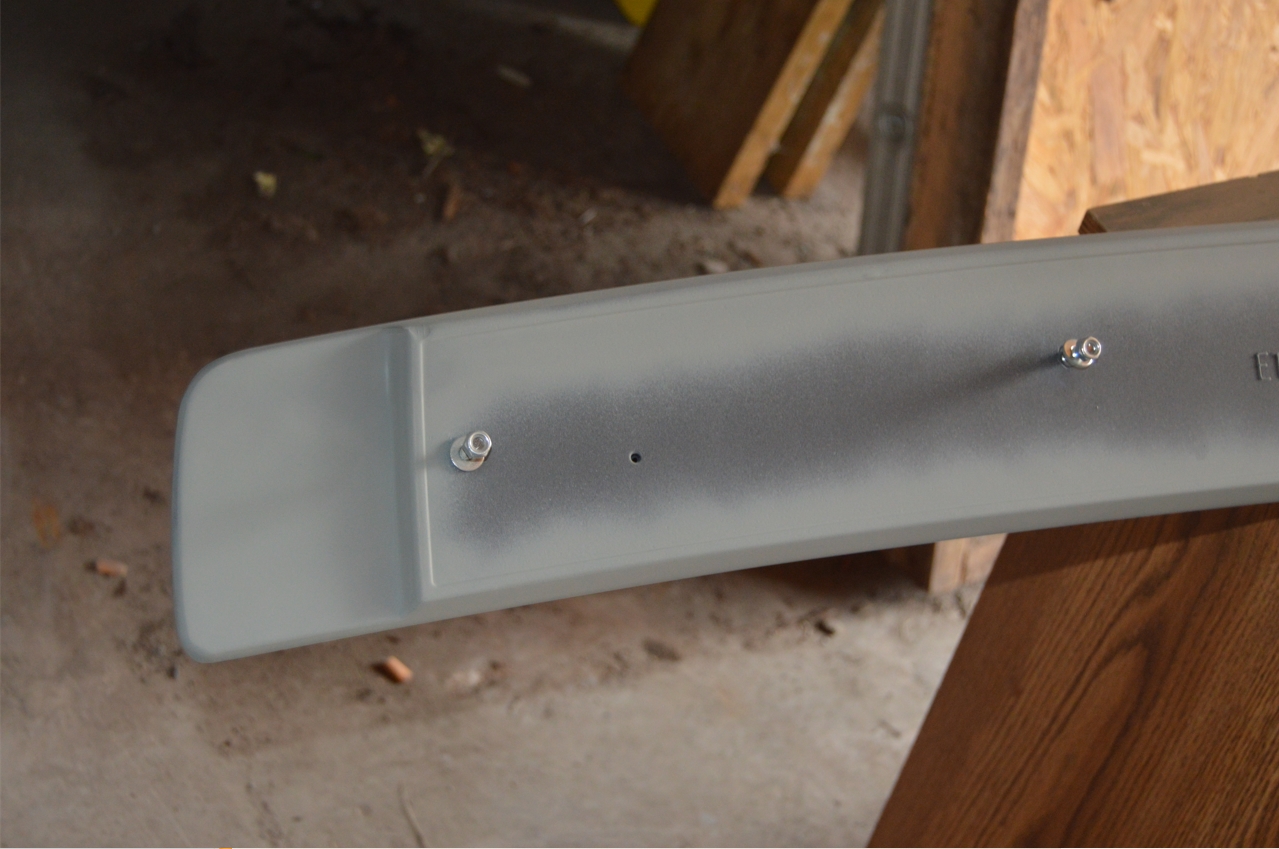
12. test fit the spoiler, place the spoiler onto the trunk lid.
(don’t bolt it down yet)
13. CHECK the alignment of spoiler, side to side, front to back.
CHECK on the underside, see where the studs come thru, trim down if necessary (do it OFF the car!).
[we left the studs the 1″ size we initially made, as since they are inside the frame structure area, they aren’t in the way at all, and there’s pretty much no chance they will snag anything]
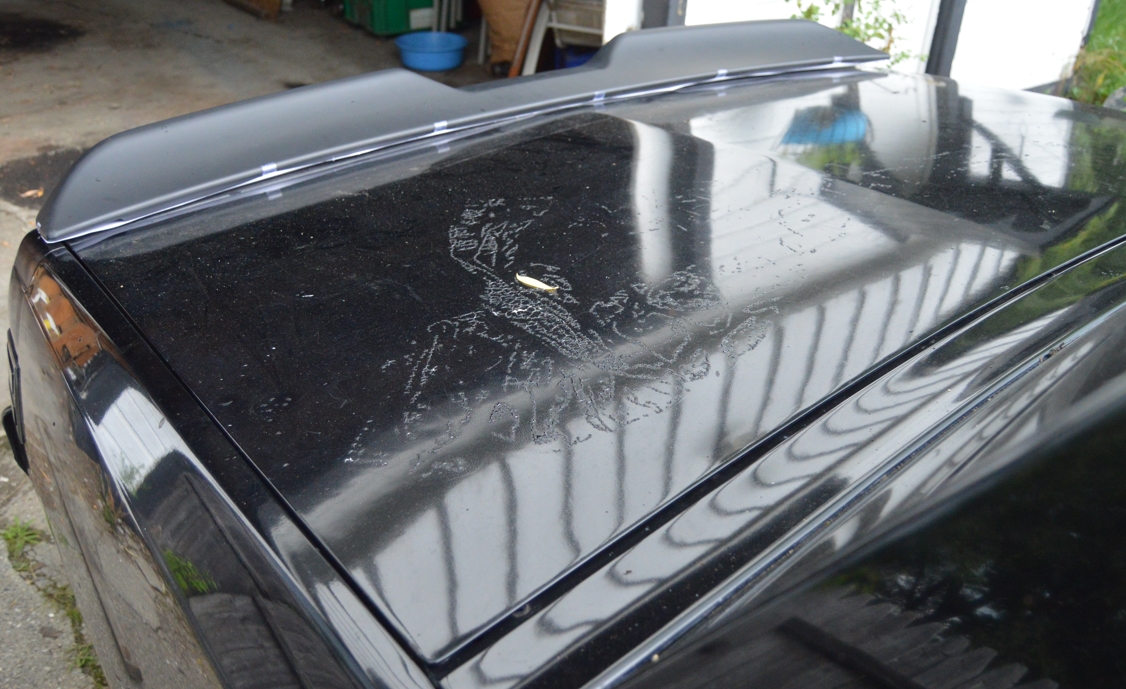
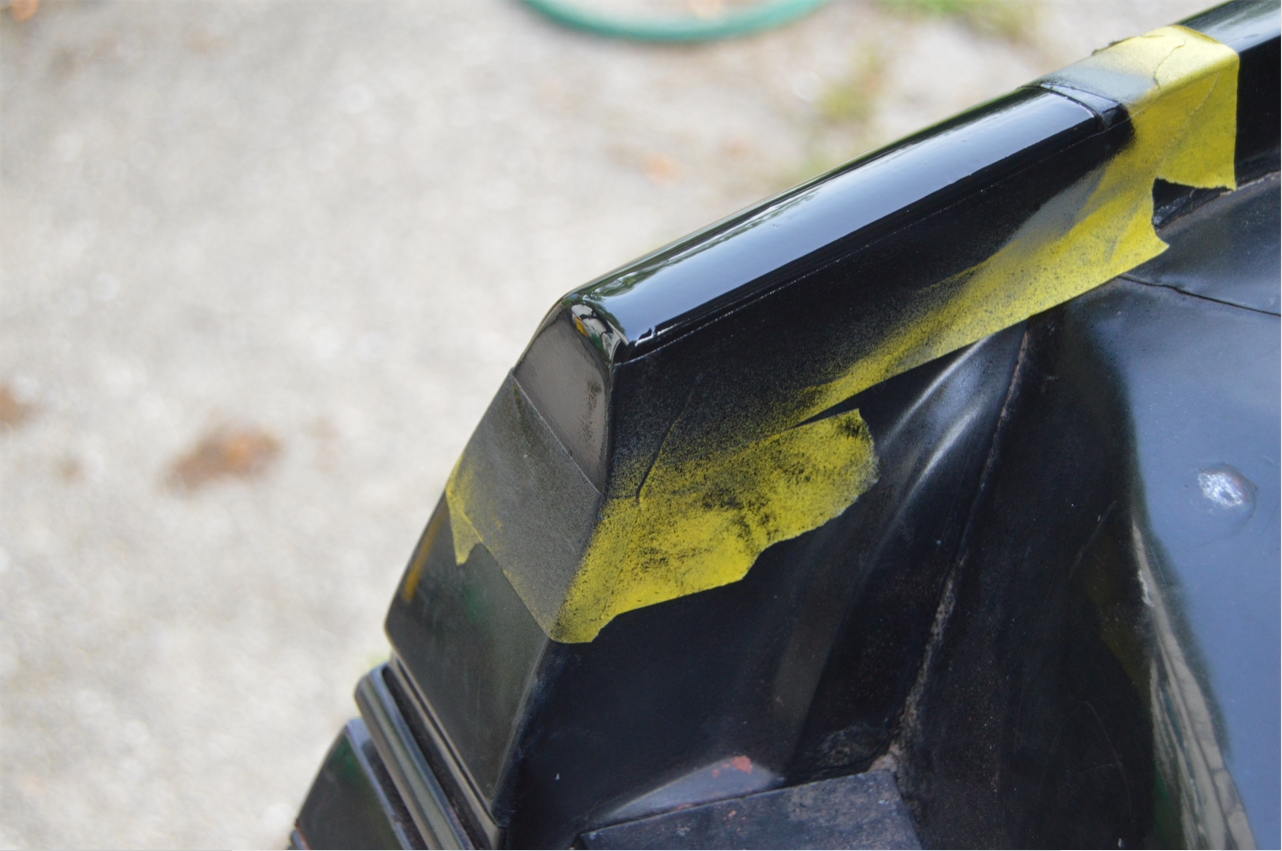
14. If you’re satisfied with how it looks and where it’s positioned, you’re going to want to paint this new rear wing.
It comes in a black primer, but since it scratches very easily, we recommend painting it.
(you may even want to re-primer it as well, like we did)
[in the future, this entire Turbo Buick will be getting painted, so for now, we shot this new rear spoiler with a rattle can]
[if you’re not satisfied with the spoiler position, you can always slot the holes a bit and move it over slightly into the needed spot]
.


.
15. while the paint on the new rear wing is drying, put some silicone (etc) in the trunk lid holes that the factory made for the stock rear spoiler.
[this will prevent water leaks]
.
{ok, update to the above note, once we final test fitted the spoiler, we realized that the tape pushed up the spoiler just enough off the trunk lid that there was a tiny air gap between the lid and the bottom of the spoiler. meaning, if you’re really using this new piece for downforce, air underneath the rear wing probably isn’t a good thing! so we ended up removing the tape done up like that, and put rtv in the holes}
16. fill the 2 holes (on each side) in the quarter panel extensions, left by the stock spoilers end caps.
[some type of rubber or plastic plug would work equally well, but consider that these holes/plugs will be seen when the trunk lid is open, and partially as well when it is closed]
[if you only fill up the top portion (top side) of these holes, you can always pop out this filler material from the bottom side, should you ever want to reinstall the stock spoiler]
[we used glazing putty, a few layers of it, so it could dry and shrink, and then end up being totally flush with the quarter extensions]
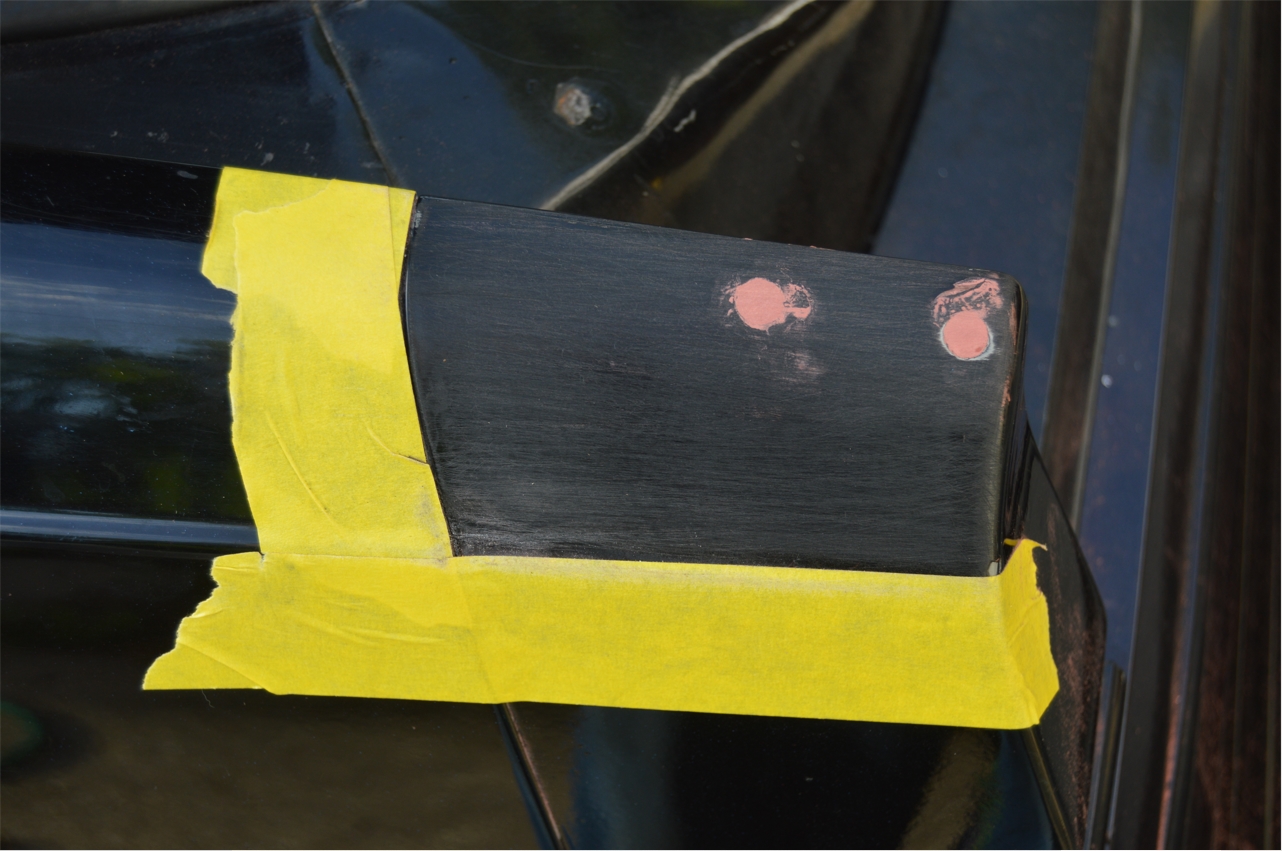
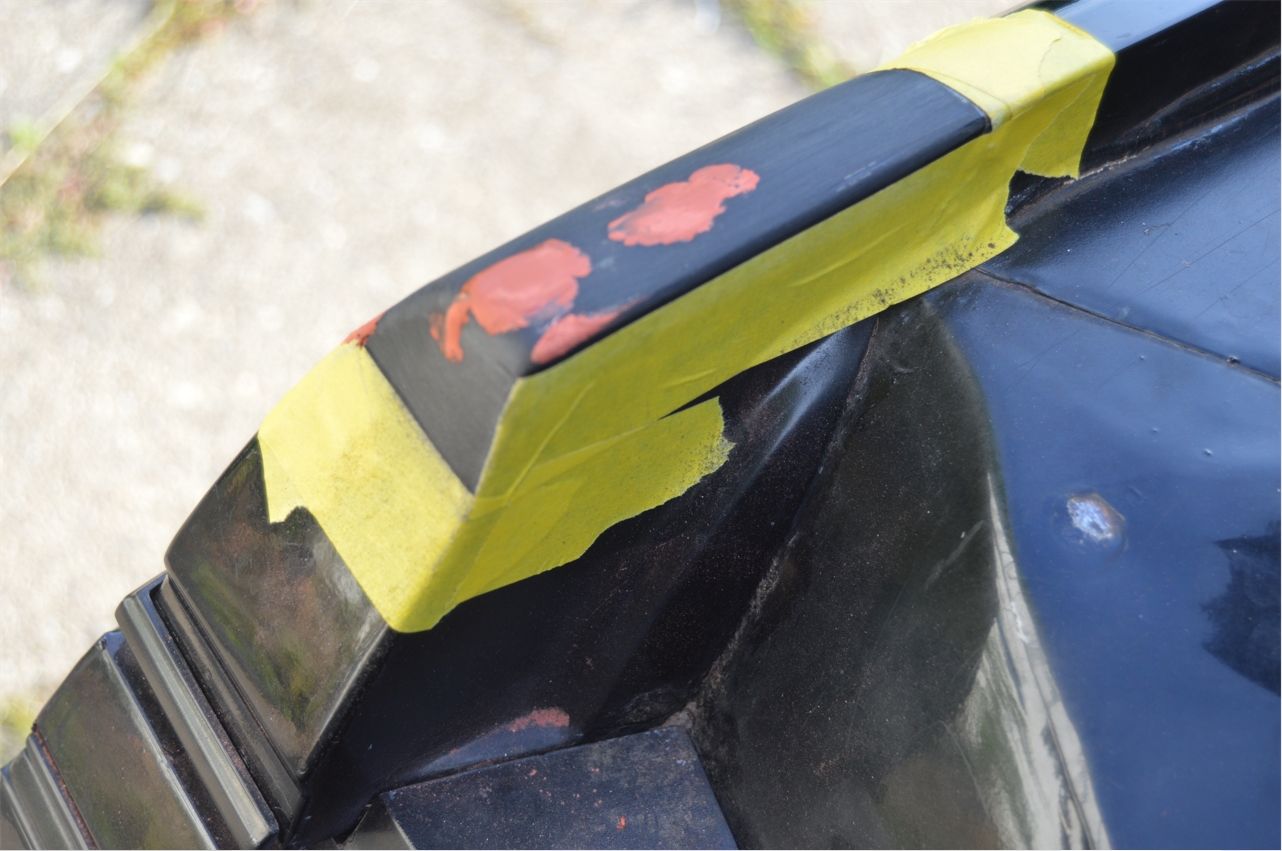
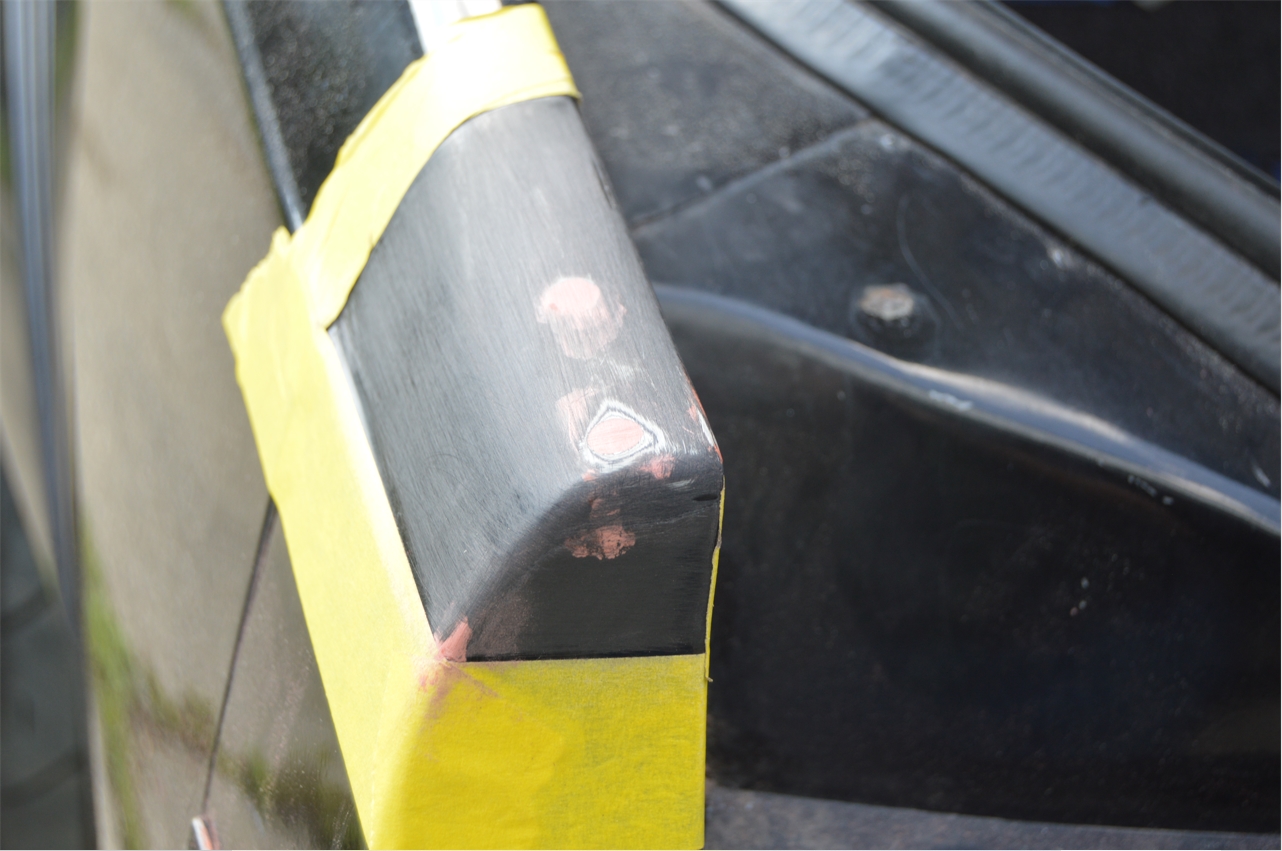
17. sand this area smooth, then primer and paint.
[the work area: we taped off right above the body line (on the quarter panel extensions), and butted up against the front side of it (where it mounts to the body; vertically), and just a tad bit on the inside (that faces the trunk). For the rear side (of extension), we cut across it (horizontally), sort of matching where the side body line is]
[we primered this entire area, then painted it black]
.

.
18. once all of the paint is done drying, mount the rear wing and bolt down securely.
[start in the middle and work your way outwards]
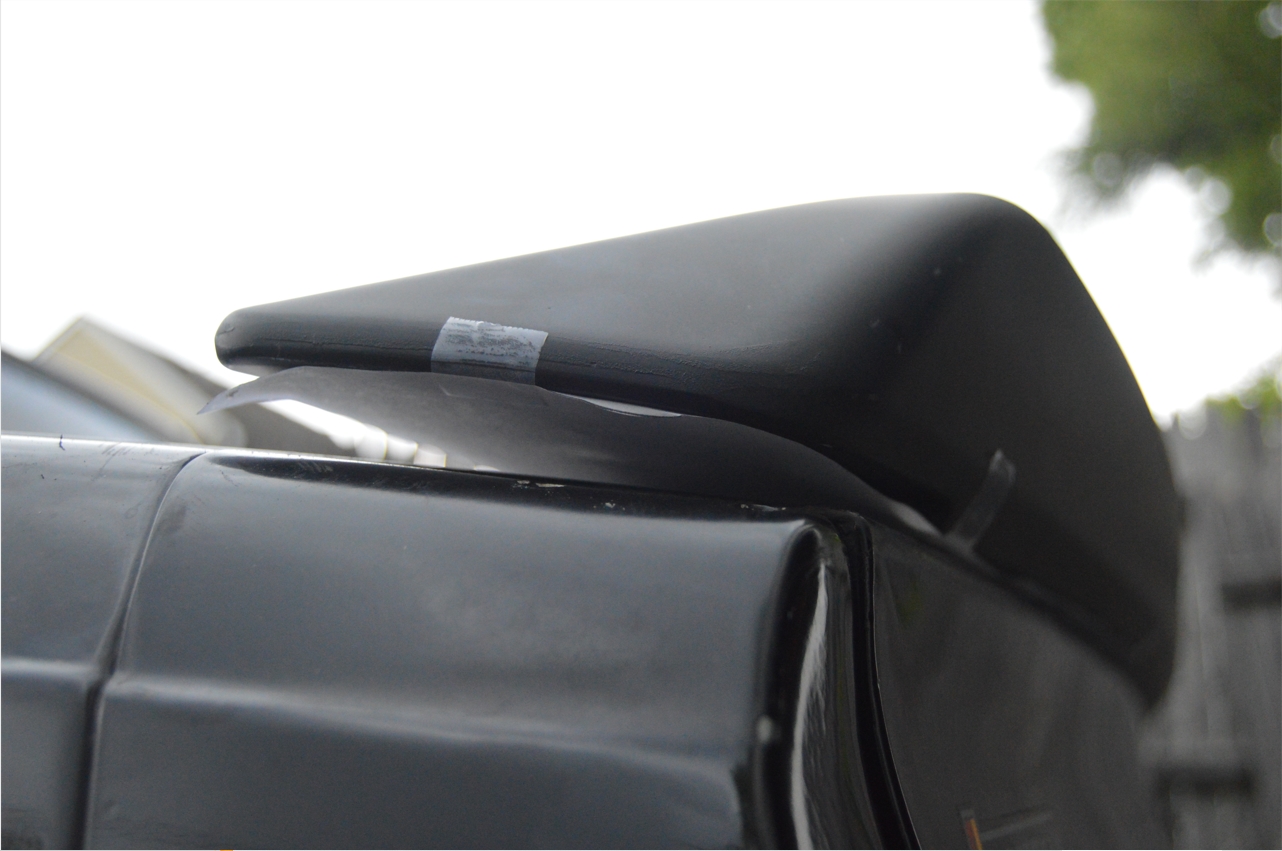
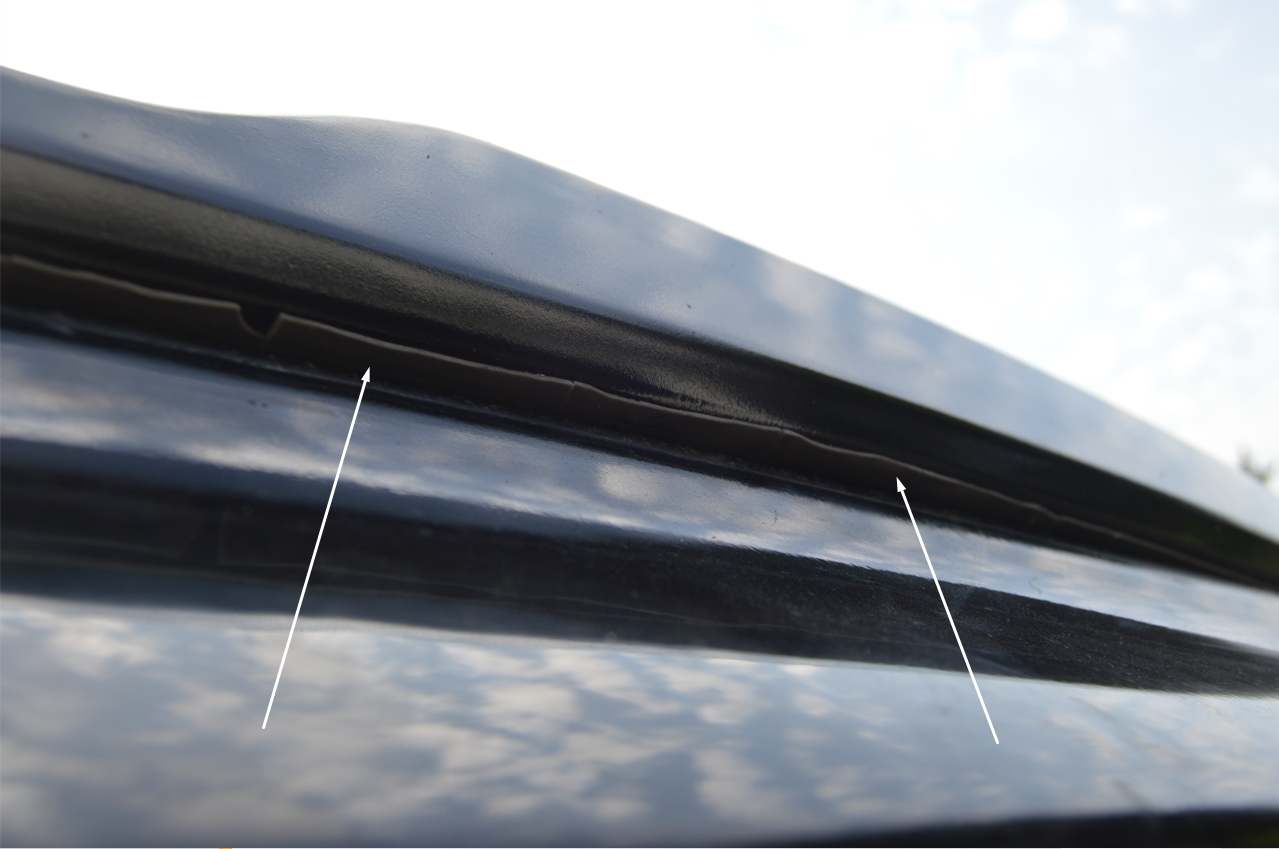
[you will have to “pull” the wing down when you tighten the bolts up, as near the outer ends it sits up from the trunk lid, it’s not totally flush sitting across like the stock unit is. but what do expect when adding on a part that’s not actually for a Turbo Regal?]
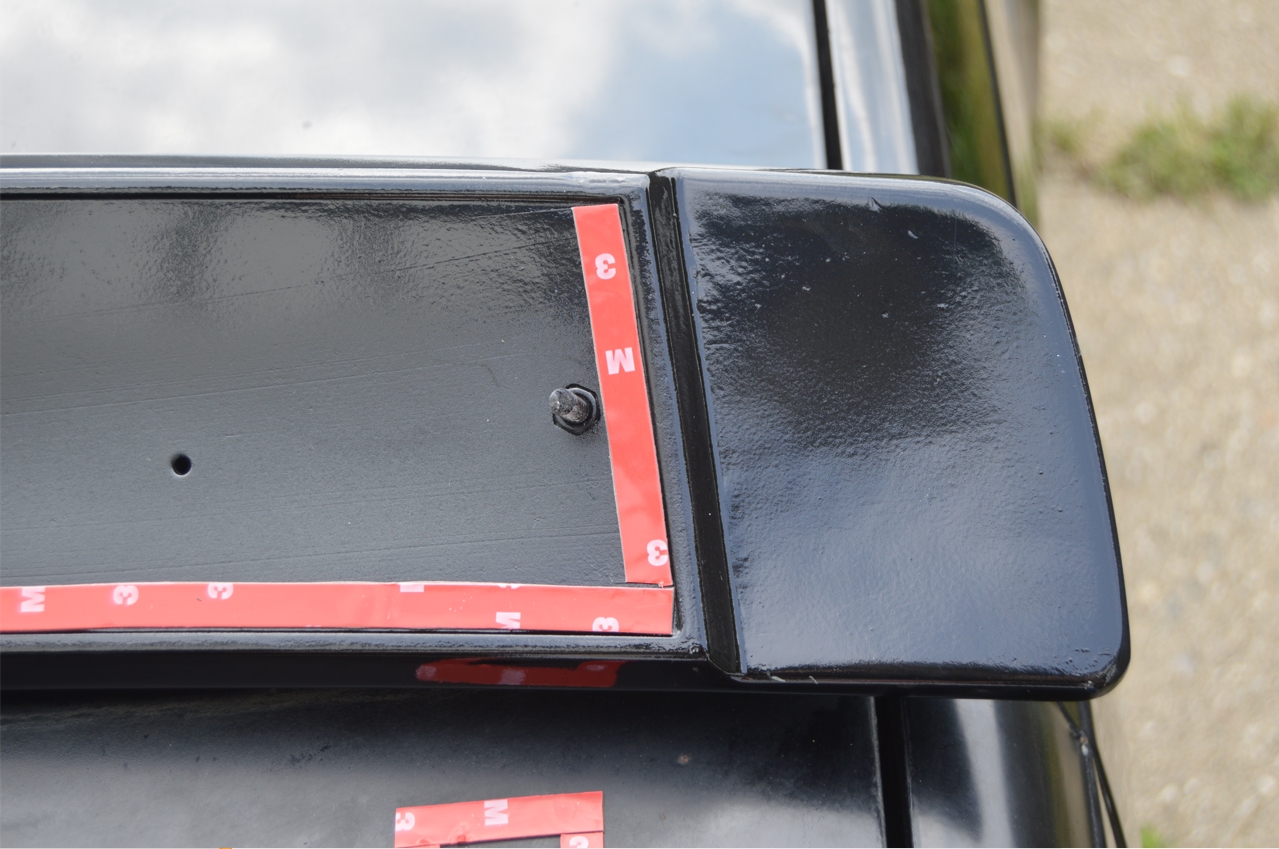
[before totally tightening down the rear wing, we noticed that 1/2 way between the center of the trunk and the drivers side edge of the lid, there’s a tiny gap (like it doesn’t sit totally flat across on the Buick Regal trunk lid), same goes for the passenger side, so we did end up using the double sided tape and running a strip along the entire perimeter – ON the bump that sits around the very outside of the wing, on the bottom – we initially tried placing the tape inside this bump (to try and visually hide it), but it didn’t sit up high enough to seal the aforementioned gap) – {but this tape does NOT get placed on both the very far outer sides/edges that purposely stick up off the trunk}, all to make sure that this helped seal up this gap, as well as to keep any new debris from getting underneath. which mostly works, but it’s not 100%]
.

.
[or you may want to consider adding a dab of silicone/RTV/etc into the new holes as well to prevent any water leaks. or perhaps put a rubber o-ring on the studs (they go on the top side of the trunk lid) to seal up the holes, or see what we mentioned above to do using the tape. or do both!]
[another realization, once the new rear wing was mounted & done, we wish we would have used black double sided tape, as you can see the gray stuff on the front side]
 [and you’ll have to trim the excess part of the tape off the back side, as some of it hangs off (due to us mounting it more back than front ways), and of course, the section in the middle hung so far out that when we attempted to trim it, well, for that center section most of it wasn’t even attached to the trunk at all. you may want to consider not even bothering using the tape for the back side, but know that there is a slight gap between the wing and trunk, but not really all that big of a deal]
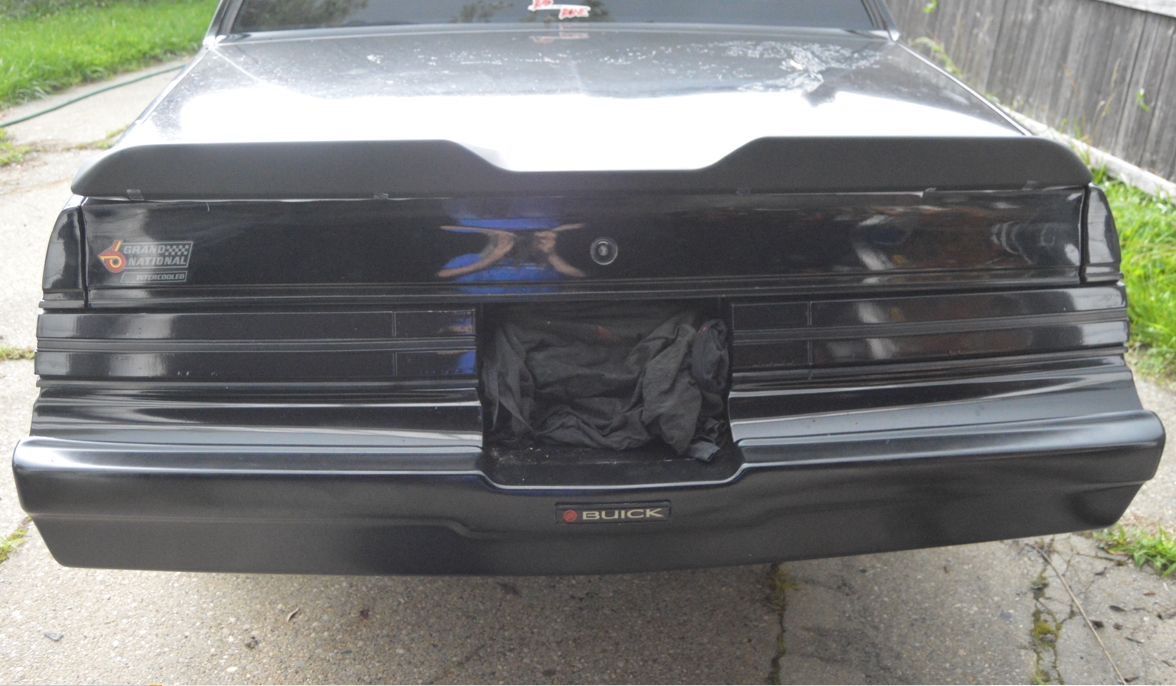
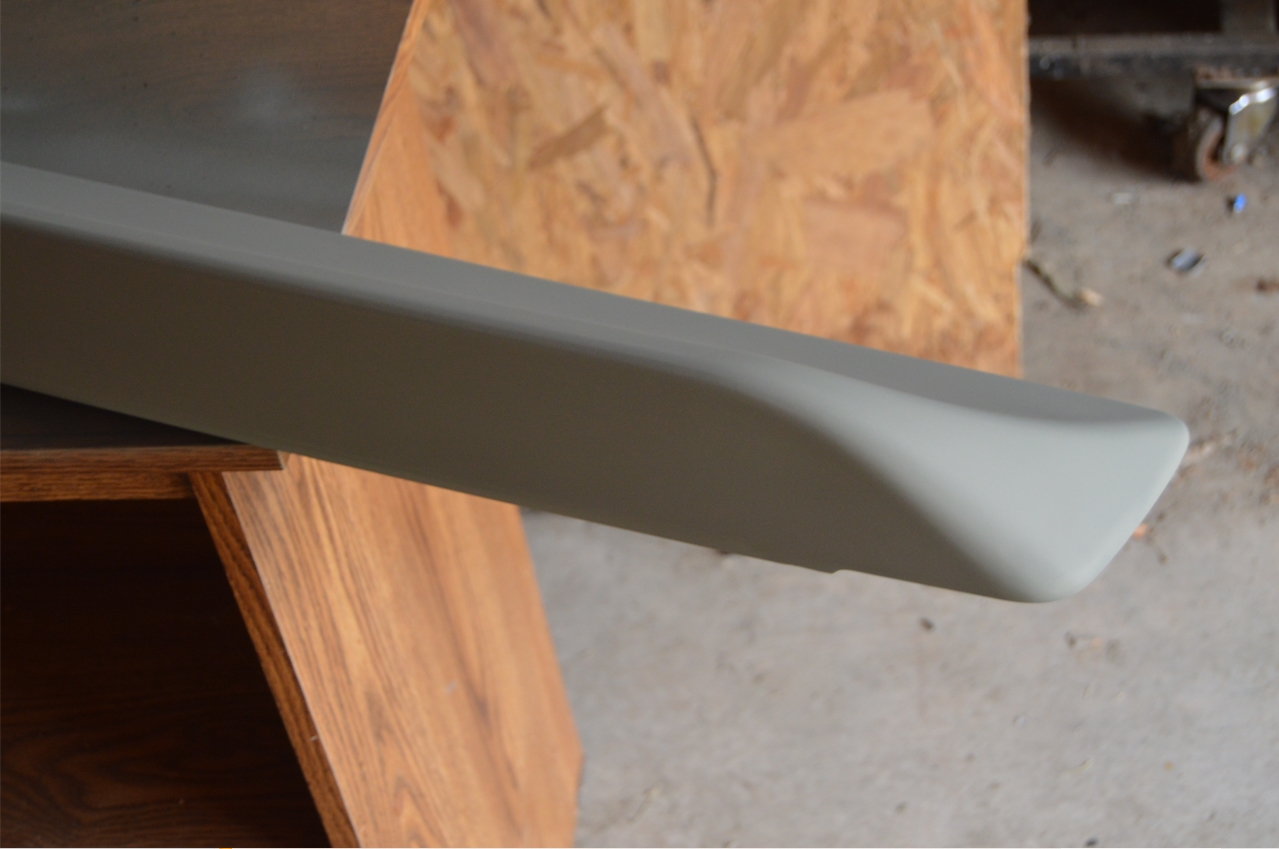
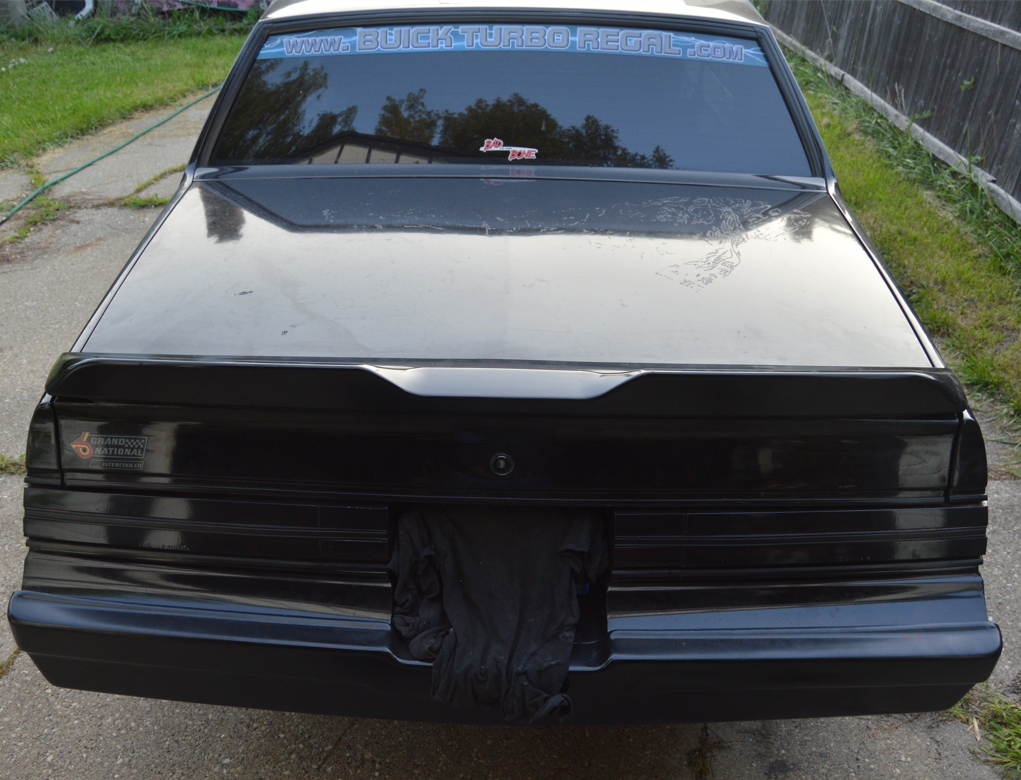
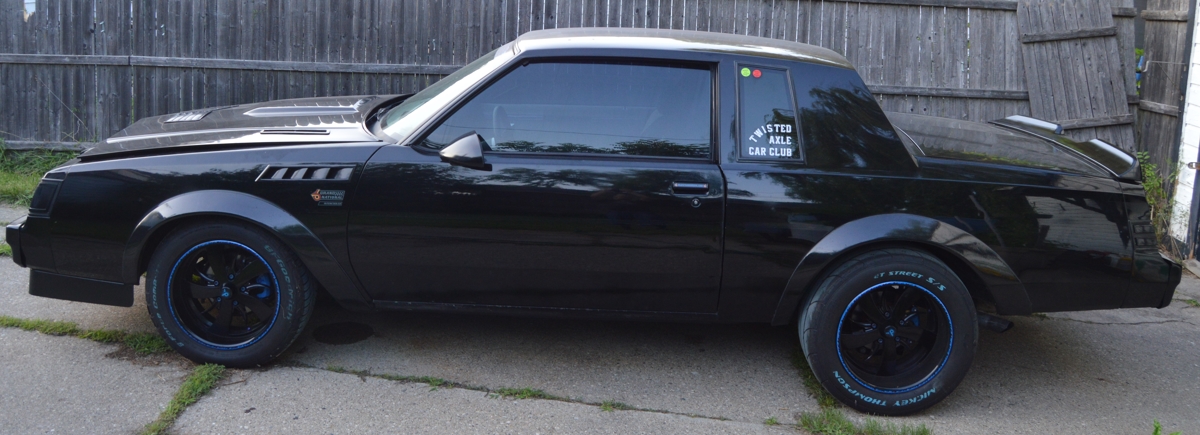
19. look at it, then smile, it’s done!
.
We would have liked to integrate the OEM end caps into the mix somehow, just to sort of give it that stock type look (while being slightly different), but there really wasn’t an easy way to do that with this new rear wing style.
We’re pretty pleased with how it turned out though, gives the Gbody Regal a new sleek tough look (at least in our minds, and that’s really all that matters, right?).
This was a job that took 1 day to finish, as opposed to the weeks that it would have taken if we would have done the 2 previous steps we’ve shown you the last few days! (Rear Wing 1,2,3)
.

.
.

.


