


We told you yesterday all about our plans for the new rear package tray, along with the tools & parts needed to make this item yourself if you wanted to.
Today, we’re going to show you how we built it!
.
HOW TO:
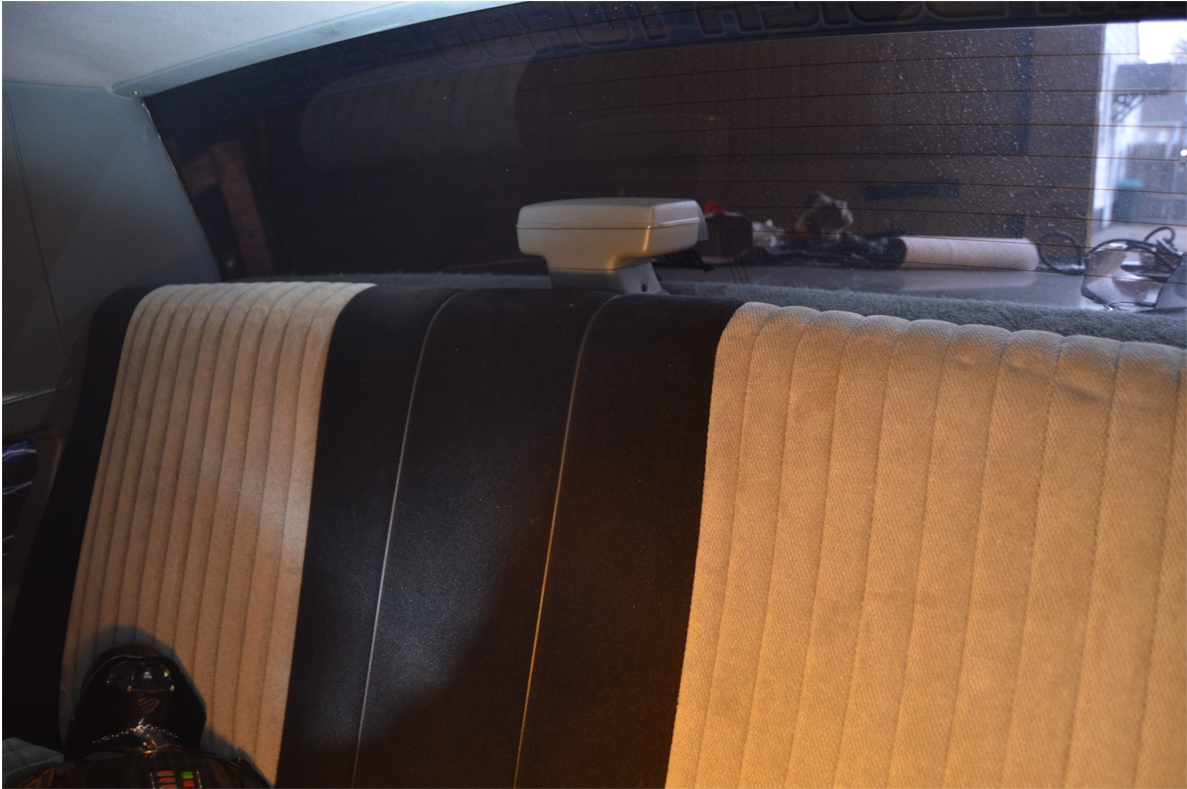
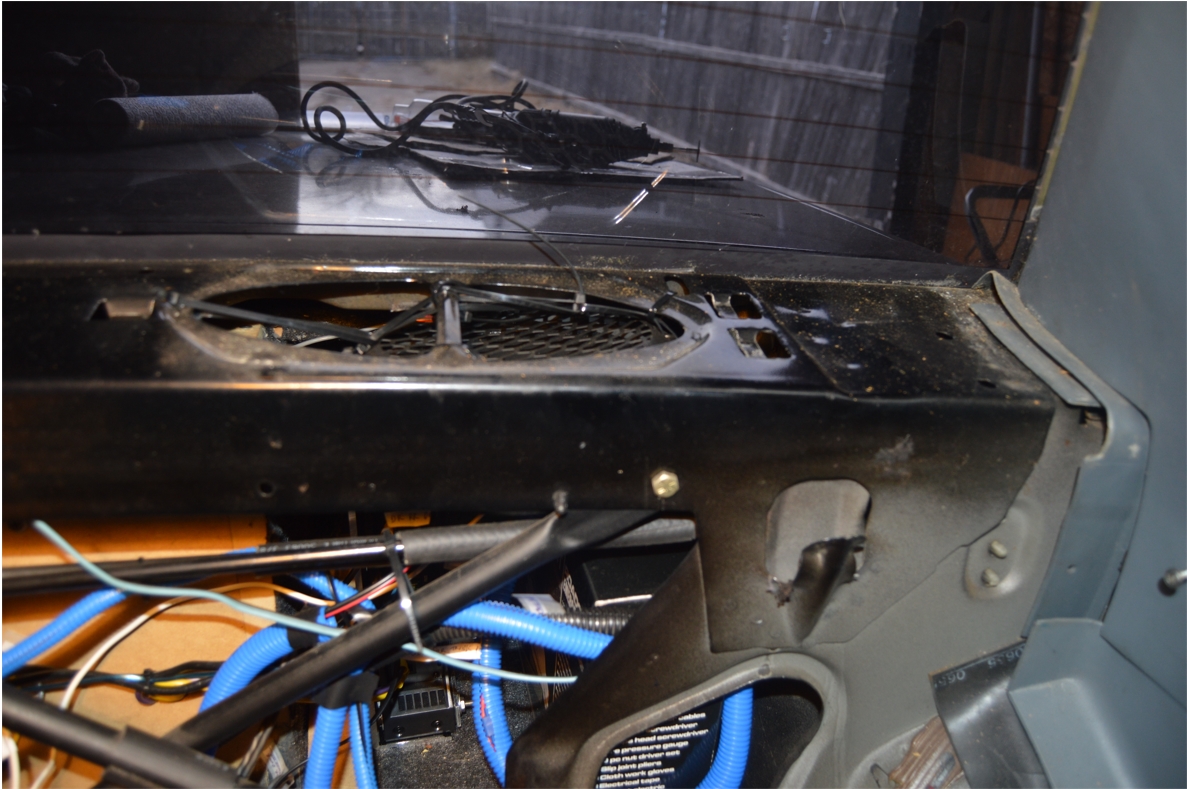
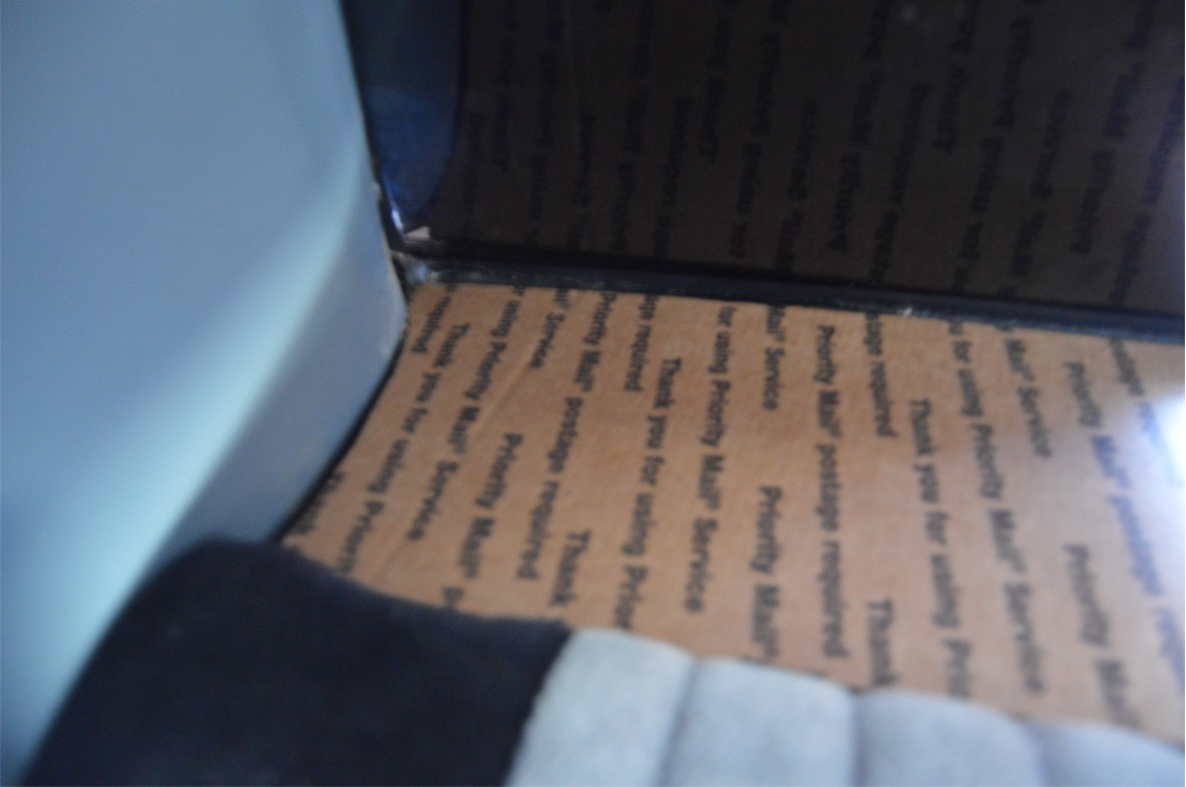
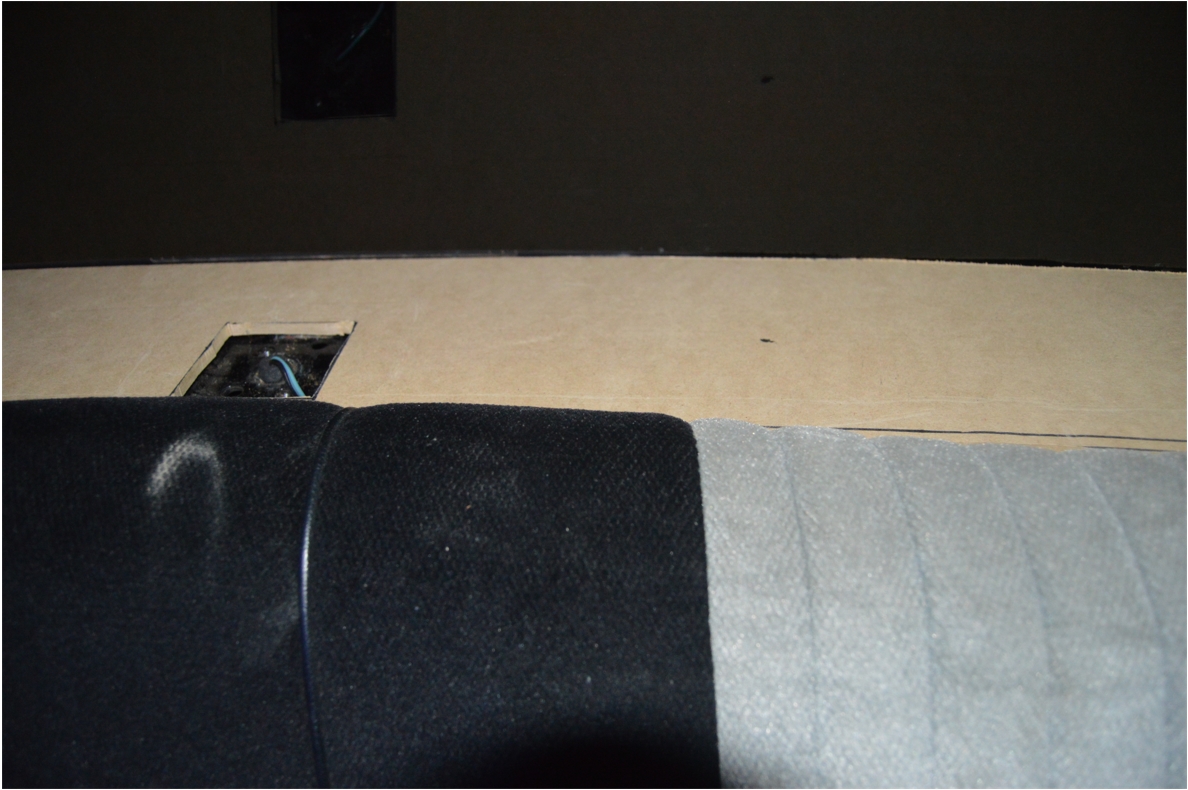
Removing the stock rear speaker shelf has to be done from the inside of the car, via removing the rear seat.
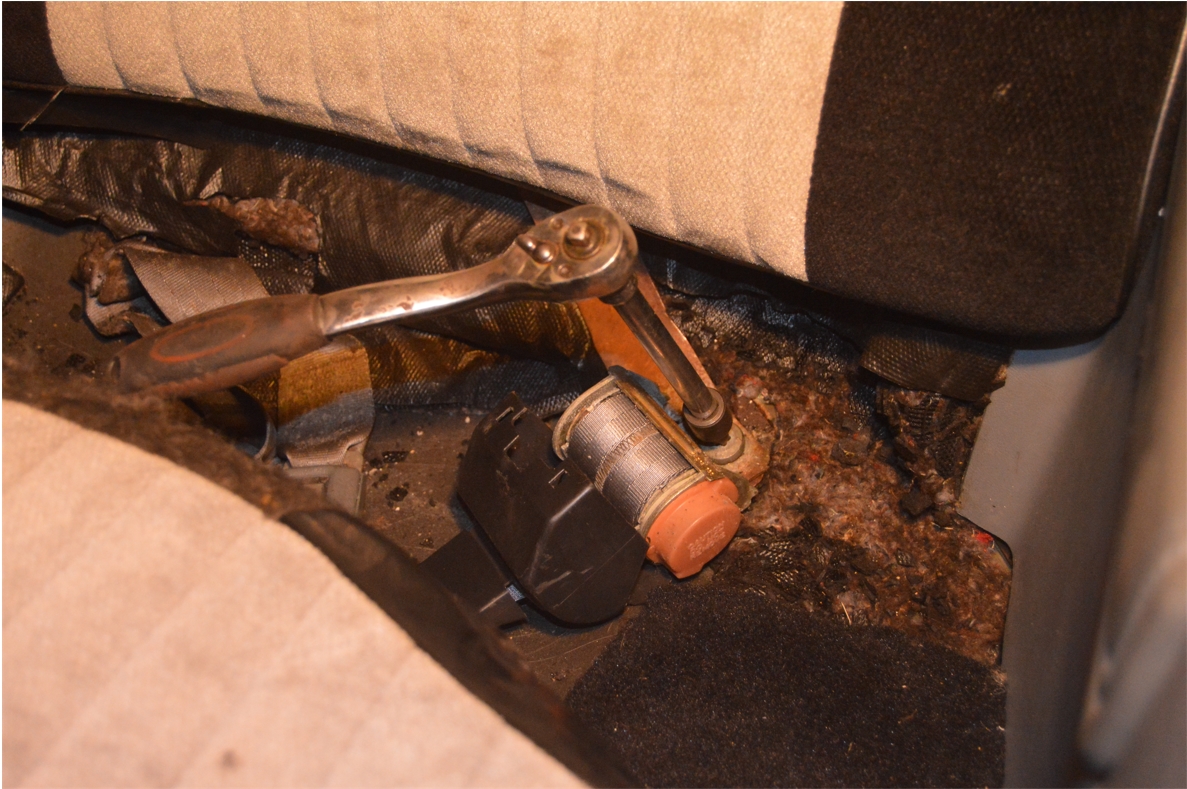
1. Remove rear seat (50 torx for the seat belt bolts).
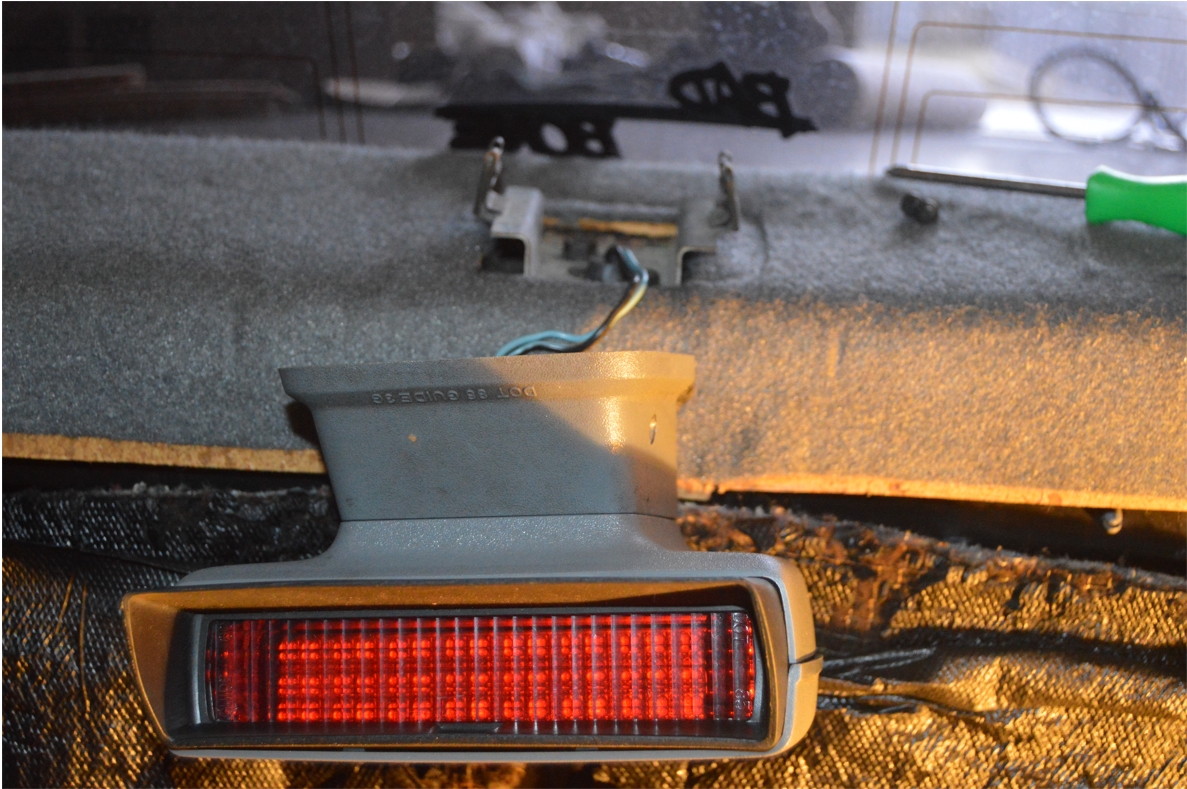
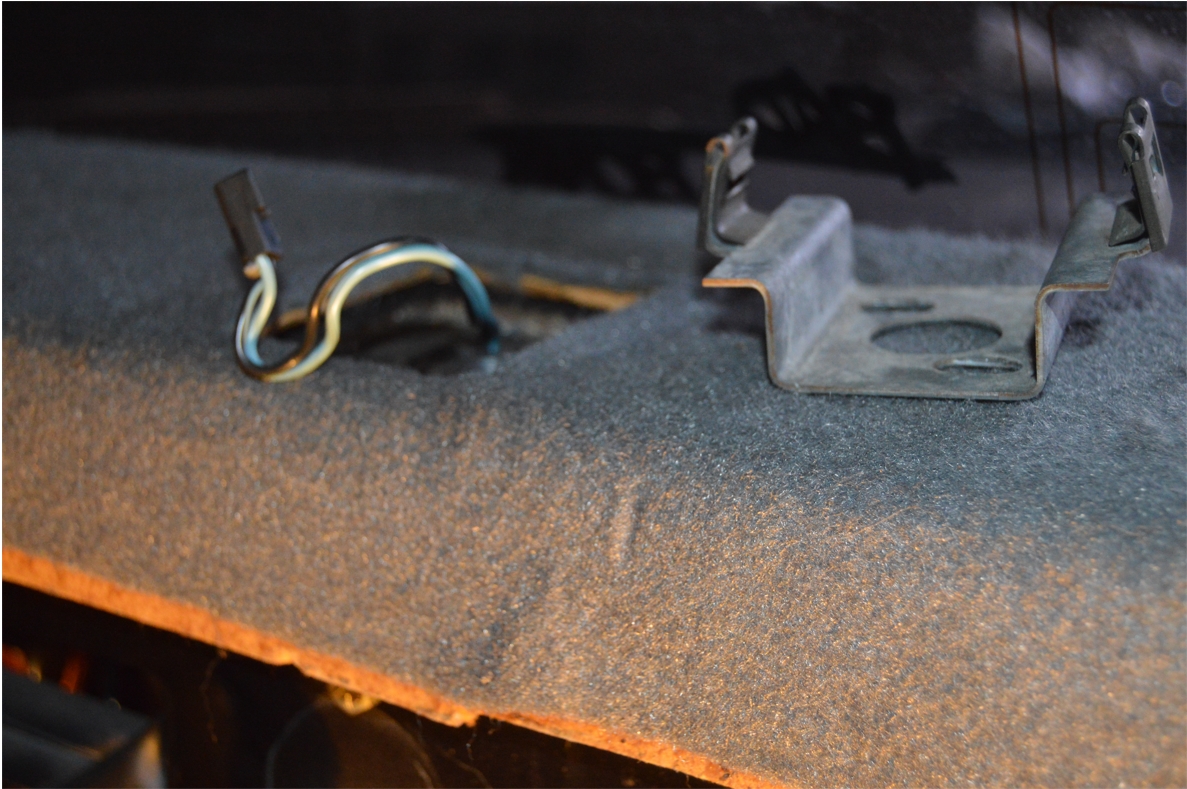
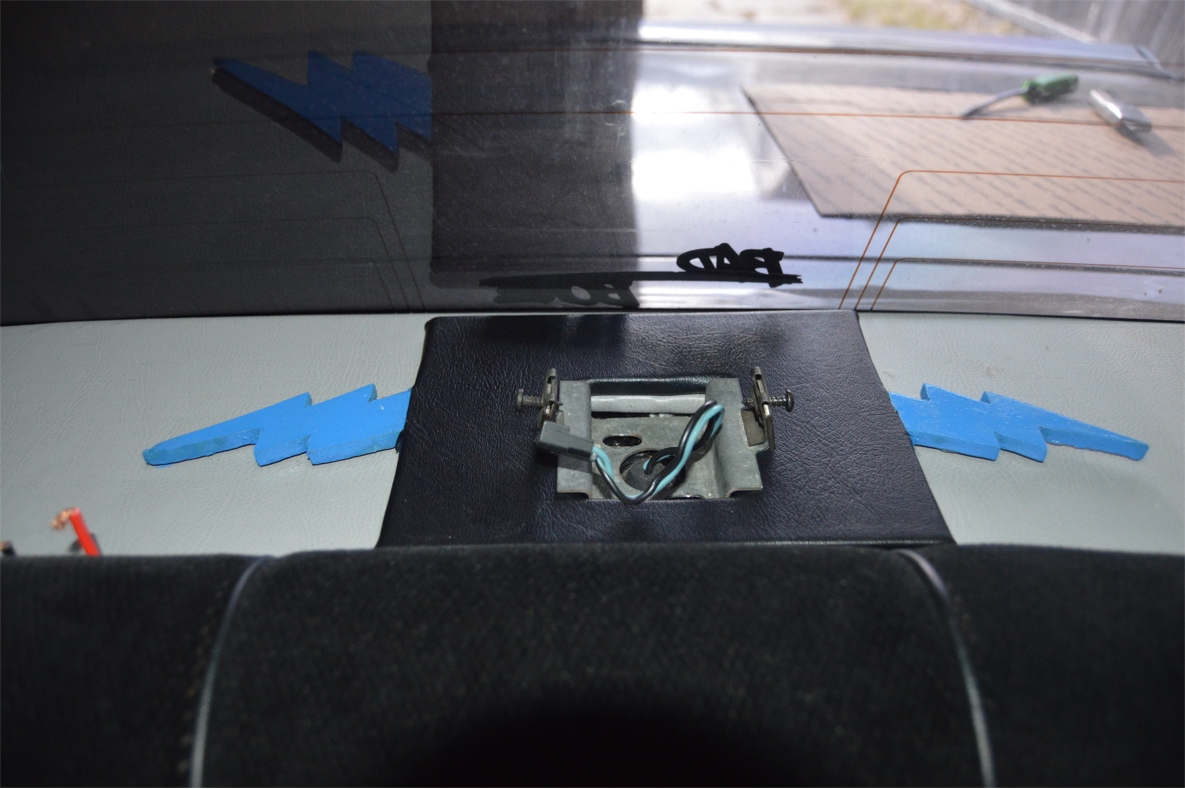
2. Remove third brake light unit (phillips screwdriver, 2 screws, 1 on each side). Unplug connector.
3. Remove third brake light bracket (2 10mm bolts)
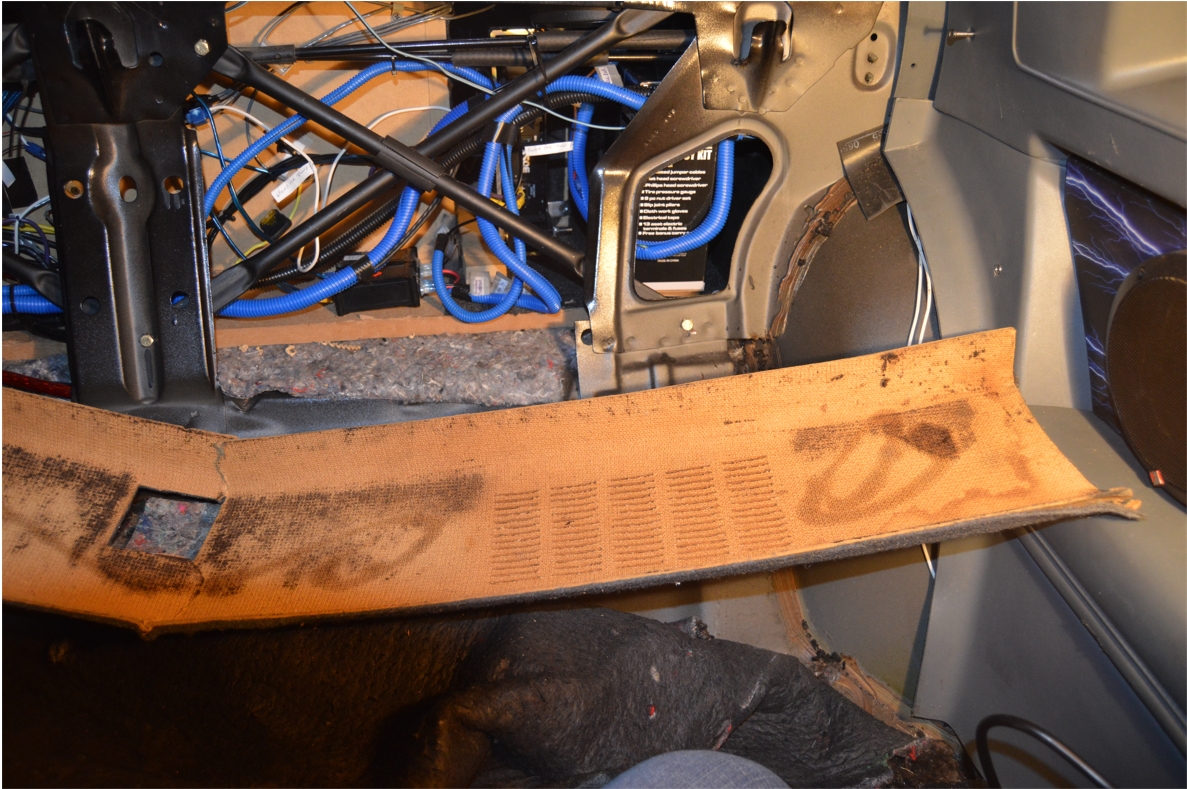
4. Remove rear shelf (you can wiggle it out, start on passenger side raising it up, then work your way to drivers side, twisting and pulling upward until it comes out).
.


.
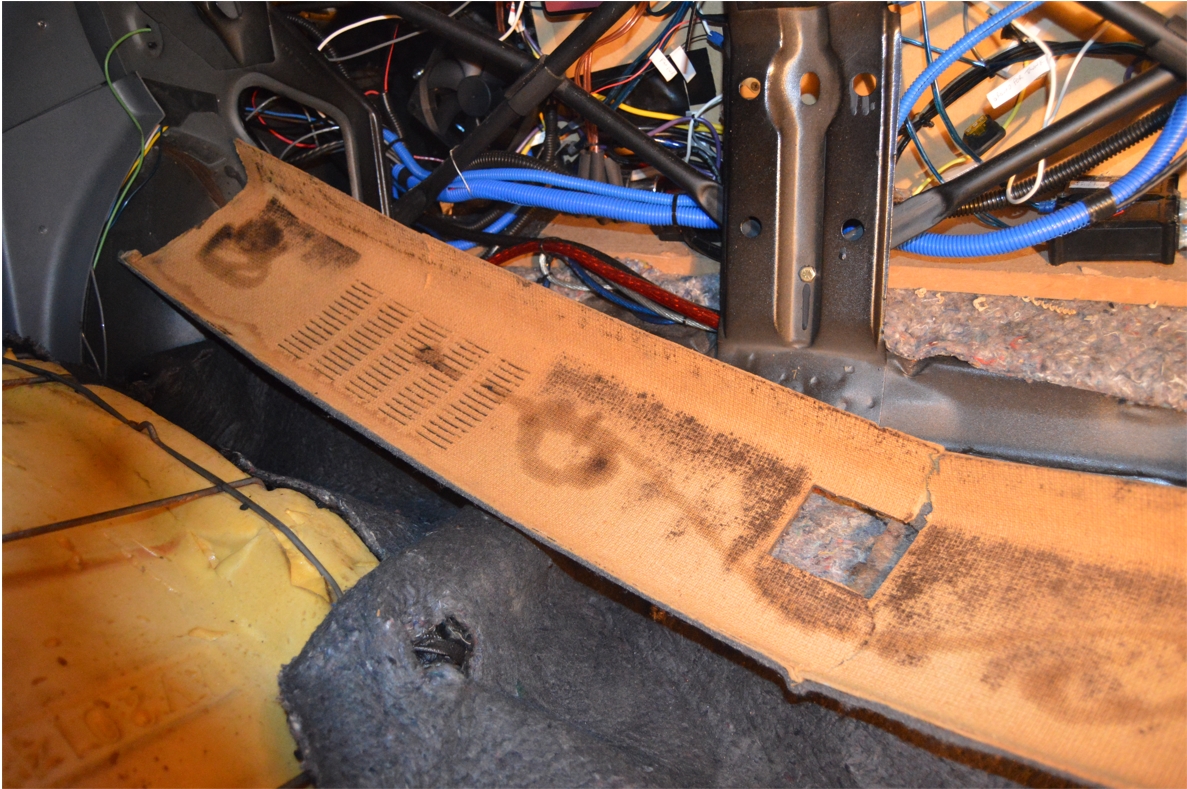
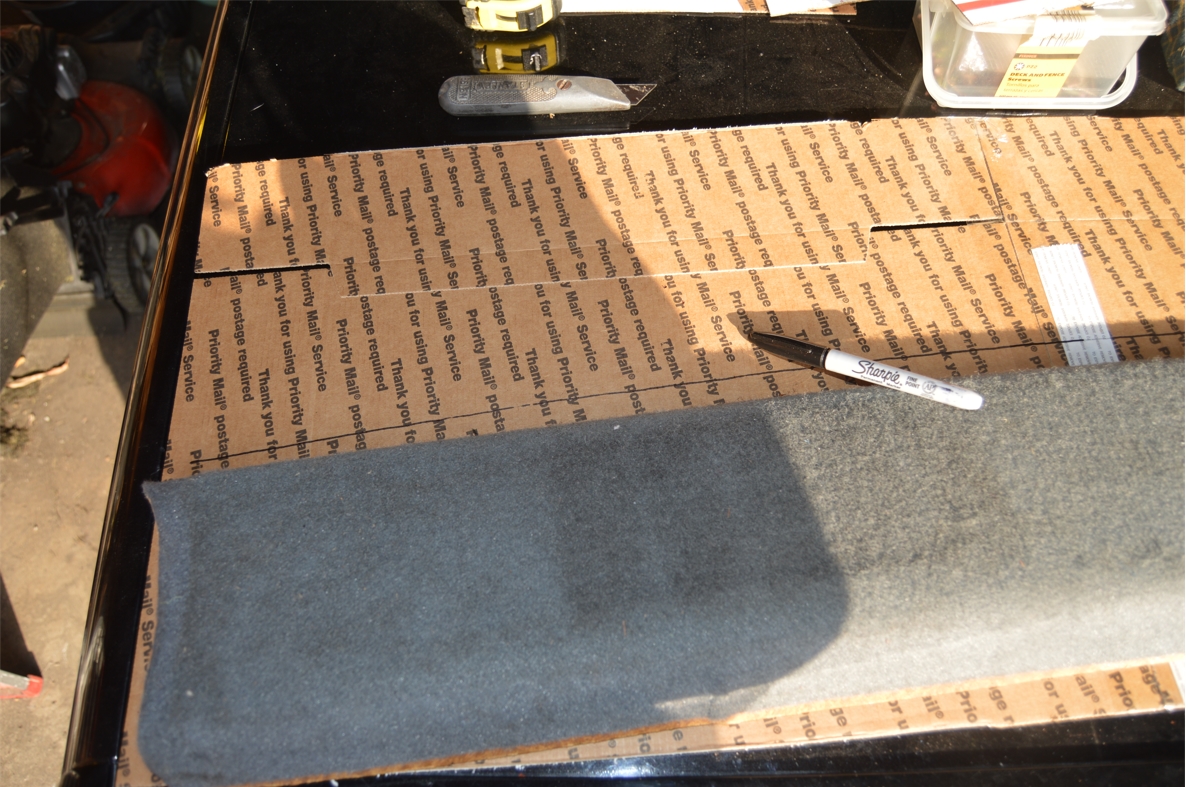
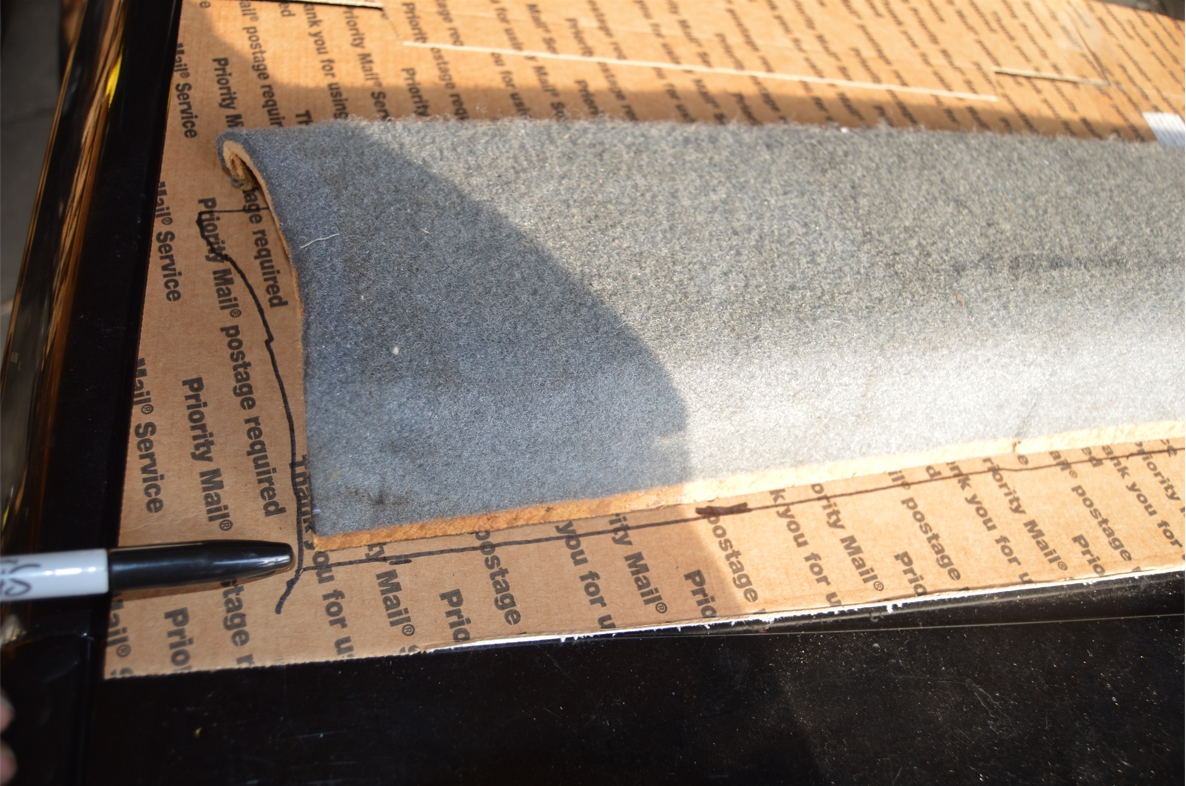
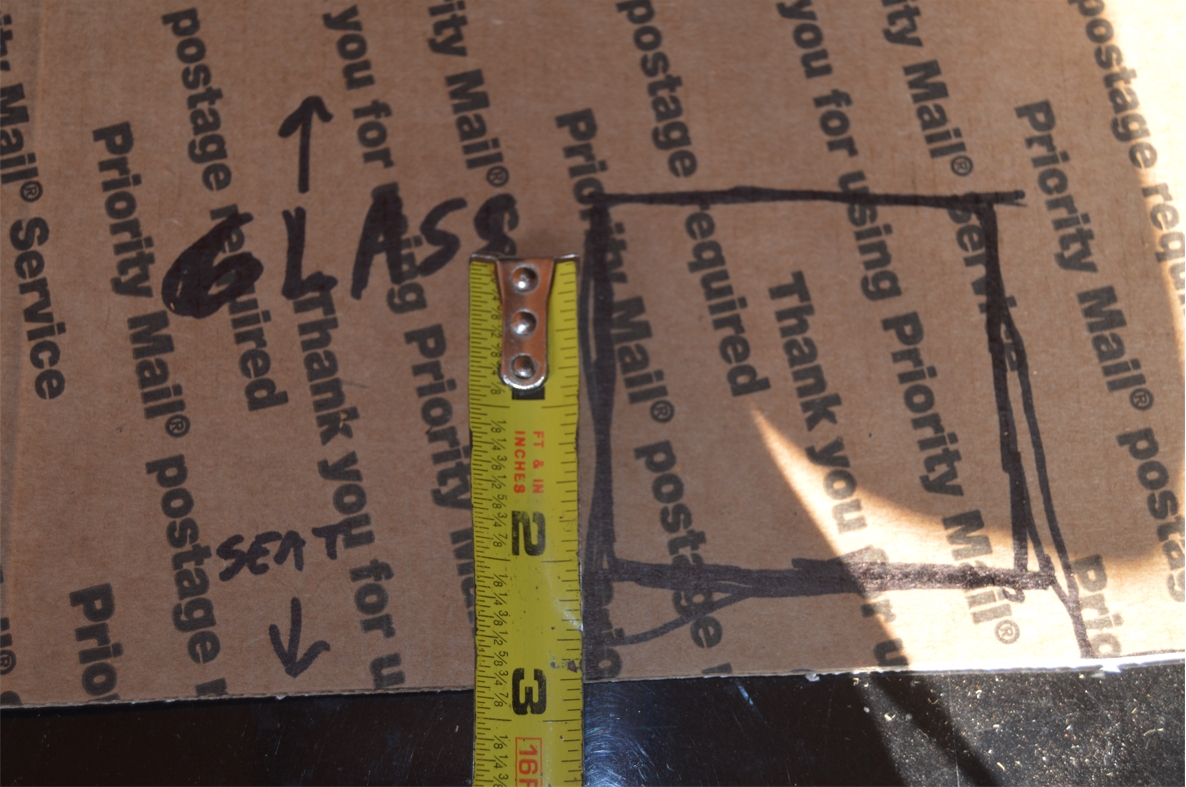
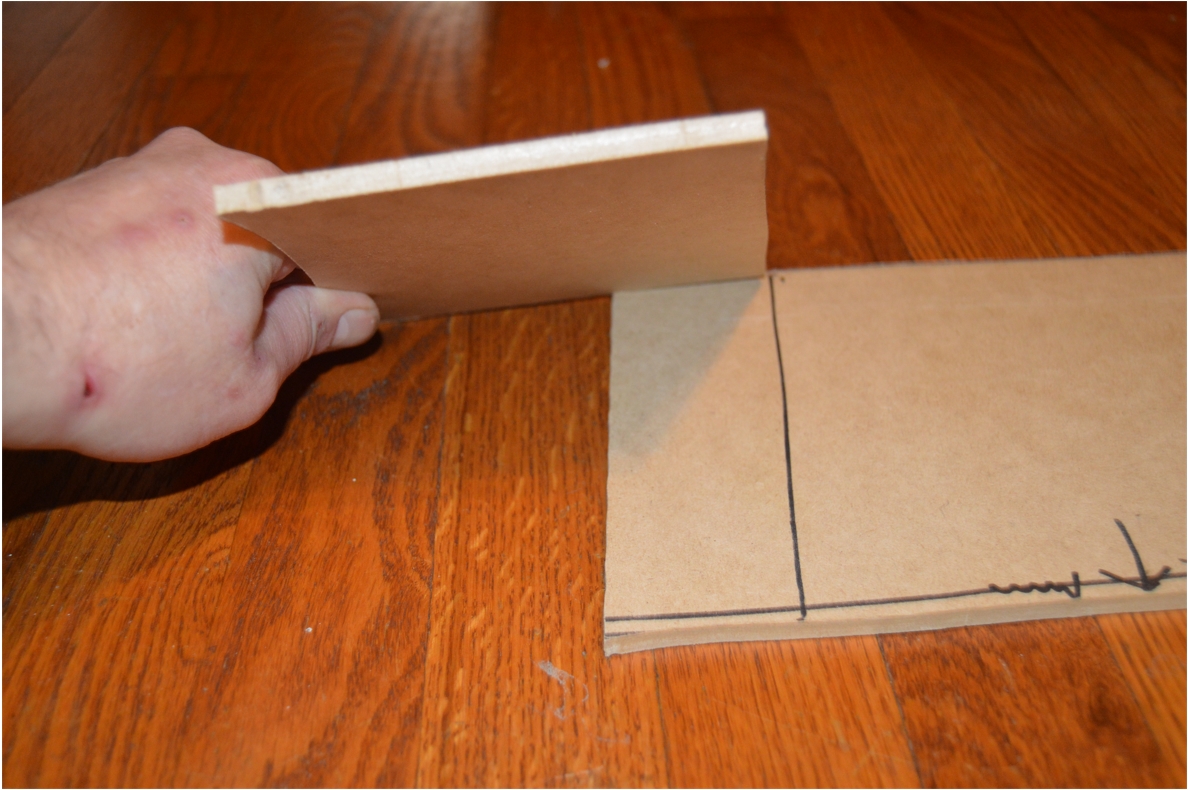
5. Place original shelf onto a piece of cardboard & trace outline of (curved) window side edge.
Measure 6″ away (down) from that measurement in a few spots along the length of the carboard (this is for the seat side angle of the speaker shelf).
Place the OEM piece (seat side of the panel) onto these marks you made, and trace the curved edge onto the cardboard.
(remember, when you pull out the stock unit, it is going to be much wider/deeper than you actually need because of the sections of this panel that tuck in below the window on the rear side, and under the seat on the front side; 6″ is about the actual depth needed on the new MDF flat panel [without the tucked in sections] )
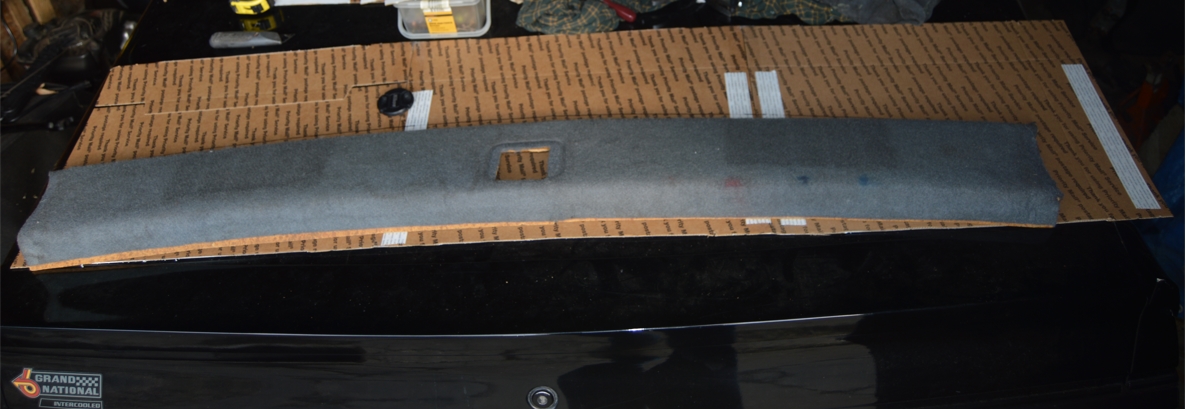
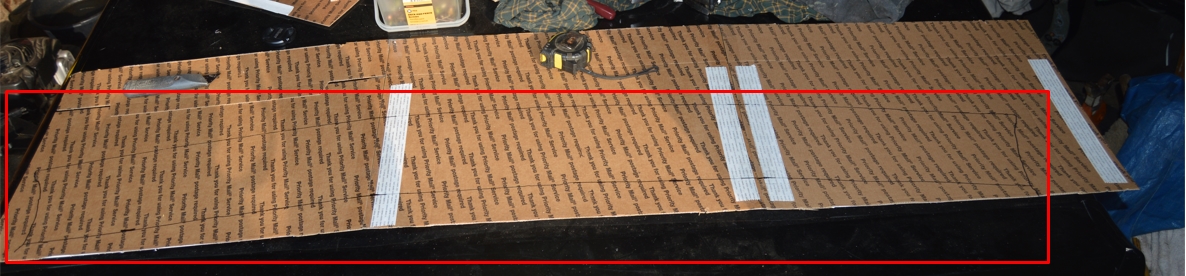
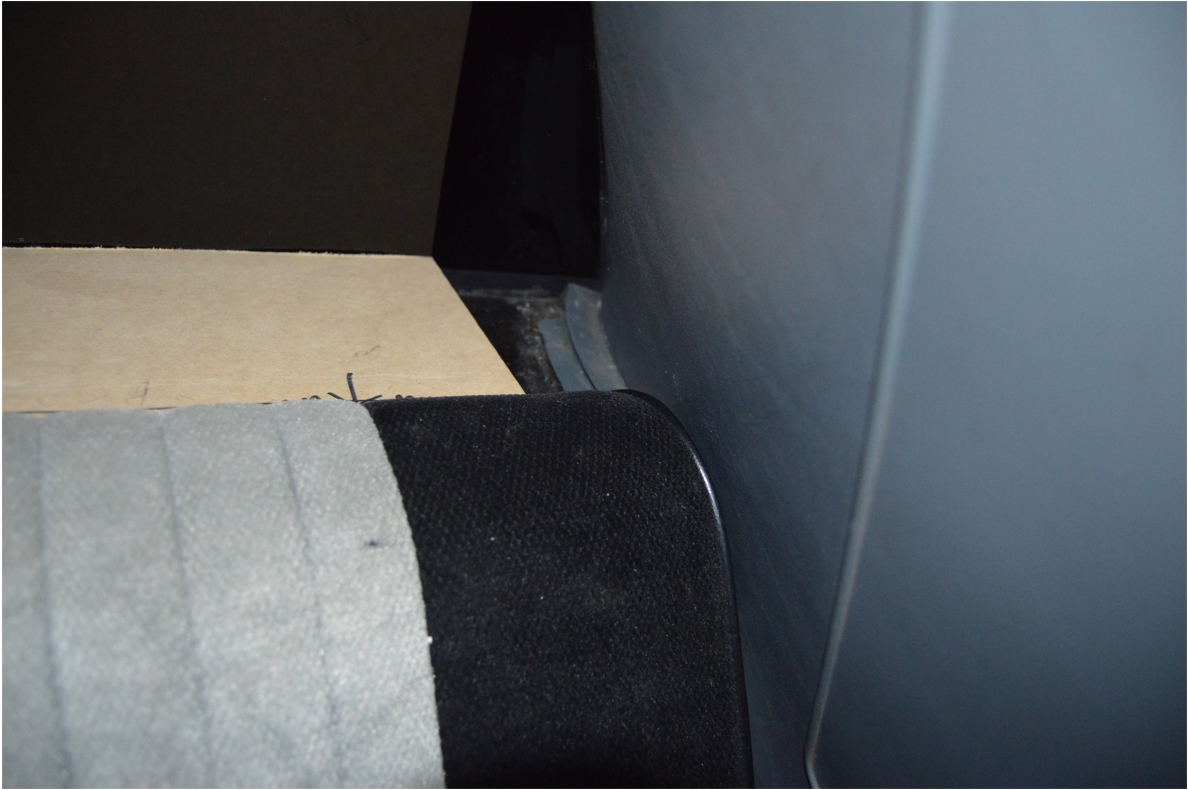
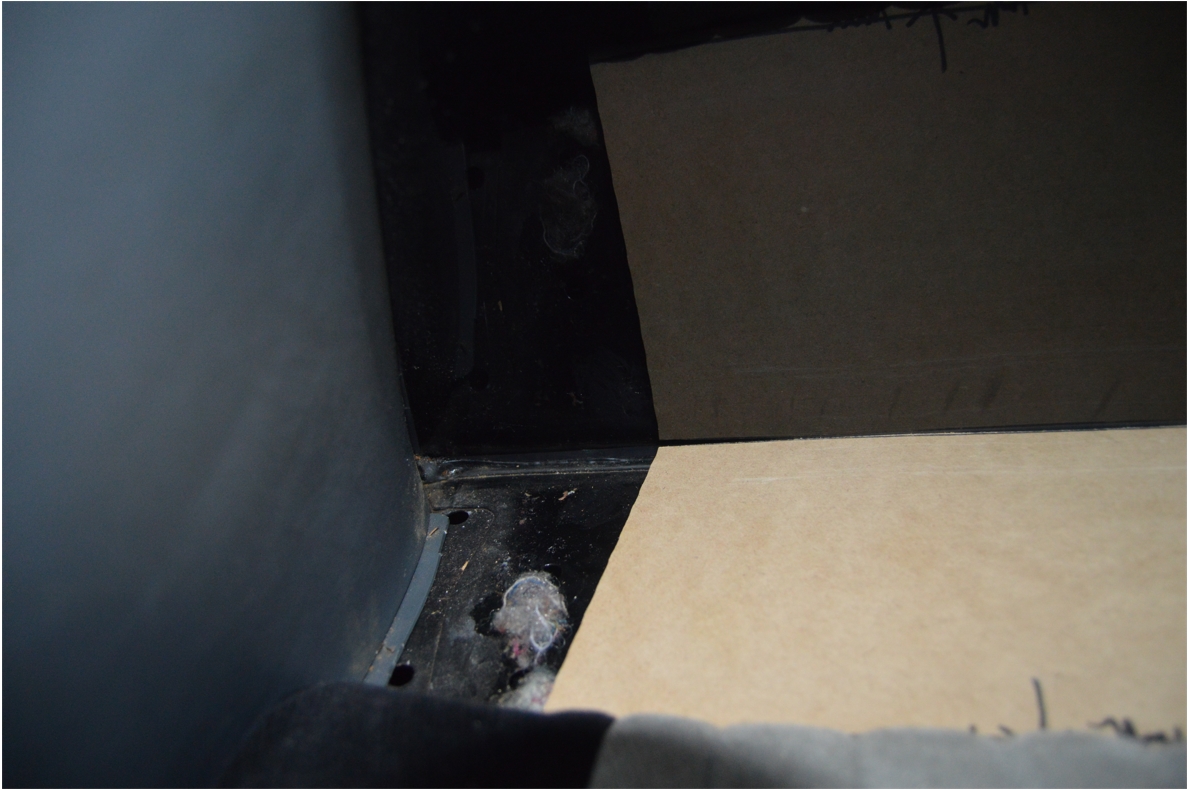
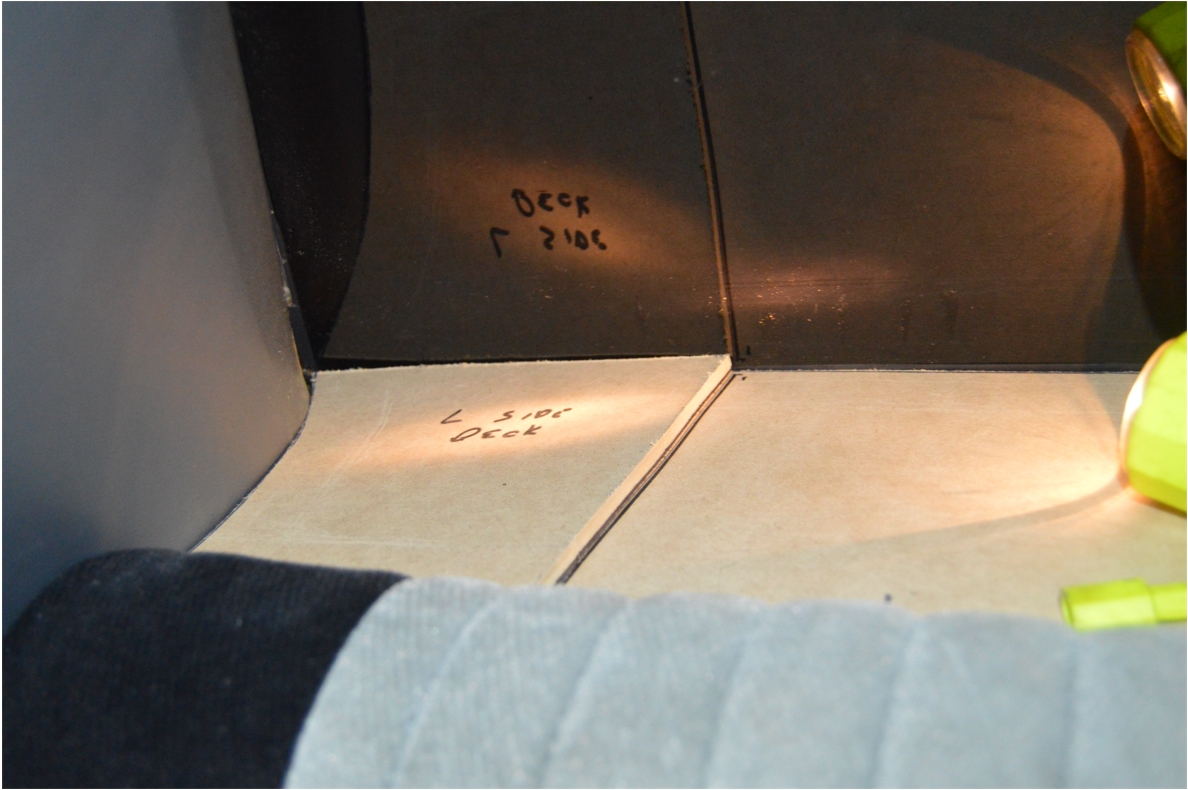
6. Cut out the template. Set the cardboard template into place on the rear deck.
CHECK for proper fitness, and to see if there’s any gaps (between template and rear glass, or between template and seat, or on the sides).
[in our case, we need to add 1/4″ more on the drivers side, so it can reach the plastic quarter panel piece]
[it’s much easier to modify a cardboard template than it would be to adjust MDF, hence the making it out of cardboard first!]
.


.
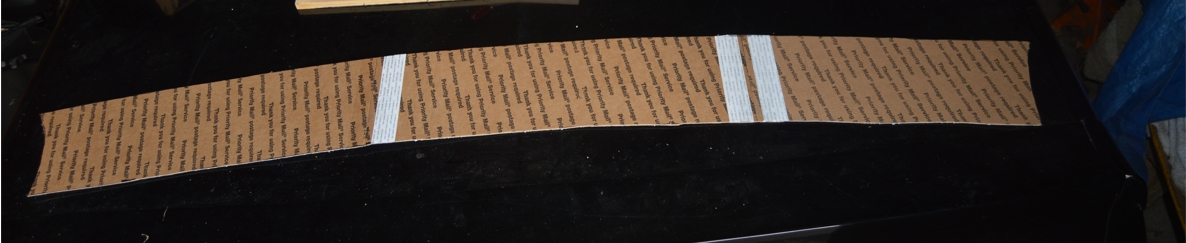
7. Once you have the fitted template the correct size, set it on the MDF board, trace, and cut it out.
8. Be sure you cut the new shelf out a bit smaller than the template outline (to accommodate the thickness of the vinyl). The new piece needs to be close to the stock size, to fit in the original area.
Test fit the new mdf shelf in place, check fitness again, adjust if necessary.
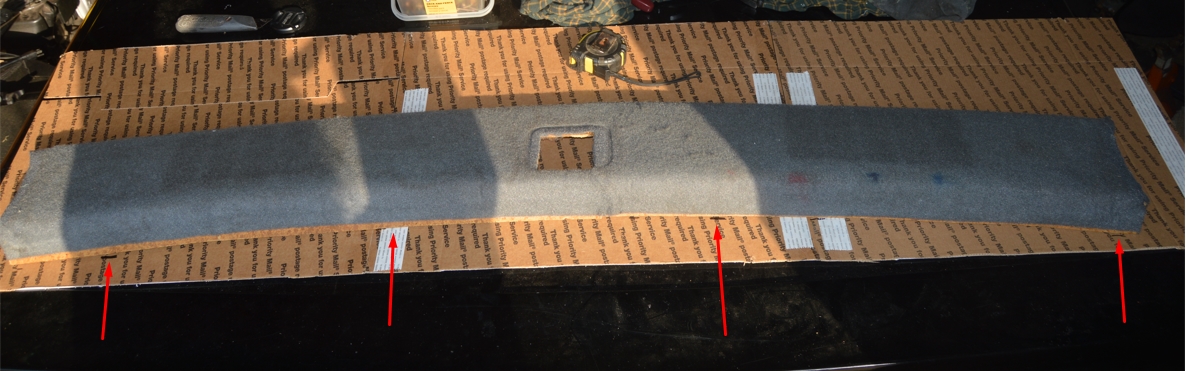
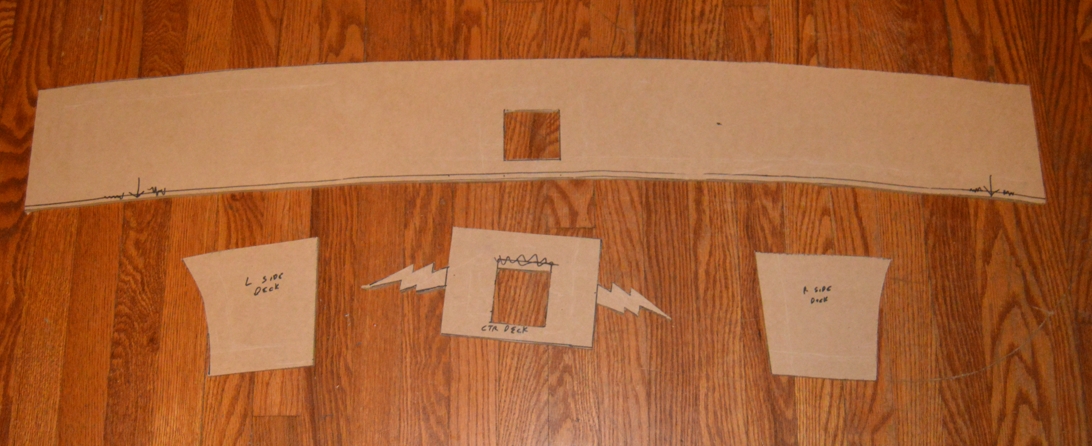
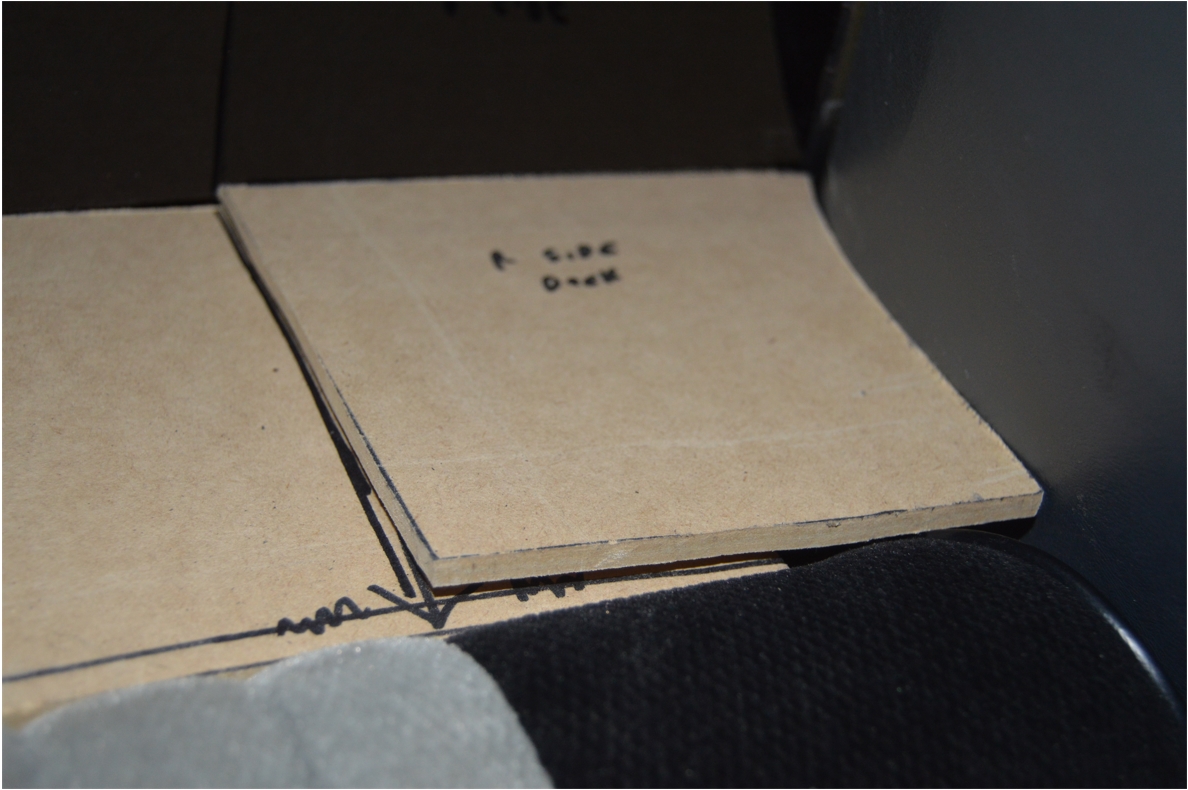
NOTE: since the main piece we are using we already know is going to be shorter than the required length, we will just center this main piece in place. Then we are taking note that the end-sides we need to take up the shortness of the main piece, need to be about 4.5″, but as they need to attach to the main board, we are adding about 2.5 extra inches onto them. (so a total of approximately 7″ wide)
(and after making these end caps, we set them on the main board, while in the car, and marked the location that they need to sit at)
.

.
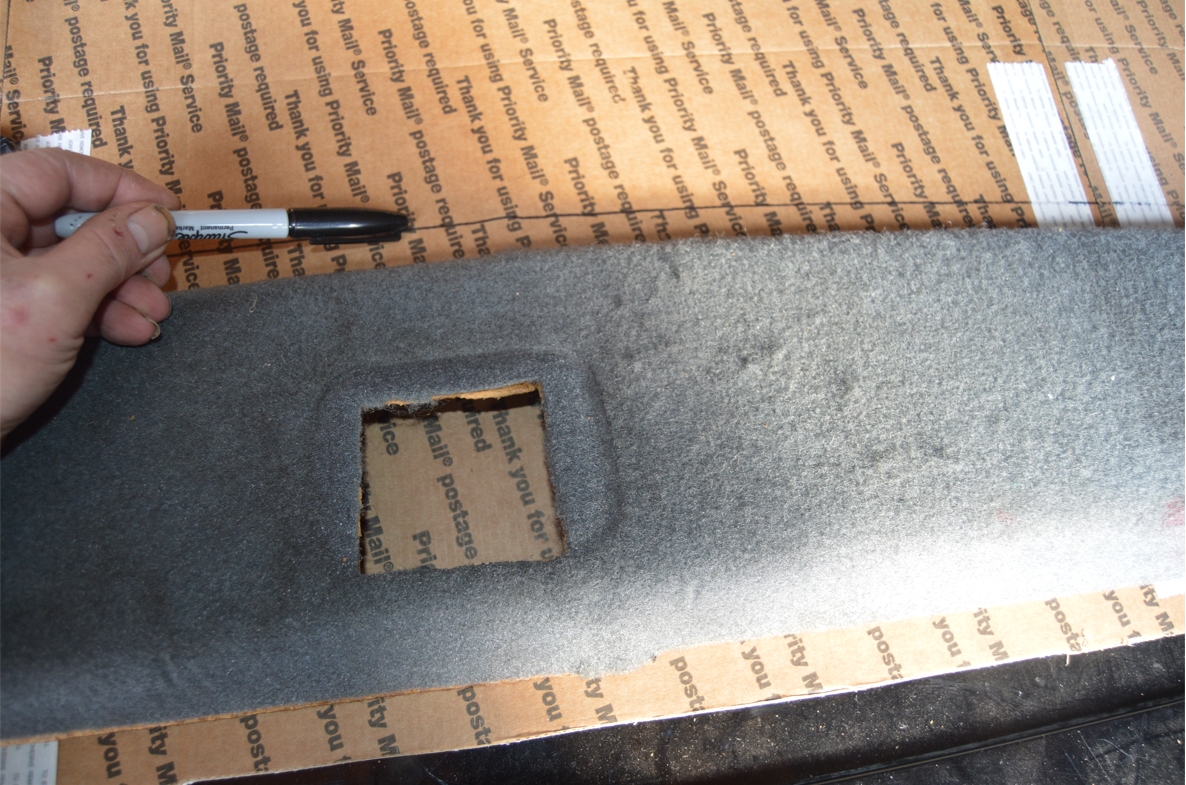
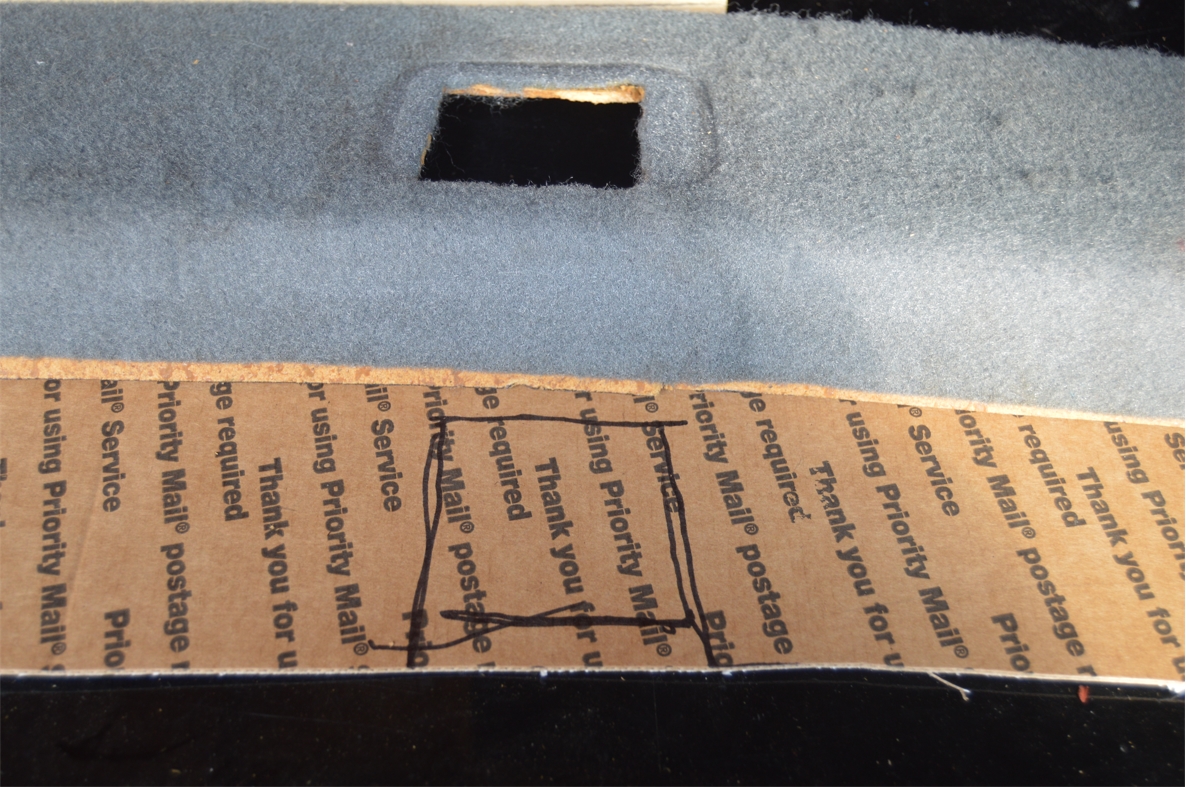
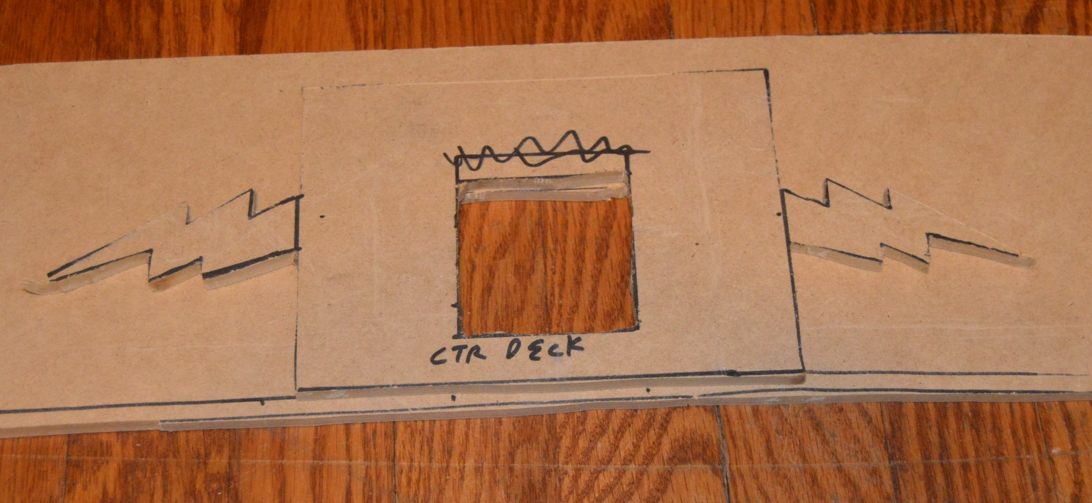
9. measure for, mark, cut out the hole for the brake light.
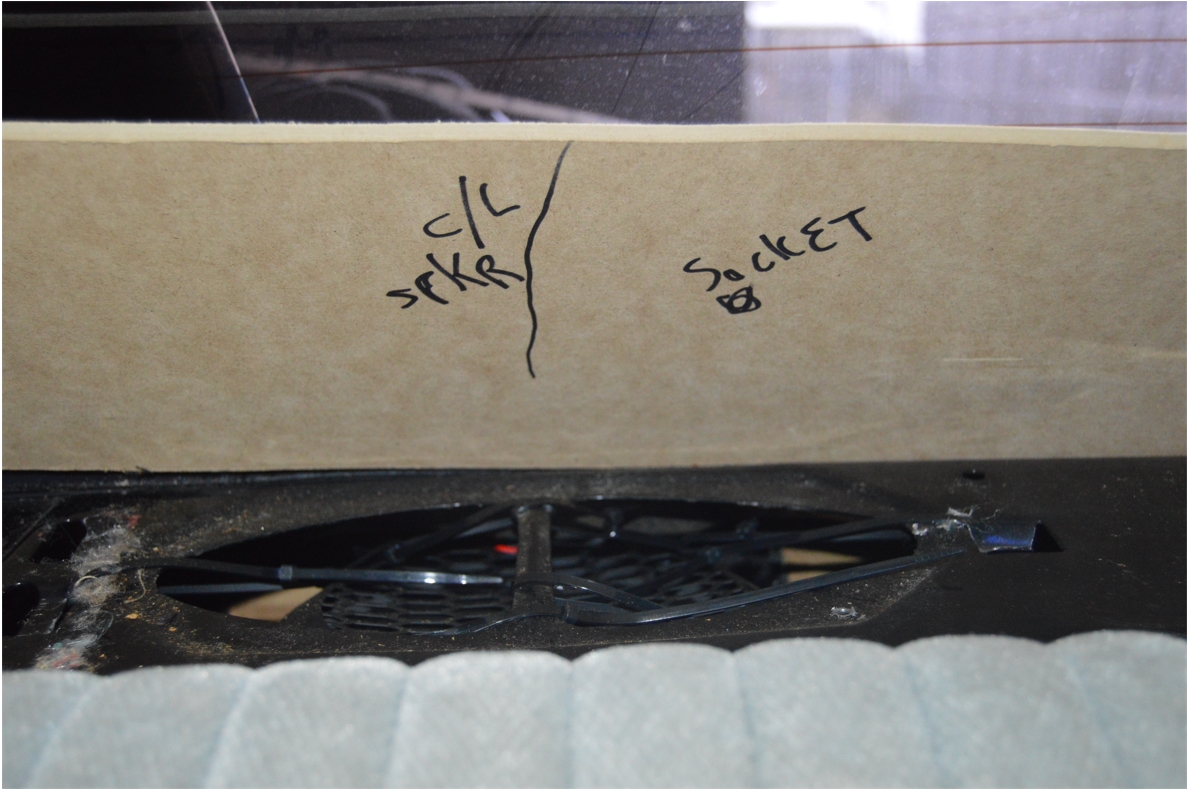
10. Mark the center of the OEM speaker cutout onto the new shelf. (on both sides, 12.5″ from each end)
[we set the main board centered in the car where it needed to be, then flipped it up, and on the backside of the mdf, marked the center of the speaker holes; for which there is an existing metal brace in the center of that hole]
[you should also mark the location of where you intend on putting the light socket, since you can check to make sure it will clear the speakers]
.
.
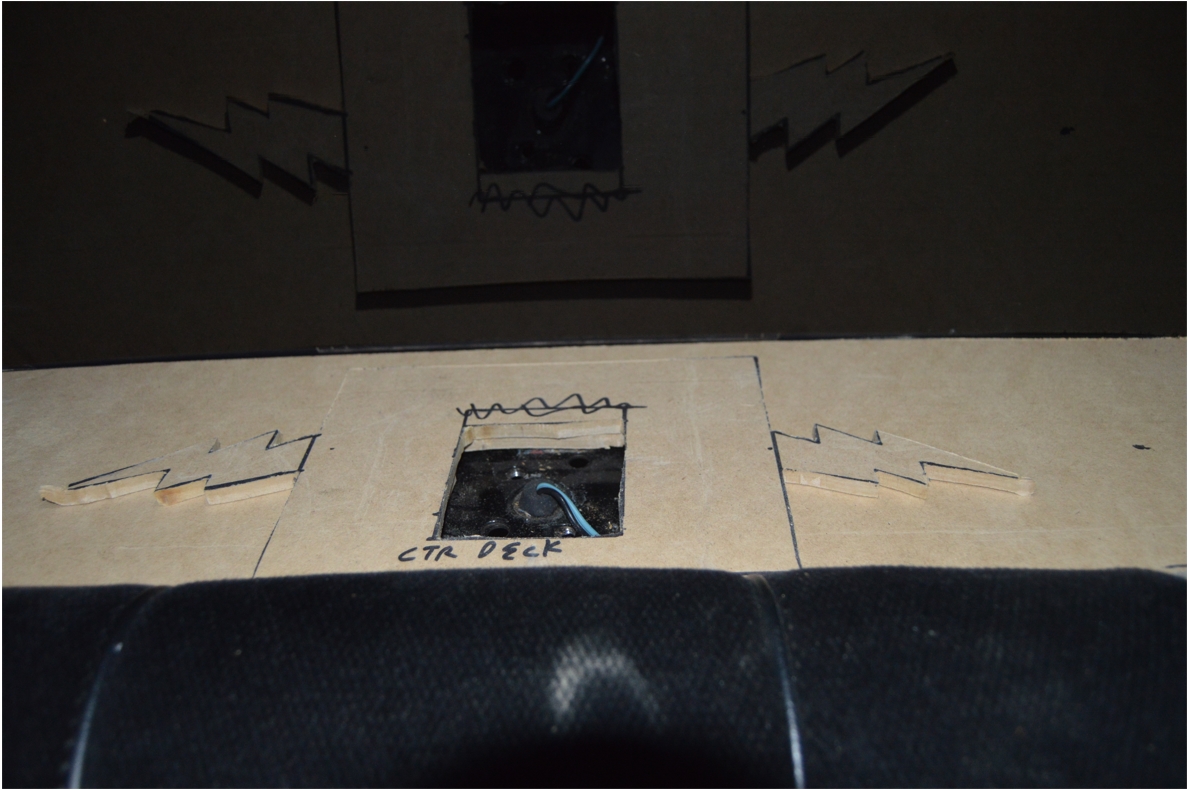
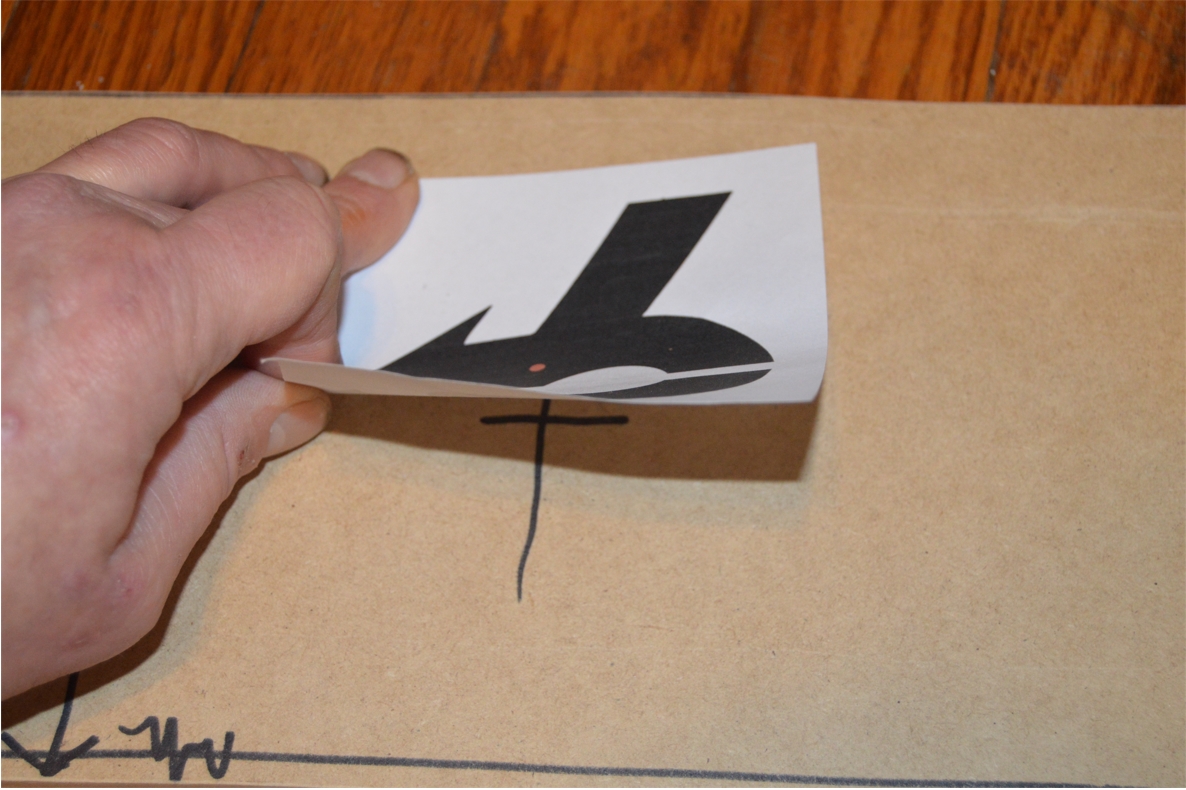
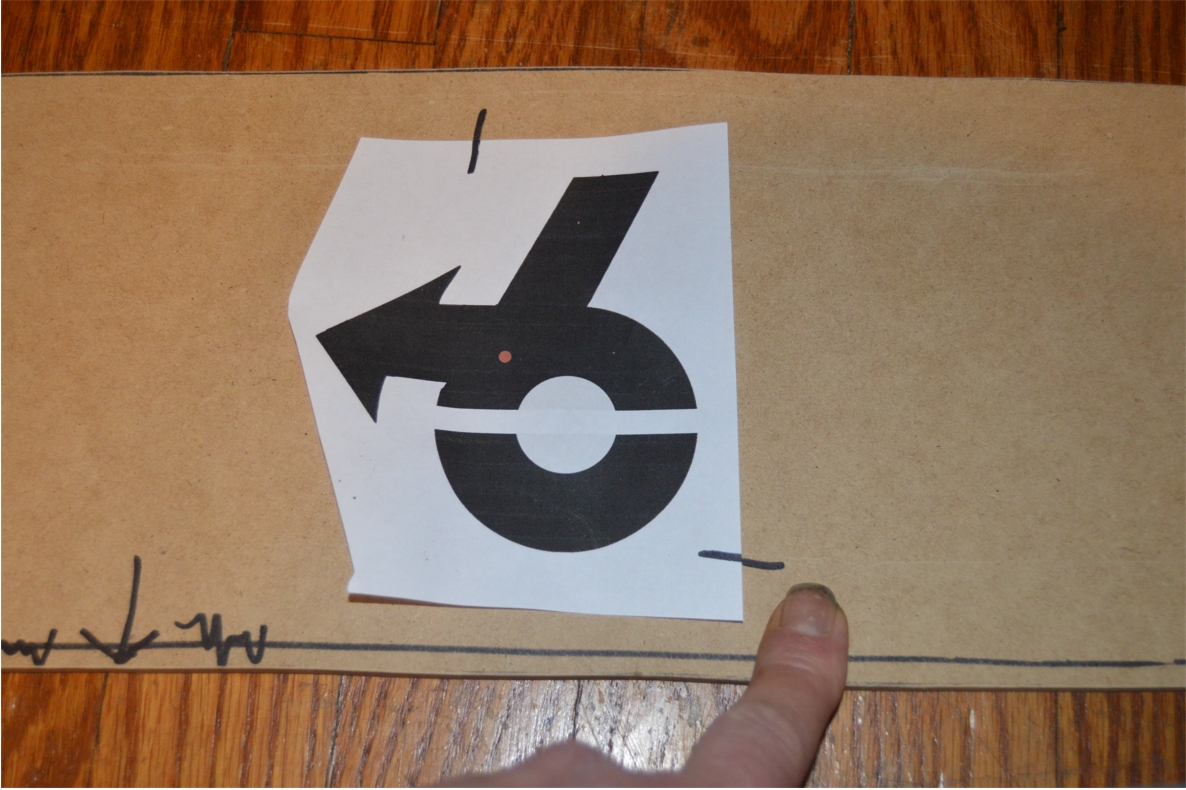
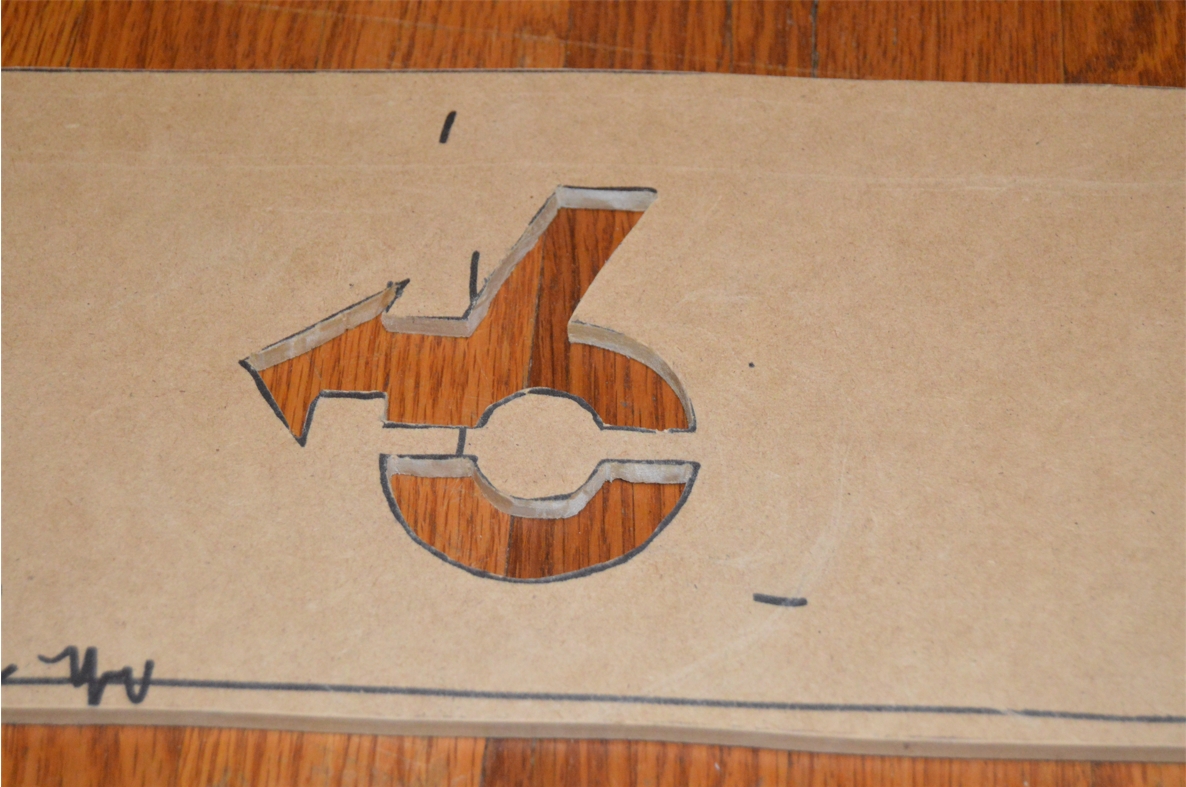
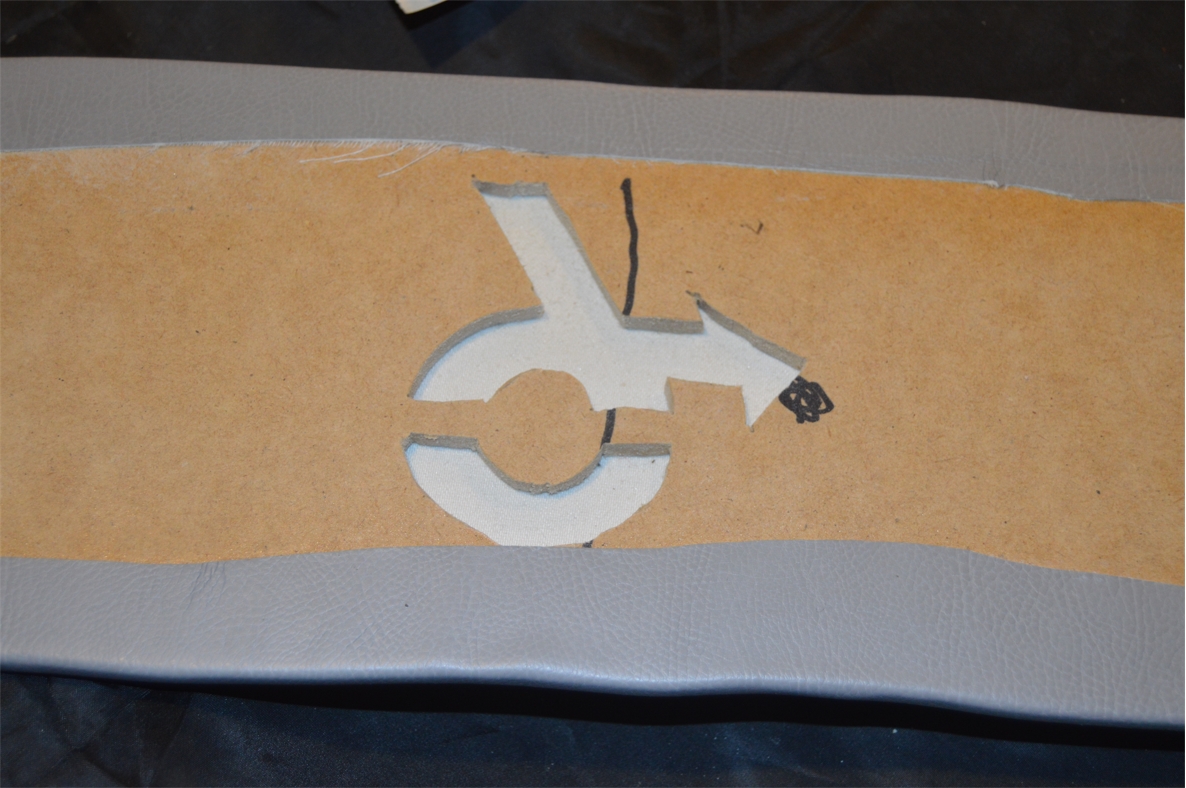
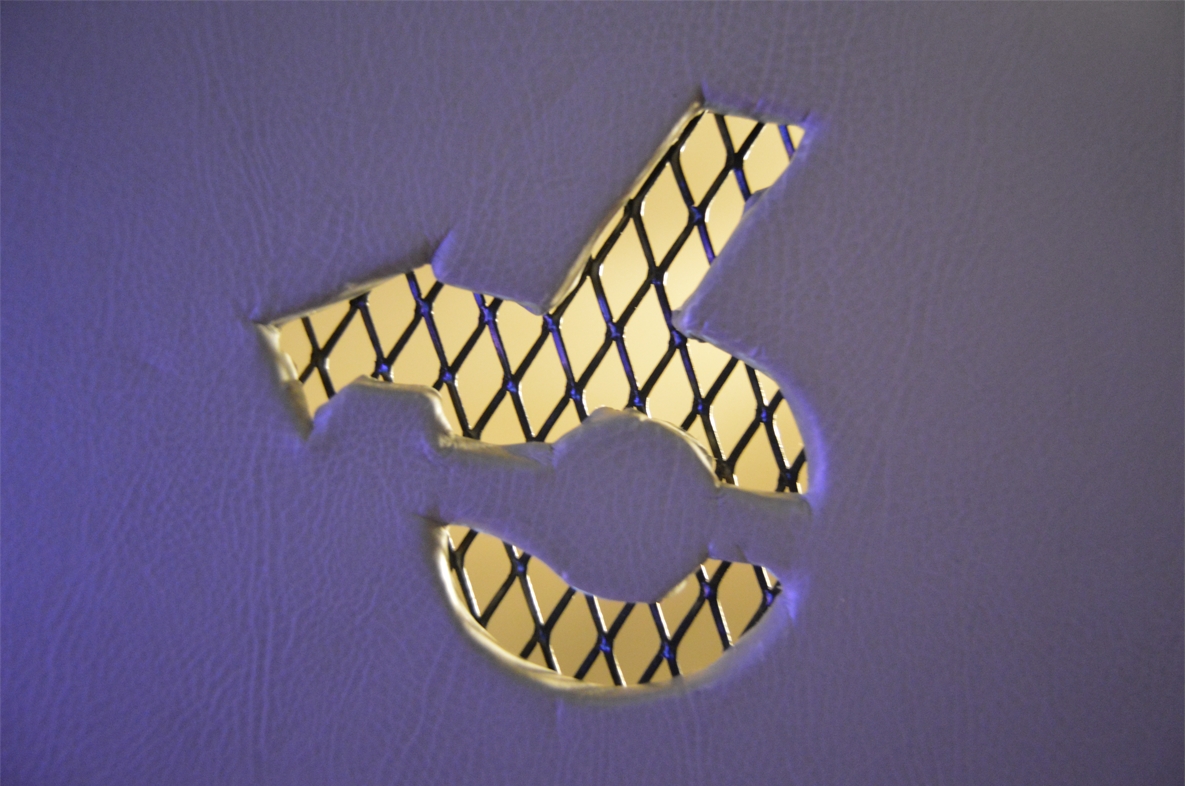
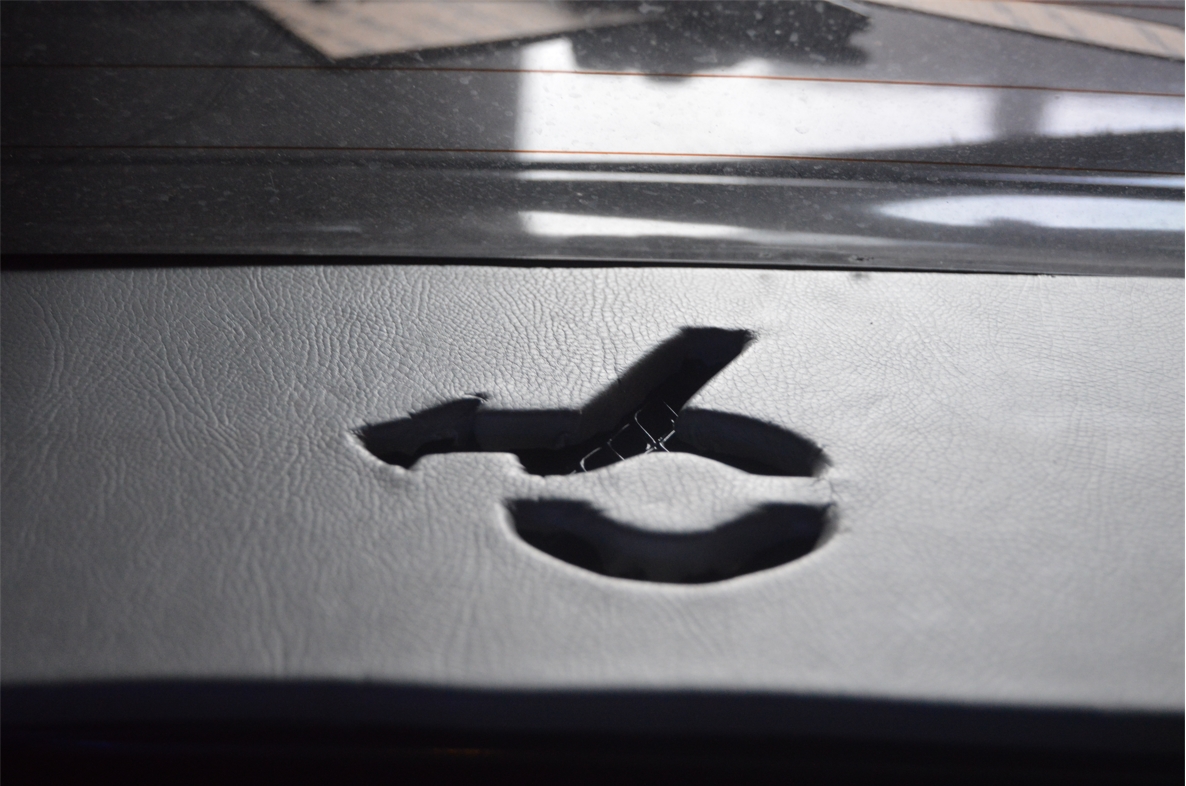
11. Place the Turbo 6 symbols template onto the board, centering them on the marks you made in the previous step. (printable template below, the arrows are 4″ tall)
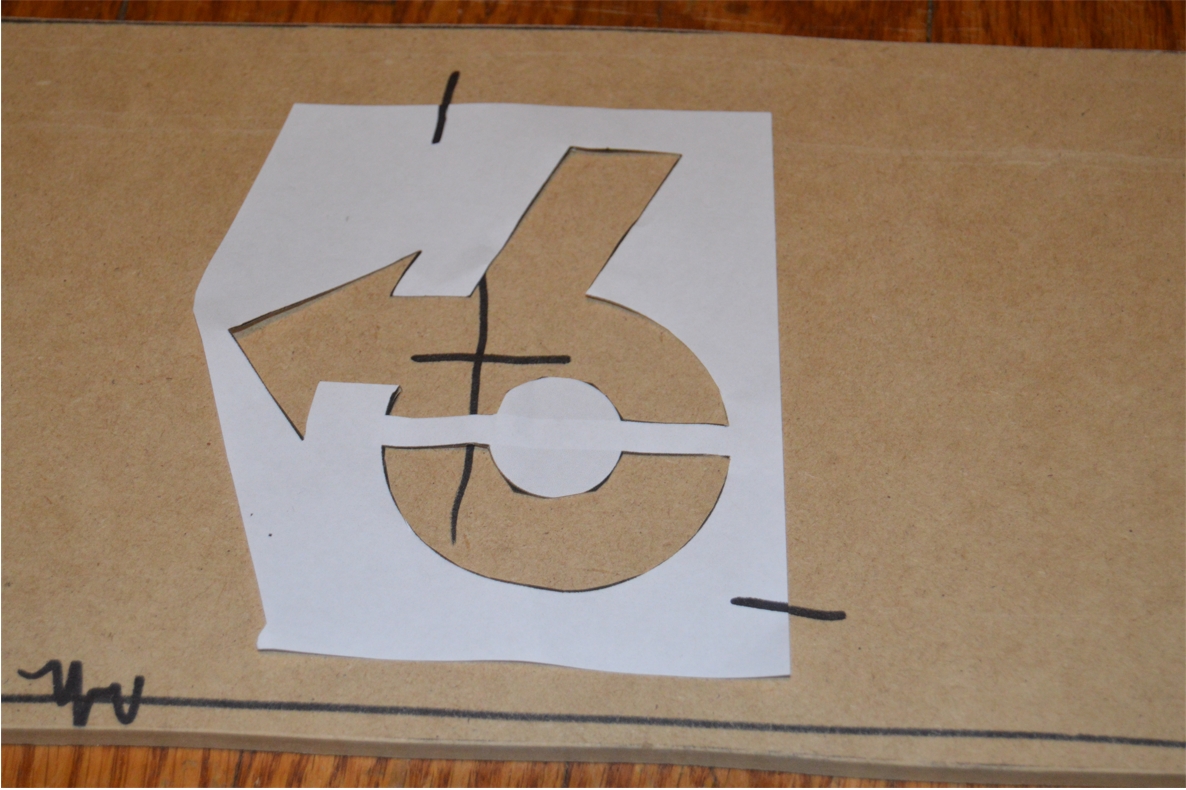
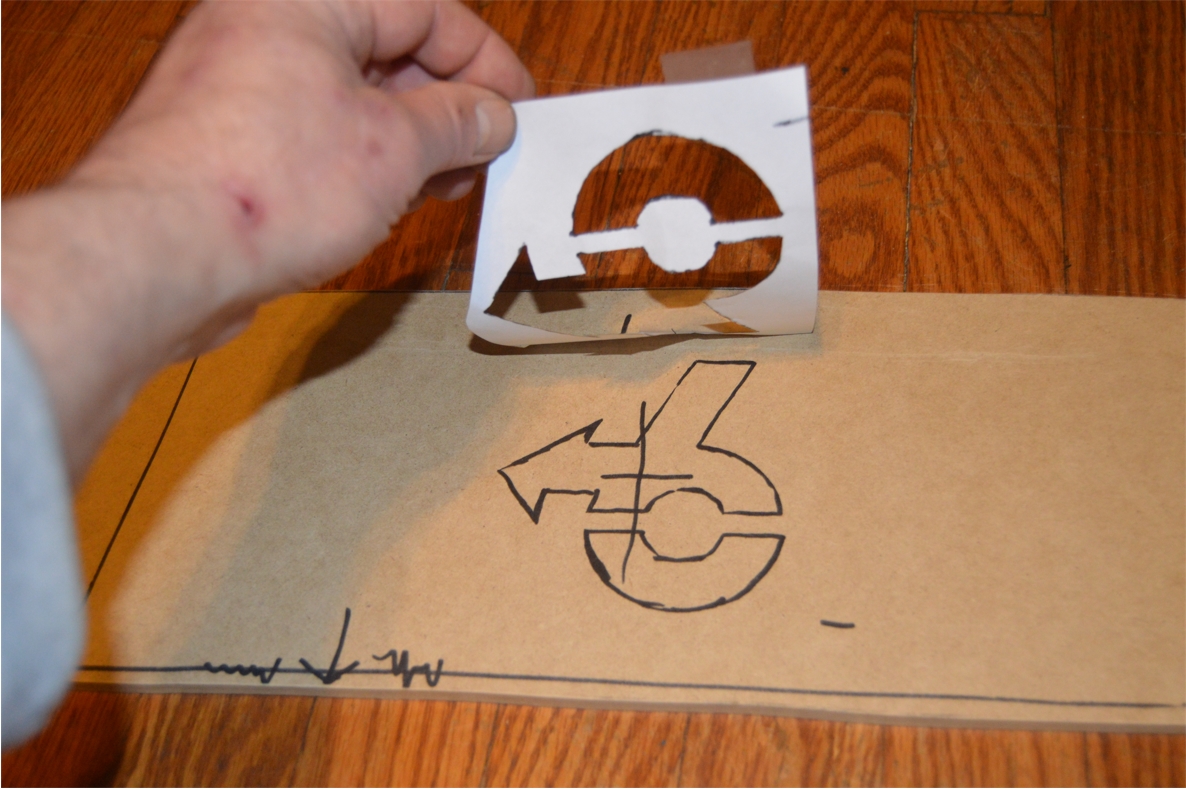
12. cut out the holes for the Turbo 6 logos.
13. Smooth out the shape with a file (or dremel tool).
.
.
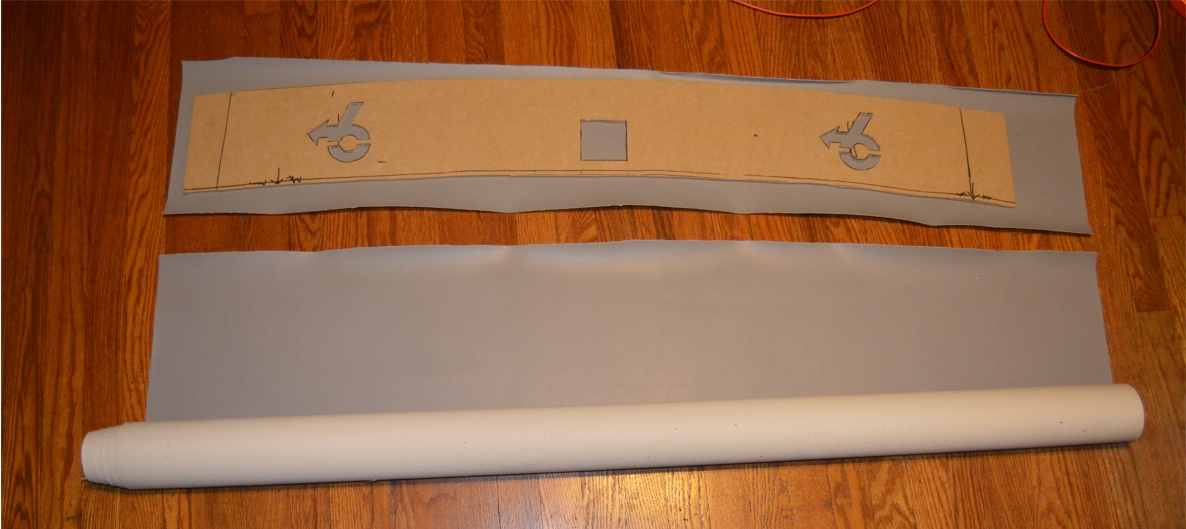
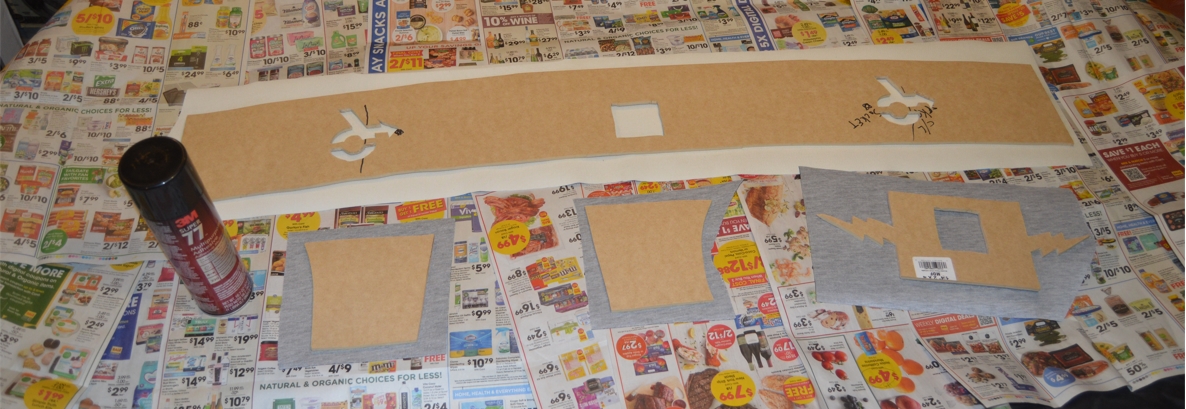
12. Place the new shelf on top of the vinyl covering.
13. Cut the vinyl about an inch and a half bigger than the shelf all the way around. (so you have enough material to wrap the vinyl over the top and edges, and have enough to secure it on the bottom side)
14. Spray the entire top side of the shelf with the tack spray.
15. Let it sit for a few minutes to set up.
16. Place the vinyl piece face down, then put the new shelf onto the (backside of the) vinyl, with the glued side down, securing it to the vinyl.
17. Push it down, make sure it’s flat, with no bubbles between the vinyl and the shelf.
18. Put some heavy items on top to weigh it down, let it sit for a few minutes so the 2 pieces bond together.
.

.
19. Spray the outer edges on the bottom side of the shelf, as well as the edges of the MDF, let it sit for a few minutes to set up.
20. Finish wrapping the vinyl onto the board. Give it a few minutes afterwards to bond before continuing on.
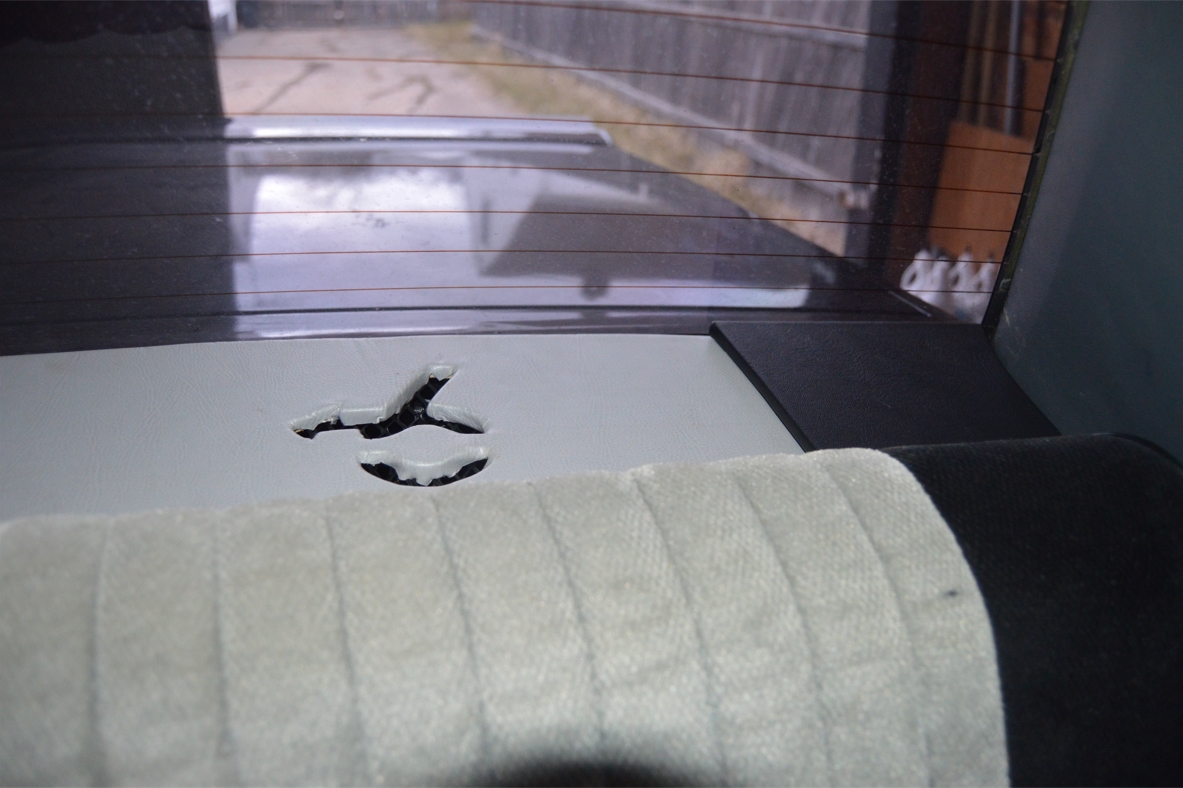
21. Cut the hole out for the third brake light. You’re going to make an “X” inside the hole (on the vinyl), from corner to corner. DON’T cut the X all the way to the corners of the boards. Leave about 1/4″ between the ends of the X and the edge of the corners. This will make sure the material doesn’t tear on the top side, where it would be noticeable.
(it’s ok if the corners are a bit rounded & aren’t perfectly square, this whole area is covered under the 3rd brake light, so nobody will see this section after the installation is completed)
22. On the backside of the shelf, spray around the outside edge of the brake light hole. Let it sit for a few minutes to set up.
23. Pull the vinyl onto the backside, and secure to board. (all 4 pieces of the vinyl)
.


.
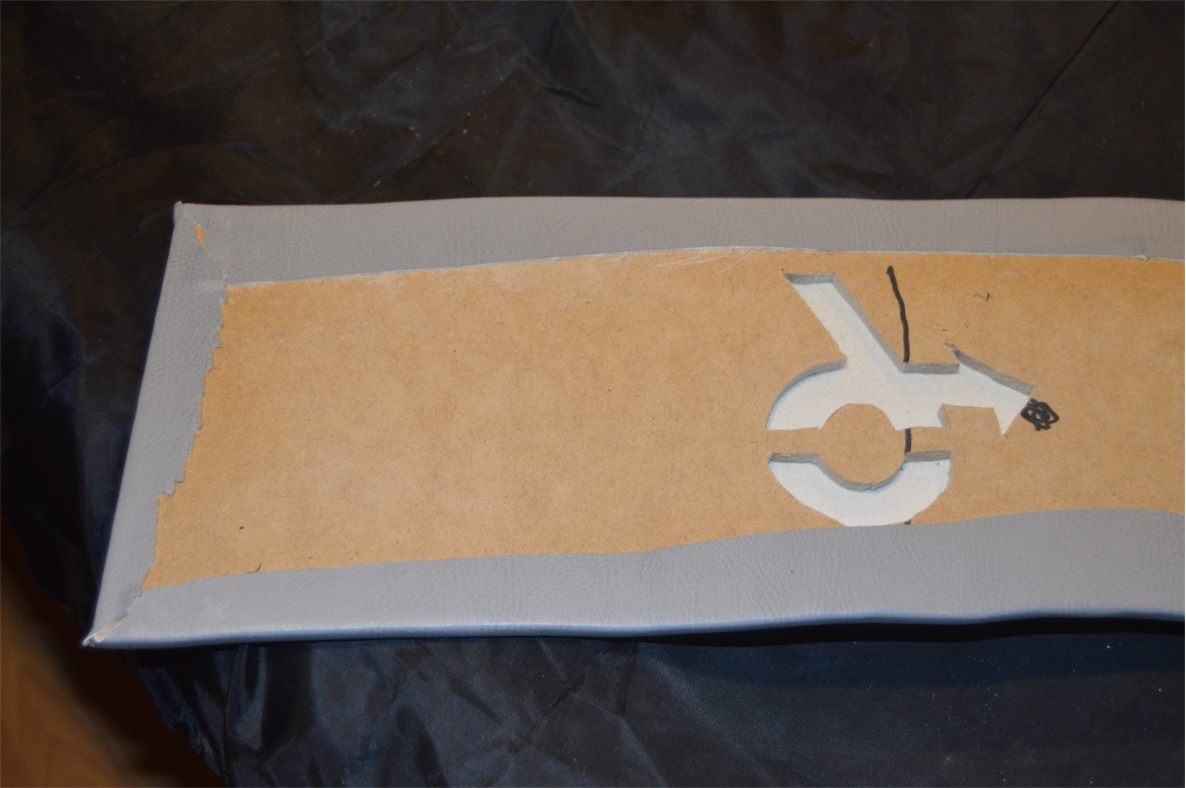
24. Cut the holes out for the Turbo 6 sections. Use a similar method for these, like you did for the above.
25. On the backside of the shelf, spray around the outside edge of the Turbo 6 holes. Let it sit for a few minutes to set up.
26. Pull the vinyl onto the backside, and secure to board.
.


.
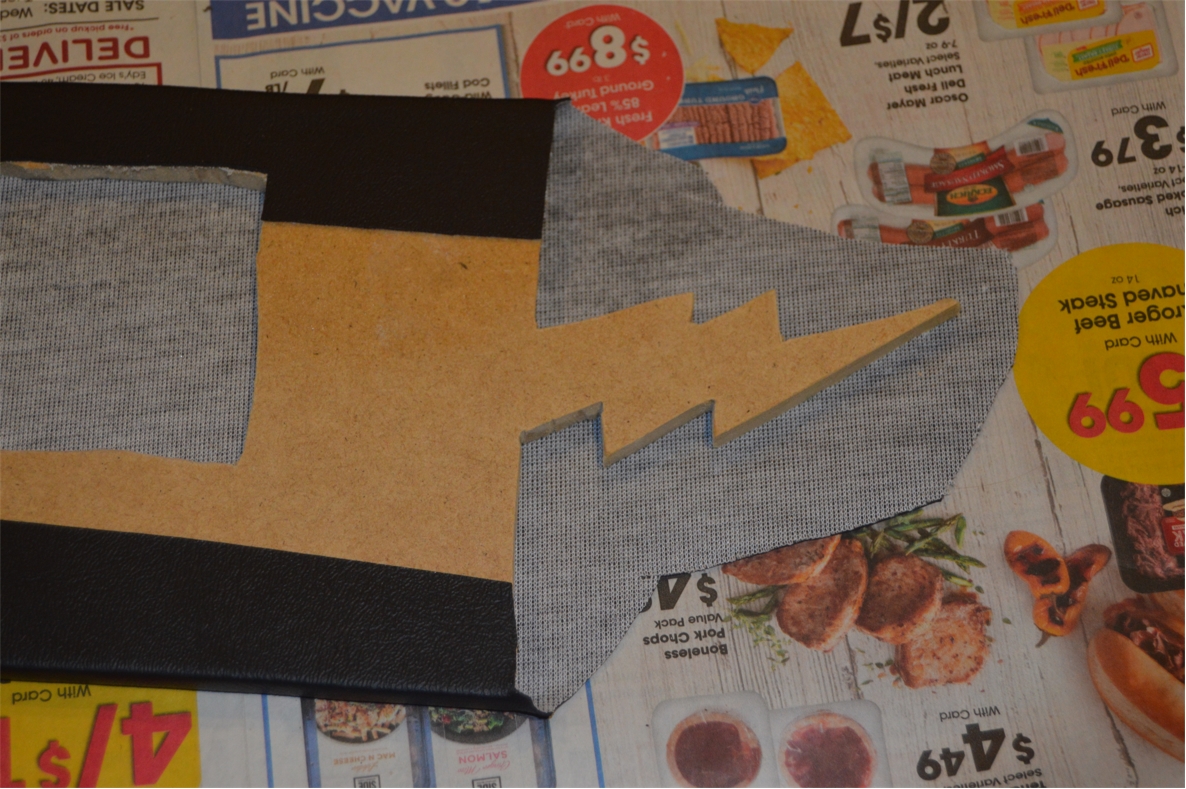
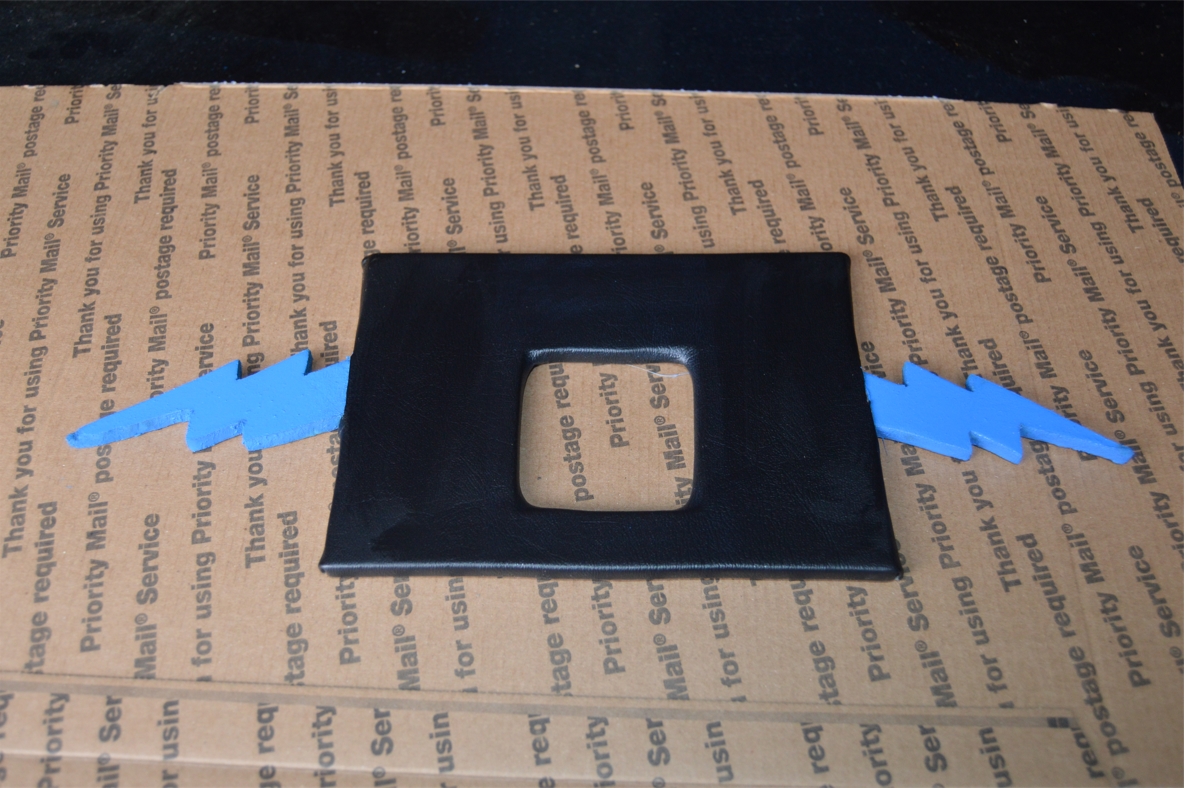
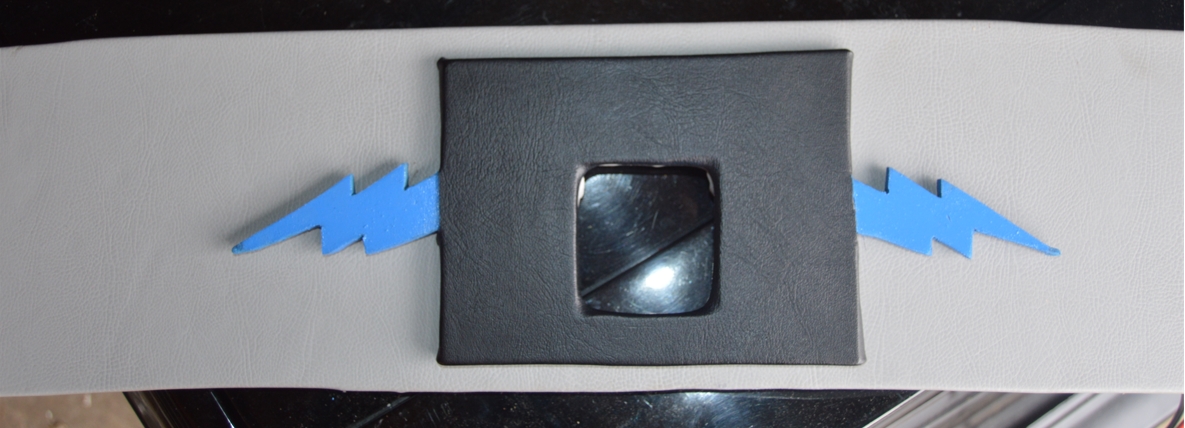
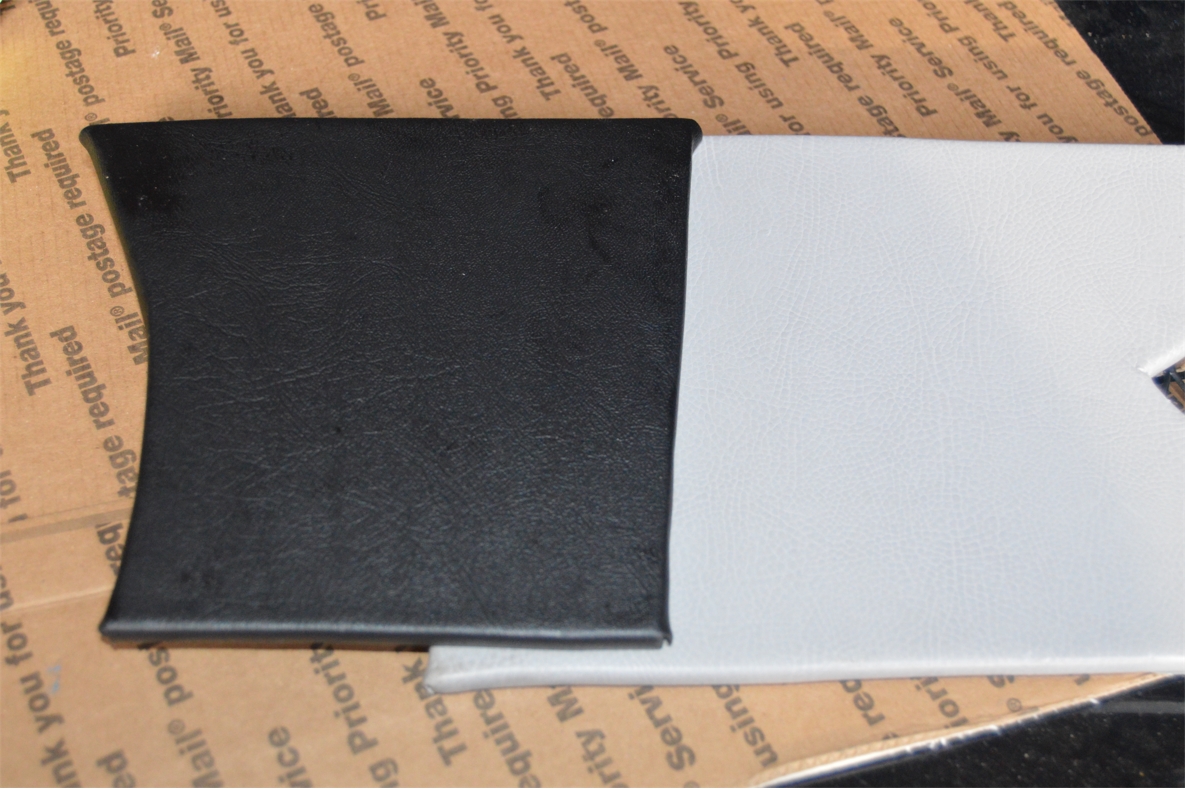
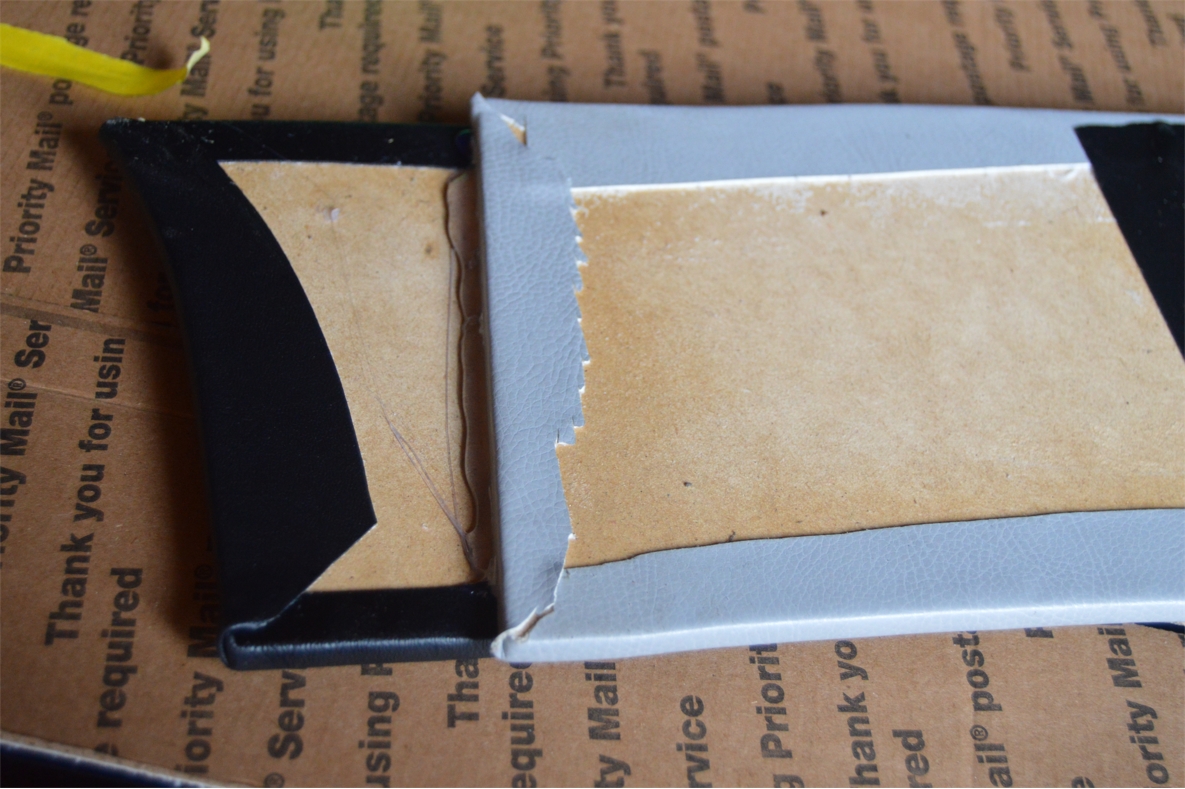
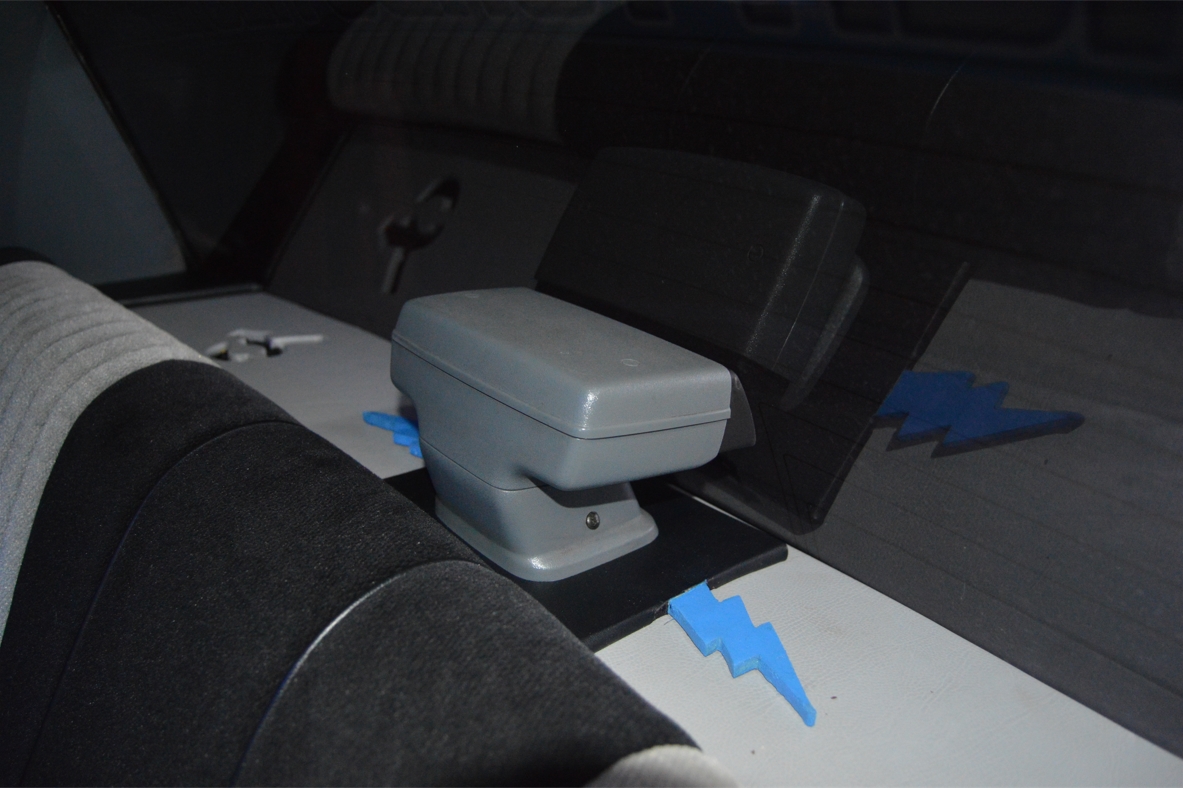
After we wrapped the main board with the gray vinyl, we then covered the 2 end caps and center section with the black vinyl.
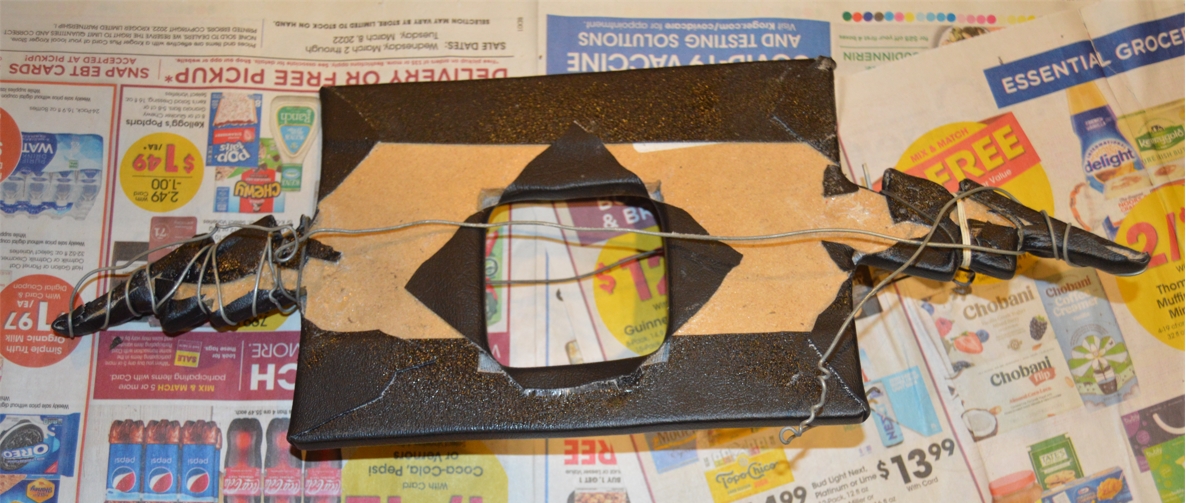
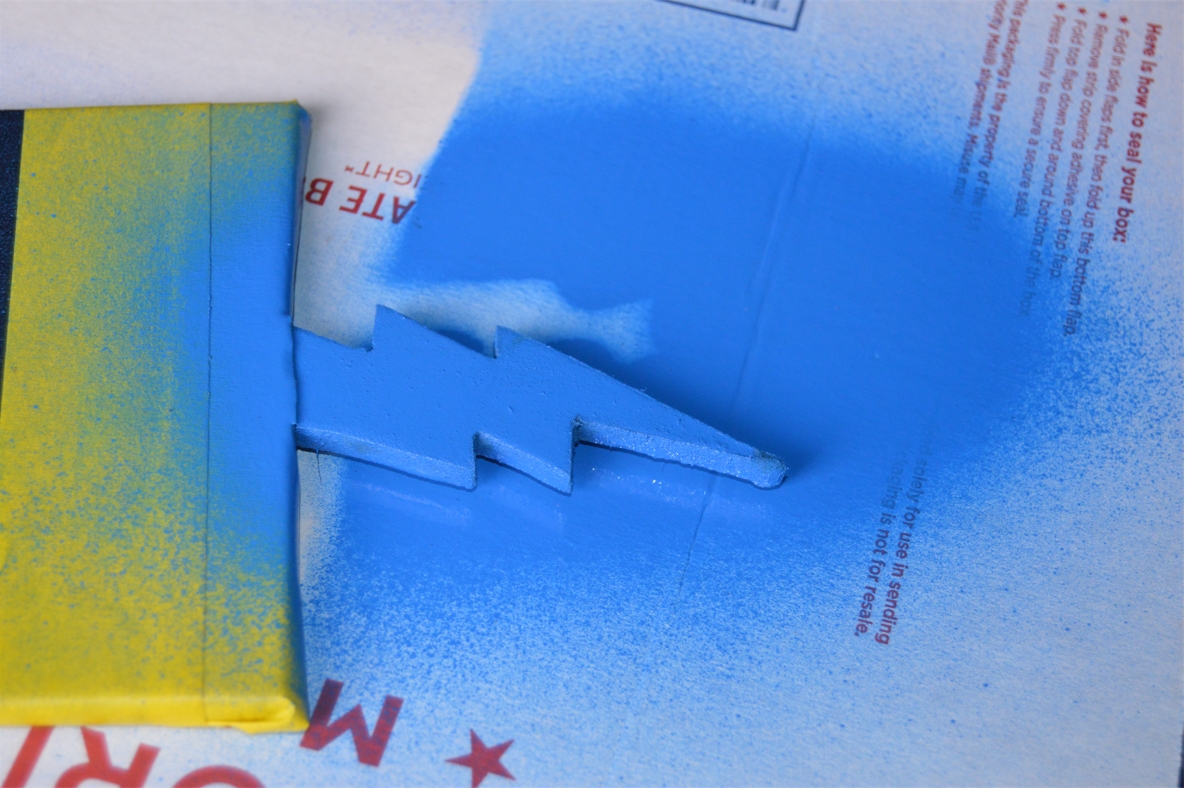
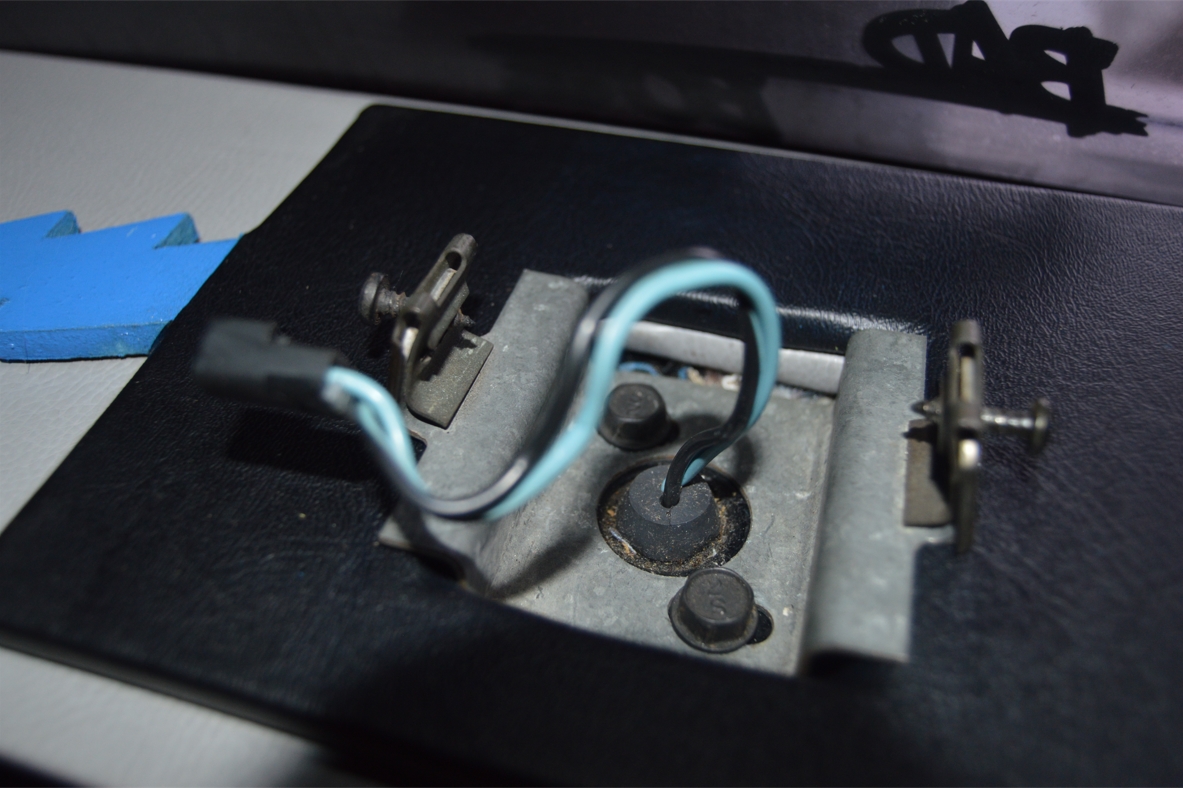
[Just FYI, wrapping the lightning bolts on the center piece with the vinyl was tough! The corners needed a little persuasion staying in place, so wire was wrapped in these areas, pulling them into place. They were left like this for a couple hours while the glue dried. That’s the wire you see in some of the photos]
[Side Note: Don’t you love it when you’re reading a story elsewhere & it seems like an easy project to do, but when YOU do it, you struggle?! Yeah, we hate that too, they never tell you the problems and issues they ran into! WE DO! If we run into a problem or something that isn’t working, we tell you about it so you don’t make the same mistake! We’ll show you first the mistake as well as how to correct it]
[So, Note to the note above! When we “wired up” the vinyl to the board, for the center section with the lightning bolts, we thought it would pull it into place. Well, it didn’t. When we unwound the wire, the vinyl was all bubbled in the corners. Uggg. So we ended up just cutting those vinyl parts off and spray painting the bolts with blue paint. At least the blue goes well with the other blue components on this Gbody Regal! You’ll see this change in the bolts in the later pics of this story]
.
.
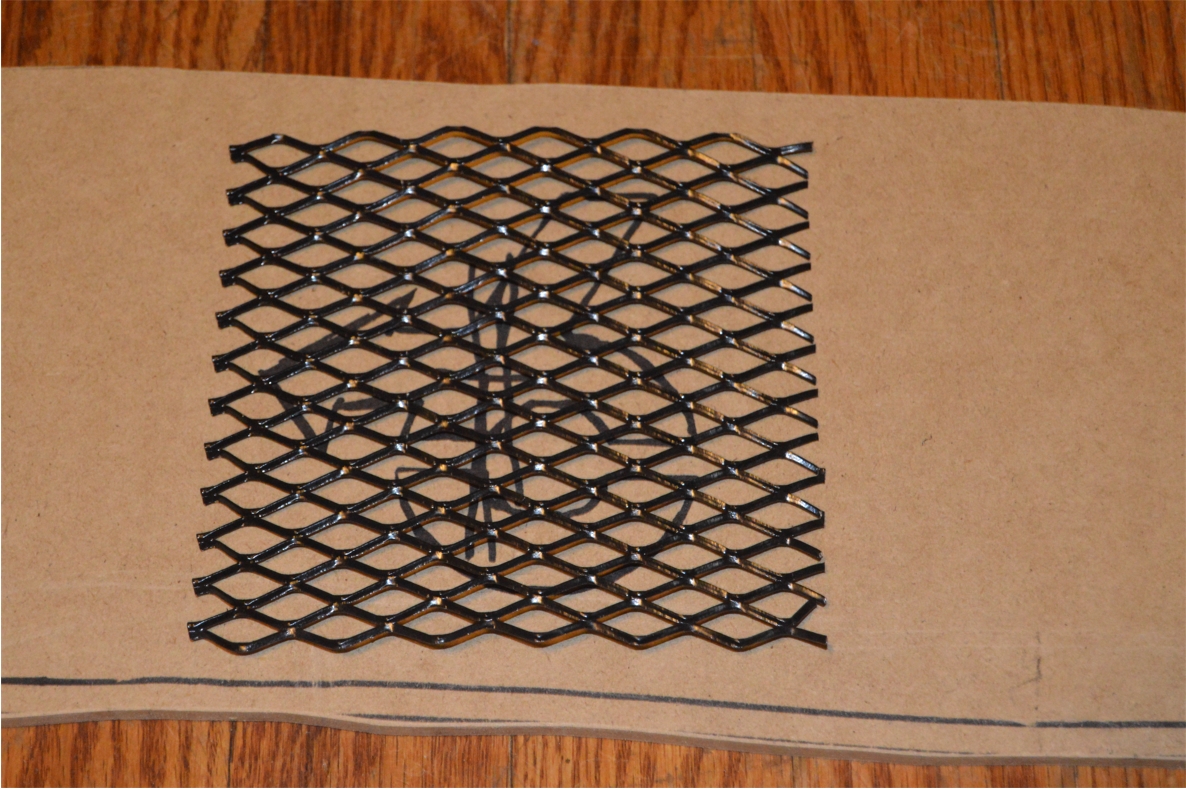
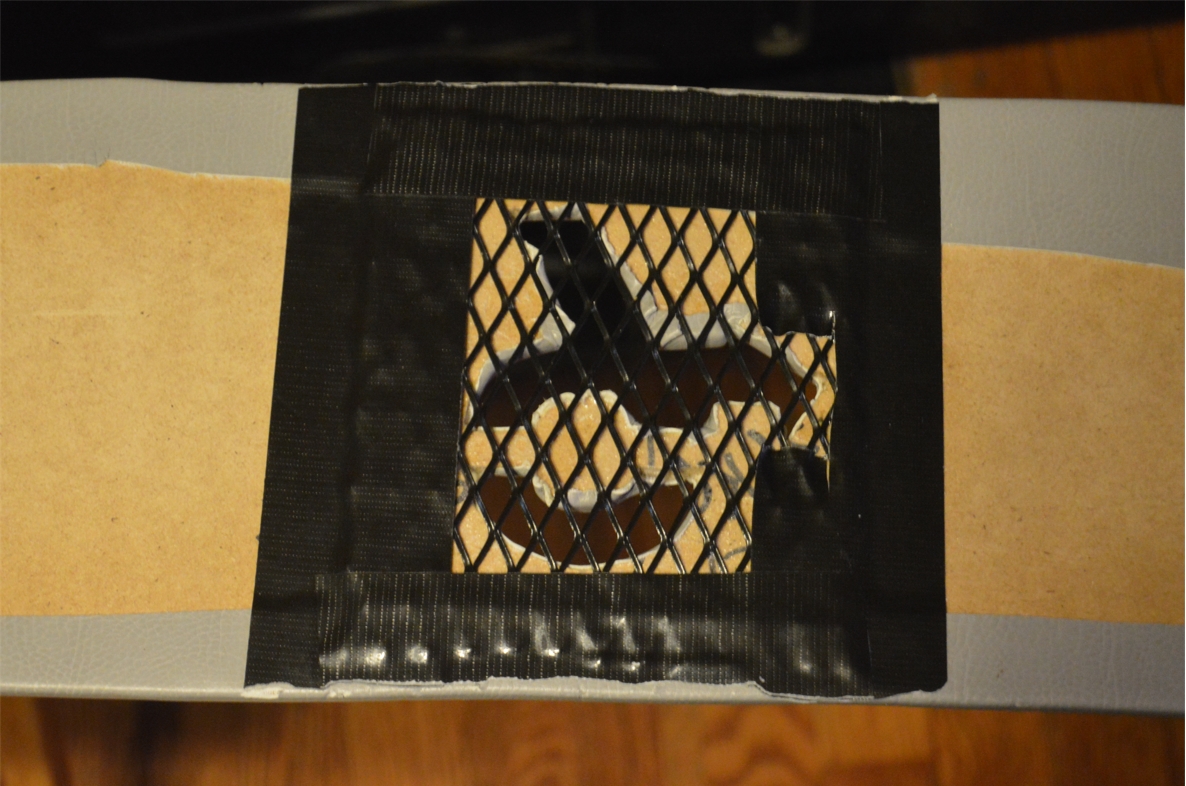
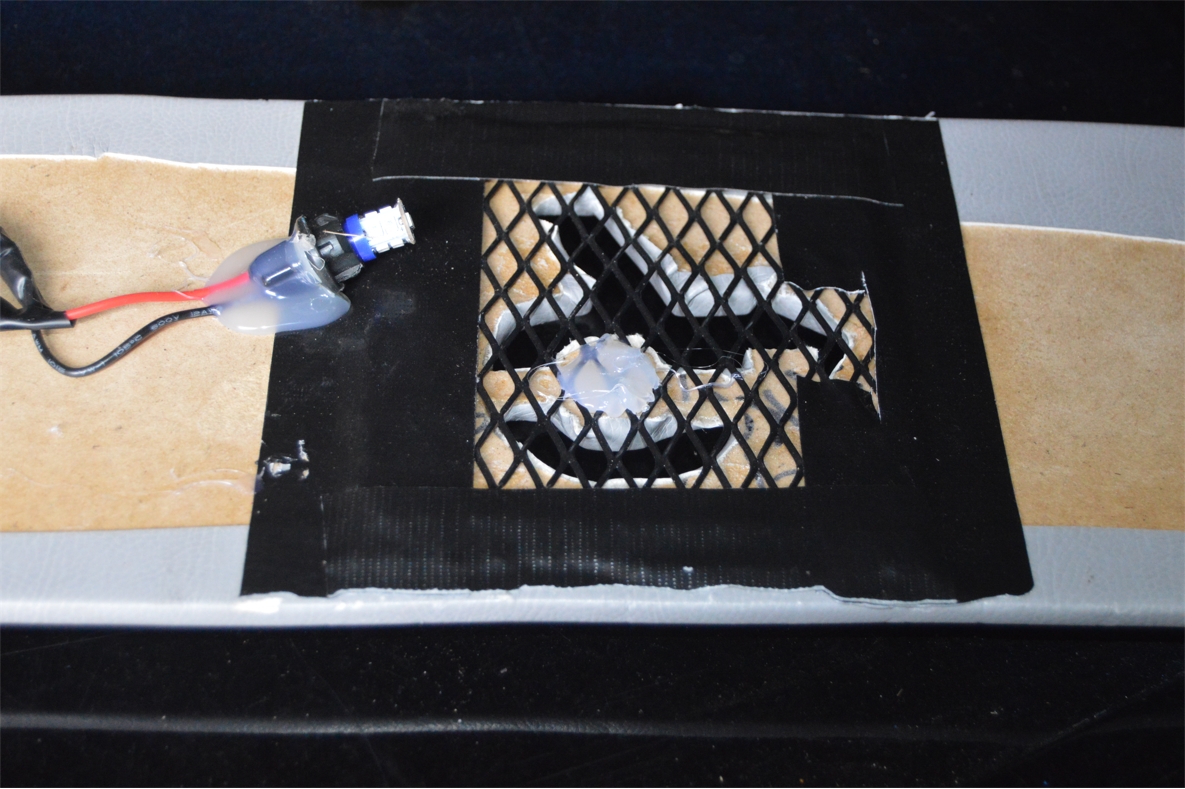
27. Cut out 2 (square) pieces of mesh a little bigger than the Turbo 6 arrows.
28. Secure mesh (on the bottom side of board) with glue (we used duct tape as well).
(glue down the actual turbo 6 arrow to the mesh as well, this will help keep it in place from vibrations)
.
.
29. On the inner sides of the Turbo 6 arrows, (nearest the center of the car), you will attach the light sockets. Secure them to the board via glue, etc.
(we used a hot glue gun, a big blob of glue will keep them bonded to the board)
If you are using the same type of sockets we are, make sure you place them down on an angle, since the bulb end needs to have enough room to be able to insert a bulb in there!
If you insert a bulb into the socket BEFORE you glue the sockets down, you’ll know the proper angle to secure the socket to the board. Just be sure to leave a little bit of extra room between the bulb and the board, so you have some room to remove the bulb when it burns out and needs to be changed!
MAKE SURE you are aware of the placement of these sockets! They should fit down into the OEM speaker holes on the metal support brace when you place the new package tray down in its proper spot!
AND MAKE SURE there is clearance between the socket and the speakers that are there!
.

.
[Note: When inserting this new rear shelf into the car, you may have to remove the upper section of the back seat. it’s made to be a tight fit (between the glass & the seat). You might not be able to just shove the new part down into place with the seat in the way]
.
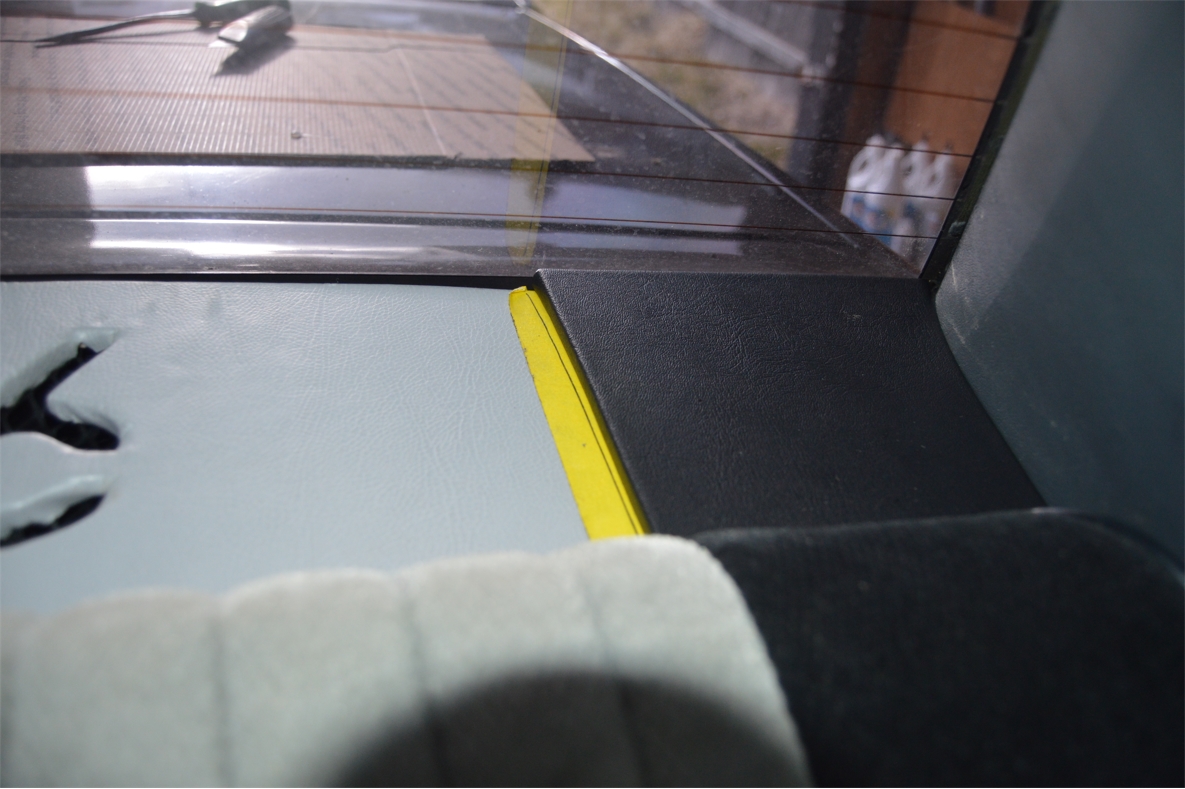
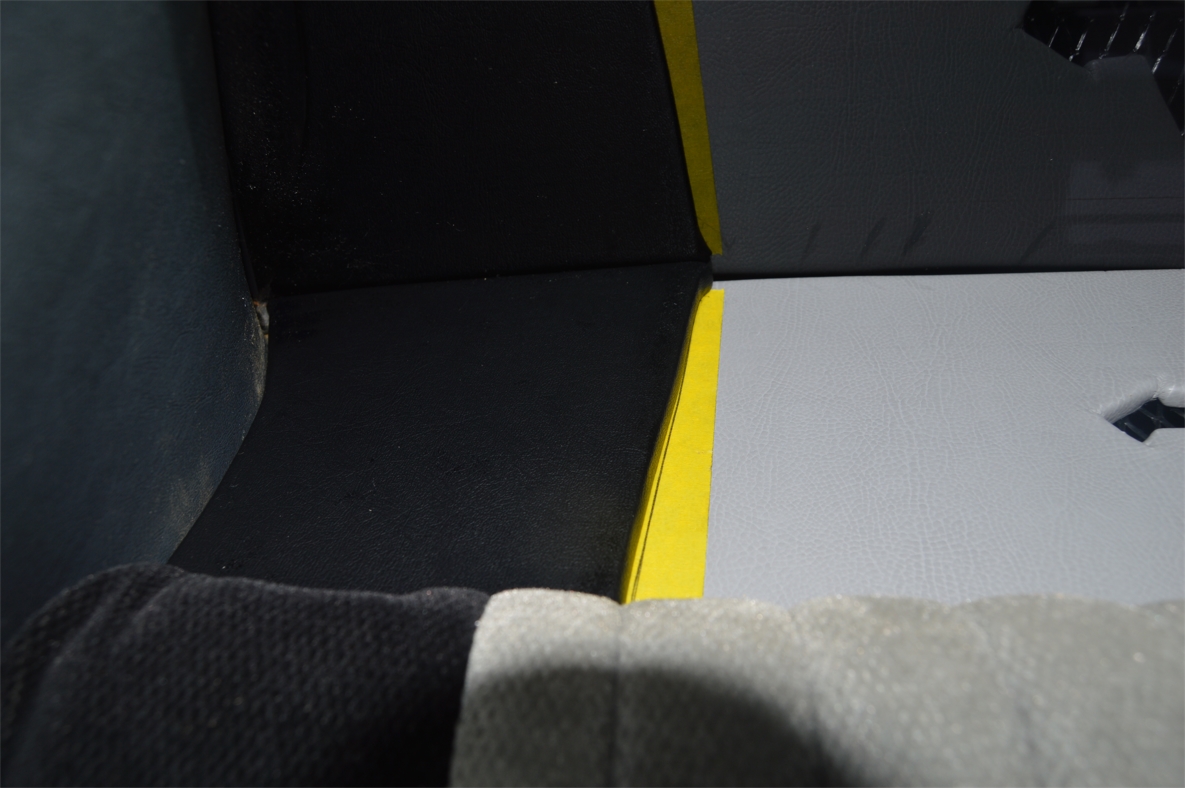
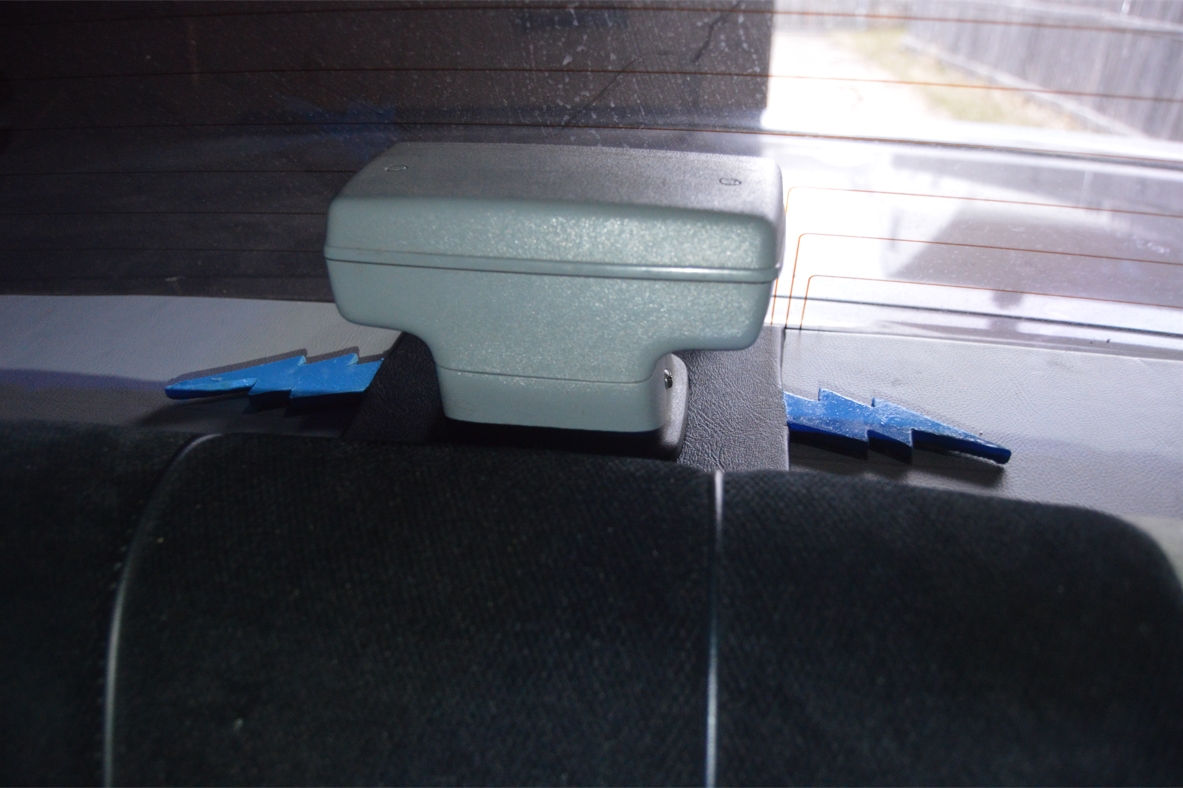
[Note: since we had the 2 ends caps that needed to still be attached to the main board, we put it all in the car and test fit it all one last time. We set down yellow tape and marked where the ends needed to be secured. we also checked the middle section, and dropped the third brake light bracket into place, to make sure everything was all lined up properly. After removing it from the car, we glued the ends into position]
.
.
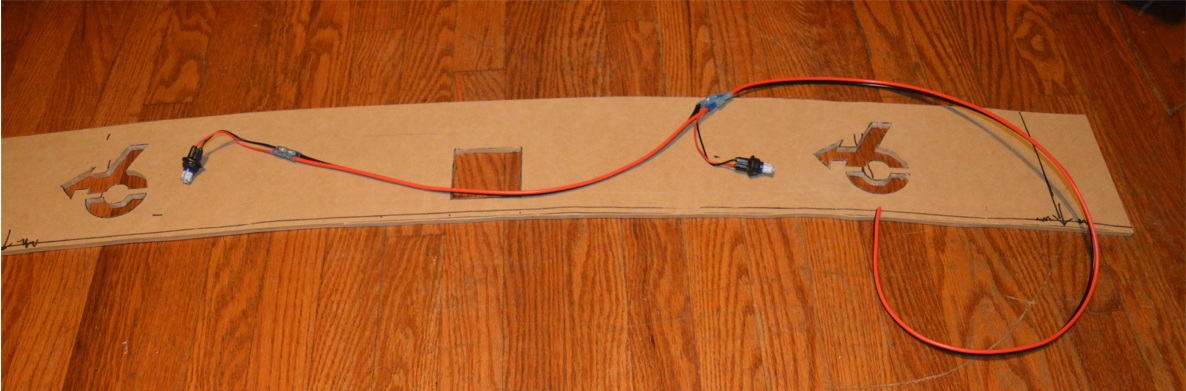
30. Set the new rear deck shelf in place, but don’t bolt it down yet.
(not attaching it yet will make it easier to run the wires)
31. Wiring up the lights. We are running these wires from the sockets over to the drivers side of the car.
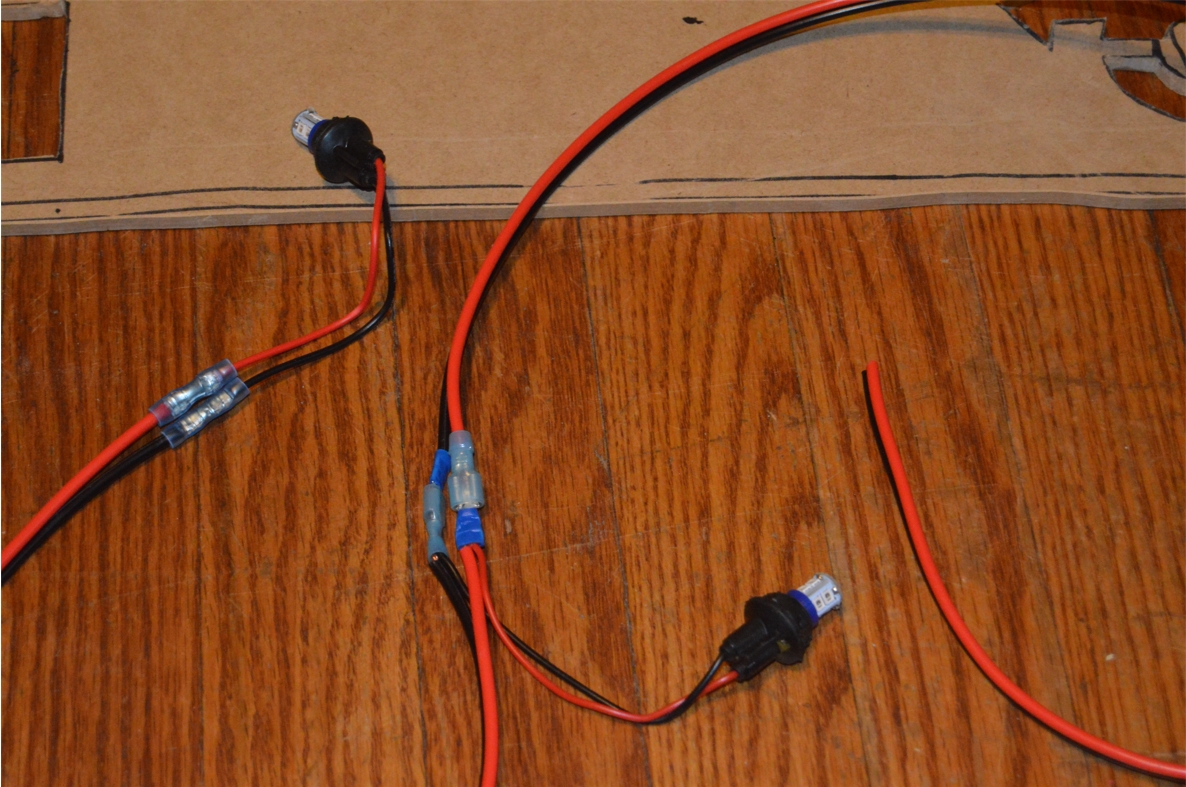
We ran the ground wire from one light socket over to the other, then used a butt connector to connect these 2 ends (on the SAME side of the butt connector), then on the other side of the connector, ran 1 single wire to a ground source.
(we have a negative junction box we installed when we did the sub box setup, so that’s where we ran this wire to)
(you can pretty much use any good ground source back there you can find, any bolt touching metal will work)
For the power wire, we used the same method as above for connecting the 2 (positive) wires that come off the sockets.
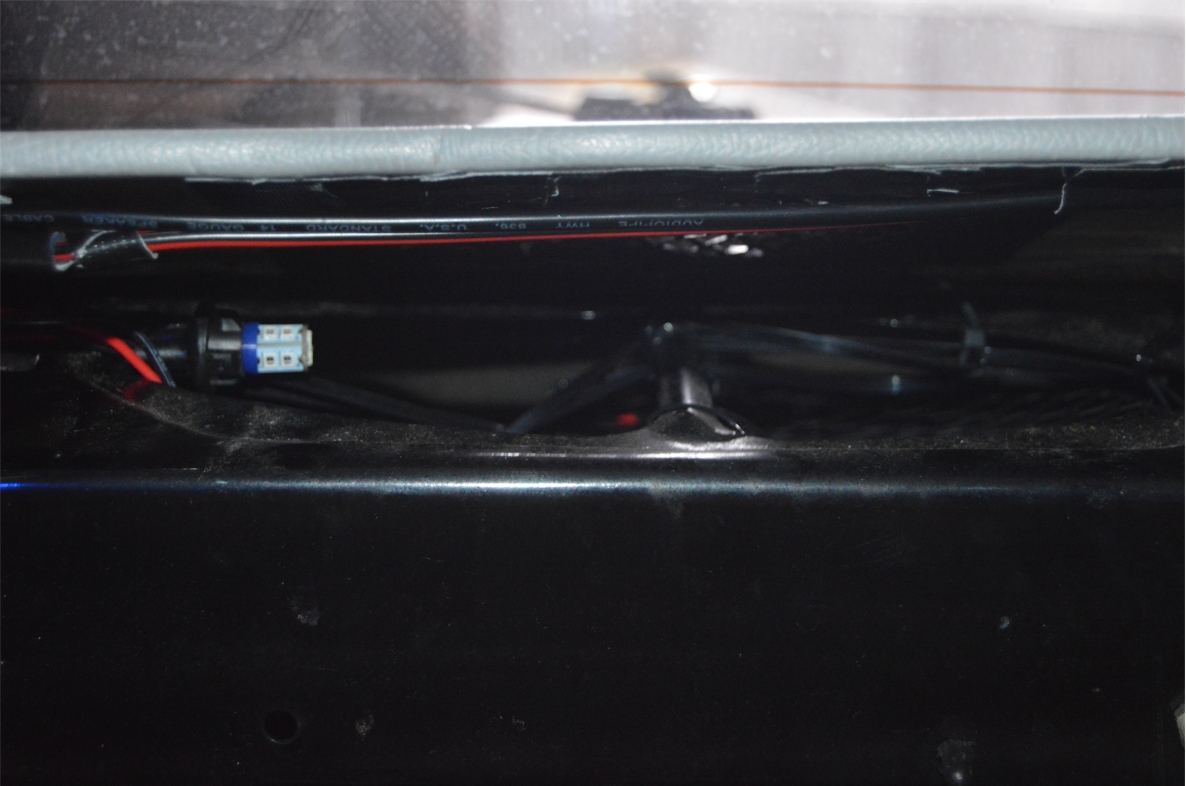
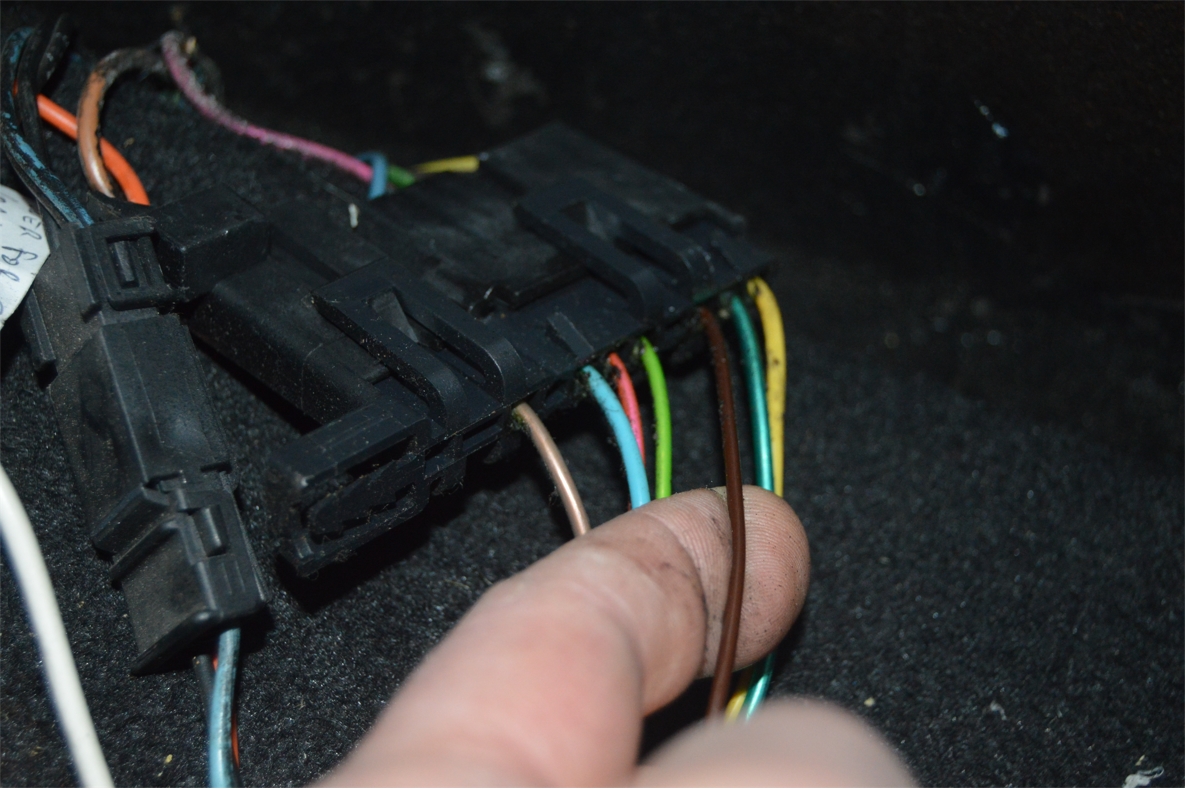
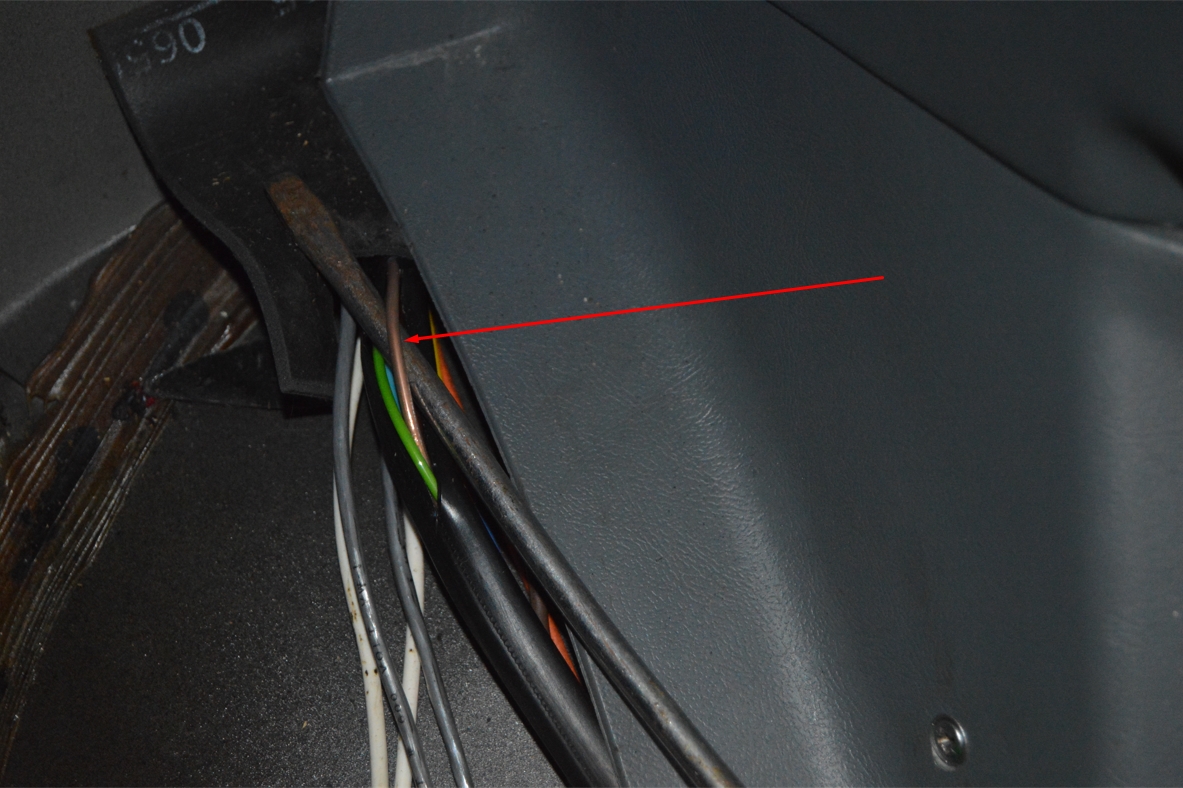
Run the single positive lead over to the brown color wire, in the harness wires.
(inside the trunk, on the drivers side, you will find a bunch of wires that go to the tail lights. Locate the brown wire within. This is the wire used on the running lights portion of the rear lights)
(you can verify you have the correct brown wire by turning on your running lights, then use a test light and probe the wire. If it lights up, you have the correct wire)
We tapped into that brown wire right behind the seat, on the front side of the trunk brace.
BE SURE you have the correct (DARK) BROWN wire! There’s a tan wire in there that’s passable as “brown” as its on the darker shade of a tan color.
[Note: DO NOT hook up the black ground wire to any black wire in the harness! The lights may end up blinking due to how the light system is wired up from the factory! Find another ground source for this wire. Drilling a small hole in metal somewhere and use a ring terminal on the wire, then bolting it down works well]
Wiring it up like this, means that when you turn on your regular lights, these new deck lights will turn on.
(alternatively, you could wire the lights up with a switch and turn them on whenever you want)
(or you can tap into the “remote” or power wire on your amp, if you have one, so they light up whenever the stereo is on, but that means that these lights will be ON during the daytime as well, and you probably won’t see them at this time, creating unnecessary usage)
TEST that the lights actually come on before you secure the new rear speaker shelf to the car!
.

.
32. Finish securing the new shelf to the car.
(you can glue it down, use velcro to secure, or just leave it unsecured in that spot – the third brake light housing will hold it down, which is what we did)
33. Reattach the third brake light assembly.
34. Reinstall the rear seat.
35. Smile, another project is completed.
[Note: the first photo below shows you we glued a 3/4″ spacer onto the bottom of the endcaps to keep these ends of the rear deck from rattling or bouncing up and down]
.
![]()
![]()
.
[Do you like hearing about more mess ups? Here’s another we made. We mounted both end caps on the center board, not really thinking anything about it. Well, when we attempted to put it in the Buick GN where it belongs, guess what? We couldn’t fit it in! It’s too long! And there was no way to tilt or bend it in there. Ugg! We ended up popping off one end, positioning it in place, then regluing the end cap back on. Good thing we glued it on with a hot glue gun, which sticks well, but was easy enough to get off, especially since we glued the cap to the top of the vinyl and not the actual mdf]
[This is something to keep in mind when doing your own, whether it’s 1 solid piece, or multiple pieces like we made]
.
Here’s the template for the (4″ tall) Turbo 6 arrows that we used.
(right click, “save as”)
You can print them out full size, tape to the board, then cut out.

.
Hopefully you found this post beneficial.
Whether that means cool enough to try and make your own, or it was just simply interesting to read how we did it.
Thanks for checking us out.
There’s more projects on the way!
(subscribe so you don’t miss out!)
.


