


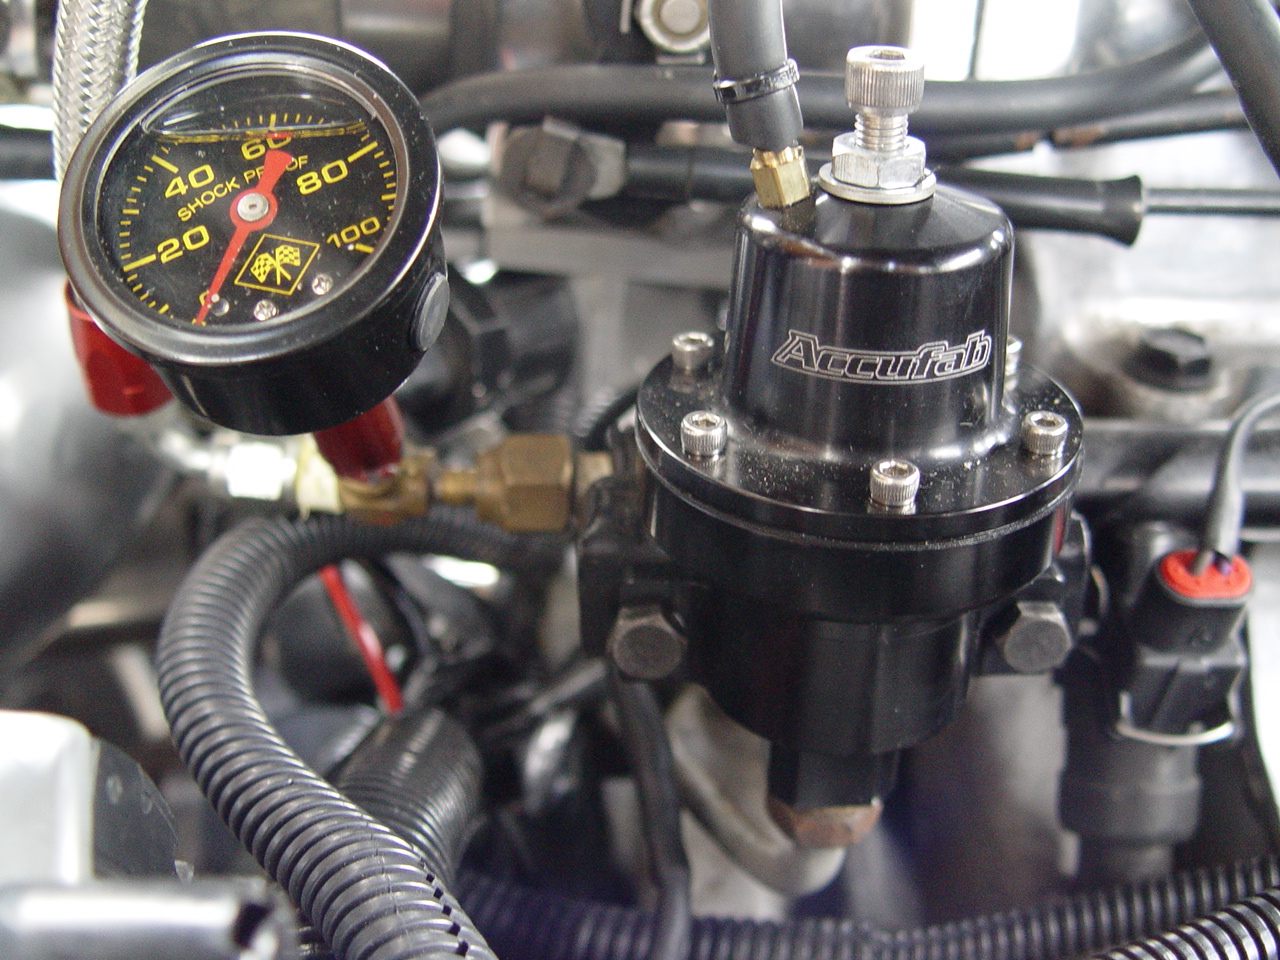
After installing a new fuel pump in a Buick Grand National, we noticed we couldn’t get the fuel pressure to go lower than 43 psi according to our freshly installed rail mounted fuel pressure gauge by using the new accufab fuel pressure regulator.
Now granted, we could have gone the cheaper route of attempting to drill out all the saginaw fittings as others have done, and that may (or not) have cured the problem, but the decision was made to just replace the entire return line and be done with it.
This modification may also be useful down the line for other upgrades if we so desire (like E85, etc.) as well. Not to mention that it’s been reported that the drill out technique doesn’t always work, so we felt why bother, just go for the guaranteed result right from the start.
Note that the below installation is done using the racetronix fuel pump sender combo for turbo buicks, so if you have the original sending unit with the original metal fuel lines coming out of the gas tank, DO NOT use the 3/8″ hose as stated below! The new sender/lines are bigger than the stock ones! Other than that, the install should be similar.
Parts needed:
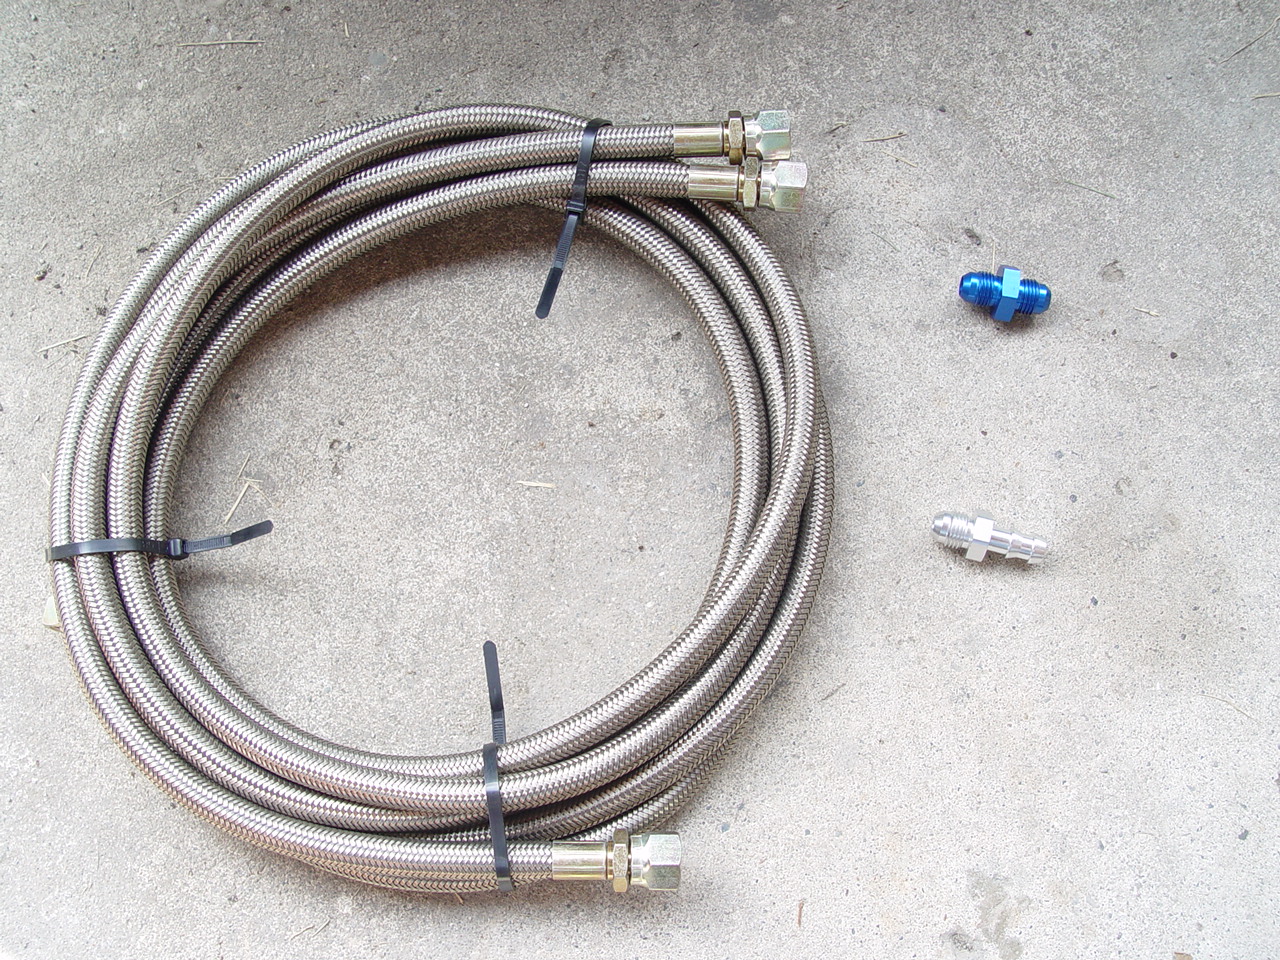
1. A #6 line (braided teflon, fittings included) was purchased off ebay for $75 (shipped!) but it came in 2 pieces, with a total length of 16.5 feet (which was plenty by the way, considering how it was routed thru the car).
2. a 90° Elbow, 3/8″ Male JIC x M14x1.5 Male Metric Adj. (this is the part that will screw into the bottom of the regulator & let you attach a #6 hose end to it – get it at your local hose supply / fittings store, or online: part # 9069-06-14 at discounthydraulichose.com).
3. a #6 coupling (to join the 2 braided hoses together).
4. a #6 to 3/8 barb fitting (to attach to the rubber hose section that attaches to the gas tank).
Note that some people say to use a 5/16″ barb, but the 3/8 is less restrictive (& almost the same size as #6an) & if you do the mod to the metal line on the sender shown like I state below, it works just fine.
(you will need a smaller barb fitting if you are using the stock sender!)
5. short piece (8-10″ is enough) of 3/8″ efi fuel hose (connects between barb fitting & line on sender). Make sure you get FUEL HOSE and NOT vacuum line or other type of hose!
(you will need a smaller hose if you are using the stock sender!)
Total cost, less than $100.
Time required to finish job: a couple hours
(but that time does NOT include removing the old fuel line! that took a couple hours by itself! the front line attached to the regulator is snaked up thru the engine & takes a bit of twisting & turning to get it out! You might even have to remove the cam sensor to get it out!)
OK, now for the How to Install:
1. disconnect the battery for safety!
2. drop the gas tank.
3. disconnect the line from the bottom of the fuel pressure regulator. Go slow, it’s under pressure!
(place rag underneath to catch spillage).
4. unbolt & remove the regulator from the rail.

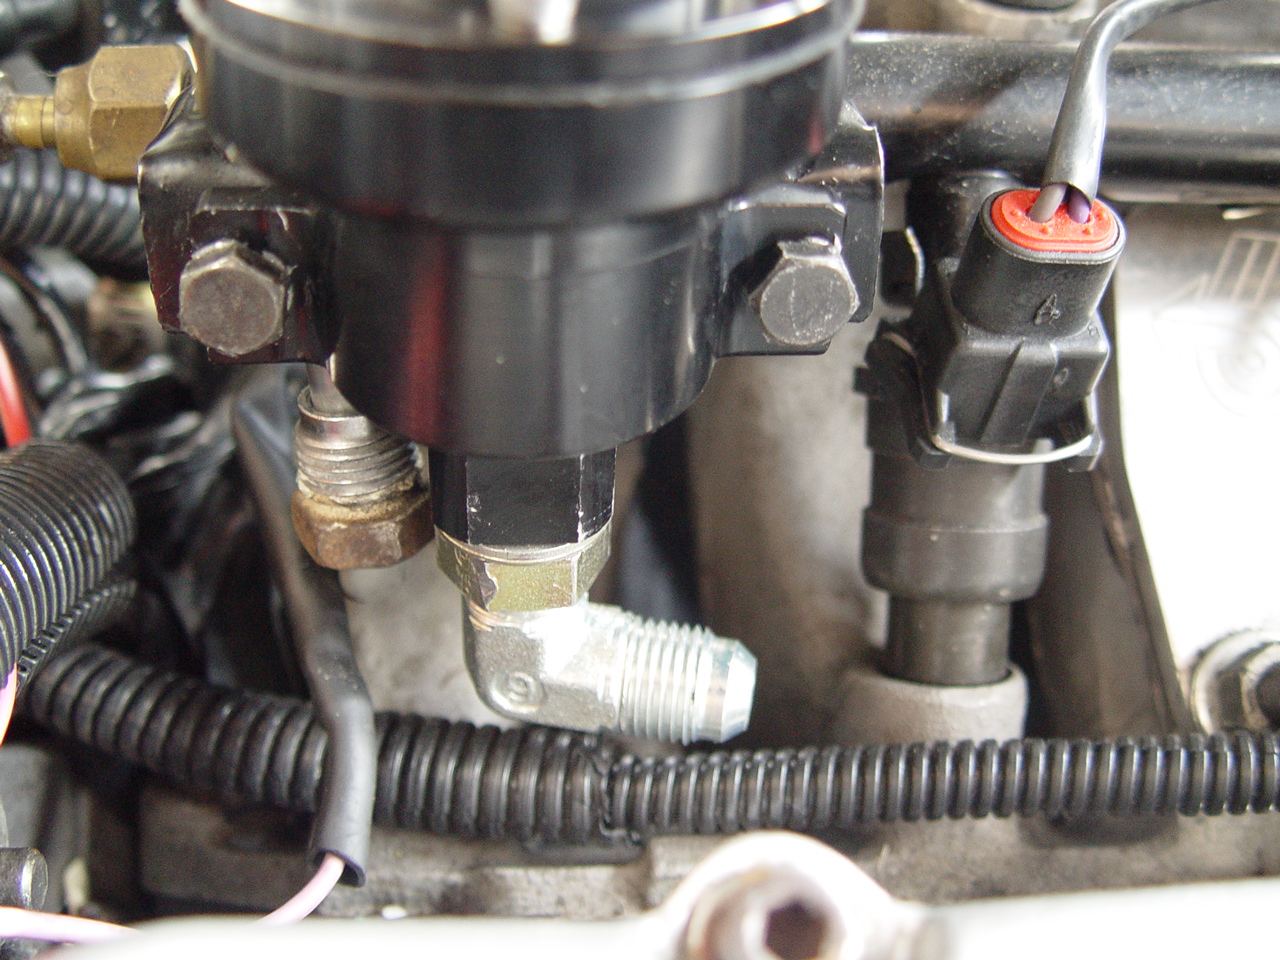
5. install the fitting in the regulator. Make sure you pre-align it before you reinstall on fuel rail! You may need to adjust it slightly on an angle towards drivers door (instead of straight to the back of the car) so it clears the stud on the old egr crossover, if your car has that, or any other obstacles in its path. Then reinstall regulator on fuel rail.

6. install the #6 union to join the 2 hoses together. I used teflon tape on the threads.
(this step is unnecessary if you have a full length hose).
7. attach the braided hose to the regulator. again, teflon tape.

8. you may want to wrap the other end of the hose with whatever’s convenient tape, so it doesn’t get crud inside while you are running it under the car!
9. route the hose towards the back of the car, draping it across the intake (you can fasten it down later). from their it will go down the back of the motor, over the top & side of the trans, but keep it as near the drivers side as you can. we ran our return line down the drivers side of the car, next to the fuel feed line.

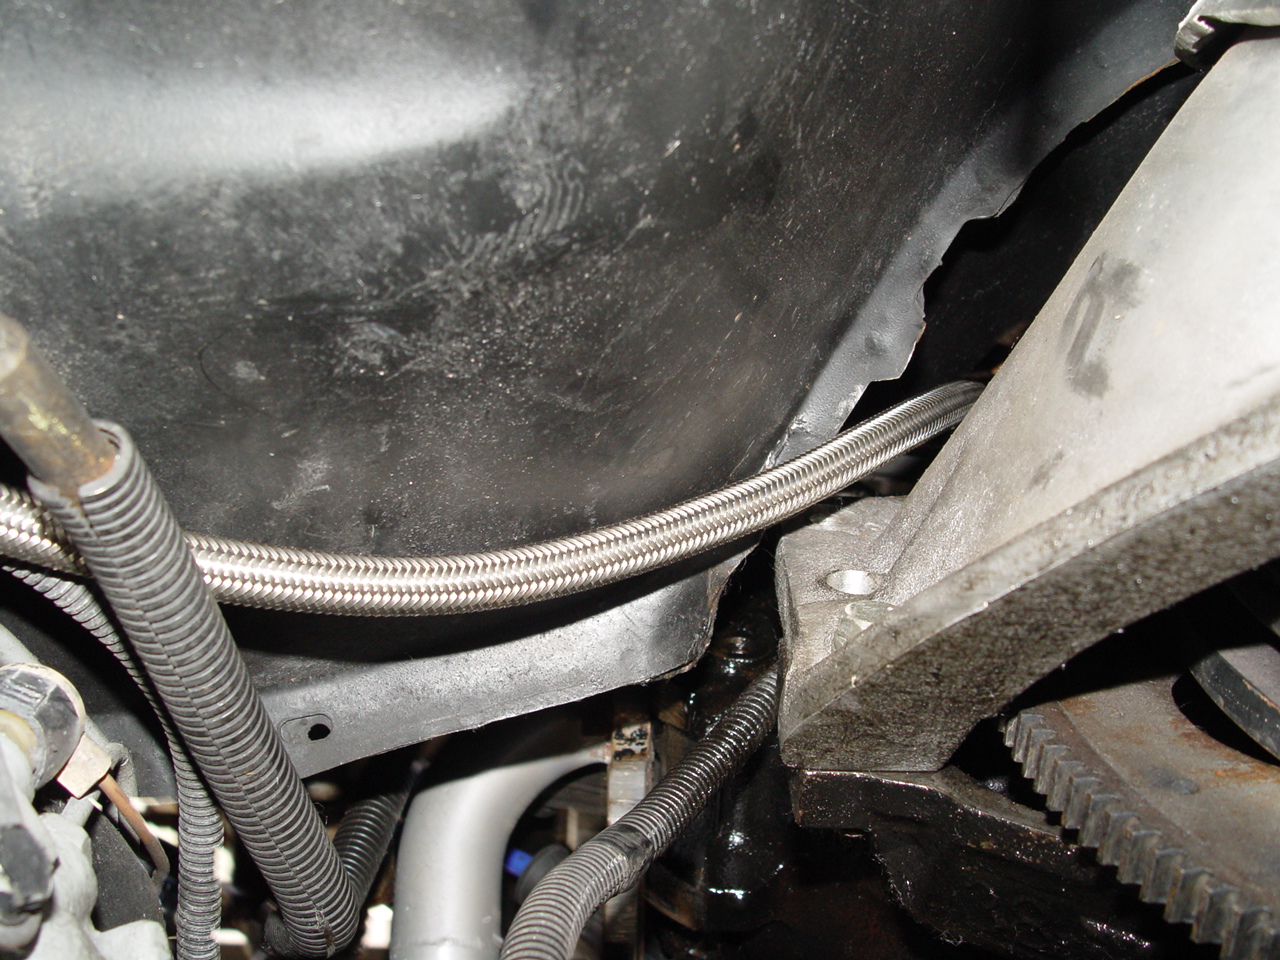
10. run the braided line on top of the brake proportioning valve, and above the steering column linkage. Make sure you route it away from the linkage, as remember it moves when you shift into drive!
zip ties work great for securing the braided line down & away from things as you route it back thru the car.
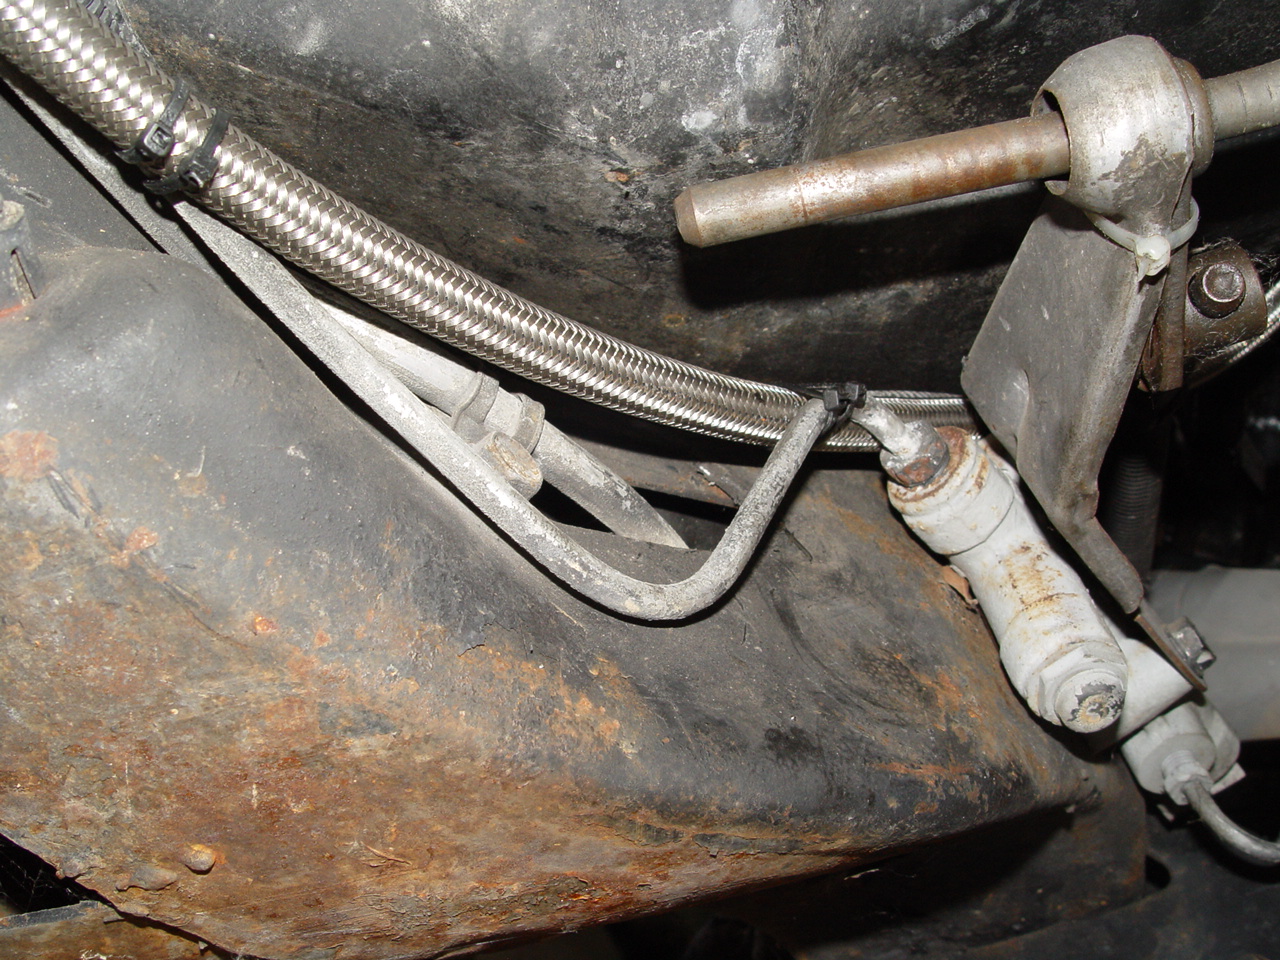
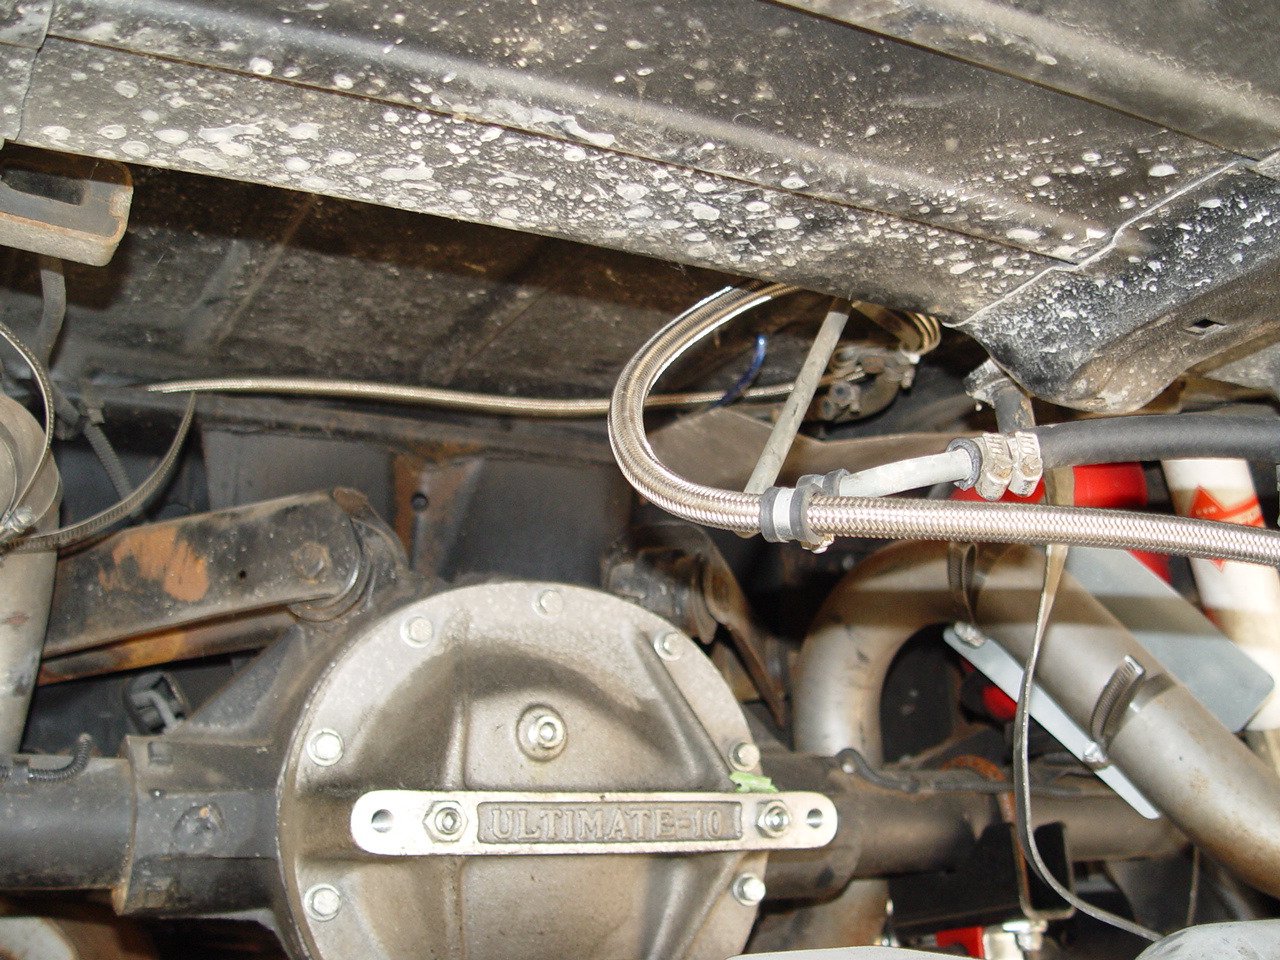
11. follow the feed line towards the back of the car, zip tieing it as you go along.
12. run it above the fuel filter. there’s a nice hole in the frame above it that makes a good place to zip tie it down.
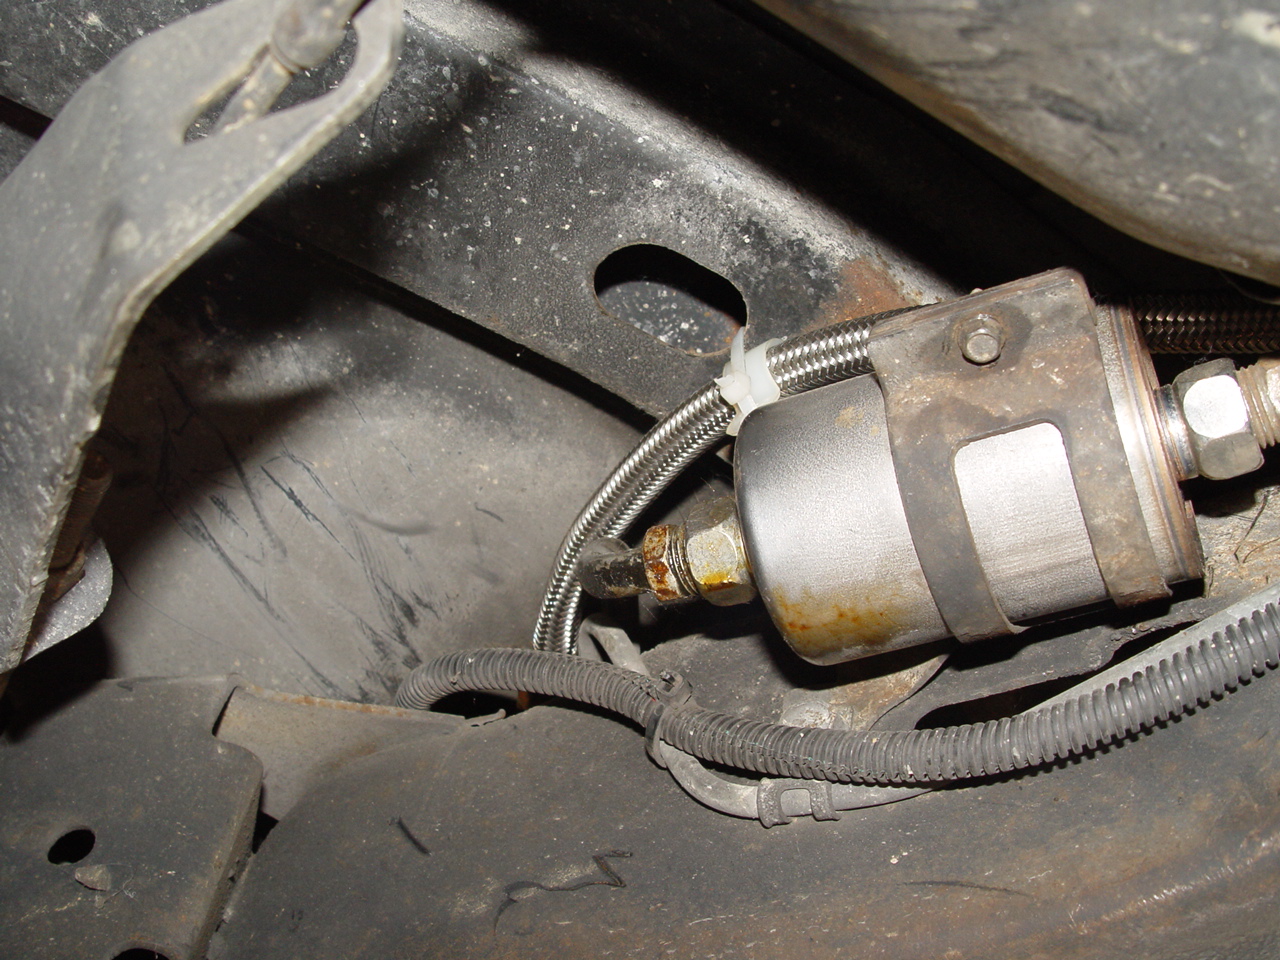

(in the above picture, you can see where the 2 ends of the braided line we bought meet up, this is where the union is)
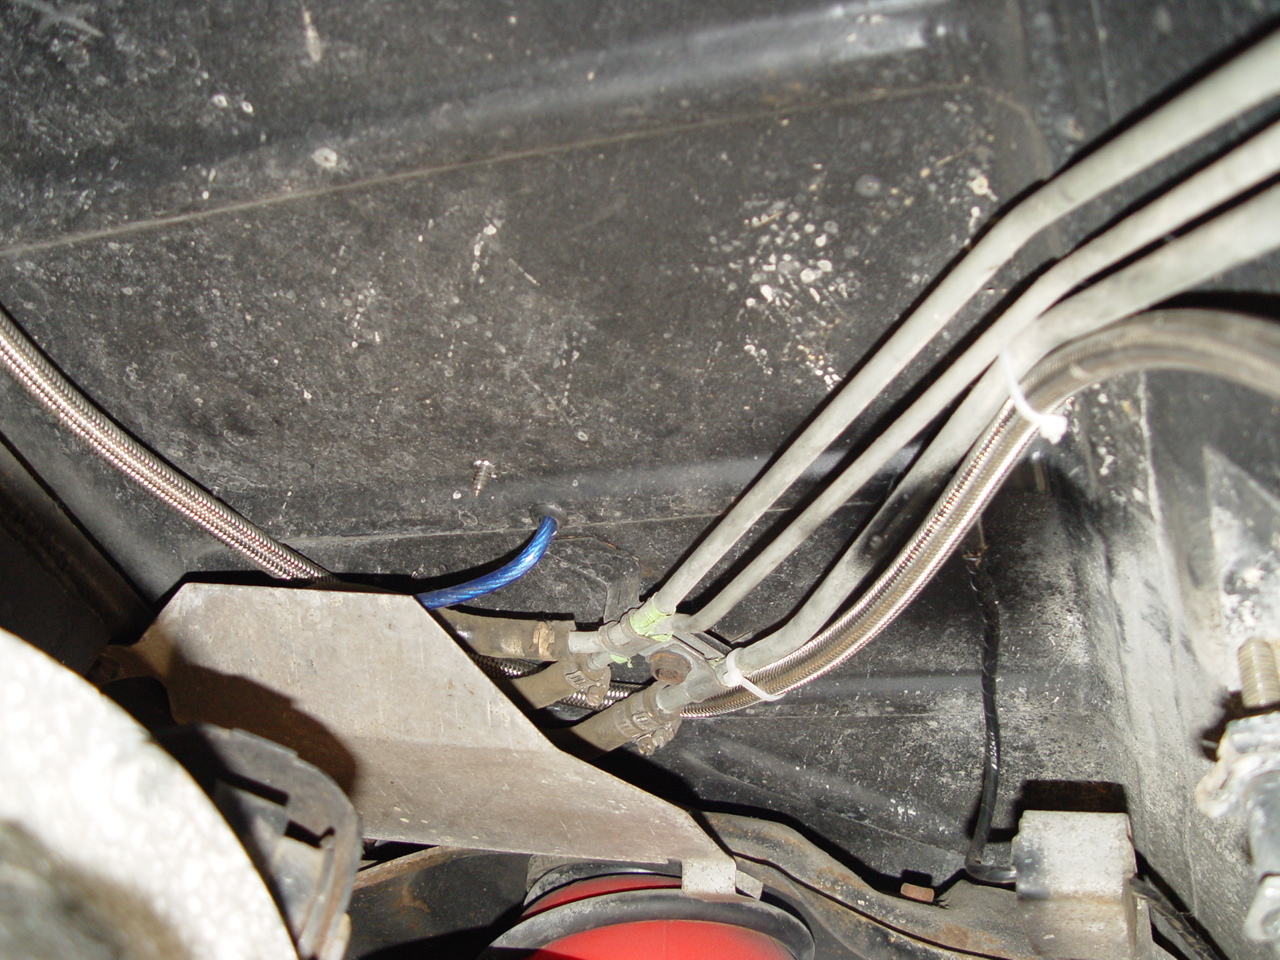
13. from here, it gets tricky. try to follow the exact path where the feed line is. you will have several objects to manuever around, in & thru.
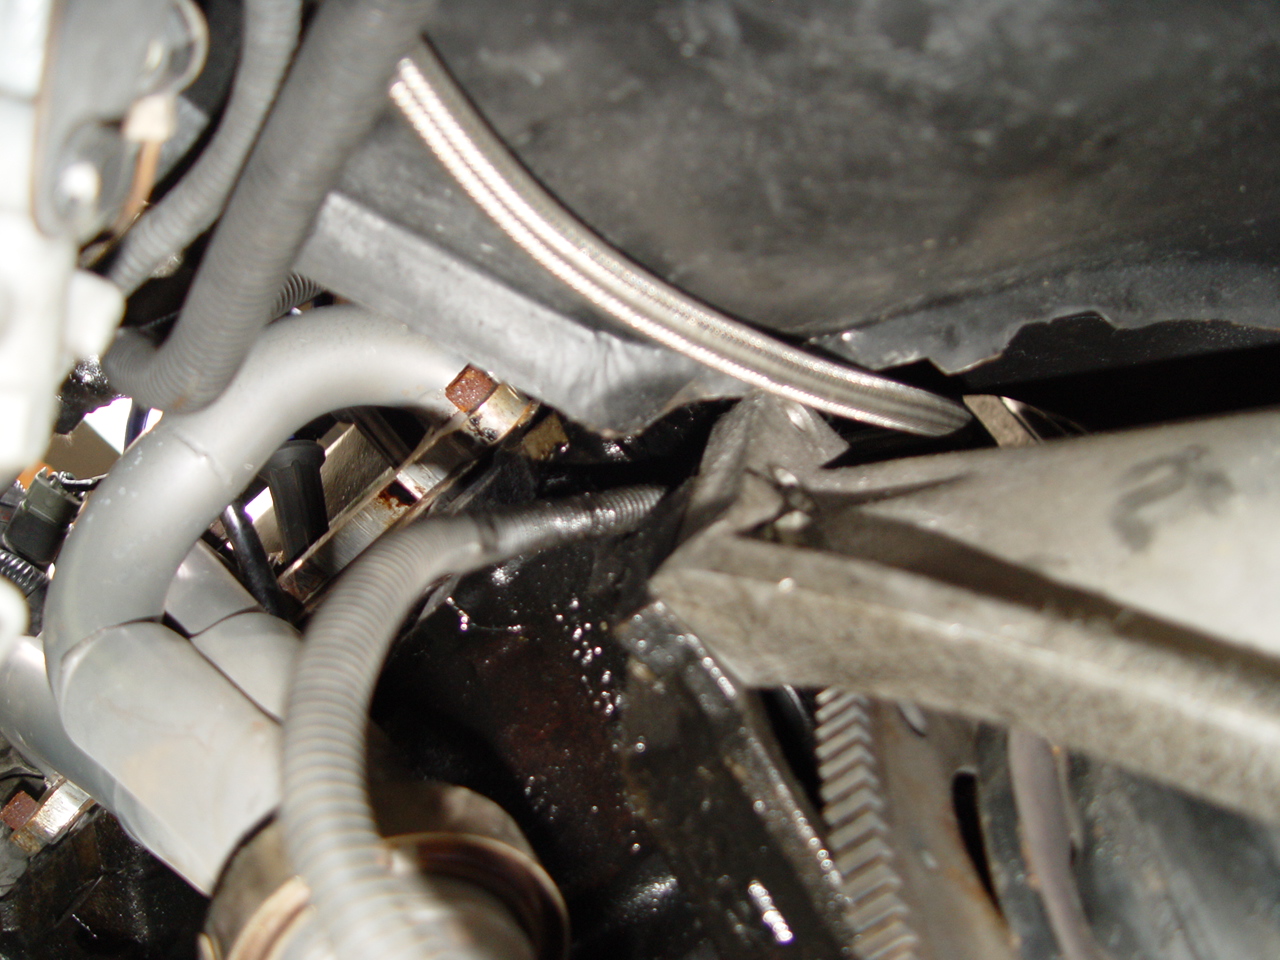
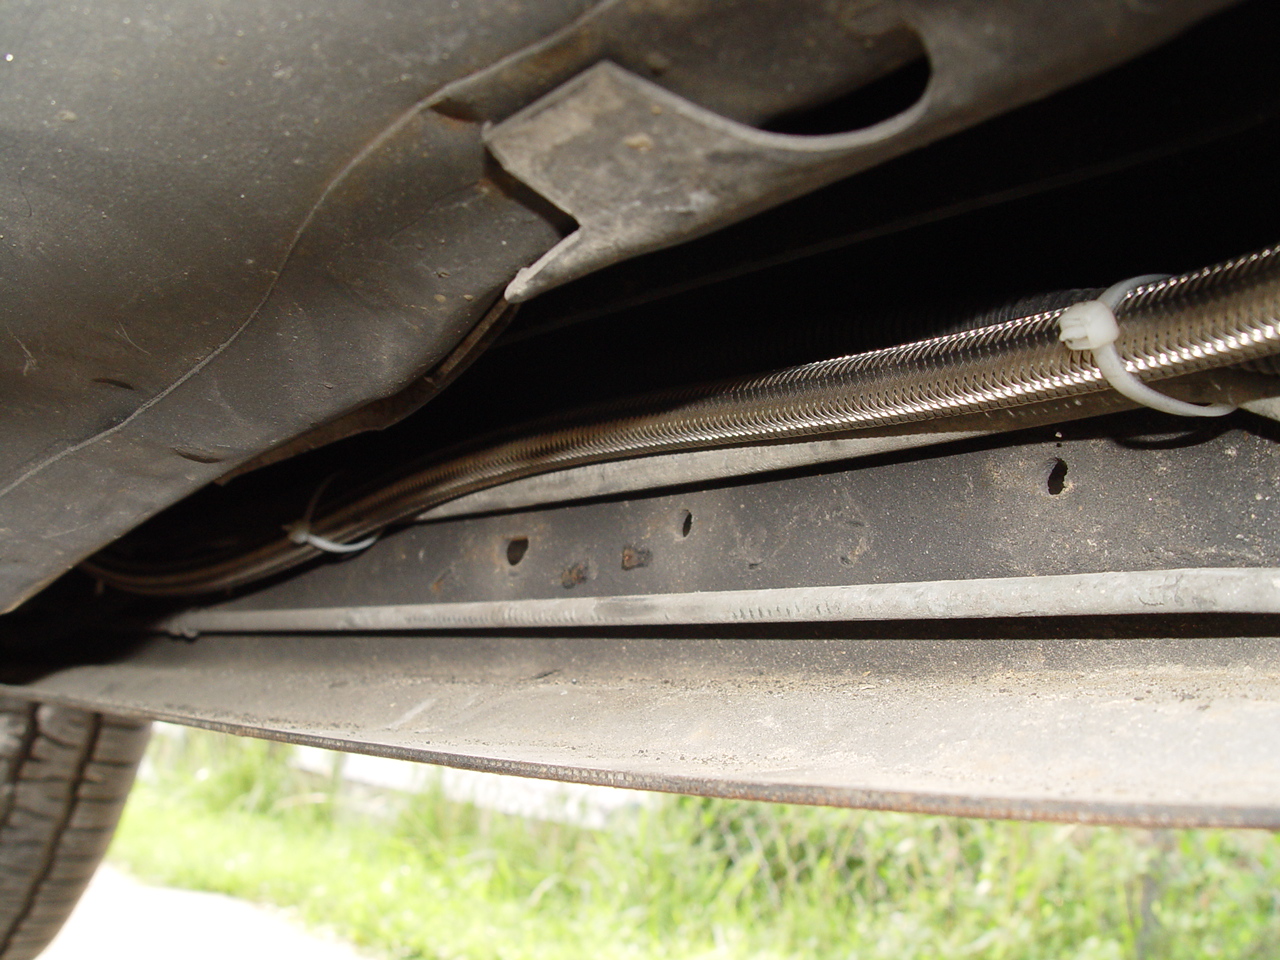
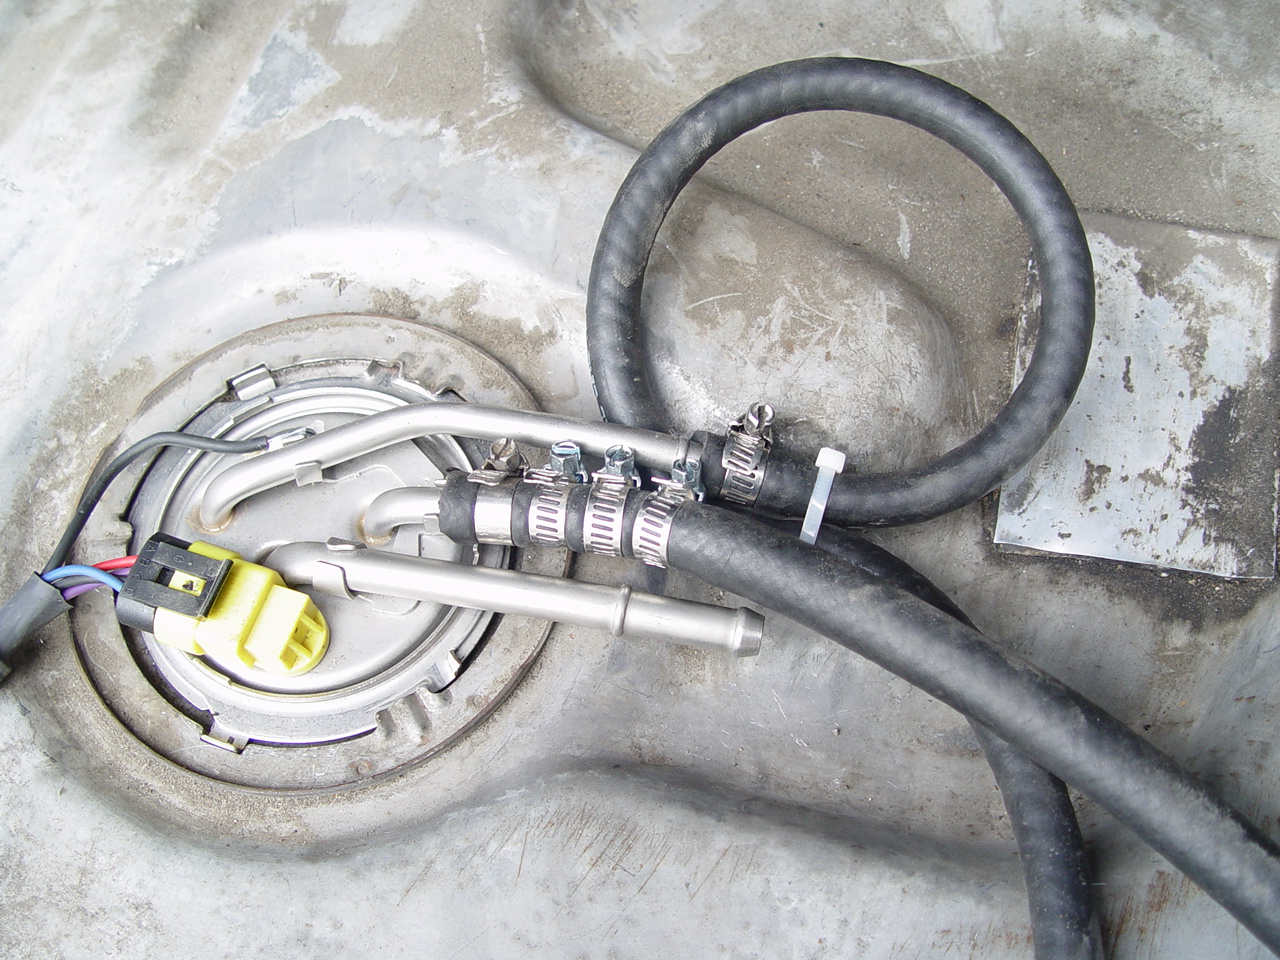
14. in the picture below, the right side is where the gas tank sits.
on the left side, you can see where the hose exits out of from step 13.
(the very last picture at the bottom of this article also shows where the hose comes out from).
theres a panel that runs up (like parallel to where the upper part of the back seat would be), that is where this hose is exiting from even though you can’t really tell that from this pic.
the middle metal tube (the factory line) is the old return line (the smallest of the 3).
15. Now’s a good time to take a break from running line.
Here’s the mod we made to be able to use the 3/8 rubber hose.
remove the (racetronix!) sender from the tank (disconnect electrical connections, remove all of the rubber hoses, drain as best you can).
On the middle tube of the sender, which is the return line, cut off the end of the tube starting just behind the raised section (in other words, remove the raised section).
Be careful not to cut the other tubes while you are doing this!
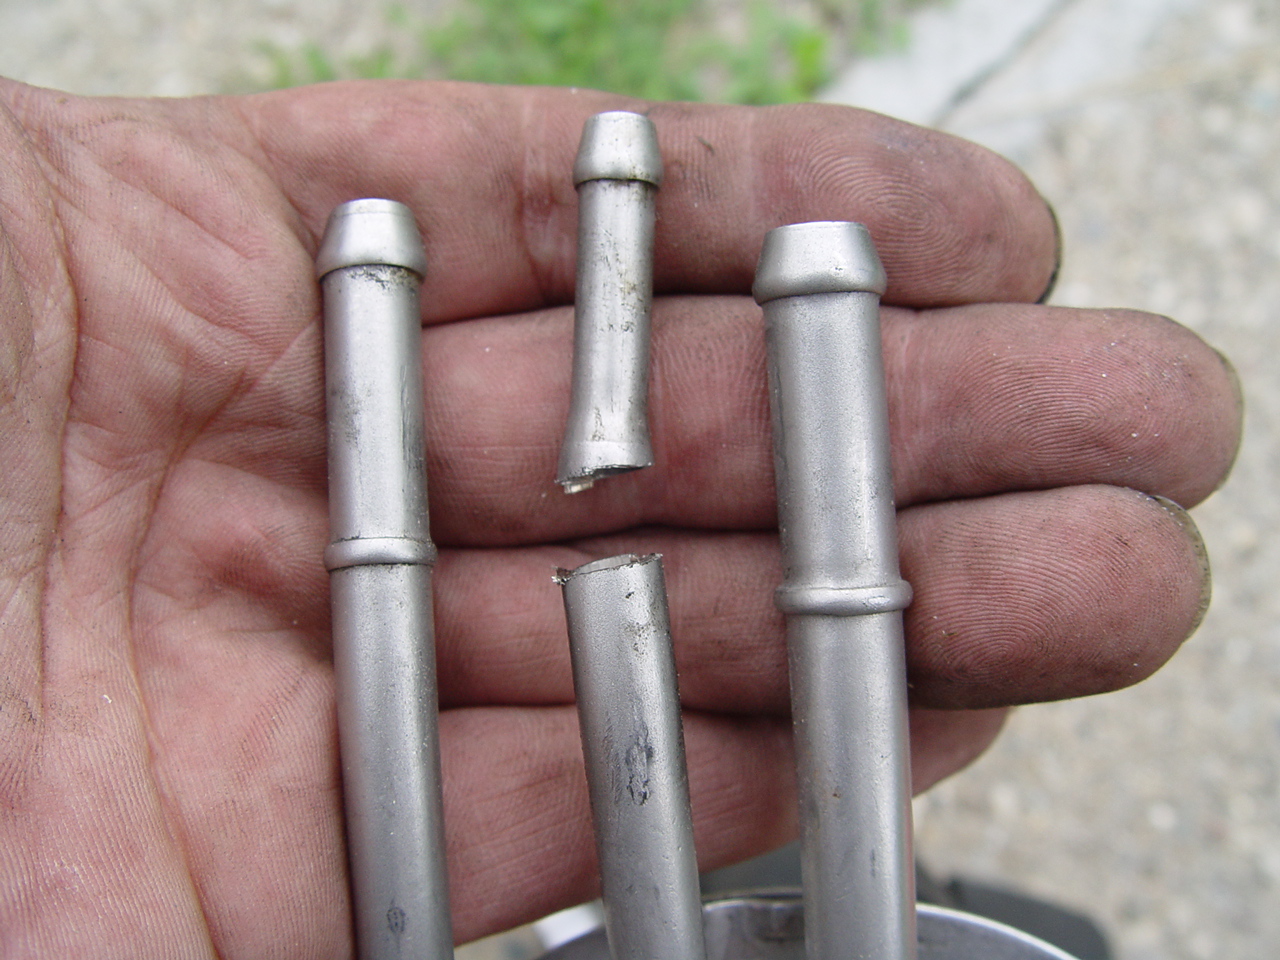
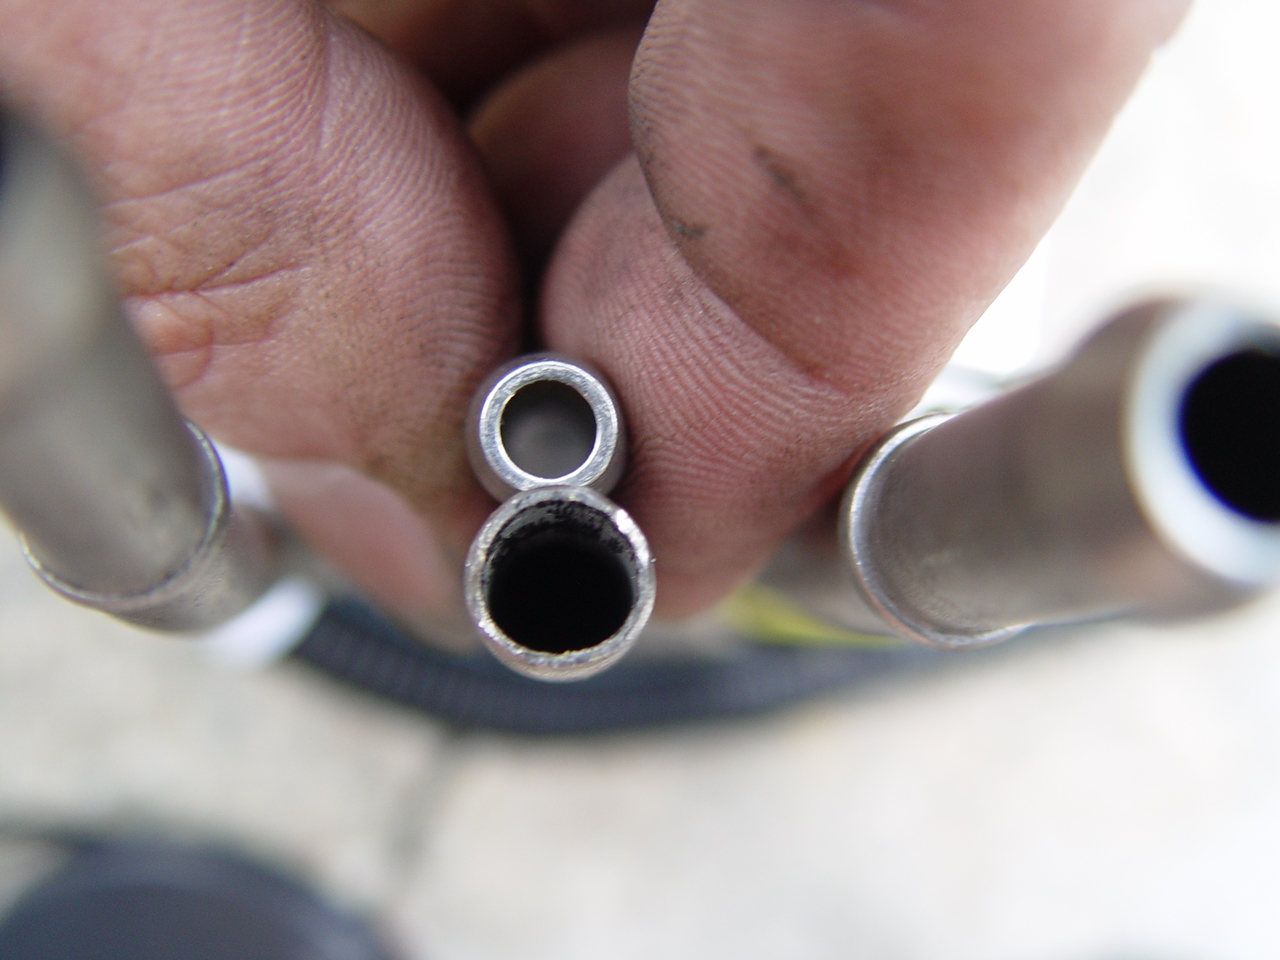
this picture below shows how much bigger the tube is now! less restriction!
and doing THIS mod will let you be able to use (& secure down) the 3/8 hose, since the tube is bigger near the sender than it is towards the end.
(If I remember correctly, unmodified the tube opening is about 1/4″, WITH the modded tube, its now 5/16″).
16. use a small file & smooth out the inside and outside edge of the cut tube.
DON’T get any shavings inside the tube!
File it holding the opening of the tube face down!
you don’t need to go crazy here, just smooth it out so there’s no rough edges or loose material.
take the short piece of new hose you have & temporarily stick it over the bottom of that tube (near the fuel sock) & blow into it! this will blow out any shavings that might have been in the tube (an airgun works good too!). be careful however, there might be gas in the sock or bottom of the pump! remove the hose when done.
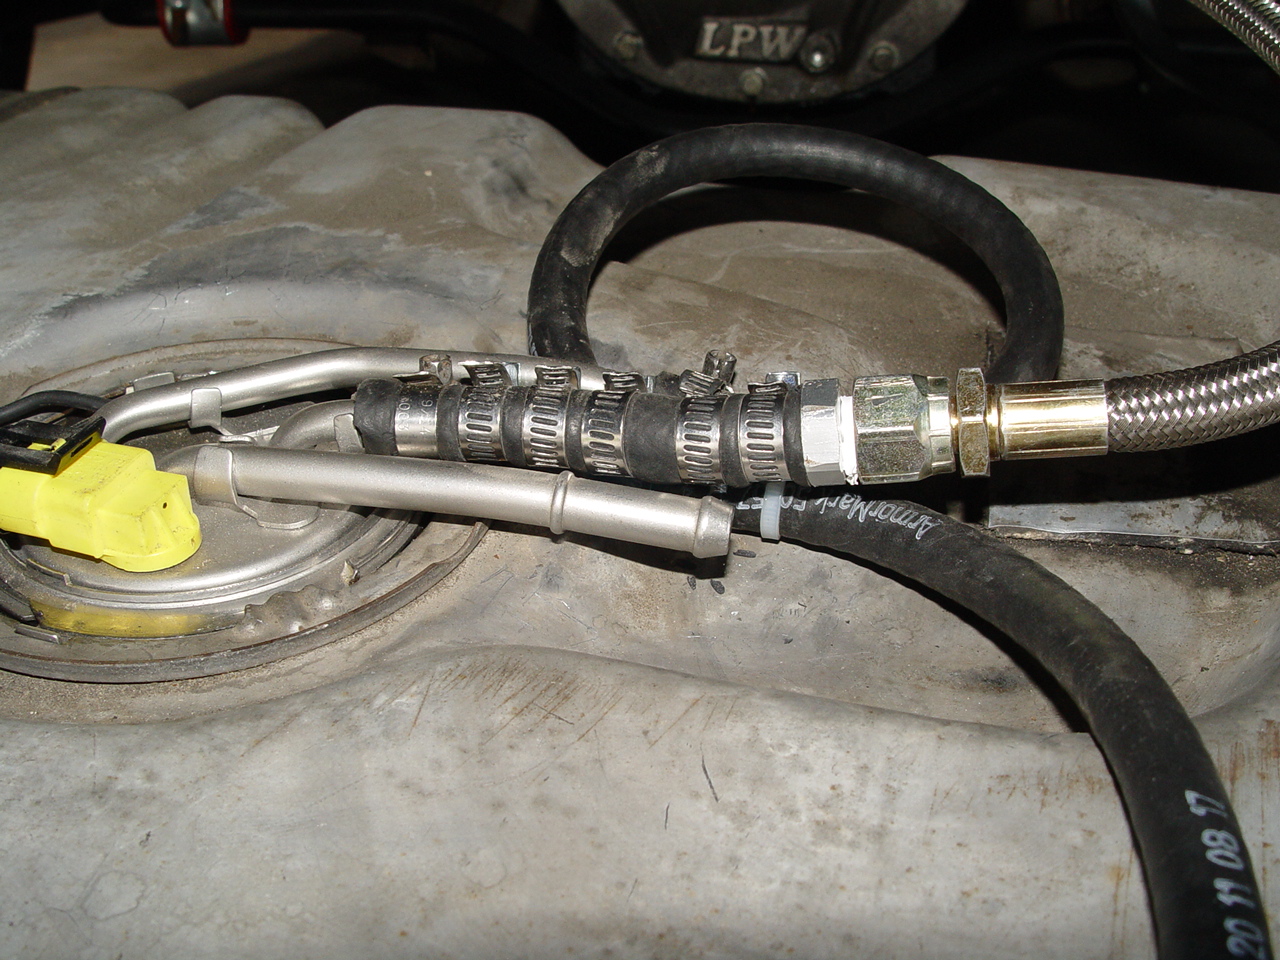
17. attach the 3/8″ hose over the middle tube as far as it will go (should go all the way to the tab that is welded to top of sender). secure the hose down with 4 clamps. there’s some, but not much gap (looseness) between the metal line & rubber hose, but the 4 clamps will take up the slack & keep it from leaking.
18. install the sender back into the tank. (its easier to put this hose on first, then put the sender in, its a tight gap between the line & the top of the tank).
19. attach the rubber hose to the barbed end & secure it with 2 clamps.
(note, in the photo shown above, that hose was about 6″ long. It has since been changed after realizing it didn’t leave enough room for a bend to contour the braided hose in the route (& dip in gas tank) that the original line followed. It now has a hose about 10″ long).
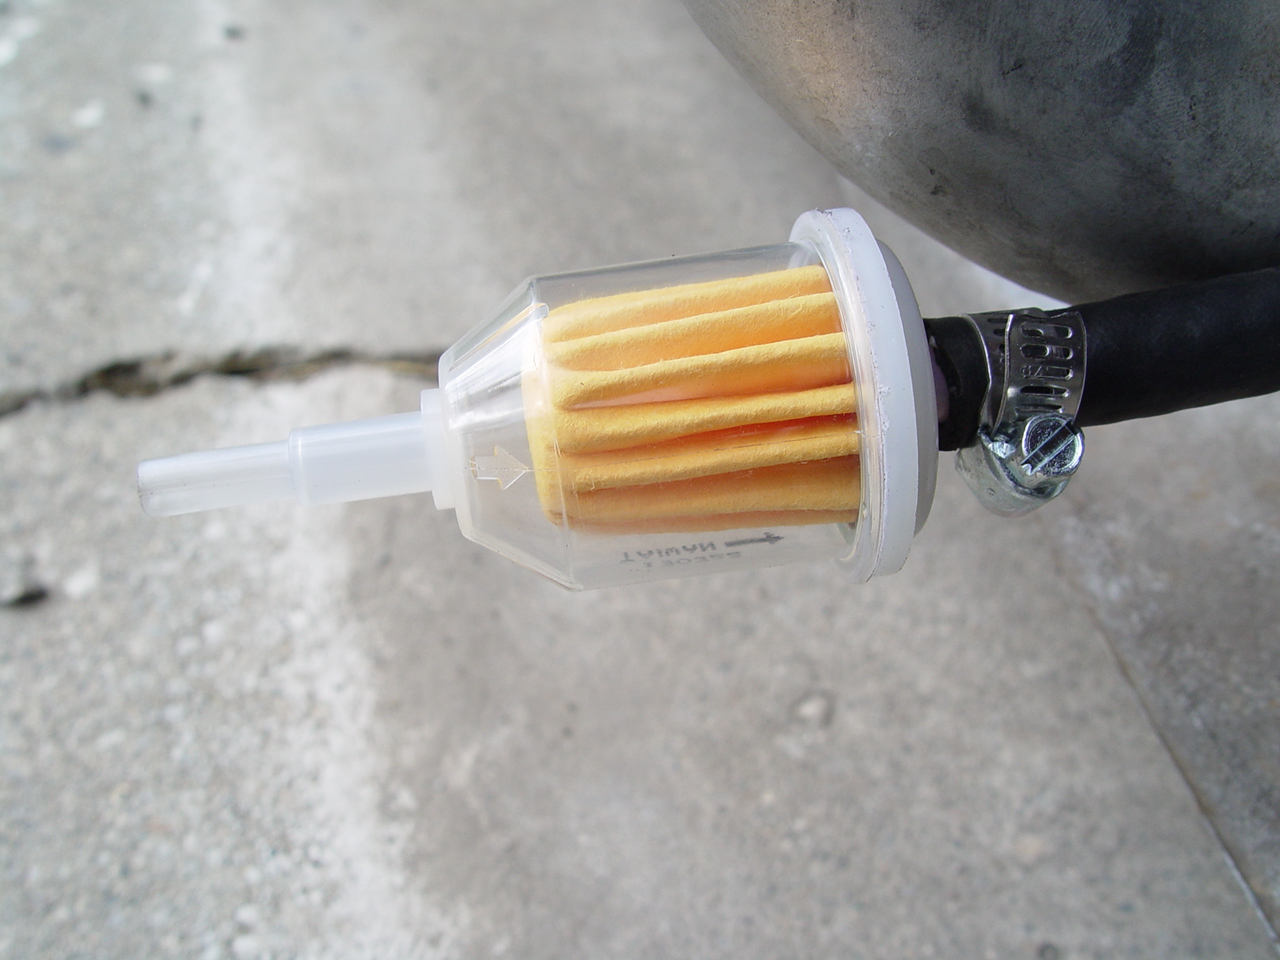
20. while we were here, with the knowledge that we are going to remove all of the original fuel lines, including the vent tube, we took a new piece of hose & attached it to the vent line. Gave it a 360 loop, then exited it out towards the back of the car. A cheap fuel filter was added on the end of the rubber hose so nothing can get inside that line & clog it up! we tied up the filter towards the fill neck.
(note, the pictures show the way we originally had the vent running, until we discovered that it was really gassy smelling doing it that way! so now we have it routed in front of the gas tank, ziptied up near where the metal clip is that the metal lines are held up by. much better!)
21. attach the feed line. pre-route the hoses in the direction they need to follow the original curves. we used these rubber clamps to keep things flowing the way they need to go.

(the above picture shows you a good view of where the new braided hose comes out of from step 14).
22. reinstall the gas tank & attach the straps. make sure the electrical connection for the sender is headed the right way!
23. reconnect the electrical connections for the sender.
24. secure down (or zip tie) the braided hose that’s in front of the gas tank.
attaching it to the old lines is fine if you aren’t removing them.
make sure the new line isn’t in the way (or can sway/move into) anything (like the exhaust, etc.)!
24. start it up, check for leaks.
readjust your fuel pressure.
nice job, you’re done!
Notes: had we known that we would have to install new fuel lines, we would have just bought the new sender that already has the AN fittings on the tube from the beginning, instead of having to make these mods! (especially now that we have already installed a new feed line as well! – upcoming story on that later…)
.


