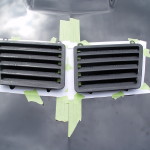
banner ads for header

Install Pontiac Trans Am Hood Vents on a Turbo Regal Hood
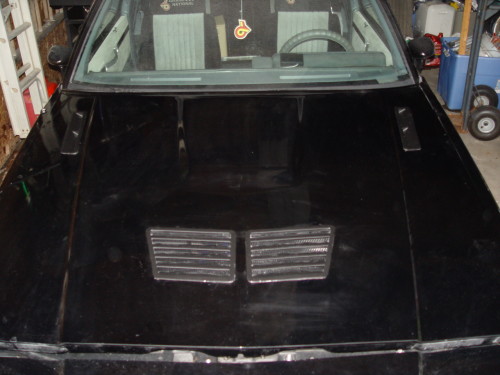
Buick Grand National Hood Vents

After looking at our previous post where Pontiac Trans Am hood vents were merged onto various Turbo Buick Regals, we thought that would be a good mod to attempt to do.
Luckily, we found someone willing to let us hack up his car, oops, I mean perform this miraculous transformation into beastual decadence and dazzling detail…

Grafting the late 1980s Pontiac Trans Am hood vents onto a turbo regal looks semi-normal, even though this wasn’t a factory option.

They look sort of correct, since both these cars are of the same era. And they are functional as well, since the rear vents let heat escape from the engine compartment, and the fronts let fresh cool air in.

Note that these hood vents vary slightly in style depending on exactly what year they came from (available on 1985-1992 model T/A’s).

Buick purists may fret at doing an install of this nature, and I would tend to agree…
That’s IF the car you are putting them on has the factory stock type turbo regal hood on it.
They ain’t making any more steel hoods with the bulge in it for these cars, so chopping one up for this use could be detrimental in the future value of your car, so think long & hard before attempting such a task.

However! The 1987 Buick Regal Grand National that we are putting these on, has an aftermarket buick fiberglass hood that was previously installed! So it’s all good! (at least in OUR minds!)

I have to admit, I think these trans am hood vents look better on a light colored Gbody car than they do on a black car, (specifically if the louvers are painted black), but that’s only my opinion, and only perhaps because they stick out more… meaning they’re way more noticeable. Especially if you’re into the wow factor. Not that that’s necessarily a good or bad thing.

They are pretty different looking though, even when installed on a black buick grand national (black on black). It does give the turbo buick a tough, mean look though. And as I’ve stated before, your car, your choices…


Parts:
~ Can of gloss black paint ($8 autozone)
~ double sided tape [about 10 feet] ($10 autozone)
~ 4 vents (ebay $75)
~ masking tape (whatever kind you have laying around is ok, but 1.5″ works great)
~ 2 sheets of 8.5×11 paper
~ epoxy [glue; weld; something to bond fiberglass to itself] ($6 autozone)


Tools:
~ cutoff wheel
~ file
~ tape measure
~ pen
~ scissors
~ straight edge
~ razor knife


Time to Completion:
~ the better portion of a day


Here’s the how-to on the installation:


{NOTE: the pictures show the mesh screens, tabs & clips still attached, as a visual reference, but you should follow the directions below & disassemble everything}
[when we did this installation, we actually had all of those still in place, but discovered later they aren’t needed, & it’s easier to take it all apart from the get go]
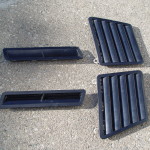
 

1986 pontiac trans am hood vents
1a. Considering you will probably buy these used (these were acquired off ebay for about $75), there’s a bit of prep work needed on them to make them fit onto your turbo buick.
You’ll also need to wash them so the new paint you put on them sticks!
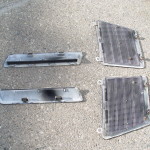
pontiac trans am hood vents
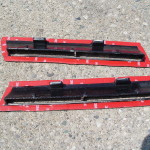
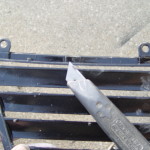
1b. First step, remove all of the mesh screens. (the fronts are held in place via 5 cut thread nuts & the rears are clipped on in 3 spots). Remove the 2 metal clips off each rear vent & discard (they won’t fit on the turbocharged Buick hood).
buick hood vent
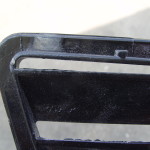
1c. Front louvers: cut off the 2 tabs on the top (the ones with the holes in them) + the center tab & the bottom 2 posts as well. Make sure you cut flush (or sand down) these areas so they are flat like the surrounding surfaces.
turbo buick hood vent modturbo regal hood vents


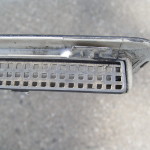
1d. On the rear vents (the long & skinny ones) remove (cut off) the 4 tabs at the top of louver {the hood won’t sit inside them since the fiberglass is thicker than the steel Trans Am hood}.
turbo regal louver modification buick regal louver modification

1e. Depending on what shape your vents are in, consider sanding them down (a little or a lot) so the new paint adheres.


2. after you clean them, do these next few steps first (creating a template). Then paint them & let dry while you’re doing the other steps & they’ll probably be ready later on when it’s actually time to install them! (helps to do it on a sunny day).


3. take 2 sheets of 8.5×11 paper & cut into 1″ strips.
For one sheet, cut 1″ x 8.5″ strips. For the other sheet, cut 1″ x 11″ strips.
(you’ll get 11 strips out of one & eight from the other).
Make sure you use a paper cutter, etc., as you need the cut edges to be straight, since you’ll be using these edges as a guide when you cut the hood.


[if you have legal sized 8.5″ x 14″ paper, that works good too, create 12- 1×14″ pieces]

{you could also just do steps 3-? by cutting out of piece of cardboard and using it as a template as well, but make sure you have straight edges on the inside as well as the outside so you have some sort of guide as to where to cut the holes in the hood!}

(we chose to use the paper strip method so we could visually see where the inside holes & outside guidelines would be when placed onto the hood {later steps} ).


4. If you used 8.5×11 paper, take 4 of the longer strips & tape the ends to 4 of the shorter strips. (so you end up with 4 pieces 19.5″ long).
Make sure they are straight (length wise). A bit of overlap on them is ok (they need to be at least 16″ long).


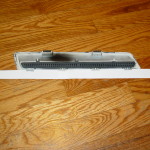
5a. Starting with one of the rear vents, place one of the 19.5″ strips under all 4 of the tabs (where the grill is).
buick grand national hood vent template

[when laying the strips down, try & keep them as tight up against the vents as you can, if the hole is too small, thats fine, you can always make the hole bigger in your hood, but if its too big to start with, well…]
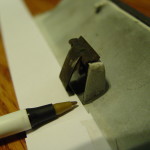
buick grand national hood louver template
5b. on the other side, do the same. Make sure the paper rests up against the plastic tab (where the pen points) & NOT the metal tab!
[it’s useful to temporarily tape this paper to the vent!]
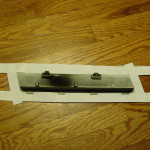
buick hood louver template
5c. using 1 of the 8.5 long strips, cut it in half length wise (1″x4.25″) & complete the box frame around the vent by taping all 4 pieces together.
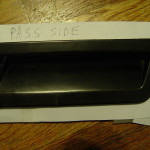
turbo buick hood louver
5d. flip it over & write on the template which side vent this is.


6. do steps 5a-5d for the other rear side vent.
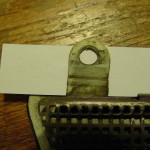
 

turbo regal hood louver
7. now, do the front 2 vents. (the square-ish louvers). start with the top (the side that has the 2 tabs). use an 11″ strip. insert the paper under the tabs. (flush up at the top, where the tabs would have been)
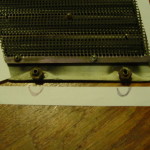
turbo regal hood louver mod
next, use an 8.5″ strip to do each side. Tape them to the top piece.
For the bottom, use one of the 11″ papers.
turbo buick hood louver mod
You want to line the paper up with where the curve (the slope) comes off the opening (from the other side).
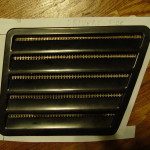
turbo buick hood vent mod
Flip it over, and again, mark down for which side this goes on.


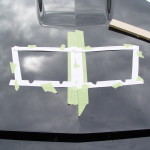
8. ok, for the front vents, where I have marked the stars on the papers, as shown in the below pic, these are the sides where you will line these up with the seam that runs down the middle of your hood. turbo regal hood vent mod [later steps, shown for reference here].
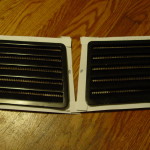
{the stars go on the side that is straight, the vent openings face towards you}
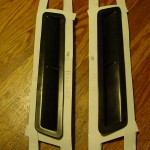
buick regal hood vent mod
the second pic, same deal, these are the rear vents, stars indicate which sides you will use to measure up against the outside hood lines.
{the stars go on the side that has the mesh insert}

you might want to mark your own templates with stars for easy reference!

{the pics show a positional view of the vents as if you are standing in front of the car looking at the hood}


9. your templates are almost done. Using a bending & twisting motion, you should be able to remove them from off of the vents (keeping them taped together in a box shape). set aside for now.


10. Now is the time to paint everything. Be sure to do both sides! {start with the back side, the top is more important!}


11. Fun time! It’s almost time to cut holes in your hood! (yikes! don’t screw it up!!)
You need to decide exactly where to place all the pontiac trans am vents on your buick regal hood.
Thats what the templates are for.
You can position them pretty much anywhere you like, but be aware of the inner support structure of the hood.

We chose to position the fronts (almost) half way between the hood bulge & nose of the hood. Seems like a visually appealing spot.
(and mostly beneficial, as too far forward on the regal hood puts the openings on the underside right on top of the core support; too far back looks funny because of the hood bulge & doesn’t let the cool air get directed towards the hot turbo).


12a. Once you have your 4 spots chosen, you’re going to be placing the templates on the hood in those spots.
You’re going to use the earlier created “stars” to line the holes up straight on the hood.
buick grand national hood
12b. For the fronts:
{this is exactly where we chose to position them, yours might be different, but the how to do concept remains the same, just use your own measurements}.

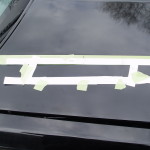
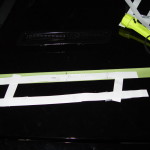
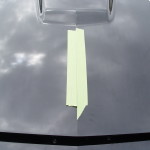
Standing at the front of the car, from the center hood line, using 1.5″ wide masking tape, lay down a 16″ long strip, halfway between the nose of the hood & the hood bulge, on both sides (left & right) of the hood line.
The hood line should not be visible after you lay the tape down, the edges of the tape will meet each other, over the top of the hood line.
buick hood guidelines
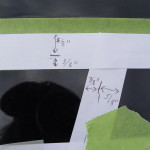
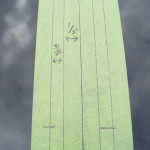
Draw a straight line on the tape, 1/2″ out from the center (1/2″ out from the center hood line). Now draw another set of lines 3/8″ out from those lines (7/8″ out from the center hood line).
[the 2 horizontal lines you see on the tape is a center reference mark, approx 11″ from both the hood nose & the hood bulge]

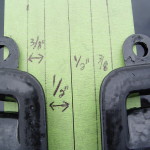
Lay your 2 front vents down on the hood, using the 2 guidelines you just made. The edge of the vent should line up with the 1/2″ mark. The 3/8″ mark is where the cutout area will be.
buick turbo hood guidelines buick turbo hood guide turbo buick hood with vents


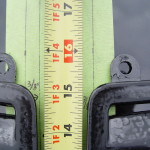
{The top of the tabs are 16″ from the (center of the) hood nose, 1st pic}
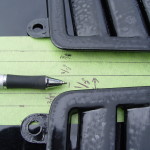
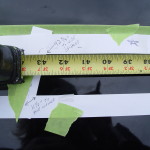
From the passenger side, make a mark (as shown in the 2nd pic, where the pen is pointing to) 3/8″ down from the outer edge of the vent.
[this represents the top of the cutout area]
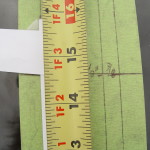
Our mark measured 14 5/8″ from the front of the hood. Draw a straight line all the way across both pieces of masking tape (3rd pic).

hood vent guidelines buick hood vent guide 1987 buick hood vent guide

hood vent cutout area


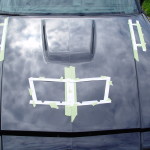
Now, for the passenger side, standing from the front of the car, line up the right cutout edge (the inside edge of the hole) of the template on the 3/8″ mark. The horizontal line you just made in the step before, line this up with the top cutout edge.
Secure the template to the hood with tape.
Do the same thing with the drivers side.

1987 buick hood vent layout
Place your vents temporarily back on the hood & check all alignments to make sure this is where you want the vents to be!


12c. For the rears:
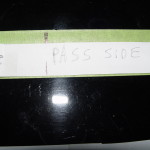
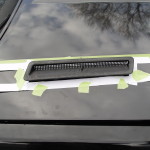
From the outside hood lines, we used 1 1/2″ wide masking tape (which is conveniently NOT 1.5 but 1 3/8″ which IS perfect for this specific use!), we ran a 2′ piece starting at the window edge.
rear hood vent
The side of the tape closest to the fender is the (top inside edge of the vent) that you will eventually cut out.
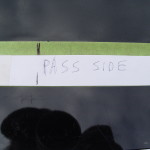
[meaning, in the pic, {pass side} the edge of the tape corresponds to where the mesh is on the louver; this is the position the louver will be at AFTER you cut the hole].

Put the vent temporarily in place here, lined up on the tape edge.
[to double check straightness of the masking tape, the top edge of the vent should be 1″ from the hood line].
buick gn rear hood vent
(as you’re standing on the pass side of car) measure from the edge of the hood closest to the door, and letting the tape measures’ metal end grip onto this edge, measure out 11 1/4″ to the bottom left side of the vent.
{this position strikes a balance between visual appeal & removing the least amount of material from the underside of the hood; the structural portion!}

buick gn rear hood louver
Now, standing parallel to the masking tape, looking down at it from above, place a mark on the tape that is directly above the center divider in the vent.
[this is the center of the vent; make your mark straight up & down NOT angled like the vent divider is].
Take your template, and on the starred side of the paper, the cutout portion of the hole, should be 11 1/2″ wide. The center of this hole should be 5 3/4″, and that’s where you will place a mark.
buick rear hood louver
[which should line up exactly with the line on the masking tape when you place the template in the correct position].

Ok, place the template on the hood. Line up the 2 marks you just made. The bottom edge of the tape should be lined up with the top of the templates hole.

buick hood louver template
Tape down the template to your turbo regal hood in several places.

The pictures below represents a numbers visual of the template, for how the vent will sit once completed. Since we used 1″ strips of paper, 3/8″ away (going outward) from the hole, is where the outside edge of the vent will be located.
[in other words, once the hole is cut out of the regal hood, the vent sits 3/8″ around the outside of this hole, on the top of the hood].

The dashed line represents the outer edge of the louver.
Your template should be in the position indicated (see the measurements) in the pic below.

rear louver template rear louver template 2 rear louver template 3 buick hood template buick turbocharged hood template buick turbocharged hood vent template


buick turbocharged hood louver template
14. Take a final glance at how ALL your templates look on your turbo buick hood. This will be the last chance you have to make positional changes before you’re committed!

scoring the template
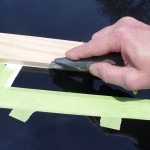
Using a straight edge & razor knife, score into the hood all the way around using the template holes as a guide. Complete all 4 holes. Remove the templates when done.
[or might be visually easier to just leave the paper templates in place & cut inside the holes]


15. It’s time to cut out all of the holes!
tarp the buick engine
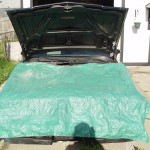
It’s a good idea to lay down a tarp over the engine compartment so the fiberglass dust & debris doesn’t get anywhere it doesn’t belong!
Wear a protective breathing apparatus.
(when you start cutting, fiberglass dust is gonna fly everywhere!)
{make SURE your car windows are up!}
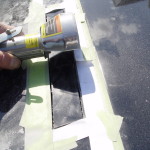
Use your cutoff wheel & cutout all of your marked areas.
cutting holes for vents
[after you start initially cutting, & once you finish the 1st hole, might be a good idea to inspect the underside to make sure all is ok]
{you may need to trim in certain areas for better clearance, especially on the 2 big tabs that face the fenders}

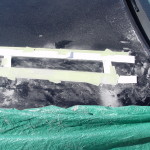
cutting holes in buick regal hood
File all the rough edges gently until smooth. You might want to paint (from the underside of the hood) the cutout edges (since they might be seen when your hood is open, considering the fiberglass is white in color!).


notching cutout area notching cutout area for vents


16. Now that all the holes are cutout, reinsert all of the hood louvers & check for clearance. Trim as necessary to fit. They should drop in easily, but fit somewhat snugly.
If the vents are slightly crooked or off just a bit in certain areas, you have a small amount of wiggle room to make the proper adjustments. (but make sure you have enough room left on the hood for the double sided tape thats on the vent to adhere to the hood)
buick turbo hood underside
All of the vents should fit & lay flush on top of the turbo buick hood (without being forced into place).

Look inside (thru) the vent holes, from the top, especially the rear ones, you may have to trim the structure support somewhat for full clearance (air flow). Be careful when trimming the side closest to the windshield! You’ll have to strike a balance here between form & function, since this side IS a structural area of the hood! Cut off only enough to get decent airflow thru the back holes of the vent.

airflow thru hood vent airflow thru buick hood vent airflow thru turbo buick hood vent


position marker
Sidenote: After retrimming the front holes to make the vents fit properly (& straight/level), we had a bit of excess clearance (movement of the louver), so we marked with tape where they are suppose to sit, so that they would be in the correct position (straight, compared to the hoods center line) when we seal them to the buick hood with the 2 sided tape.


underside buick regal hood underside turbo regal hood underside turbo buick hood


17. We applied some (5 minute) epoxy in a few different places between the hood & the support structure to help restore the stability of the hood (in the sections we cut out).

epoxy strengthener epoxy strengthener between layers


apply double sided taoe on vents
18. While you’re waiting for the epoxy to dry, apply the double sided 3M tape to the bottom side of the trans am hood louvers. Cover all 4 edges.
[the vents should be fully painted & dry by now] – {Using the 2 sided tape will also keep the buick hood somewhat stable from the holes we made}


19. Reattach the mesh screen on the rear louvers. You may have to (or want to) use a bit of glue on them, since the 4 tabs you cut off from the top was part of the securing method that held these on.


20. After fitting the louvers on the hood one last time with the tape on them (but with the protective strip still attached), and you are happy with how they look, take a mental note where each of them sits on the buick grand national hood.
Make sure the surface where the hood vents will sit is clean & free of fiberglass dust & debris, etc.!
Working with one vent at a time, remove the red strips & secure them down on the hood. Press firmly to seal them down.


underside turbo regal hood
20. For the front set, secure the mesh screen on the louver using the 5 speed nuts, from the underside of the hood.
Note the position of the long tabs that are on the top side (the side closest to the windshield when the hood is down), the bent section faces up towards the hood.
You may have to wiggle/twist/turn the mesh into place, since the support structure is in the way a bit.

For the rear set, nothing else is required, they are secured down only by the double sided tape.


21. That’s it! Here’s how they look when they’re done.

turbo buick hood louvers turbo regal hood louvers turbo regal hood vents


turbo buick hood vents buick regal hood vents buick regal hood louvers


1987 buick regal hood louvers


INFO: the fiberglass hood is just shy of 1/8″ thick. The steel original stock hood is much thinner.


NOTE: since the 2 sided tape is gray, we quickly sprayed black paint across the outside edge on all of the vents, making it blend into the black paint. (a black permanent marker works also).


BE AWARE: where you position the rear hood vents! Remember since there will be holes here now, water will drip inside the engine compartment! (& hopefully NOT onto any electronics!)


WHILE: we had the hood open, & before we stuck the louvers on permanently (step #20), we spray can painted the entire underside of the hood, which took care of the white cut line outline (step #15).
The (Hartline Performance, maker of the buick grand national hood) decal that was on the underside got cutoff in the process of inserting these louvers, leaving only the middle section showing, so that helped in the decision of just repainting the whole underside.


LATER MOD: We had a custom Buick Grand National decal made to stick on the underside (near where the “Buick Turbocharged” wording is on the factory buick turbo hood).

,

Related posts


Hey, Turbo Buick Fan!

Was this post beneficial?
More Cool Info is Added Daily!
DON'T Miss Out!
Sign up to our FREE subscription service
and receive an email whenever we post new articles.

Just enter your email address below and click the Subscribe button.
(NO spam sent - only new post alerts)

Join 1,026 other subscribers