


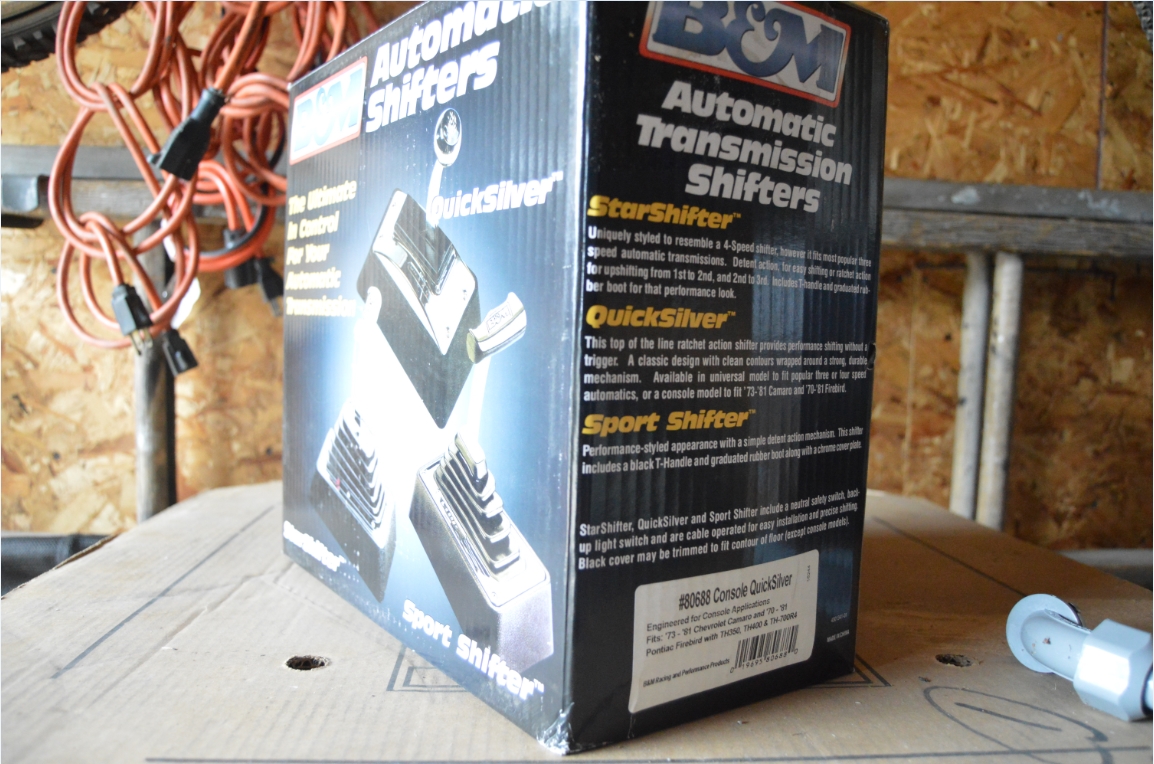
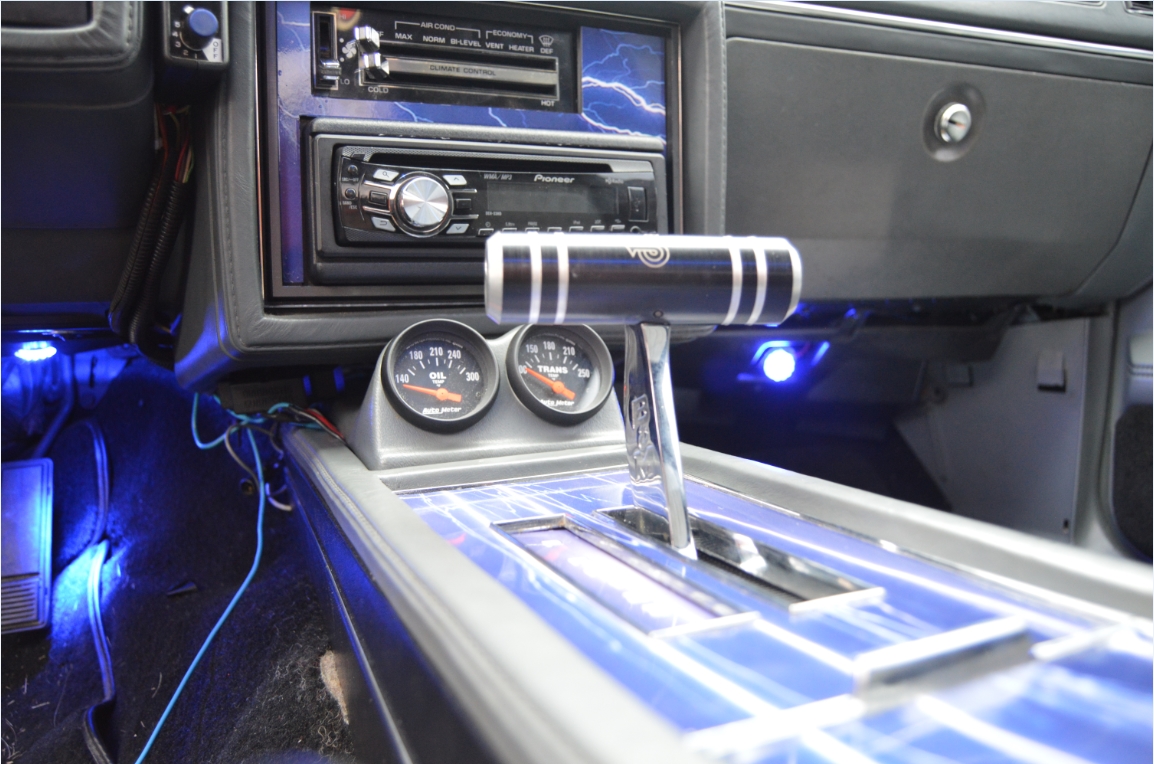
When you decide it’s time to upgrade the shifter in your 1984-1987 Buick Grand National (or other variety Turbo Regal), one of the most popular choices is the B&M Quicksilver. It’s affordable, looks good, relatively easy to install (but time consuming), and most of all, it fits (with a few mods) and works great.
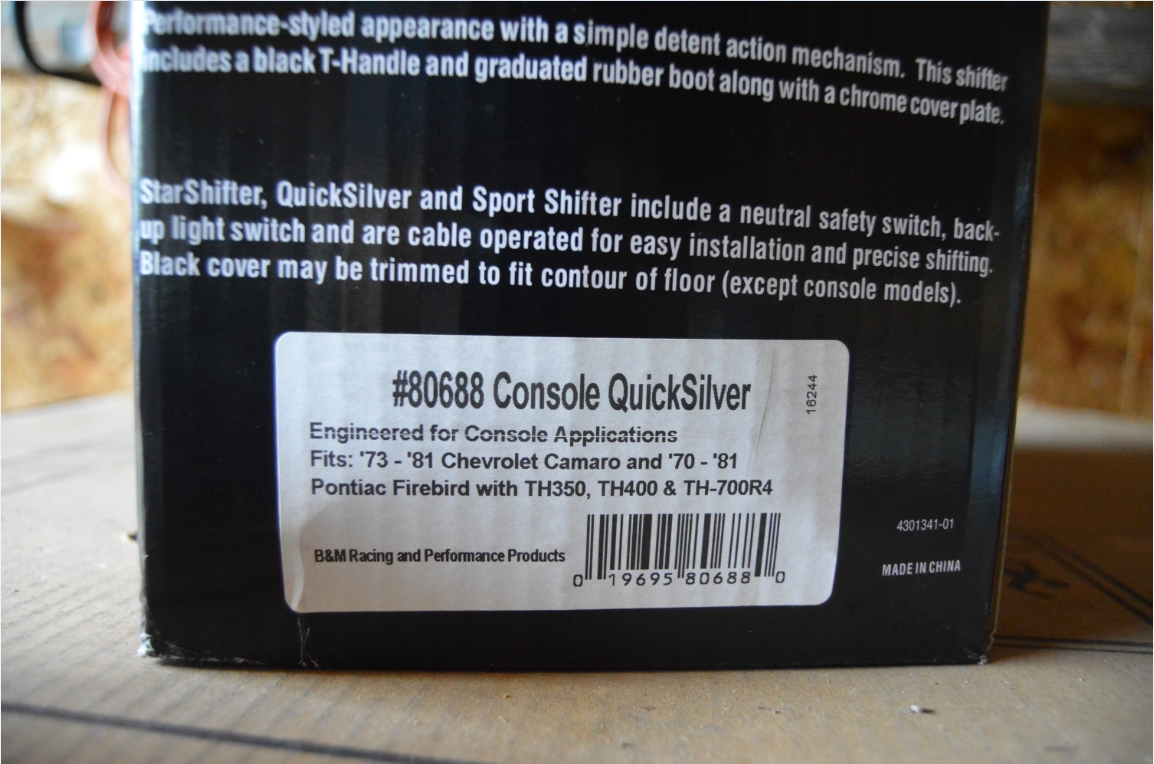
Other people have performed this modification, but nobody has ever really mentioned the specific model number of the Quicksilver shifter to get (there’s like 3 different versions available). We chose #80688, which fits (console for 73-81 camaro). I’m sure the other versions probably work just as well, they are all basically the same.
[note: “I think” #80688 will sit lower in the console (since it mounts direct to the trans tunnel, with no other brackets), meaning has a shorter stalk than the other ones. The stalk on #80688, measures 2.5″ tall from top of console plate to bottom of where the handle is]
There is a turbo 400 trans (along with a manual valve body) in this Regal G-body, so a couple issues come up that probably won’t for you if you still have the stock 200R4 in yours. (namely space limitations where the front of the shifter gets mounted)
Since this model Quicksilver shifter uses the existing factory shifter cable, we also had to modify the bracket that holds this cable onto the shifter (we aren’t sure if the cable in this GN was factory or an aftermarket one, but it didn’t exactly fit how it was suppose to according to the instructions. Good thing we’re creative at coming up with stuff that works!).
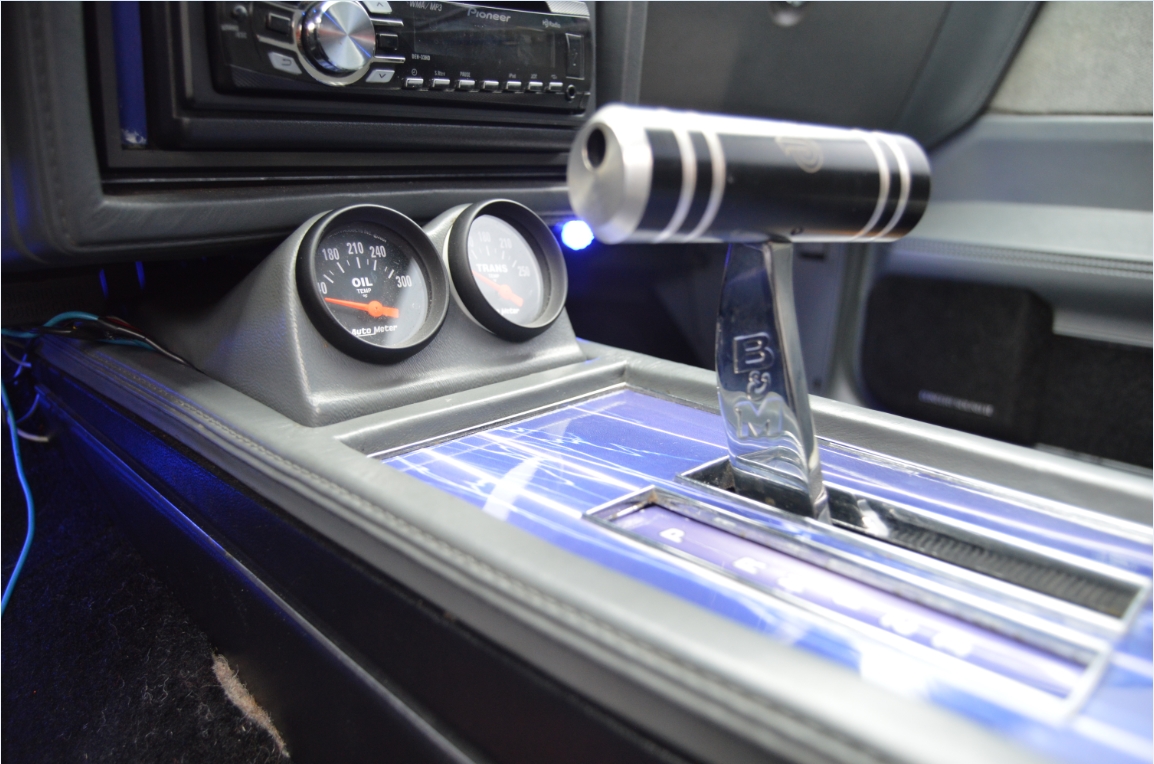
The original shifter on this car has the cool billet T-handle (with turbo 6 logo) that TR Custom Parts (buickGN.com) created many years ago (but is no longer made).
If you have desire for one like this however, recently GbodyParts.com has been producing some of them.
The problem with this billet handle though, is that it’s not threaded (where it would attach to the top of the new shifter). Using it on the factory shifter only requires that it just sort of rests on top with 2 tiny screws that keep it secured on the underside of the front & back side of the handle (kind of jamming it in place).
That presents one of the issues with trying to keep this neat looking shifter handle. We think we can get a machine shop to thread the handle, or put an insert in it, etc., to get it to work so we can put it back in this Buick GN.
(not to mention that at a future date we plan on having a hole drilled in the side [where the current push button is now] so that we can install the line lock button there!)
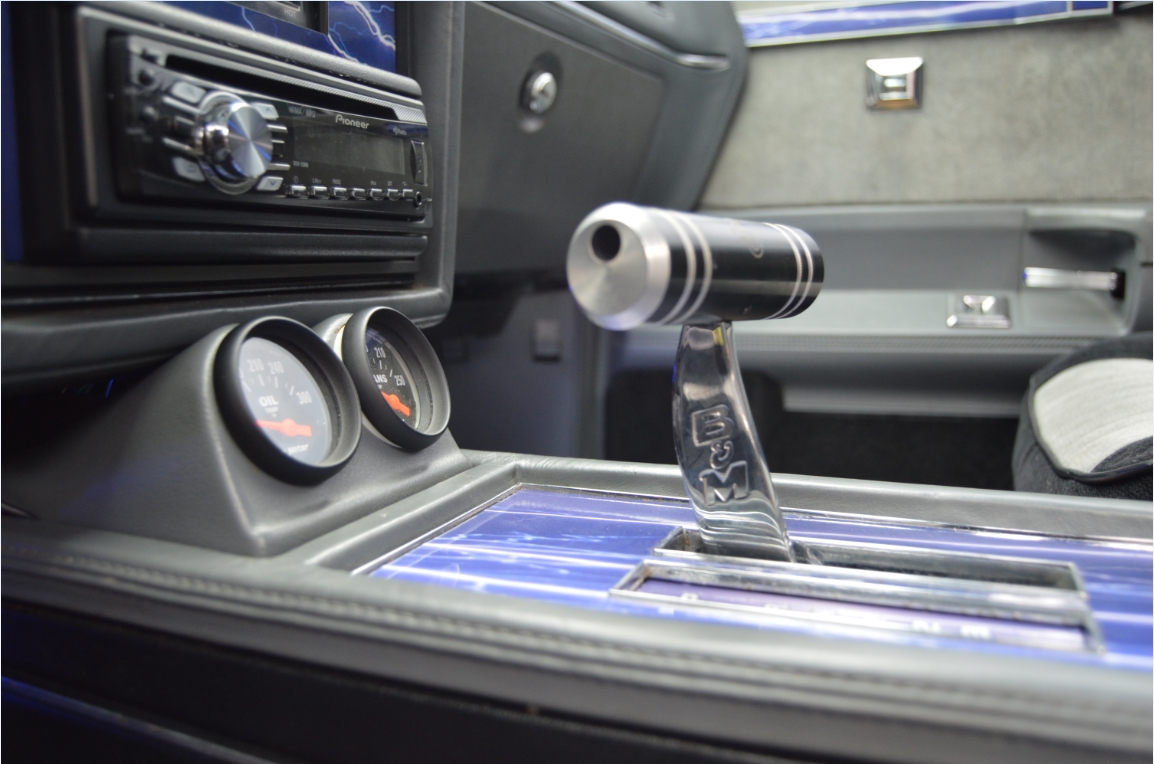
The gear shift indicator positions are no where even near where they need to be, and the “pointer” on the new shifter, in park, lines up with the “N” position on the factory indicator plate. We’re kind of stumped on how to resolve this for now, so it’s a good thing we know how to count: P R N 1 2 3 ! (or in your case, P R N 3 2 1)
[note: Mark from TR Custom Parts did his own install of this shifter years ago, you can find the (excellent) write up on turbobuick.com]

.
PARTS:
Quicksilver Shifter #80688 (console for 73-81 camaro, uses the existing factory shifter cable) $300 (summit)
TOOLS:
7mm, 10mm socket, ratchet
pliers
drill with 5/16″ bit
grinder or cutoff tool
TIME TO INSTALL: 3-5 hours
.
HOW TO:
[sorry for jumping around a bit on the how-to, we fixed issues as they came up, as well as taking some time for notes for this write up!]
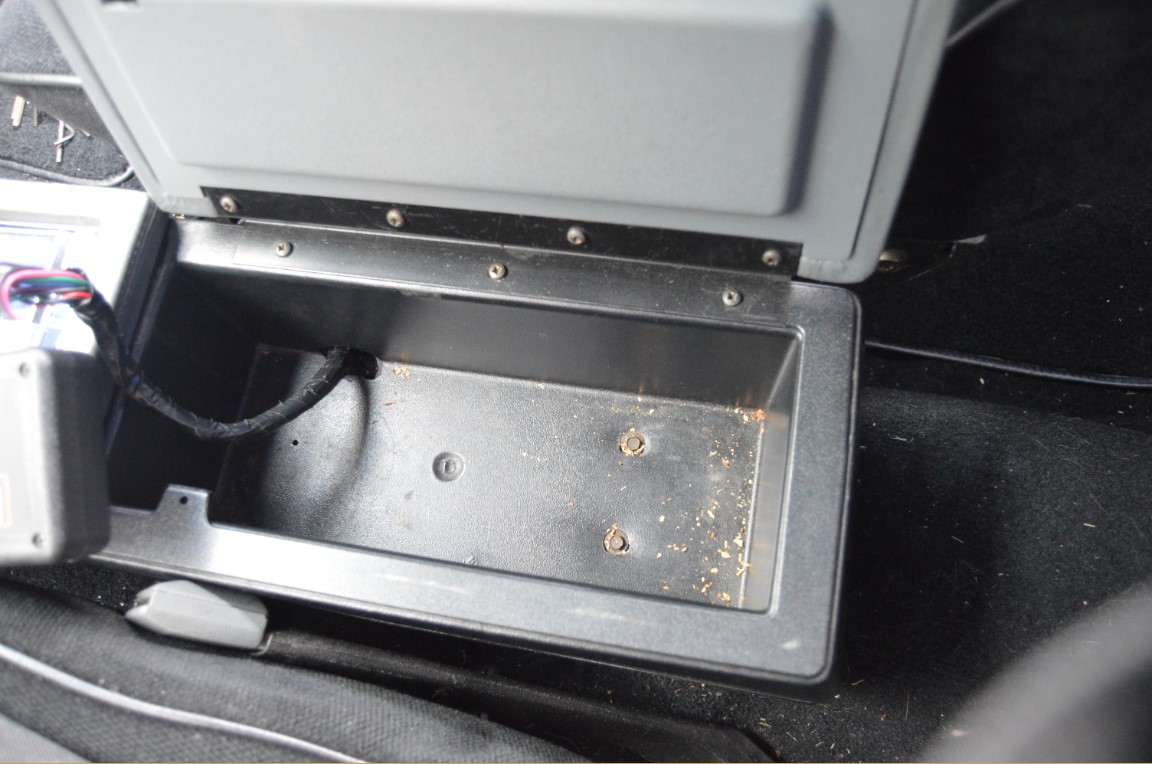
1. remove 2 screws from inside compartment.
2. remove 2 screws from ashtray. remove ashtray.
3. lift off chrome shifter bezel. (lift off from back, unhook from front)
4. remove 2 bolts from front side of console.
5. remove console, unconnect shifter indicator light (unconnect ground wire also).
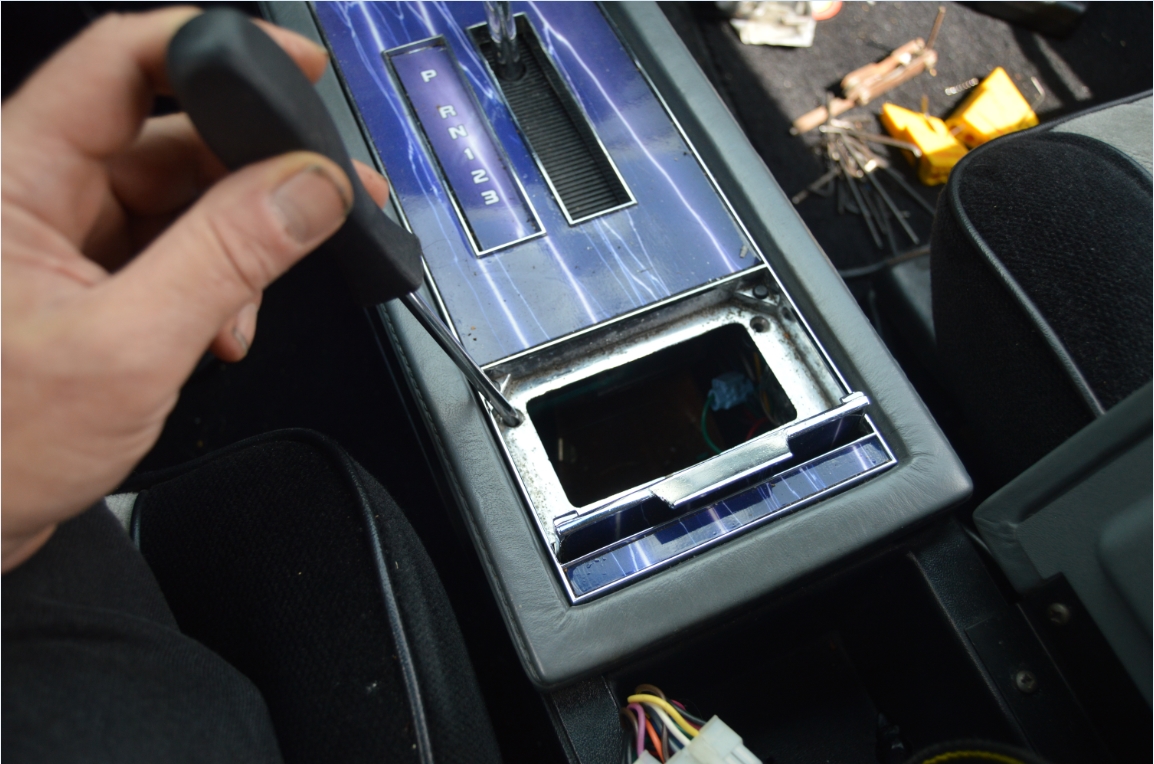
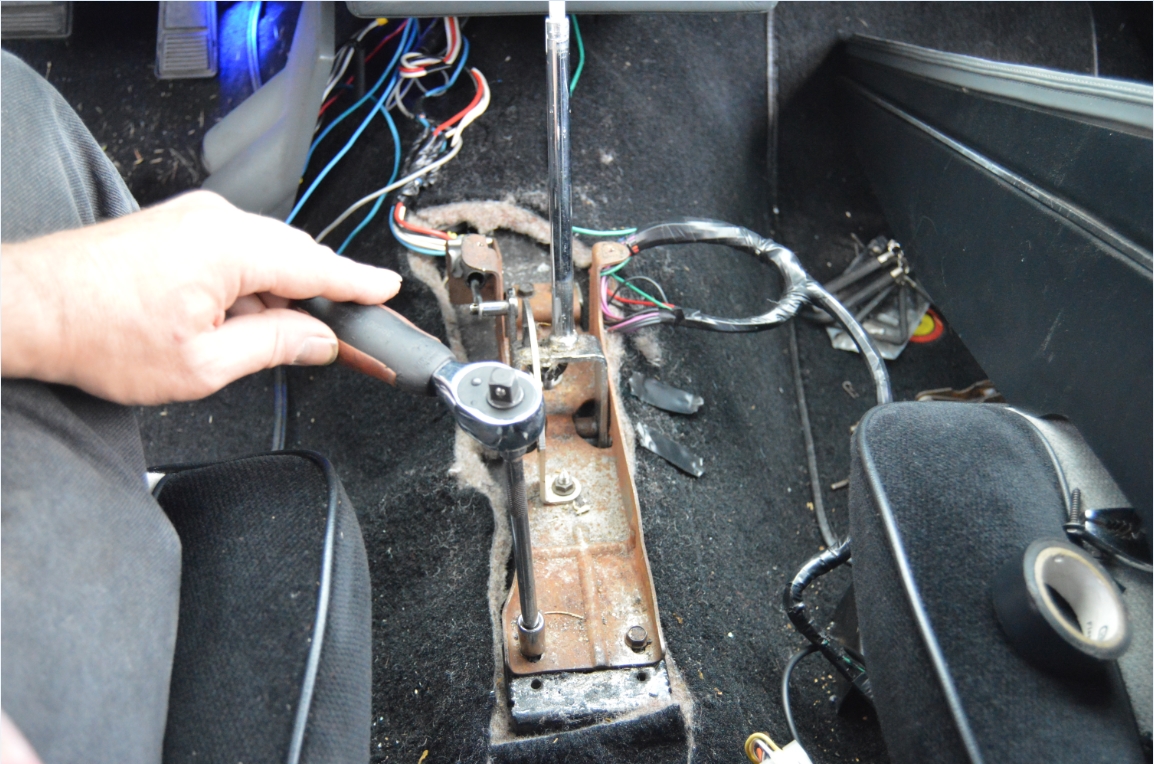
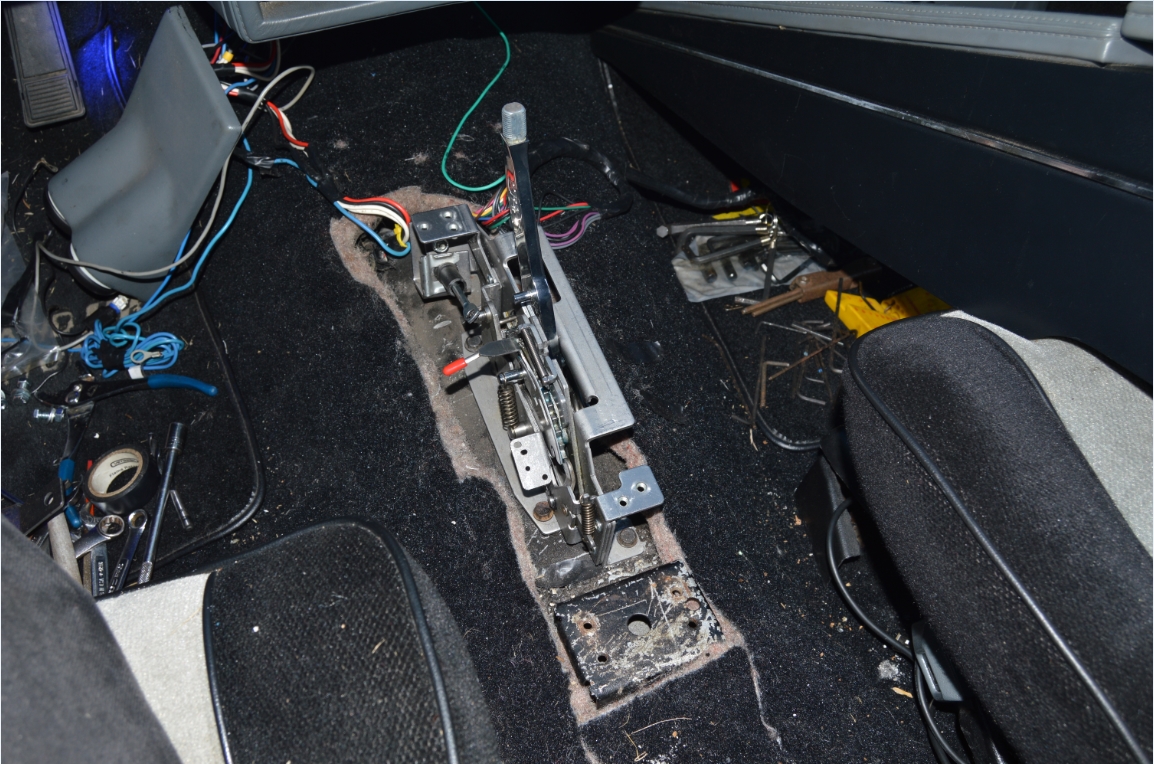
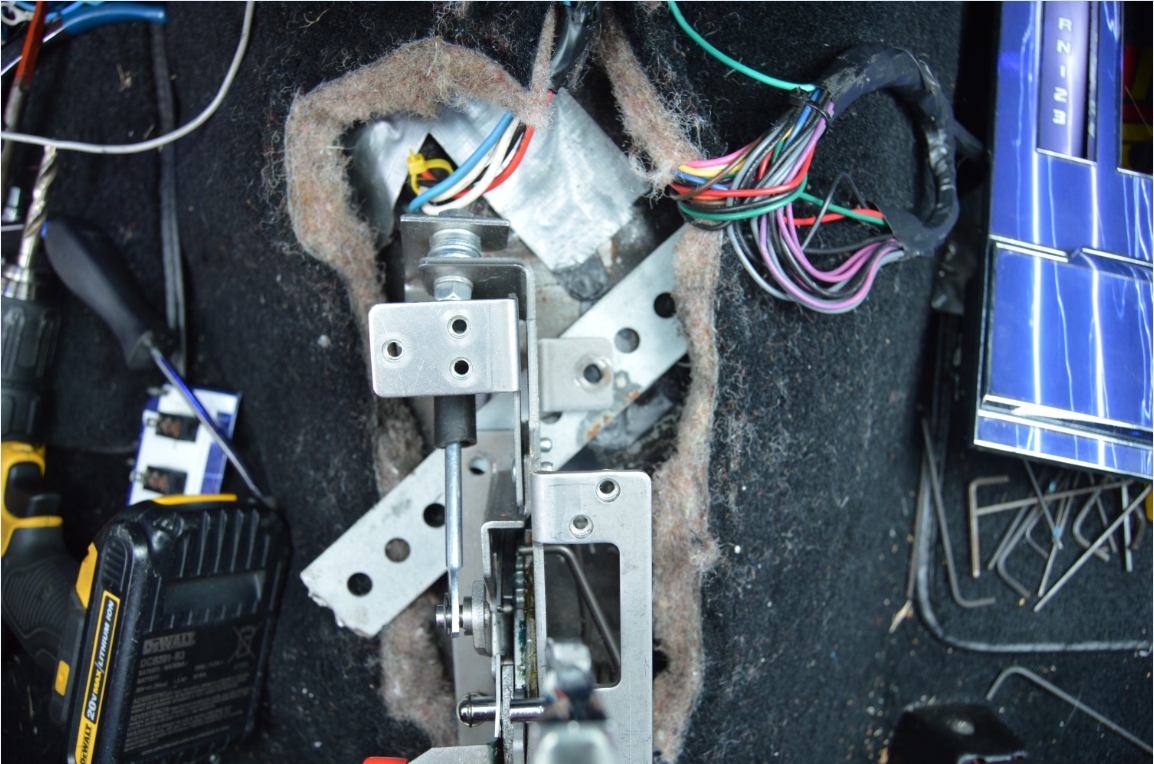
6. remove the 4 bolts that hold shifter to floor. unclip shifter cable. remove shifter.
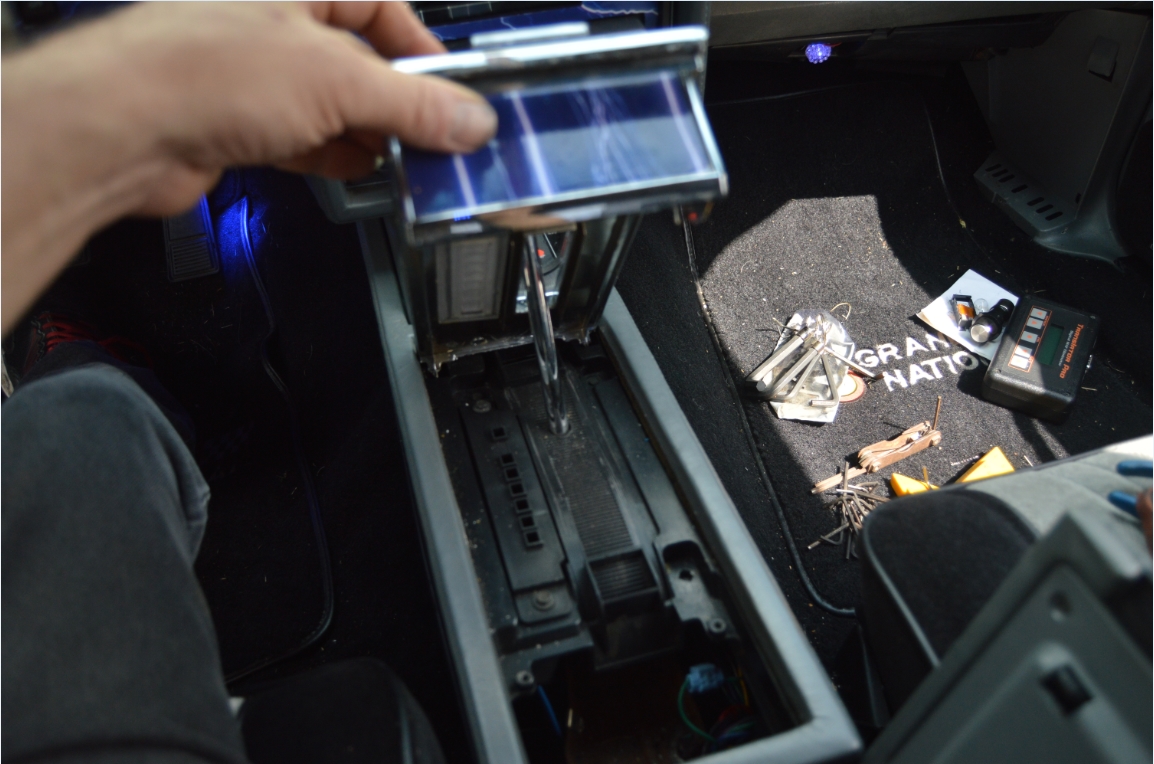
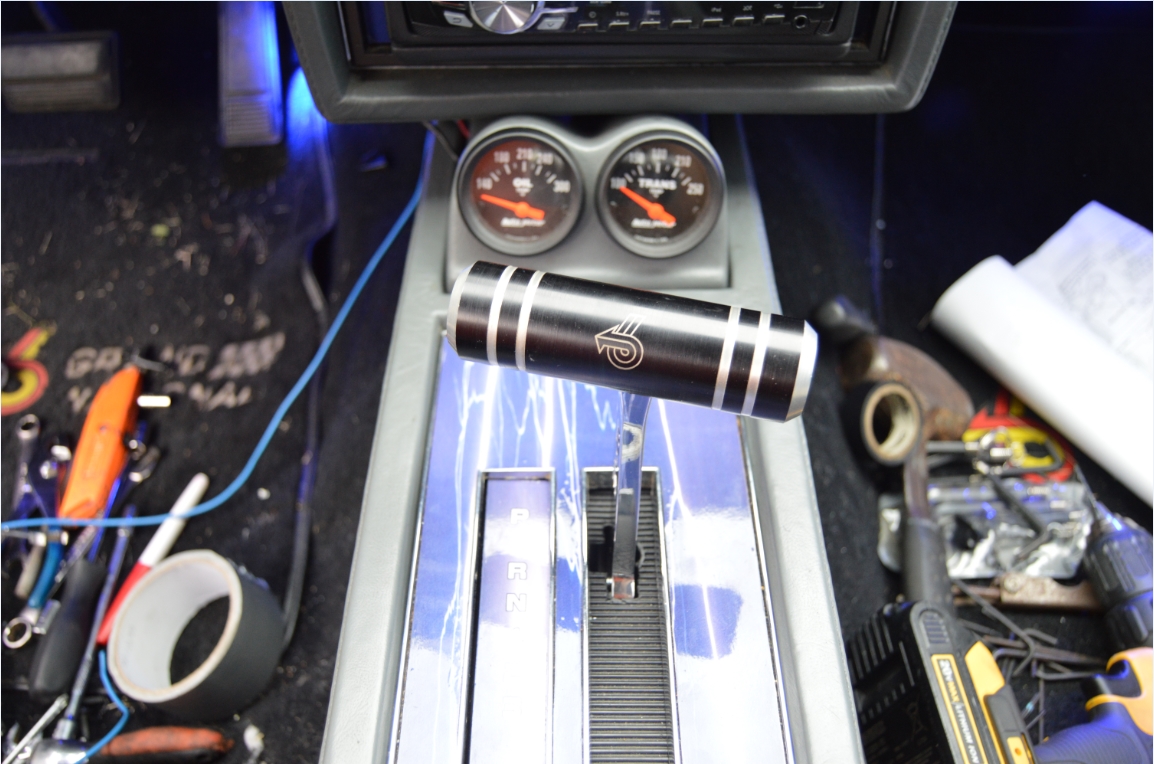
7. test fit the new shifter into place so you can visually see how it will be. (it’s nowhere near done & won’t fit right just yet, but you can kind of see howit will be aligned)
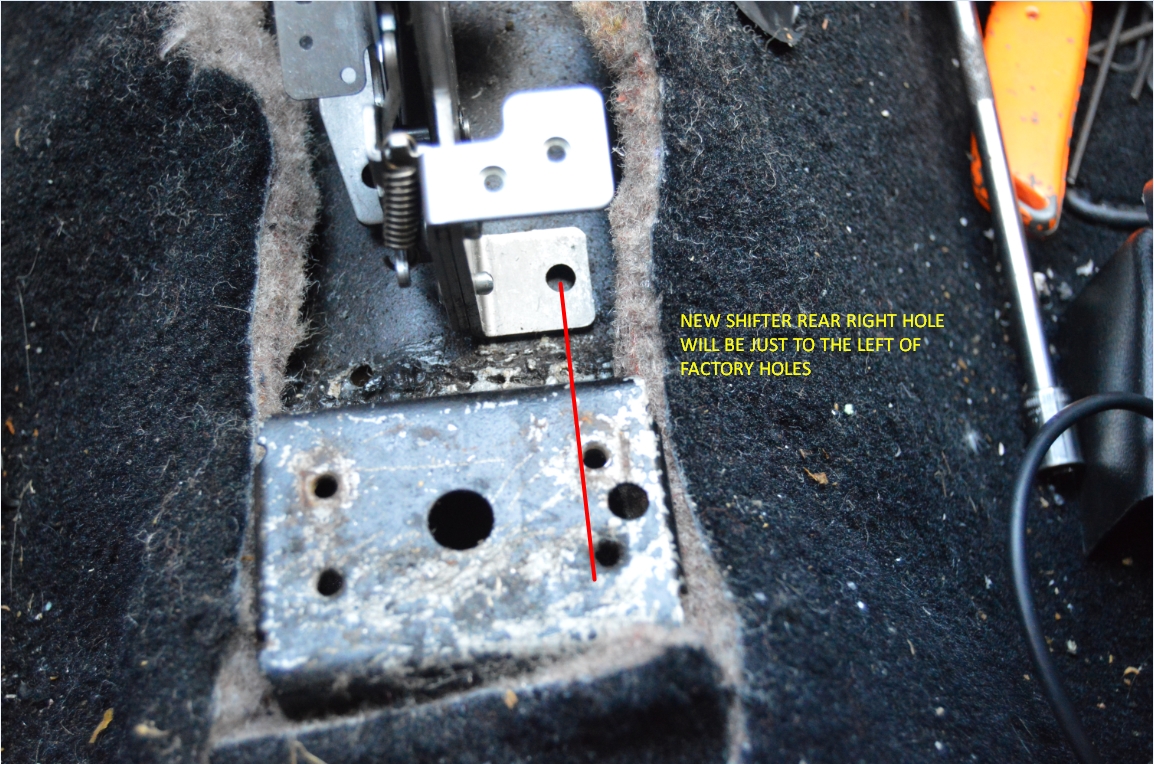
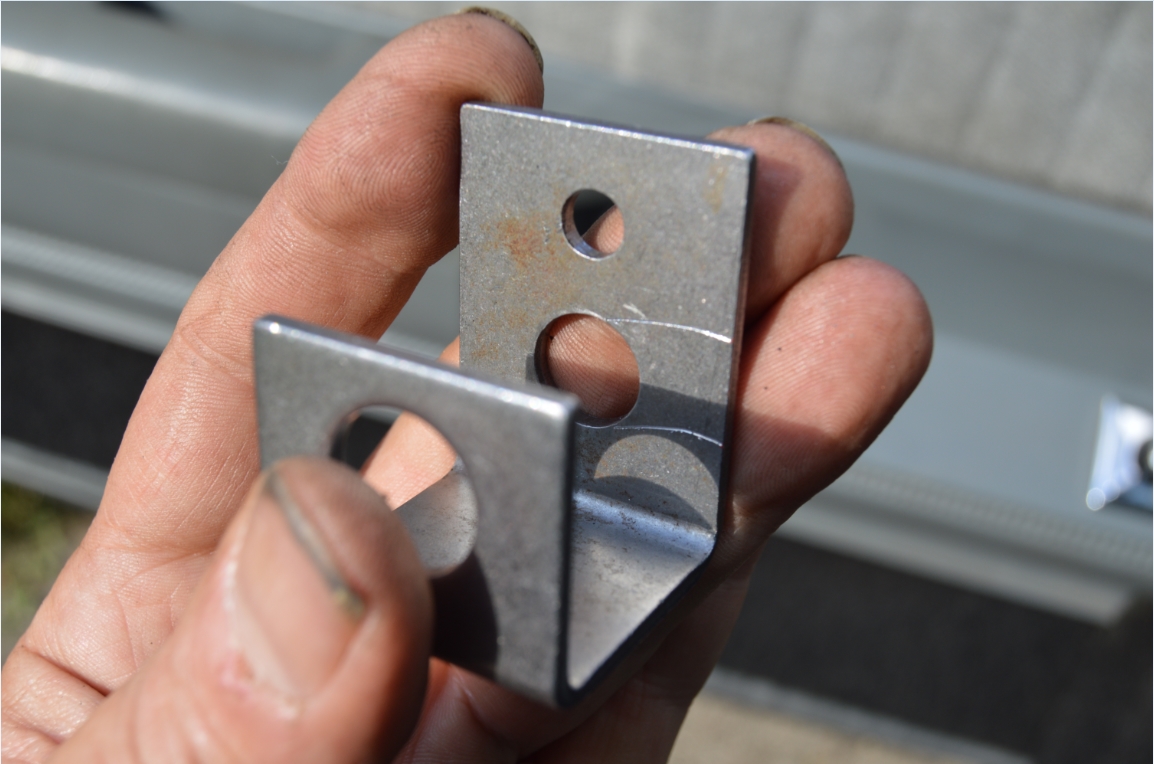
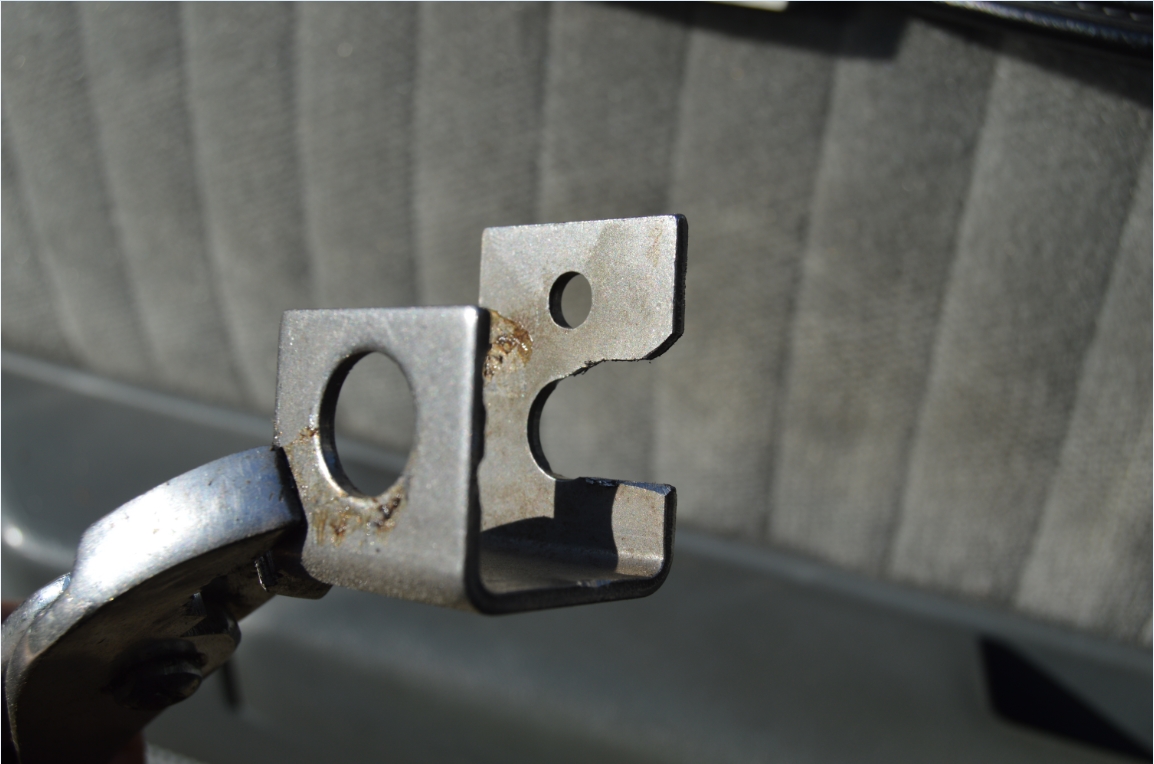
8. the back right mounting hole should be just slightly to the left of where the factory shifter hole is (see pic). the hole is also about 2″ forward. The back of that mounting hole tab (on this car) rests just in front of where the weld mound is (from the OEM bracket).
9. the front left hole will be basically in the bottom left corner, on top of, where the OEM bracket was, (the foremost bottom left corner of the plate where its welded onto the tunnel – NOT the part of the bracket where the bolts use to attach to).
[for the remaining 2 bolts, you can figure their positions from these first 2]


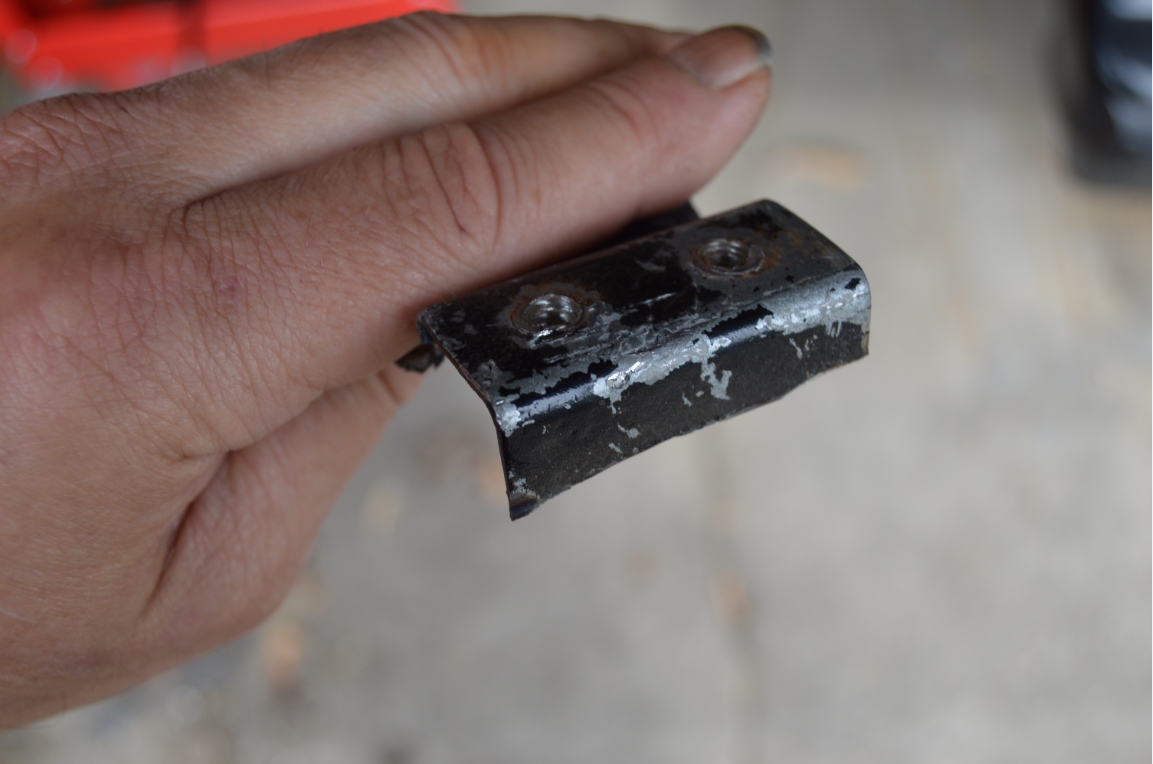
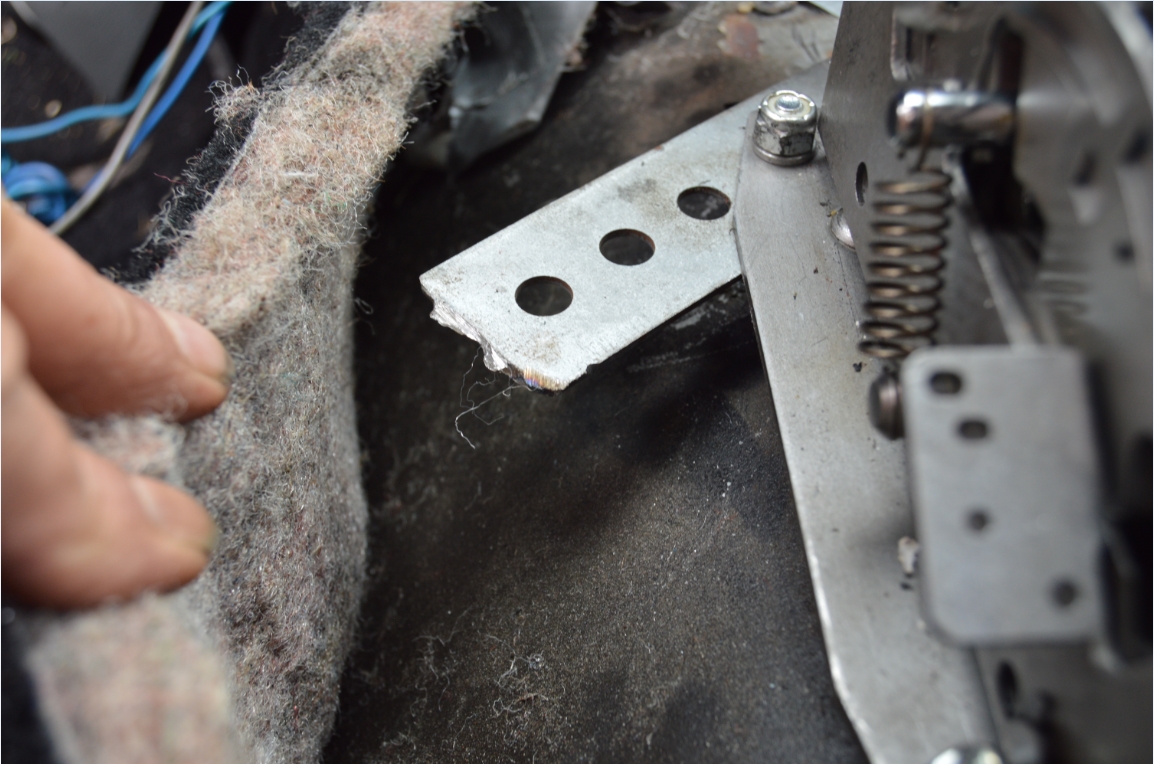
10. cut off the front mounting pad. ONLY the top! leave the portion where it is welded onto the tunnel there! (you will use it as a reference point)
[note: protect your interior & carpet from sparks, etc. when cutting!]
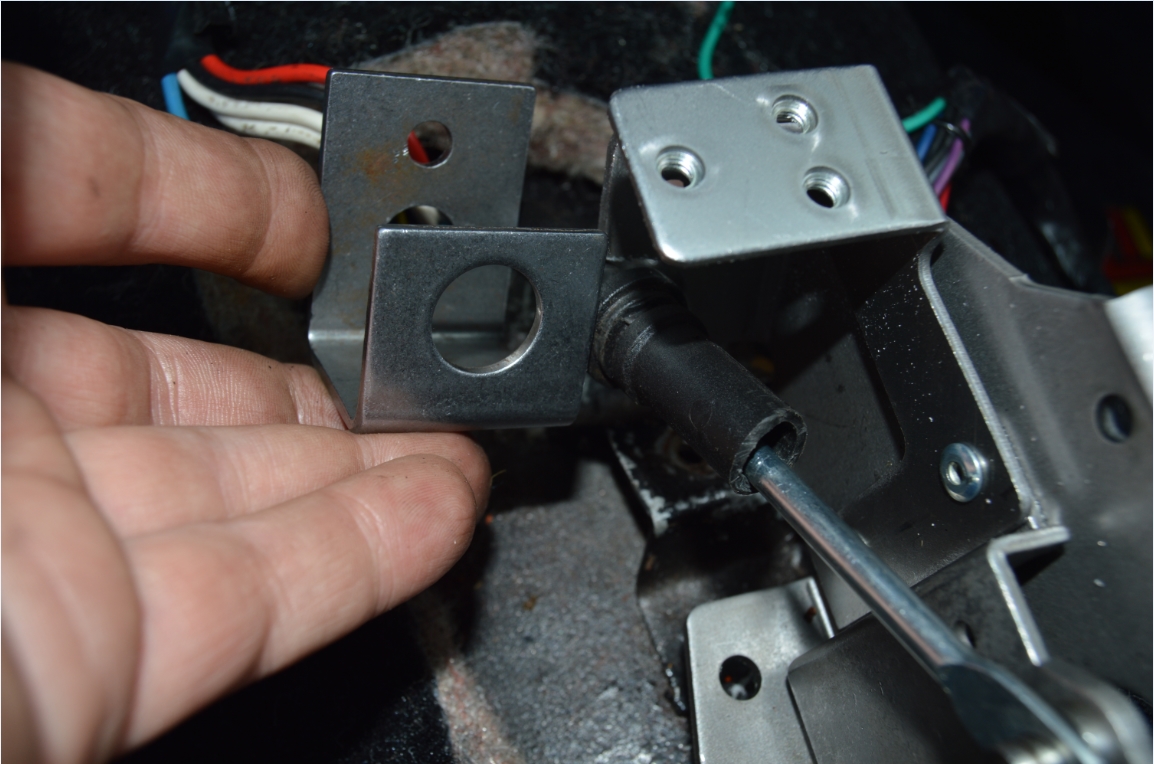
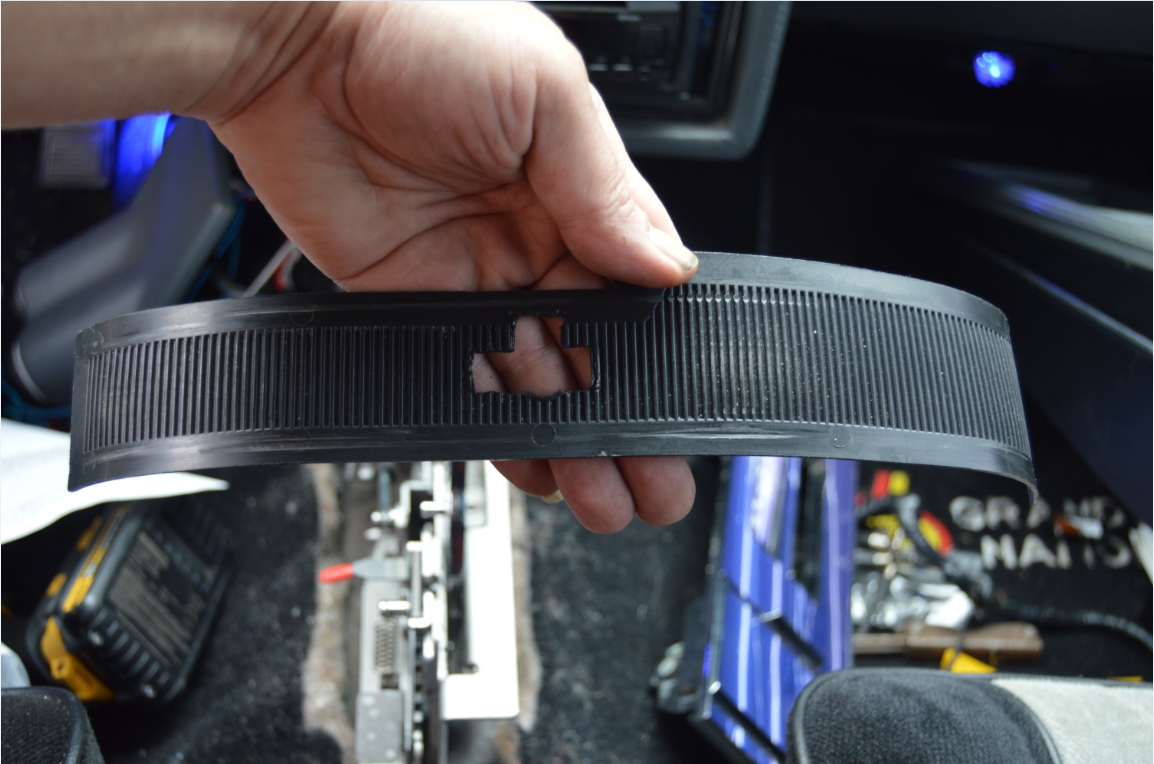
11. for the shifter cable, we noticed that it won’t fit inside the notched out area in the new shifter, the notch is too small. the cable also sits to far back to mount properly.
12. so first off, we filed it out some until the cable fit into the notch. (we filed the top portion of the notch)
13. the extra (U-shaped) bracket (with 3 holes) that comes with the shifter, that is suppose to keep the shifter cable secure, can’t be mounted as instructed in the directions. so we improvised. we flipped the bracket around.
However, this leaves the small hole towards the front of the car, and the cable can’t fit thru it!
Notching out the hole will fix things. (see the pic, the marked area is what we are going to remove)
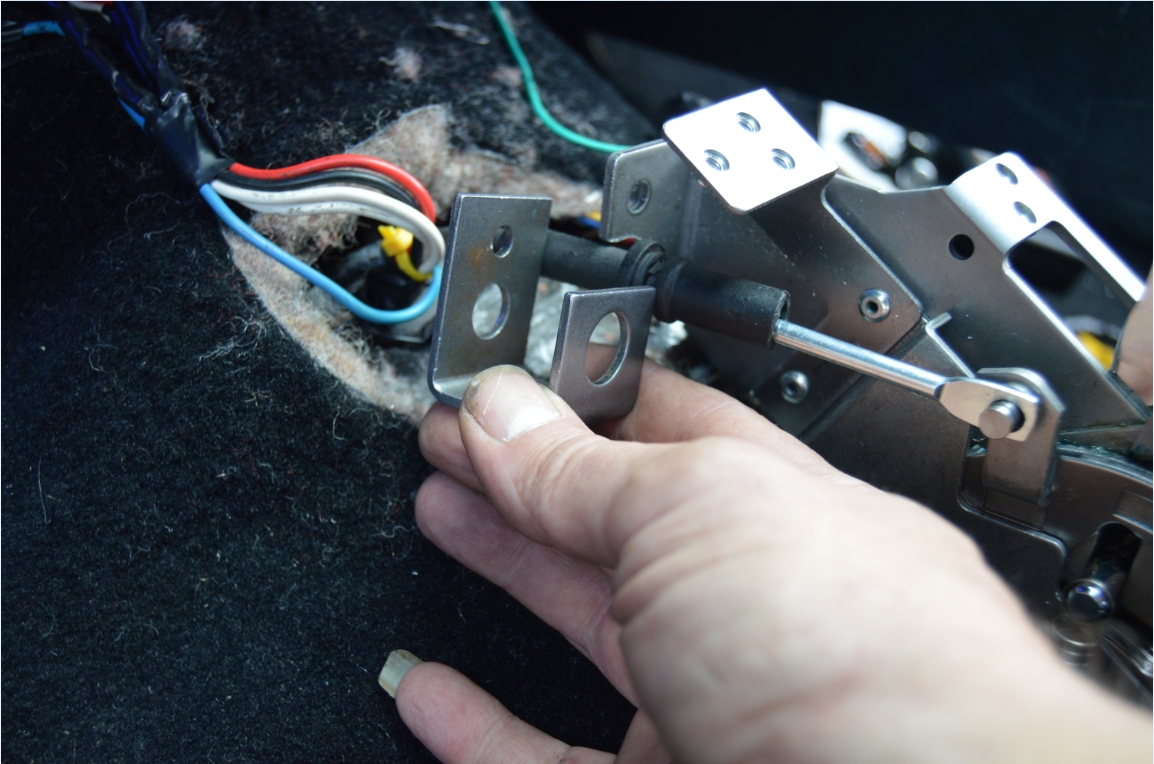
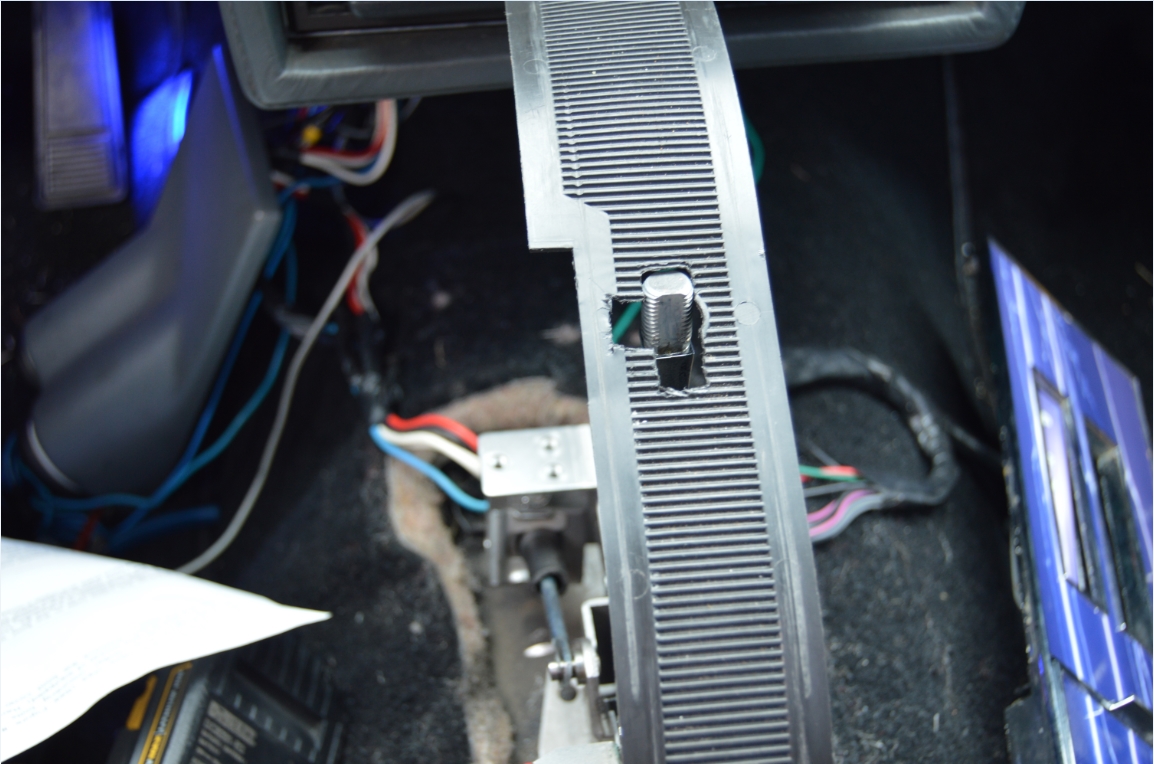
14. install this bracket onto the cable. also attach the factory (“U”) clip that was used on the original to secure the cable.
15. install the bracket onto the shifter. we needed to use 8 washers between the front of the bracket & the shifter, to space it out properly, and to make sure it had enough room to move the (actual) cable, and not the cable housing.
[it might be a good idea to put a small dab of silicone between/on the u-clip and the shifter to keep it securely in place]
attach the cable end to the shifter using the supplied c clip.


16. we placed the console on top of the new shifter (quite a few times) to make sure things lined up correctly. (it should be relatively close – like straight front to back, left to right – not hitting the chrome bezel on either side, etc)
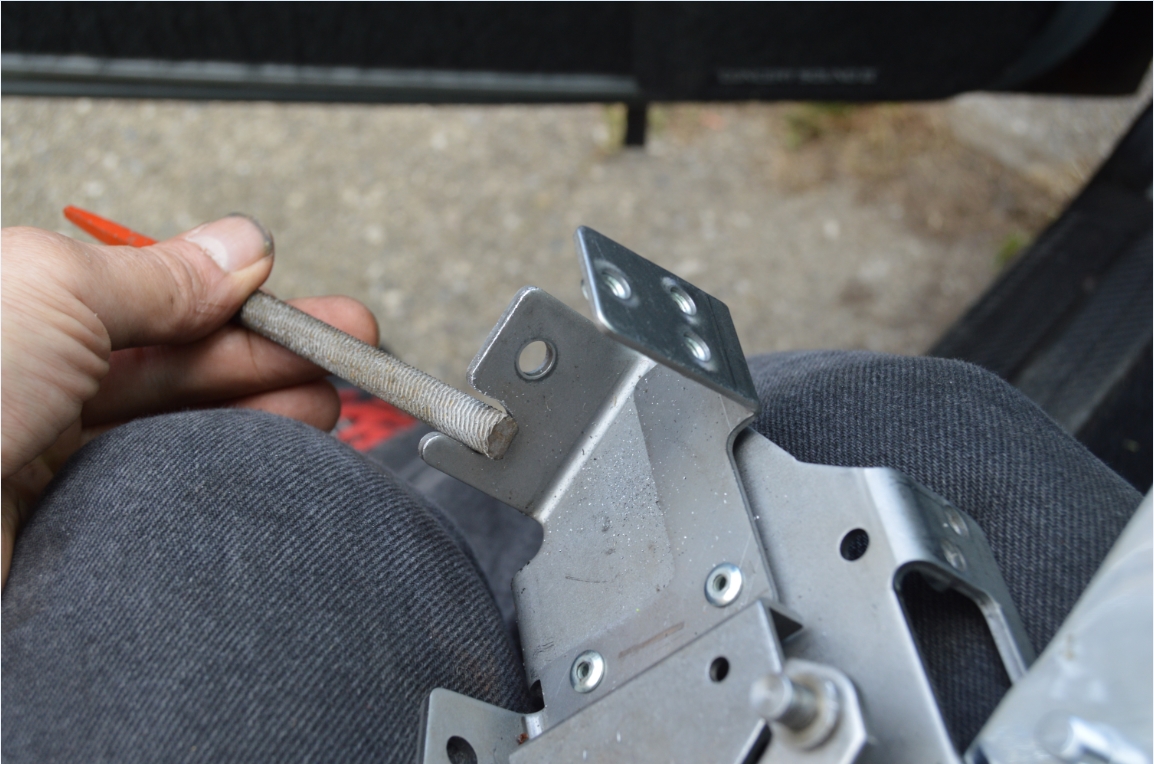
17. on the console, you will need to trim the plastic piece shown in the pics. the cylindrical pin that attaches to the shifter stalk will hit this piece if you don’t remove it.
[we opted to remove the entire section between my fingers, but I think you could get away with just about an inch or 2 in the very middle if you wanted]
18. drill 4 small holes in the positions they need to be to attach the new shifter to the floor.
we used the (smaller than the new ones that come with shifter) 4 OEM bolts to secure the new shifter onto the tunnel.(temporarily! to test fit only!)
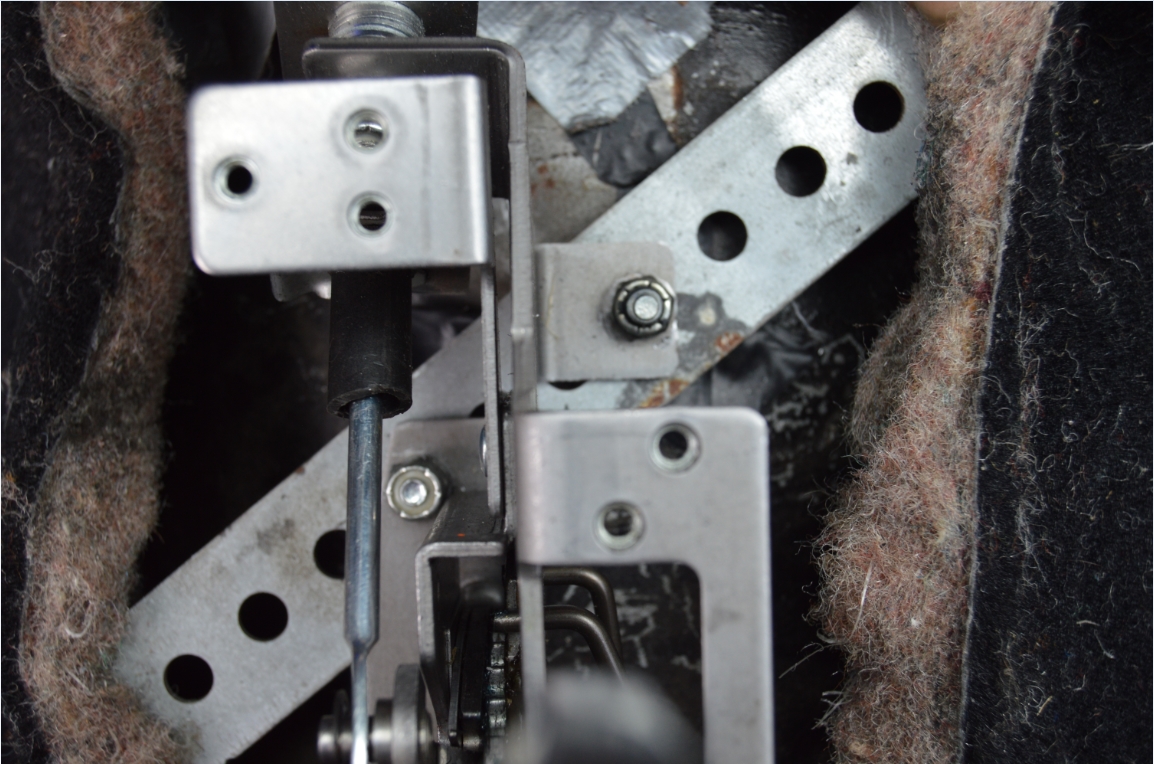
19. the back left side needs 3 washers between the tunnel and the shifter to level it out. same goes for the front left. Both right side ones get secured directly to the floor.
[note: because of the turbo 400 in this vehicle, there literally is NO room between the front 2 holes and the transmission, to be able to get the bolts in there. we did come up with a solution however, see below. For now, the shifter is held in place via the 4 OEM bolts to make sure all lines up]


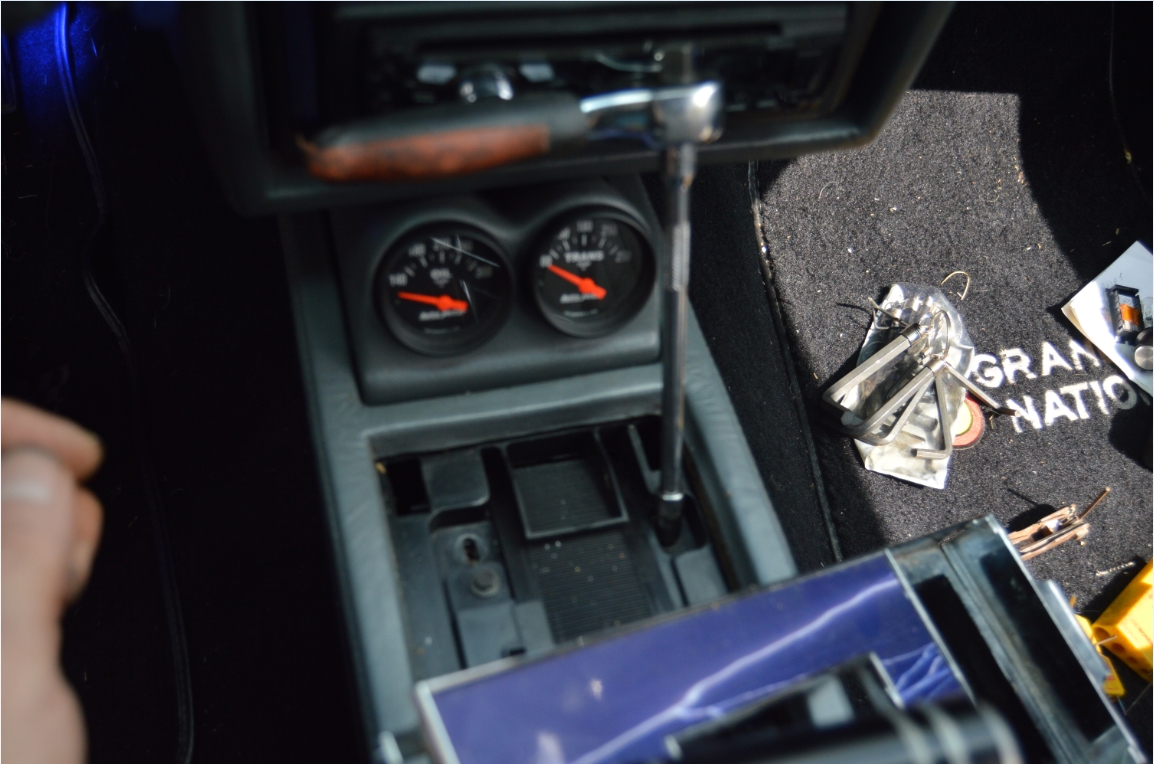
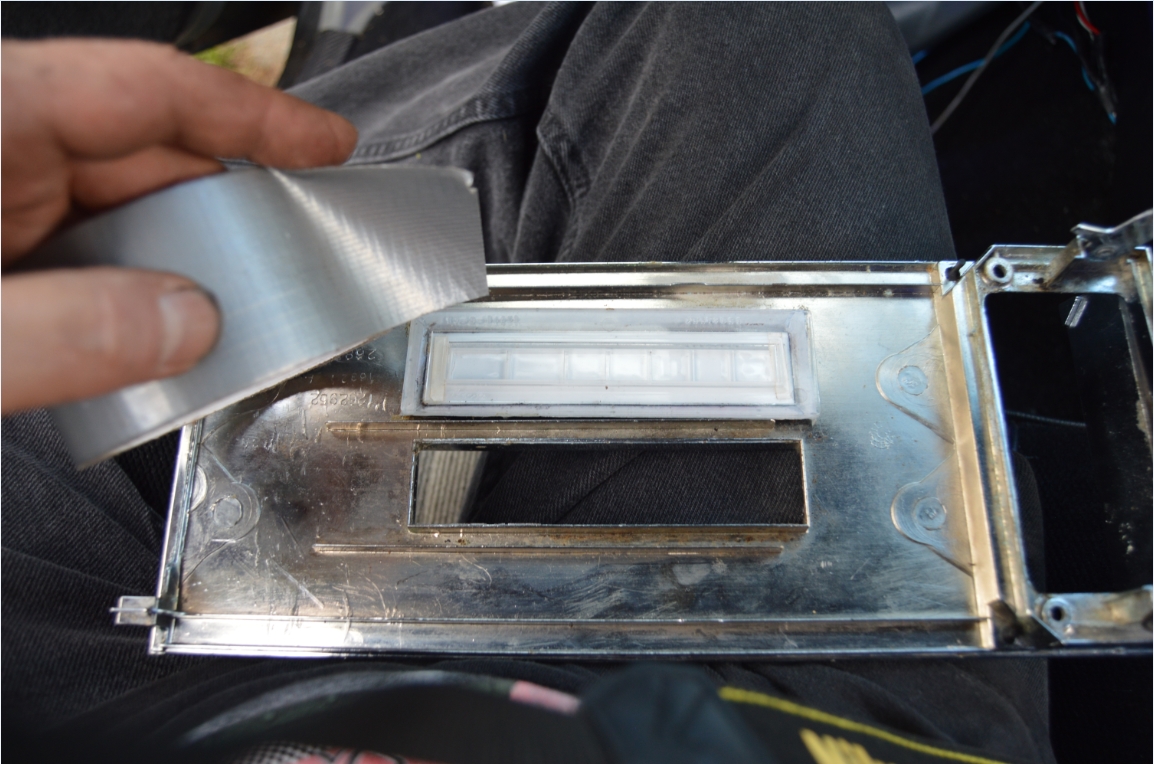
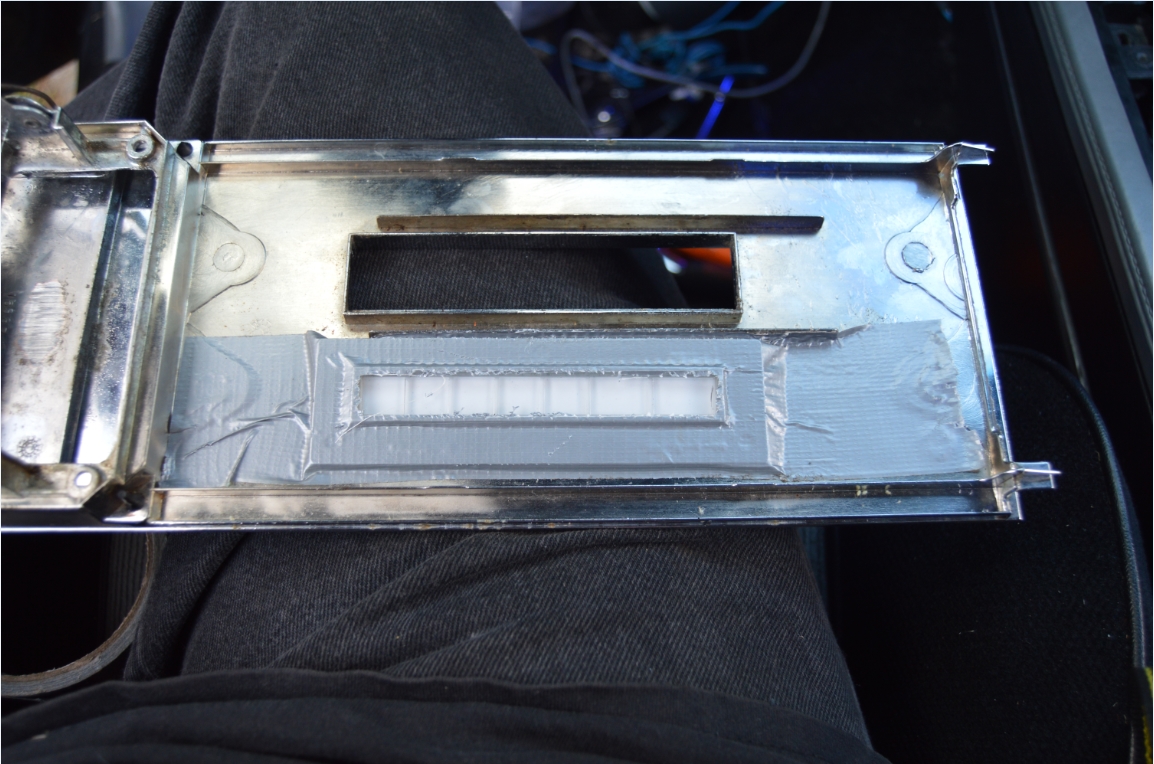
20. for the gear indicator, the factory piece that sits directly below it, hits the shifter, so we didn’t end up using that piece. We simply duct taped the indicator to the bezel on the underside. (since at this point, it doesn’t matter since the shifter indicator doesn’t point to the correct gear anyways). we did cut out the center section (where PRND is) for future use when we get back to this, in case we figure out how to make it line up.
[note: I believe the entire PRND321 needs to be moved down (towards the back of car) inside of the slot where it is now]
21. we did retain the black plastic slide piece that goes over the shifter stalk. some rectangular trimming (and a slot) was necessary to make it fit (cut it evenly on both the front & rear side until it fits over the stalk). You will need to cut another little section out in the middle of that (pretty much directly in the middle), so that the shifter pin can poke thru there. also, the box where the OEM gear indicator light goes needs to be removed (otherwise the shifter hits it).
22. once you have the shifter temporarily bolted in with 4 screws, place the console back into position to check fitness. shift into ALL gears. make sure it shifts properly, sits into position, is aligned left to right and top to bottom.
[note: if you have a 400 transmission, see the mod we made (far below) on how to secure the front of the new shifter, before you continue on!]

23. you’re ready for final install!
24. unscrew the 4 bolts that secure the shifter to the floor.
25. drill out the 4 holes using the 5/16″ bit.
26. secure the shifter using the bolts/washers/nuts supplied with the shifter.
[note: for clearance sake, we put the bolts in from the bottom for maximum clearance! the driveshaft & trans runs pretty close in this area!]
27. you will have to figure out how to secure the front of the console down since the OEM mounting point has been removed.
we simpy took a rectangular piece of aluminum (2.5″ x 4.5″), bolted it to the front mounting pad on the new shifter (first), then attached it to the console (after this entire job is done) using the existing holes in the console using the OEM screws (we had to drill 4 holes thru the aluminum to secure it – 2 for attachemnt to the shifter, 2 for the console).
28. place the console into position. secure it with 2 screws in the compartment, and the 2 new screws in the front.
[note: since we will deal with the gear indicator light later, we just stuffed it under the console for now. if you have a solution, now is the time to address that]
29. insert the black slider piece into position.
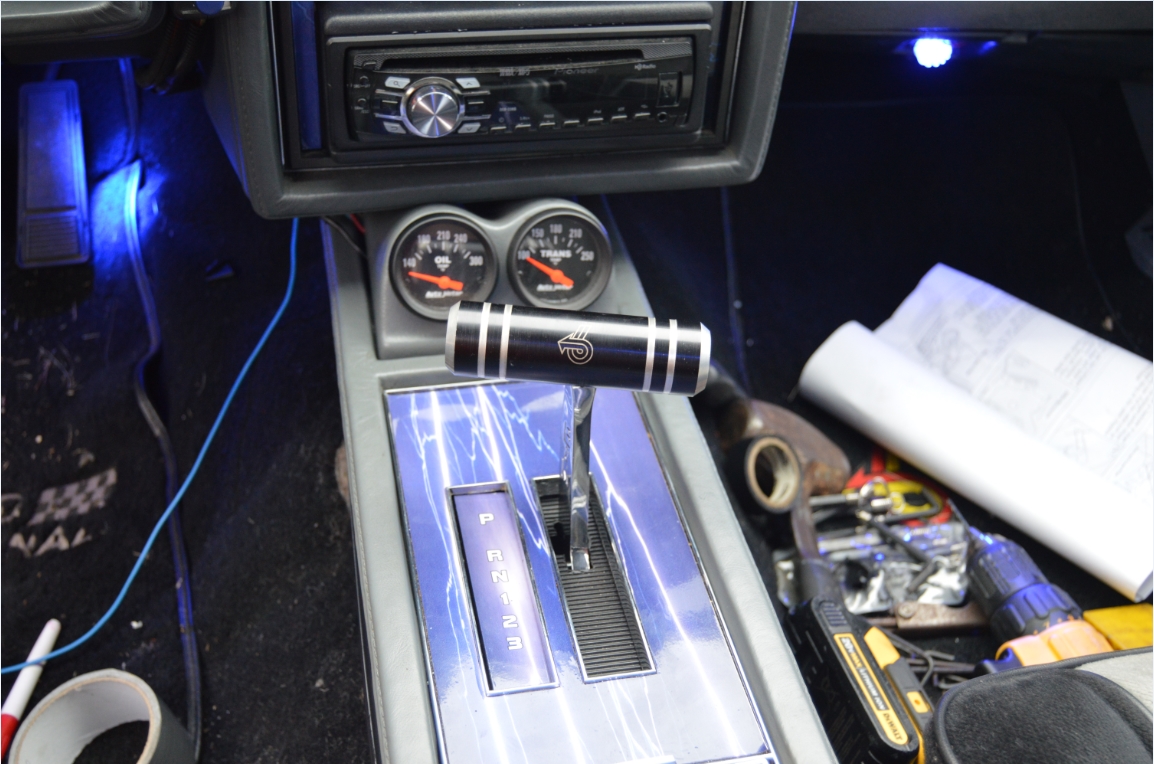
30. attach the chrome bezel and ashtray (using 2 screws for ashtray).
31. attach shifter knob.
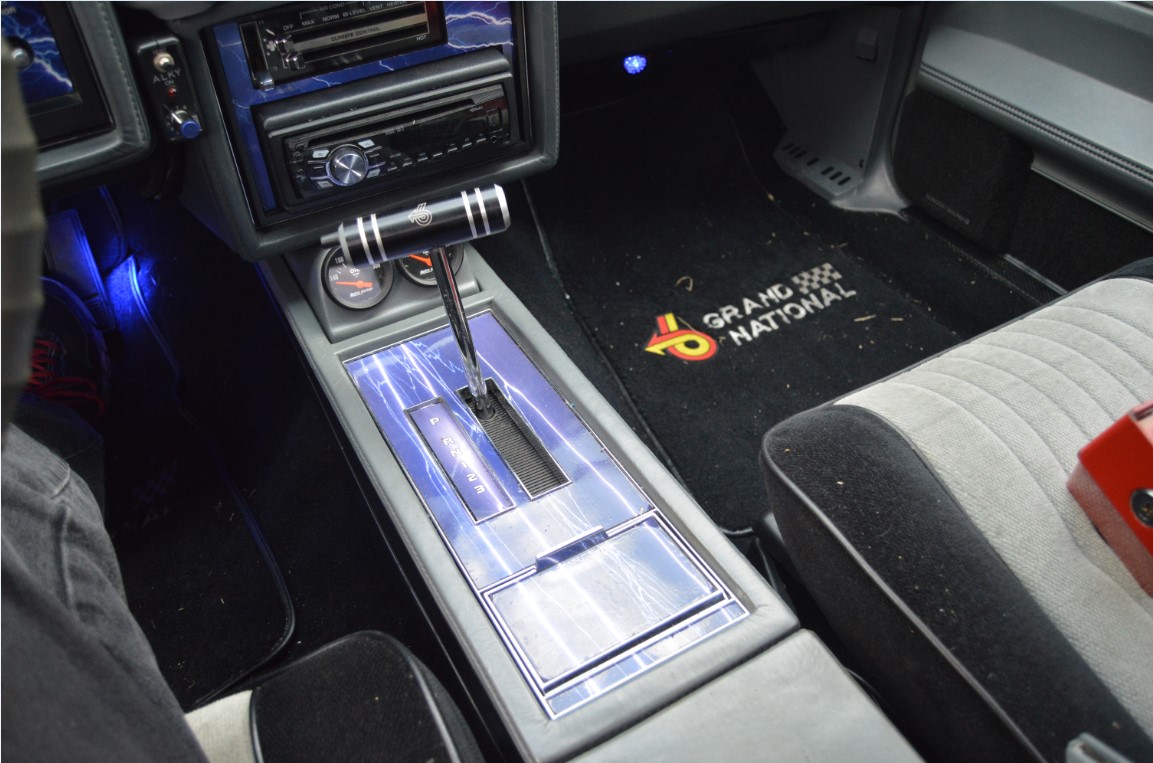
32. recheck shifting operation through all of the gears.
job done!
.
[note: we didn’t adjust the shifter cable at all! we did check it however! all gears are where they are suppose to be (reverse is a bit off, it works but doesnt 100% line up with the column rod, so no backup lights – an issue we’ll fix later). If you need to adjust the cable, just follow the directions that came with the shifter]
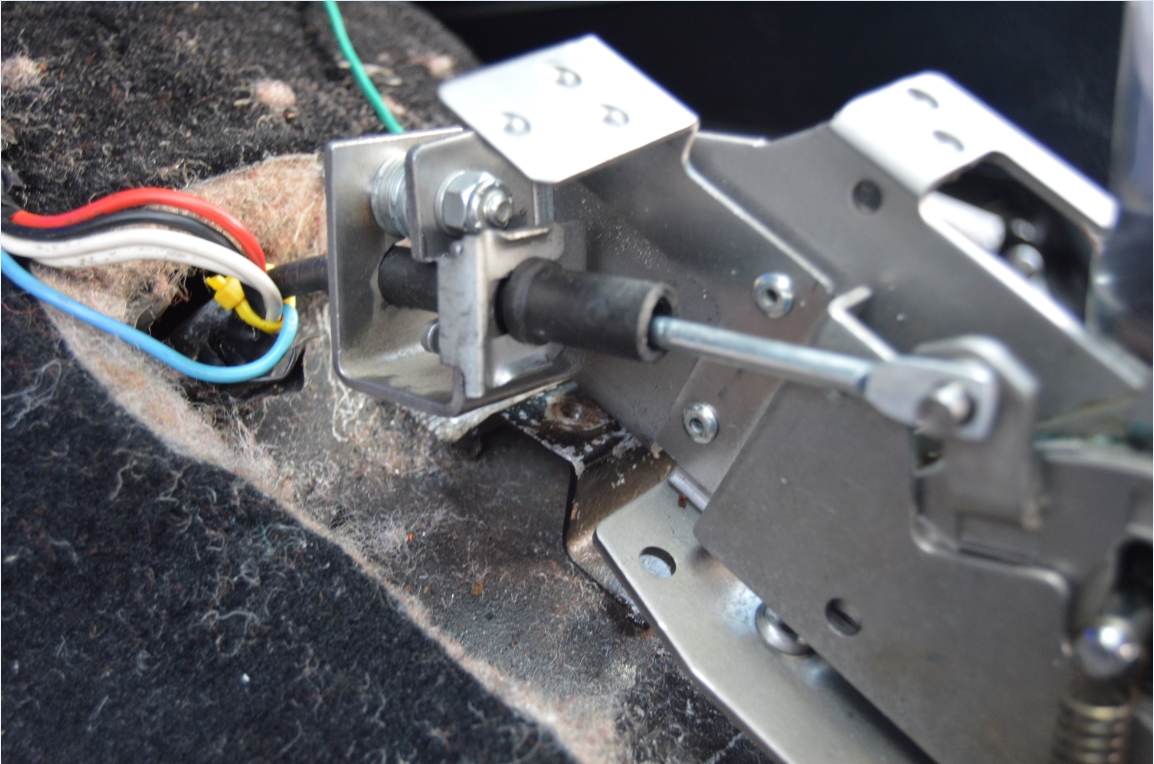
[note: for the shifter lever bracket that attaches to the trans: this car had the oem bracket on it, which worked as it should! (even after the new shifter install!). The included instructions with the Quicksilver shifter details how to adjust any new cable/brackets on the trans if need be]
![]()
Others have combined both the factory trans shifter lever with the B&M unit, via cutting the lower section off the OEM piece and welding it to the quicksilver piece.
![]()
![]()
.
(continued from above, step 22)
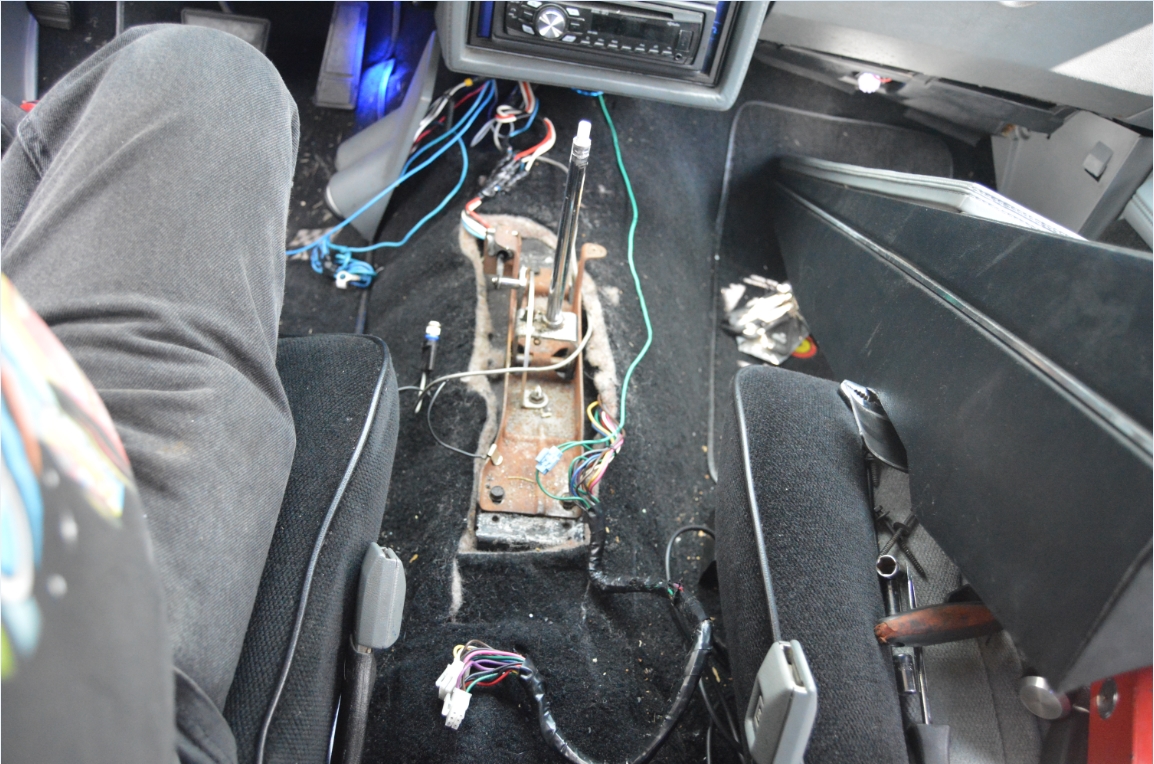
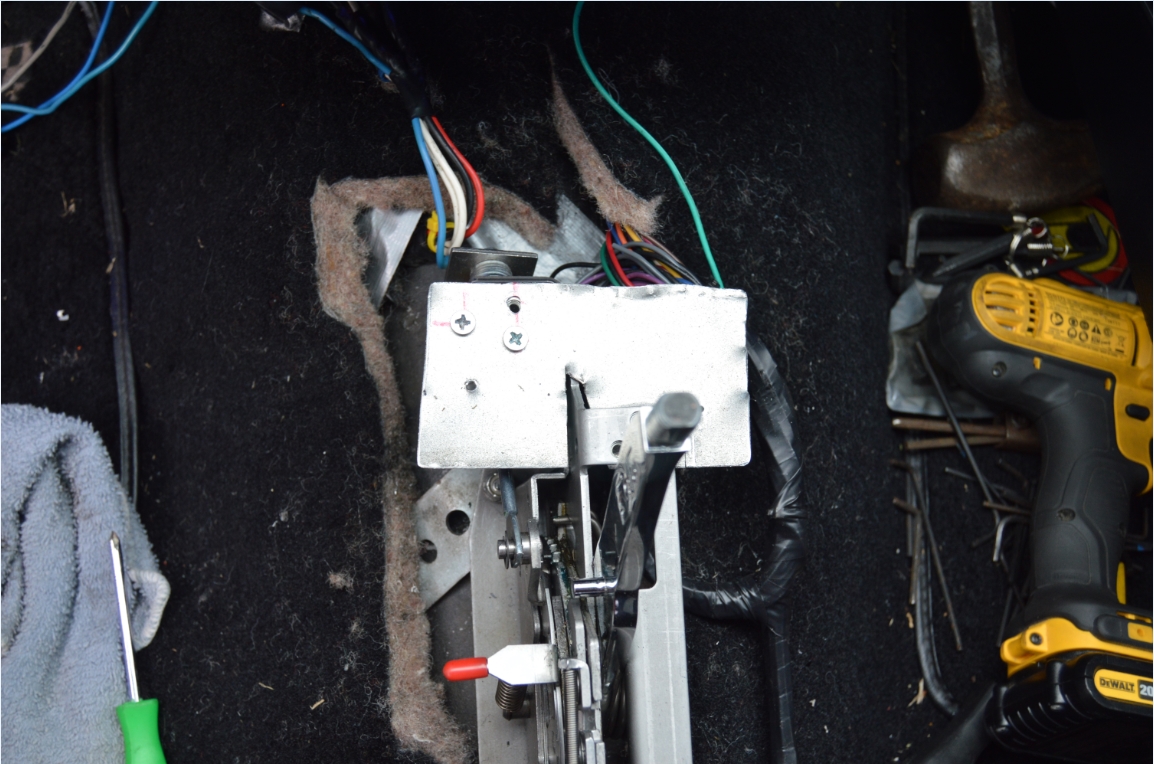
OK, since the trans in this Grand National is a turbo 400, we have to deal with the securing the front of the shifter, since there isn’t enough room under the tunnel (above the trans) to use the bolt holes from where the shifter is now.
Solution? flat steel stock. (although a “U” shaped piece would probably be better).
You need to move the front mounting holes at least 2-3″ forward.
Bolt the shifter to this new flat piece, then bolt the piece to the floor.
(don’t forget to use a spacer on the front left bolt, it needs to be about 3 washers tall from the floor to the bottom of the shifter; be sure to compensate the thickness of your new hold down plate from that dimension.)
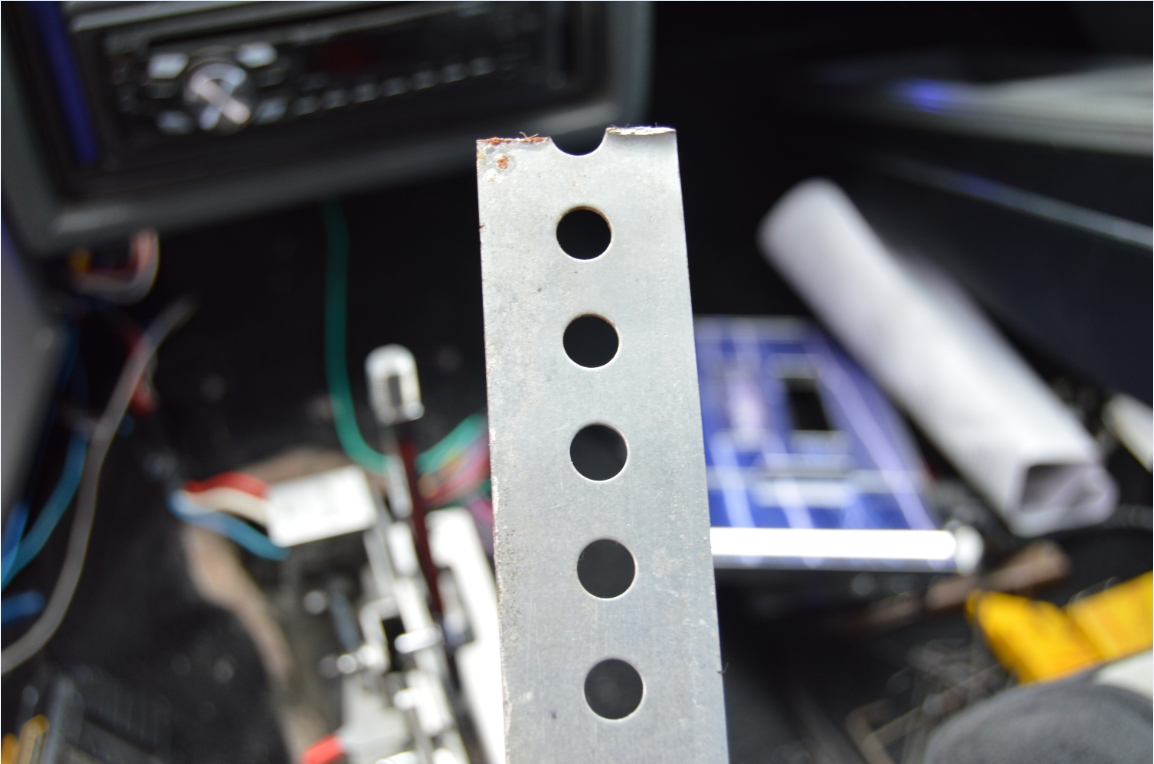
Or, another option, we had some thick strapping metal that we used. we cut it 8″ long, then inserted it above the tunnel and below the shifter, on an angle. fortunately, the 2 holes in the shifter lined up with 2 existing holes in the strap. we bolted the strap to the shifter first. Then we lightly “massaged” (read: hammer time!) the ends of the strap to conform to the curve of the tunnel. Drill 2 holes (1 on each side of strap, left/right) into the sides of the tunnel (in the appropriate positions lining up with the existing holes in the strap), then bolt the strap to the tunnel. These 2 new hole positions have a bit of room for you to access the bolts on the underside of the car (unlike where the shifters front existing bolt holes were).
Giving it a quick monkey test, it seems secure enough to do the job when you’re banging thru the gears on that big race (against those “other” cars that “think” they’re fast…)
Continue on to step 23 now.

![]()
.


