


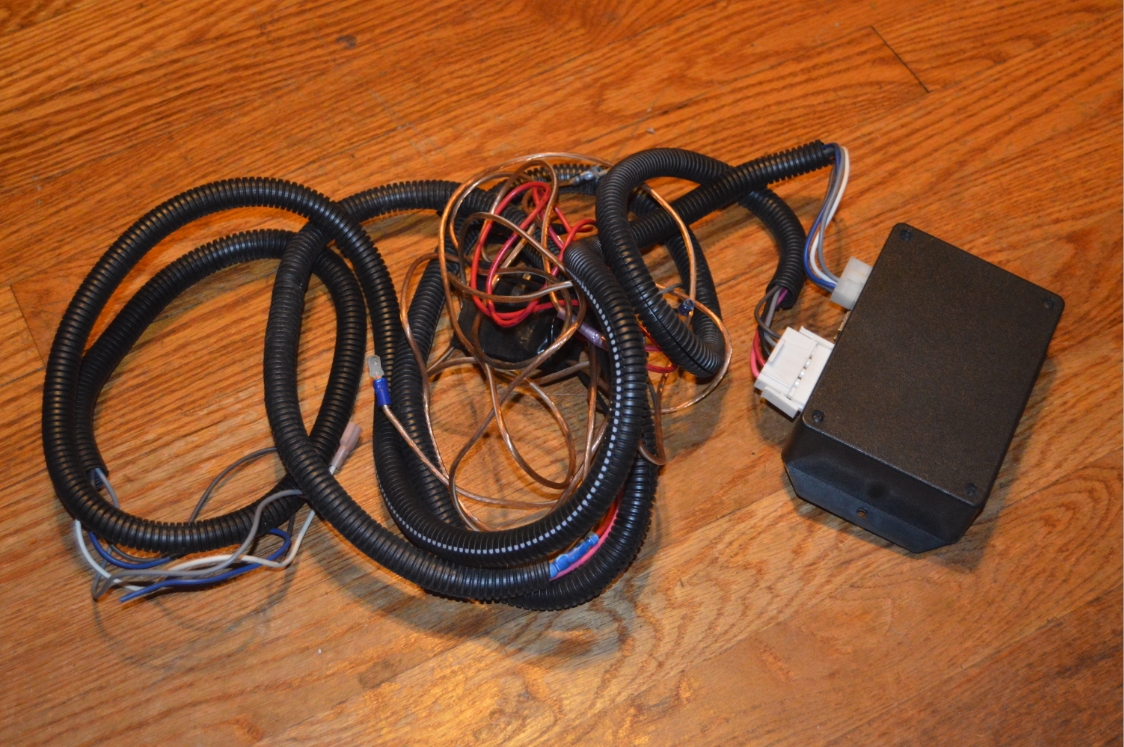
To go along with the line lock kit system we installed on the 1987 Buick Grand National, we decided to install a 2 step box to keep the RPM’s under control.
We bought a used 2 step shift and launch controller from a fellow Turbo Buick owner.
This is the one from Bailey Engineering (made by Bob Bailey).
.
If you’d like to get yourself a new one, you can go to the Bailey Engineering site:

.
Basically what this box does is two-fold.
It is a rev limiter for the top end of the 3.8 Liter turbocharged Buick V6 engine.
It also limits the RPM’s during a burnout and at the starting line on the low end.
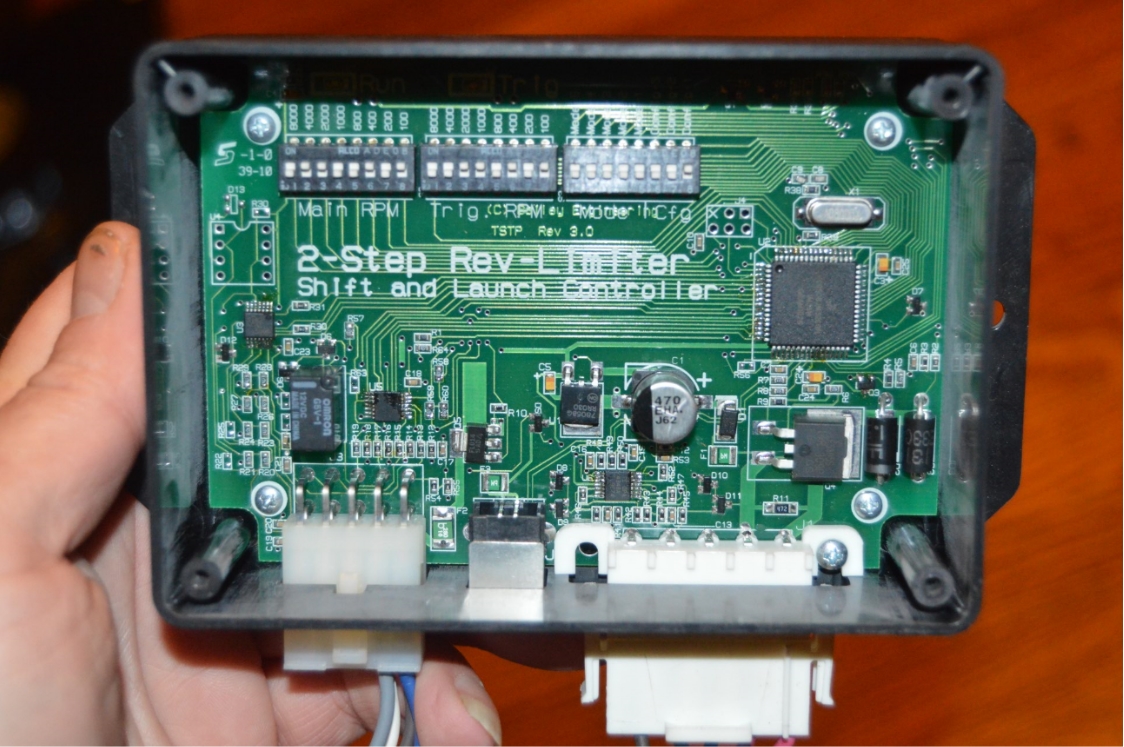
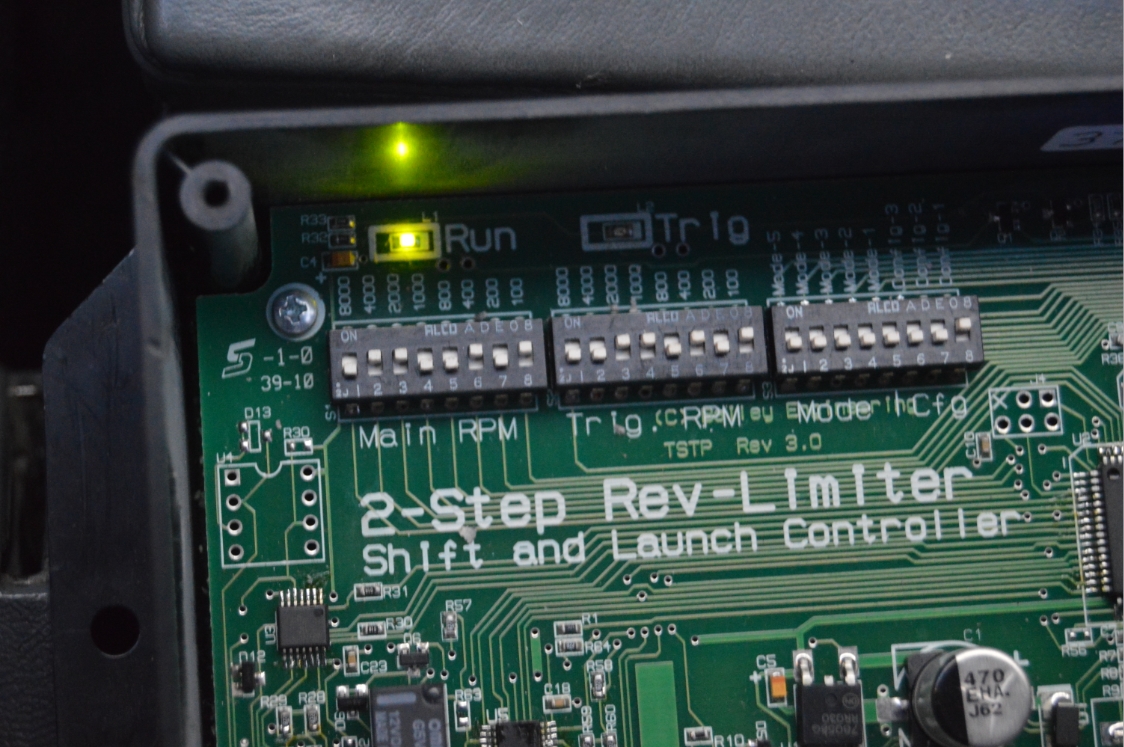
Through a set of dip switches on the inside of the box, we have set the high limit to 6500. This setting is called “main limit” on the board.
“Trigger RPM” on the board is used to control the low end, to which we have this set at 3500.
(both of those settings have multiple switches you must select to get the total you need. 4000+2000+400+100=6500)
“Mode CFG” is the configuration you want to use for the 2 step box. We have config 1 set to ON, indicating that the vehicle selection is “Buick v6.”
5 different “Modes” can also be selected to choose timing retard values and limiter settings. We are not using any of these at the moment.
The top end rev limiter works by disabling spark ignition to the engine to control top end speed.
.
.
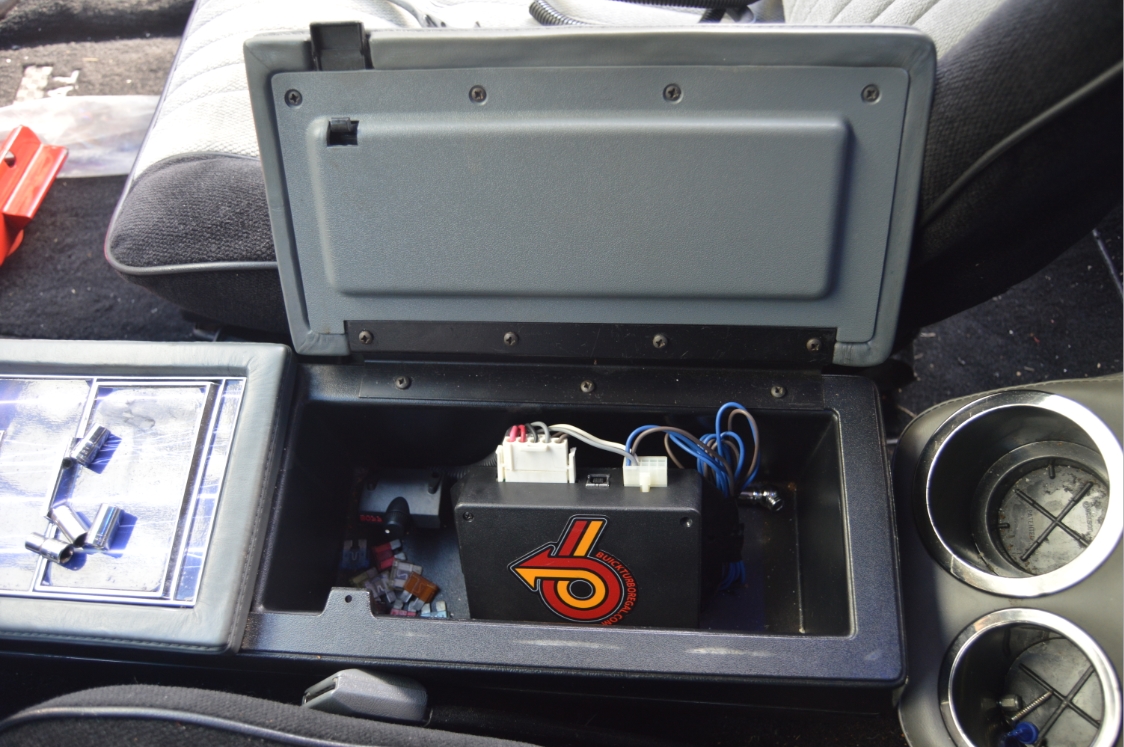
The 2 step box should be mounted inside the G-body Regal somewhere, since it’s not waterproof. The supplied wiring is long enough to mount it pretty much anywhere you like in the interior.
We chose to put it in the center console box (since there’s already too many things behind the dash now). We have an aftermarket console riser with cup holders that has a storage box of its own, so we’re not worried about taking up space in the factory box (which only has the subwoofer control, some spare fuses, and misc. small junk in there).
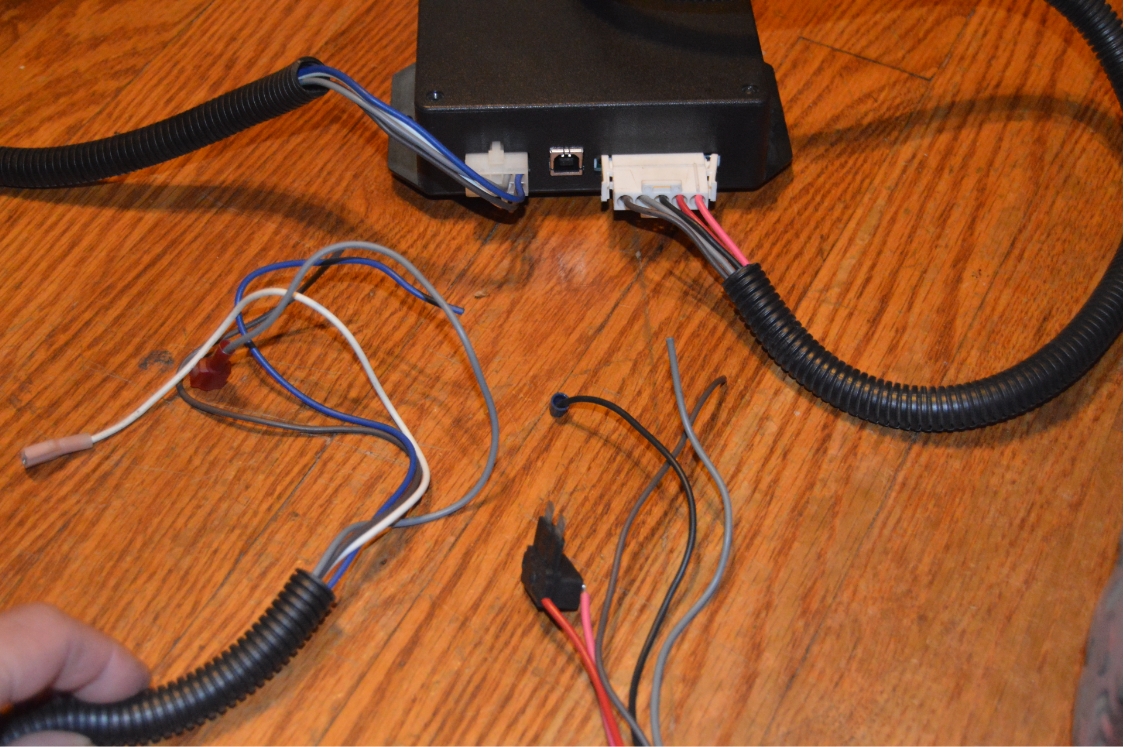
For a Turbo Regal application, there’s only 7 wires that need to be connected, making this entire job relatively simple.
.
We do not have a transbrake in this vehicle, and do not intend to put one in at any time in the future.
This box can be hooked up to one, but we are not covering that here (the instructions tell you how to do that if you need to).
.
Bob Bailey says:
The 2-Step unit is designed to limit engine speed (RPM) to the desired presets to allow the driver to hold the accelerator floored while preparing to ‘launch’ the vehicle when racing.
The modes of operation allow increased performance on those equipped with turbochargers.
It protects the engine when running alcohol injection or Nitrous Oxide:
Another important application for the 2-Step unit is to limit the top engine speed to below that of the engine control module (ECM, PCM).
The ECM rev limiter disables the fuel injectors to cut engine power and prevent over-revs. On engines equipped with Nitrous Oxide or alcohol injection, disabling the fuel injectors while accelerating results in an extremely lean condition as the nitrous or alcohol is still flowing. This can cause serious engine damage and must be avoided.
The “Main Limit” in the 2-Step unit is designed to prevent these occurrences by limiting engine speeds to a safe level.
.

![]()
.
COMPLETION TIME:
about 30 minutes
.
PARTS:
– 2 step box (new $235, used about $125)
– electrical connectors, tape, solder, etc.
– some kind of switch to activate the 2 step box
.
TOOLS:
– wire crimpers
– phillips screwdriver (door sill removal)
– socket (kickpanel & underdash panel removal)
.
HOW TO:
1. Find a suitable place to mount your 2 step box.
Set your RPM choices & mode selections inside the box before you mount it.
The box has 4 phillips screws (1 in each corner) securing the lid to the box.
[in our case, we placed it in the console box. the wires run under the center console up towards the front of the car, then the 2 power wires and 2 trigger wires head towards the OEM fusebox, while the ground and 2 ECM wires run towards the passenger side of the car. The ground wire gets attached at the extra fusebox in this Buick Regal, and the 2 ECM wires go over to the computer.]
.
.
2. Remove the underdash panel on the drivers side so you can run the wires over that way and have access to the fusebox.
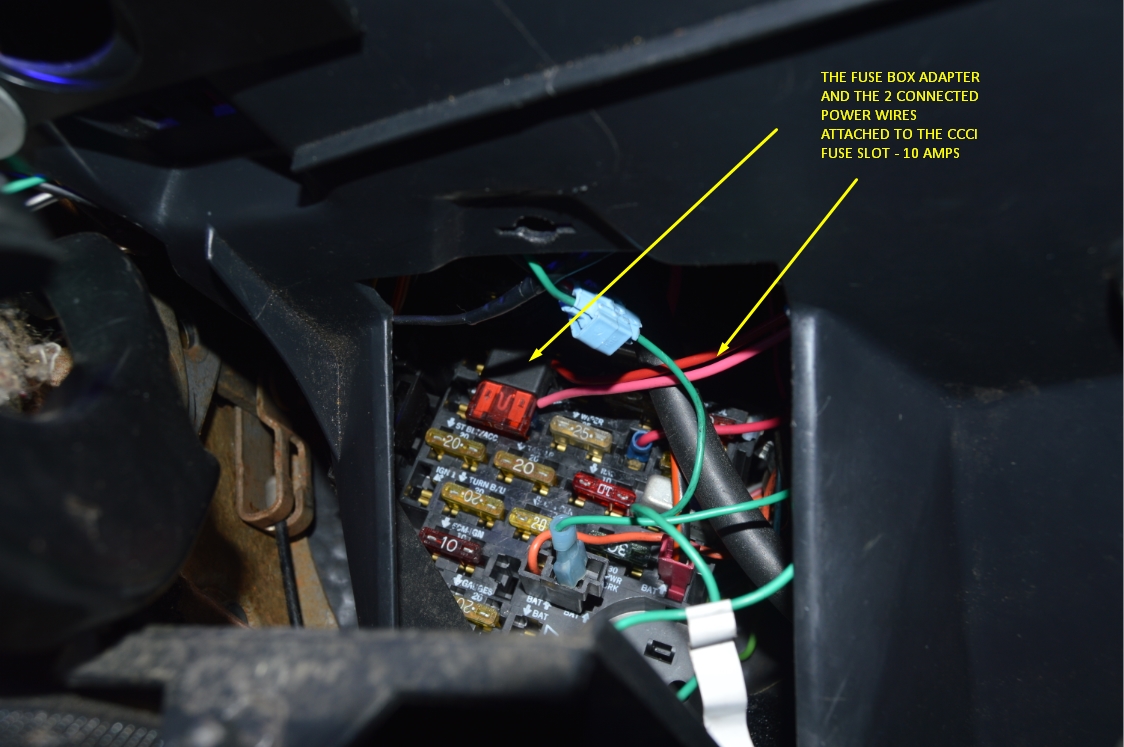
3. Remove the 10 amp CCCI fuse from the OEM fusebox.
Plug in the fusebox adapter from the power harness conduit on the 2 step box (the wires face to the right) into the fuse box.
(there are 2 wires attached to the adapter, the red wire and the pink wire)
Put the original fuse into the adapter (at the bottom).
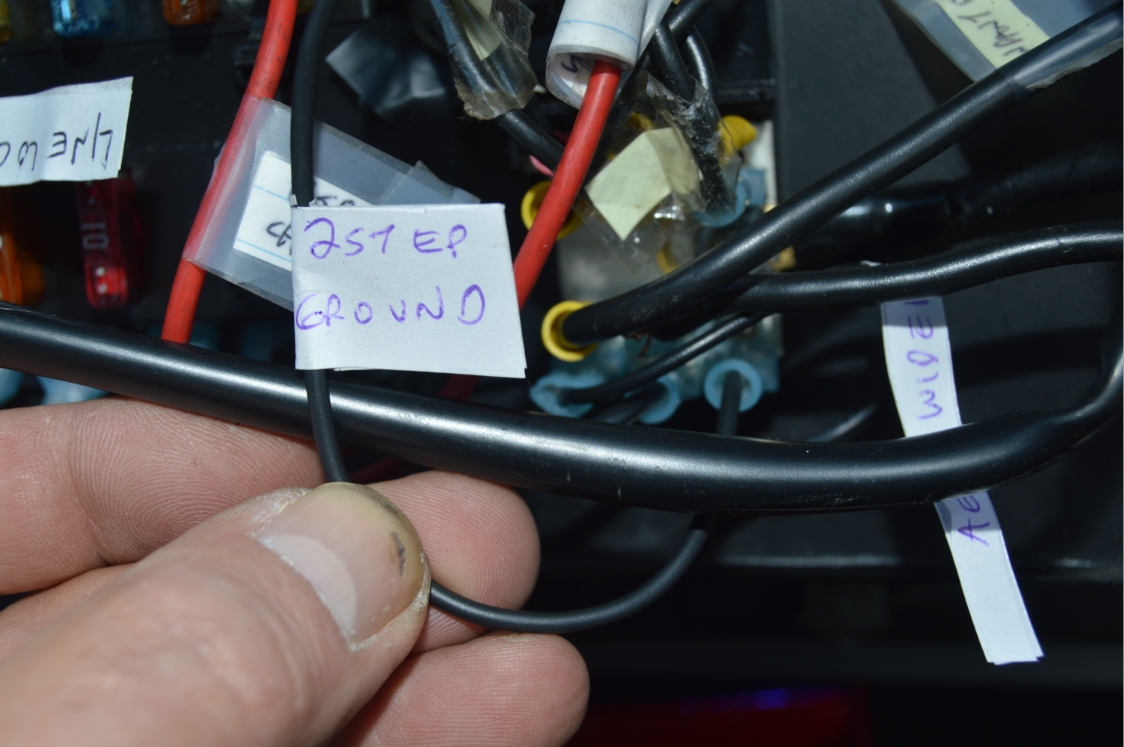
4. Ground the black wire to a good grounding point.
.
.
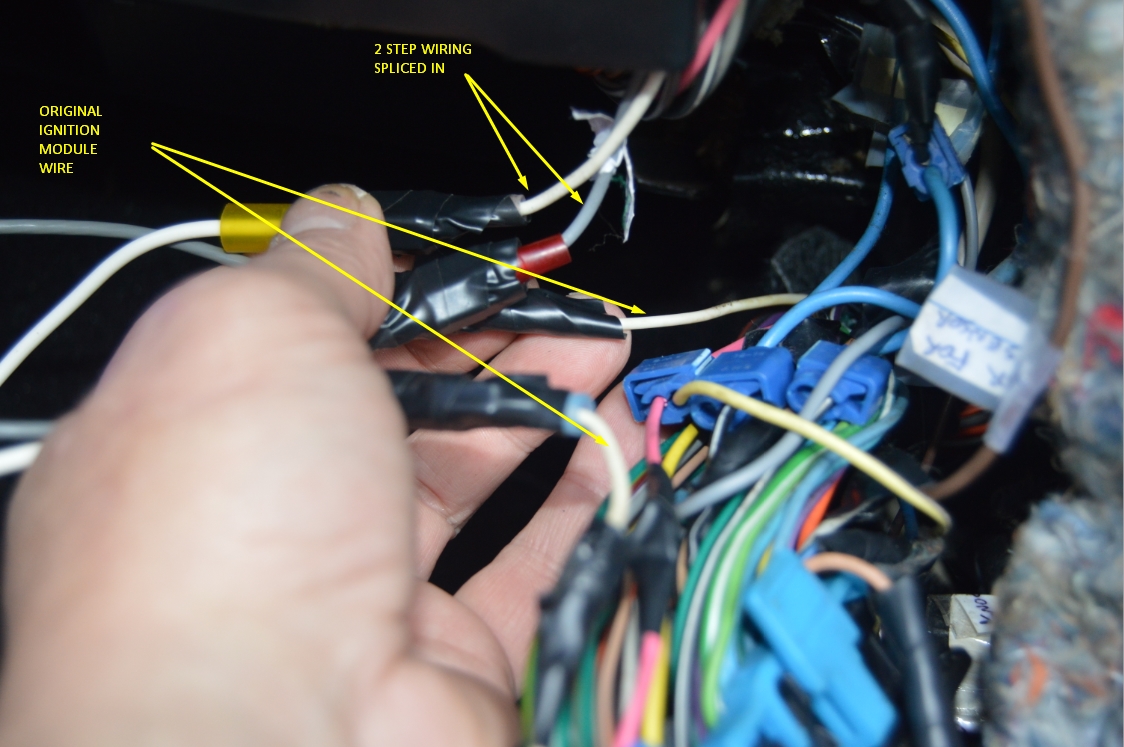
5. The signal wires (1 grey, 1 brown) – (from the 4-wire signal harness) are connected next.
You can open the glovebox (completely) to access the backside of the dash and get the wires over to the computer.
You need to cut the B4 pin (white) wire at the ECM (the ignition module wire).
Connect the 2 step signal harness white wire to the white wire that goes into the ECM side.
Connect the 2 step gray wire to the side that goes to the engine.
The other 2 wires are not used (stick them back in the conduit so they are out of the way).
[you will have to remove door sill & kick panels on the passenger side to have access to the ECM wires]
.
.
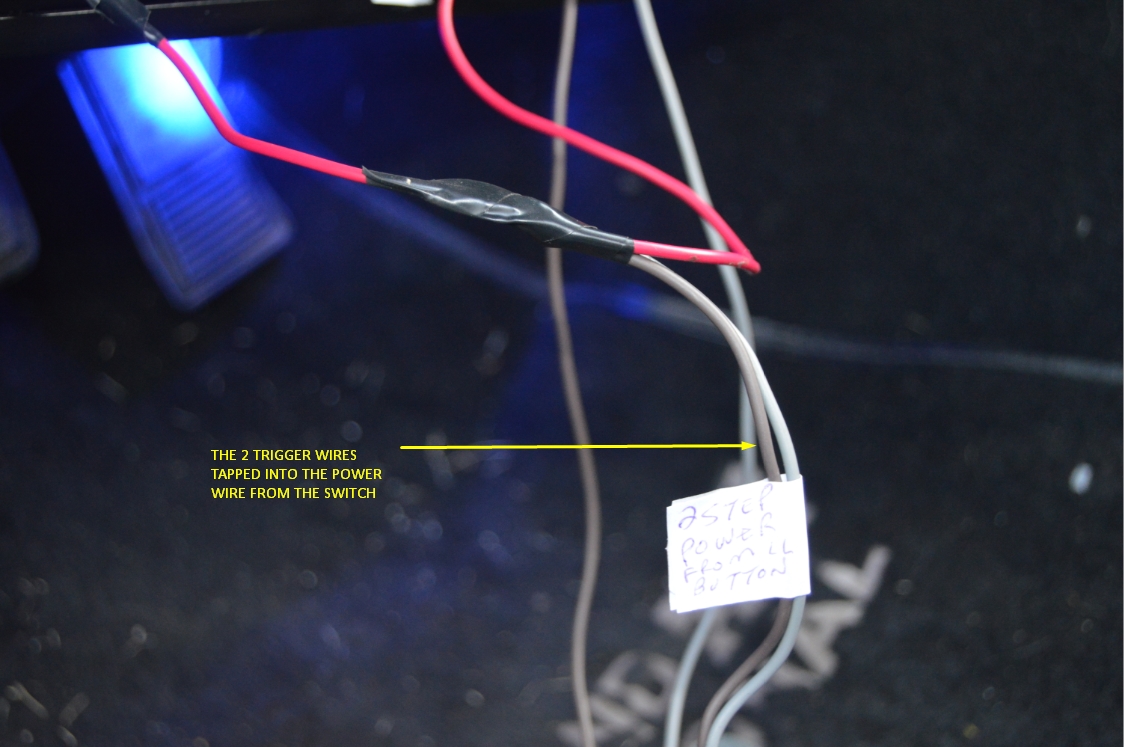
6. Back to the 2 step power wire harness.
They gray wire and the brown wire are activated via power (not ground) applied to them.
The gray wire triggers the timing retard.
The brown wire triggers the 2 step.
We connected both wires together, then tapped them into the outgoing power wire coming from our line lock button.
,
.
7. Make sure all your connections are secure, then reinstall the under dash panel, kick panel and anything else you removed to do this job.
8. Inside the 2 step control unit, are 2 green LED’s.
The “run” light comes on whenever the engine is on.
It will blink whenever the main RPM limit is activated and controlling RPM (over 6500 RPM in our case).
This will also blink whenever the DIP switch settings are changed to verify they were accepted.
The “trig” (trigger) light comes on whenever the input has activated.
It will blink whenever it is controlling RPM (3500 RPM in our case).
.
.
That’s all there is to it.
You should test out the system in a safe area.
In our case, since we also have a line lock connected to the same trigger (the shifter handle button), when we are doing a burnout, the engine RPM should not go over 3500 RPM while doing the burnout.
Likewise, while going down the track, the top end speed should not exceed 6500 RPM.
If these are both true, then the 2 step box is doing it’s job.
If one or both of these don’t happen, then you know something is wrong!
Check connections, settings, etc., and fix it.
.
NOTES:
A USB cable can be connected to update or reflash the box, if need be.
Because the system uses spark ignition to control RPM, that means excess fuel will travel thru and out the engine (without igniting/burning as it normally does), and backfires may occur, this is perfectly normal (although it may freak you out the first time you use the 2 step box!).
.
Buick 2-Step testing, set to 2700rpm, no timing retard, throttle to the floor, built 6psi boost:
.


