


After decades of left and right turns, adjusting the tilt up and down, and just general all around use, your tilt steering column will eventually loosen up and start wobbling.
It starts out with you being able to lift the steering wheel up and down a small amount.
Then it gradually gets worse, quickly.
Soon, your steering wheel has 3 inches of play in both the upward and downward position.
It gets scary enough that you know it’s time to deal with the situation before something bad happens.
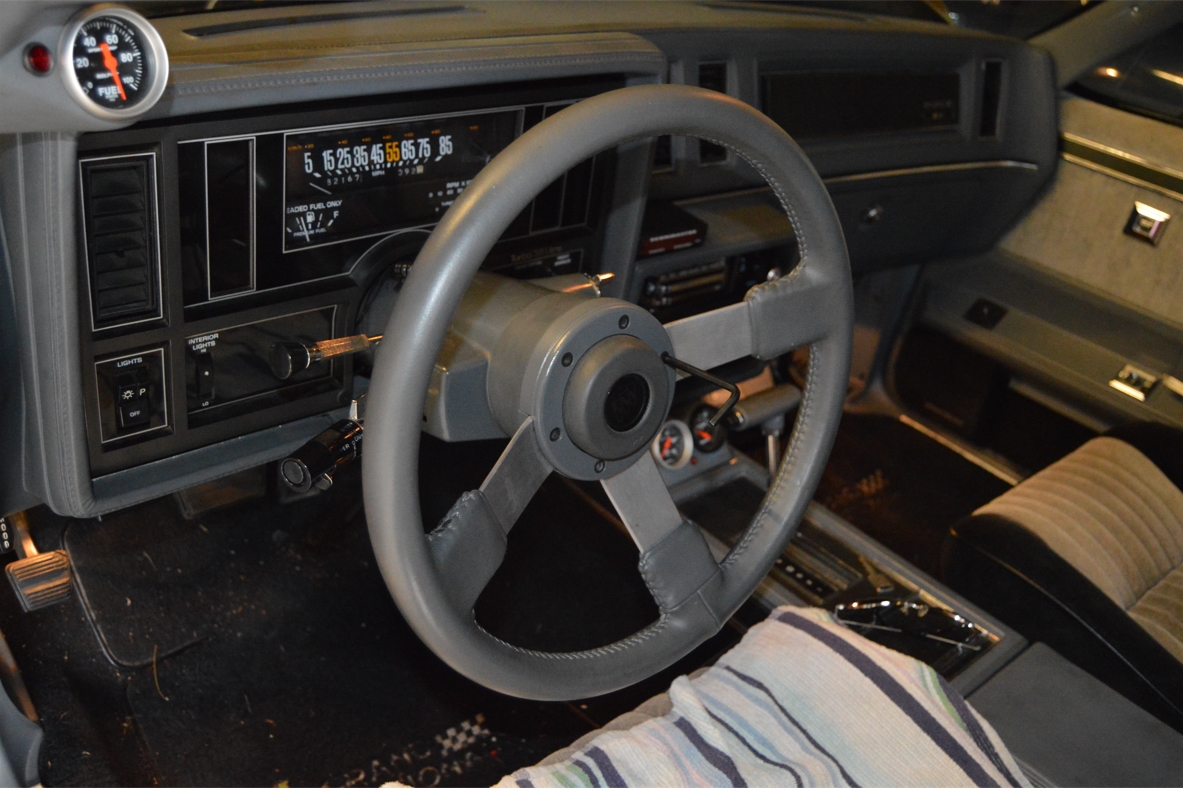
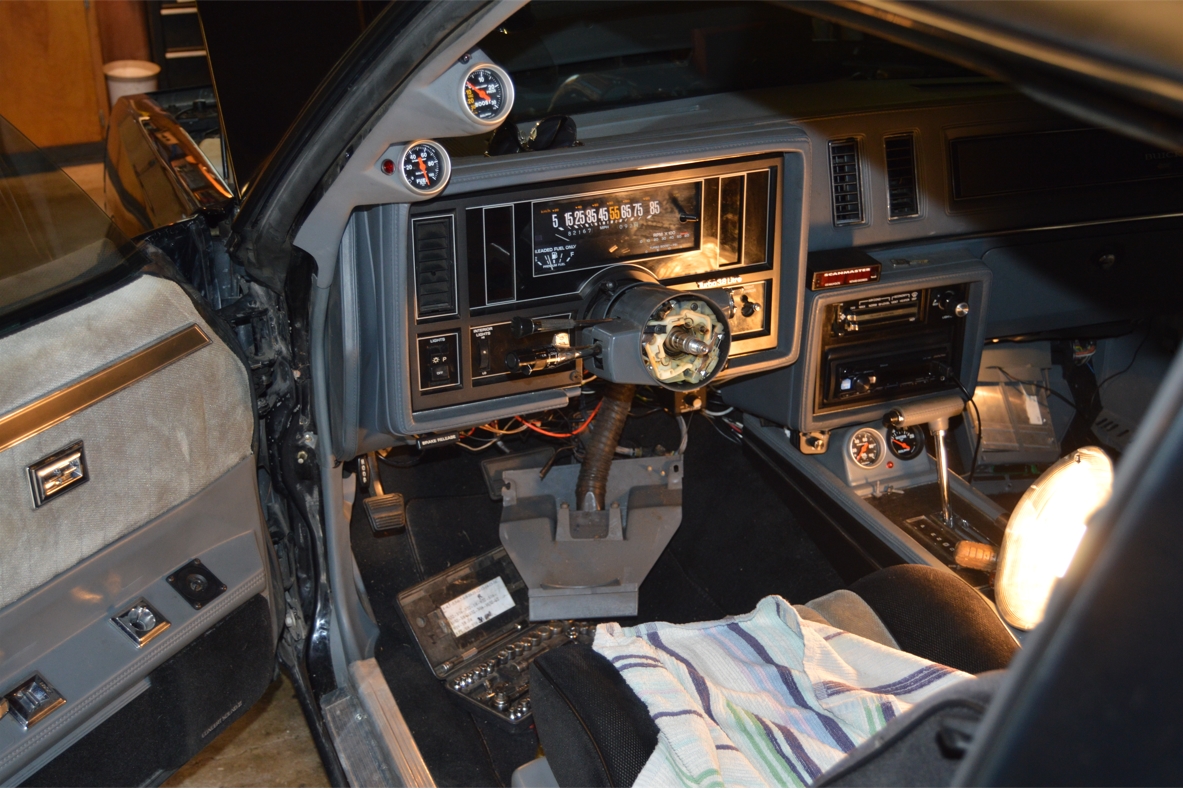
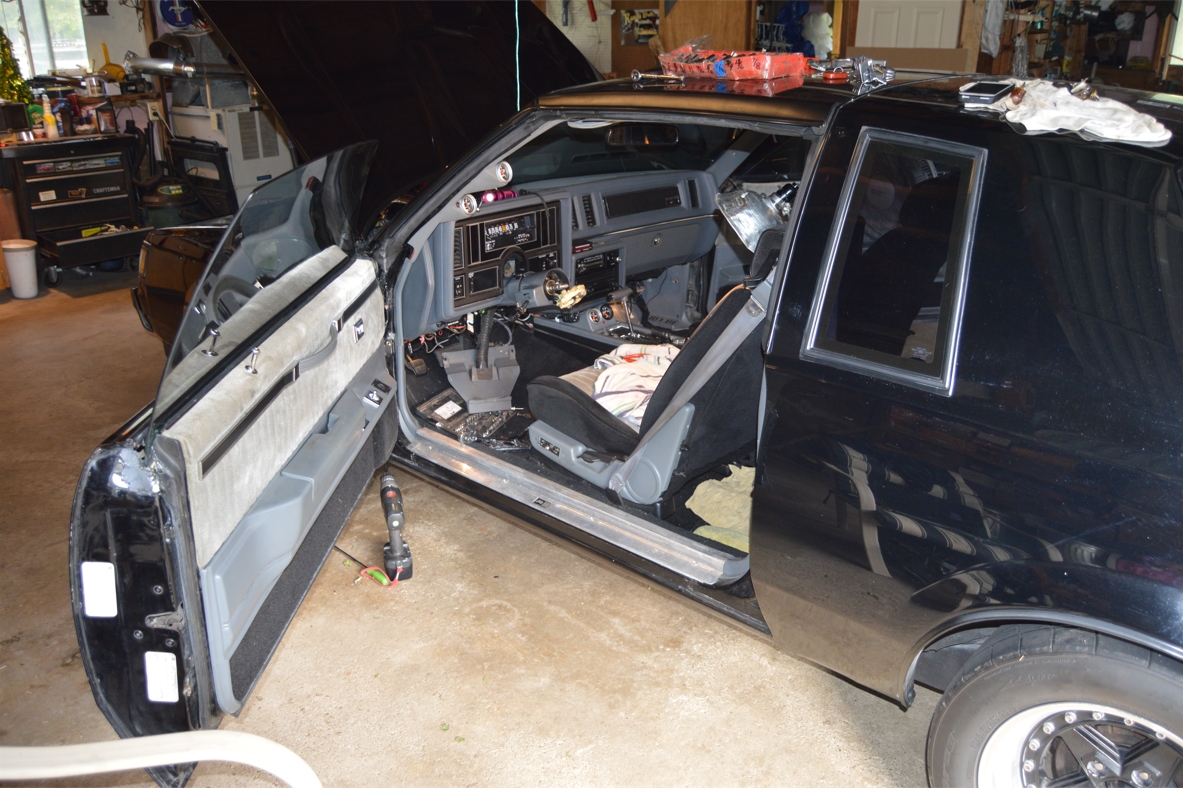
That’s exactly what happened with this 1987 Buick Grand National.
With 82000 miles on the clock, this kind of malfunction was probably overdue.
Repairing this issue isn’t too difficult, just time consuming.
Like about 4 1/2 hours worth of time.
The fix is simply tightening 4 screws…
But getting to those 4 screws…
Well…
That’s the time consuming part.
.
While we had the steering column dropped, the ignition switch was replaced (because they’re cheap, and we’re also chasing some voltage drop issues, so this was just good insurance).
This part is located on the top of the steering column, (behind the dash), held on by 2 bolts.
(the actual replacement isn’t shown in this post)
.
COMPLETION TIME: 4.5 hours is what it took us to do, your mileage may vary.
.
TOOLS:
* steering wheel puller
* 13/16″ socket (holds the steering wheel on)
* 15mm socket (drops steering column from dash & removes the bracket)
* 5mm allen wrench (for the 2 bolts on steering wheel)
* snap ring pliers (steering wheel clip)
* a few flathead screwdrivers (small, medium, large)
* a few phillips screwdrivers (small, medium, large)
* pliers
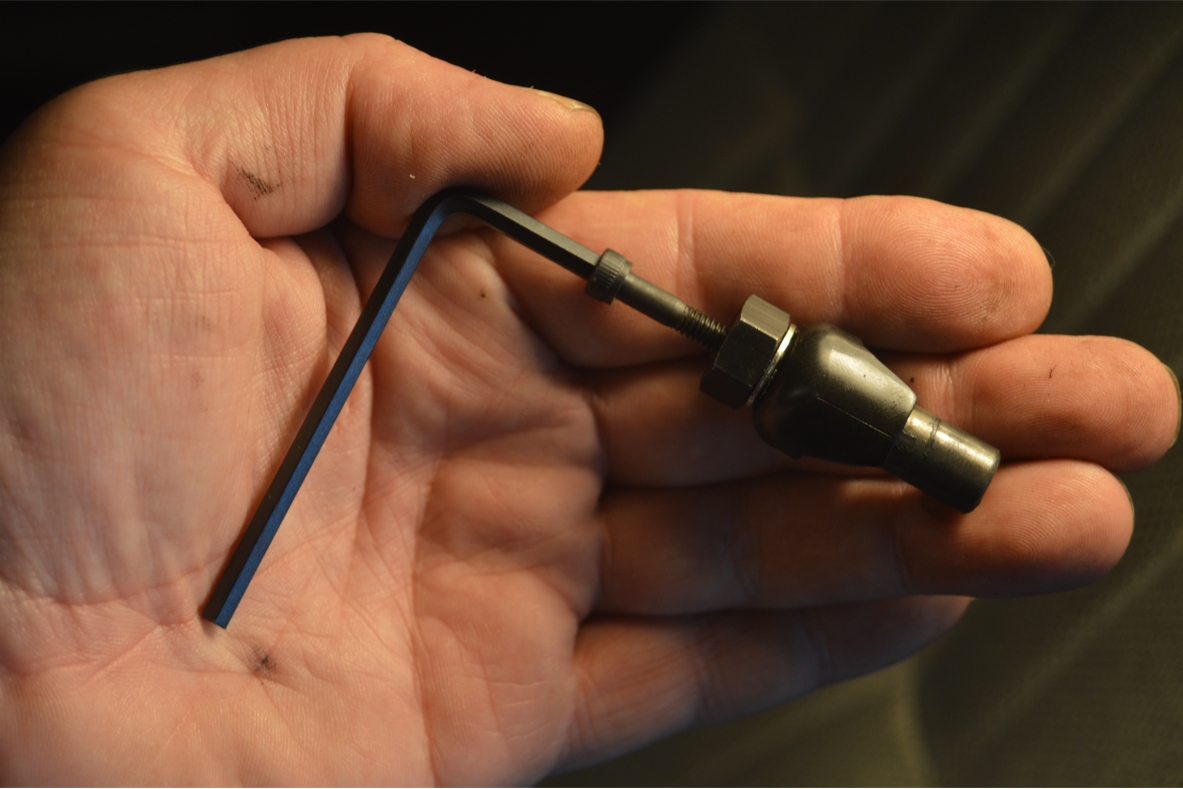
* E8 torx (reverse bit) (these are the 4 main screws that need tightening)
* 20 torx
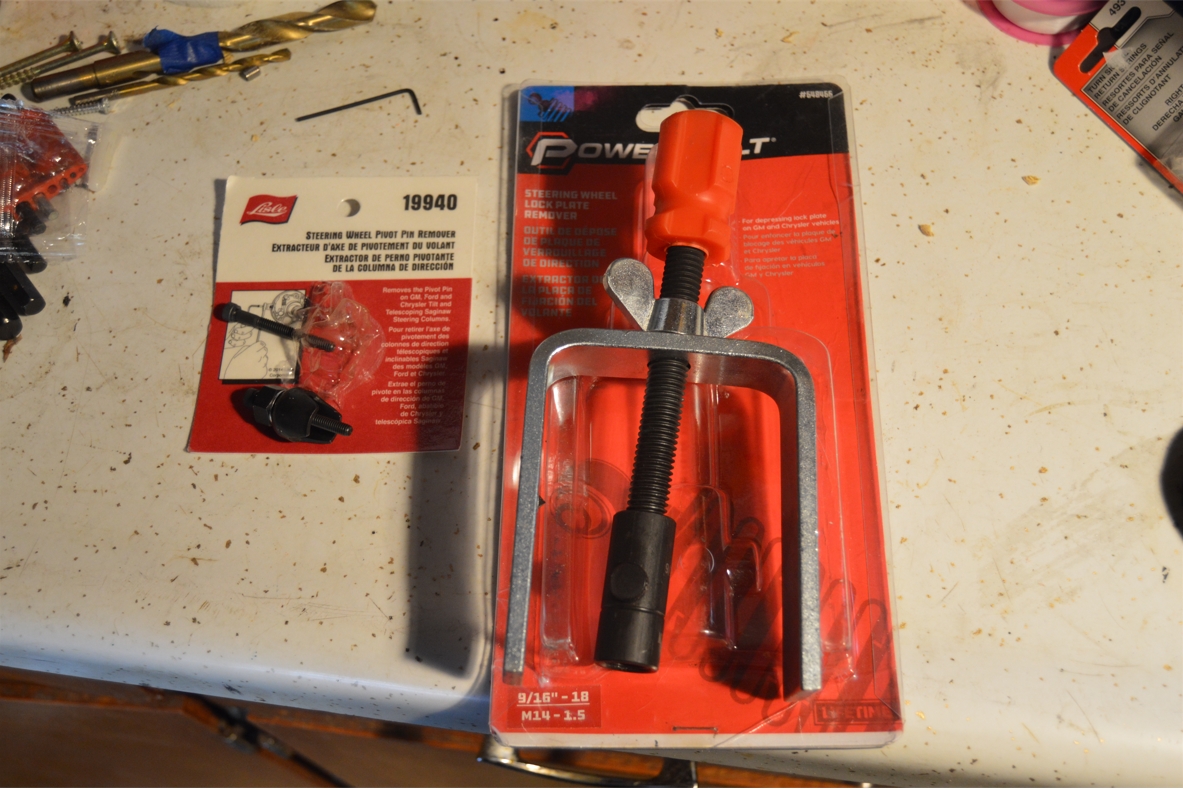
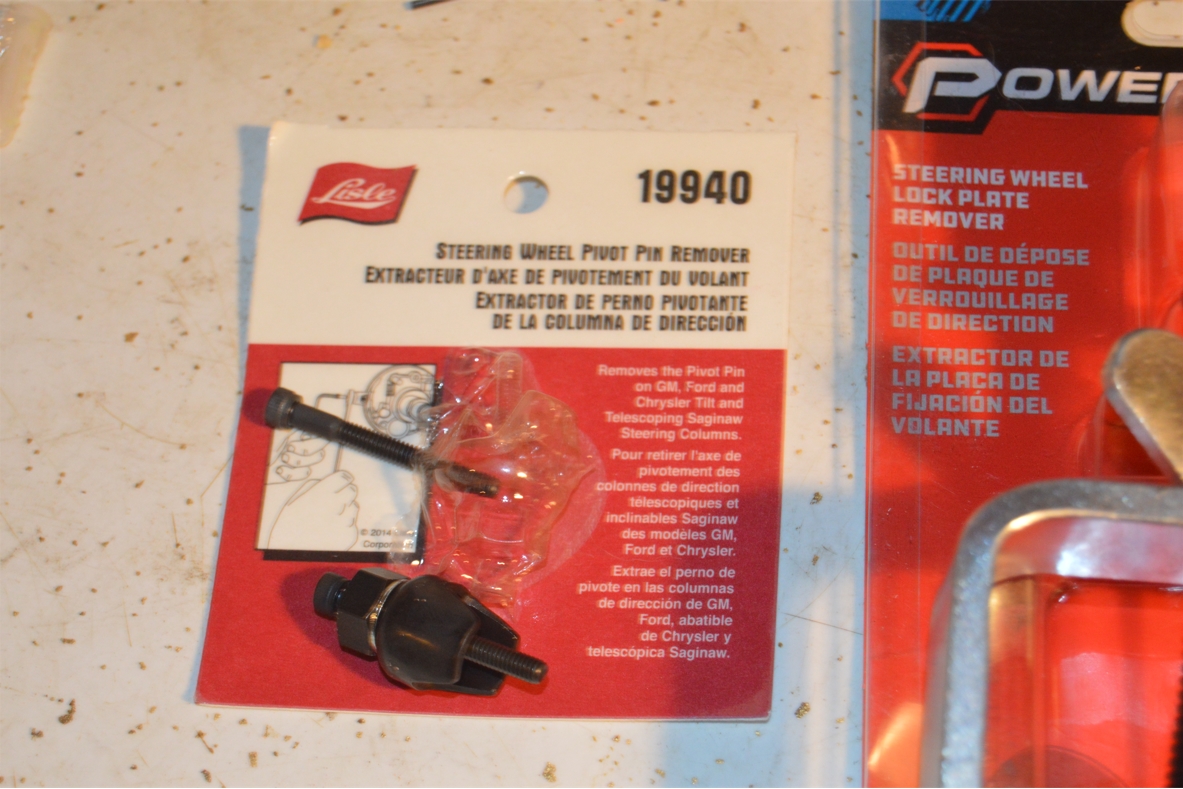
* steering wheel pivot pin remover ($10 amazon; Lisle #19940)
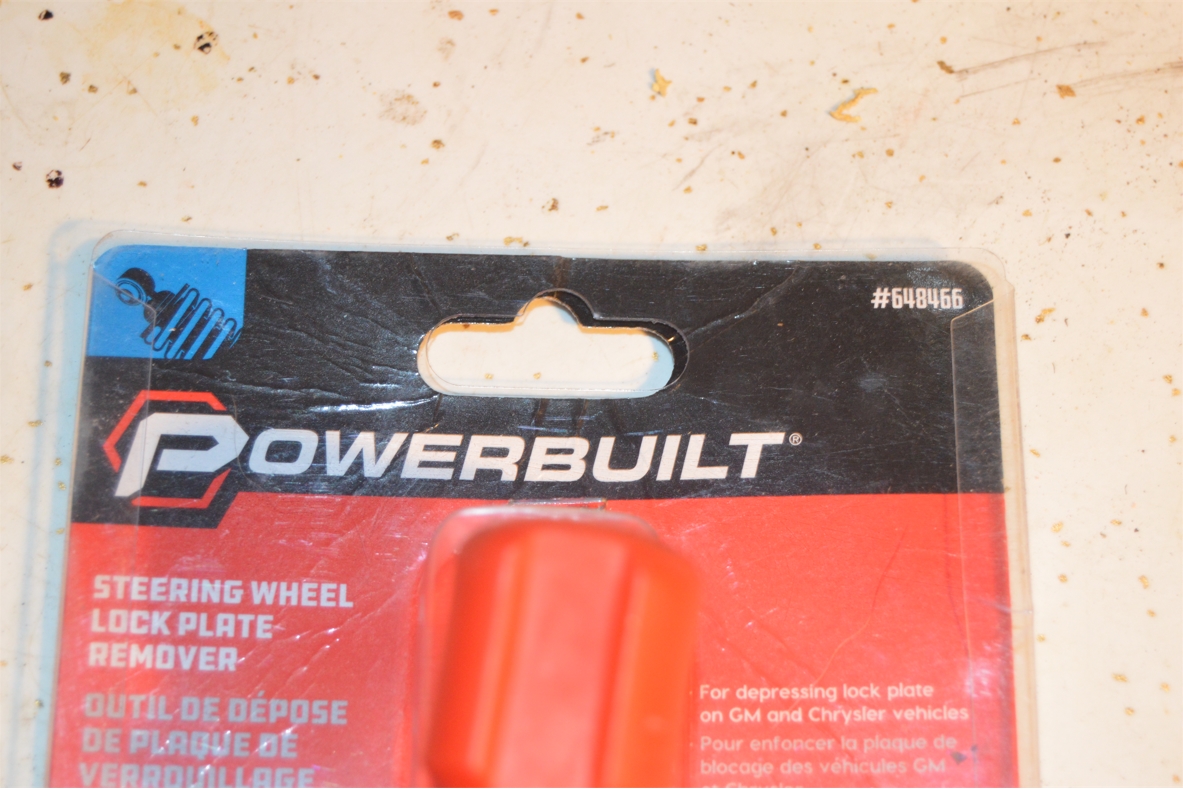
* steering wheel lock plate remover ($10 used ebay, Powerbuilt #648466)
.
.
Make sure you have good lighting (so you can see inside the column), or use a flashlight.
.
PARTS:
.
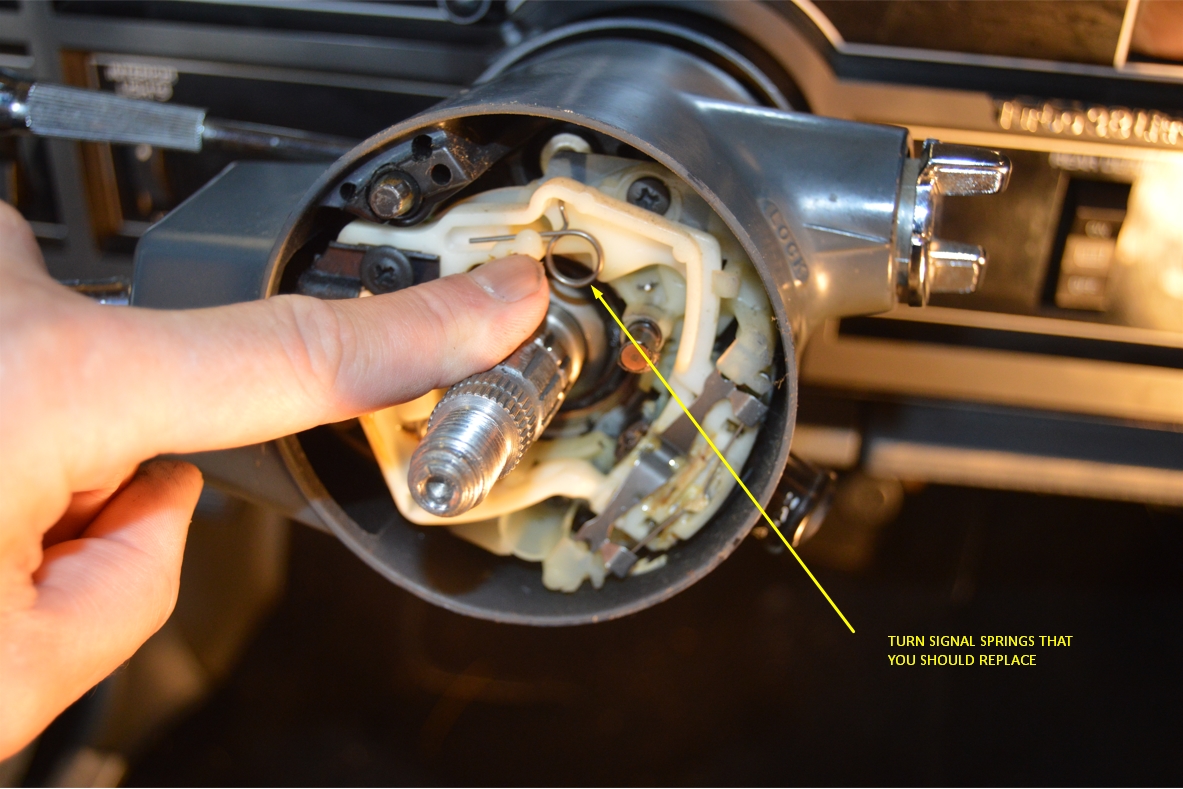
[ NOTE: you SHOULD buy the springs below, they break frequently, and since they’re tough to get to for replacement, it’s just simply smart to replace them since you have easy access to them while doing this job and they’re inexpensive also! ]
.
.
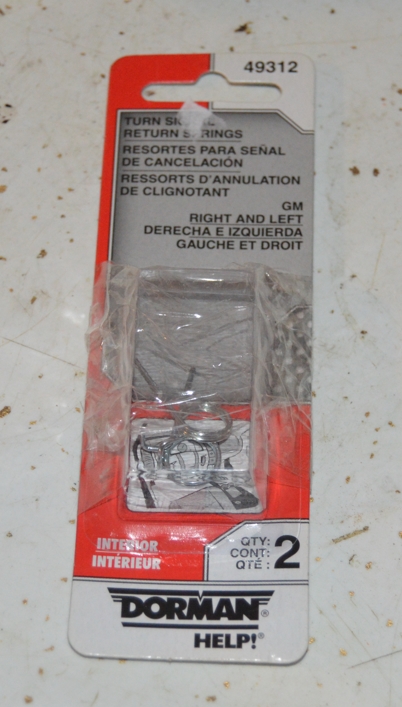
* turn signal return springs ($6 autozone; Dorman Help #49312)
* ignition switch ($15 amazon)
* lock tite
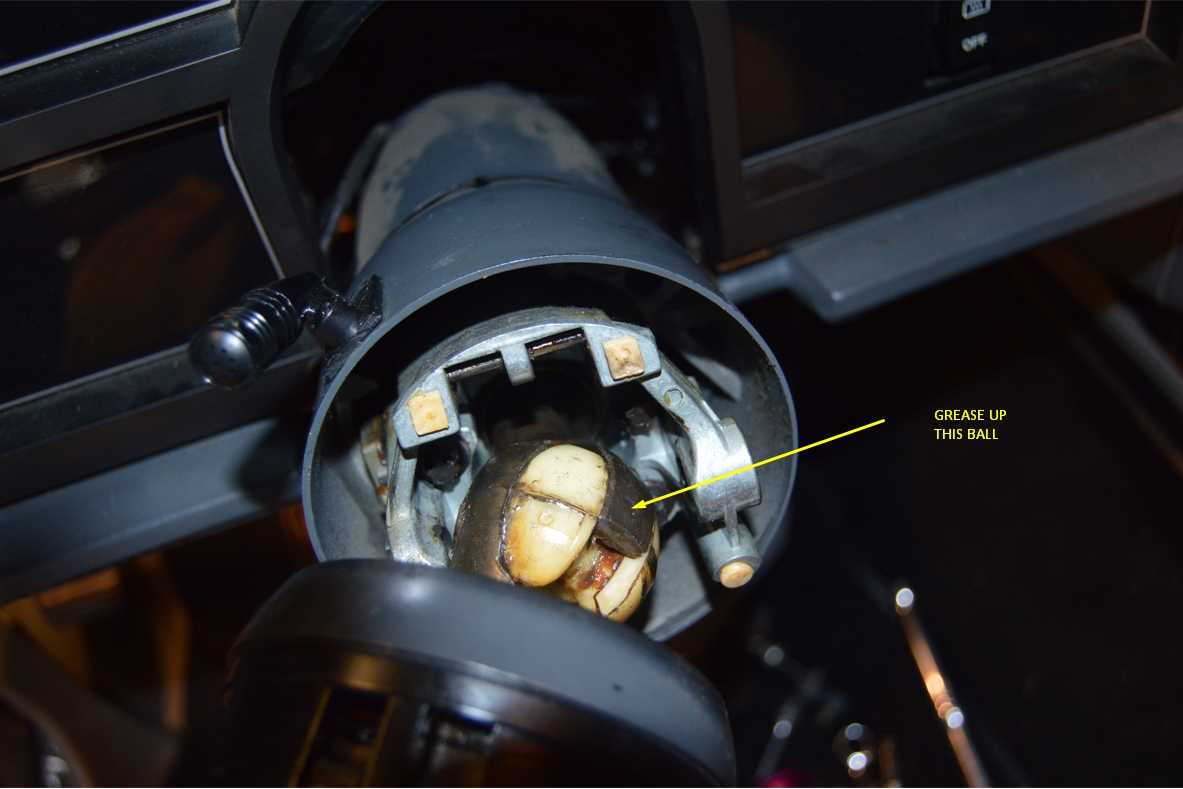
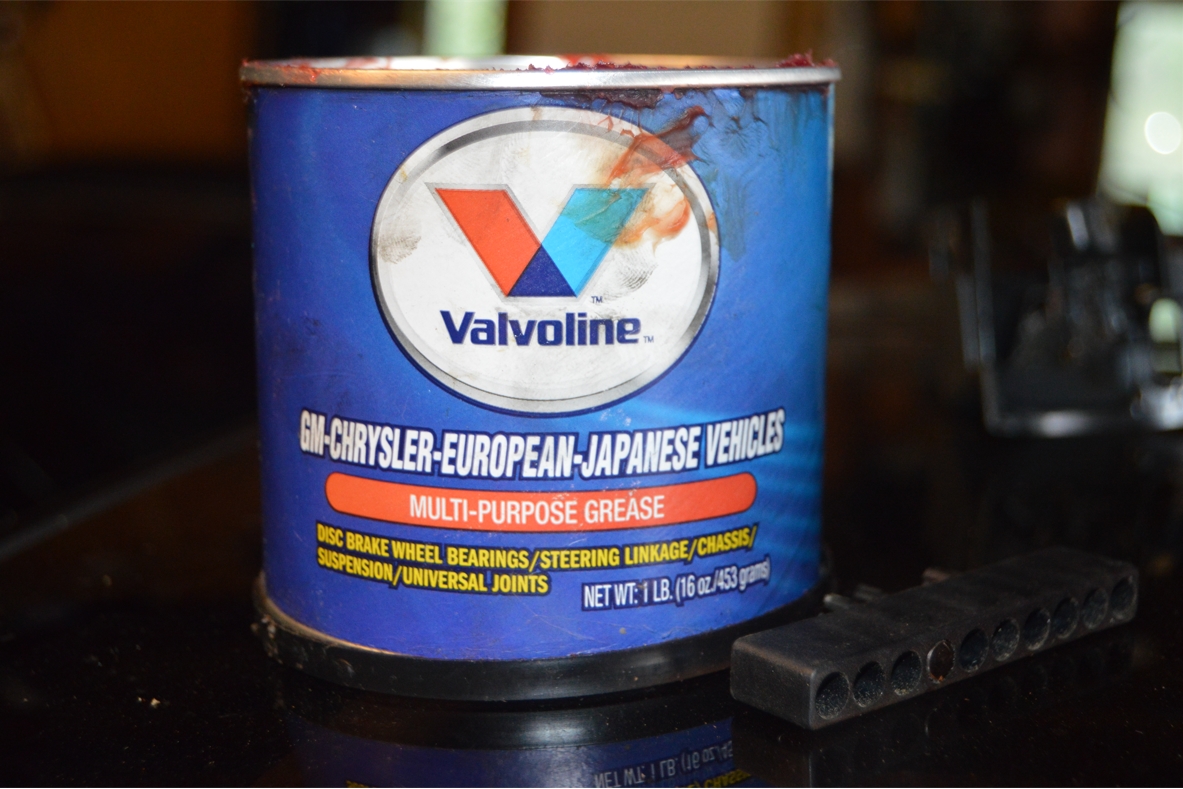
* grease (to lube up the ball inside the column)
.
HOW TO:
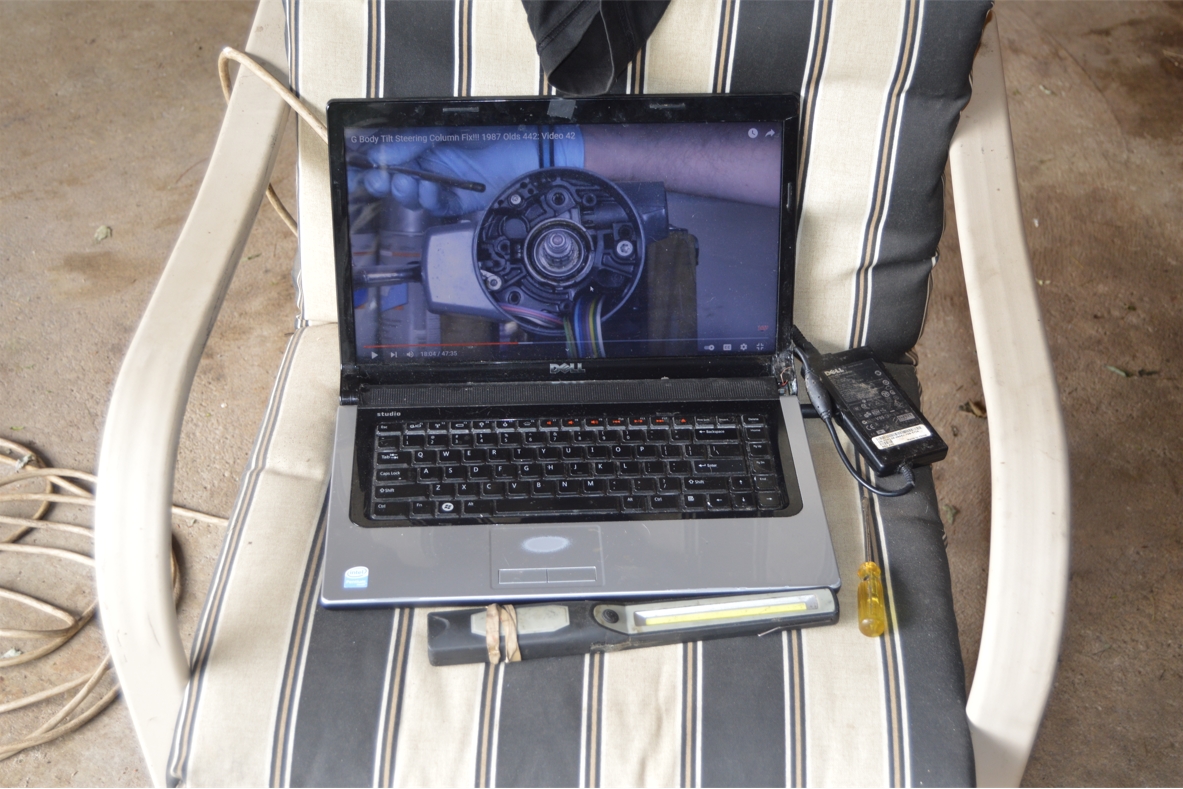 [ note, we had a laptop handy, sitting next to this Gbody Regal, and used the Gbody steering column fix video we previously published on here to see fine details about this repair. There’s A LOT of parts that need to be removed, so you NEED to know what you’re doing here! ]
.
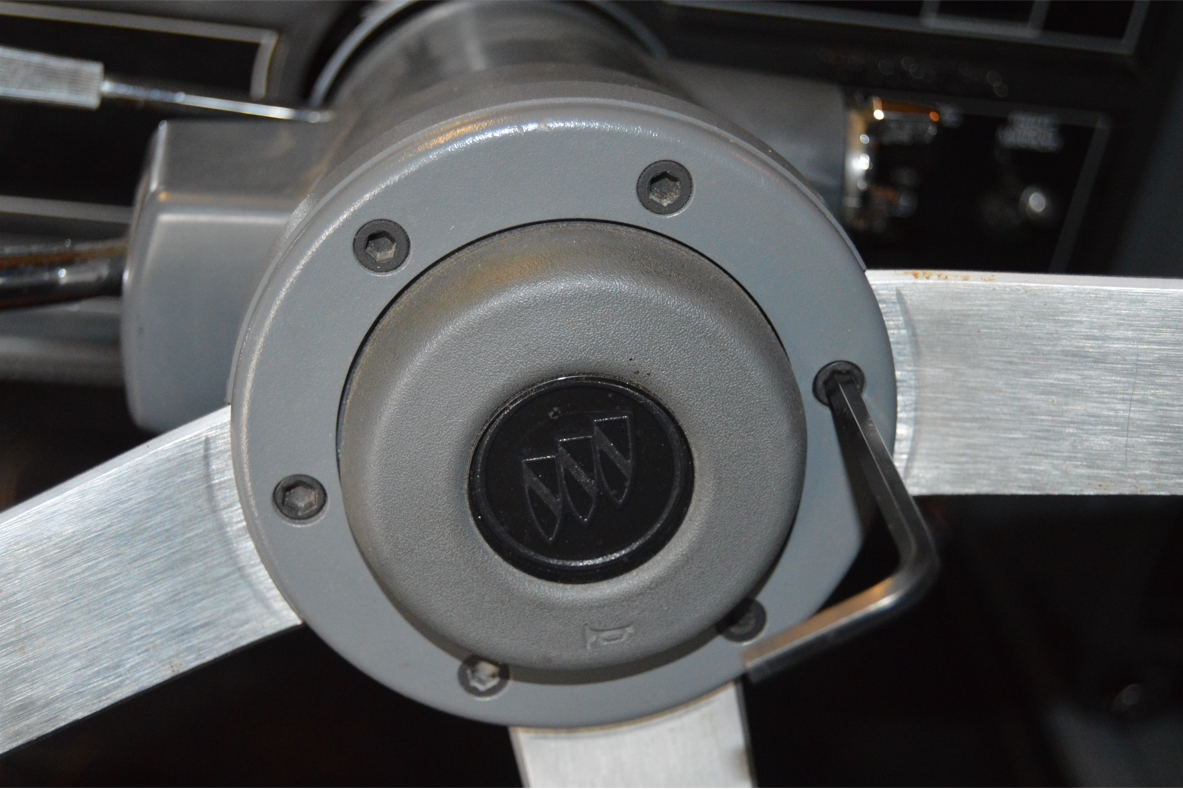
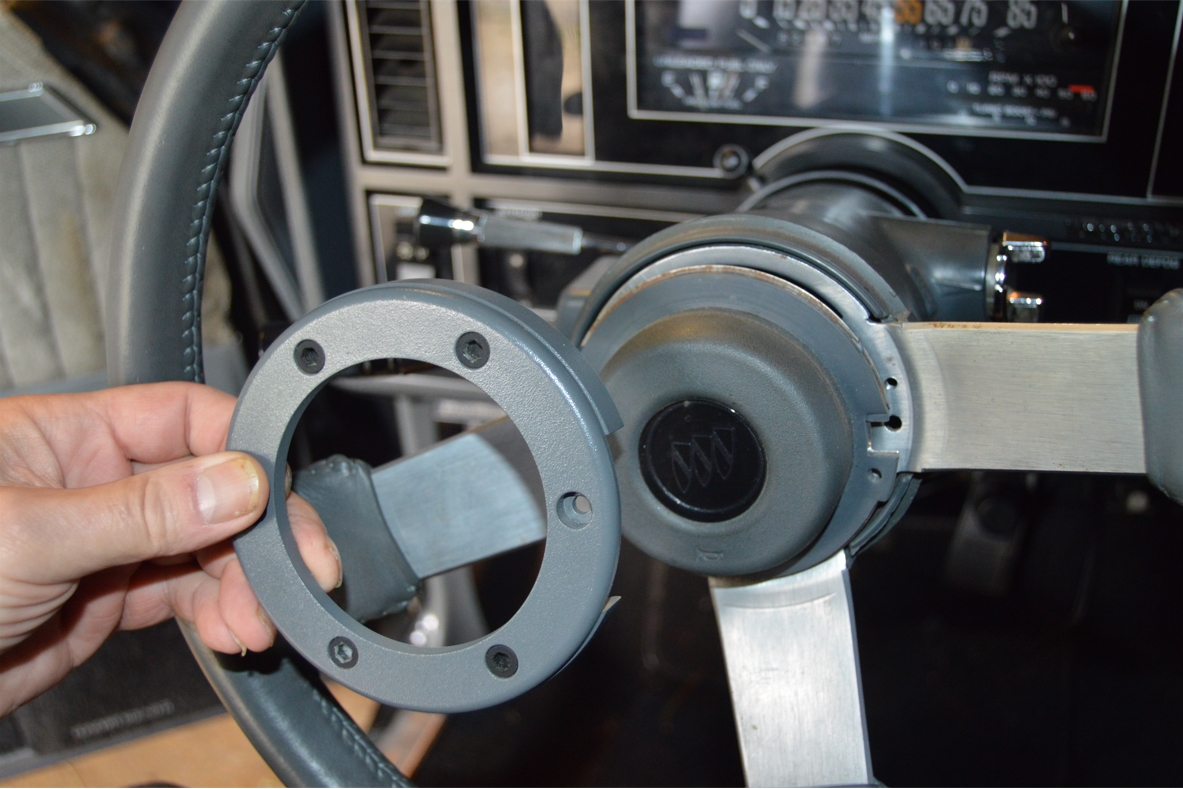
1. Remove 2 screws off horn ring using 5mm allen wrench. These are located at 3 & 9 o’clock.
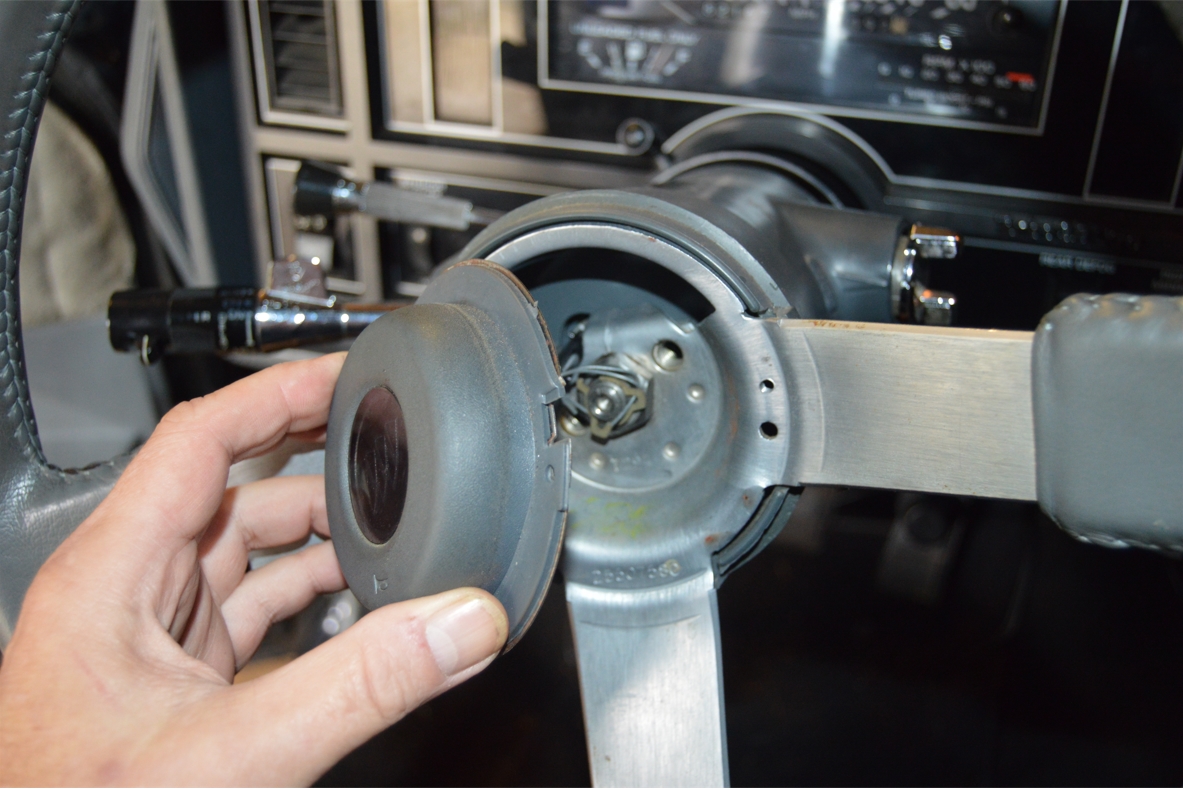
2. Remove horn button.
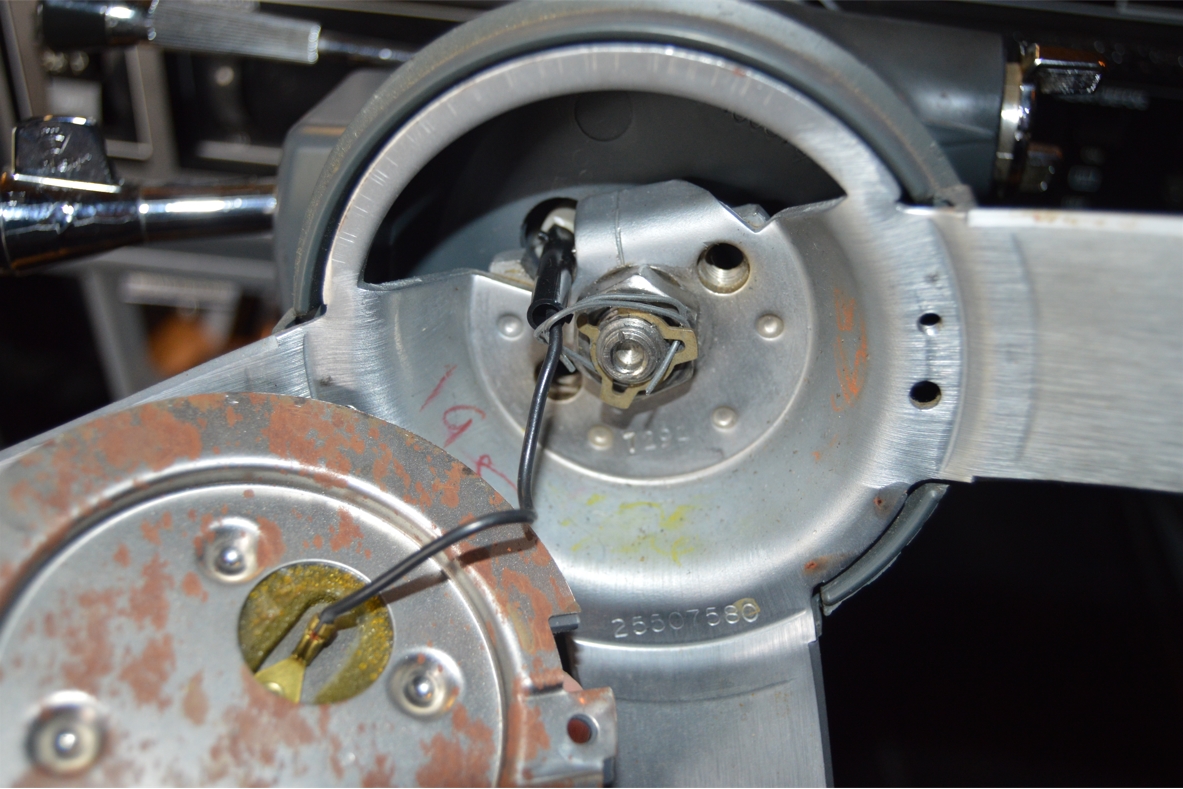
3. Remove horn wire.
4. Remove center clip.
5. Remove center nut (13/16″).
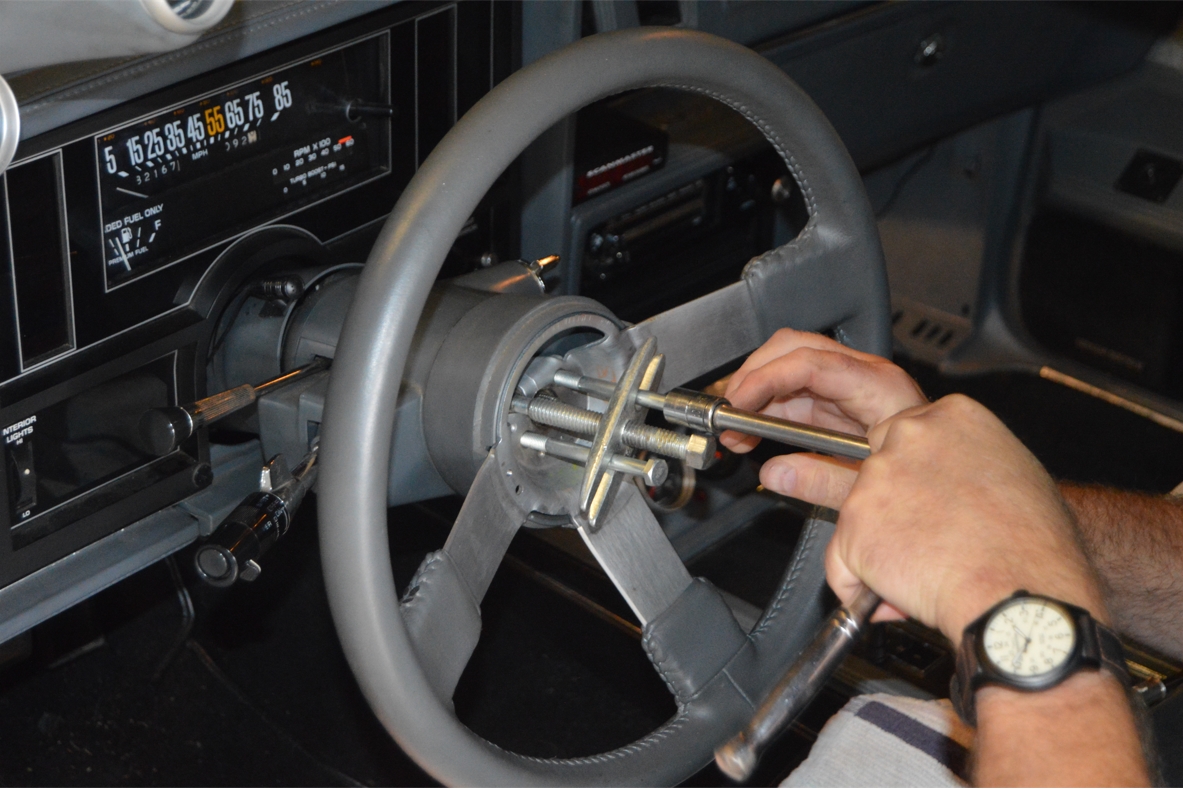
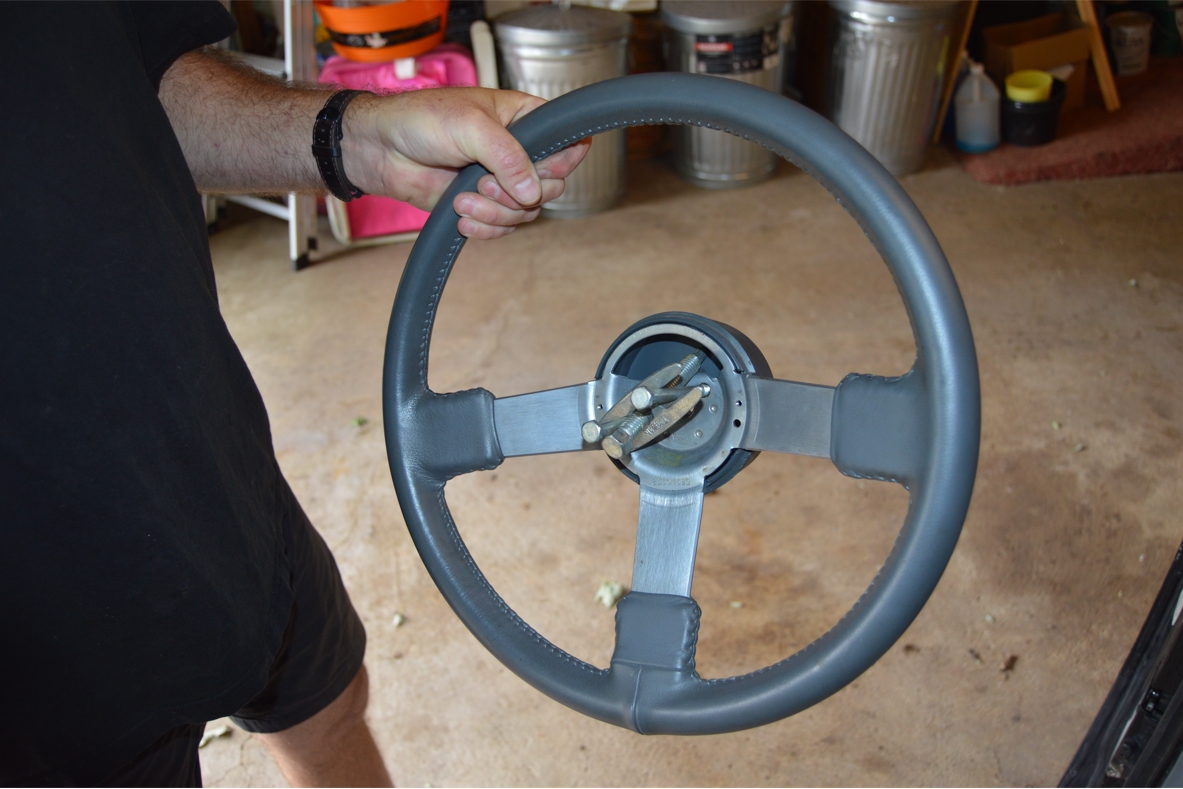
6. Remove steering wheel using puller.
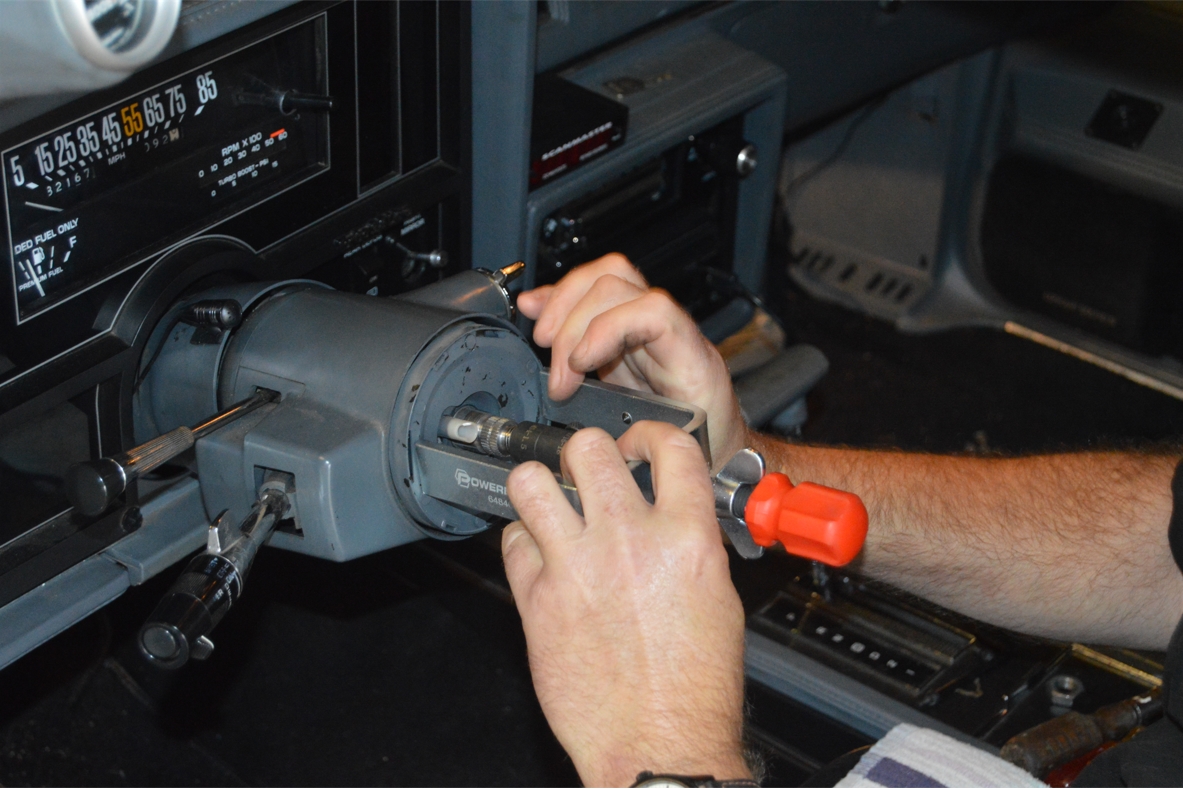
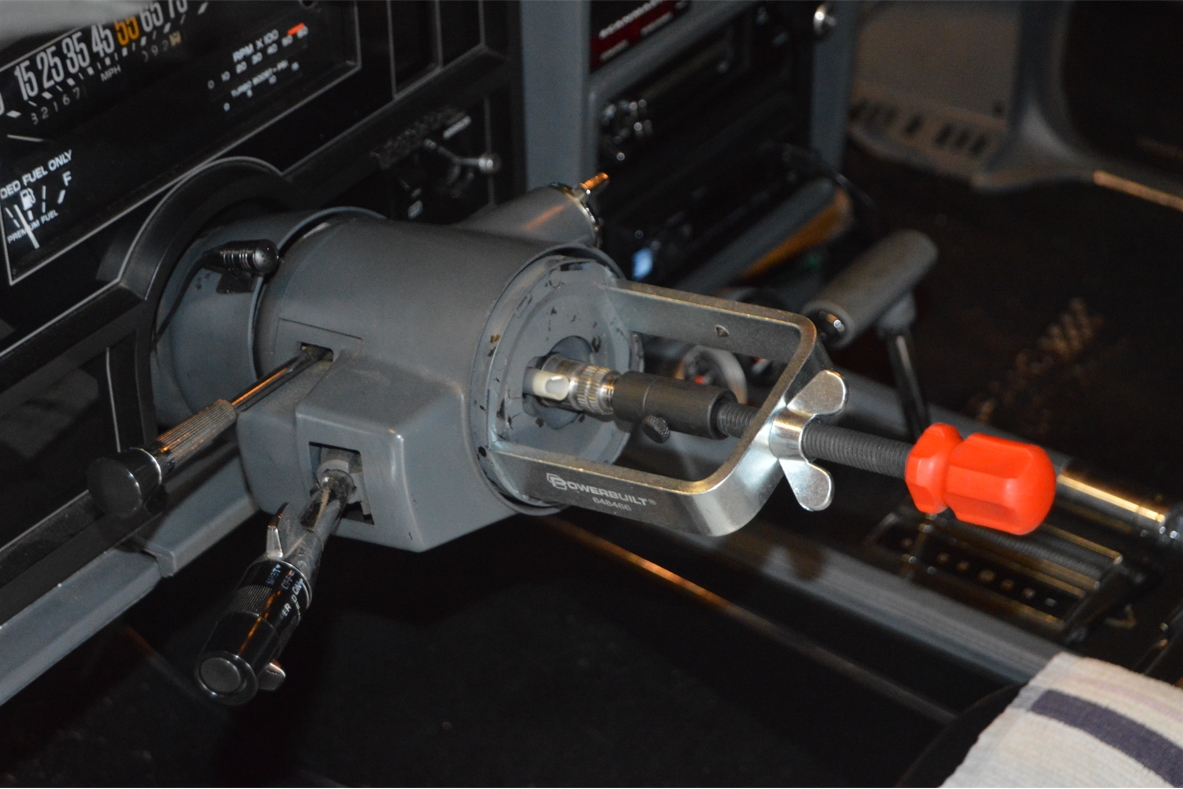
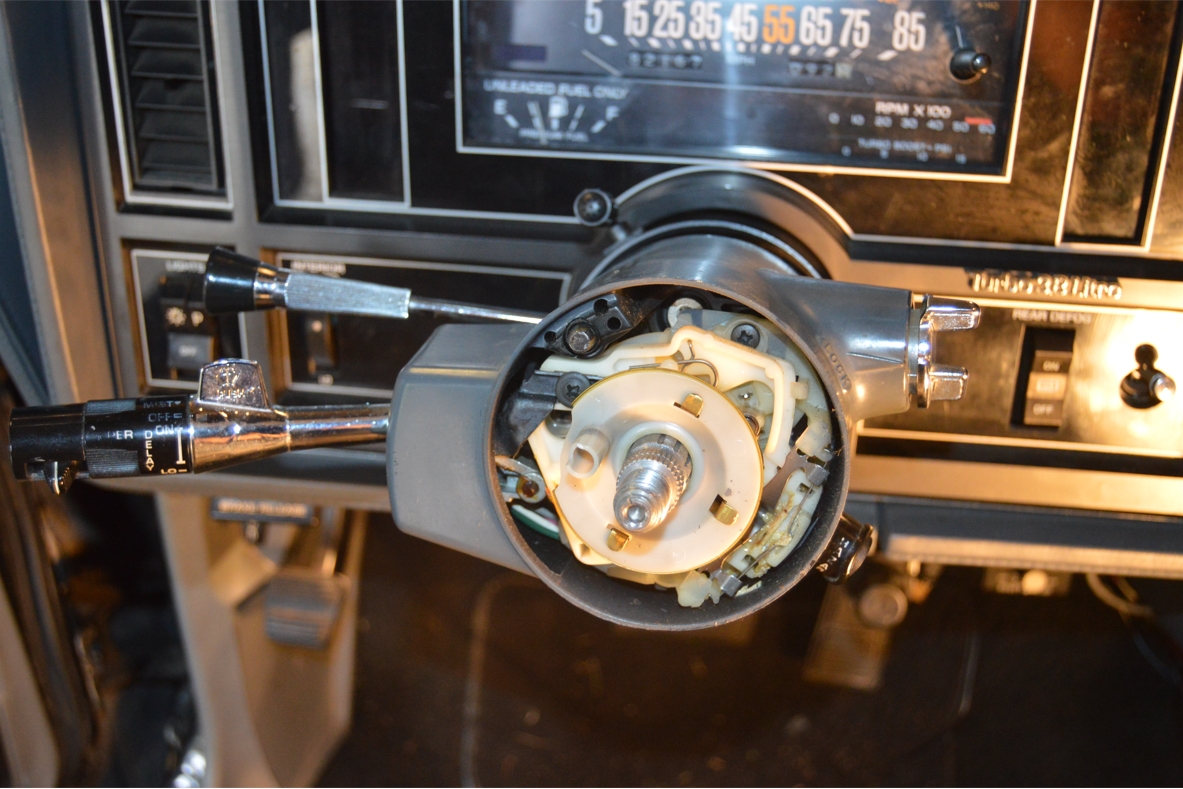
7. Use lock plate remover. attach to main center bolt, push plate down.
8. Remove center ring clip.
This is tough! Take 2 small flat screwdrivers and try to pry it off.
Twist, push, wiggle, work it off.
.


.
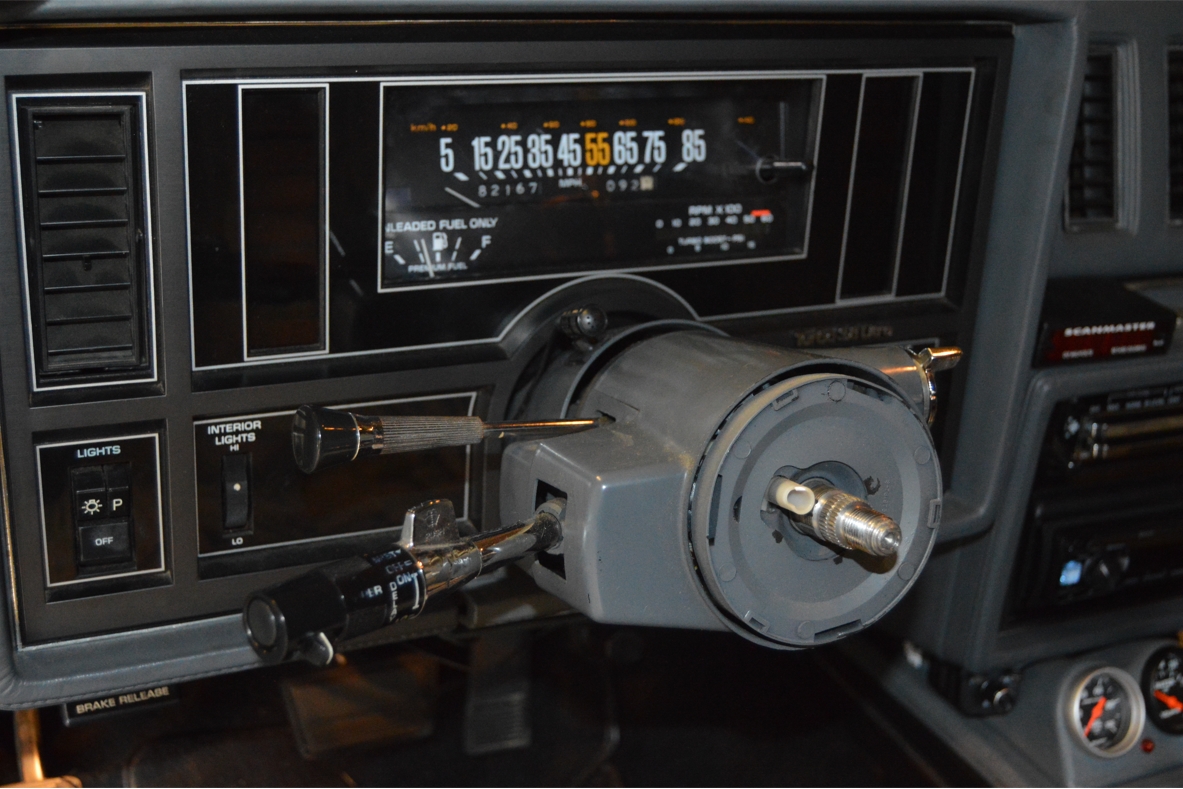
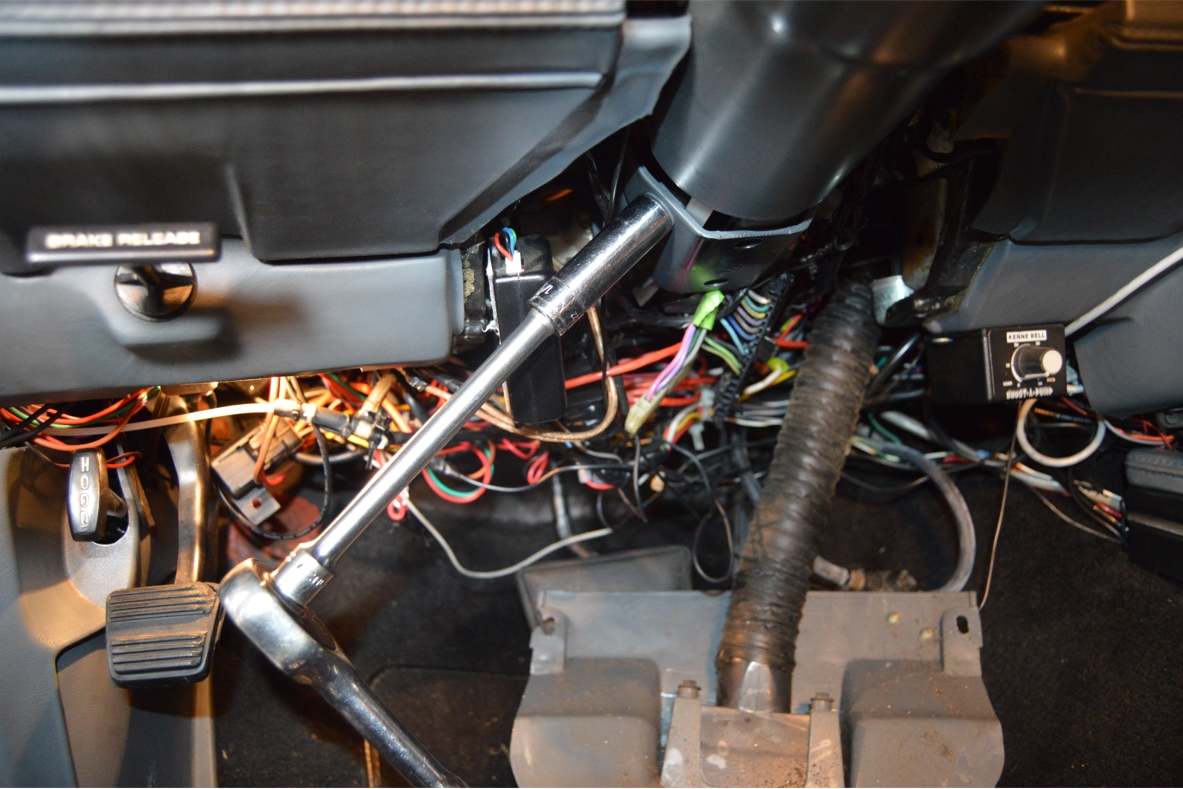
9. Remove underdash plastic.
10. drop column (2 15mm nuts) from dash.
11. Remove that bracket from steering column.
.

.
.
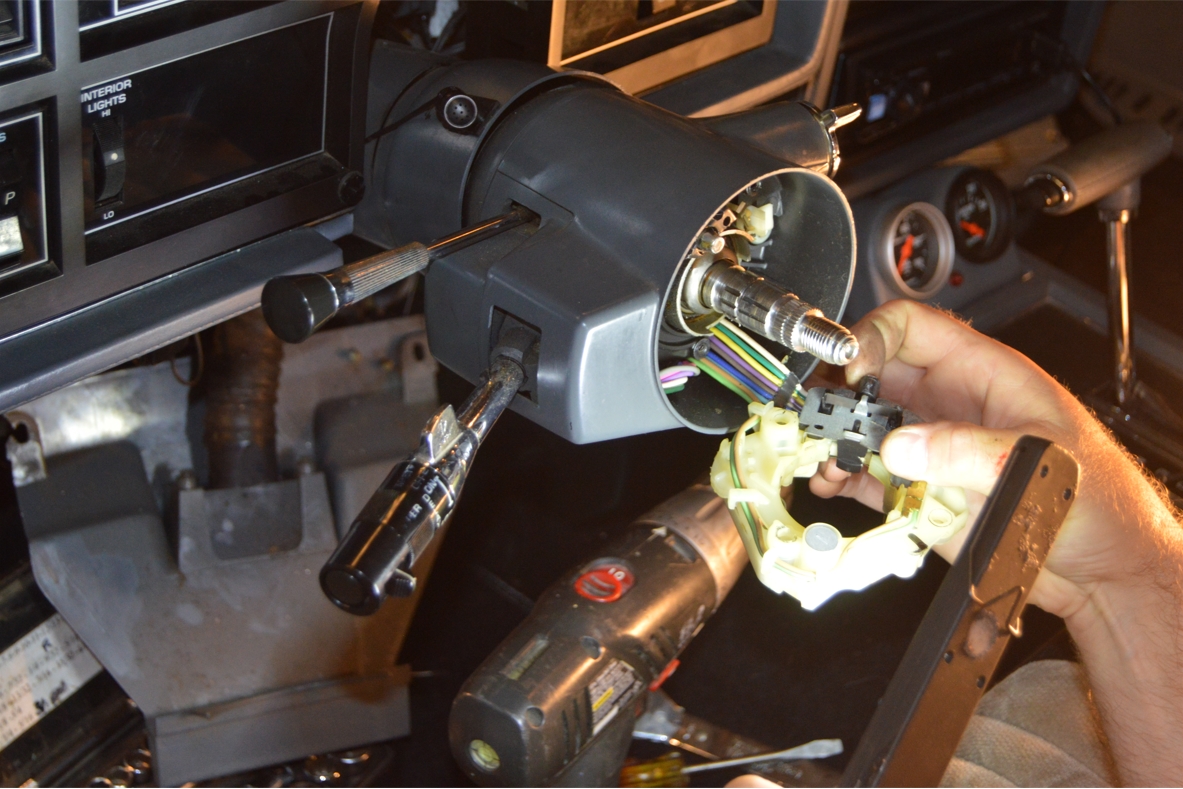
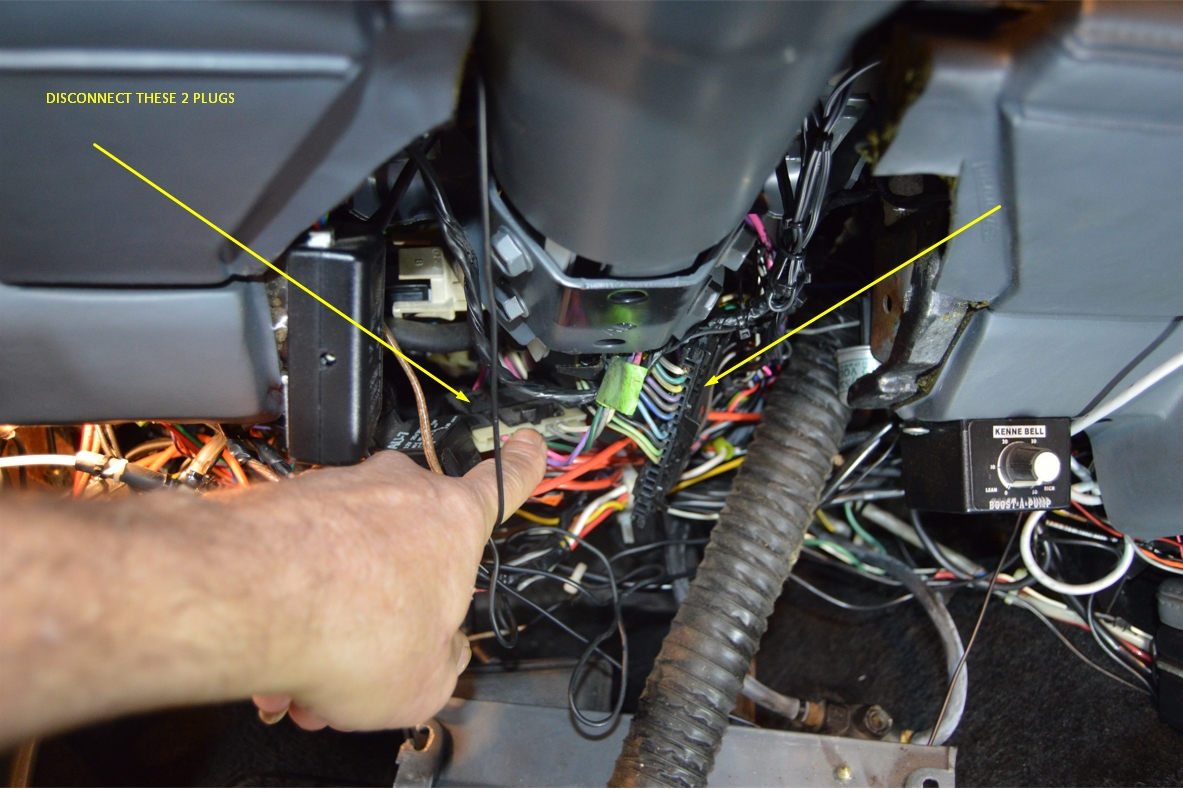 12. Disconnect the wiring harness (right side of column, flat black plug) (this is for the turn signal cam).
13. Disconnect the wiring harness (left side of column, white plug) (this is for the turn signal lever).
.
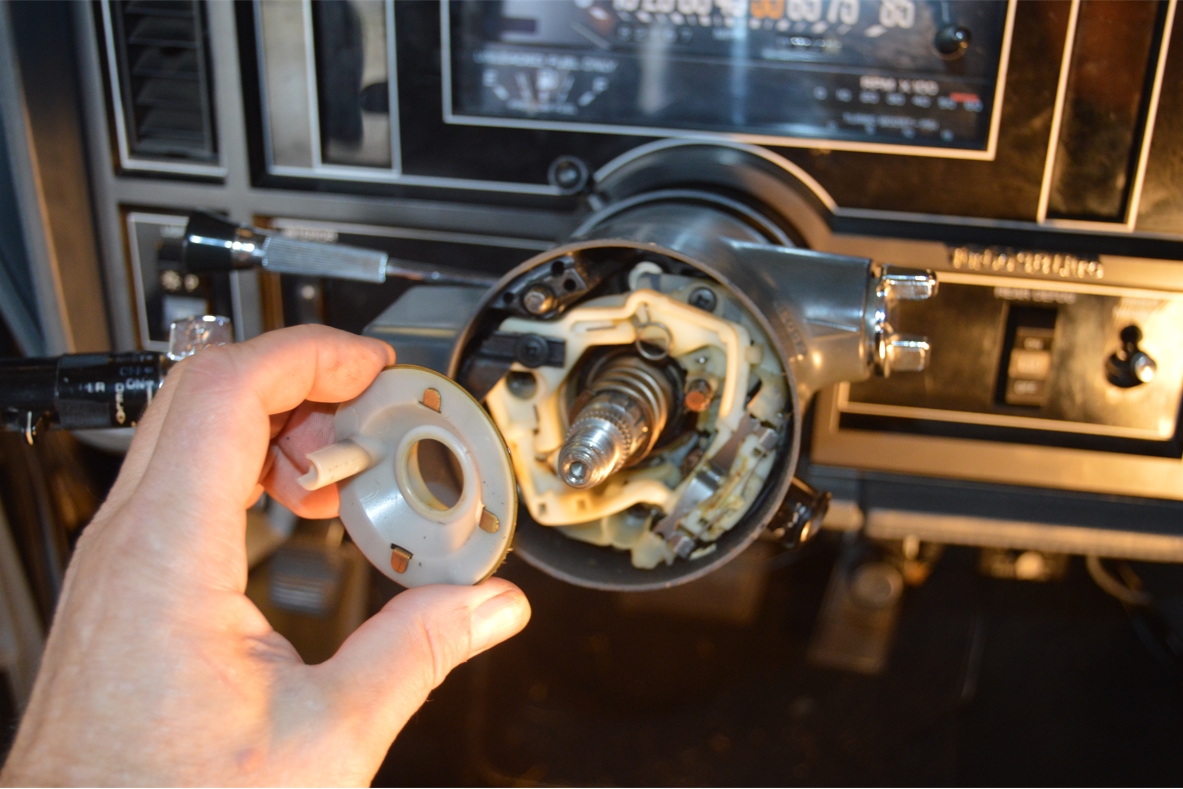
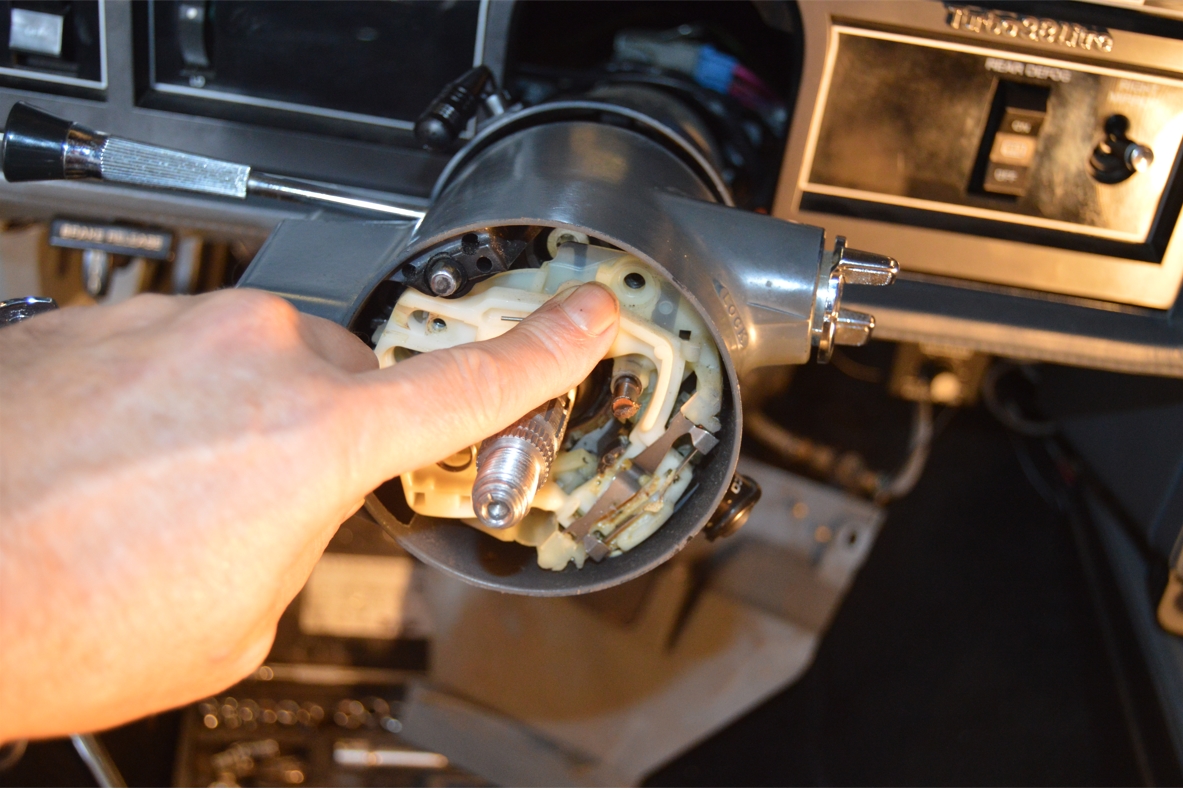
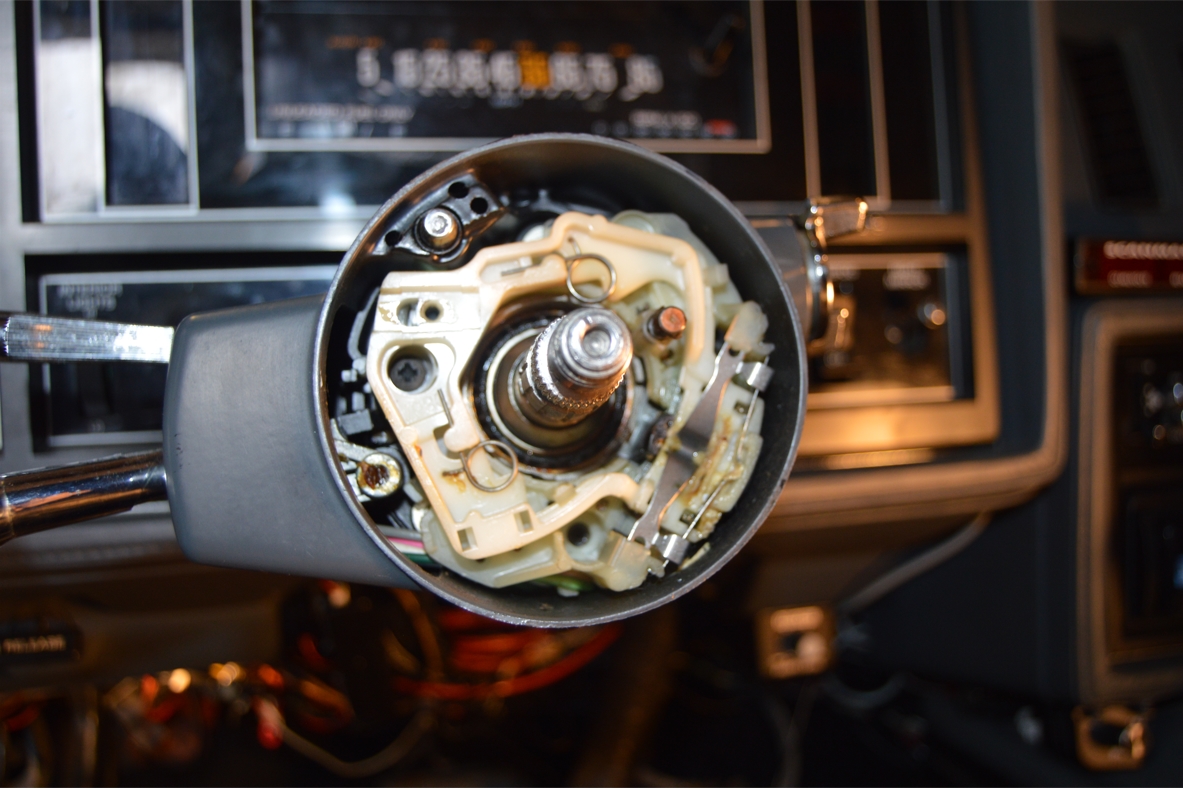
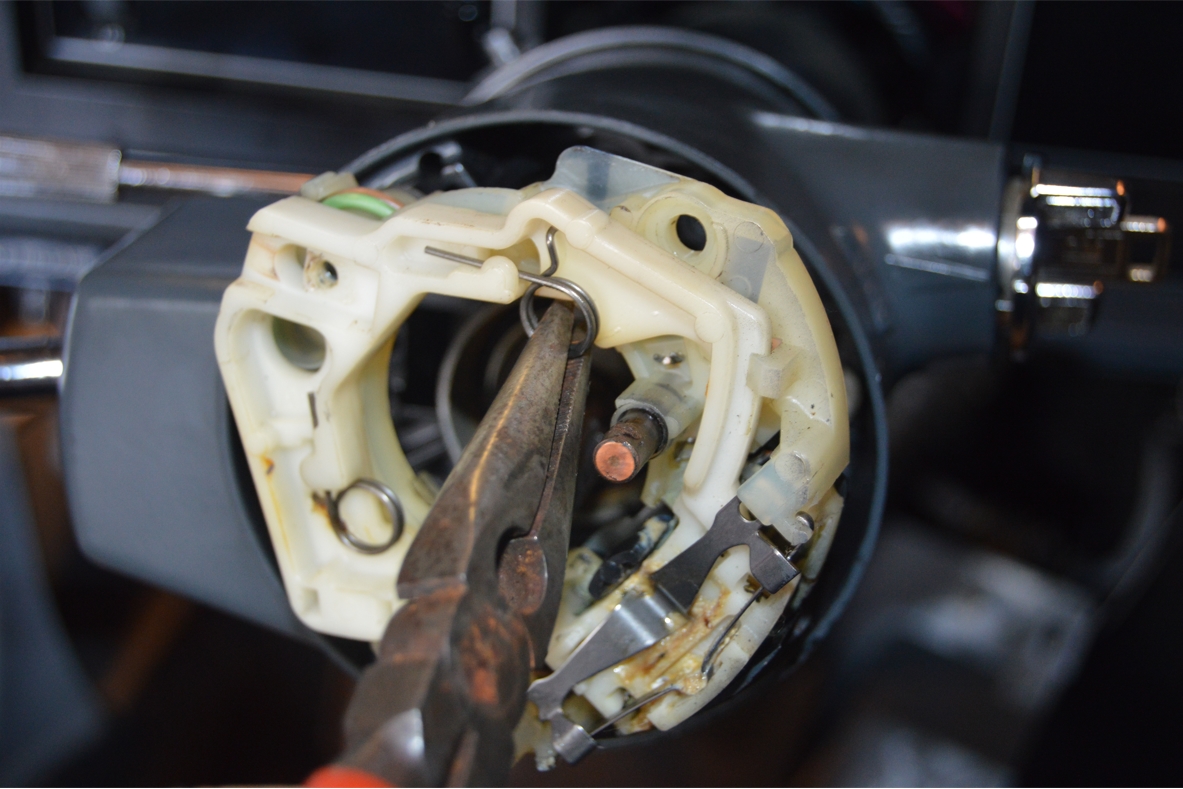
14. Remove horn cam (ring, where the spring goes) (they call this part the turn signal cam)
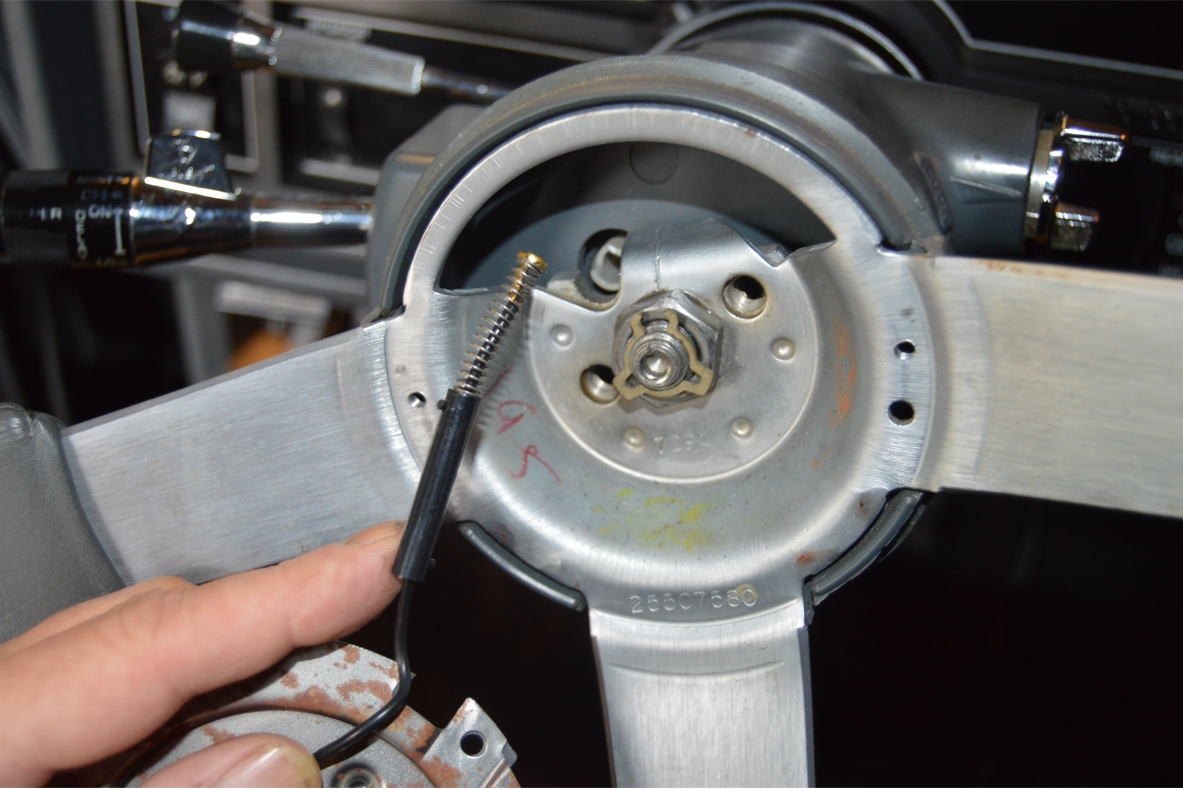
15. Remove spring from center shaft.
16. Remove the 3 phillips screws to pull (yellowish color) cam out.
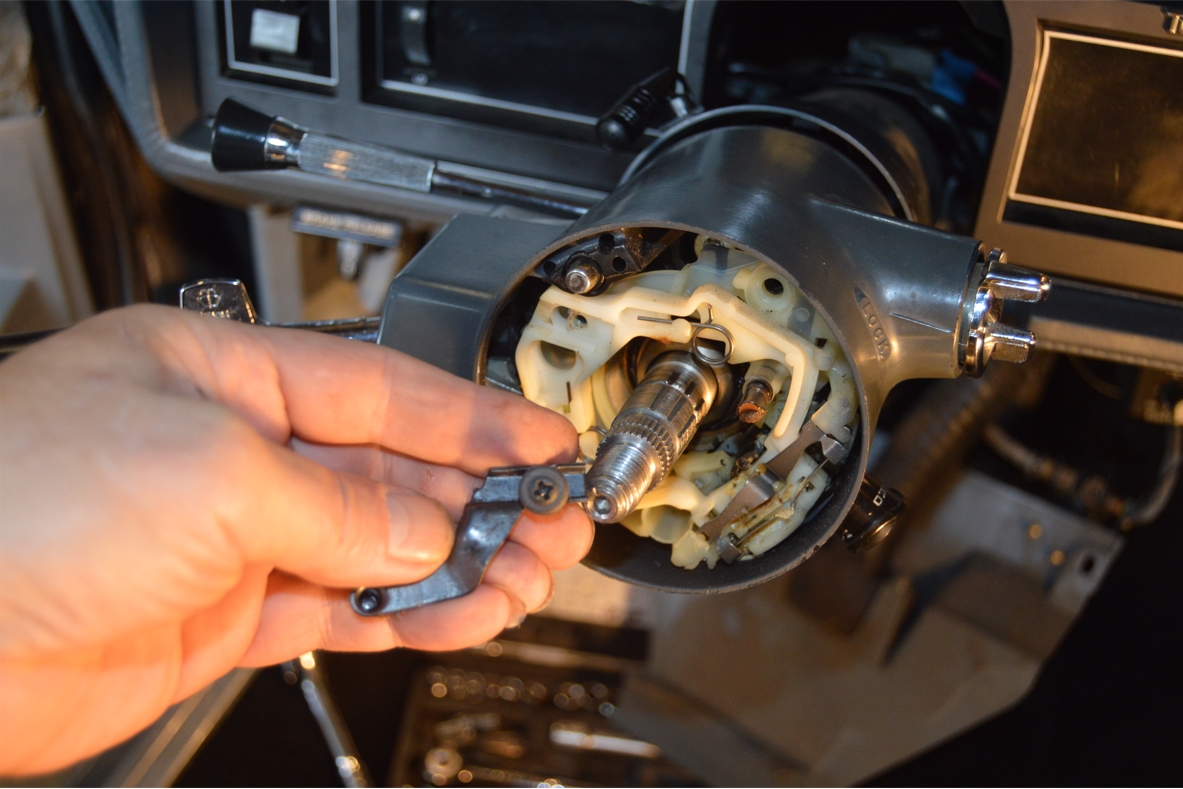
17. Remove 1 phillips screw (left side) with connected (black) arm (it’s attached to turn signal lever).
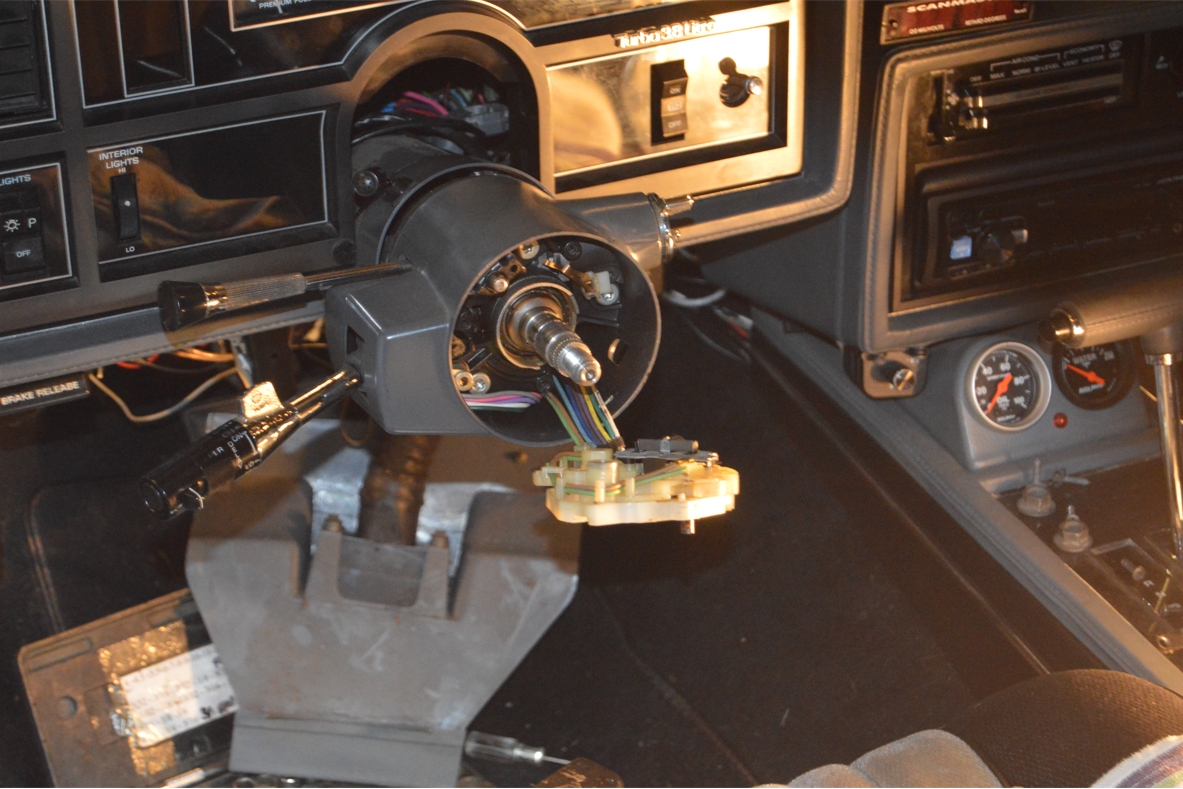
18. Pull cam out.
Use pliers to pull out. There are wires on the backside, they should pull out with the cam (that’s why you disconnected the wires from above steps, to give them enough room to slide out with the cam)
.


.
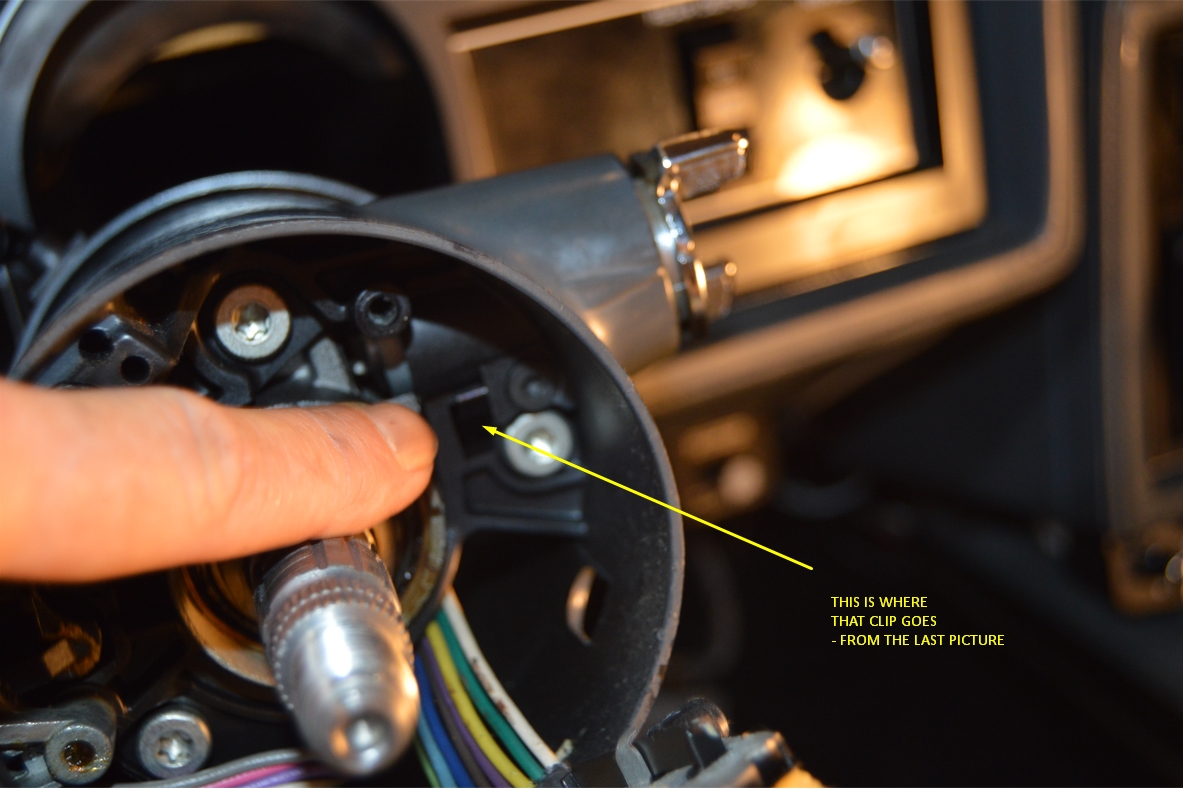
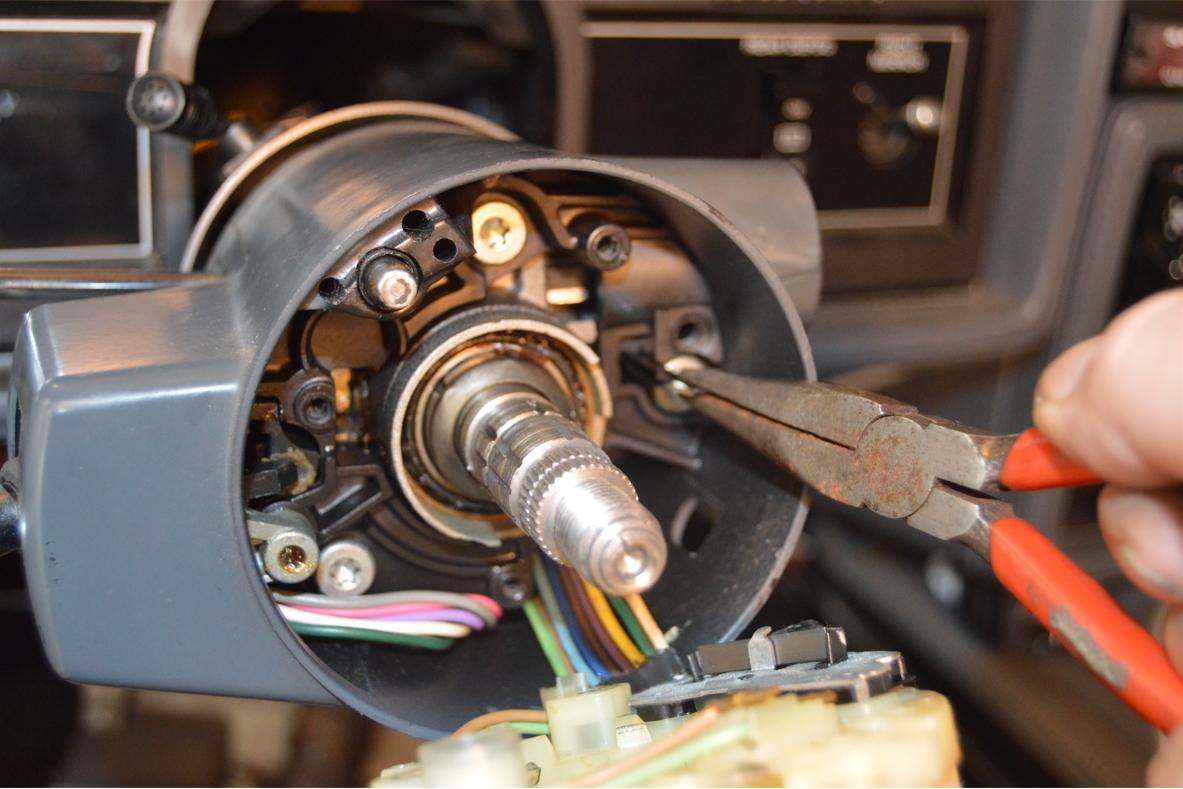
19. (right side), pull clip (white) out for ignition lock cylinder.
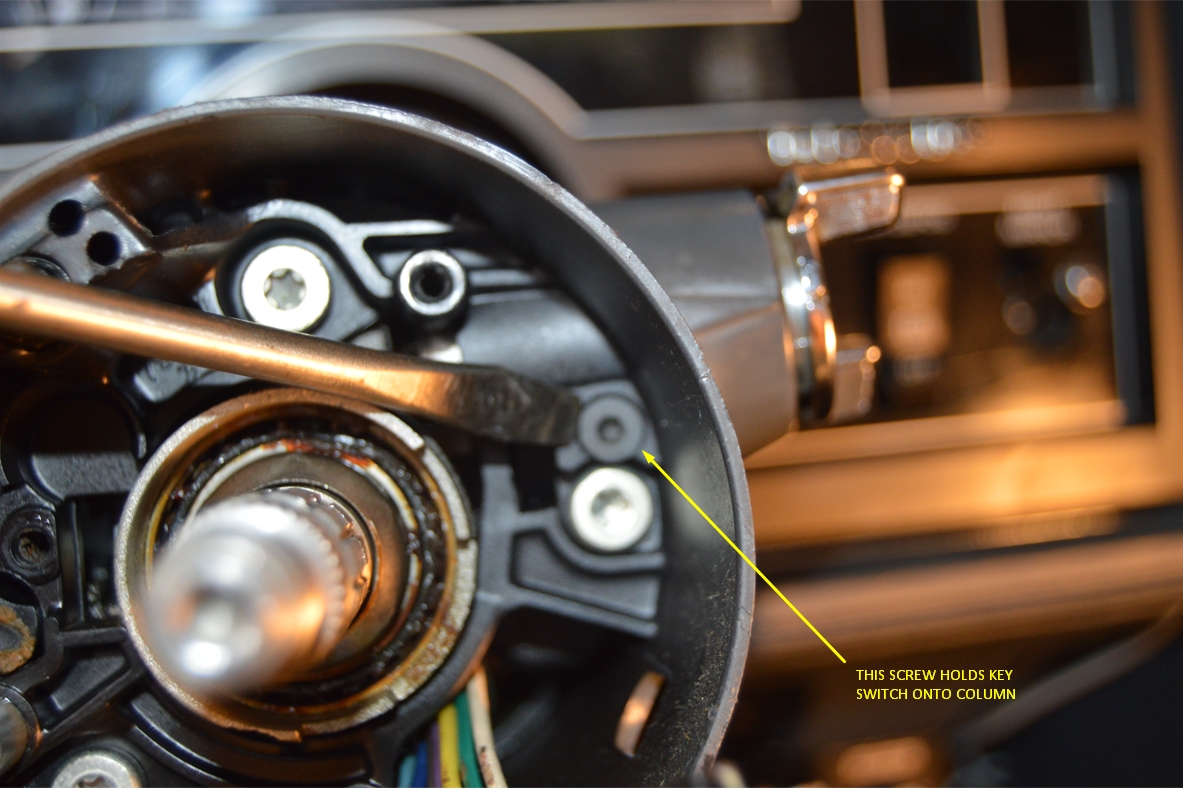
20. Remove torx 20 screw.
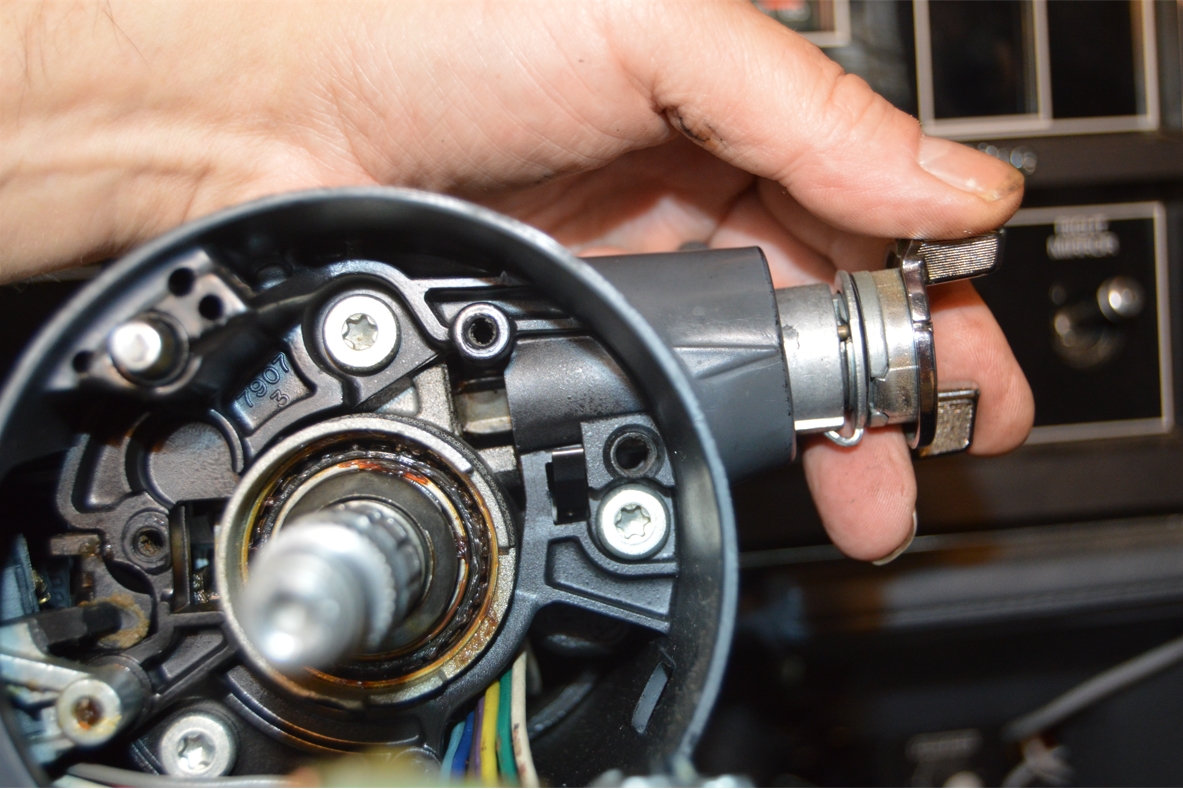
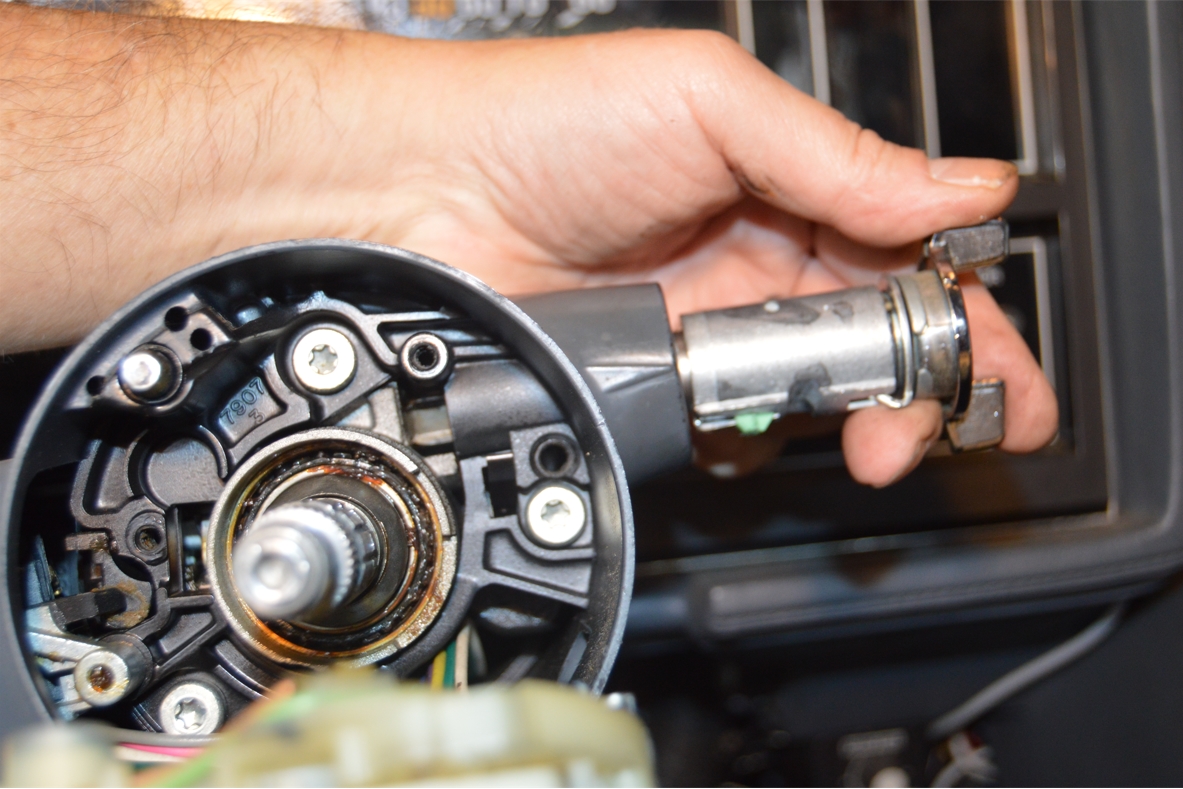
21. Pull out (key switch) ignition lock cylinder.
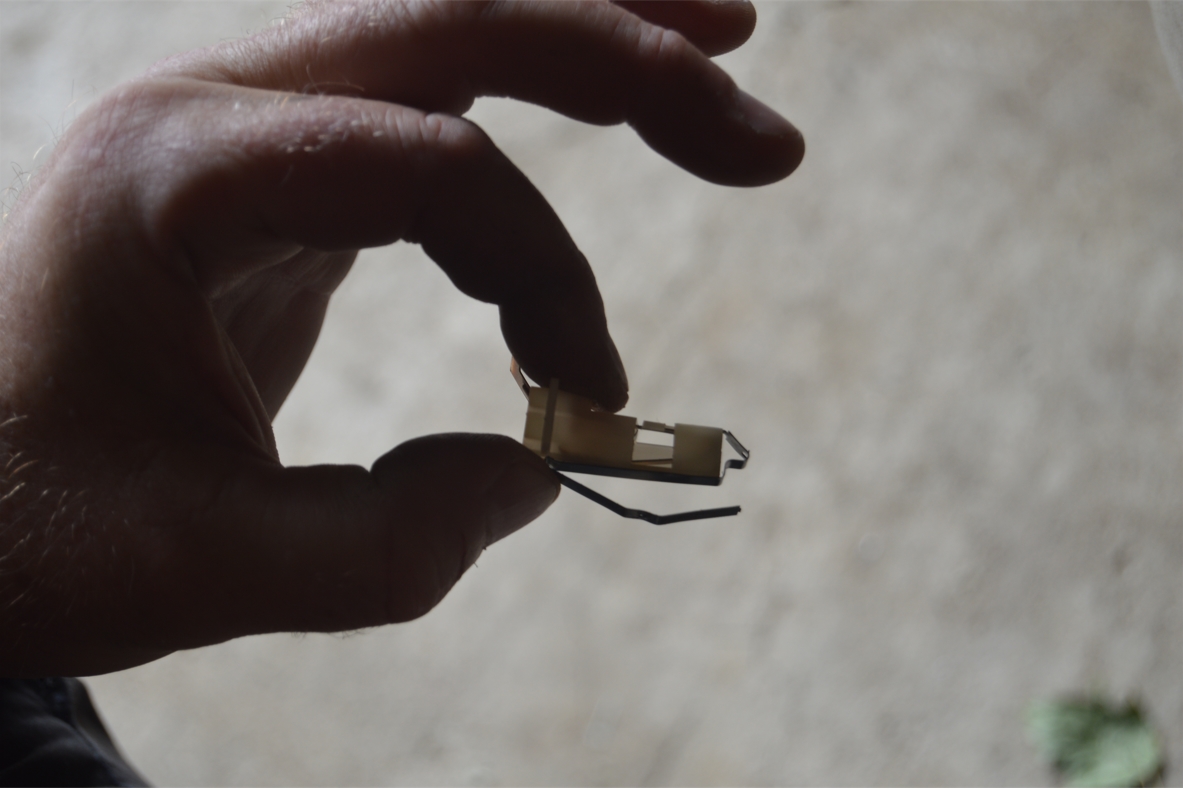
22. Pull out snap clip.
(this metal snap clip/spring attaches to the white clip/plug you removed in step 17; reinstall both pieces together as shown in pic before you reinstall)
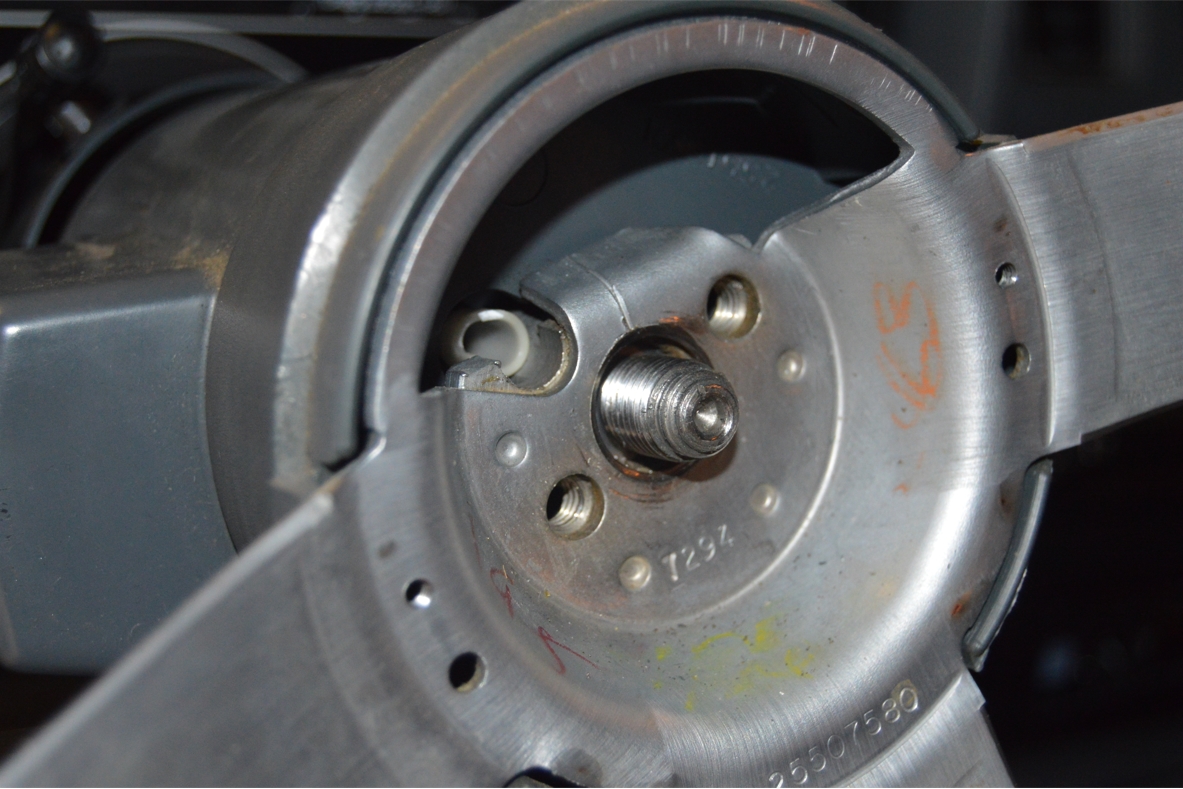
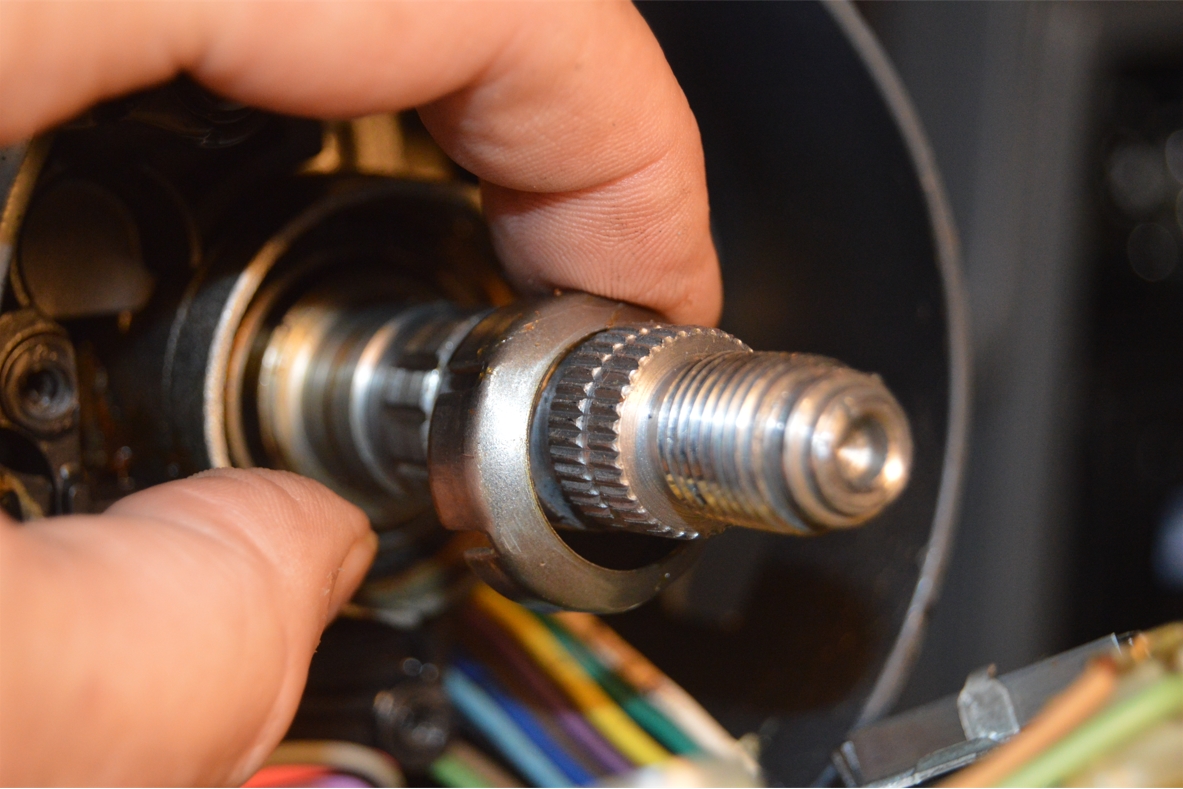
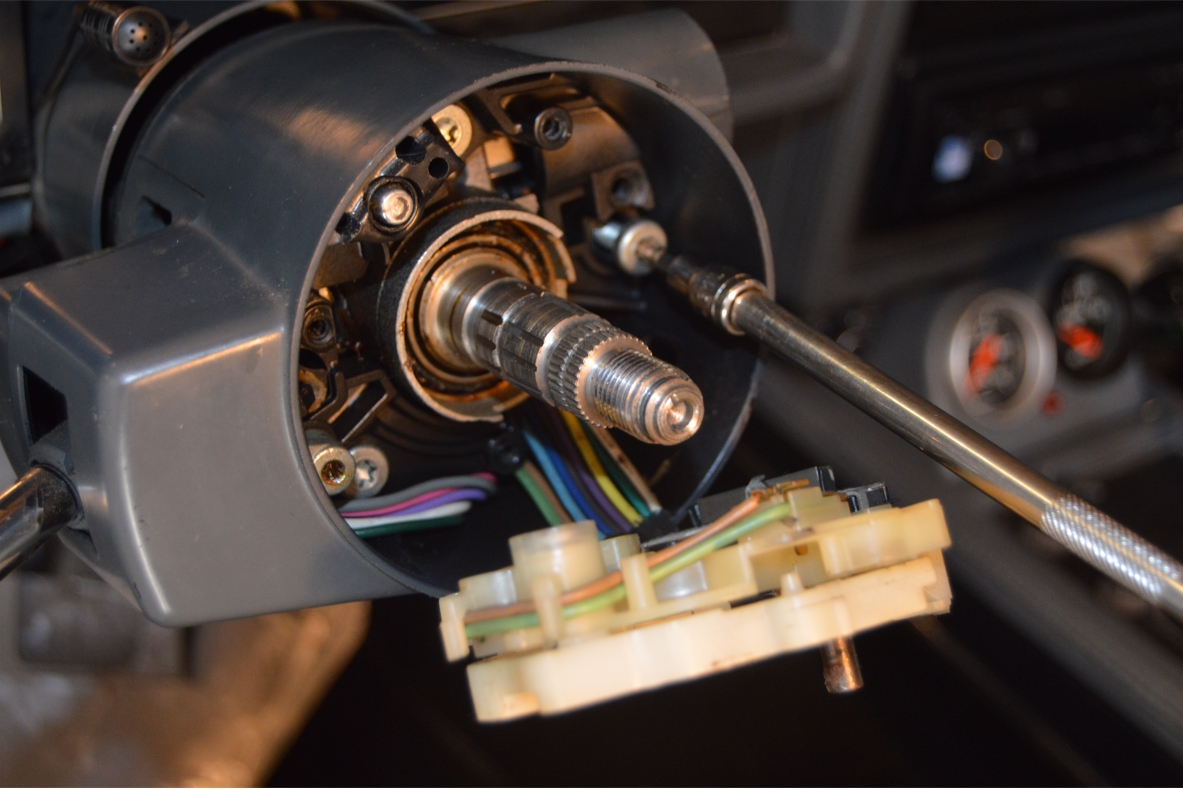
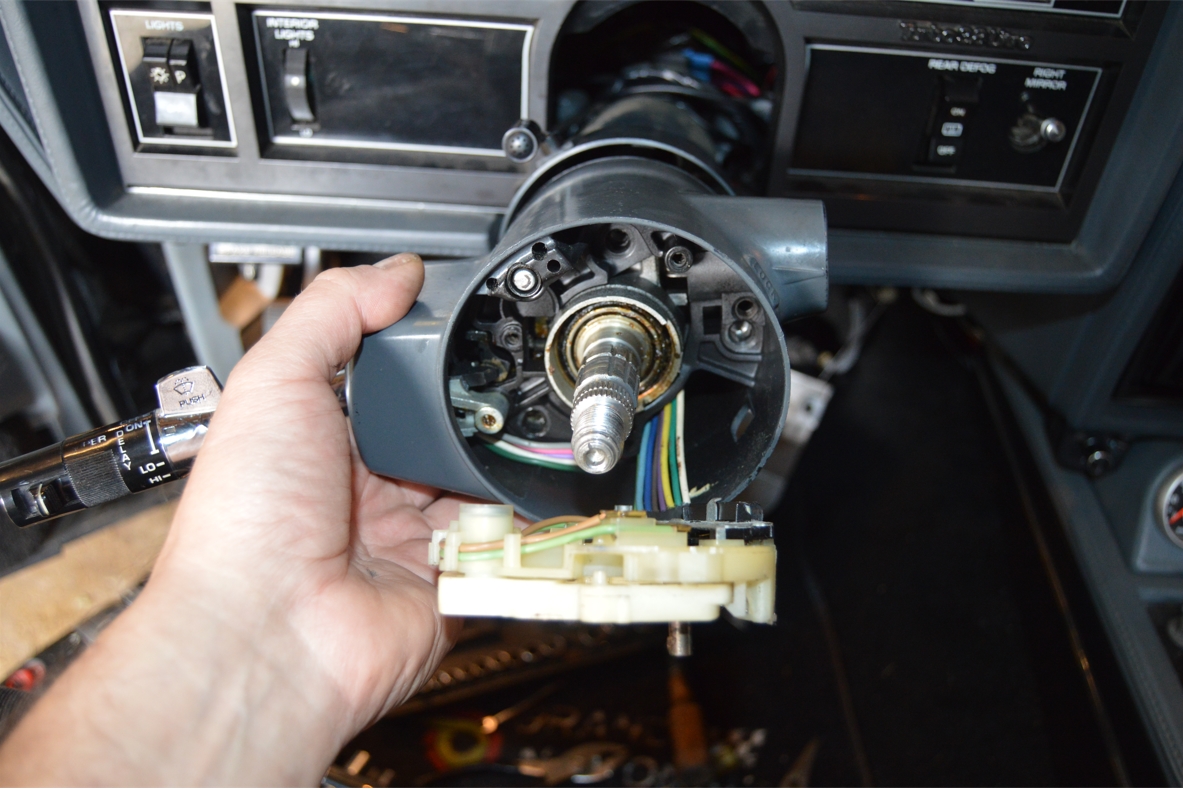
23. Remove outer race (on main center shaft). Use a flathead screwdriver and pry / work it out.
24. Remove tilt lever. (unscrew)
25. Remove emergency flasher button. (small phillips)
.


.
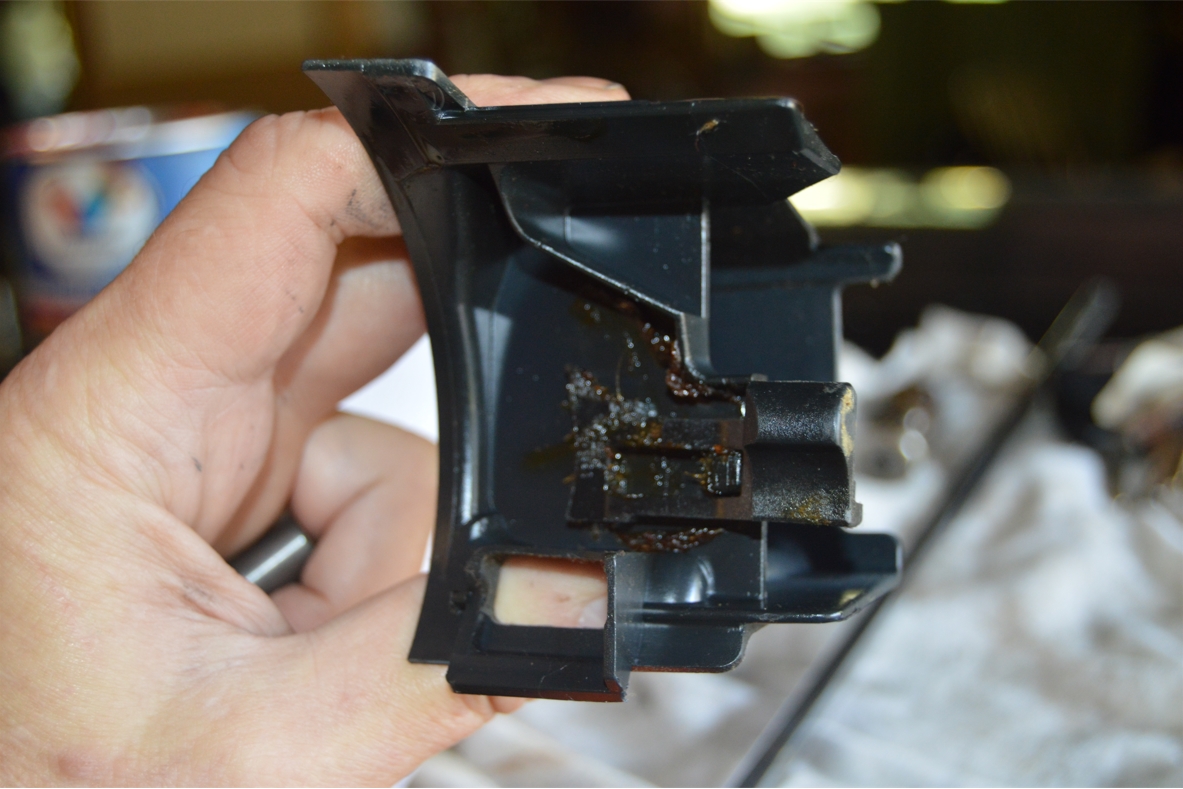
26. Remove 3 silver torx screws.
27. Pull off cover.
Note the bright switch plastic lever will fall out! Don’t lose it!
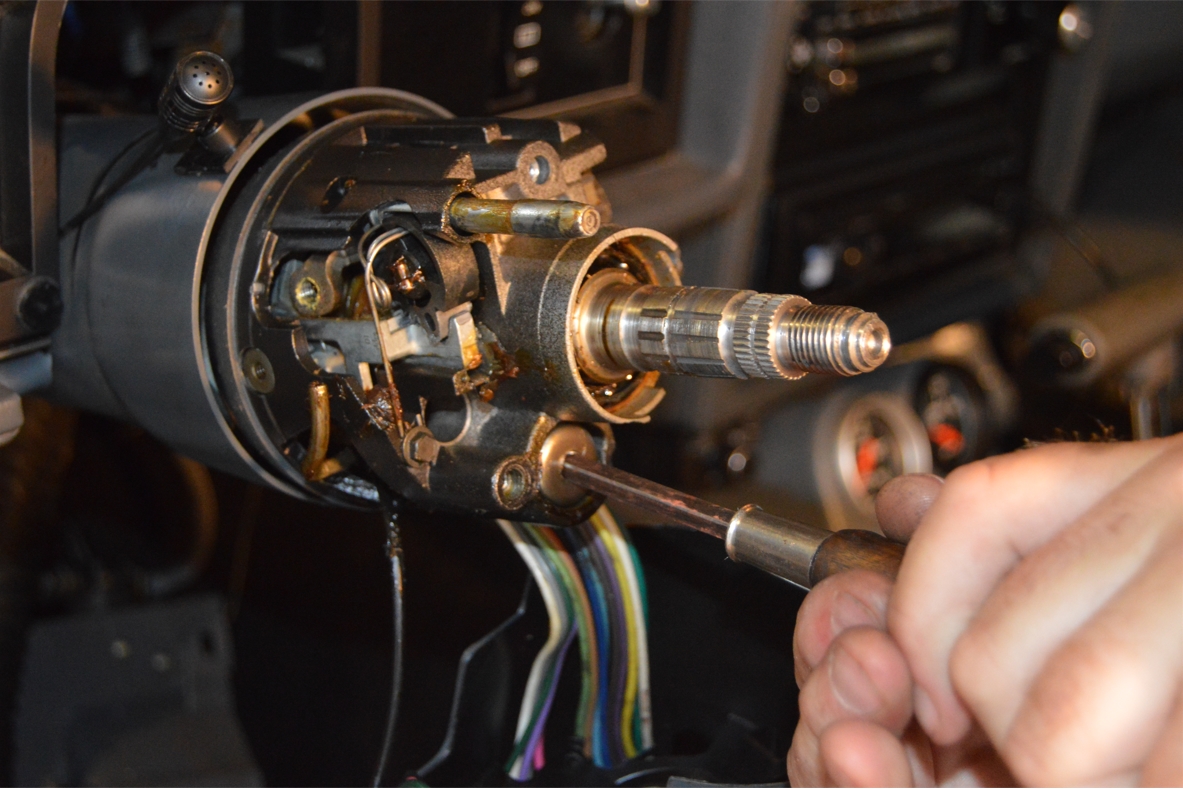
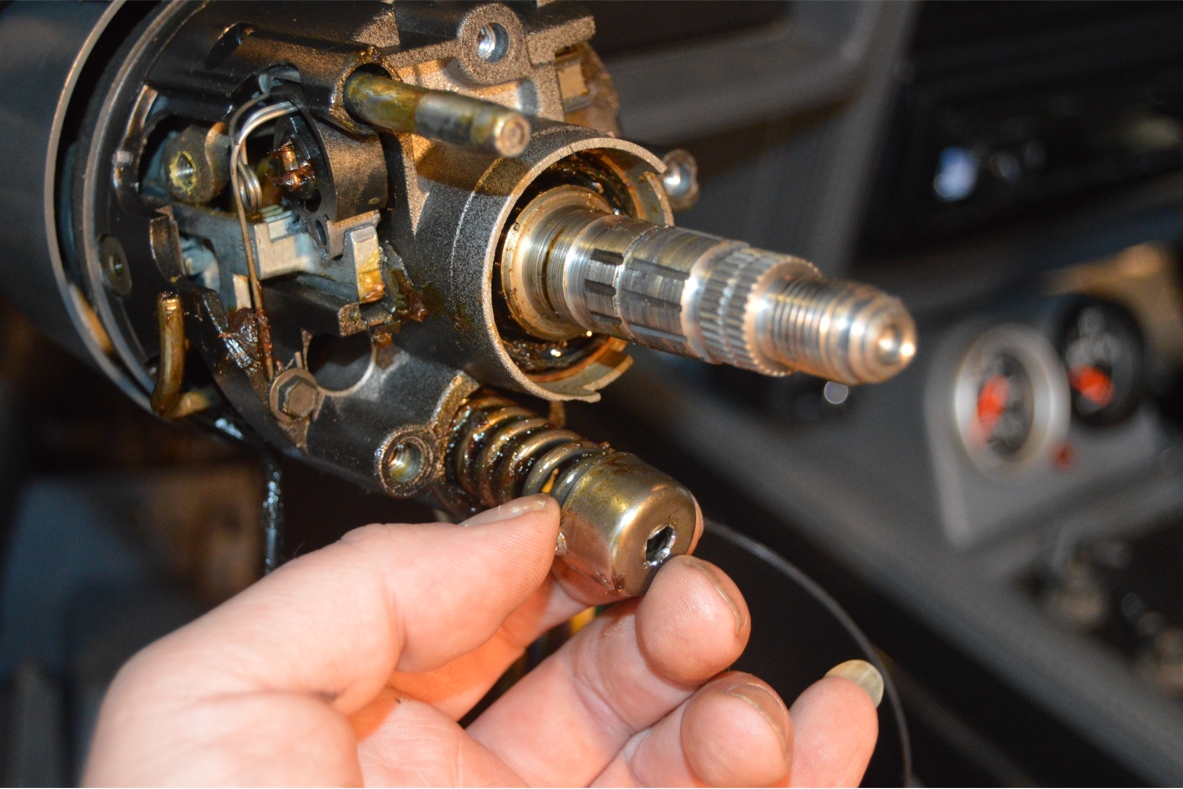
28. Remove lower race cap off center shaft.
29. Remove spring holder and spring for tilt. It’s a big gold colored button, at the 6 o’clock position. A big phillips screwdriver will unlock it, turn counter clockwise.
IT’S UNDER PRESSURE, USE CAUTION!
The spring is long (about 4″).
.


.
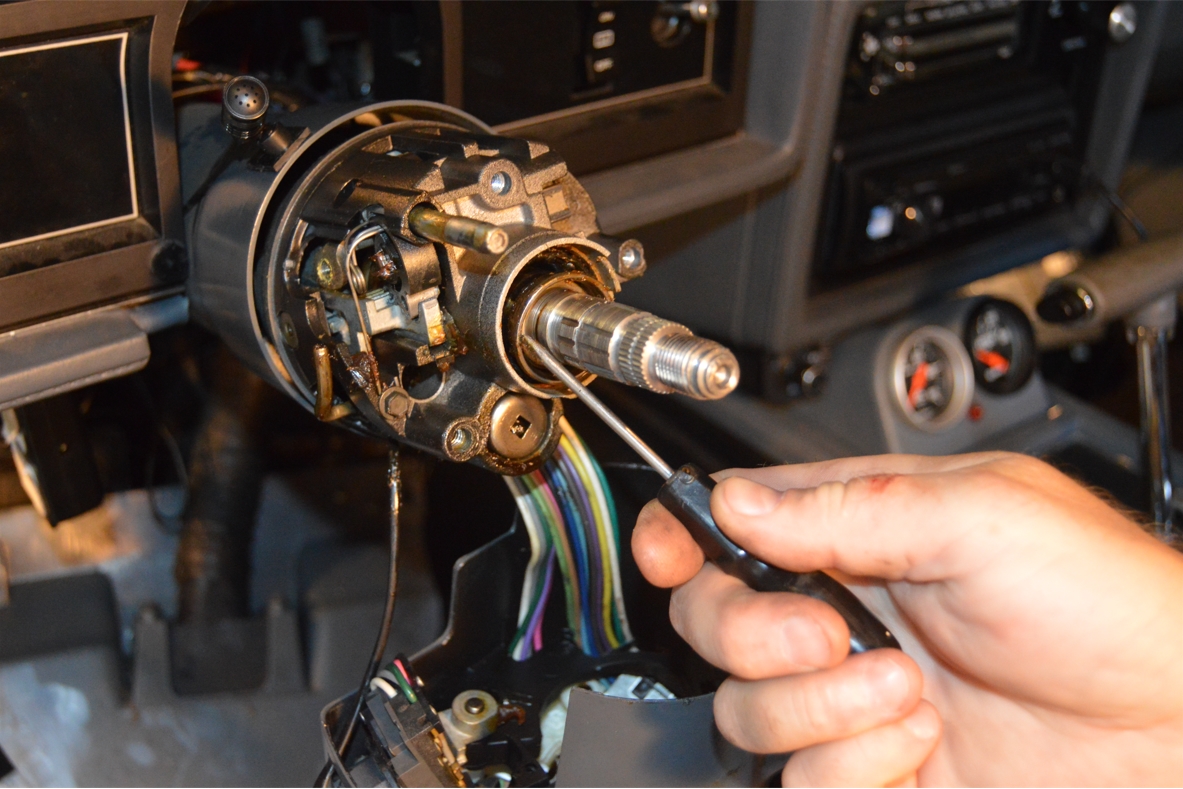
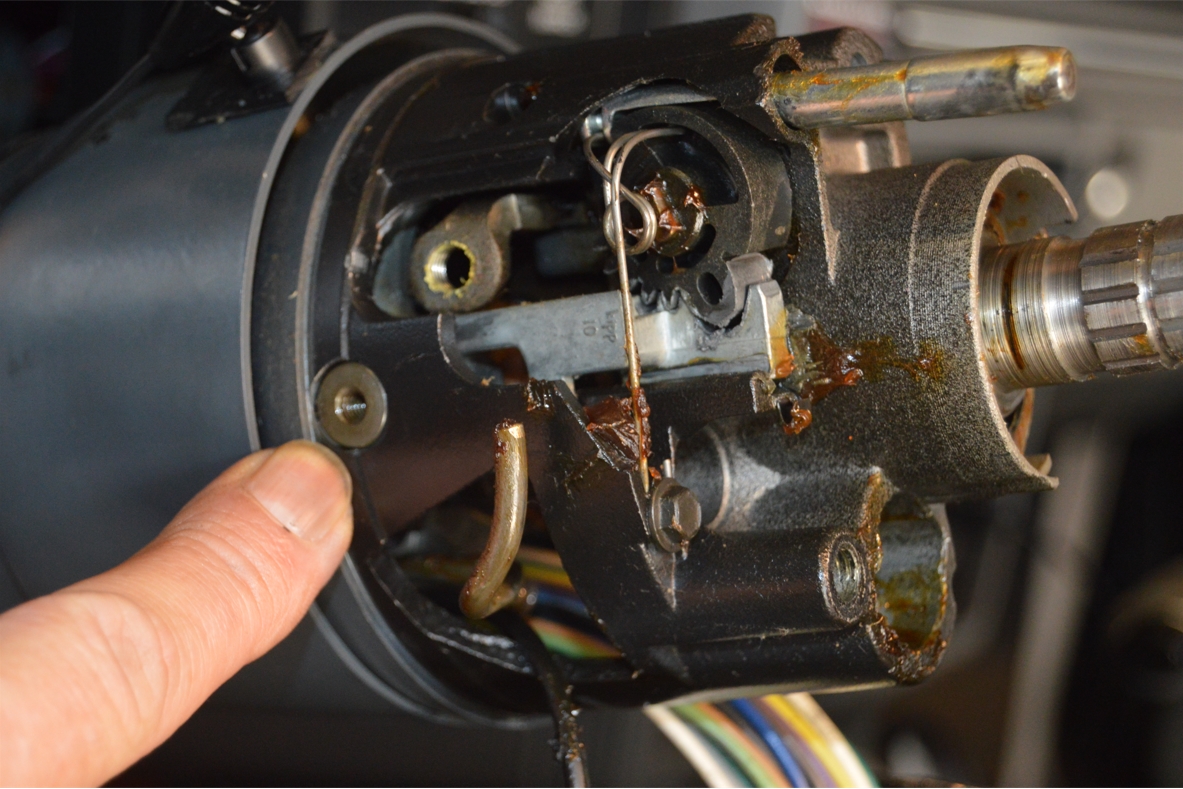
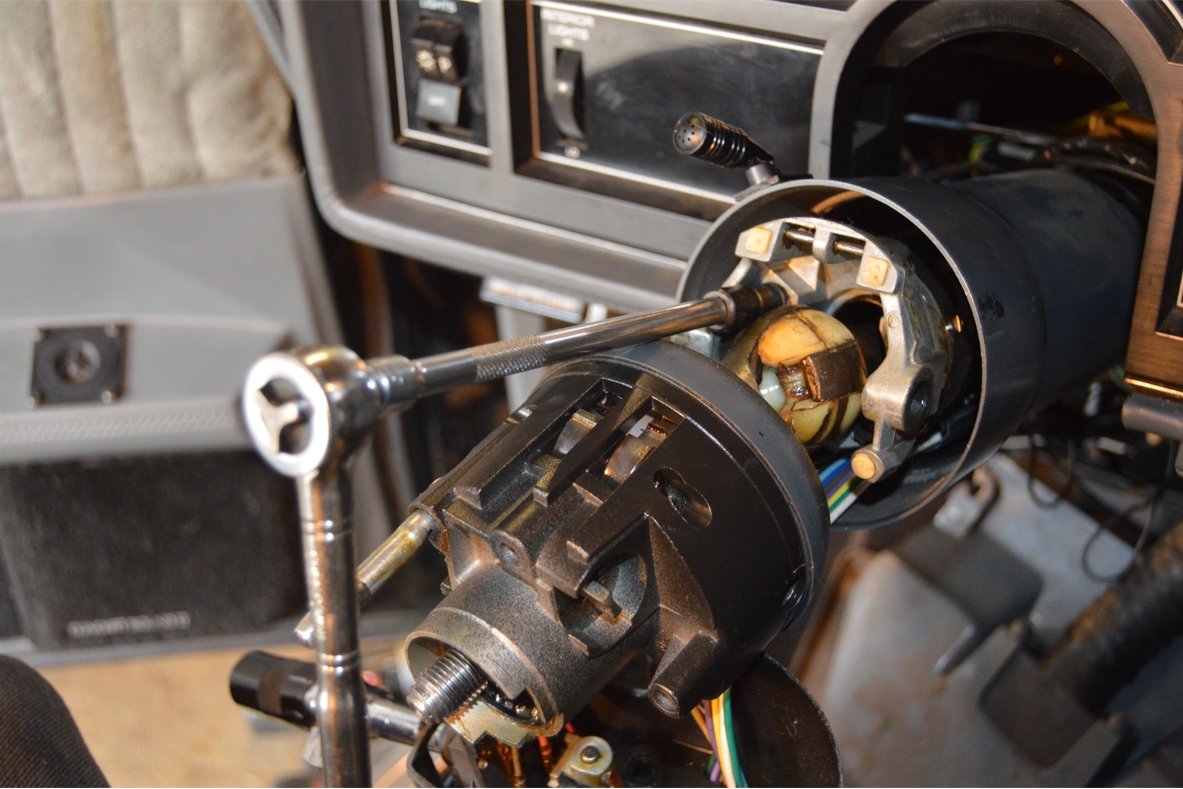
30. Remove pivot pin, using the tool made for this purpose.
There’s a pin on each side of the column. (2 total)
(tool uses 9/64″ allen to remove pin from tool)
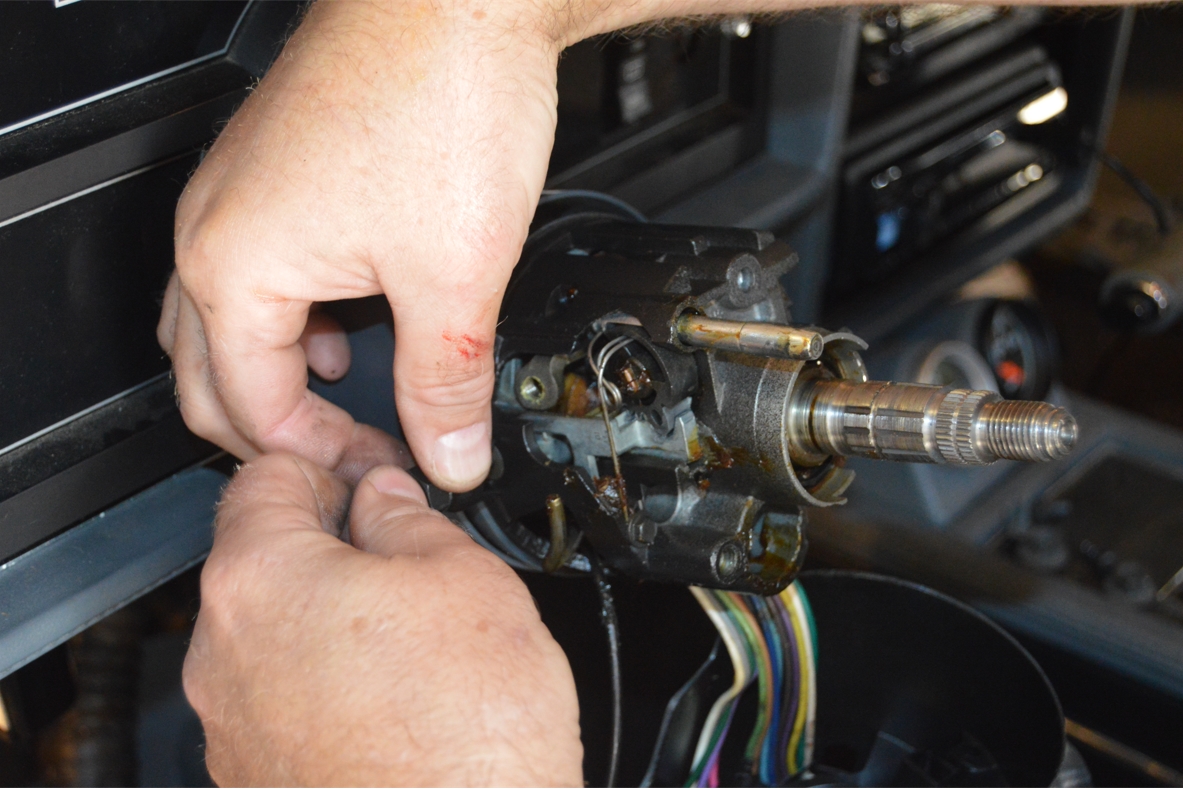
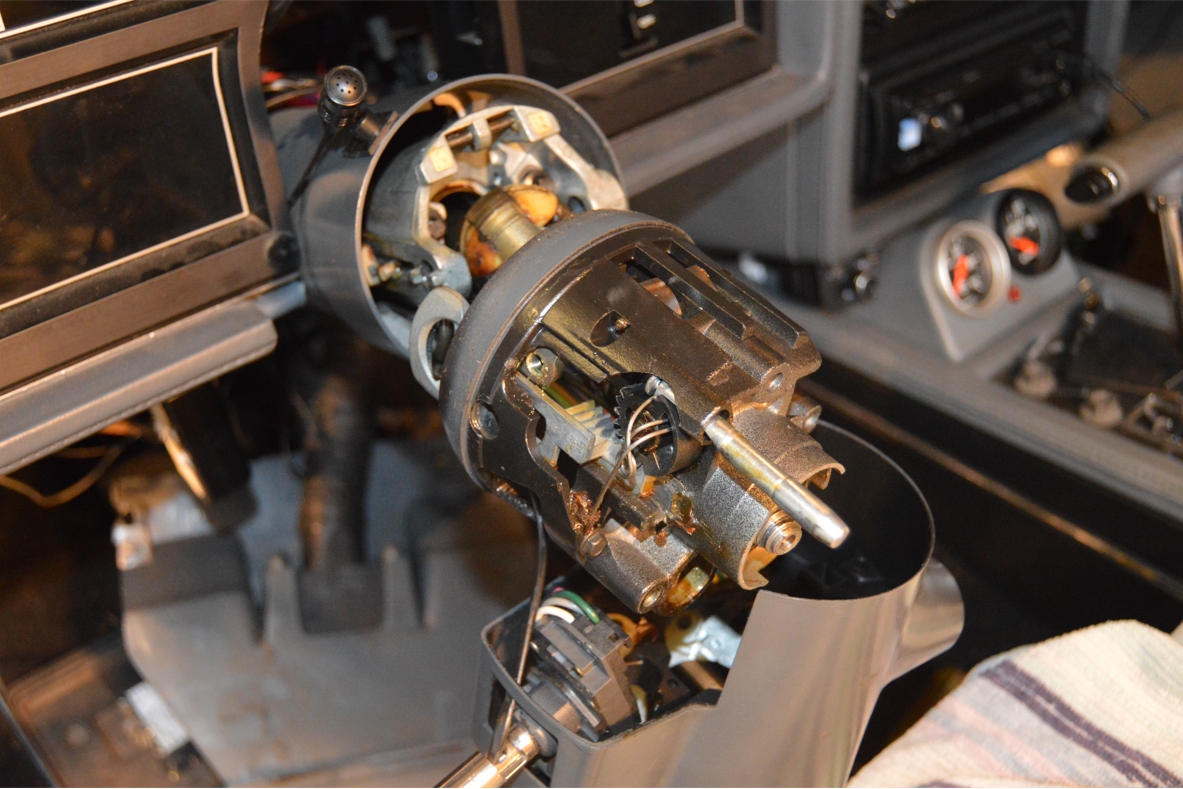
31. Pull the entire case outward to access the 4 screws that need to be tightened.
(the video says to remove this, we were able to simply slide it out of the way to access the screws; you can move this case up/down, left/right, while you are accessing the individual screws)
Work around the high beam lever, twist the case clockwise a bit, move lever out of the way.
.


.
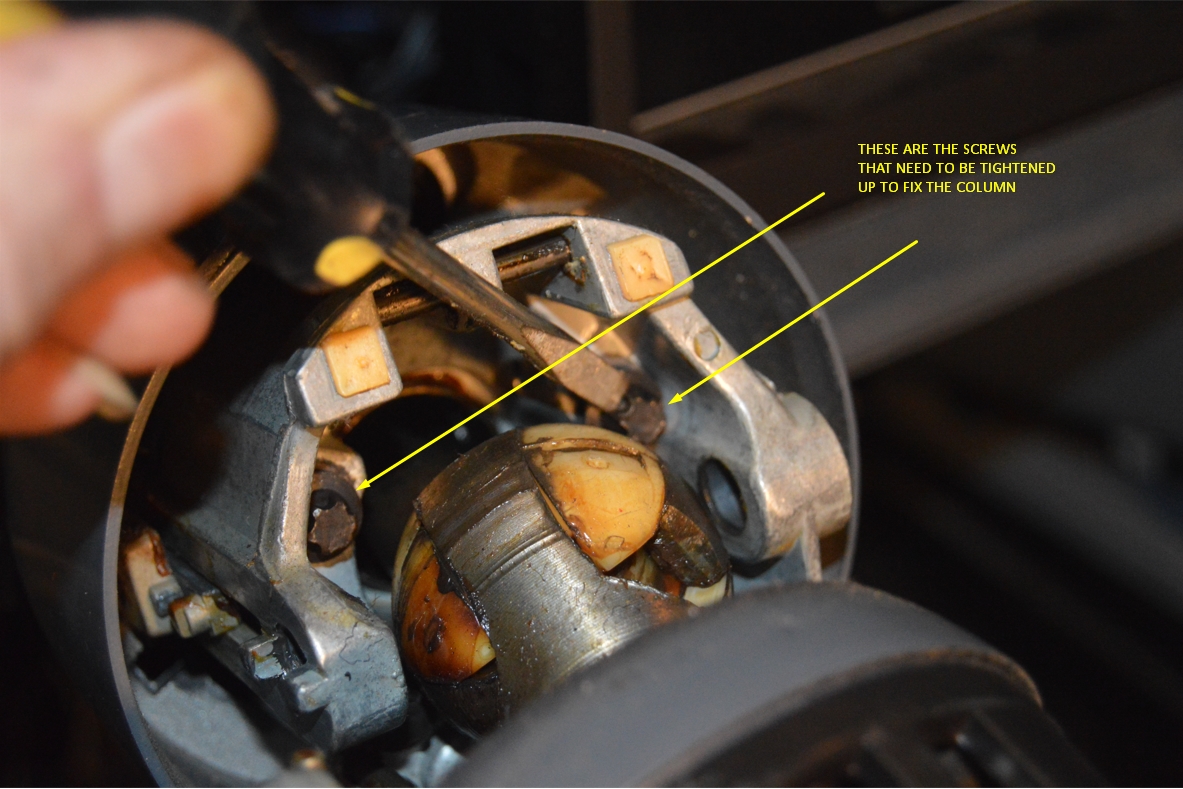
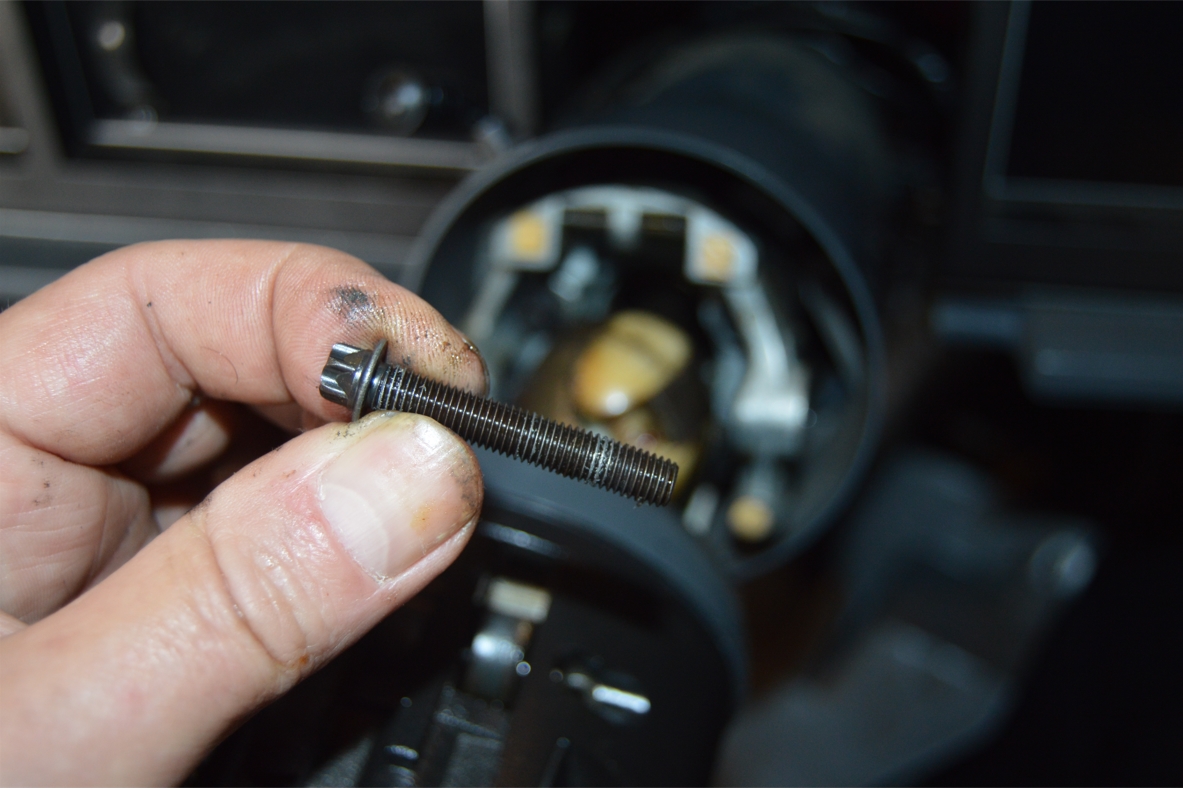
32. Remove the 4 screws ONE AT A TIME. Pull out a screw, apply locktite, replace and tighten down. Then do the next screw. Continue until you have done all 4 like this.
An E8 torx bit is what you use for these screws.
33. Lube up the main center ball with grease.
.
.
THIS ends the repair. Now reassemble the entire steering column in reverse order.
.
THINGS TO CHECK WHEN REASSEMBLING:
.
 Be careful with the high beam switch lever alignment.
When you reinstall the plastic (outer) cover, MAKE SURE you push on the tab, it actually CLICKS when you push. If it does not, the sliding tab is NOT aligned correctly.
Also check the actual lever once the case is reinstalled. You should hear the CLICK.
If it does not, go back and realign everything!
When you reinstall the key switch, check to see that the car will start up, DON’T actually start it, just bump it.
If it doesn’t attempt to start, the arm and lever on the (left side of column) probably is not aligned correctly.
FIX THIS before you proceed on!
 Before you reinstall turn signal cam, replace those 2 springs with the new ones.
We put a dab of grease on the splines before we reinstalled the steering wheel to make it go on a bit easier.
Make sure you tighten it down far enough.
Check the gap between the back side of the wheel and the hub on the column (should be like 1/8″).
Before you put the steering wheel on, make sure you line up the “witness mark” on the wheel with the one on the center shaft.
.

.


