


This is day 5 of a 7 part series on how we created a custom home made center console for a 1987 Buick Regal Grand National.
An inspirational, idea gathering story, that you can use to think about creating your own, if you so choose. Or to just admire what we did to our Buick GN!
Within the how to steps below are details of some of the (non-stock) custom touches we added.
.
This is an ongoing series about creating a new custom center console unit for a Buick Grand National.
See the steps taken below to create (will be linked after publication).
.
Find the first part (thoughts, plans) here:
Custom Center Console for Buick Grand National (1 of 7)
Find the second part (specs, parts, building template mockup) here:
Custom Center Console for Buick Grand National (2 of 7)
Find the third part (wood size choices & the weight differences) here:
Custom Center Console Buick Grand National (3 of 7)
Find the fourth part (prep work, cut out parts) here:
Custom Center Console Buick Grand National (4 of 7)
Find the fifth part (building the console) here:
Custom Center Console for Buick Grand National (5 of 7)
Find the sixth part (wiring up all the lights) here:
Custom Center Console for Buick Grand National (6 of 7)
Find the seventh part (installing the console) here:
Custom Center Console for Buick Grand National (7 of 7)
.

.
TIME FOR COMPLETION:
2 hours to design & mockup console cardboard templates
about 8 hours (in steps, total) to build & wrap & finish the console
2 hours test fitting parts, in/out of car
2 hours to wire up lights, gauges, relays & switches, etc.
(& about 10 hours writing up all these articles, taking photos & formatting all the stories!)
Note: This will probably take the better part of the weekend to finish, but it’s not constant work. There’s a lot of steps to perform, in and out of car test fits, assembly, and gluing of parts together (which takes time to dry before you can proceed). So plan on starting this project, letting the glue dry while you go do something else, then come back to it for the next steps. Repeat often until done.
[we actually built the entire console over the course of 1 week, taking our time, step by step, thinking about exactly how we wanted to accomplish this project. Not to mention transferring our logic, ideas, and the actual process of making it onto these articles for you to enjoy]
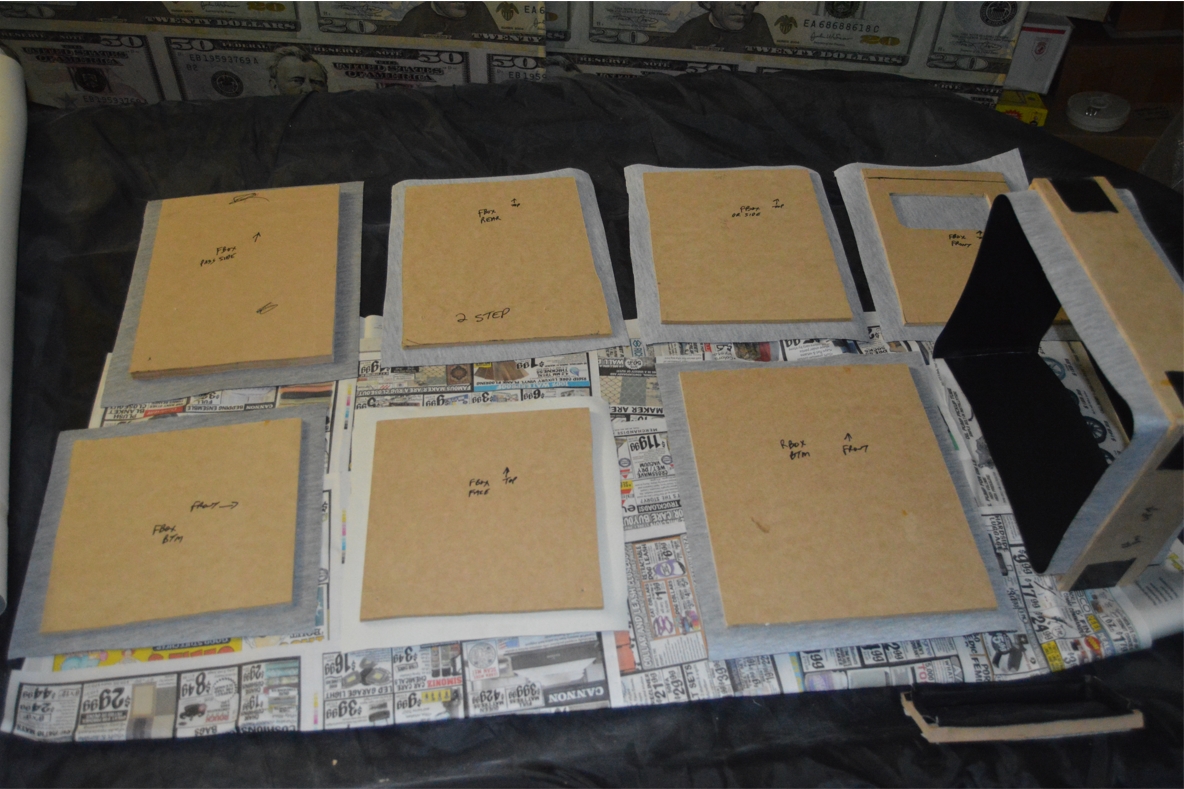
Note: we predrilled all of the screw holes, and then countersunk them (slightly below the surface of the MDF). They were then filled with putty resulting in a smooth surface, so they wouldn’t show thru the vinyl outer covering. The screw ends you see protruding thru the wood, we left them in for these photos so you can see how we did things, for the final product we grinded them down flush with the board.
All of the wood pieces were both glued & screwed (where possible) together. And sometimes had duct tape as an extra support method.
.
Find the parts list here (was listed in Day 2).
Find the tools list here (was listed in Day 4).
.
Note about trimming the vinyl material to the console:
Since we didn’t want to have seams (shown), or have to sew up the vinyl (between the black and gray sections), we had to come up with a creative way to blend these 2 materials onto the console, making it work, but also making it look “right.”
This made it a bit challenging, that’s why the different parts are built (and wrapped with the vinyl) separately, then it was all assembled together.
The sides (with all of the braces and supports) was wrapped with the black (and tucked to the insides of the console).
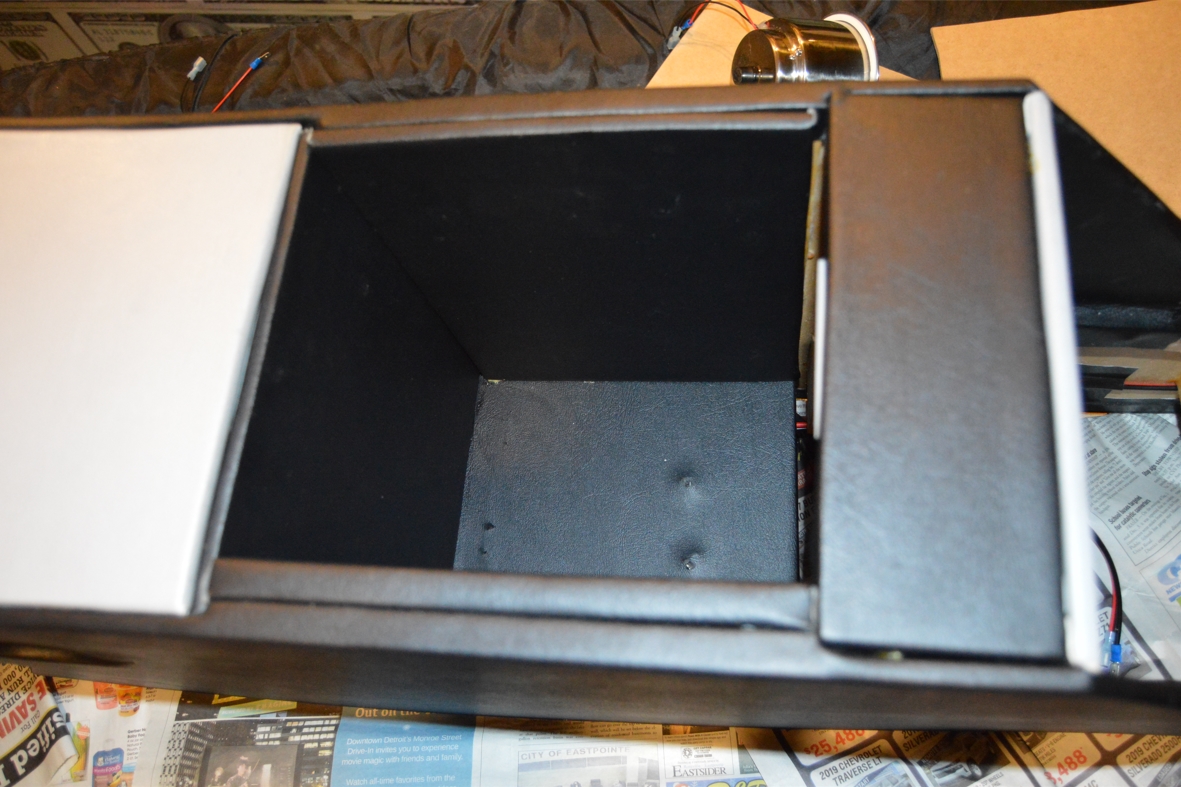
Then the top cover areas (the shifter plate area & the rear top part), along with the console boxes, and gauge panel, are basically shoved down into the console in their proper place.
This made a nice looking transition everywhere between the 2 different colors (and you don’t actually see any unusual looking seems between the vinyls, they just kind of end where the next piece begins – and none of it will come loose or undone since they are below each added panel and squished between the various sections).
.
HOW TO:
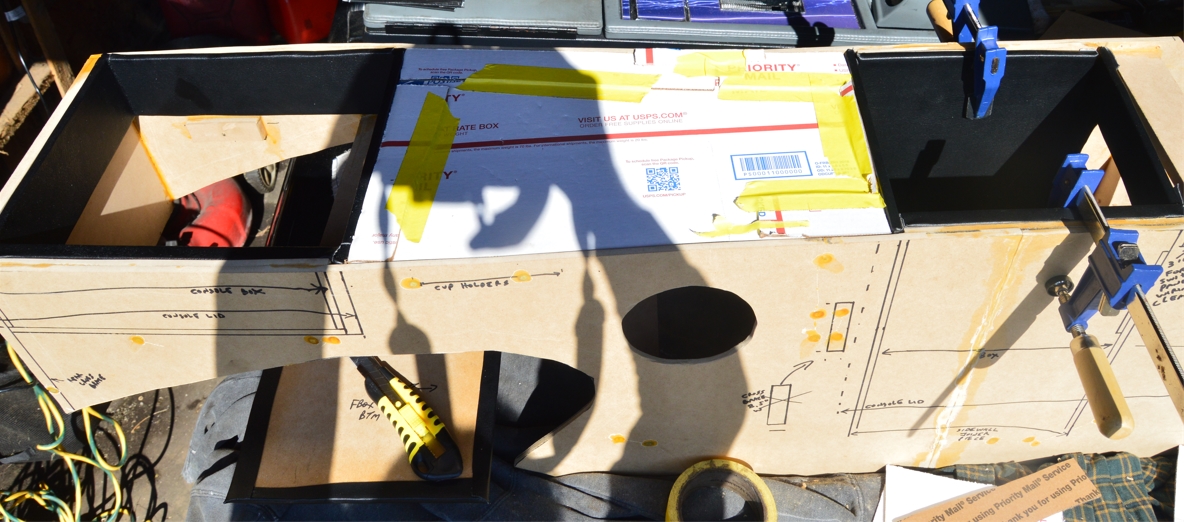
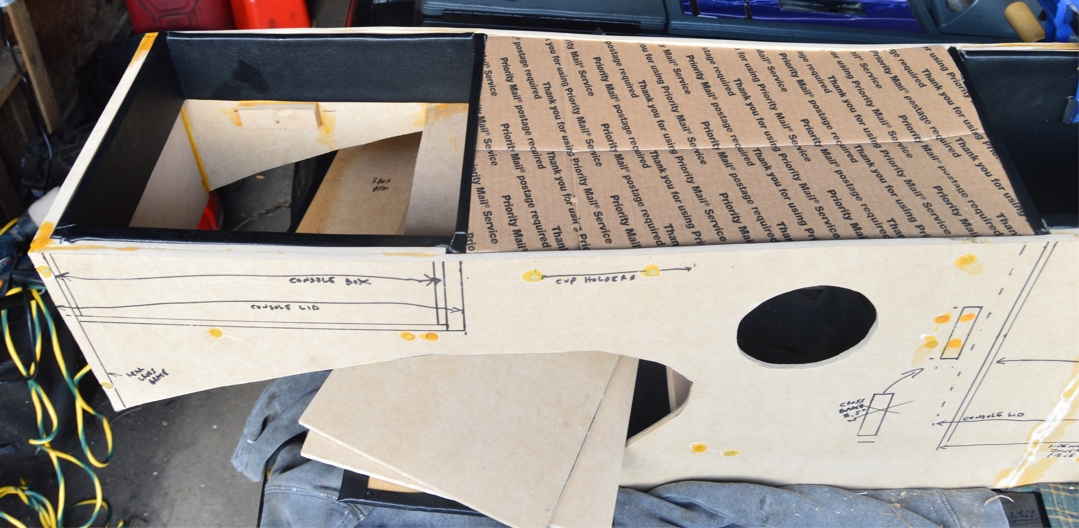
(we made the basic overall shape of the cardboard template mockup a few days ago, today continues on from there)
[note: the new console will be 1/2″ taller, on the (outside left & right) sides, than the OEM version is, giving it more of a raised edge/lip than the stock unit has]
1. set the template onto your MDF, trace, cut out.
Do this twice (once for the driver side, once for the passenger side).
Secure the “joiner pieces” to the console sidewalls. (glue in place)
(you will have to let these fully dry before you can proceed)
.

.
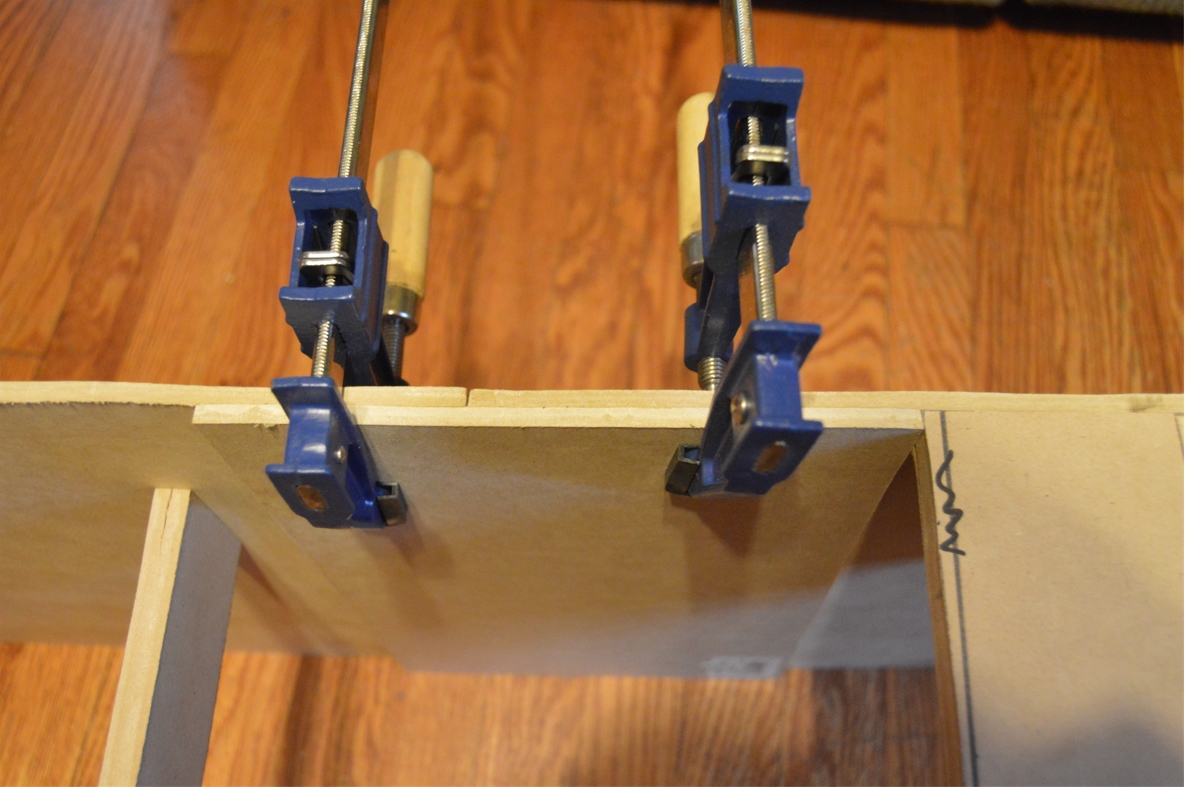
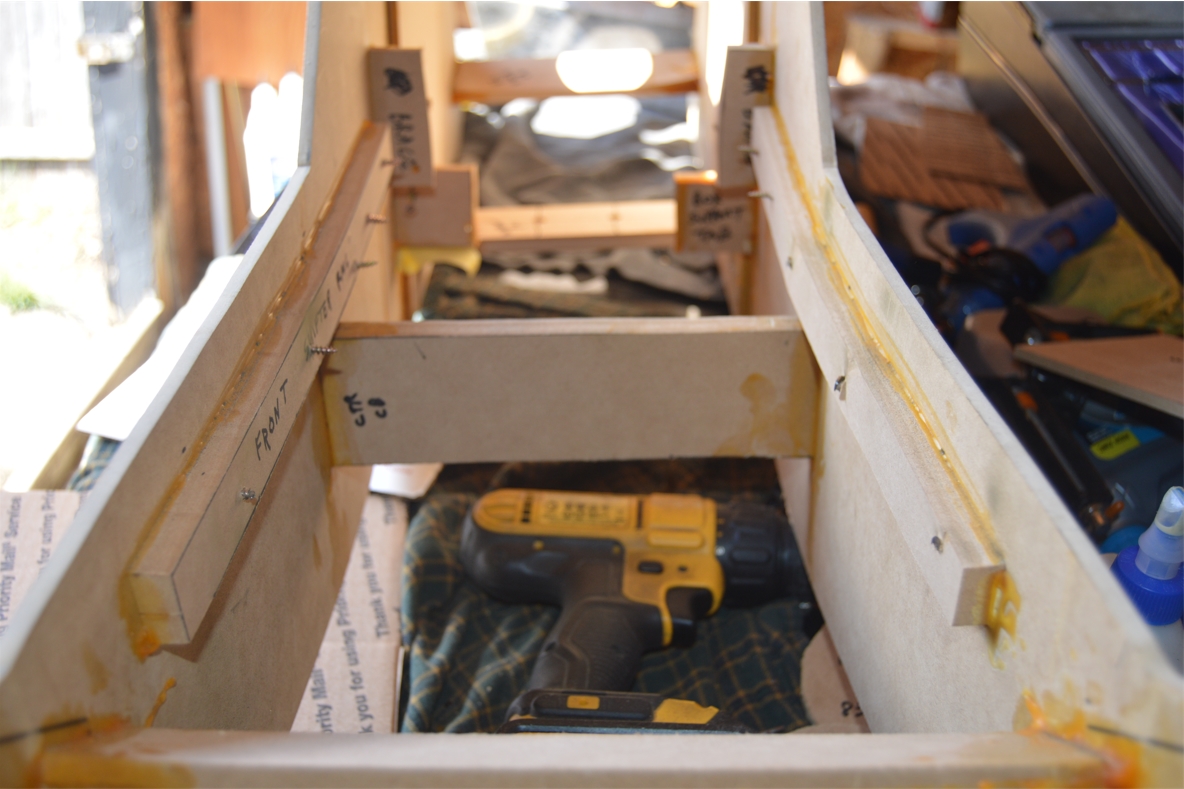
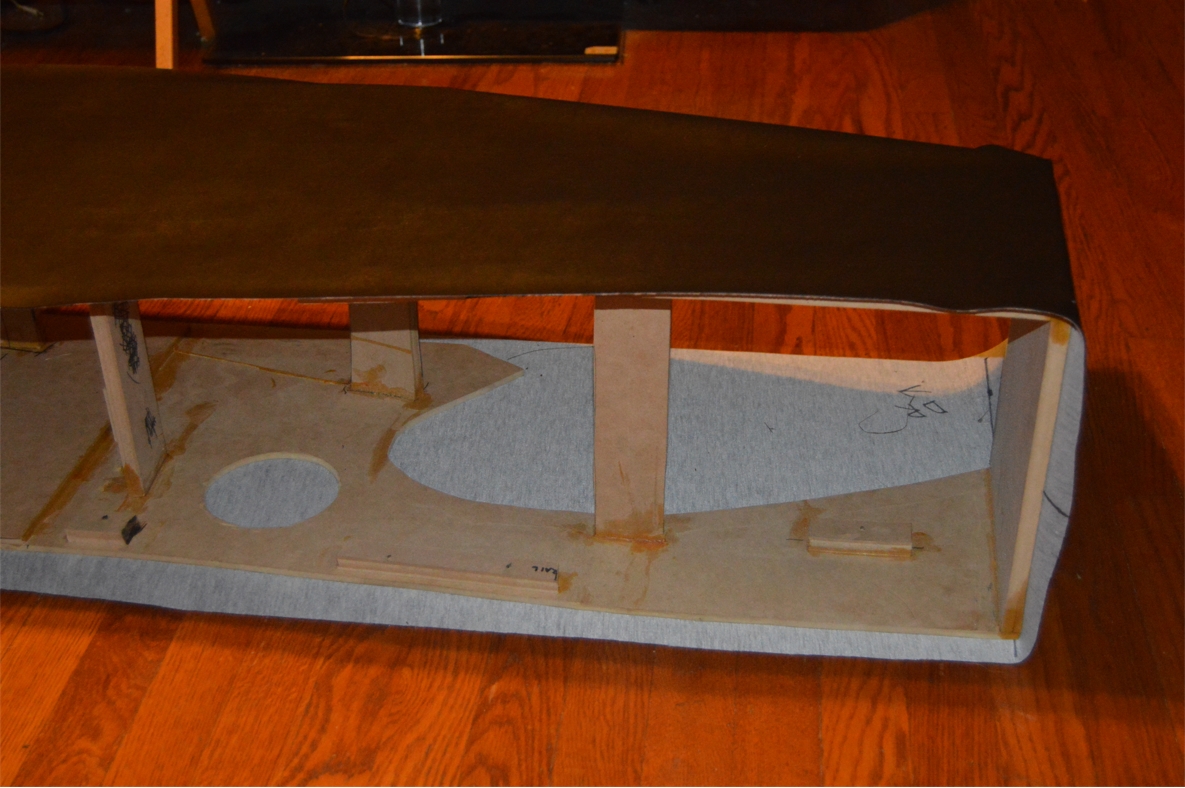
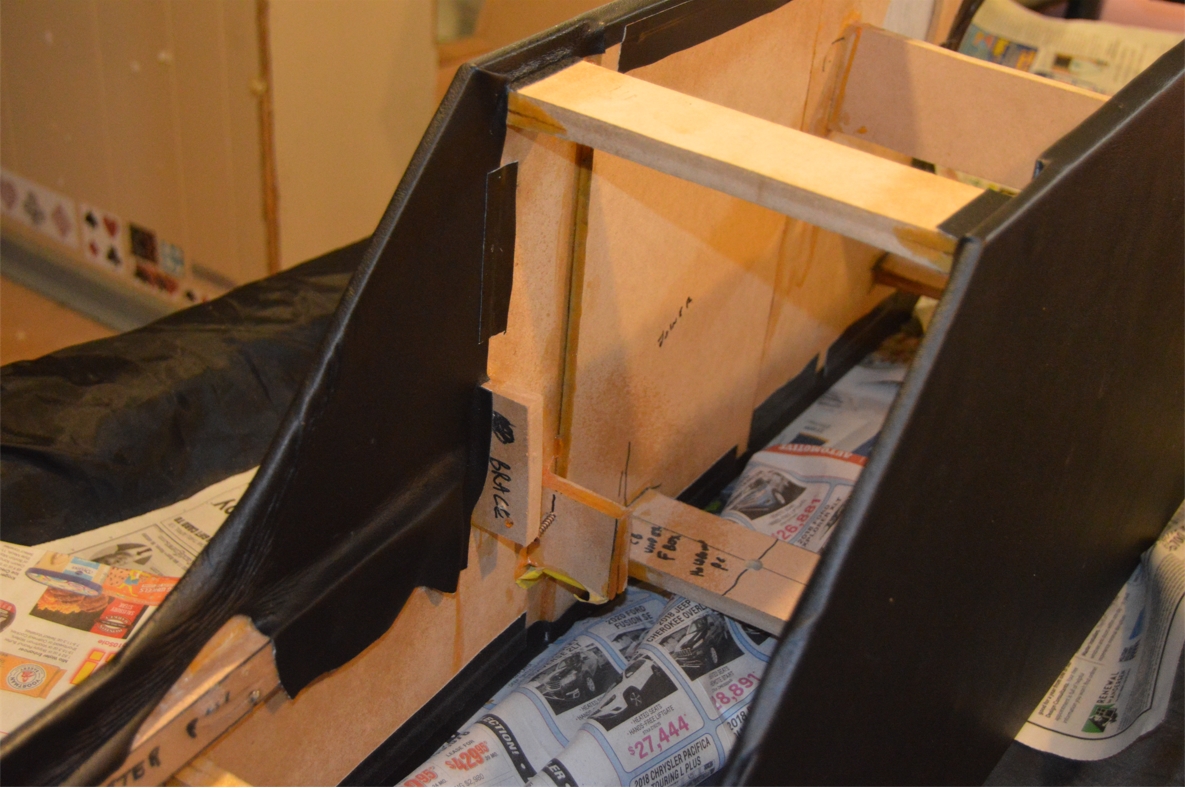
2. Attach 3 (of the 4) main cross support pieces (the front wall & the 2 middle pieces) between the sides.
(the front & rear of the new unit will be 10.5″ wide; the middle of the unit will be 9″ wide, which accommodates the section between the seats)
(the middle support braces are set into place at 24″ from the front, then 16″ back from that point)
(all of the support braces are [vertically] mounted to the sides at roughly the center point of the height of the sides, top to bottom, which allows them to clear both the floorpan of the car and the top side of the console)
.


.
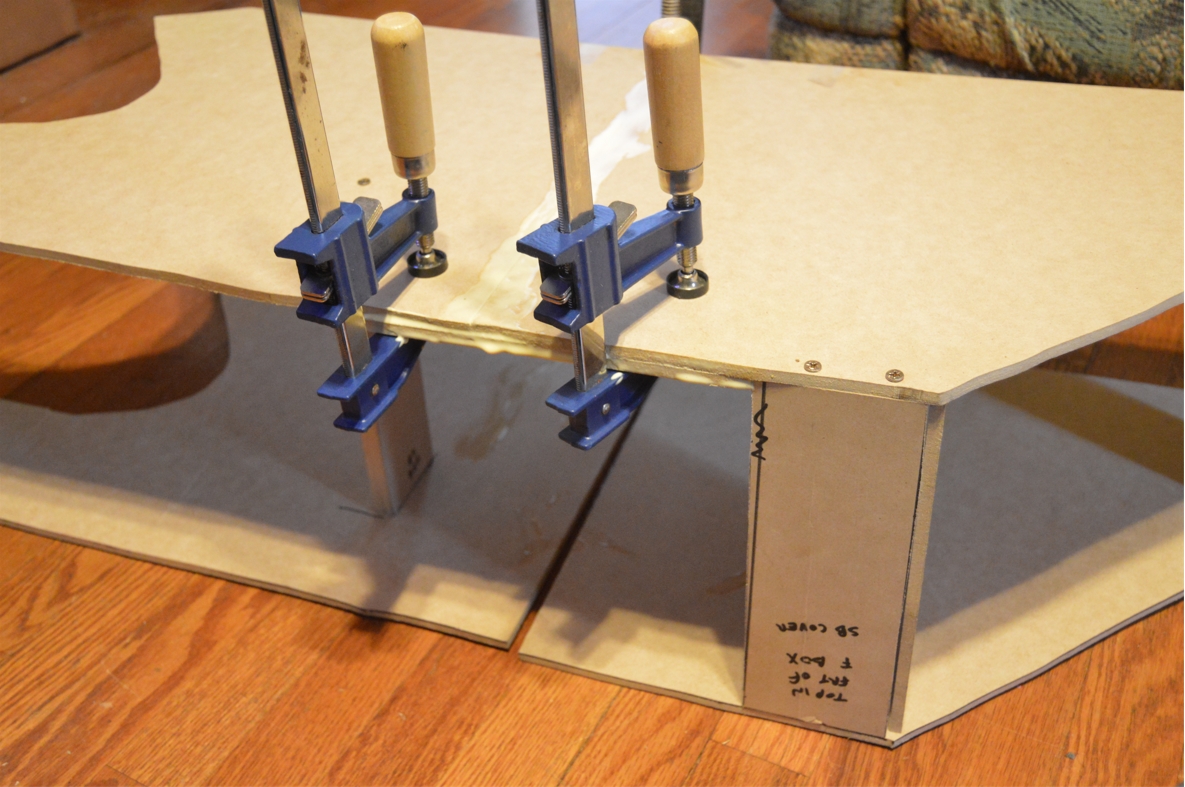
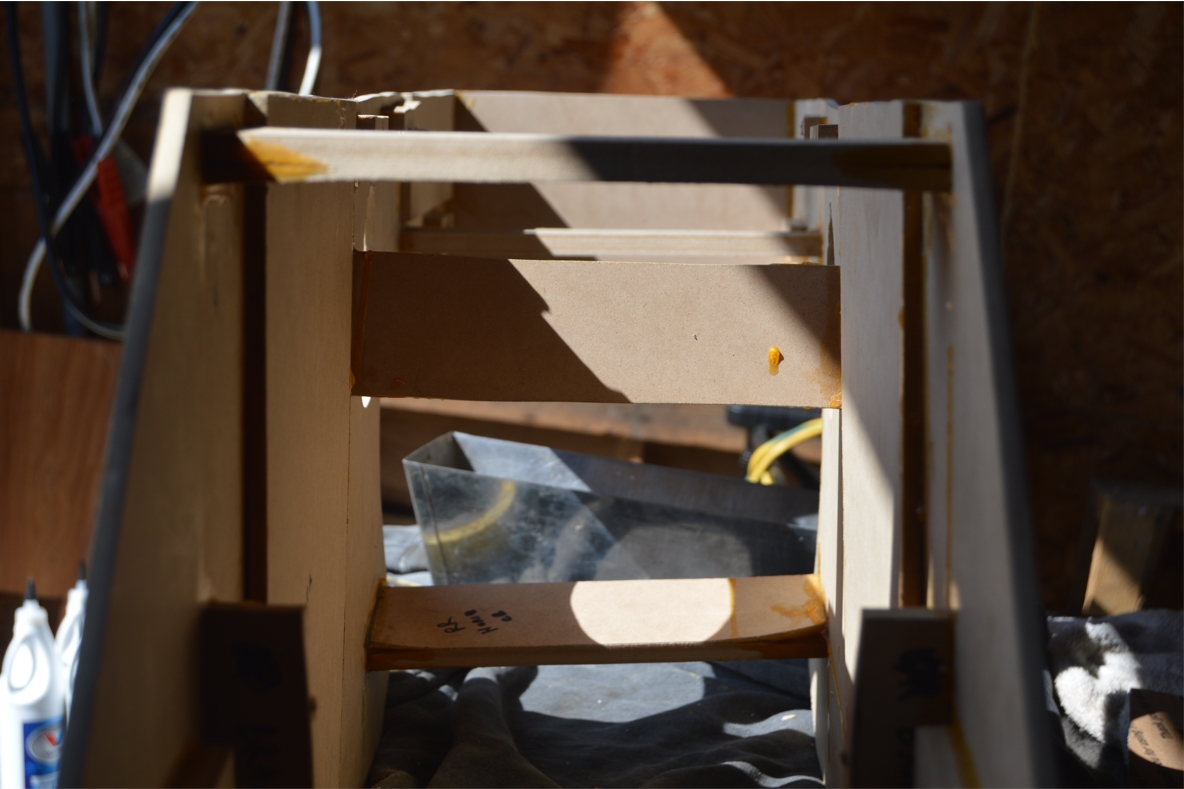
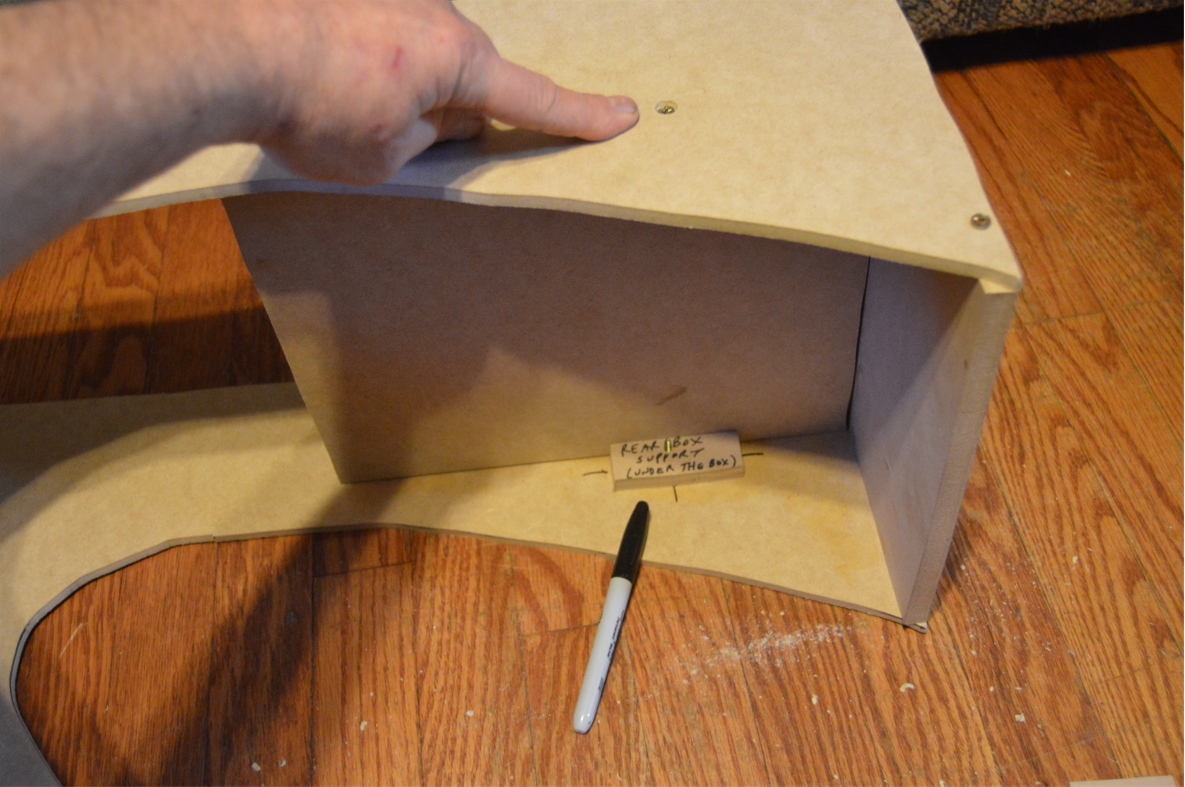
3. Attach the rear cross brace. This is also used as the back panel on the console.
A (horizontal sitting) cross brace piece is added onto the rear section, at the point where the floor meets the seats. This piece aids in supporting the (rear portion of the) console unit in place (and makes sure the console doesn’t slip down onto the floor).
This piece is 3/4″ longer than the center 2 cross braces, helping expand the rear of the console to get to its final dimension of 10.5″ wide.
A similar piece is set at the front, and is approximately underneath the front of the radio.
This piece is also 3/4″ longer than the center 2 cross braces, which does the same thing as the above one does.
[set the console in the car, then set the above 2 pieces on the trans tunnel, mark the locations of these 2 pieces on the INSIDE of the sidewalls. Remove all. Mount the 2 pieces onto the console about a 1/8″ LOWER than the marks you made – this will raise up the console by the same amount, making the console rest on these 2 braces, instead of the console itself]
.

.
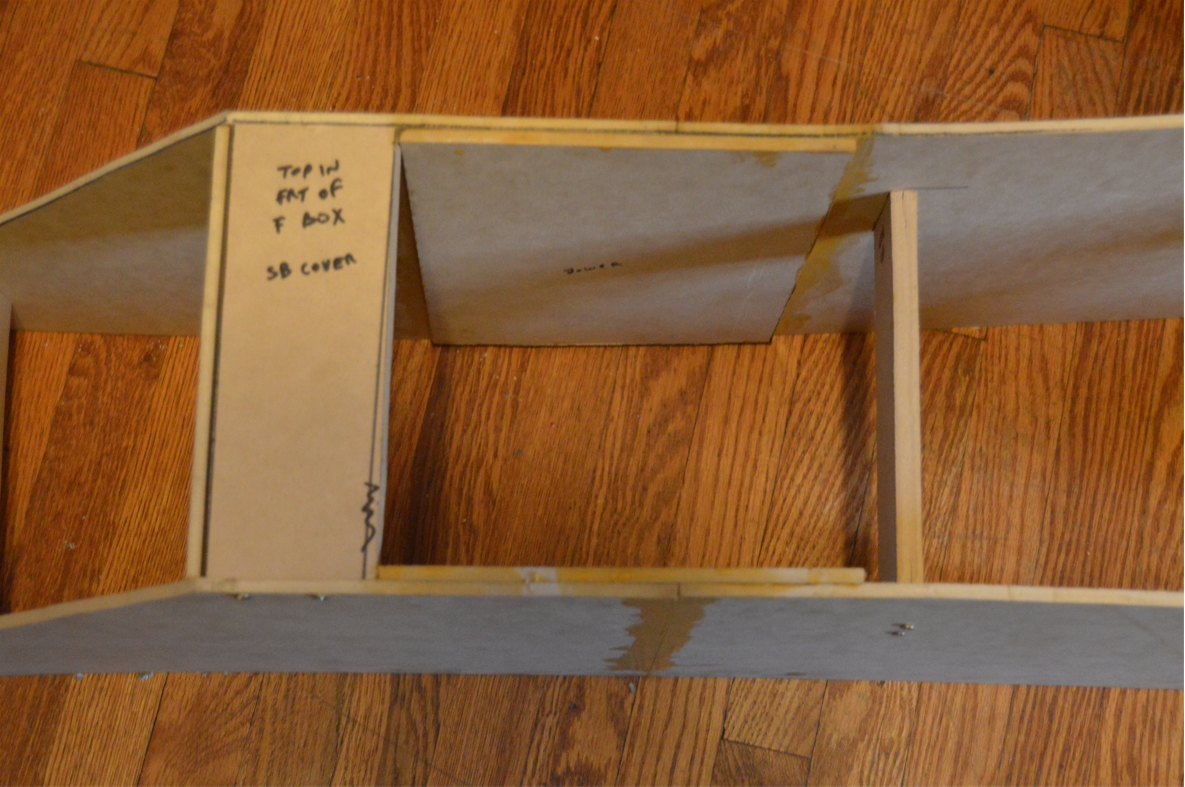
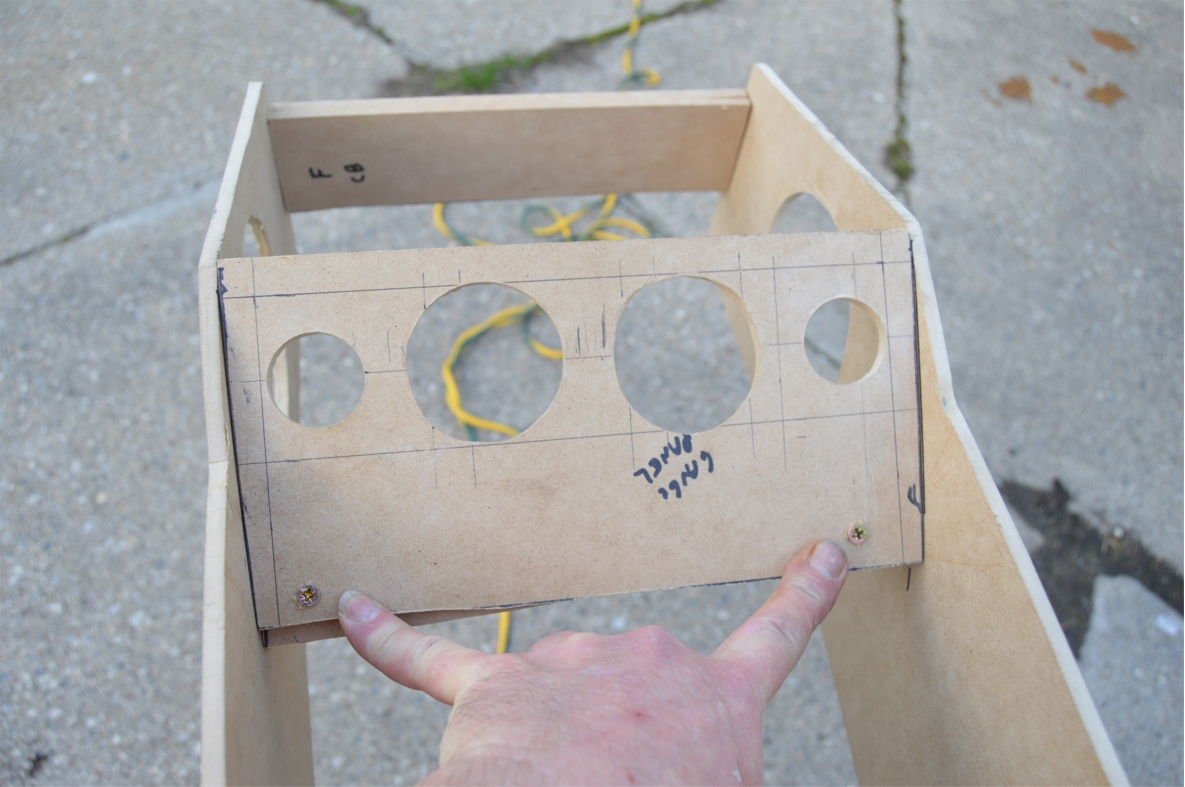
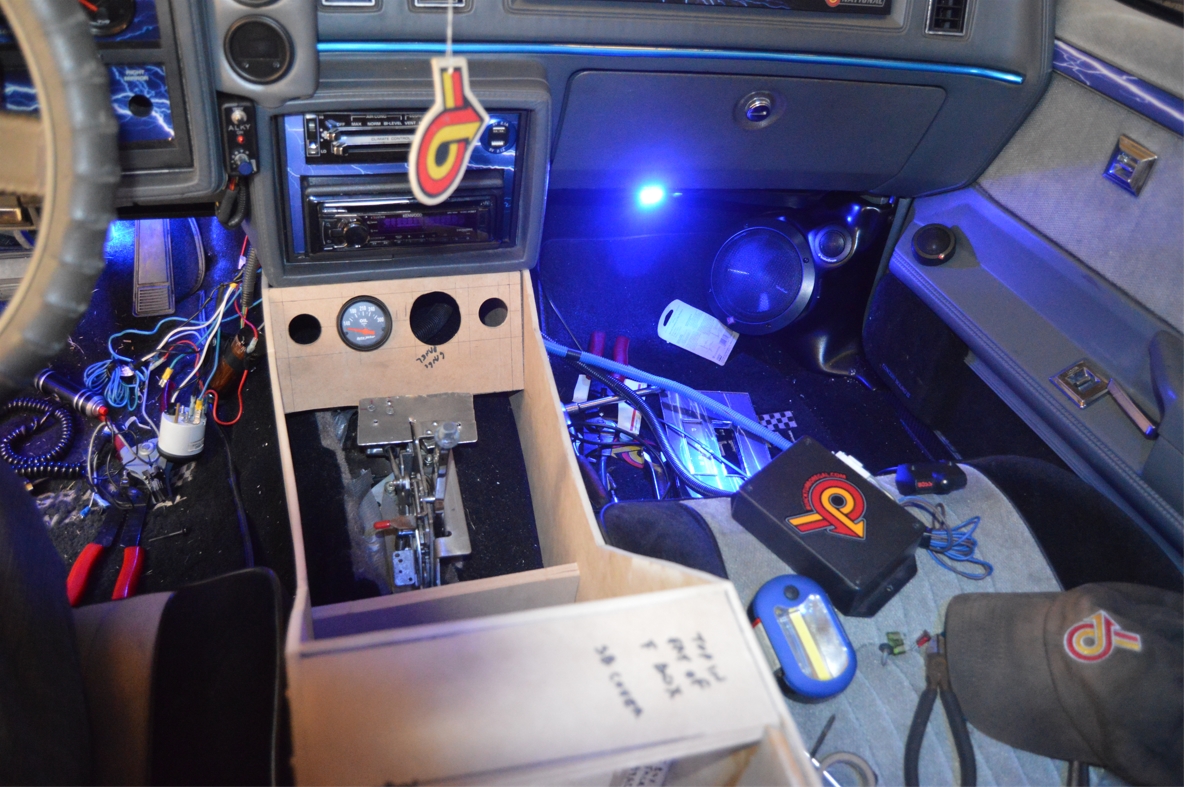
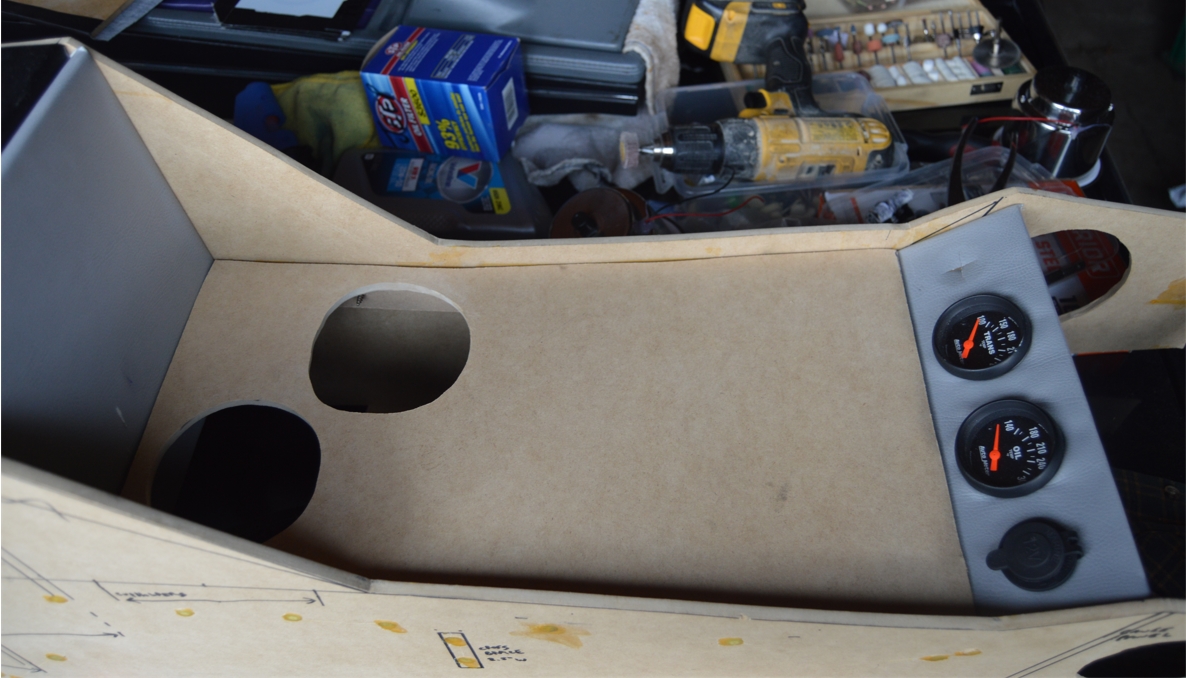
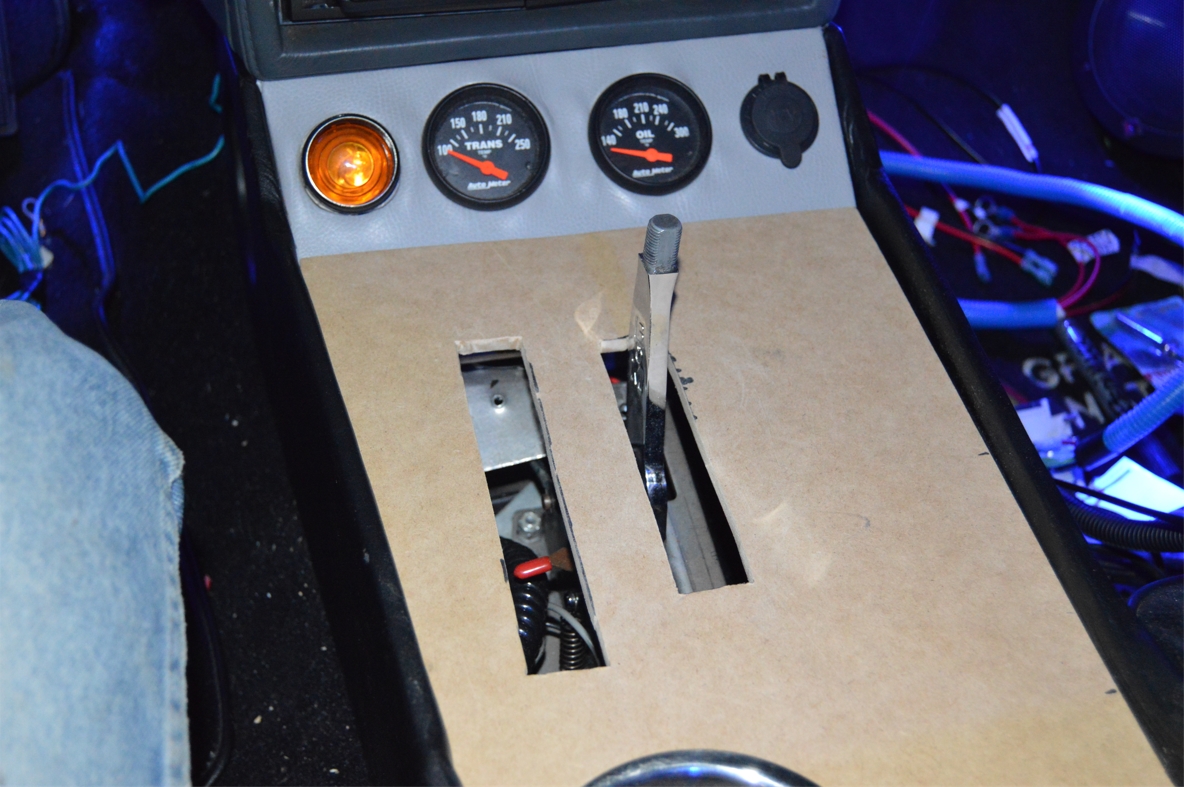
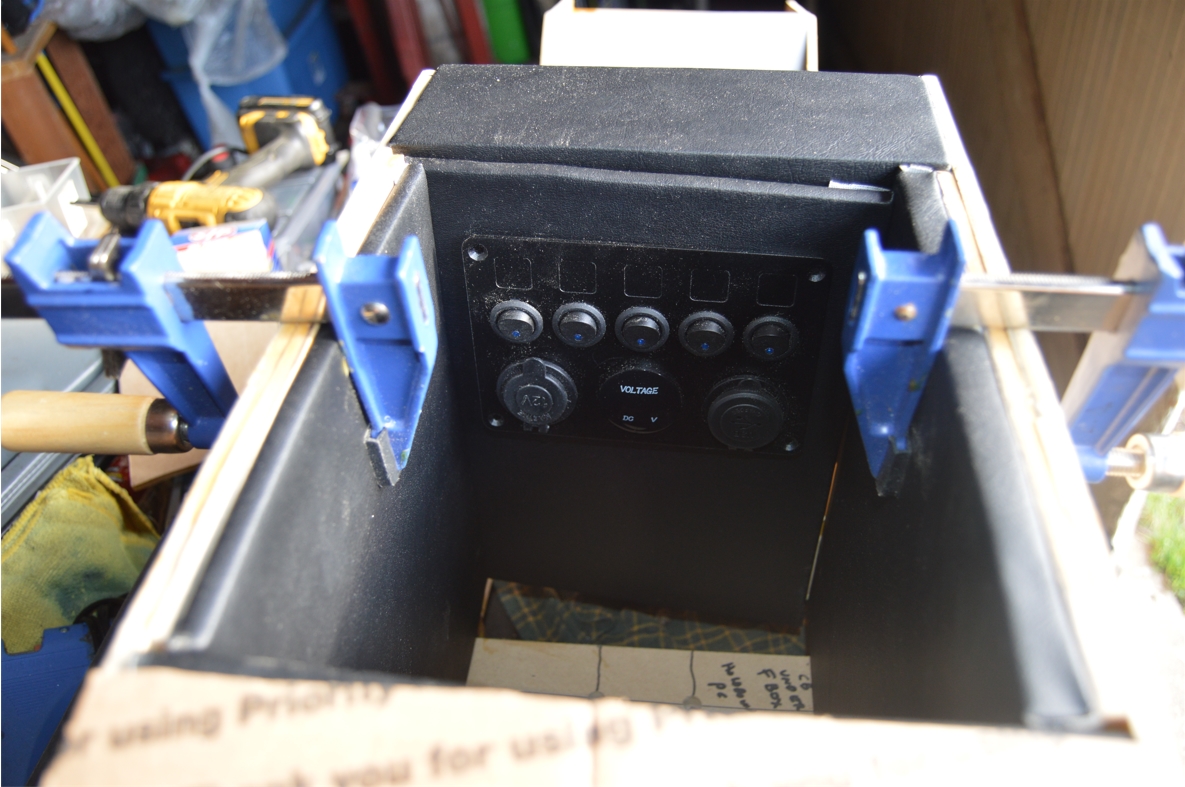
4. Temporarily mounting the front gauge holder panel is next.
Secure the gauge panel support piece (permanently) in place on the inside of the sides of the console.
(we set the console in place in the car to figure out the exact angle that we wanted the front gauge holder piece to be mounted at)
This gauge panel is temporarily set on top of the cross brace (and screwed in, from the front side, at the very bottom, which will be how this panel mounts permanently when done).
.

.
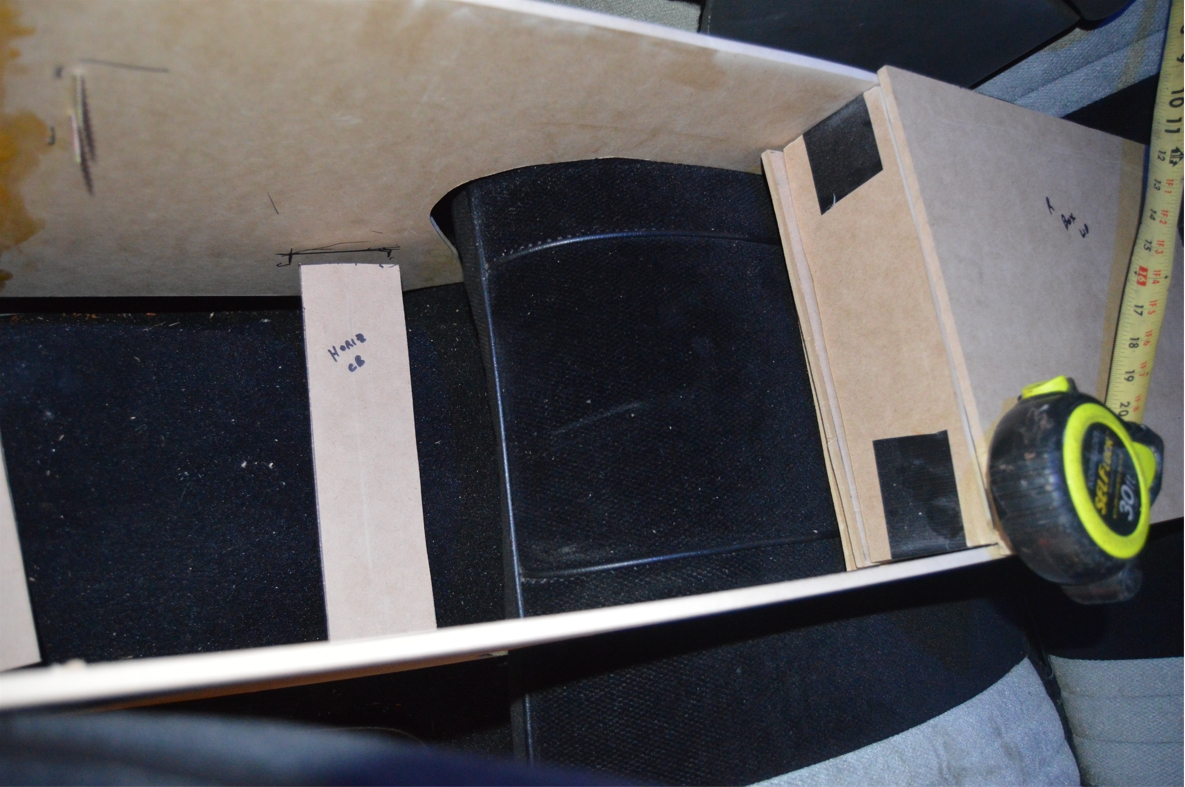
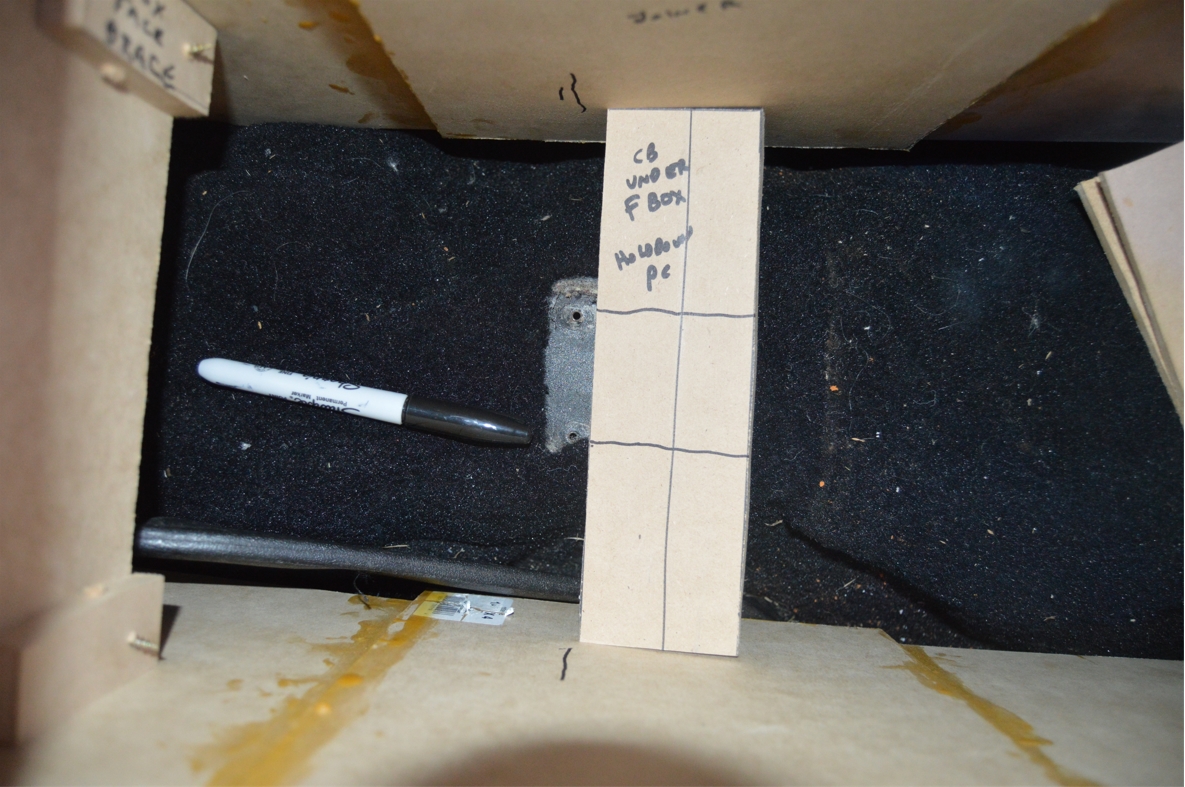
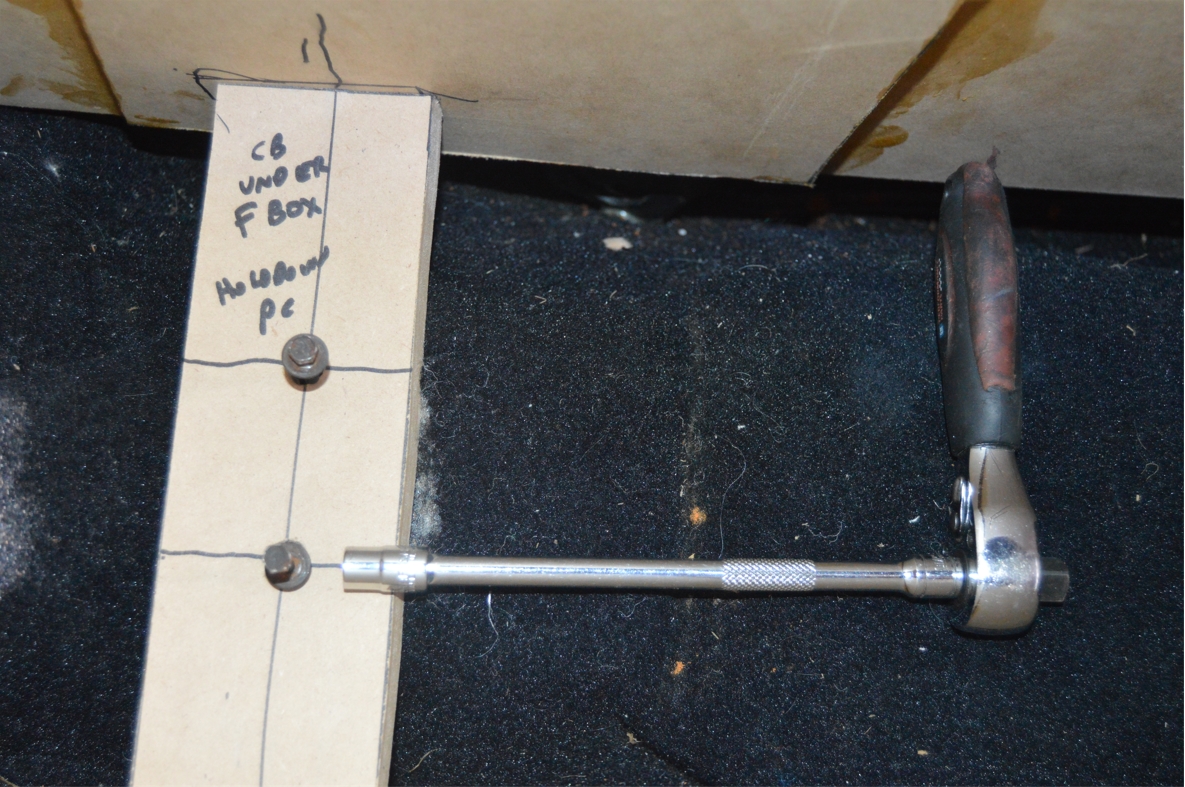
5. Set the entire console in place. Set the front console underneath support brace on top of the OEM floor mount bracket for where the original console was attached to the car (using the 2 bolts found in the console box).
2 holes will be made in this piece, to accommodate the bolt holes for securing the console down.
Mark the proper location for them, then drill out using a 1/4″ drill bit.
Set the piece back in place and temporarily attach the 2 bolts thru it to make sure the piece is accurate & fits in the proper spot.
Mark where this new piece fits along the (inside) of the console, for reference.
Place the console hidden box you made previously, on top of this brace piece, and into the proper spot where it will be mounted permanently (the rear of the box should be approximately where the back of the seat is).
Mark the location of this box onto the inside of the console.
Remove the console from the car, place the brace piece where it belongs on the console, and attach it permanently (we used screws, putting them inward from the outside of the console).
.
.
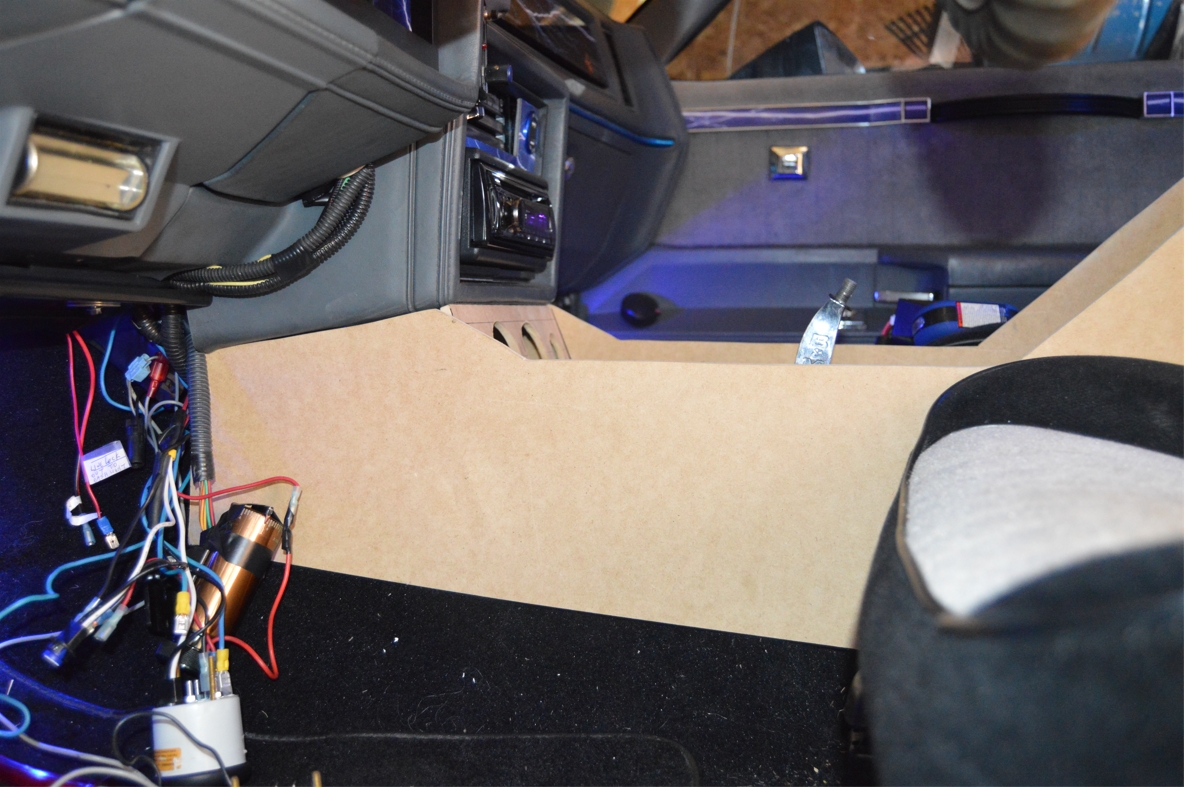
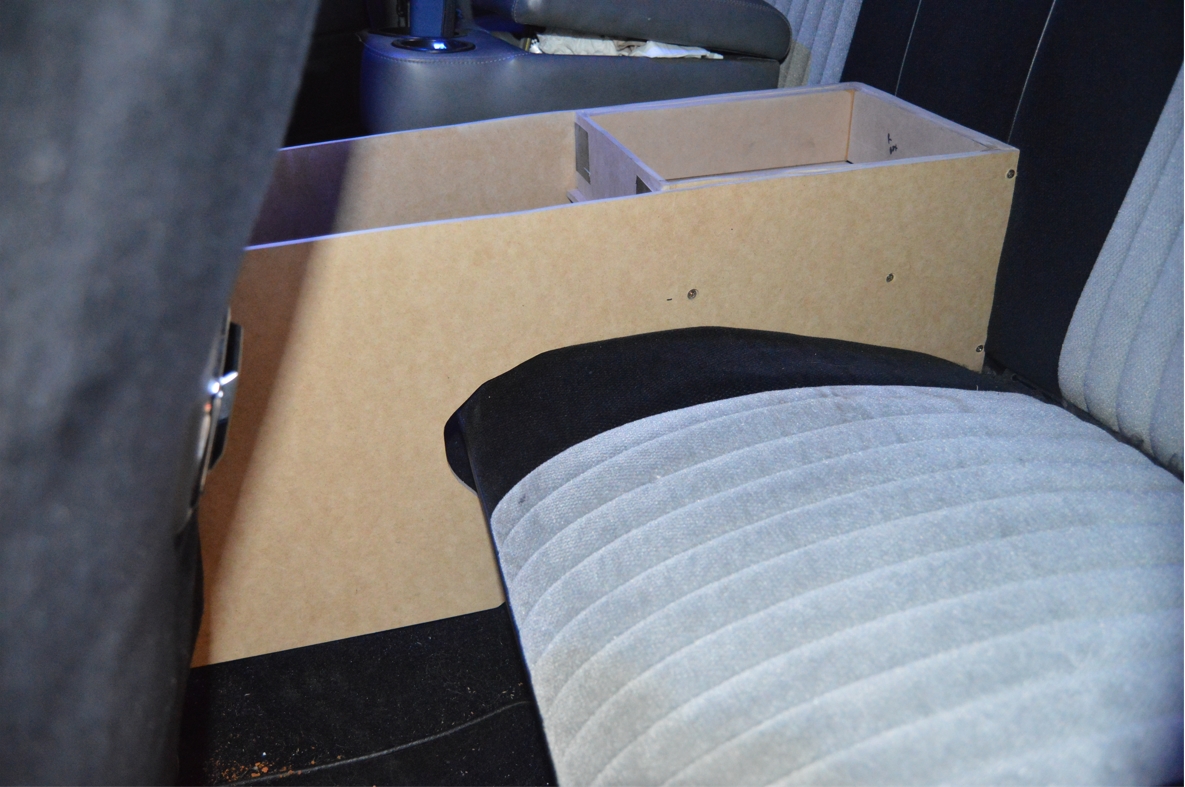
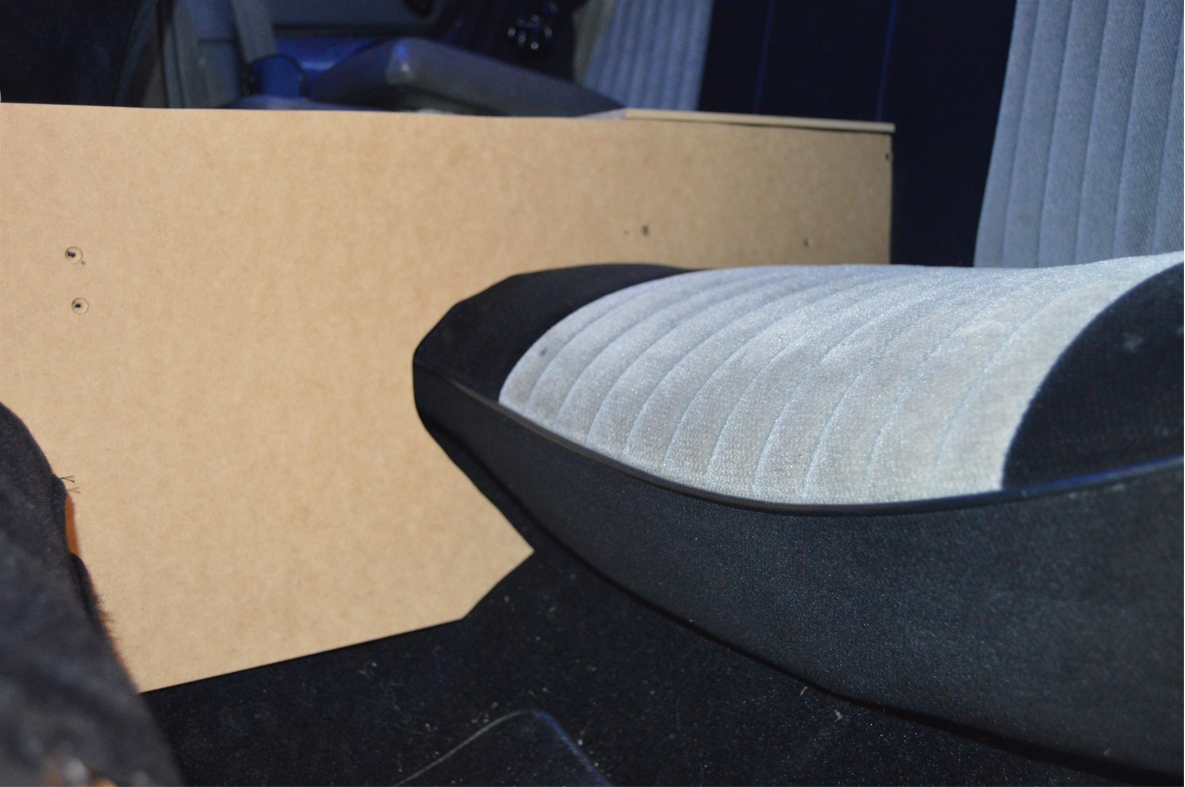
TEST FITTING THE REAR SEAT (LOWER) CUTOUT AREA TO MAKE SURE IT FITS OK & LOOKS GOOD:
.

.
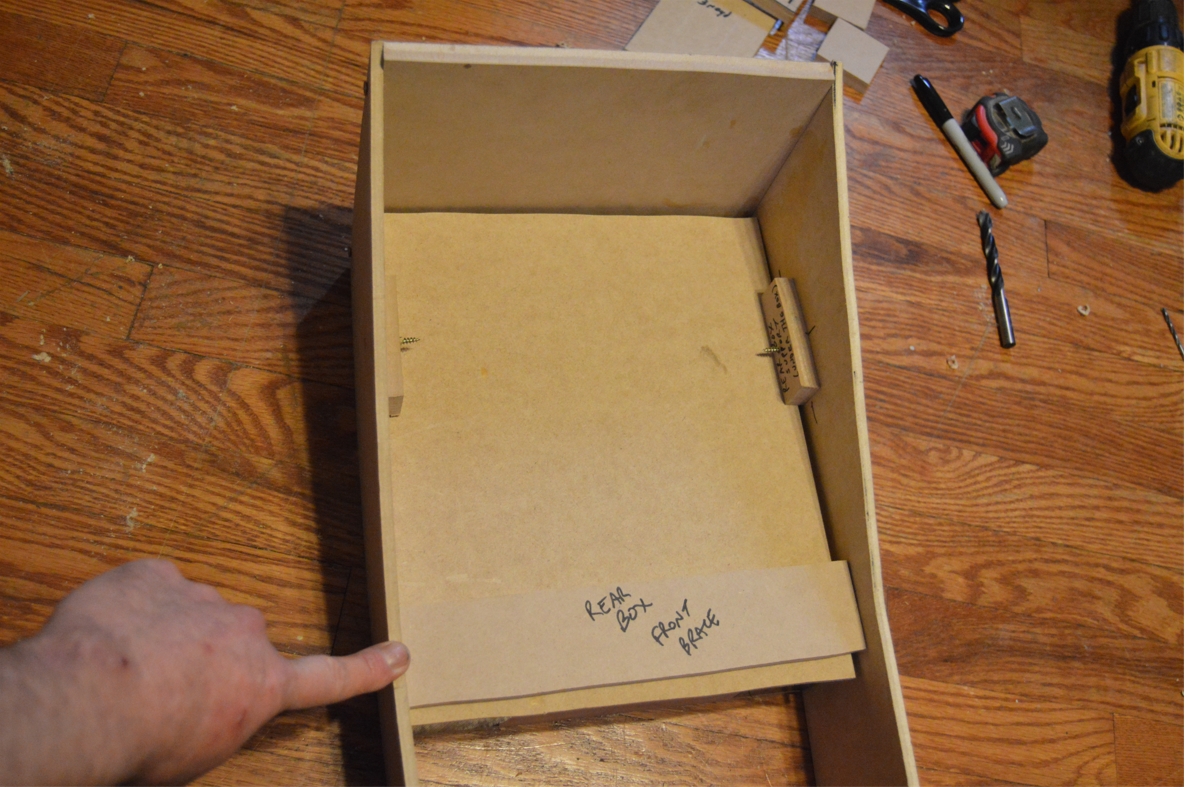
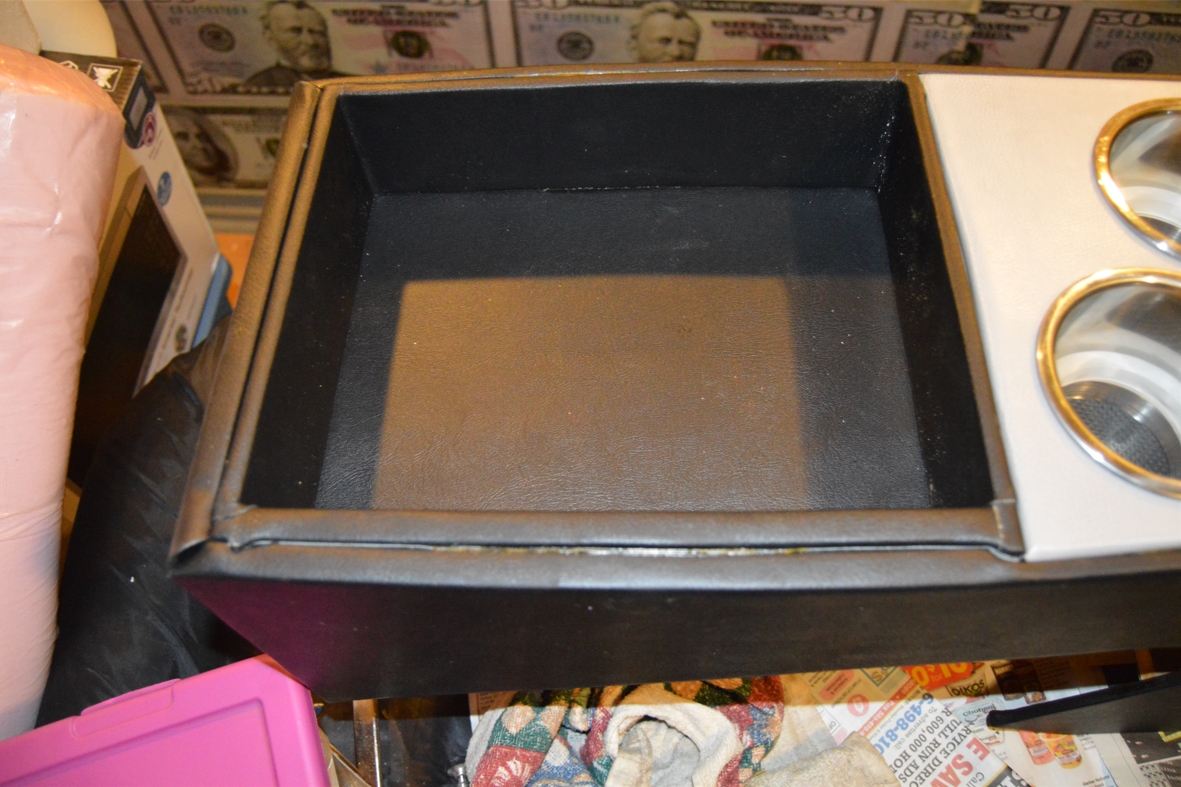
6. Place the front console box into its proper spot within the console (using the marks you made above).
set the 4 console box attachment braces in place, in front of the 4 braces that are already attached to the box.
These new braces will secure the box (later) to the console (via a screw thru each brace).
Permanently attach the 4 console box attachment braces to the sides of the console.
DO NOT FINAL ATTACH the box to the console yet, just get it ready to do so, for a later point in this build.
Also flip the console over, and mark, thru the 2 holes you made for securing the console to the floor, onto the bottom of the console box. Drill these 2 holes out with a smaller bit.
Place the rear console box into its proper spot within the console.
Attach the rearside underneath support braces into their proper spot and secure (screw them in from the outside of the console sides).
DO NOT FINAL ATTACH the box to the console yet, just get it ready to do so, for a later point in this build.
.
.
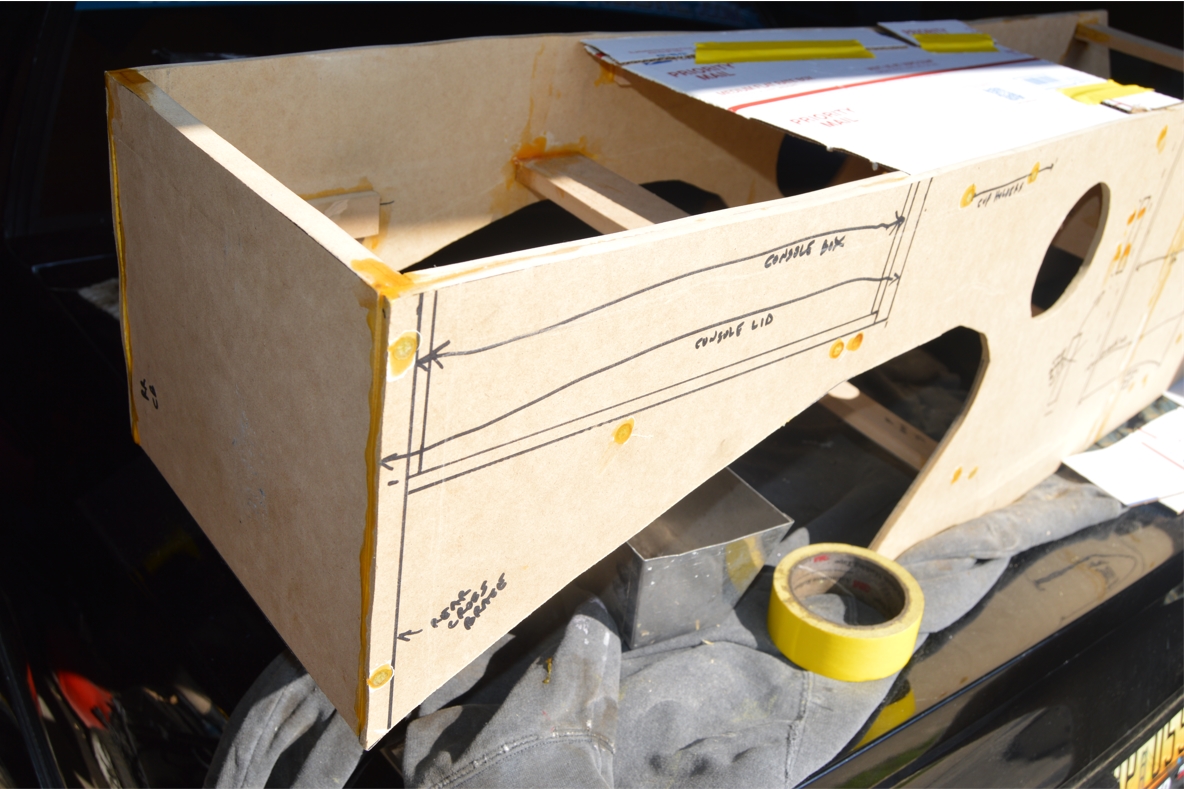
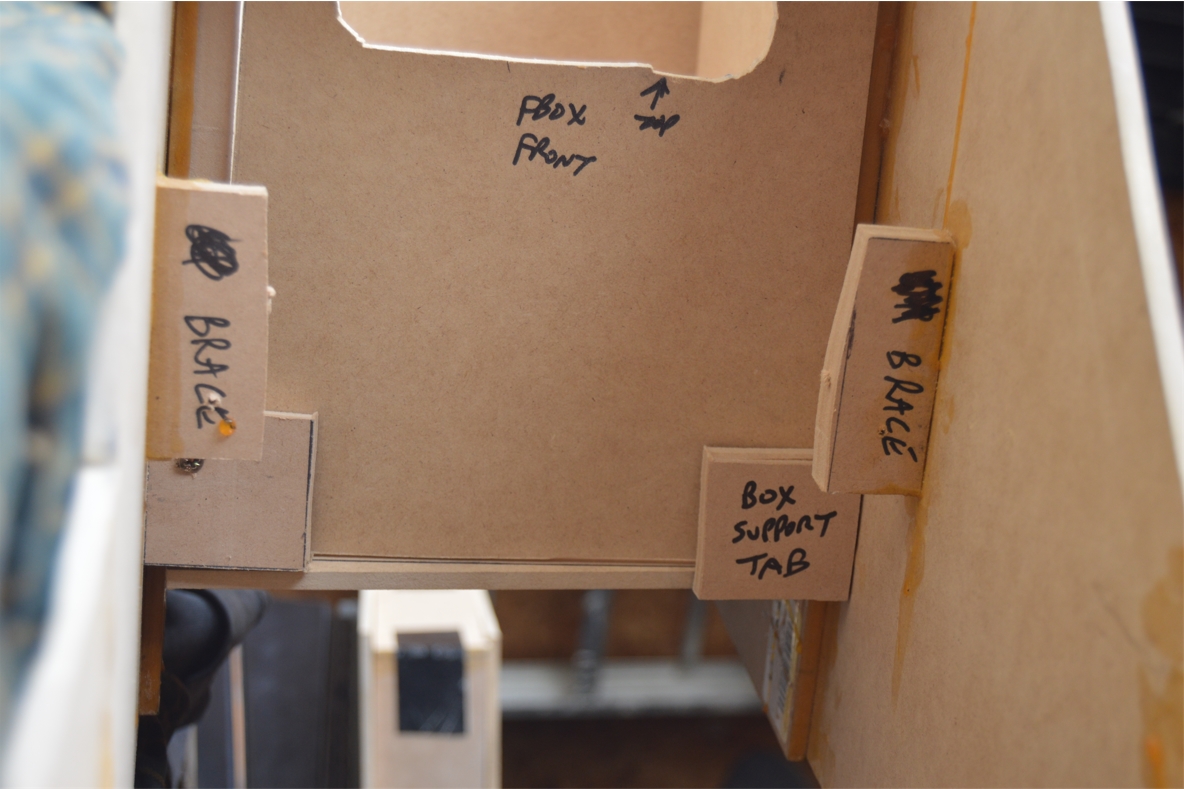
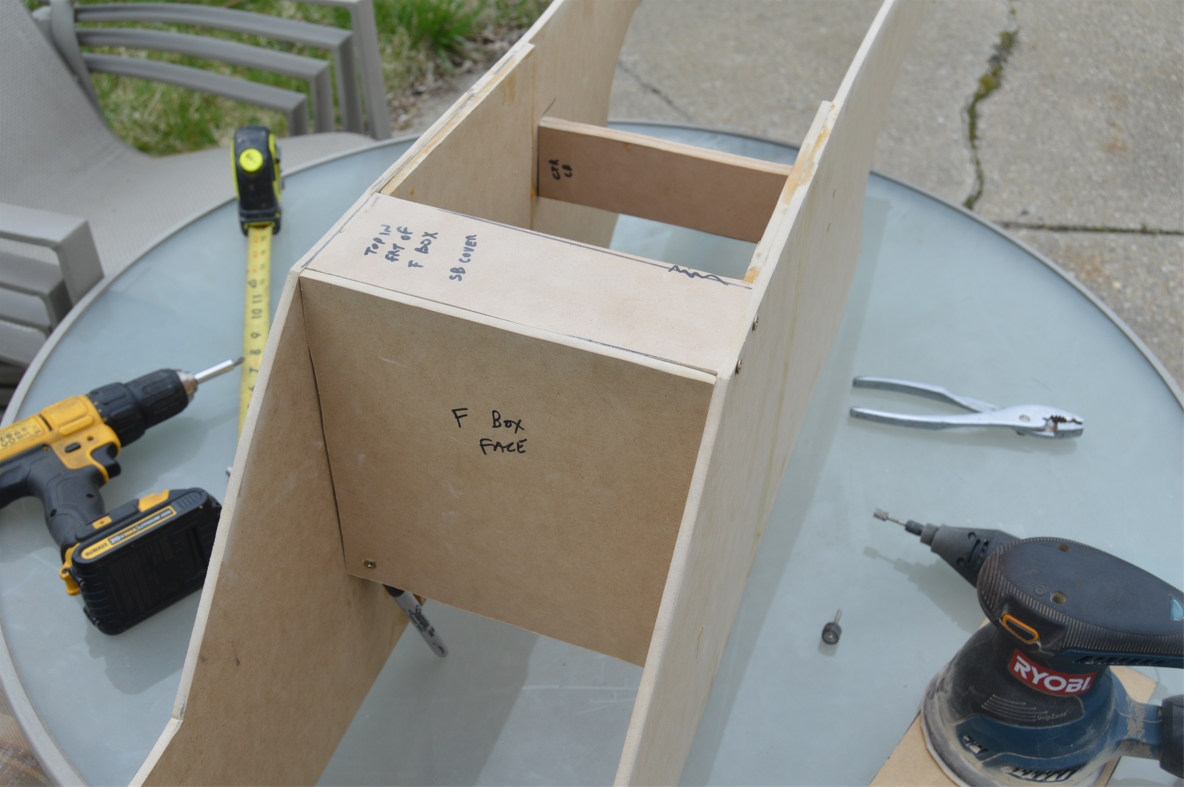
7. Set in place the console box front finishing panel (front box face). We mounted this piece straight up and down. Set the console box front finishing panel support brace in place, underneath (on the backside) and near the bottom of the finishing panel. Secure the support brace to the sides of the console.
Temporarily, mount the finishing panel in place (we used 2 screws, secured from the front side of the panel into the brace) onto the support brace (these screws will be how this piece mounts permanently in place, after it’s wrapped with the vinyl).
.

.
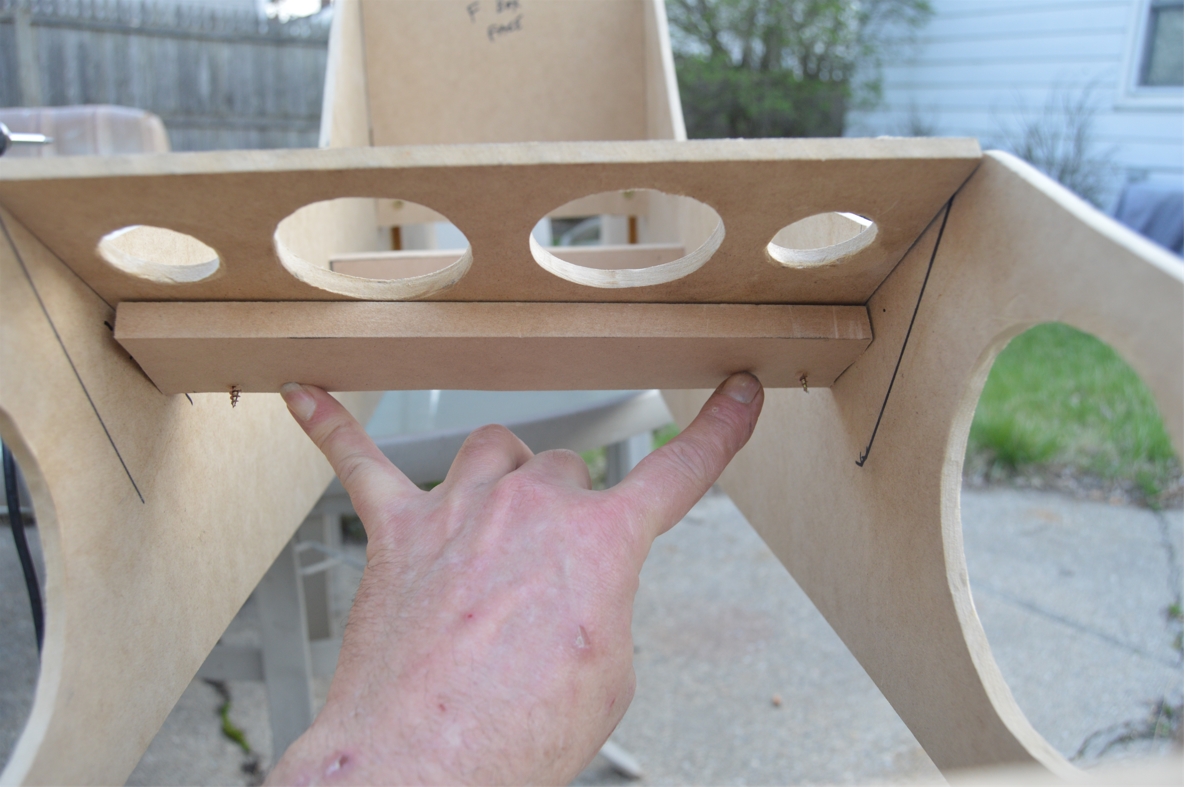
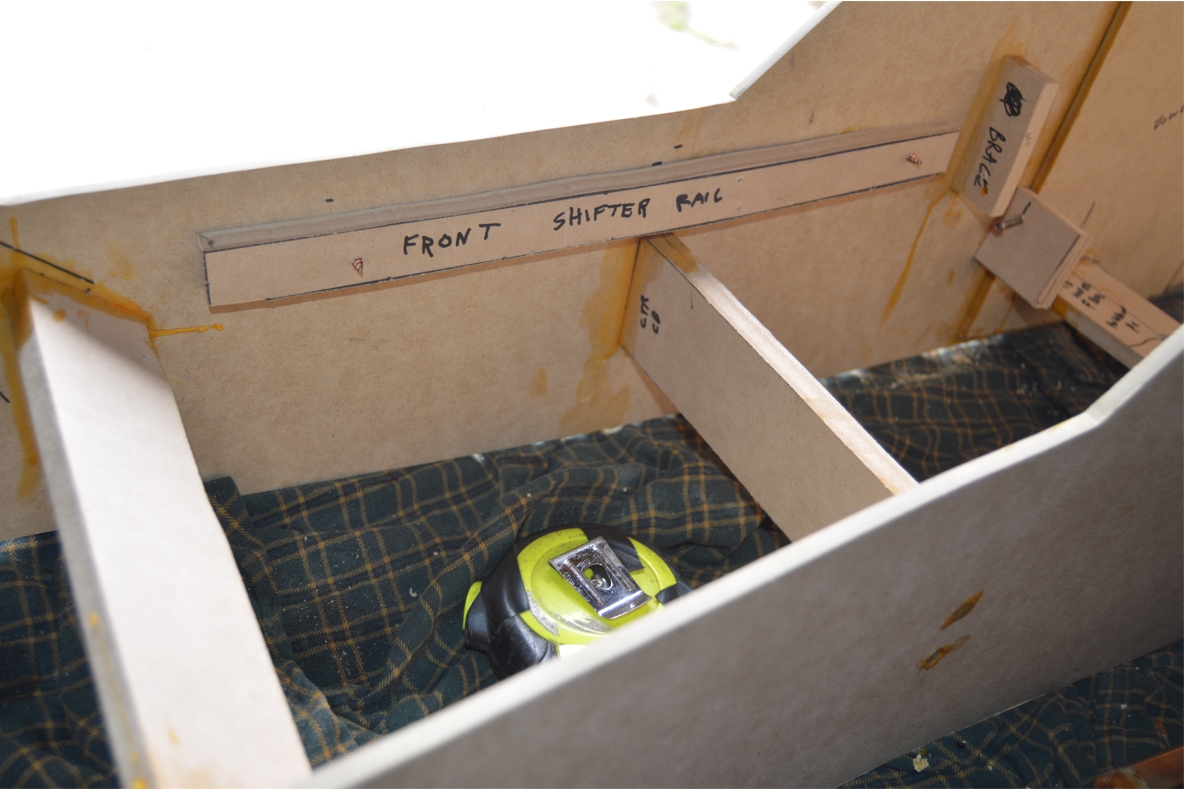
8. Secure the 2 shifter plate rail braces in place. On the INSIDES of the console, 1″ from the top. Center them between the gauge panel and the front of the console box.
.
.
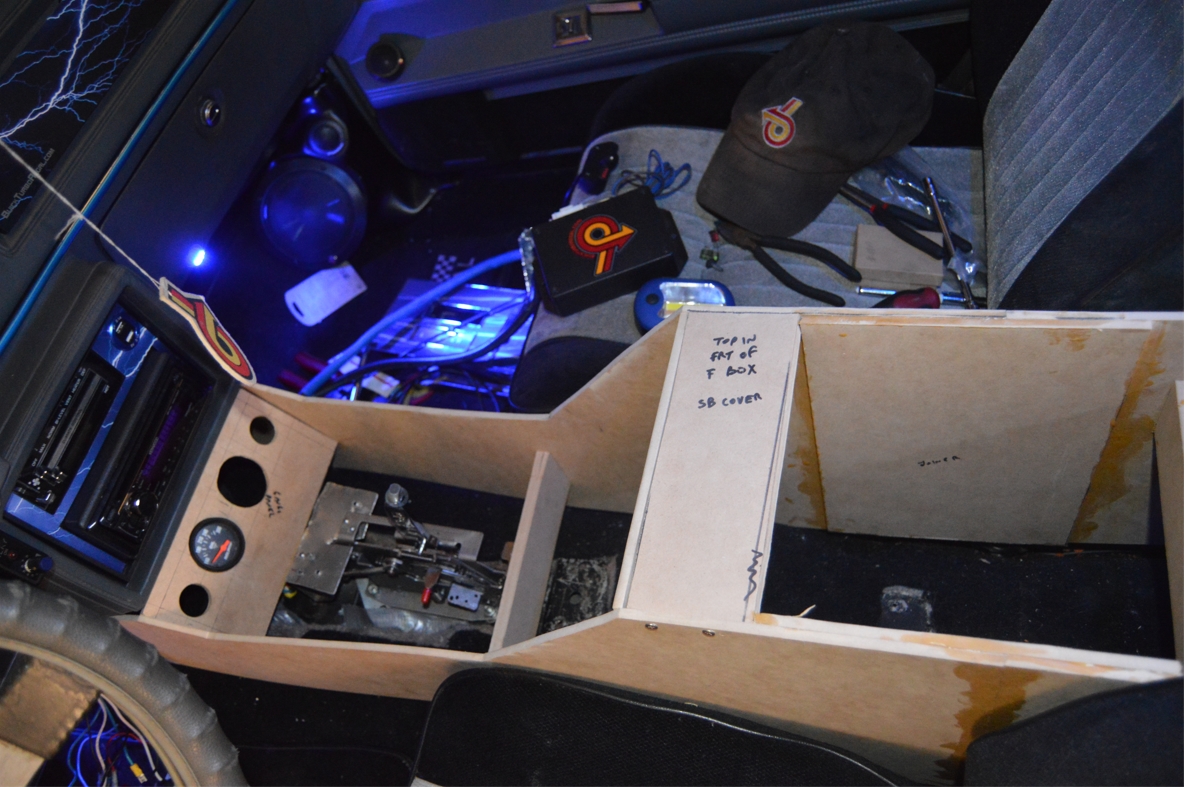
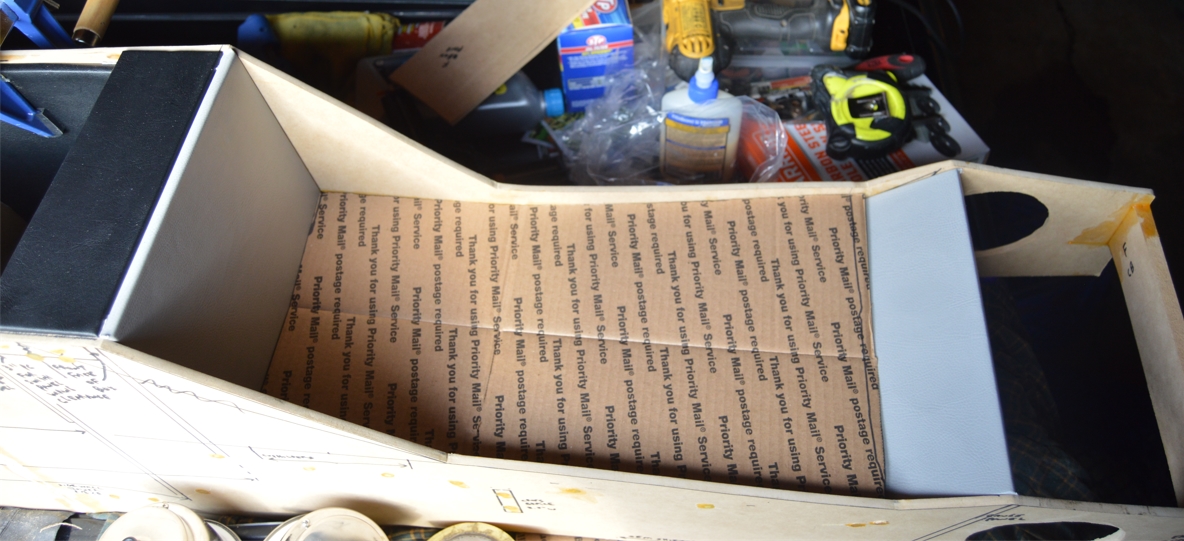
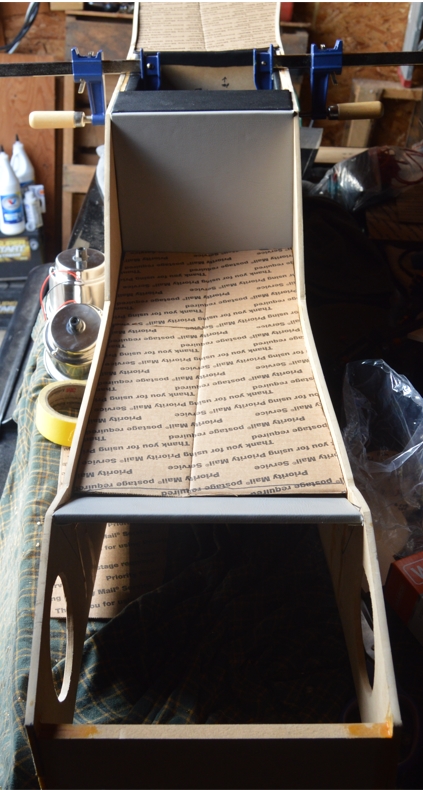
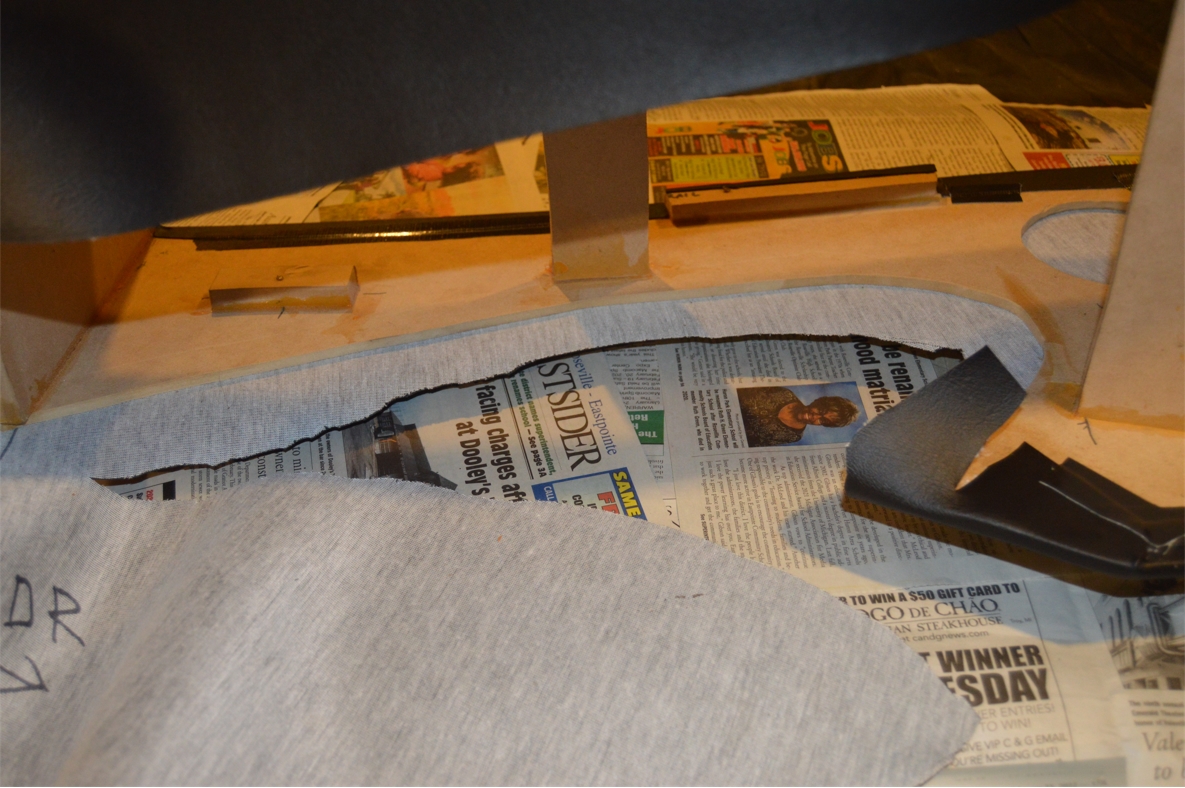
9. Set the console back in the car. It’s time to make the top plate sections (shifter area, etc.).
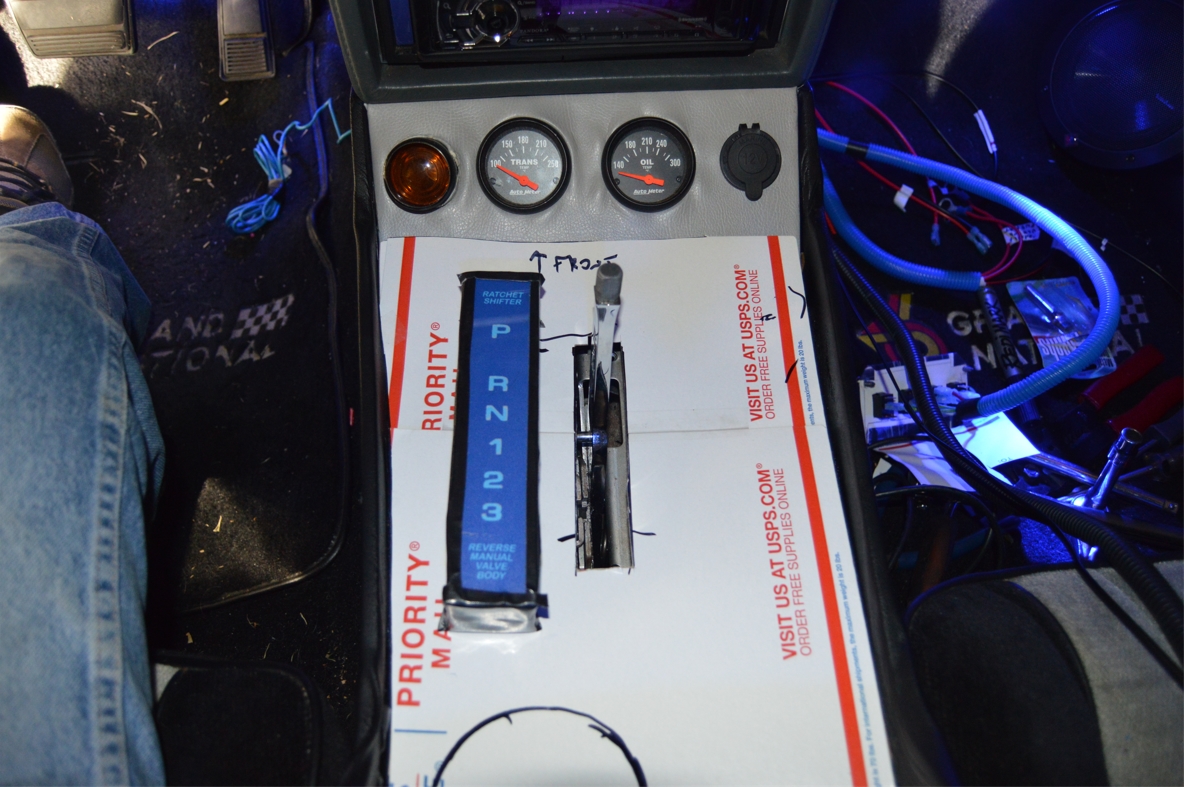
We made a roughly designed cardboard template that we made to fit over the shifter, and fill the gap between where the gauges are, and the front of the console box.
Since we know the console unit is about 10.5″ wide (at the front), and the sidewalls are each 1/4″ (mdf thickness), 10.5″ – .5″ = 10″ wide will be the width of the top plate, at least for the front portion of it. Remember, we are squeezing the section between the seats down to 9″ wide, so part of this new top plate (nearest the console box) will have to be narrowed as well.
Set the cardboard mockup in the position it needs to be. Trim exactly to fit this area.
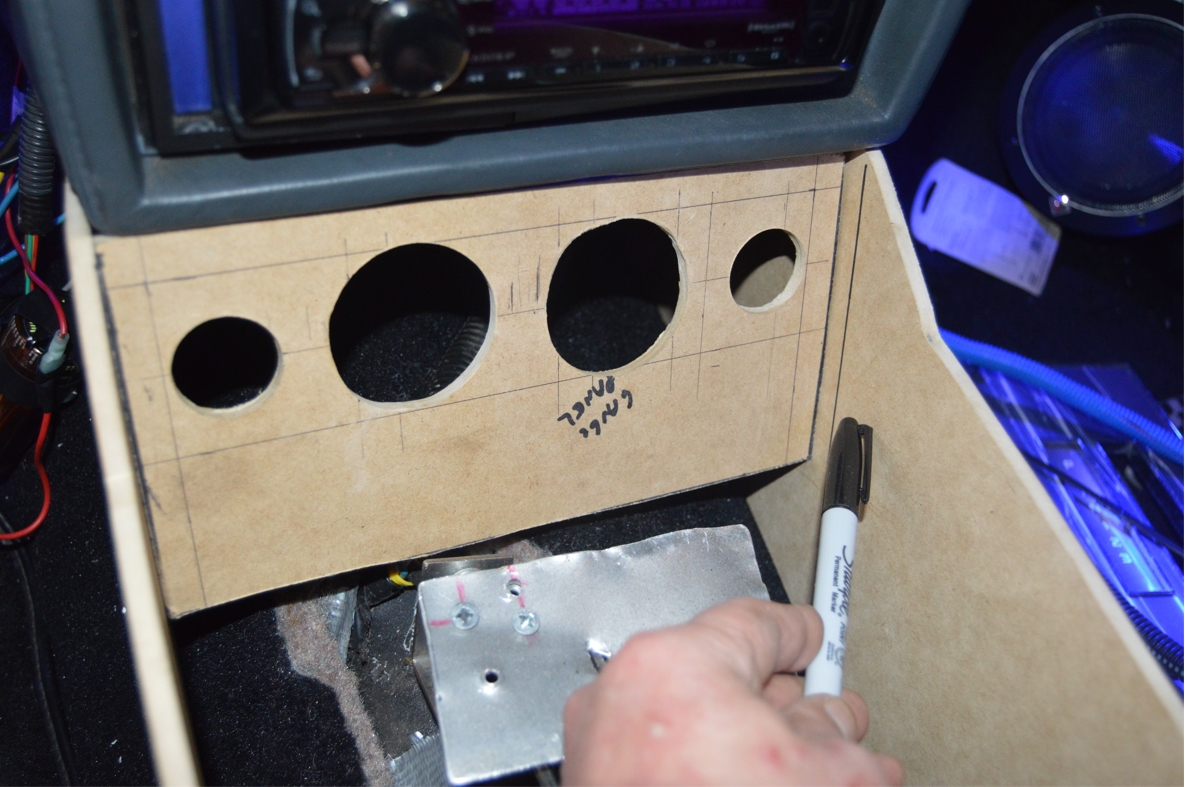
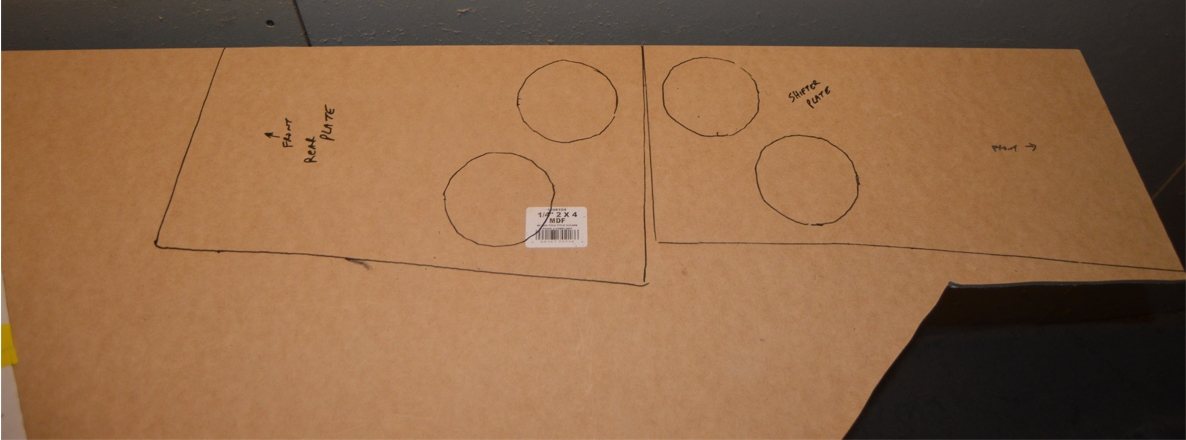
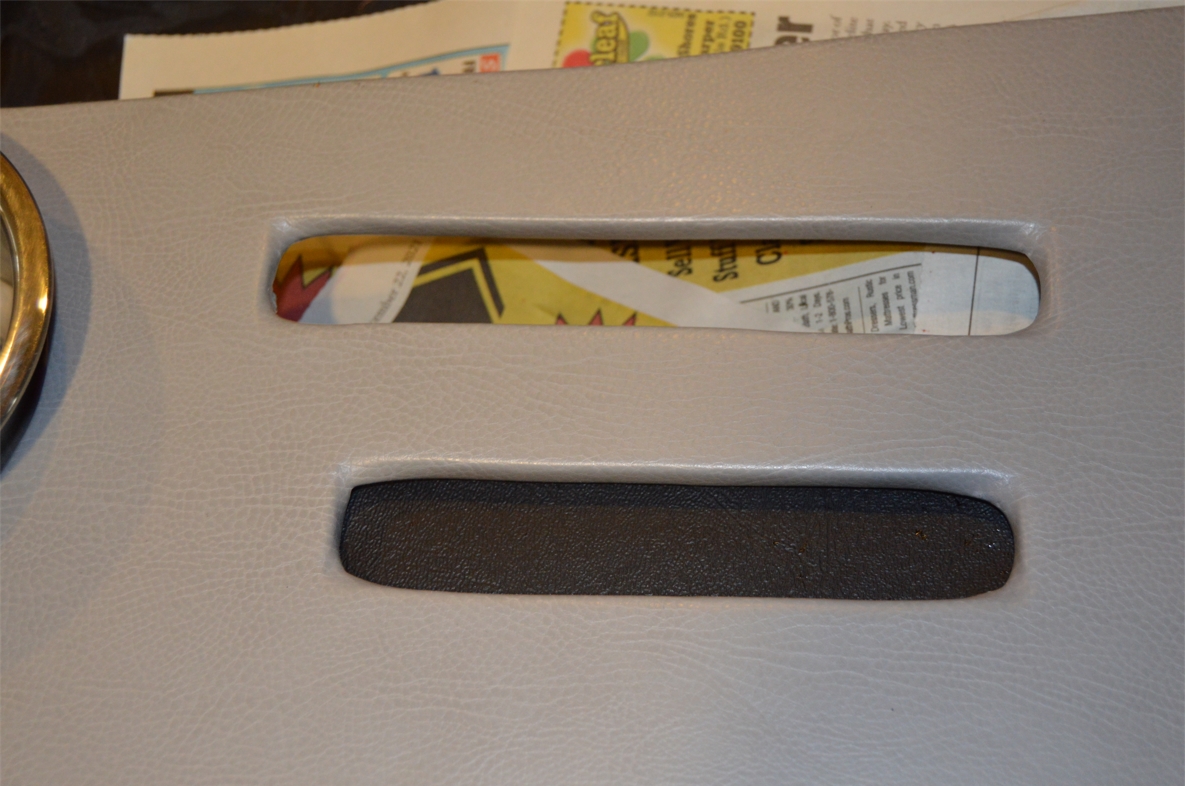
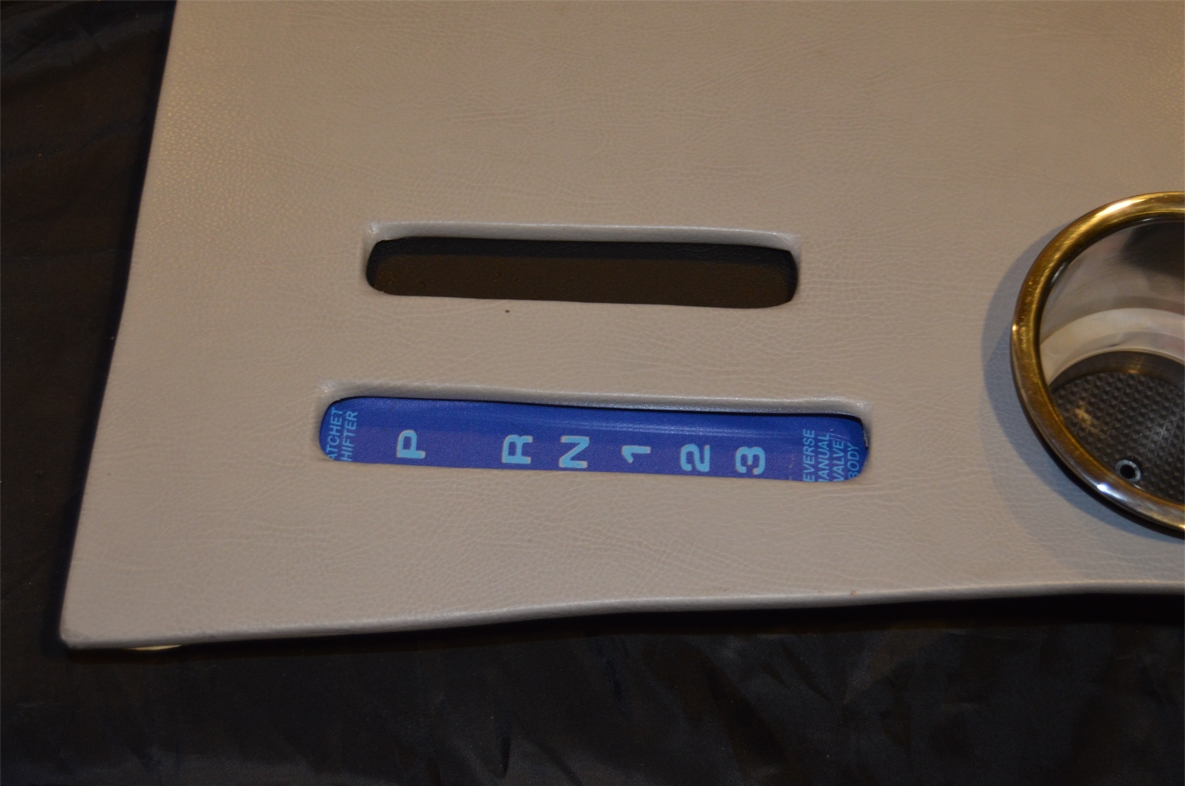
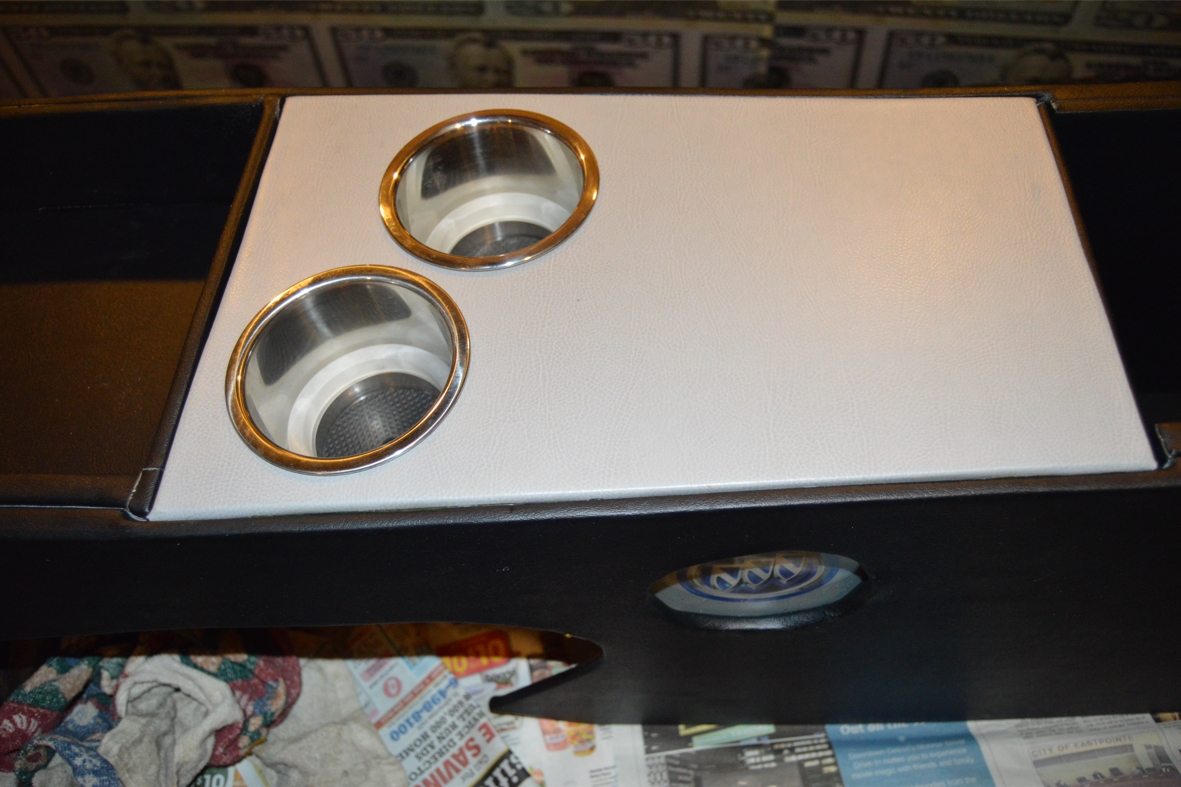
We marked the locations for the shifter indicator area, as well as the recessed/cutout area where we will be using as a phone holder.
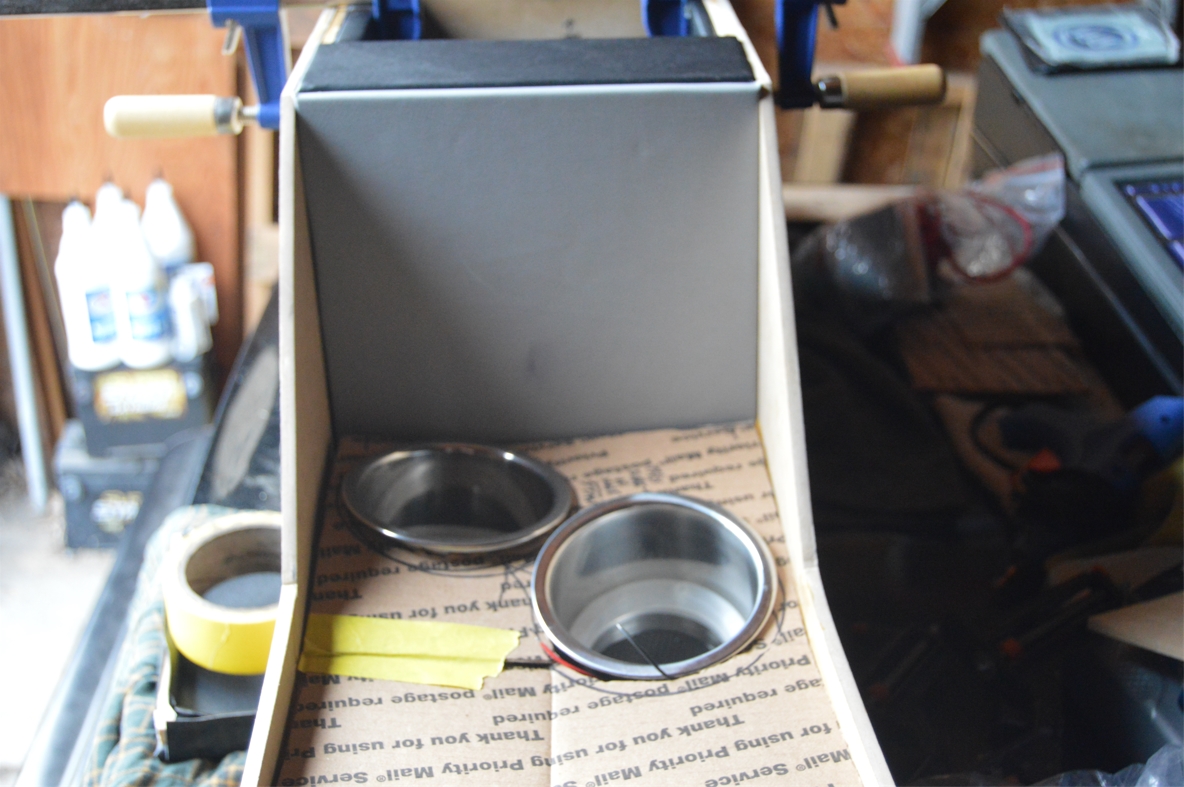
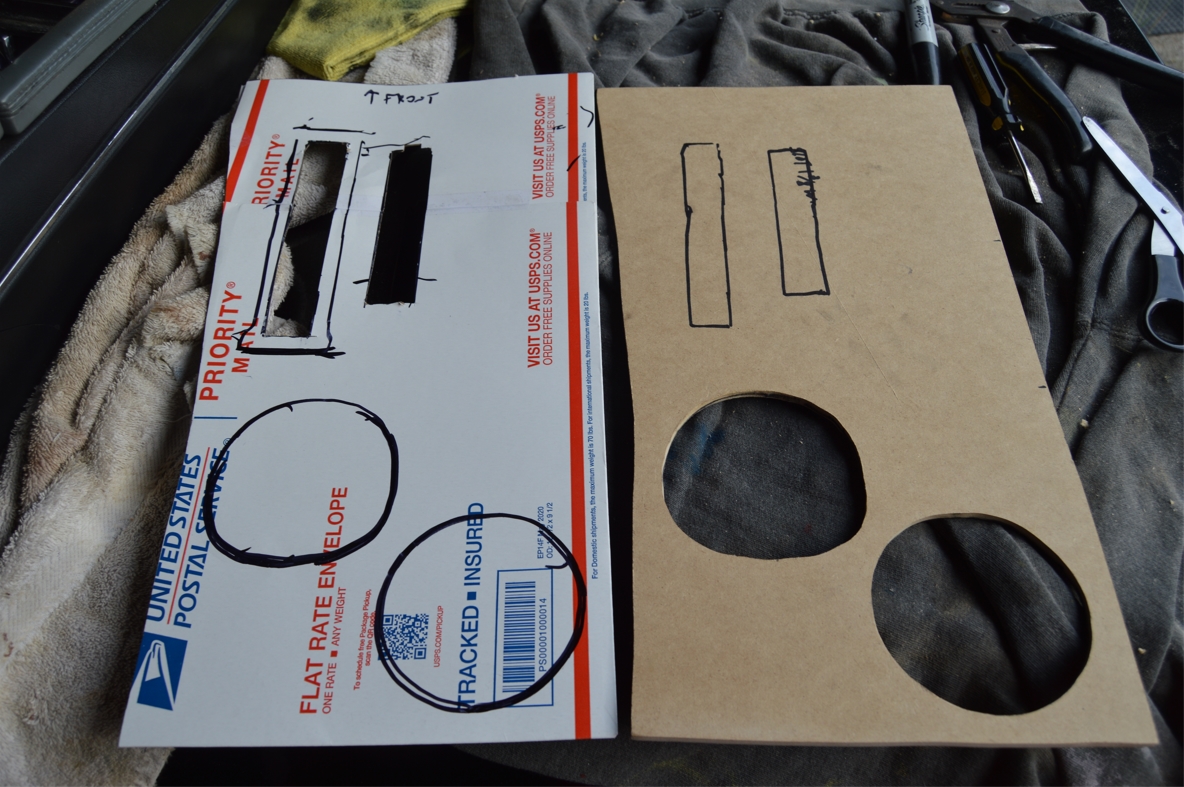
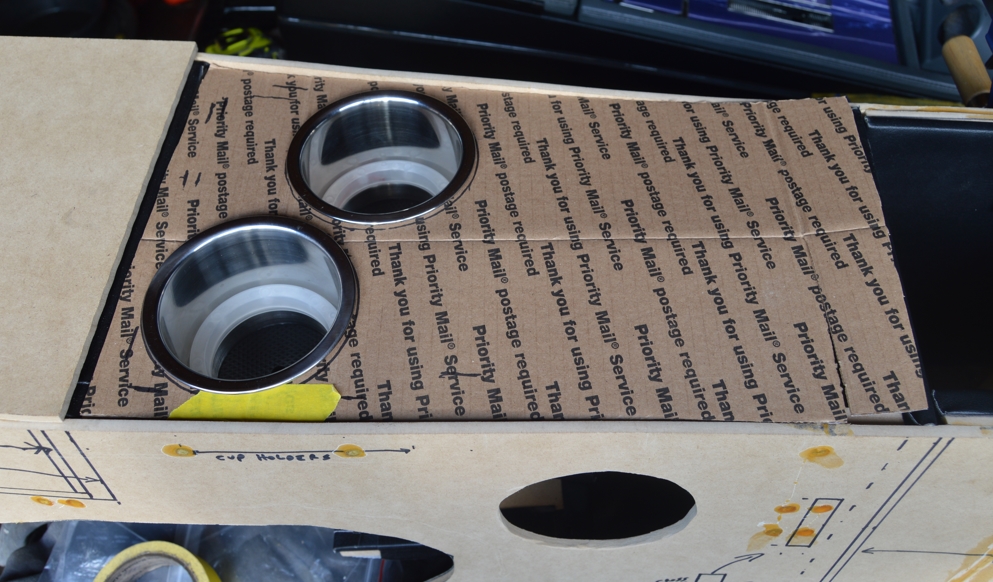
Mark the hole locations for the cup holders, too.
Transfer this template to the 1/4″ mdf, trace, and cut out all sections.
(when you cut it, be sure to make the overall piece 1/8″ smaller than the actual template, to allow some room for the vinyl wrap)
.
******
[NOTE: because of the specifics for THIS particular car, which we mentioned previously in the last few posts, this top plate we are making today will fit THIS specific Gbody Regal. We intend on creating another center console, which will be shown in the future, that will show you HOW to make the OEM shifter plate fit into this new console unit – be sure to check back on this website later if that’s something that interests you!]
******
.
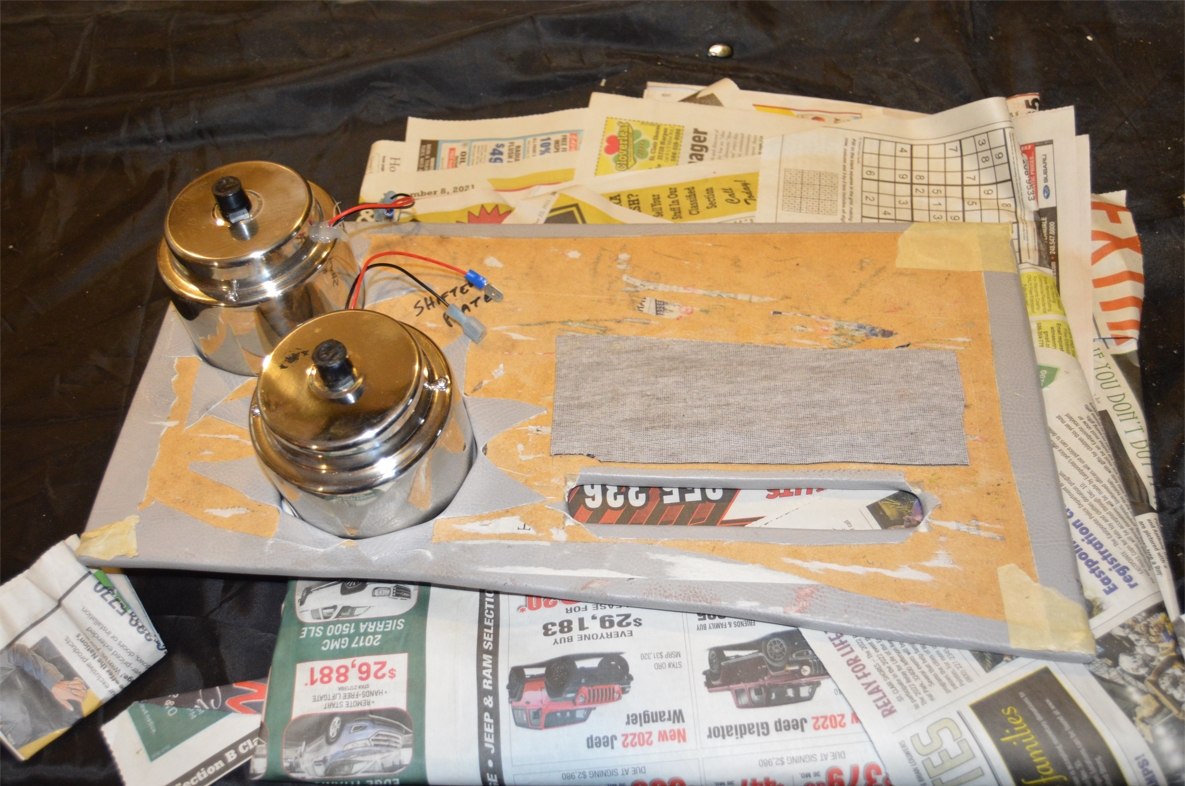
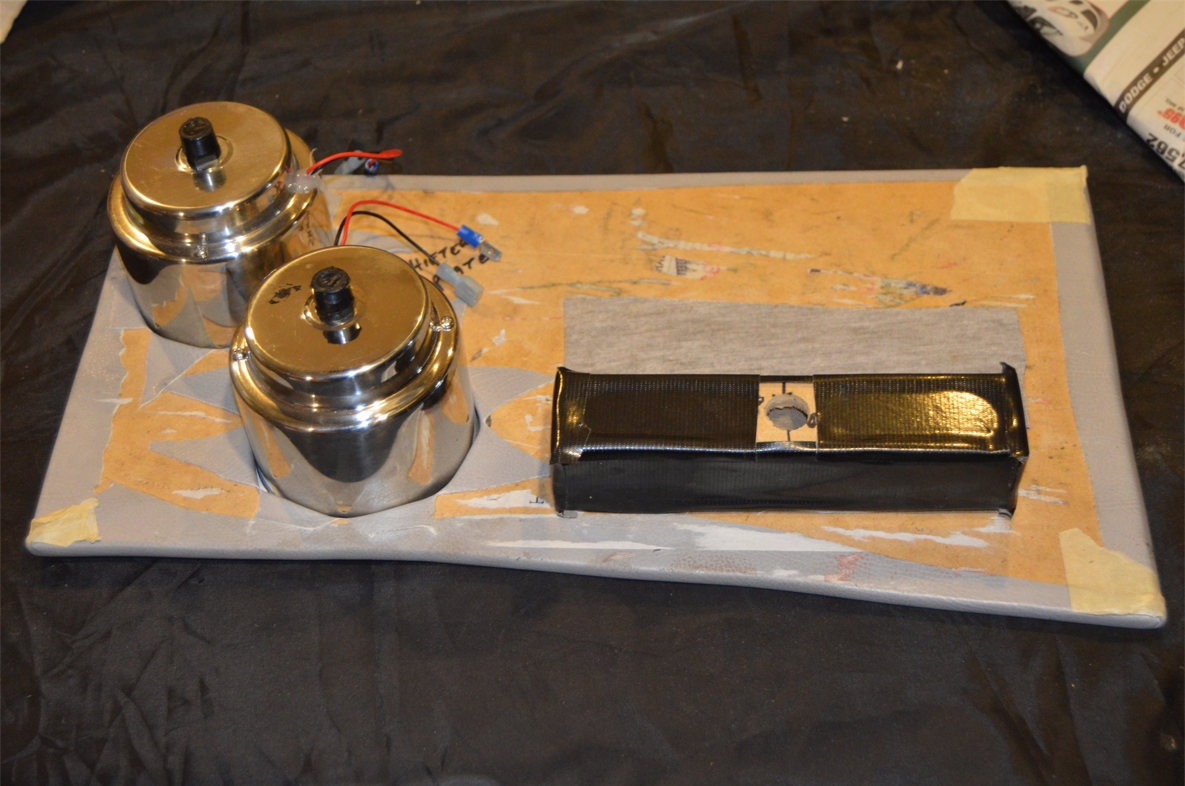
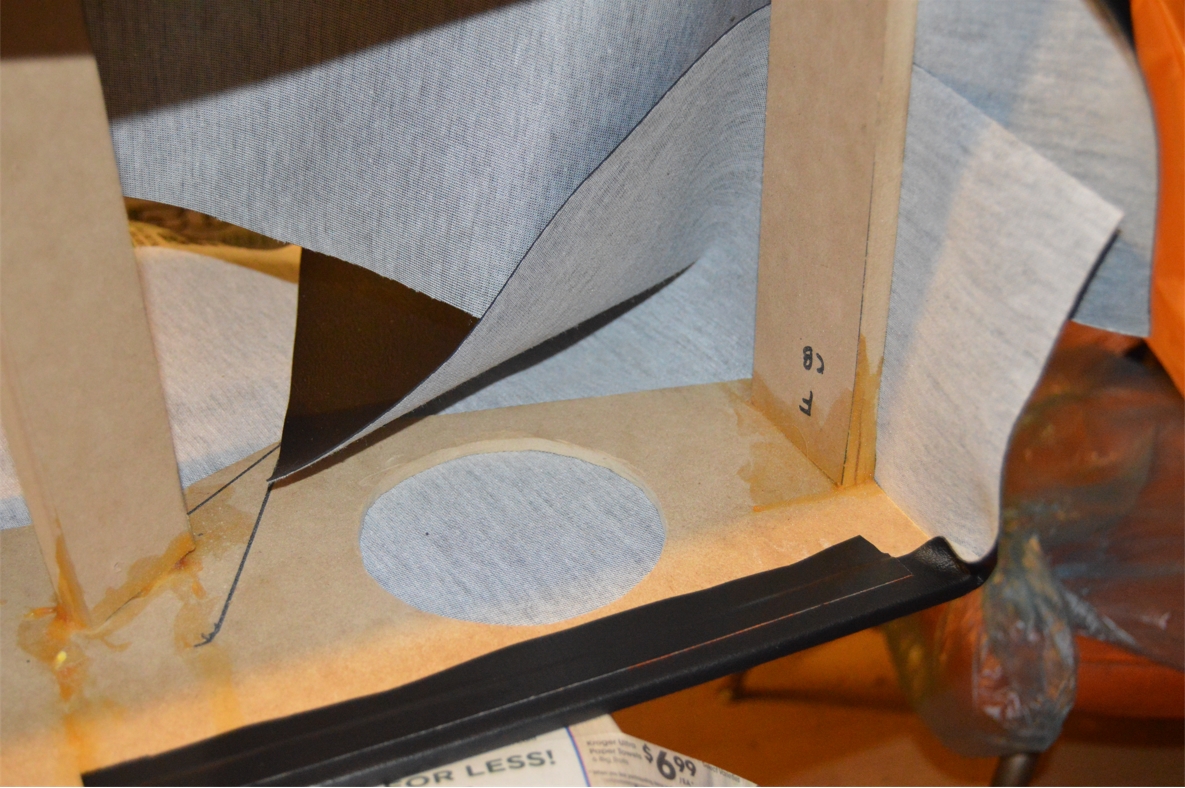
Wrap this top plate with the gray vinyl.
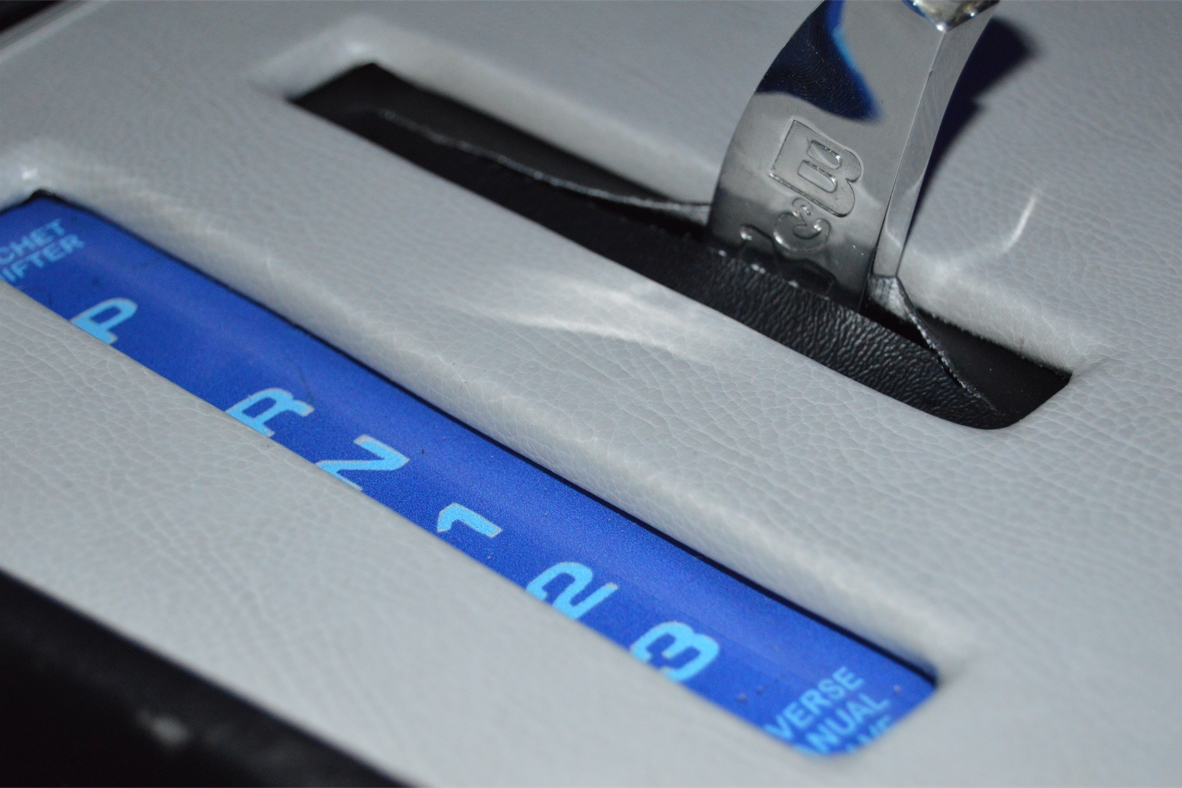
[this is the point where we secured the gear indicator and the phone holder to this new shifter plate. It’s glued and duct taped into position]
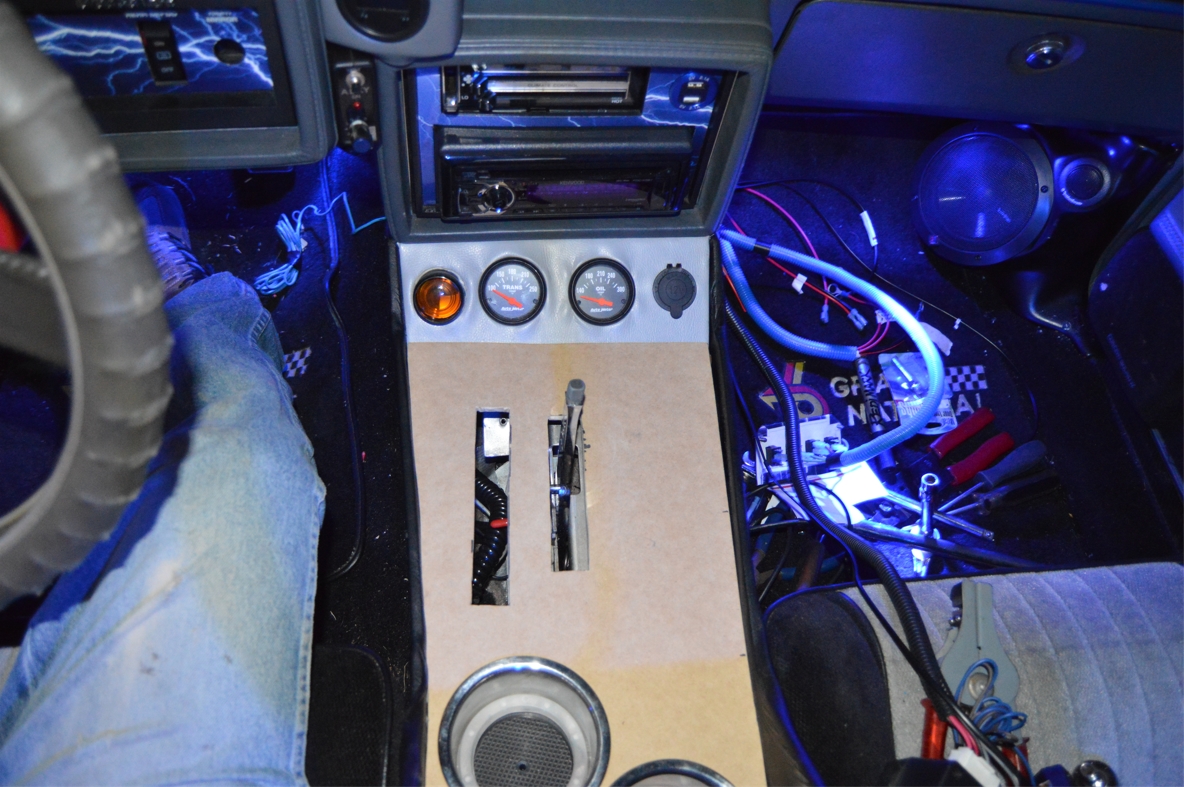
Once the top plate is done, set it in place again on the console to check for fitness.
If all good, set it aside for now.
[note: we first made a cardboard template for the shifter area based from the console alone (out of the car), sized it, cut it out of the mdf, made the holes for the cupholders, THEN, after we put the console back in the car, made another cardboard template to fit the shifter stalk cutout area, and to locate the cutouts for the gear indicator and recessed phone box. Once those areas were figured out, we set this new template on top of the existing new mdf shifter plate, marked where the cutouts were needed, then cut them out. This plate was then wrapped with the vinyl, and finally the indicator box & phone section was attached. That’s why you see 2 different types of photos here of this area]
.


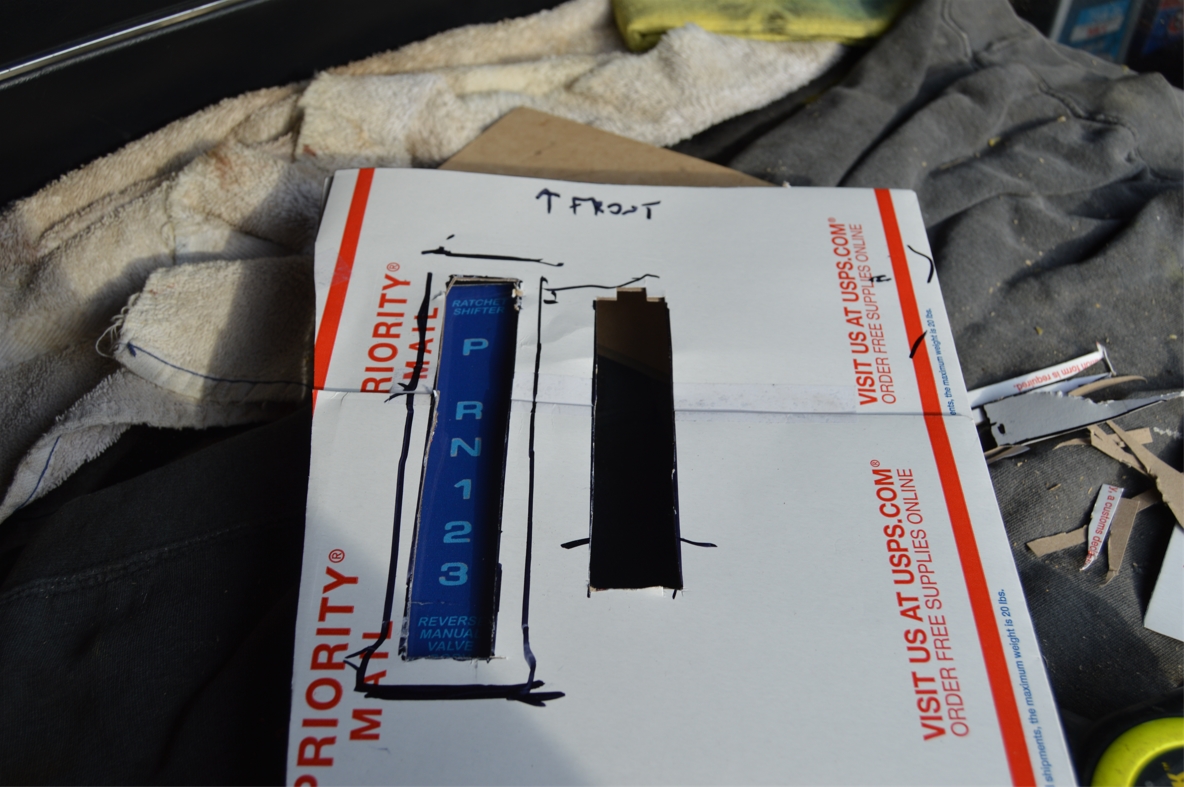
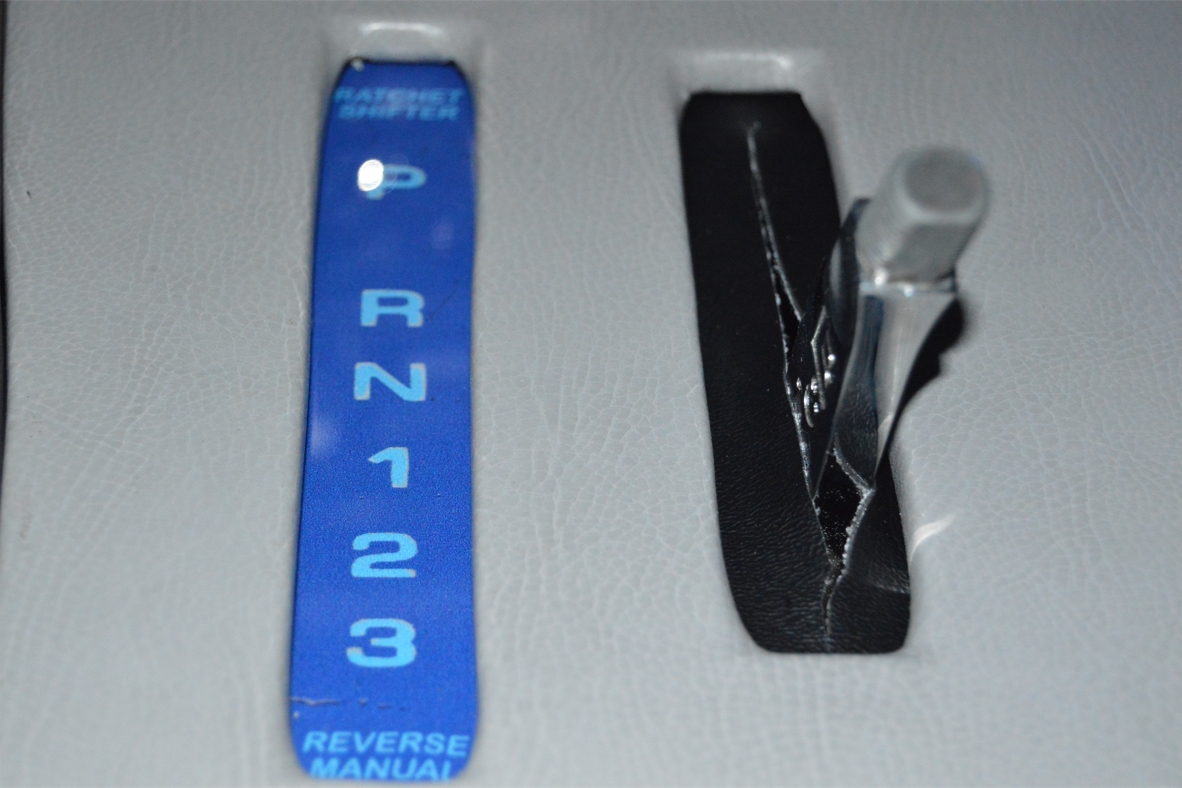
Inside the slot for the shifter, on the underside of the new shifter plate, we glued on a piece of the black vinyl. A slit was simply cut down the center so the shifter is able to move back and forth. Easy, looks good, and works for this purpose.
After making the new shifter plate, and seeing it in place on the console, we realized there wasn’t really room (on the underside) for the recessed phone box that we were planning on installing. So we just scrapped that idea and didn’t use it.
.
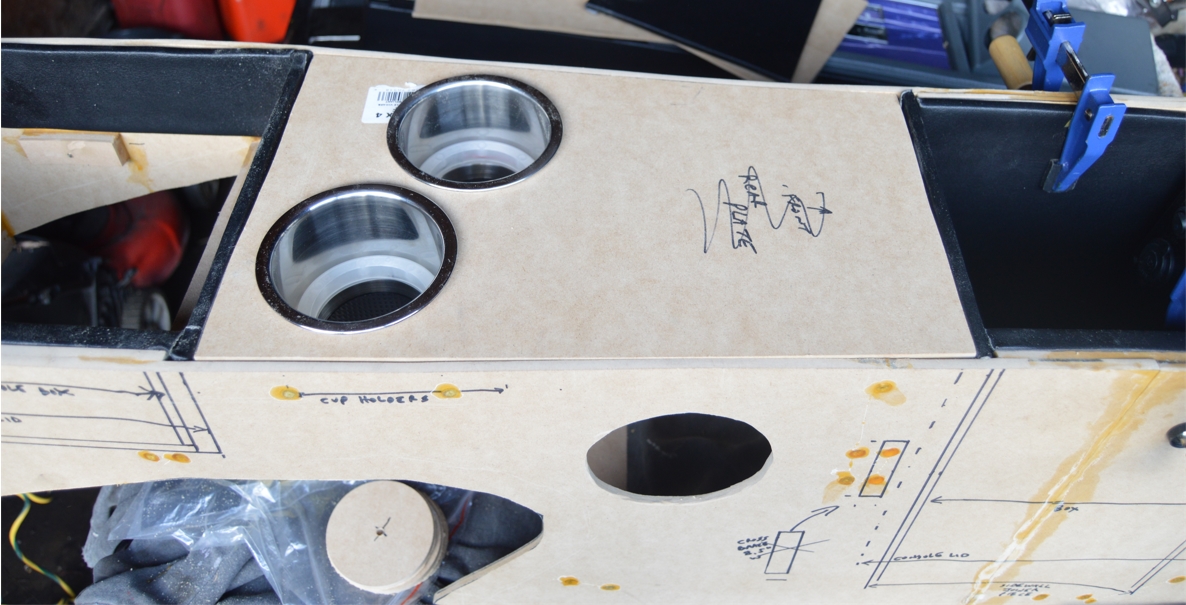
10. Set the front console box in place, inside the console. Also set the rear console box in place. It’s time to make the rear top plate now.
Measure from the backside of the front box, to the front of the rear box. The width should be (roughly, due to the different widthness of between the seats, and the rear sections 10″ width) 9.5″ and the length about 16″.
Cut out a piece (1/8″ smaller than) this size using the 1/4″ mdf. Mark the hole locations for the cup holders, and cut out.
Spray the top side with the tack adhesive, let set up, and attach a piece of the foam padding.
Wrap it with the gray vinyl. Set this aside.
.

.
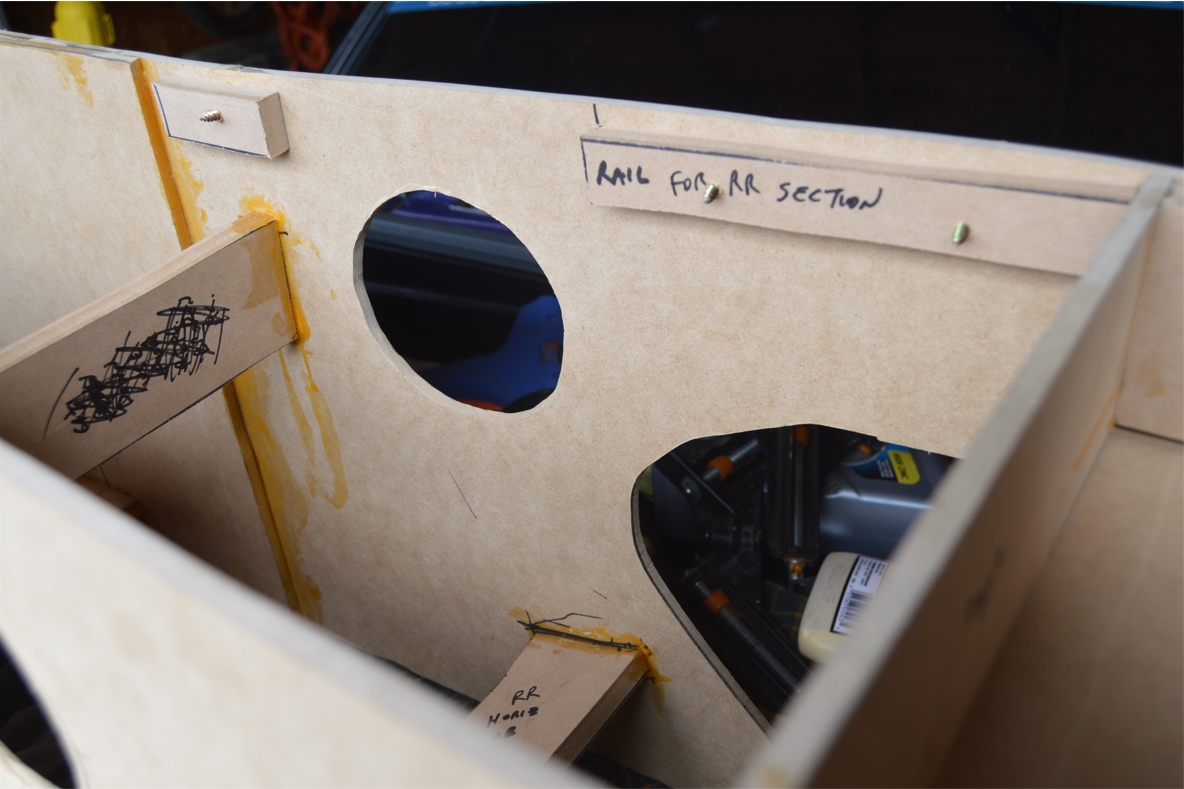
11. Mount the 2 rear plate rail braces, on the inside of the console sides, 3/16″ from the top, which after the rear top plate is attached, will make this rear top plate almost flush with the side height of the console.
(we also had to make sure the tri shield logo panels would fit in between the rear rail braces)
.
.
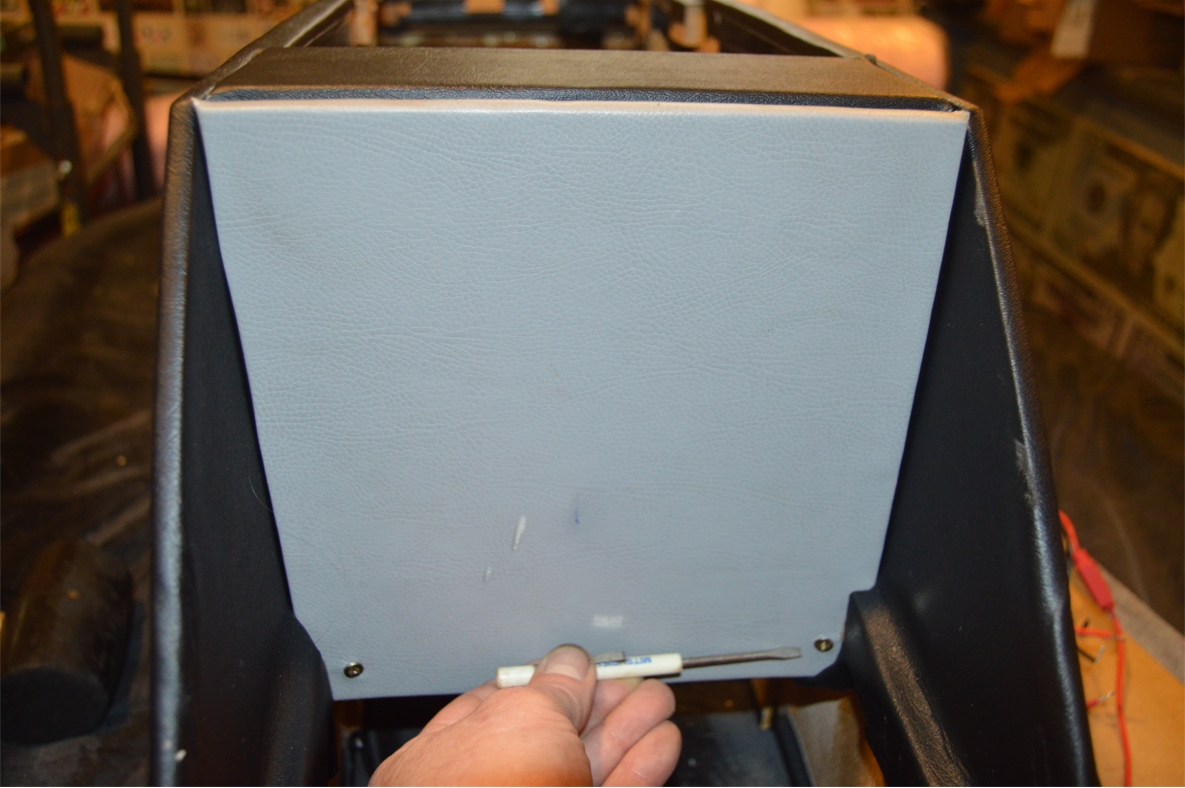
12. Remove the console box front finishing panel. Wrap this piece with the gray vinyl.
(then set it aside for now)
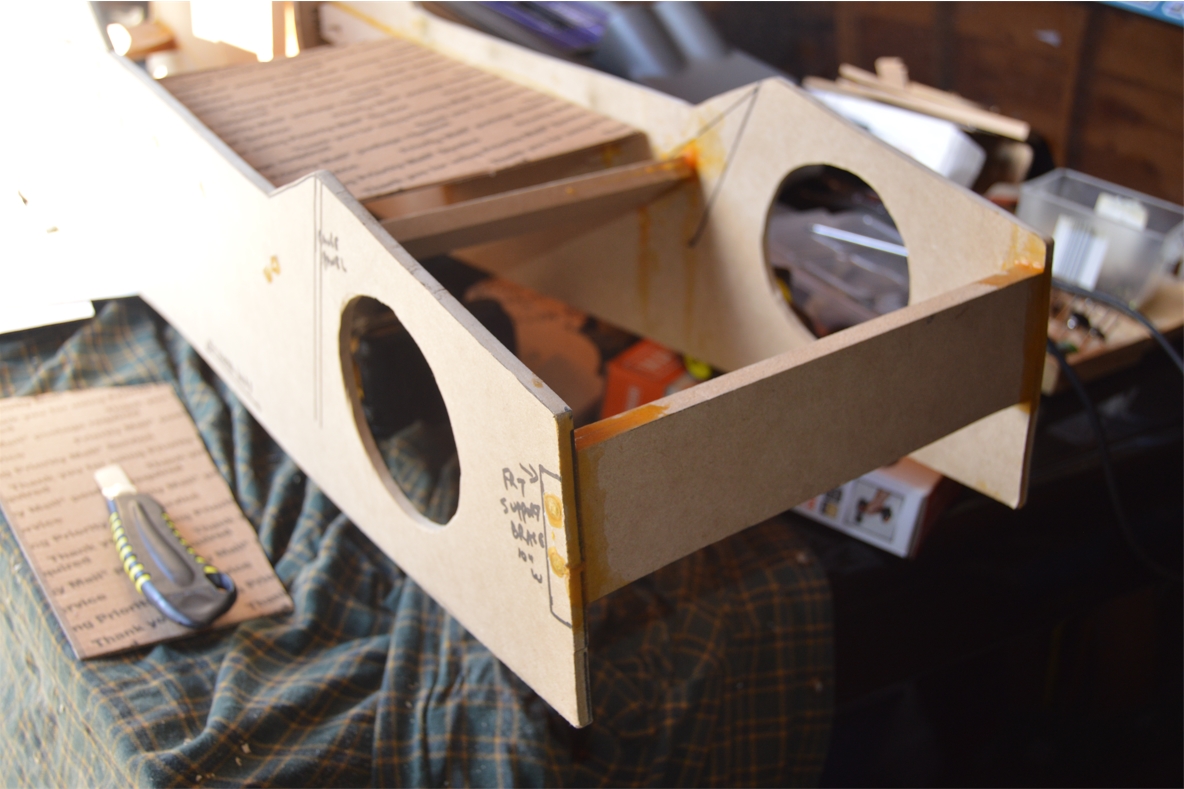
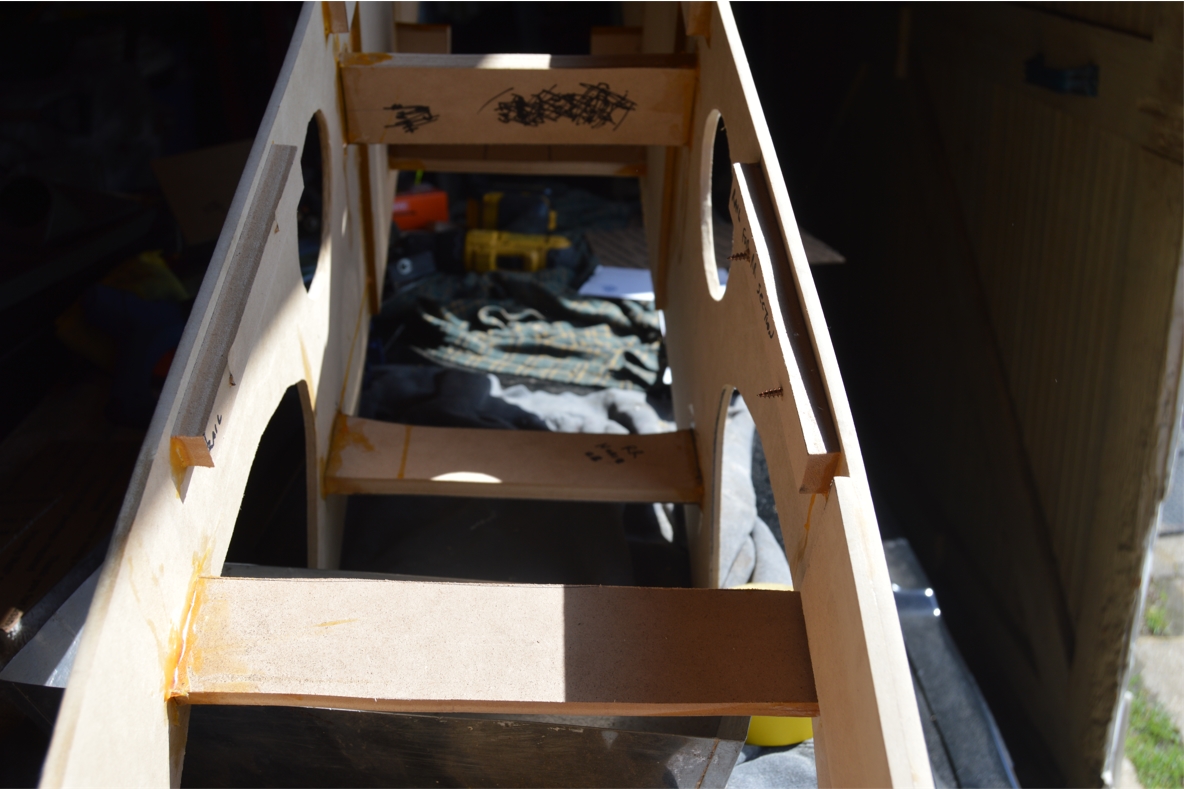
13. We are installing some cool backlit Buick Tri Shield logo pieces into the sides, on both the front and rear sections of the console unit.
These will require 4″ holes to be cut out from these areas. (more details/locations about these in tomorrows post)
Remove the console from the car and cut out these 4 holes.
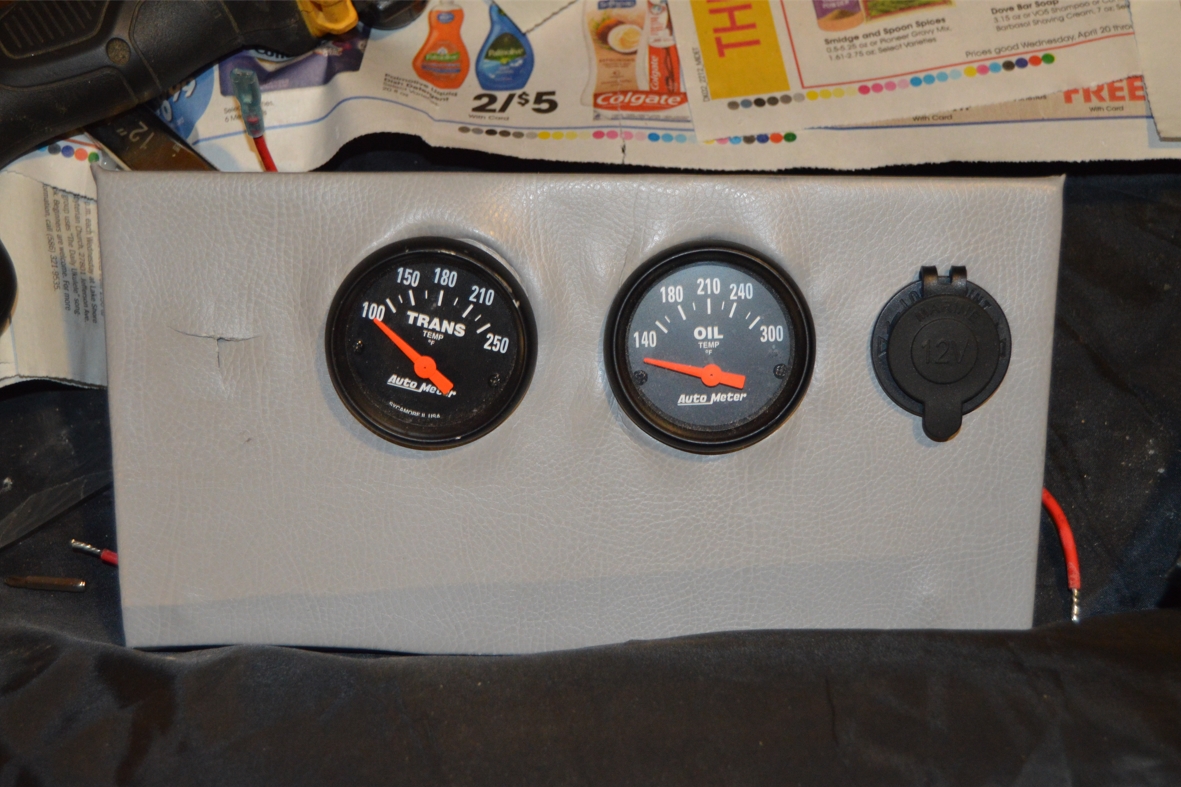
14. Remove the gauge panel. Wrap it with the gray vinyl. Cut out the holes. set aside.
.

.
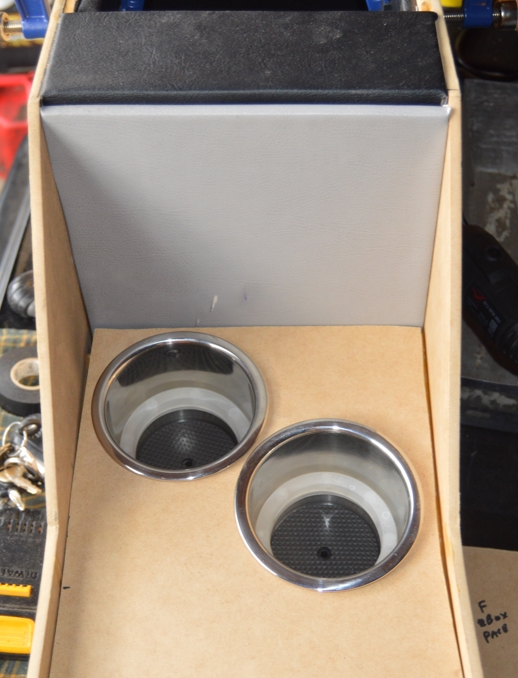
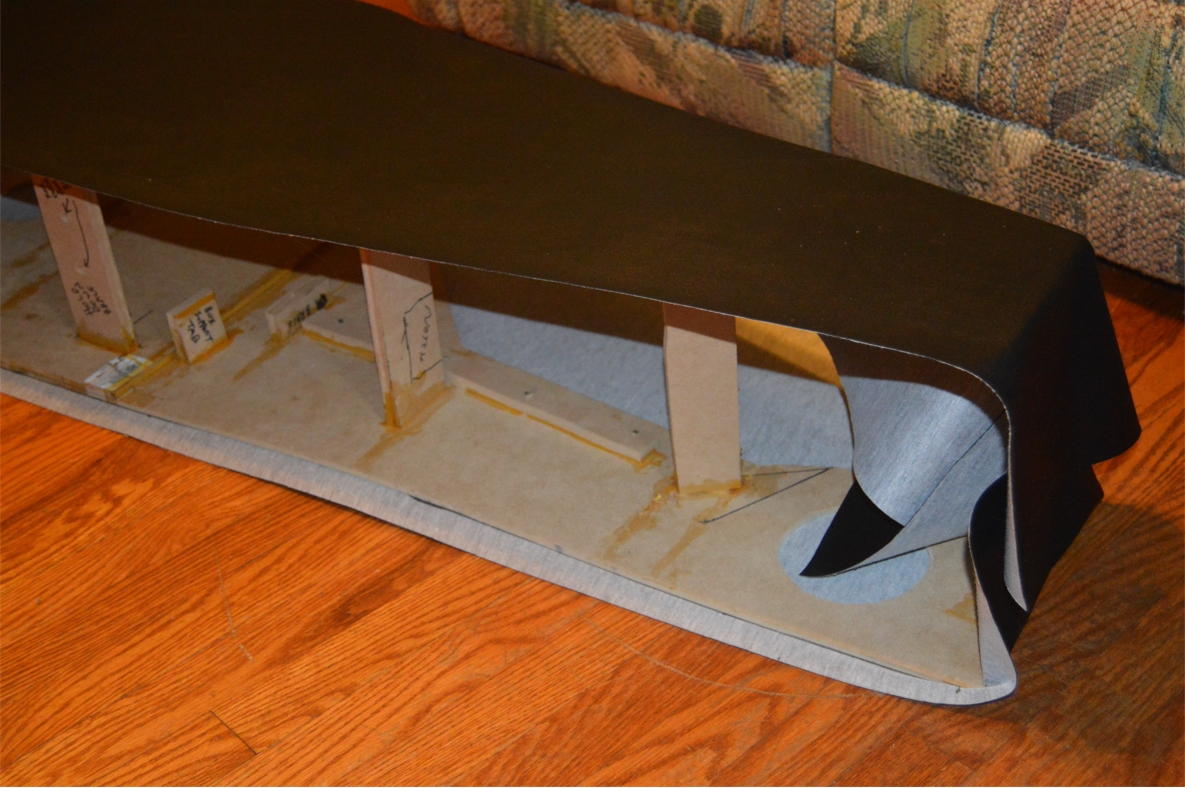
15. Wrap the entire console shell with the black vinyl. We used 1 complete piece of the vinyl to wrap the entire thing; both sides and the front and the rear.
(it measured about 16″ wide/tall x 150″ long)
All of the (top & bottom) edges of the vinyl get tucked to the inside of the console, creating a nice finish, no seems are seen from the outside.
Spray tack adhesive is used to stick the vinyl to the MDF.
.


.
Now that the console shell is wrapped, we can actually begin assembling the center console!
16. Screw/glue the front and rear console boxes in place.
17. Screw the gauge panel in place.
18. Screw/glue the front finishing panel in place.
19. Glue the shifter plate in place.
(but you might want to wait to do this until the entire console is actually IN the car, since it makes it easier to get the console inside the vehicle without this piece in the way)
20. Glue the rear top plate in place.
21. Glue the side Buick logos in place.
.

.
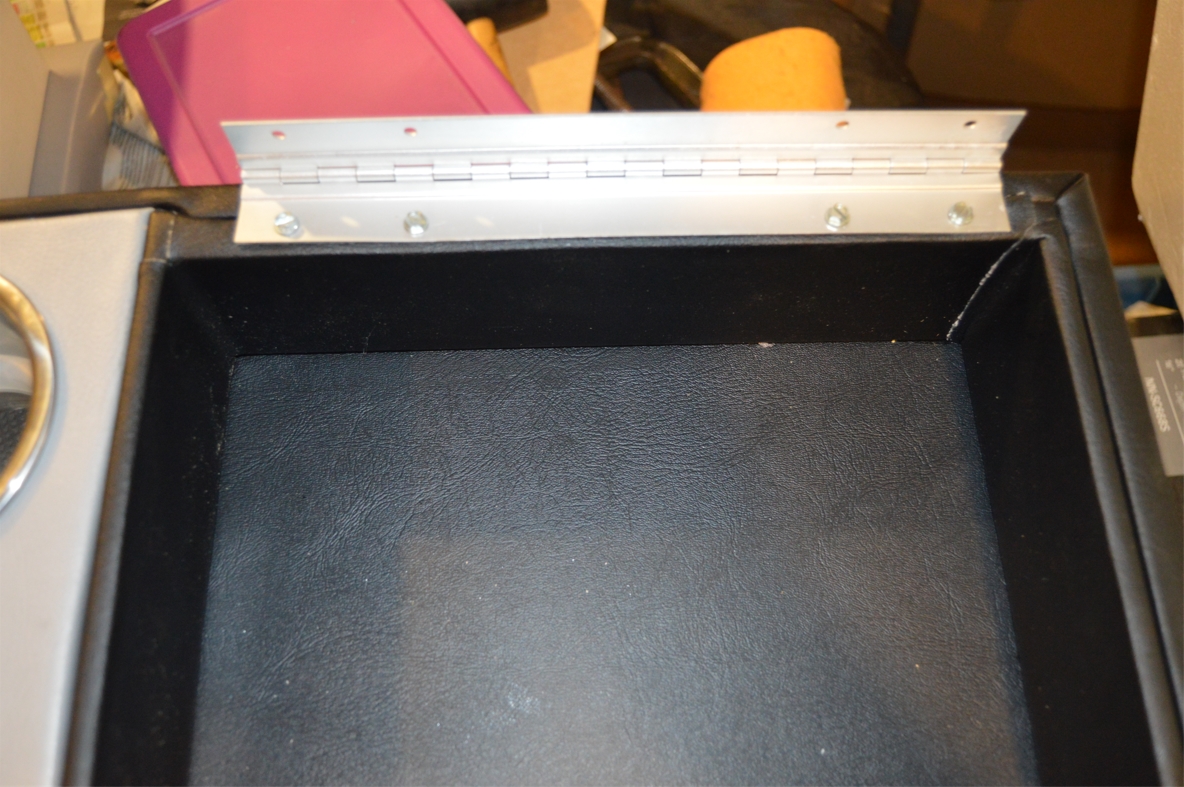
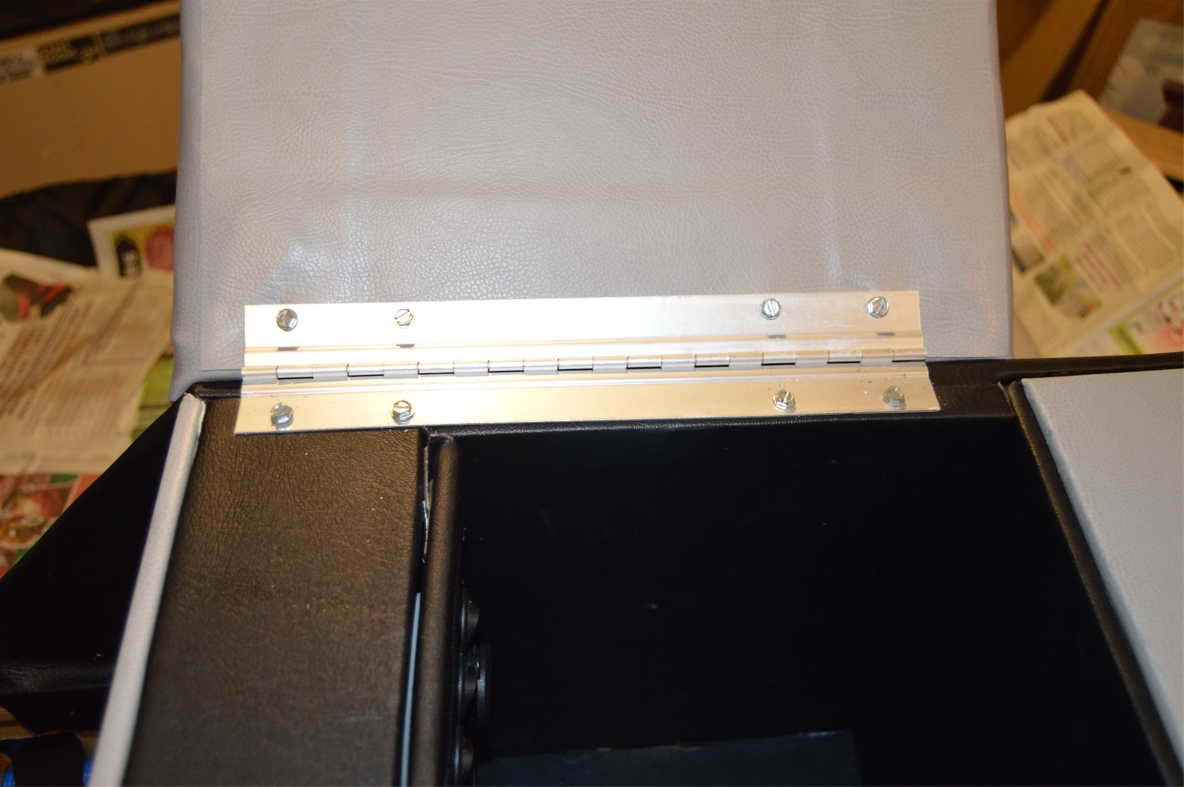
22. Screw the front and rear console lids & hinges in place.
23. Secure your gauges (etc.) in place. (or wait & see our easy wiring tip in post #7)
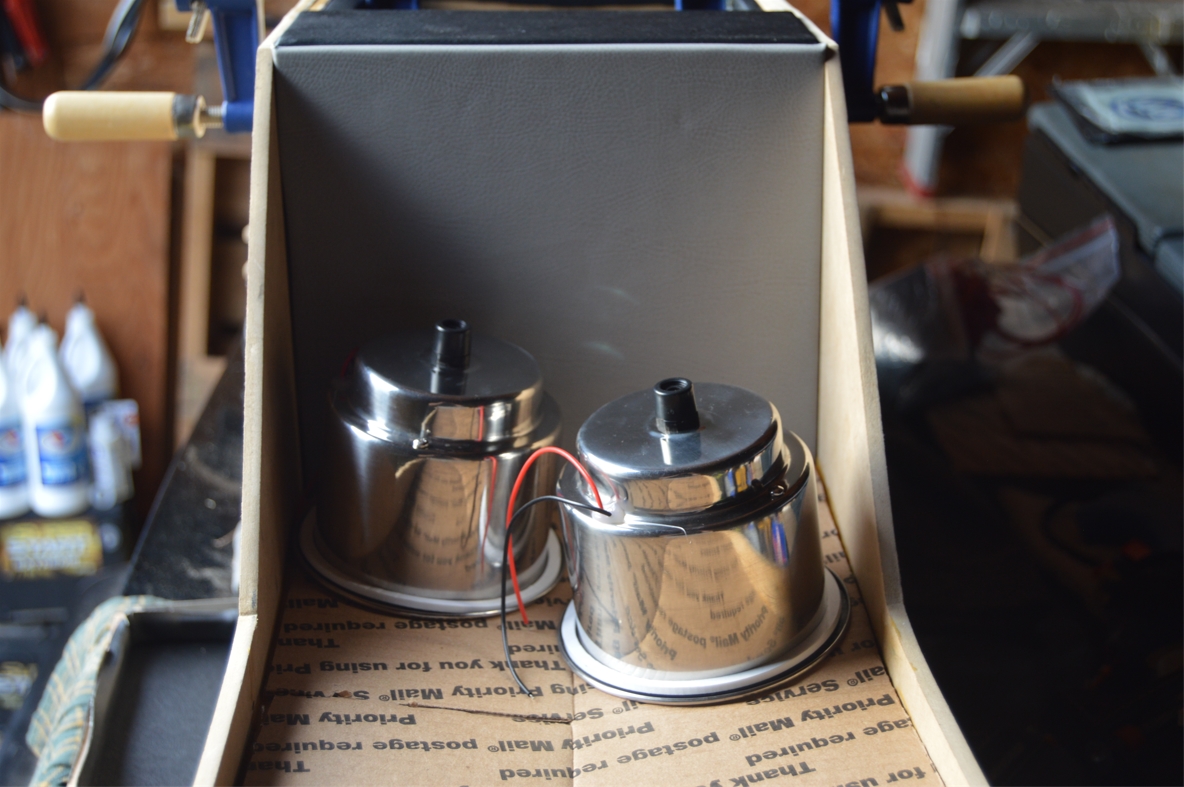
24. Set the cupholders in their holes.
.
The new center console is almost complete!
See how we did the way cool backlit Tri Shield side emblems tomorrow.
You’ll also see us wiring up all the lights, adding the final touches, etc.!
We hope you’re enjoying this new series.
.


