So after almost 8 years of this second extra fusebox being added into the Gbody Regal, and multiple new components going in over the years, we discovered the original 10-slots in that panel just weren’t enough to fulfill the requirements of all the things we added onto this 1987 Buick Grand National.
We started with adding a second fusebox, since we had just a few new items that needed power sources, from what we put into this Turbo Regal at the time.
[the basic logic for adding the 2nd fusebox at all was to not fill up or overload the OEM fuse block, which was a pretty smart idea in our opinion]
(could you imagine with all the extra stuff we have on this vehicle, how many wires would be jammed into the OEM fusebox had we not did this mod?? Makes us curious what other people are doing for this situation?)
We searched for a single bigger box (with like 16+ terminals) to no avail.
The largest that’s available (without spending bookoo bucks) is a 12-way (12-slot; 12 terminal) unit, which was what we acquired.
But this still isn’t really enough slots to fit in all of the extra wires we needed.
So we bought a matching style 6-slot fusebox as well.
[we really only missed by 1, we actually needed just 13 slots, for now…]
That gives us 18 total power & ground tabs to use for the necessary feeds in this Buick GN.
(that seems like a LOT of extra wires being connected, but all needed for what we have in the GN)
[even with 18 different electrical hungry items, the overall power requirement isn’t really all that much, most terminals only need a 5 or 10 amp fuse in them]
(and no worries on it being overloaded, since not everything runs all at once, not to mention that the incoming power feed [a 6 gauge wire] to these fuseboxes are run off a 100 amp relay, which more than covers the supply needed for both of these units)
You might be thinking, “18 extra fuses?”
Well, yes.
Instead of overcrowding the original items/fuses (like all of the extra gauges just ran together), we separated the additional gauges that were added on.
Stuff such as the speedo, vss/cruise/tach, scanmaster, line lock, 2 step, etc., being ran on their own line.
The various electrical outlets (usb / power outlets, lights) on our custom center console are also separate, as well as all the relays that were installed for the various switches and things contained within there.
When you count all of these up, there’s more than a dozen different things that require power (hence us now needing the 2 fuseboxes).
Having add-on components each on a separate power wire makes things easier to track down should any problems arise.
(but yes, it adds a lot of extra wires along with their combined weight)
None of the “well there’s 5 different things on this power wire & it could be any of them that’s the problem.”
No tracking and tracing each individual component in that series of 5 different items. You know exactly which item is causing the issue and can tackle what’s wrong with it.
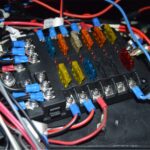
And should a fuse blow for any reason, instead of having to get out the old test light, or manually pull each fuse and looking at it to see if that’s the blown one, there’s a neat LED on every bank that lights up when that particular fuse is out. How convenient!
.
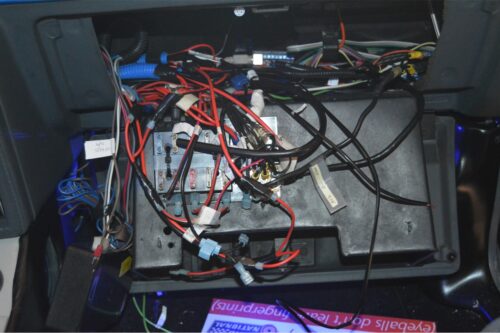
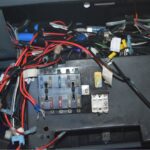
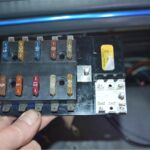
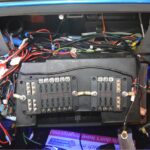
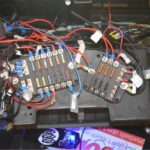
THE OLD EXTRA FUSE BOX (that’s currently installed):
[mounted on the back side of the glove box, as it’s a convenient place to put it!]
.
.
The new install was pretty basic, just remove the old fusebox, mount the new ones, then take all the old connections and move them to the new fuse boxes.
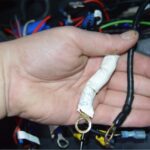
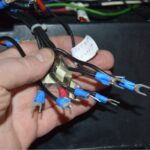
Some of the old wire connections had to be split up, as on some of the circuits we did have to double them up (because of needing more than the old 10-slot fusebox could provide).
That was as simple as separating the 2 wires, adding a new forked spade end to both wires, and then connecting it to the new fusebox.
All of the wire ends needed to be redone from the original spade terminals we used to the newer style forked spades, since the connections on the new fuseblocks are different than the old terminal box had.
This part obviously took the longest to perform for this entire job.
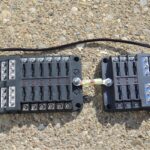
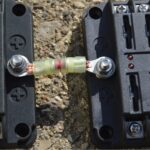
We ran (color coordinated red/black) jumper wires from the 12-slot unit to the 6-slot unit to give it a power and ground source.
[note that the jumper wires are made from 10 gauge wire (good enough) since the lines we’re running to the 6-way block are the most low-power needed sources of all the wires; and we purposely did it that way]
[we didn’t have any 10ga black wire for the jumper, but we did have some red, so we simply took out a black permanent marker and covered it up! Gotta do what ya gotta do. Use what ya got. It works and it’s effective. Not to mention no one is really going to see it anyways]
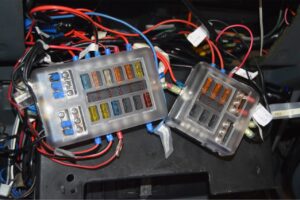
These new fuse blocks have a cover on them, making them look prettier than the old setup, as well as a bit safer too.
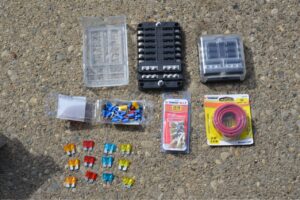
THE NEW FUSE BOX HOLDERS (& the components needed):
.
.
PARTS:
– 12-Way Blade Fuse Box Block Holder with LED Indicator 12V, $15 shipped (ebay)
– 6-Way Blade Fuse Box Block Holder LED Indicator 12V, $10 shipped (ebay)
(it’s nice that these boxes come with an assortment of new fuses)
– 1 piece 2″ RED 10ga wire (for jumper)
– 1 piece 14″ BLACK 10ga wire (for jumper)
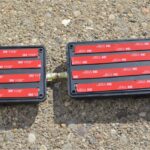
– double sided 3M tape (to hold the fuseboxes to the back of the glovebox)
– package of forked spade terminals ($7/autozone)
.
TOOLS:
– 1/4″ socket (power/ground nuts on new fuse blocks)
– 3/8″ socket (power/ground nuts on old fuse boxes)
– wire crimper / stripper / cutter
.
TIME TO COMPLETION:
about an hour
.
THE TRANSFER OVER PROCESS:
.
.
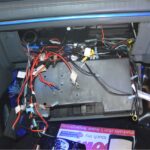
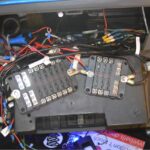
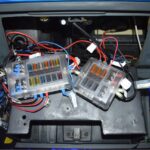
It’s still kind of a jungle behind the glove box with all those wires (but where else in the Buick Regal could this be placed at?), and it looks a bit better than it did, plus gives us the room we needed, with even a couple slots left open for future development.
All of the wires are labelled (paper attached with tape), which we’re leaving on them so we know what’s what later on. This also makes it easy to trace, and to know what size fuses they need to have.
1. we made the jumper wires.
2. we applied the double sided tape to the back side of the fuse boxes
(the kit supplies screws, however, they couldn’t be used since they would protrude thru to the inside of the glovebox)
3. since we need to remove all of the wires, we got out our pen & paper and wrote down what size fuses went with each wire we were removing (so we could put back the appropriate one for the source in the new blocks).
4. all of the ground wires were done first.
snip off the old spade ends, strip the wire, crimp on new forked ones.
5. all of the power wires were done next.
Note, that there’s no juice running thru any of these wires since the fuse boxes only receive power when the key is on (via a relay controlled by “ign” in the factory fusebox)
.
6. the old terminal box is removed.
7. the new terminal box is installed.
8. all the ground wires are attached.
9. all the power wires are attached.
10. the main incoming (6ga) power wire is attached.
11. the main outgoing (6ga) ground wire is attached.
.
12. key forward to check everything still works & all is good.
13. start Turbo Regal up, to do another check & verify (no blown fuses, components are functioning, etc).
That’s it.
Transformation complete!
(note that we actually secured the fuse blocks down in place after all of the wires were attached, that’s why the boxes look crooked in the pics!)
.
.


