


After installing “almost” a new complete fuel setup, the only part needed to really make it completely new, was a new fuel feed line, so we went ahead & did that as well. It’ll be ready to rock down the line if and when future upgrades are necessitated!
Here’s what we’ve done so far:
* installing a fuel pump & sender combo,
* then the Accufab fuel pressure regulator,
* next, a fuel rail mounted gauge,
* and next to last, how to install a braided fuel return line.
Now finally, the last step in the puzzle.
Installing a New #8 AN Braided Fuel Feed Line on the 1987 Buick Regal Grand National.
Just putting in the return line would have been enough to get the car running great (considering the other mods we’ve done), but we figured, heck, there’s just this “one last thing” (it’s always just “one more” – right?) to do before it’s “all” new, so alrighty then, might as well go ahead then…
The parts list needed is shown within the steps below.
(it varies depending on what you’re using).
Let’s begin.
(we’re assuming you’ve at least read the “how to” on the return line, so we’re not including some redundant detailed steps here that were previously described in that install).
1. as always, disconnect the battery for safety!
2. place a rag under the feed side of the fuel rail to catch the excess that will drip out.
3. disconnect the factory feed line. it will be under pressure, so use caution!
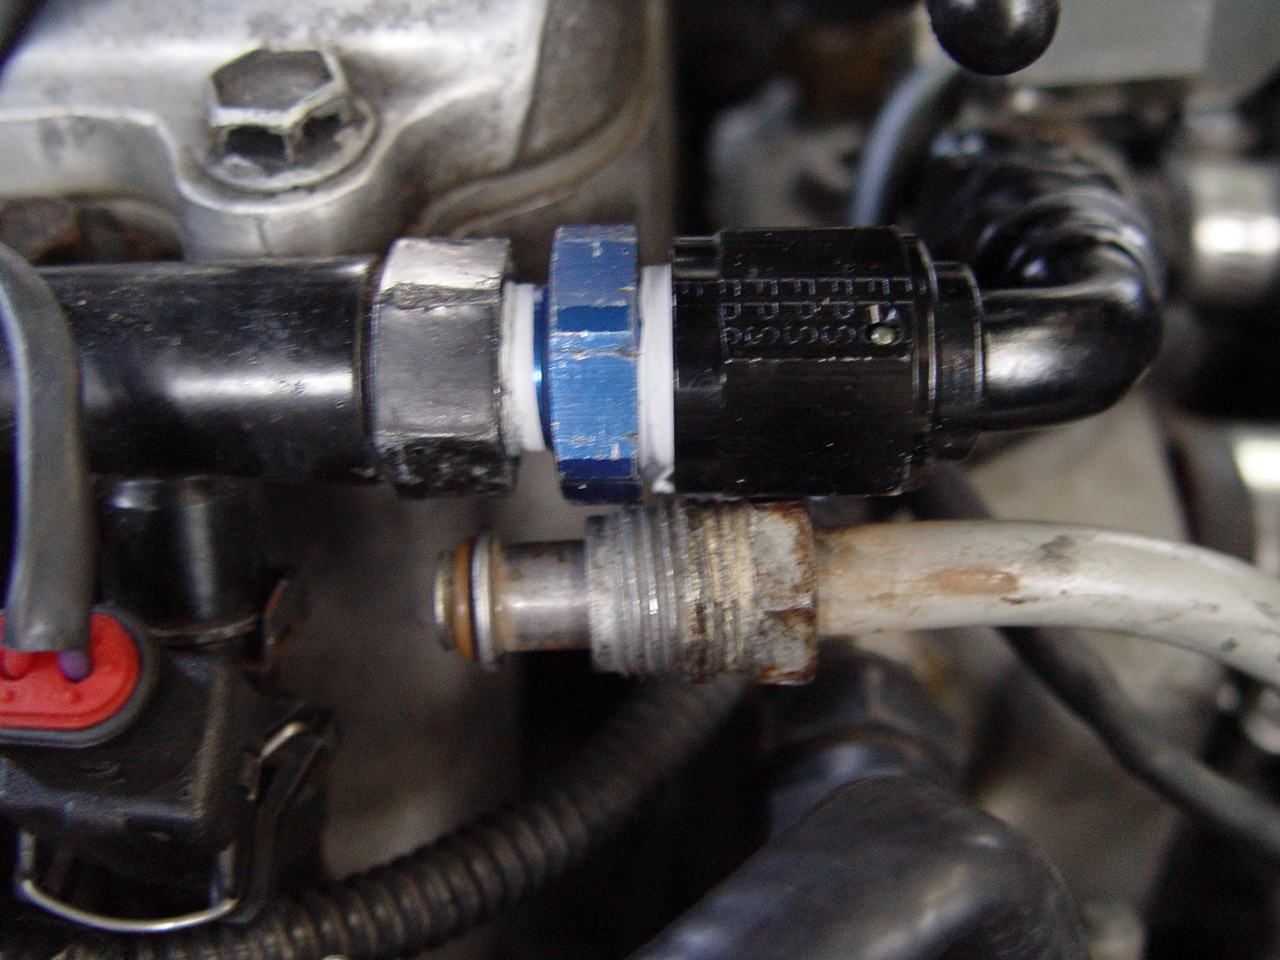
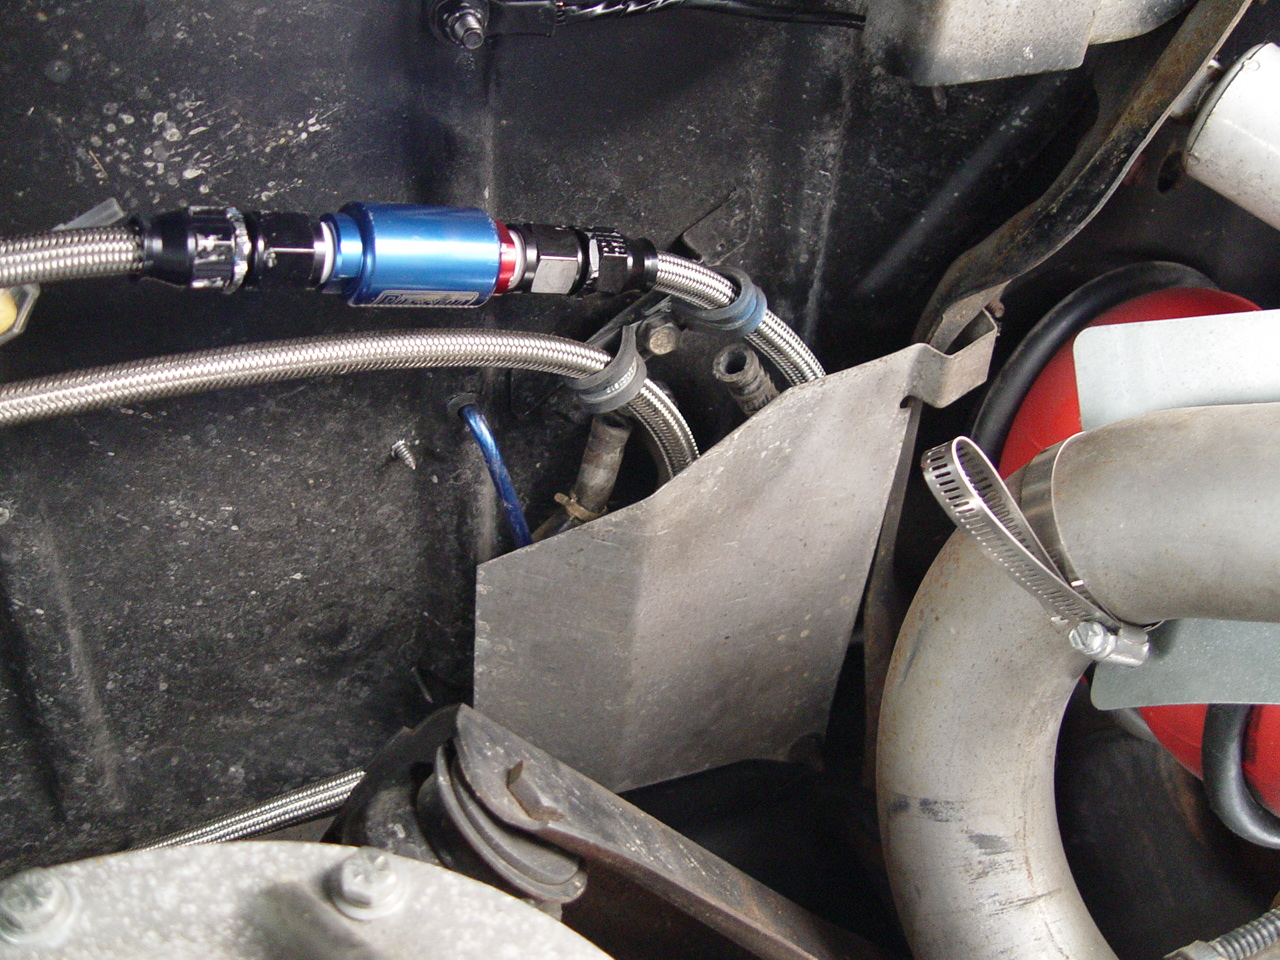
4. insert a 1/2″ Male JIC x M16x1.5 Male Metric adapter (thats the blue piece in the pic) into the factory fuel rail.
We lined the threads with teflon tape.
(there’s a piece on the end of the fuel rail that looks like a nut, but that part does not come off! The new adapter simply screws into that piece!)
{the adapter: http://www.jegs.com/i/Russell/799/670550/10002/-1?parentProductId}
5. a 20′ piece of teflon lined #8 braided hose was purchased (but about 3′ was cut off, not needed).
(teflon line is used because the rubber lined braided hoses stink! really! they give out a gassy smell! teflon doesn’t! The cost difference isn’t that much, especially if you can find it on sale, or get it at a discount at places like on ebay, etc.)
{we bought summit brand hose, which was slightly cheaper than the rest & it looks & works just as well as the other brands! note: you MUST get teflon hose ends when you buy teflon line! they’re different than the ones used with rubber hoses!}
For the fuel rail end, we got a 90 degree fitting to attach to the adapter.
(and this 90 fitting attaches to the hose directly).
{it’s recommended, by summit of course, that you use their own brand of hose ends, when using their brand of hose, so we did, & they work just as well as the more known name brands}
attach the 90 to the adapter.
(you can see the old stock fuel line just hanging there next to it, waiting for future removal)
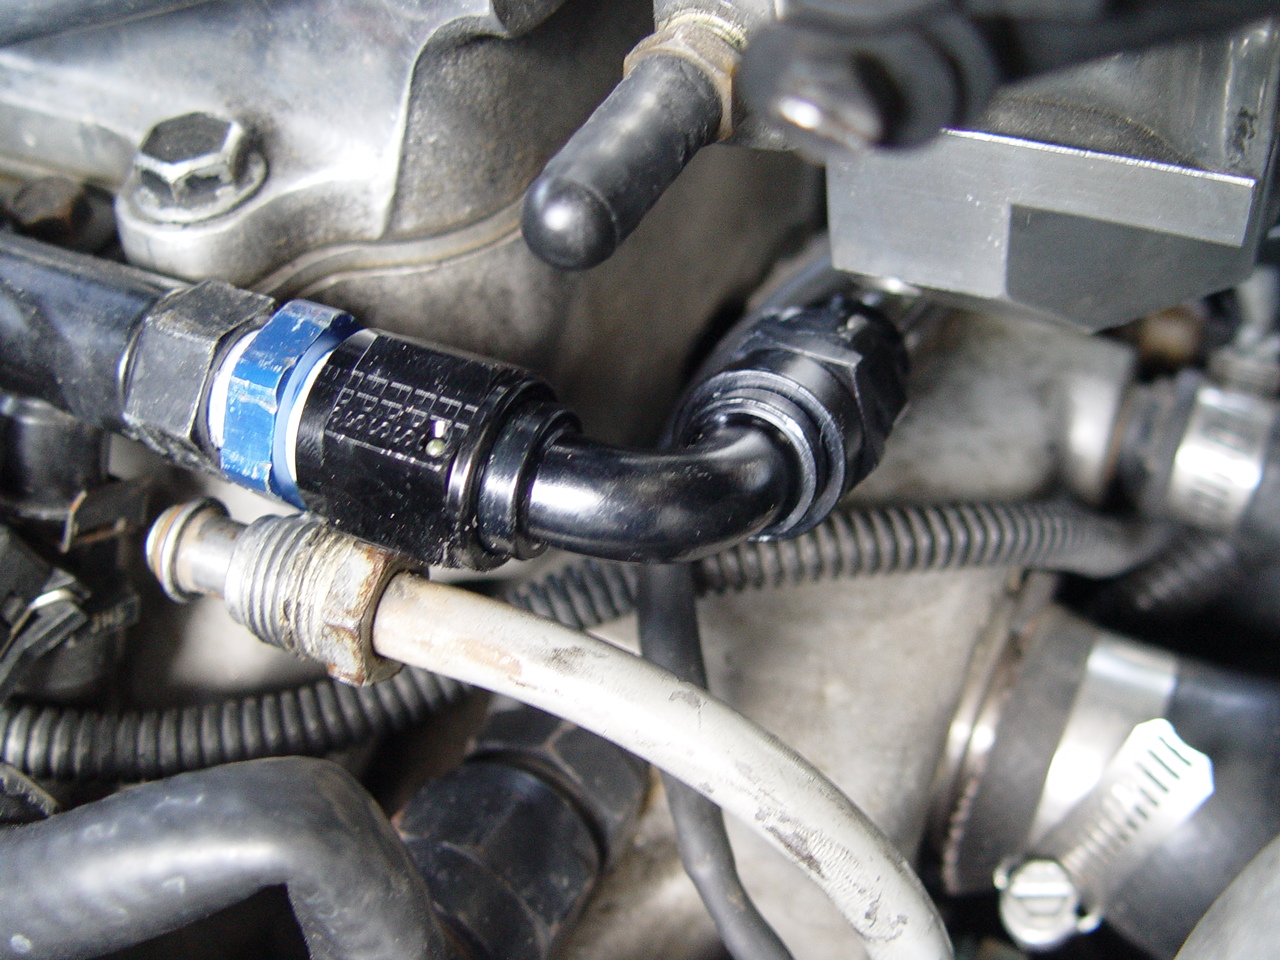
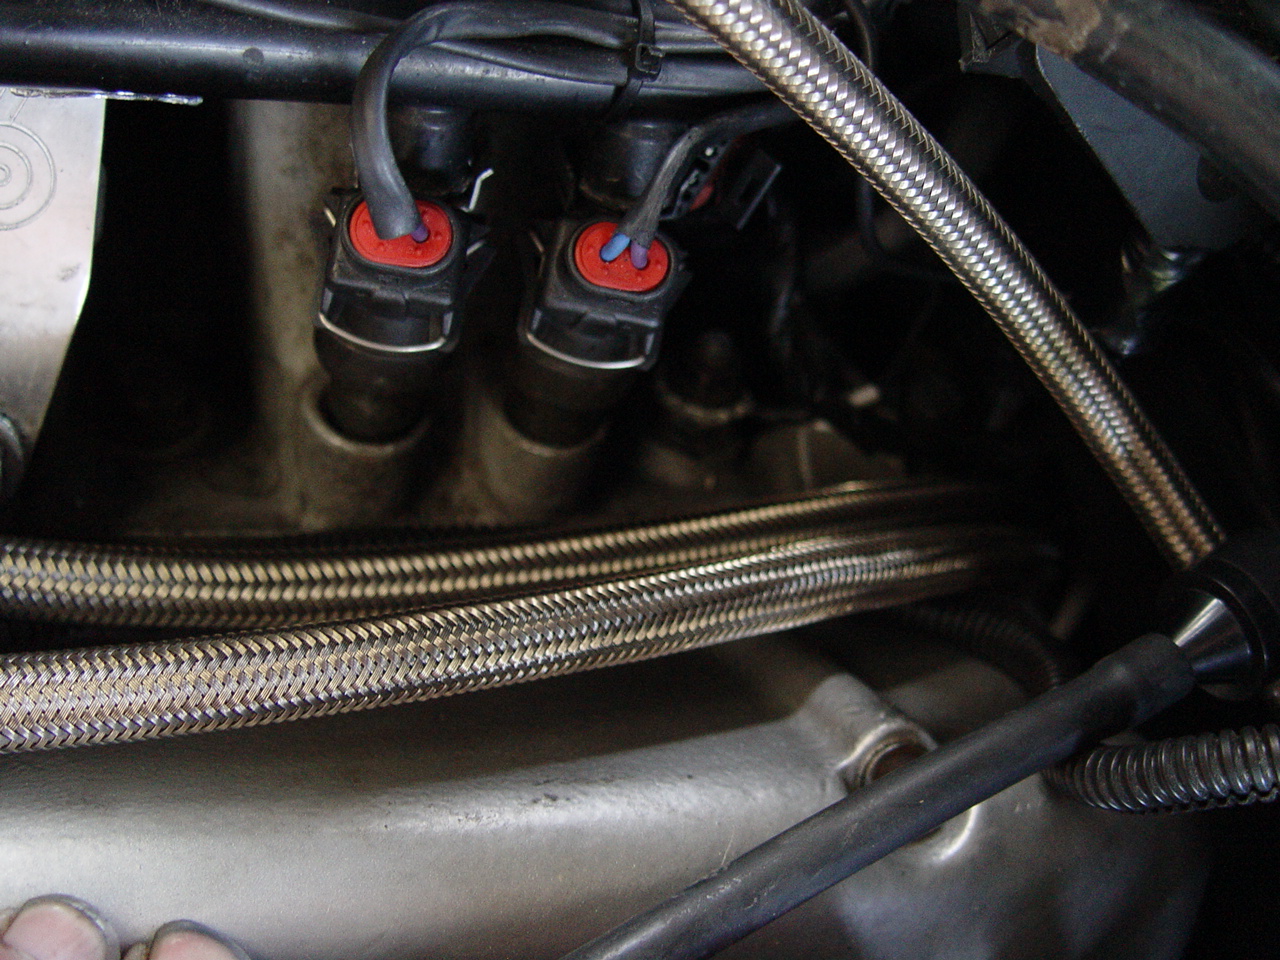
run the line under the throttle body & over towards the regulator.
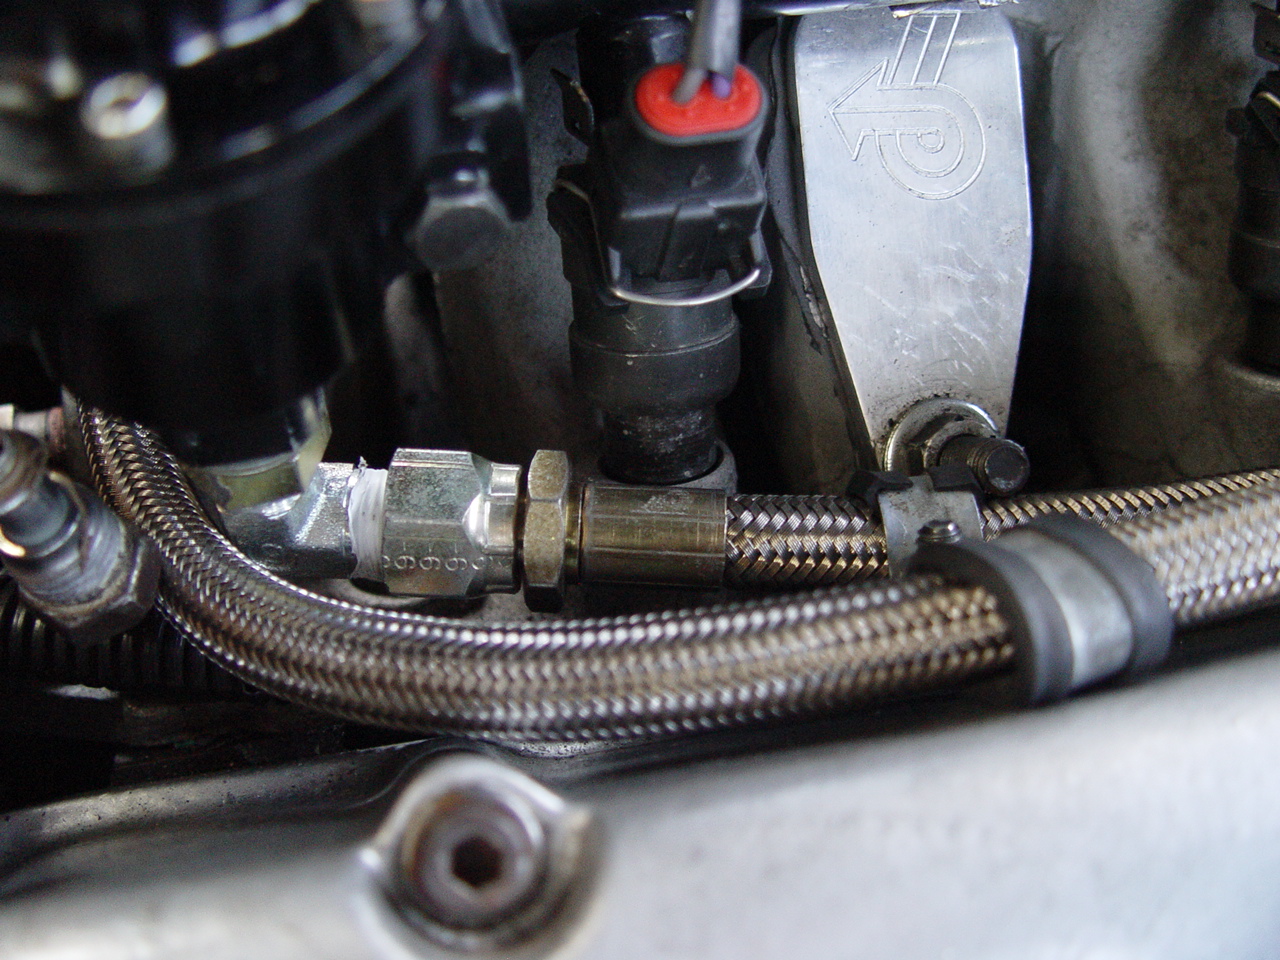
we are going to follow the exact same route we used for the return line.
we placed the feed line right next to the return line.
(IF you need it, more details about running the line, shown in a new window: running the return line)
6. run the line to the back of the car where the fuel filter is, using zipties as you go along.
(the fuel filter is located in about the position where “behind the drivers door would be, but in front of the rear tire” – attached to the inside of the frame)
(before you secure the new line in, now would be a good time to remove the old lines off the frame if you choose to go that route)
7. ok, you have an option here.
We chose to eliminate the factory fuel filter altogether & purchase a new one (different style), to be installed further back in the car (in front of the gas tank).
so if you are going to chose to do that, you can go on to step 8.
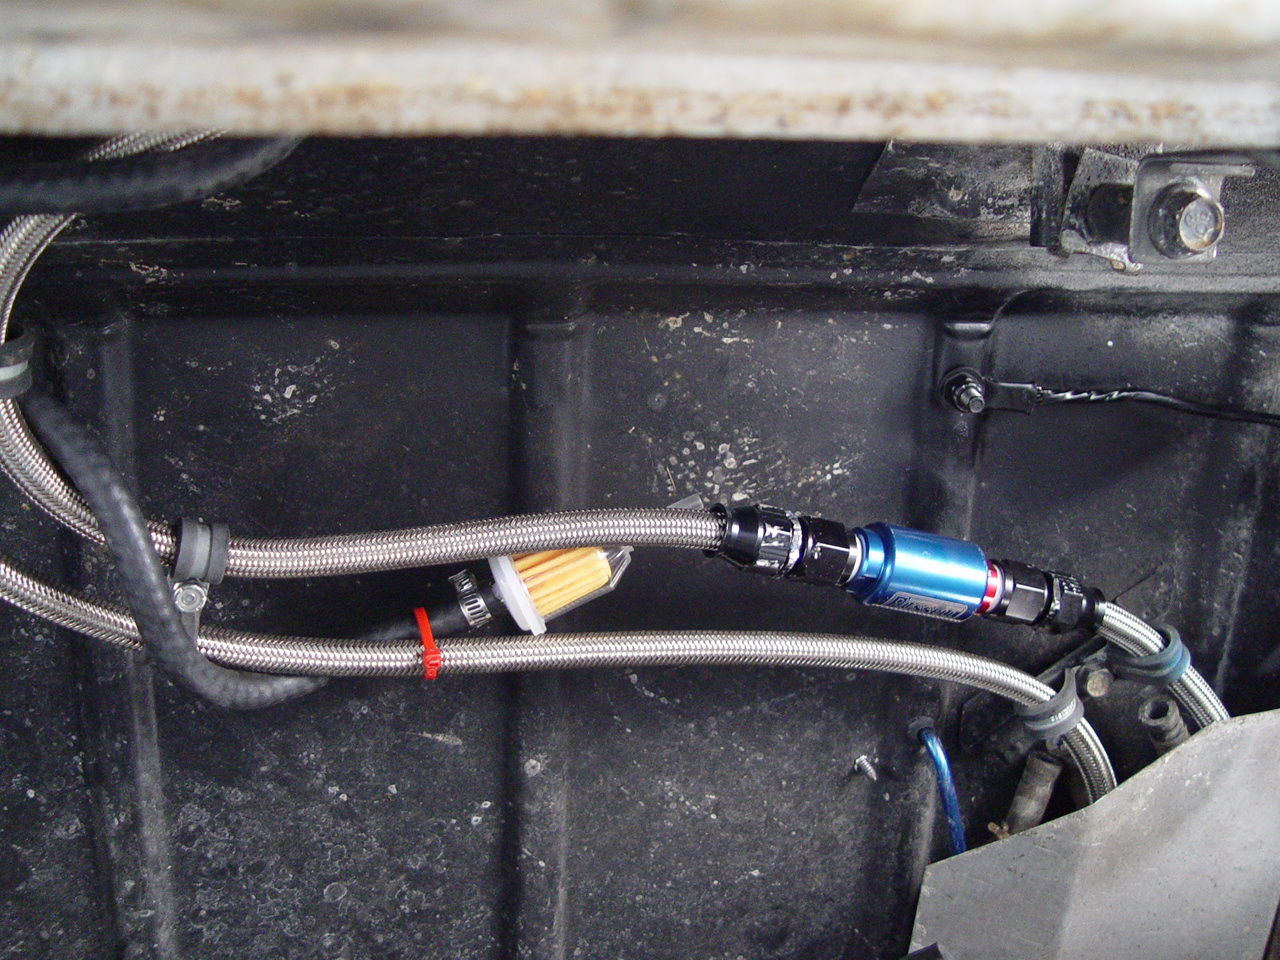
If not, here’s how you implement using & keeping the stock fuel filter:
purchase 2 adapters that screw into the fuel filter itself.
(these are the same exact adapters that you use on the fuel rail)
you will also need 2 more straight #8 hose ends, that will attach to these adapters (1 on each side of the filter).
{so you have the hose from the rail, ending at a straight #8 fitting (female end), then attaching to the adapter (male/male), which is attached to the fuel filter. the other side (filter entrance from gas tank) has an adapter on it, which is attached to another straight #8 fitting & then the hose is routed to the back of the car).
8. when you get to the old return line at the back of the car, specifically the point where the metal clip attaches the old lines to the chassis, stop. you can secure your new line at this point like we did (we removed all the old lines off the car).
{the picture below shows the clip we are talking about}
If you kept your original fuel filter, go on to step 9.
If you decided to run a new filter like we did, here’s the next step for you:
Run the new braided hose a short ways past that point, then you will cut the hose & attach a straight #8 hose end. This will then screw directly into the new filter.
{here’s what we used: http://www.summitracing.com/parts/rus-650100/overview/, note that some say this specific filter only filters down to 40 microns, and that its recommended to use a filter like 10 microns, but so far, so good for us. if need be later on down the road, we will upgrade to a better filter [that runs about $80] – but will be a direct screw-in replacement for this one, so it’s an easy swap if it’s needed}.
the logic behind having just a few inches of hose past the metal clip was for support for the new fuel filter. we didn’t have to physically secure down the filter by doing it this way.
leave yourself enough hose past the clip to be able to have enough room to remove the new fuel filter later on, when it’s time to remove it & clean it!
(note, it might be easier to run the hose like stated, mark it off where you need to cut it, then pull the hose back out {or pull it out just enough from the area where the stock filter is/was} & away from the car so you have have room to work to cut it & attach the fitting, so you don’t have to do that UNDER the car!)
attach the fitting onto the hose, then rerun it back thru the car to the metal clip.
attach it to the fuel filter.
attach another straight #8 hose end onto the remaining piece of #8 teflon braided hose.
then attach to the other side of the fuel filter (inlet from gas tank).
note, since there is just a screen acting like a filter, and nothing else inside, I don’t think it makes a difference which way you put the filter on.
(in this pic, the hose on the left side of the fuel filter (its blue), is the section that goes towards the gas tank).
9. run the hose towards the gas tank.
(the gas tank is at the top of this picture, the view is from “looking up” from the ground)
(on a side note, you can see how we routed the vent for our gas tank. more details about that in the return line article!)
the hose is going to come out from the metal panel / shielding, that is parallel to the upper portion of the back seat, head towards the passenger side of the car, go thru the metal clip, then swing towards the drivers side, (we ziptied the lines to the stock muffler hanging bracket {that we no longer use}) then semi-curve back towards the gas tank & follow the indent that the gas tank has on top of it.
Seems kind of like a lot of wasted hose, but, should the need arise, there is plenty of room to wiggle the hose out & about if you need to pull it or move it around for any reason.
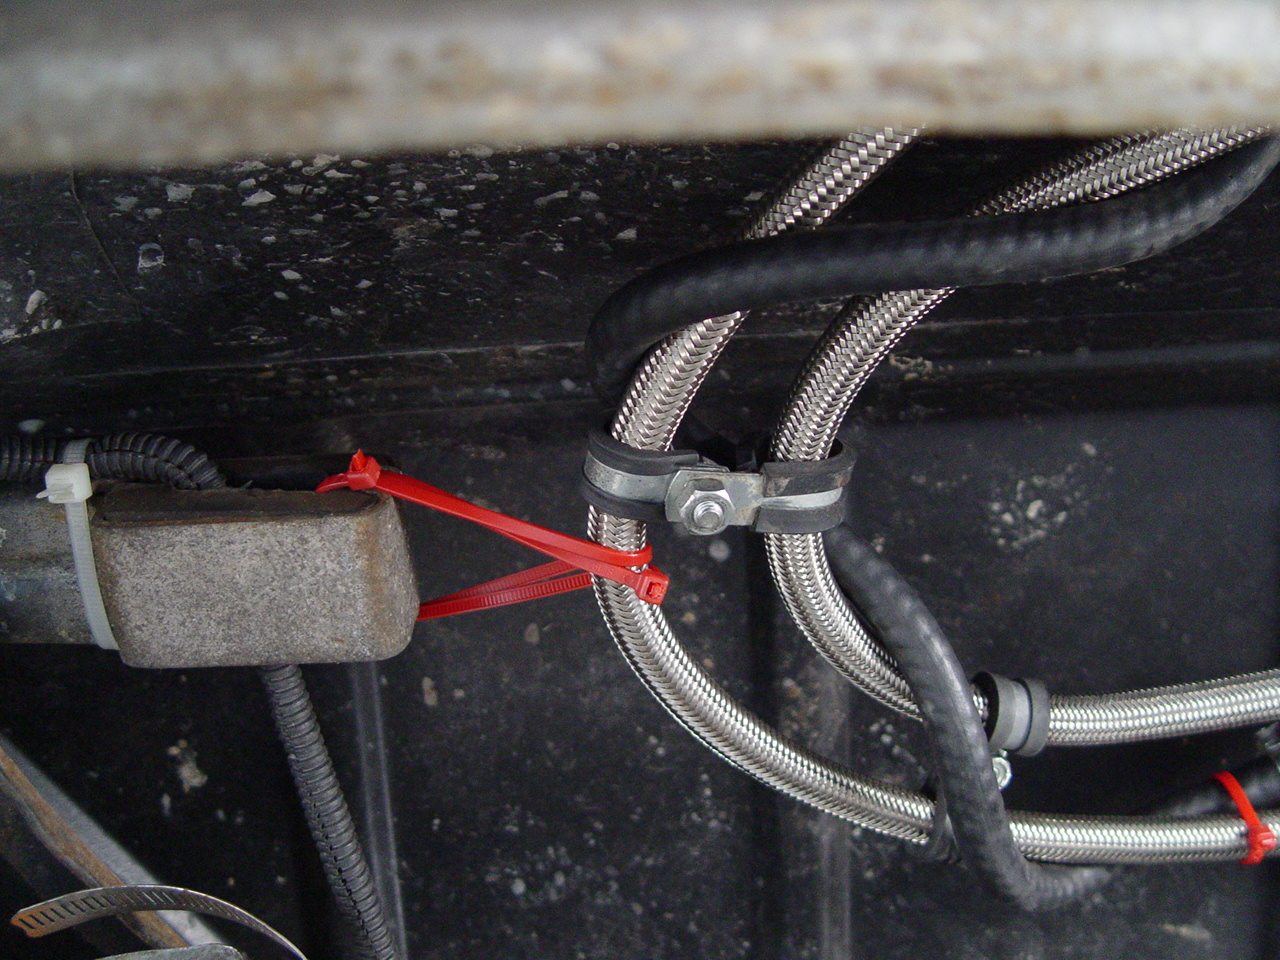
we also used these metal clips that have rubber around them to secure & guide the hose in the direction that we wanted it to go.
10. now you need to attach the hose to the gas tank.
If you routed your hose like we did (and used a new filter), the hose from the filter to the gas tank measures about 30 inches (give or take).
If you pre-route the hose, and figure out exactly how much you need (it’s always better to allow a few more inches than less, as you can always mount up too much hose somewhere, whereas, if you’re too short, then you’re screwed), you can cut as much as you need & mount both ends of the hose with the #8 straight fittings at the same time (from step 8).
depending on whether or not you have the factory sender, or bought a new one, such as the racetronix unit we used, depends on what type of barbed end you will need (to connect to the rubber hose that attaches to the fuel sender).
the factory metal tube is for a 3/8″ rubber hose.
the racetronix unit – you can use a 1/2″ rubber hose.
(note: you could use a 3/8″ even with the new sender, but why cause more restrictions?)
{if you bought one of those racetronix [or other] senders that already have AN fittings on the metal lines, just measure the amount of braided hose needed & connect it directly up to that! you may need 45/90 degree fittings instead to make sure the gas tank indent route is followed}
(the gas tank indenting is their for your hoses to follow in that path since the gas tank sits pretty close to the chassis!)
we bought a #8 male to 1/2″ barb fitting.
attach whichever barb fitting works for your application.
if you’re using the factory stuff, attach a 3/8″ hose (about 10″) from the barb fitting to the tank & clamp down.
for the racetronix version, here’s what we did:
originally, we couldn’t find 1/2″ EFI hose, so we used 1/2″ heavy duty heater hose. Since we only used a piece that was about 4 inches long, we figured that’d be ok, considering that, basically, there was no gap between the barb end & the sender lines, it was more or less a “coupling” between the two.
However, there wasn’t enough stretch, between the rubber hose & the braided line, to make the turn or bend, as is imbedded/routed in the gas tank.
we are mentioning this because that “seemed” like an easy fix, an easy way to do the line to get it done. but after doing it that way, and thinking about it, later consequences could be bad! like leaking lines, etc.! (especially since there really wasn’t any “give” in the line by doing it that way).
ok, removed that & next attempt:
we still couldn’t find the correct to use 1/2″ EFI hose.
and even though the way we did end up doing it, isn’t technically “the right way” to do it, we think it’ll be ok, as we intend to check it out in a few years to make sure the hose is still doing ok (not melted away / fraying / leaking, etc.).
Here’s the steps, but then after you see it, we’ll tell you how the hose was actually made (its 2 pieces).
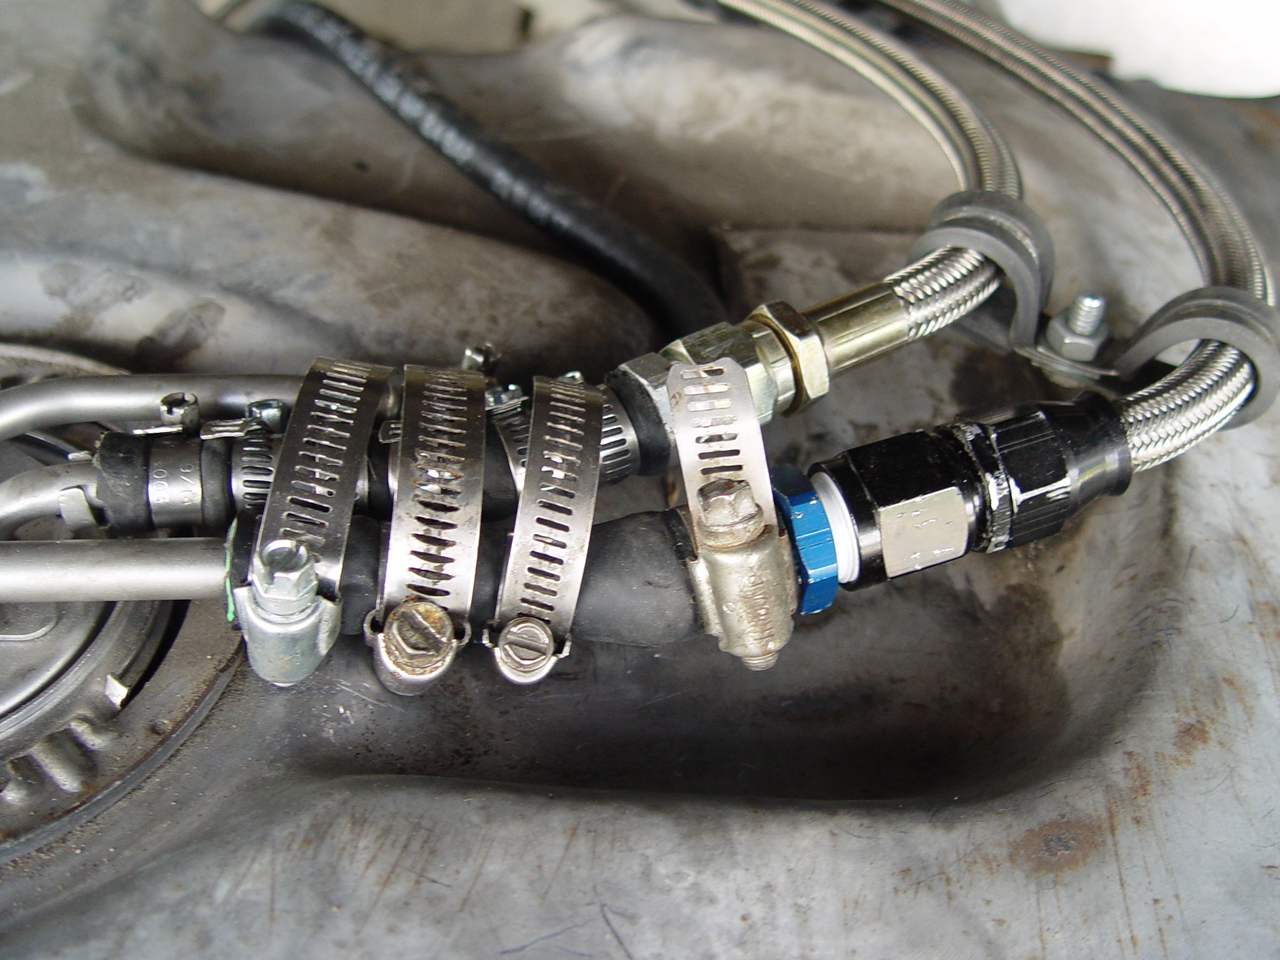
attach the barb fitting to the hose end. teflon tape.
attach rubber hose. use 2 clamps to attach to barb.
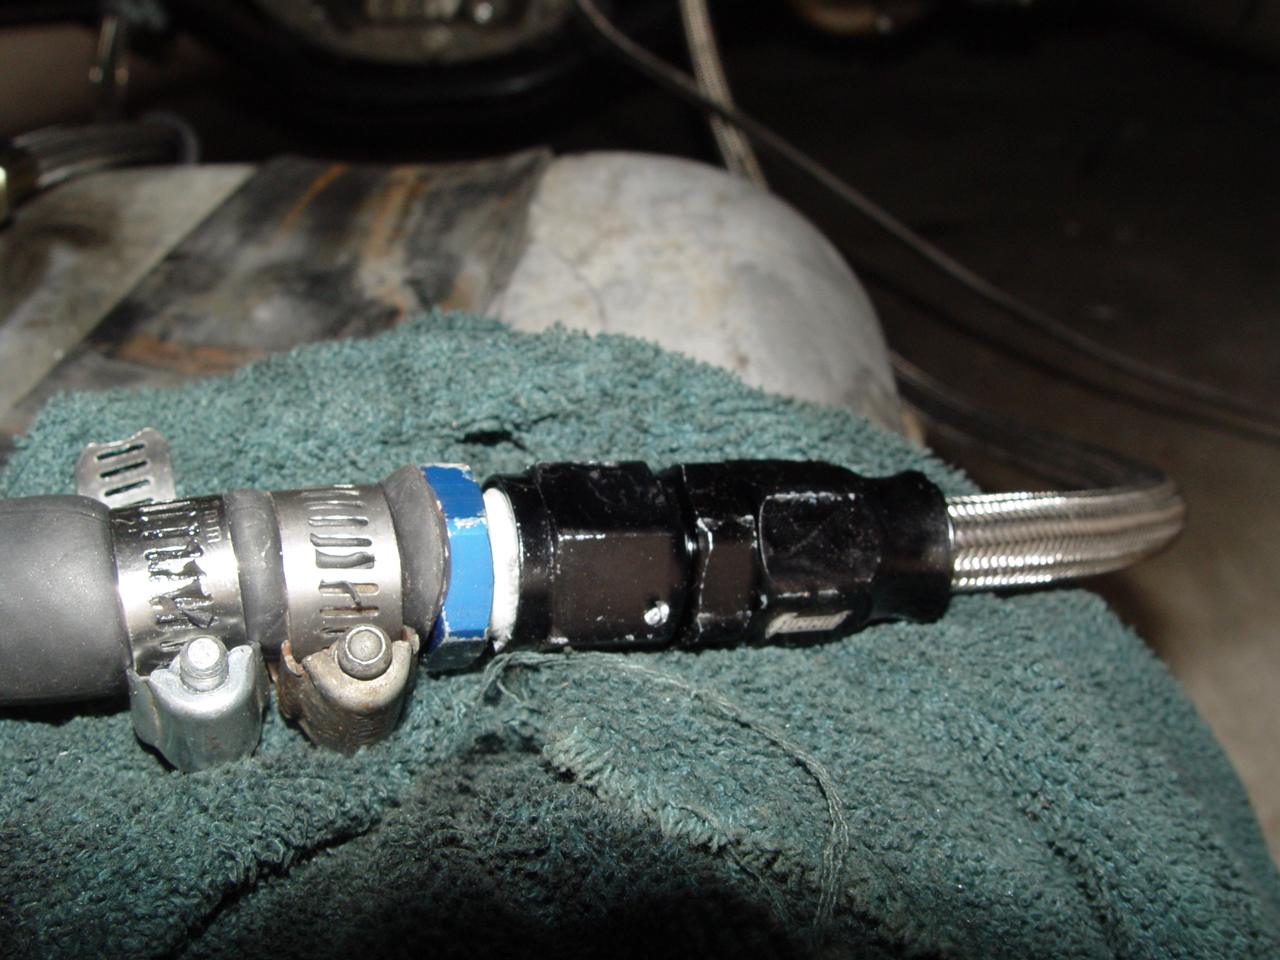
attach rubber hose to gas tank tube.
(biggest tube of the 3, the one closest to the rear of the vehicle).
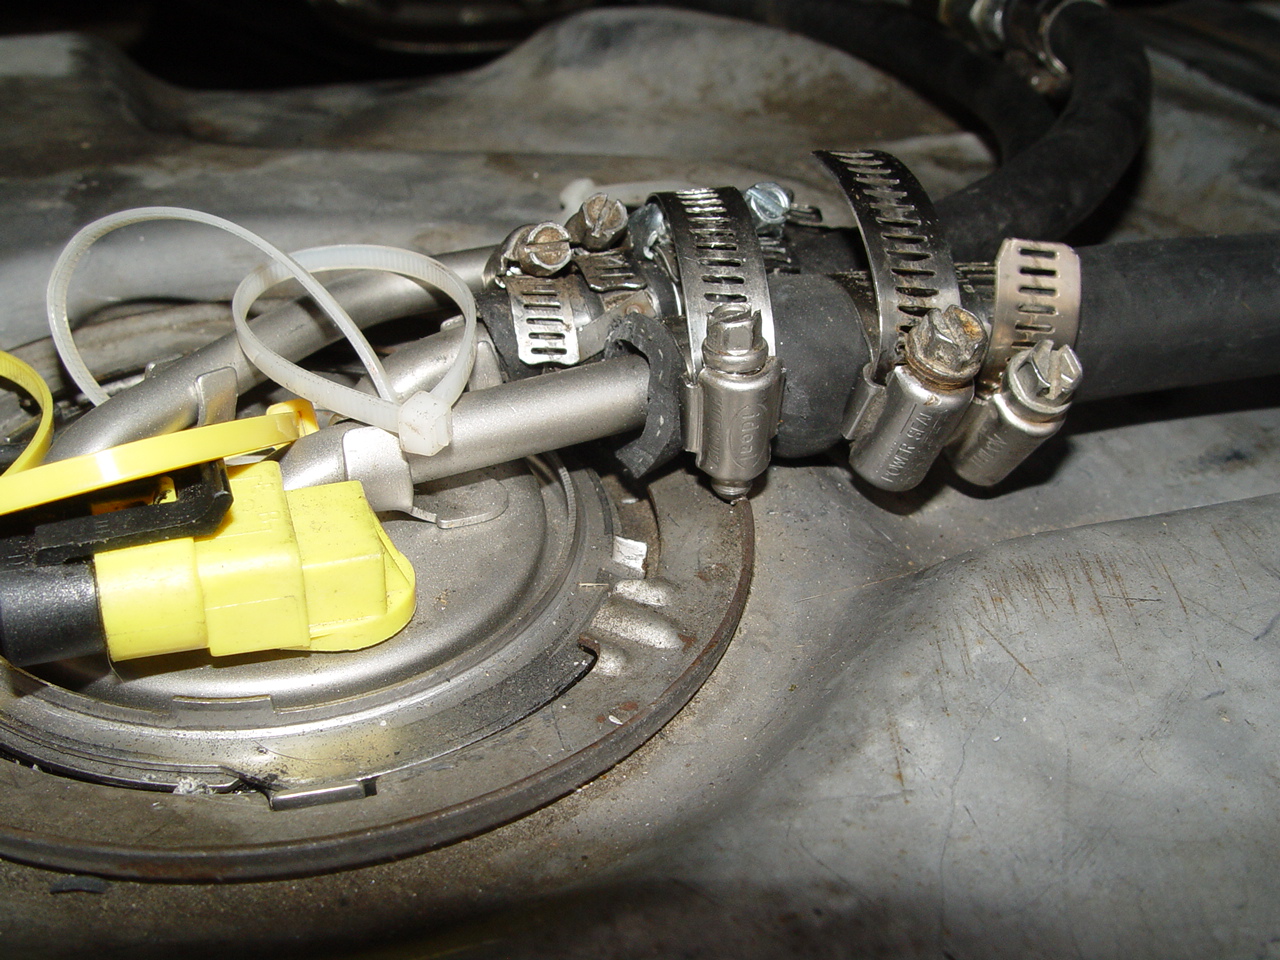
we used 3 clamps to secure the hose onto the metal line, one on the side of the bump nearest fuel pump, 2 on the other side nearest braided line.
here’s a whole shot of both ends:

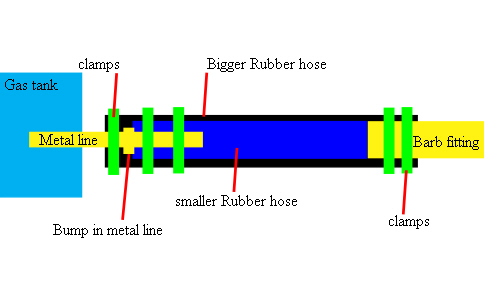
Now, here’s how we made up the hose, considering that we used heater hose, but felt like that alone, either wouldn’t hold up to the pressure, or wouldn’t last considering that it’s not really meant for gas.
the below picture will probably explain it better, but here’s what we did:
we took a piece of heavy duty 1/2 heater hose 8″ long, and stuffed it inside an 11″ piece of 5/8″ heater hose.
(it might have been a 3/4″ piece of heavy duty hose instead of 5/8″, I don’t remember. when you are at the store acquiring your new rubber hose, physically put one into the other. there shouldn’t be any gap in the 2, or a very minimal amount).
the inside hose is about 1.5″ from the barb end, with the bigger hose (only) attached to the barb using 2 clamps. this in effect, puts the 1/2″ hose butted right up to the barb fitting (but it doesn’t actually “attach” to the fitting).
{1.5″ of the bigger hose is clamped onto the barb fitting}.
on the gas tank line side: the 1/2″ hose slides over the metal line, and rests against the bump thats on it (the bump is the first step to prevent leaks). The 5/8″ hose goes even further onto the metal line, past the bump (towards the fuel pump), about 1.5″. then its secured with the 3 clamps: the 2 that are next to each other hold both hoses onto the metal line before the bump. the other clamp (nearest fuel pump) only holds the 5/8″ hose onto the metal line (the second step to prevent leaks).
thats a description of the way it works.
Of course, when you actually install it, both hoses are already assembled together, so do it like this:
Push the 1/2″ hose into the 5/8″ hose and butt up the 2 ends on one side (coating a bit of oil on the smaller hose will make it go in easier).
Then take that end & push it onto the barb fitting, to make sure that the end of the smaller hose IS right up against the barb fitting, and clamp it down.
For pushing onto the metal lines, it’s kind of a struggle (a little oil on the metal line helps lube it up & makes it a bit easier), but keep shoving the rubber hose onto the metal line. You should feel it when the smaller hose hits the bump on the metal line (you can check with a flashlight or stick a small screwdriver inside to feel if its lined up).
The smaller hose should already be in the correct spot inside the bigger hose from when you did the other side.
When the 1/2″ hose is up against the bump, the bigger hose should be in the right spot further up onto the metal line.
secure the 3 clamps down on the bigger hose (of which 2 of them will be securing down the smaller hose).
believe it or not, no leaks!
and it seems strong enough to last for awhile.
(but hence the future checks on it!)
Note: IF you can acquire the proper 1/2″ EFI hose, you should use that. we didn’t because we couldn’t find it, and were in a rush to finish this up. At a later date, we intend to use the correct sized hose!
11. It’s a good idea to leave the gas tank on the ground, with all hoses attached, wire up the pump connections (& grounds) & actually turn the key forward (but NOT with engine started) & check for leaks before installing the tank again! That way you don’t have to drop it back down in case it does leak!
12. No leaks? Cool! put the tank back up & connect up the wiring.
13. In front of the gas tank, secure the hoses out of the way!
Look out for exhaust pipes or anything that might be in the way!
You don’t want to have the braided hose swaying around when your right foot decides to make your face smile!
14. check your fuel pressure! adjust if necessary!
15. Miller time! (or whatever your preference!)
unless you want to go for a test drive… then perhaps you should do that first…
.


