


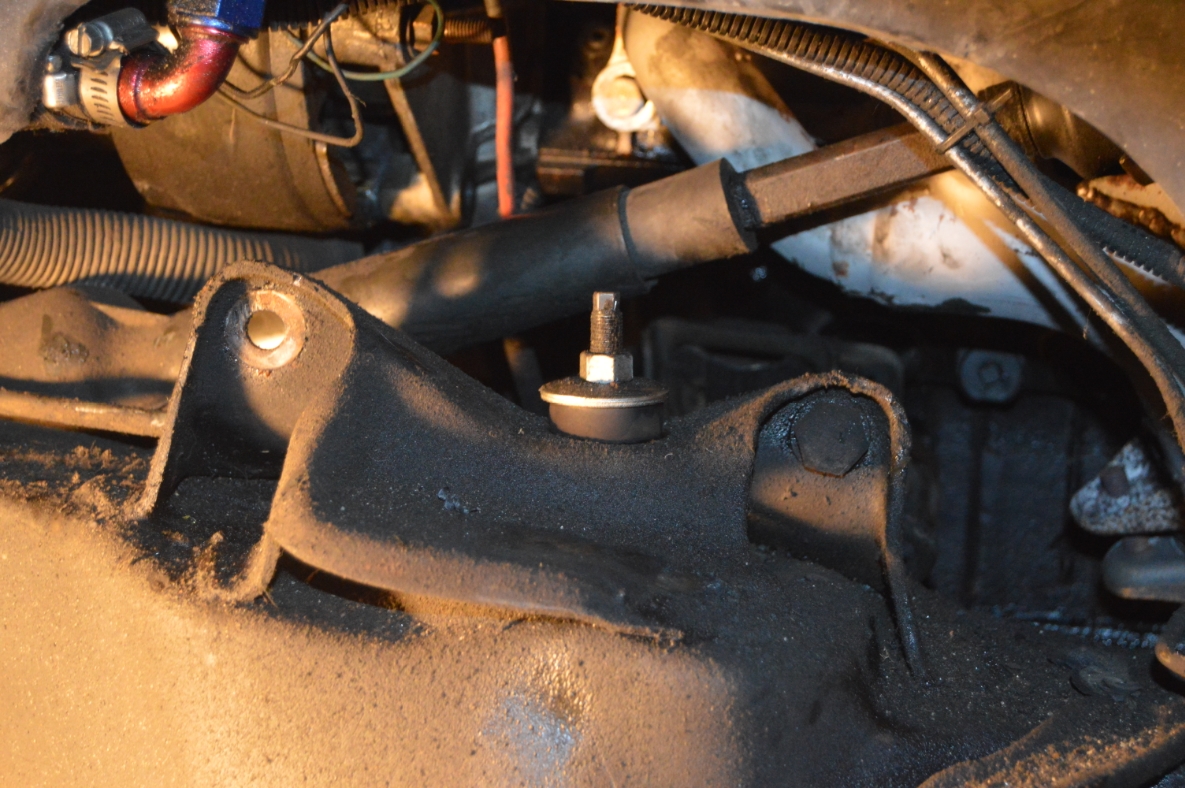
Most Turbo Buick owners don’t usually mess with (or even check) the bushings on the cross shaft of the stock front upper a arm unless there’s an issue with them.
Sometimes they start to feel funky vibrations coming from the front end of their Regals.
Then that’s usually one of the items that are looked upon when investigating what could be the potential problem.
Discovering that this was the exact cause of the shaking coming from the front end of this 1986 Buick Grand National, replacement of the cross shaft bushings needed to be tackled.
This isn’t a real fun job to do, but one that requires attention and is a necessity to put the Gbody Regal back to it’s natural state of handling.
.
Theoretically, the front end alignment should still be ok after this job is done, assuming you put all of the alignment shims back in the same place that they were before you began this task.
(for this specific Turbo Regal, on the drivers side, there was 1 thick 2 thin on the front & 2 thick 1 thin on the rear; passenger side there was 2 thick on the front & 4 thick 1 thin on the rear)
.
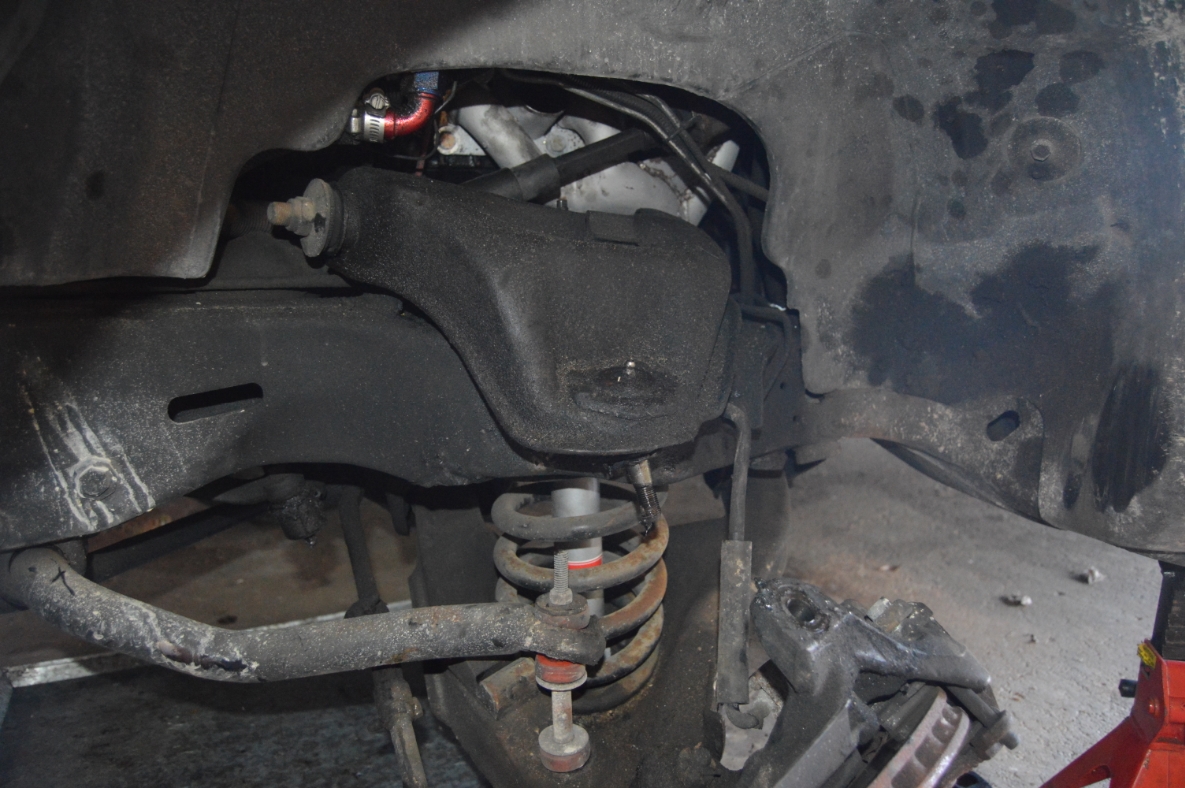
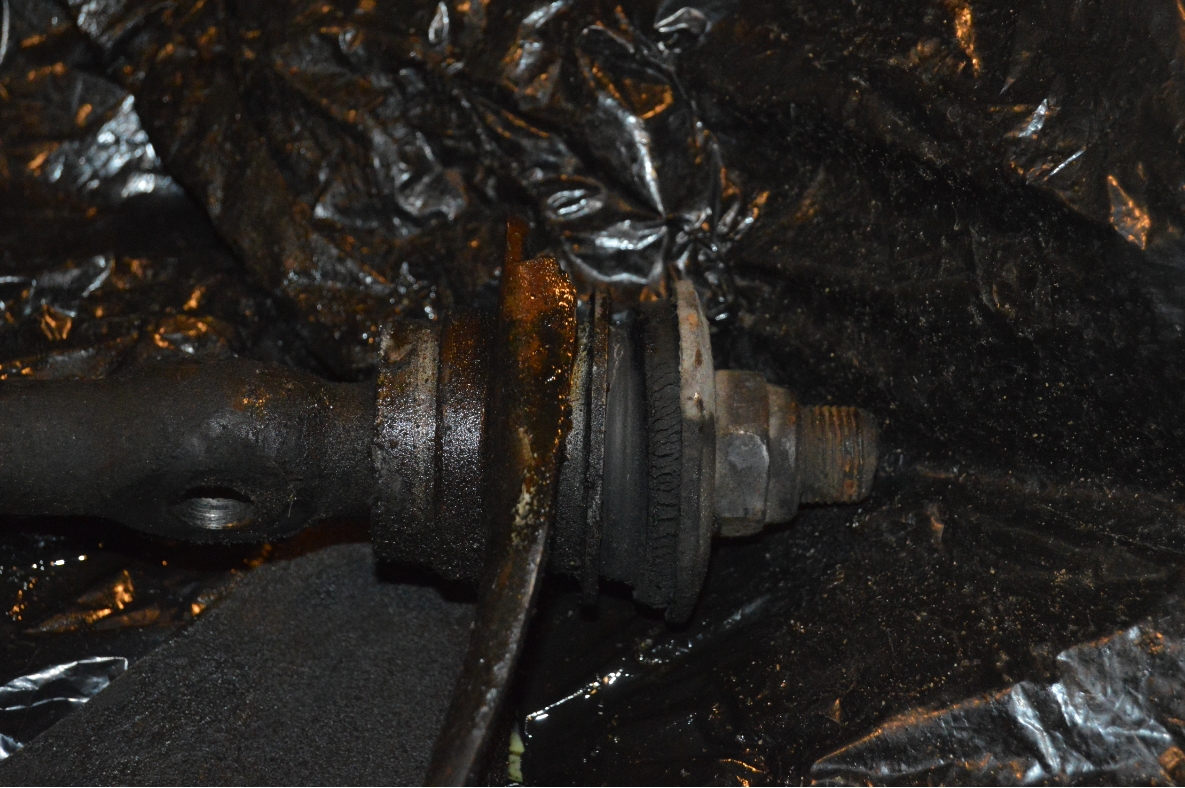
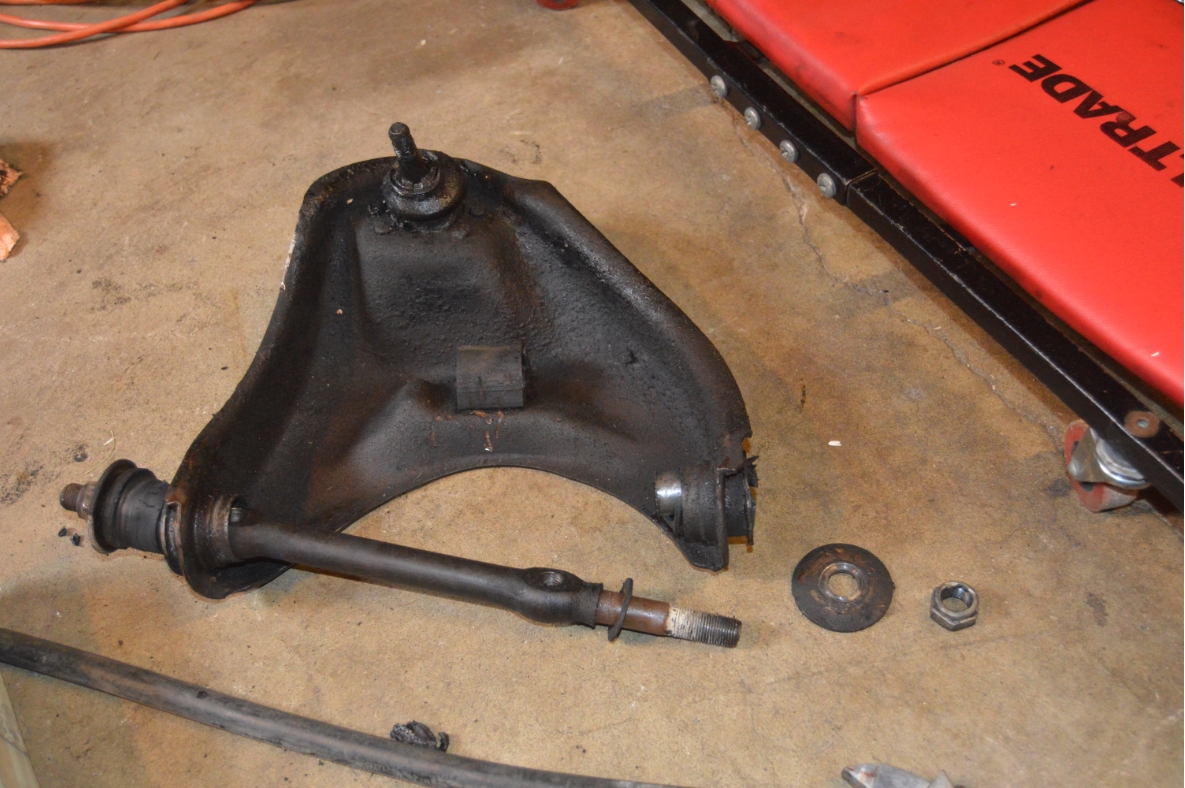
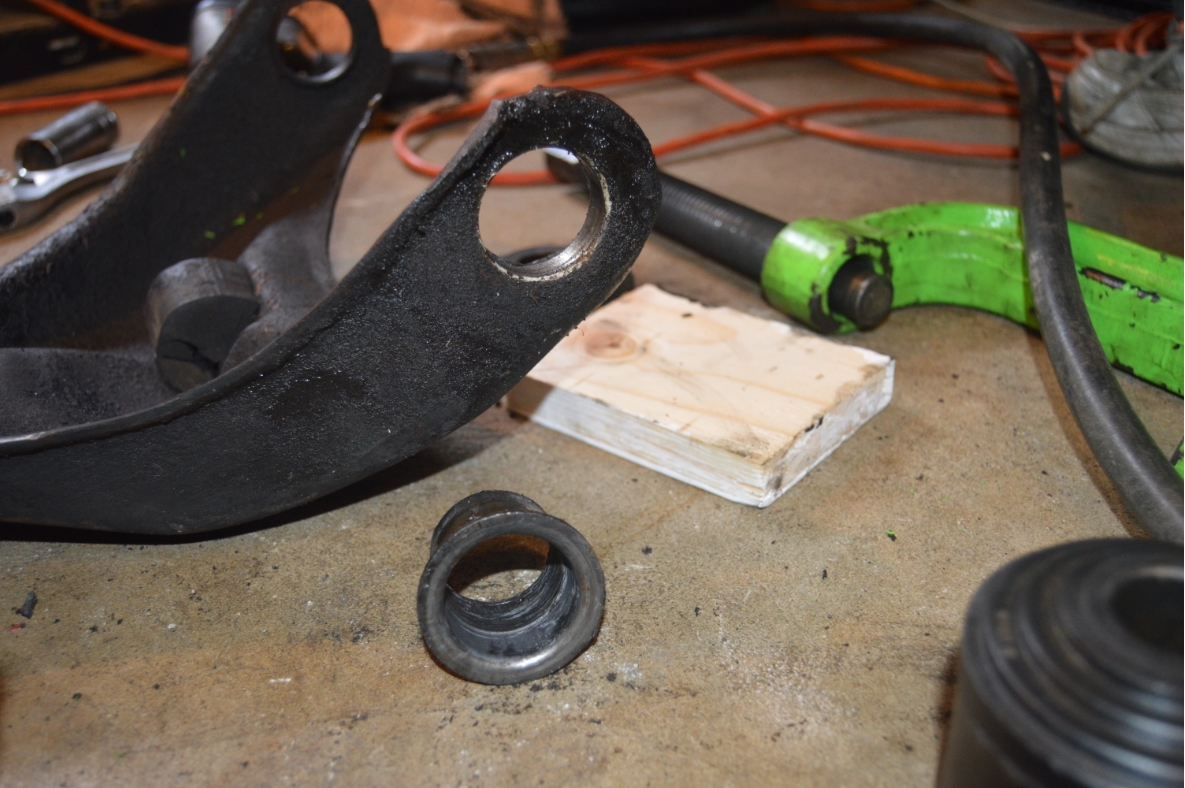
Some people replace the bushings ON the car (a bit difficult as there isn’t much room in this area). We decided to remove the upper arms so we could inspect them, clean them up, and give them a fresh coat of black paint.
.
.
COMPLETION TIME:
about 4 hours
.
PARTS:
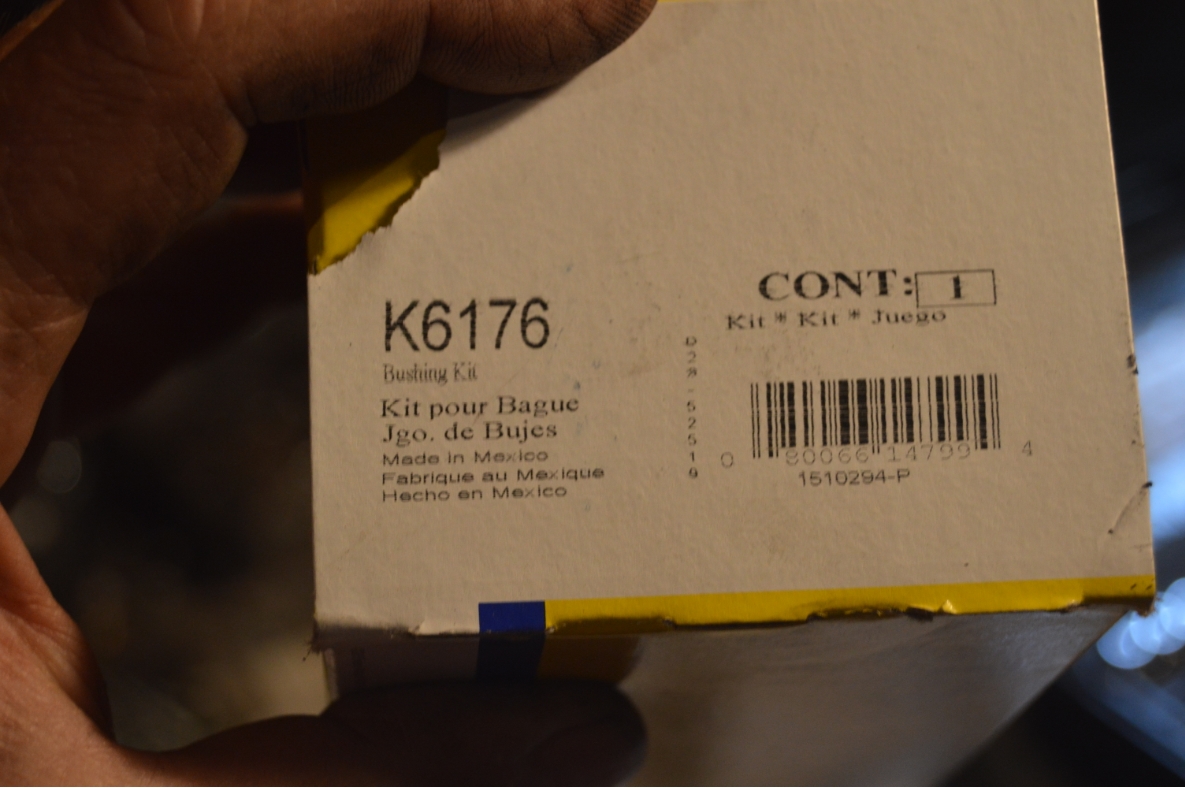
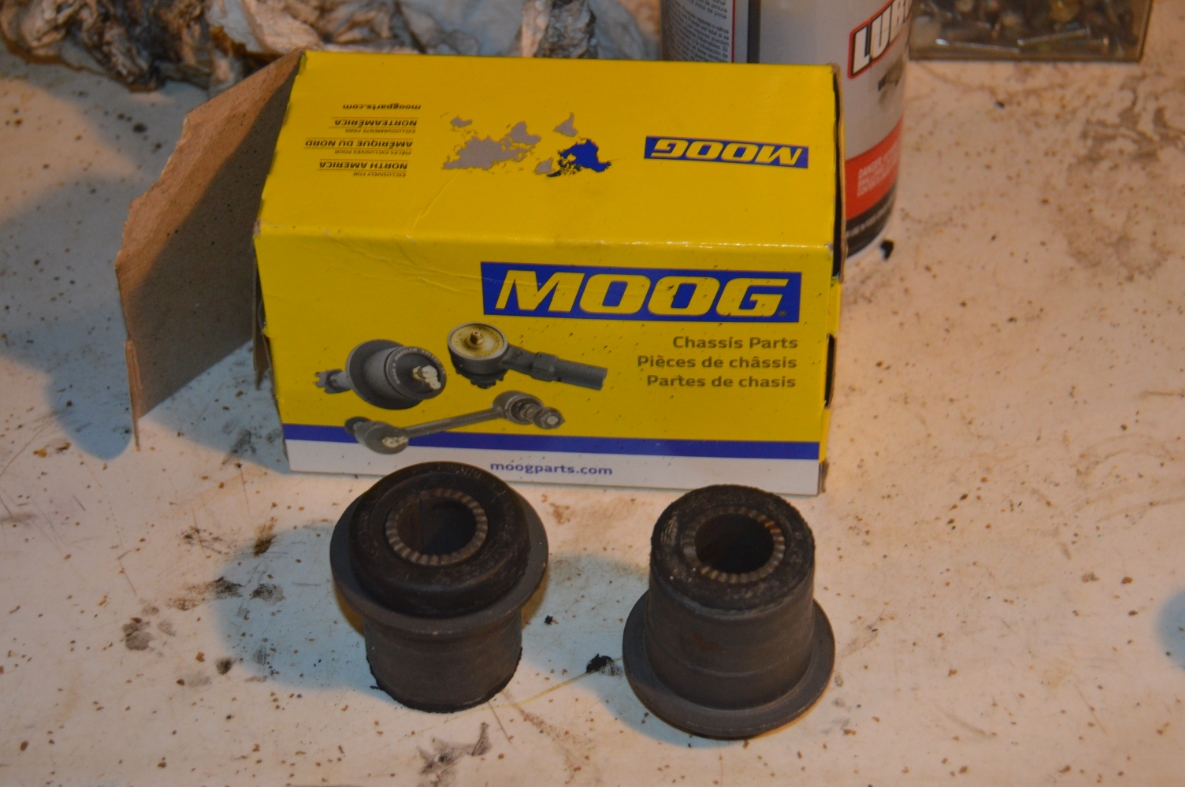
* Moog cross shaft bushings (#K6176, set of 2, you need 2 sets, $12 each, amazon)
* black paint (1 can, $5 home depot)
.
TOOLS NEEDED:
* 22mm wrench/socket (ball joint castle nut)
* 18mm wrench/socket (cross shaft to frame bolts/nuts)
* 24mm (15/16″) wrench/socket (cross shaft end nuts)
* pipe wrench / crescent wrench (to hold cross shaft while you remove end nuts)
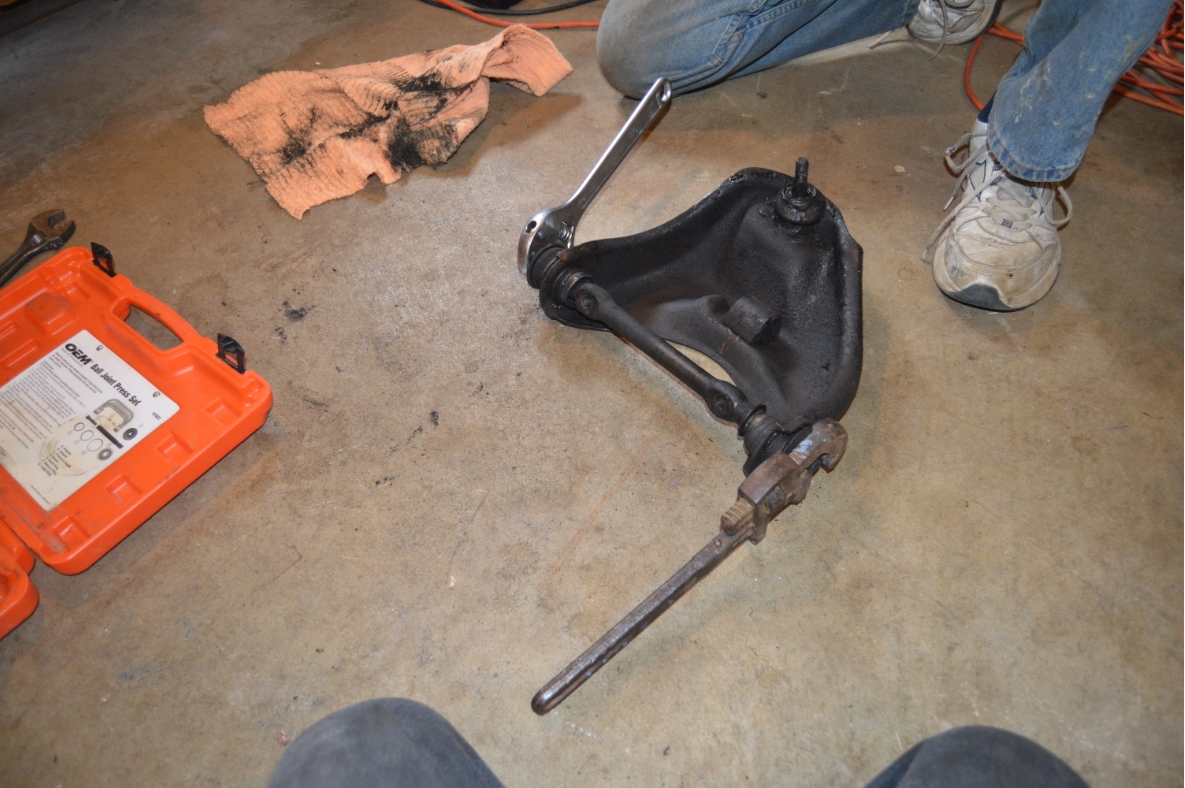
* pickle fork (ball joint separator)
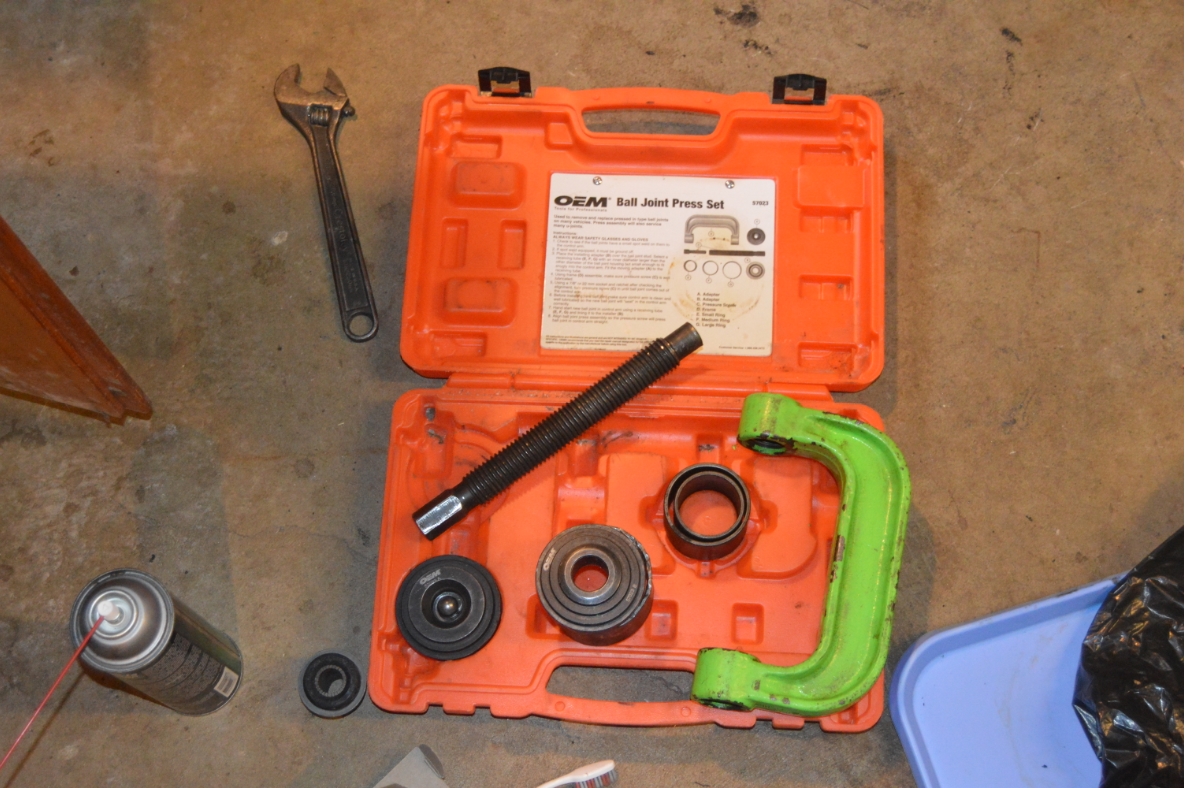
* ball joint press set (rent at Autozone for free)
* hammer (BFH)
* wire wheel (to clean arm before painting)
* jack stands
* floor jack
* air tools are helpful, if available!
.
HOW TO:
.
We started on the drivers side (harder than doing the other side because of lack of space due to the steering shaft being in the way) and totally completed this side before proceeding with the passenger side.
.
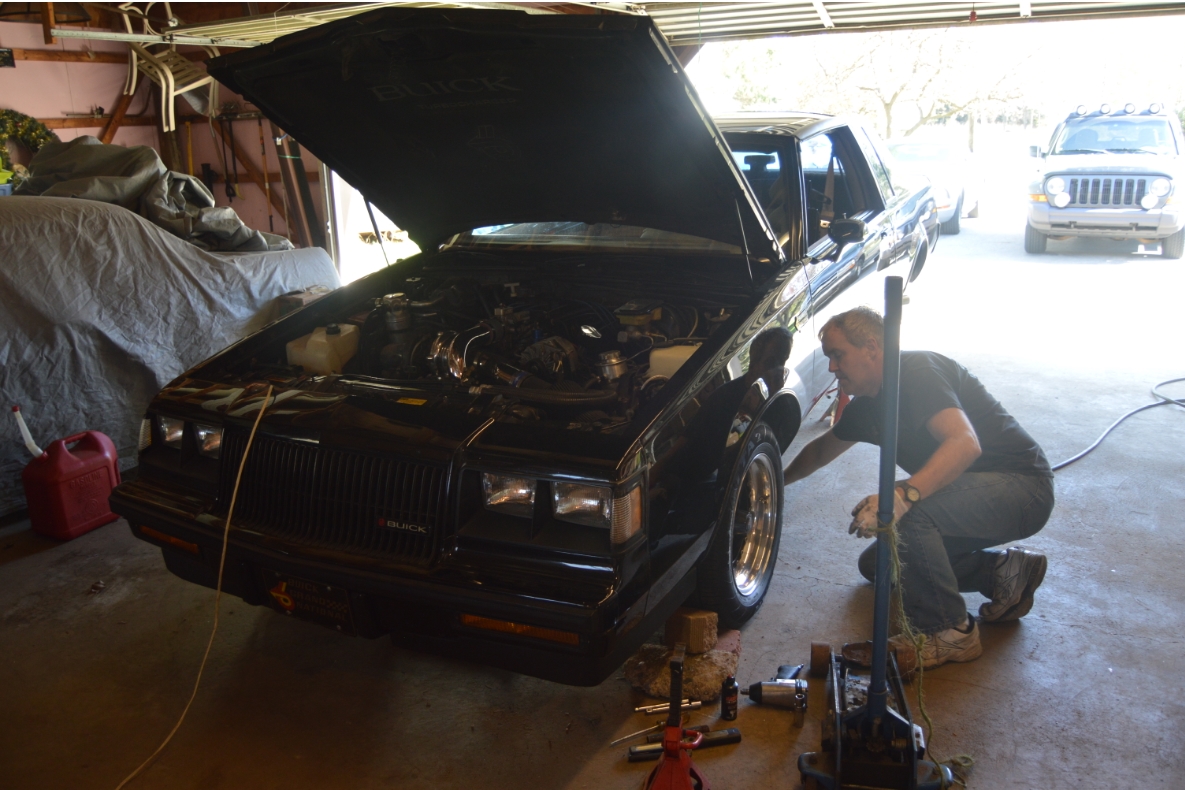
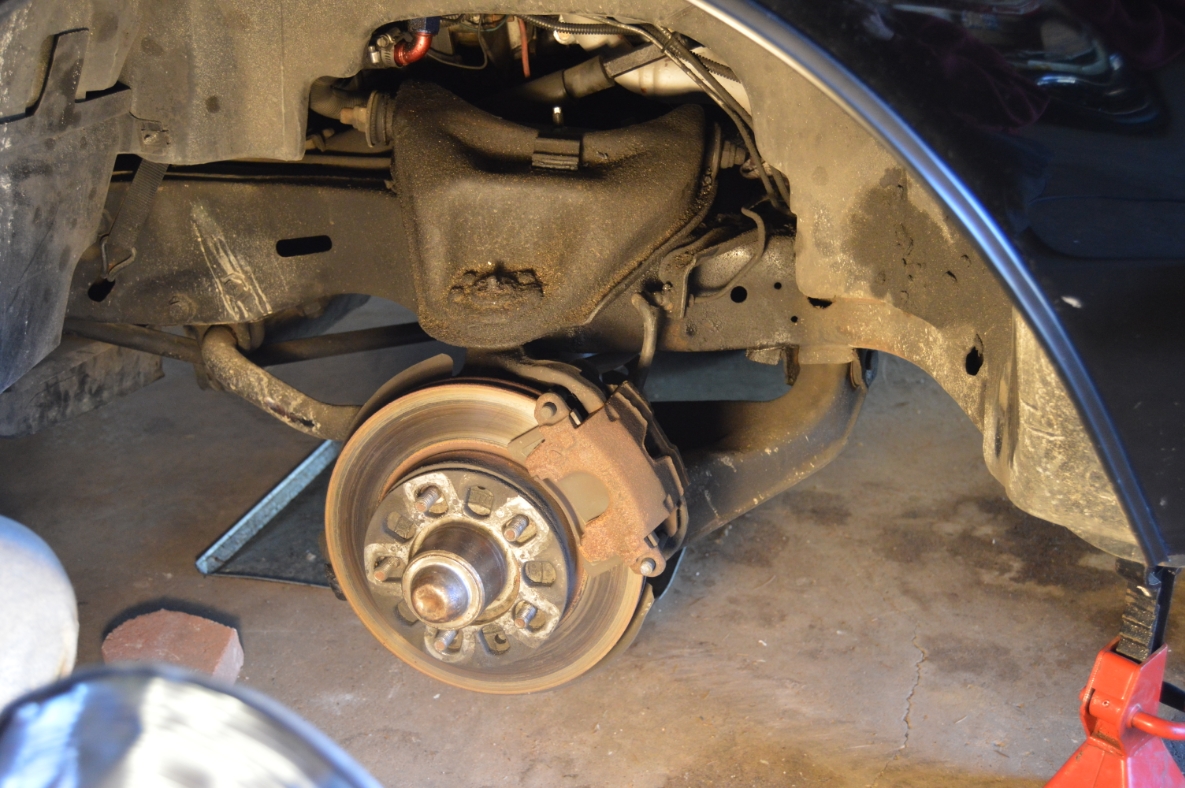
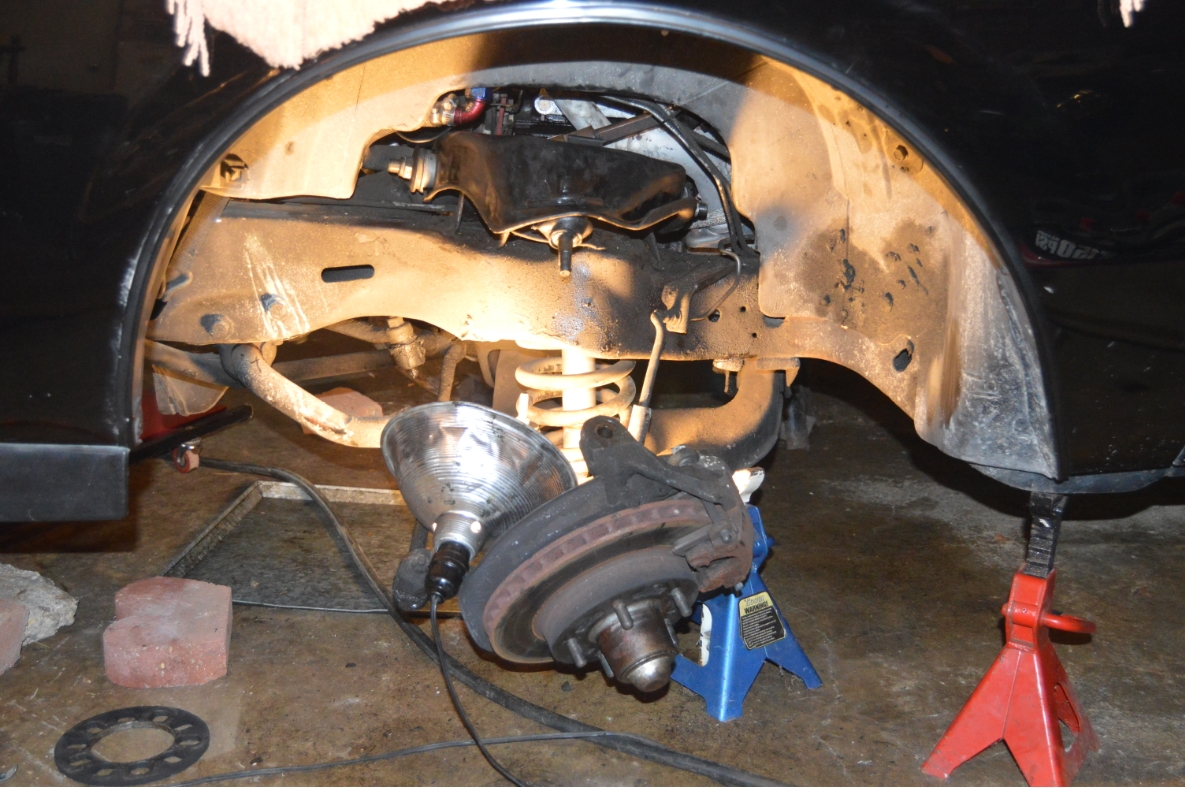
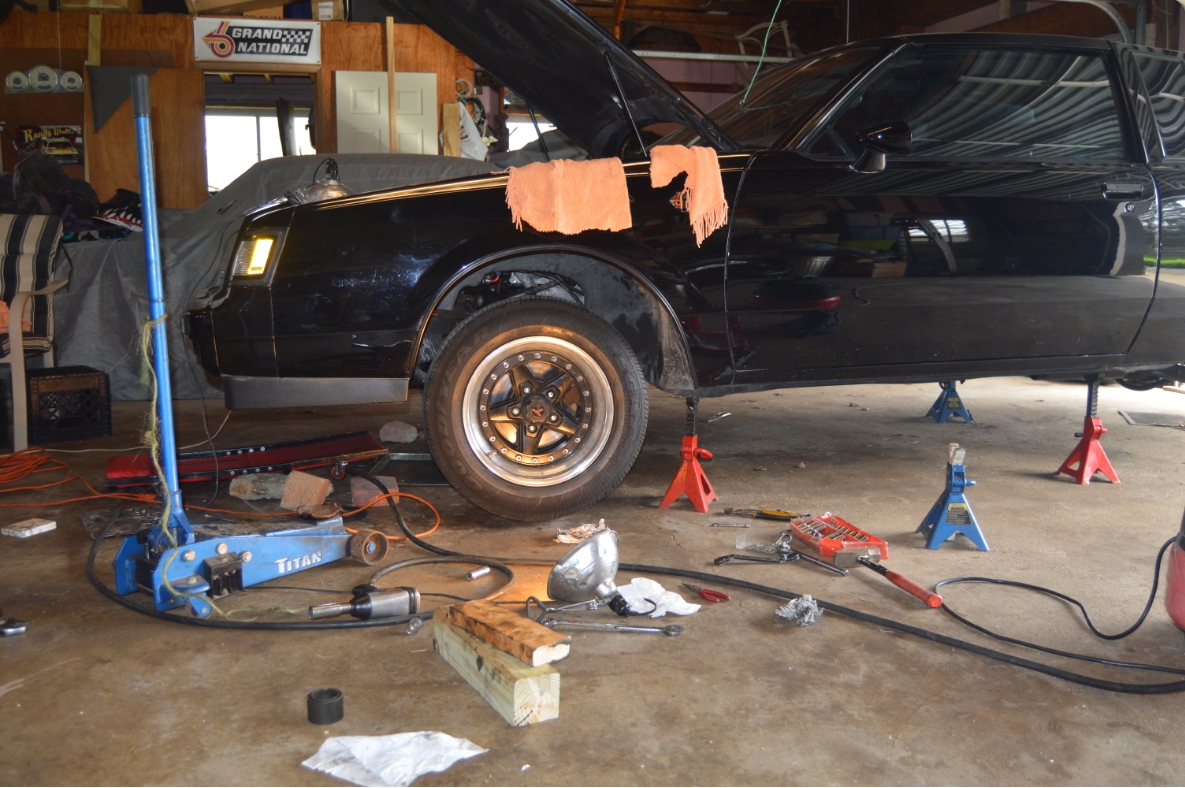
1. Put Turbo Buick frame up on jack stands (place in front of doors).
2. Remove wheels.
3. Place floor jack under the lower a-arm (so that it doesn’t go shooting down when you separate upper/lower arms).
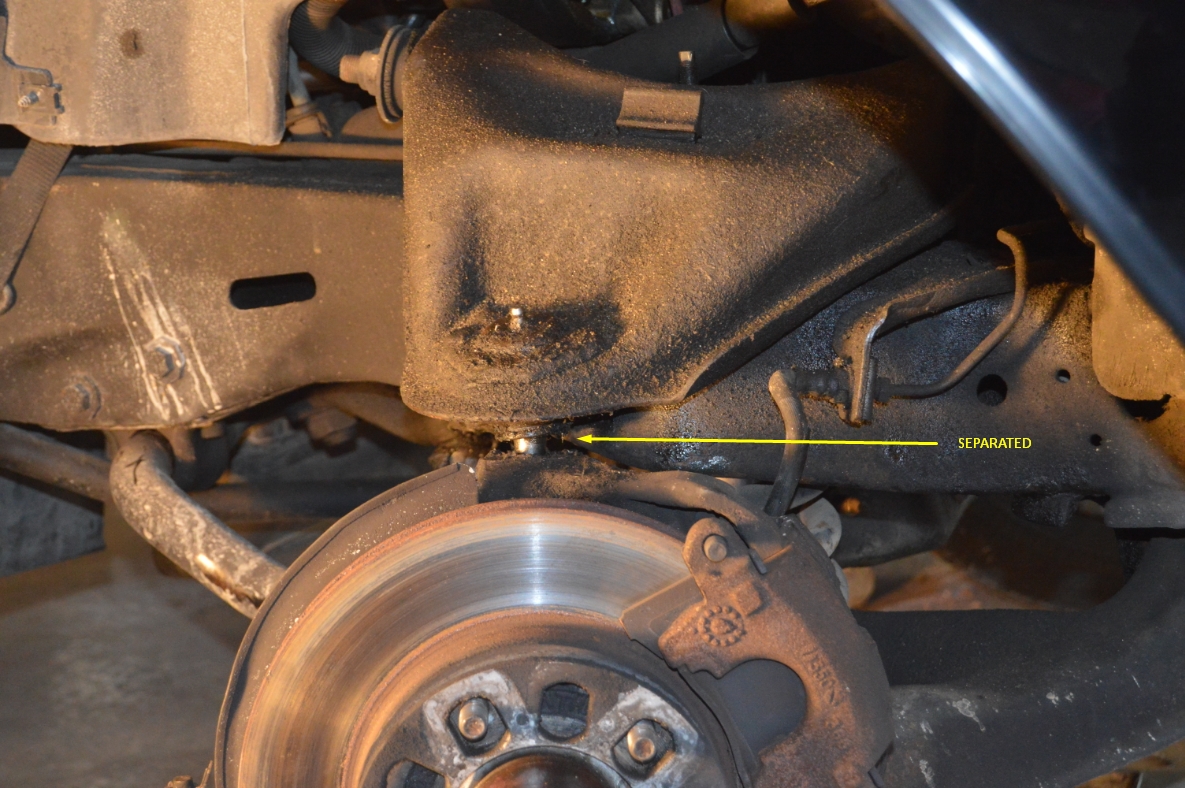
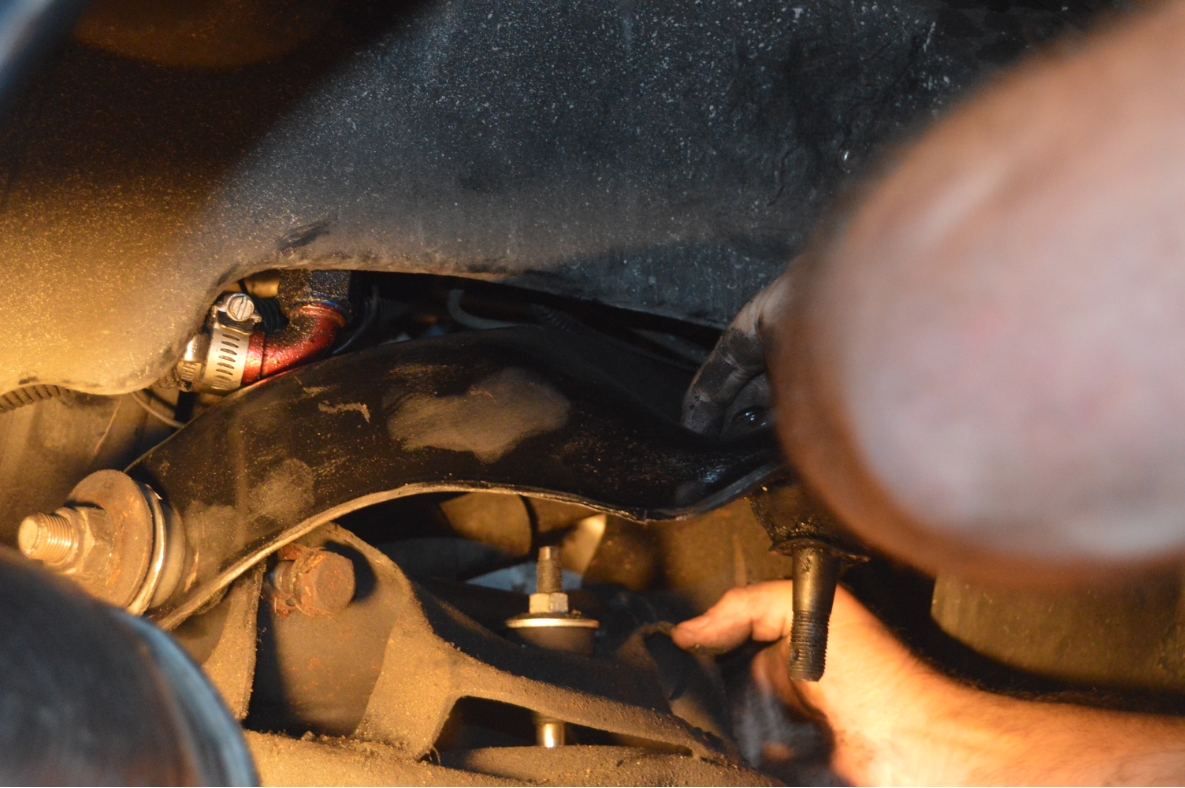
4. Remove castle nut on ball joint (22mm).
5. Use ball joint separator to separate spindle from upper arm.
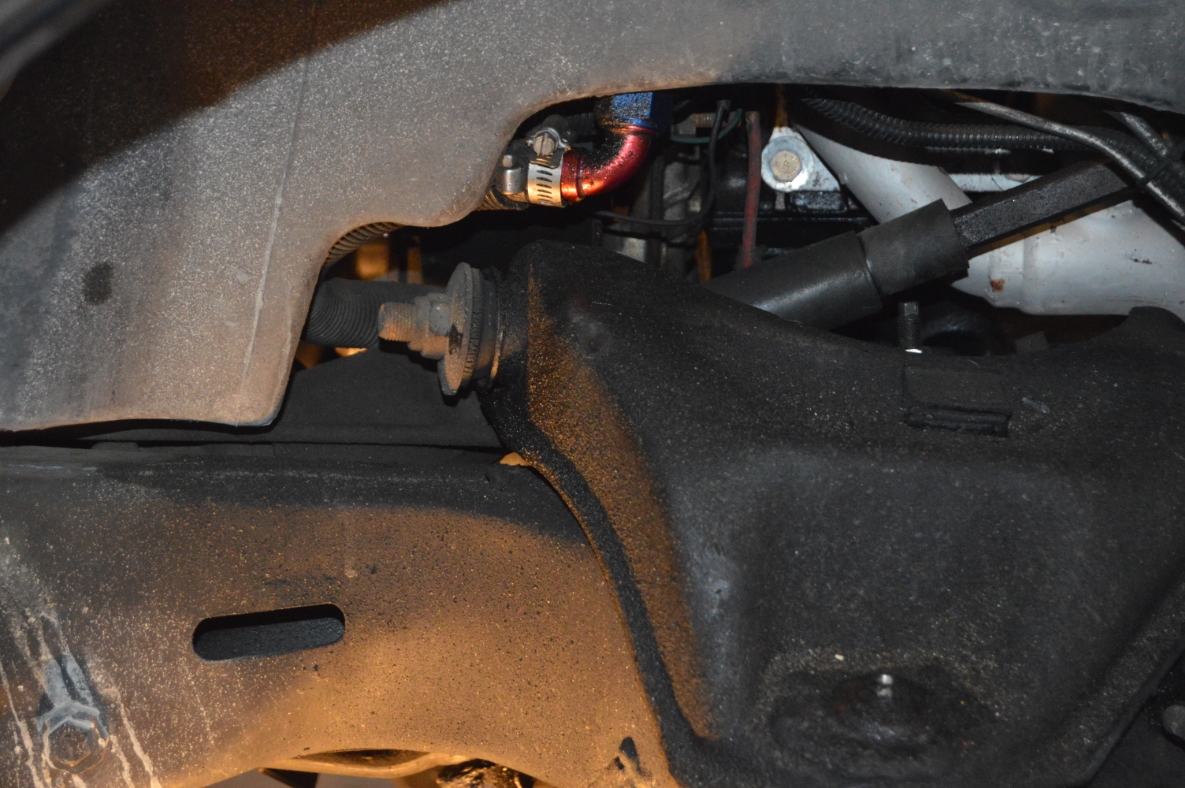
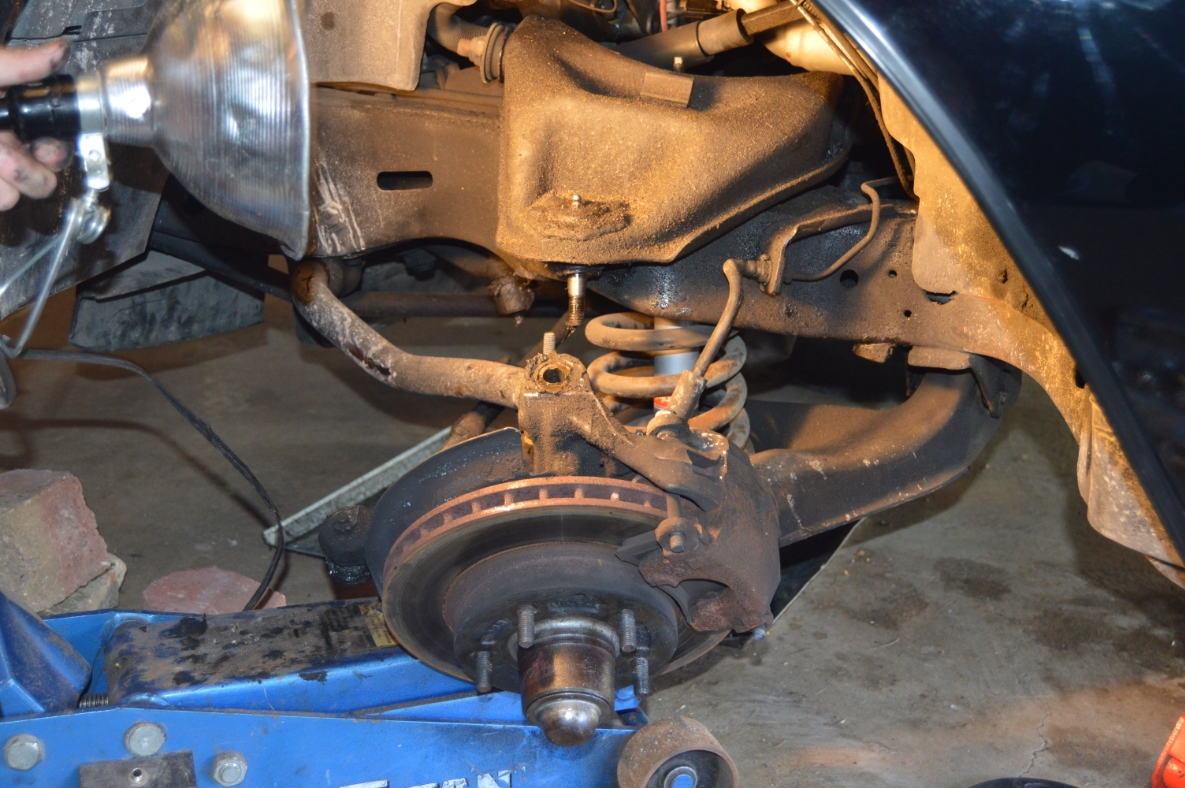
6. An 18mm wrench removes the cross shaft to frame nuts.
(this is a slow process on the drivers side, you’ll get 1/4 turns as the steering column is in the way. Reach in and turn the wrench from the engine compartment side)
.

.
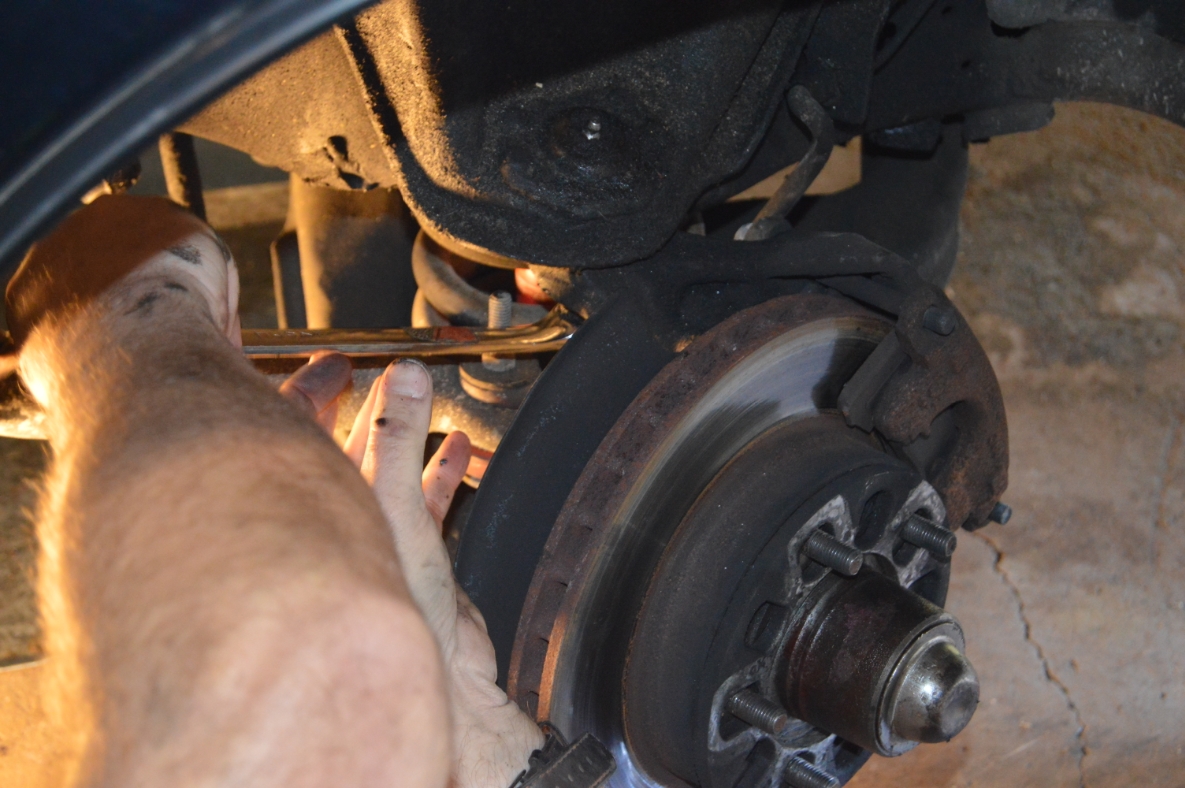
7. Once the nuts are off, push the arms in (towards the center of the car), so you can get them off past the long bolts.
This is a twist, turn, push/pull, wiggle job to get the arms out!
(you are fighting everything in this area, the bolts, the headers, the frame mount, are all in the way of removing the arms)
We figured out that if you push the arms in, then forward (towards the front of the car), then lift and pull out the rear side of the arms out, then the front side, they will come out of the car.
(reverse this process to reinstall)
(we ended up removing the front side bolt on the driver side, and rear bolt on passenger side of the car, to aid in removing/installing the arms)
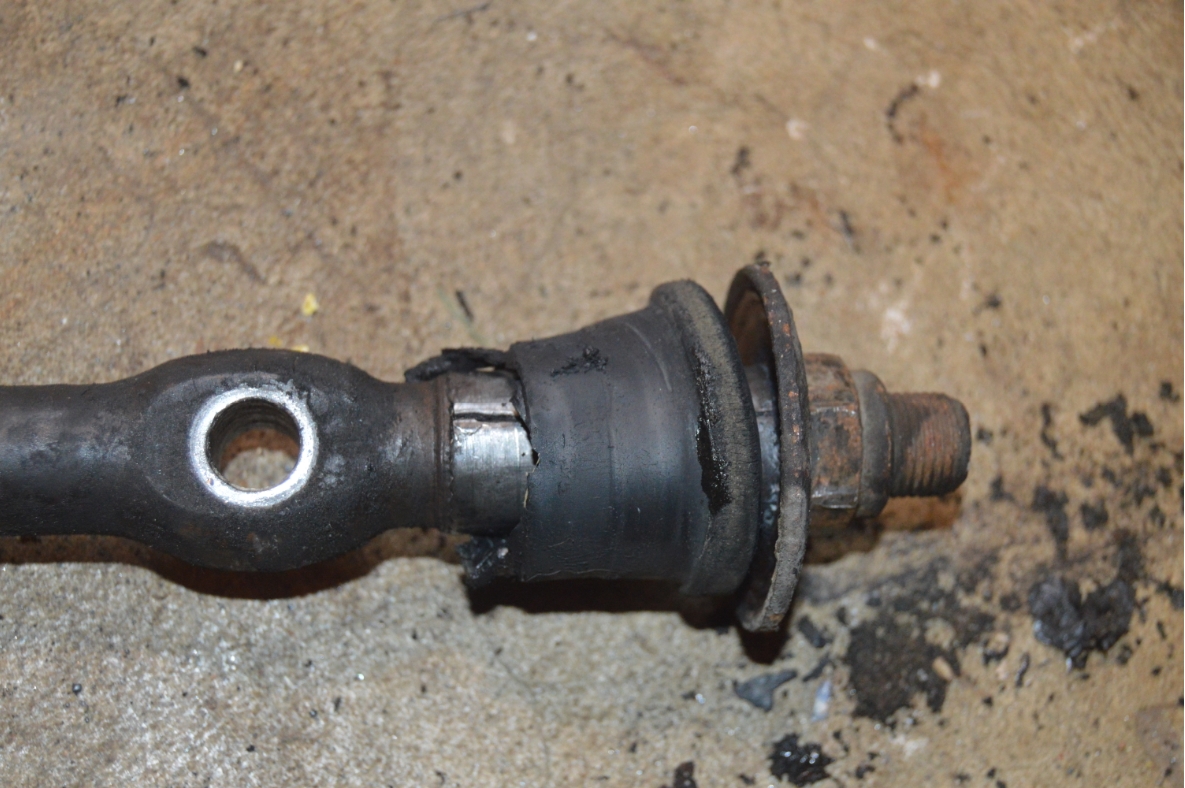
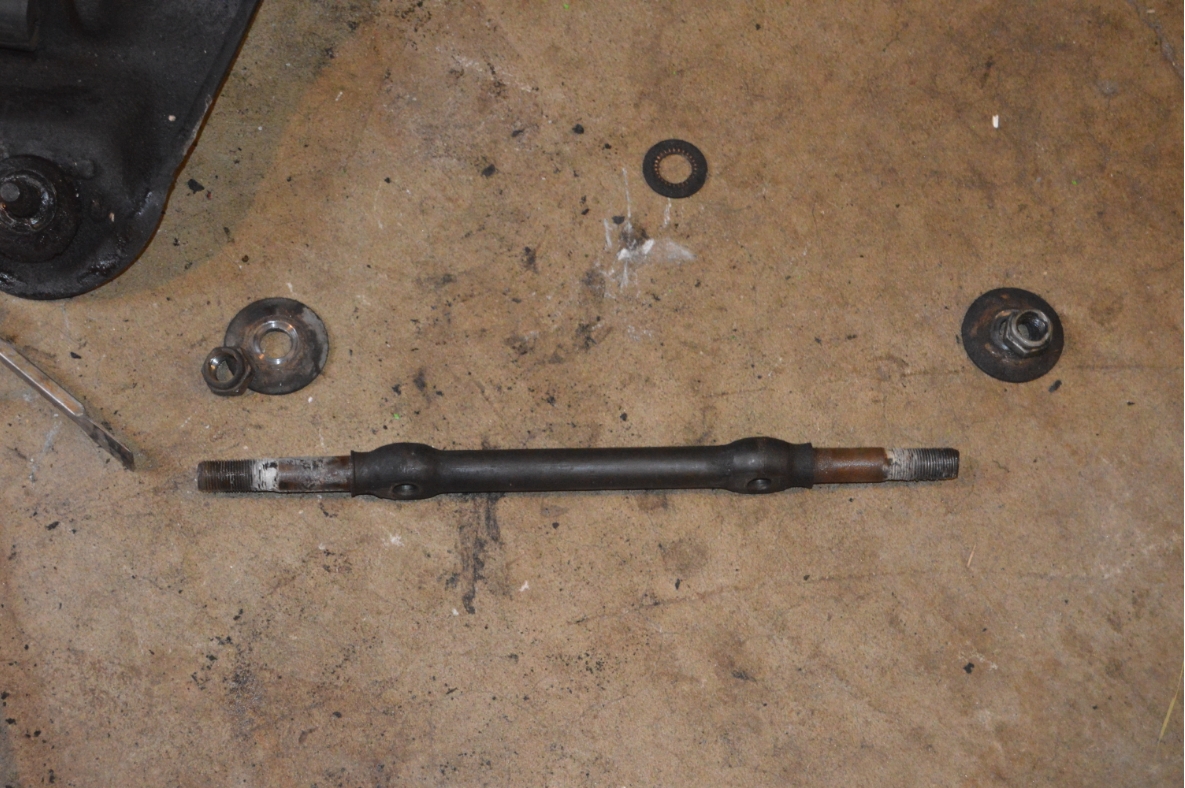
8. Now that the arm is out of the car, hold the cross shaft (we used a crescent wrench) while you remove the end nuts (24mm).
9. Remove the big end washers.
10. Take a hammer and pound the shaft out (the rubber bushings should be worn out enough to be able to do this).
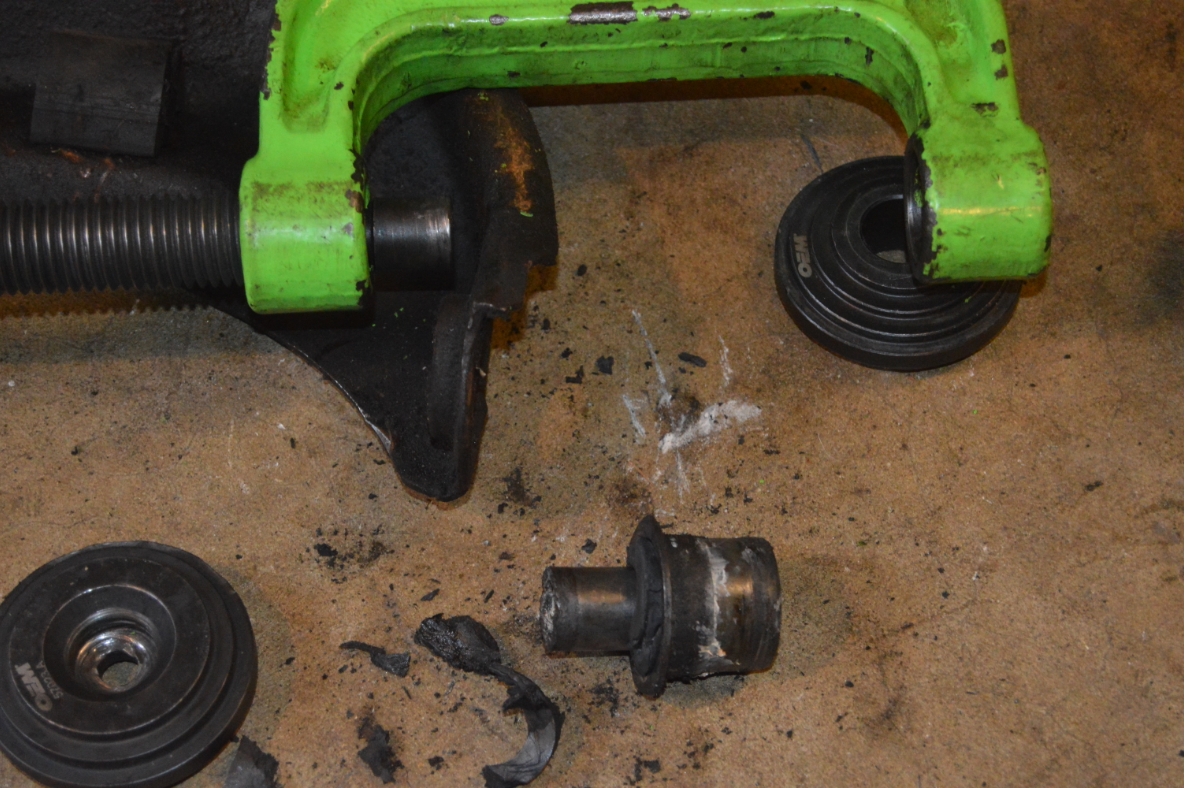
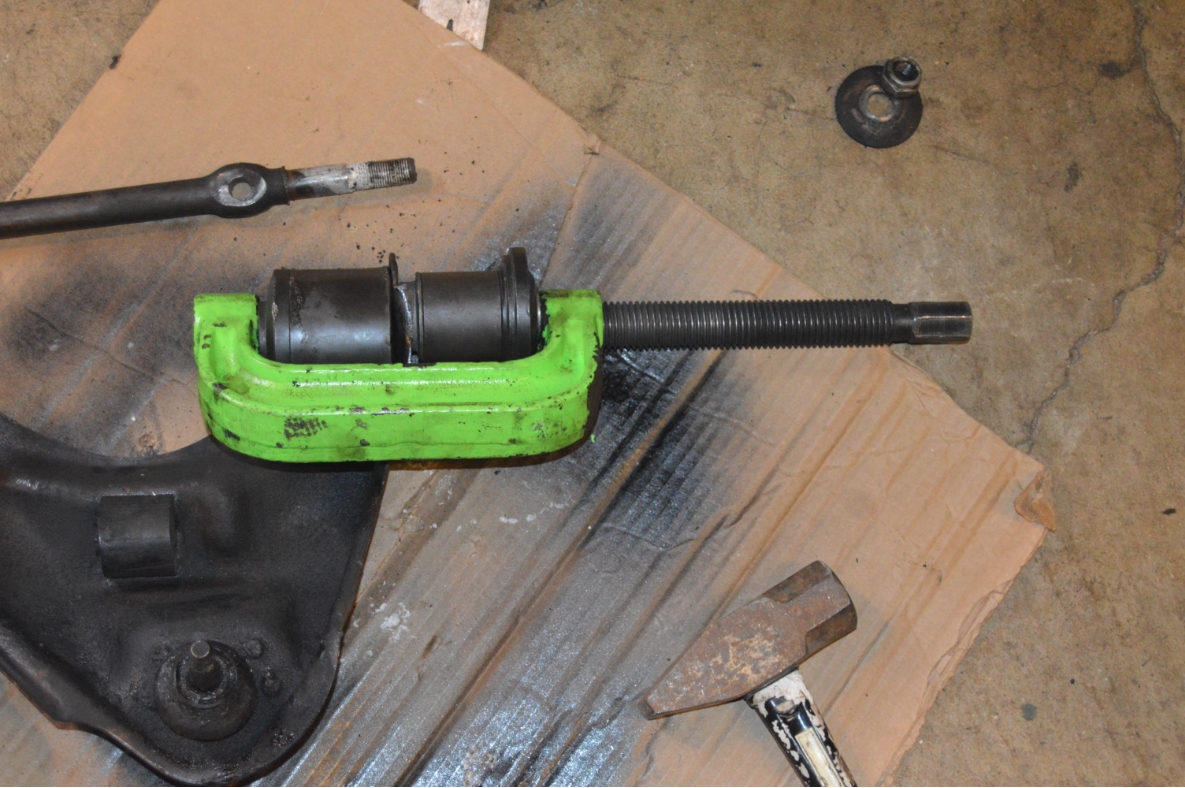
11. Use the ball joint press set and remove the old metal bushing housing from one side.
(if the press doesn’t completely remove the metal sleeve, tap it out)
12. Remove the old metal sleeve from other side using the same method.
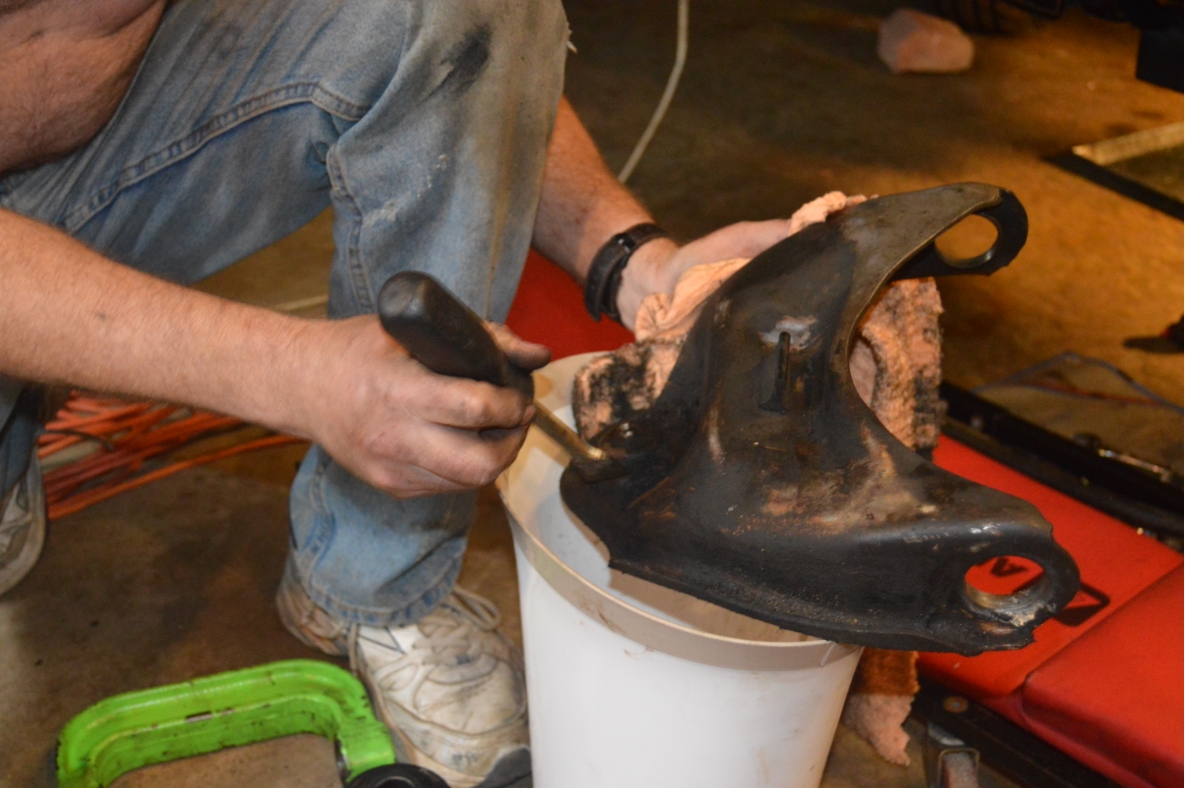
13. Clean the upper a-arm using wire wheel, degreaser, etc.
14. Paint it.
(while you are waiting for the paint to dry, now would be a good time to start working on the passenger side. Unless of course, you decide that it’s Miller Time, in which case, keep on keeping on!)
.


.
OK, returning to the drivers side, now that the paint is dry:
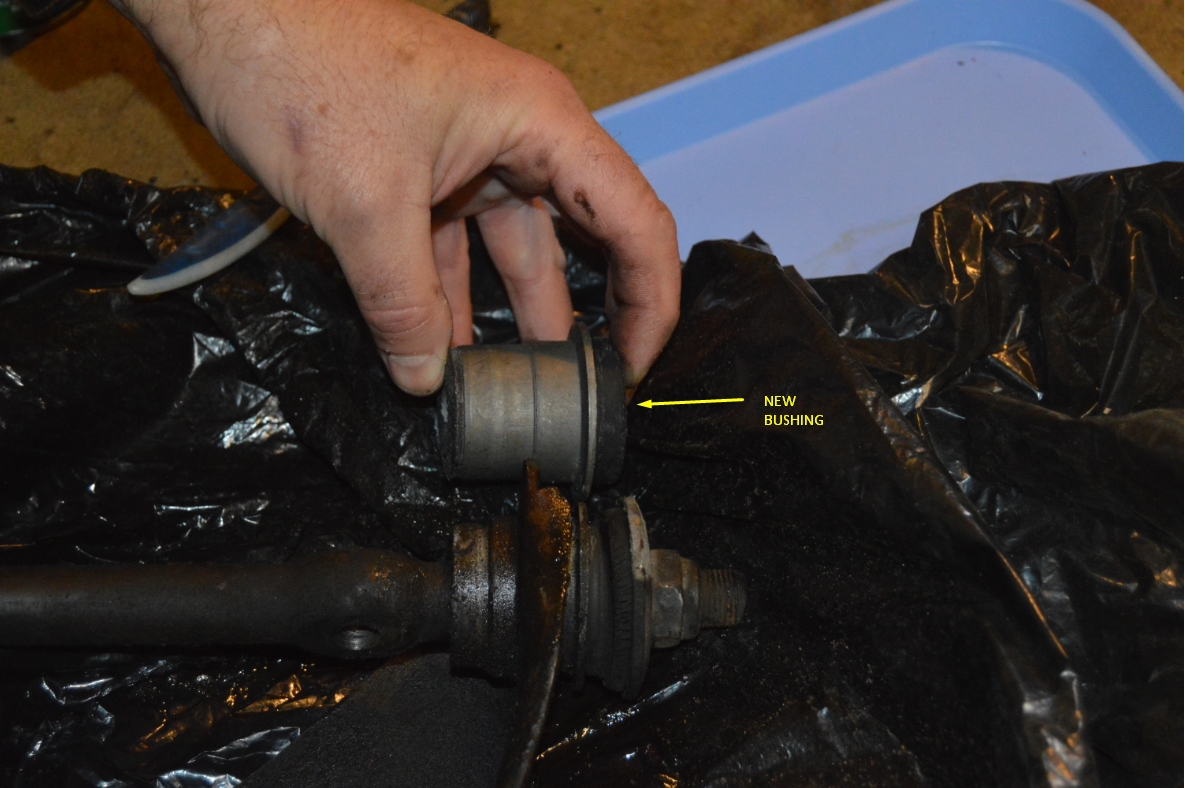
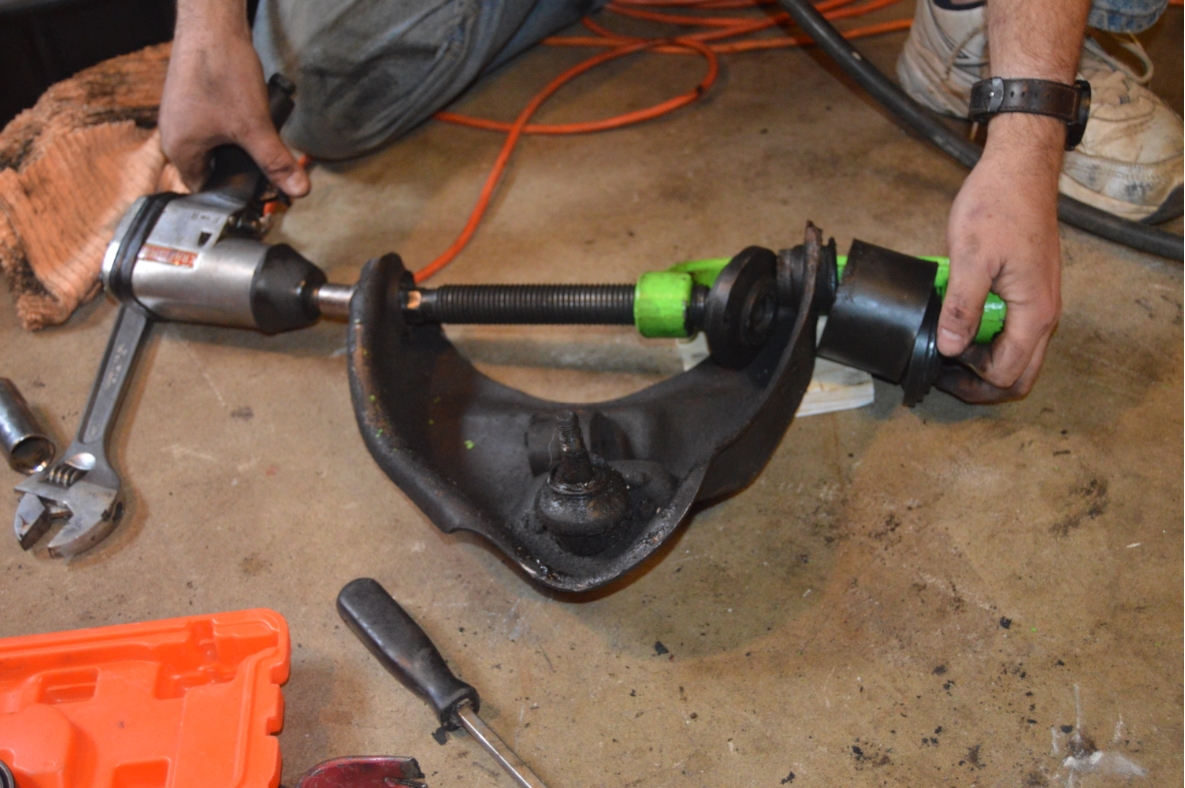
15. Install on one side of the arm, the new bushing, using the ball joint press.
16. Insert the cross shaft.
17. Place the other side bushing into place temporarily (by hand).
(note that the bushings aren’t meant to go “all the way in” – there’s a hump on the bushings to indicate how far it should go in. The widest part of the metal sleeve sticks out approximately 3/8″ away from the arm)
18. Cut a 10 5/8″ piece of wood (2×4). You will jam this in place between the a arm, to keep the ears from bending in when you reinstall the end nuts.
19. Place and tighten the washer and nut onto the side that the bushing is already completely installed on.
20. Put the washer and nut on the other side and tighten down until it pulls this side in.
The bushing should be completely pulled in using this method, as well as tighten down the entire assembly.
You may need to go back on the other end and retighten it (to center the shaft).
Make sure the exposed threaded ends, on each side, are about the same length.
85 lb/ft is the correct torque spec that these nuts should be installed at.
You may need to use the crescent wrench again to hold the shaft still while you attain this spec.
Make sure the shaft is relatively straight, the bolt holes should be basically parallel with the arm, so that you can reinstall the a-arm easily.
21. Remove the piece of wood.
.


.
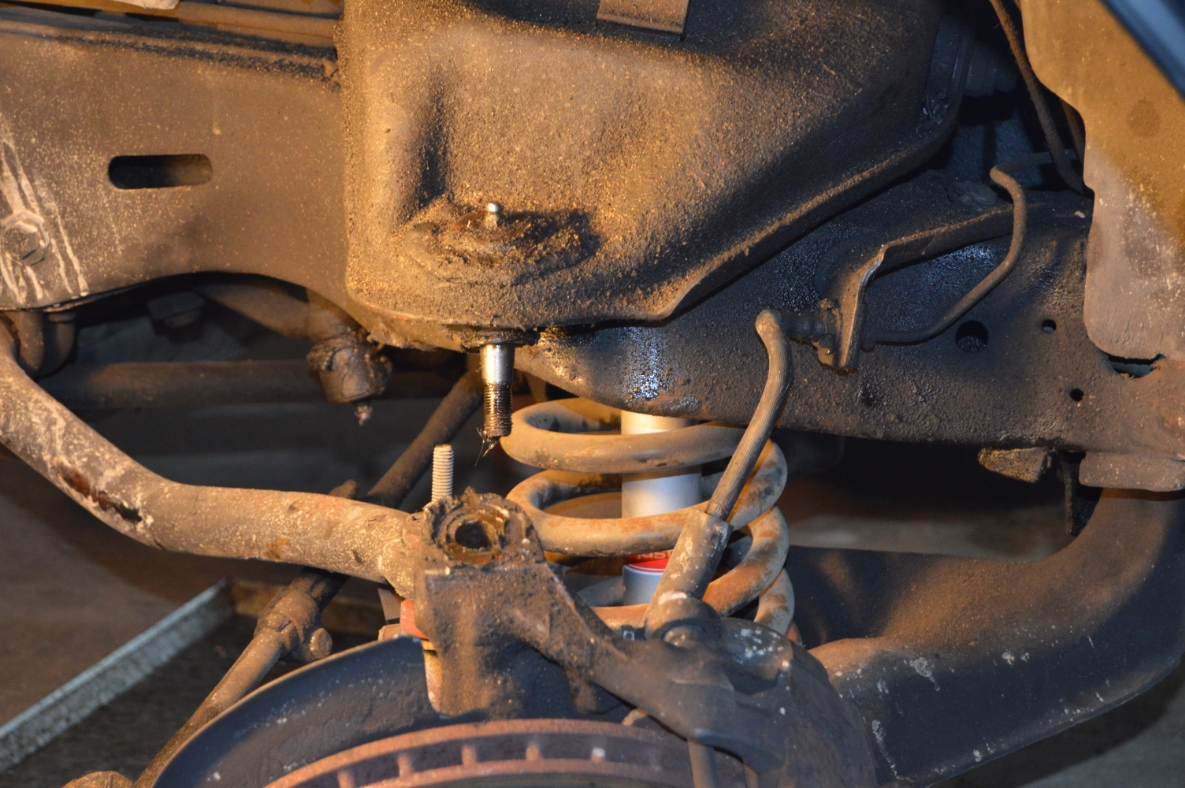
22. Reinstall the arms cross shaft onto the frame.
23. Tighten down the 2 nuts that secure it to the frame.
MAKE SURE you put the alignment shims back in place!
The shims go BETWEEN the frame mounts and the cross shaft.
(note that the OEM bolts have knurls under the head. I believe this was a factory aid to keep them in place while installing the arms. They say you should try to keep this intact, however, aftermarket a-arms simply have regular nuts/bolts to secure the arms to frame. Once these are tightened down, it’s not likely they are going to come loose. So, using that logic, if you want to make re-installation easier, just place a wrench on the nut, and tighten the bolt using an air impact wrench. That’s what we did.)
24. Raise the floor jack enough to be able to push the upper a arm down, so you can reinstall the ball joint into the spindle.
22. Tighten down the castle nut, and insert cotter pin.
25. Finish up the passenger side.
26. Remove jack stands, and lower the Turbo Regal to the ground.
.


.
Job complete!
Go for a spin and check the improved (restored) handling that your Buick Regal should have now!
At the very minimum, the shaking vibrations that you previously experienced should be gone!
.


