.
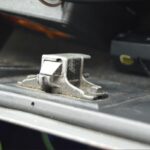
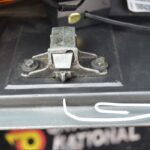
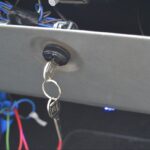
Continuing in our “Blackout” series, where we are totally dechroming the interior of this 1987 Buick Grand National, we are replacing the chrome version of the glovebox lock with a black-faced unit.
We bought this off ebay, in a listing claiming it was actually for a Buick Grand National, but as we know, all of them (in all the Turbo Regals regardless of model type) were all chrome-faced units.
[but that part mis-naming was ok this time around, as it fit our needs perfectly, and made finding the right part for the right purpose much easier]
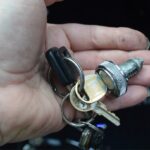
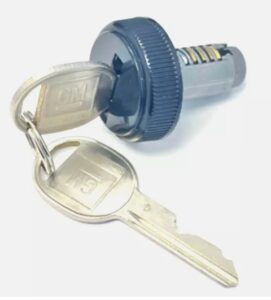 This glove box lock was about $45 shipped (including tax).
It came with the actual lock, and 2 sets of genuine GM keys.
(some of these you buy online don’t supply OEM GM keys, which isn’t really that big of a deal unless you require OEM parts)
(there’s other listings if you need the inside mounting bracket as well)
Seems a bit costly for this item, but we offset the cost by selling our stock piece.
And we wanted this chrome part to be replaced with the black one, so all the interior parts would be blacked out.
[note that you will now have another key for your Gbody Regal, as your original round key was for the glovebox, as well as the doors and trunk. You could always get this part rekeyed if you want to use your existing factory round key. We didn’t.]
.
The whole process takes less than 15 minutes to swap out.
BUT, you have to know the SECRET to removing this part!
(we show you how below!)
We’re loving the way this new black colored piece looks on our Turbo Buick!
.
HOW TO REPLACE LOCK:
1. Do NOT have the key inserted into the lock.
2. Open the glove box.
3. Take a (kind of thick & sturdy) paper clip, and insert it into the factory access guide hole.
4. You need to push down the very first tumbler
(the one closest to the front of the cylinder)
This may take you several attempts to find it!
(took us like 6 tries to get it to go down)
5. Hold it down while you stick the key in.
6. Remove paper clip.
7. Pull the lock assembly out.
[make sure the glove box is still open when you do the below steps!]
[it’s best to spray a little oil in the new key hole before you start, then twirl/spin the lock cylinder around to get the oil flowing all around inside of it, since this is a new dry part. A little lube never hurts!]
8. To reassemble, take the new lock, with key out, push that same tumbler down (with your finger), then stick the key in it (it will hold that tumbler down).
9. Shove the new lock assembly into place.
(you may need to slightly twist and turn it in to get it in the right place, ours was sticking out about an 1/8 of an inch, but by turning it slightly to the right, then back to the left, it fell into the right spot.)
10. Remove key, which locks it into the correct position within the latch assembly.
(that fist tumbler pops back up, locking it in place)
11. Yank on the lock to make sure it is indeed secured into place.
12. Stick the key back in, and turn it to make sure the cylinder is working, visually look at the latch to verify it moves up and down.
13. Close the glovebox.
14. Use the key to open it.
15. If it opens, then another job well done!
.
.
Here’s an excellent video showing you exactly how to do it.
(yes, the video is actually for something else, but it shows you how to remove the glovebox lock)
(and it’s made by Rick Hunt, the GNX XRAY owner!)
.
.


