


I’m sure many other Turbo Regal owners have an assortment of different reasons why they dumped their original rear suspension and made the switch over to a coilover type system.
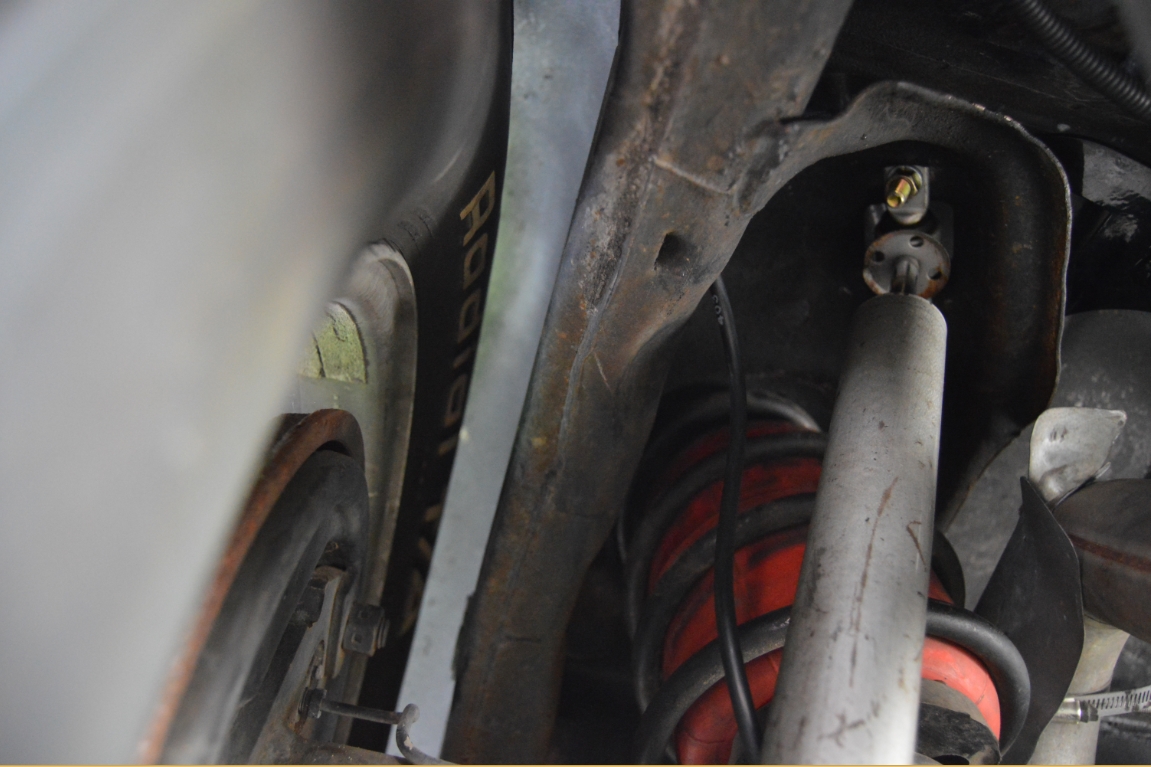
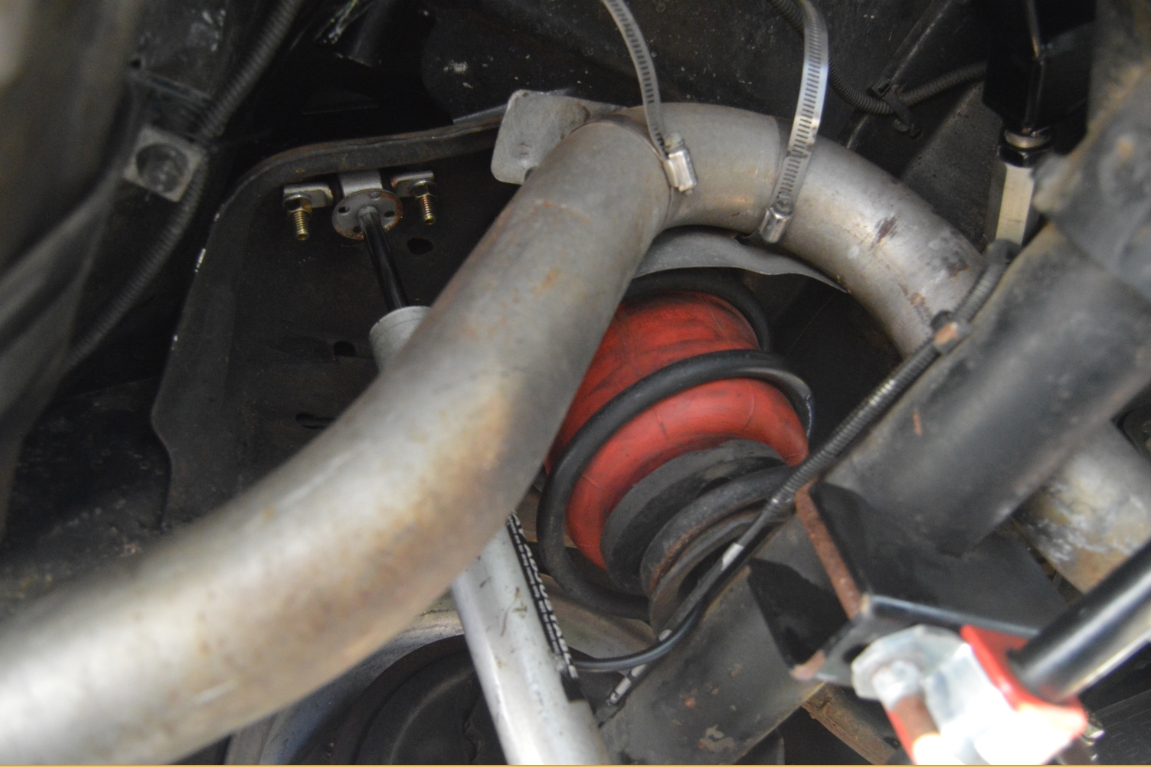
For this specific 1987 Buick Grand National, old original worn out springs coupled with newer semi-adjustable shocks that just didn’t quite perform like expected, and leaking airbags (again) were the culprit in this case.
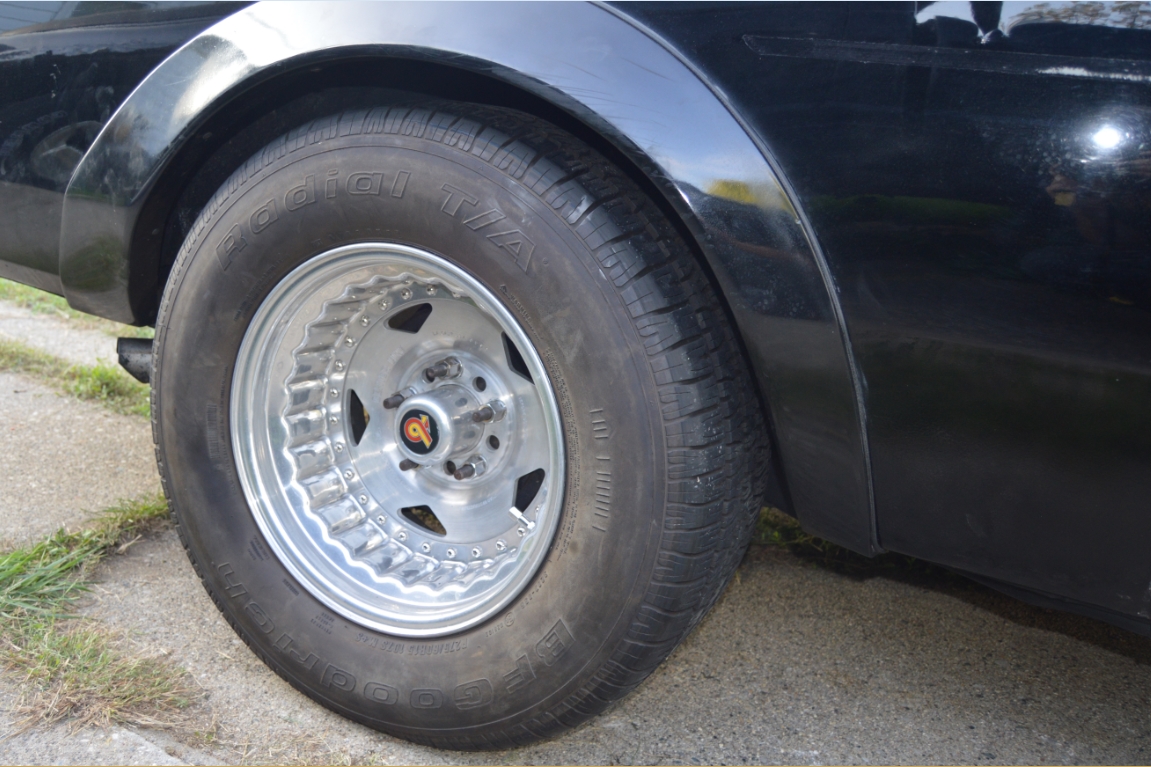
There also was the issue that this car has GNX fender flares on it, and having the tires smack into them probably wouldn’t be a good thing.
So the owner bit the bullet and made the decision to purchase UMI’s rear coilover setup for this Gbody Regal.
(scheduled out planning for items like this is always a good thing, as most stores have holiday sales & give discounts!).
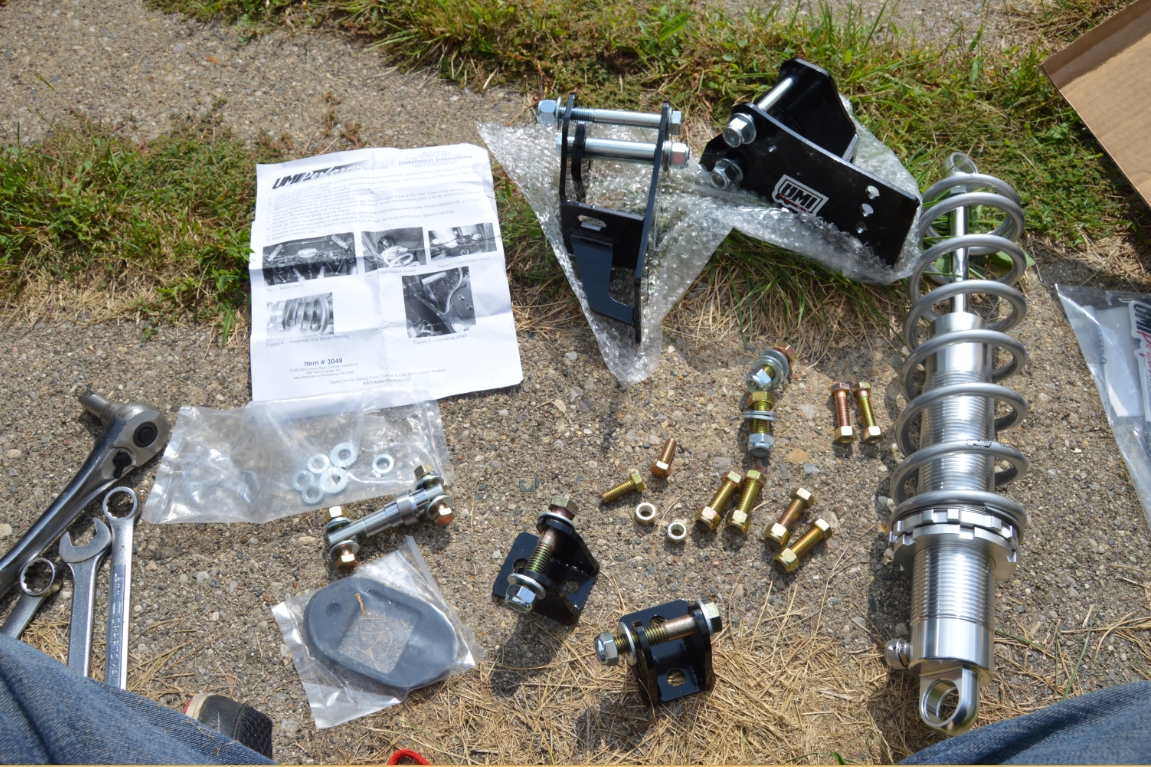
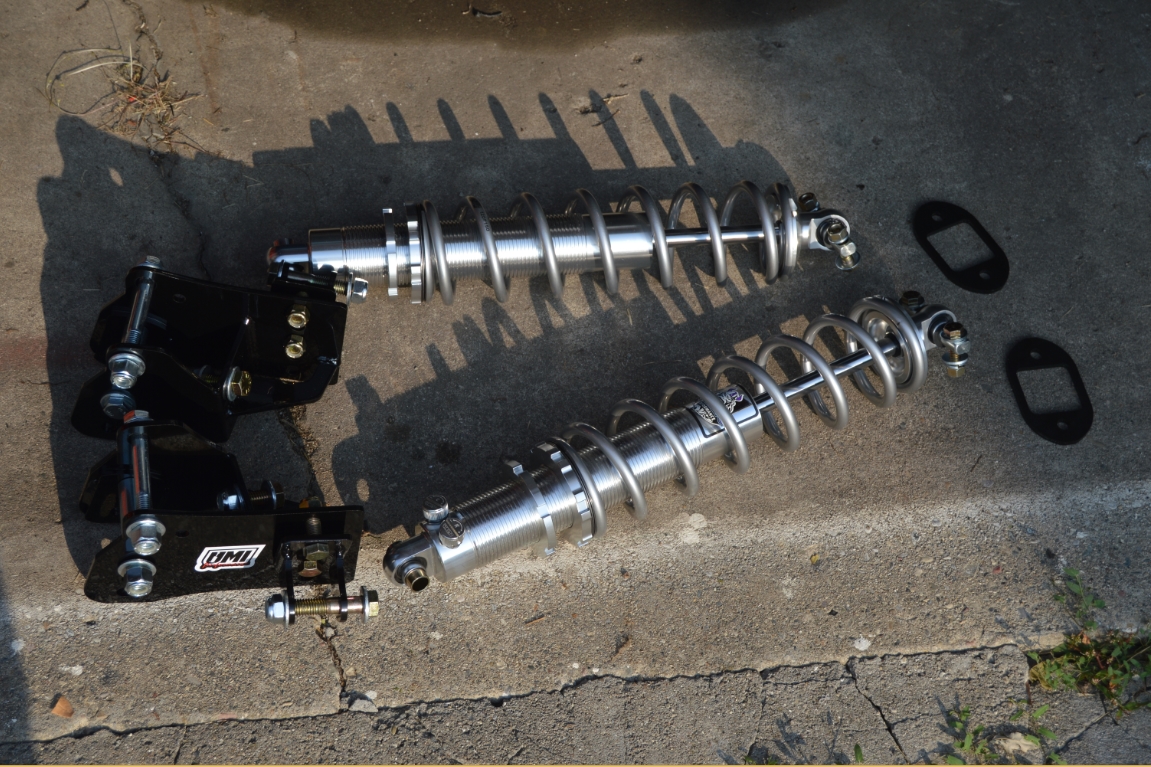
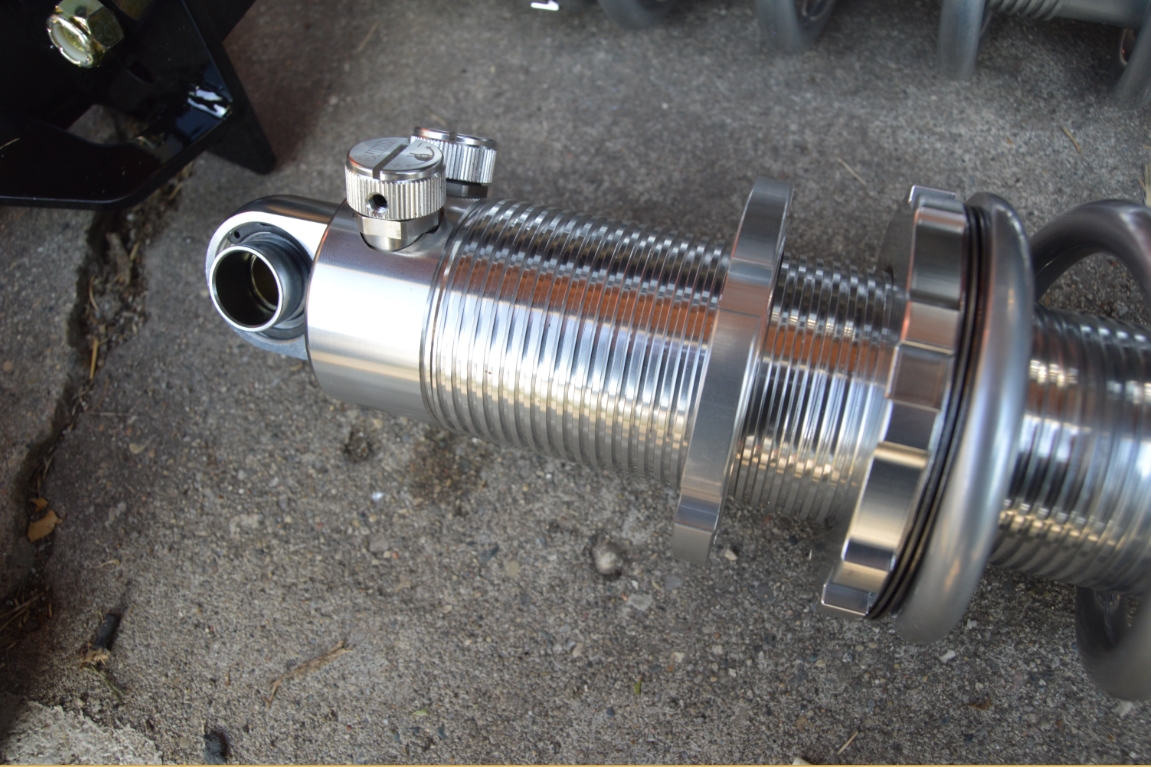
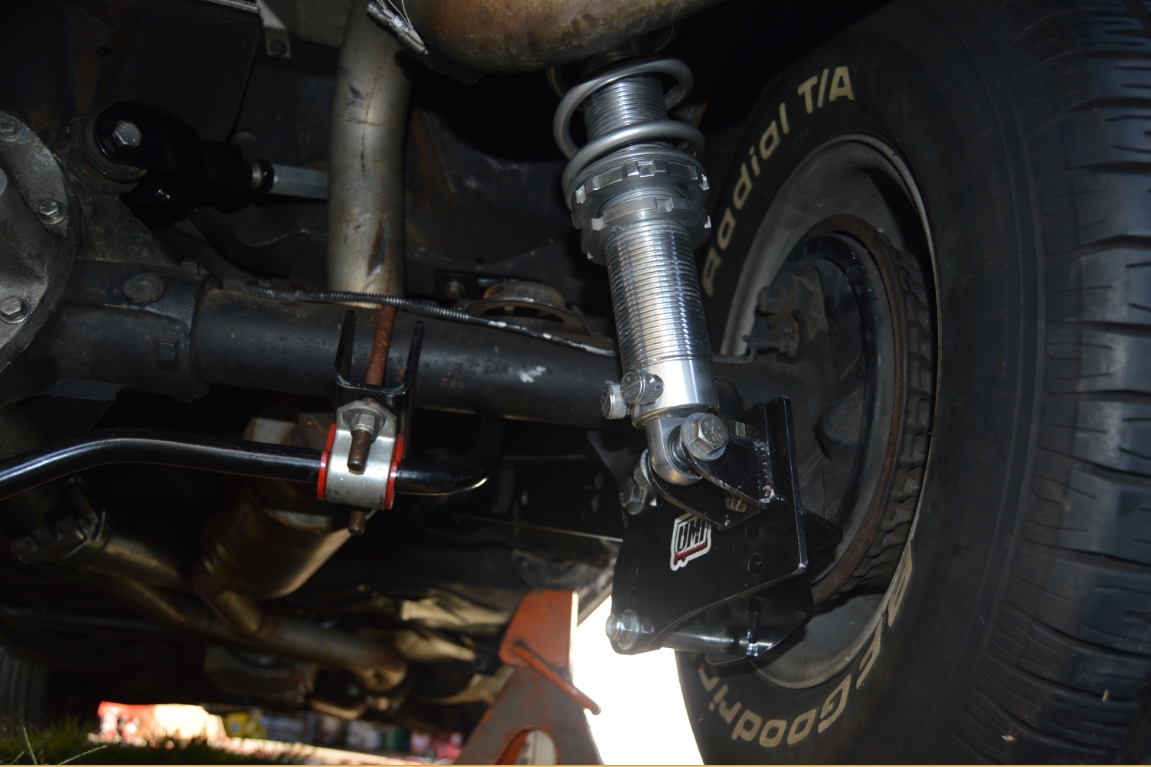
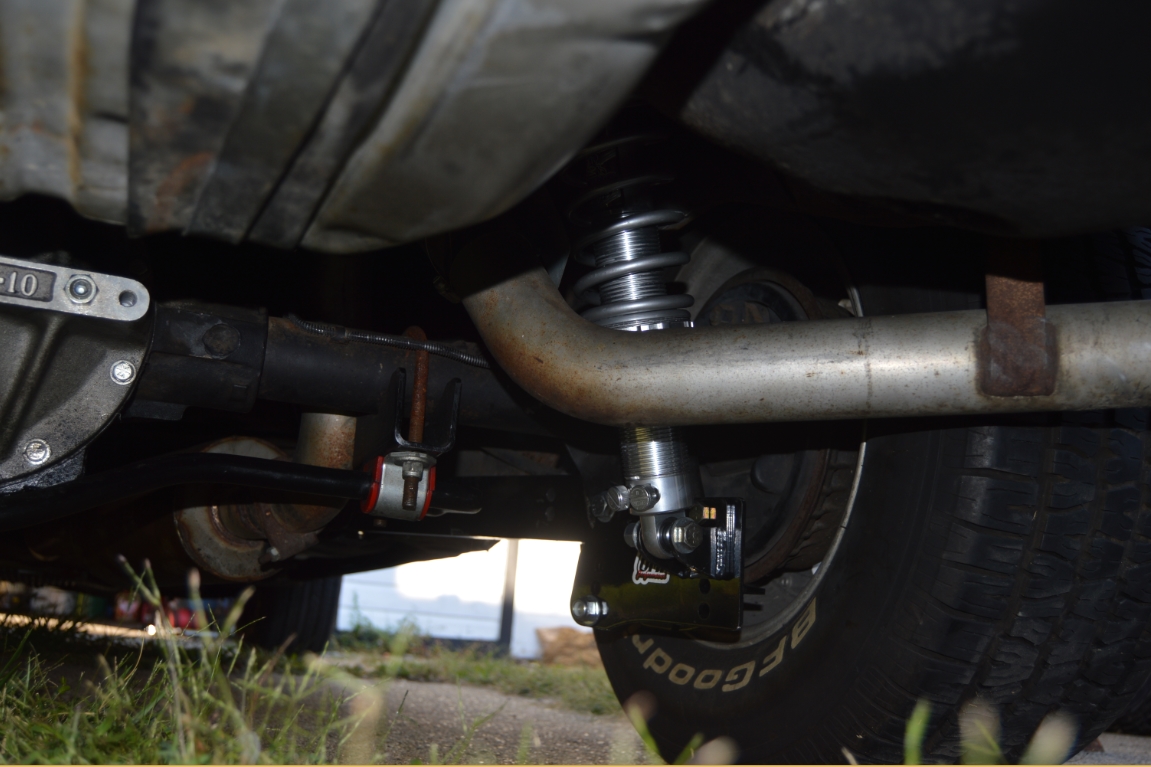
Viking shocks and springs mated to UMI’s attachment pieces seems like it will cure all ails that this Regal Gbody suffers.
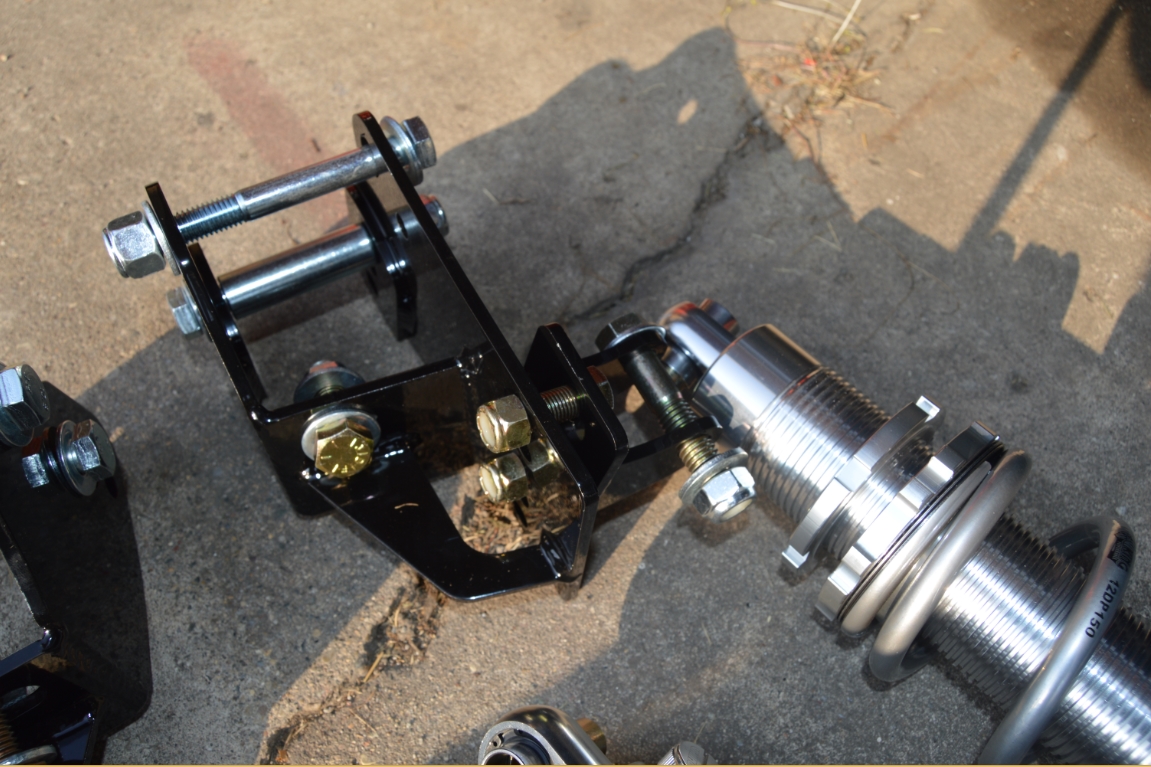
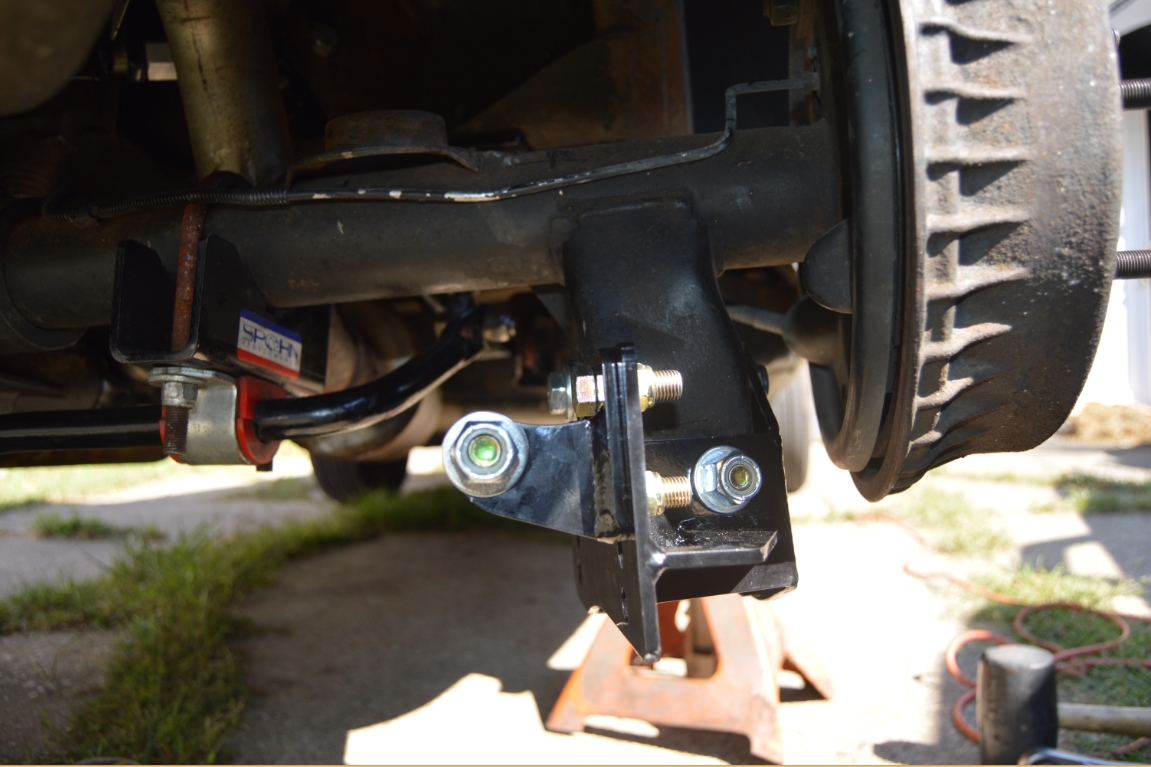
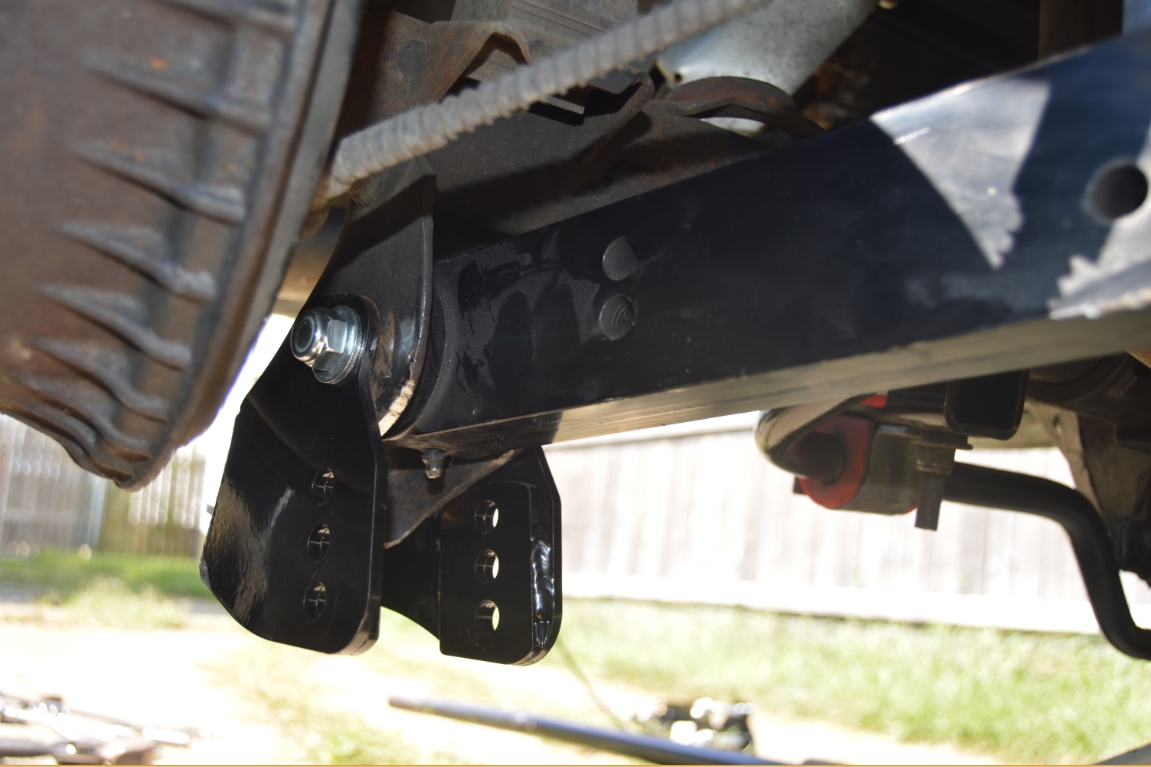
After researching all of the other options (QA1, etc), UMI’s lower bracket design was the main reason this kit was chosen above all the rest. Not only does it look beefier, it’s adjustable as to where the lower shock mounts are (height +- .75″).
Having 2 extra holes for lower control arm relocation is a nice feature as well, should geometry changes be needed in the future.
Finally, the UMI bracket actually moves the lower shock attachment inwards (from stock location, away from the drum brakes), which is a big benefit for this car, since a rear disc brake upgrade is scheduled as a future project (and most of the time, the shocks are in the way of the disc brake caliper).
Having the option to control ride height means there’ll be plenty of room to raise the rear when the bigger tires get installed on this vehicle sometime in the near future.
(or it could be lowered, in your case, if that’s what’s needed for your Turbo Regal).
If you’re considering a kit like this, you should also think about installing the UMI G-body rear shock tower brace as well, since it provides direct support between the upper shock mounts.
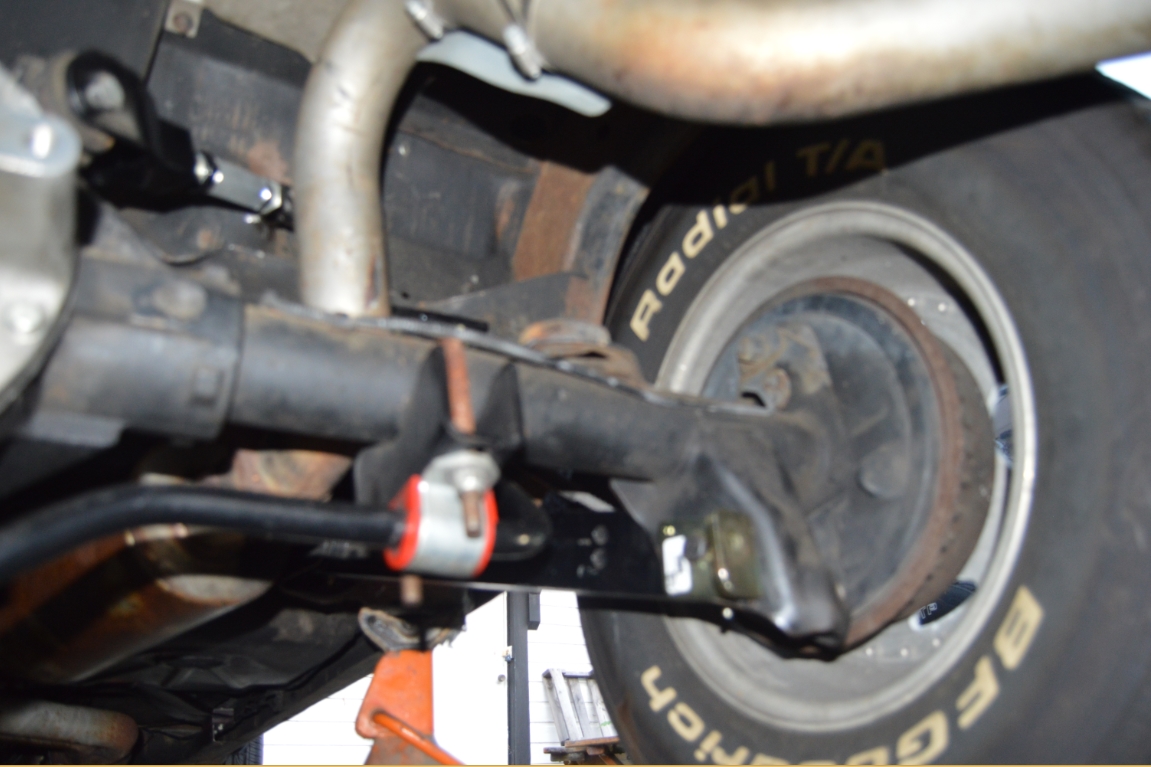
Once we finished the install, by simpling just snugging up the spring so it wasn’t loose on the shock, we dropped the car to the ground & had about 1.25″ between the top of the tire and the fender lip (which is good for now, since we were previously worried that hitting road bumps would make the tire scrape into the GNX fender flares).
[note: for the lower shock mount brackets, we purposely positioned them in the uppermost holes (there’s 3 positions to choose from), since we knew we wanted the car to be raised up]
.
TIME TO INSTALL: a few hours
.
TOOLS:
* 3/4″, 18mm, 13mm, 9/16″ sockets & wrenches
* snap ring pliers
* spanner wrench
* grinder
.
PARTS:
* #3064-150 (“1978-1988 GM G-Body Rear Coilover Kit, Control Arm Relocation, Bolt-In, Stock Height” – 150lb 12″ springs). Regular price $849.99 from UMI’s site.
* thrust bearing kit (#7917-101) & spanner wrench (7995-101). Both optional items (about $42 more), however, the spanner wrench is needed if you plan on making height adjustments!
* anti-seize
.
HOW-TO:
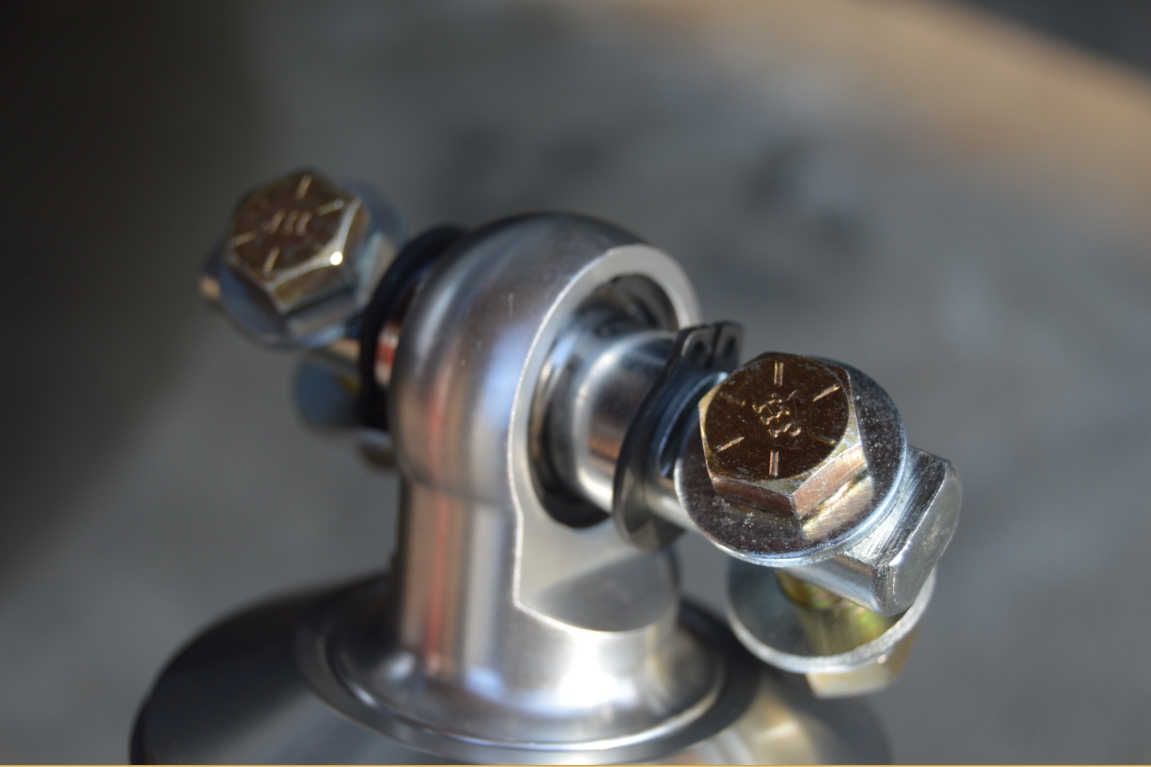
1. There’s a lot of bolts included with the kit (that the directions don’t really identify all that great as to where they all go)! We found it easier to pre-assemble everything so we know what goes where.
2. Jack up the car by the rear end, then support the frame with jackstands. You’ll be lowering the rearend so you can remove the old components. Take out old springs (+ airbags if applicable) & shocks.
3. Now is a good time to drill the 2 holes for the upper shock mount out to 3/8″ (for the new bigger bolts that come in the package) if yours are still factory sized.
4. do 1 side at a time. remove the lower control arm, from the axle side. We started with the passenger side.
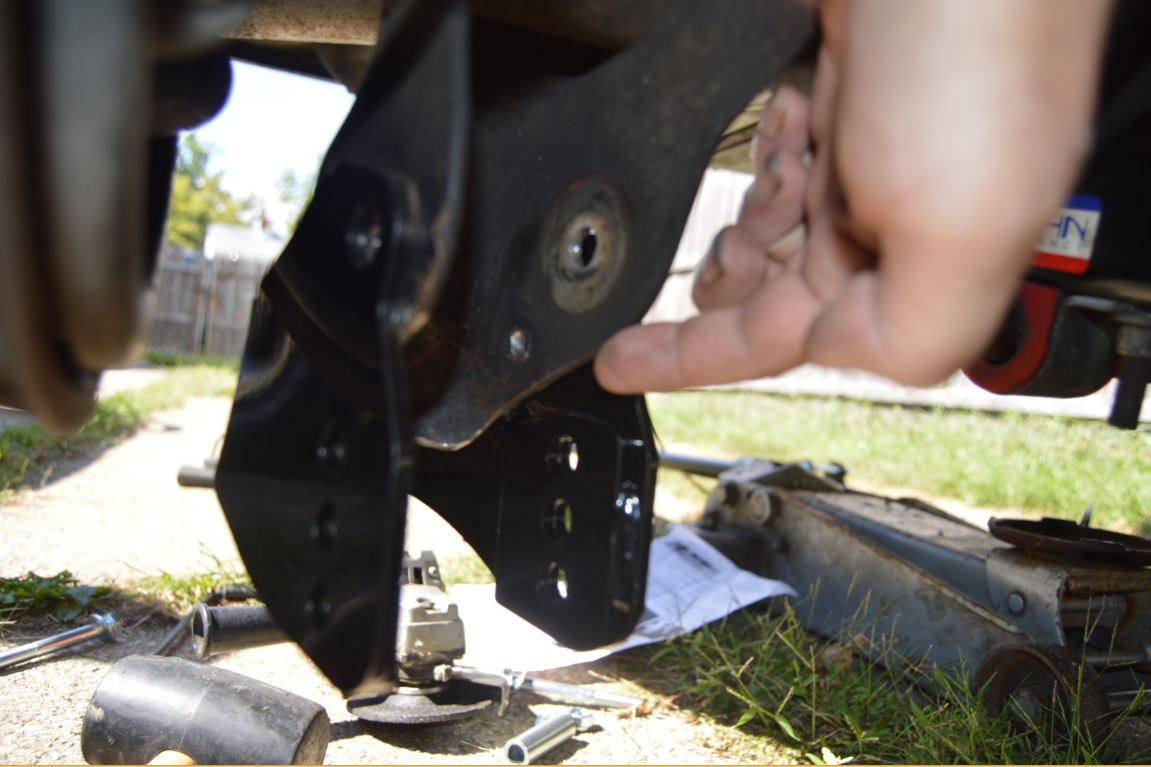
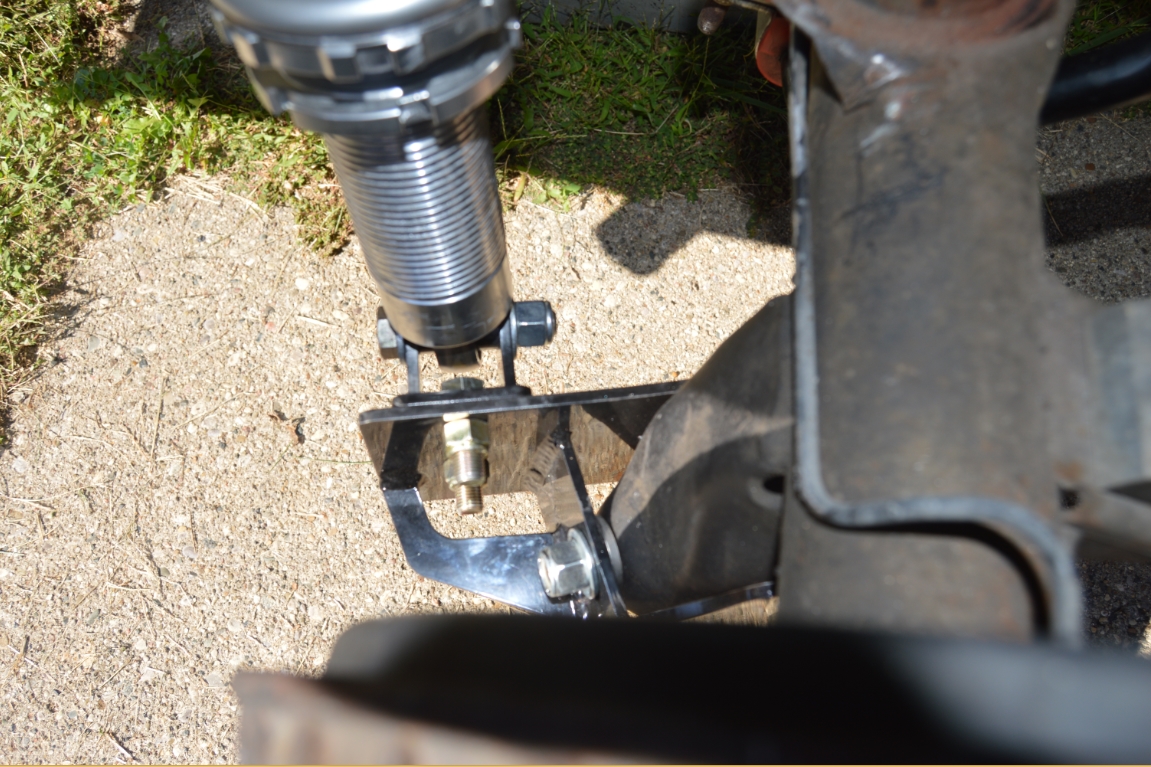
5. Next you’ll be installing one of the lower bracket units. You need to grind a bit off the old LCA mount. (see pics, shown is the passenger side). The directions don’t have a clear view of exactly “where” you’re suppose to grind. You’ll need to do 3 sections:
1st, on the rear portion, towards the inside (middle) of the car, (opposite side from where the old lower shock mount attachment point is), there’s a little hump towards the bottom, you need to smooth this out somewhat so the new bracket can slide over this.
2nd & 3rd, at the front end, at the very edge, on the bottom, (of both sides), the inner side only needs grinding a little bit. The outside (closest to the brake drum) needs about 1/8″ (or so) grinded off as the (3 relocation holes bracket) hits this portion.
[note: mock up the new bracket as close to where its suppose to end up as you can & judge where you need to grind off from that]
6. reinstall the LCA, but only (mostly) tighten the nut/bolt. You will final tighten once everything is done & the suspension is under load.
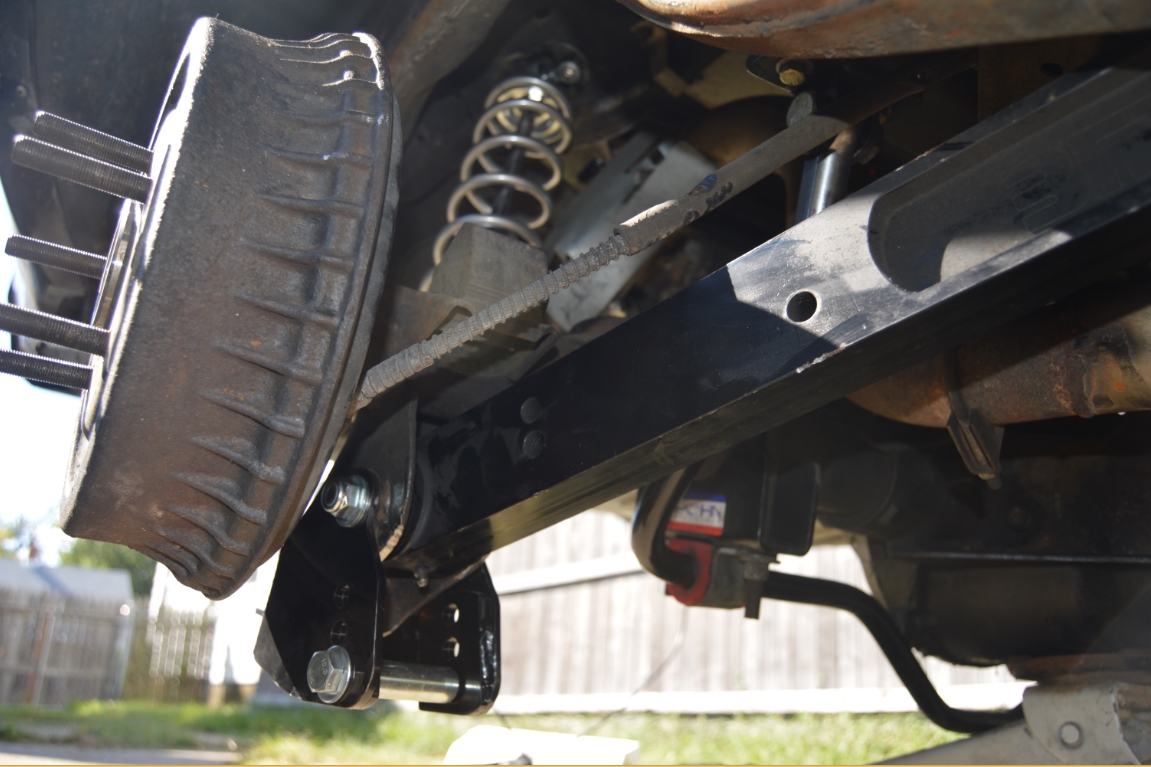
7. install the coilover & shock. fully mount the upper side. then mount the lower side.
8. repeat steps 4-7 for the drivers side.
for the grinding of the original LCA on the drivers side, it only required a slight hazing on the rear side (side nearest middle of car), and approximately a 1/2″ long notch x 1/4″ tall on the front side (outer edge, nearest drum).
9. Now that all is mounted, you should have originally set the springs about a third of the way up from the bottom of the shock. Remove jacks & lower your car to the ground & check ride height. Adjust the springs to your desired ride height using a spanner wrench.
10. Final tighten the LCA.
11. The instructions give you a starting point to set the shocks at. You’ll have to drive your Gbody Regal to feel/test how close this adjustment is. Make further adjustments from there.
12. Ta-da! You’re done! Go enjoy the fruits of your labor!
.

.
.

.


.

.


