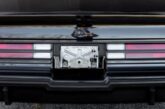

















We’re always into custom touches done on these Turbo Buicks (as if you couldn’t already tell from some of the “how to” posts on this site), so when we saw someone do this, we were all thumbs up! Purists be damned! (LOL)
Daytime running lights, which weren’t introduced onto production USA vehicles until 1995, weren’t a thing yet back in the 1980s when the Turbo Regals hit the streets.
Of course, that doesn’t stop anyone from now adding them onto cars made before the 1990s.
Like Jeff Payton, who lives in KY, and likes the looks of them on his 1986 Buick Regal T-Type.
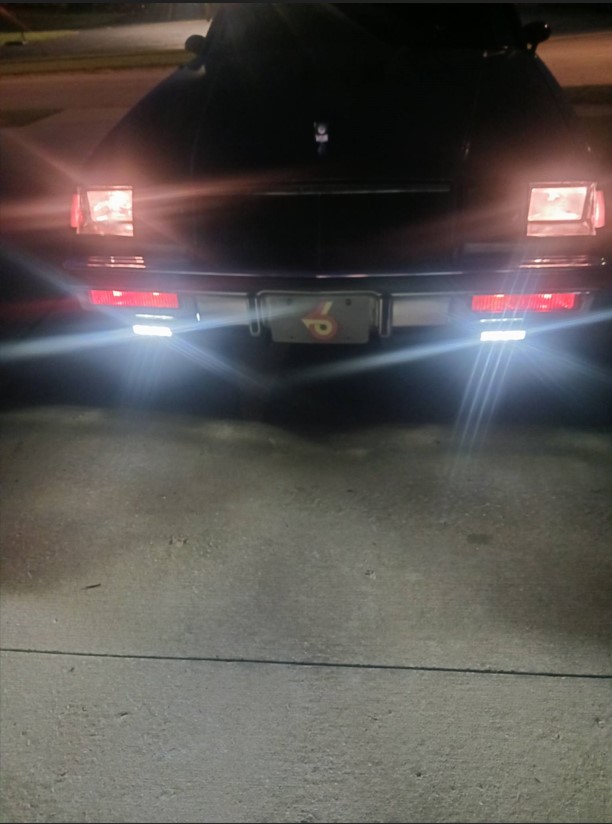
Plus, he can use that extra light while going down those dark roads at night.
He says the process to install them isn’t that difficult, not that expensive to do, and definitely makes for better road safety in these G-body Regals.
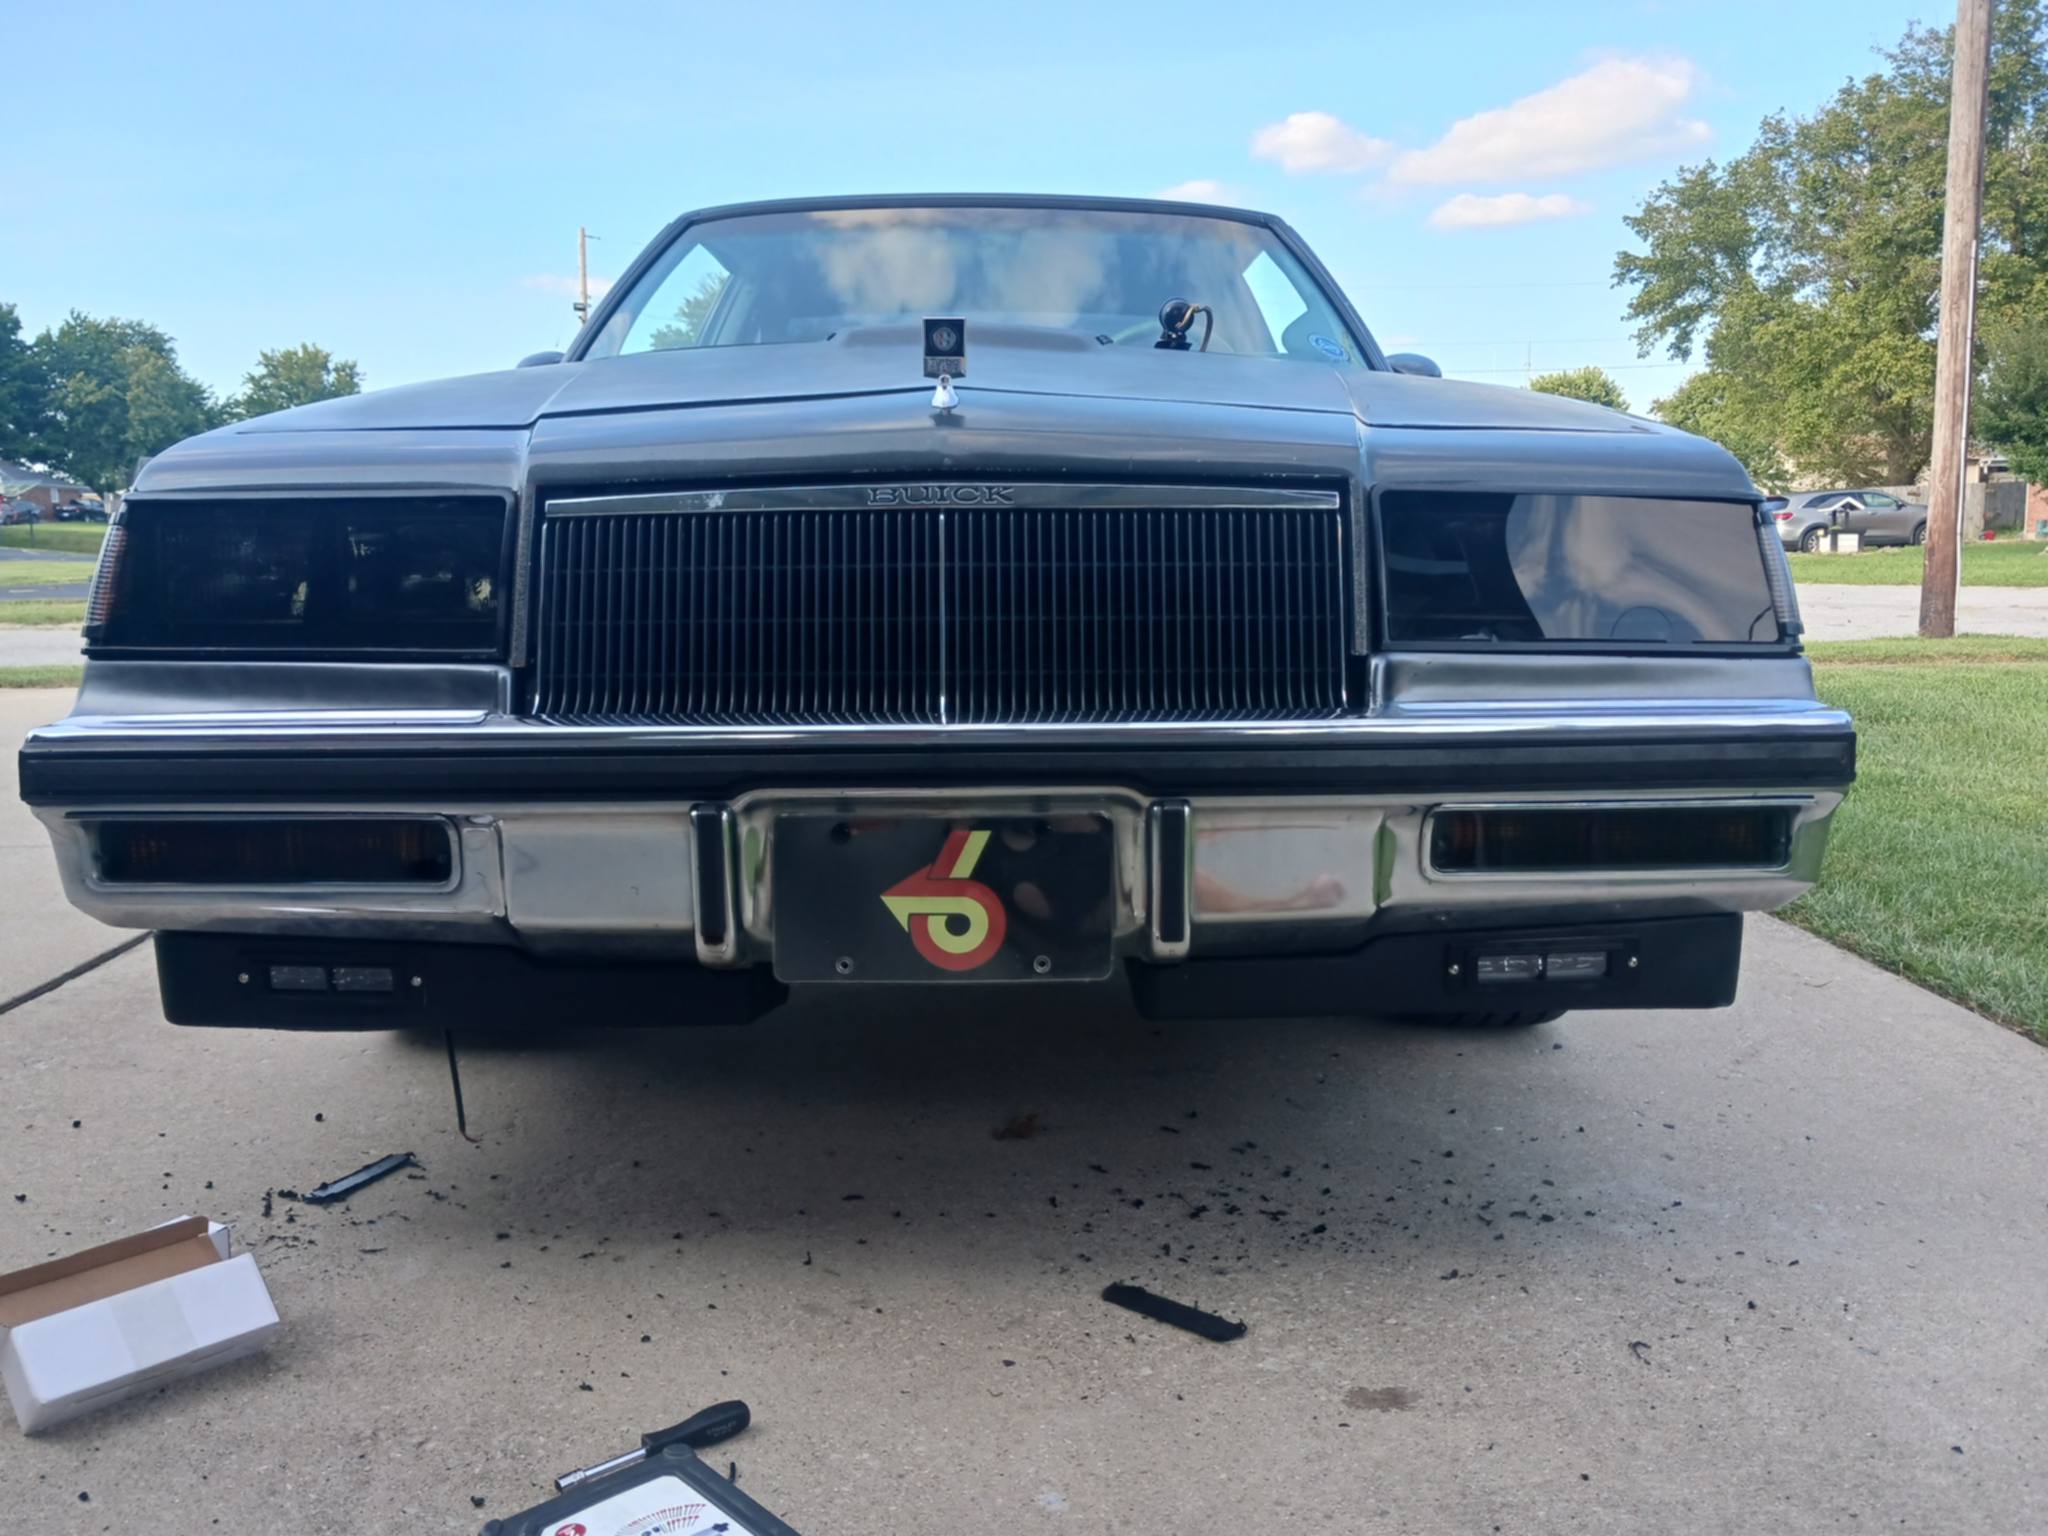
Not to mention the “cool factor” he gets when people really notice them, since they mostly blend into the factory air dams (and you might totally miss them if you aren’t paying attention to details).
The only real scary part of doing the job, is actually the cutting into, since those OEM air dams ain’t cheap to replace if you mess it up!
.
Jeff says:
The reason I added the lights to the air dam is 2 fold.
1) I have the tinted covers on my headlamps and I don’t like the looks of the LED headlamps (thru them) and needed the extra light.
2) I liked the looks of the LED lamps in the air dam, it just added some sporty look to the car.
It’s a straight forward installation process. Difficulty level is about a 6.
I decided on the 7 inch due to the area I had to work with and felt that they filled the position very well without being too large.
.
We thought adding DRL’s was a pretty cool idea, so we reached out to Jeff and asked him to share his experience on these with us.
(Big thanks Jeff, for partially writing this story out, so we can share this idea with others!)
.
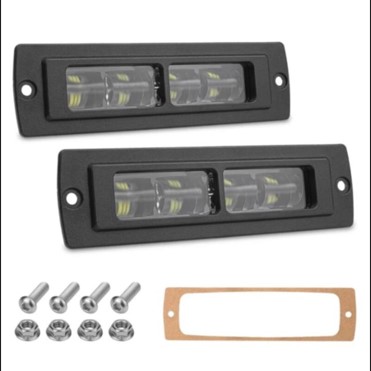
PARTS NEEDED:
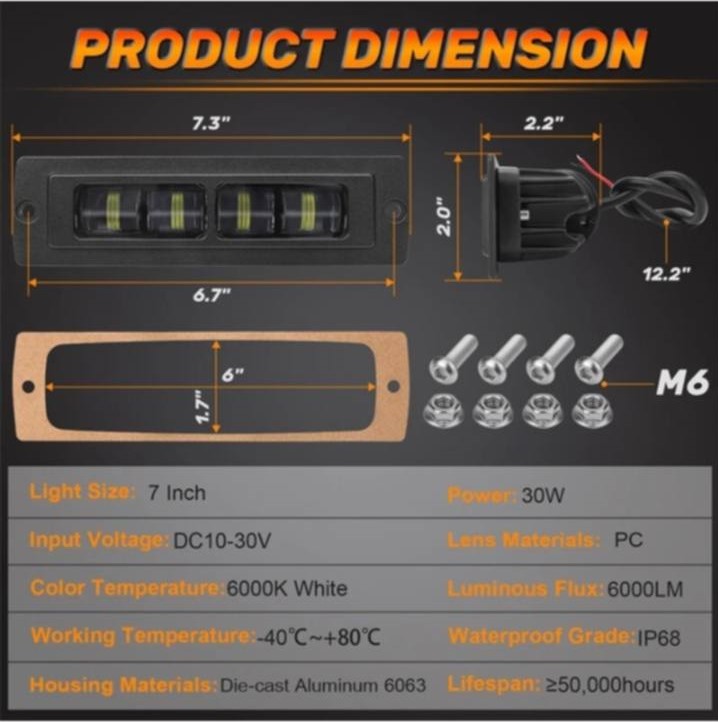
– 2×7 inch LED “Light Bar” “Pod Lights” (universal fit)
(each light: 30 W, 6000 LM! plenty bright for this purpose!)
(about $40 on ebay, comes with bezel & mounting bolts + wire harness)
[ NOTE that the 7″ dimension is the overall width, the bulbs area is only approximately 4.5″ wide, and about 1″ tall ]
[ these are “flush mount” style, meaning they fit snug against your air dam ]
[ This LED pod mounts behind the air dam, with the bulb section protruding thru the hole you make, then a bezel is attached to the front of the air dam, with bolts securing it all down. Making it almost a flush mount style. ]
[ Other led bars mount in front of the air dam, with no bezel. They are an almost flush type, sticking out about 1/4″ or less from the air dam ]
[ all of these LED bars are waterproof & dustproof, so no worries about mounting them low to the ground ]
[ Watts (W) and Lumens (LM) vary for these lights, with the higher the Lumens = more brighter, regardless of wattage ]
[ in comparison, each of the stock OEM halogen headlights produce: low beams = 1000 lumens (40W), high beam = 1500 (50W) ! ]
[ meaning any type of these new LED’s are brighter than the stock headlights {even with all 4 lights on} ! ]
[ led’s/chips/smd’s quantity per light vary, and more is not always better, total LM is a better accuracy measurement for brightness ]
[ There are a lot of similar lights like these listed, so BE SURE to check the “Beam Type” – as these are offered in many configurations: Spot Beam, Flood, Driving Beam, Driving Flood, Flood Spot, etc. ]
[ Flood = a wide but close to car coverage area, but not shining a lot at a far distance away from car ]
[ Spot= further away coverage, but a directed spot light, so not wide towards the curbs]
[ some light bars have combo “spot/flood” led’s & reflectors, so best bet here ]
[ also check “Beam Angle” which tells you how much light coverage you’ll get in front of your car {measuring left to right} – 180° = possible max light coverage, but none are 180° . We have seen 160° units available, which would shine light from past the left curb all the way to past the right curb! ]
[ there are combo deals like “150 degree flood cup” which shines curb to curb, PLUS “30 degree spot cup” which is useful for shining directly in front of the car ]
[ most have “Color Temperature” = 6000K, which is a cold pure white light, typical of bright white LED’s ]
[ some of these are offered with and without wiring harnesses {&/or relays & switches}, so if you’re able to wire up your own, or don’t need any extra parts, it may be cheaper to get a kit without these extras, but it is nice to have a mostly plug n play wiring setup to use! ]
.
TOOLS NEEDED:
– 1/2 inch drill bit, shrink tubing, wire strippers, screw driver and socket set, test light, self tapping screws, eyelet connectors, black paint.
.
TIME TO INSTALL:
– about 1 hour
.
HOW TO INSTALL:
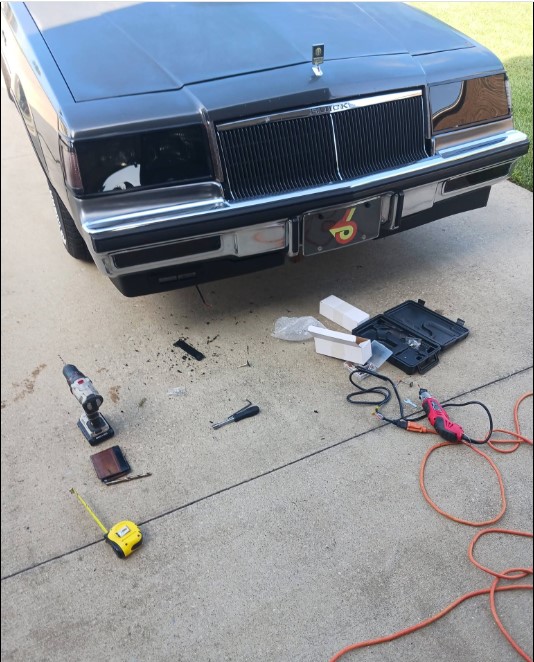
The first thing that you do is find the center of your light based on your measurements from top to bottom and left to right.
Using the gasket as a template, take the drill bit and drill all 4 corners to give you the 4 corners, and this also makes for a nice corner transition.
Using the dremel with a cut off wheel, slowly cut a straight line from corner to corner.
This is where you really want to be careful and precise.
Test fit your light and check your fit until it fits snug but doesn’t affect the air dam, because otherwise it will bow and not allow the light to fit flush.
Once you have a good fit, drill the mounting holes for the supplied hardware.
I changed the hardware to black just for personal preference.
Once I had both lights mounted, ensuring that they were level and centered, it was wiring time.
I wanted mine to operate in conjunction with the low beam headlamp circuit.
This is where your personal preference will make the difference on how you power them up.
[ Jeffs DRL’s come on only when the headlights are on, so not a true DRL setup like the newer cars have, but fits his purpose for them, which are more like additional driving lights working with the regular headlights ]
[ see far below for optional wiring instructions, to make them true DRL’s ]
Using the test light I found the hot lead for the low beam headlamps.
I cut the wire and wired the hot lead to the running lights into the wiring harness and soldered the wires back together and used shrink tubing to insulate the connection.
I grounded the running lights to the frame and repainted the area after using self tapping screws to secure the wires.
This has been a great addition to my car and I get compliments on them at every car show.
What I like is that at first glance, you don’t even see them.
Then people notice them.
The whole job took me about an hour to do.
The biggest thing I can’t stress enough, is to take your time and make sure that you are absolutely certain about their location and them being level (parallel with the air dam).
Once you cut, its cut!
.



.
If you’d like the daytime running lights to function by themselves (without the headlights being on as described above), similar to the way newer vehicles operate (coming on when you start the car), you need to wire them to come on when the ignition key is forward (or when the car is running).
This can be done by wiring them up in your Buick Grand National / Turbo T / T Type / Regal Limited, via your “ign” power junction in the fusebox.
(meaning they come on automatically ONLY when the ignition switch is in the “on” or “run” position)
No (extra) switch required to activate them (they are basically hotwired in via the “ign” connection).
Although it might be a good idea to wire in an inline fuse, just in case.
(and perhaps a relay depending on how much power {wattage/amps} they draw)
This could also be accomplished with a relay (and an inline fuse).
Something triggers the relay to turn on (you decide, perhaps an actual switch, or another method), which then turns on the DRL’s.
.

.