If you’ve visited this site often, you probably already know that we’ve done posts for door jam vents before.
Showing you guys all the different versions that are out there.
[ see some: turbo regal door vents ]
In fact, we’ve installed a few different sets on our own 1987 Buick Grand National in the past (besides the original OEM type).
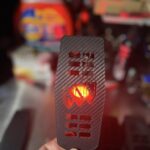
The last set we had, which looked cool, with the words “Buick Regal” on them, plus a cutout of the Triple Shield crest (which worked great for letting the LED light that’s behind it shine through the big opening on the middle), that we ended up painting gloss black, were on this Gbody Regal up until now.
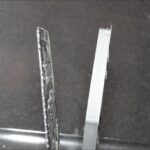
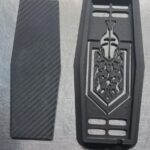
The problem with those, however, was that this type is totally flat (on the back side).
Which isn’t favorable, considering that this plate is only held down by the single factory screw at the bottom.
Meaning, since most of these original screws (on these cars) are kind of loose (from wear over time), the plate ends up sliding one way or the other (and not staying in the correct position they belong).
[ see that flat metal type here: tri shield door vents ]
[ before the above, we actually tried to make our own vents out of blue plexiglass: custom made door jam vents, but being as they were blue, they really looked out of place ]
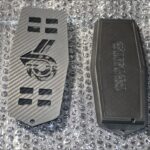
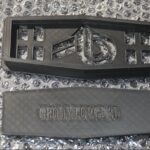
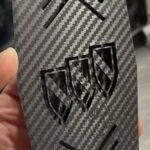
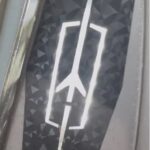
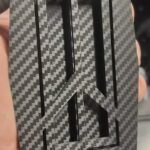
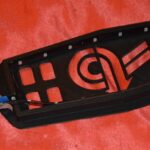
SO, recently we found out about these cool 3-D printed versions.
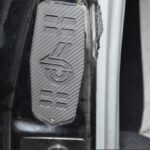
And they’re made with a neat carbon fiber texture pattern design on them.
[ which will look great in this area on our GN, considering we have carbon fiber door sills that blend in and will match these in the door jam! ]
.
THE NEW PAIR OF CARBON FIBER LOOKING DOOR JAM VENTS:
.
.
A company called “GBody Forge 3D” makes these door jam vents.
Run by Dana Macri, who not only makes a couple different Buick styles, but has a selection for all of the other Gbody vehicles as well (see sample pics, far below).
We spoke in depth to Dana about the process of creating these.
He knows his stuff, and actually cares about the products that are spit out of the machine, rejecting lots of pieces for various reasons (bad prints, scuffs, marks, etc).
He also mentions that he makes these from ABS plastic, which is good until like 360 degrees Fahrenheit, so no worries about them melting in the hot sun.
Here’s a link to the Gbody Forge Facebook page:
facebook.com/profile.php?id=61568058341786
(you can send him a message for any queries about this product)
Currently priced at 64.99 for a set of 2 (+ 14 ship), they are in stock and ready to go.
.
.
CONTACT / ORDER THEM FROM HERE (they are being sold on ebay):
3D Door Jam Vents
.
.
A competitively priced (thick plastic) part, compared to billet aluminum versions (that sell for $200), or the flat metal type (like the tri shield ones we mentioned above, that cost about $40).
You could always acquire stock units, but even those are running somewhere around $60 last time we checked.
If you’re looking for something to jazz up this area of your Turbo Buick (or other Gbody for that matter), not to mention getting something themed to actually match your car (versus the stock type look), you should check into these.
Unless you absolutely require the OEM part, if your old vents need replacing, why not get something cool looking instead?
We weren’t super happy about the vent choices that were previously installed on our Buick GN (for one reason or another), so we always had planned on getting some other type. We weren’t actively searching, but it was one of those things that was in the back of our minds should the occasion pop up.
And it did, so we jumped at the opportunity to give these a whirl.
So far so good, and since we don’t have to worry about them moving out of place like the last pair did, these should be the last ones we ever install on this Turbo Regal.
Since we already had LED lights installed behind the old vents, it should have been relatively easy to swap them over into this new pair.
(or so we thought, read far below about what we had to do to make them work!)
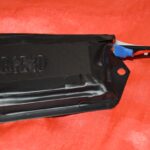
These new vents units already have a channel built into them for wiring purposes (convenient!).
[ Need to see how we wired up the lights to work previously? door vent LED lights ]
Installation for these carbon fiber texture versions took about 15 minutes (for both sides).
13 minutes to rework/convert the lights into the vent, and 2 minutes to remove the old vents and screw the new ones in.
If you don’t plan on using lights in this area, expect to do the entire job in less than 5 minutes.
These look excellent even without lights, so don’t think that’s it’s a must have to put them in.
If you are putting in lights, expect it to take an hour.
(as you have to run power wires to the vent lights)
.
These vents come with a similar design backing piece (to use with or without the lights), so you put the lights inside (on the back side of) the front piece (the side you see after it’s installed in the jam), then put the back piece on.
Or just insert the backing piece if you aren’t using lights.
The wire channel built into the vent is on the bottom side, so make sure your wires lead thru that area.
Finally, you push the (outside of the vents) exposed wires into the vent hole in the car body, then slide the new vents into place (top side first, in on an angle catching the retaining slot on the vent, then the bottom), and then screw them down (snug but not overtightened, since these are plastic).
.
.
We’ve seen other 3-d printed items before, and some of them don’t look all that great due to the grip/production marks that are left on them when done. THESE however, look awesome (flawless)! And we’re pretty happy campers now!
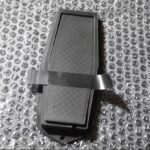
* A suggestion! Before you put the new vents in, (even though the backing piece is mostly snug already), you might want to stick a piece of tape across the back side, securing the back piece to the front piece, as if the back piece ever falls out, it will land down inside the wheel well, and how will you ever be able to get it out from there!?
.
.
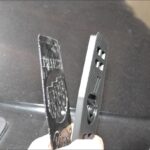
COMPARISON OF VENT THICKNESS, OUR OLD ONES VS NEW PARTS:
.
.
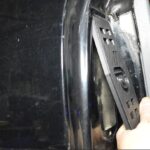
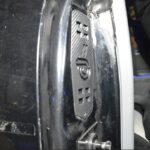
INSTALLATION OF NEW DOOR JAM VENTS:
.
.
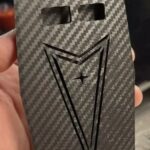
A SAMPLING OF THE OTHER DOOR JAM VENTS FOR GBODY VEHICLES:
(Made by GBody Forge 3D)
.
.
.
Think these are pretty cool?
CONTACT / ORDER THEM FROM HERE (they are being sold on ebay):
3D Door Jam Vents
.
.
Here’s the process Gbody Forge uses to make these door jam vents “light up”:
[ note that the lights we already had in the Buick GN used 194 type bulbs and sockets, so we ended up converting those to a similar type like he uses within this video ]
.
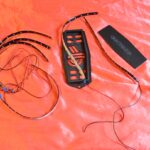
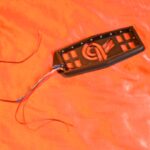
We bought “flexible strip led’s” to use on these (5 pack for $8 shipped). They are 12″ long, so for each vent, you’ll use 1 full piece, and then for the 2nd piece you can trim it down for the remaining outer edge (or just let it hang below the vent like we did, you won’t see it after installation). They looked like they would work, but they are actually a bit too wide to fit down into the proper place (it hangs a bit outside of the vent). You can’t trim the width down (we tried), as the wiring runs on the outer edges. So we ended up sticking them into place as is (there’s tape already on the back), then placing the rear cover on top (but it doesn’t fit “into” the vent anymore), so we just taped the cover down into place (all the way around, works ok). Note that these are (5050 chips/bulbs) so they aren’t as bright as we’d hoped (but still work ok). Strip all of the power/ground wires, and wrap them together (both positives, both negatives), then attach to the new power/ground wires you ran. When you open your doors, they should light up. When the doors are closed, they should be off. If yours work like that, then you did the job properly!
.
Want to see the cool process of how these Gbody door jam vents are actually made (printed)? Check this video out!
.
GO get you some cool new parts today! ( HERE )
.
.
.
.
.
.
.
The vendor shown above has supplied us with the parts we used in this project, per our request. If you are looking for similar parts, don’t hesitate to inquire with this specific vendor!
.


