


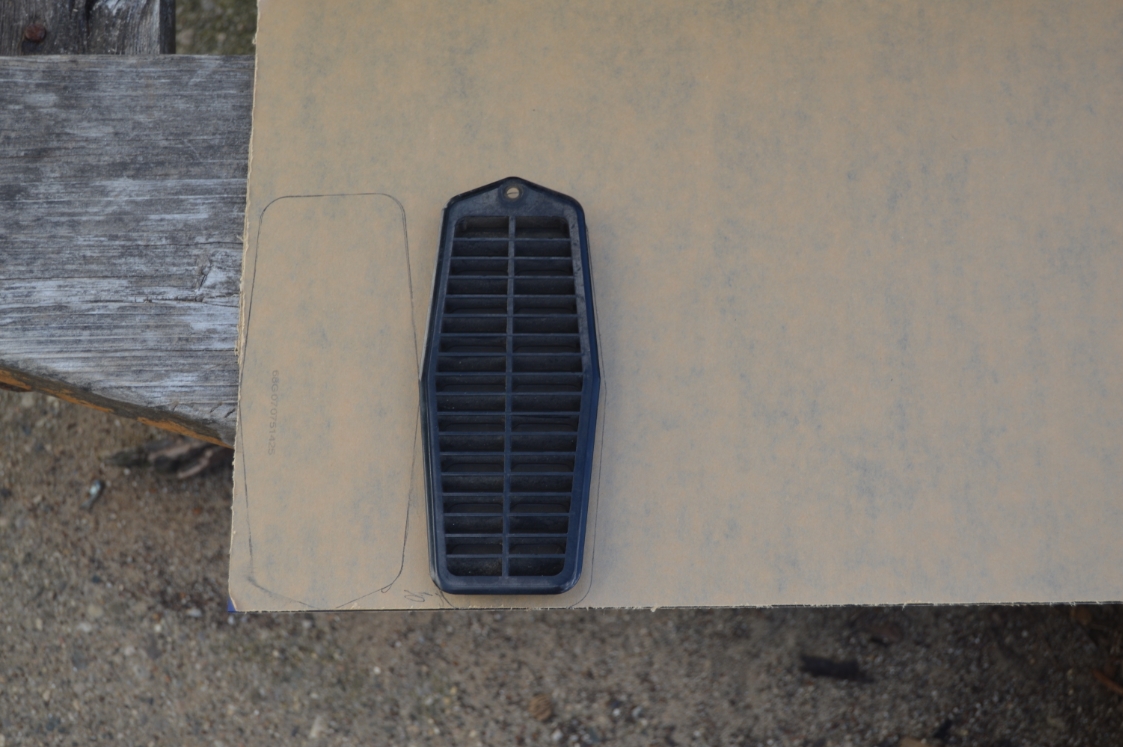
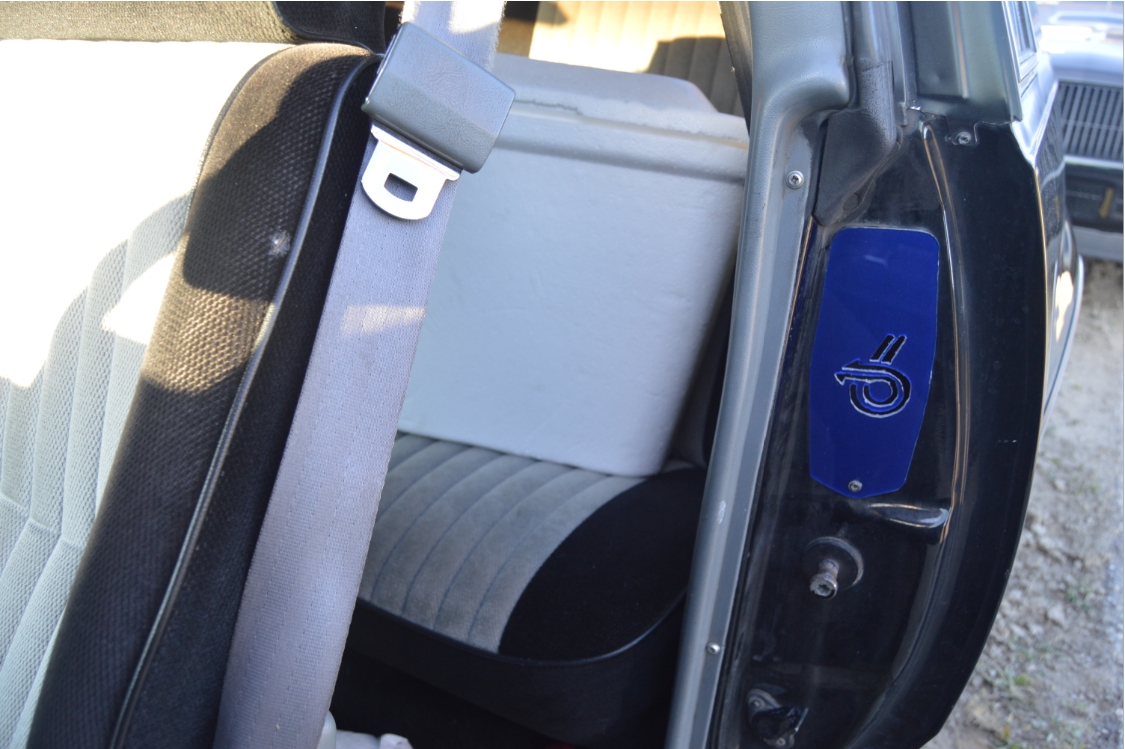
The stock door jamb vents on a Turbo Regal are functional, black in color so they blend in well, and that’s about it. There’s nothing fancy about them at all. What do you expect from a factory GM part?
Most Turbo Buick owners are ok with just this OEM unit, they work.
Others (like us) are always looking for little things we can do to jazz up the G-body Regal.
If you’re looking to spiffy them up, there’s a couple vendors that custom make aluminum ones. Some are plain slotted versions, others have Buick logos engraved (or cut thru) on them like the tri shield symbol, turbo 6 arrow, etc., but they’re a bit pricey (around $225).
That’s pretty much your only options if you’re looking to replace your stock Buick vent.
Crafty as we are, we decided to try our hand at creating our own style of a door jamb vent for this 1987 Buick Regal Grand National.
Actually, we made 2 different types, with 2 different logos, but only one of them lights up.
.
COMPLETION TIME: about 4 hours
.
TOOLS:
– phillips screwdriver (to remove old vent)
– jig saw or dremel
– small files (to smooth out the center cutout)
– hot glue gun
.
PARTS:
– acrylic sheet (12″x24″, $15 shipped ebay)
– can of frosted glass paint ($7 local hardware store)
– LED lights (blue, set of 10, $7, ebay)
– 4 pieces of wire (18/20 gauge, 7′ long each, 2 positive 2 negative)
– 4 wire taps (or solder and electrical tape, etc)
.
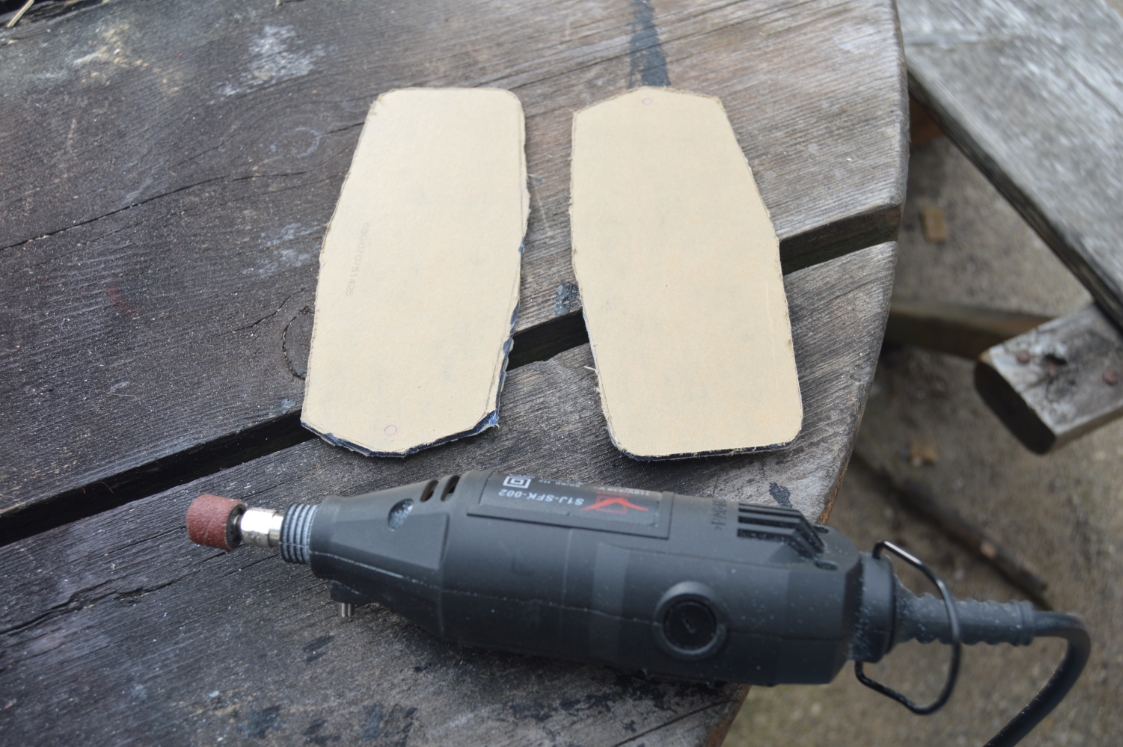
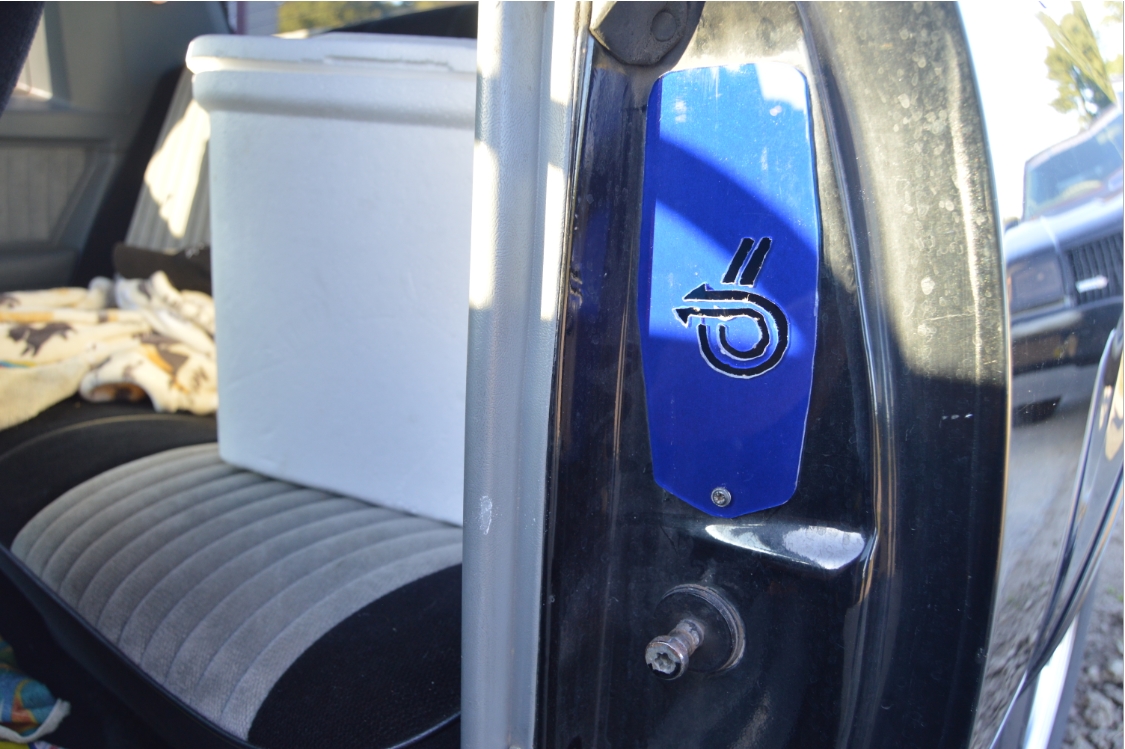
We started off making this new vent with just a flat piece of plexiglass, and having a turbo 6 logo cut out in the center of it.
We simply traced the original vent onto a sheet of plexi, then cut it out.
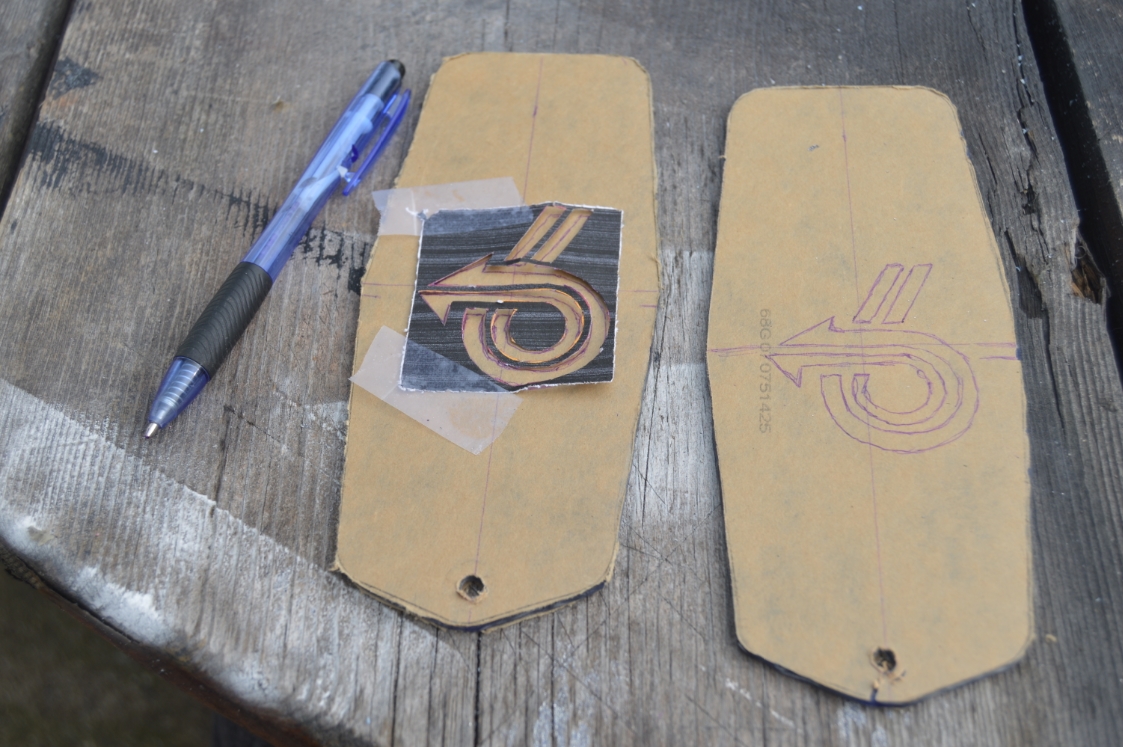
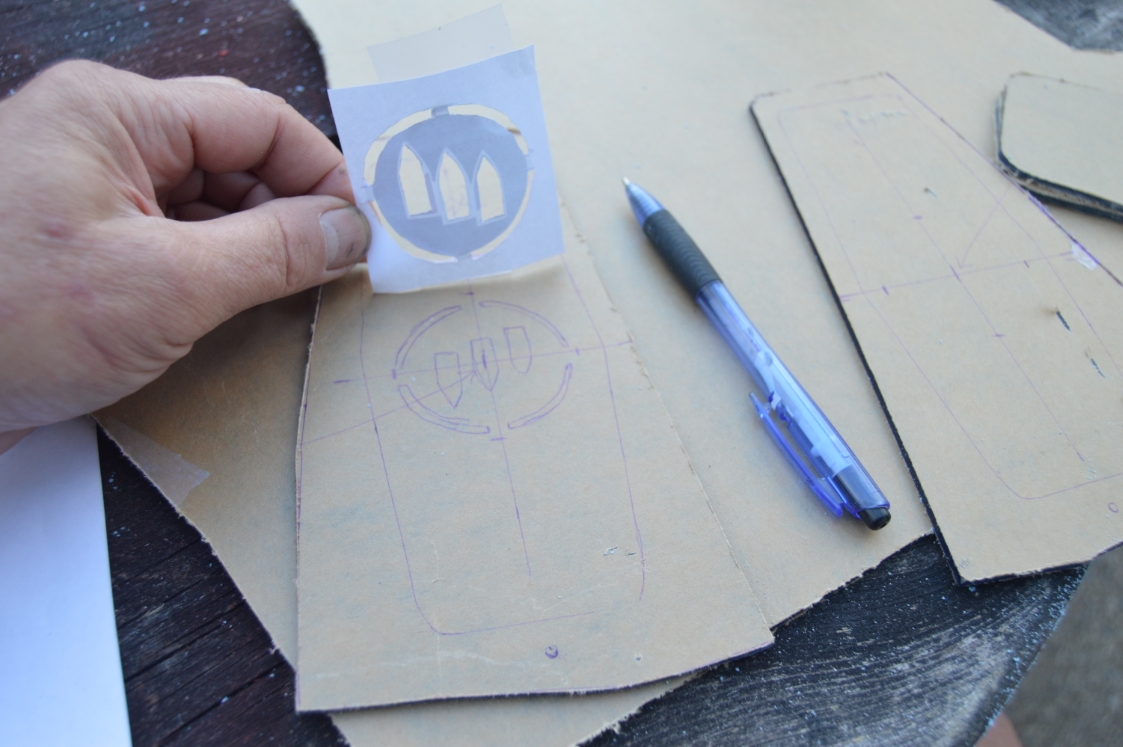
Then a turbo 6 symbol was printed to size (2″) on paper, centered onto the vent, traced out, & cut out with a dremel and hand filed into shape.
.

![]()
.
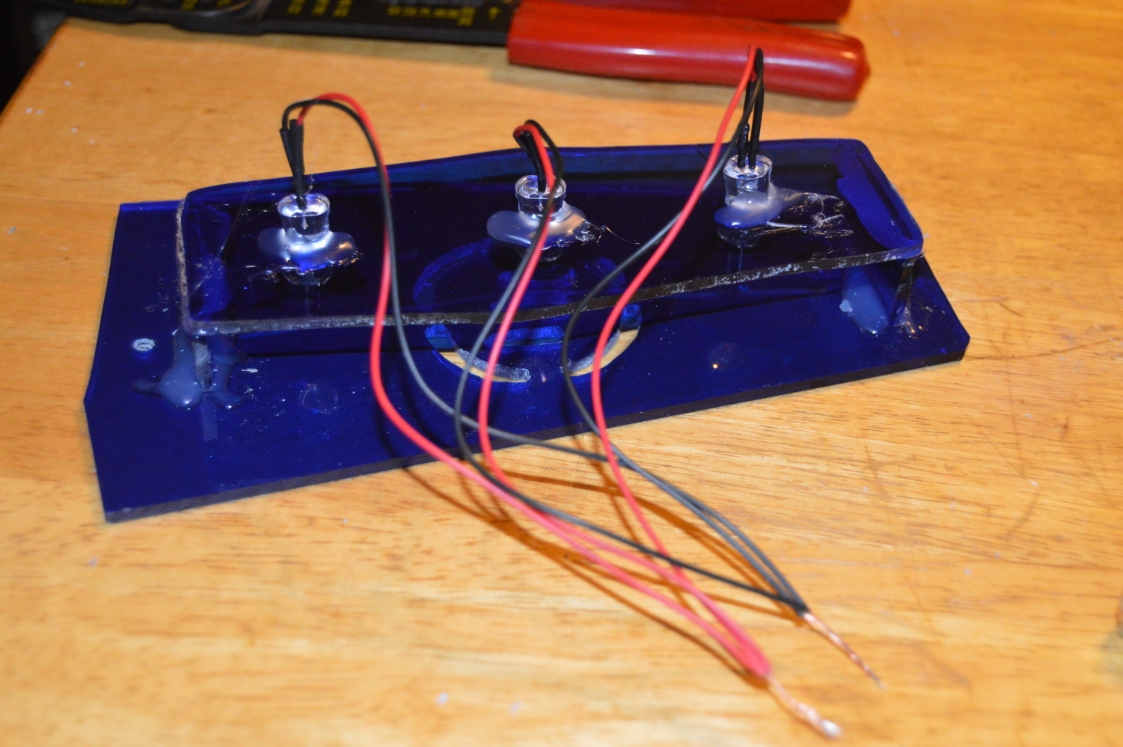
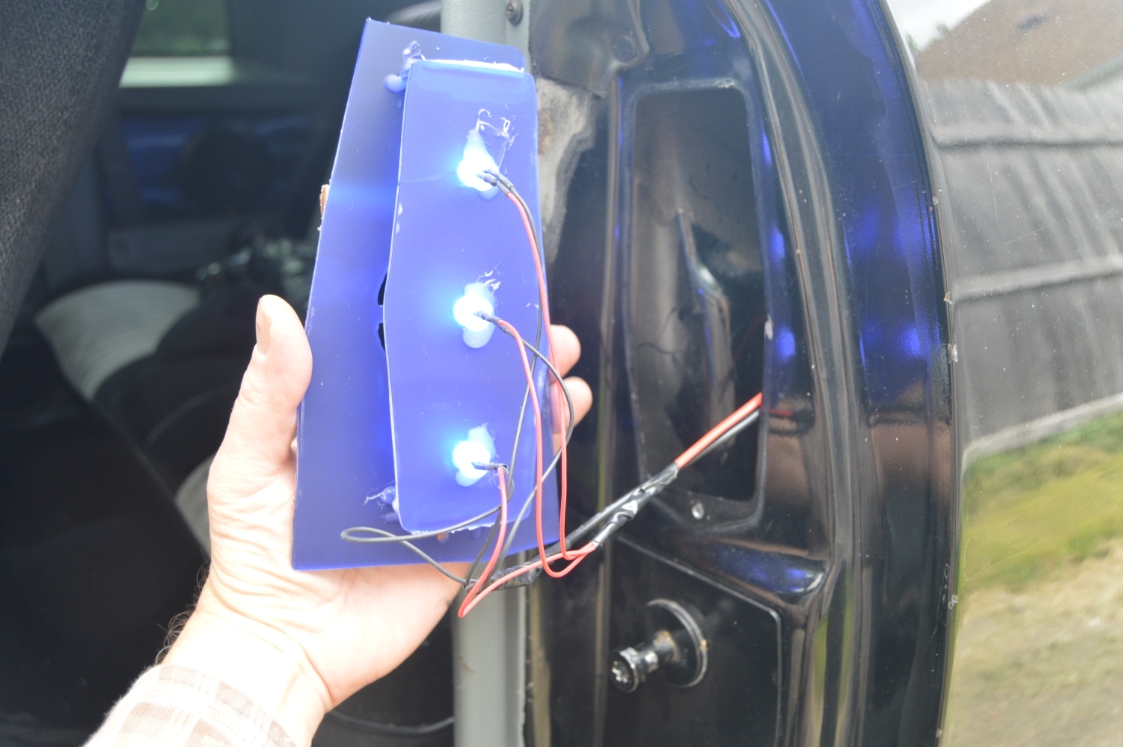
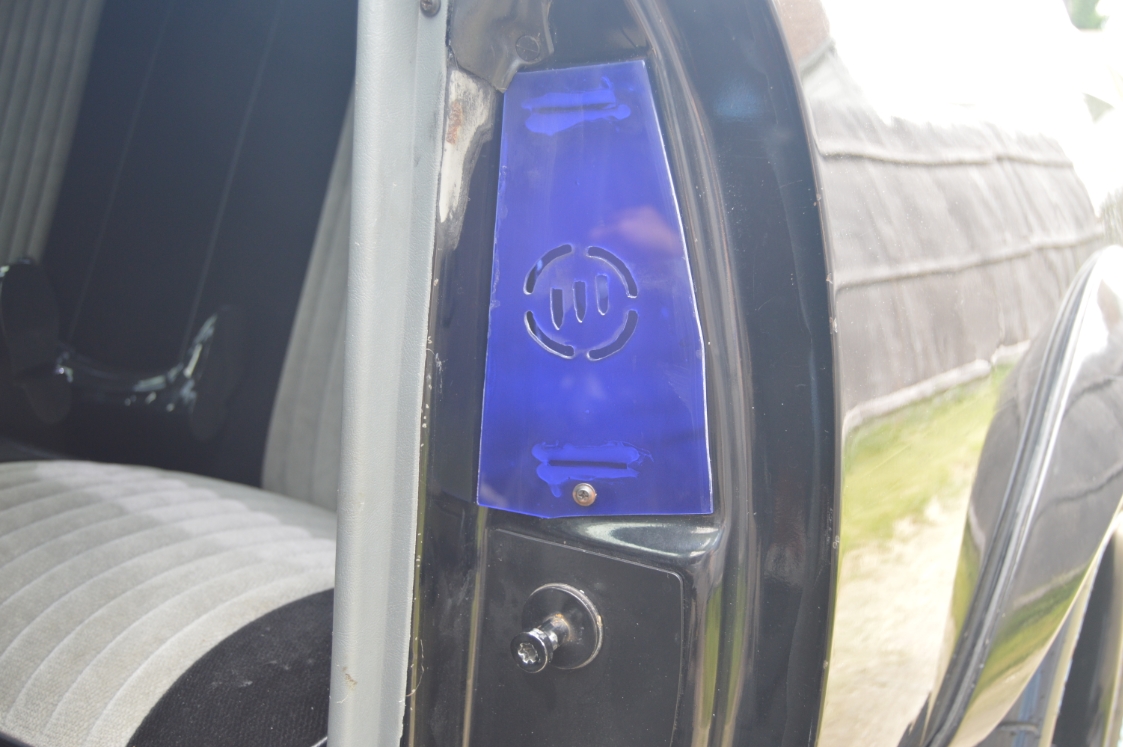
For the 2nd vent unit, the square-ish one that lights up, was done next.
We completed the lighted door jamb unit using 4 pieces:
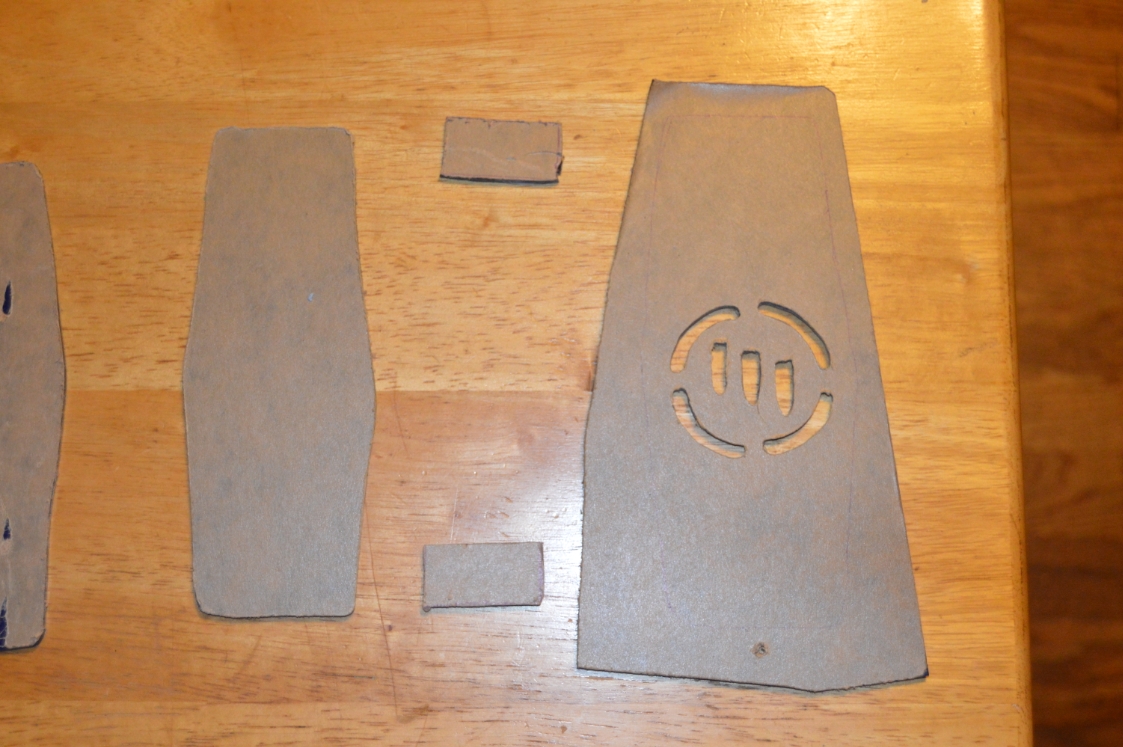
The face (with a cutout tri shield symbol on it), a back piece (sized slightly smaller than the overall opening in the body), and 2 spacer pieces between the front and the back.
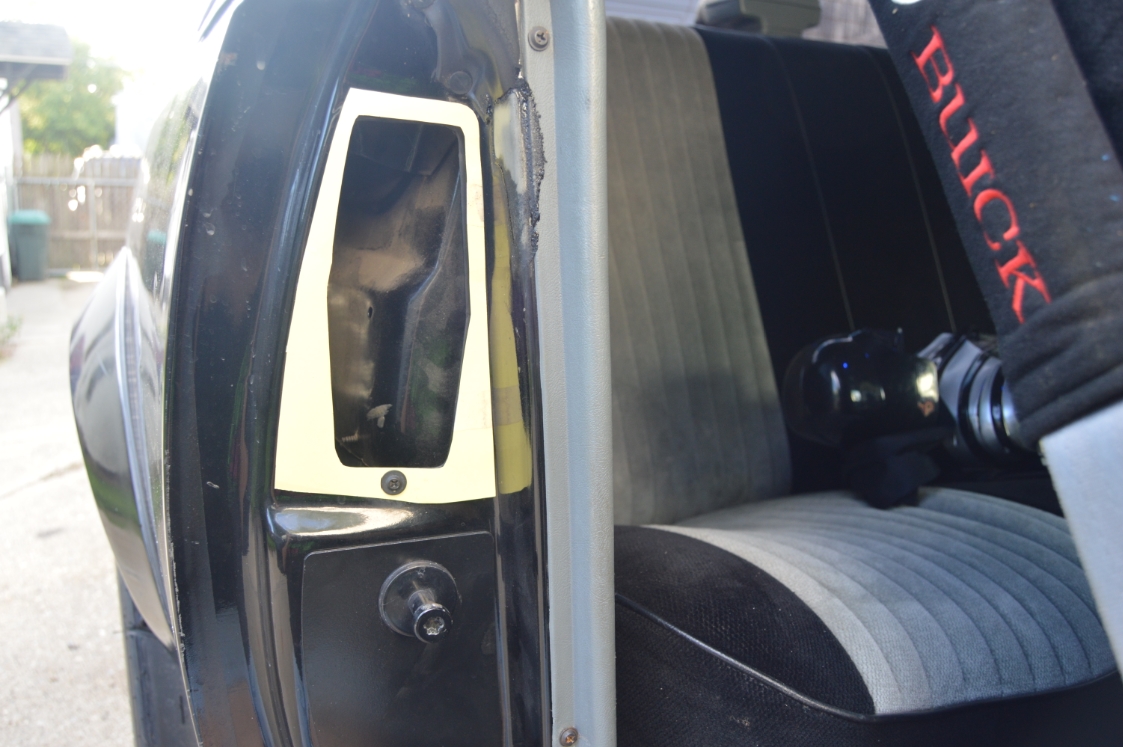
Once you take off the OEM door jamb vents, looking inside you’ll see that the wheel well is partially in the way, limiting the depth that this new vent can be. There’s only about an inch of room that you can go in before you hit it.
So the depth of the new door jamb vent unit can only be an inch deep max.
We started off creating the new vent the same size and shape as the original factory one is.
Then we were tinkering around and made it kind of (bigger and) square to fit the shape of the actual door jamb itself. It fits perfect and looks great (but much much different than how the stock one appears).
It’s one of those things were if you aren’t really paying attention, you see it, but it doesn’t look out of place or different, unless you are actually looking for it. Then it’s noticeable, and neat looking (in our minds at least, lol).
The entire unit is secured to the door jamb via the same single screw that held the OEM piece in place.
(but we did use some black silicone around the entire outside of the plexi, to keep it waterproof inside)
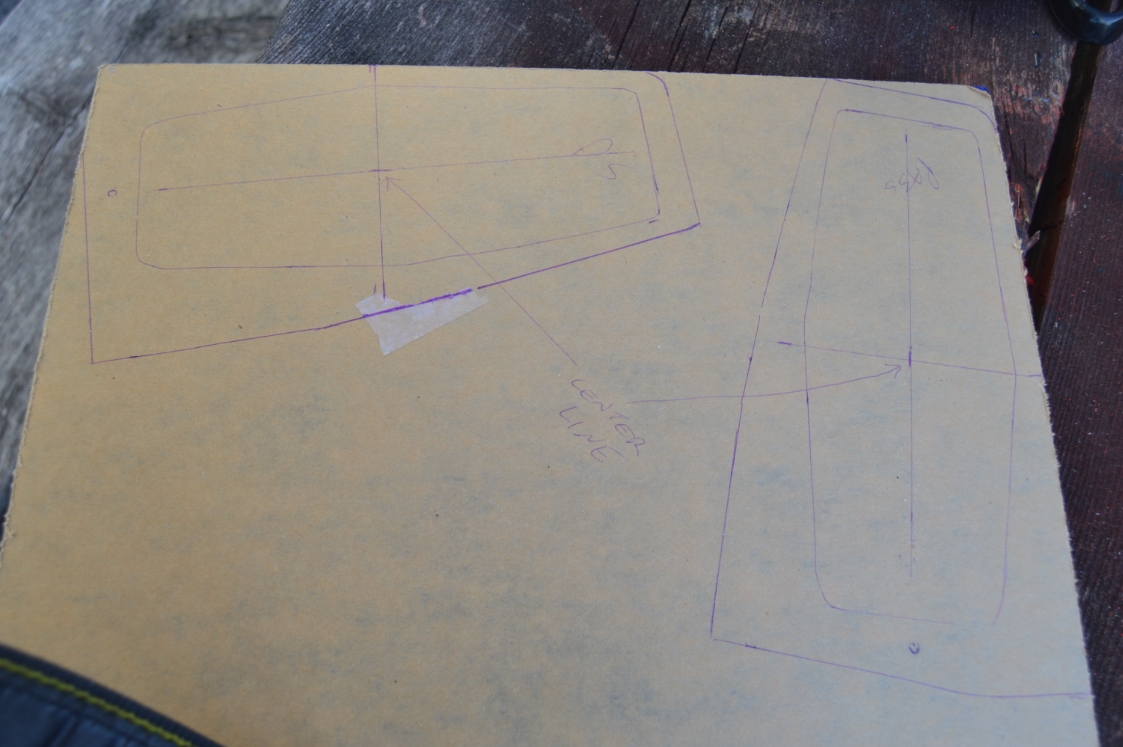
We made a template (out of paper) mocking up the new square vent unit, then traced it onto the sheet of plexiglass and cut it out.
(this would become the front piece of this new unit)
We outlined the factory opening and marked that onto the template (while it was taped to the door jamb).
That opening area (the center piece) was cut out from the template and was traced onto the plexi sheet and then cut out a bit smaller to be able to go inside of the door jamb opening.
(this would become the back piece of this new unit)
.


![]()

.
2 spacer pieces (3/4″ x 1.5″) are needed to provide some depth between the front & back pieces, so the LED lights have some area to shine on, as well as secure the back piece to the front piece.
All of the pieces were attached together using a hot glue gun, including the LED’s, which were glued into place on the back piece.
The back piece holds the 3 (10mm) blue LED’s, which are all wired up together along with 2 new sections of wire (positive & negative).
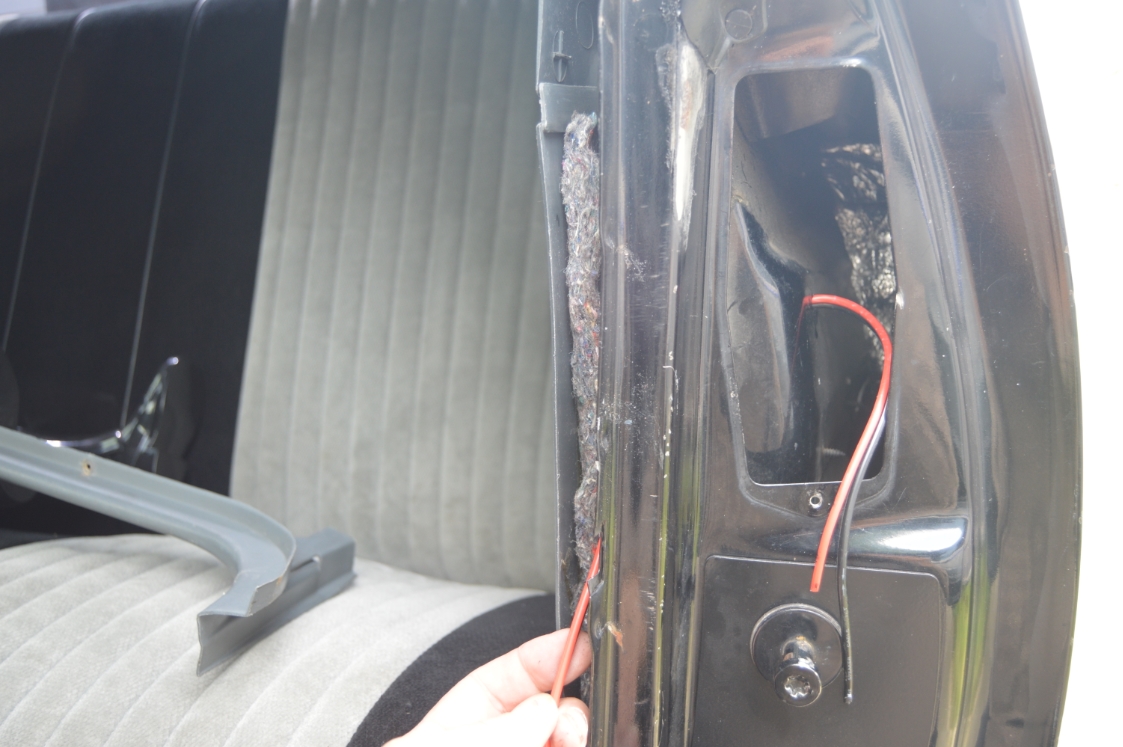
If you look inside the driver side vent opening, there is a small hole on the left side, which you can run the 2 wires thru.
(there’s a similar hole on the passenger side – if not, just drill a small hole to feed the wires through).
.
![]()
.
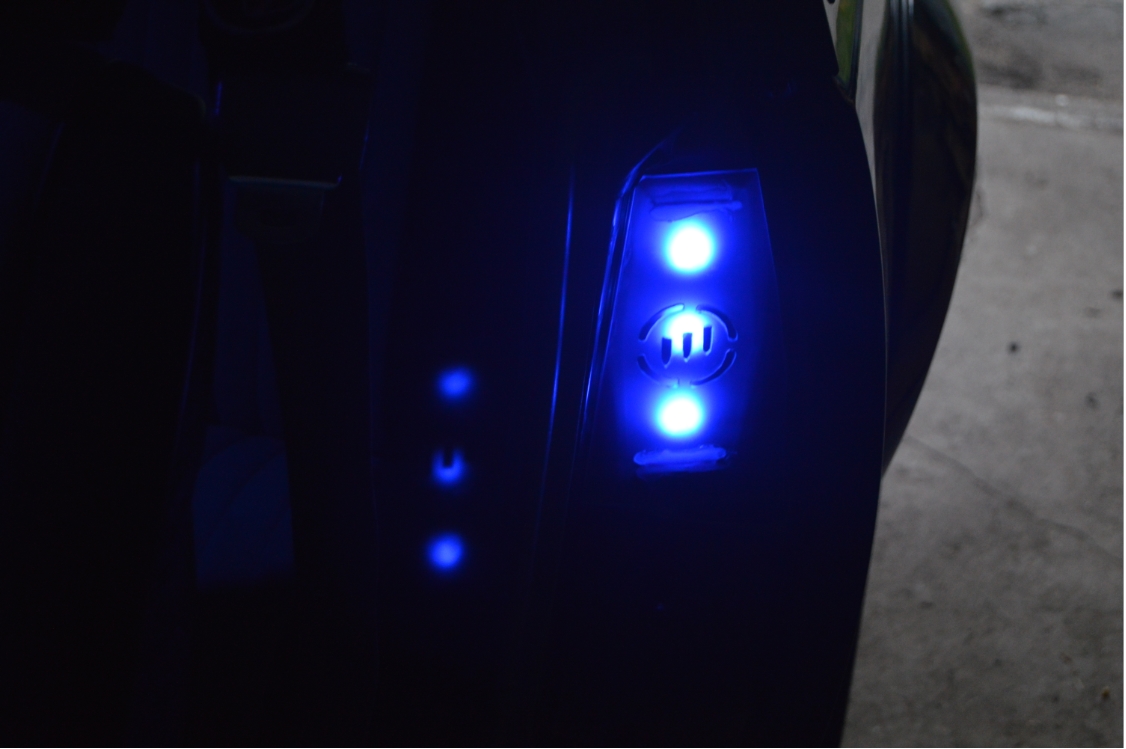
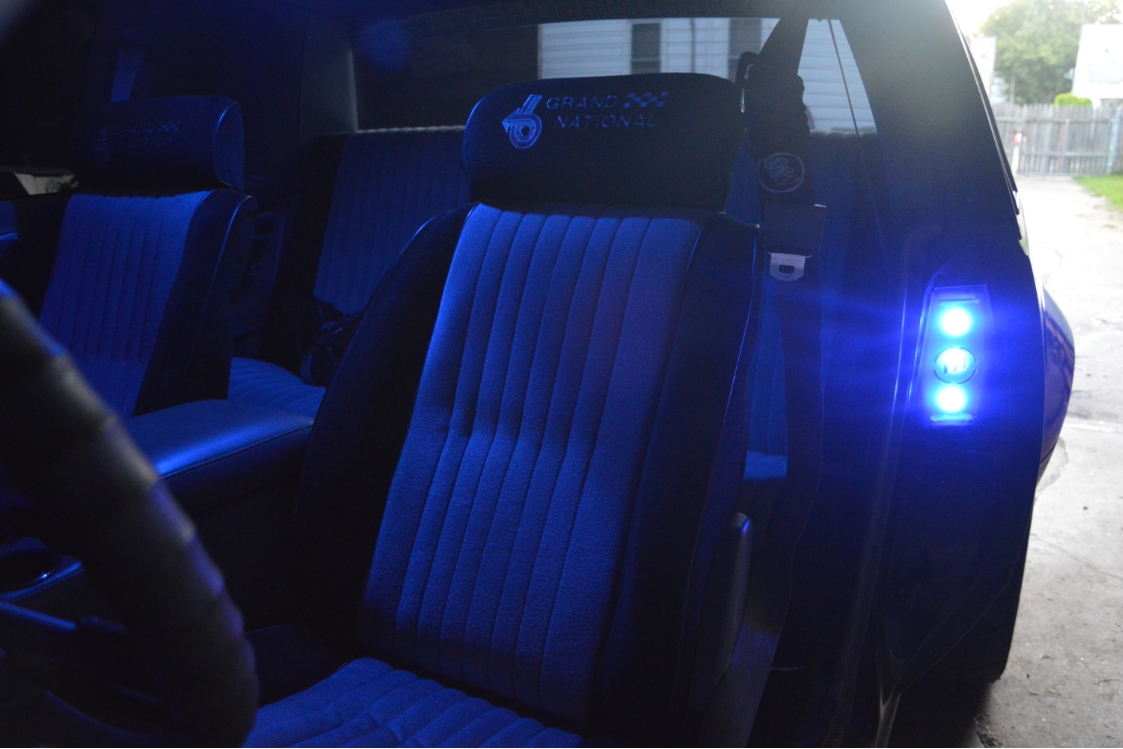
These new LED’s are set up to trigger off of the dome light.
(meaning they only come on when the door is open)
The power wires & ground wires (for both sides) are spliced into the dome circuit at the door jamb switch using the exact same wires as we used when we installed the door ghost lights, from awhile back.
(that made it easy to get these new lights to function, check out that previous post to see how to wire it up correctly)
The wires from the new door jamb vent run behind the quarter panel side trim pieces, then under the carpet near the door sills (where the factory wires are run through), head forward and come up behind the front kickpanels, go behind the dash & attach to the dome light circuit wires we did previously.
.


.
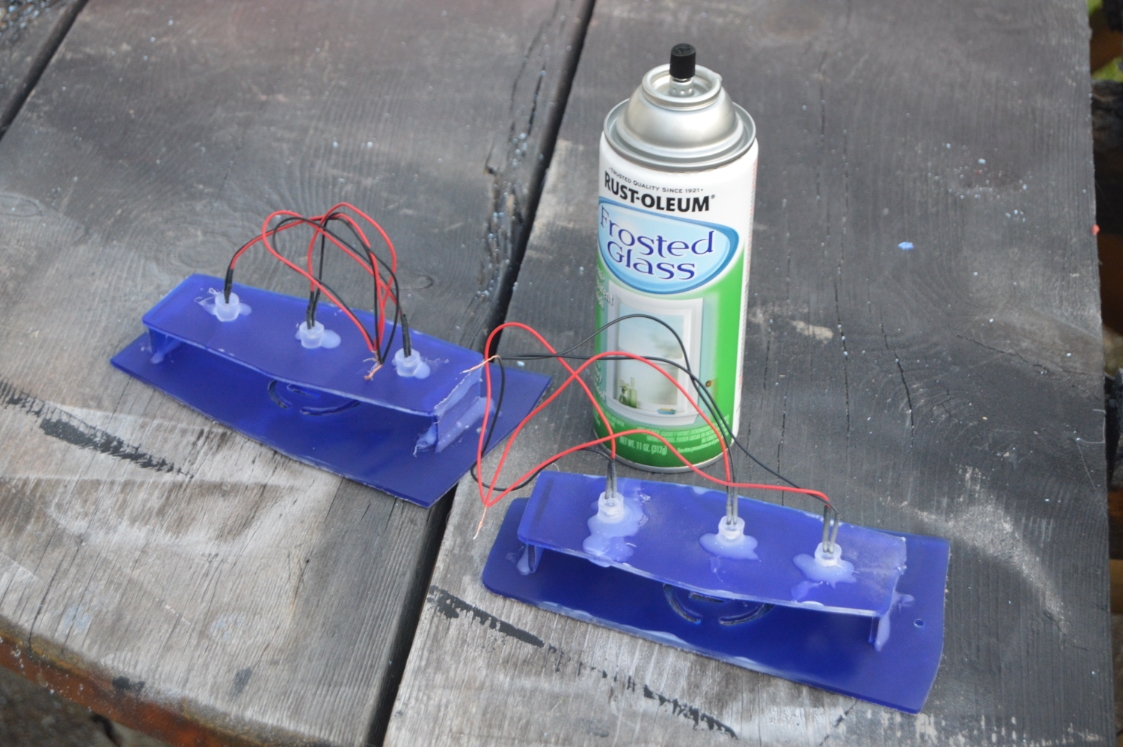
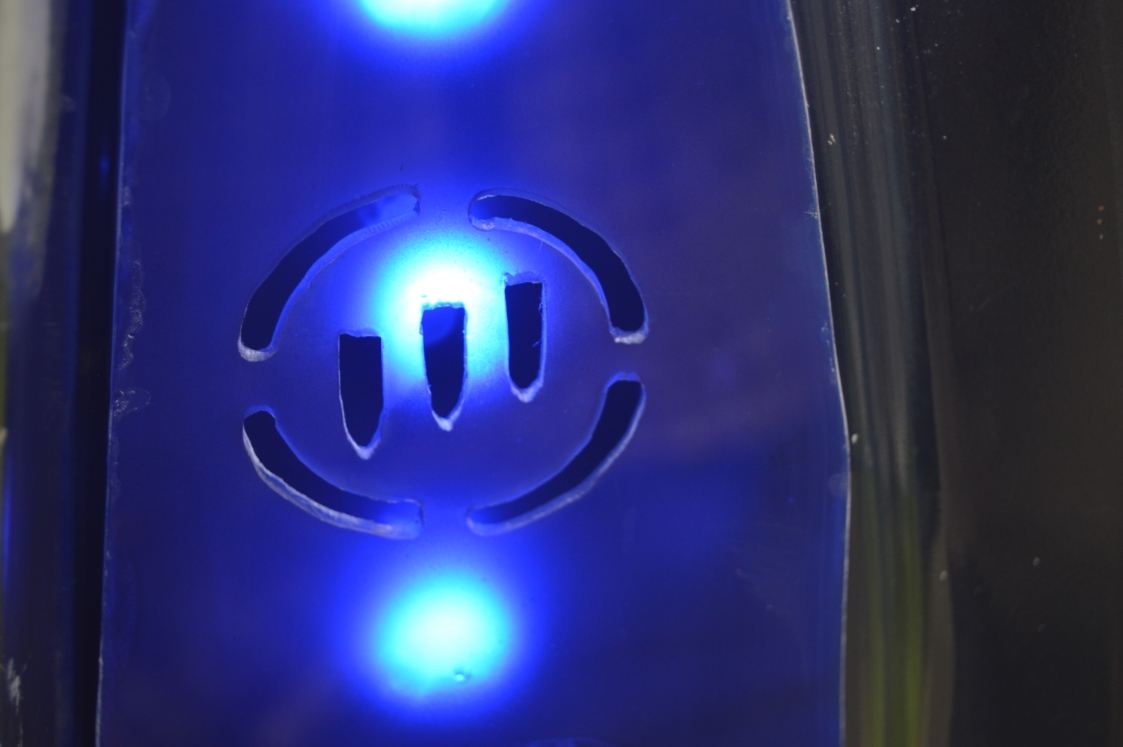
NOTE: when you buy acrylic plexiglass you can select either “transparent” or “translucent.”
Transparent is see thru and looks like glass.
Translucent is opaque (but light still shines thru) but looks like colored plastic.
We chose transparent, for the way it looks (on the outside of the vent, the part you actually see in the door jamb), and we thought the light would “glow” through and look cool once inside the jamb.
However, after the assembly was complete, the lights were actually too bright, and didn’t provide a glow, just basically 3 spotlights in 3 sections of the vent, and you could see the 3 bulbs, which looked ok, but not really the effect we wanted.
So what we did, was get a can of frosted glass paint and paint the backsides of the vent.
The bulbs were also sprayed dimming them down somewhat since they were very bright.
This eliminated the spotlight effect, and provided (for the most part) the glow effect we were seeking.
We probably could have used translucent plexi instead and got the glow effect we wanted, but the blue plexiglass available in translucent is just TOO blue for the door jamb (it would have been very noticeable, something we didn’t want).
The transparent blue sheet we bought looks mostly black in the daytime, since it is a dark blue color.
You only really see the blue, when it lights up, and you only really see it light up at night.
.
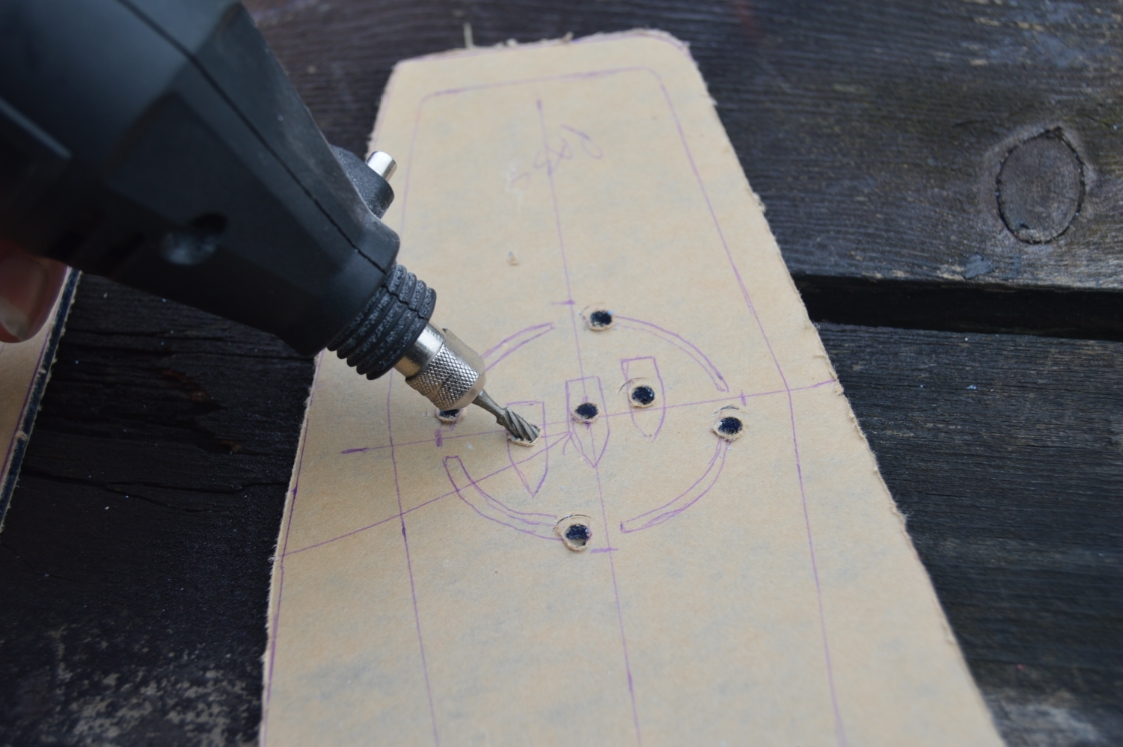
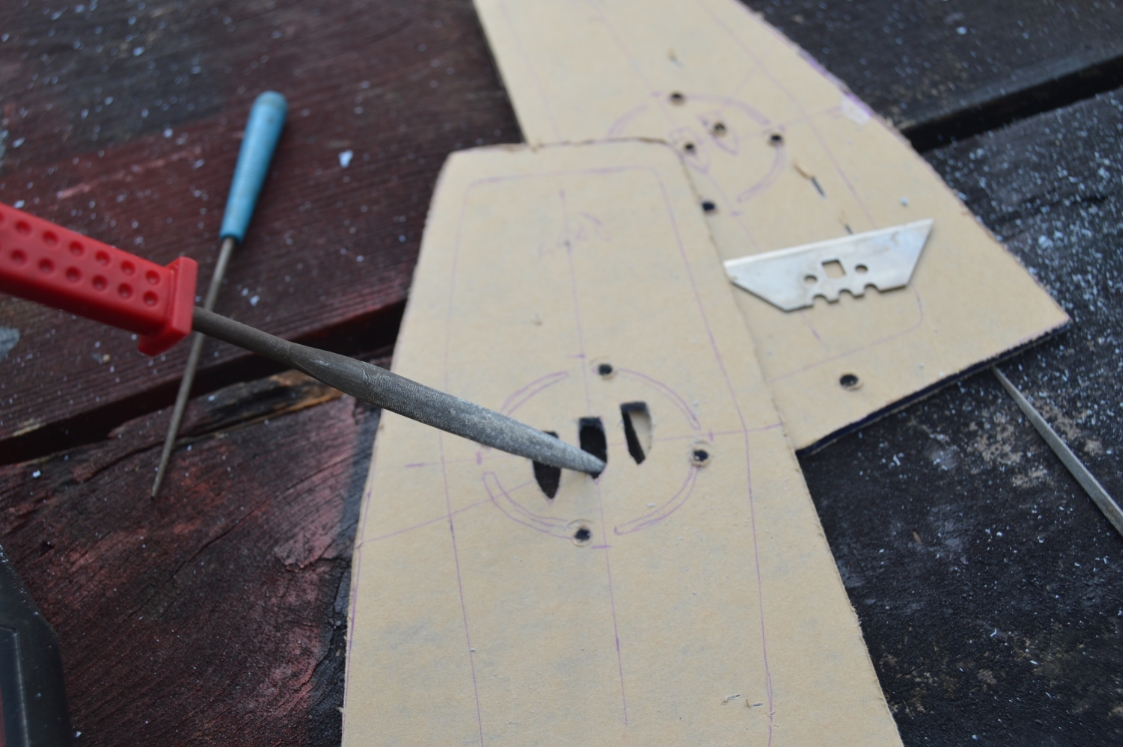
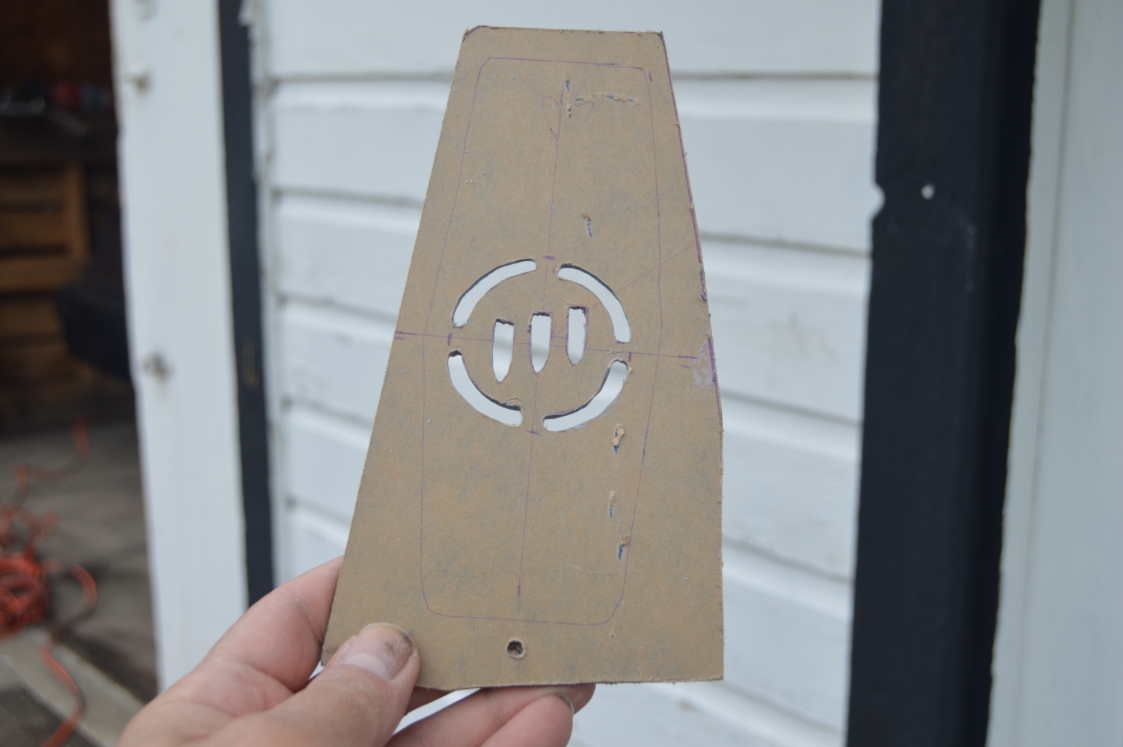
To make the tri shield symbol cutout, which functions as the actual vent in these units, we printed out on paper a copy of the tri shield image, cut out using an exacto knife the 3 center sections, and the outer round part leaving about a quarter inch at the top and bottom and sides of the circular shape (because something has to hold it in place). Then centering the paper on the vent (within the same opening that the body has, which is already marked off on the plexi), taped it to the plexiglass, and traced the outlines. A small drill bit was used to start the holes that needed to be made, then a burr bit on the dremel further opened them all up, and finally a small file was utilized to finish off the holes.
.
Admittedly, it’s very different looking, and most likely something that’s not for everyone.
Even with toning it down using the frosted paint, at night it is still bright and provides light in that area which is helpful when entering this Gbody Regal.


.


