


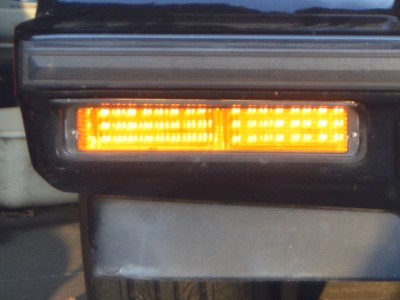
In theme with the rest of the LED bulb upgrades we have performed on this 1987 Buick Grand National, this go round we are installing the ones for the front bumper lights from Digi-tails.

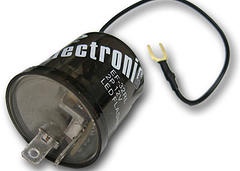
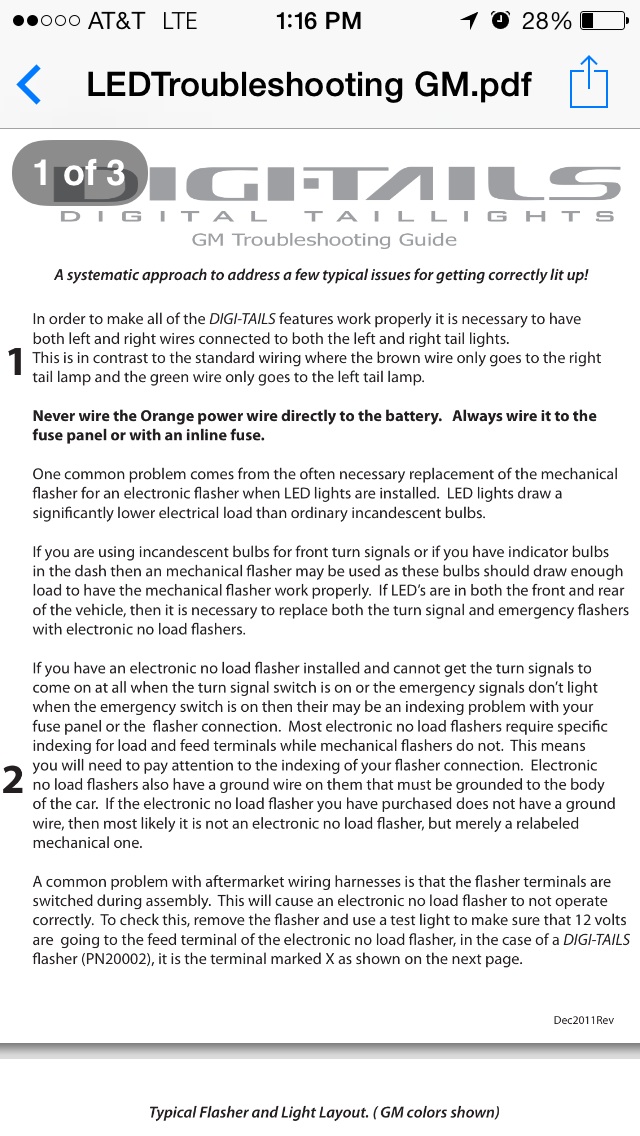
We ordered the electronic (no load) flasher with the light set, as this G-body Regal already has the rear LED (Digi-tails) lights on it, and they recommend to replace the flasher if this is the case (they actually say to replace BOTH flashers, which the one was done previously at the time of the rear install).
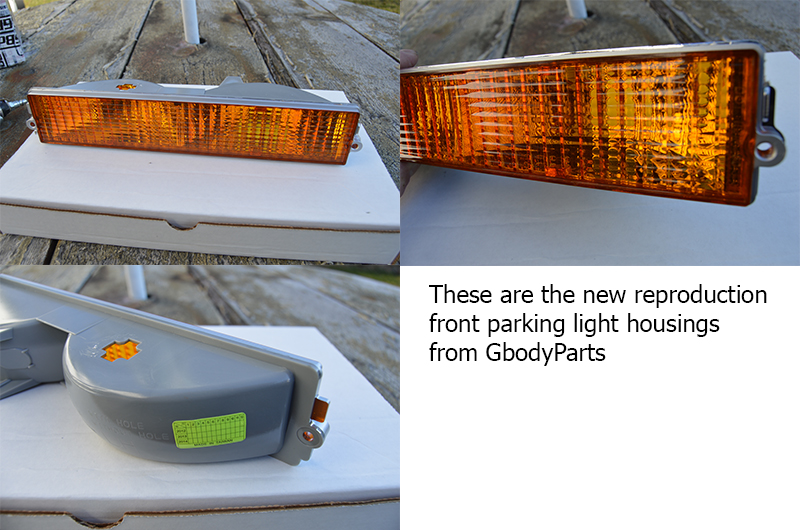
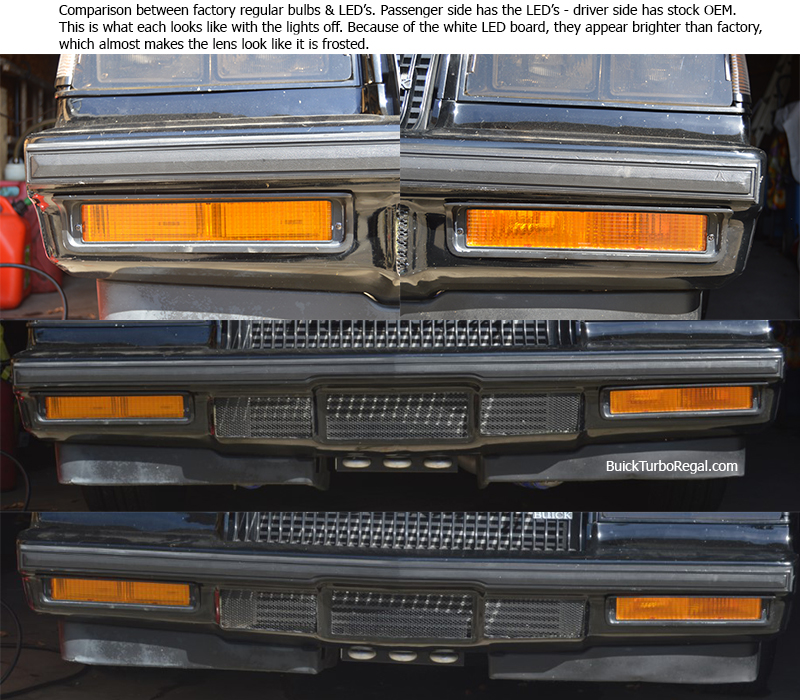
Of course, after receiving this way cool LED upgrade for the Turbo Regal, we realized how bad the original OEM Buick housings actually were (faded, slightly hazing & a few stress cracks in the lenses) and as most of us Turbo Buick owners know, we all want our Gbody cars to be the best they can be with all new parts always being installed!
So we ordered a new (reproduction) replacement set from Gbodyparts.com ($99 shipped via ebay).
These new housings are perfect in every way, matching the style of the factory setup excellently.
The lenses really shine and gives the car a new appearance!
(too bad we are going to cover them up with dark shaded lens covers once this project is completed).
It seems kind of disheartening to buy something brand new that you are just going to cut up for a project, but alas, it needs to be done.
.
TIME TO INSTALL: less than an hour.
TOOLS REQUIRED: T10 & phillips screwdriver, dremel tool (or similar)
PARTS REQUIRED: silicone (or better yet some butyl tape, see note below), white lithium grease, Digi-tails Front LED lights (about $159, PN 2100886v2 – from Digi-tails website, assorted Buick vendors, or below)
.
HOW-TO:
[NOTE: the instructions included with the set we bought must have been from version 1 of these lights; the pics within it show 2 sets of wires on each LED panel (each side/housing) & the LED panels we received only have 1 set of wires (3 wires total for each housing) – this new V2 version of the lights has both panels (for each side) connected together; meaning v1 had 4 total panels with each panel having its own wiring (4 sets of wires total), V2 has only 2 panels with each panel having its own wiring (2 sets of wires total – 1 for each side). looks like a great improvement for V2!]
Start off first by replacing the OEM flasher with the new electronic one, if you are using it.
[there’s 2 flasher units in the G-body, we put this new one in the fusebox, in the top left corner, as the other flasher had already been replaced for the rear digi-tails]
{You may need to splice in a small extension wire on the flasher to be able to reach a proper grounding point near the fusebox area, since the existing attached wire on it is kind of short}.
1. unplug both light sockets (turn counter-clockwise) from the parking light housings. Now remove the bulbs.
2. Remove the metal bezel & lens housings by using a screwdriver & unscrewing the 2 screws that hold them in the bumper.
3. with scissors cut out the supplied templates. tape it to the housings in the proper position.
4. wear safety glasses. cut out where shown using a dremel tool (or similar). remove templates. use a flat screwdriver to knock out the remaining slag of plastic. smooth off the cut edges.

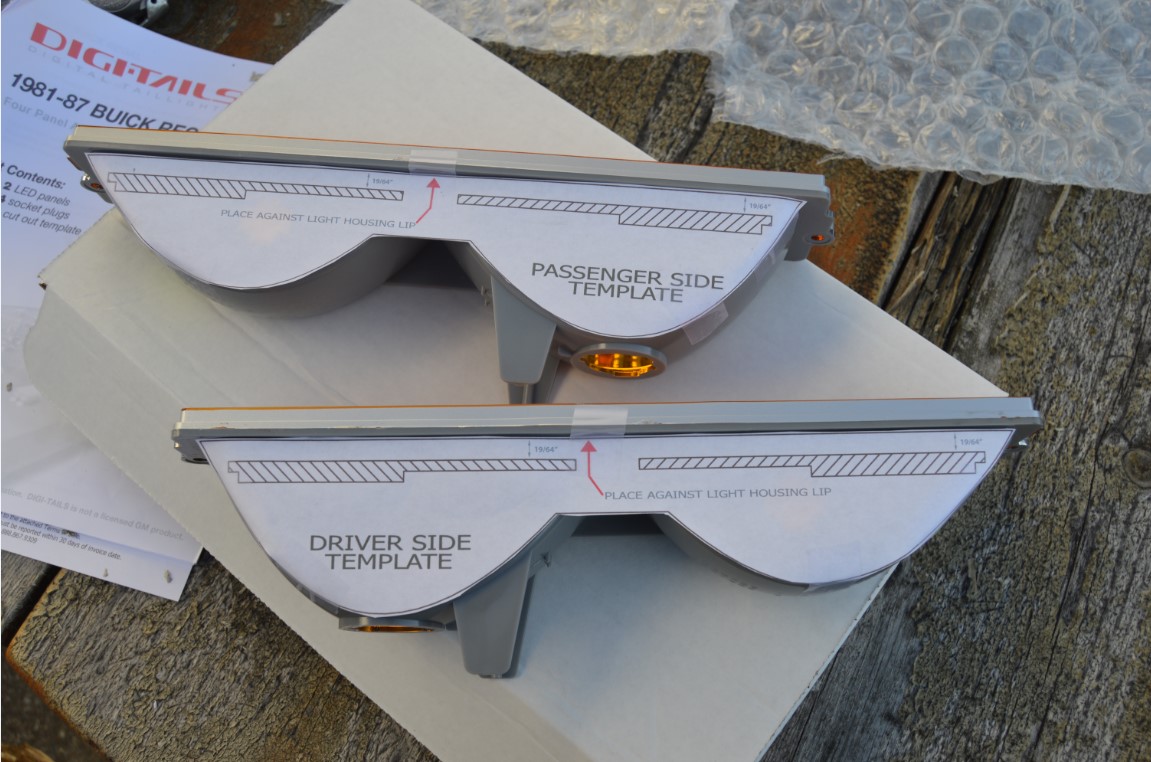
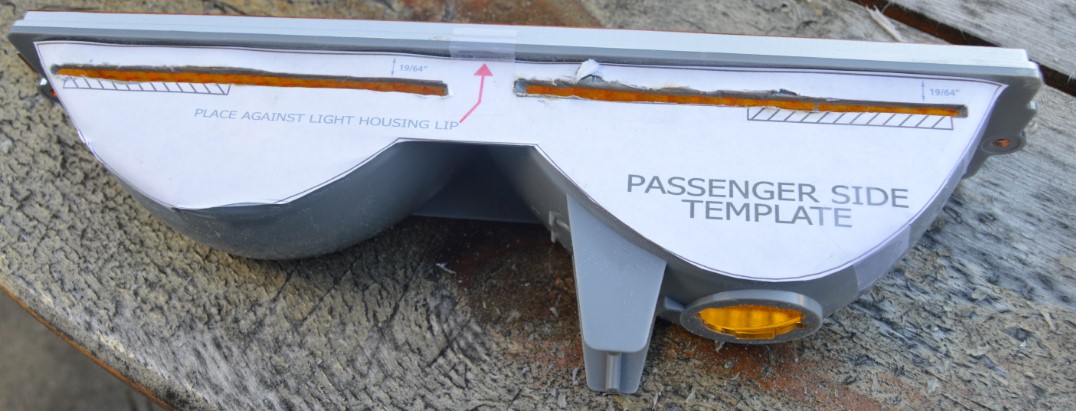
5. test fit the LED panels, trim more off if necessary. (you want to get away with the least amount of cutting you can, since these holes will be exposed)
6. wash out & dry the housings.
7. test the lights. plug the panels into the OEM socket, then turn the lights on. Check to make sure the blinkers actually blink.
[note: the wires coming off the LED panel are very short, so it’s easier to plug them in from the front of the car (the front side of the bumper), rather than from behind the bumper.]
8. if all works, unplug the panels.
(if they don’t, check connections, etc.).
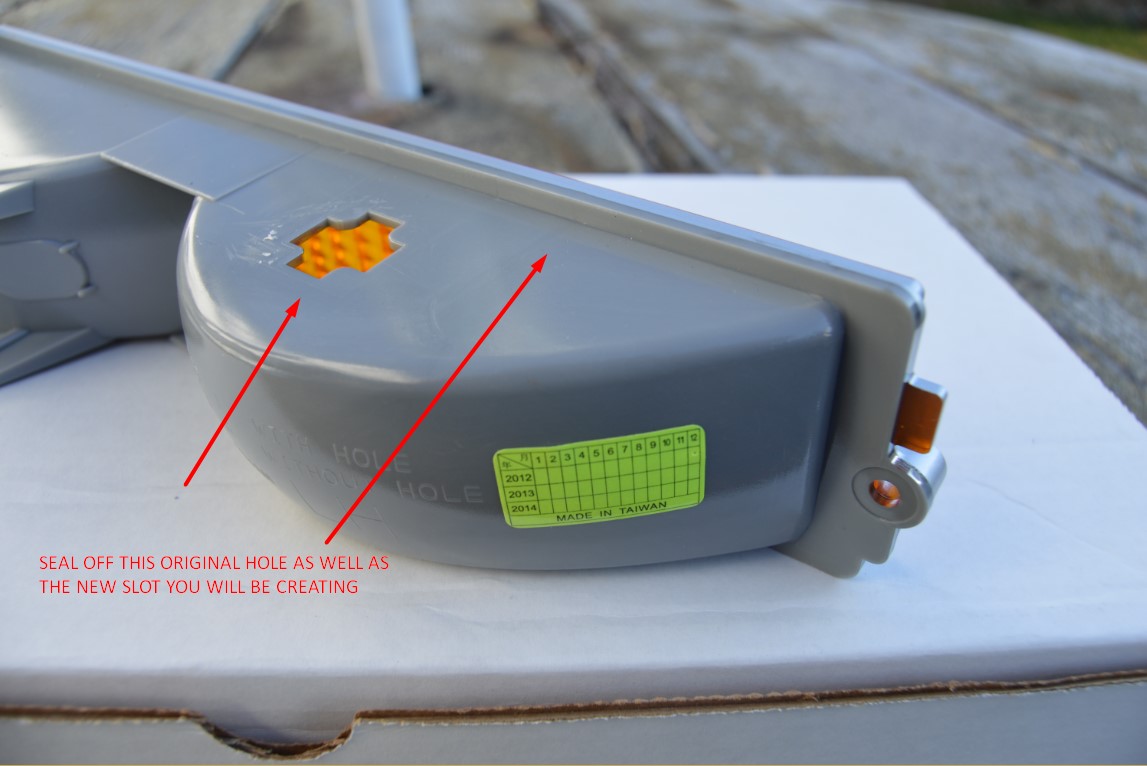
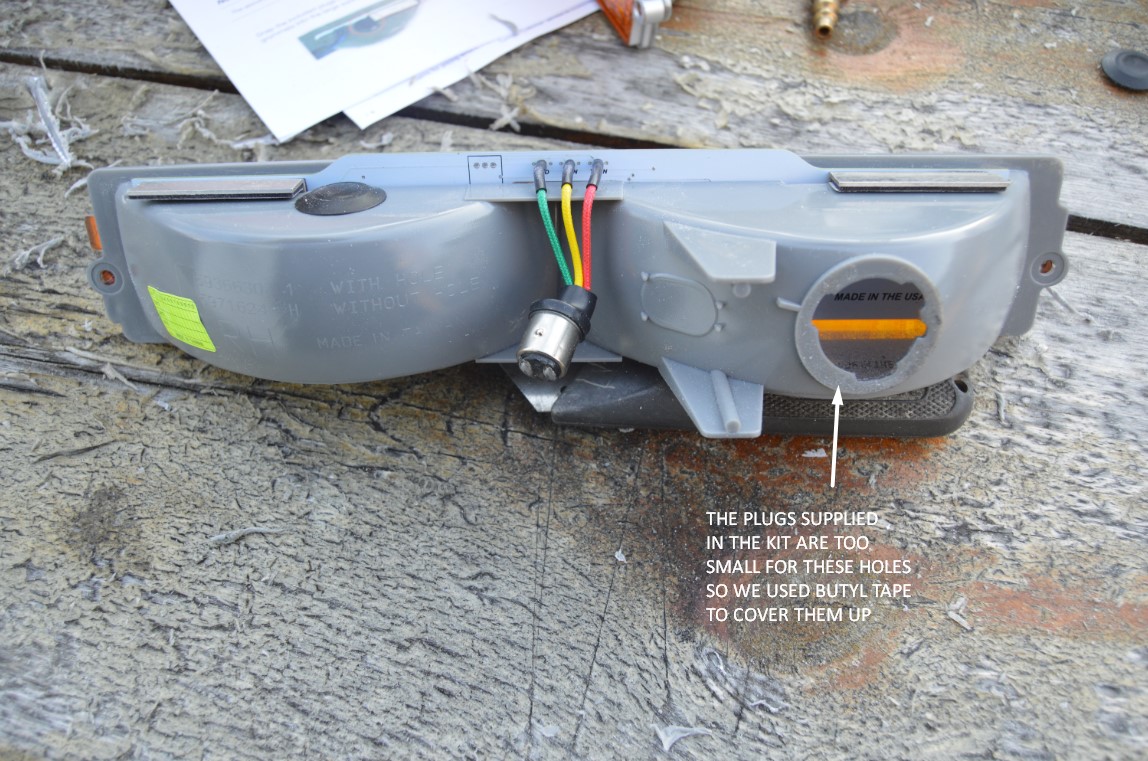
9. use the 4 included plugs to seal the factory holes (2 for each housing).
[or just seal up these holes with butyl tape, like we did]
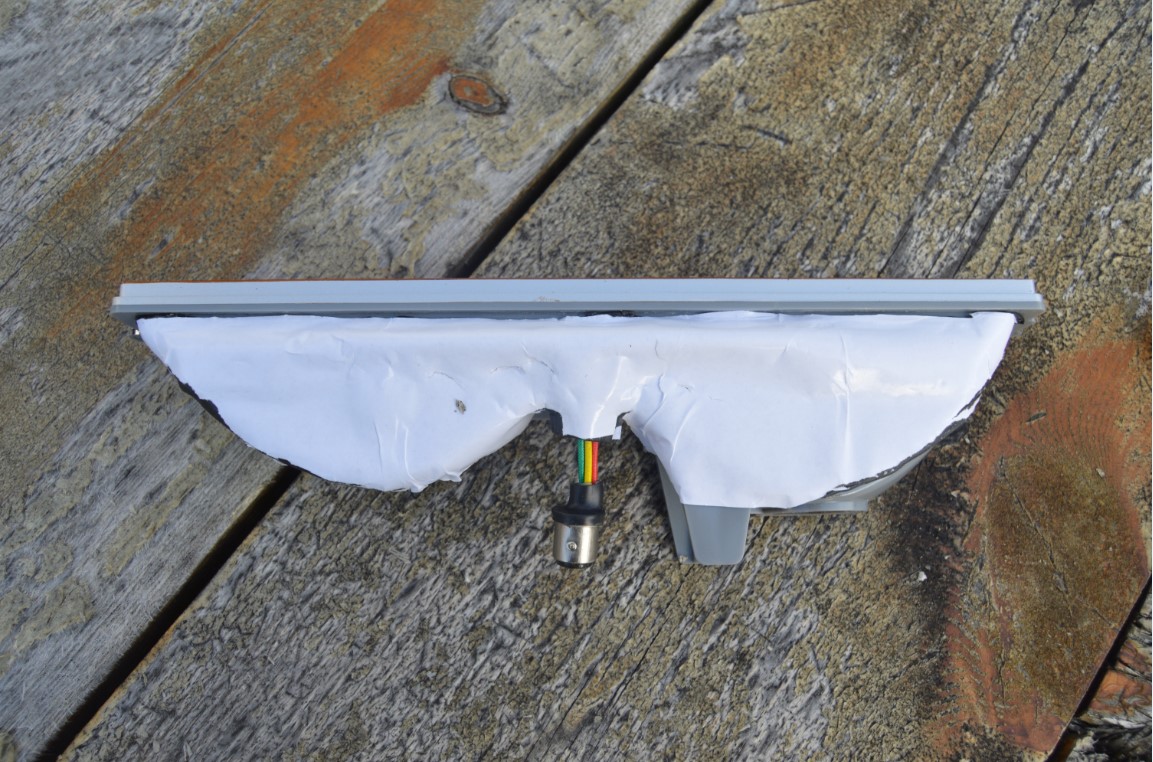
10. using 1 panel (1 housing) at a time, remove the protective covers off the 2 tape strips from the underside of the mounting bracket.
lower the panel nearly into position & then squeeze some silicone all around your cut holes (sealing it all together so no water can get into the housings).
[HINT: we saw someone else use butyl tape to cover all of the holes/gaps instead of silicone to keep weathering to a minimum, which we thought was an excellent idea, so we implemented that idea – you can find some butyl tape – the type we bought was 2″ wide in lengths of 12″ long ]
.
finish installing the panel by lowering it completely down.
(the tape strips + the silicone or butyl tape will keep the LED panels secured to the lens housing).


Now do the other panel/housing the same way.
11. mount the housings back into the bumper using the 2 screws. then reconnect the panels into the OEM light socket.
[note: it’s kind of tricky pushing the LED panel’s wiring into the OEM bulb socket as the only thing you have to turn & push it in with is the actual wires]
12. For the original (small) bulb socket (the inner running light), remove the bulb, then fill the socket with white lithium grease. wrap it all up with electrical tape. stuff it somewhere out of the way (like the hole located behind the opening of the marker light).
13. your corner lights (the ones next to the headlights) need to be rewired/modified (according to the instructions). If you don’t, your dash lights & front lights will not work correctly, especially if you have the rear Digi-tail LED lights.
Remove the headlight bezel (4 screws; 2 on the side, 2 on the front at the top) to access the side marker light.
[for us on this Buick GN, the blinkers worked with both the park lights on & off, but the dash (turn signal) lights DID stay on when the park lights were on – AND these dash lights are also LED’s – so apparently that doesn’t make any difference than the original factory bulb setup for this issue]
There’s a decision to be made here.
You have to choose whether you want these corner lights to function as a running light, OR a blinker.
It’s one or the other, you can’t have both.
[note: in the instructions, it says there is an option to wire in a resistor to get the light to function as originally intended. this was debated as sometimes it works, sometimes it doesn’t, see the side note below.]
[side note: on the turbo buick board (search: gns led issues), there was a discussion going on as to a remedy that was said to have worked. the solution was to buy sylvania 194led white light bulbs ($12 each) which supposedly made the stock function work properly. But we didn’t try those. We did try some cheapo LED lights we had laying around (from previous LED light upgrades), 4 different styles/types, and NONE of them cured the dash light issue.]
Here’s the typical GM wiring setup for how the blinkers are suppose to work:

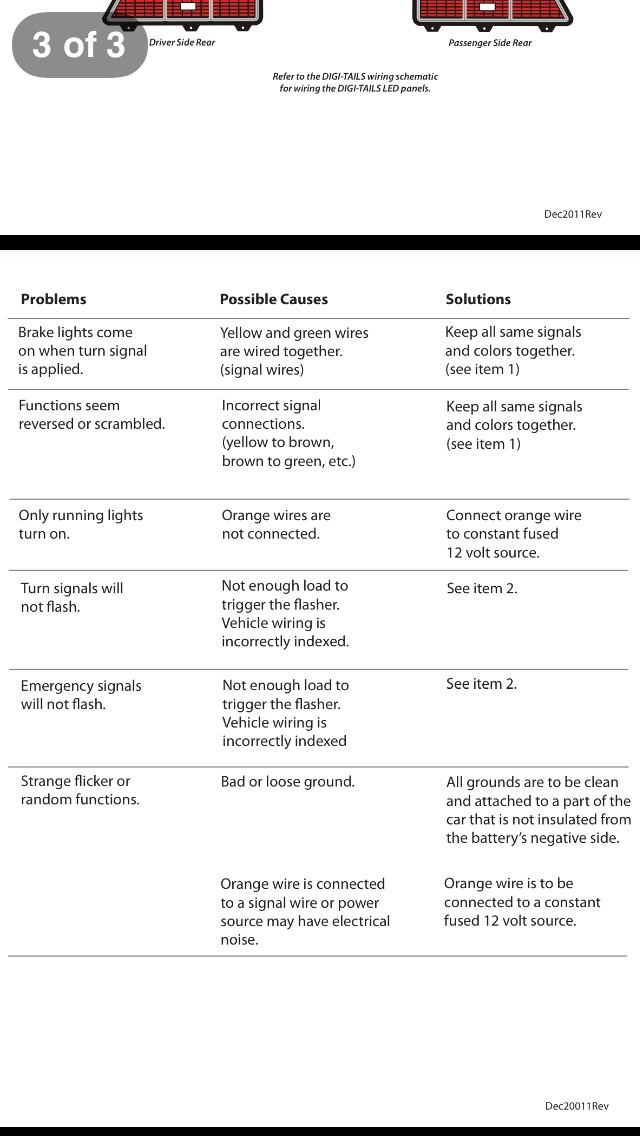
[We opted to use these corner marker lights as a running light only]
option 1:
use as a turn signal. cut the brown wire from the bulb. on the bulb end, wire this to ground. (tape off the other end.)
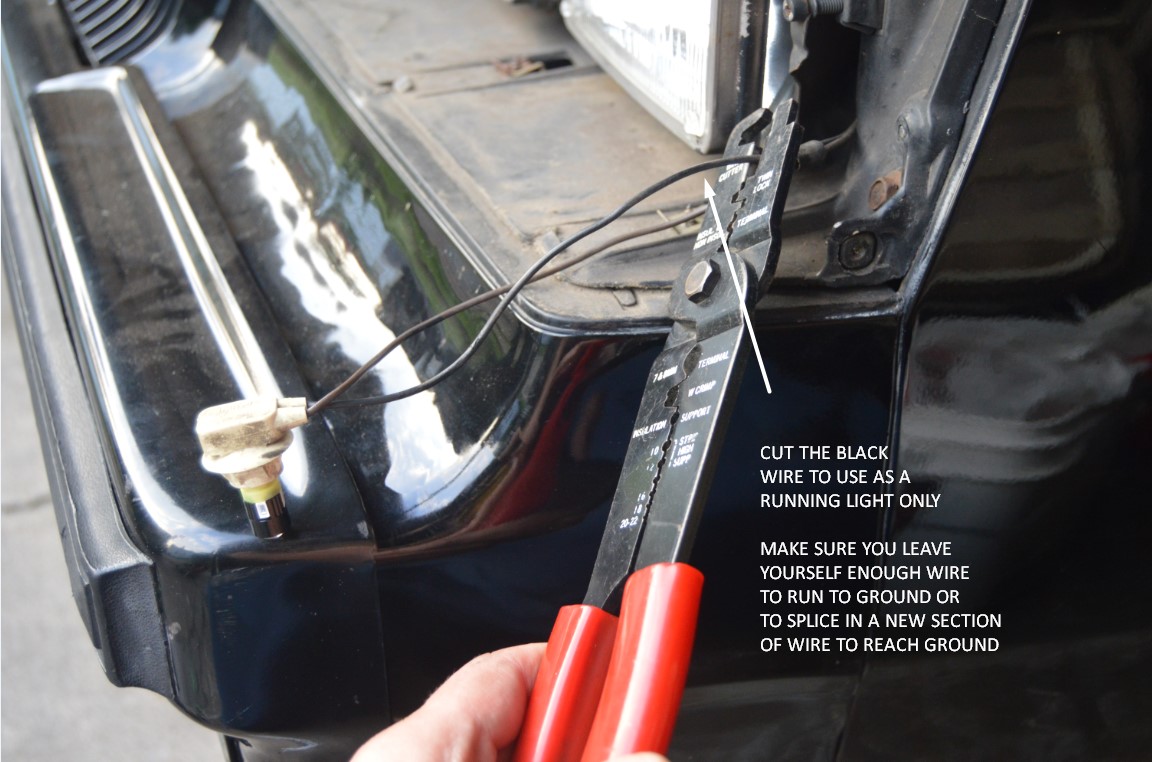
option 2:
use as a marker light. cut the black wire from the bulb (leave yourself enough wire to reach the grounding point, or enough to splice in a new little piece of wire with a ring terminal on the grounding end). on the bulb end, wire this to ground. (then tape off the other end).
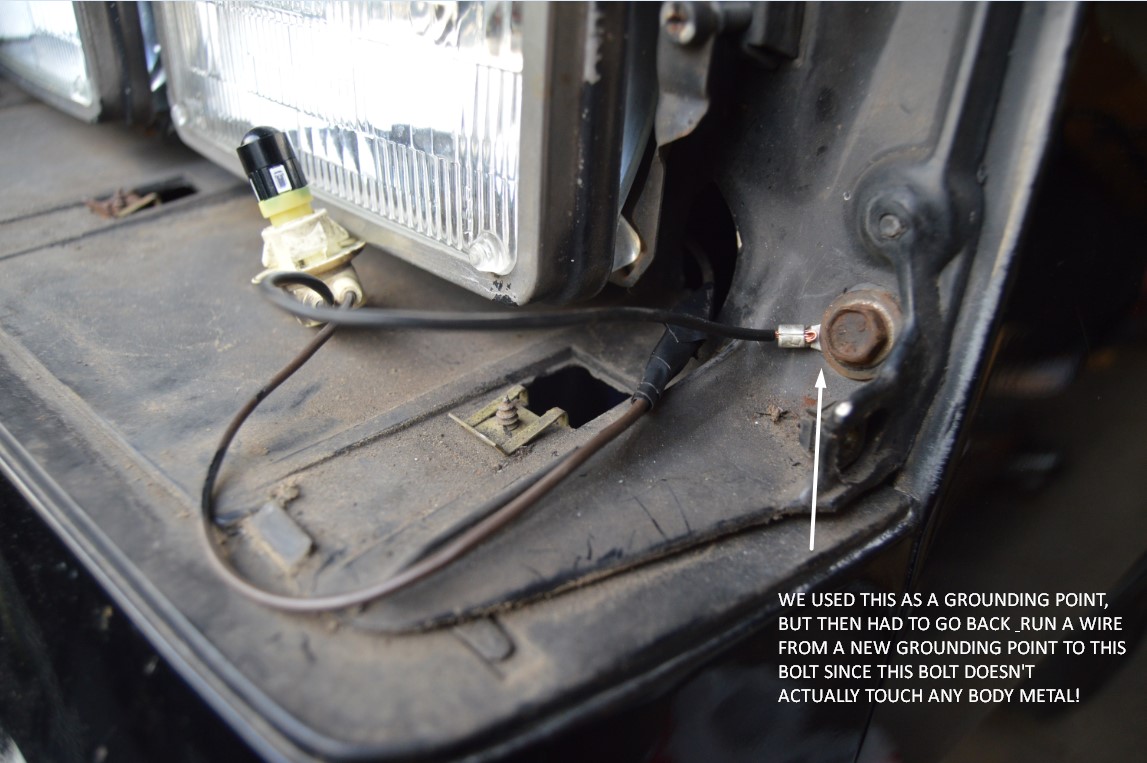
{see the pic for where we mounted this new ground wire}

Reinstall the headlight bezel.
14. check again to make sure the front lights work. lights on, then lights on with turn signals, then lights off with turn signals.
[note: If you have the rear digi-tails also, be sure to check the overall function of THEM as well, in all 3 conditions above! some people have experienced issues with the rears after the fronts are installed!]
15. all good? everything works? great, you’re done!
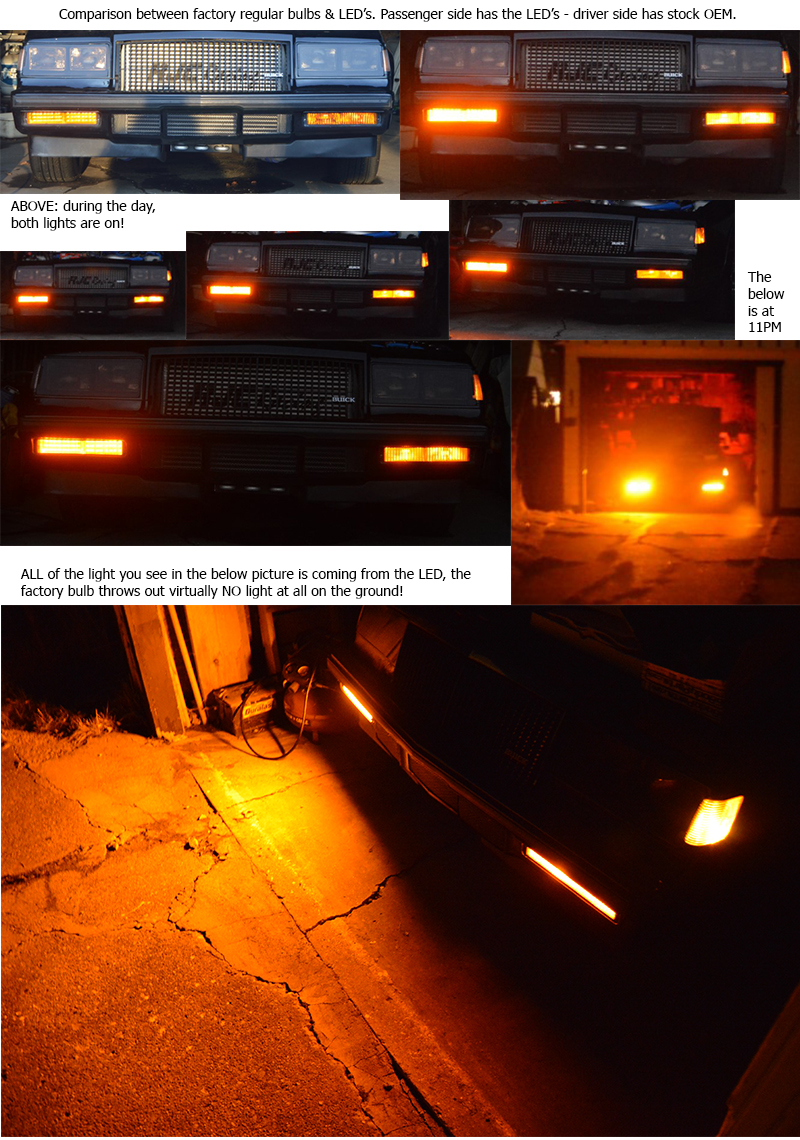
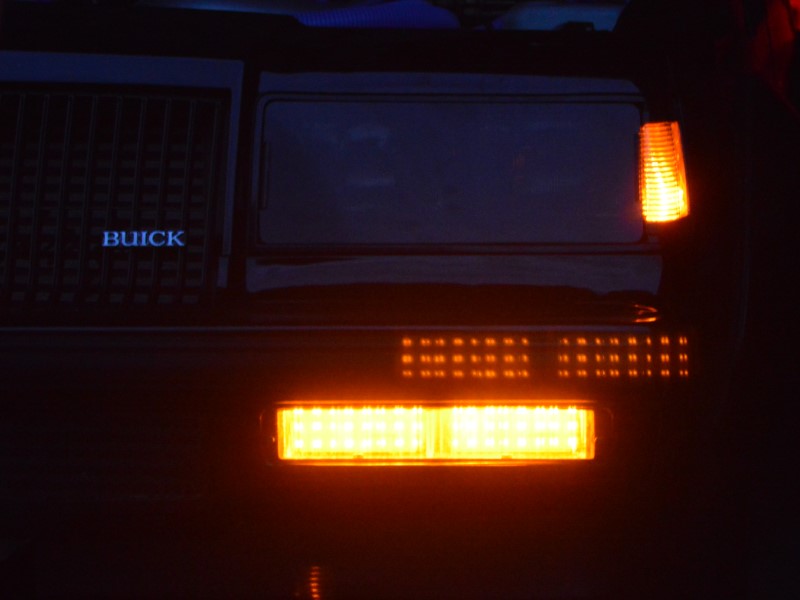
Not only do they look awesome, but you can be sure that people will now see your turn signals (as well as the park lights) since these are super bright!
.
.


