


If you’re seeking to record logs for your Turbo Buick, or want to see exactly what your engine is doing at any given RPM, the only way with a factory stock ECM is to use a Powerlogger.
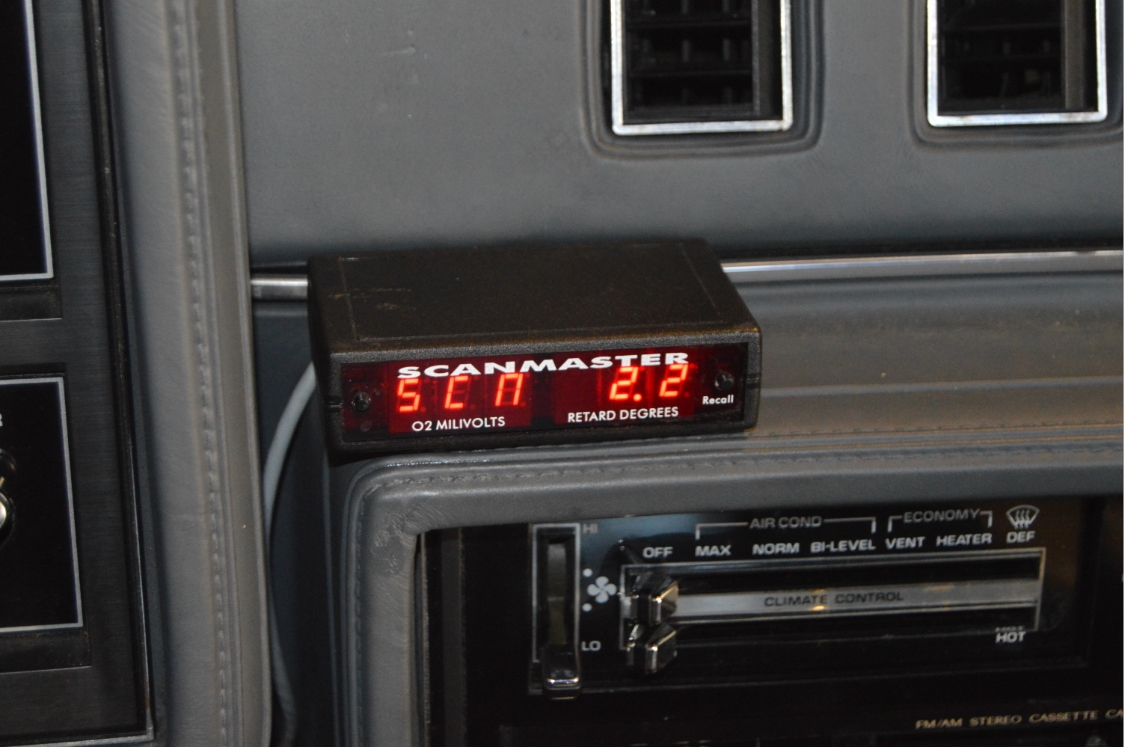
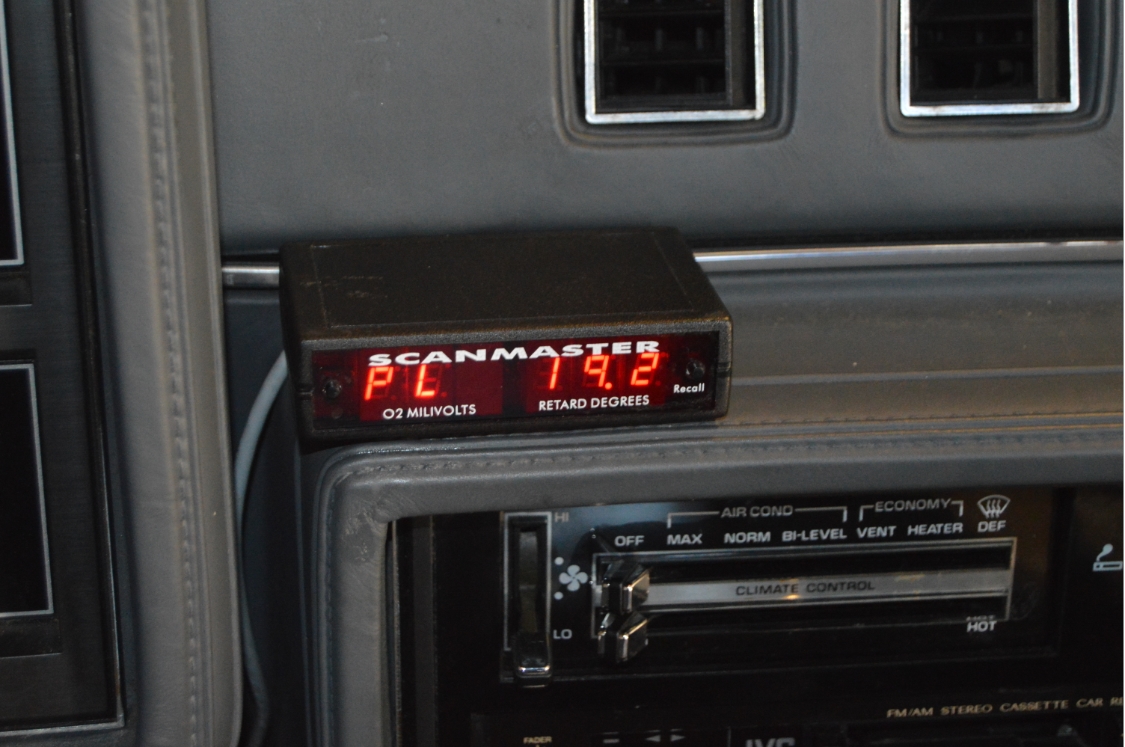
Your Scanmaster can show you some of the info, but you’d have to watch all the separate specs throughout the entire power band.
With the Powerlogger, you can see all of the different inputs at all of the different RPM ranges, in a frame by frame viewing on the (recorded) Powerlogger screens.
That’s the only real way to see ALL of the data all at one time, comparing for example, what your fuel pressure, boost level, and O2 is doing, at any given RPM (or throughout the entire RPM band that you ran, by scrolling thru the recording).
This is one of those items that’s been on our “to get list” for awhile, and now it’s time to install it in the Buick Grand National.
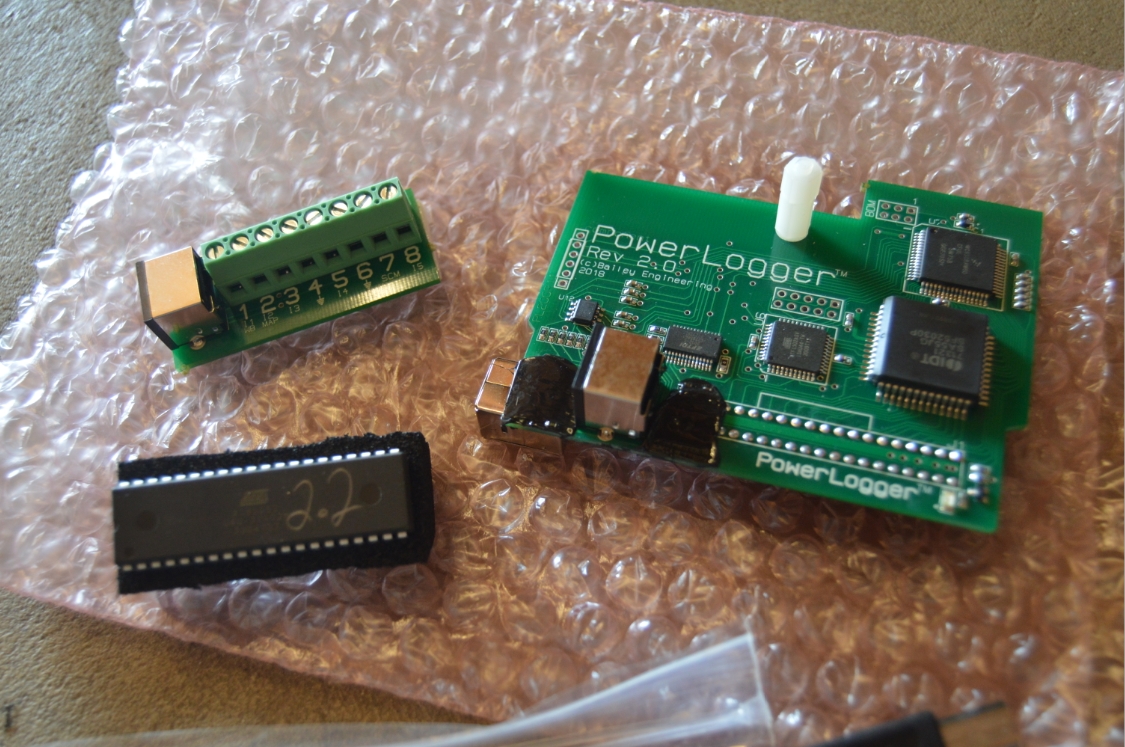
The Powerlogger comes with a new chip to update your existing (original square box unit) Scanmaster version 2.1 to the 2.2 version (required for using PL), so the Scanmaster can be connected to the Powerlogger for faster updating (way faster), quicker wideband O2 readings and boost display, amongst others.
Scanmaster G users don’t need this chip, as it’s already updated & ready to perform with the PL.
The Powerlogger works with any chip in the ECM, it does not require any special chip to datalog.
The Powerlogger is the most advanced datalogging scantool available today for the 86/87 Turbo Buicks and 89 TTA’s.
It connects to a USB port on any laptop (needs Win98SE, 2000, XP, Vista, Windows 7, 8, or 10 to run).
The Powerlogger simply plugs into the ECM, of which a slight modification of the ECM case is necessary, but it’s very easy to do, as we show you below.
.
You can acquire the Powerlogger from Bailey Engineering:
.

.
COMPLETION TIME:
about an hour
(assuming your laptop will talk to the PL correctly; we had minor communication issues with our old computer that took an hour to resolve, but not that big of a deal)
.
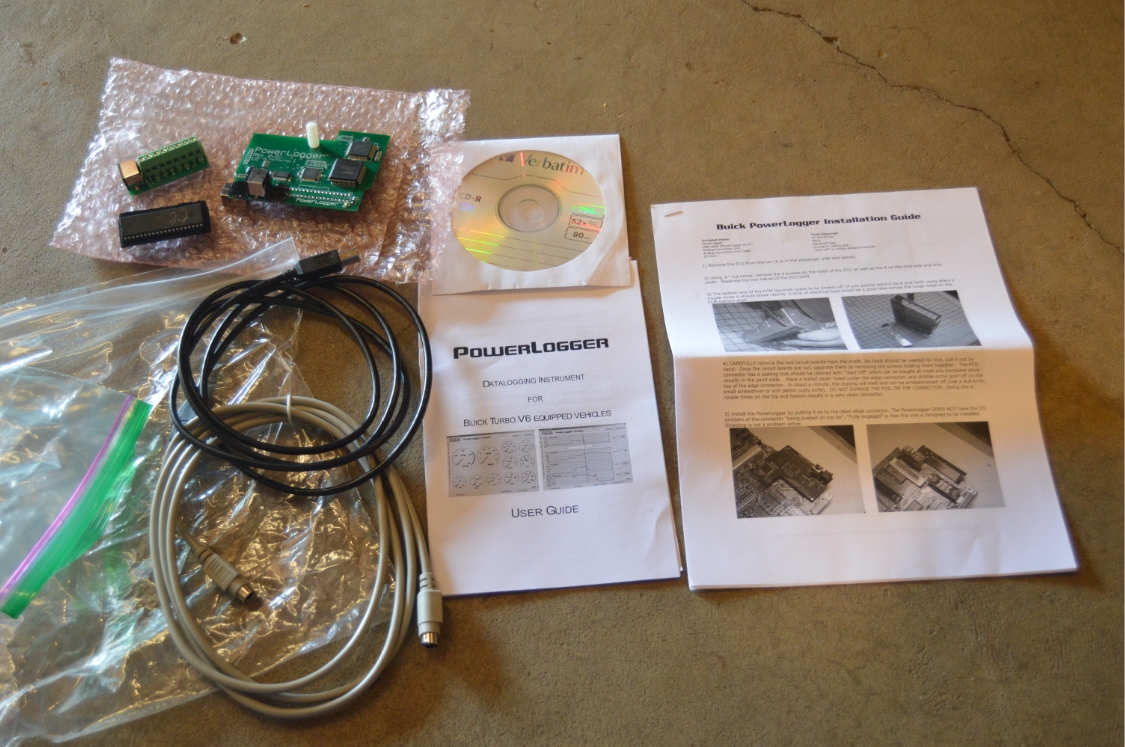
PARTS:
- Powerlogger ($264.99)
- about 8′ of wire (PL board to MAP sensor)
- about 2′ of wire (extend scanmaster white wire to PL board)
- electrical tape
.
TOOLS:
- 1/4″ socket (to open up ECM)
- tiny phillips screwdriver (to open up scanmaster)
- tiny flat head screwdriver (analog bar screws)
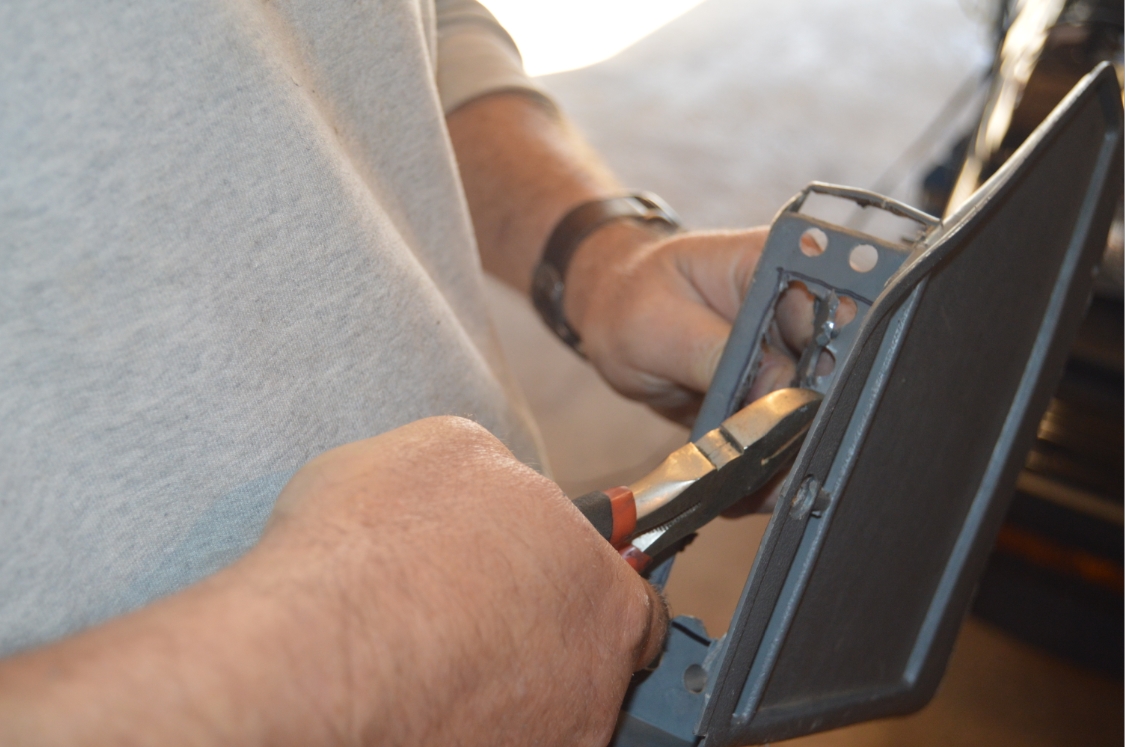
- pliers (to remove the end off ecm case)
- wire crimper (tap into MAP sensor)
- dremel / tin snips, etc (to cut plastic kick panel)
.
HOW TO:
.
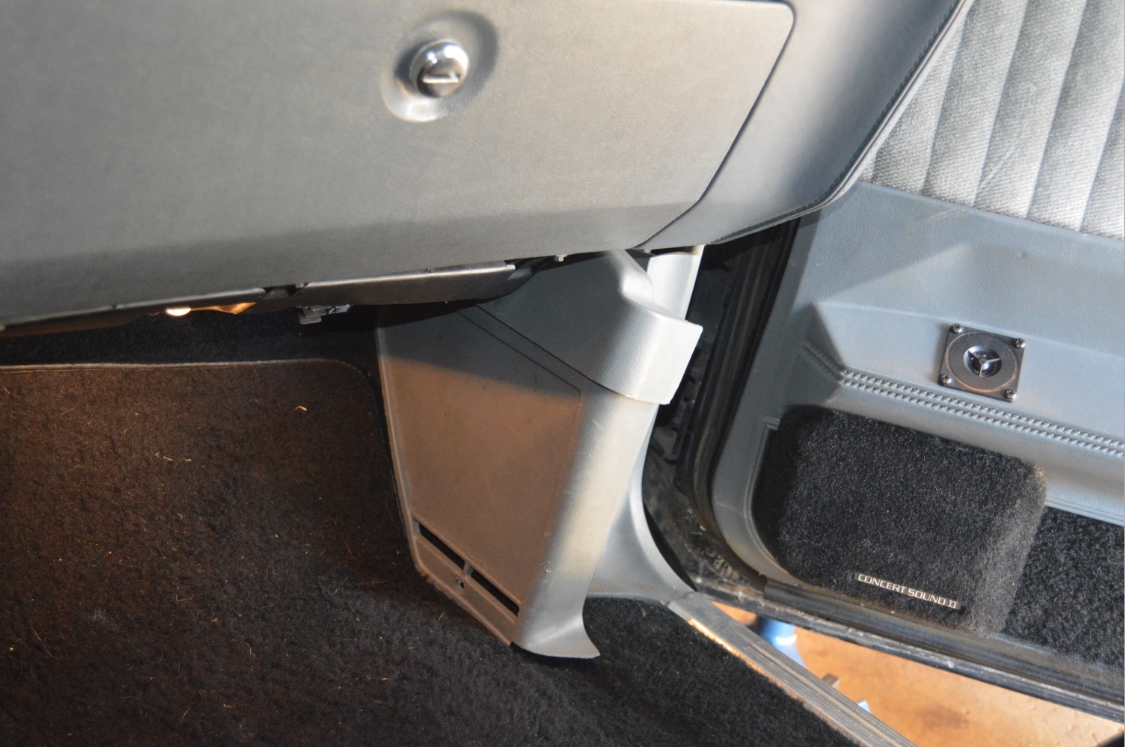
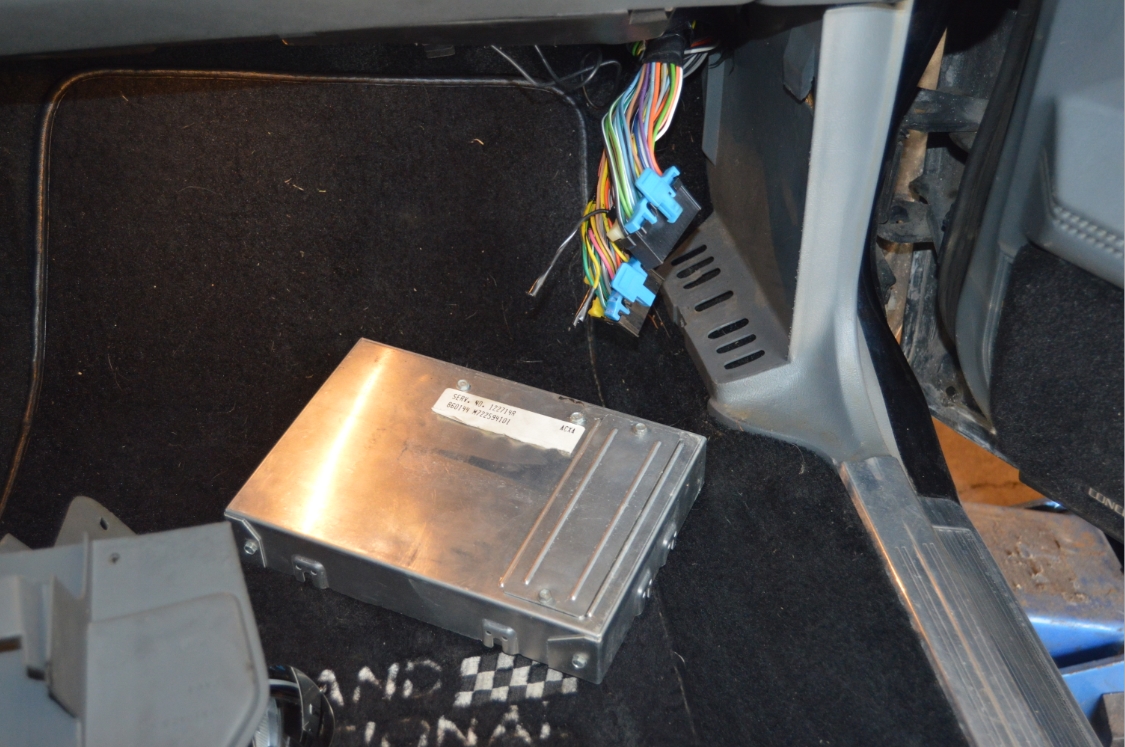
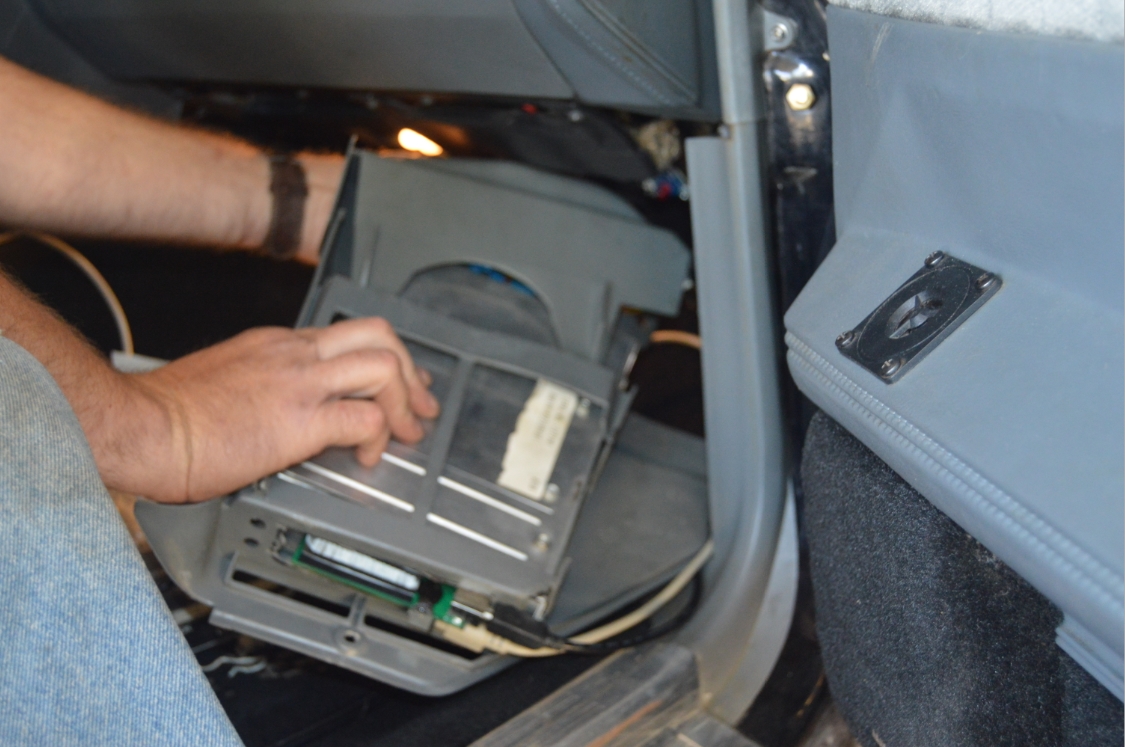
- Remove kick panel.
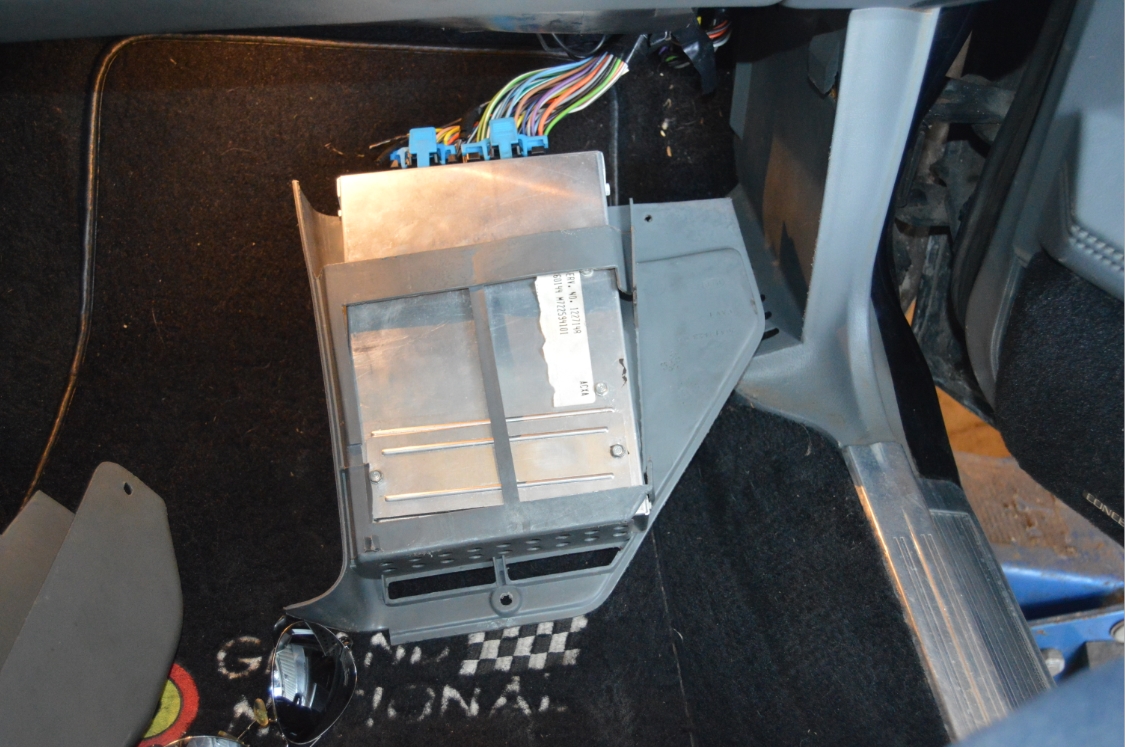
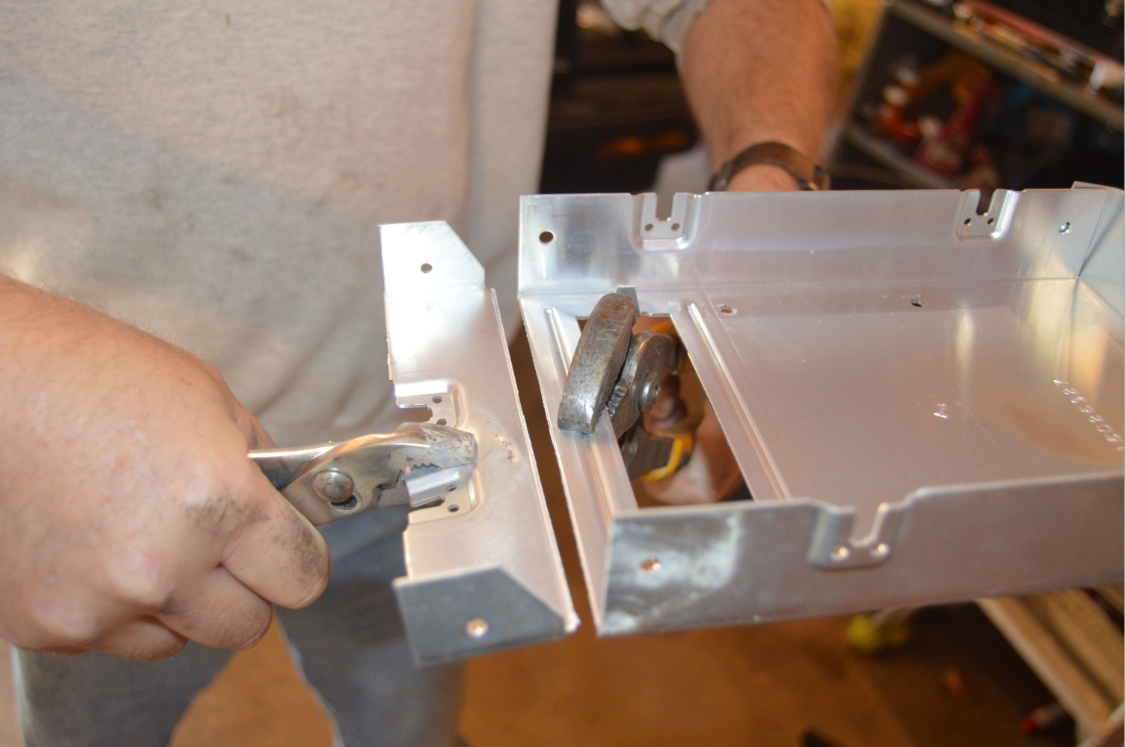
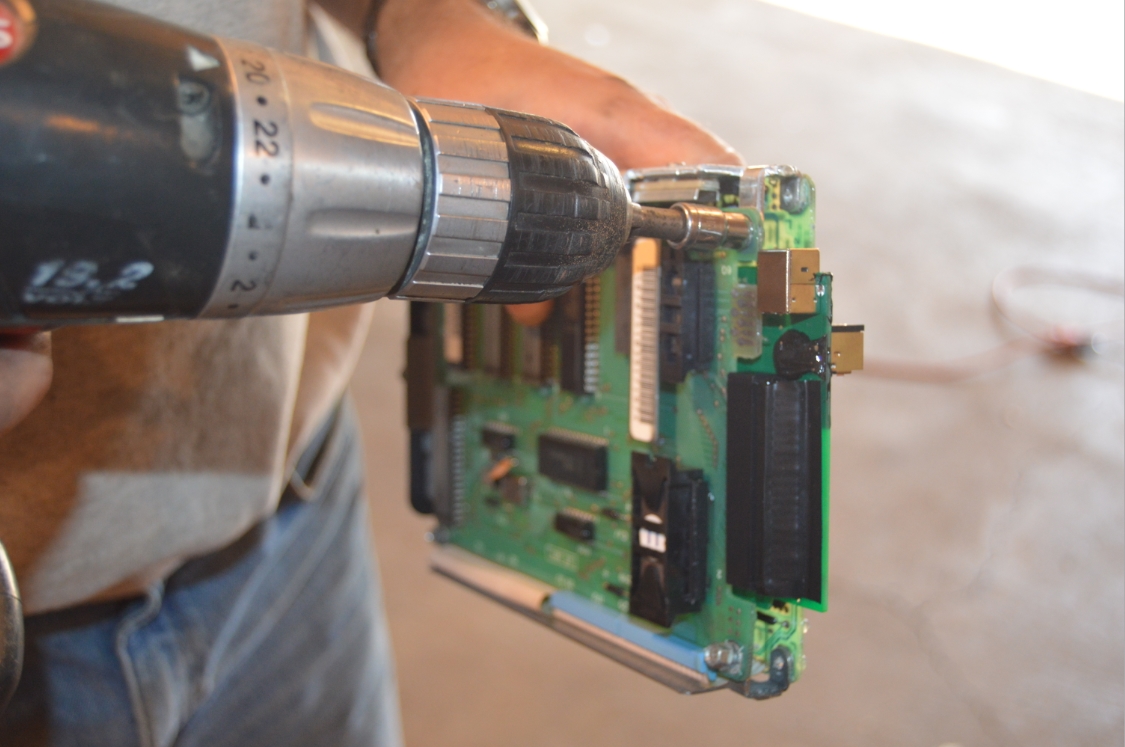
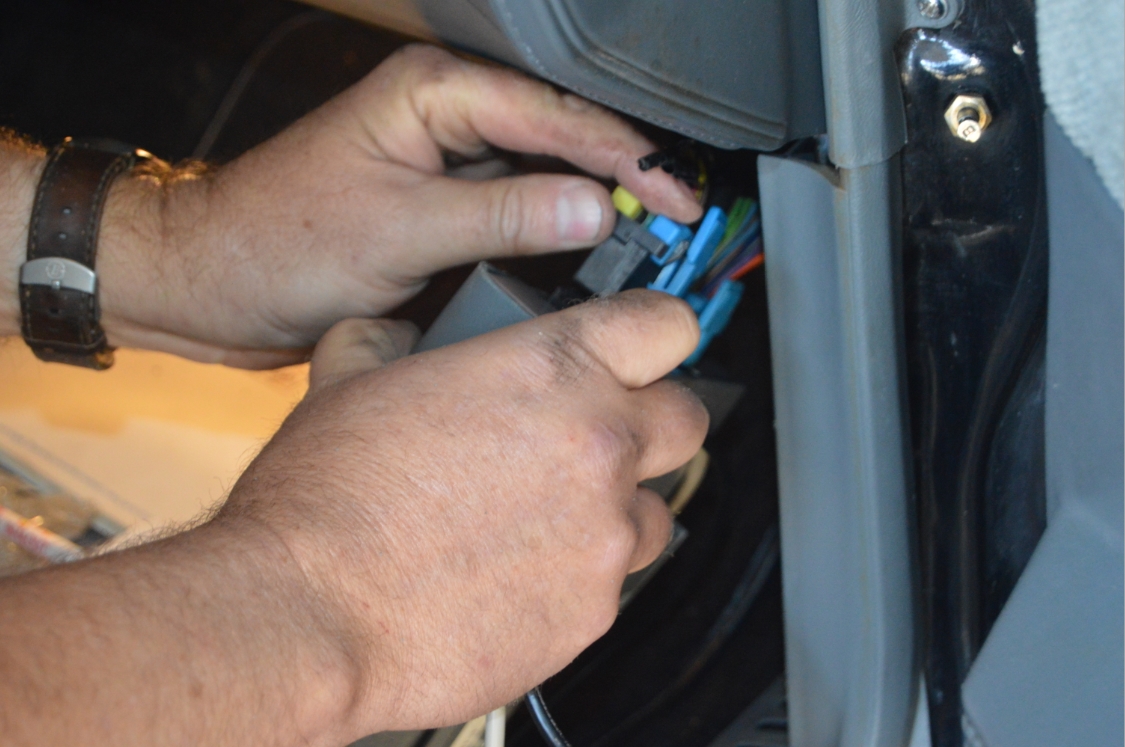
- Disconnect the 2 ECM plug connectors and remove ECM.
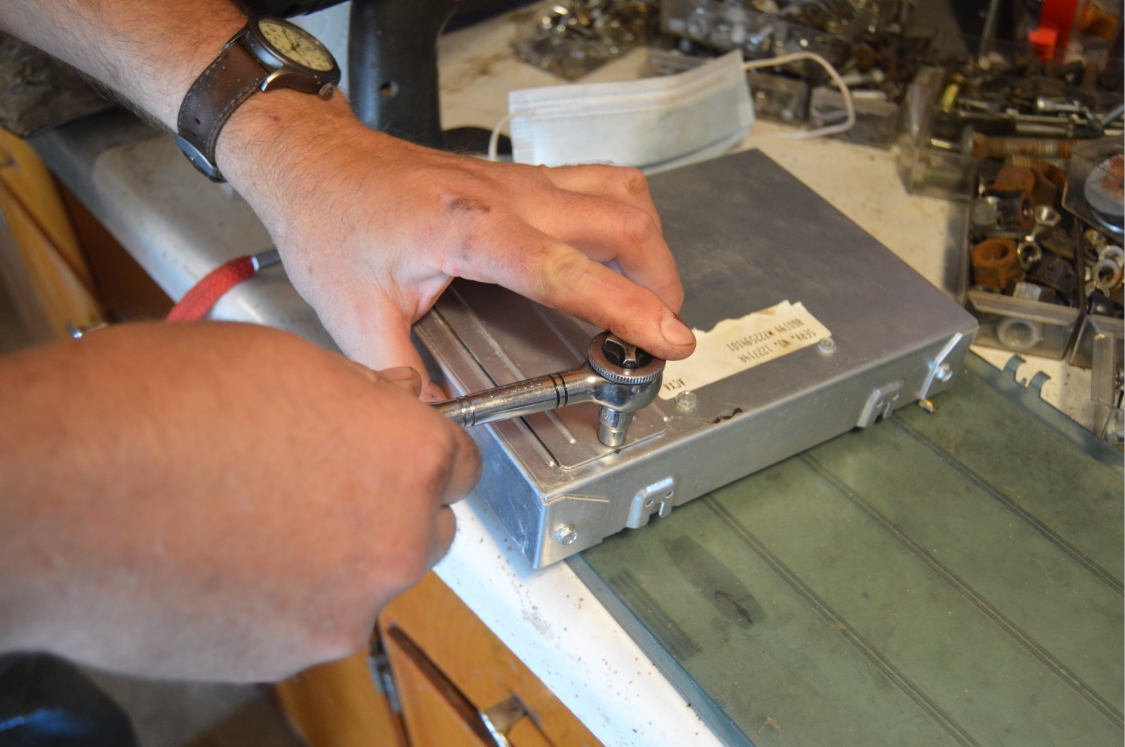
- open up the ECM by removing 8 (1/4″) screws, 4 on chip side and 4 on the sides of the ecm case.
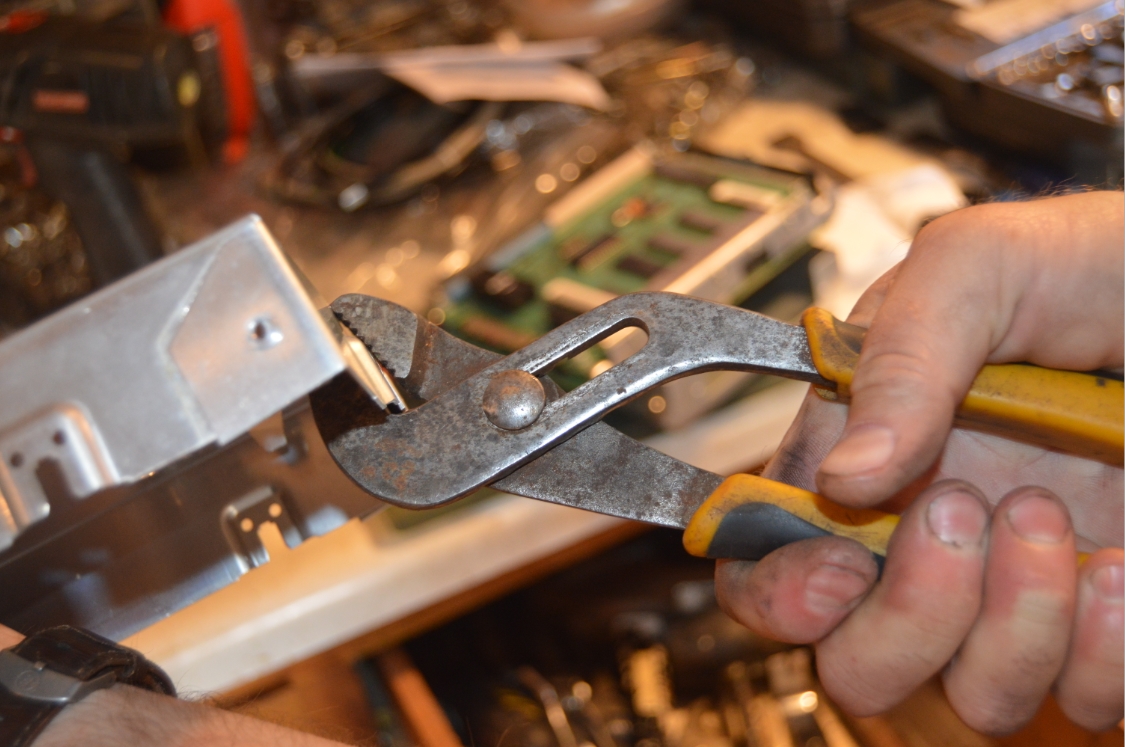
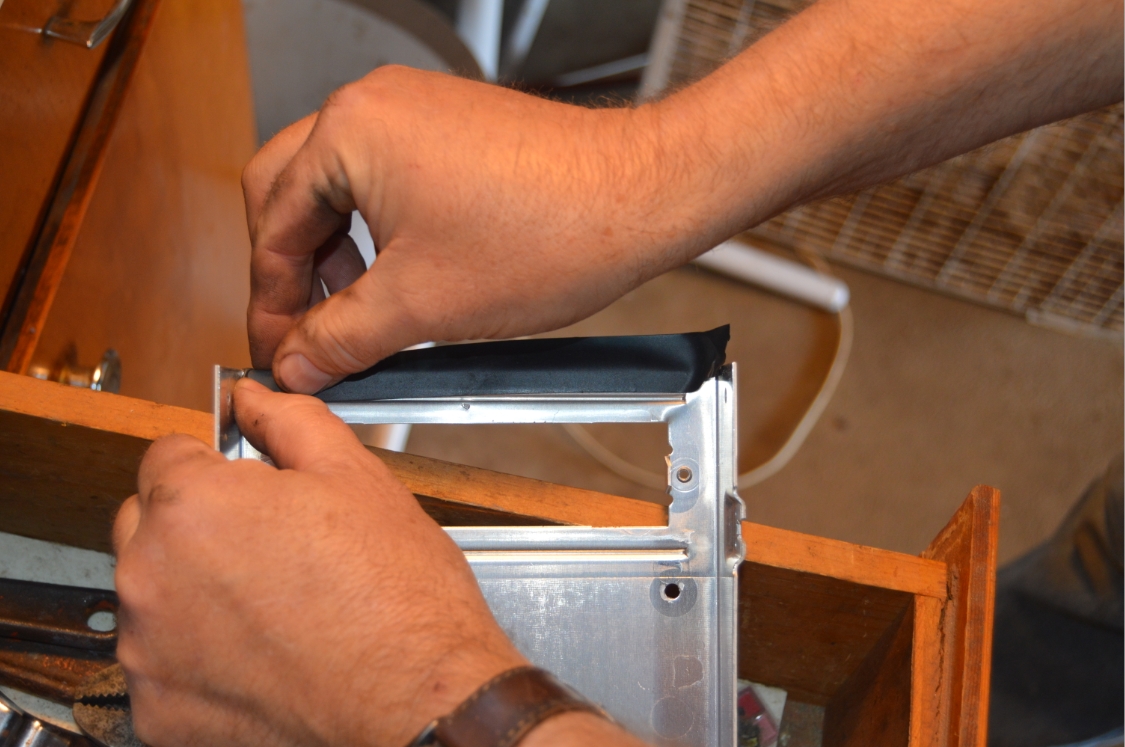
- snap off the bottom end of the ecm top-shell case.
Bending it back and forth quickly should snap it off. - run a piece of electrical tape along the outer edges of the cutout where the powerlogger sticks thru.
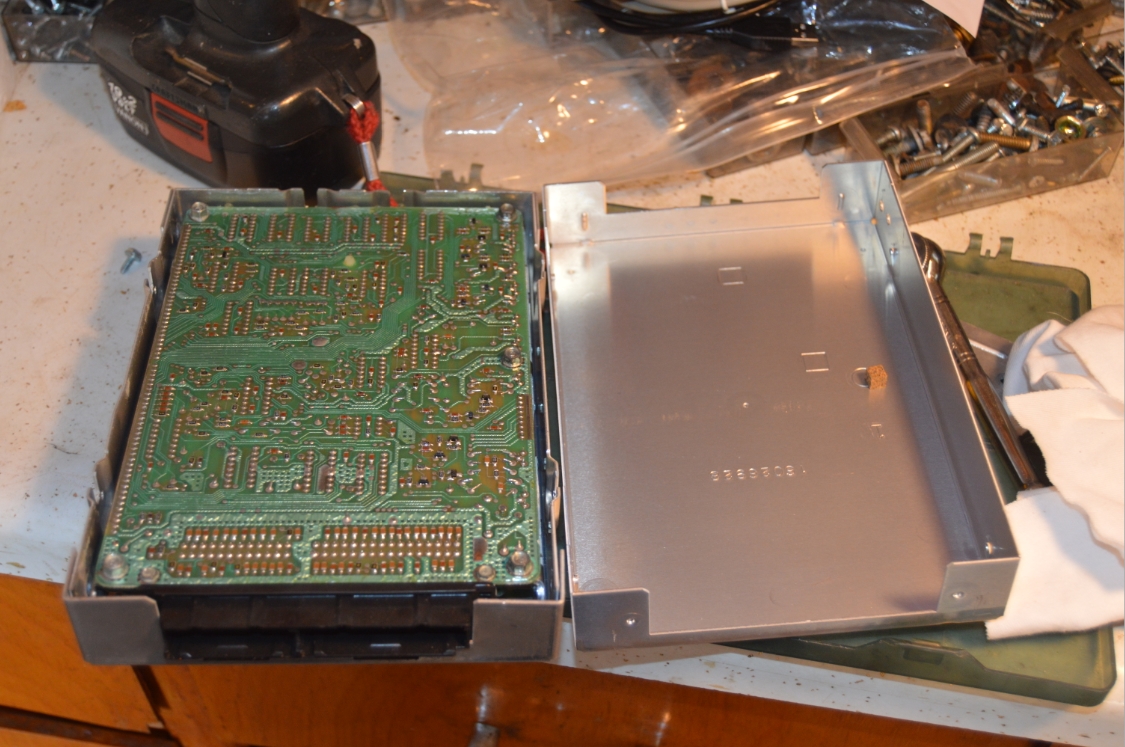
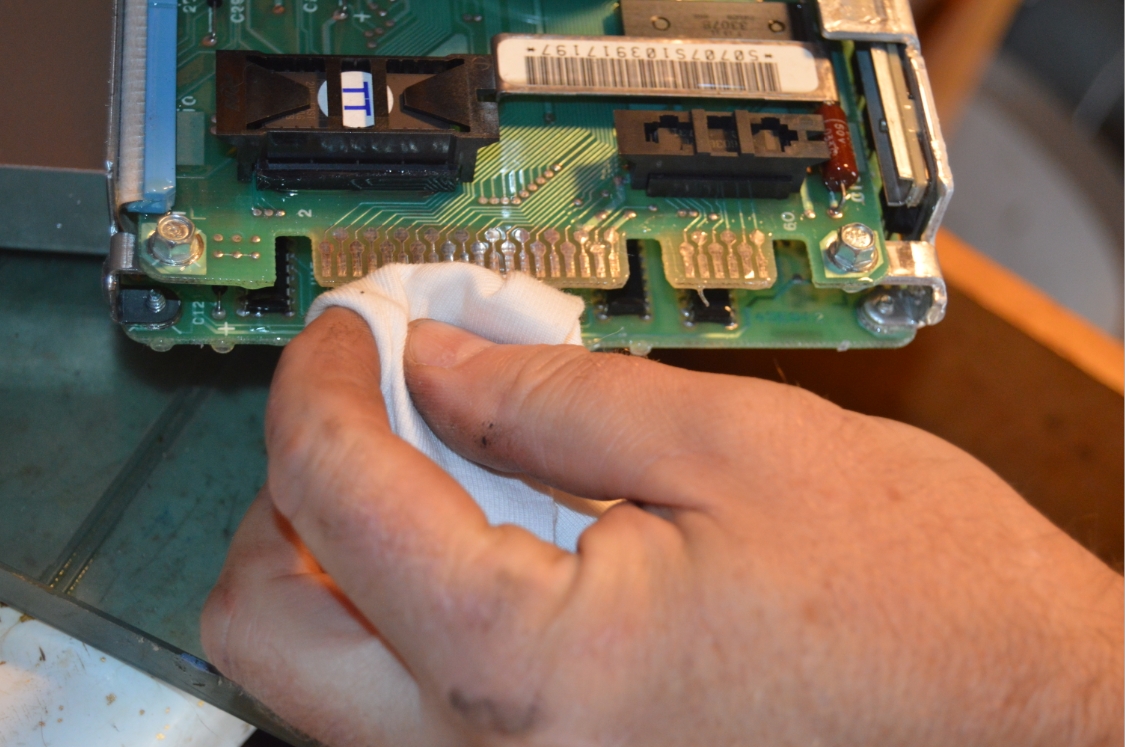
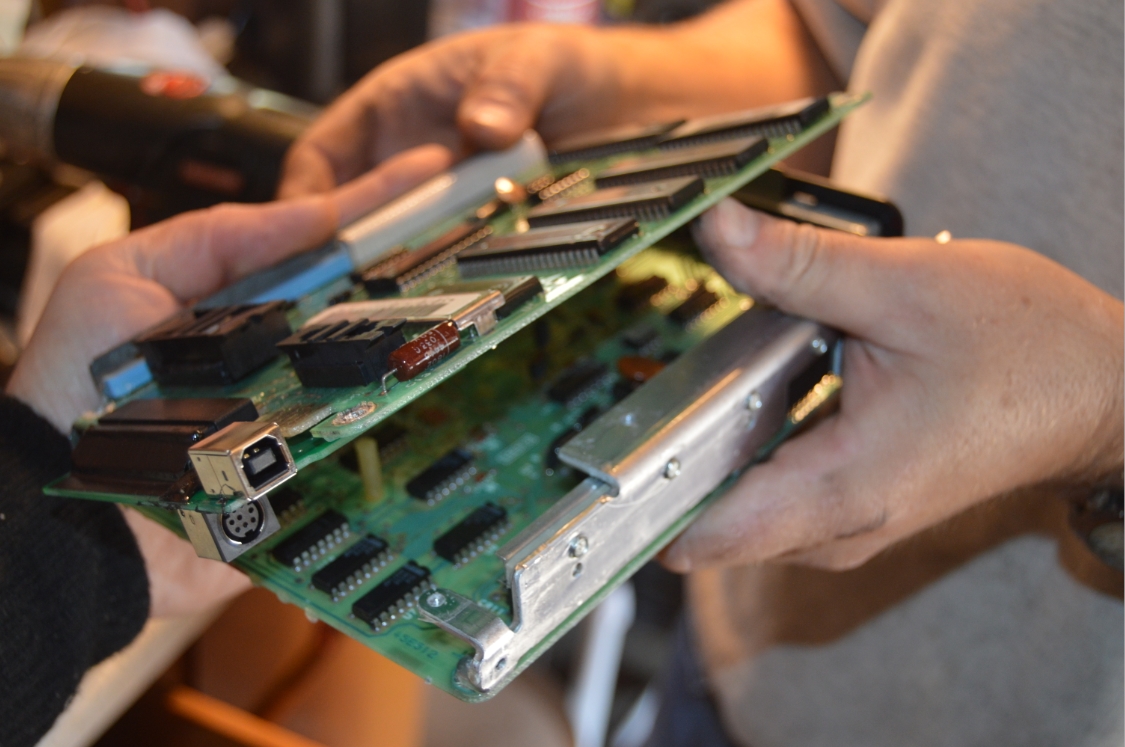
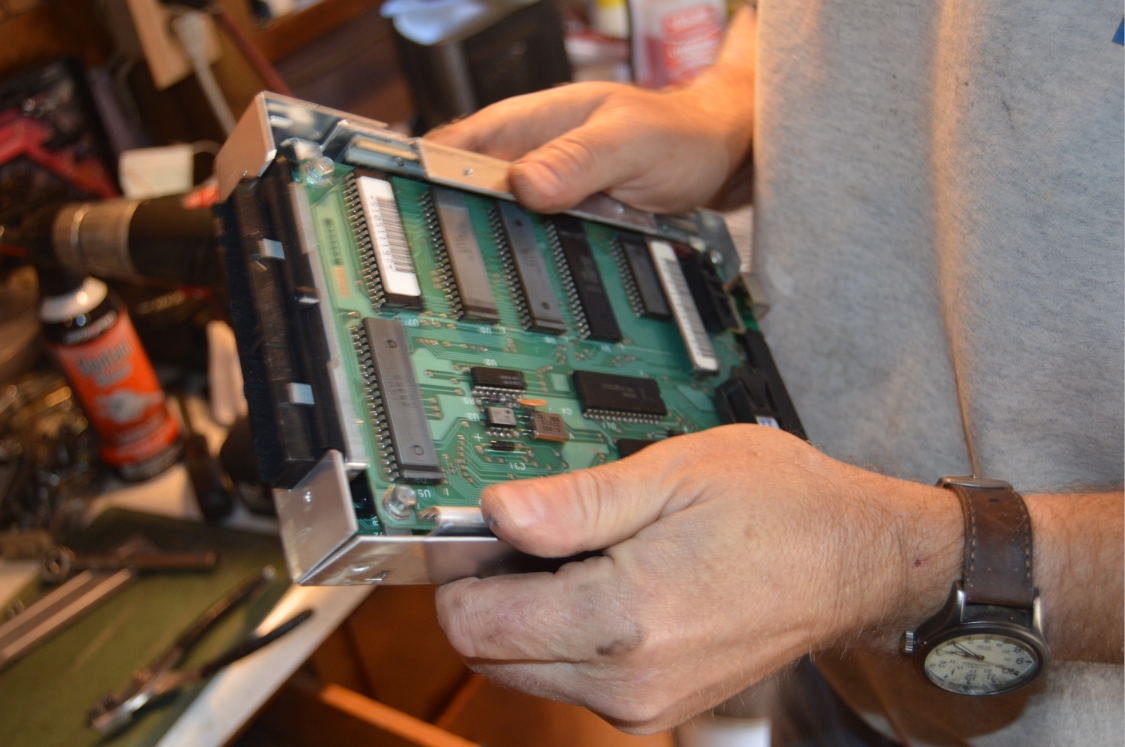
- remove the 2 circuit boards, by hand, from the shells. Separate the 2 boards by removing the 2 screws.
- clean the connector on the ecm circuit board where the PL attaches using goof off / goo gone (or similar). There’s a factory coating on it that you need to CAREFULLY rub off. DO NOT damage the foil connectors! Wipe quite a few times to get a clean connector.
(a q-tip works good for scrubbing it off)
(we had what looked like glue blobs on some of our connectors that we removed, check yours, make sure the powerlogger is able to fully engage on the foil connectors)
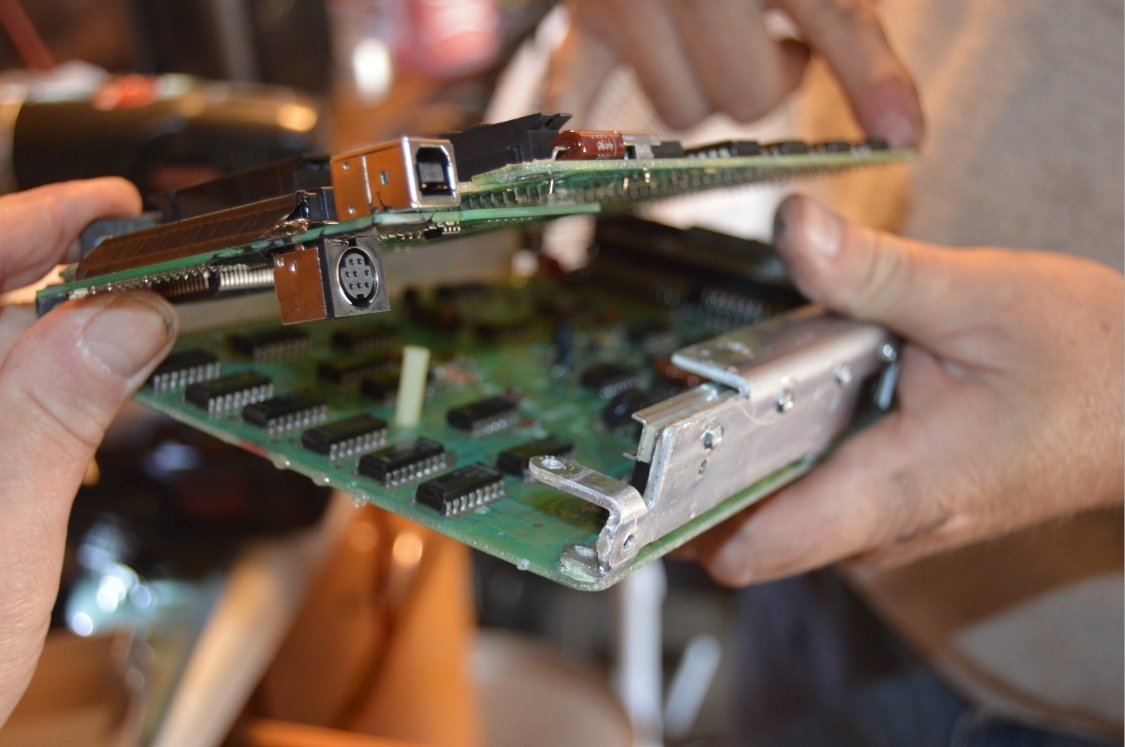
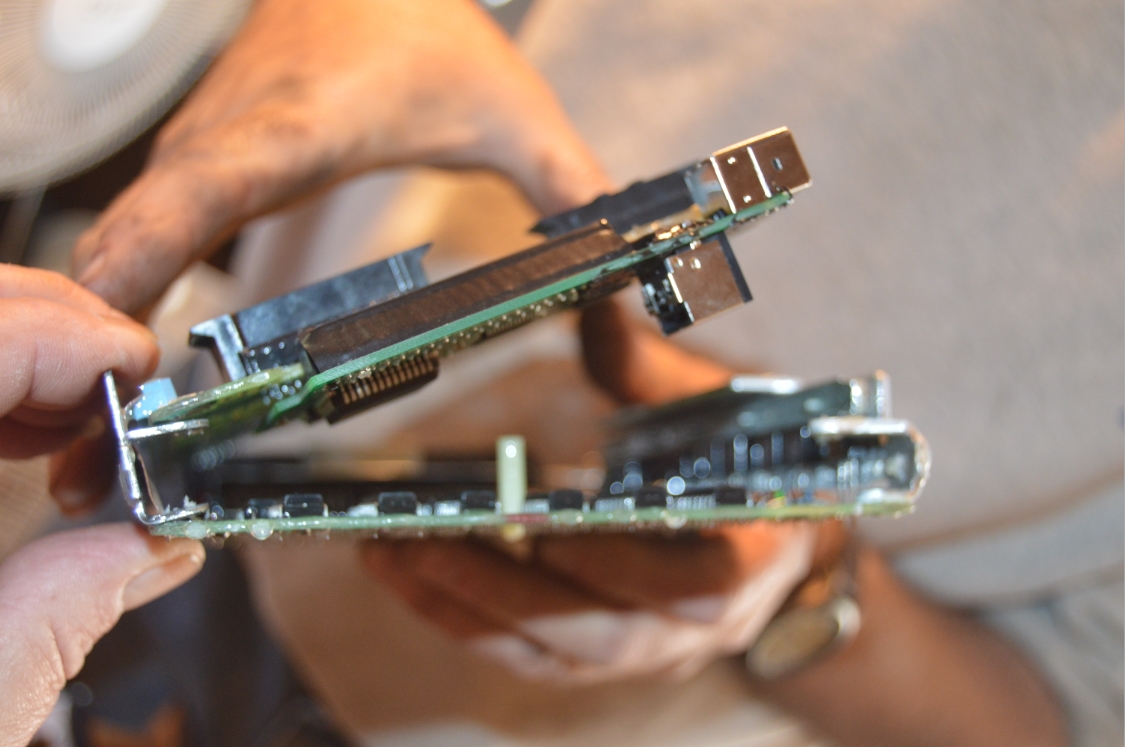
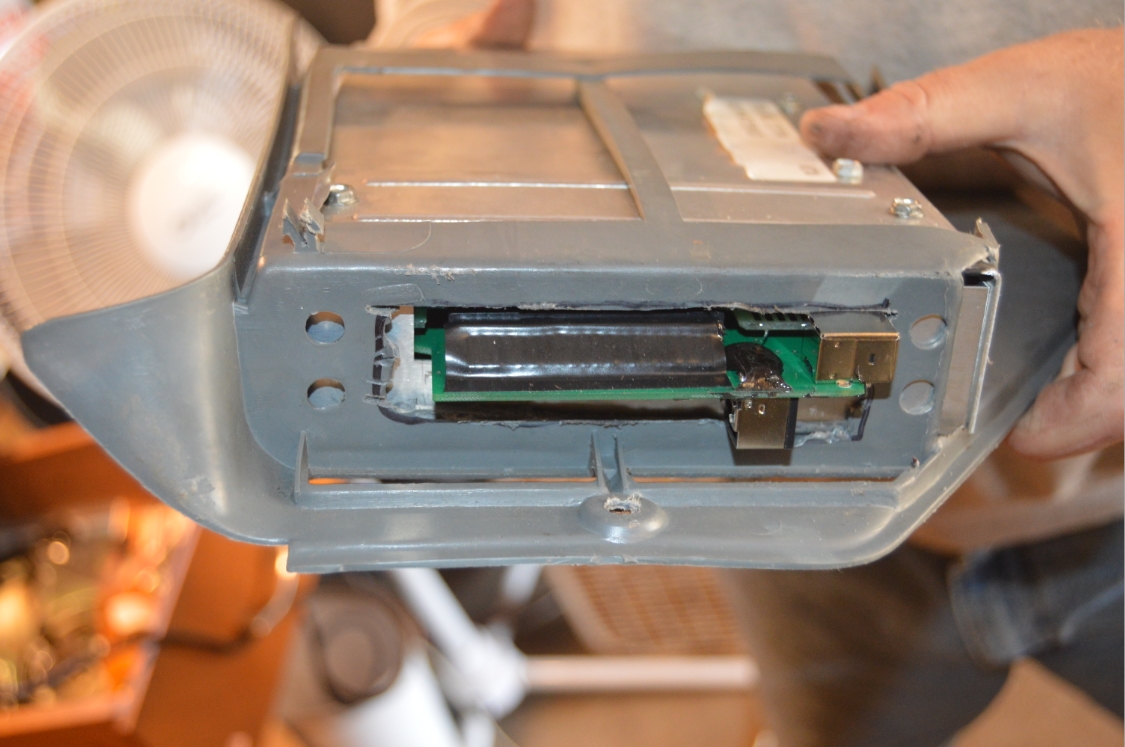
- Slide the PL unit onto the foil connector. Push it all the way on. “Fully engaged” is how the unit is designed to be installed.
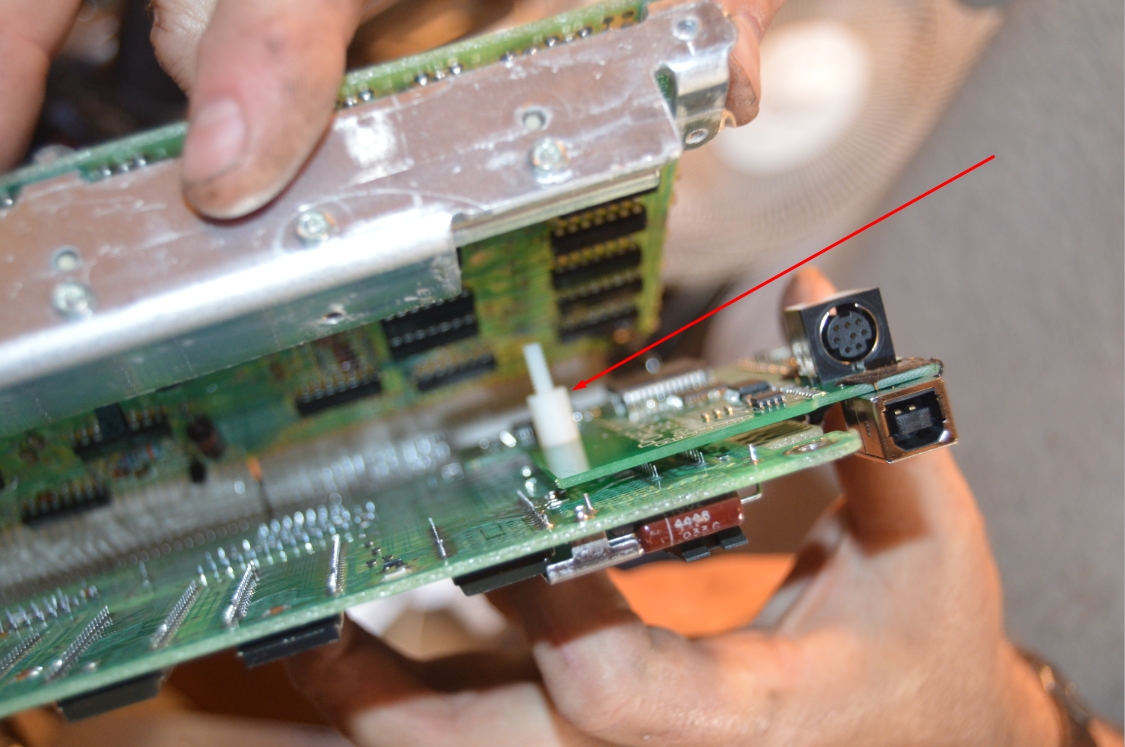
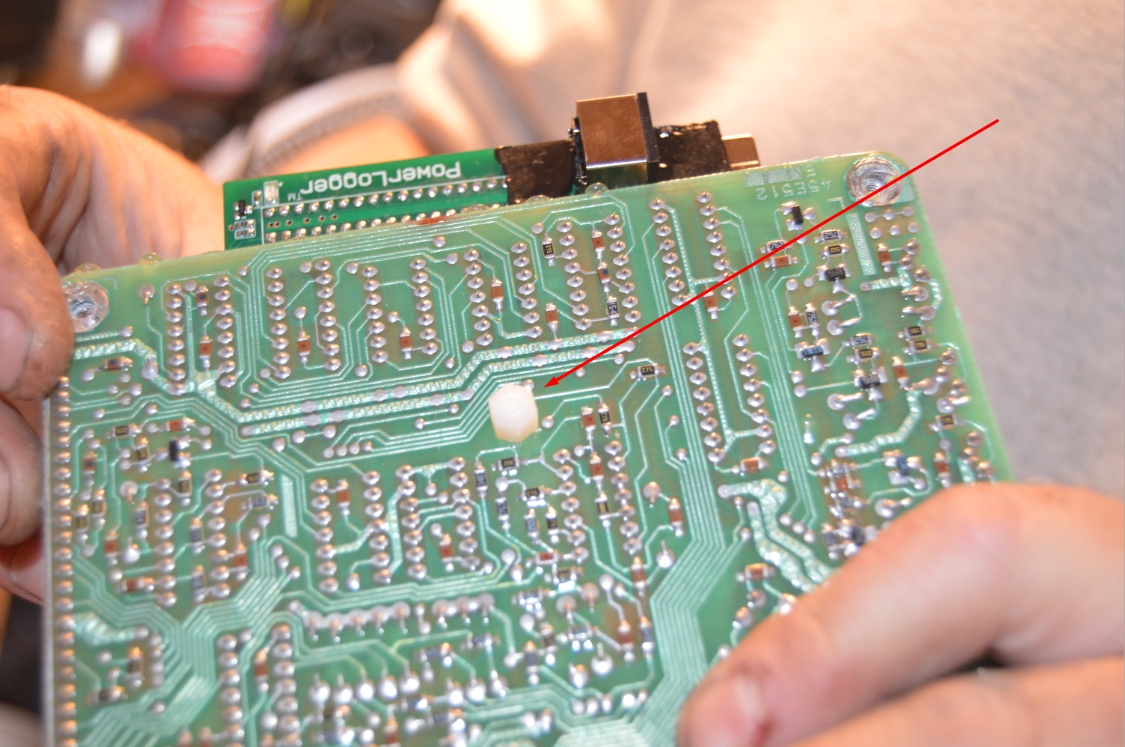
- Remove the original white colored pin that’s attached to your existing circuit board, push it over on an angle & it should pop out.
- The PL has a new white pin attached to it. unscrew the short cap end, insert the pin thru the ecm board, then screw the short cap back on to secure the PL to the circuit board.
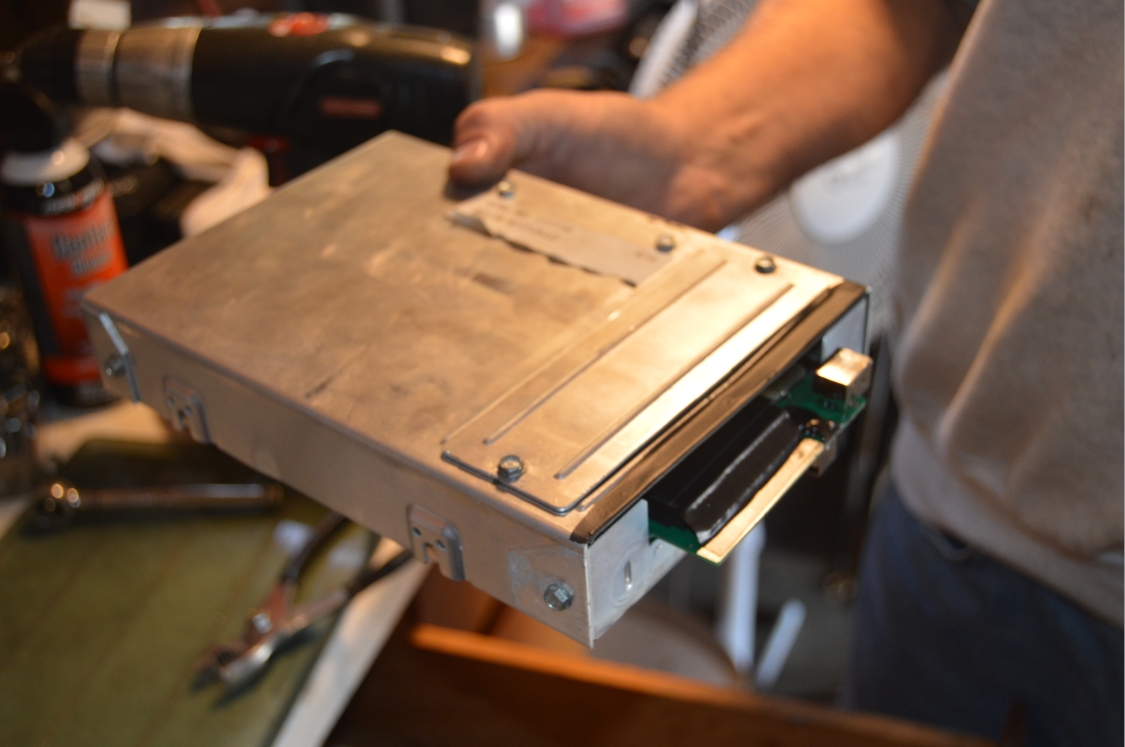
- Reattach the circuit boards, then reassemble the ECM case.
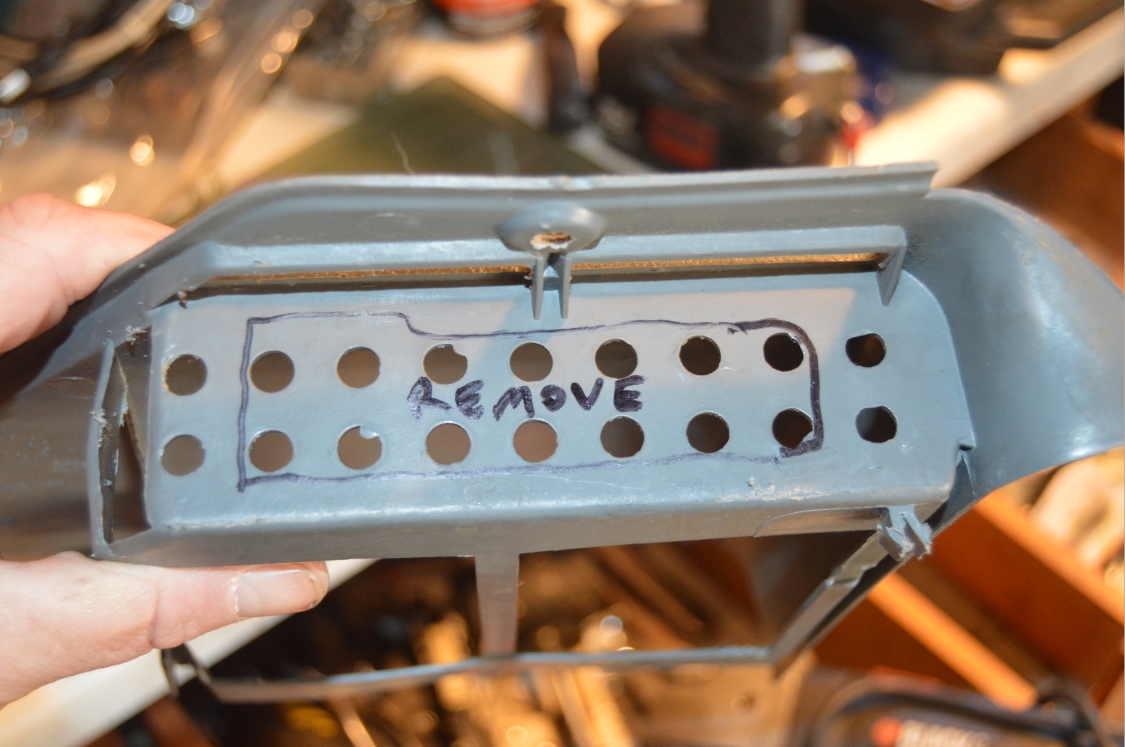
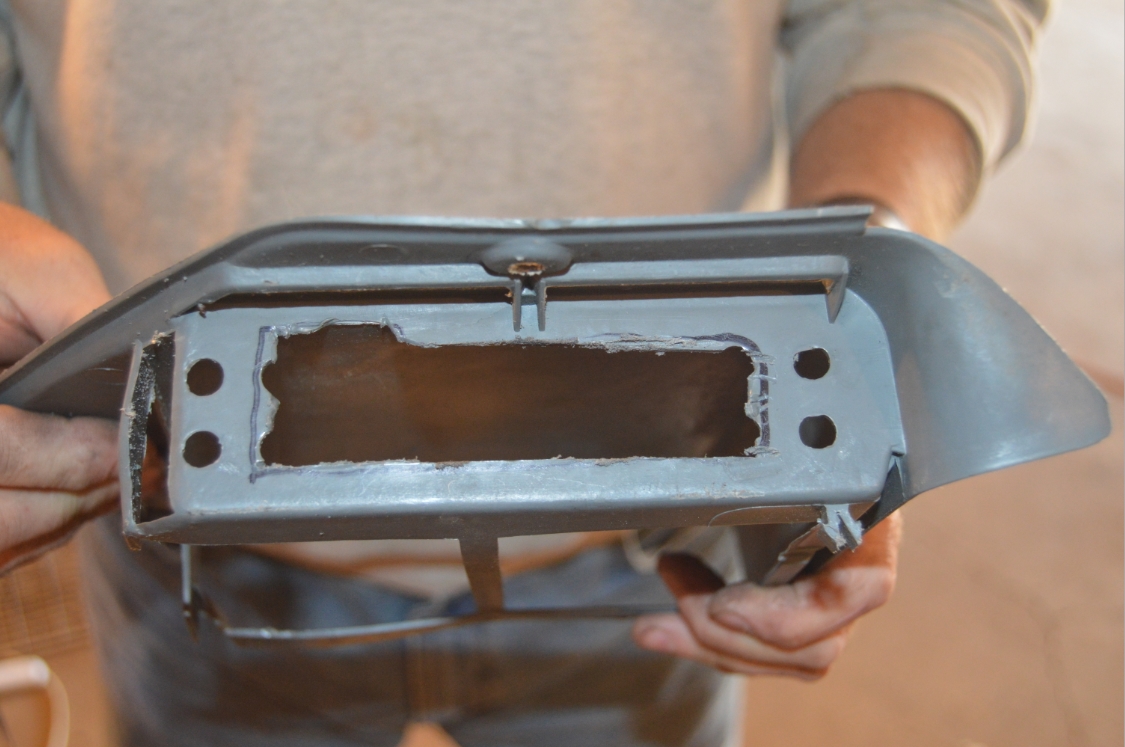
- You will need to trim out the bottom of the plastic kick panel, the section with the holes.
(see pics for the shape needed)
It doesn’t need to be pretty, this section isn’t noticeable once installed. - insert the ecm into the kickpanel. attach the top plastic cover to the kickpanel.
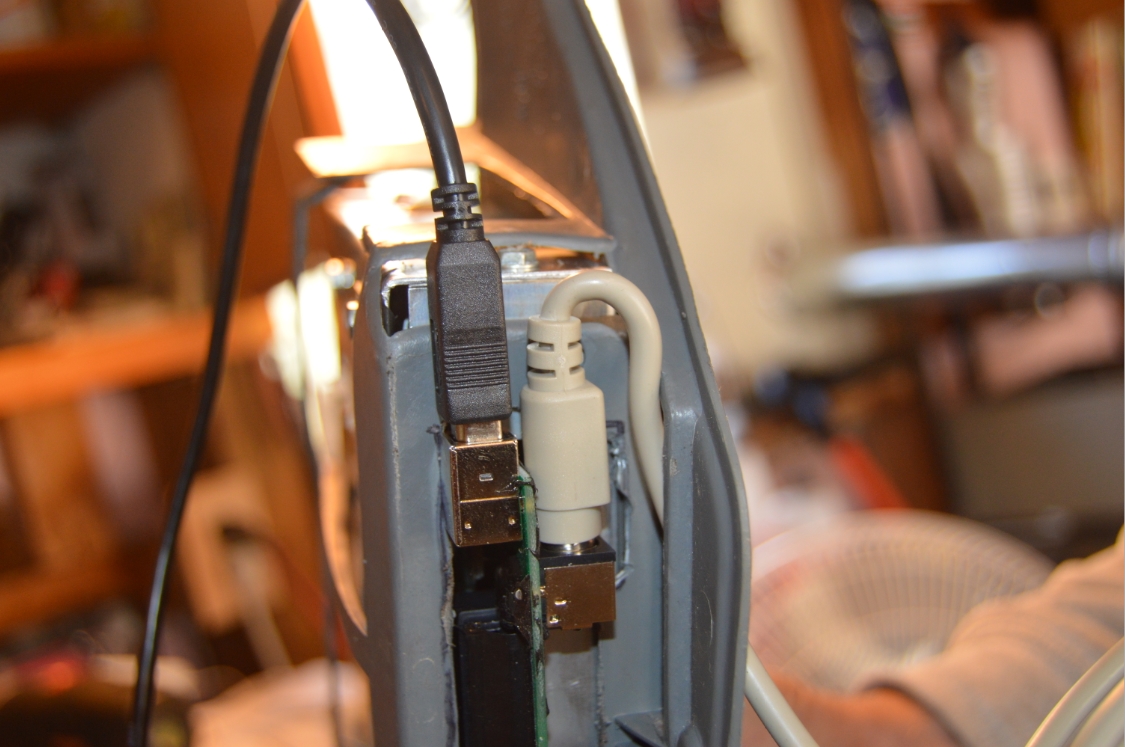
- connect both cables into the powerlogger unit at the ECM.
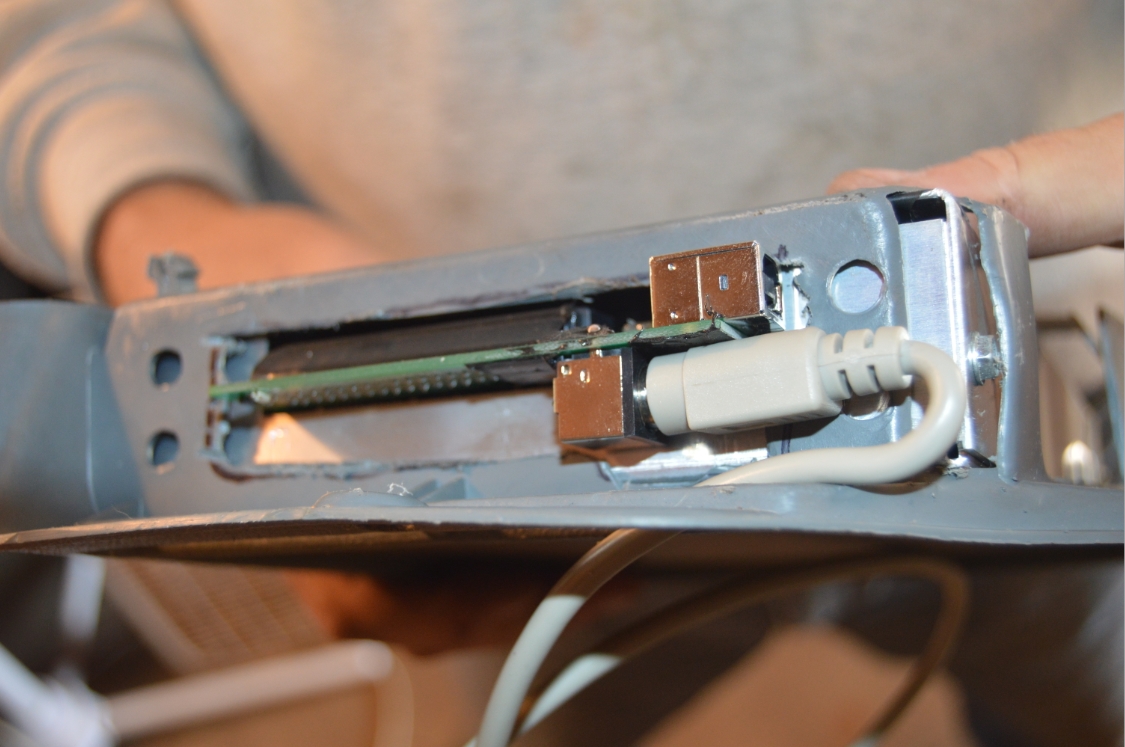
- reconnect the 2 sets of wires that attach to the ECM.
- reinstall the ecm / kickpanel back into place.
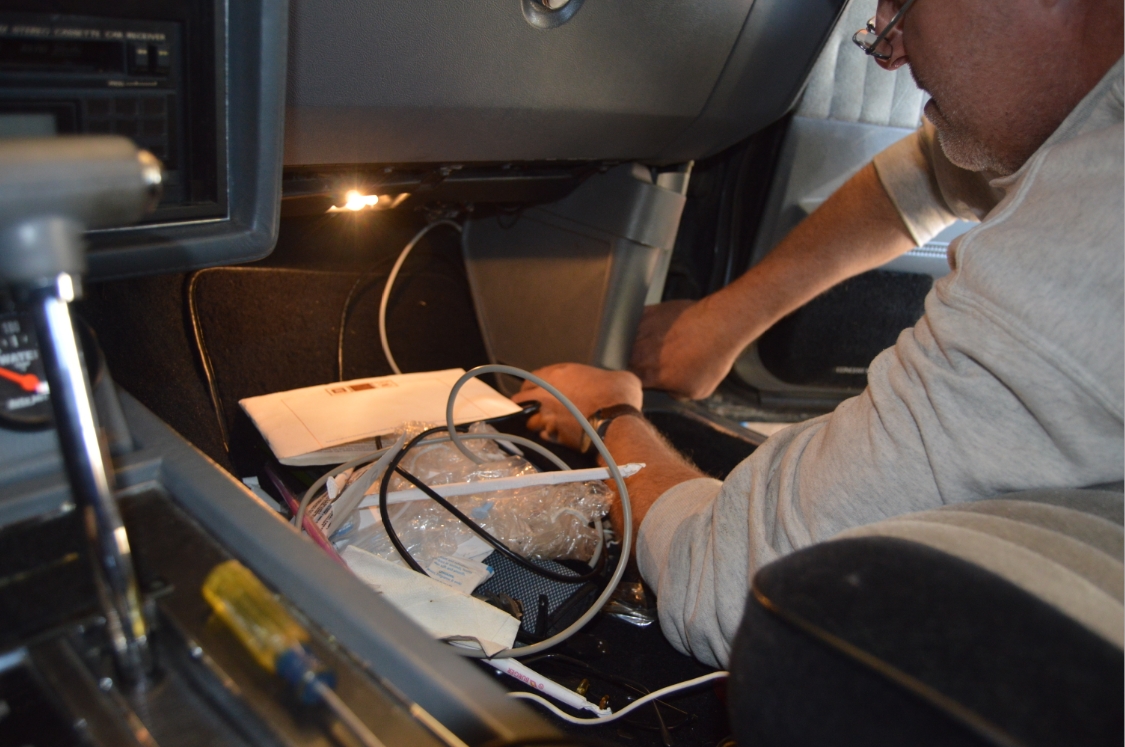
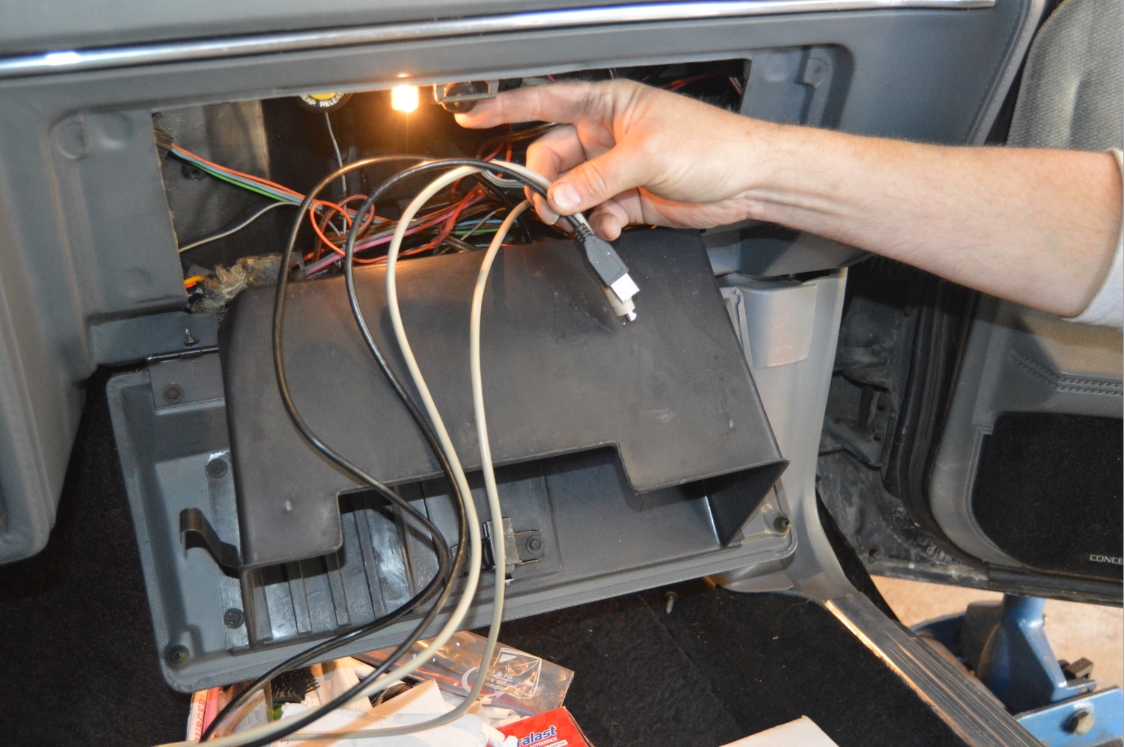
- run the 2 cables up under the dash and behind the glovebox.
- The black cable is the one that will be connected to your laptop, so make sure you put it in a spot that’s easily accessible.
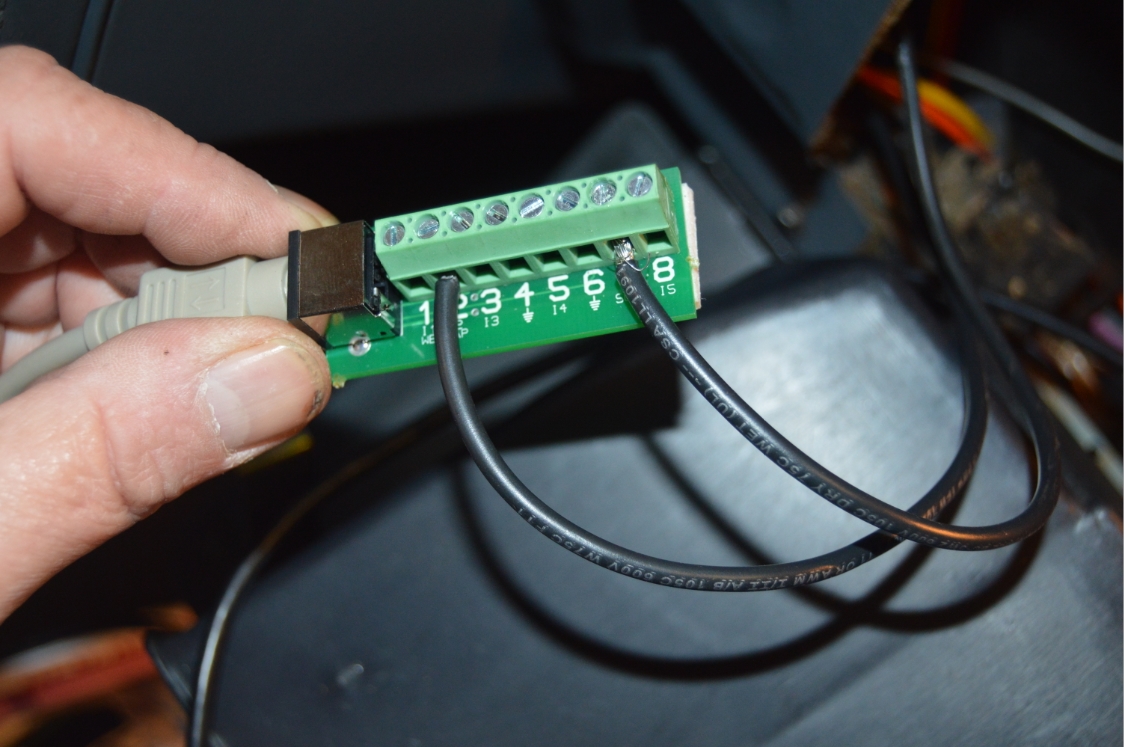
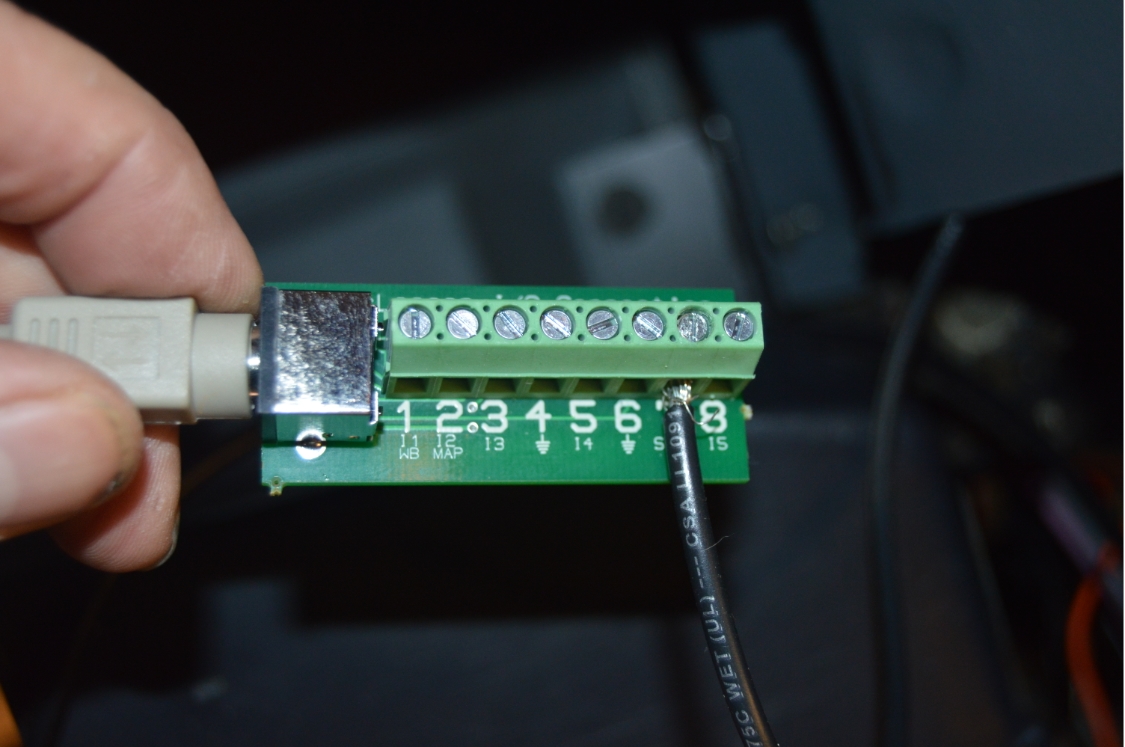
(we left ours in the glovebox, so all we need to do is pull it out & attach to laptop whenever needed) - Plug the gray cable into the the analog module (the square numbered plate).

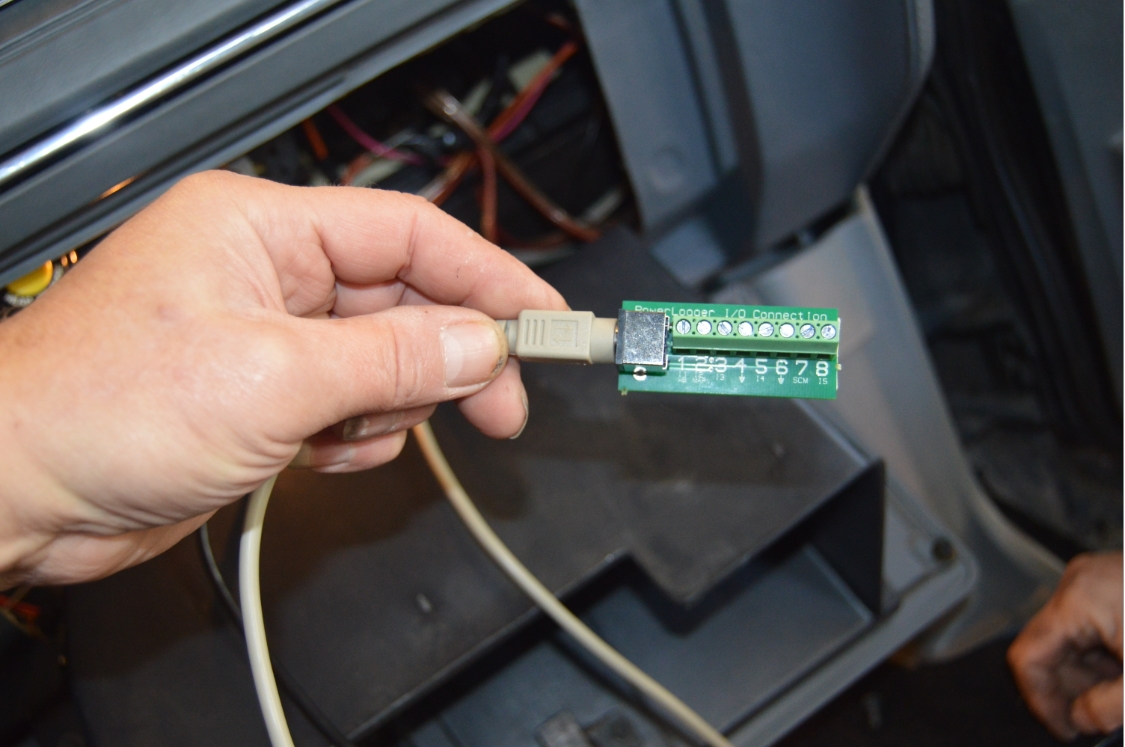
- Connect the white wire from your scanmaster into the #7 slot on the analog module.
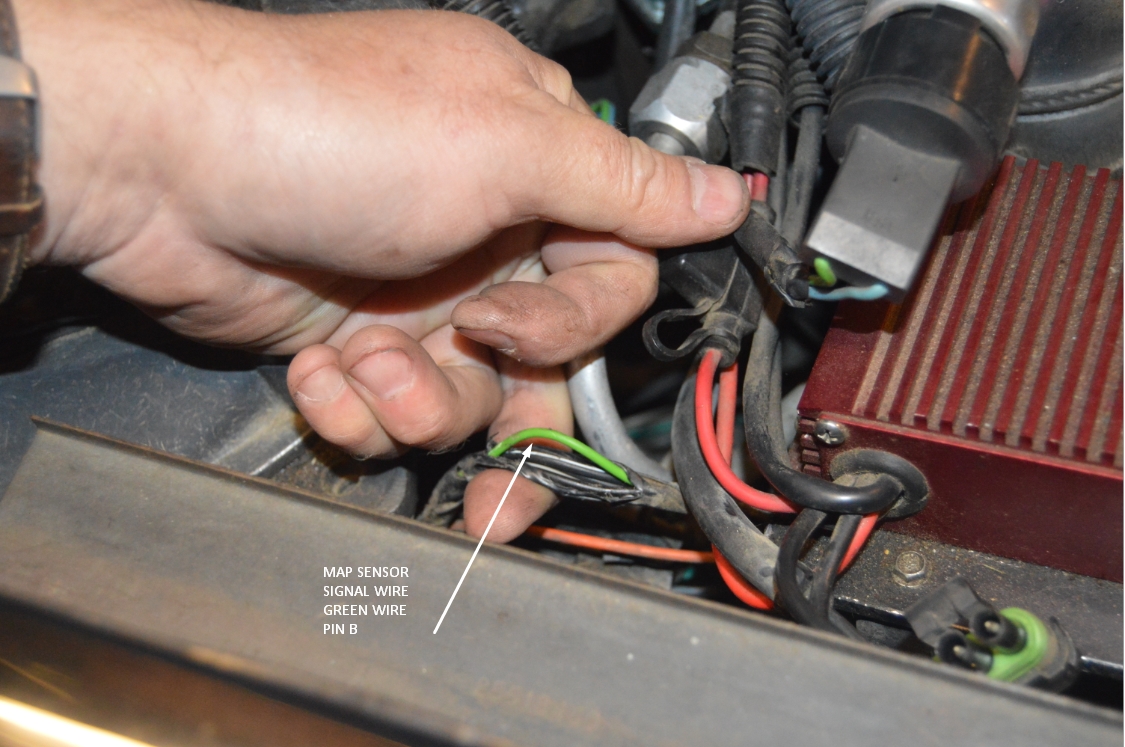
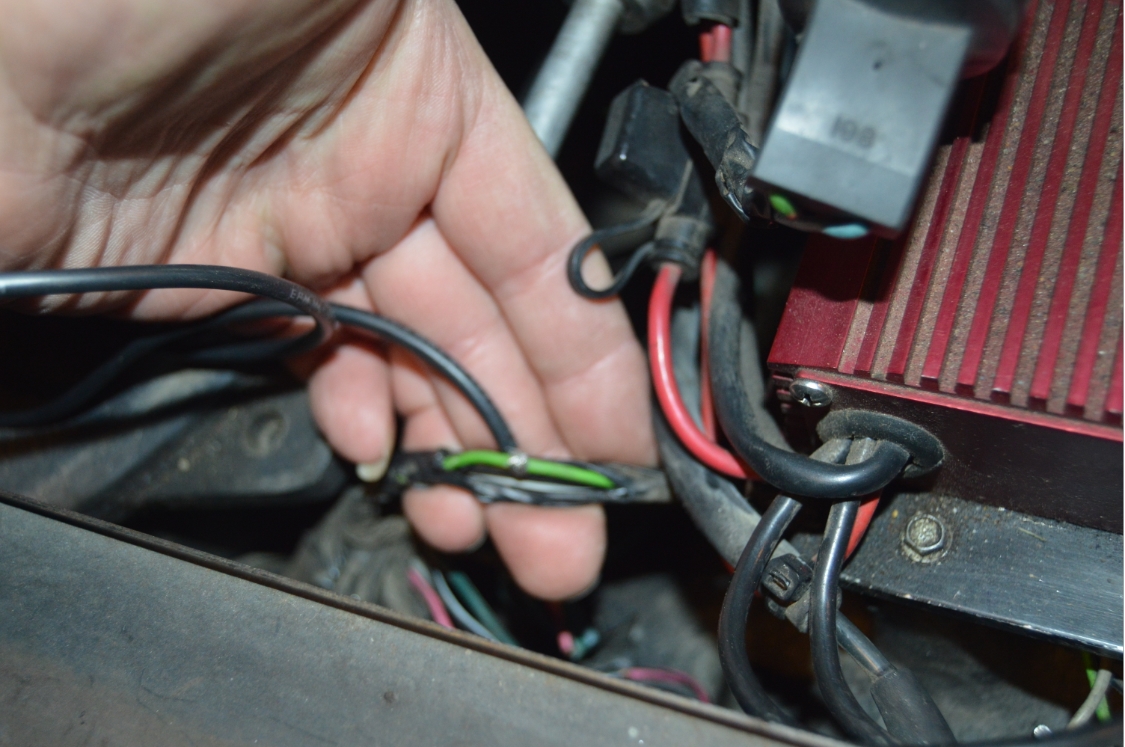
(you can extend the white wire if necessary to reach the module) - you will need to tap into the MAP sensor, pin B, the green wire, and attach it to the #2 slot in the PL analog module.
(we ran a new wire from the MAP all the way to the module)
(the MAP sensor is located on the passenger fender)
[this gives the PL your vaccum/boost reading]
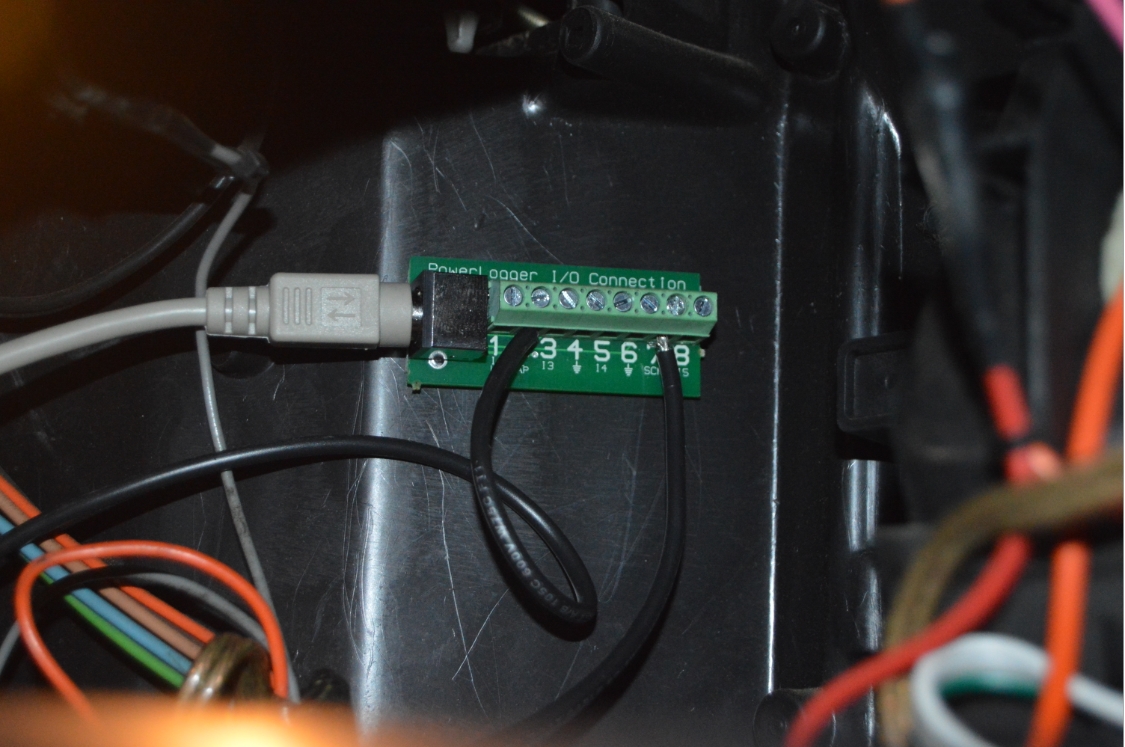
. - We mounted the analog module behind the glovebox on the firewall (it has double sided tape on the back of the module) since this is a pretty convenient spot, and easily accessible for future wiring add-ons onto this module.
[there’s additional slots on the analog module for: wideband O2, EGT, and 2 extra spots where you could add things like a fuel pressure sensor, alcohol sensor, etc. Transducers will be needed for these sensor slots for the PL to be able to read the data]

MODIFY THE SCANMASTER:
(Scanmaster G users can skip this section)
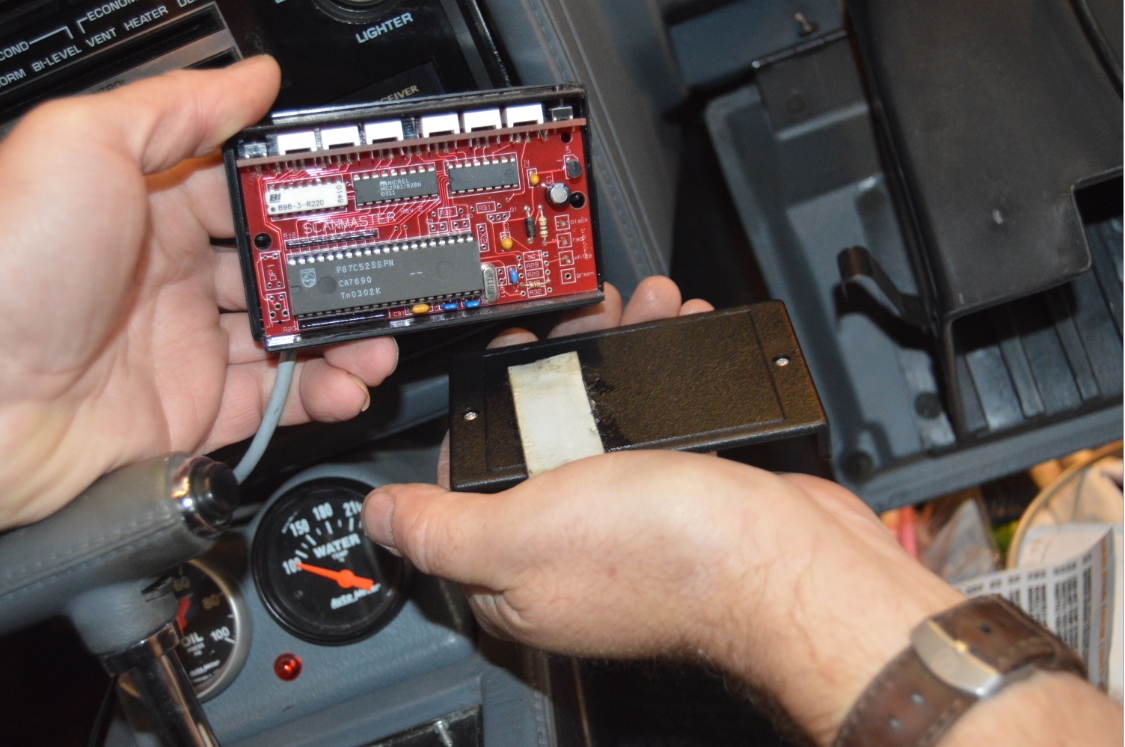
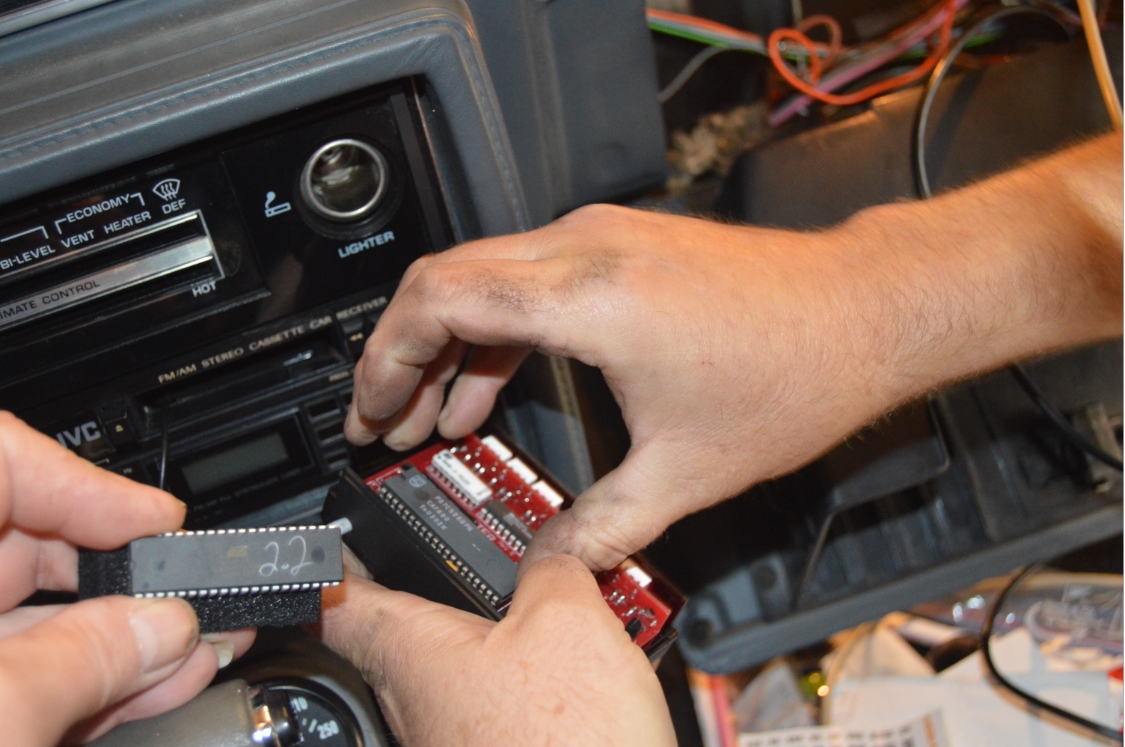
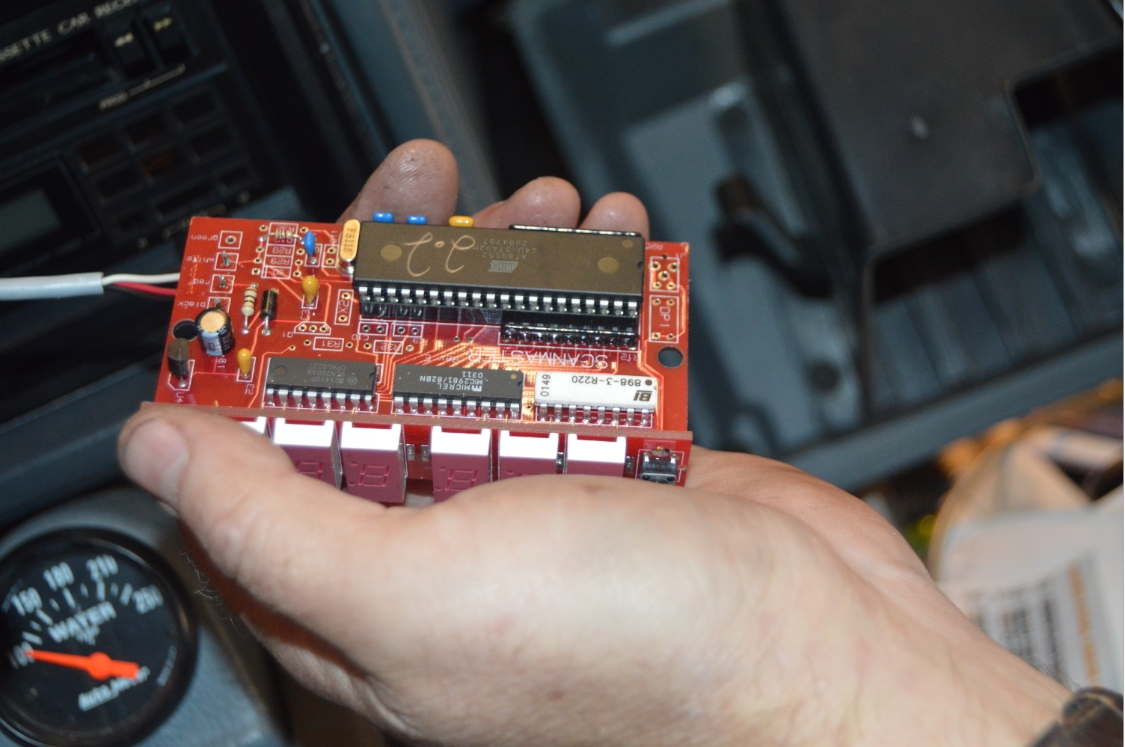
- included with the powerlogger is a new chip for the original (rectangle box shaped) scanmaster.
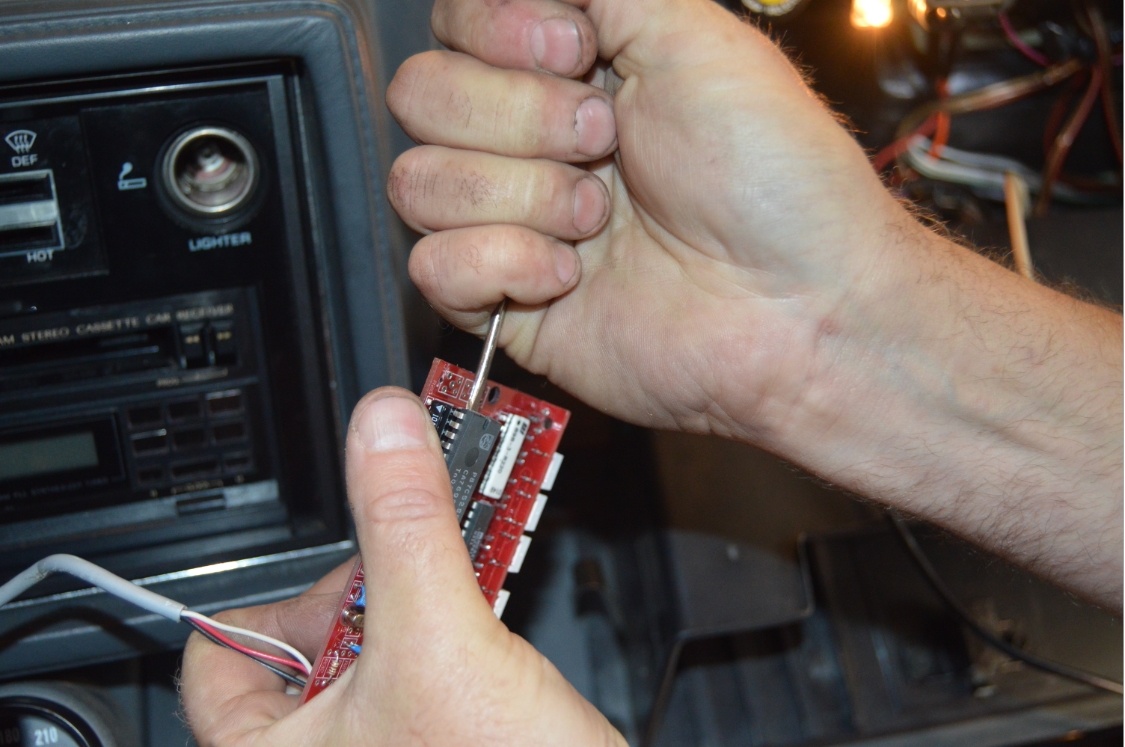
- open up the scanmaster using a small phillips screwdriver.
- Remove old chip & replace with new version 2.2 (40 pin) chip.
You can use a small flathead screwdriver to pry the old chip up & out carefully.
MAKE SURE you put the new chip in the correct direction!
The notch in the chip faces away from the middle of the board.
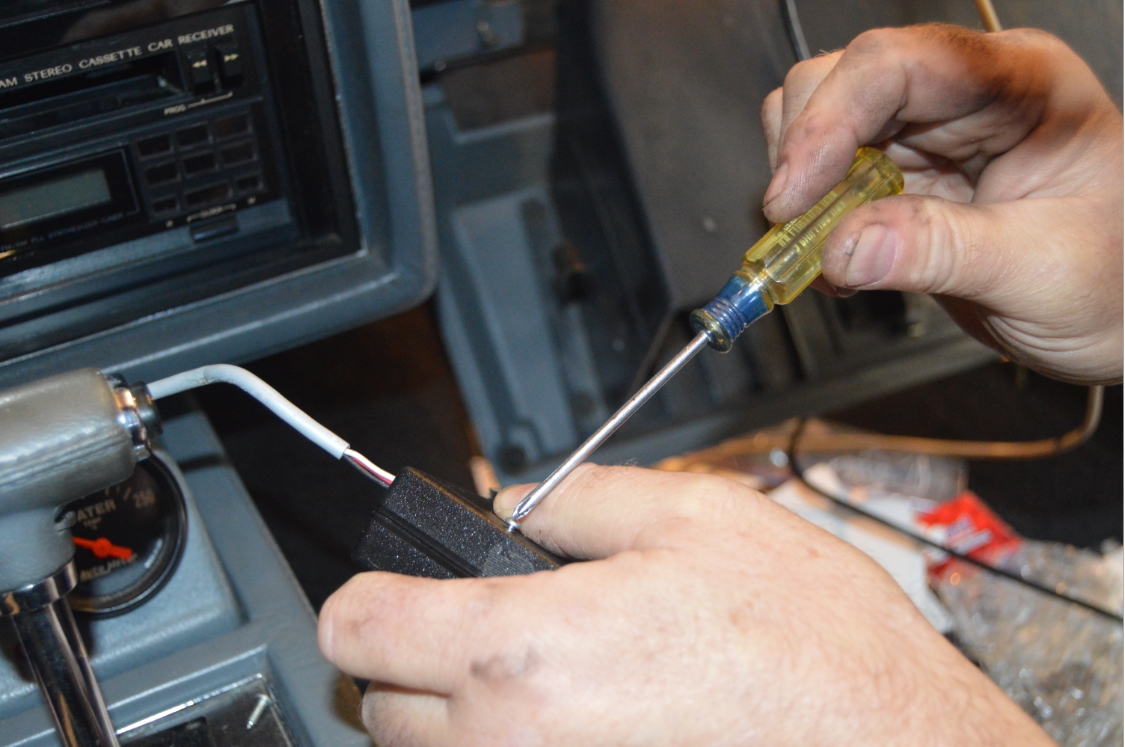
[when you plug in the new chip, the scanmaster may light up indicating it accepted the new chip] - reassemble the scanmaster.
Just FYI about the scanmaster:
The (red) power wire of the SM should be connected to IGN in the fusebox (or a switched power source).
The (black) ground wire should be connected to the ALDL (black) ground wire, or the PL analog board (slot 4 or 6), or a GOOD ground point (NOT an underdash bolt).
The white wire connects to PL board, slot #8.
[we initially had scanmaster/PL connection issues, however, after connecting the wires as stated above, all good now]
.

INSTALL THE PL ON LAPTOP COMPUTER:
(different windows operating systems may install slightly different, but should be similar enough to below)
- from the included cd, drag the entire PL folder onto your desktop of your laptop.
[this folder will remain on your desktop forever, run the PL out of this folder] - connect the black usb cord from the PL to your laptop.
- open the folder, click on the (square) PLC icon to launch the powerlogger console.
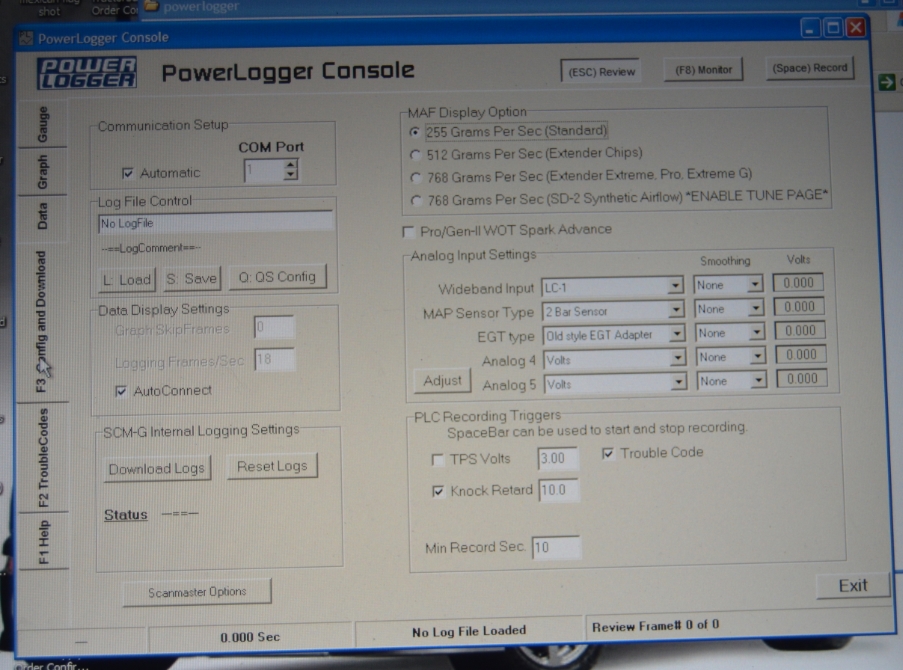
- go to config tab in PL, and make sure the port choice shown matches the usb port you’re actually using.
(click in the box & change it if necessary) - match this comm port number to the device manager port number shown on your laptop. (this makes the PL talk to your laptop).
[windows 8 systems (compared to previous operating systems) needs updated drivers, on the laptop, not included on cd, but see below]
[all windows drivers are now “signed” – meaning if you’re connected to the internet, your laptop should automatically find them when you flash/update the PLC]
[we ran our powerlogger on an old laptop with XP, and after reflashing the PL, and changing com port number, it connected ok]
[another G-body Regal with the PL installed we tested, using an older laptop with windows 7 worked fine too]
[if you run into connection issues, the first step should be to shut down the PL & reboot the laptop. sometimes laptops need to re-engage]
You have to have (car) key on, as well as PLC on, and usb connected to your computer, for “ports” to show up on your laptop in the device manager (on the laptop).
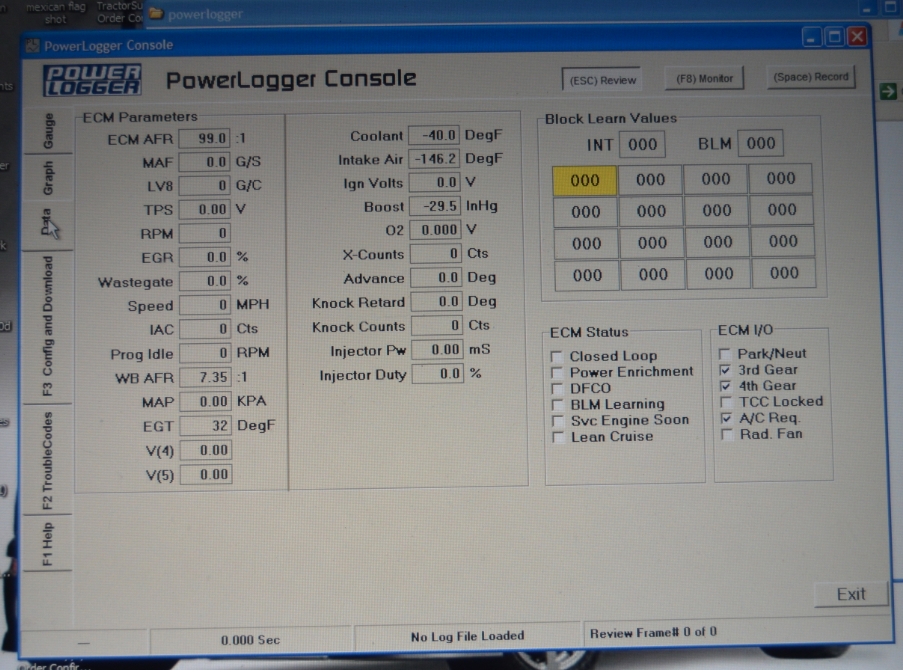
- After you’re connected, the PL should be reading your engine data.
(even if the car is off, with key on, “some” data should be live, like volts)
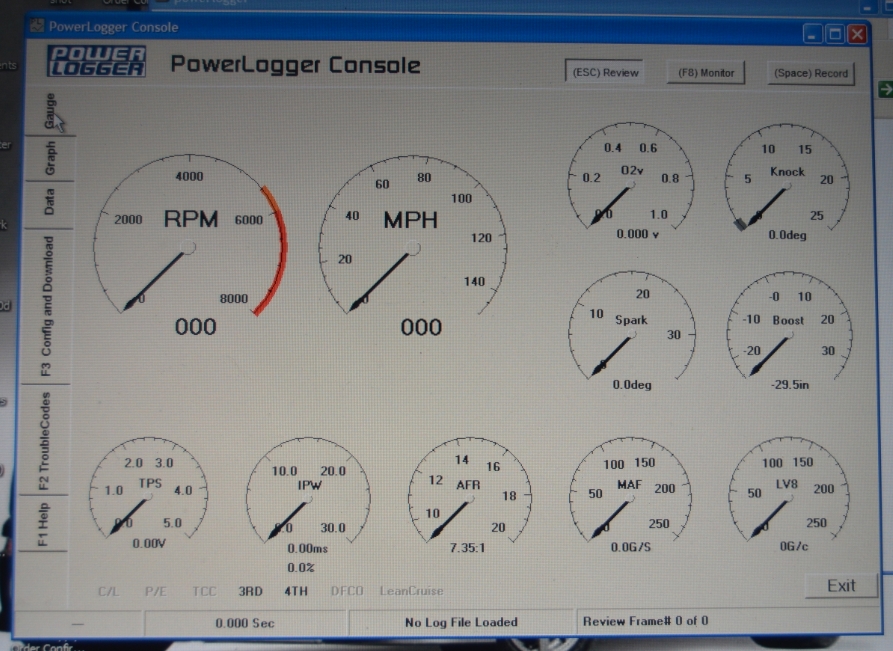
Click the F8 (monitor) button to actually view live data.
Start the car to see the other live data, which should be present.
(if not, check settings in PLC, and/or reclean foil connectors on circuit board)
. - There are scanmaster options on the configure page (F3), as well as some other options to chose from. Check this page out and make the appropriate selections for your particular setup.
[if you are having SM issues after PL install, check the settings on this page. click the “scanmaster options” button which opens up a new window. check/uncheck appropriate choices]
- Your scanmaster should be functioning correctly, and giving you faster data than you had previously, as well as some new data to look at that you didn’t have there before!
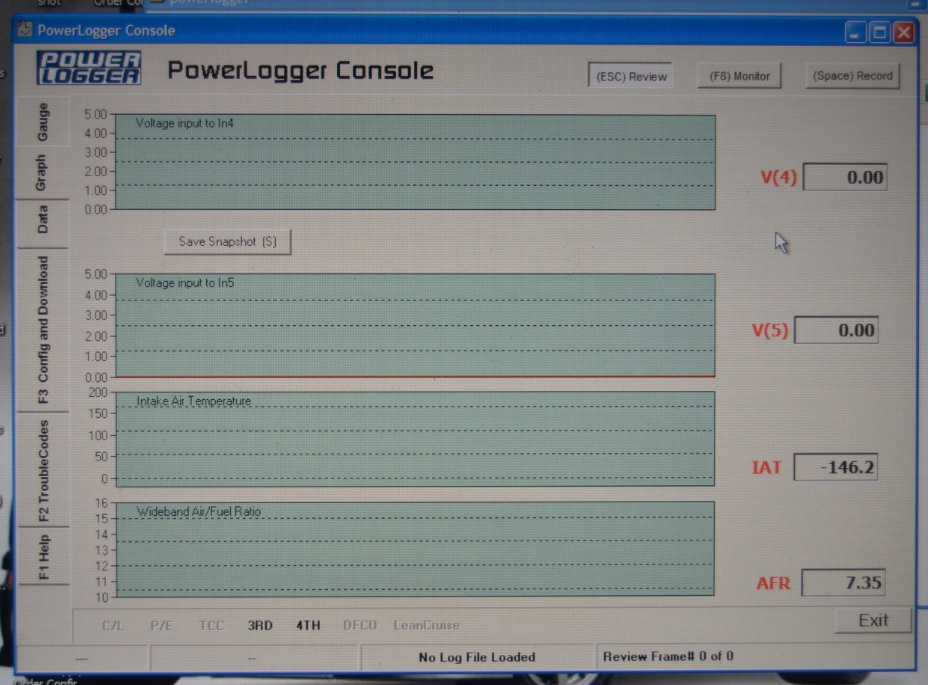
THE DIFFERENT SCREENS IN THE POWERLOGGER CONSOLE:
.
NOTES:
We had issues with the foil connector on the ECM. MAKE SURE it’s super clean! Clean it very well to get the factory coating off. Most issues are because of bad connections here. Use goof-off or goo gone to remove the factory coating.
The PL unit itself is fully updated when shipped, so no need to update it.
If you have a wideband O2 sensor, you need to connect it to the powerlogger connection bar.
(it goes into slot #1)
For scanmaster G users, grounding it to the Powerlogger analog module is best. The ALDL plug ground is second best. Using any ‘body’ ground can have offset and noise issues, so try and use one of the 2 previously mentioned ground points.
In the PLC, on the “graph” page, you can right click within the graph and change the data (sensors) you are looking at.
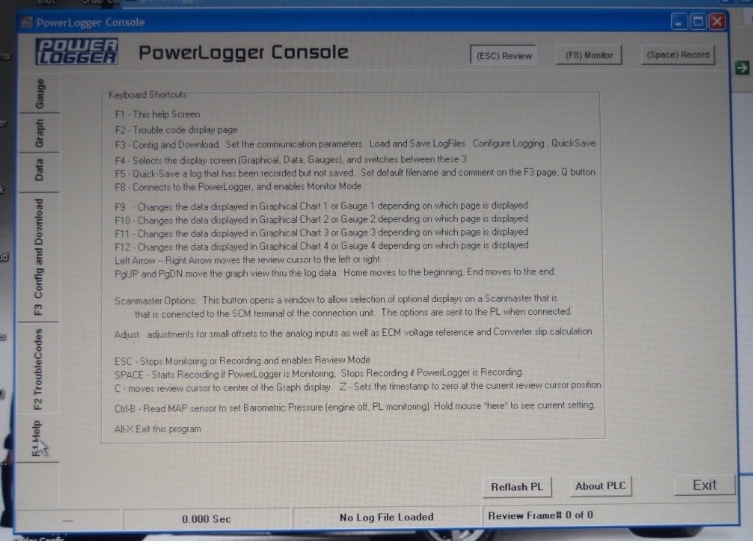
There are other neat things you can modify, change views, etc., so be sure to read the included booklet that comes with the Powerlogger.
So now that you have the Powerlogger installed, it might be helpful to have a guide to determine what all those numbers mean. Check this out: powerlogger readings.
If you have connection issues between the powerlogger and the scanmaster, or the PL won’t display any engine data, or other SM problems after PL install, head to the turbobuick .com forum, there has been plenty of threads created that will explain common issues that other Turbo Regal owners have had installing the PL.
Most commonly, port issues (explained above), or you need to reflash the PL, with the #1 problem being you didn’t clean the foil connectors on the ECM good enough (try cleaning again to remove the factory coating – we thought we had it cleaned well but had to do it again).
If all else fails, you can always contact the place you purchased it from or even the creator of this item, Bob Bailey (but that’s a last resort since the forum has plenty of answers on it already that should assist you in getting it working).
.
Boost on!
.
.
.
.
The vendor shown above has supplied us with the parts we used in this project, per our request. If you are looking for similar parts, don’t hesitate to inquire with this specific vendor!
.
.


