


This is the final day in our 5-day story about installing these new a arms.
Everything is prepped, and ready, to start installing!
If you didn’t do all of the other associated tasks like we did for the past few days, and you left out at removing old a-arms (that was day 2 for us), then this is your next steps to finishing the install.
We’re pretty excited to get this done, as now (literally) the entire front end on this 1987 Buick Grand National Regal has been replaced or modified.
(the only original parts left are the actual frame and steering box! even all of the nuts & bolts have been replaced)
(body bushings still need to be done, but that’s a future project)
.
Are you curious to know if there’s any weight savings on these new arms compared to stock units?
Perhaps. But only vs the OEM arms.
(we have a factory lower on this Turbo Regal, but a GbodyParts upper a-arm)
We weighed the lowers, stock = 14.9 lbs, UMI = 12.4.
For the uppers, we didn’t have a stock one (but we’re pretty sure it weighs more than either of the following 2 units), but the gbody version we have weighs 3.5 lbs (no BJ), vs the UMI one weighing 7.1 lbs, but it did have the BJ attached so that accounts for some added weight difference on the new upper.
So for us, the lower a-arm weighs less but the upper weighs more, the difference between the 2 (old vs new) being basically no change in overall weight at all.
(which we’re ok with, since we gain from the performance aspect of the arms and the good looks they provide)
.
OK, on with the installation!
We are assuming that you have the lowers pre-assembled and ready to go.
(sway bar links, shock mounts, etc.)
These lower arms are ONLY meant for coilovers, so if you don’t have them (or planning to get them), these are NOT the correct lowers for your Turbo Buick!
.
For reference again, the upper arms are UMI # 3056, and the lowers are 3057-1.
Along with using Viking Coil over kit #A224-450RK.
.
Factory specs for torqueing down all components can be found here:
suspension torque specs
.
A list of the tools you need for this job can be found on Day 2 of 5, which was the removal of the old arms.
.
HOW TO:
- assemble the shock mounts to both lower arms. use the correct spacers for your shocks.
(1 arm gets 1 of each shear mount, a 1/2″ hole bar and a 3/4″ hole bar)
(the shock hole in the mount gets installed closest to the balljoint)
. - use the pre-lube packet to lube the outer surface of the Delrin bushings.
(the lube eases the installation) - position the lower arm into place at the frame, and secure with the old bolts (or new ones if you bought them).
(we coated the bolts with anti-seize to minimize rust and make it easier for future removal if needed)
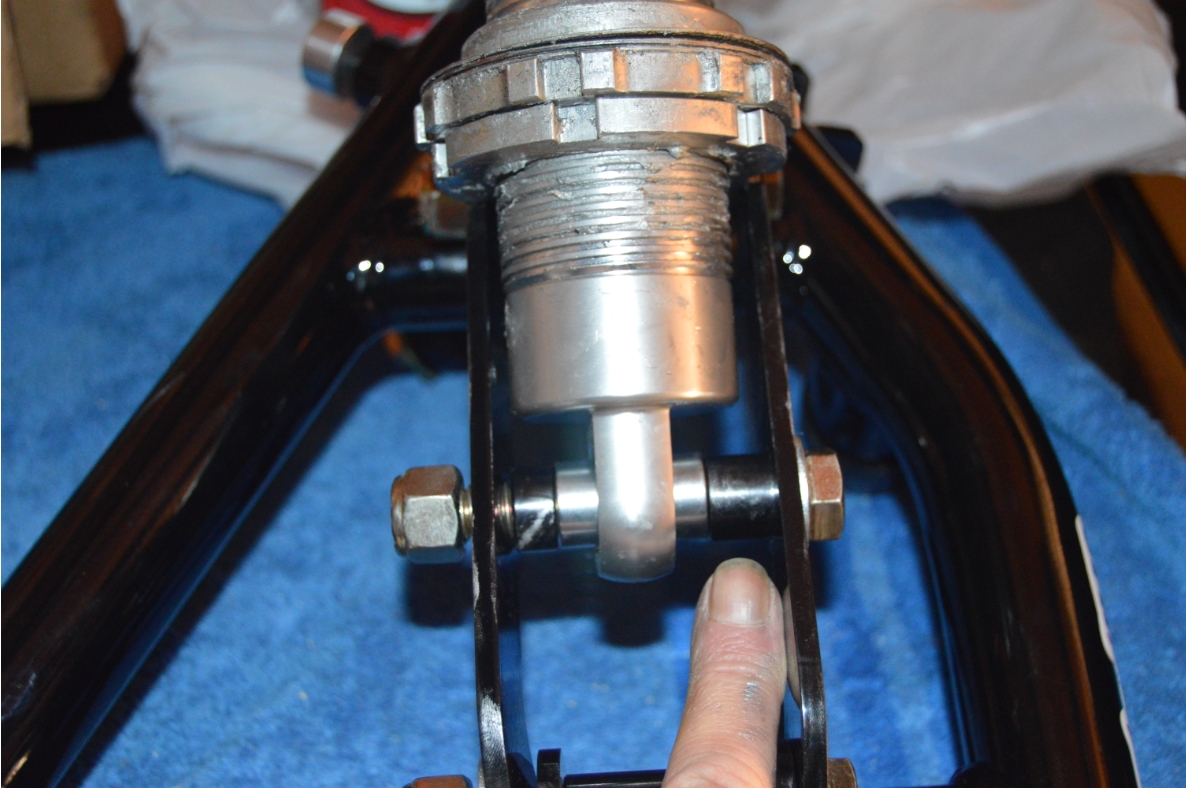
. - install the spindle onto the lower arm and hand tighten the castle nut.
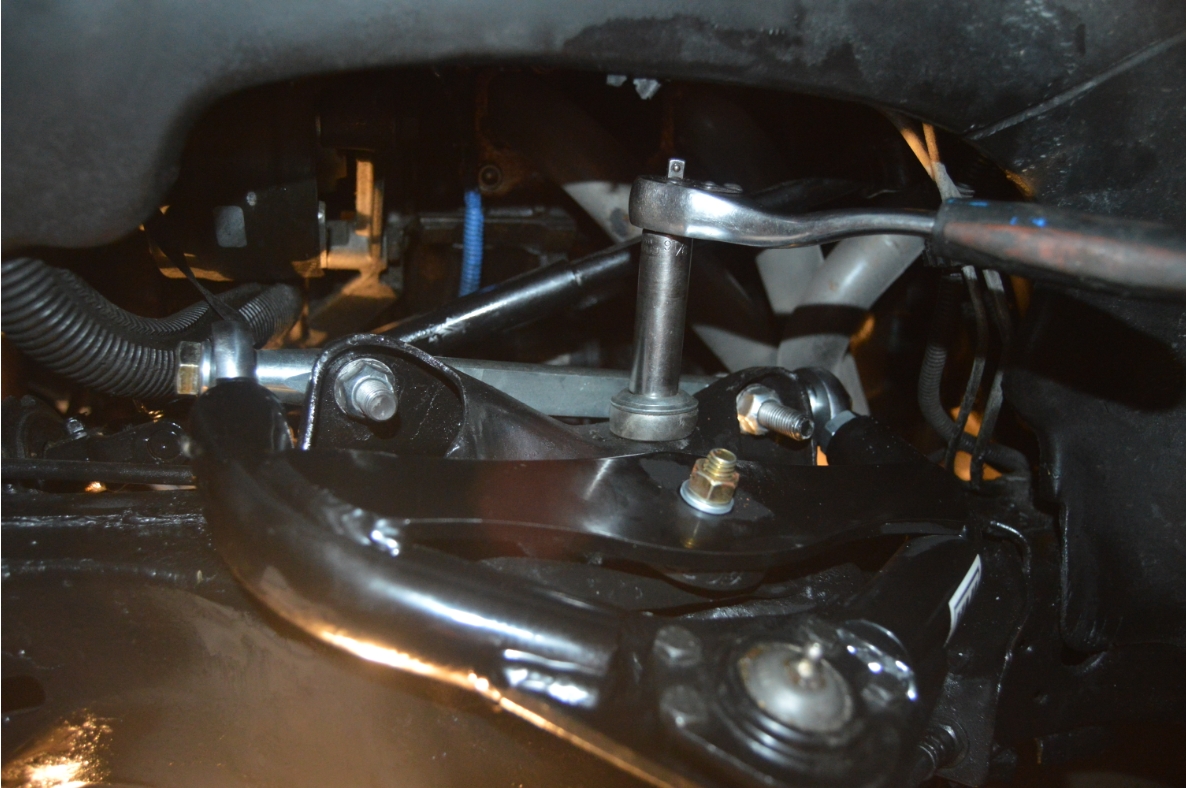
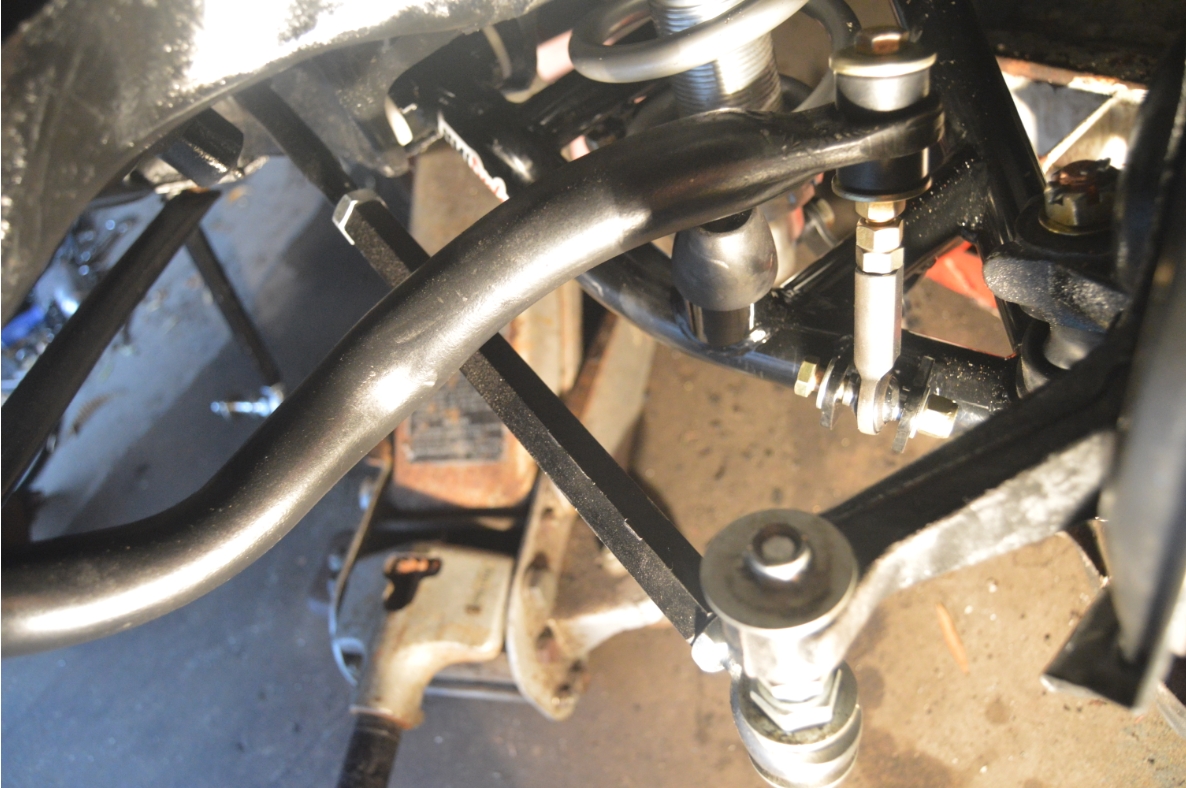
- attach the upper a-arm to the frame, using the 2 bolts on top. hand tighten only.
(note: we attached the bolts with the bolt head on the engine side, this giving more clearance in that area. Normally they would go on with the head facing outwards, but we don’t think it really matters which way they are positioned, so we opted for engine clearance)
(note the BJ gets positioned in front of the center line of the arm, that’s how you know which arm goes on which side of the car)
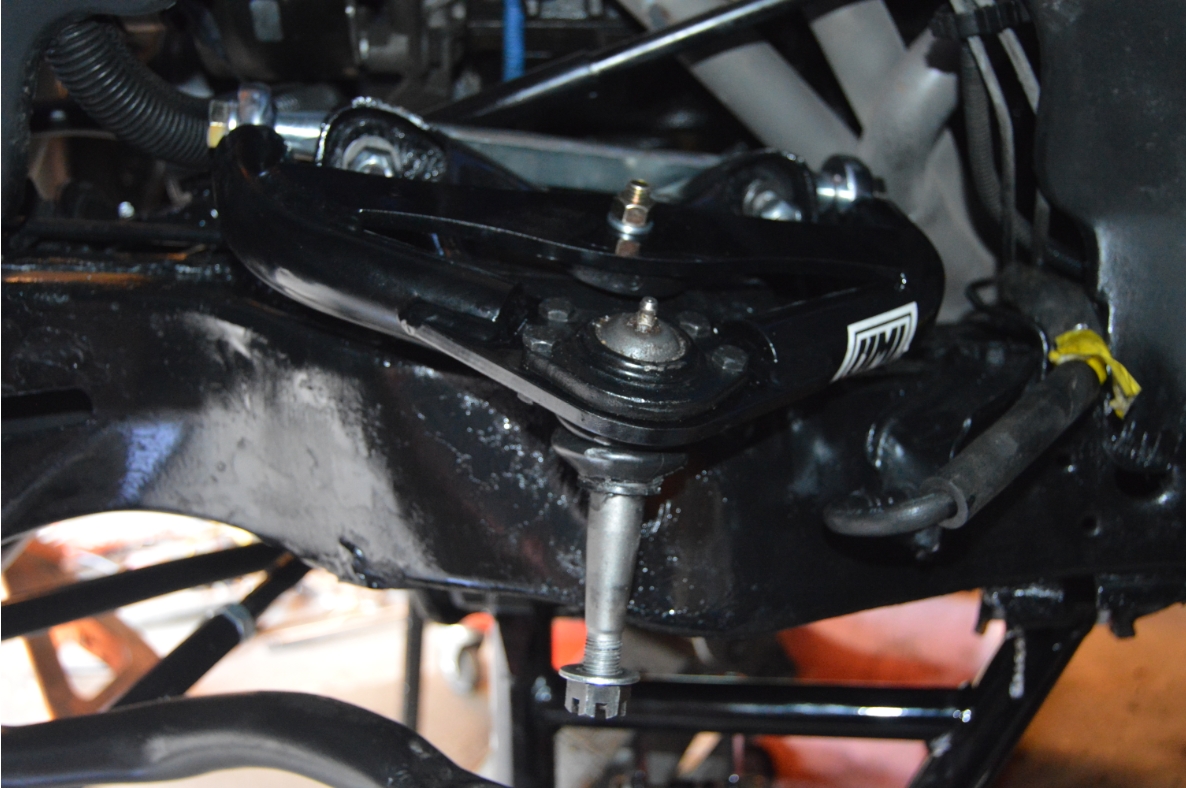
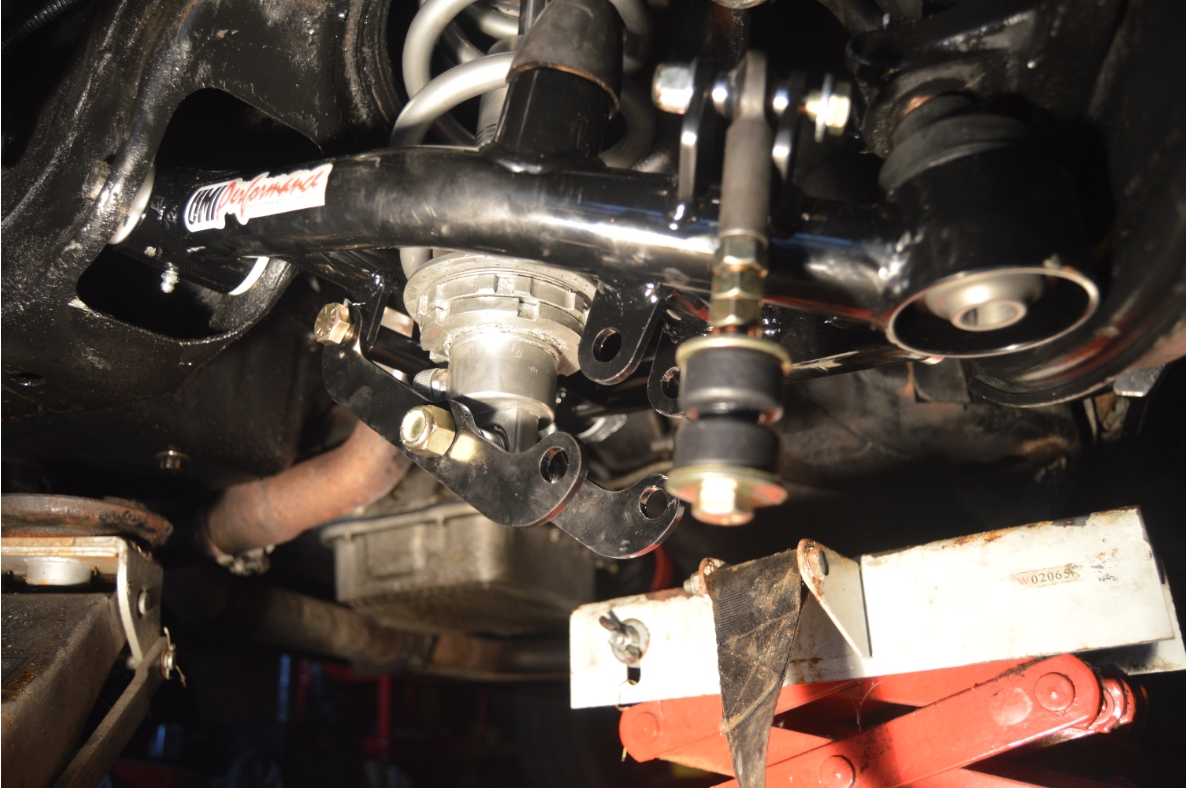
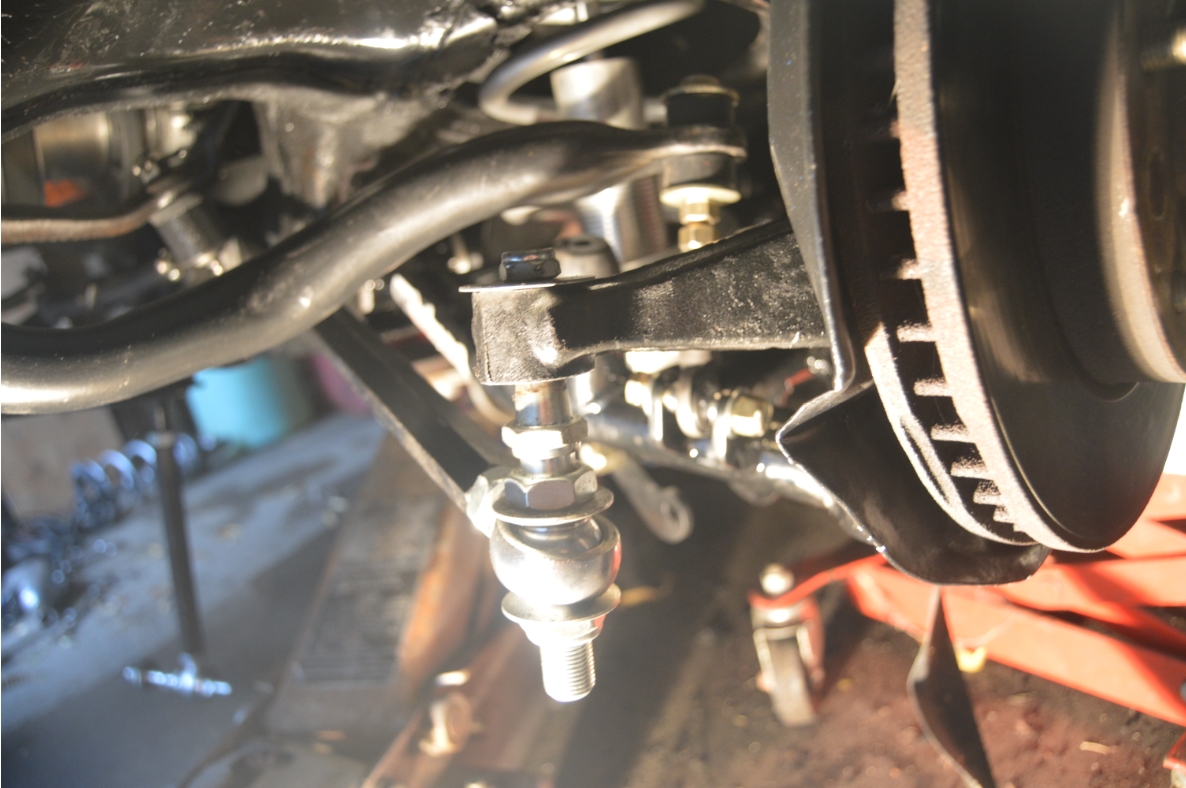
. - align the upper ball joint with the spindle.
secure and tighten castle nut.
attach cotter pin. - tighten lower ball joint castle nut.
attach cotter pin. - remove outboard shock mount bolt, let the 2 pieces swing down.
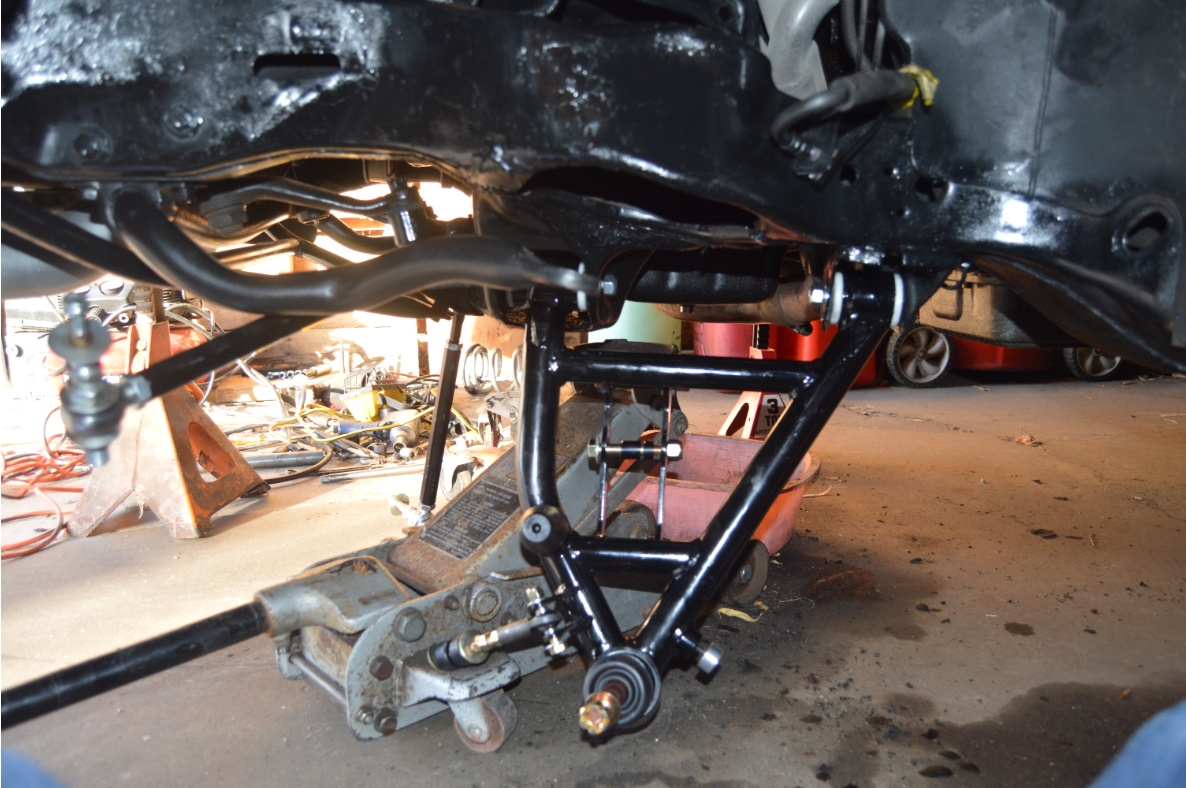
. - attach shock and spring at the top loosely.
position coilovers so adjuster knobs are facing toward the center of the G-body Regal.
(we used a jack on the bottom of the shock to lift it up into the top hole to be able to put the nut on, as the spring makes it difficult to get it up there!)
. - connect the shock bottom to the arm.
make sure the spacers are in the correct position.
(you can lower the shock body nut to the lowest position to make it go in easier) - reinstall outboard shock mount. secure bolt.
(again, you may have to use a jack to lift the shock up to be able to attach the shear mounts to the arm)
. - tighten upper shock mount nut.
. - reinstall the tie rod to spindle and tighten down.
- tighten all remaining bolts to factory specs.
DO NOT CONNECT THE SWAY BAR UNTIL YOU FINISH THE OTHER SIDE!
. - complete the install of the other side.
- attach the sway bar end links.
tighten top and bottom nuts/bolts.
tighten the 2 top jam nuts.
tighten the lower jam nut.
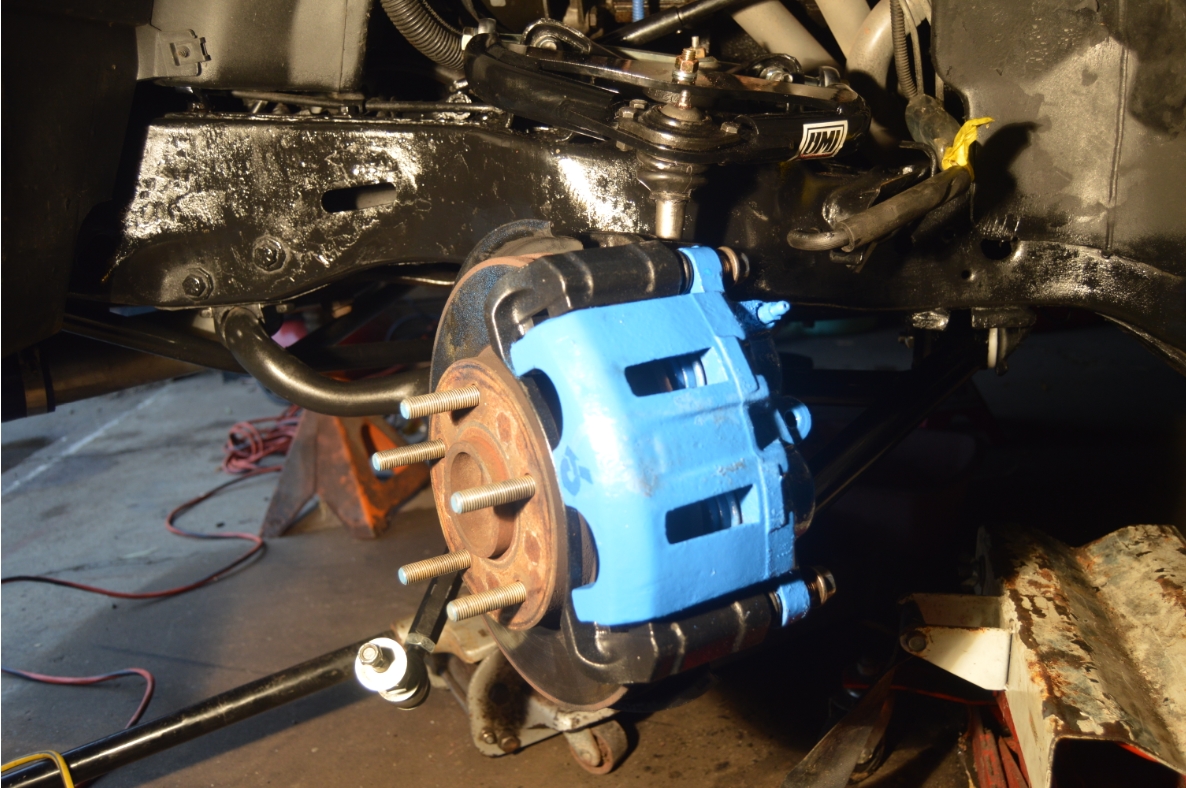
. - reattach the calipers & brackets if you removed them.
- reattach the brake line.
- put your wheels back on.
- lower off jackstands.
.
That’s it. That completes the installation!
.
check correct spacers 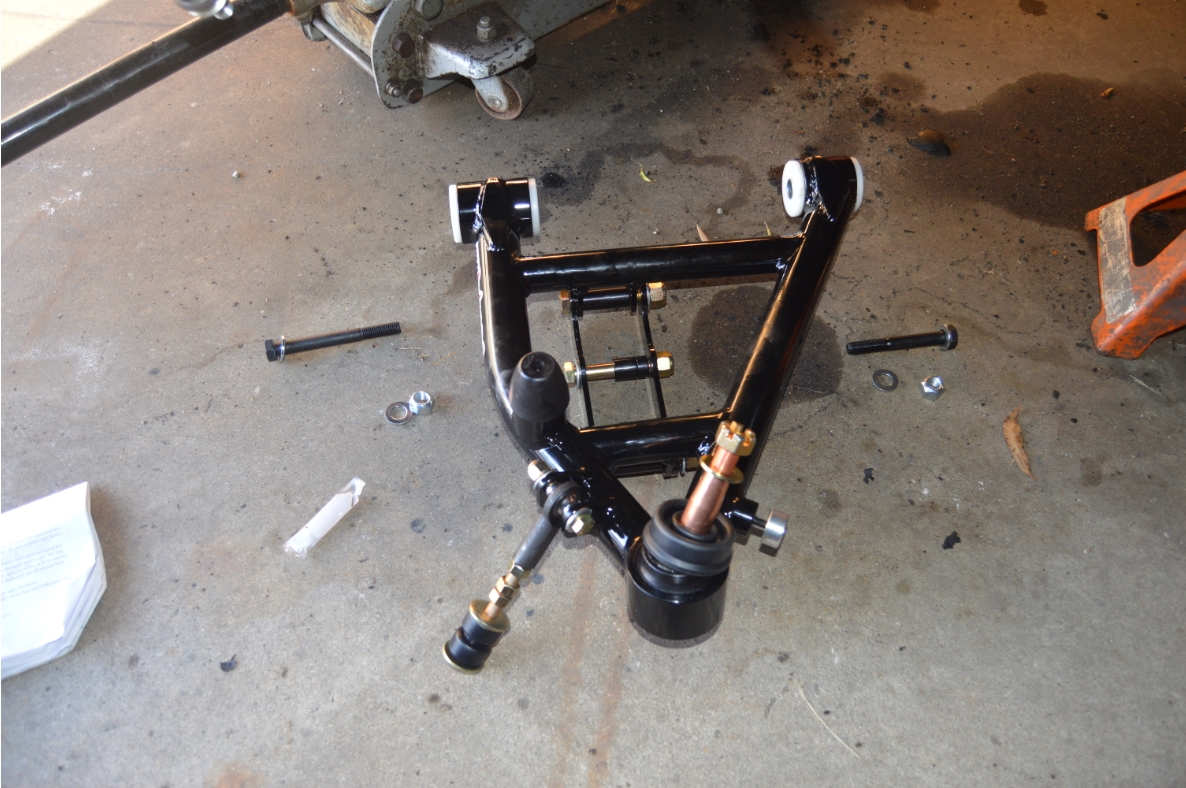
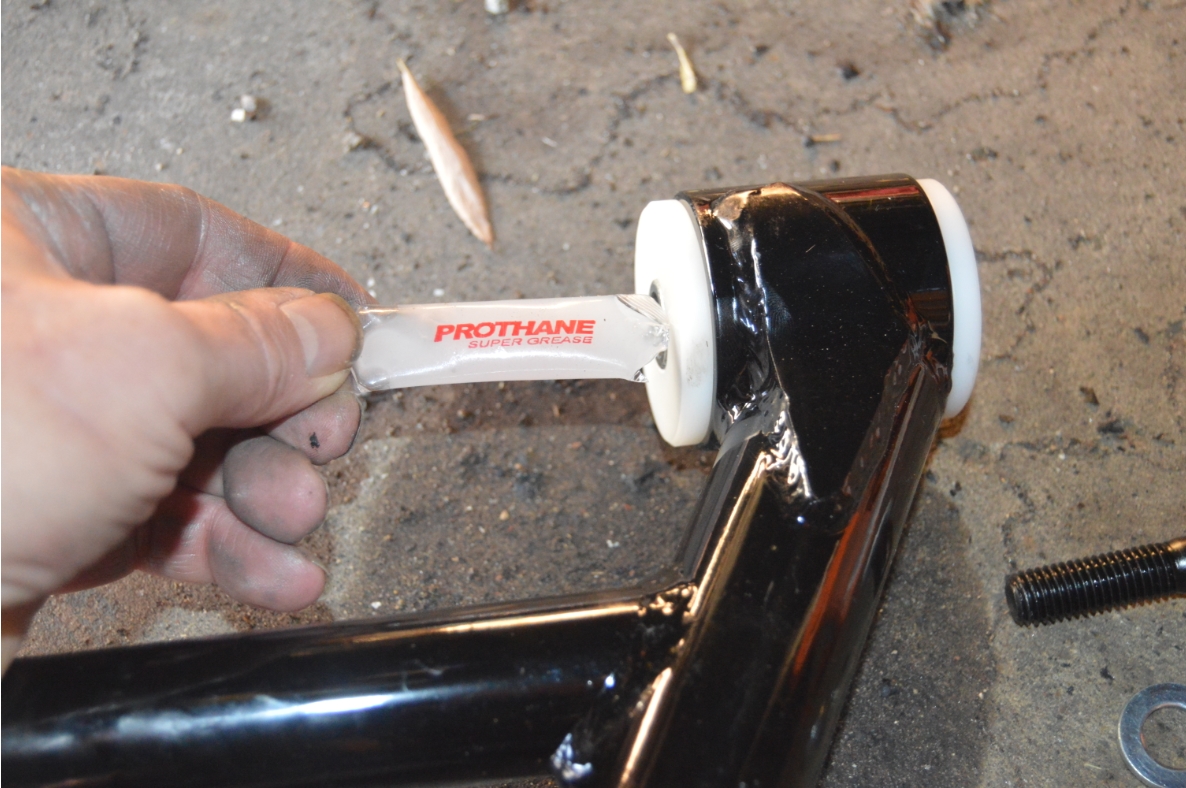
grease bushings 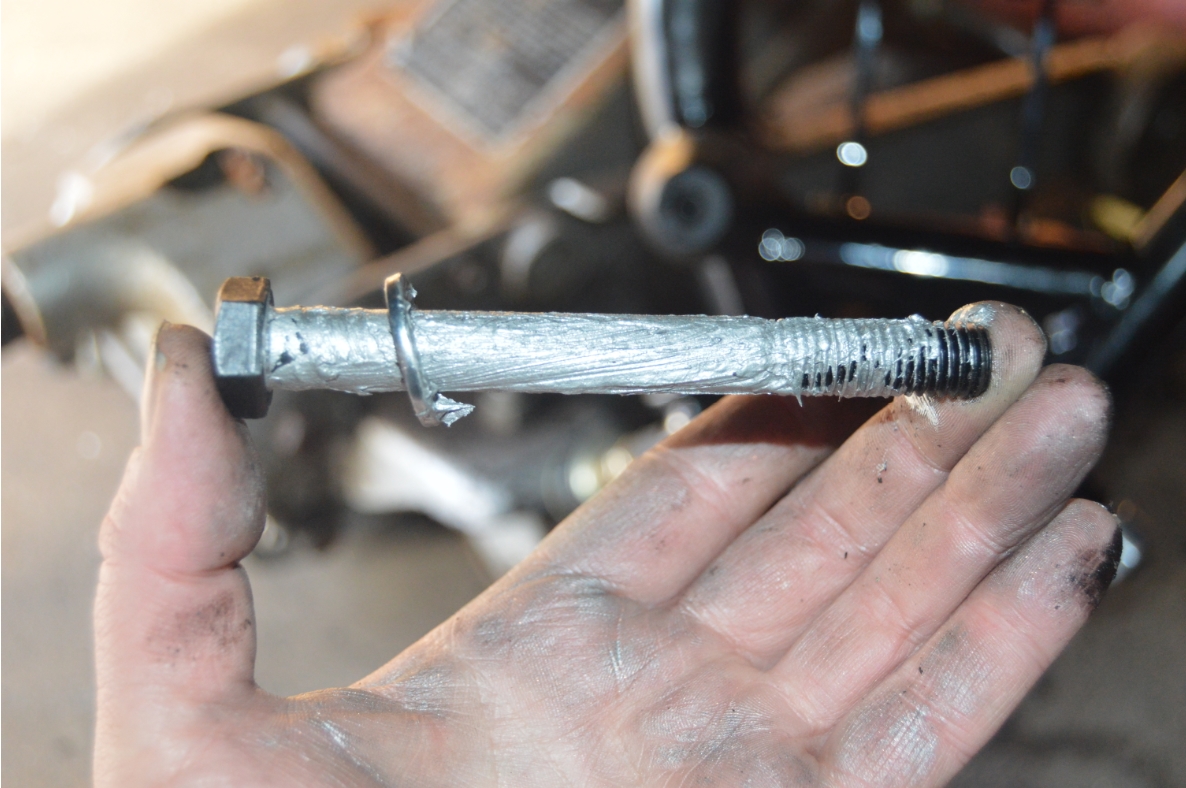
anti-seize on bolts 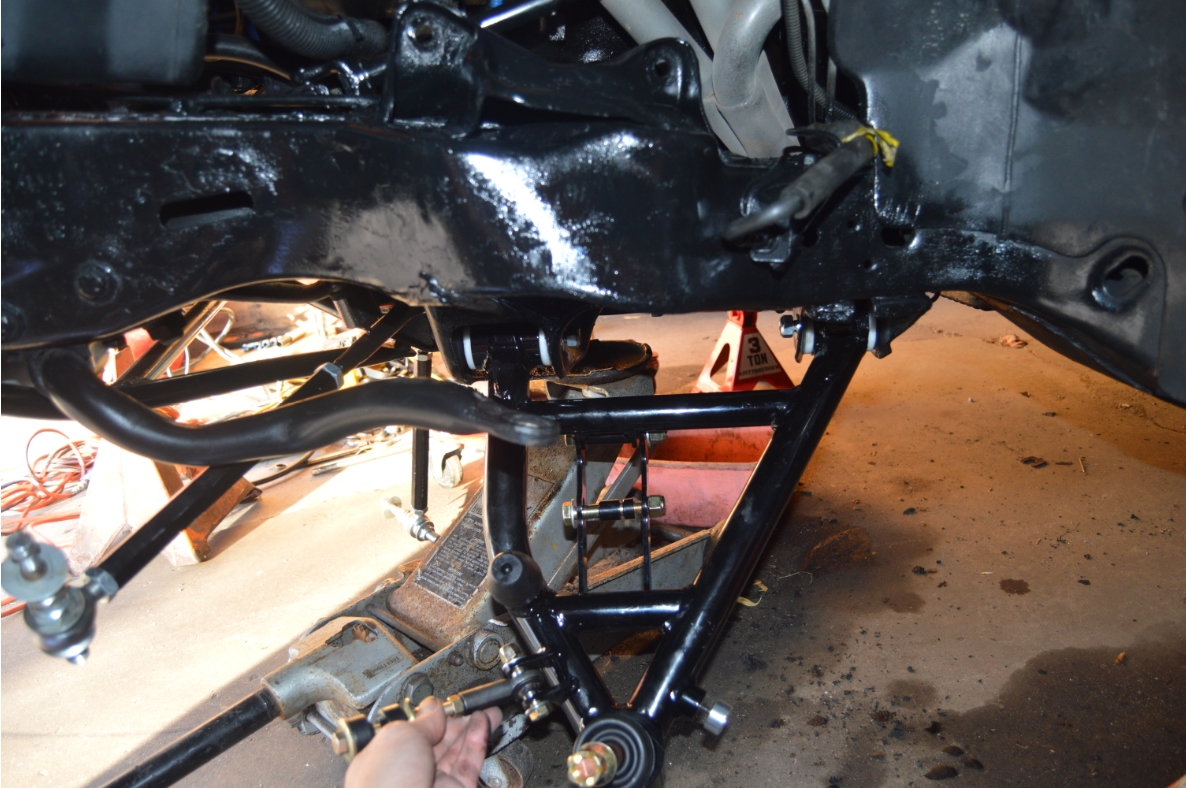
lower arm attached 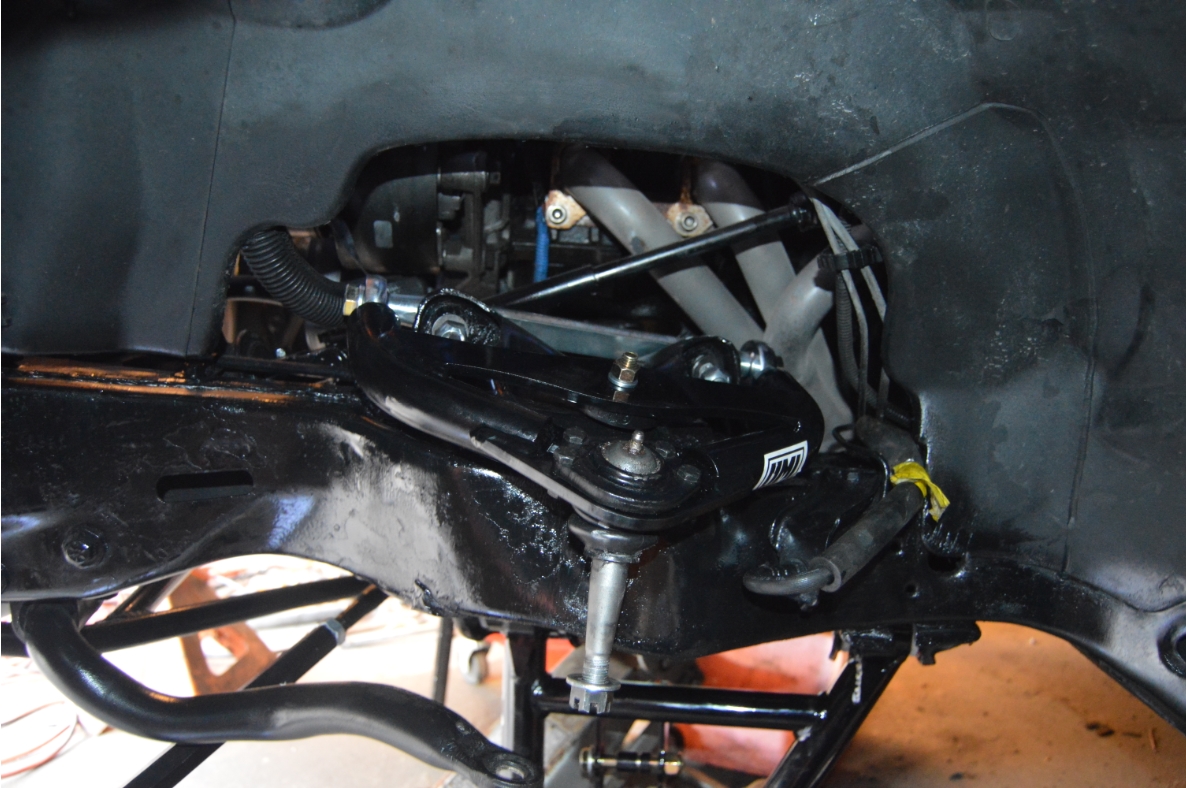
upper arm attached 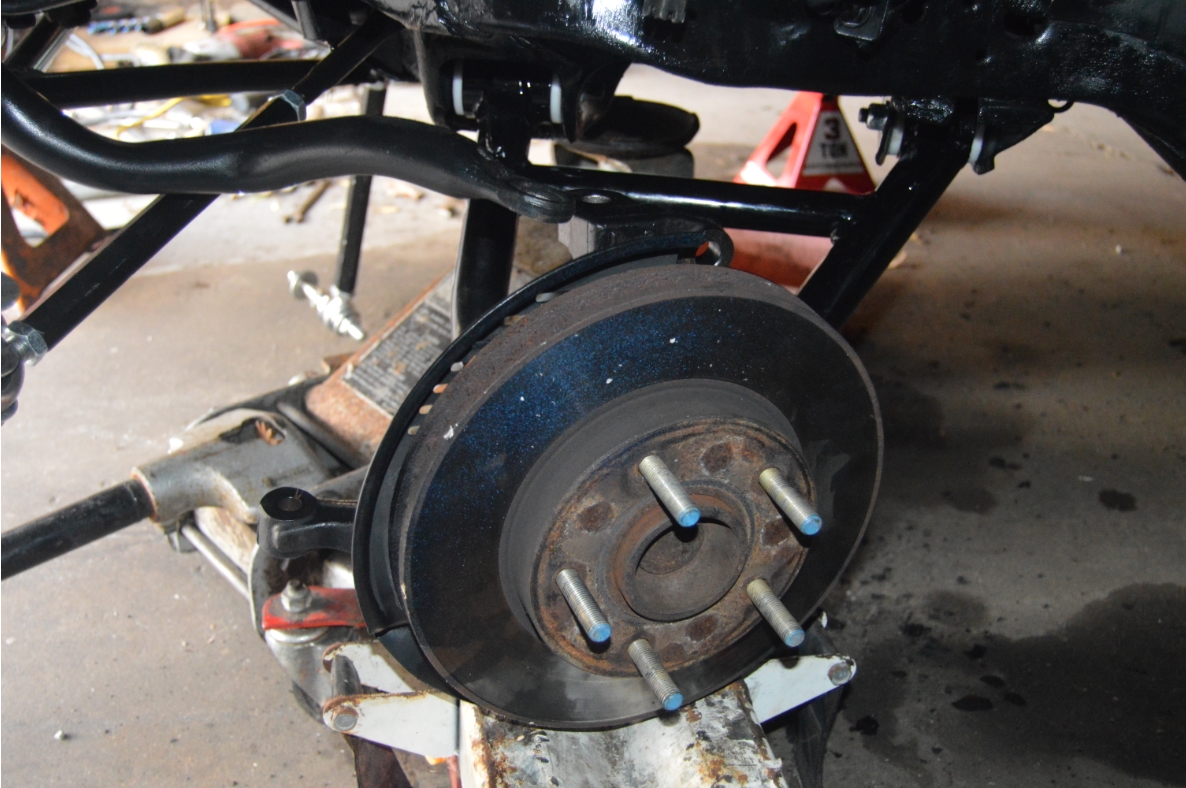
attach spindle 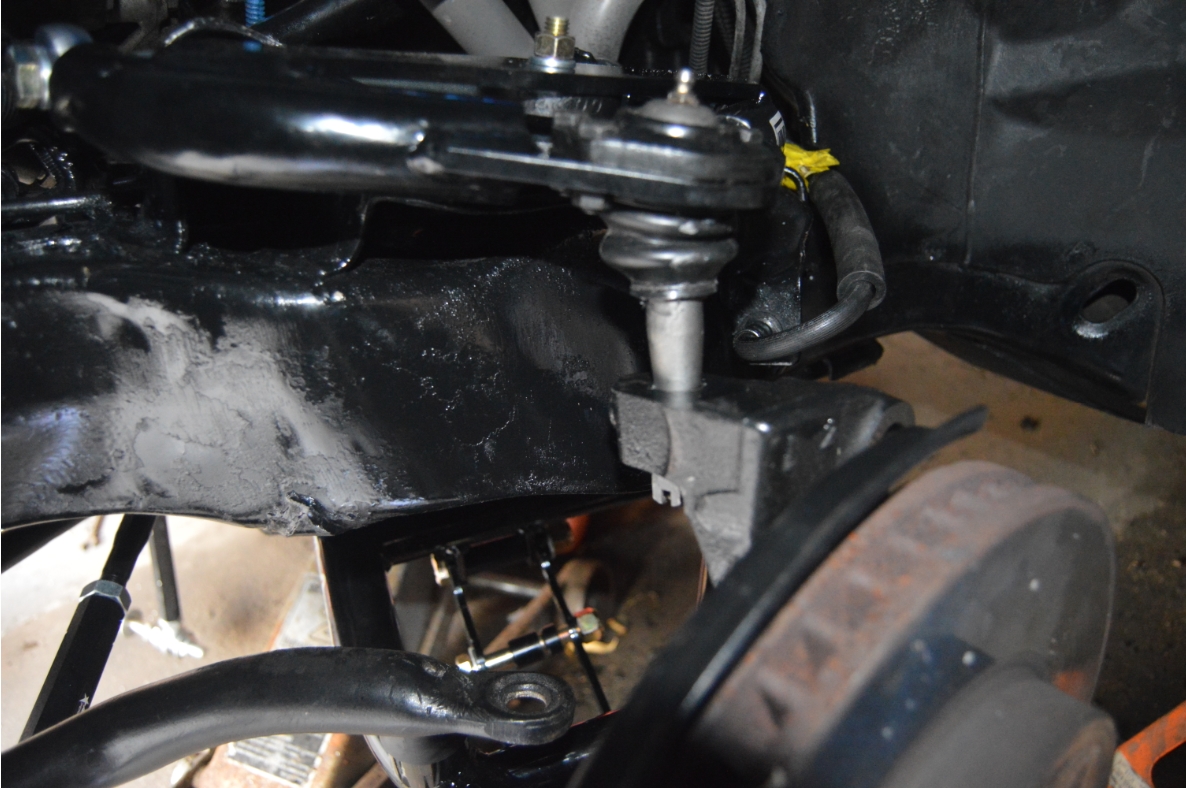
insert upper BJ 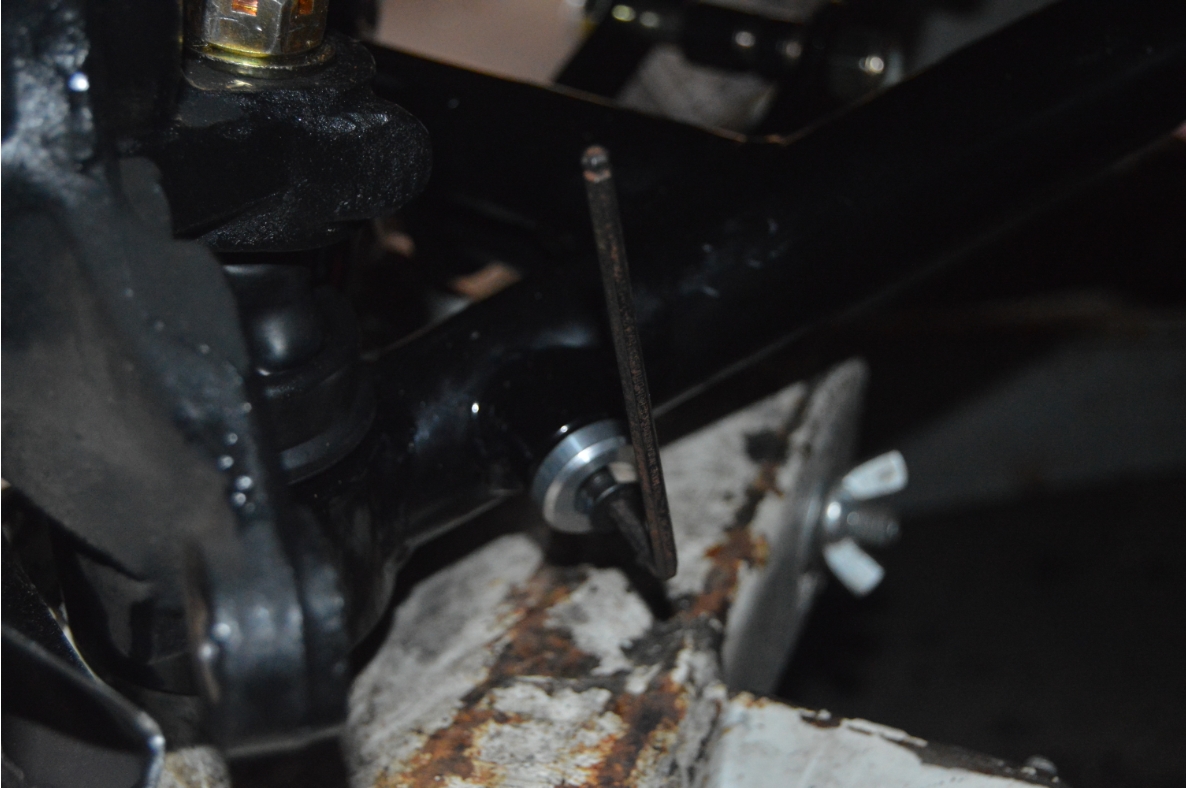
attach steering bumpstop 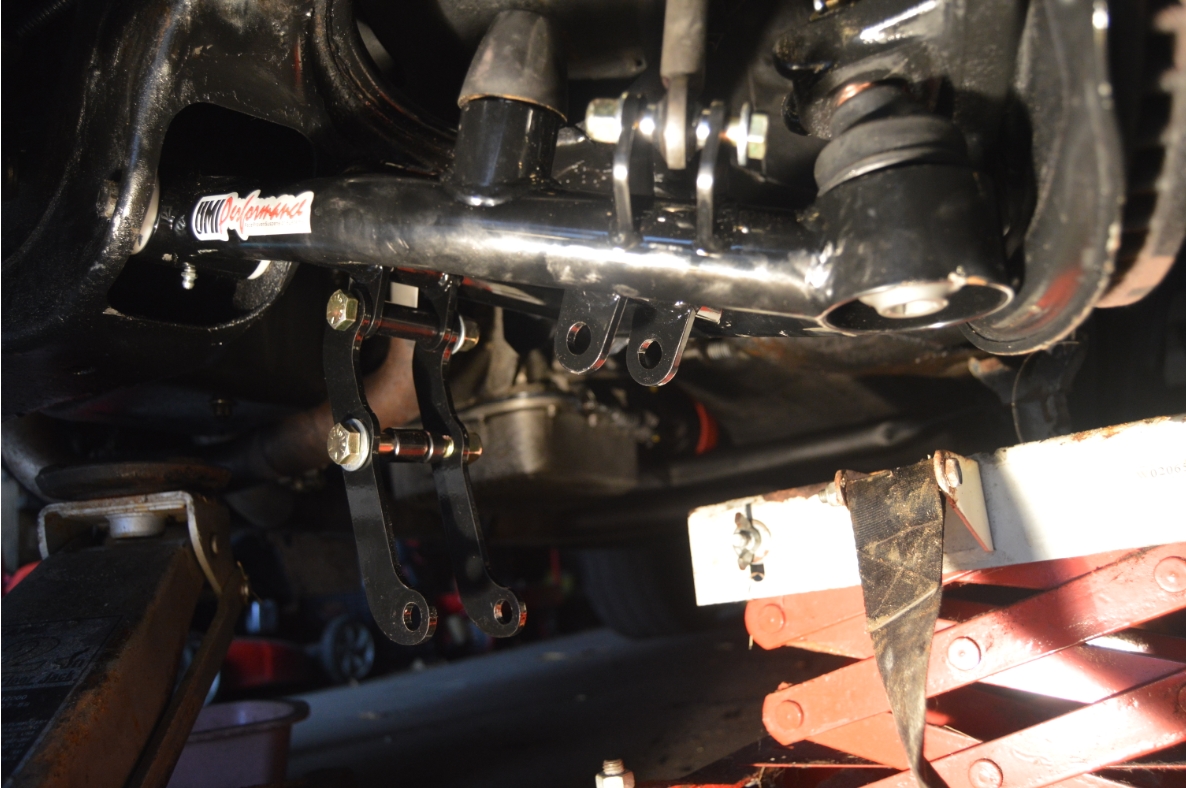

disconnect outer mount 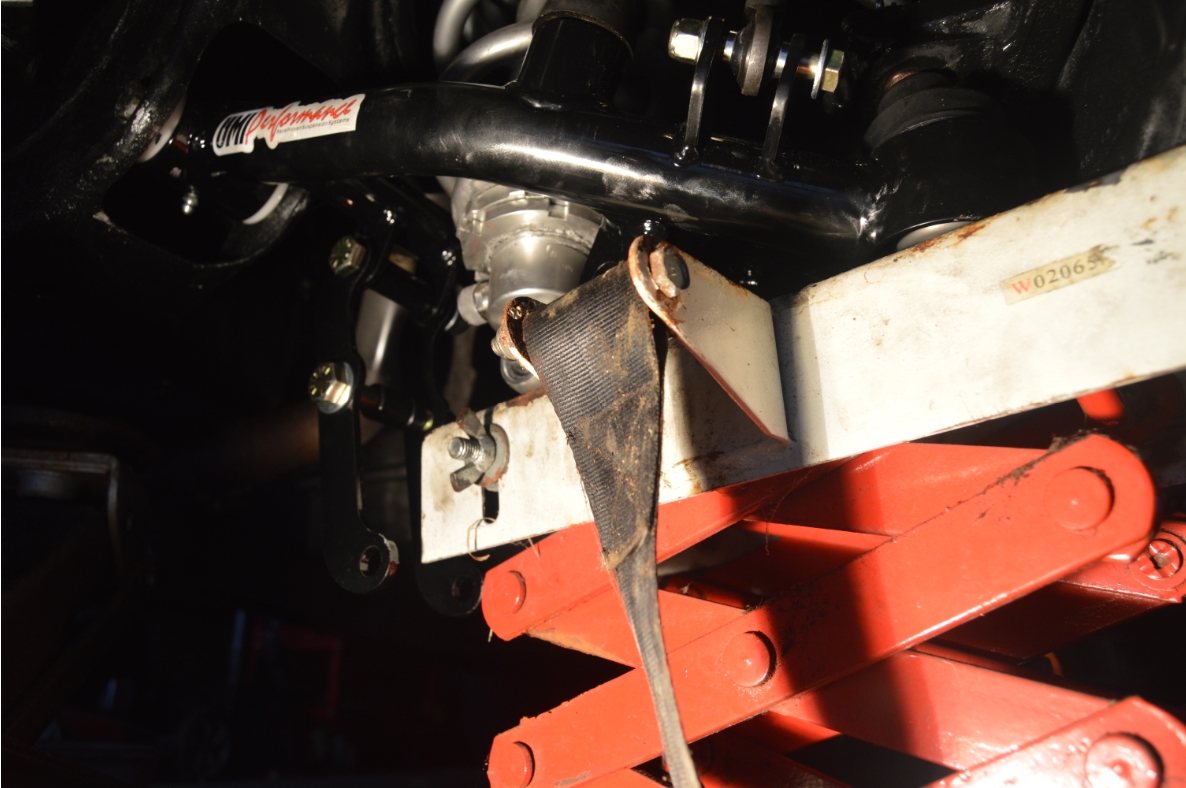
jack raises shock 
attach upper shock nut 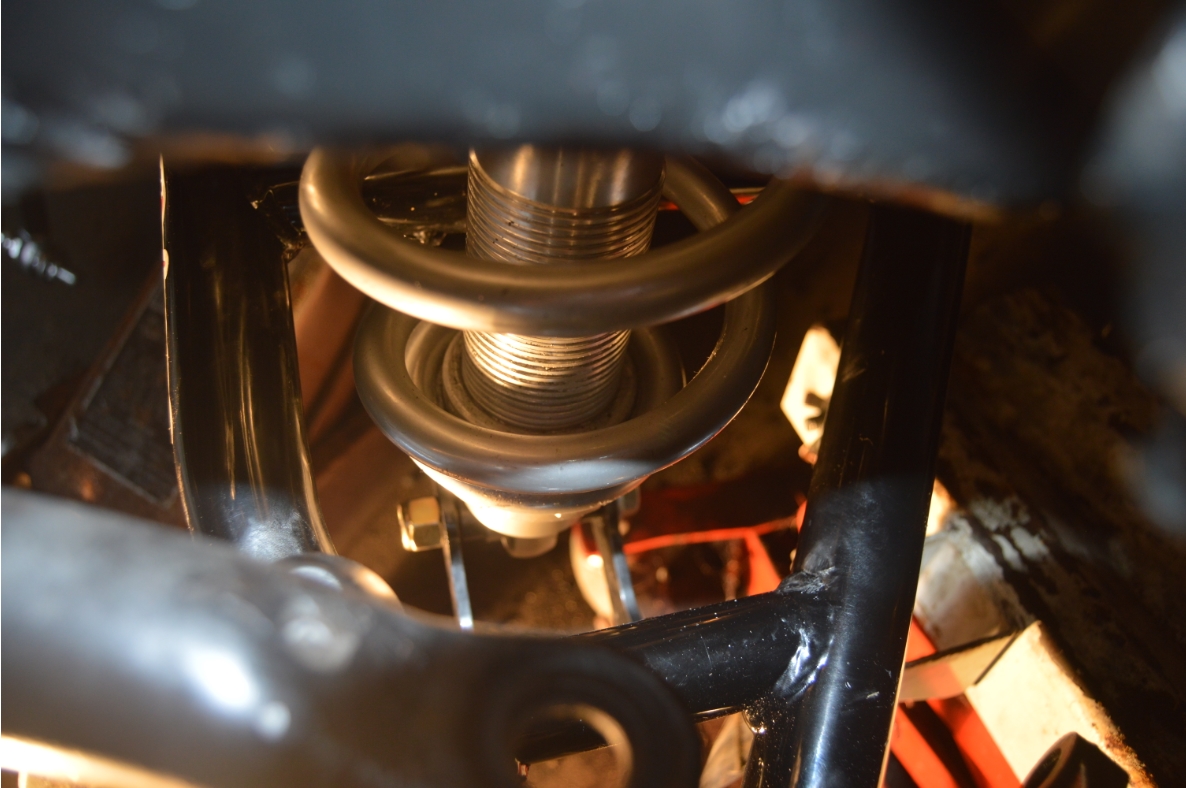
lower shock mount attached 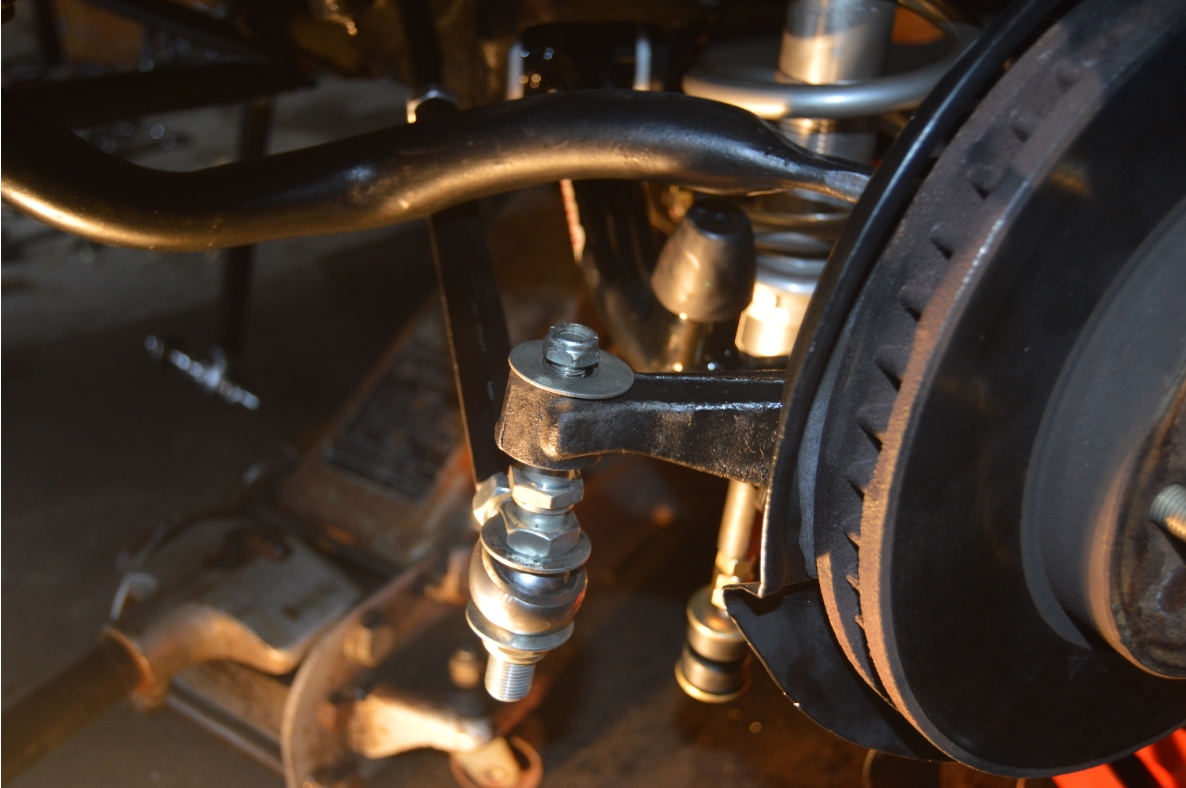
tie rod attached 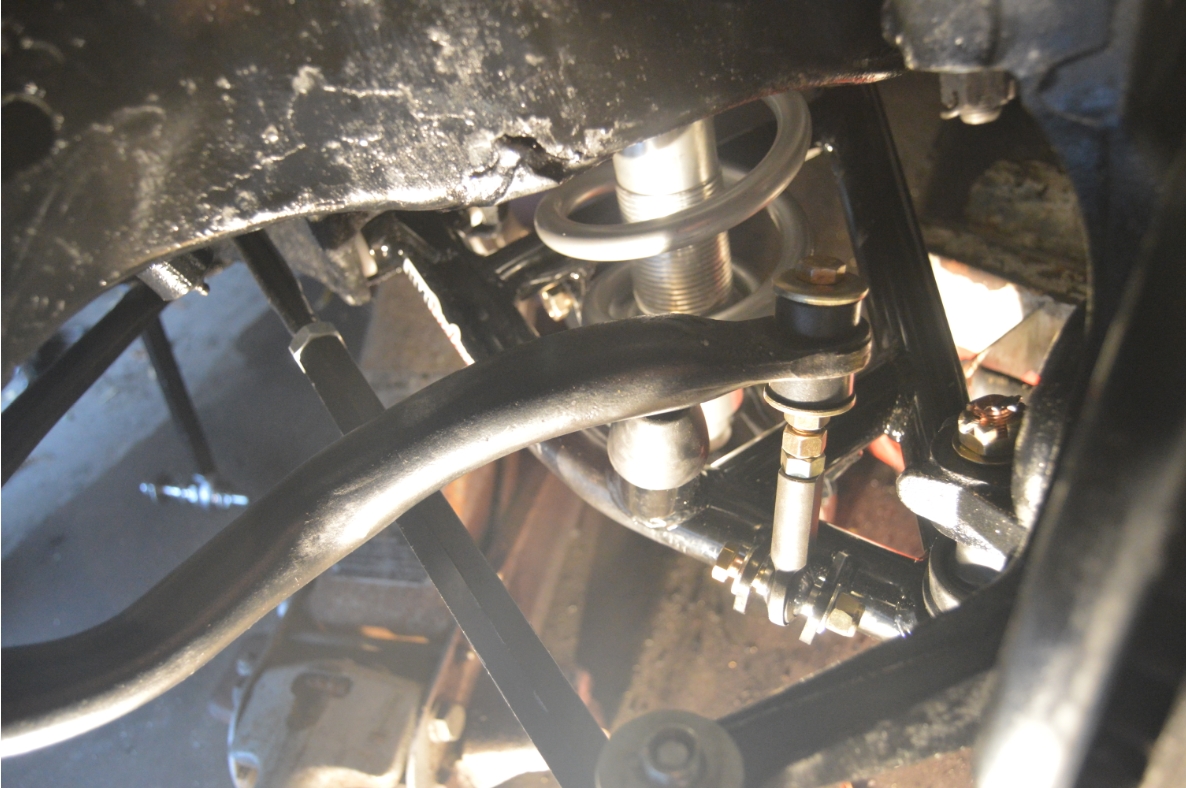
sway bar link attached 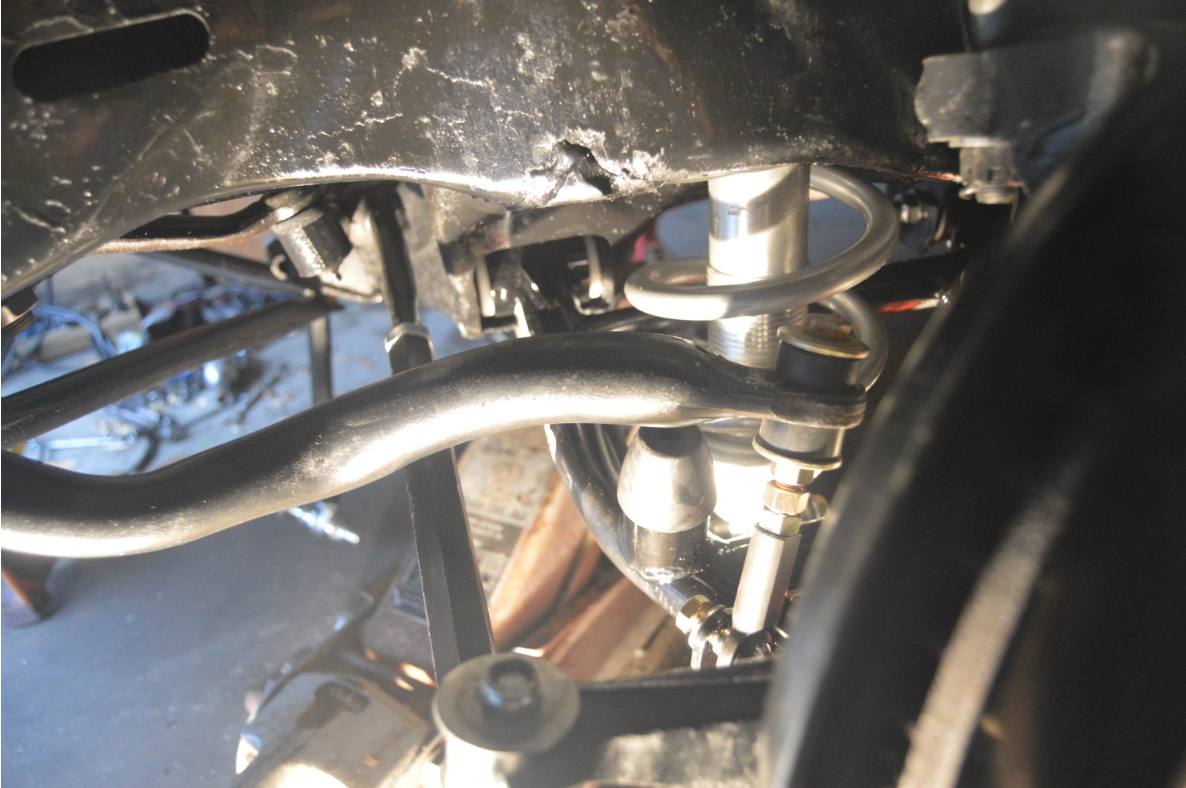
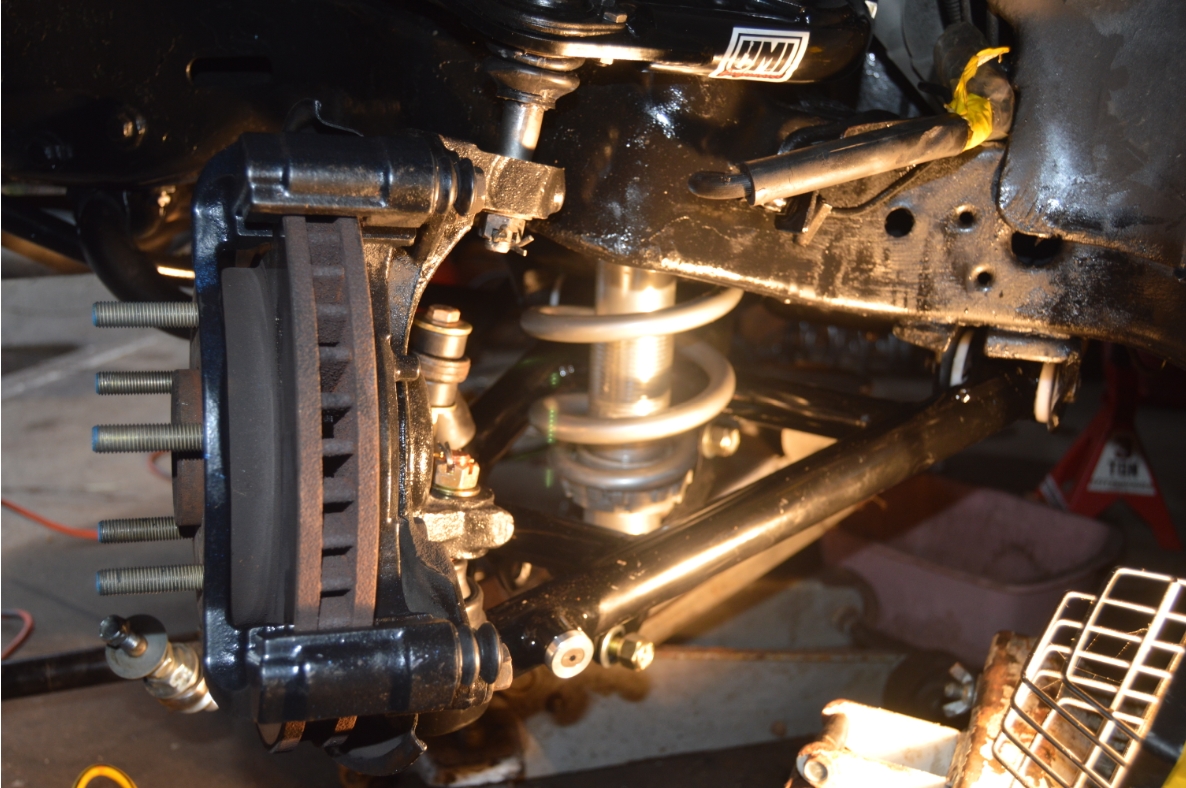
caliper bracket installed 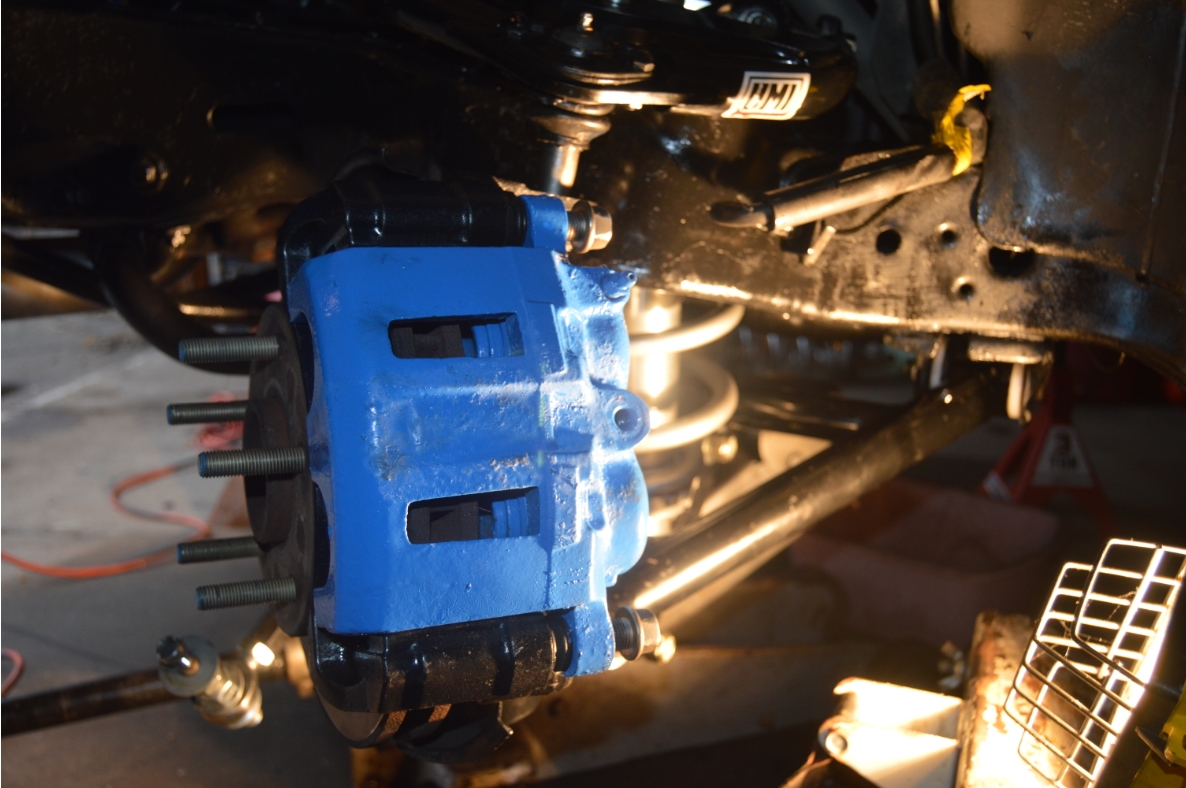
caliper attached 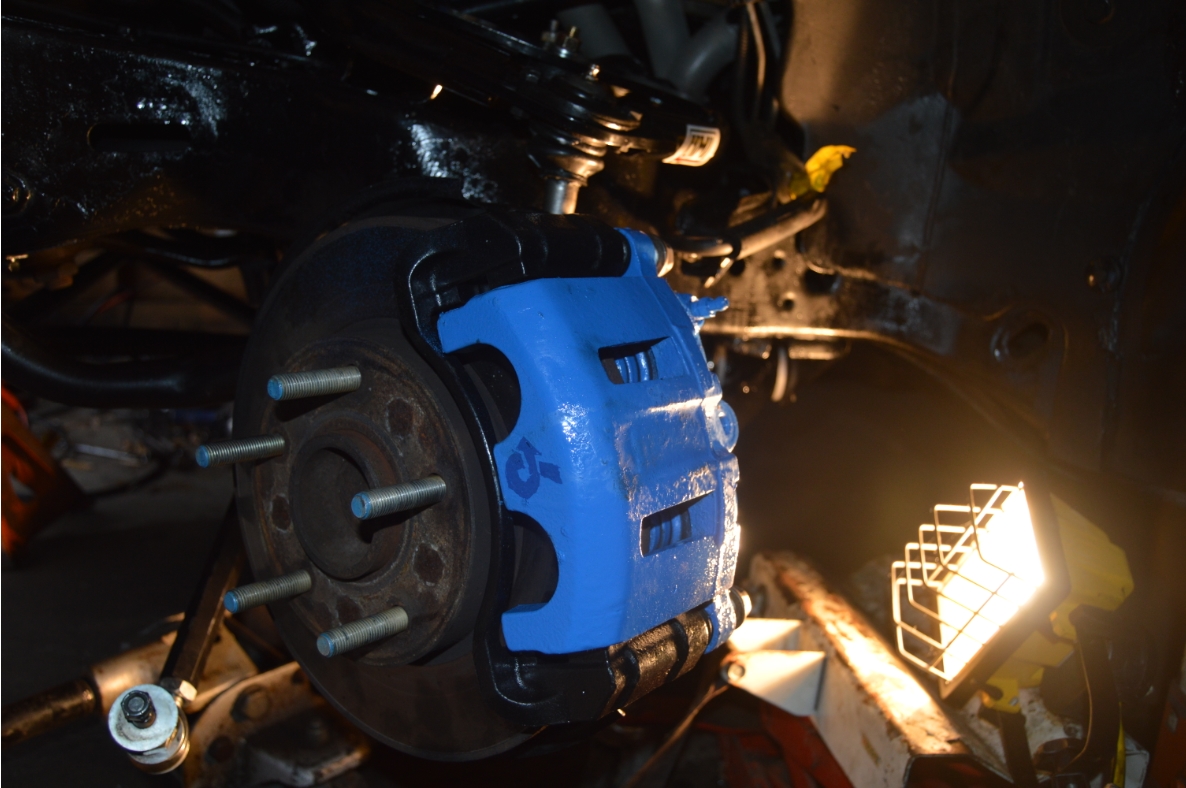
.
This weeks agenda:
1- Comparing Old OEM vs New UMI A Arms Before Install (Day 1 of 5)
2- Remove Old A-Arms on Buick Grand National (Day 2 of 5)
3- Prepwork Before A-Arm Install (Clean & Paint Frame, Install Spring Isolators, upper/lower Balljoint Swap, Replace Coilover T-bar With Sleeve) (Day 3 of 5)
4- Paint Front Calipers Brackets Spindles on Buick Grand National (Day 4 of 5)
5- Install UMI Upper & Lower A-Arms on Buick Grand National (Day 5 of 5)
YOU ARE HERE
.
With today’s job being done, the new a-arms are complete & installed.
It’s been a long week, glad the weekend is here!
.
An alignment, and/or caster/camber/toe check still needs to be performed.
Specs for setting these new a-arms is included in the package.
If you feel confident and have the proper tools, you can accomplish a DIY front end alignment yourself, which is what we intend to do.
.
Be sure to come back next week to see us put a rear disc brake conversion kit on this 1987 Buick Grand National!
.


