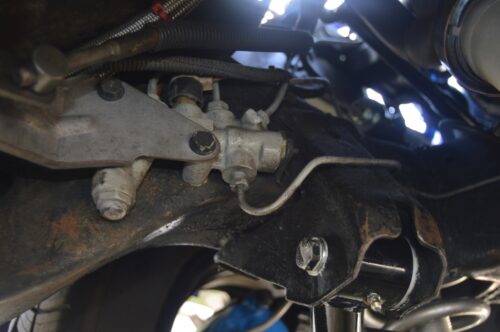
The stock prop valve on a Turbo Regal is setup for front disc, rear drum.
When you upgrade to rear disc brakes, you need to do something about that original factory proportioning valve.
You have 3 choices:
1. modify your OEM prop valve.
2. acquire an external adjustable proportioning valve (for the rear side).
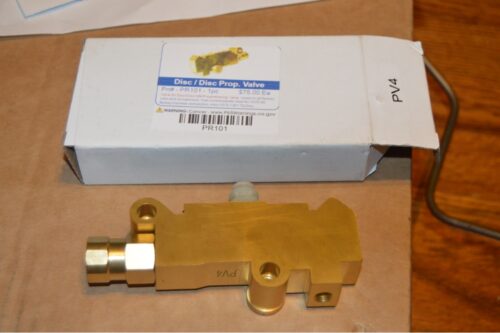
3. purchase a new prop valve made for disc/disc.
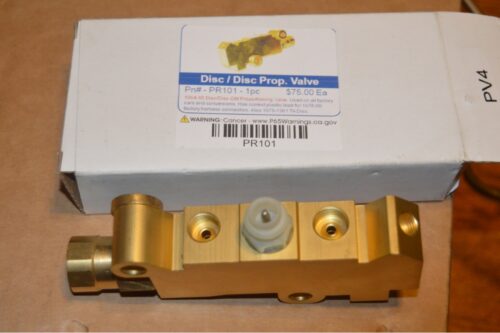
We chose easy option #3 and acquired ours from Inline Tube.
(#PR101, $75)
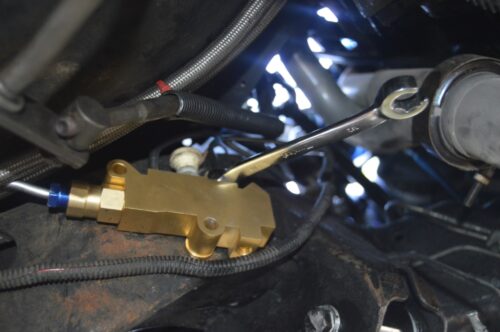
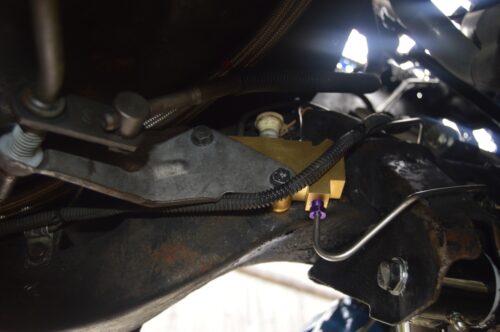
This is a four wheel disc GM-style proportioning valve made out of brass.
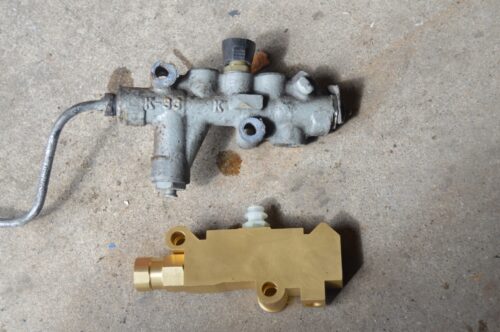
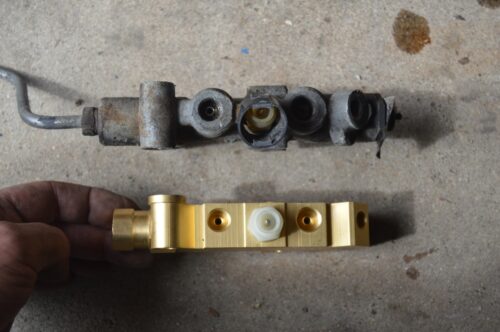
The shiny and brand new part certainly looks much better than the Flint, Michigan, installed on the assembly line, factory piece that’s been on this 1987 Buick Grand National for 34 years!
Inline Tube (AKA Motorcity Muscle Car) offers a variety of products for all classic cars and trucks ranging from Brakes, Transmission & Drivetrain, Air Intake & Fuel Delivery, Mouldings & Trim, Decals & Emblems, and Detailing Accessories.
You can see the details about the proportioning valve by clicking the banner below!
.

.
This is the last article of the ongoing 7-part series:
1st, overview on rear disc brake setup, prepare axles.
2nd, paint brackets and calipers & add turbo 6 arrows on them! (same like we did up front).
3rd, removal & installing the new rear disc brakes setup.
4th, installing stainless steel braided caliper hoses on rear calipers.
5th, installing the main rear tee connecting braided hose (chassis to axle, with Tee).
6th, installing all new stainless steel brake lines from Inline Tube, complete, from the master cylinder to the proportioning valve to the calipers in front, and master cylinder to prop valve to the Tee on the rear axle housing to the rear calipers.
7th, remove & replace OEM proportioning valve with 4-wheel disc prop valve (also from Inline Tube).
YOU ARE ON PART 7 HERE.
.
.
.
COMPLETION TIME:
- we installed this item during the course of doing the rear disc brake swap. It took roughly 20 minutes to disconnect all the lines and unbolt it from the frame, then reconnect everything.
(make sure you seat the new brake lines properly, there’s a video shown in Part 6 of this series that shows you exactly how to do it)
.
TOOLS:
- 7/16″ line wrench (front 2 lines, out)
- 9/16′ line wrench (front line, in)
- 7/16″ line wrench (rear line, in)
- 9/16′ line wrench (rear line, out)
- 13mm socket (remove prop valve from frame)
.
HOW TO:
.
- with the front end of the Turbo Regal up on jack stands
- there’s 5 lines attached to the prop valve that need to be removed, then replaced.
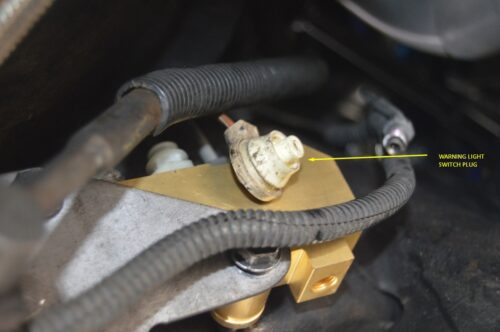
- 2 come from the master cylinder (on top, on either side of the warning light electrical connection) – (7/16″ and 9/16″)
- 2 on the front side, 1 on top, 1 on bottom (these go to the front brakes)
(the bottom one goes to the driver side) – (7/16″) - 1 on the rear side, there’s only 1 line that goes to the back of the Gbody Regal. (connects to the chassis TEE line) – (9/16″)
- .
- 2 bolts hold the proportioning valve to the frame. (13mm)
- the shifter linkage bracket is attached on top of the prop valve.
- there’s a warning light switch plug, on the top, in the center. it simply pushes on/off.
.
See Part 6 for more details about all the brake lines that attach to the prop valve.
.
.
.
.
.
The vendor shown above has supplied us with the parts we used in this project, per our request. If you are looking for similar parts, don’t hesitate to inquire with this specific vendor!
.
.


