


So today is the day that we are going to actually install the rear disc brake setup on the 1987 Buick Grand National!
You should note that some kits require a bigger than stock rim (16″ plus) to be able to clear the calipers. Some kits accept 15 inch wheels. Check before purchase!
We have 17″ wheels on this Buick GN, so we’re all good in that department.
.
.
This is an ongoing 7-part series:
1st, overview on rear disc brake setup, prepare axles.
2nd, paint brackets and calipers & add turbo 6 arrows on them! (same like we did up front).
3rd, removal & installing the new rear disc brakes setup.
4th, installing stainless steel braided caliper hoses on rear calipers.
5th, installing the main rear tee connecting braided hose (chassis to axle, with Tee).
6th, installing all new stainless steel brake lines from Inline Tube, complete, from the master cylinder to the proportioning valve to the calipers in front, and master cylinder to prop valve to the Tee on the rear axle housing to the rear calipers.
7th, remove & replace OEM proportioning valve with 4-wheel disc prop valve (also from Inline Tube).
YOU ARE ON PART 3 HERE.
.
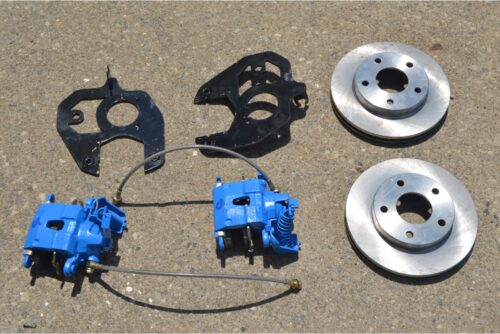
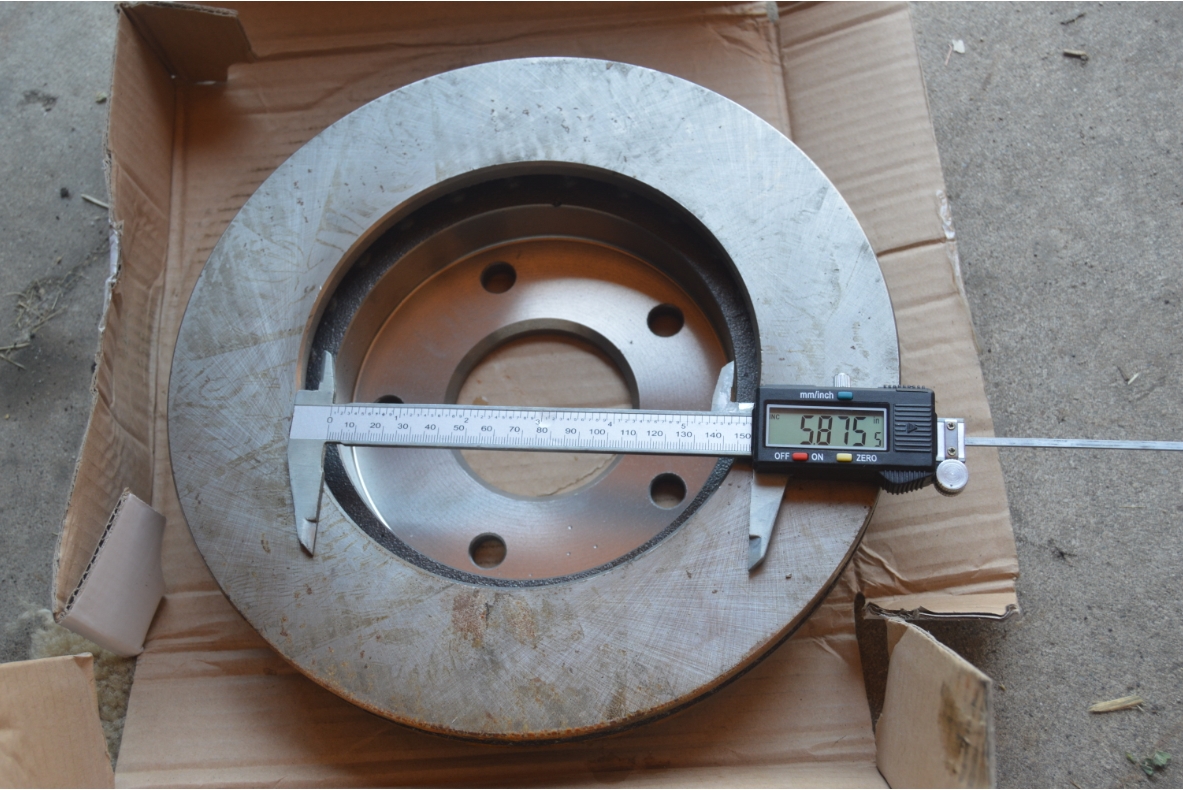
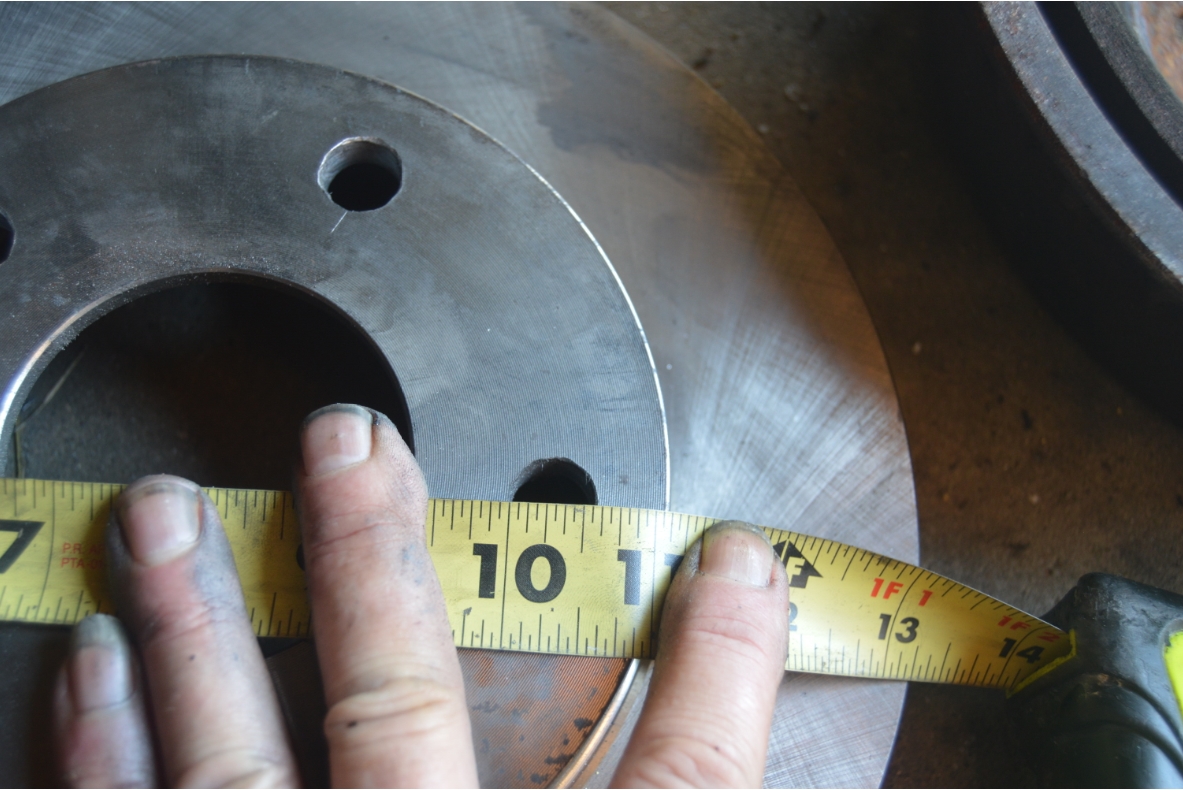
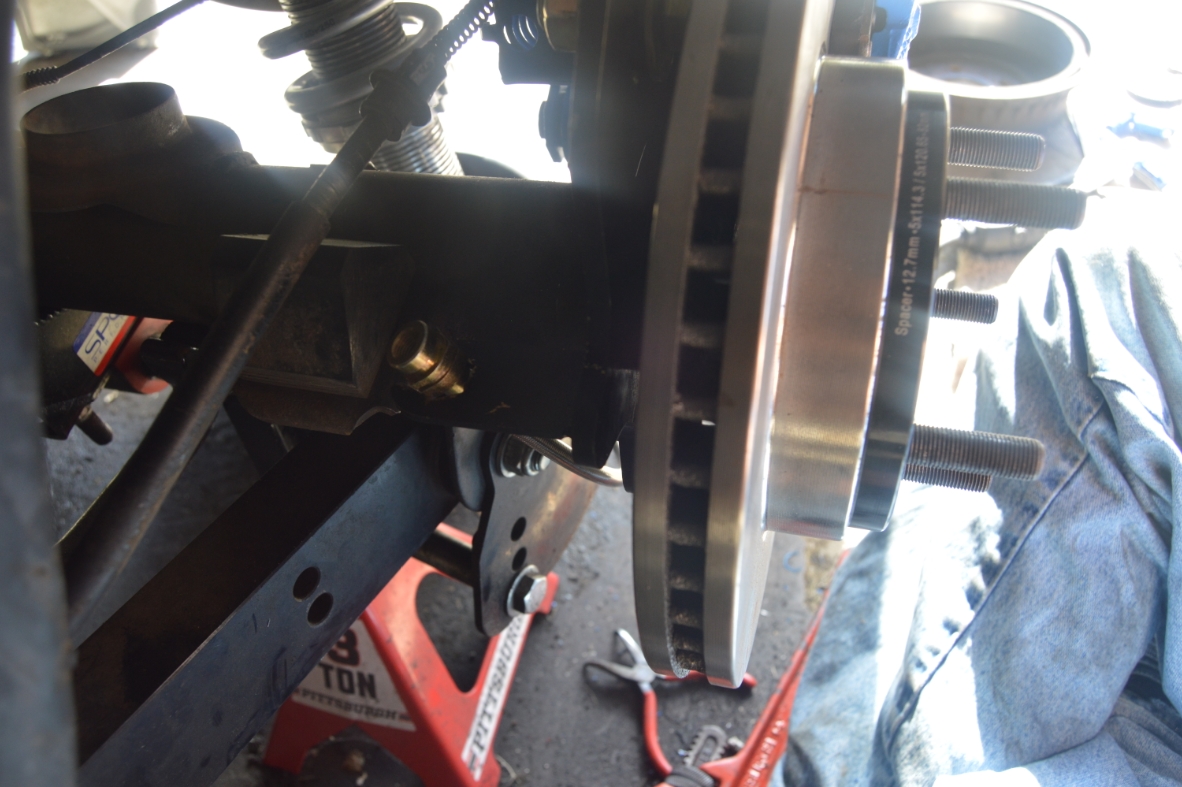
The axles we had turned down are back, the rotor holes have been drilled out, and all of the components are painted & ready to go.
Without a doubt, the hardest part of this whole job is removing the old drum setup!
.
COMPLETION TIME:
- removal of drum brakes (3 hours) / install of new caliper setup (1 hour)
(we started on the drivers side, had to figure out how to get upper bolt from backing plate off, how to line up new parts, shimming properly, and taking pics for this post. The passenger side only took 1 hour start to finish, remove & replace all, since we knew how to do it from the experience on the drivers side!)
.
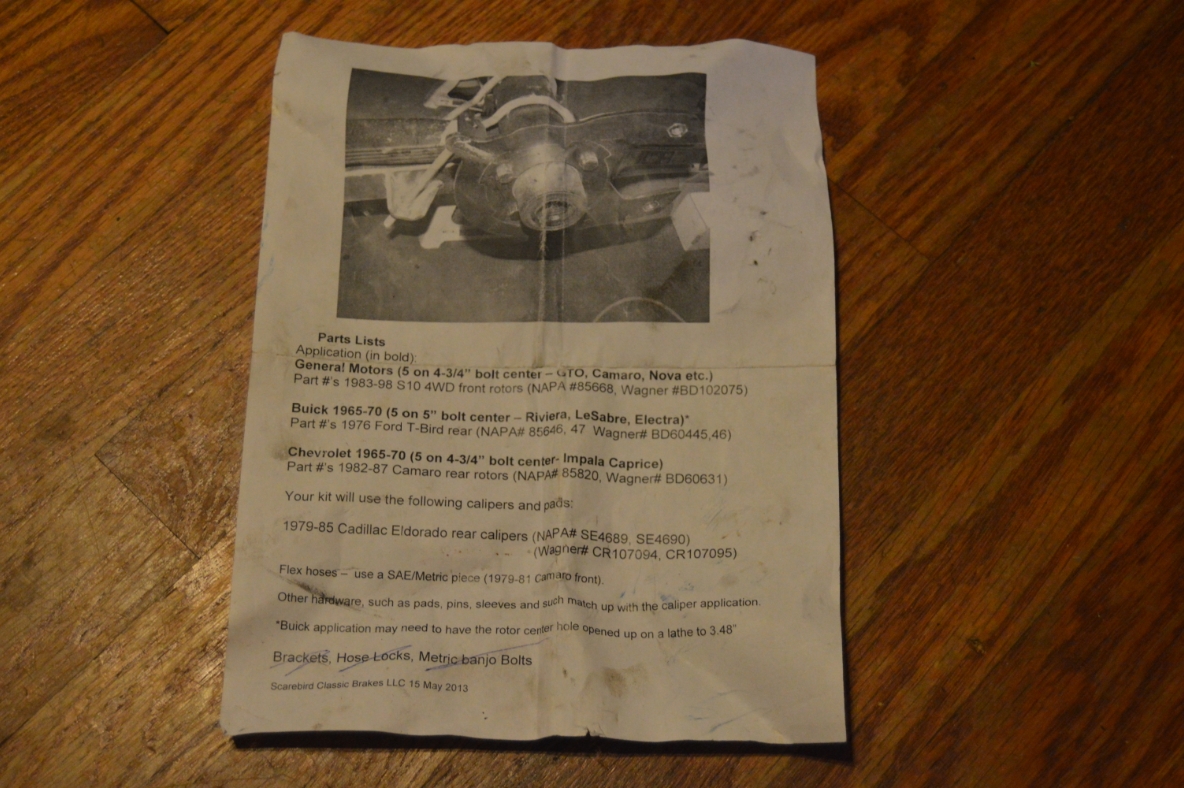
(you can see the PARTS LIST in the first post)
.
TOOLS:
- 13mm socket (rear end cover)
- 10mm socket (lower backing plate bolts)
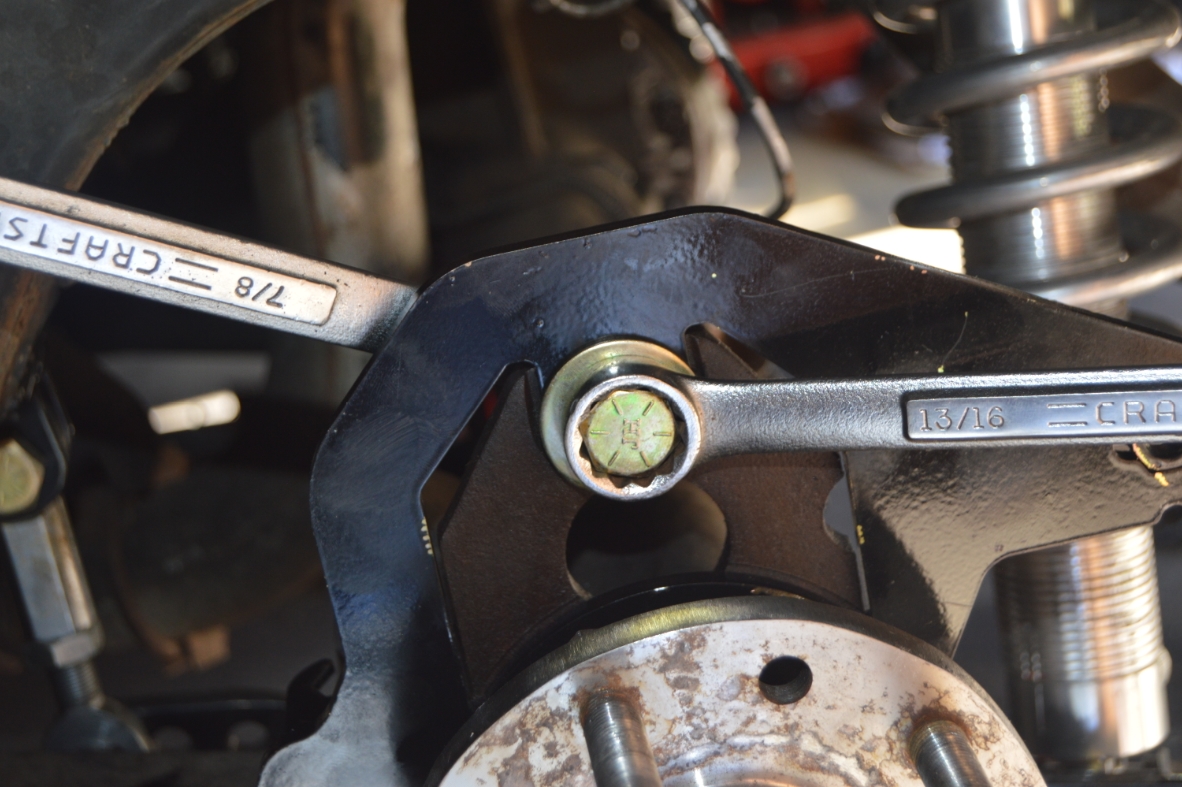
- 22mm / 7/8″ wrench (old top nut)
- 7/8″ & 13/16″ socket & wrench (1 new big top nut/bolt)
- 8mm socket (bolt for pin in differential)
- 11mm wrench (removes brake line from wheel cylinder)
- BFH (for hitting wrenches to remove top bolt!)
.
HOW TO:
(we are including the steps to remove the axles from the differential first so you can see what needs to be done to get them out so you can have them turned down)
.
REMOVING AXLES:
.
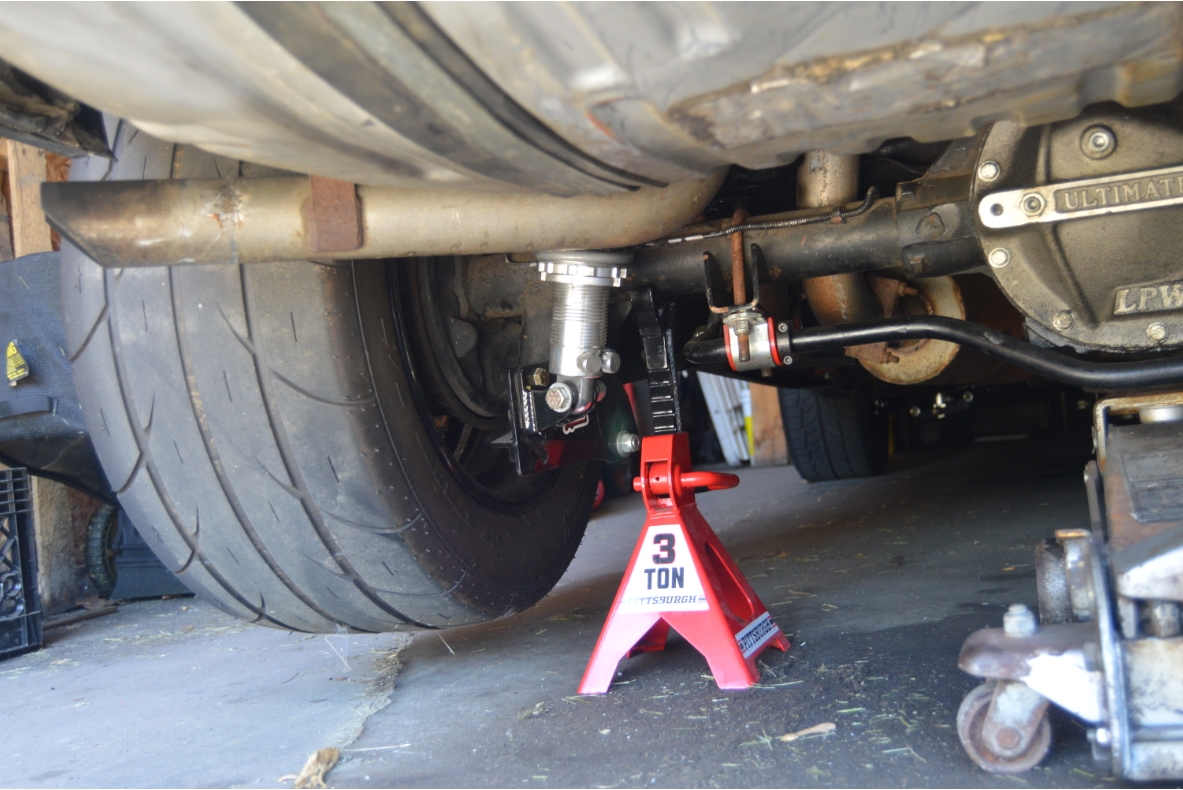
- put the turbo regal on jackstands (under the axle).
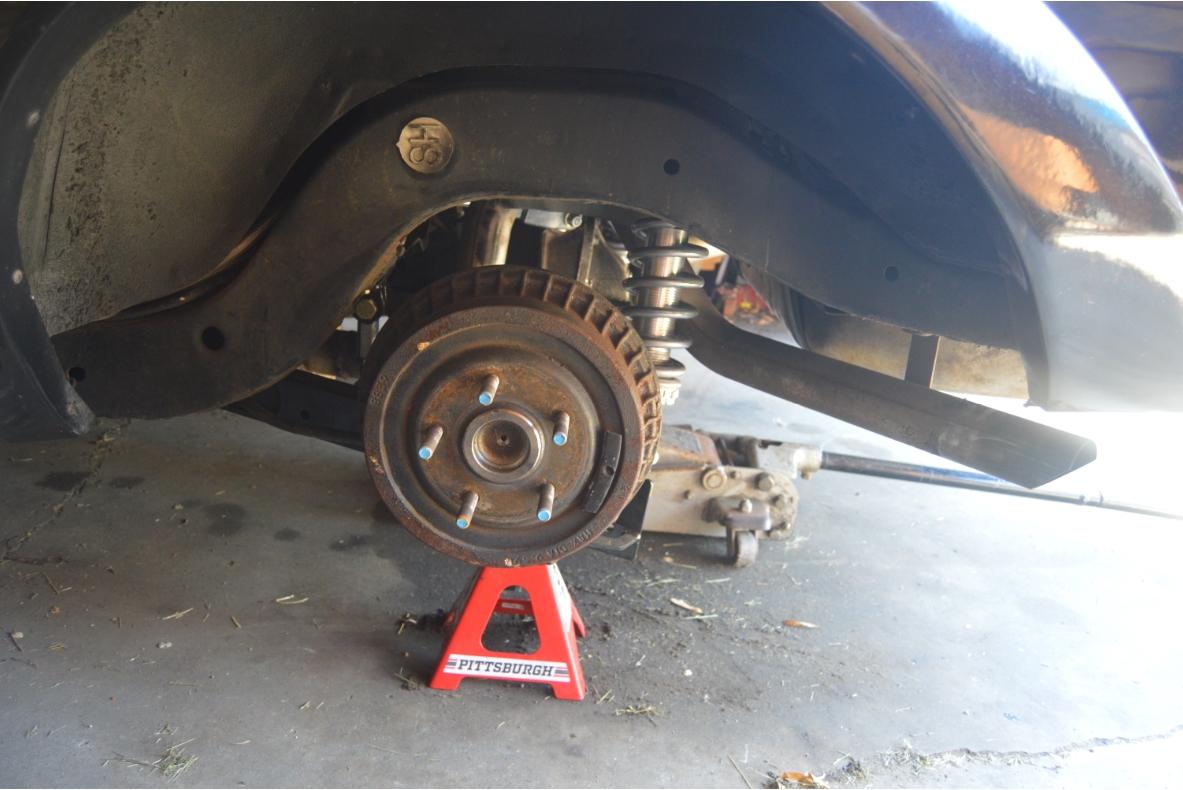
- remove the wheels.
- remove the drum brakes.
- remove the lower 8 bolts on rear end cover. loosen upper 2.
- pry cover SLOWLY, let fluid drain!
- remove the upper 2 bolts & remove cover.
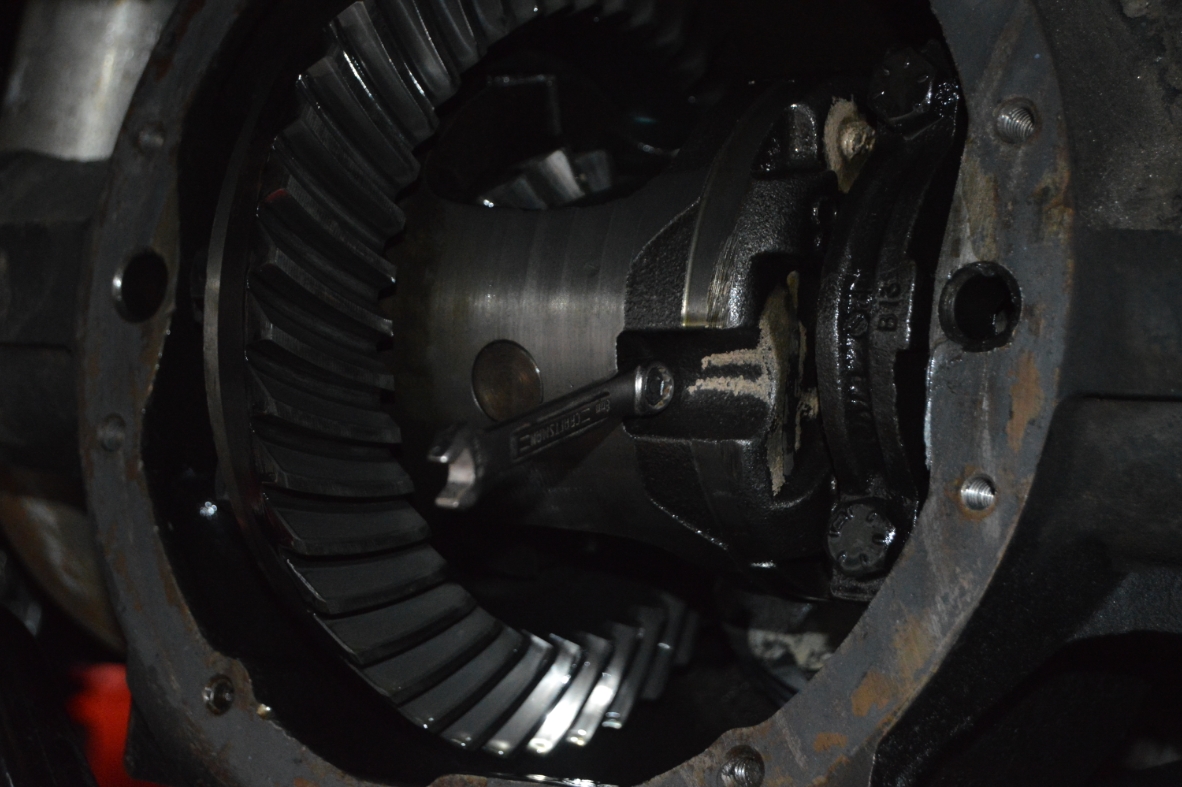
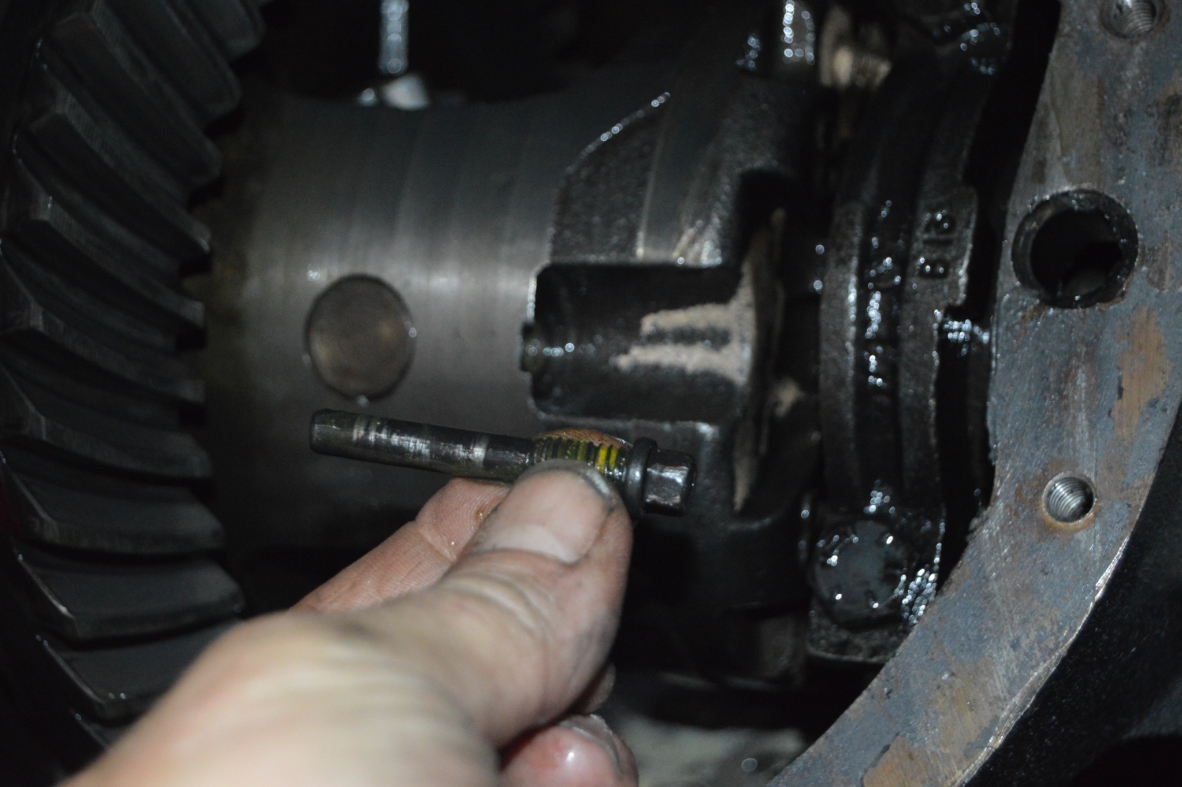
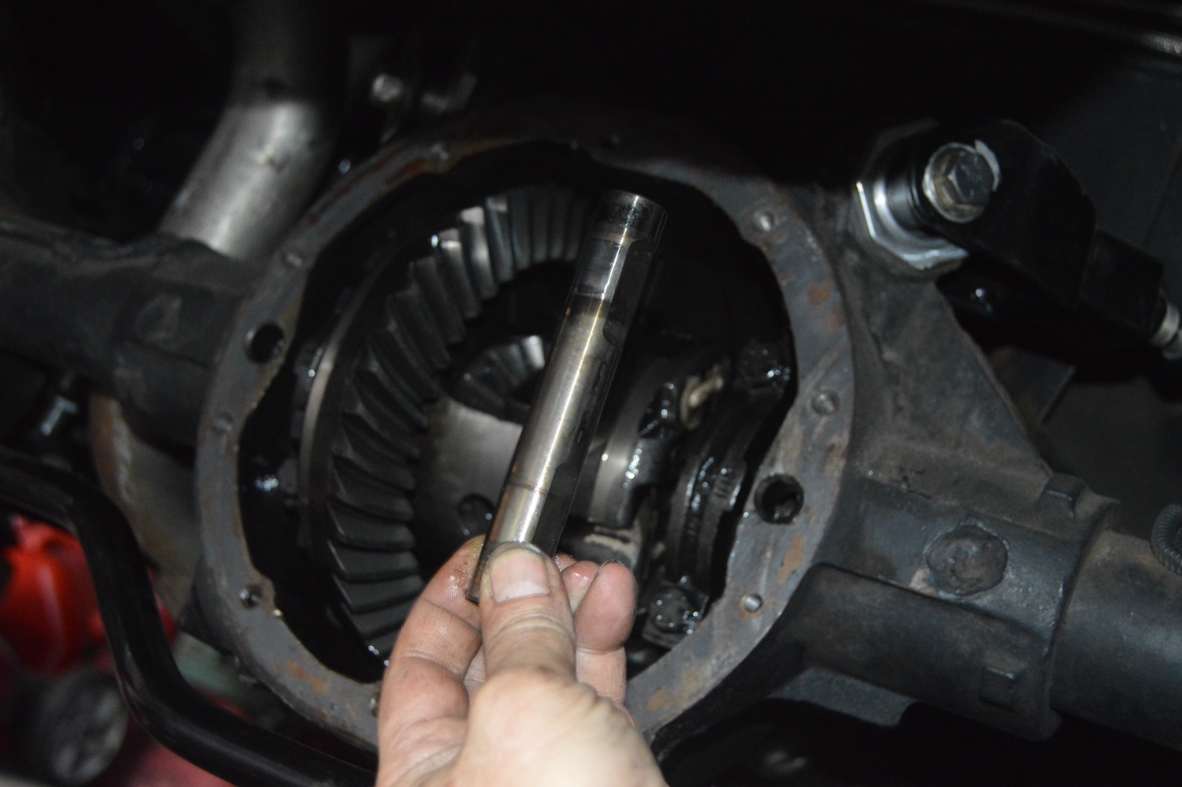
- remove the 8mm bolt from the differential unit so you can remove the center pin. (spin the differential until the bolt is in view)
- remove the pin.
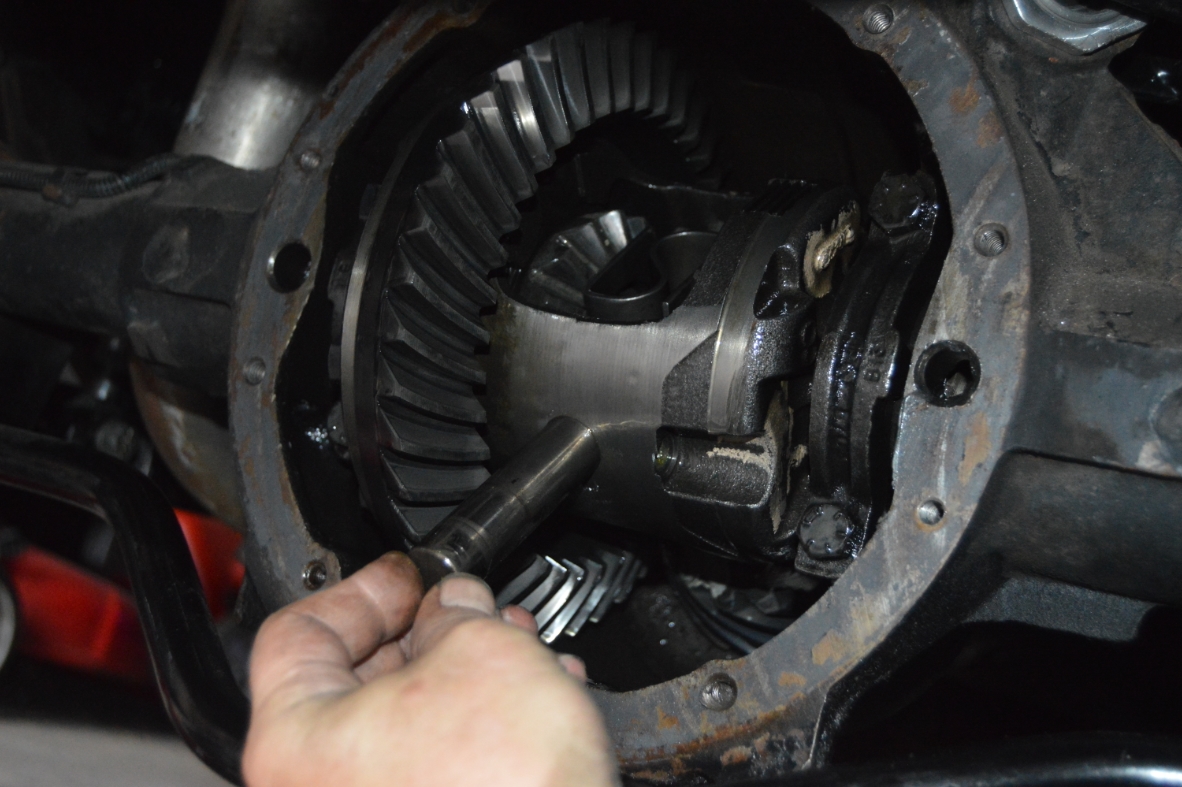
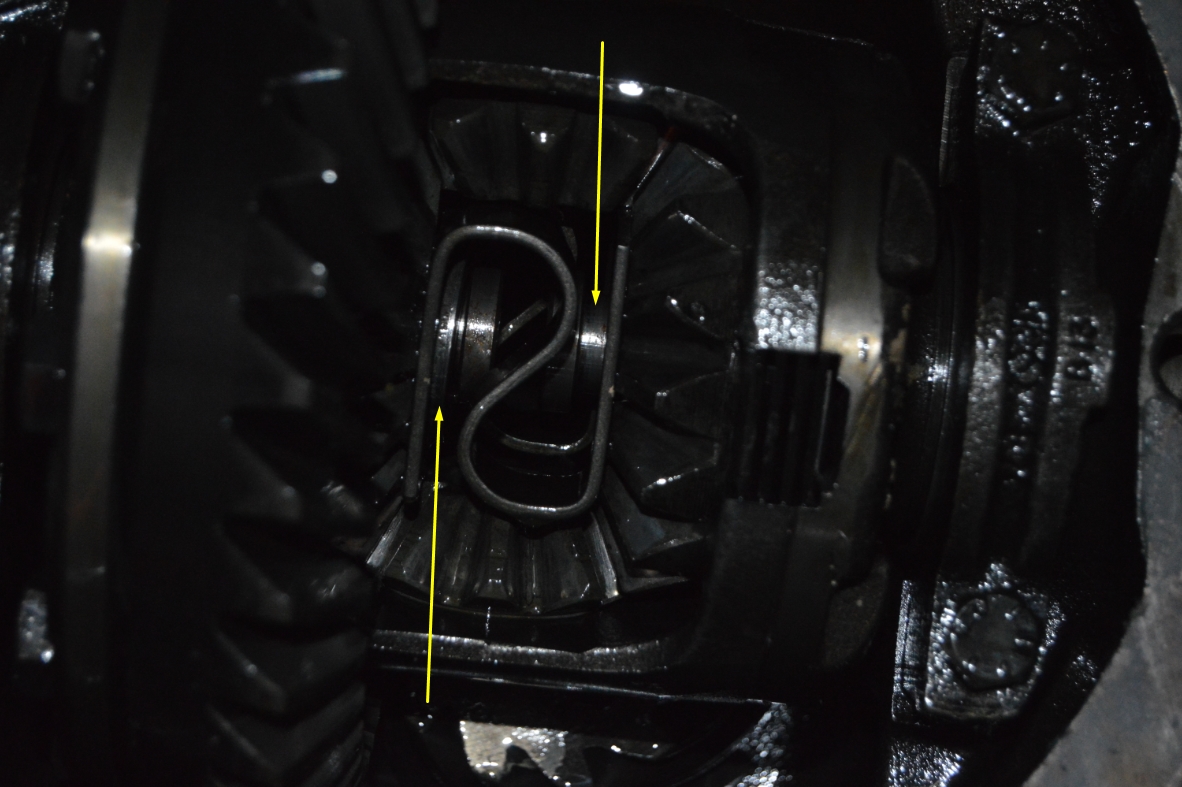
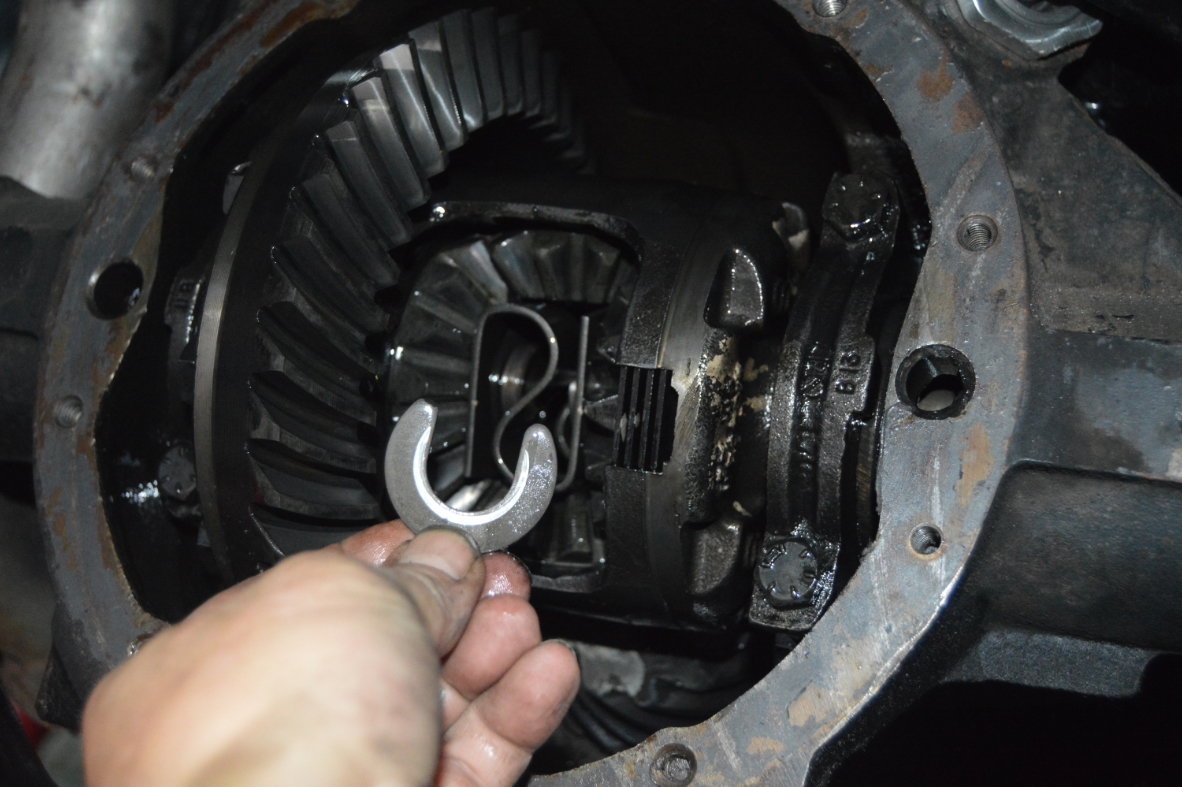
- push the axles inward, so you can remove the c-clips.
- use a magnet and remove the c-clips.
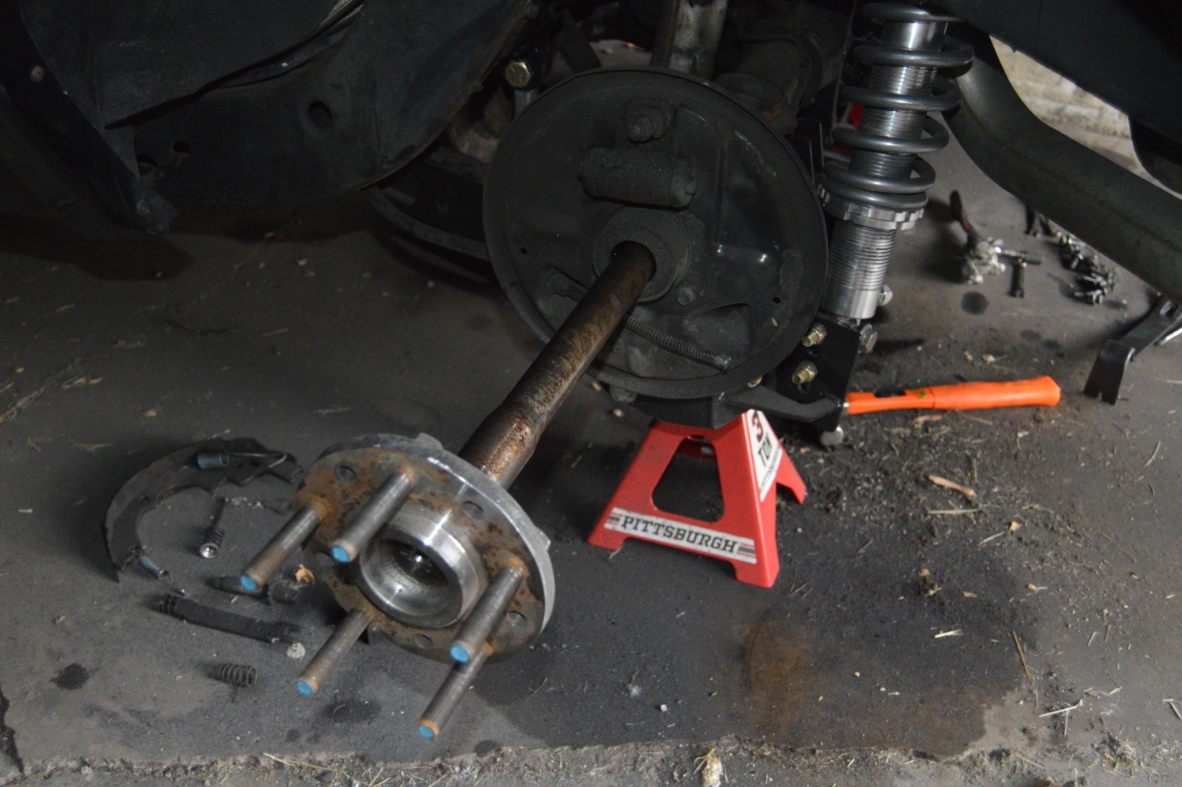
- pull the axles out.
Have the axles machined down if needed.
(some of the disc brake kits do not require this, check your direction sheet)
Leave them removed from the axle housing for now. (whether they need turned down or not)
.
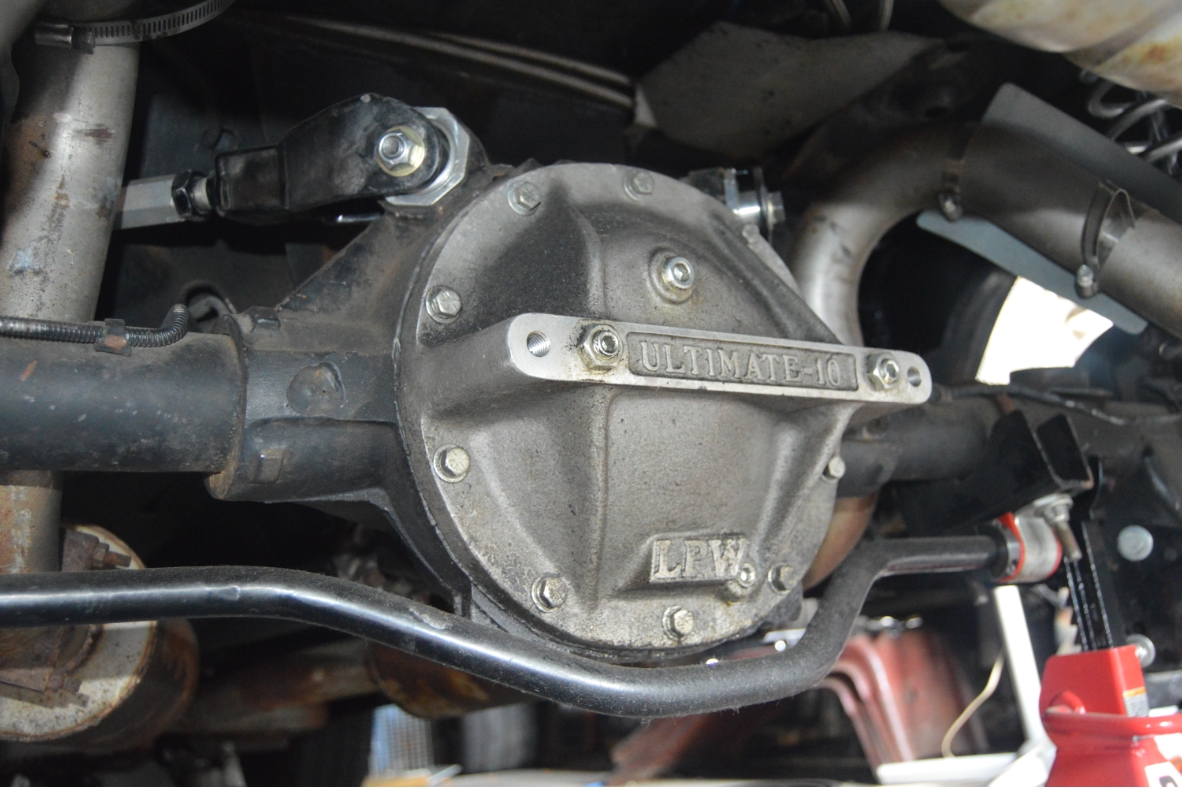
- clean the differential cover, scrape old gasket off.
- try to remove all of the old gear oil from rear end.
- check for metal shavings, etc.
- clean the housing where the cover sits at.
.
.
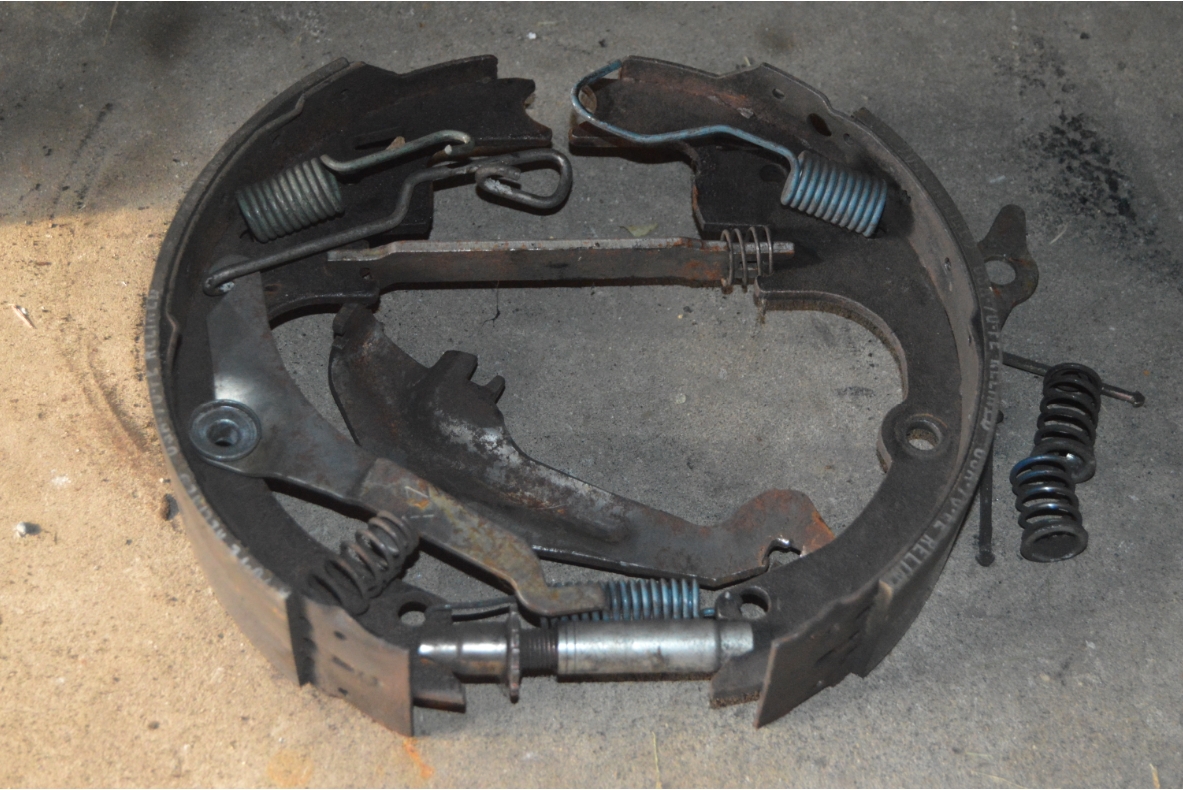
REMOVING OLD DRUM BRAKE SETUP:
.
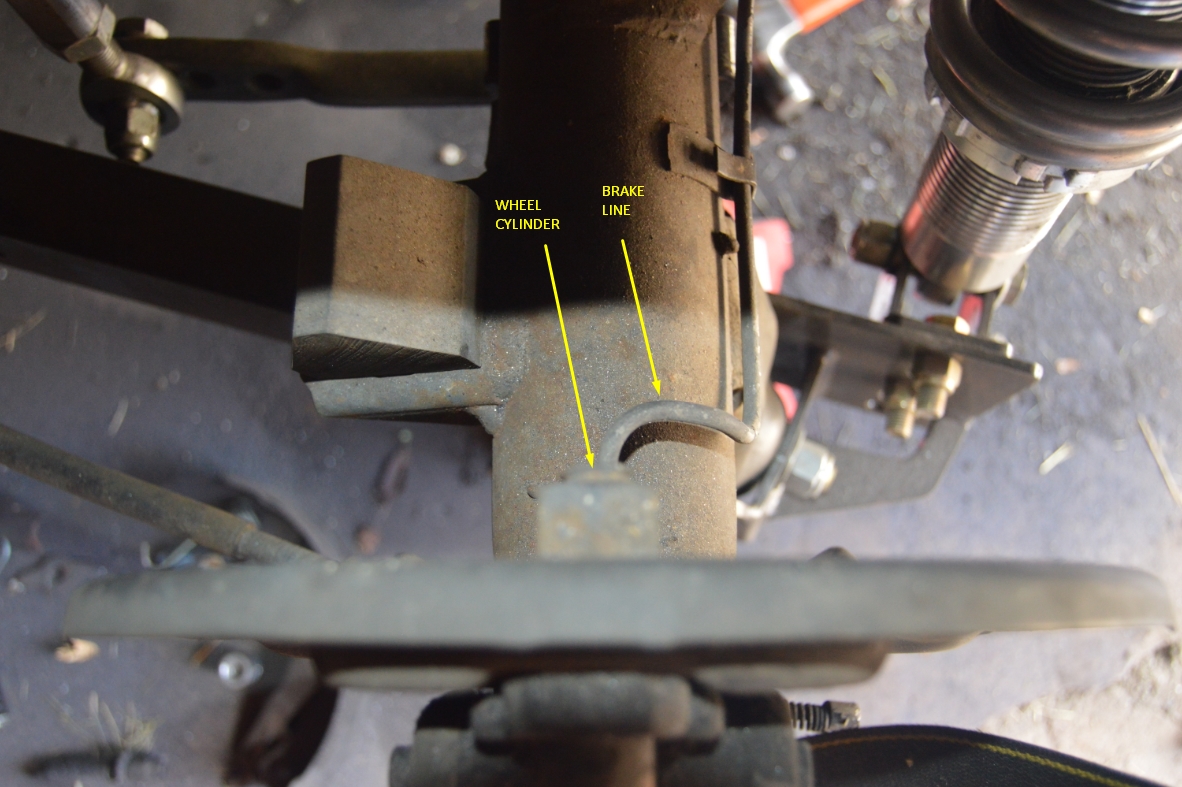
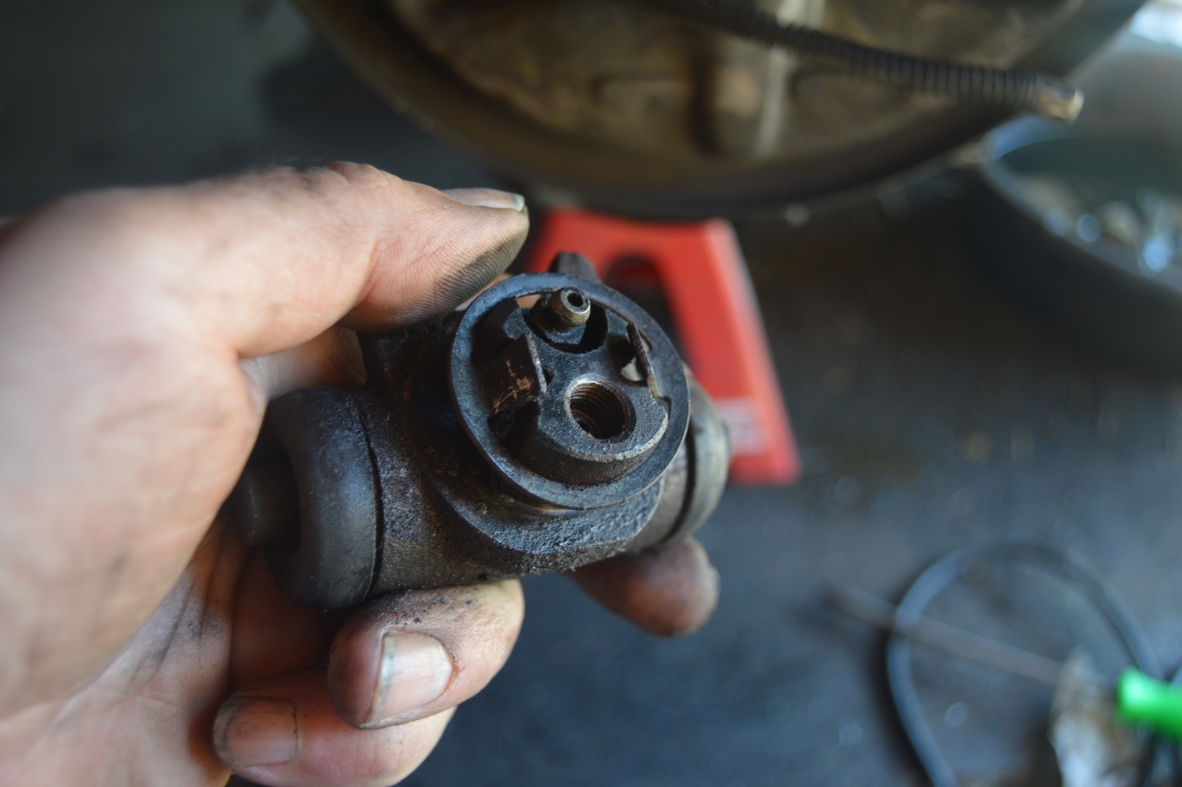
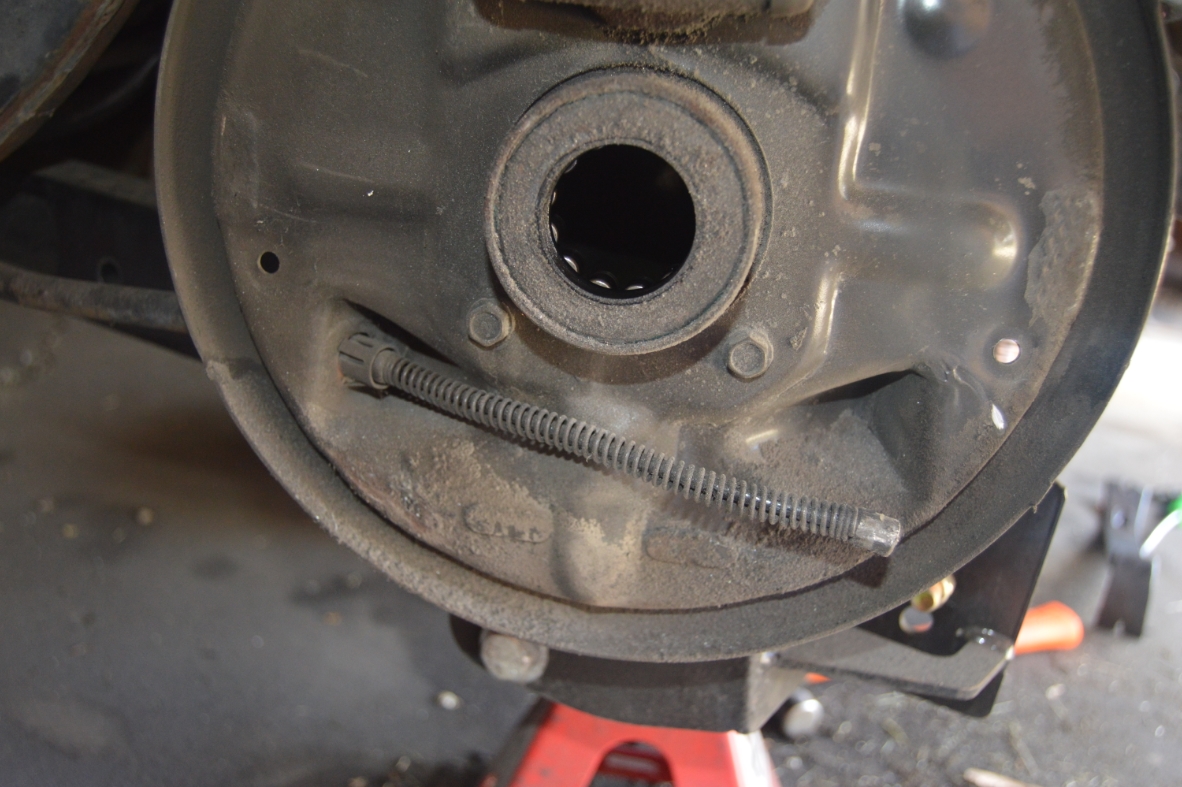
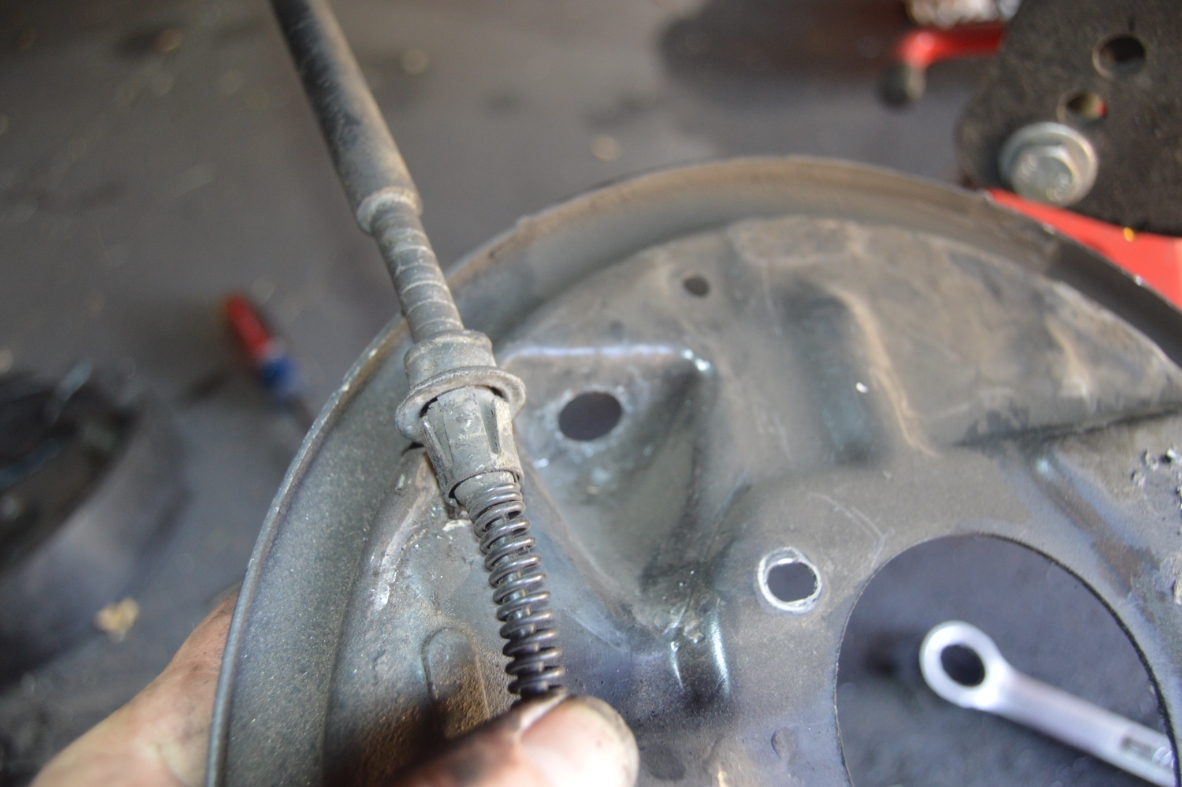
- disconnect rear brake lines from rear wheel cylinders.
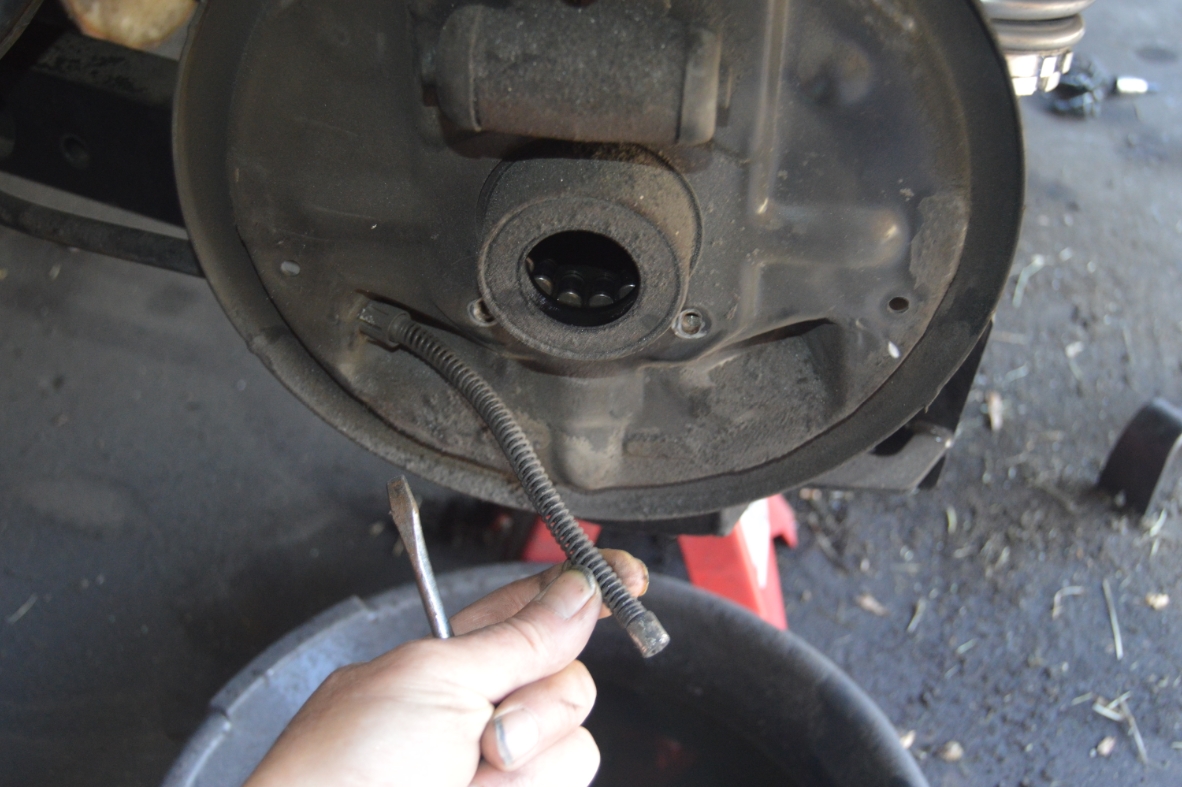
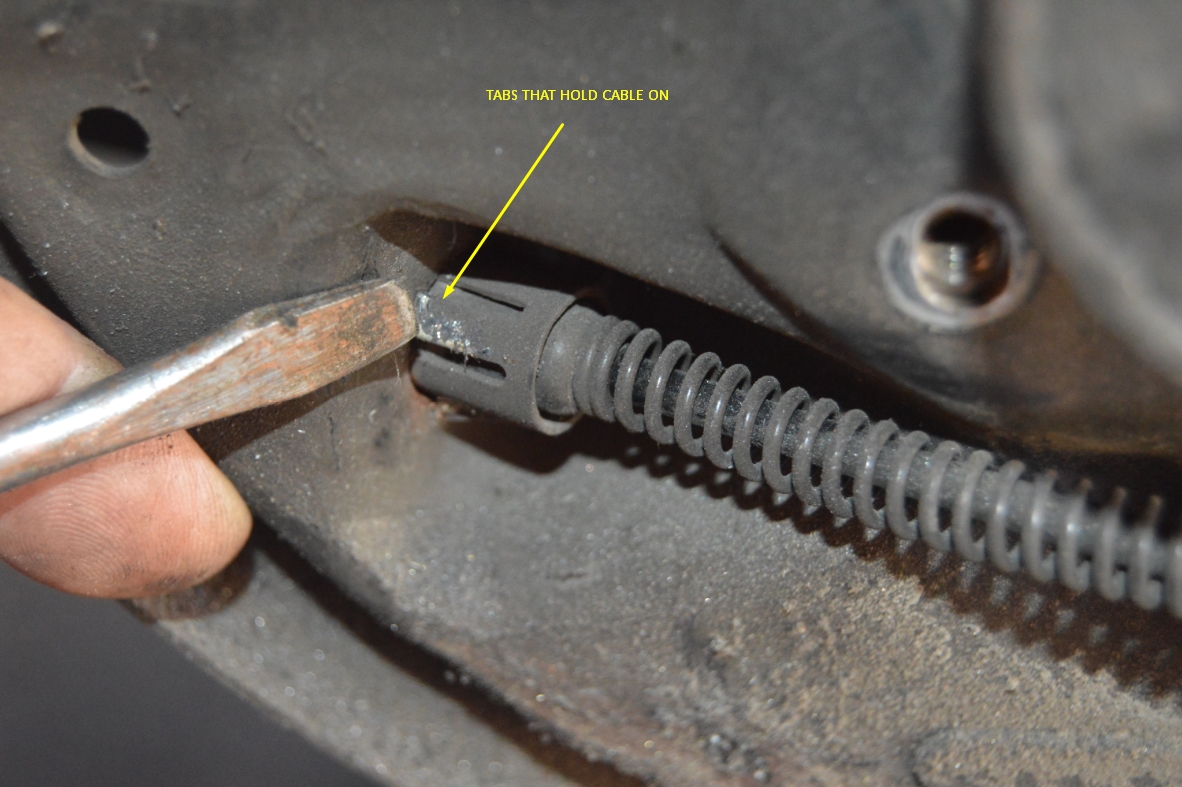
- disconnect emergency brake cable (from the inside, pinch the tabs inward and pull the cable out)
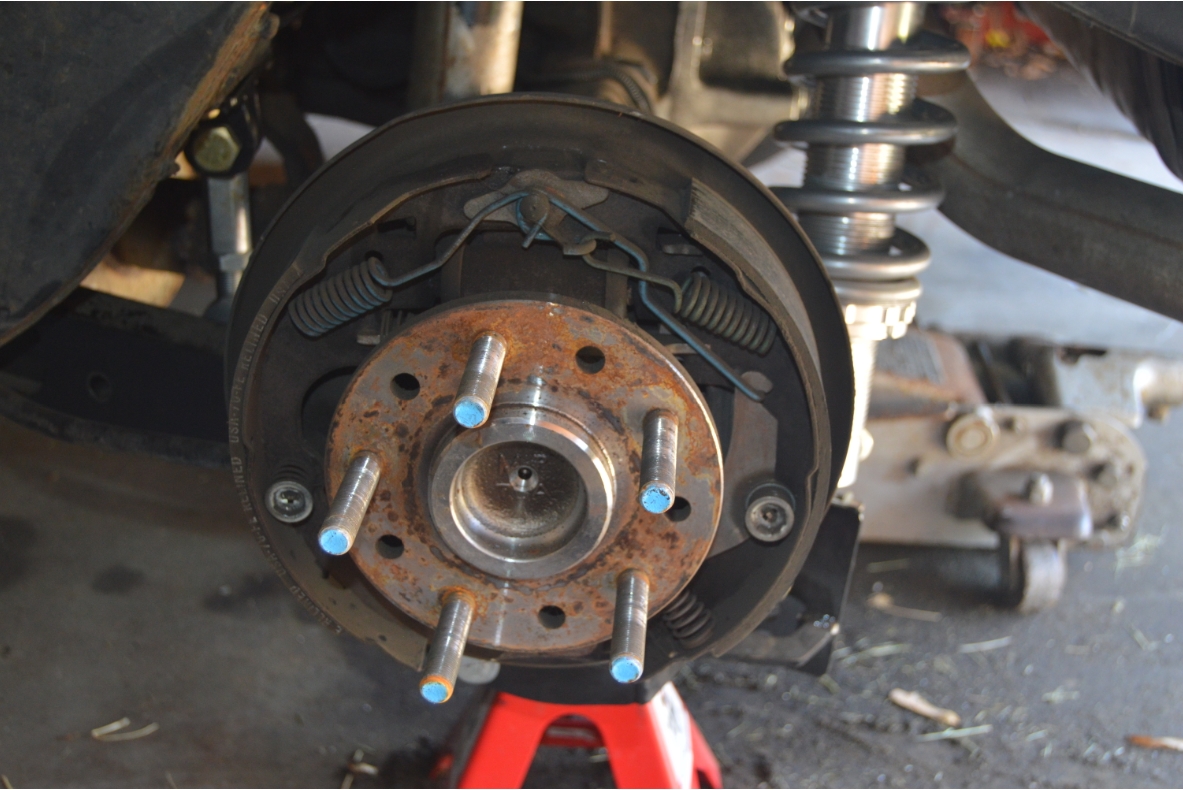
- remove all of the drum brake hardware & pads so you can access the bolts that hold the backing plate on.
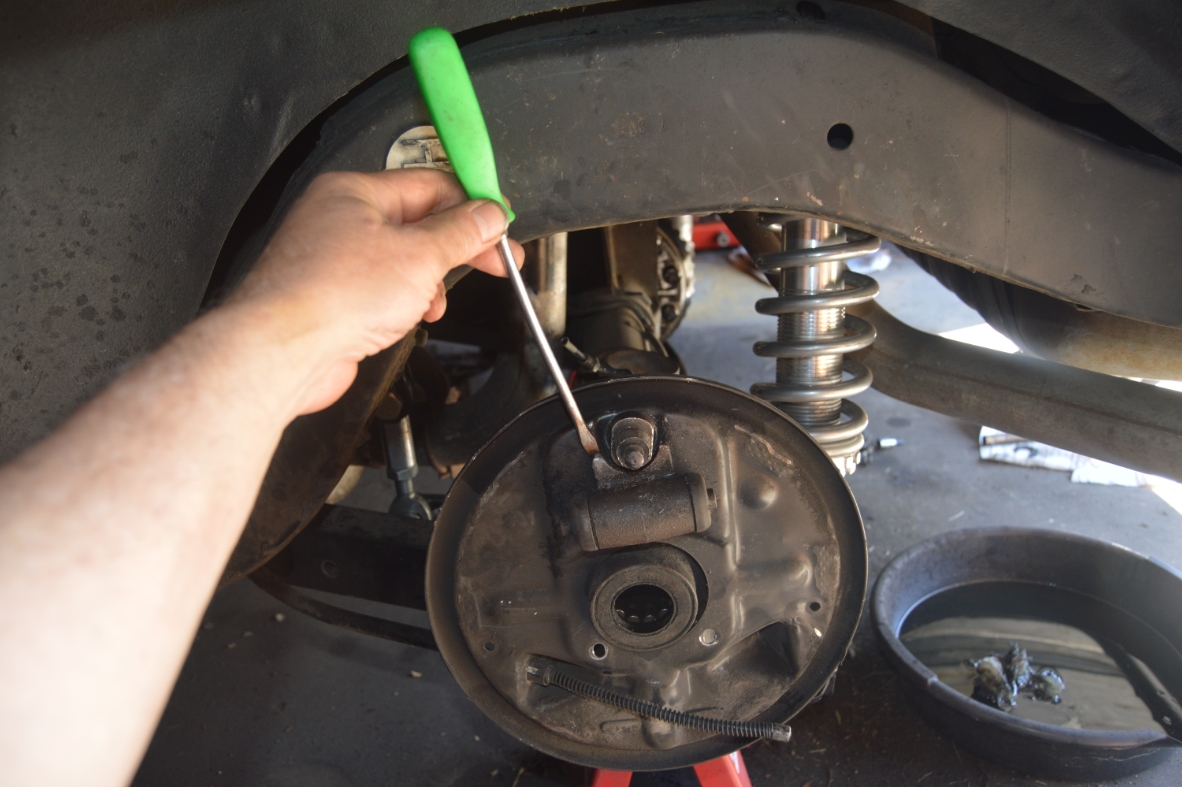
- remove the wheel cylinder. (2 tabs on the backside of the backing plate hold it on. you need to pry the 2 tabs outward, then pull the wheel cylinder out )
- remove the 2 lower (10mm) bolts that hold the backing plate on.
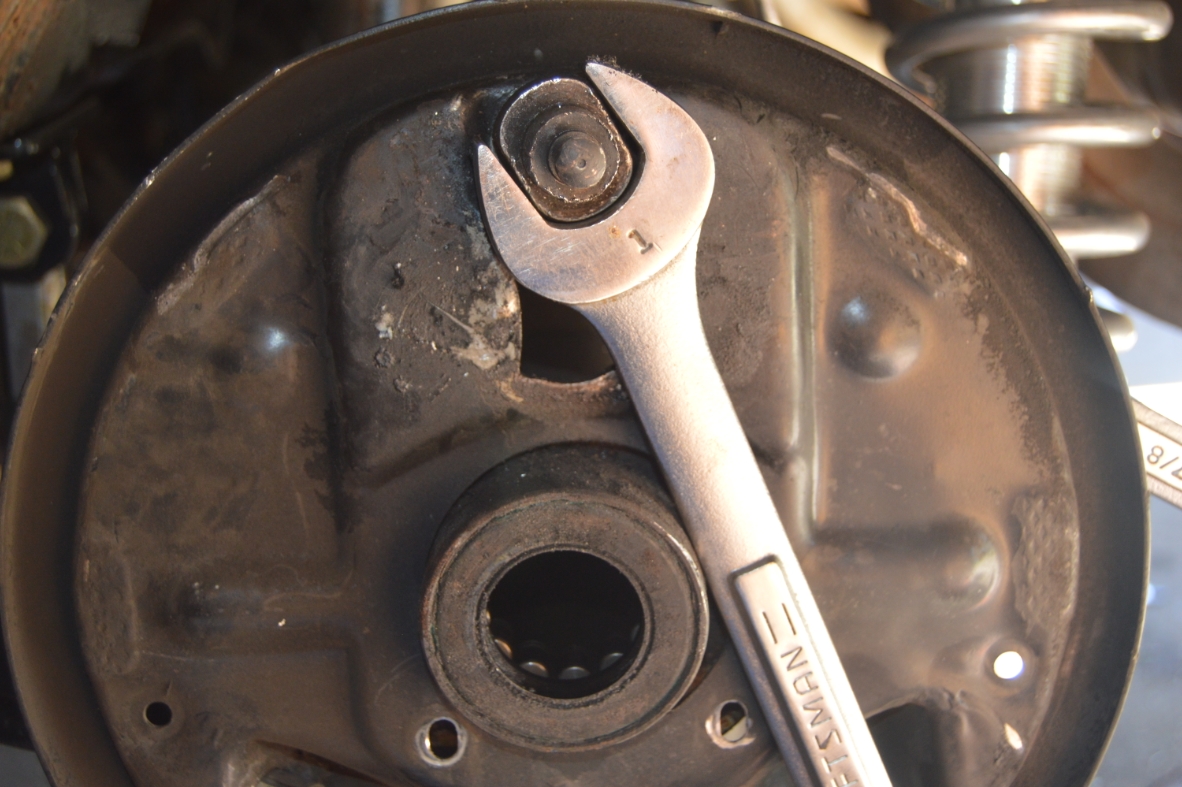
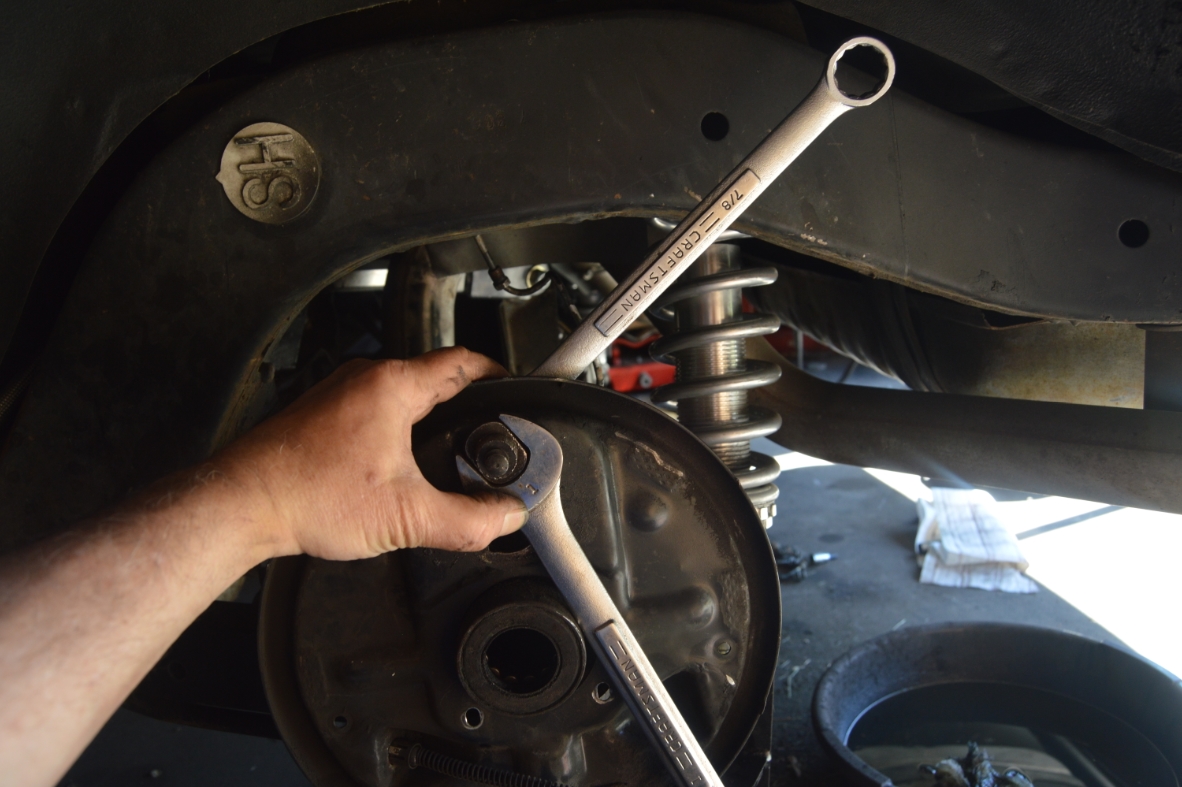
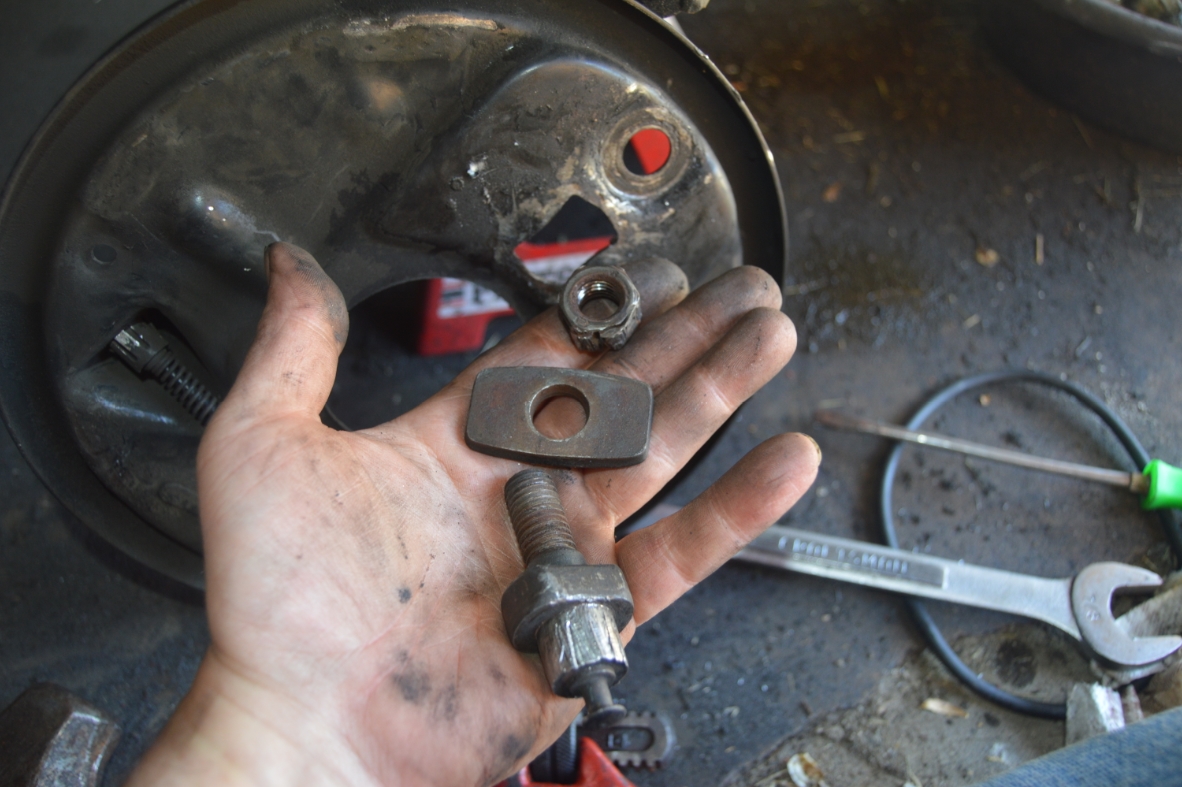
- remove the big upper nut from the backside of the backing plate.
(THIS was a struggle! It’s 30+ years stuck on!)
(you might get lucky on yours & the nut will just come using an impact, etc. we weren’t that lucky so we used the below method)
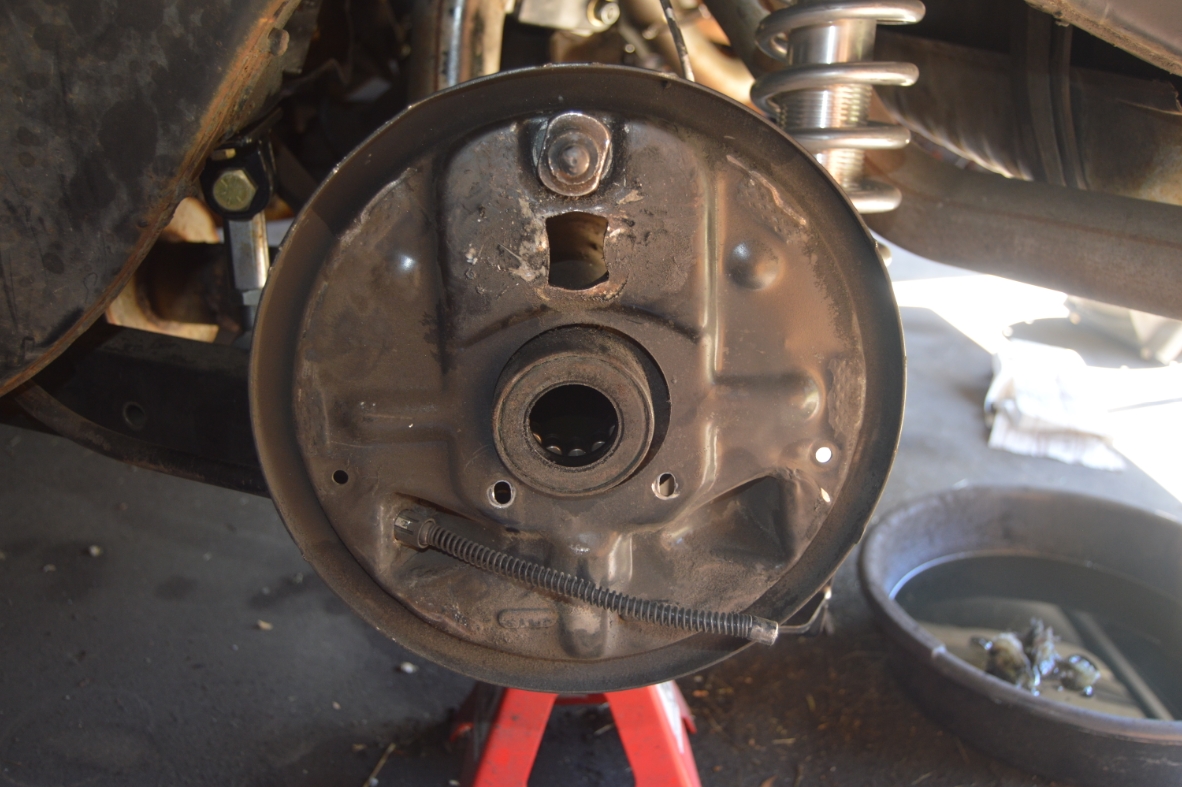
(take a 1″ wrench and attach it to the tab on the front side of the bolt, you may have to turn it to get it to line it up where you need it, and jam it up against the axle. use a 7/8″ on the nut to remove. If you try to just simply turn the nut without this method, it just spins and spins in place) - remove backing plate & all drum brake parts.
.

.
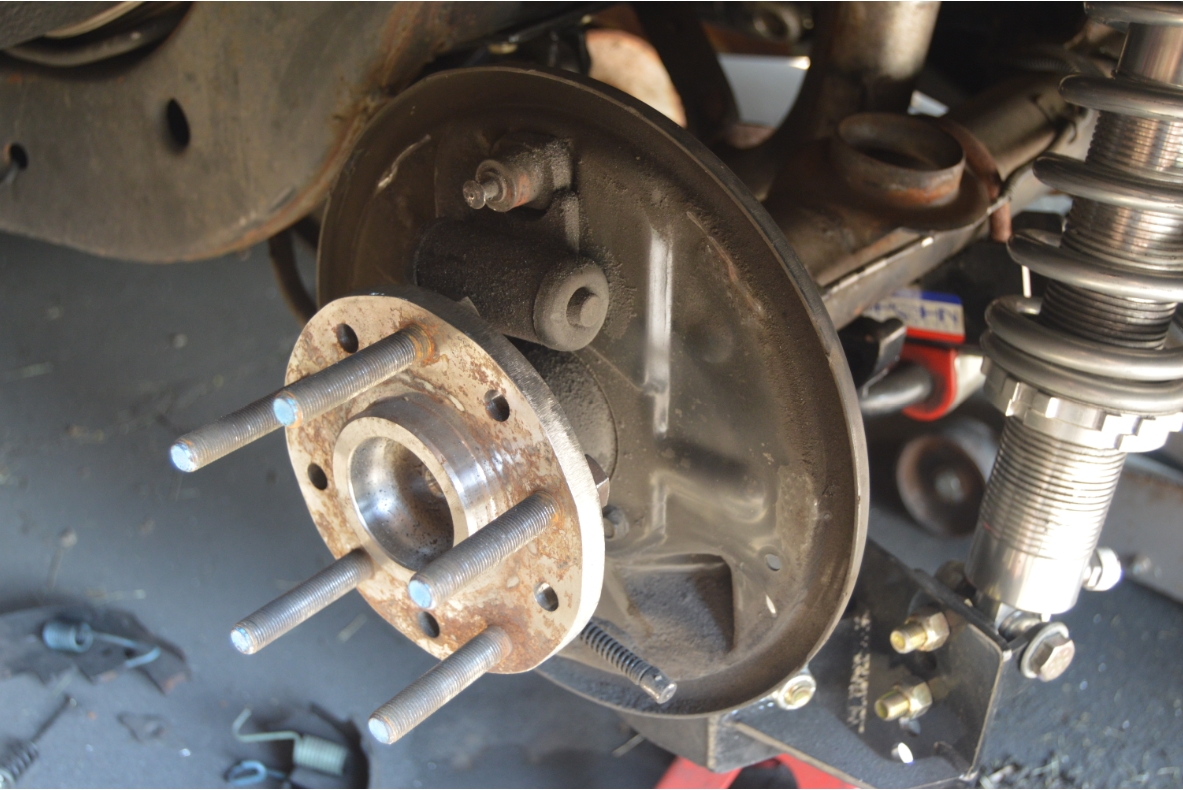
(now would be a good time to inspect and/or replace the wheel bearings / seals!)
.
ASSEMBLING NEW REAR DISC BRAKE SETUP:
.
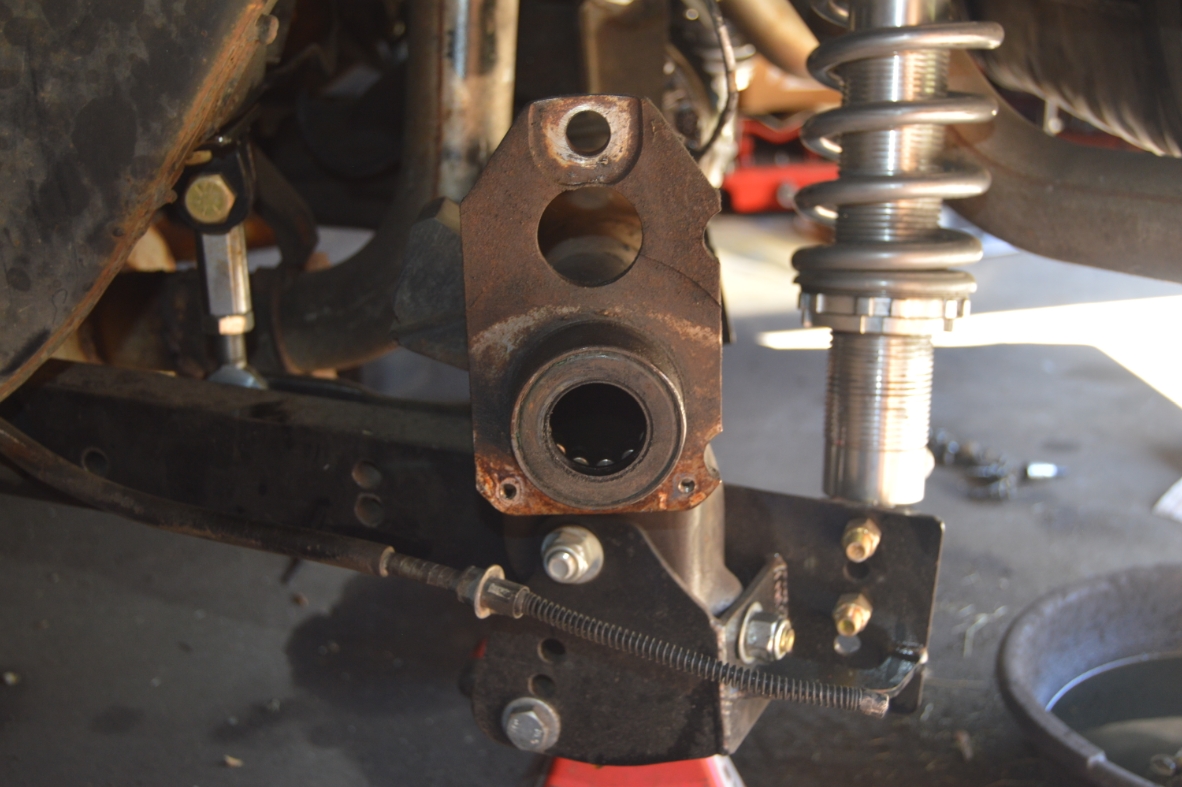
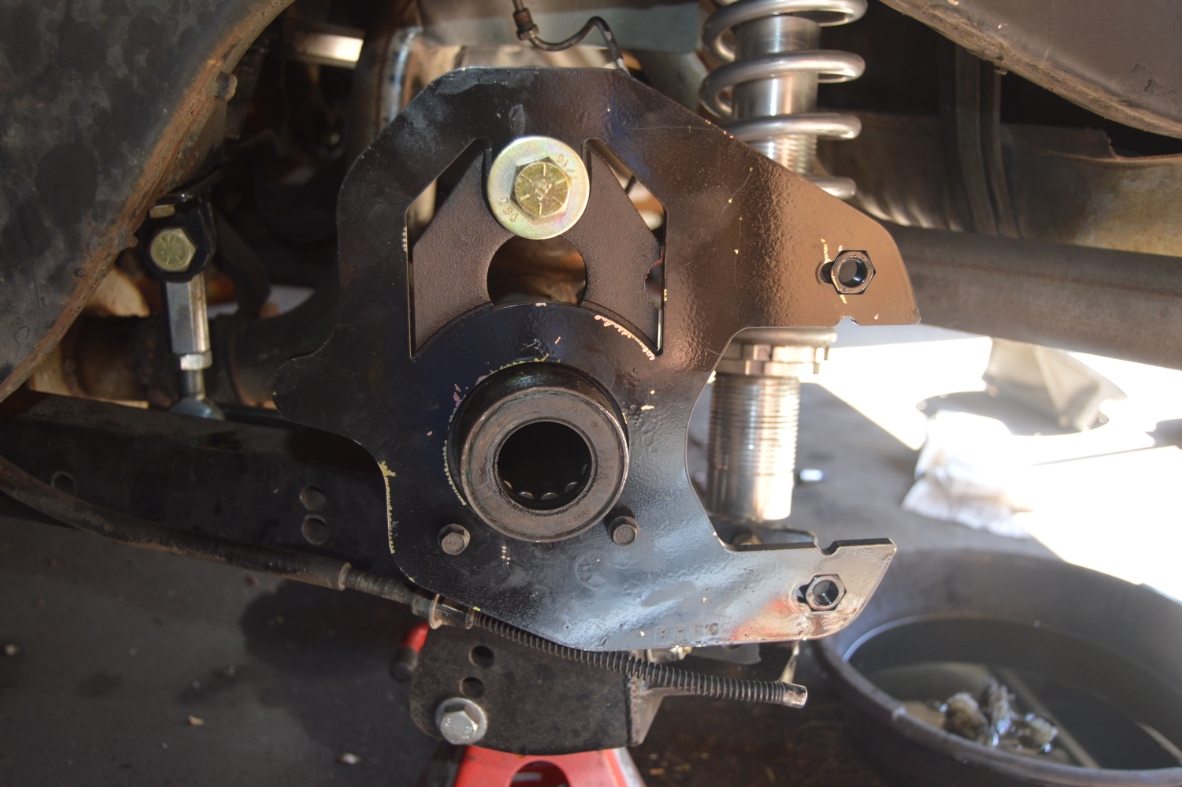
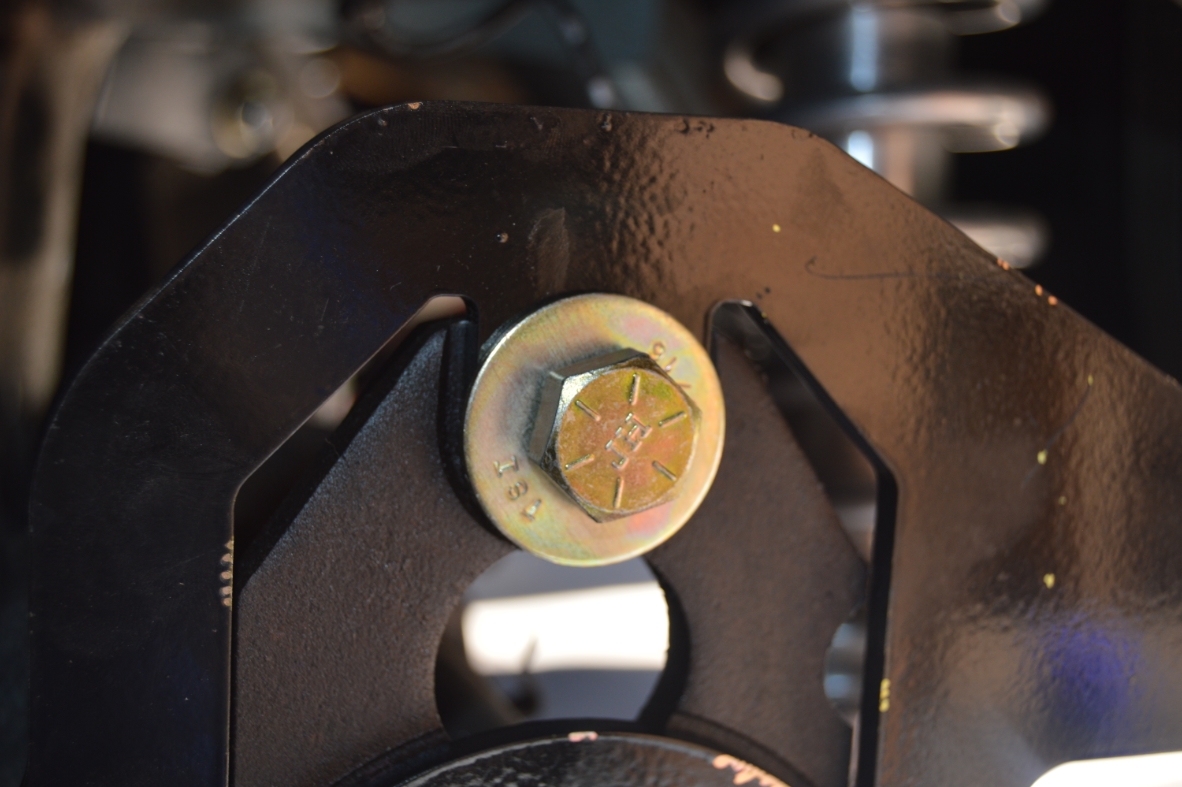
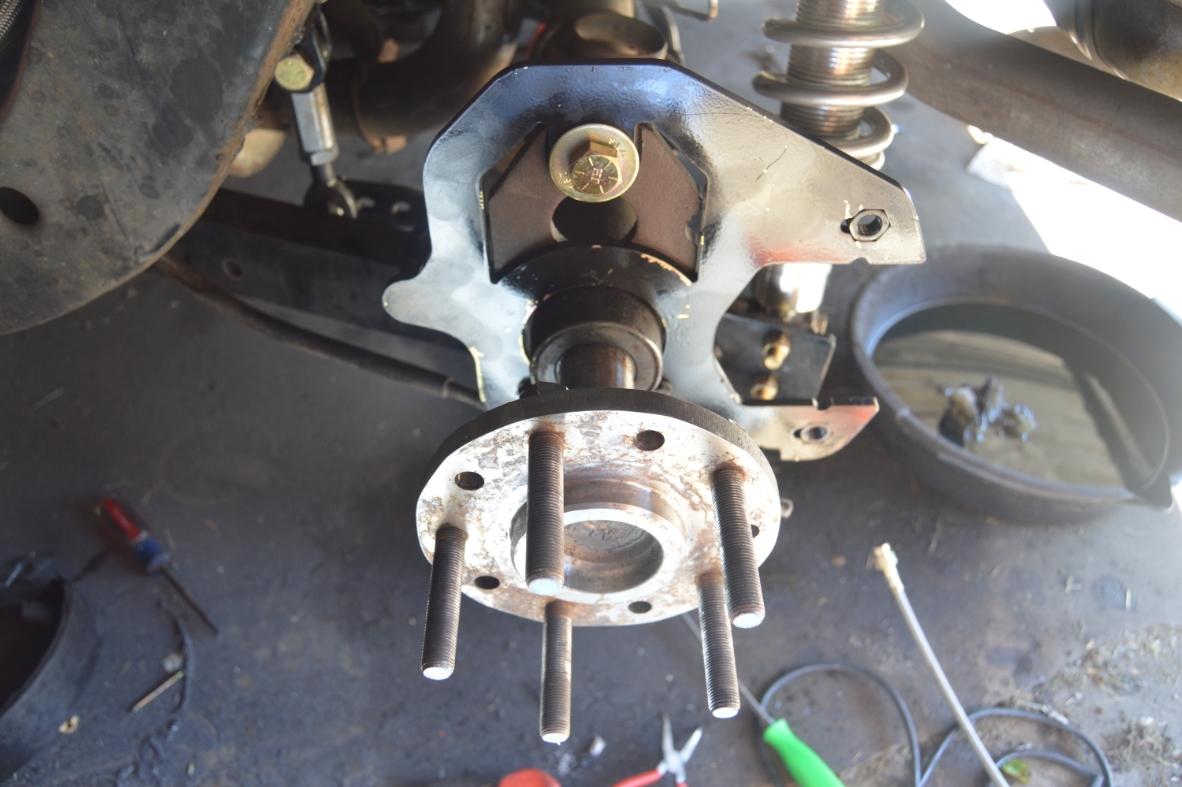
- place the new main bracket on the end of axle housing. (the brake line hose tab goes on the front side of the Gbody Regal, pointing towards the center of the car. The caliper will sit on the rear side)
- attach the big bolt & nut at the top. Hand tighten.
- attach the 2 lower bolts & nuts. Fully tighten.
(you may have to reuse the original bolts here) - Fully tighten the big upper nut/bolt.
On this specific kit, the bracket does NOT get shimmed at all. Mount it up flush against the end of the axle housing. It goes on the outside of the housing flange, unlike some kits with multiple brackets that this main plate would be positioned on the backside of the axle housing flange.
.

.
REATTACHING AXLES INSIDE HOUSING:
.
- slide axles back into housing.
- reattach c-clips.
- pull axles outward.
- reinstall center pin.
- reinsert & tighten bolt (it goes thru the center pin).
- .
- rtv gasket to cover. (smear a small bead all the way around)
- rtv axle housing where gasket sits. (smear a small bead all the way around)
- attach cover to housing & secure with 10 bolts.
- remove fill bolt.
- fill with limited slip lube & 2 quarts of gear oil.
- reinstall fill bolt & fully tighten.
.
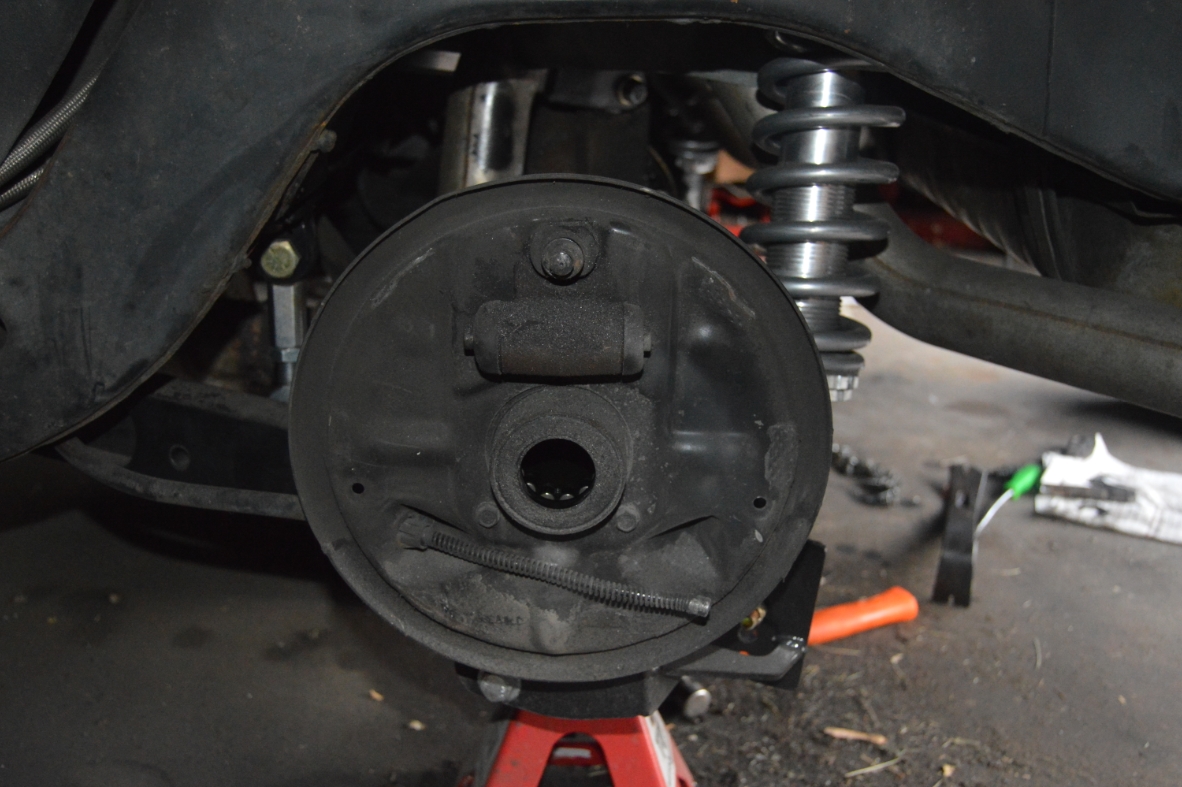
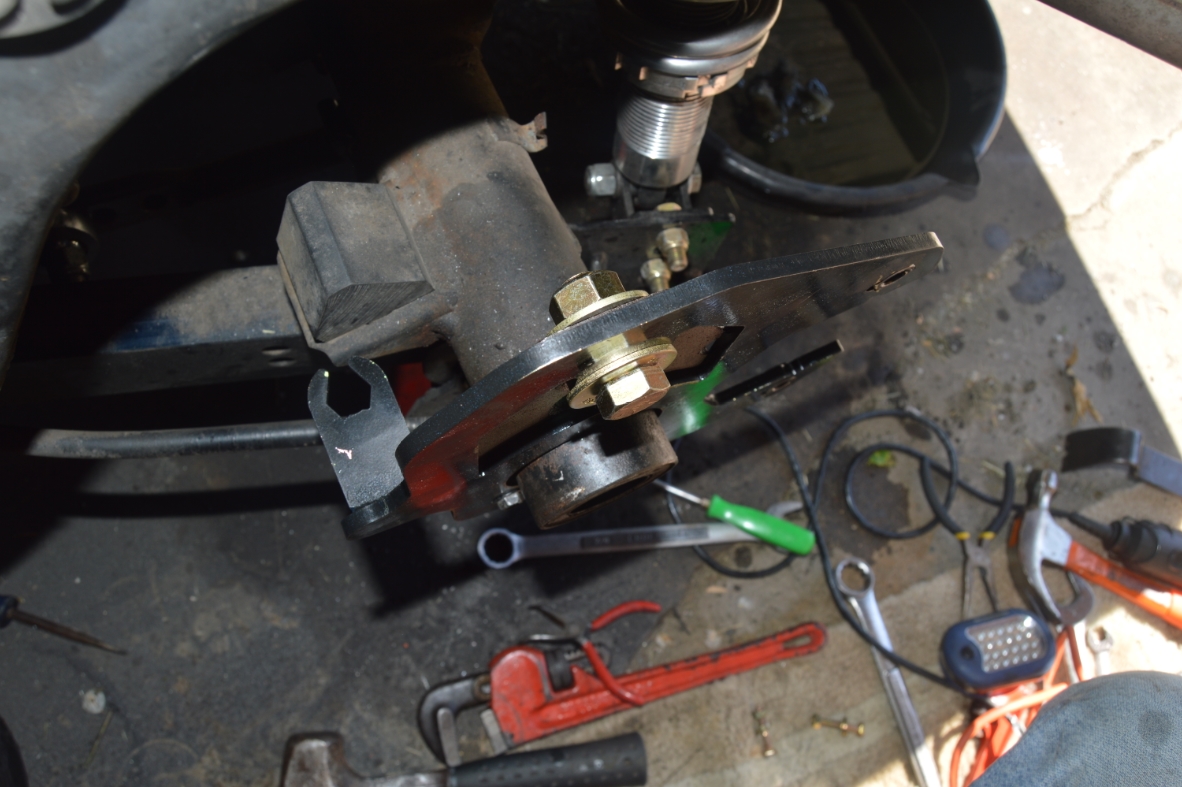
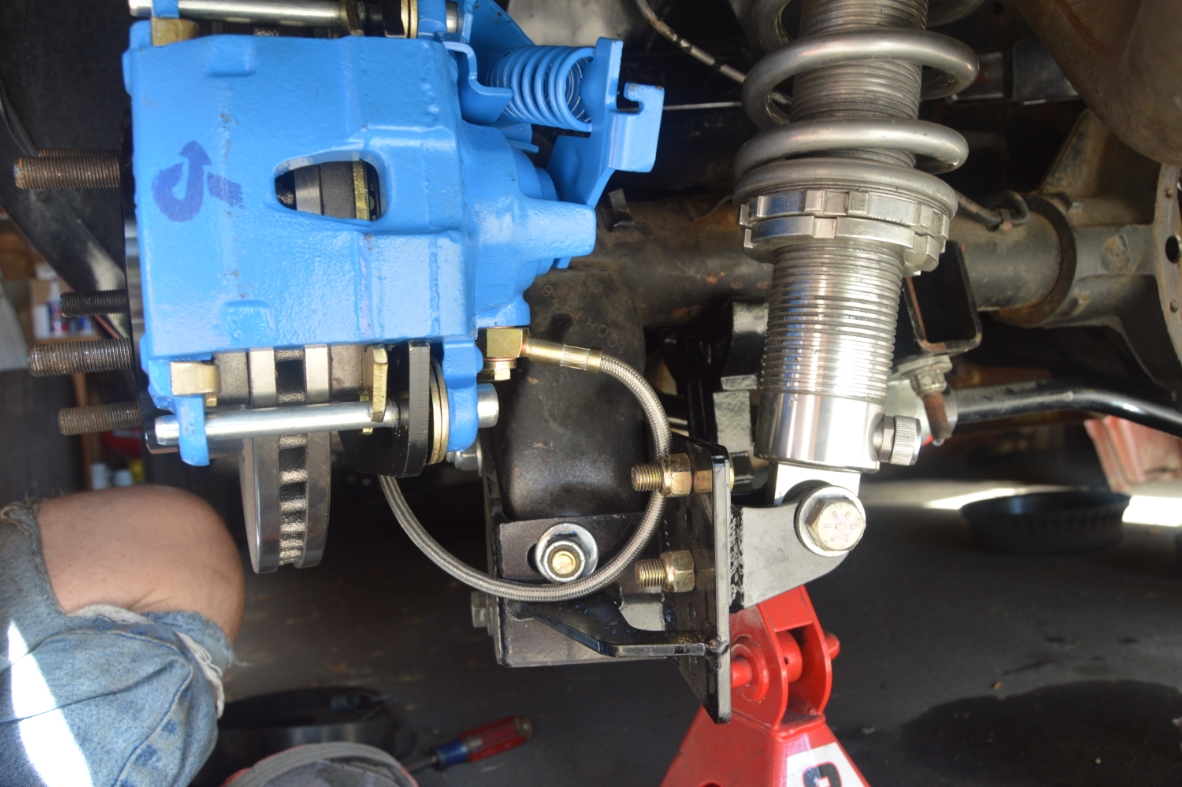
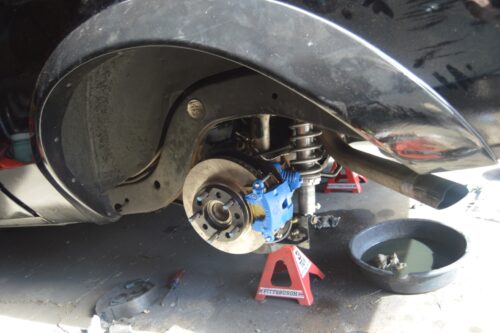
ATTACHING CALIPERS:
.
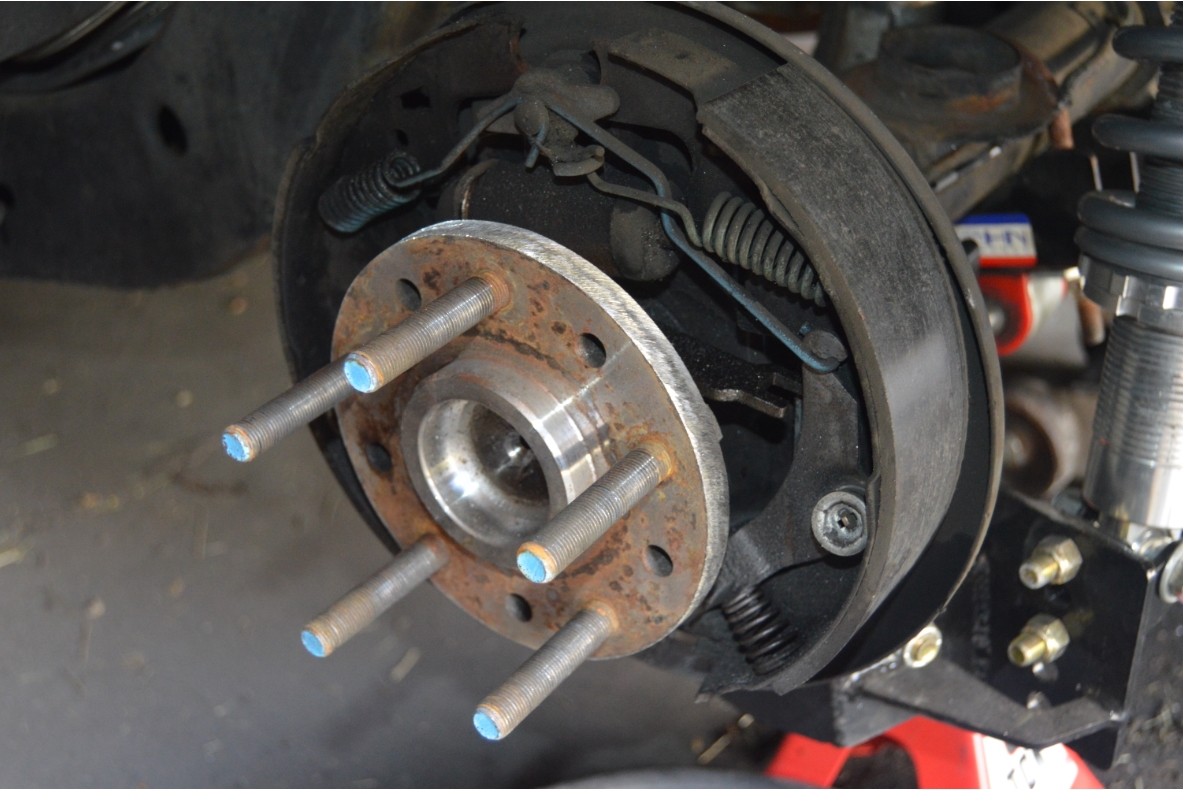
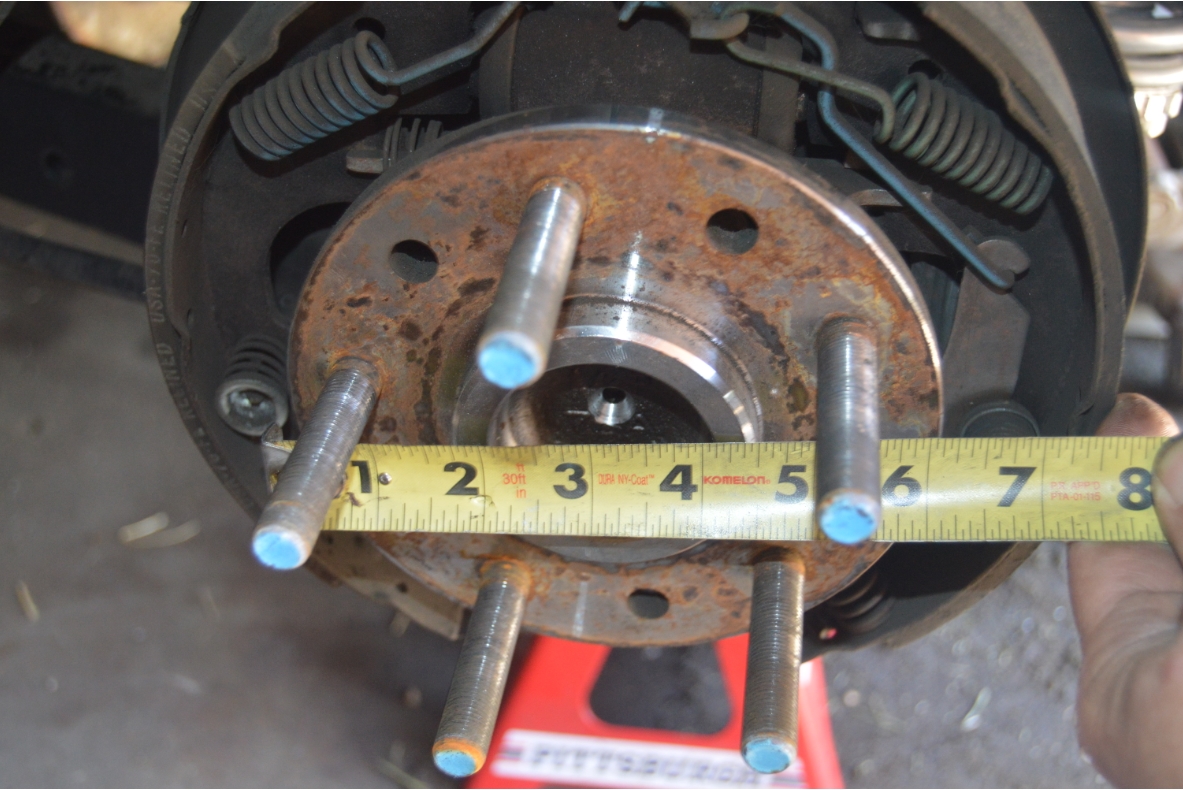
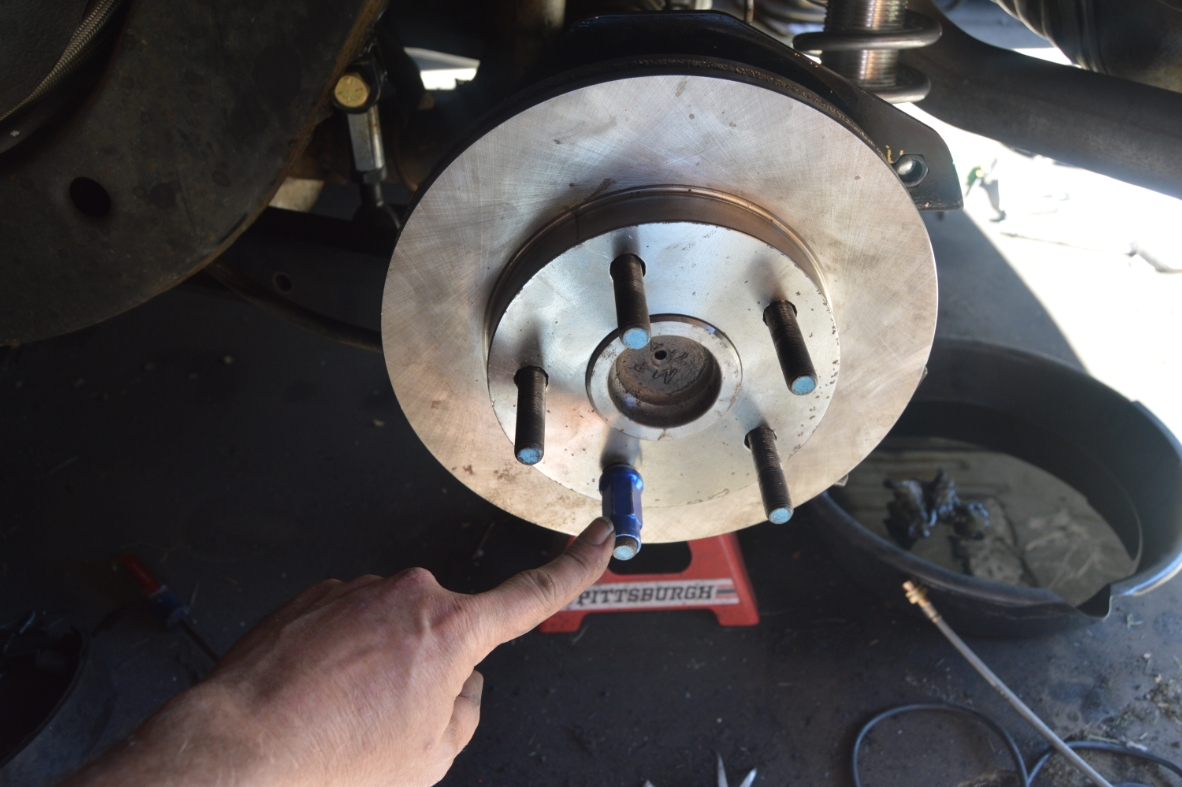
- install rotor onto axles. Secure with 1 lug nut to hold it in place.
- leave brake pads off calipers for now.
- calipers go on the rear side of the axle.
- MAKE SURE bleeder pins are facing UP!
- the caliper hose will be on the rear side, at the bottom
- position caliper onto bracket & secure with 2 caliper pins.
- spin the axle to make sure rotor clears calipers (and pins)!
- (you can pry up on the caliper, at pin, to adjust if need be)
- MAKE SURE all parts have clearance to function normally!
- check distance between caliper and rotor surface, on both sides of the rotor.
- the distance should be equal between caliper piston and rotor, and rotor and the other side (outside) of caliper.
- if the distance is unequal, you can shim the caliper.
(we needed to shim ours. the piston side had about 1/2″ clearance, the other side had about 3/4″ clearance.)
These need to be as equal as you can get them! Otherwise the pads will suffer from premature wear. not to mention you may not be able to get the caliper and pads onto the rotor at all!
We put 2 (heavy duty) washers onto the pins to space it correctly. The caliper needed to go inward more, towards the center of the car.
The washers go up against the main bracket, and the caliper goes up against the washers. this pushes the caliper inwards. - Once the spacing is centered, remove the caliper and attach the brake pads.
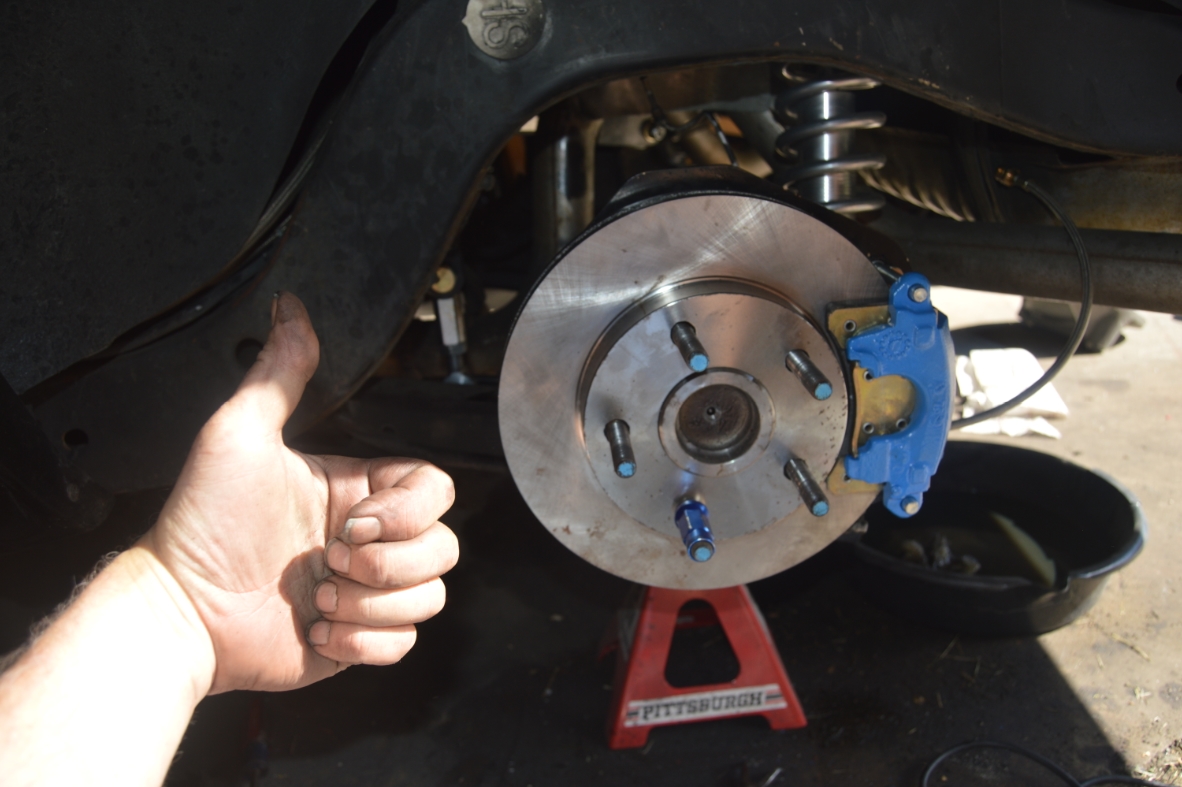
- Install calipers, tighten upper and lower pins into place, for final install.
.
Instructions from the Scarebird brackets:
.

.
.
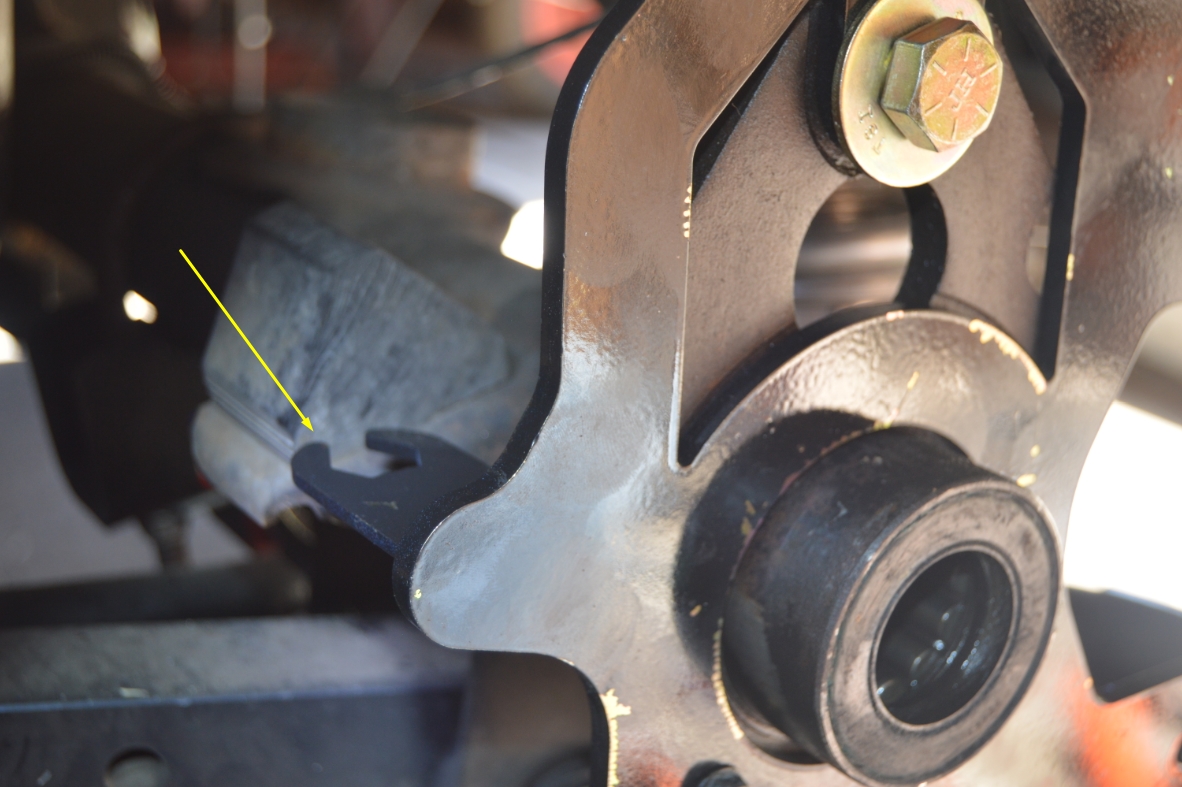
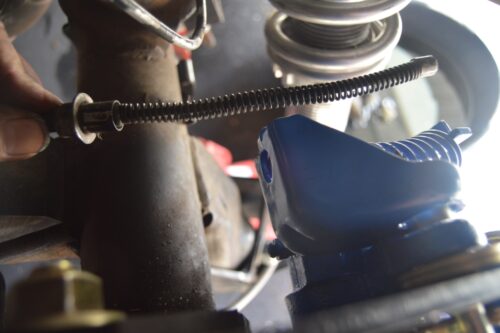
ATTACHING BRAKE HOSES:
.
- attach brake hose loosely on the caliper end.
- correct order: bottom to top: bolt, washer, hose, washer, caliper.
- attach other end of brake hose on the tab (on the main bracket), use clip to secure it into place.
- fully tighten hose bolt on caliper side.
- attach axle brake line to caliper hose, and fully tighten.
- MAKE SURE the brake hose isn’t in the travel path of anything that moves!
Note that we bought a 15″ hose, but it’s a bit long, a 12″ hose would probably suffice.
.

.
ATTACHING THE EMERGENCY BRAKE CABLE:
,
- we found out that the original factory e-brake cable is too long (where it attaches to the caliper)
- this kit we are using did not come with new cables (some kits include them)
- the directions we got with this kit say that the calipers NEED to be adjusted with the emergency brake cable attached (and cycled thru a few times to provide adequate internal adjustment of them)
- we can’t access our e-brake pedal (inside the car) because of the kickpanel speaker pods we installed, so for now, we are going to test out the brakes as is (with the cable not attached to calipers), and see how it goes. If we need to add a new cable on later, we will (and post updates on this site to let you know!).
(the instructions say premature pad wear may occur if not adjusted properly, so fair warning)
.
.
FINAL STEPS:
.
- the proportioning valve NEEDS to be changed or modified!
(original is disc/drum and now a disc/disc is required)
(we will show you detailed steps on prop valve swap in part 7) - .
- we are replacing all of the brake lines, you’ll see that in part 6
- .
- the brake line tee attached to the rear end is being replaced as well with a braided hose. part 5 will detail the steps performed.
- .
- we are swapping out the rubber caliper hoses supplied in this kit with stainless steel braided hoses. That’s part 4 of this 7 part series.
- BLEED YOUR BRAKES!
- .
- reattach wheels.
- remove jack stands.
- .
- TEST your new brakes, CAREFULLY, SLOWLY, in your driveway.
- if all good, & the Turbo Buick stops like it should, job done.
.

.


