


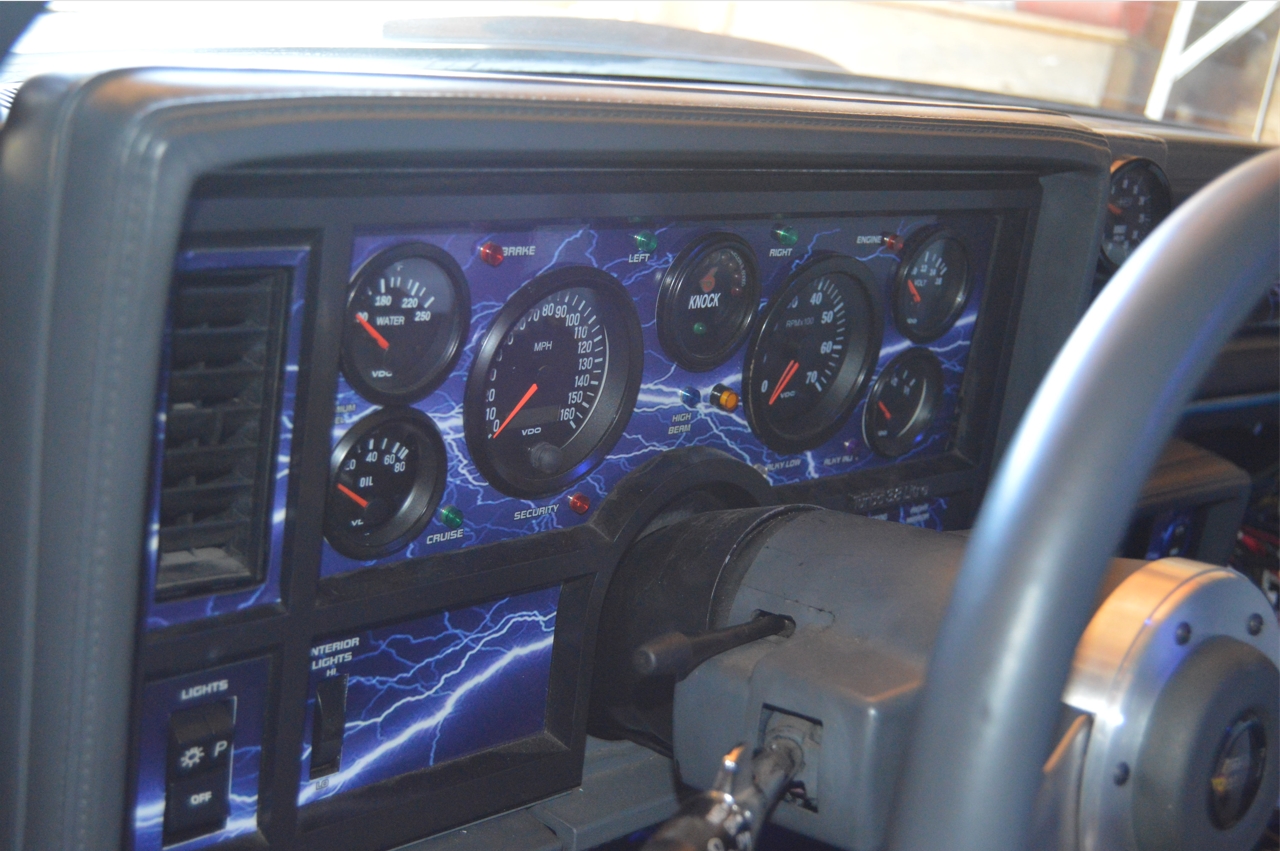
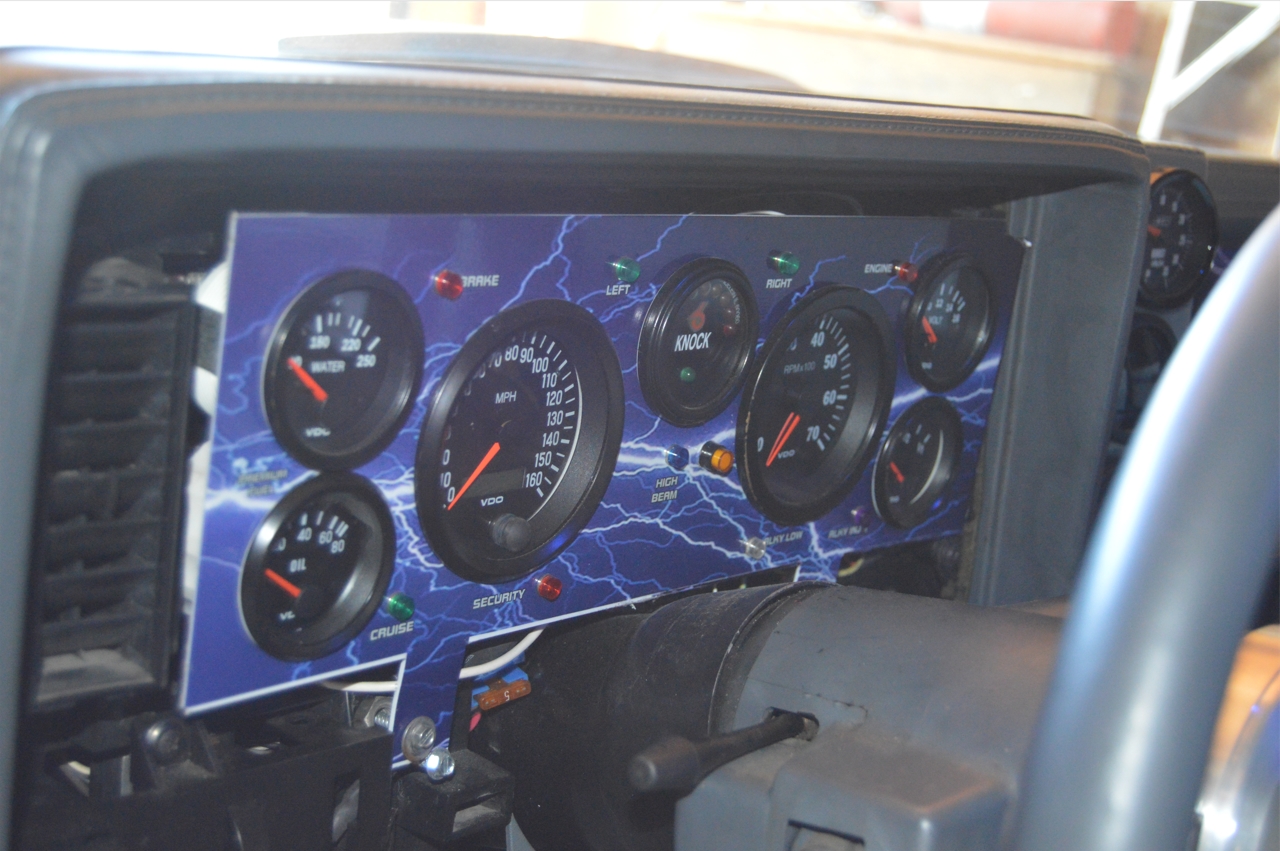
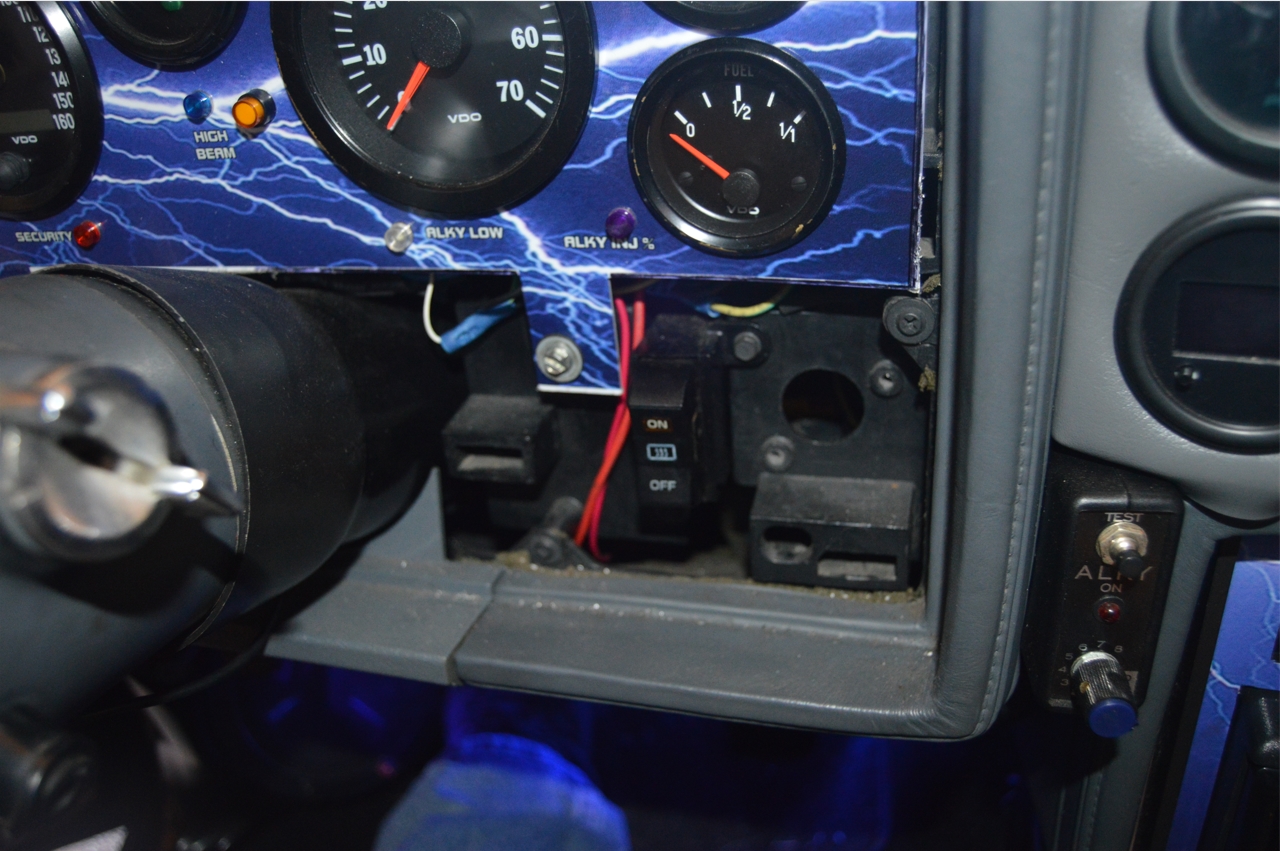
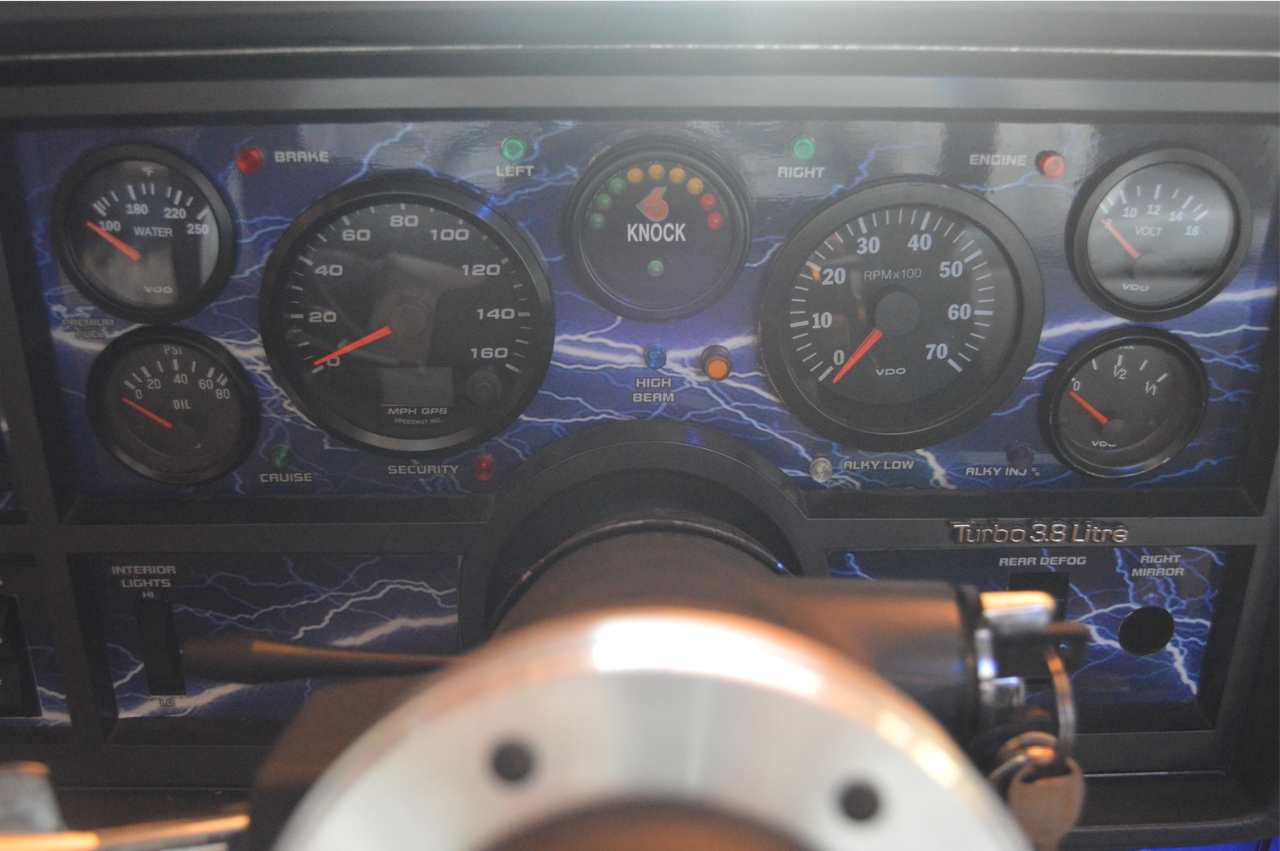
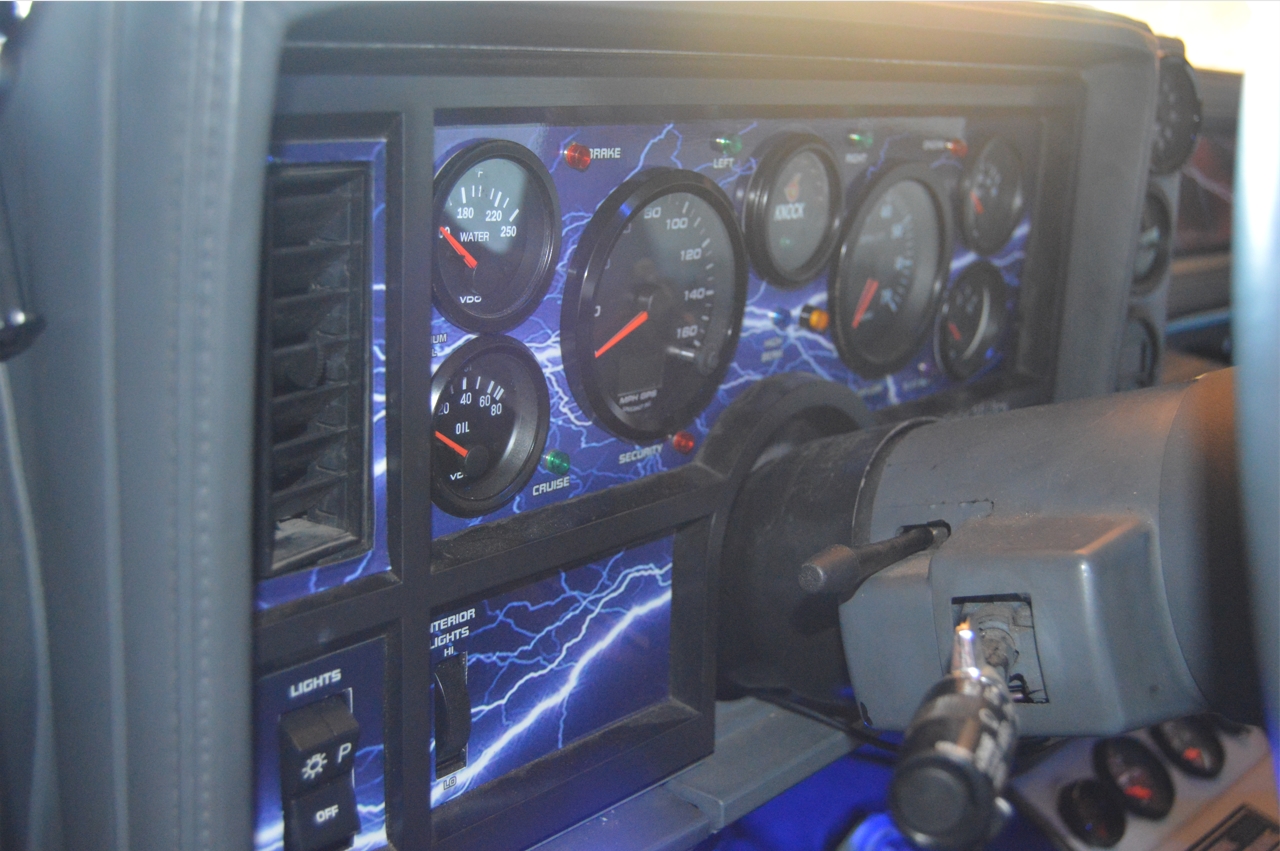
The interior compartment of this 1987 Buick Grand National holds a Buick GNX style dash that was installed over 10 years ago.
The VDO gauges were wired up using the (pretty much only) method that was available at that time.
Using a deadhead (mechanical to electronic) sender on the transmission, connected to a signal converter box, then onto 2 signal amplifiers, one for the speedo and one for the cruise control system.
(this was quite an ordeal wiring up all that stuff, and the hoping that it would all function as intended once it was done, as you eliminate the stock vss buffer, components and other connected parts)
Everything works great until it doesn’t.
For some unknown reason, the (electronic) speedometer stopped working.
(the rest of the system is still running fine)
(we think part of this electrical system failed for the speedo portion of the wiring, perhaps the signal amplifier)
We thought about reworking the original configuration to restore it, but after looking around, the decision was made to just scrap that idea and acquire a brand new speedometer unit.
(this way we didn’t have to replace the old parts and try to narrow down exactly which one was bad)
(and besides, who doesn’t love to add new stuff onto their Turbo Regal?)
(something about the latest and greatest whiz-bang parts….)
.

.
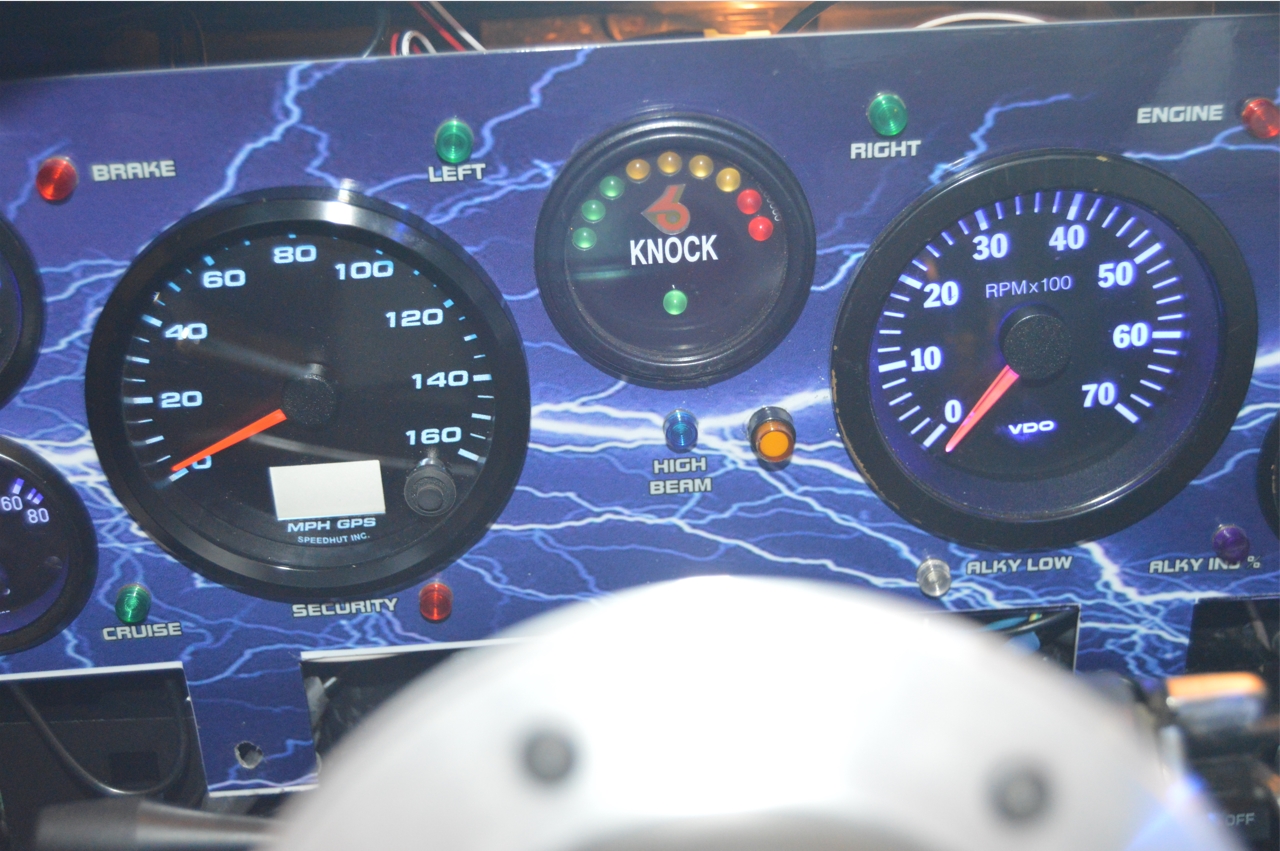
Technology has come a long way in the last decade, and they now have speedometers that utilize GPS signals to accurately function, eliminating the need for a transmission connection at all.
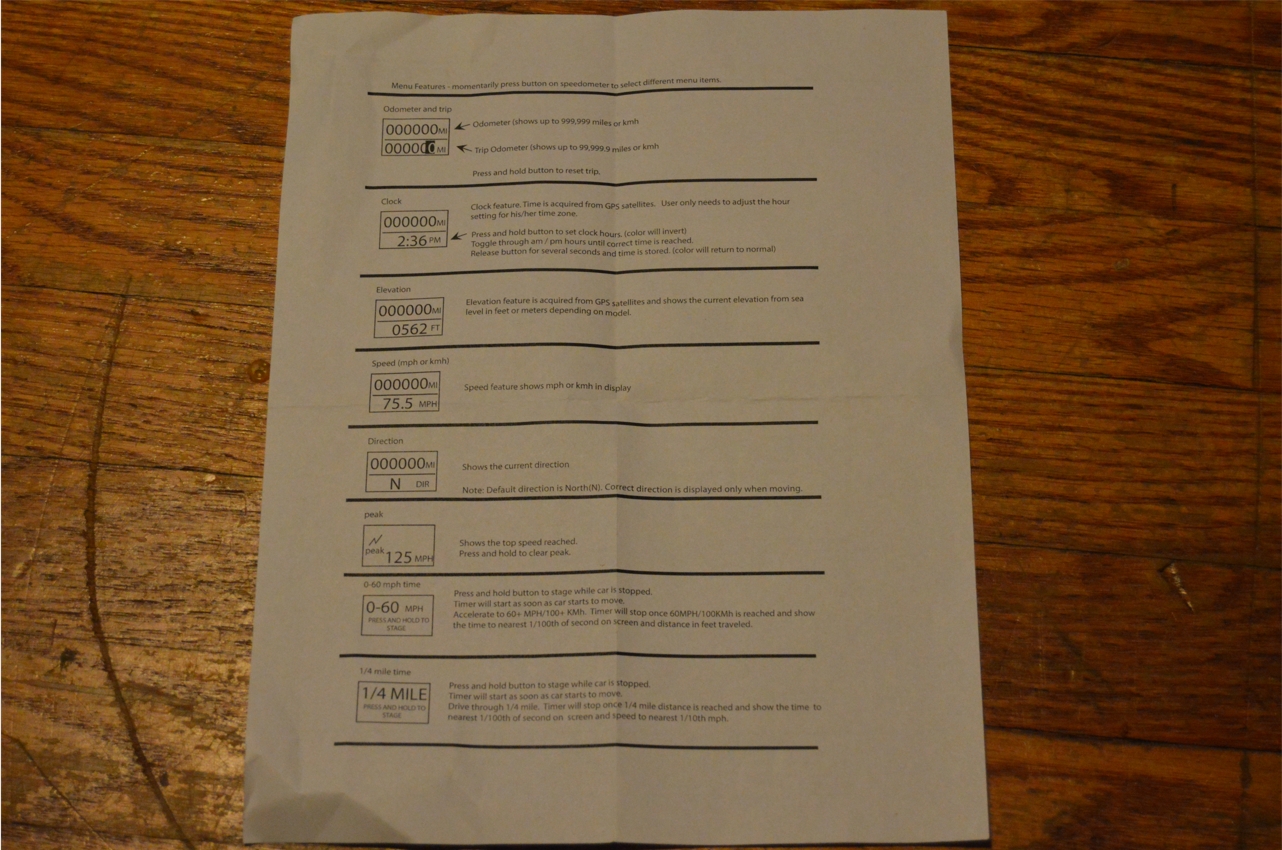
Incorporated into these new fangled gadgets, there’s some other way cool options included.
Who needs a Dragy, G-tech type unit, or similar measuring devices, when you can incorporate all that type of tech into one single gauge?
0-60, 1/4 mile time, time, elevation, and direction are just a few of the bonuses within the new speedometer gauge.
(there’s 8 different functions / views)
This gauge is made by Speedhut (which are the same gauges that GNS Performance uses in their gauge cluster instrument package).
.

.
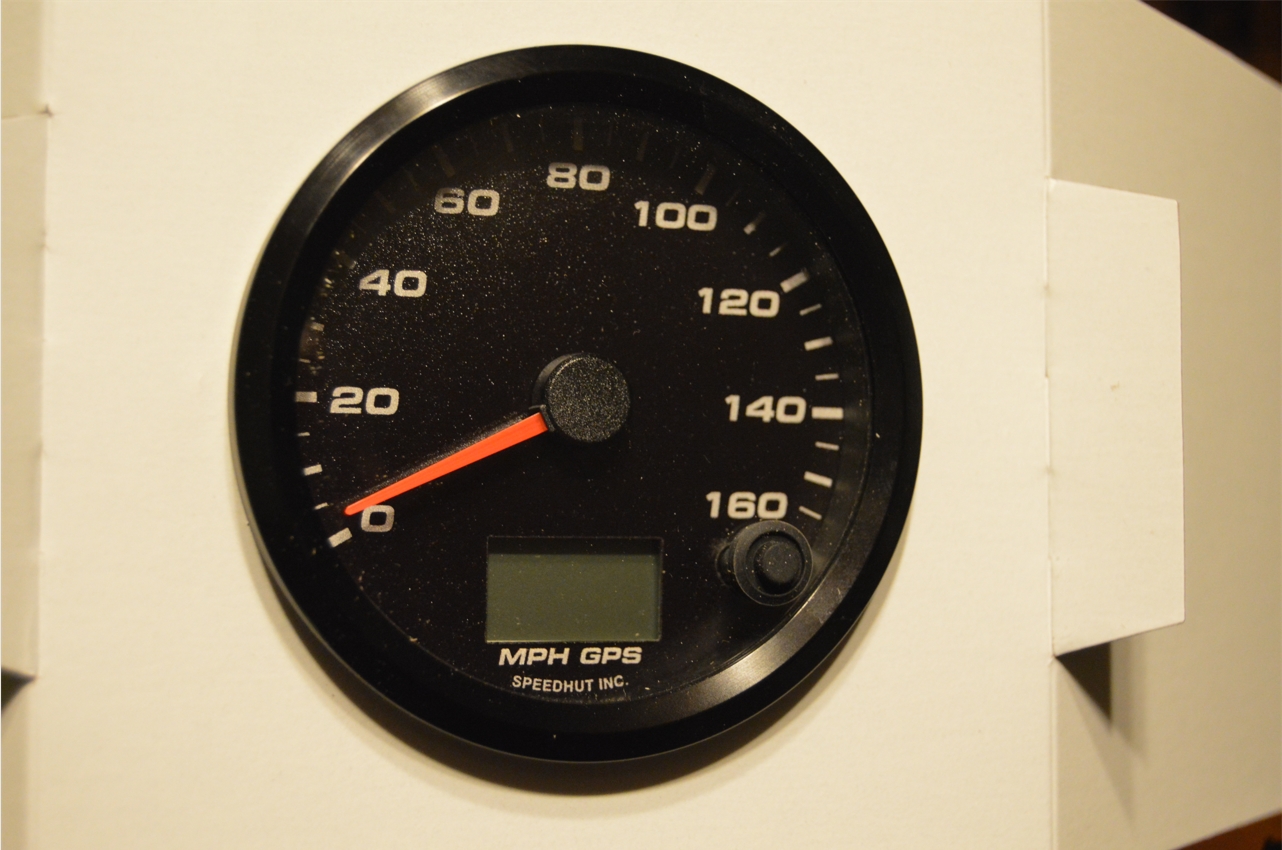
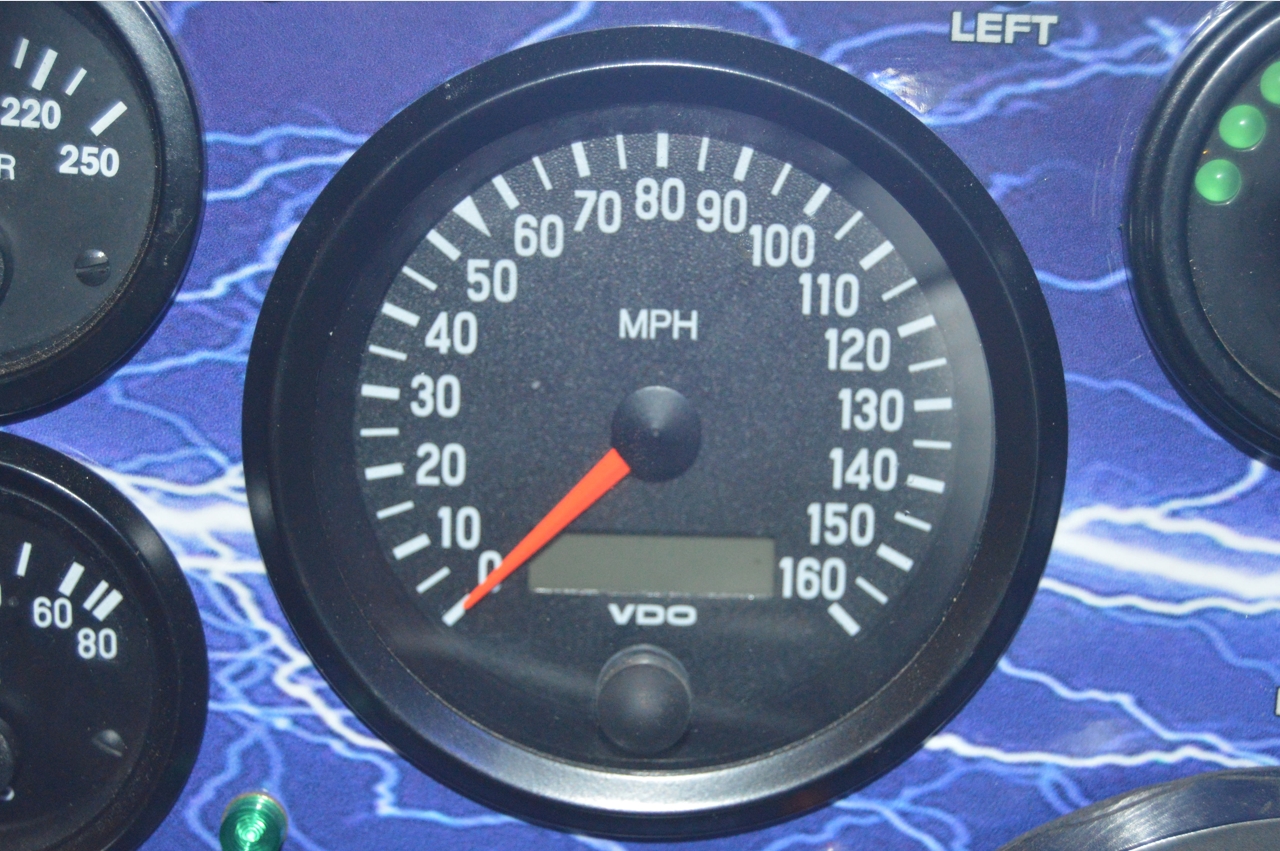
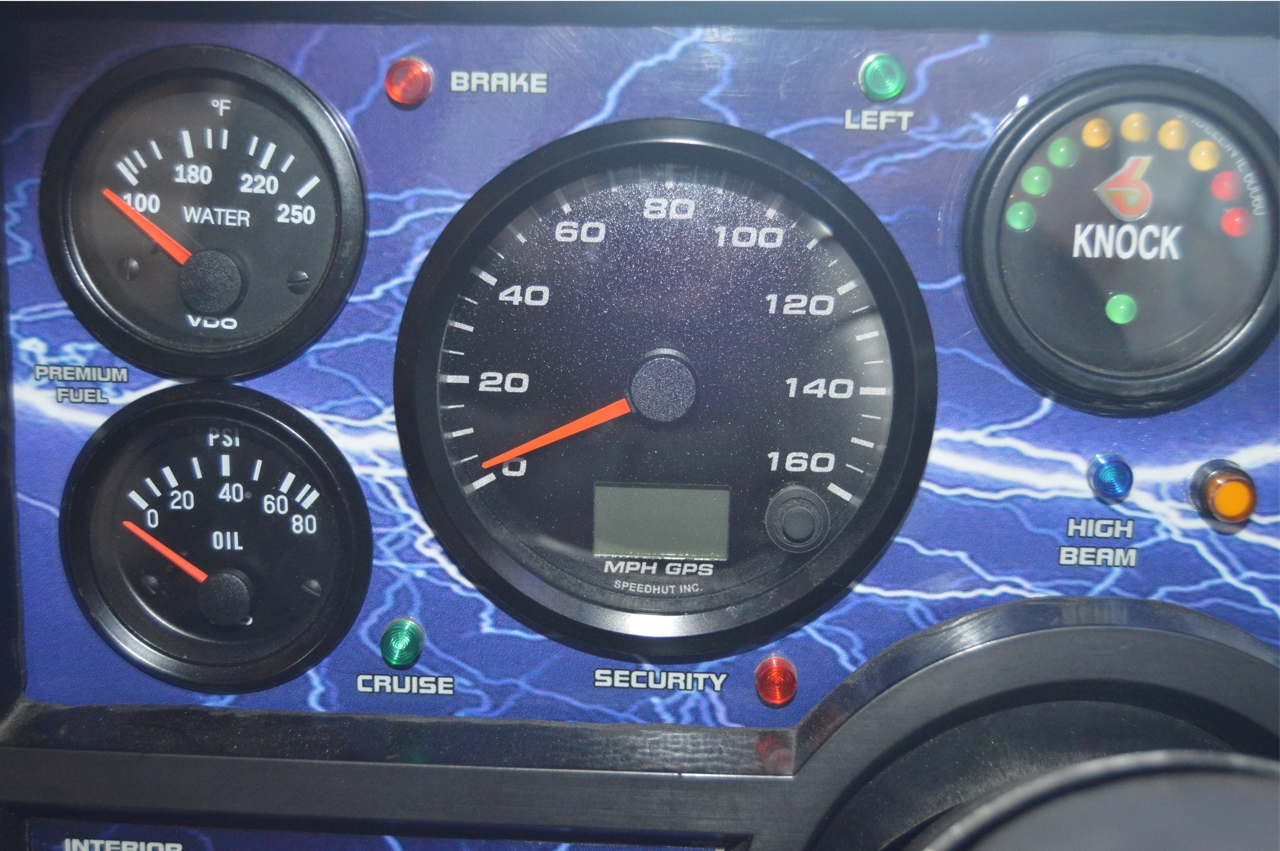
The perfect selection for replacement of the current VDO 160mph speedo, is their 3-3/8″ GPS Speedometer, with the same 160mph top end reading.
(not that we’ll ever see more than around 130mph or so, but it sure does look cool sitting in there!)
Other than a couple new add-ons to perform (power wire & antenna) to get it working, this should be basically a remove and replace task.
Ordering the gauge requires you to decide on a few options for the new unit.
 We chose the following:
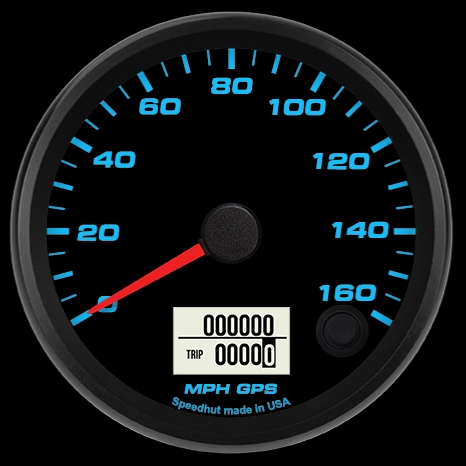
Black Dial with White Numbers, and Blue Glow for lighting
(what the gauge face looks like)
[there’s color options for face & lights]
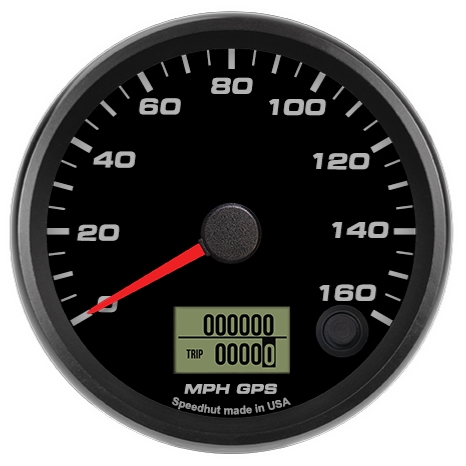
Font/Tick Style: Modern
(what the numbers look like)
[there’s options to match your exisiting styles]
Pointer: Standard Racer Red (Glows Red)
(you can choose red or white indicator, and red or white glow on it)
[there’s choices for needle colors & the color it lits up as]
Bezel: Stealth Black
(the outer ring on the gauge)
[there’s choices and colors for styles of the bezels]
There’s also a couple other selections you can add if you wish, but we chose not to.
(disc option, a silver disc that goes behind the black center button that holds the pointer; Logo, where you can add your logo on the gauge face – like GNS does)
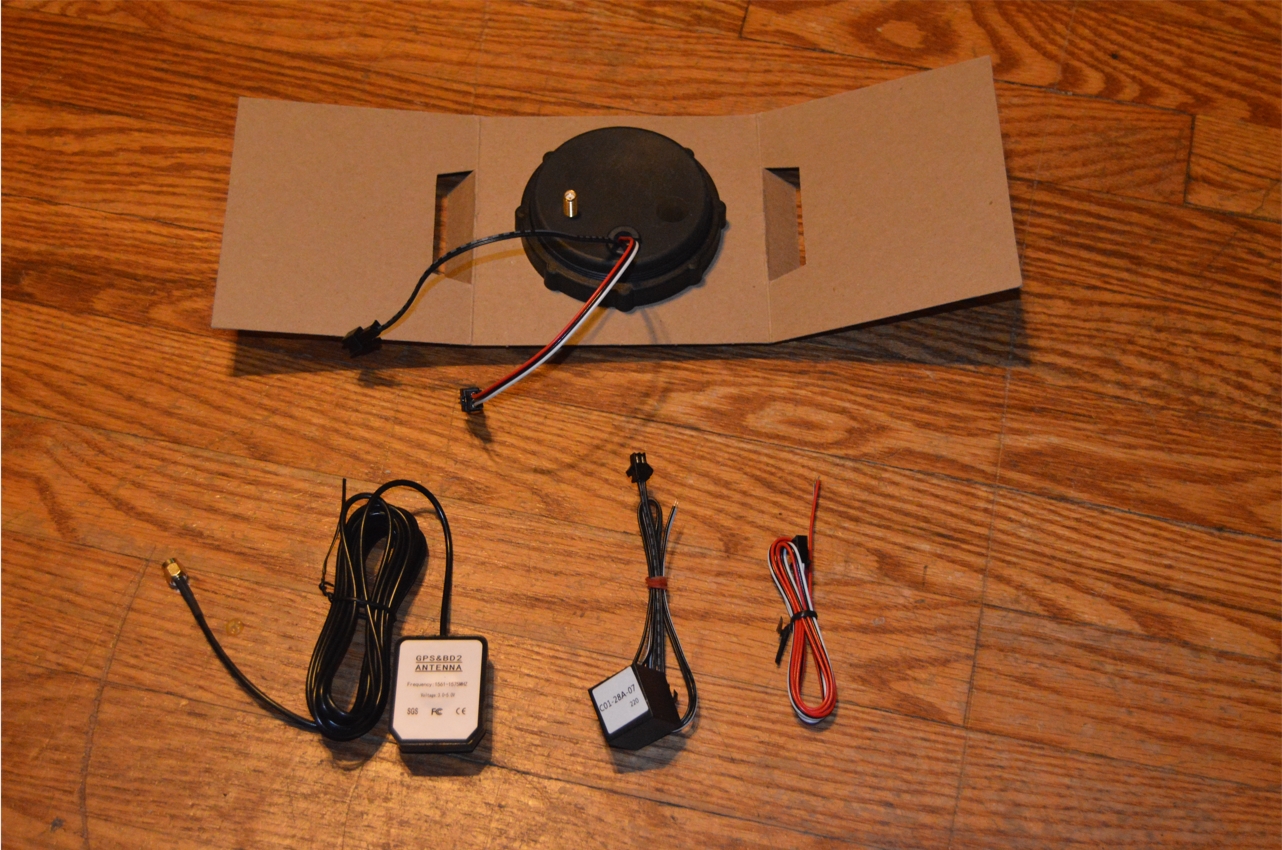
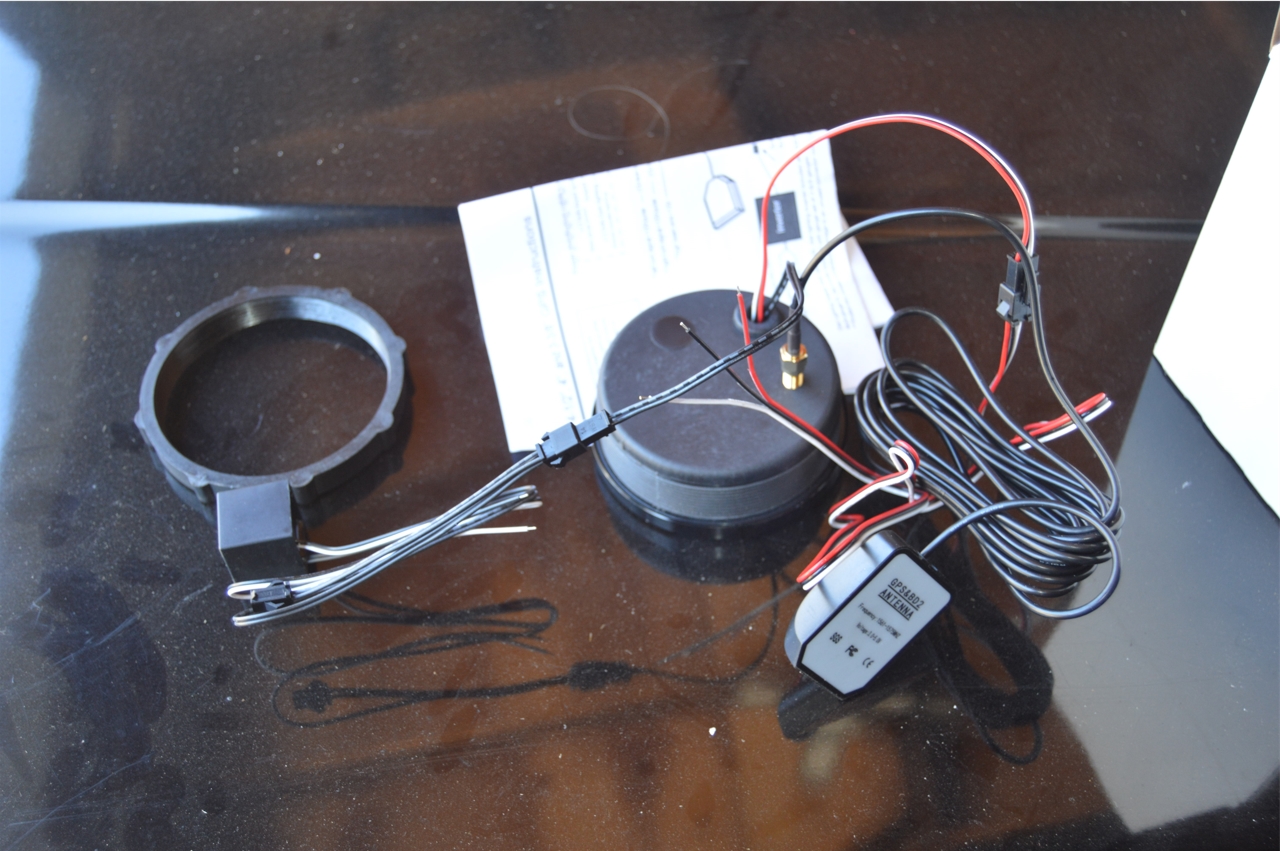
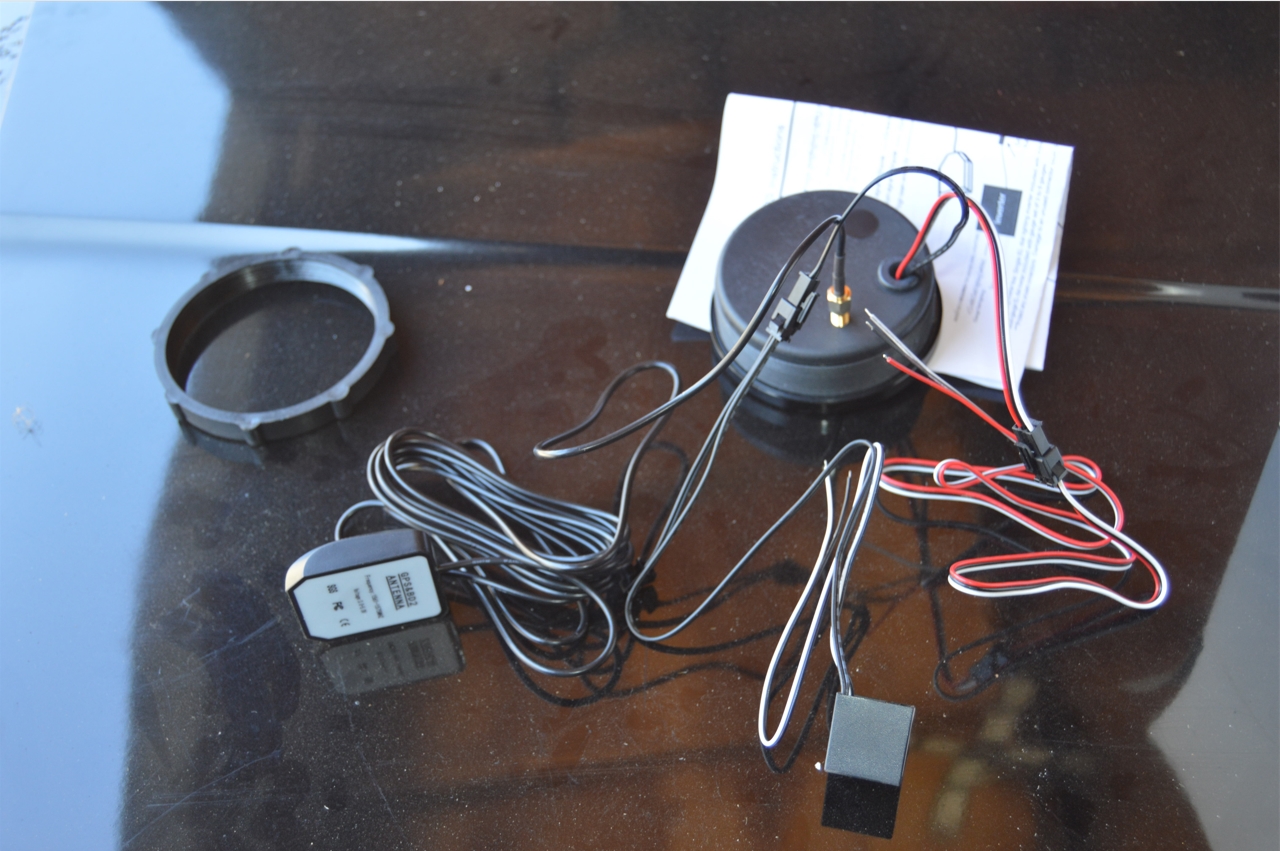
When you purchase the new speedo, it comes with:
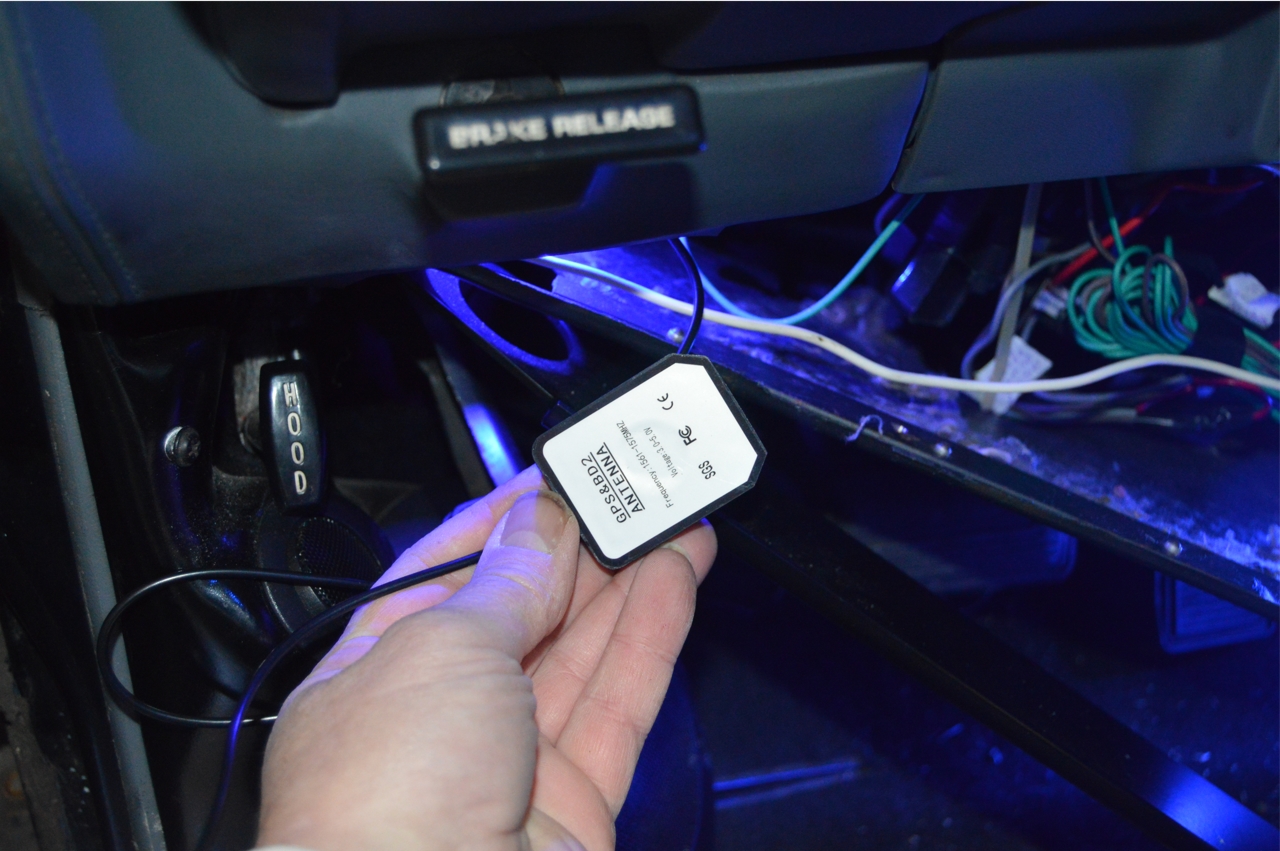
GPS Antenna with 9ft long coaxial cable and male SMA connector
(Waterproof Antenna, Magnetic Base, 48 x 40 x 13 mm, High-performance active GPS antenna, Low noise figure and high gain coverage)
Single Power Cable Link (powers up 1 gauge).
Gauge Lighting Inverter Kit (powers up 1 gauge).
.
The website says it takes about 2 weeks to arrive, but actually took a bit over 3 weeks.
(not that big a deal since it’s winter season right now)
The cost is about $300 including shipping.
.
Con (but maybe a Pro too): since this unit works via GPS, this means if you have your Gbody Regal rear wheels off the ground, and it’s in gear, the speedometer (and odometer) does not move.
[so much for trying to test it out without leaving the driveway…]
.
.
The LCD screen that is in the center at the bottom of the speedo unit is very small. It measures about 1″ wide by 1/2″ tall.
(but what can you possibly expect from a small 3 3/8″ gauge?)
There’s an instruction sheet included for wiring purposes, and tells you how to access the different functions available (push the button to scroll to the setting, then push and hold to activate / change / clear options).
Wiring it all up is pretty simple. They give you 3 sets of wiring to get it working.
[listed below in the order from this pic]
.
.

.
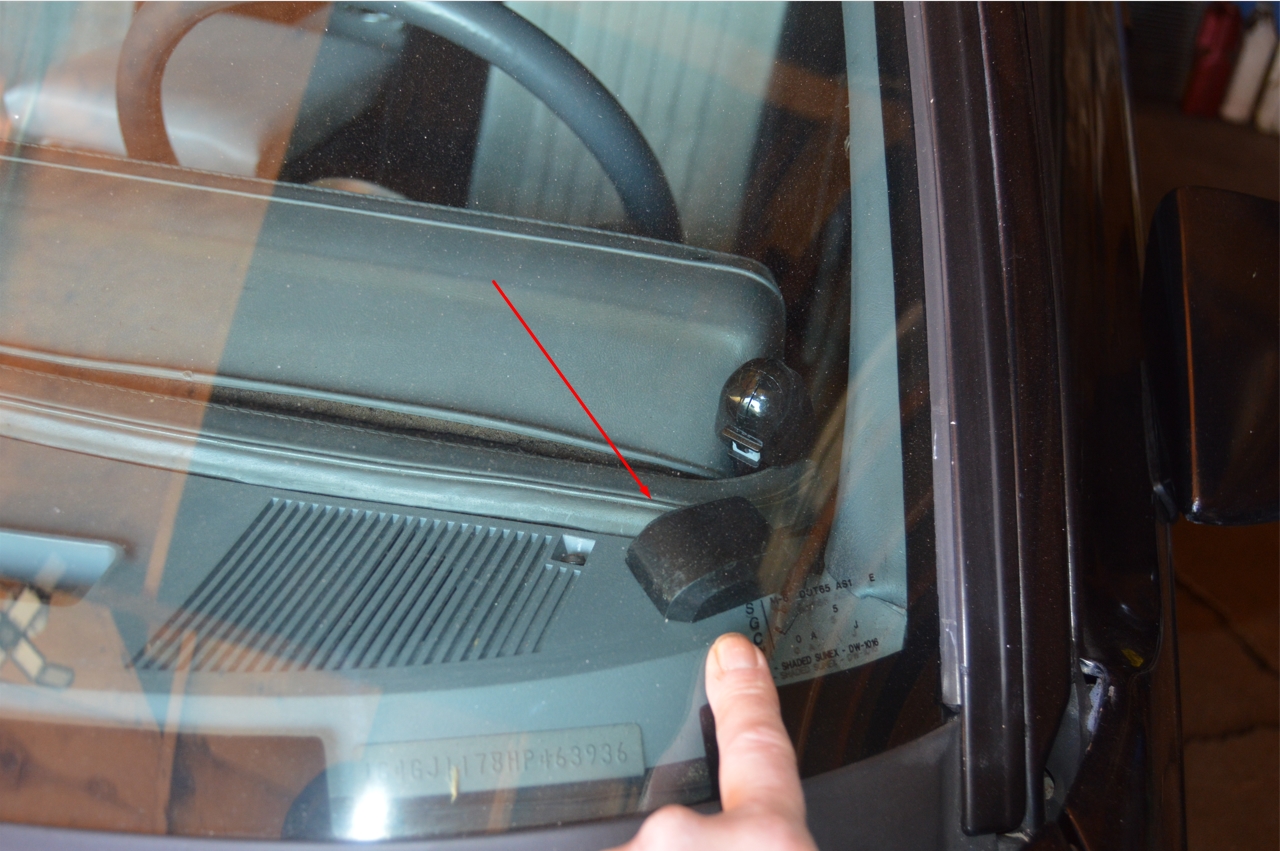
1. The antenna just screws in (to the gold looking outlet on the left side of gauge).
You put the receiver (the rectangle box part) at the highest point you can (on your windshield).
(you’ll have to attach double sided tape to the base, to be able to secure it to the windshield, which is not supplied, but the box is magnetic, so that’s an option, but you’ll have to figure out how to do that in a Buick Regal!)
(there’s no other electrical connections to this part)
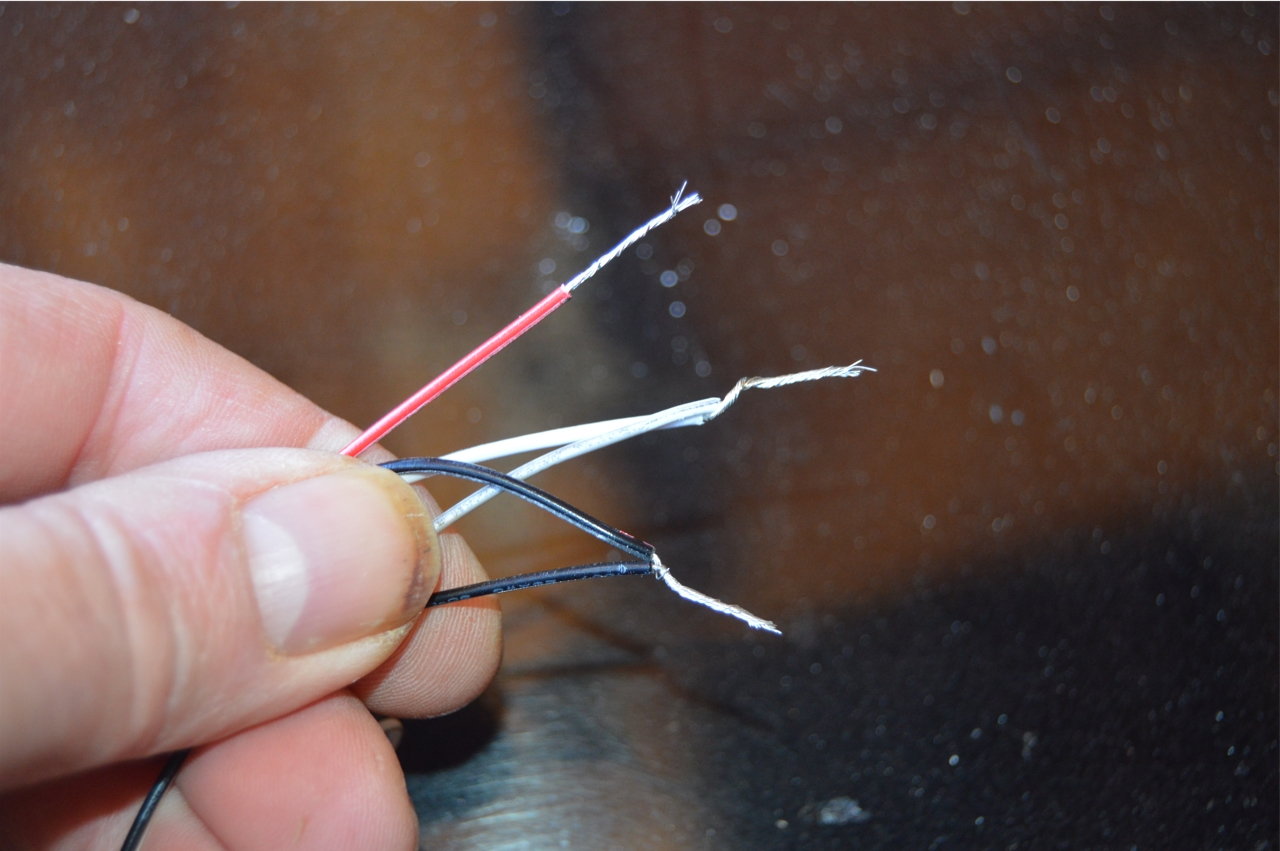
2. The inverter (square box) has a 2 pin connector, and attaches to the black set of wires on the backside of the gauge.
The black wire is a ground.
The white wire is a power wire for the dash lighting (gauge dial lighting).
3. The power distribution cables connect to the (red/black/white) set of wires on the right side of the gauge, via a 3 pin connector.
The red wire is a 12+ volt keyed ignition source (main gauge power).
The black wire is a ground.
The white wire is a power wire for the dash lighting (pointer needle lighting).
The directions state to connect both the white wires from (#2 & #3) above together, and connect them to the same dash lighting source.
[to which we used the lighting source from the old setup, we just tapped these new wires into the old bulb socket wires (which already had spade terminals on the wire ends), on the positive wire side]
[we also connected both ground wires (from #2 & #3 above) together and again connected these new wires into the old bulb socket wires, on the negative side]
For the red wire (from #3 above), we ran this wire over to our second fusebox (with a 5a fuse).
[note the factory red wire is only 28″ long, so we had to add a new piece to reach the fuse block]
(note that all the supplied wire harnesses are very small, like 22 gauge wire in size, except for the antenna. Seems rather small, but they probably know what they’re doing when it comes to this)
.
HOW TO:
1. Remove gauge cluster bezel.
2. Remove gauge cluster (we pulled it out just enough to replace the gauge).
(our instrument panel is only held in place by 2 bolts at the bottom)
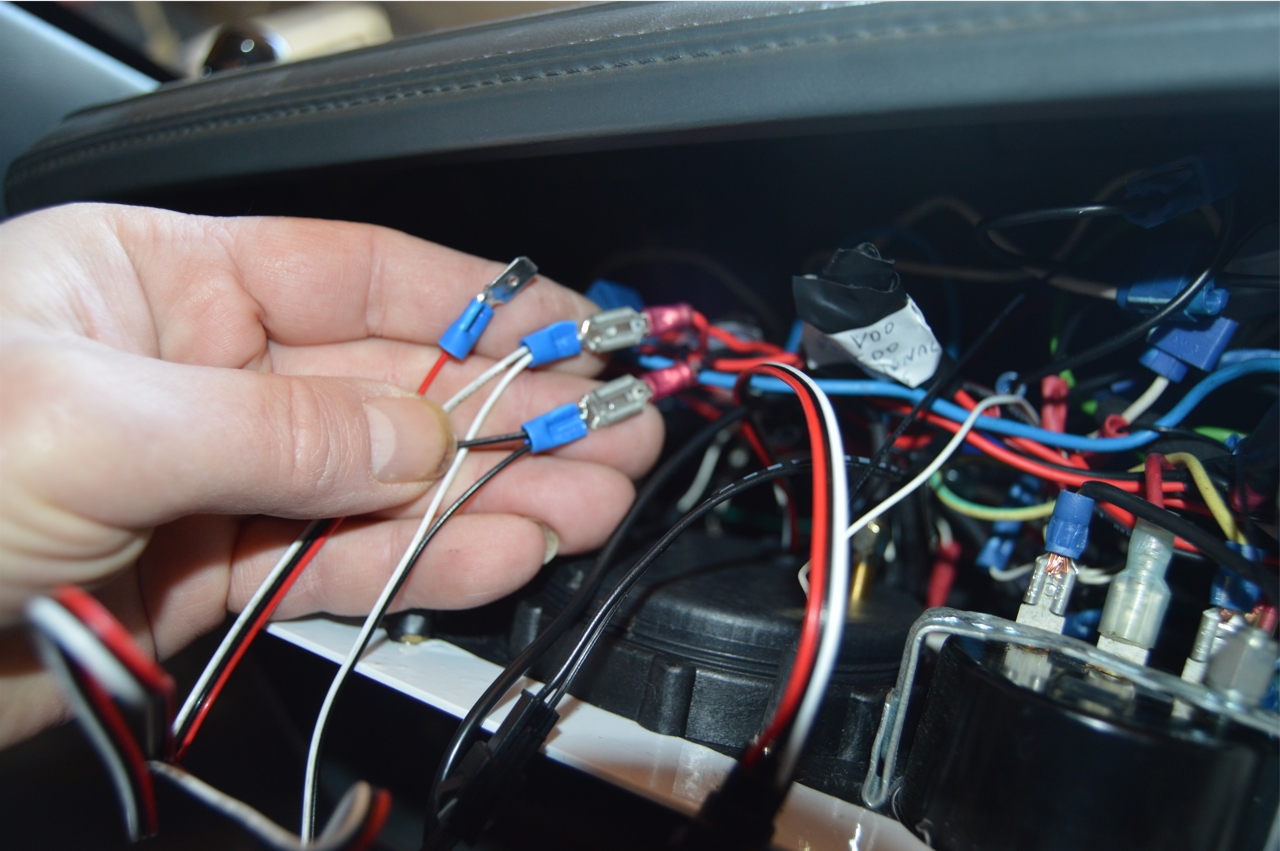
3. disconnect original electronic wiring hooked up to old speedo unit.
(lighting, power & signal wires)
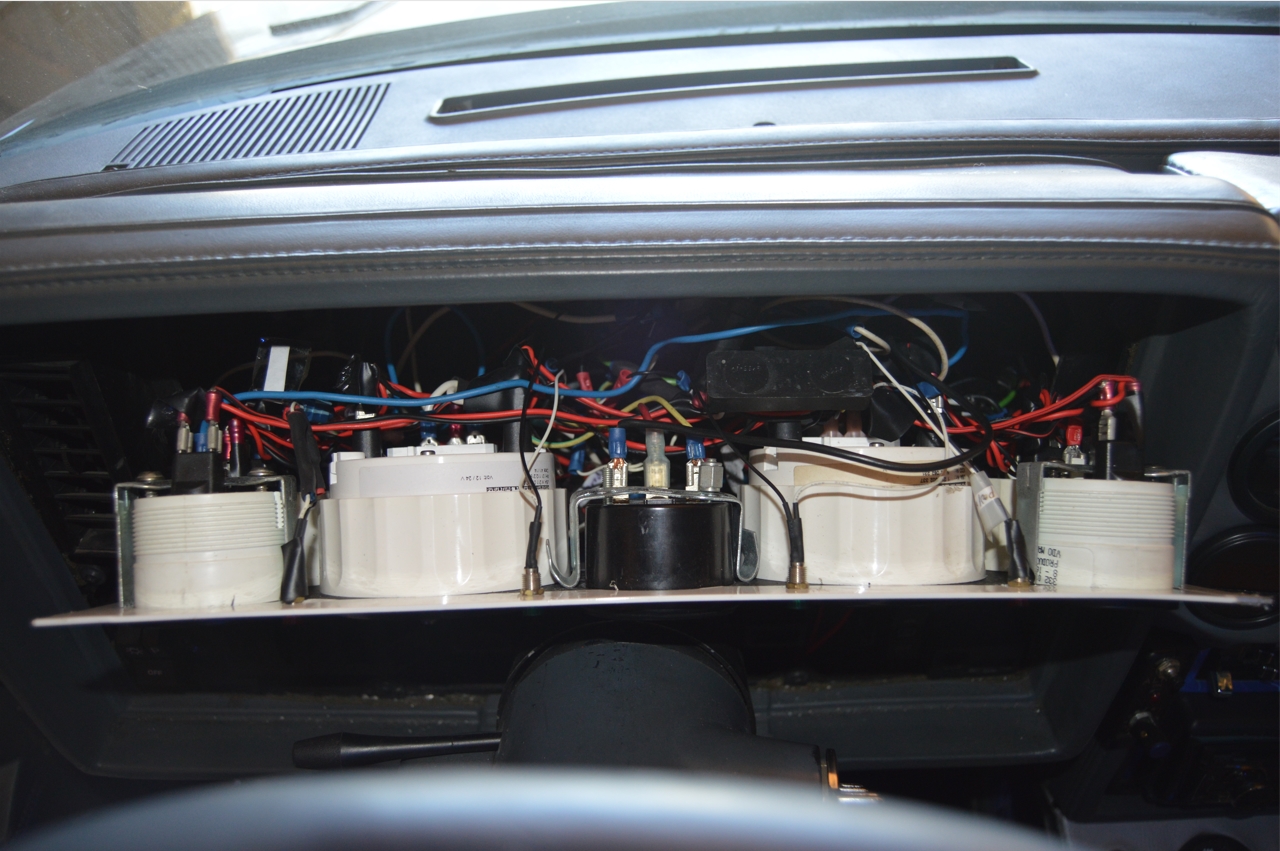
(we left this all intact behind the gauge plate, since it still controls the other items; we just taped it off and shoved it back there)
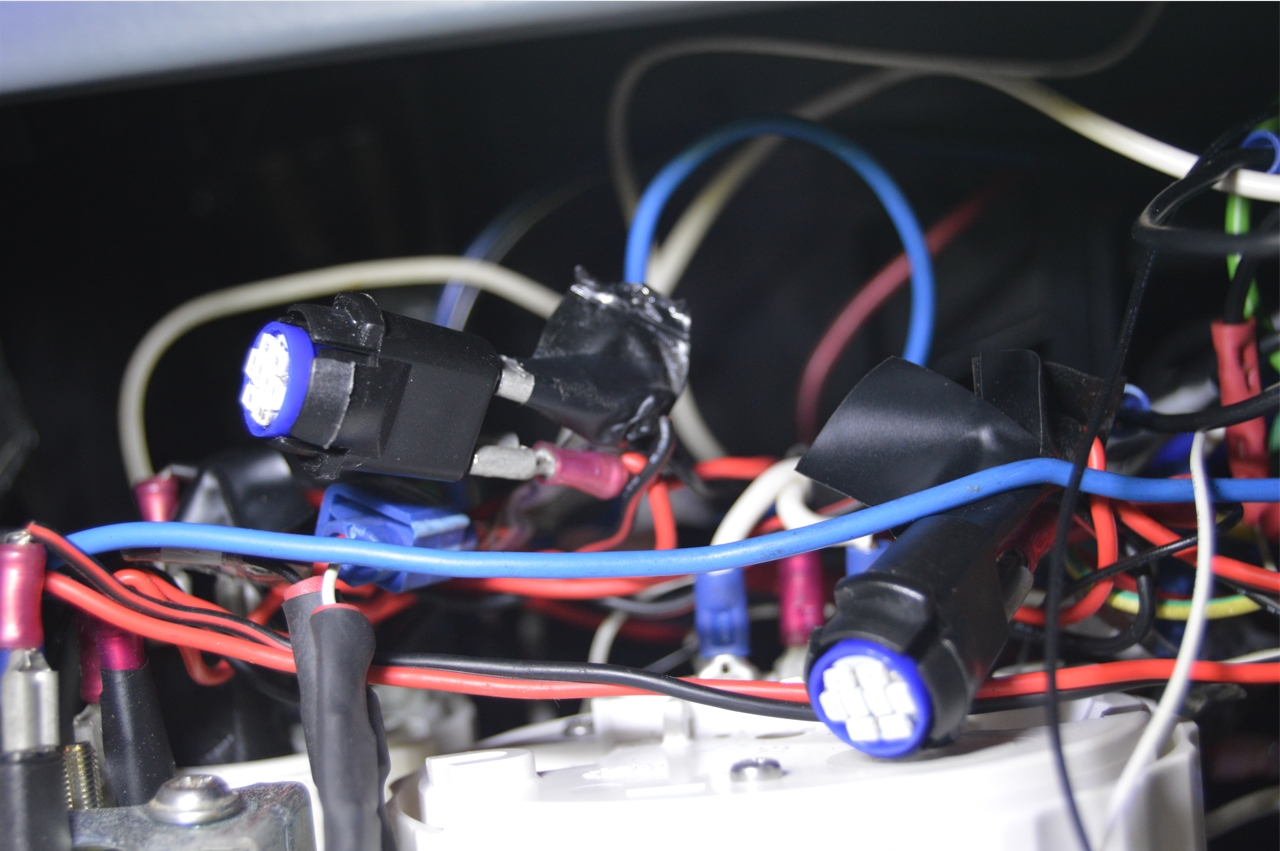
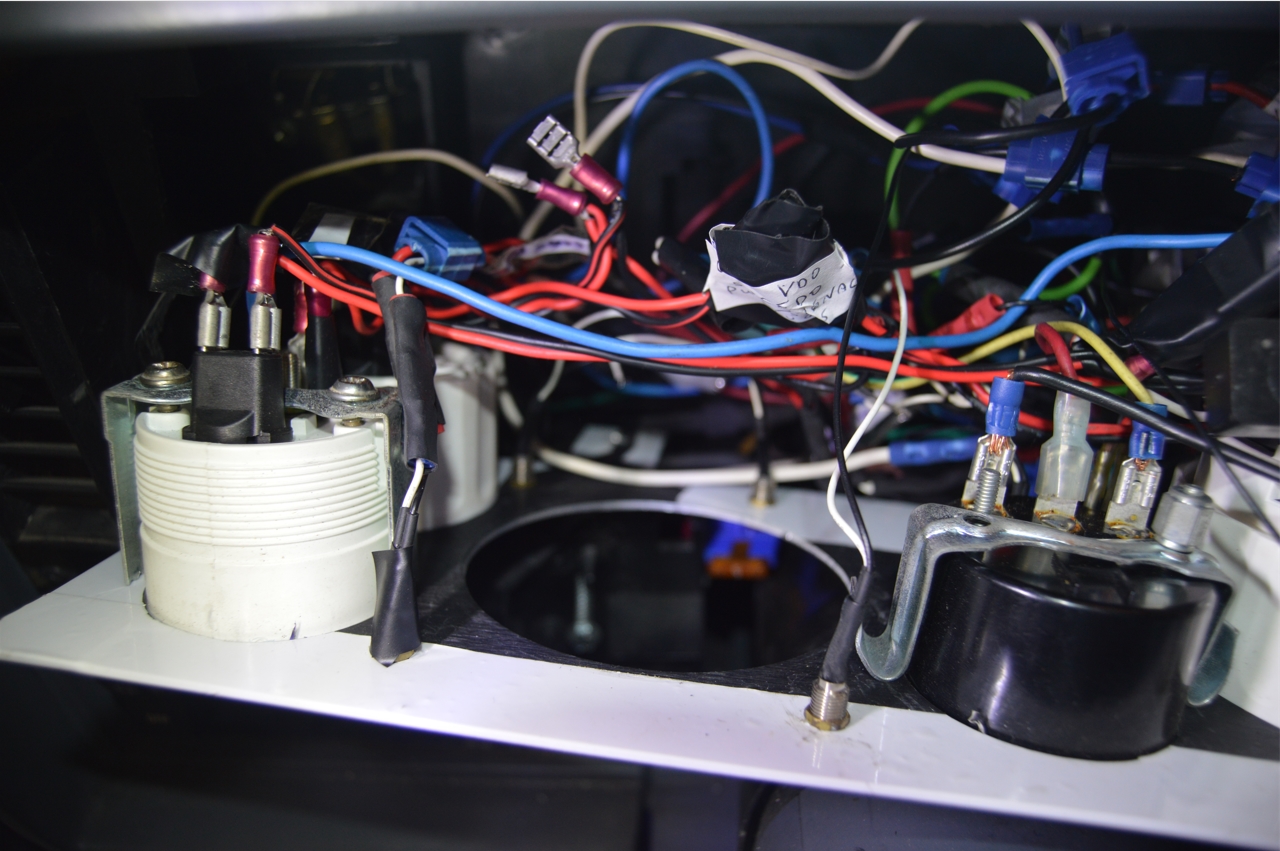
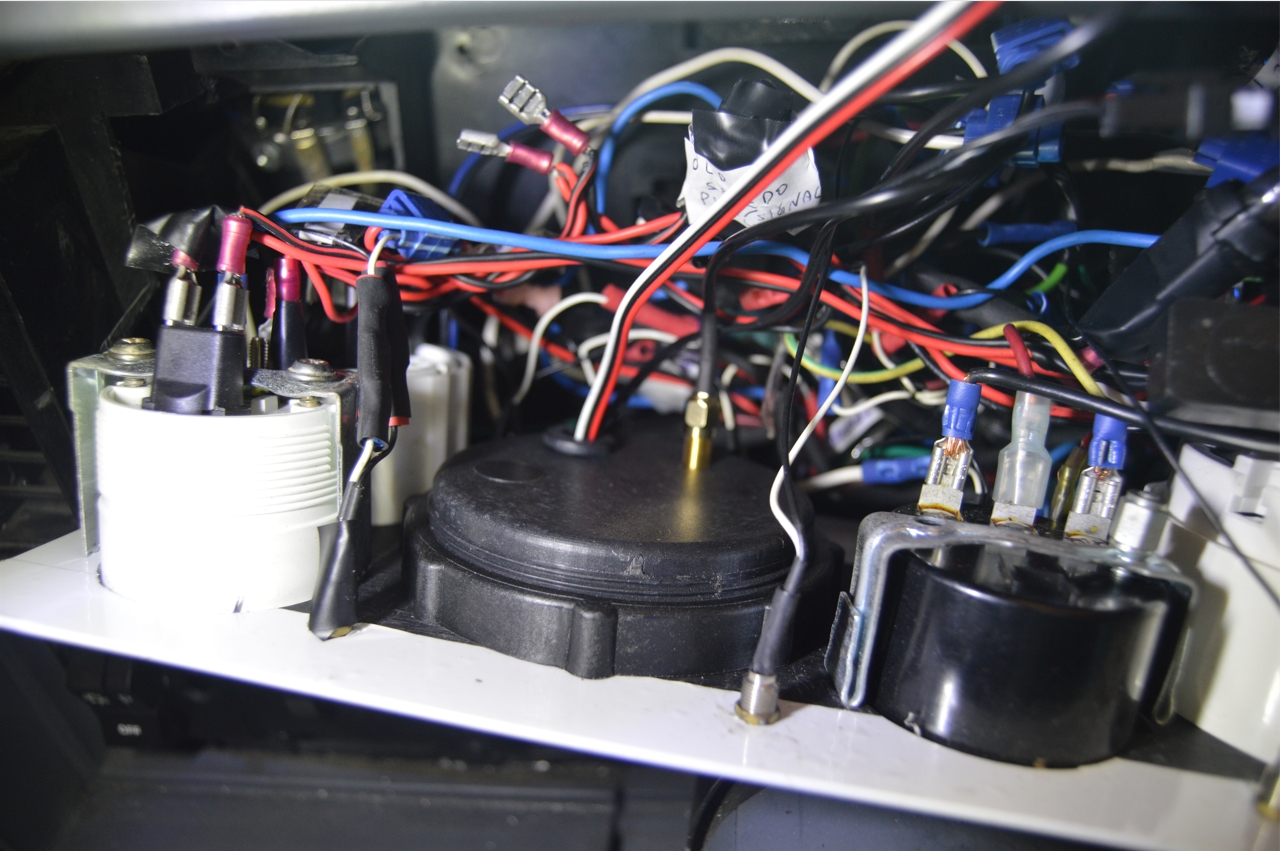
[you can see what a jungle it is back there behind the gauge panel, with all the wiring, but this is normal considering that all of the gauges are of the electronic variety]
4. Remove old speedometer (it has a spin ring on the backside, so easy removal)
.
.
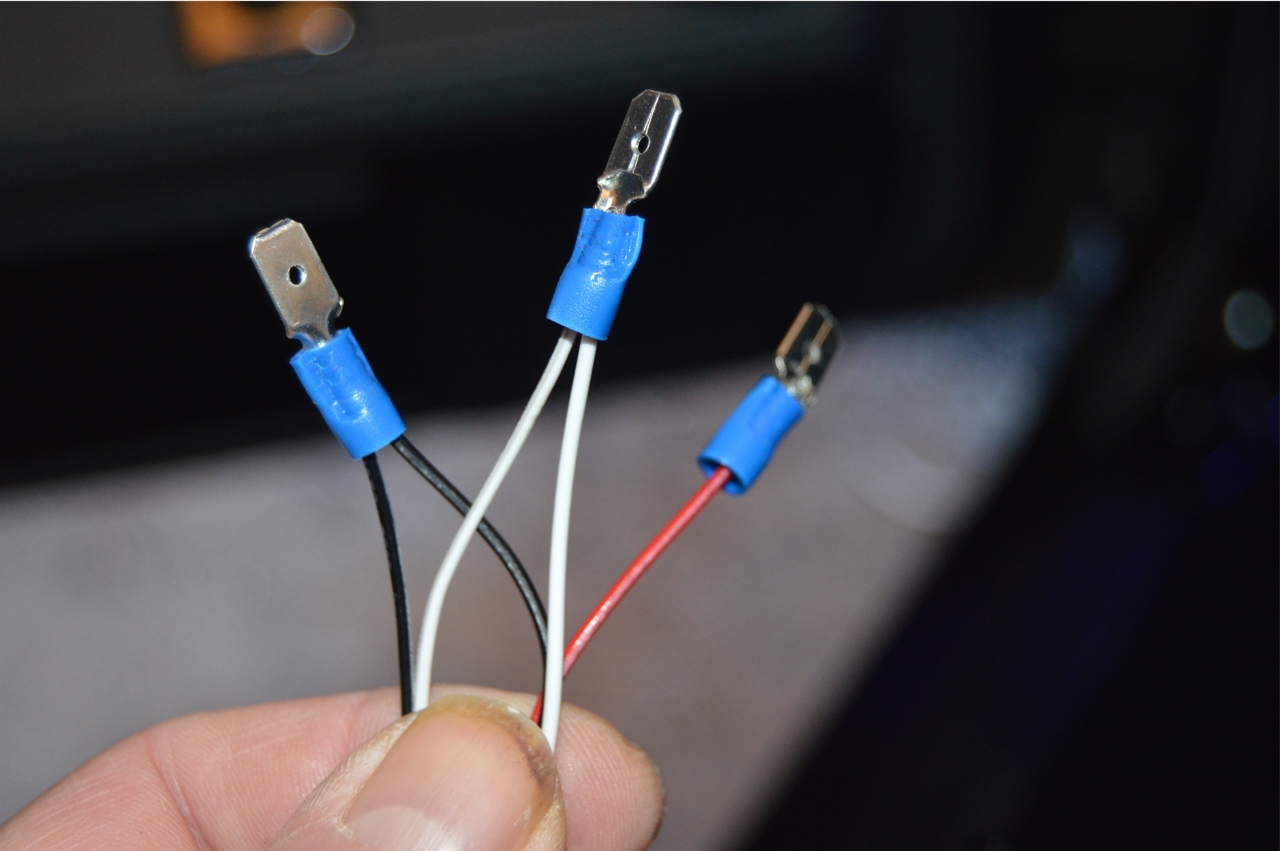
5. wire up new lighting inverter.
connect the 2 power wires and 2 ground wires together for dash lighting, add spade terminals.
attach all the wiring & connectors to the speedometer.
(2 white wires attached together and connected to power wire from the old lighting socket)
(black ground wires were done the same way, connected to the negative side of the old lighting setup)
6. wire up new power cable.
(this wire is ran down the bottom of the dash, over to the extra fuse block on the passenger side, behind the glovebox, that we installed awhile ago)
(it’s protected by a 5 amp fuse)
7. insert new speedo & attach to panel. (uses another spin ring).
connect new spade terminals to old ones.
(since the terminals aren’t fully insulated we put some electrical tape on them)
.
.
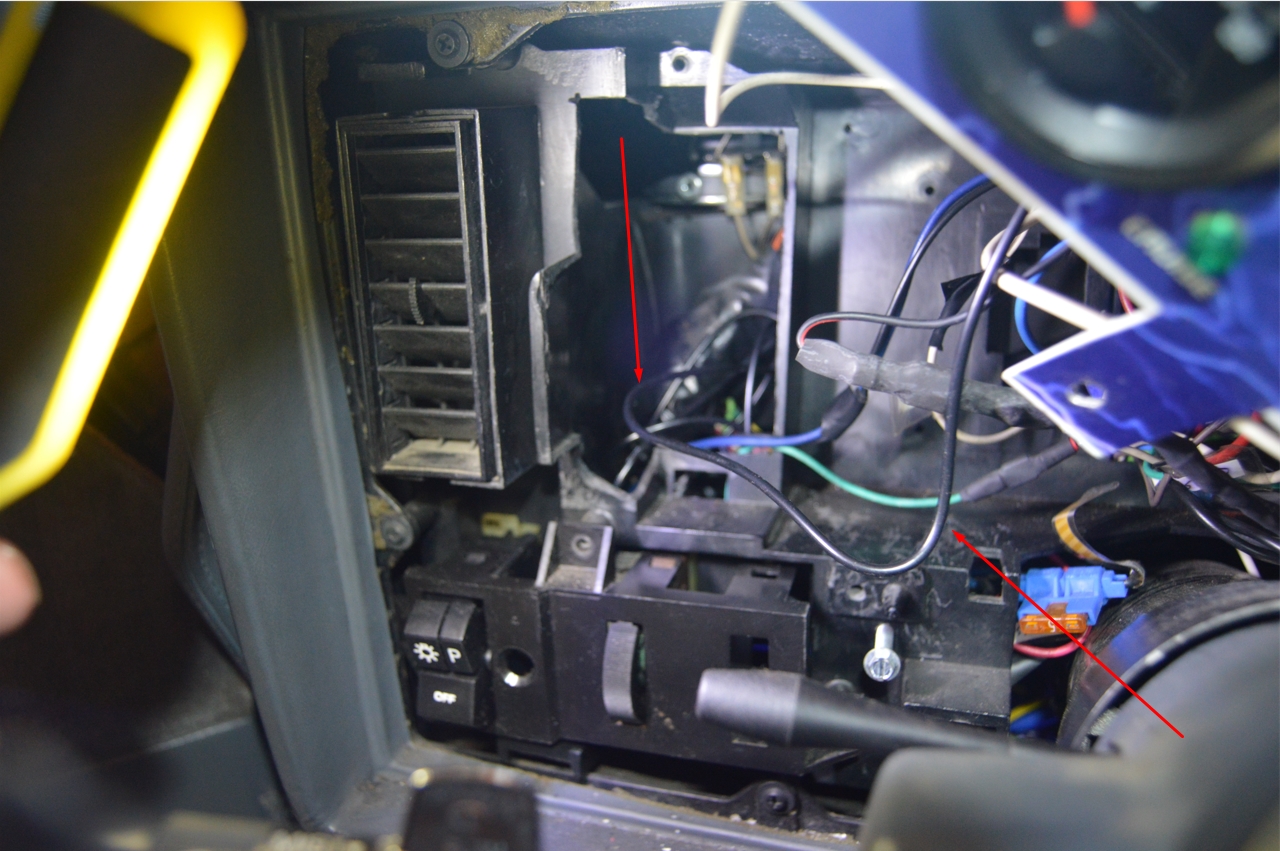
8. wire up, run & mount new antenna.
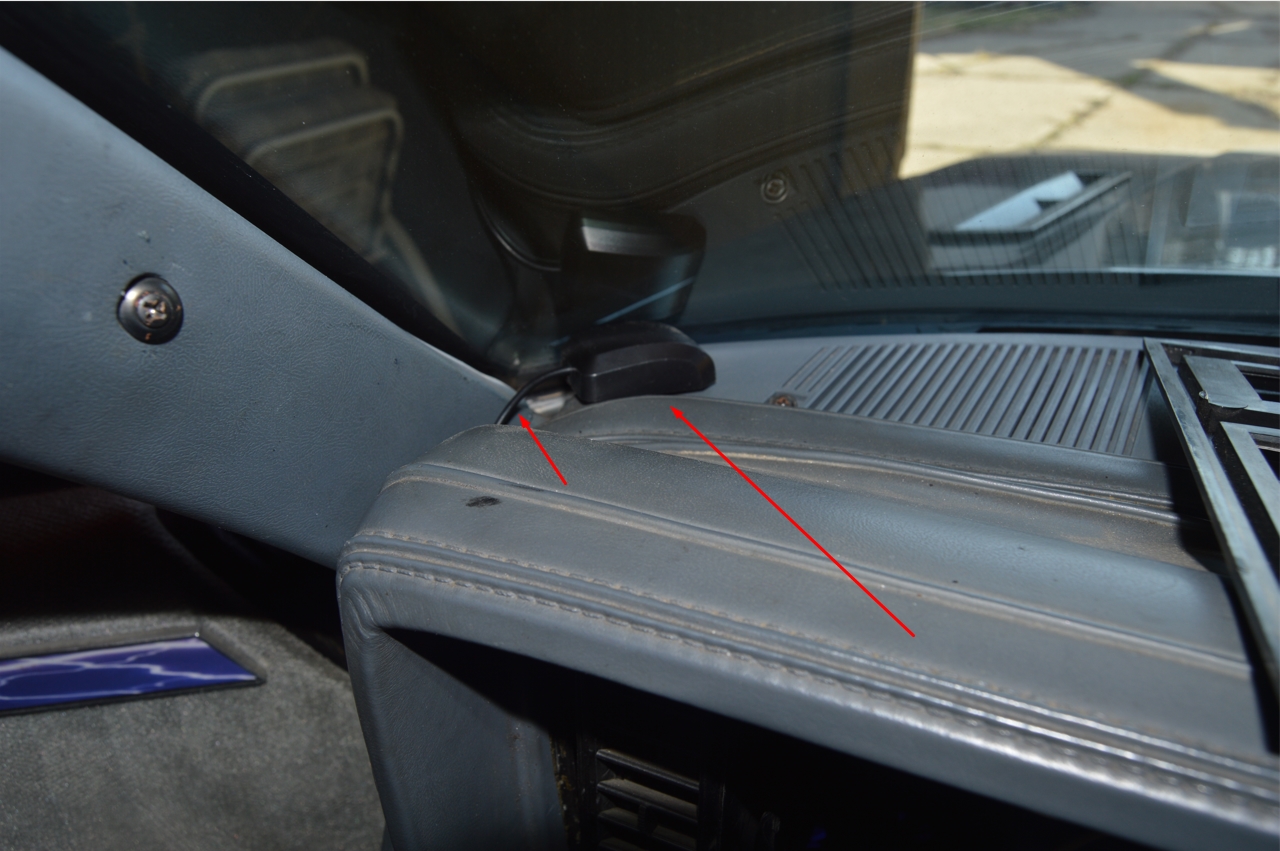
(we placed the antenna box on the top of the dashboard on the drivers side, in the corner nearest the windshield)
(we were going to stick it to the top of the windshield, but we figured that the extra 18″ higher up wouldn’t really make that much difference. Not to mention the directions says the antenna box should try to grab as much of the sky as possible, so we thought lower down on the dash would be a better choice to accomplish this)
Installing the antenna is probably the hardest part of this entire task.
You have to work behind the dash, dropping the box antenna down behind everything and out the bottom, then run the attached wire up the left side of the dash (between door jamb and dash) and A-pillar trim to where it needs to eventually go.
(there’s 9 feet of wiring attached to the antenna box, so you have to stuff all this back there behind the dashboard too!)
.
.
9. put the gauge panel back in place & secure.
10. reinstall gauge bezel.
.

.
That’s it, other than testing if it actually works (MPH, odometer), and playing with all the new toys that are available within the new speedometer LCD display!
(we can’t wait until winter is finally over!)
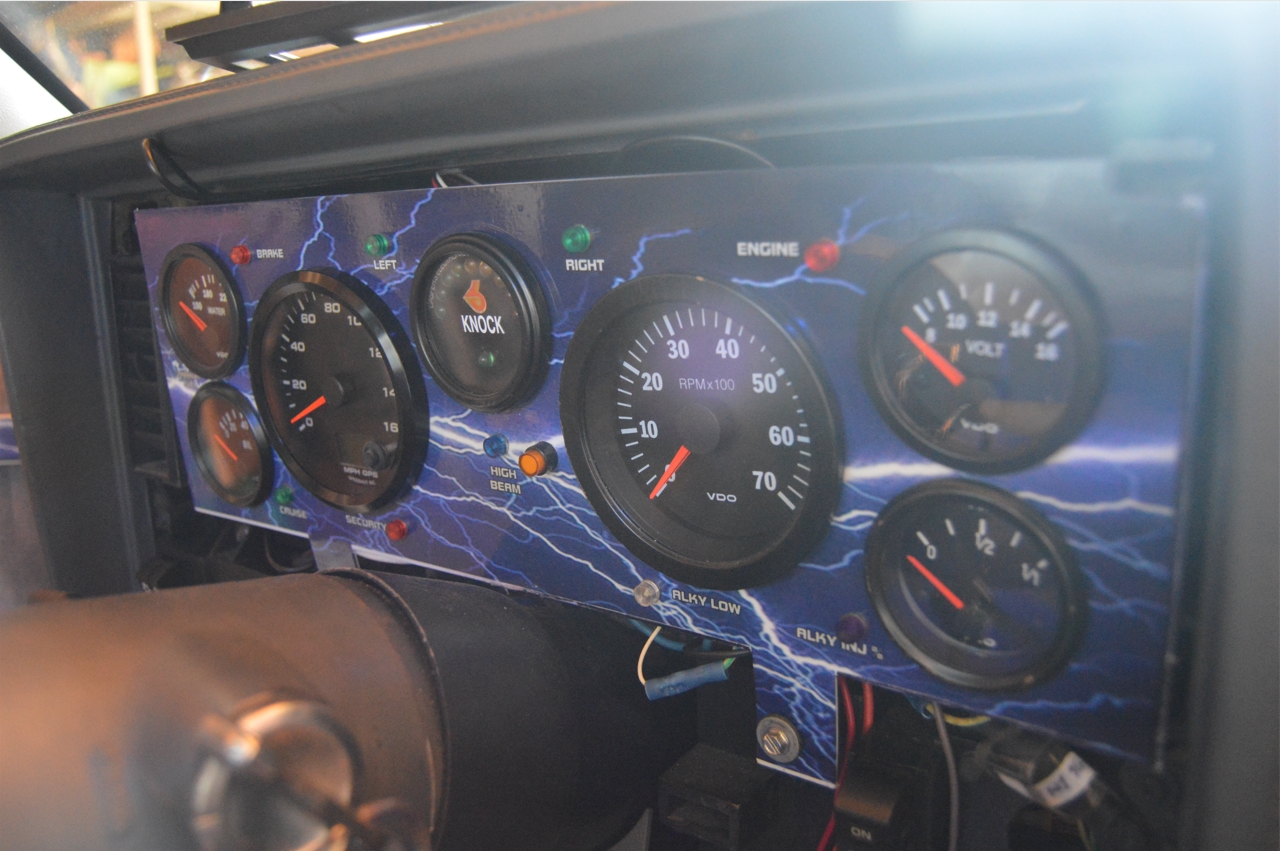
Our only complaint, which in reality is more of just a personal choice, is when we lit up the gauge, it isn’t like their example photo (shown above) from the website.
Instead of it being a dark blue shade, it’s lighter. Much lighter.
“Ice blue” is a more correct version of the supplied tone.
Not that there’s anything wrong with that color, it just wasn’t what we were expecting (or really wanted).
And it doesn’t match our other (dark) blue (LED lit) gauges.
An easily remedied situation however, by acquiring new (ice blue) led bulbs (for the other gauges) since the GPS gauge has an internal light source (which isn’t changeable).

Overall it’s not that bad though, we’ll probably get use to the lighter blue color.
(as we do have multiple shades of blue throughout this Gbody Regal)
Vroom vroom.
.


