


While not technically part of our Buick Grand National Engine Bay Cleanup series, considering we’re installing brand new parts, and the engine compartment is (mostly) where we’re currently working at, this fits in nicely with that. And it is sort of “cleaning up” things in this section of the Gbody Regal since it makes this area prettier than it was.
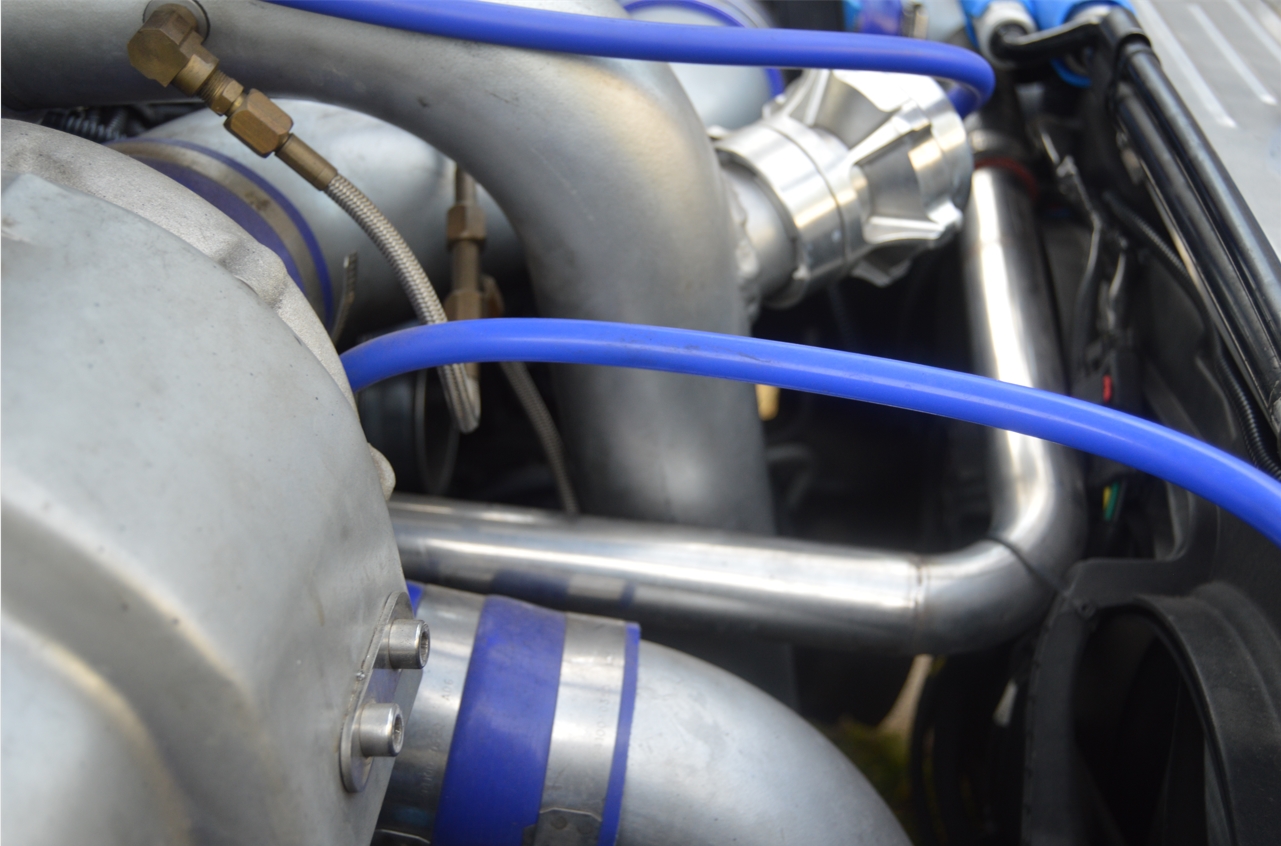
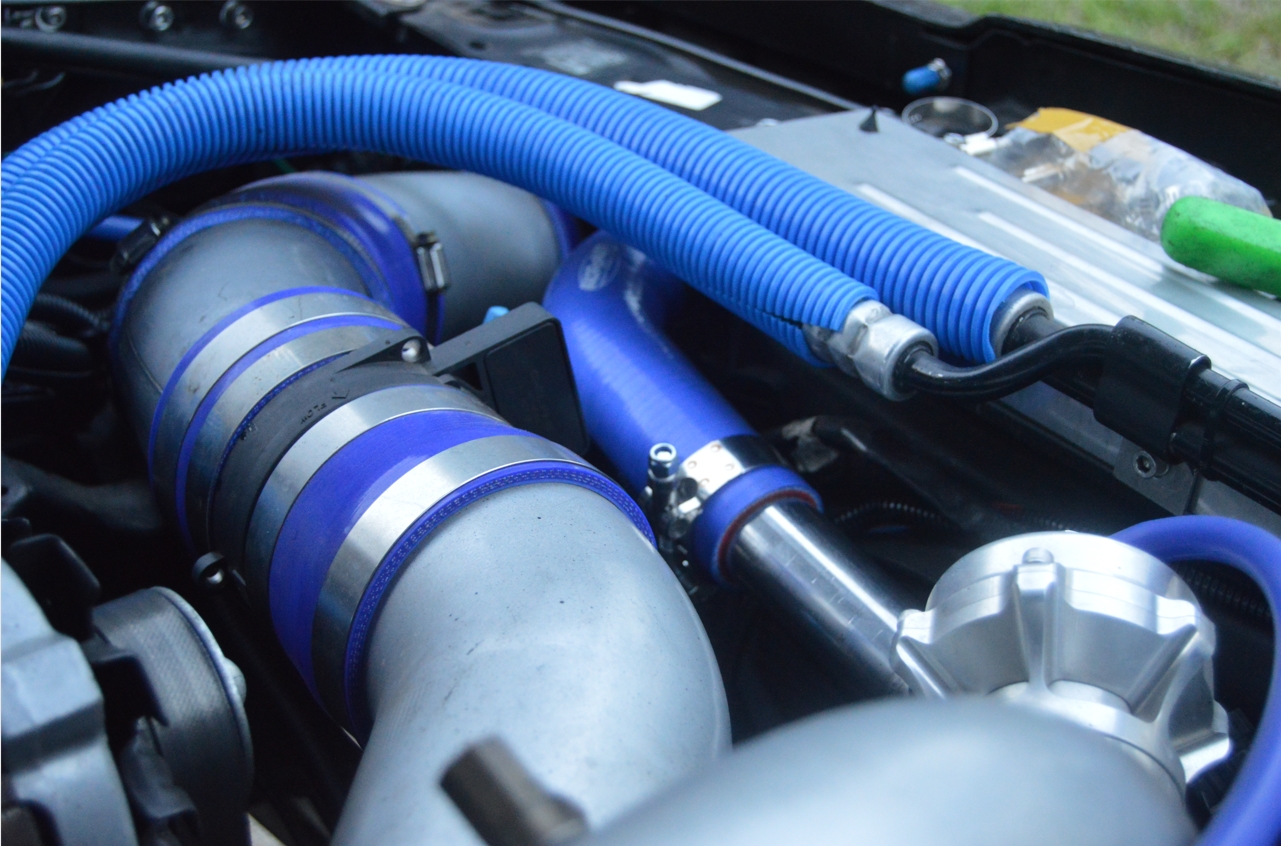
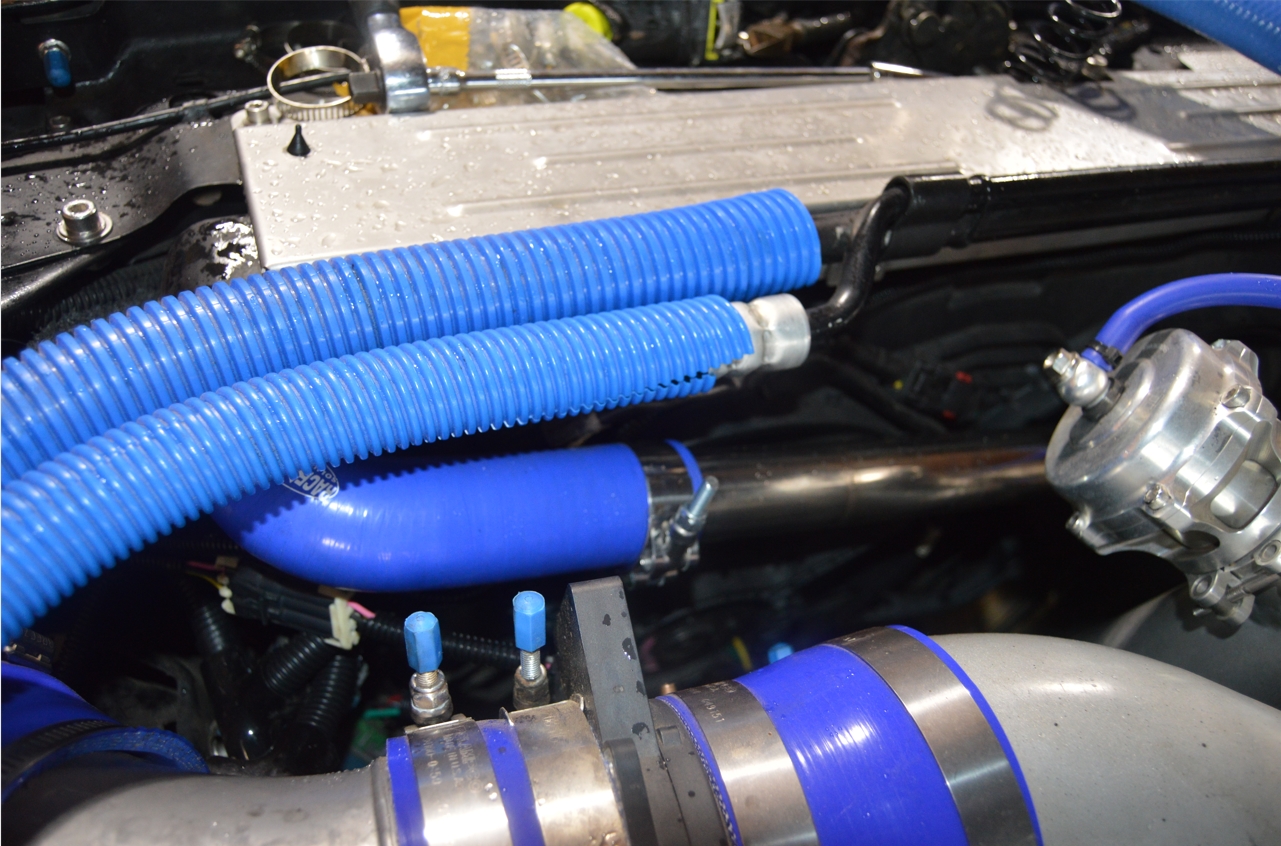
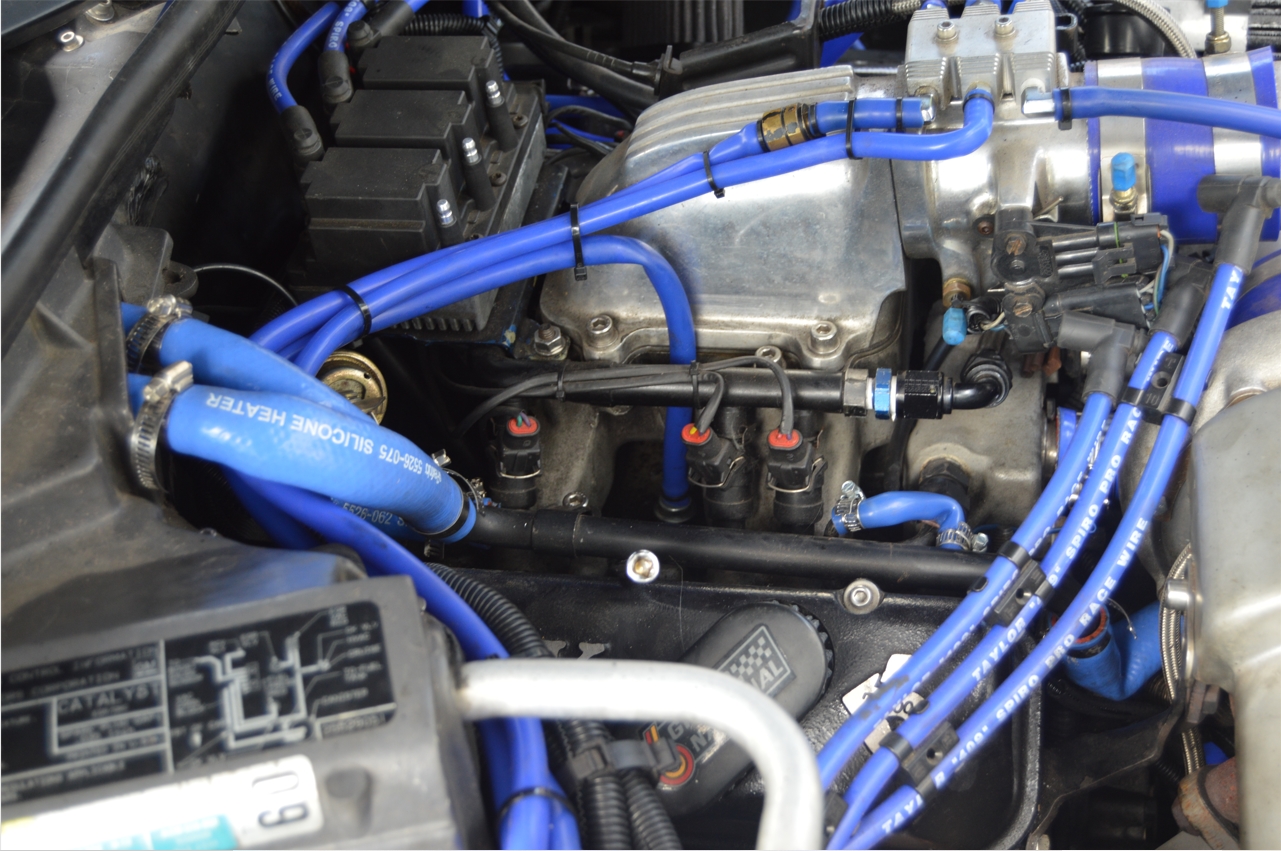
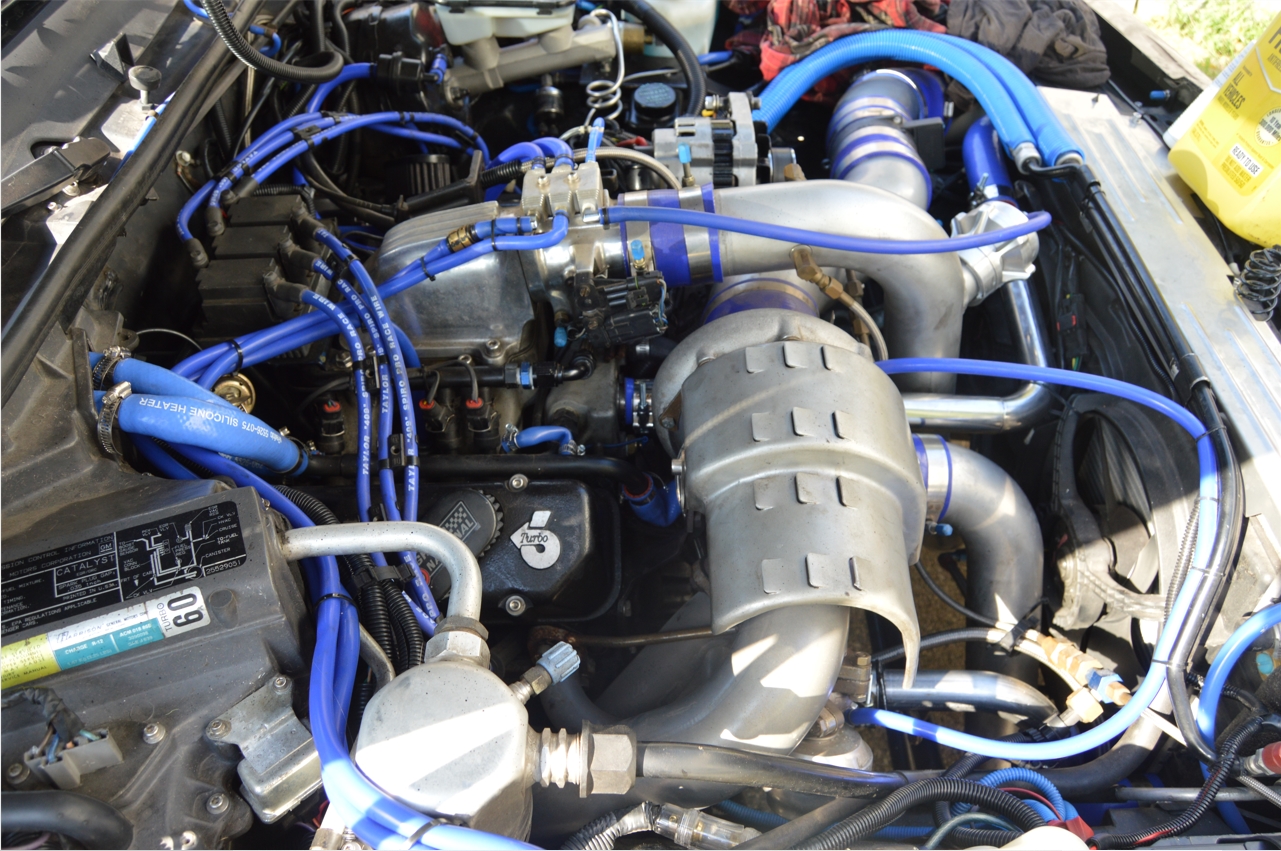
Even though we have a lot of blue components under the hood already (and it was a lot more, but we removed most of the blue colored wire loom that was there), we wanted to install these new (blue) heater hose and radiator hoses we’ve had sitting on a shelf for a few years now.
They’re brand new, will freshen up the existing ones, and hopefully add some more “pop” to the engine compartment.
.

.
Most of the projects we’ve tackled in the engine bay (paint master cylinder, paint fender braces, and others) aren’t costing anything (except time to do them), since it’s mostly just clean and/or paint things, and we have all the supplies we need already.
Except for this job.
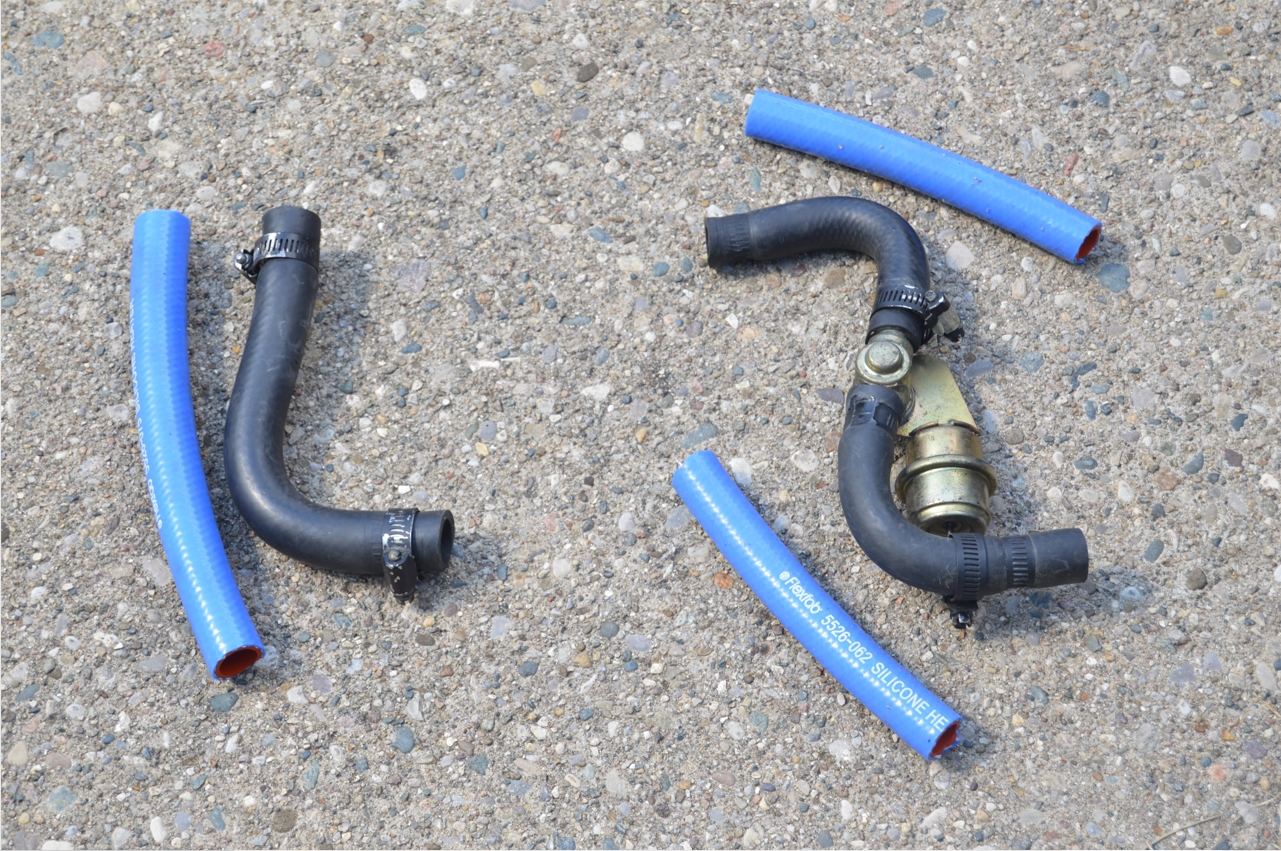
 We bought the upper and lower radiator hoses about 5 years ago,
before parts prices on just about everything started to skyrocket.
Aside from the color,
the prices on these items seem to have remained (mostly) about the same.
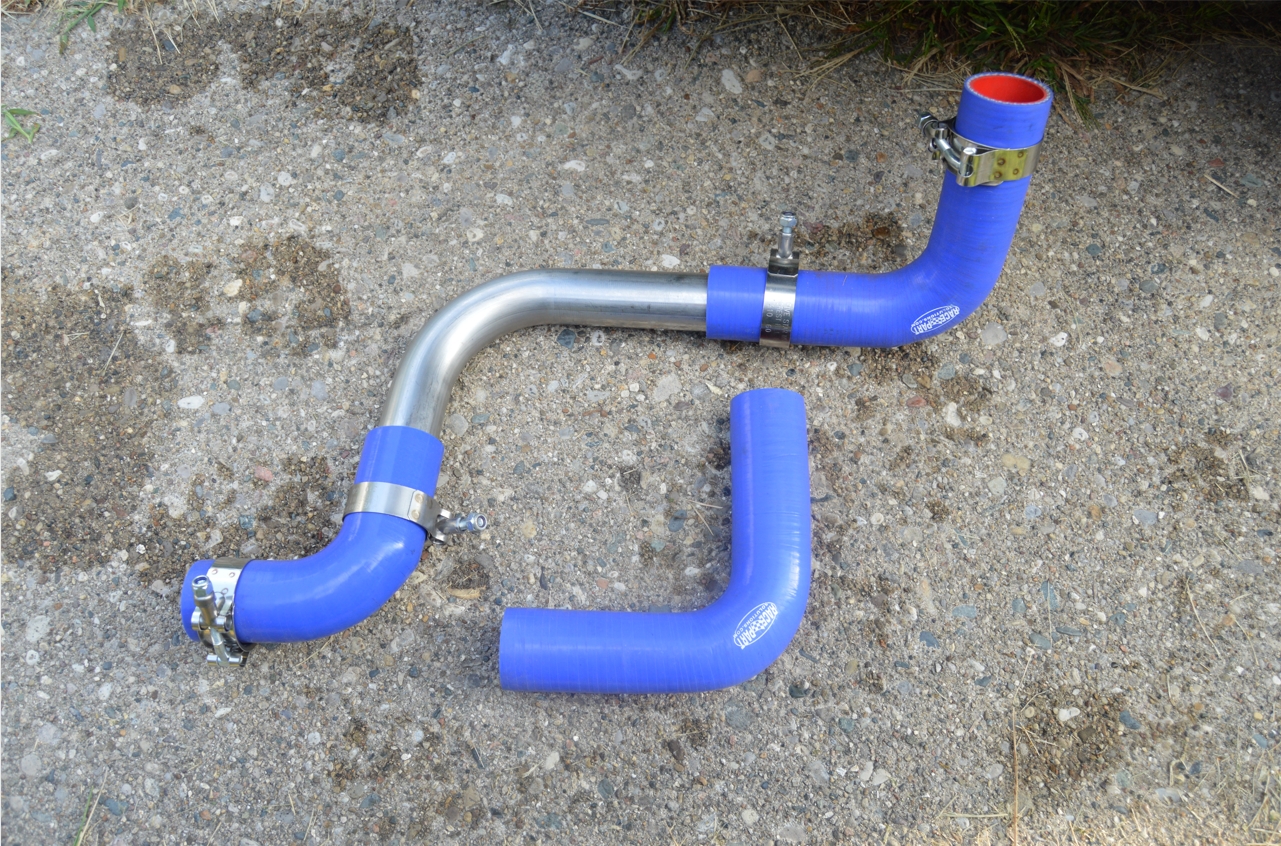
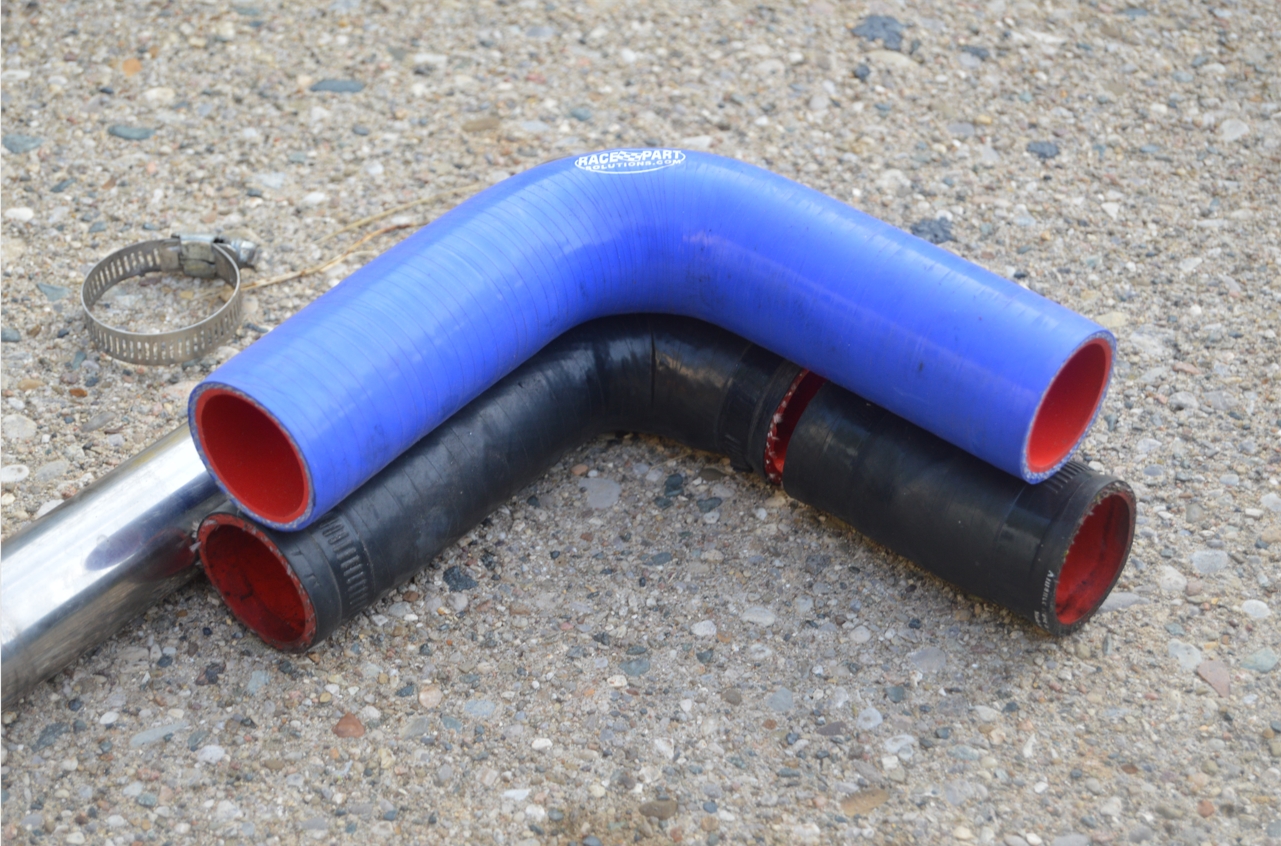
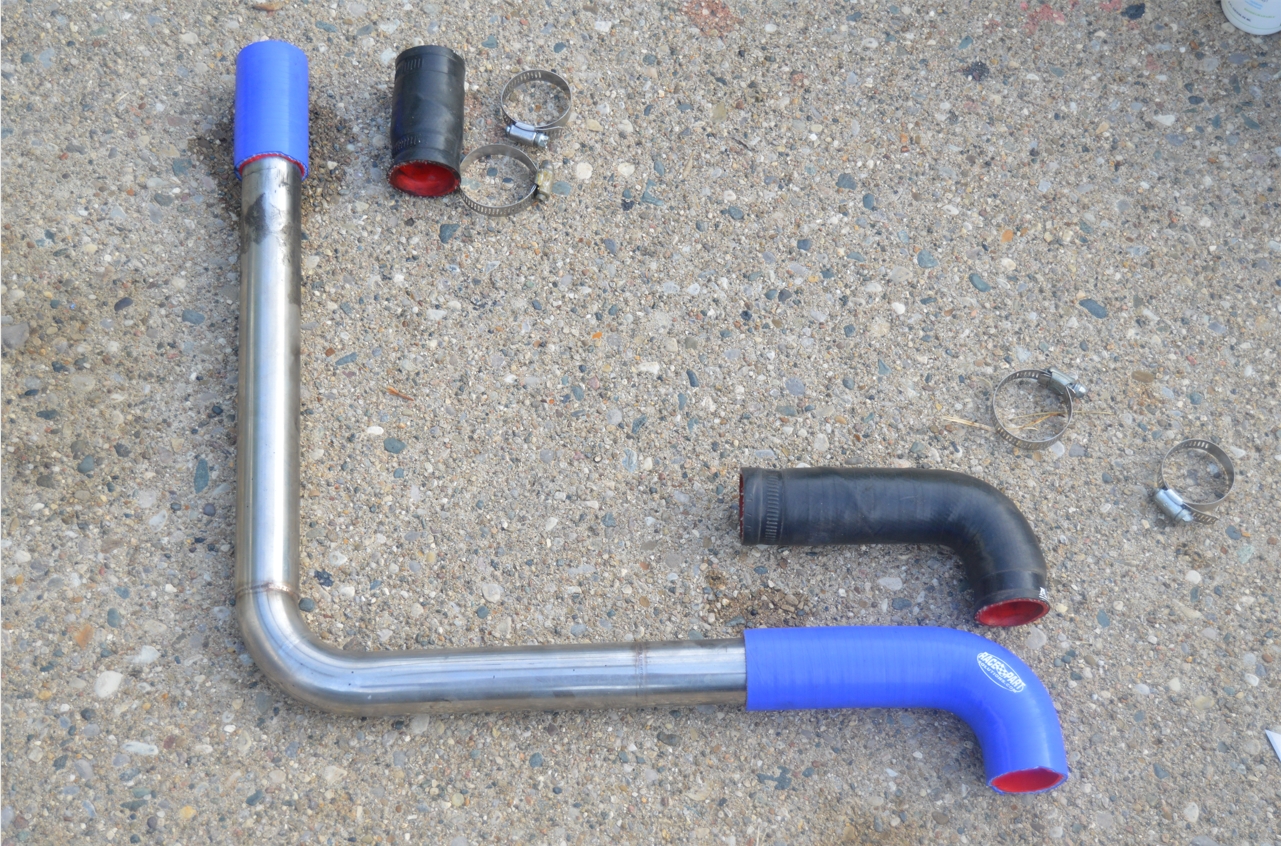
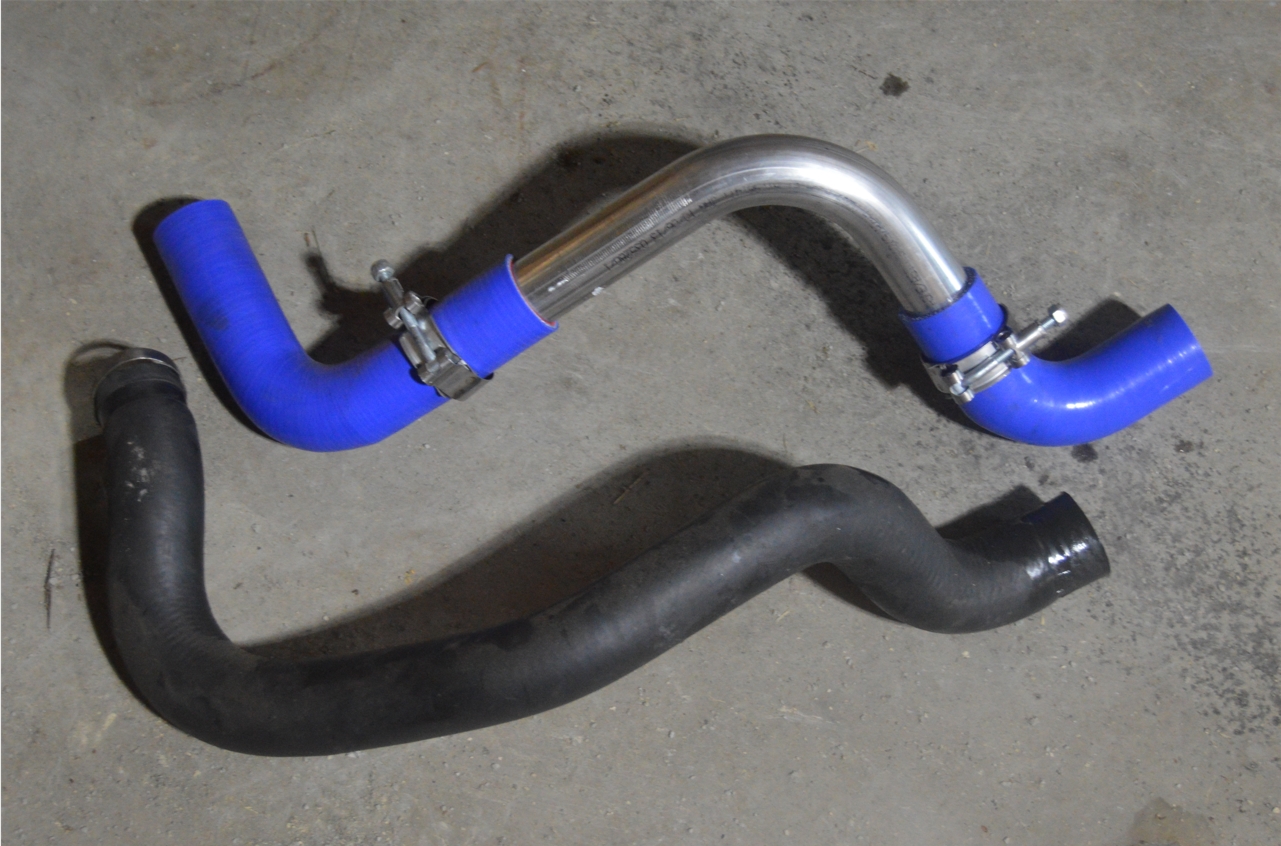
They are silicone hoses
(which is suppose to wear better than rubber, and lasts longer too).
The lower was about $45 (shipped).
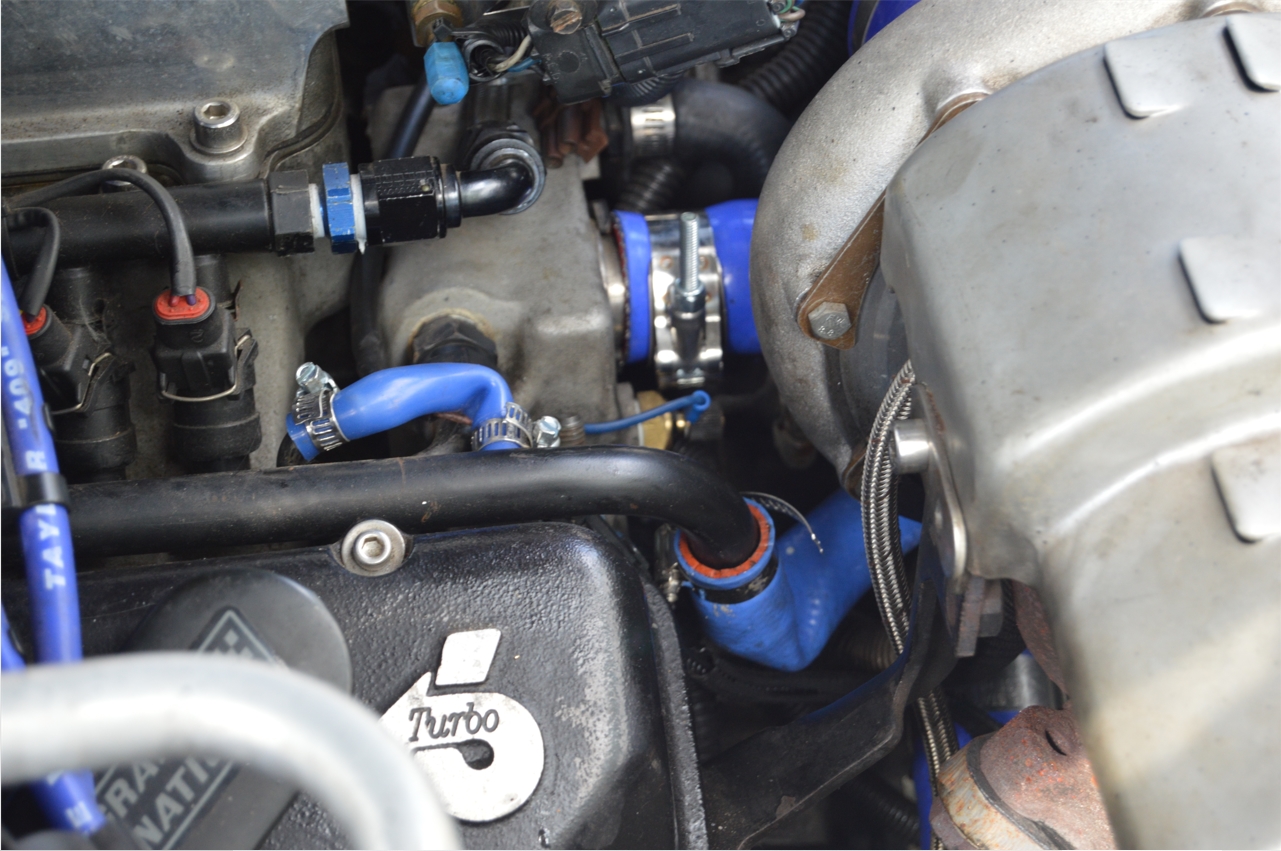
(it has a stainless tube in the middle and looks pretty cool, since it matches the upper radiator hose 100%)
[The drawback is who really sees this item? But for those who look hard and deep enough inside the engine bay, they’ll see it. Besides, “we” know it’s there, and personal satisfaction and knowledge of said modification is good enough sometimes]
The upper one was about $15 (shipped).
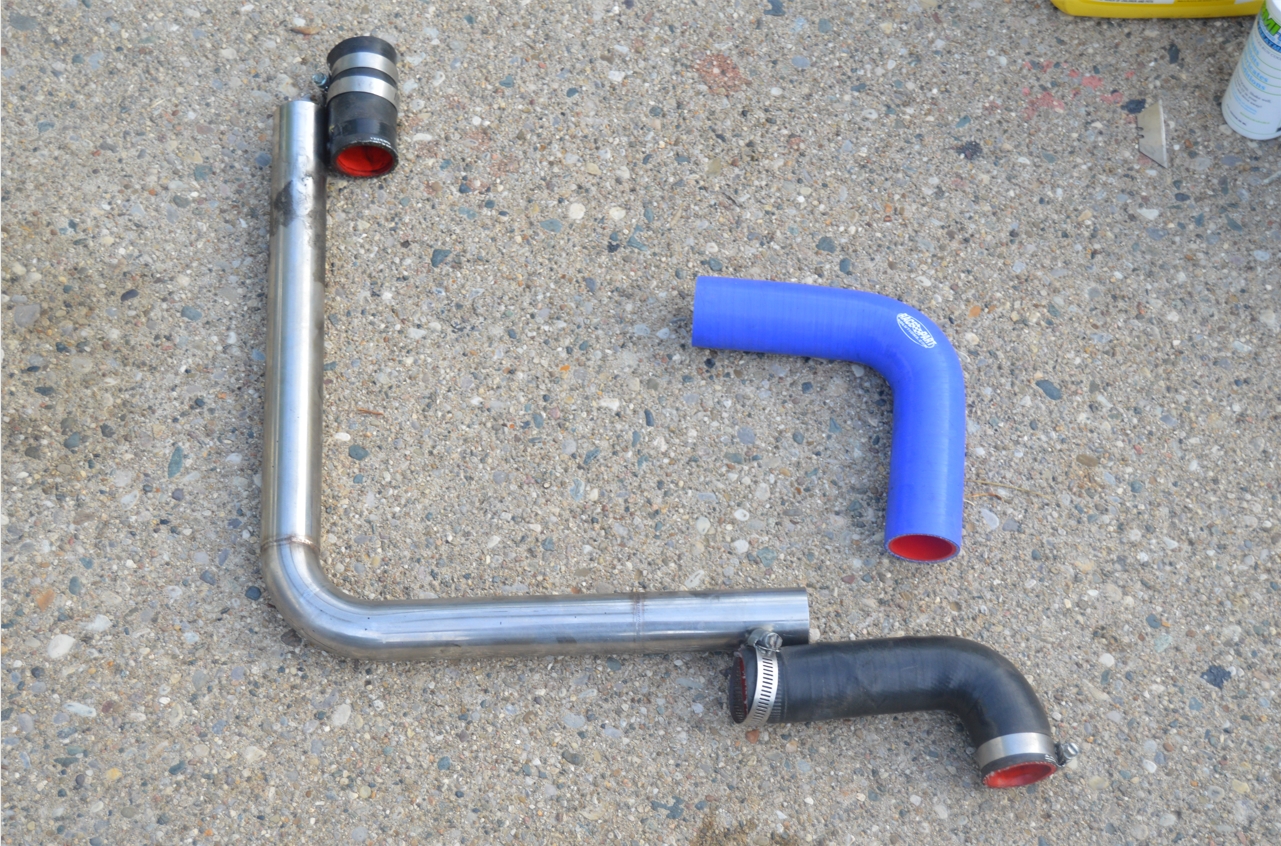
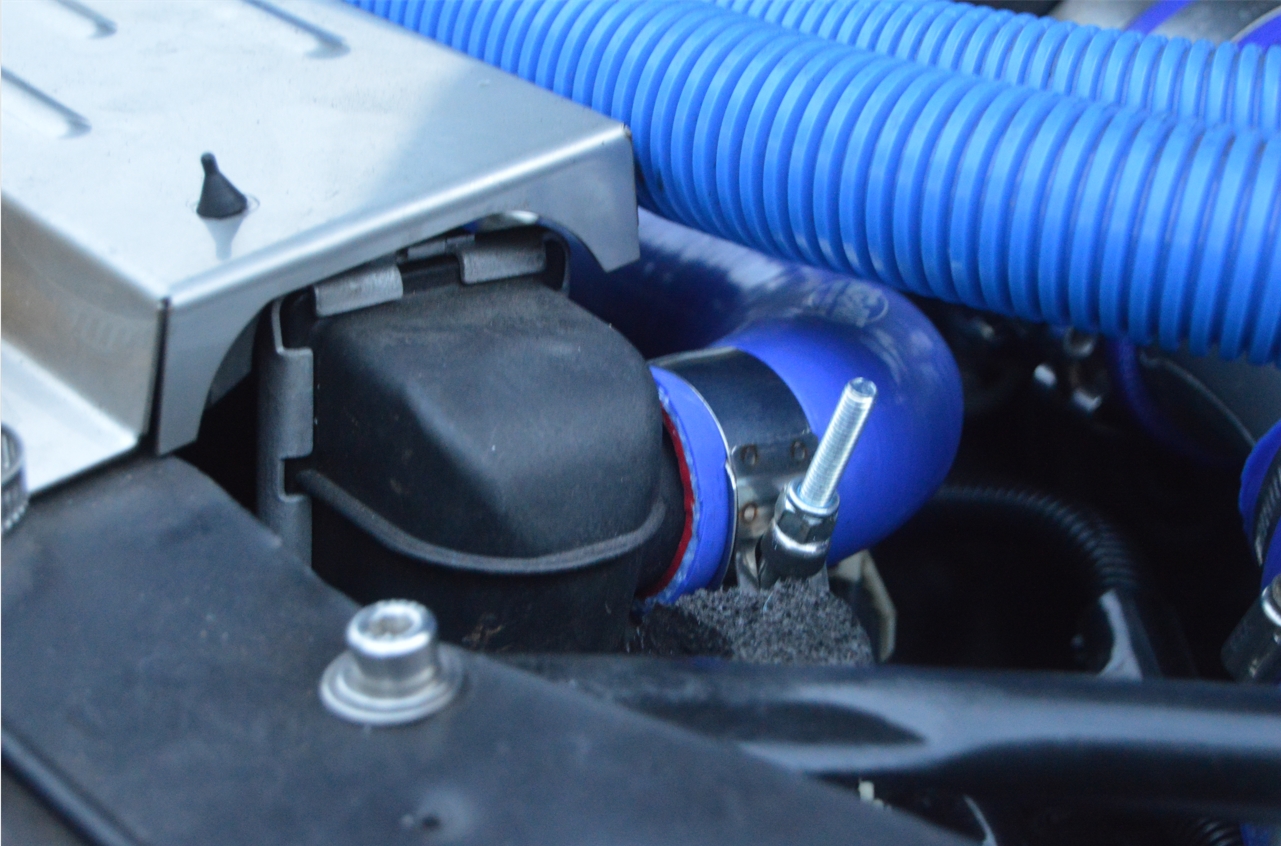
However, we already had the “stainless tube in the middle” type of hose there previously, so we only really needed to replace the actual (rubber or silicone) hose ends.
The 2 separate hose parts (one on each end) are probably available (by themselves) but why buy 2 individual hoses, when being the crafty people we are, we just bought an extra long 90 degree hose (it’s 6″ long on each end measuring outwards from the centerline of the 90 degree angle).
The way this upper tube/hose combo is setup, it only needs about 2″ of hose after the 90 on the radiator outlet side, meaning we have about 4″ that we need to cut off anyways from there… so we used this portion on the opposite end (the side that connects to the manifold water inlet)!
[yes, that was intentional it worked out that way, that’s why we bought the extra long hose!]
[GbodyParts still has these stainless steel tube styles available, but only in the hose color black now]
[side note: both upper and lower radiator hoses are 1.5″ inside diameter, about 1.75″ O.D.]
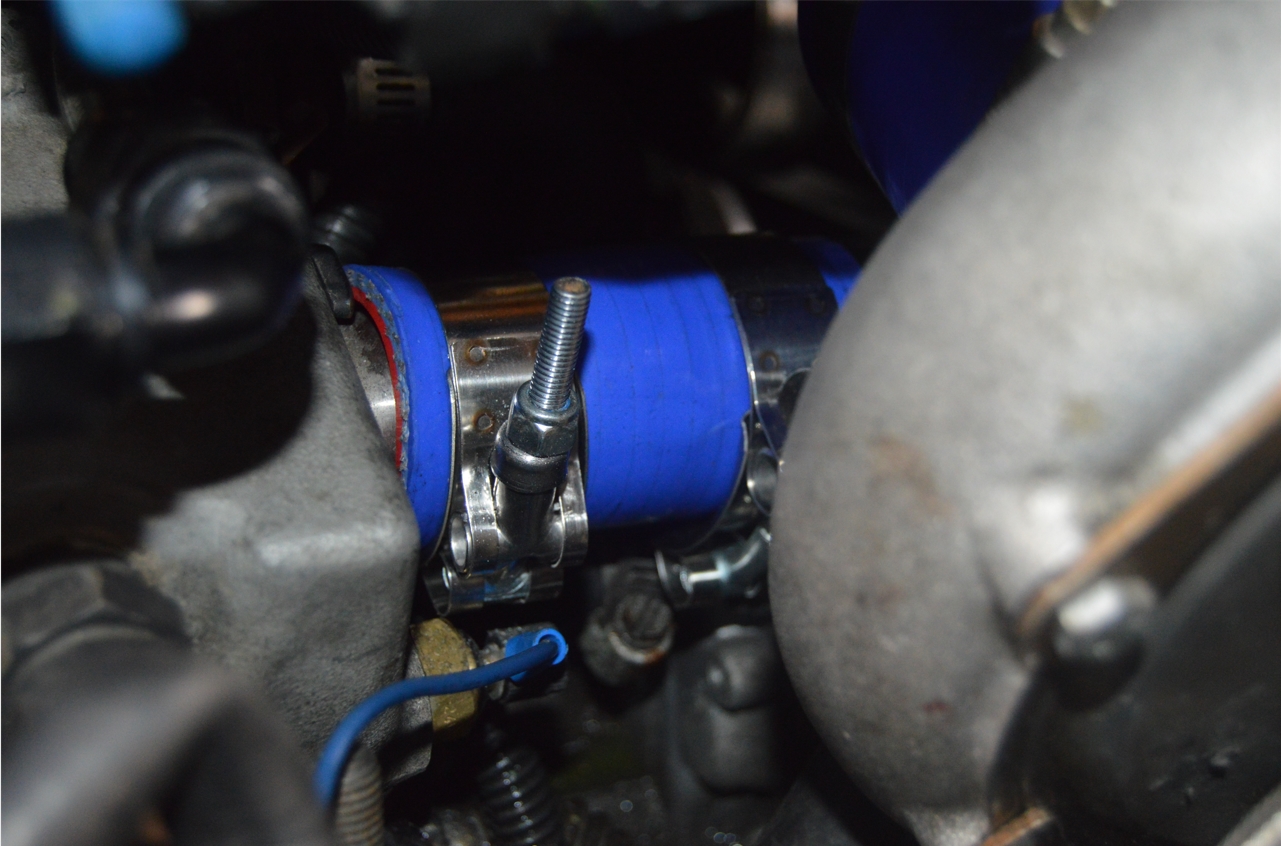
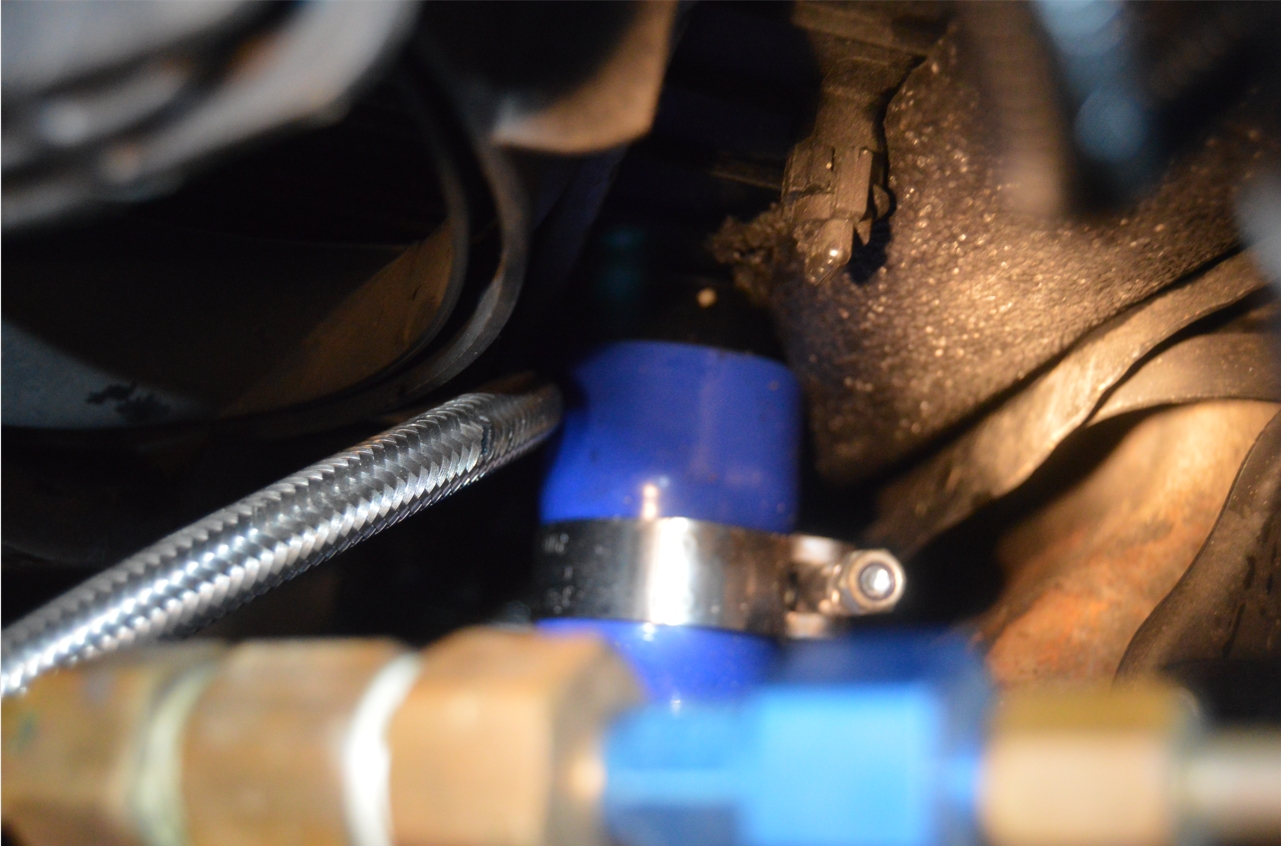
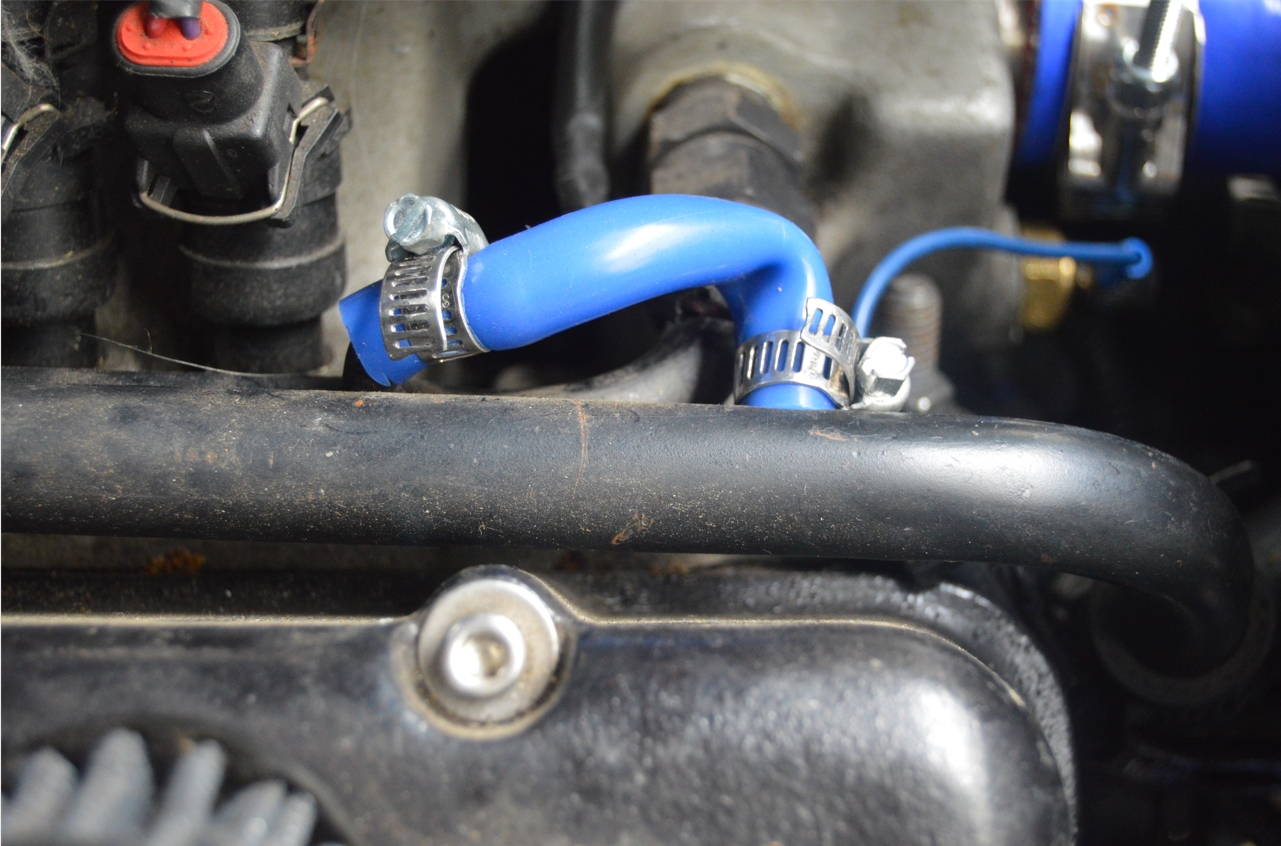
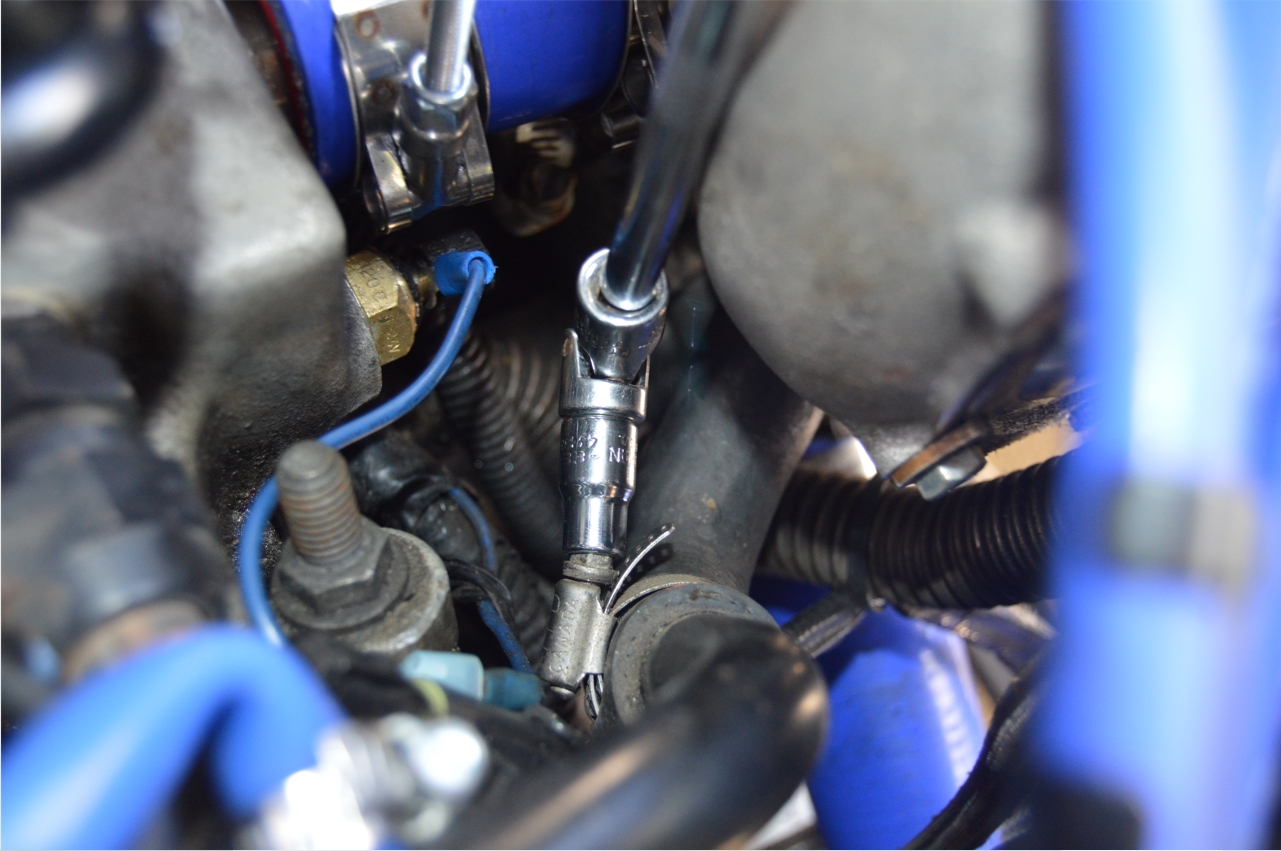
We also acquired some stainless steel T-bolt clamps (size: 42-49mm; about 1.75″) to secure the hoses down (package of 8 was about $20 shipped). They have a 10mm head on them (and why wouldn’t they, goes with most of the rest of the bolts on these GM G-bodies!)
[upper hose : 2 clamps go on each hose piece. the side that is attached to the engine is tough to get t-bolt clamps in there, as there really isn’t enough room for the T-bar type in that area, but we’ll show you a trick (below) on how to manage it]
[for the lower hose: there’s 4 T-bar hose clamps, 2 on each section]
.
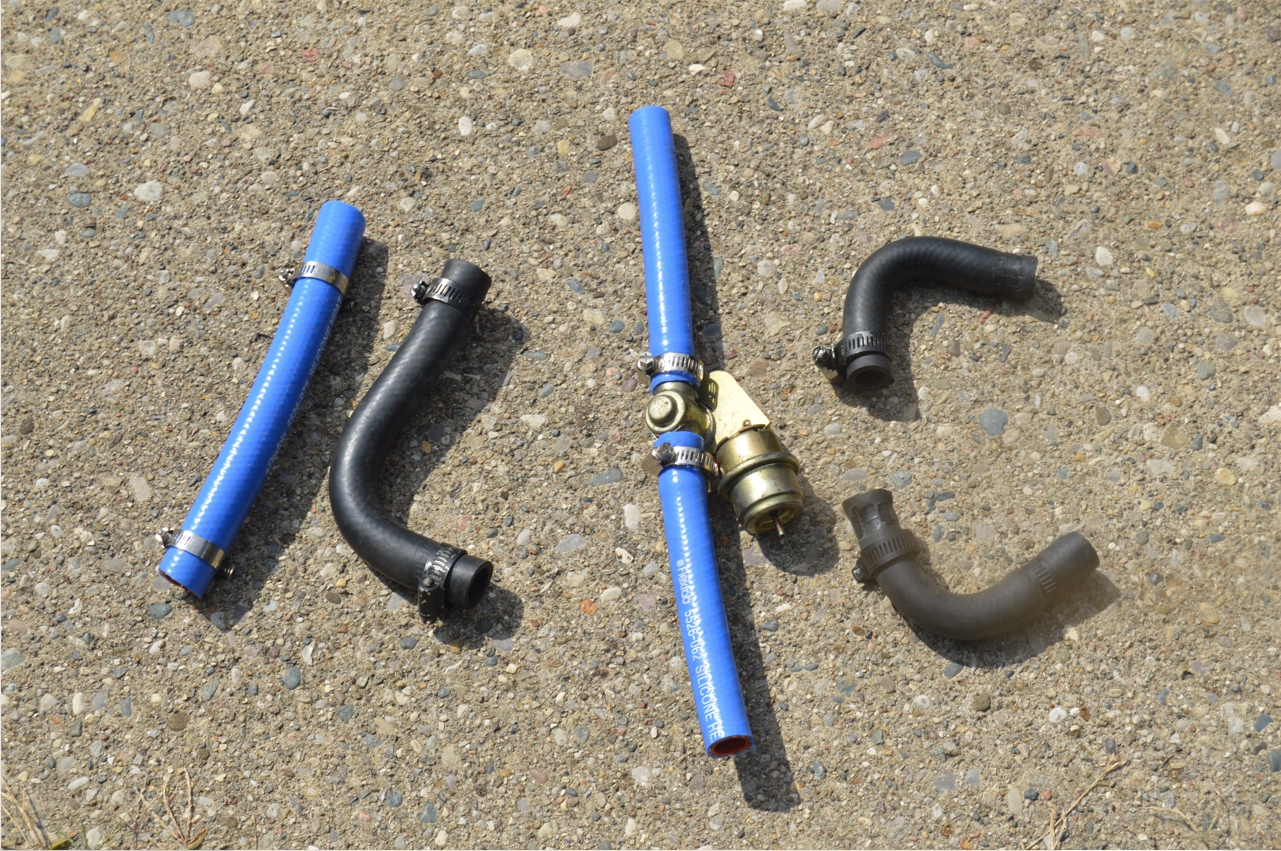
For the silicone heater hoses, we thought we had sitting on the shelf 3/4″ hose, but it turned out that it was 1″, which is way too big for the heater hose sections.
Time to buy some proper fitting material.
NEEDED:
2′ piece of 3/4″, $18. 2′ piece of 5/8″, $14. 1′ piece of 3/8″, $6.
Sold by the foot (ebay).
Gees, prices have went up for this stuff!
Just under $40 (shipped) to get the required amounts to do the job.
Oh well, we want this done, so got to get it.
They’re really nice hoses though, double walled, made by Flexfab, AND, of course, they are blue in color!
.

.
[Our original hose choice was from Goodyear (it’s called “hi-miler”), and is made completely out of rubber, but was really expensive back then when we were shopping, and probably now as well, so we opted with the Flexfab brand version. We’ve seen 10′ sections or more of the Goodyear brand currently, and is around $5 a foot, but who needs ten feet minimum of this stuff?]
The only (smallest length) choice (for the Flexfab stuff) when purchased years ago was 3 feet long, and cost about $20 shipped. This was a very hard product to find back then (considering the color), and even still now (but we did find some like this on Amazon for about $9/foot).
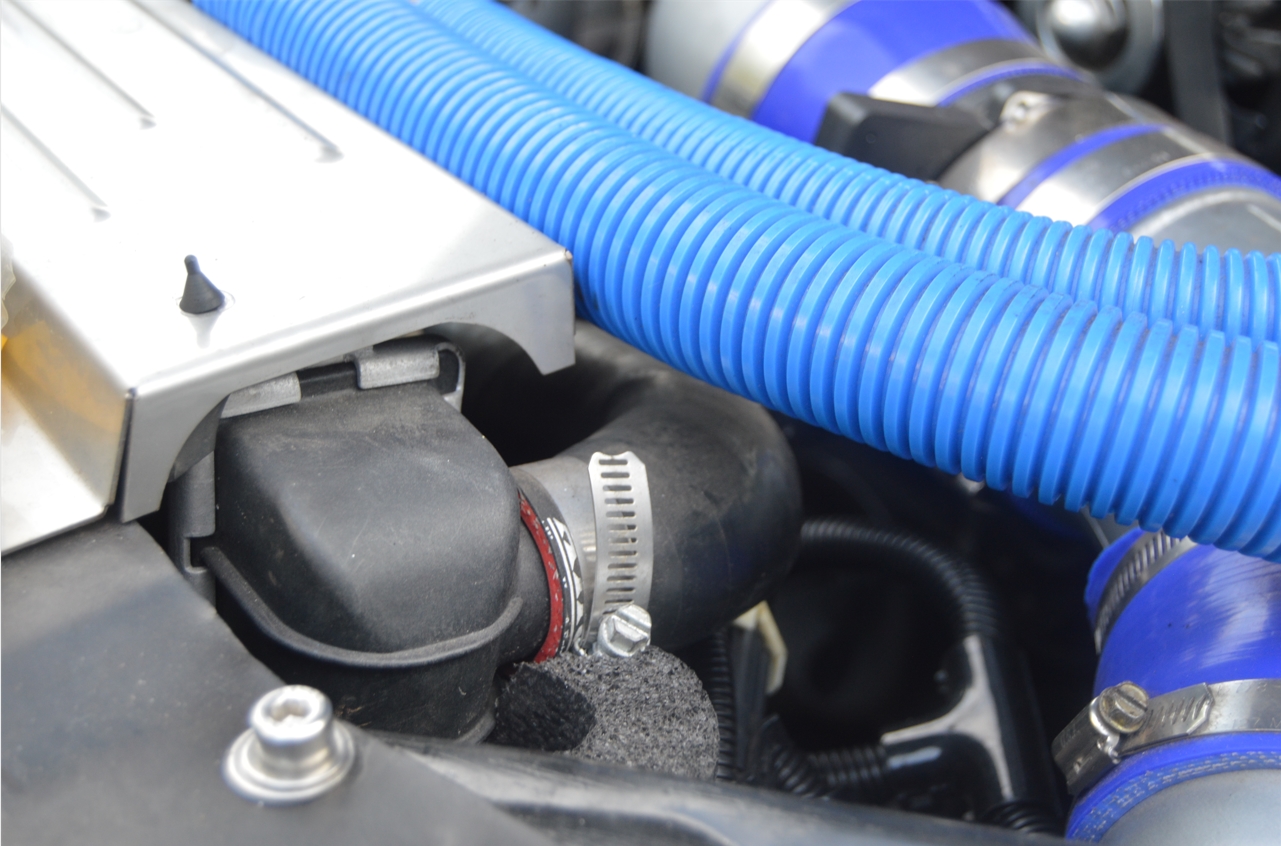
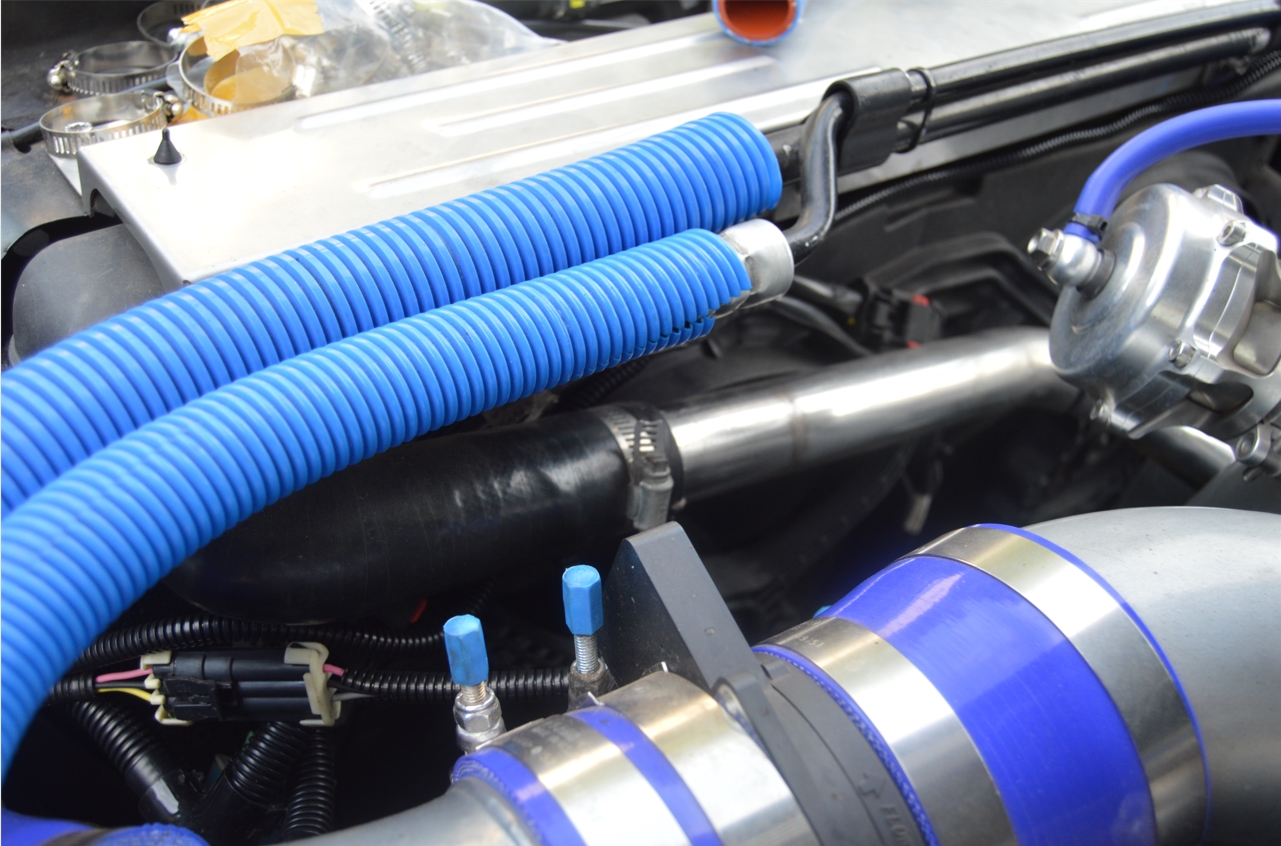
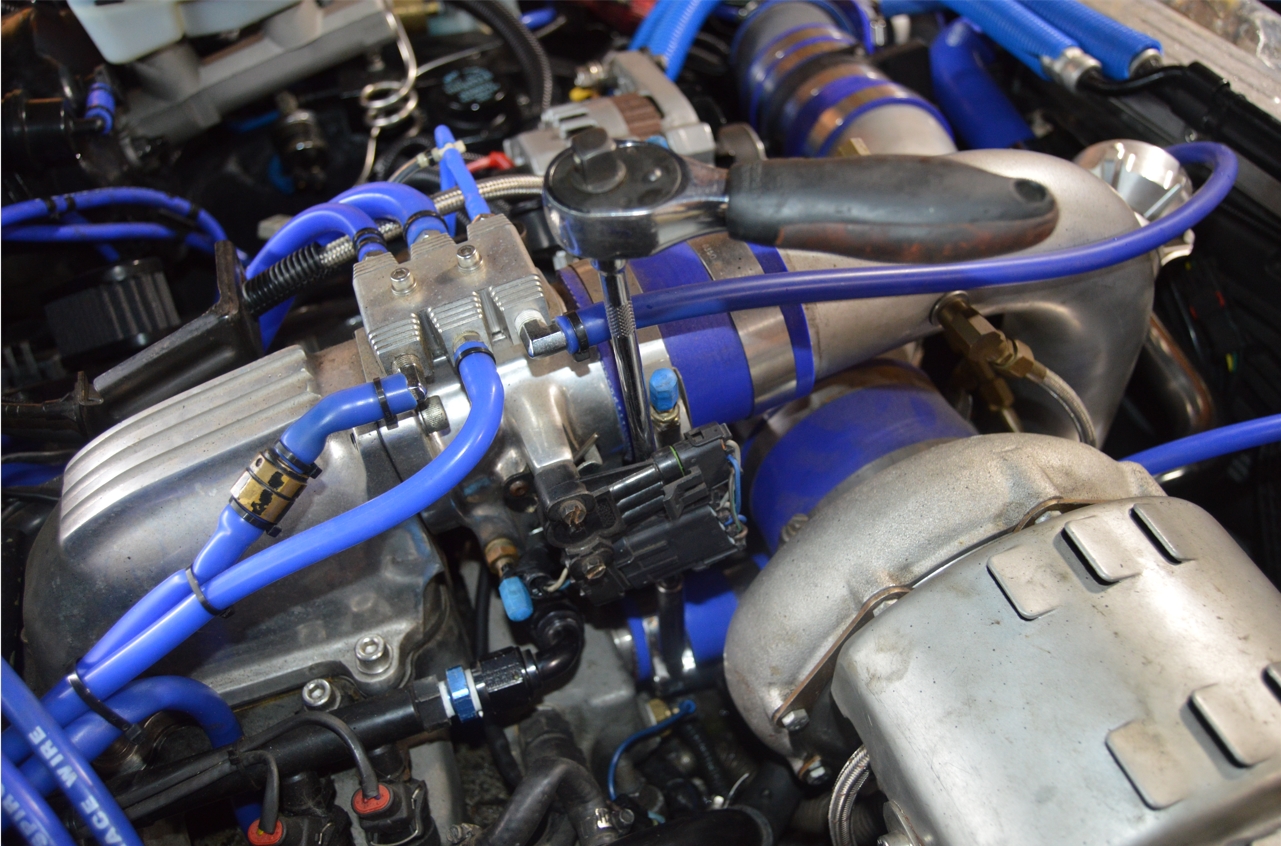
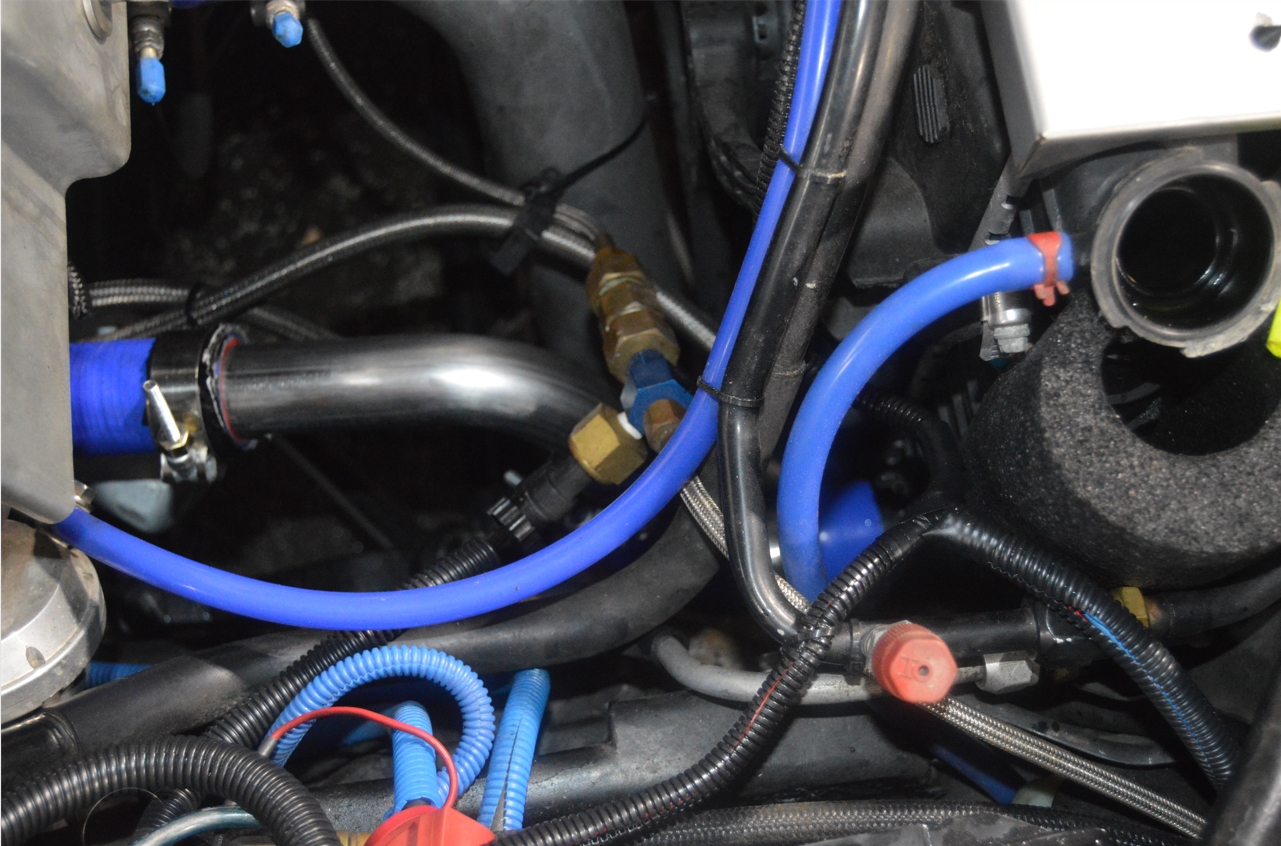
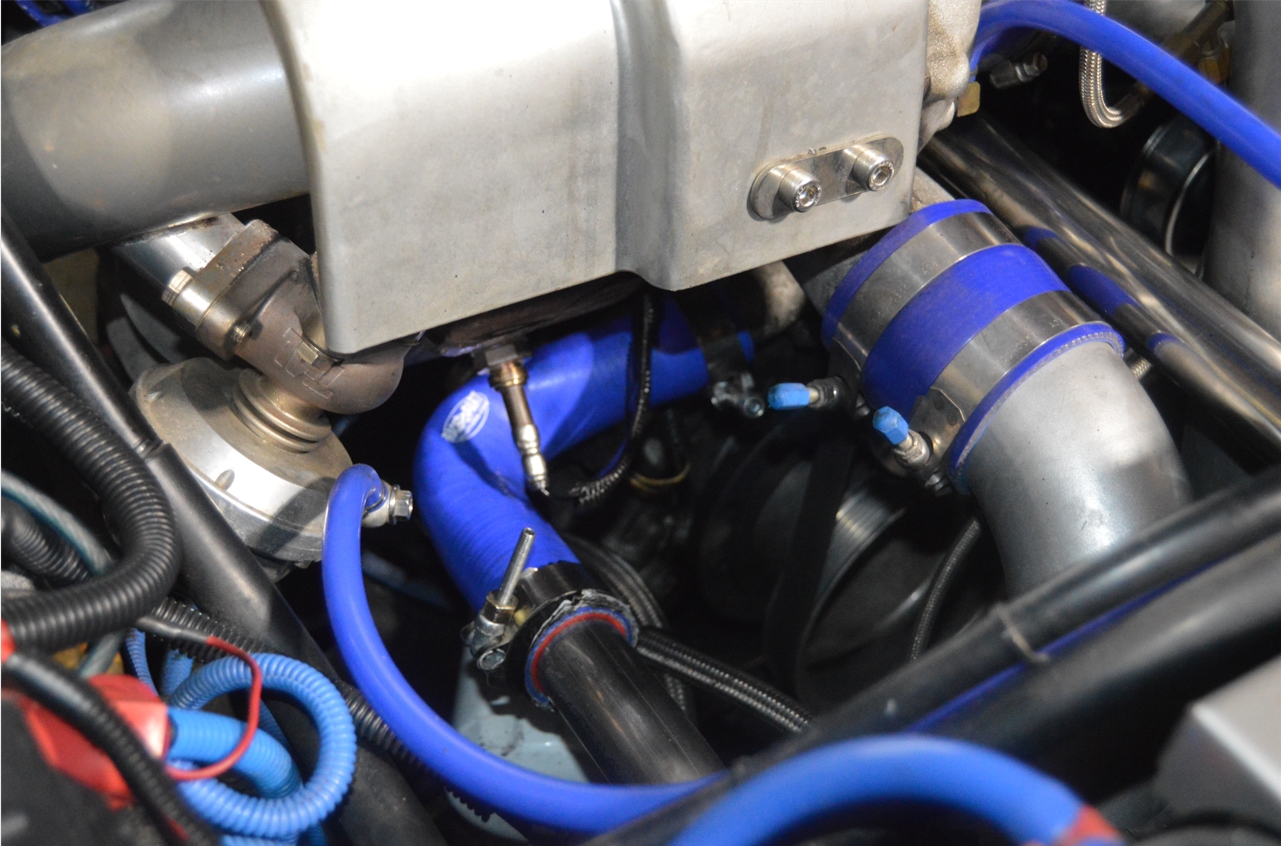
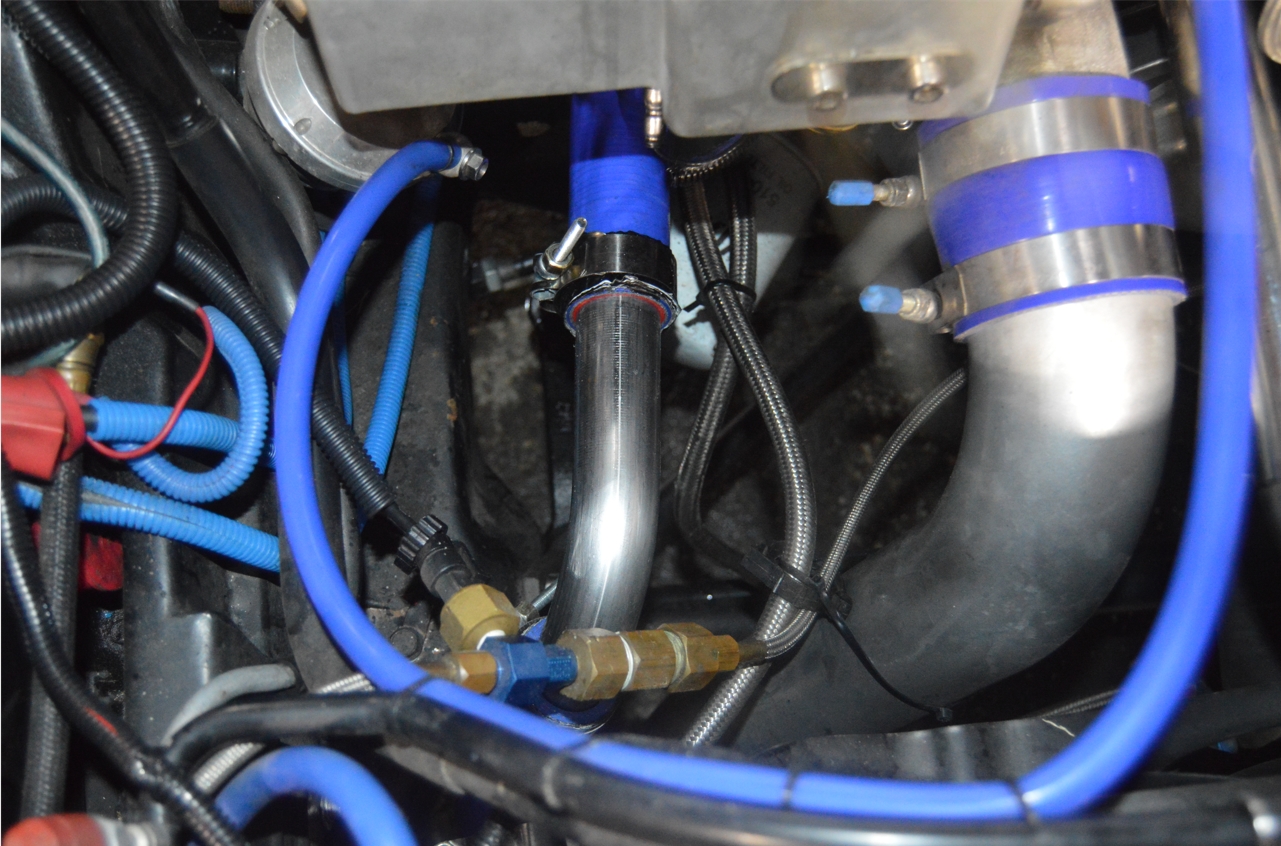
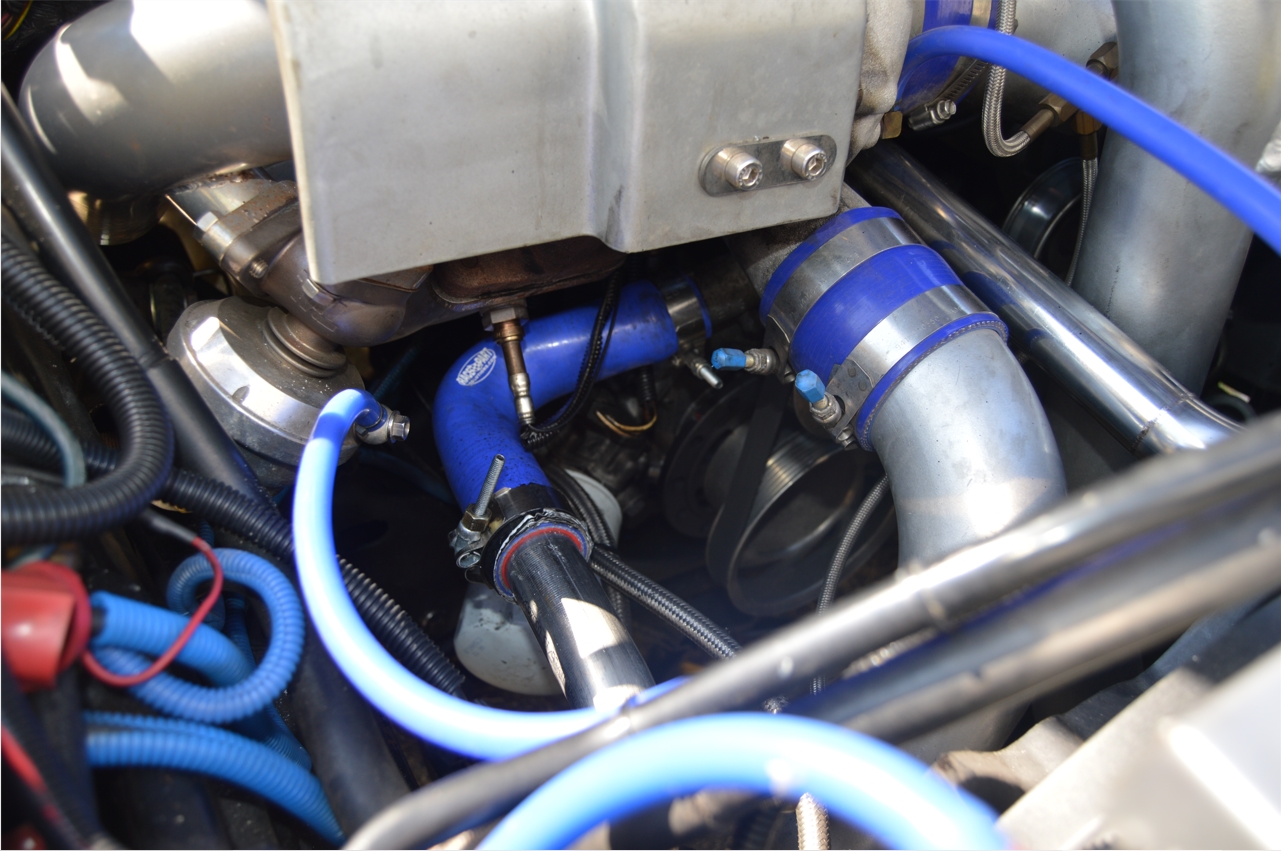
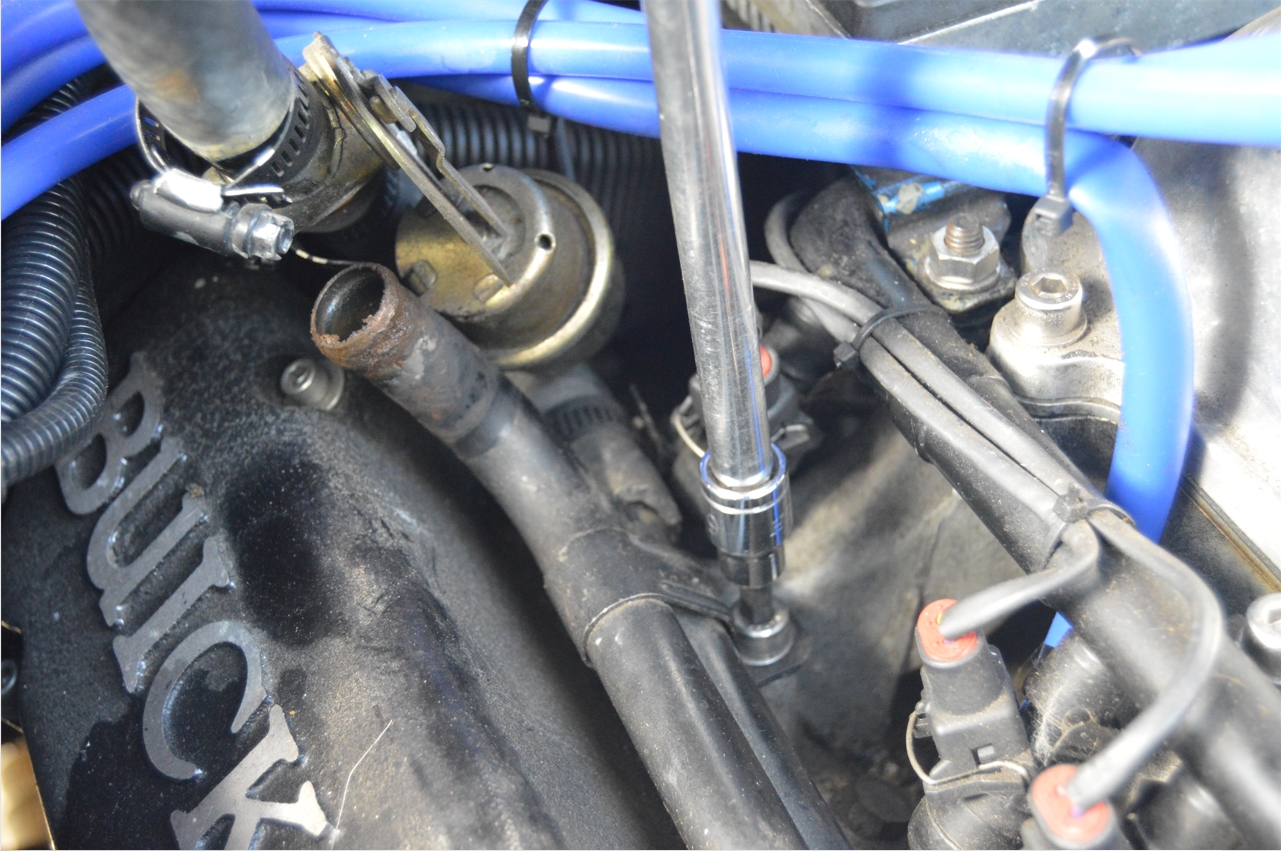
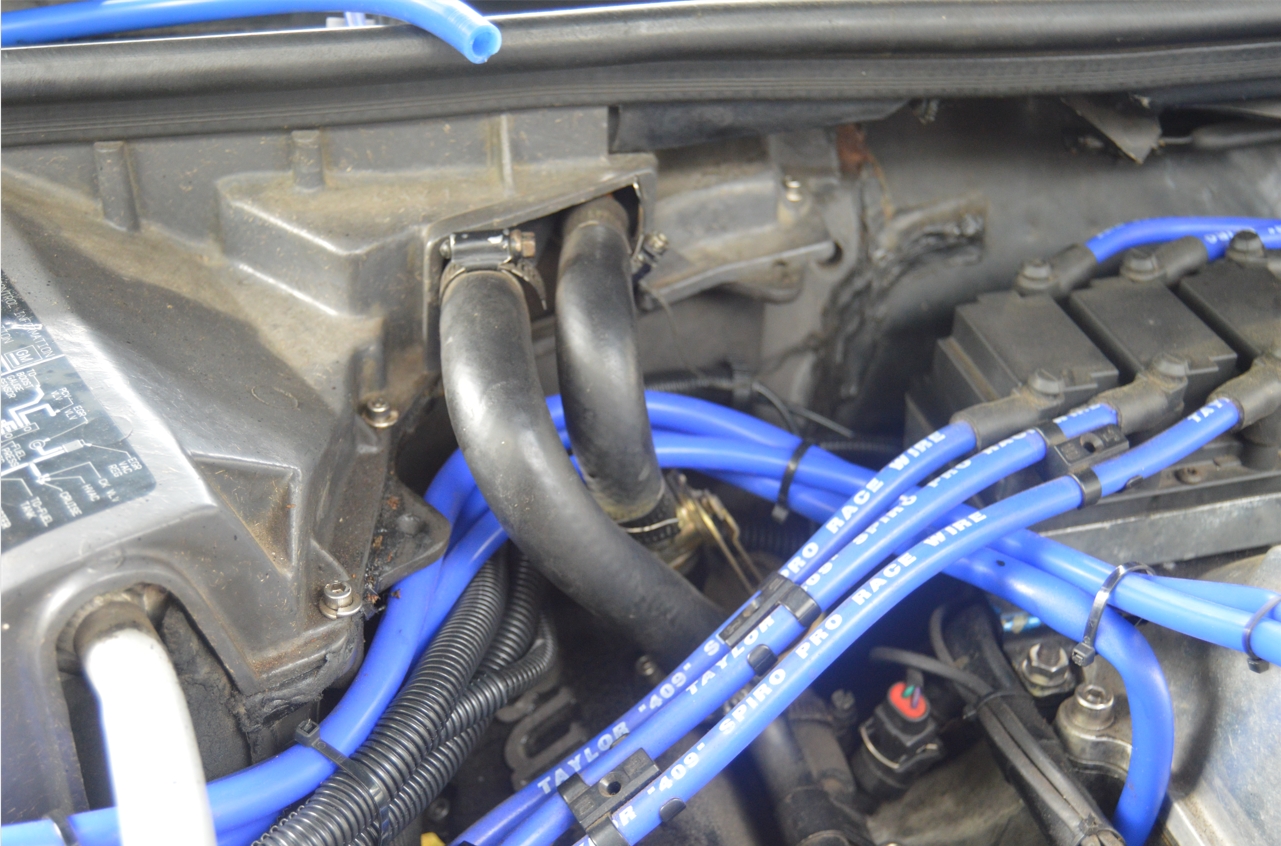
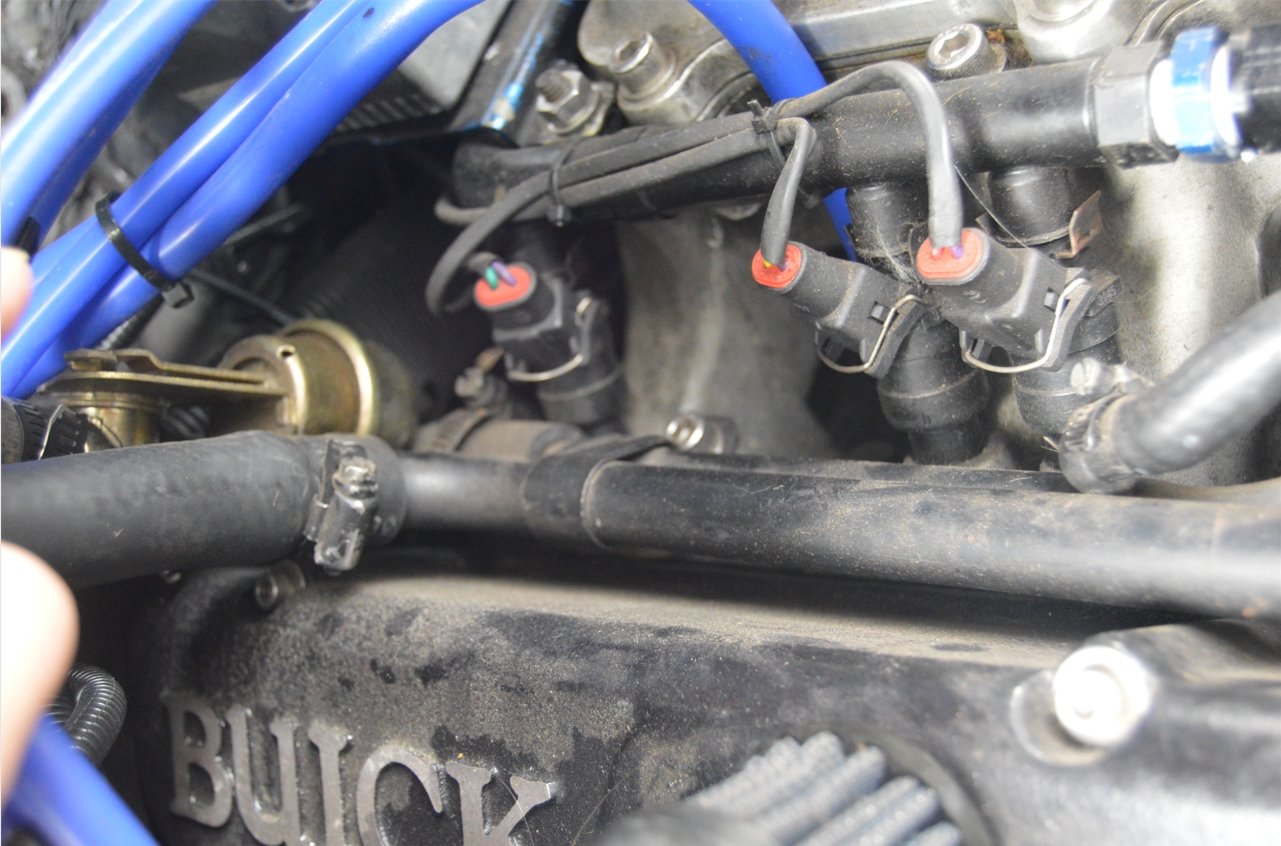
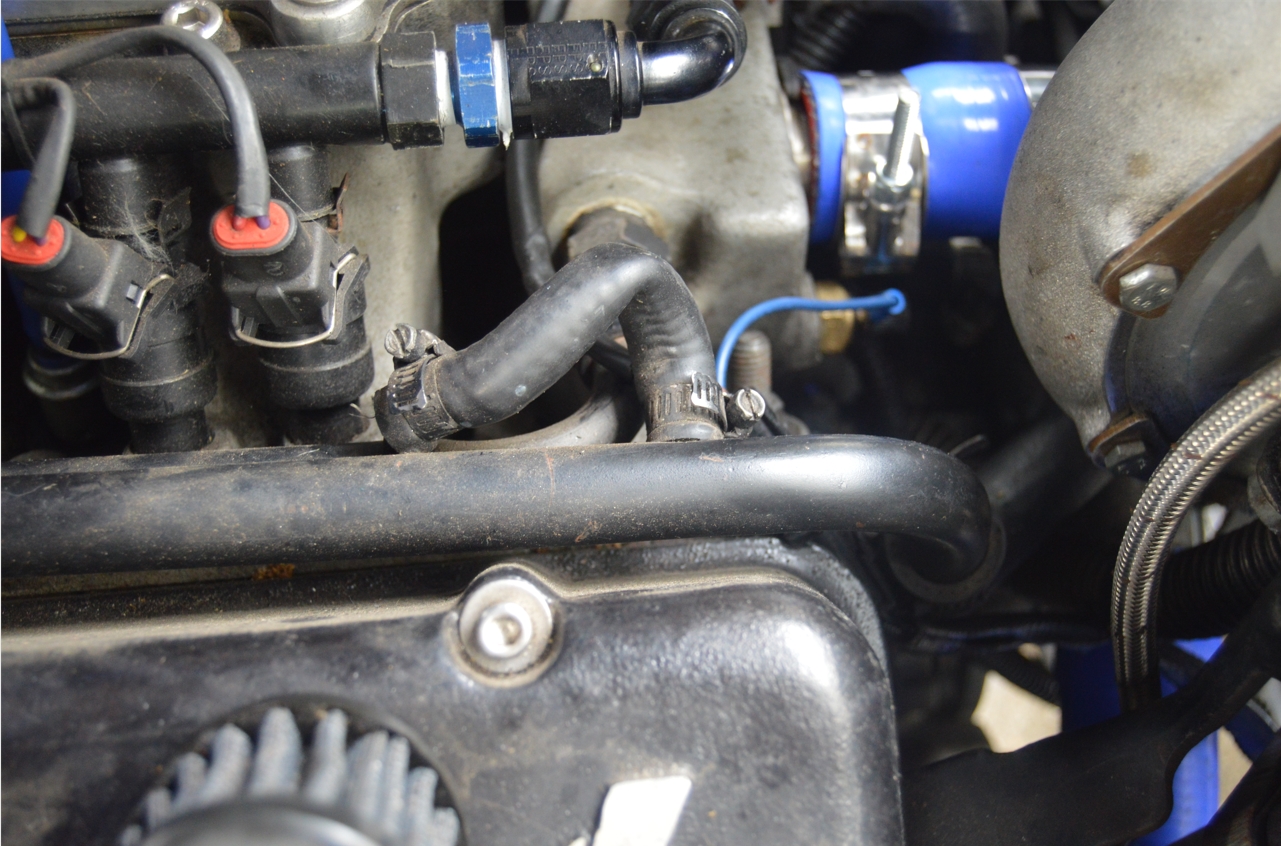
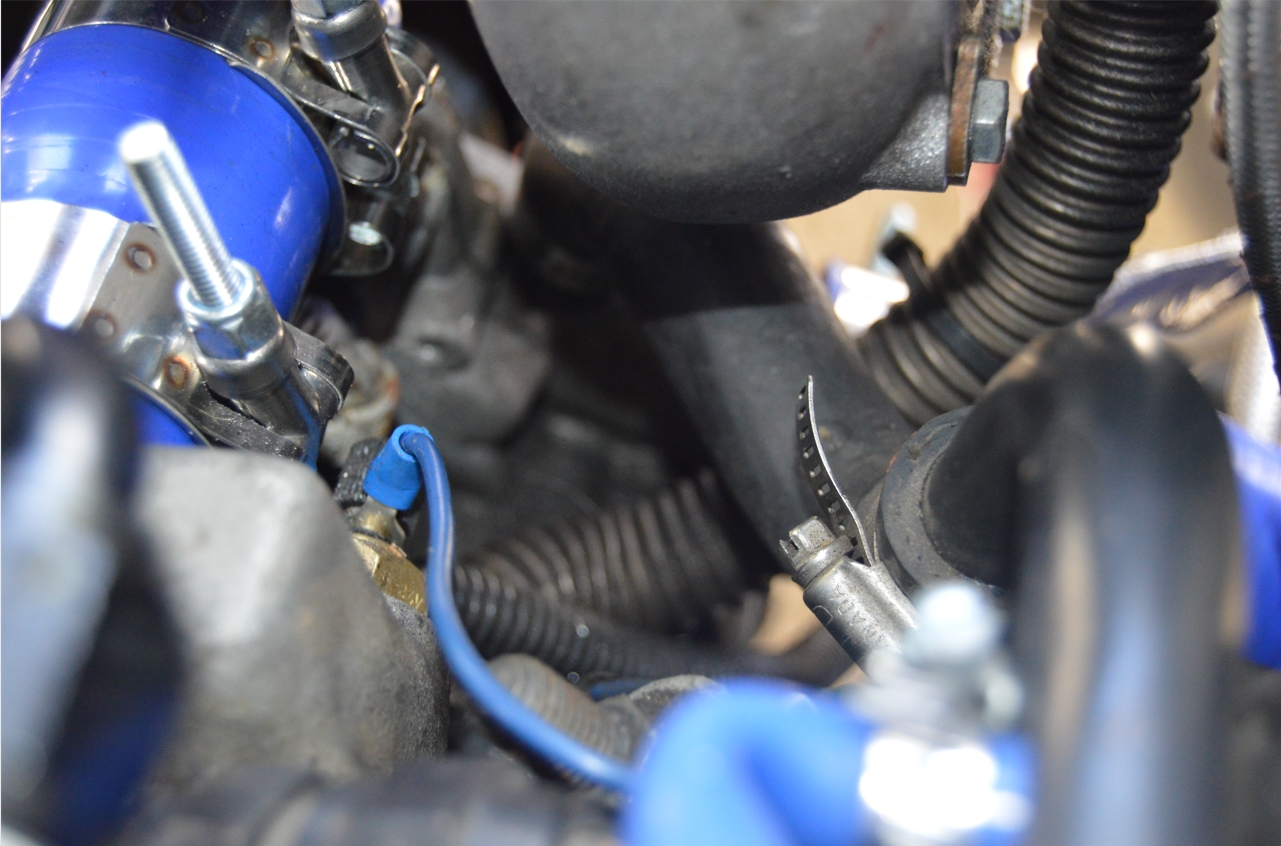
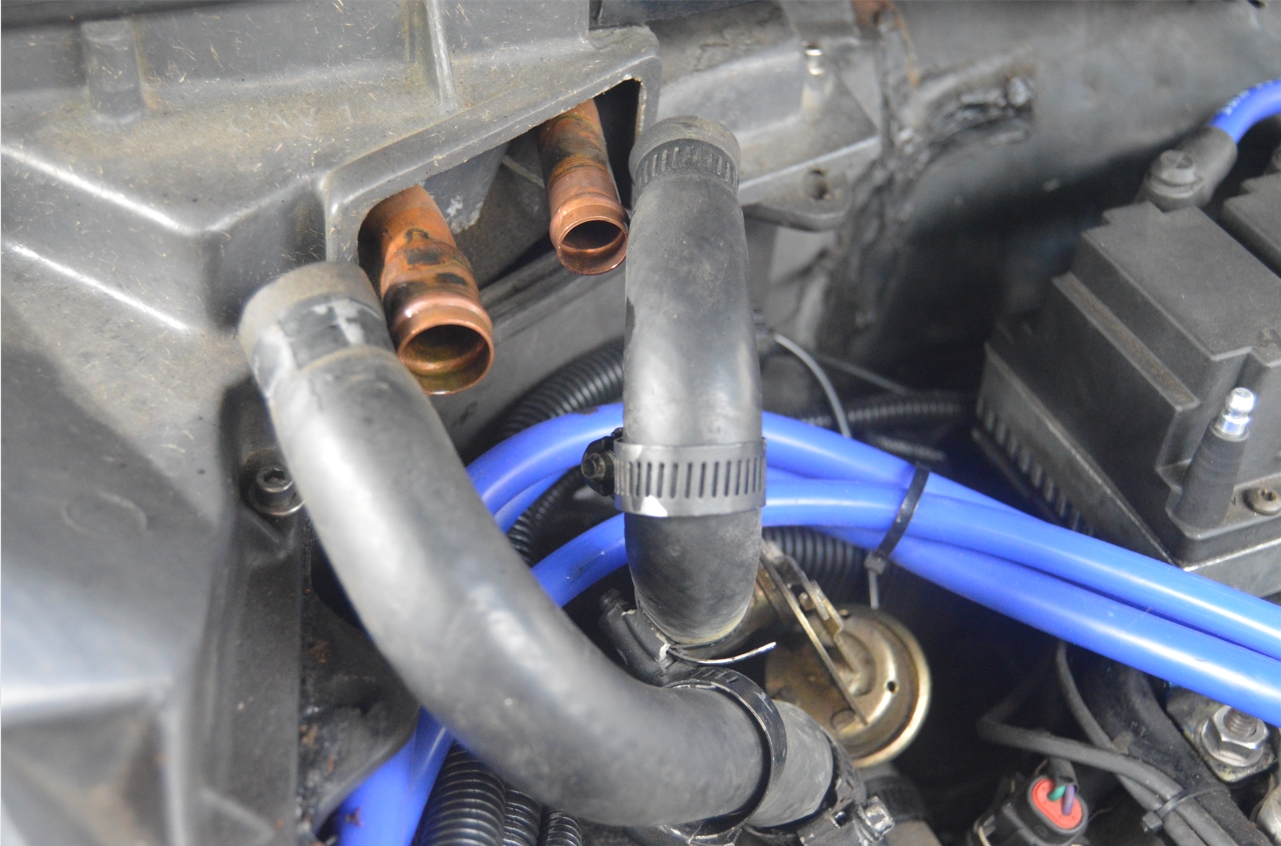
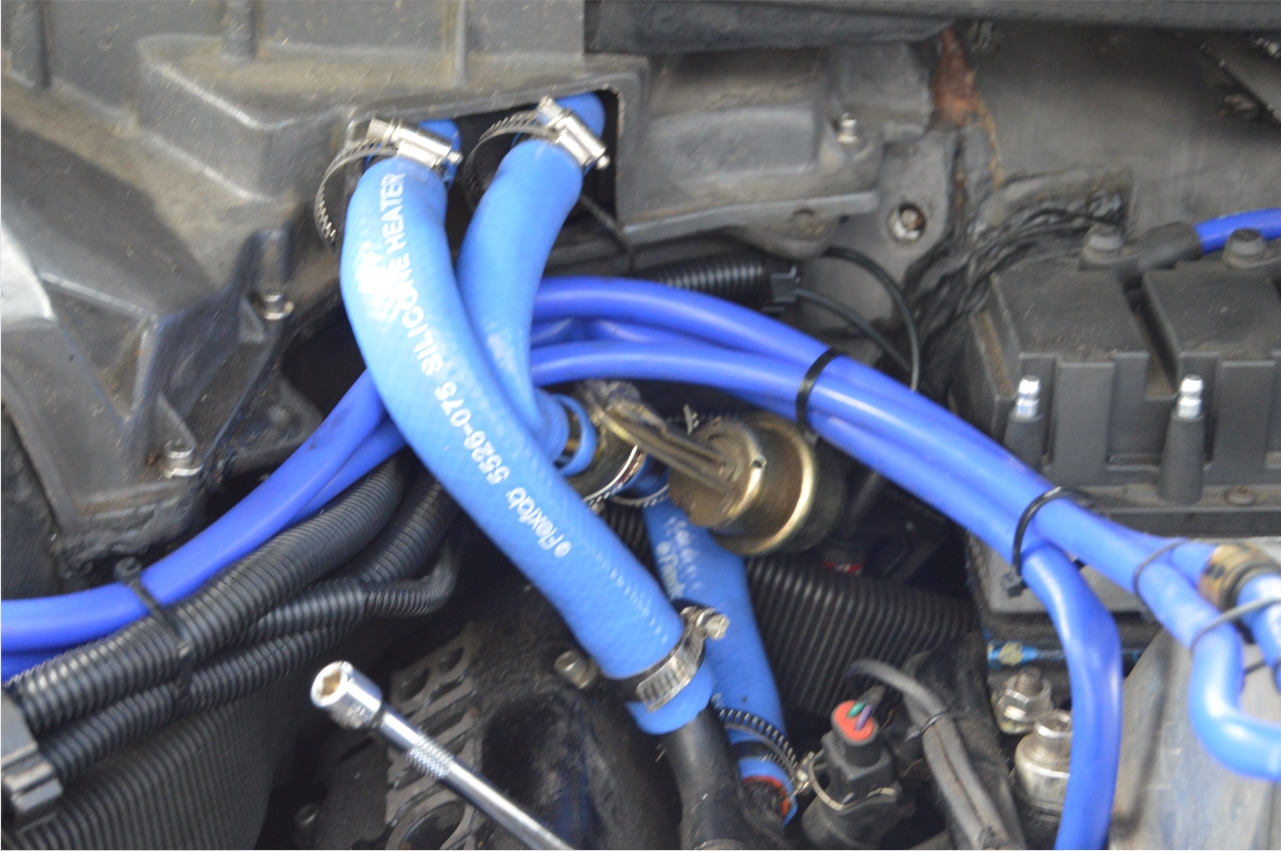
The water valve section (which is what we’re replacing) has coming from the heater core, the coolant valve and then 2 metal tubes that run along (above) the valve cover (on the passenger side).
Each tube needs 2 pieces of hose on it.
So in total, 4 pieces of new hose are required:
First tube (top tube, 3/4″):
10″ for the piece between heater core and metal tube
6″ for the piece between metal tube and water pump
Second tube (bottom tube 5/8″):
9″ for the piece between the heater core and water valve
7″ for the piece between water valve and metal tube
[note: now that we finished this part, might fit and look better to acquire 2 90* pieces for this area, to prevent the harsh bends]
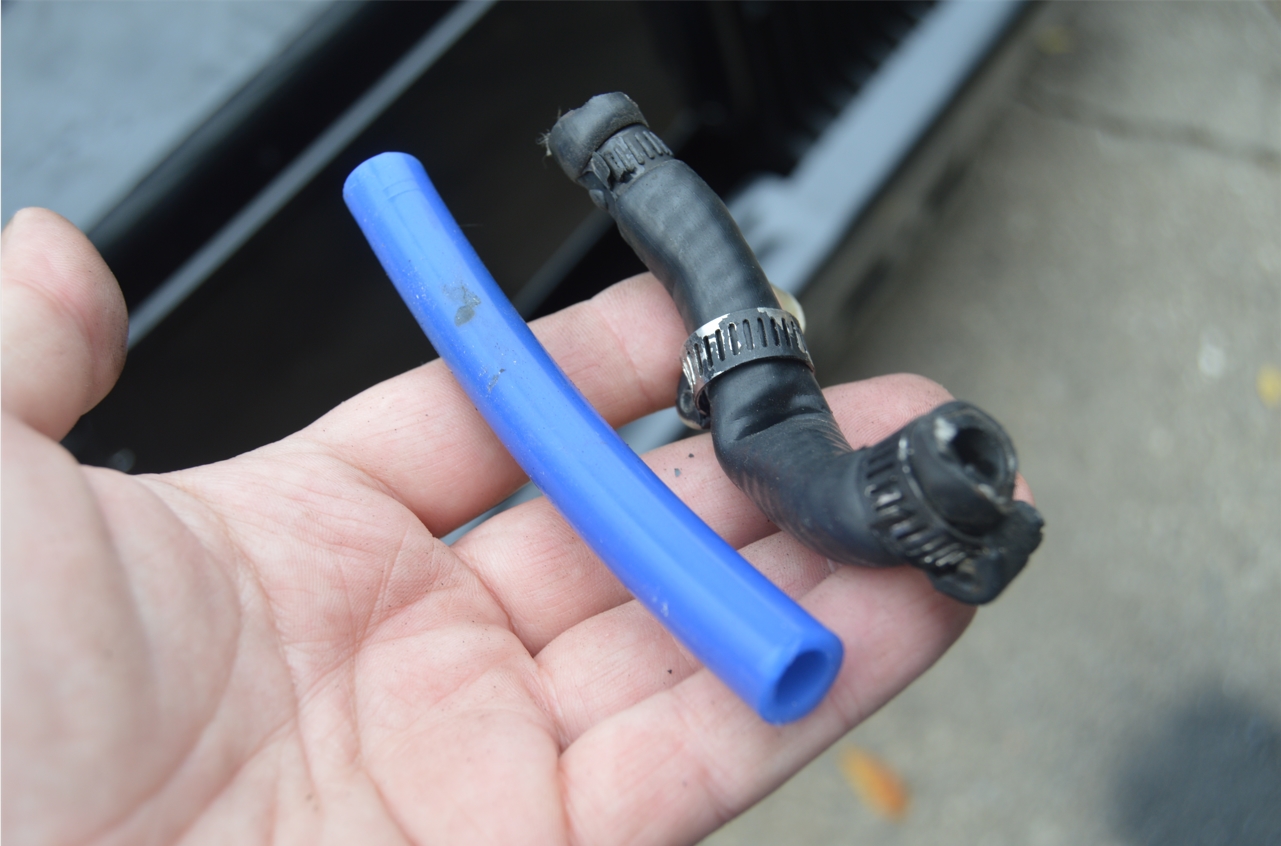
The Loop (bypass between the tubes 3/8″)
3.5″ piece
[there’s also the commonly called “S” hose, in the same area but not part of the heater core metal tubes portion, which goes between the intake manifold and the back of the water pump, but we’re not replacing that special made hose. Not to mention it’s hard to get too without removing a bunch of things!]
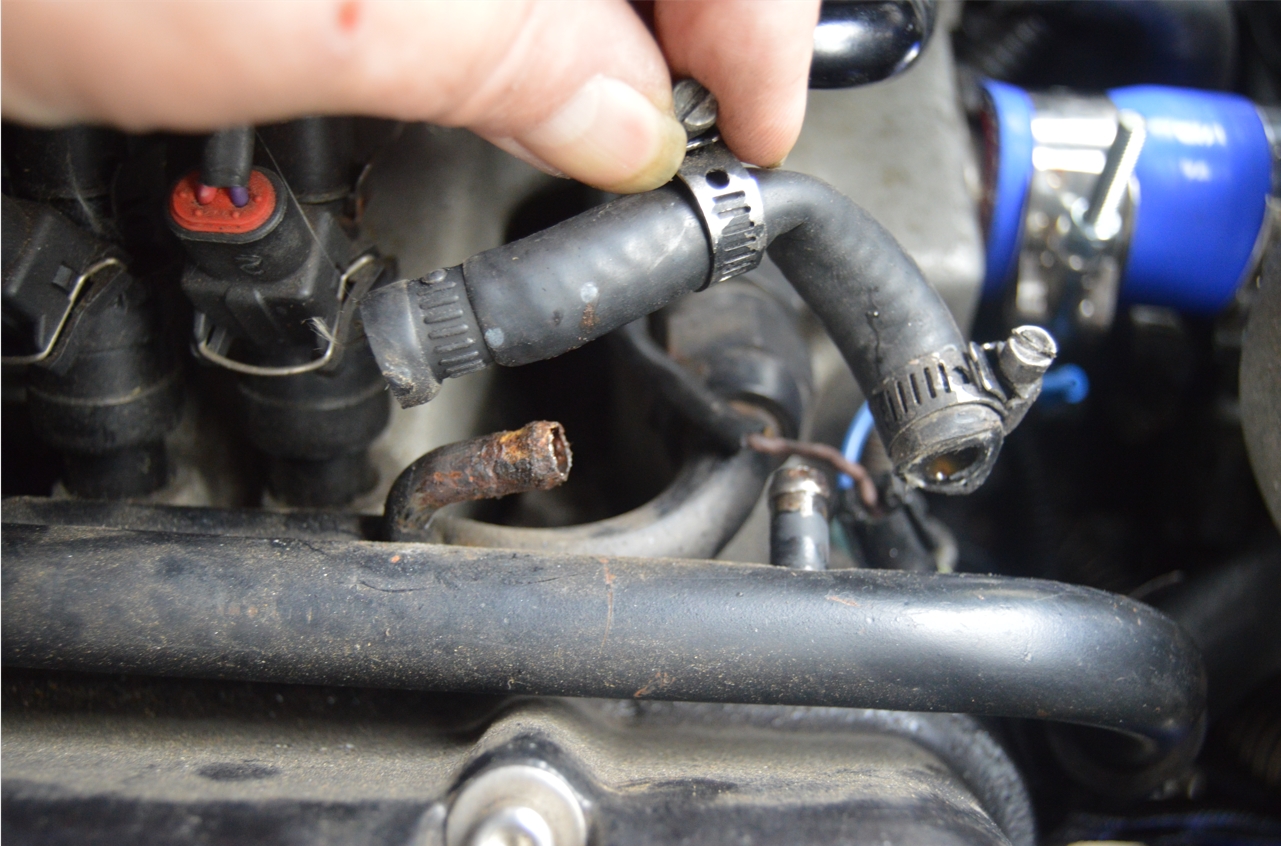
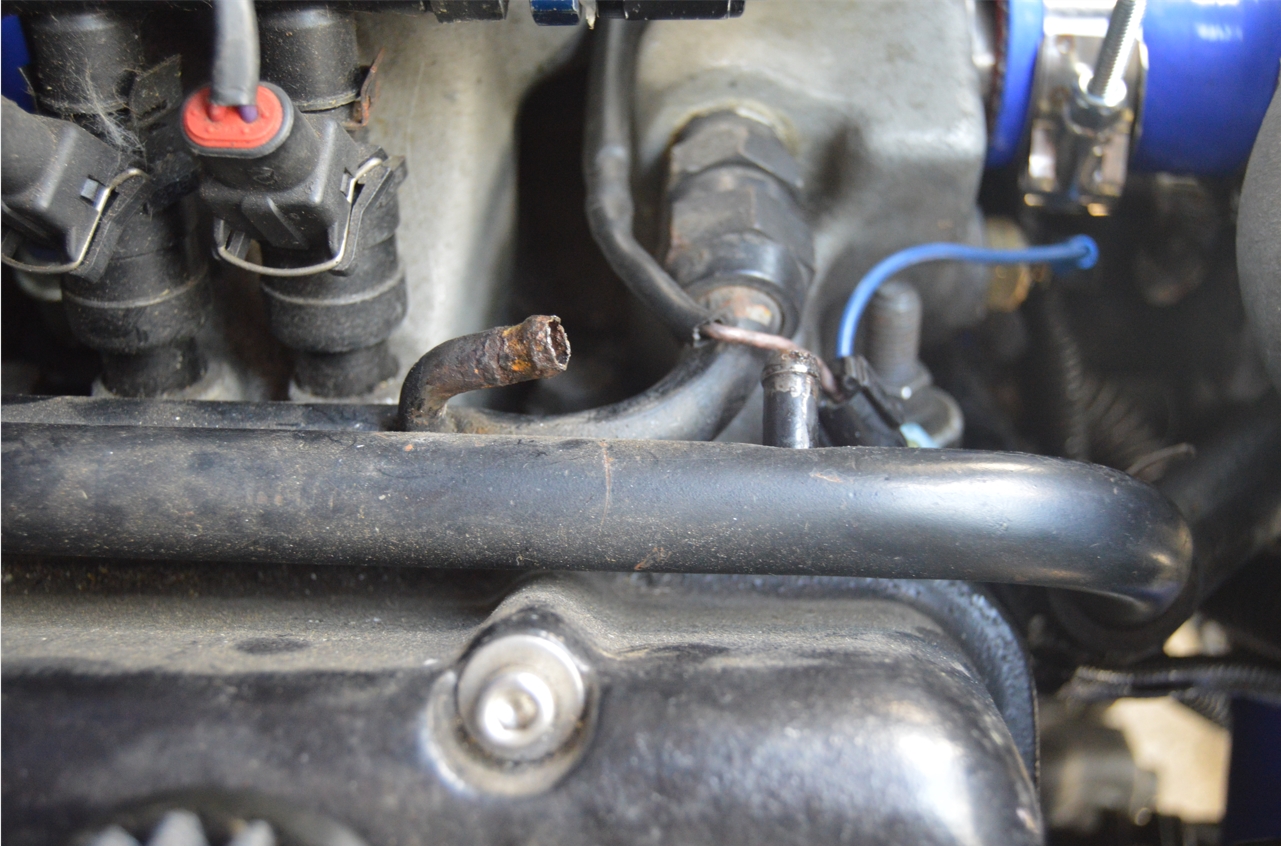
[Just FYI, there’s also another small hose in this area, which loops between the 2 metal tubes, we were going to leave that one the way it is (with the black stock rubber piece), but we found some blue silicone hose from the maker where we got the rest of it, and decided to replace this looped hose as well]
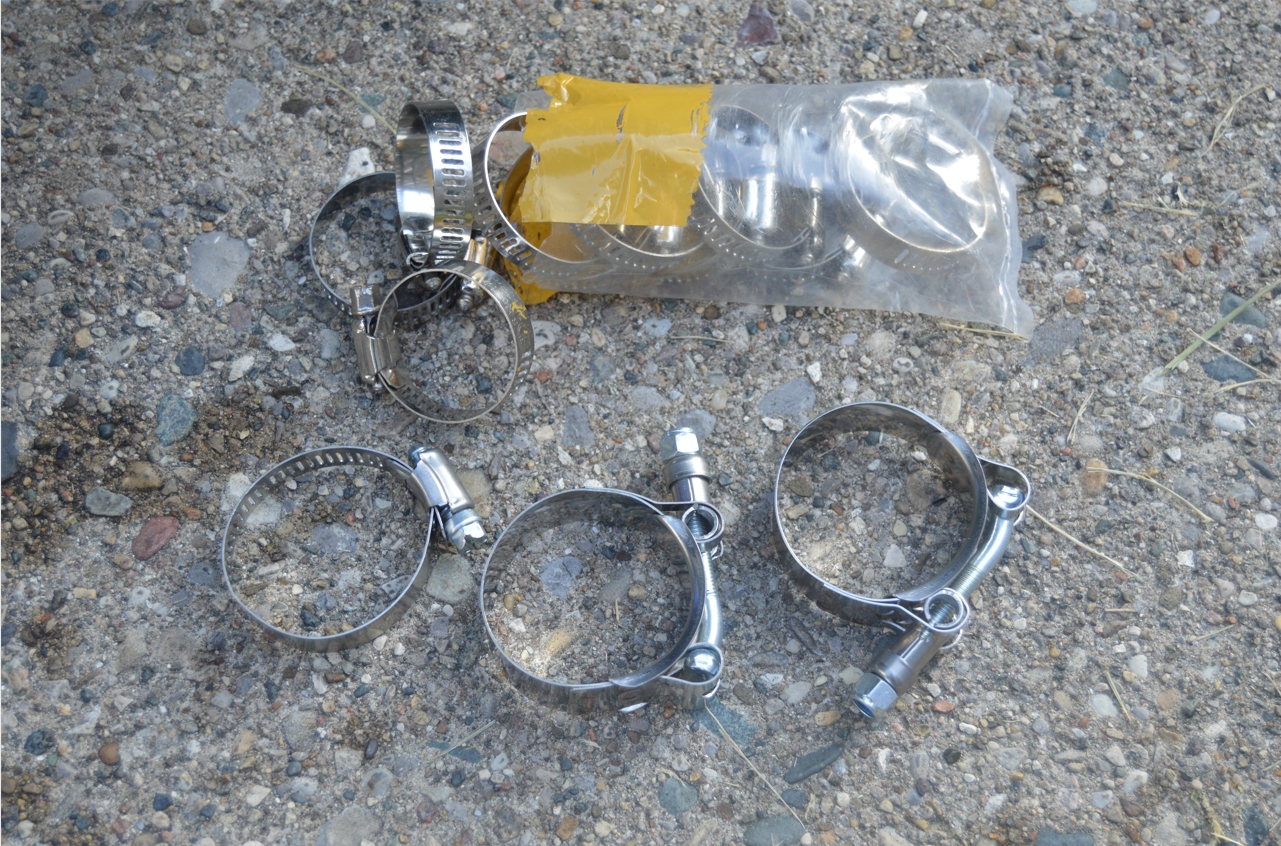 [a package of 10 regular stainless steel hose clamps was about $12 shipped.
They use a 5/16″ head for securing or removing them.
We’re using these normal type worm clamps for all of the heater hoses]
.
WHERE THEY GO:
Starting at the heater core:
The 3/4″ is for the hose closest to the passenger side (which turns into the metal tube on the TOP).
The 5/8″ is for the hose closest to the center of car (which turns into the metal tube on the bottom – and has the water valve attached to it).
The 3/8″ is for the hose that loops from one tube to the other (near the front of the motor).
.
Installing them takes a bit of time.
You need to drain the coolant out.
All the old clamps need to be removed, then reinstalled (unless you’re using brand new ones, like we are, but they still need to be set on the new hoses and installed).
Other than that, it’s pretty much just remove and replace.
Should take about an hour or so for all of them.
(it took us a bit over 2 hours, but we were also compiling all this info & took the photos for you to read at the same time!)
And these all make the engine compartment much more pretty now.
.
A TIP WHEN USING NEW SILICONE HOSES:
Lube up the inside of the hoses, or the outsides of wherever you’re sticking them on! They’re a bit difficult to shove them on since they’re new and stiff! (a bit of saliva works good)
The new replacements are slightly bigger (O.D.) than factory hoses. Meaning they will fit a bit tighter (closer) to other engine components. Compensate for that! Make the new ones slightly longer to accommodate, and also for when making any bends in the hoses, as the silicone versions don’t bend as easily (you’ll need more length in the bend area versus OEM parts – otherwise there will be a kink in the bend section).
.
[note: we did this entire job at the same time as the replacing the antifreeze task, since both jobs required draining the radiator. Work smarter, not harder! Always try to combine jobs that require doing similar tasks or working in the same area!]
.
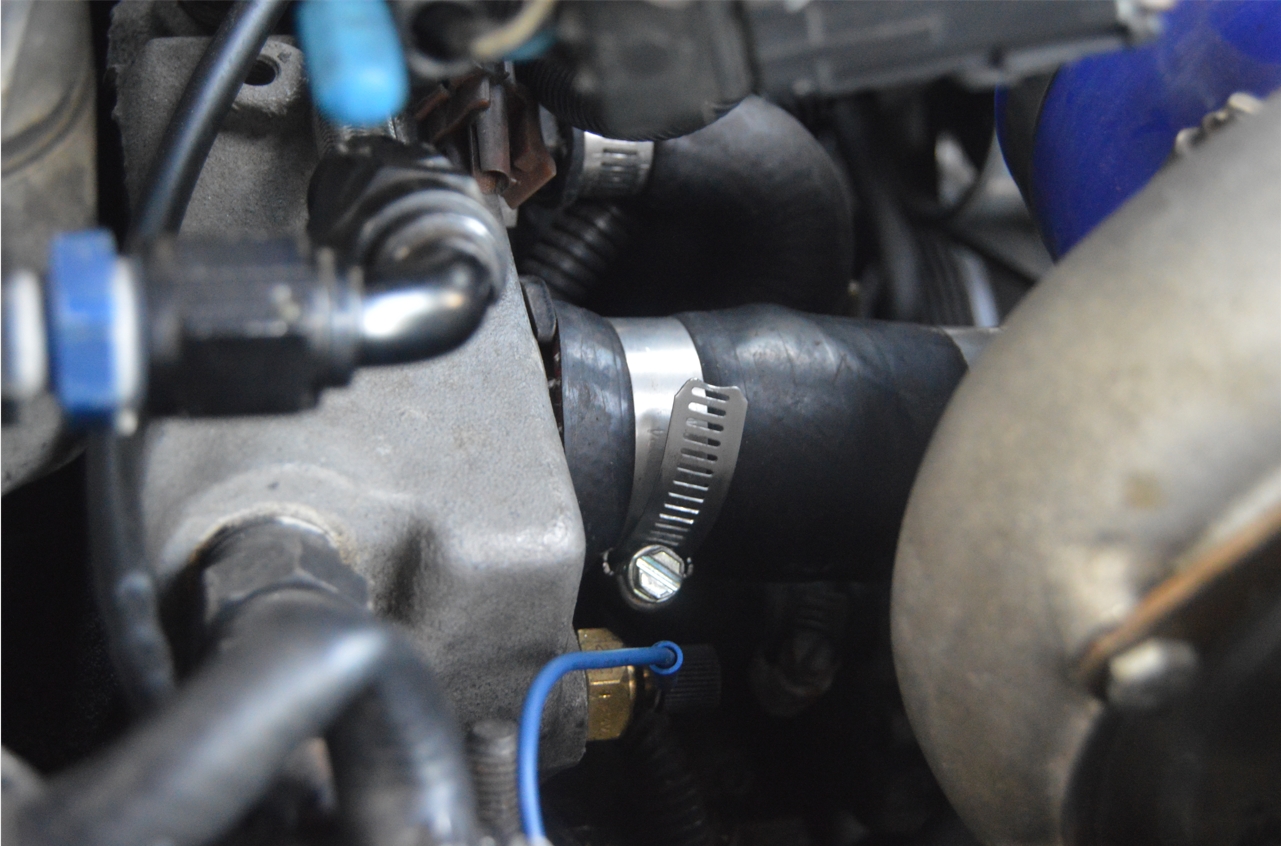
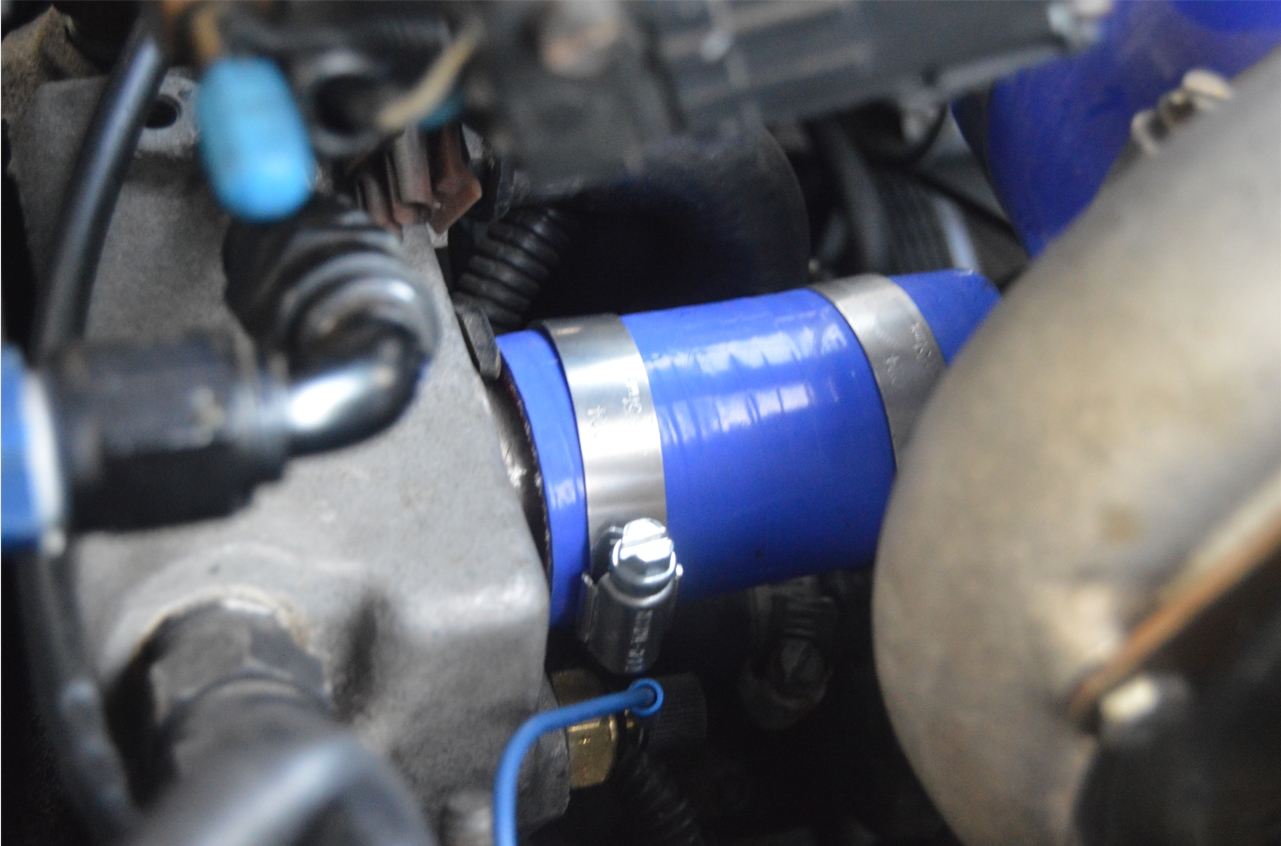
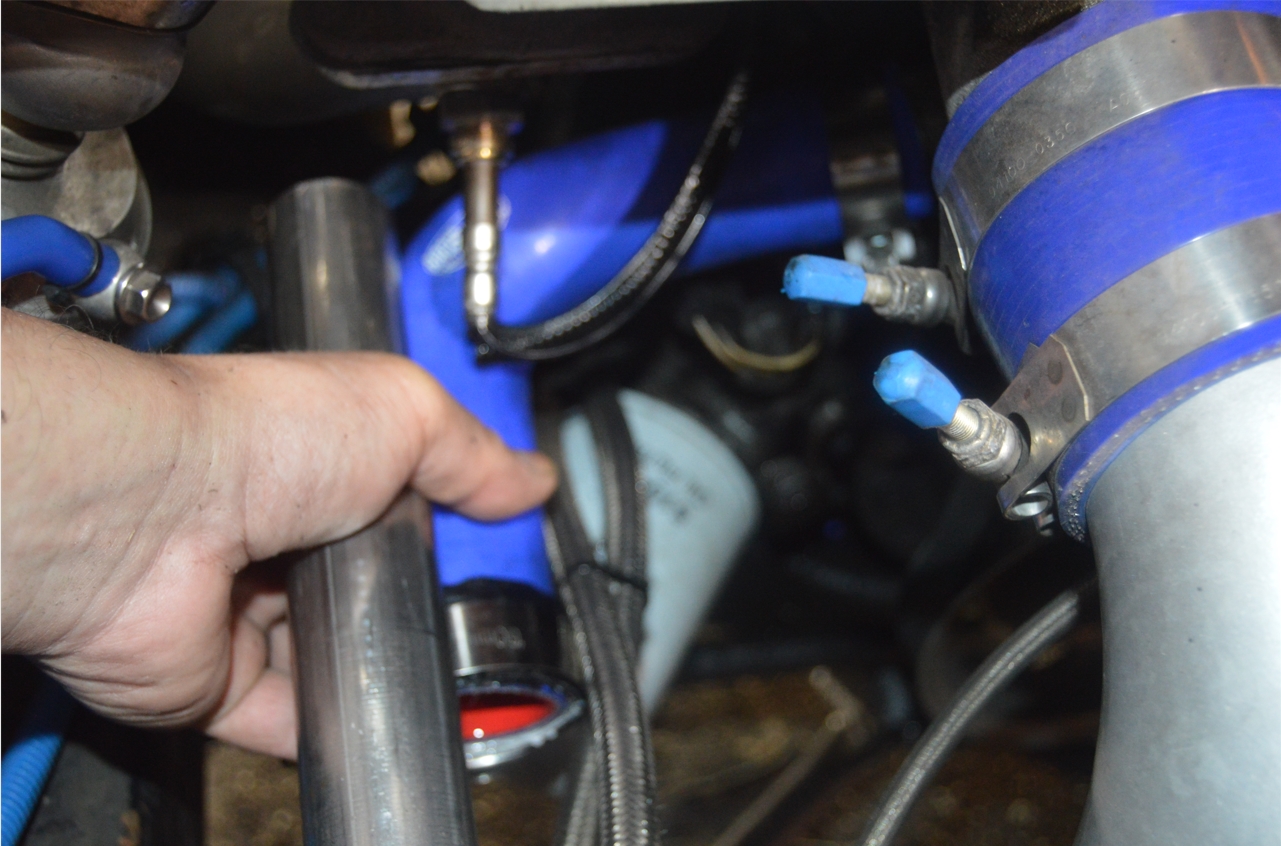
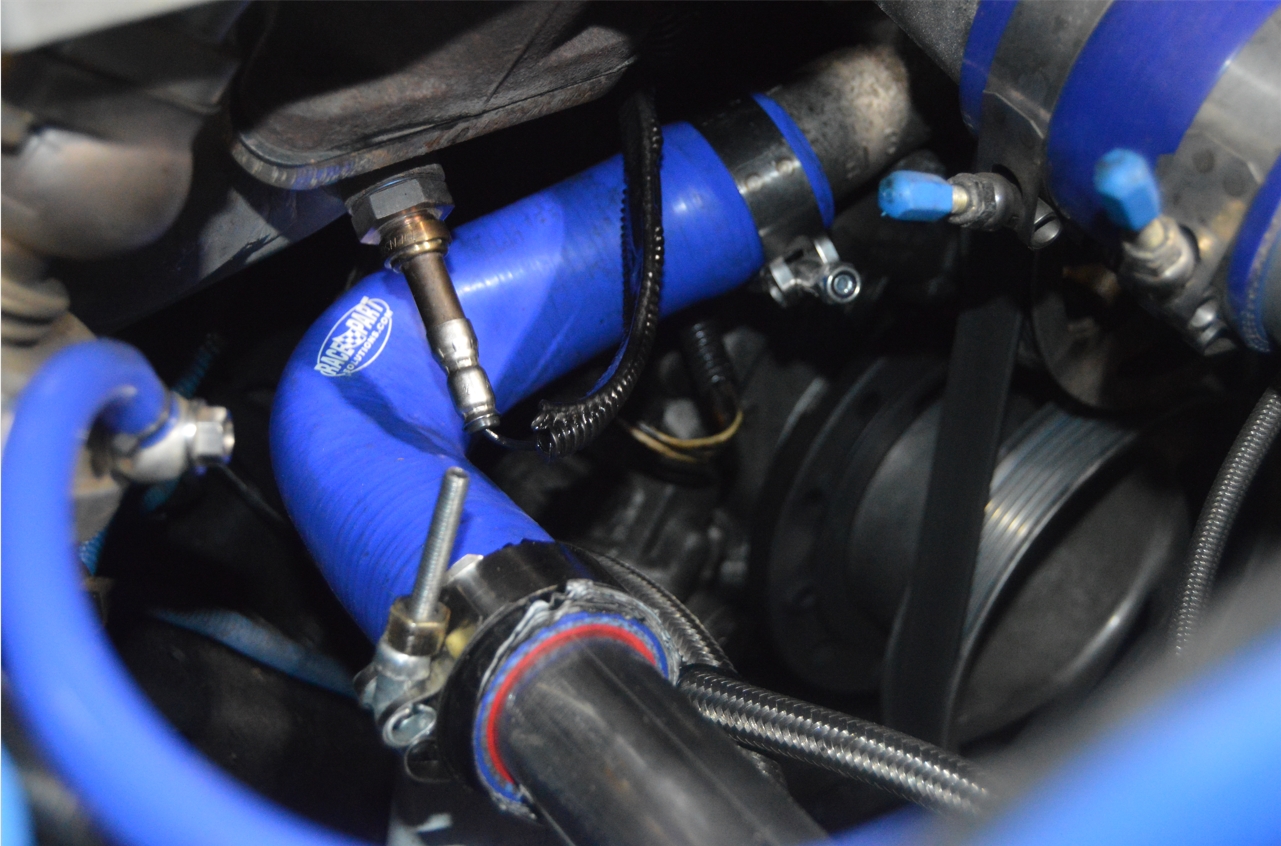
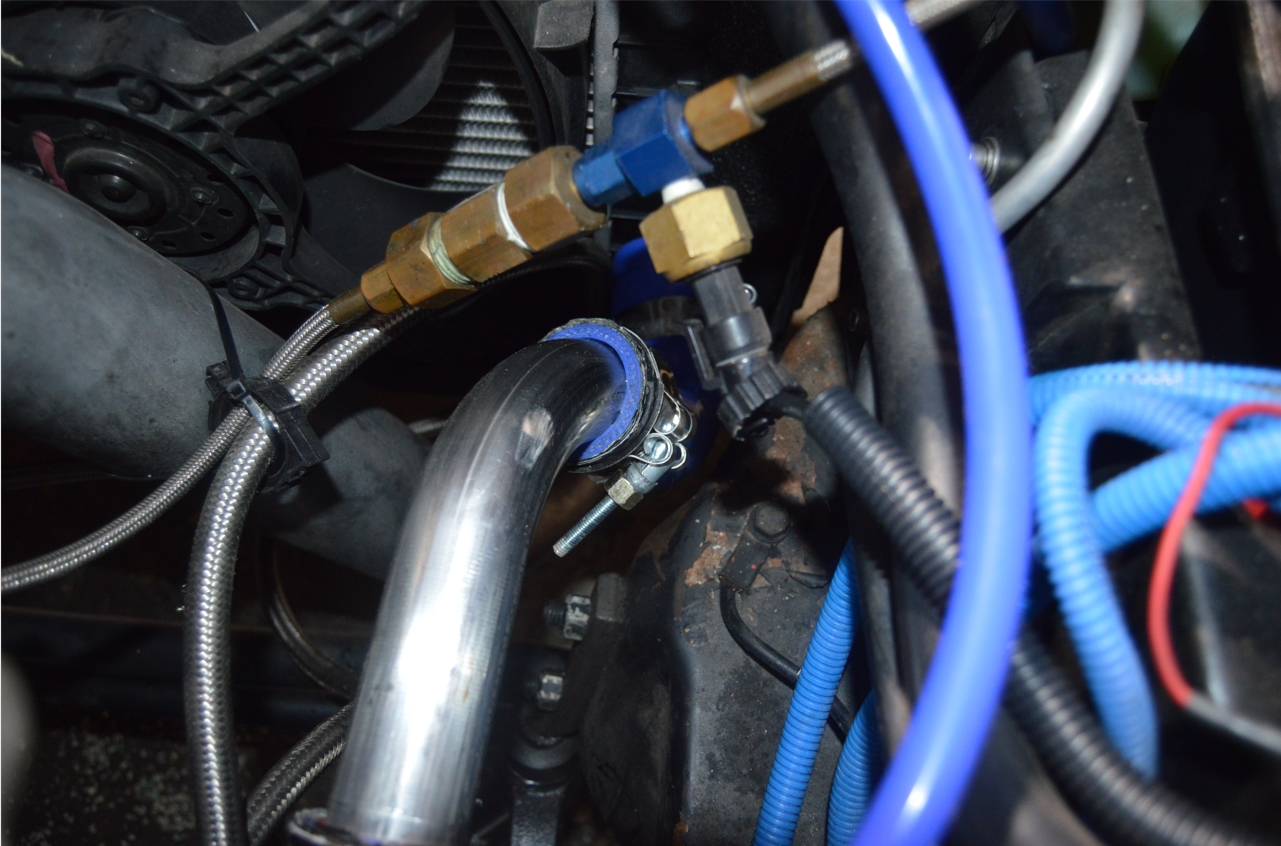
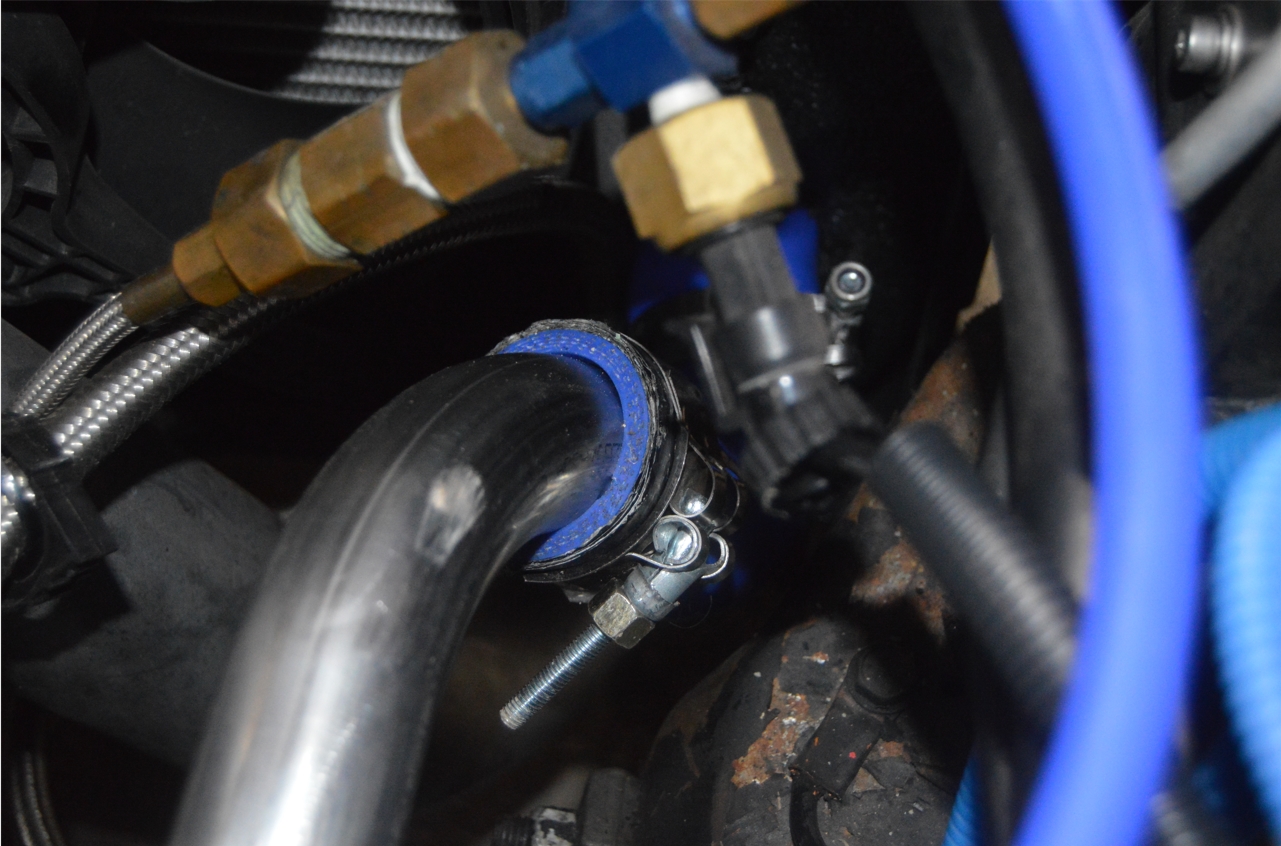
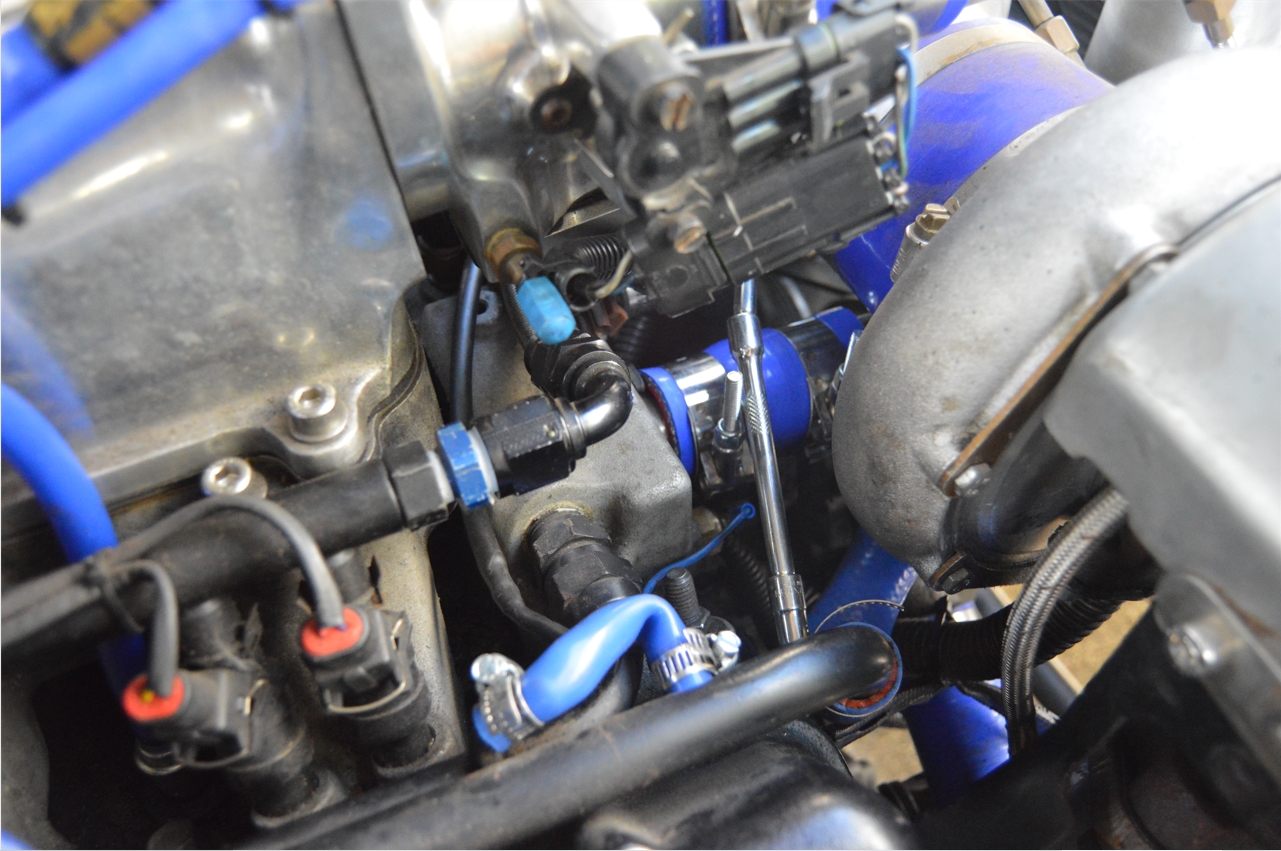
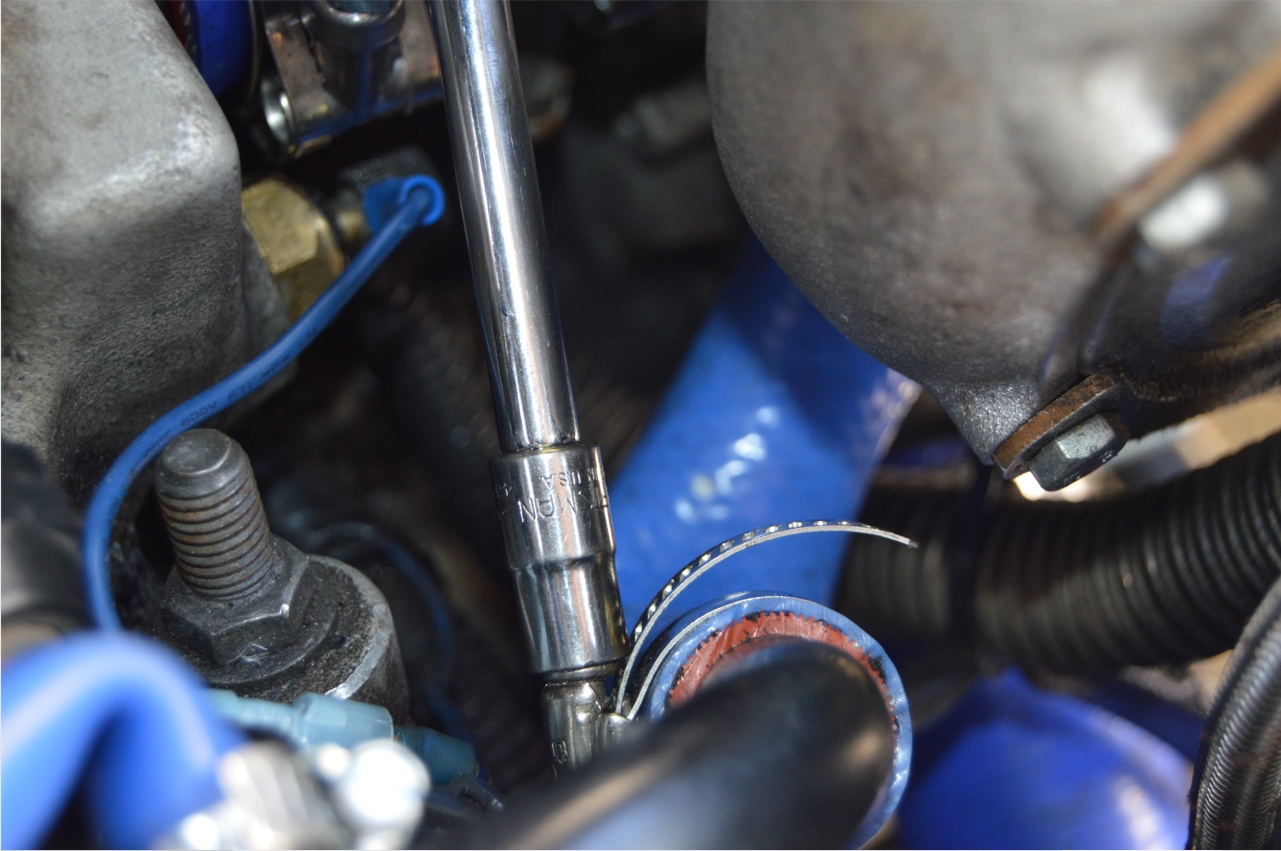
UPPER RADIATOR HOSE:
[the trick to getting this one off, is loosen all of the clamps first. then totally remove the hose touching the radiator. swing the metal pipe over to the passenger side. wiggle and pull out the pipe from the hose touching the intake manifold. then pull out that hose as well. To install, reverse this procedure. install the manifold side hose WITHOUT the metal pipe attached, then slide the t-bar clamps on, and clamp it on the manifold side (only), then insert pipe inside, don’t clamp down the other attaching clamp here just yet until you completely install the upper radiator hose. then secure down the other 3 clamps.]
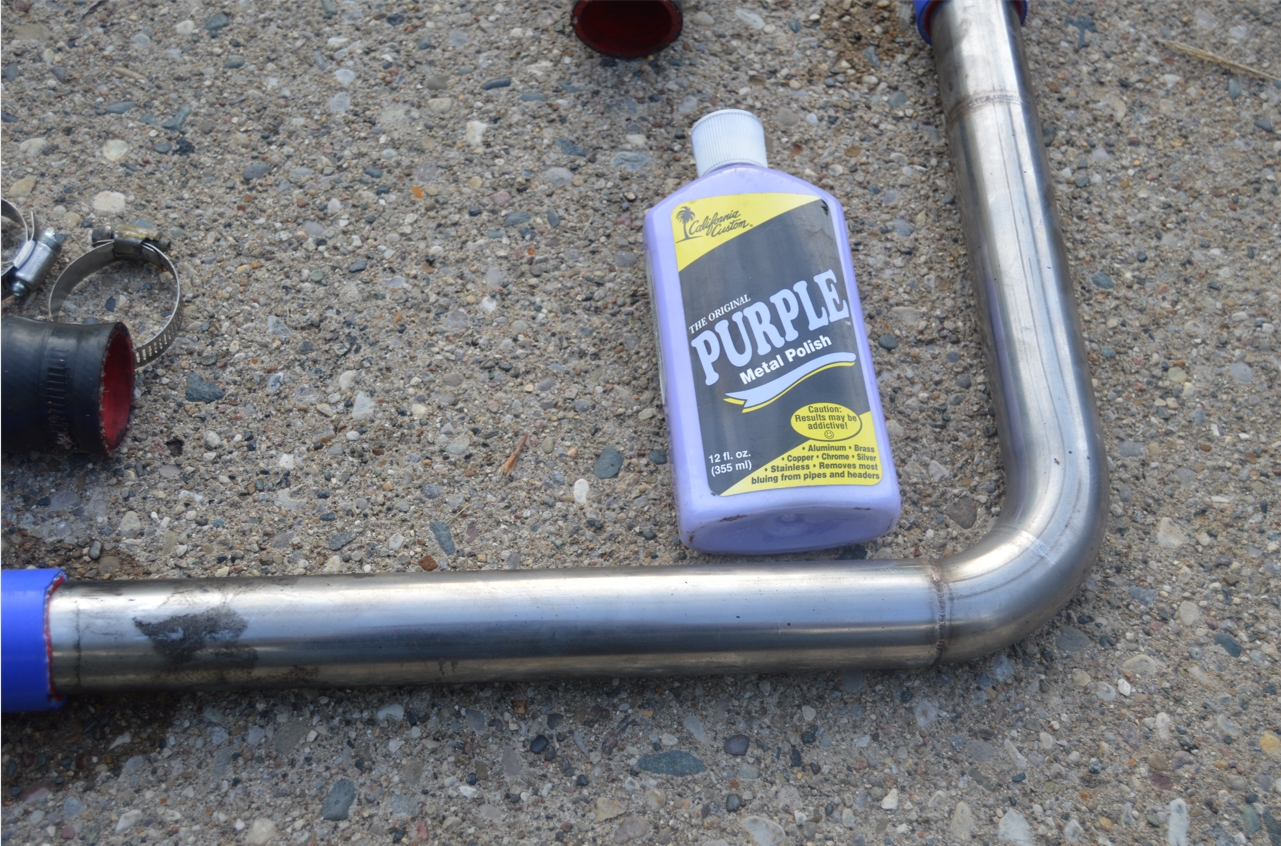
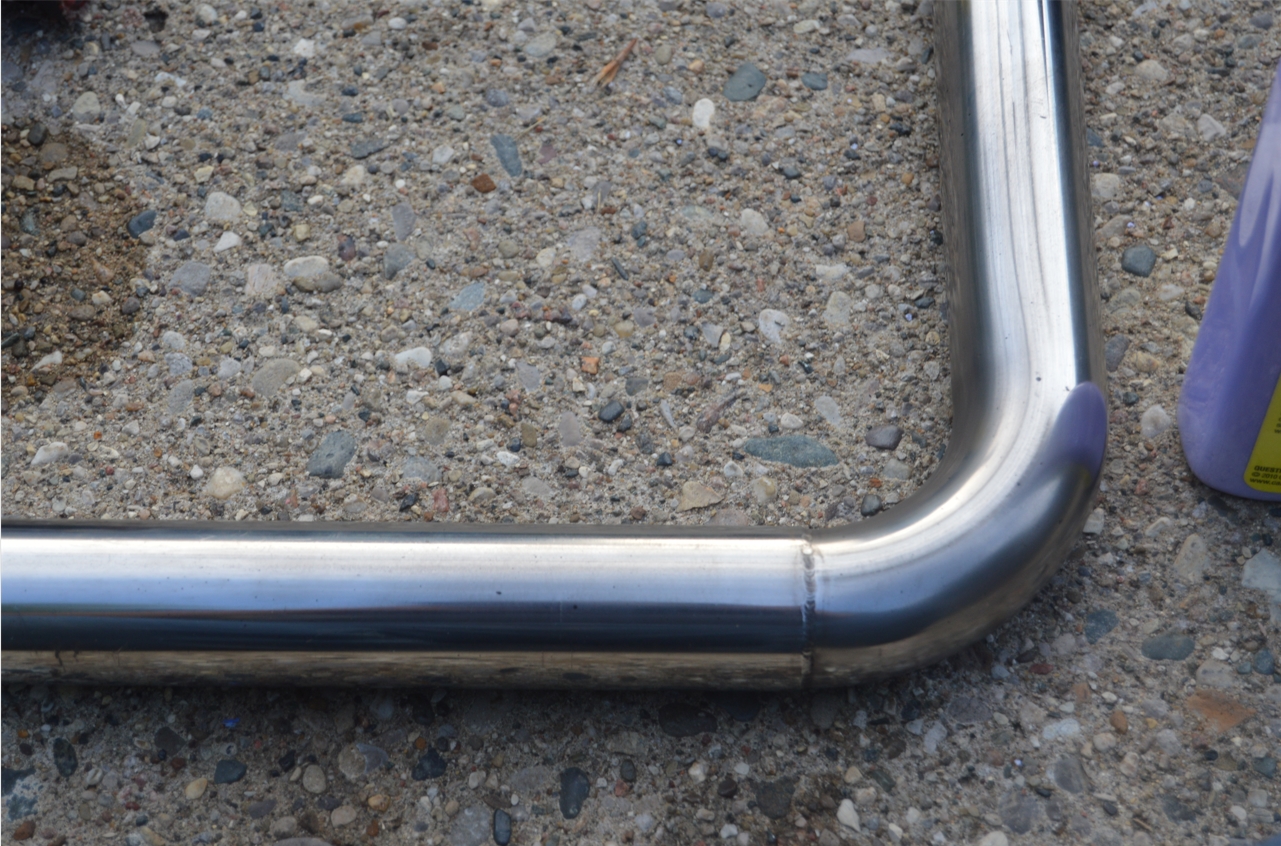
[before we reinstalled the upper radiator hose, we took 10 minutes and used some metal polish we had sitting on a shelf and shined up the entire length of the stainless steel tube. We haven’t really cleaned this part in years, and since we’re trying to make everything in the engine compartment look nice, it seemed like the thing to do. it turned out pretty good!]
.


.
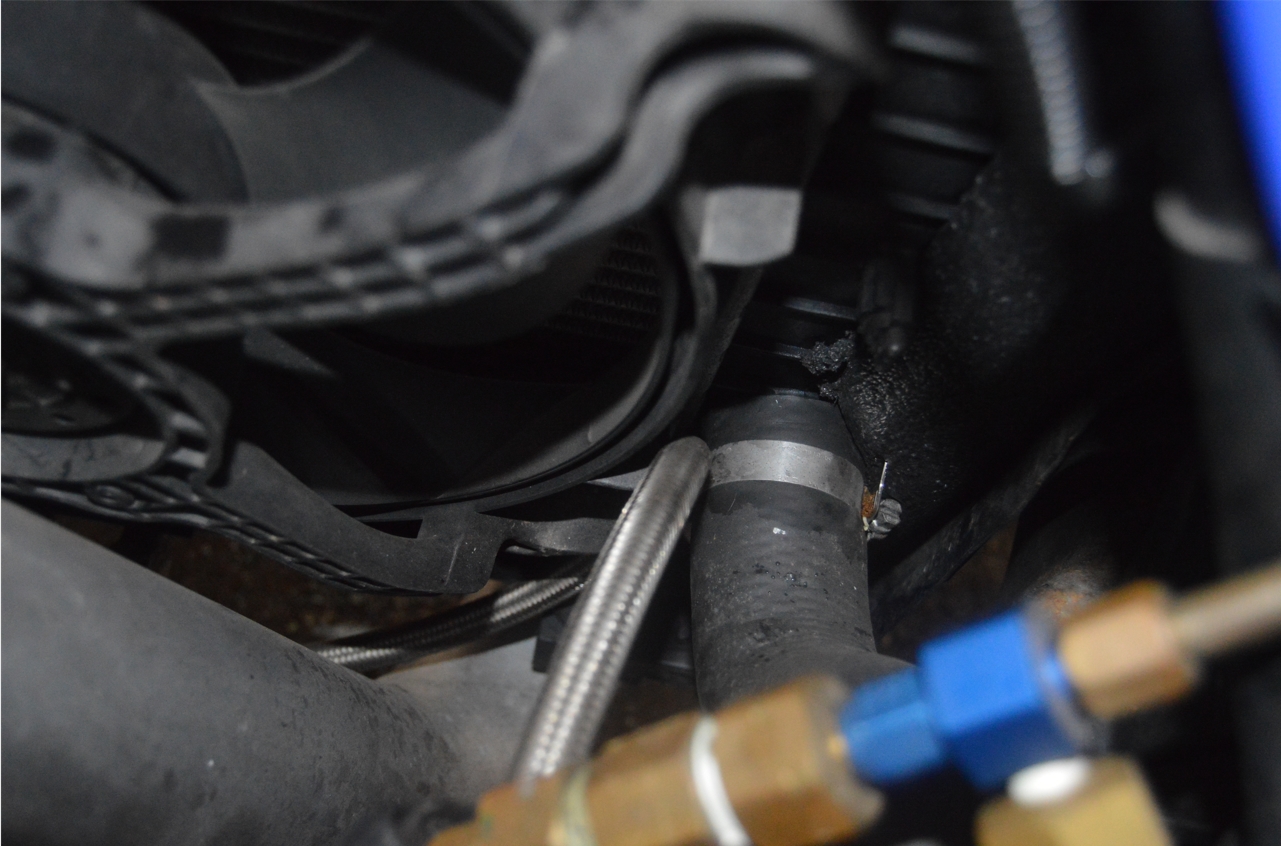
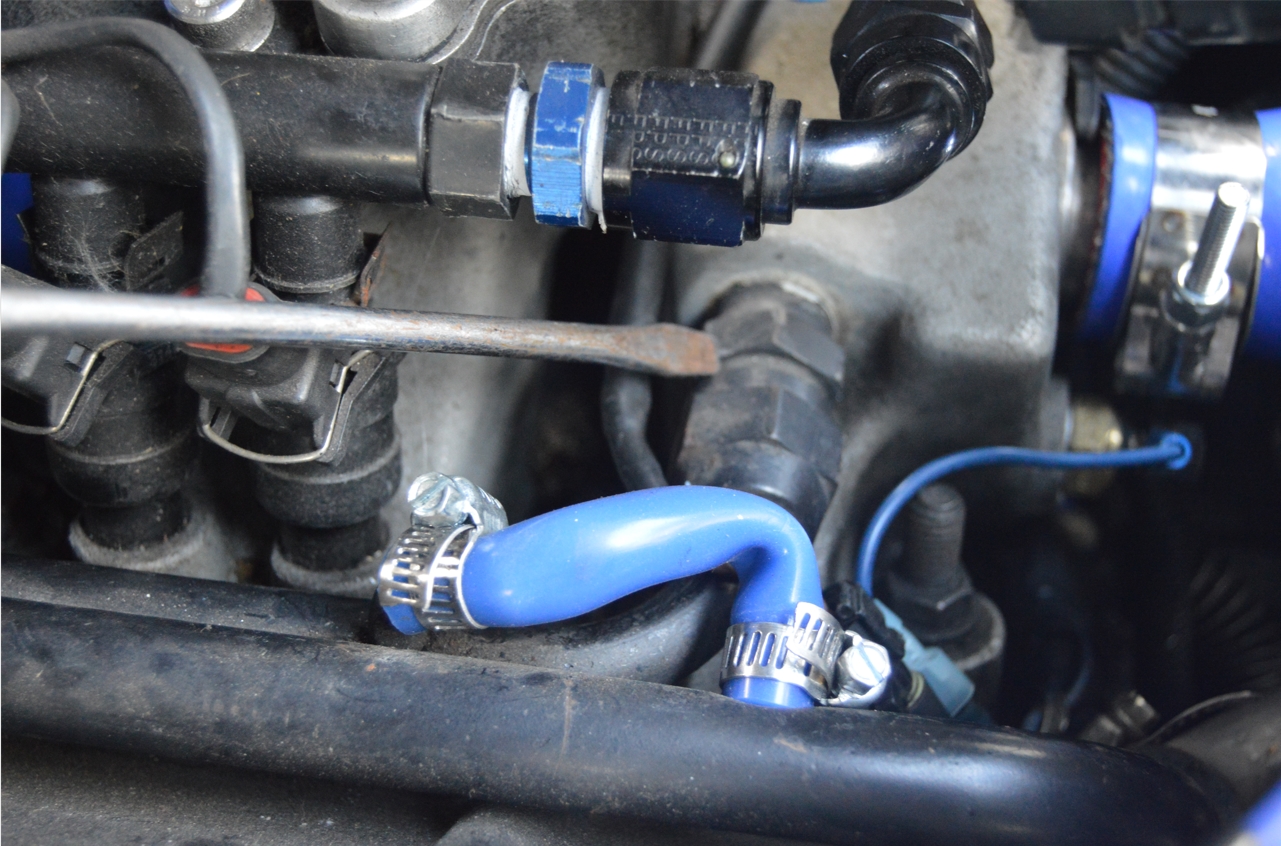
LOWER HOSE:
[take note, that when you remove the lower radiator hose, A LOT of coolant will come out, as you’re basically draining the majority of the engine block!]
[For the lower hose, keep all the clamps loose until you do a final fit in place, as you’ll need to twist and turn it to get it into the proper position. It’s similar shaped to the OEM hose, but not exactly (see note below).
(from closest to the radiator: the metal portion points up and towards the back of the car, as it needs to clear the frame). Once it all looks and fits well, secure all 4 clamps down. Make sure you look at how the old clamps were positioned, so you know which direction the new ones need to face, as far as which sides the bolts need to go on. That makes it easier to tighten them down in some areas!]
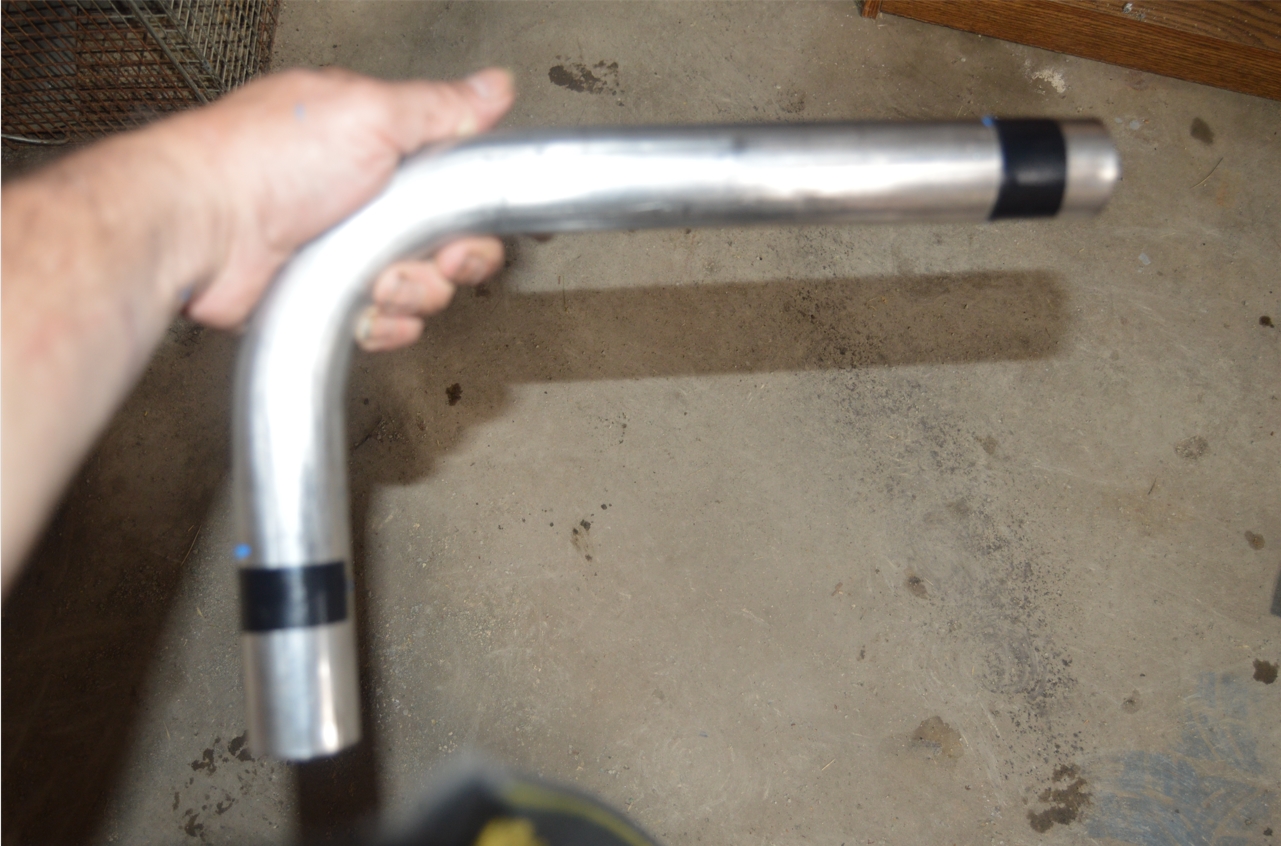
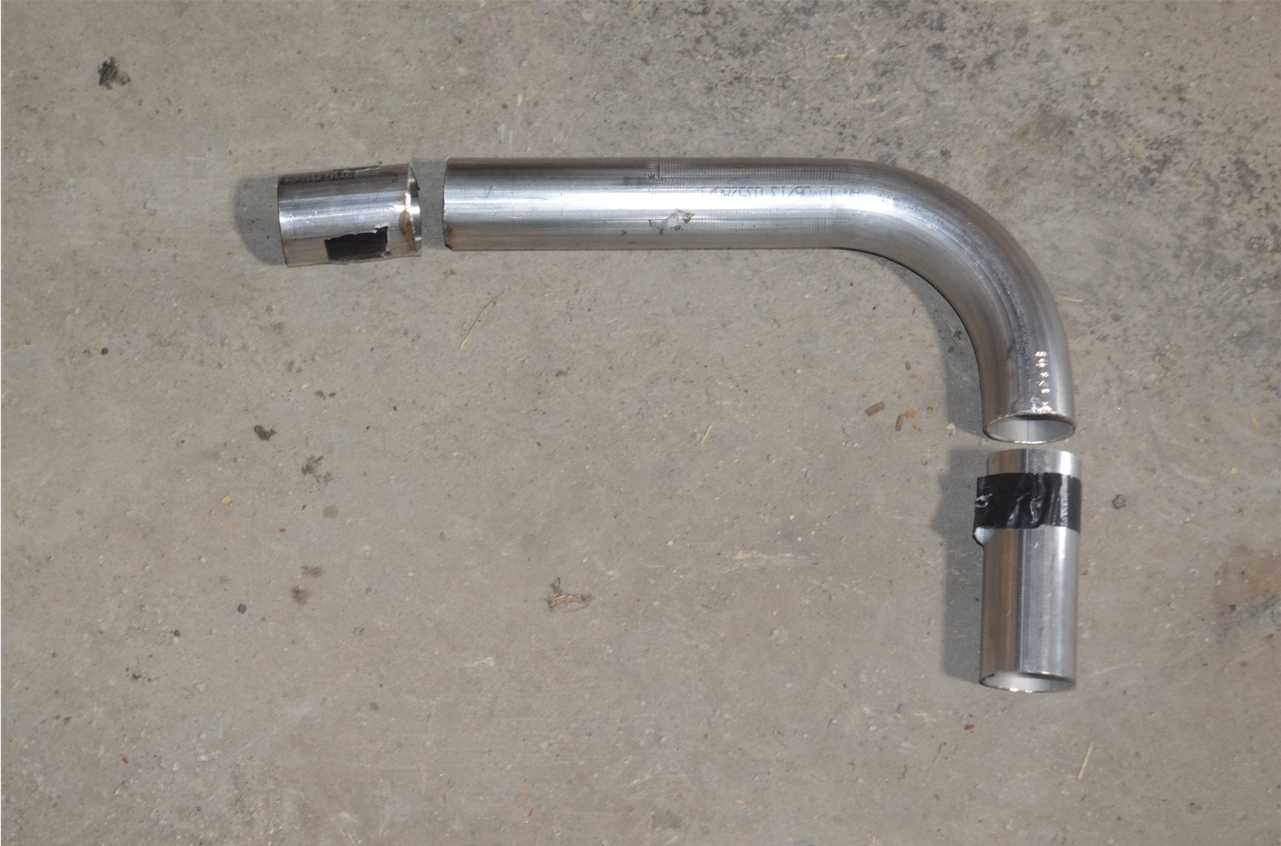
[we compared/configured the shape of the new version versus the stock hose, (while it was off the car) and while we got it close, when we actually tried to install it, it wouldn’t fit right (not to mention trying to get the entire piece wiggled down there into place with all the other things in the way (since it’s such a long unit). we even tried taking it apart and installing both hose ends into place first, then tried to put the tube in place last). that didn’t work either. so we ended up cutting off 2″ from the engine side, and 3″ from the radiator side, of the metal tube, to get it to fit into position. it doesn’t sit exactly in the same place as the factory lower radiator hose did, but it’s fine now. it’s shifted slightly more towards the center of the engine (the tube section). we messed with it for 20 minutes twisting/turning, etc., trying to get it to fit and look right (it’s on some weird angles), before we just gave up and trimmed down the stainless steel tube. that was much easier to install that way]
.

.
HEATER HOSE:
(you should remove old ones, and measure against new hoses to get correct lengths)
[note, some coolant will come spilling out from the hoses when you remove them]
 Also,
Also,
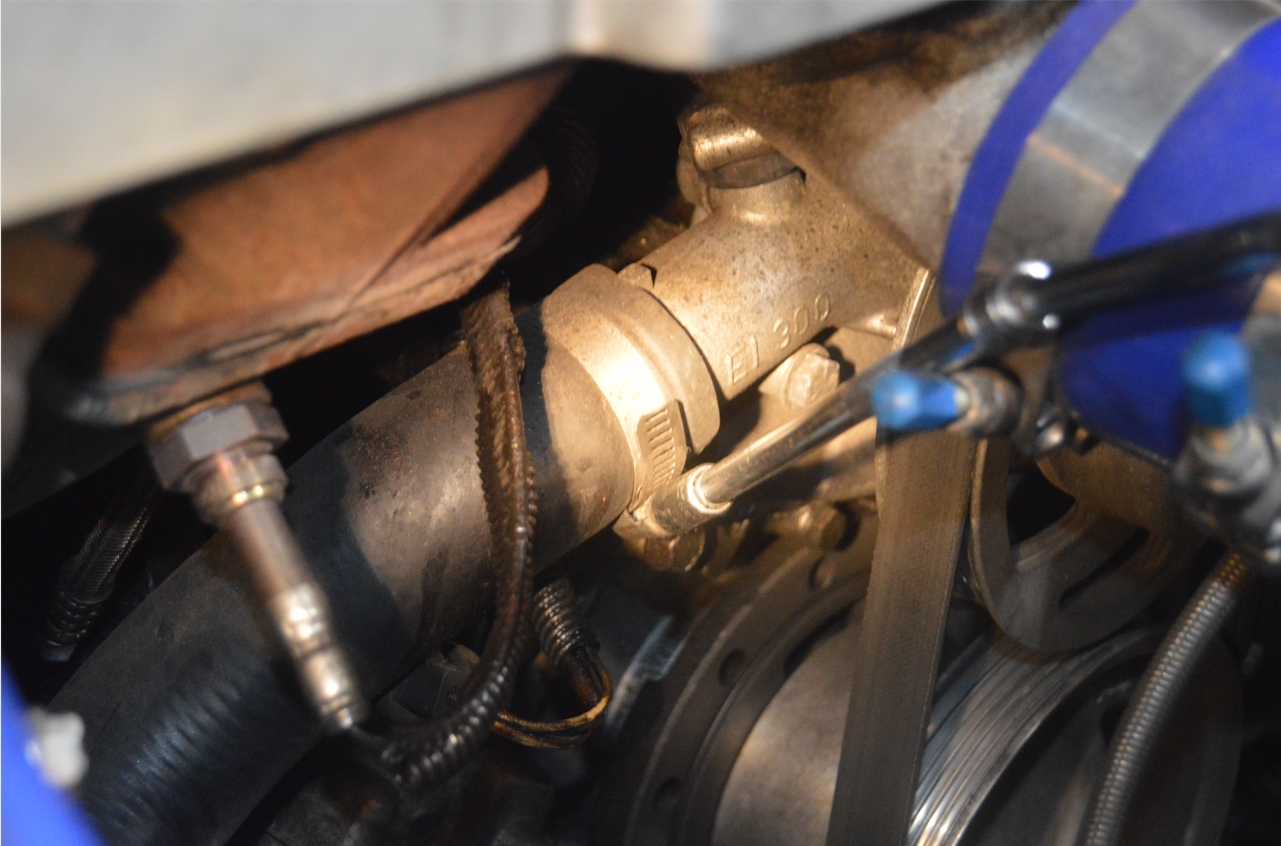
it might be helpful to loosen the 1 bolt holding the water rail onto the manifold.
[the hose on the lower tube sits right upon the manifold
(near the firewall),
and it’s easier to remove/install hoses with the rail slightly higher up]
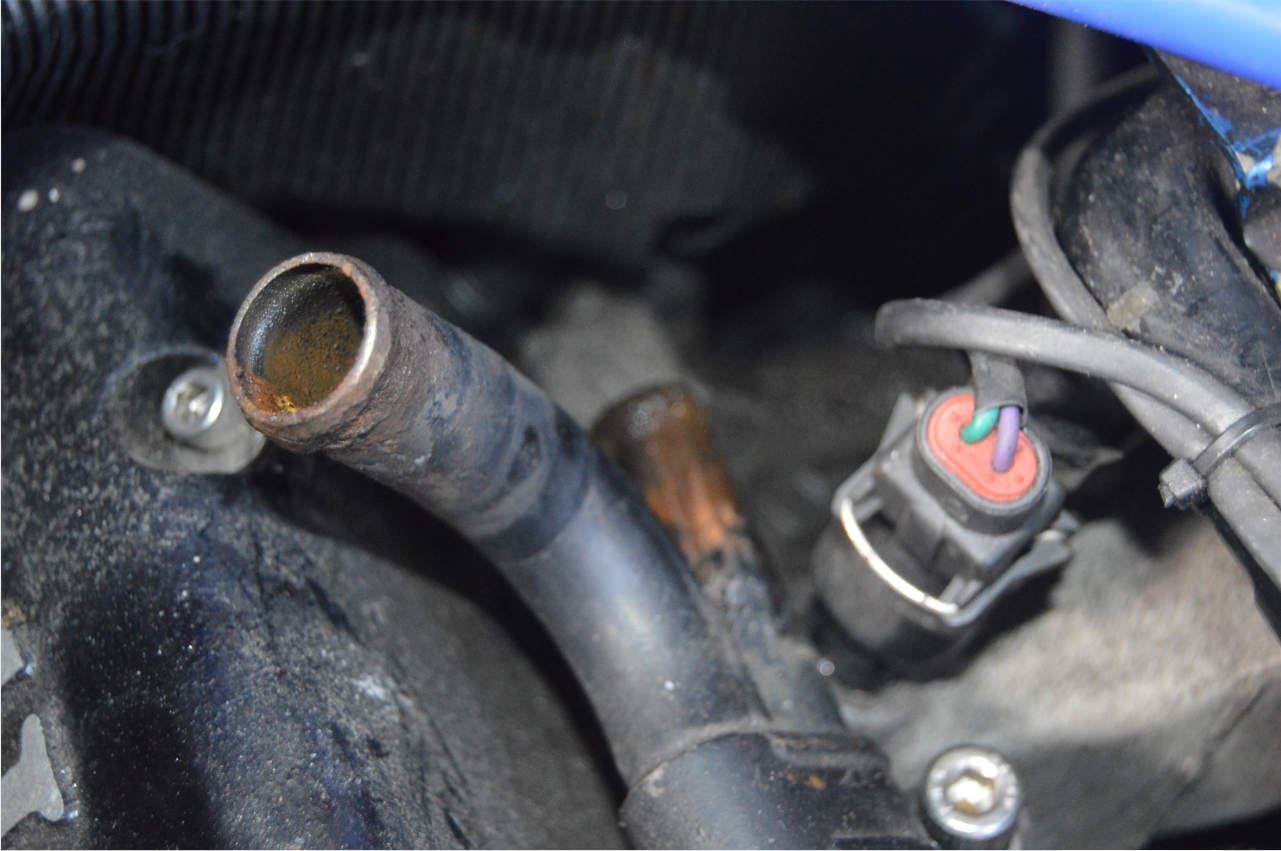
[the hose that is attached to the water pump (from the upper tube) will probably need to be cut off, since you can’t really pull it off of the pump. It’s a tight area in there!]
.


.
We think this new addition makes our 1987 Buick Regal Grand National much more “cooler” now!
(or is the Buick GN more “hot” now?)
[see what we did there?!]
.
.


