


.
Today’s job is a bit more of a time consuming task than the previous painting things we’ve been doing (hood spring, fender to core support braces, etc.) under the hood.
This is part of our “Buick Grand National Engine Bay Cleanup.”
(a multi-part series we’re doing for assorted things under the hood)
(eventually the entire thing will look as pretty as the rest of the Turbo Buick does)
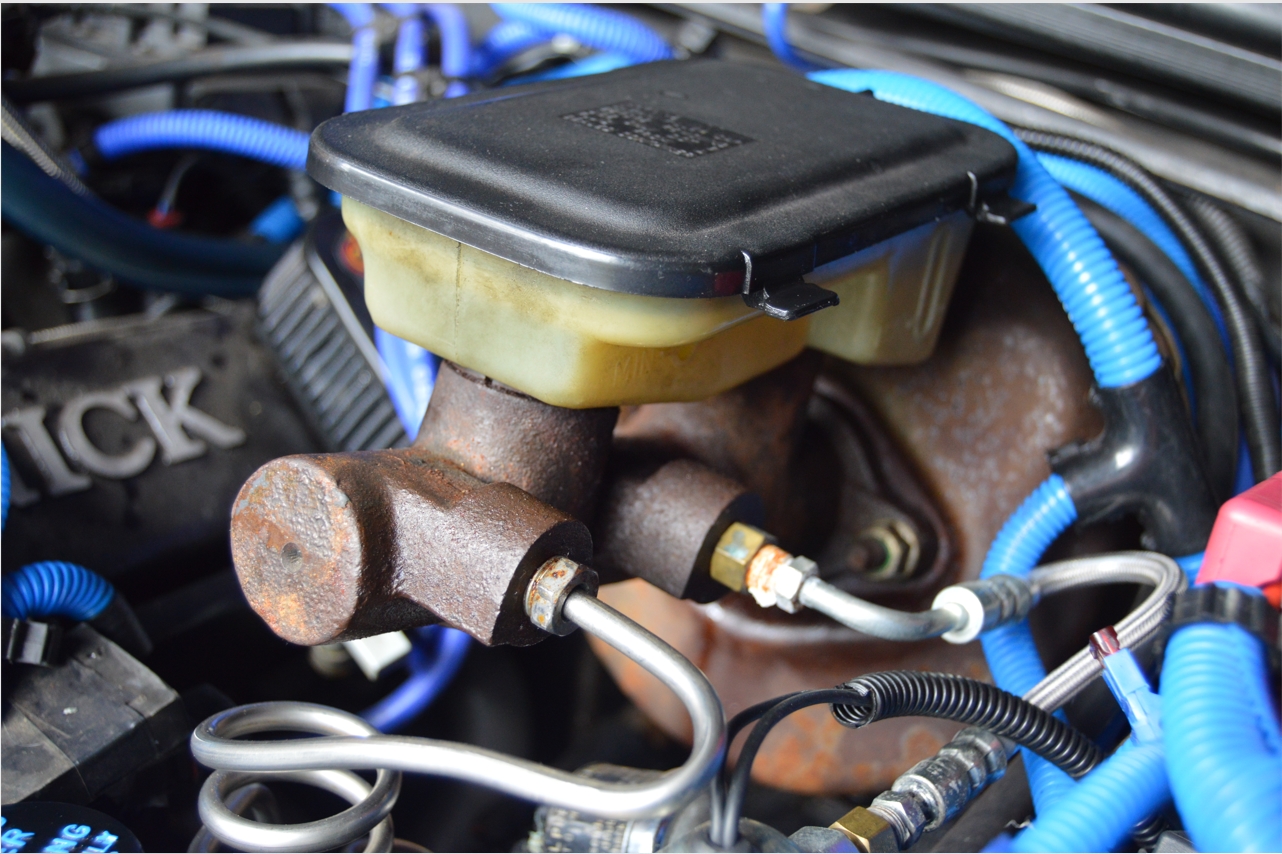
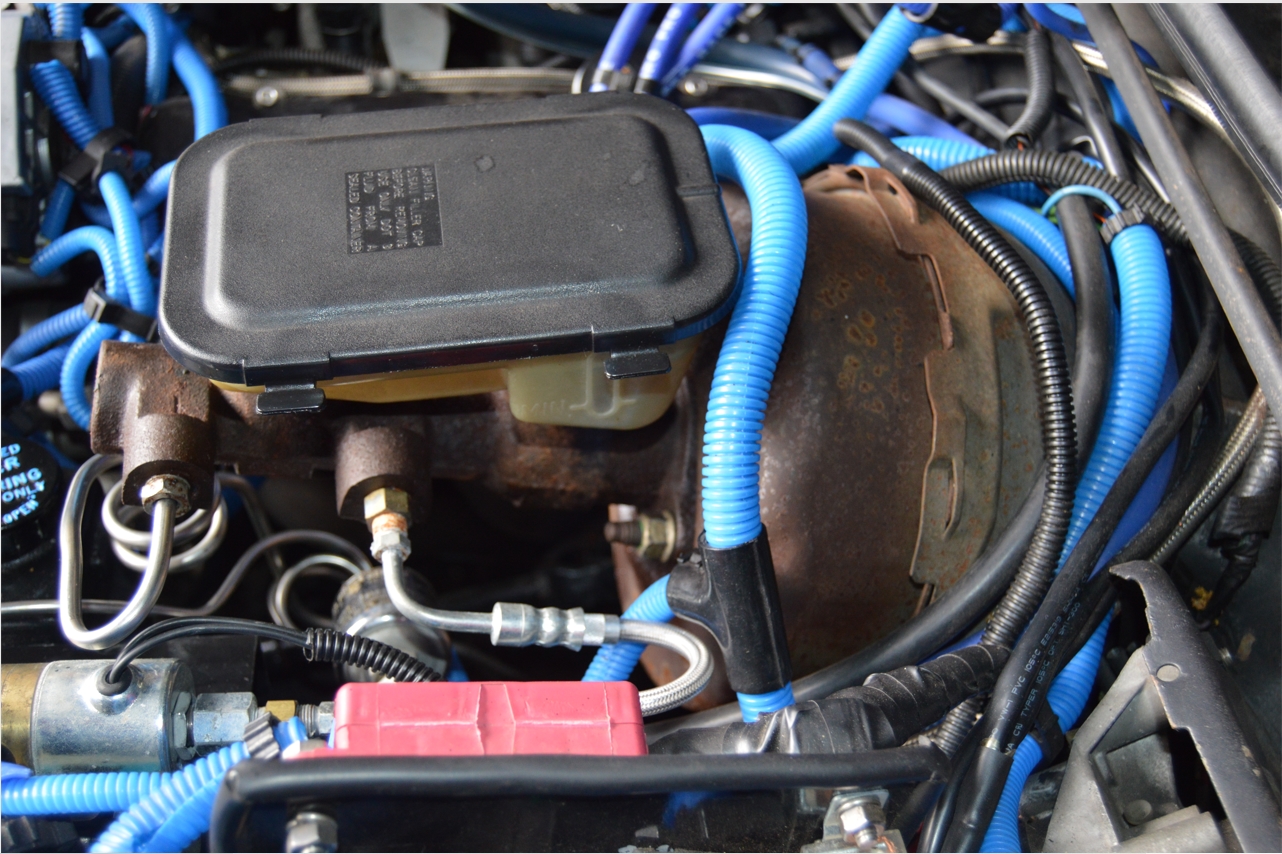
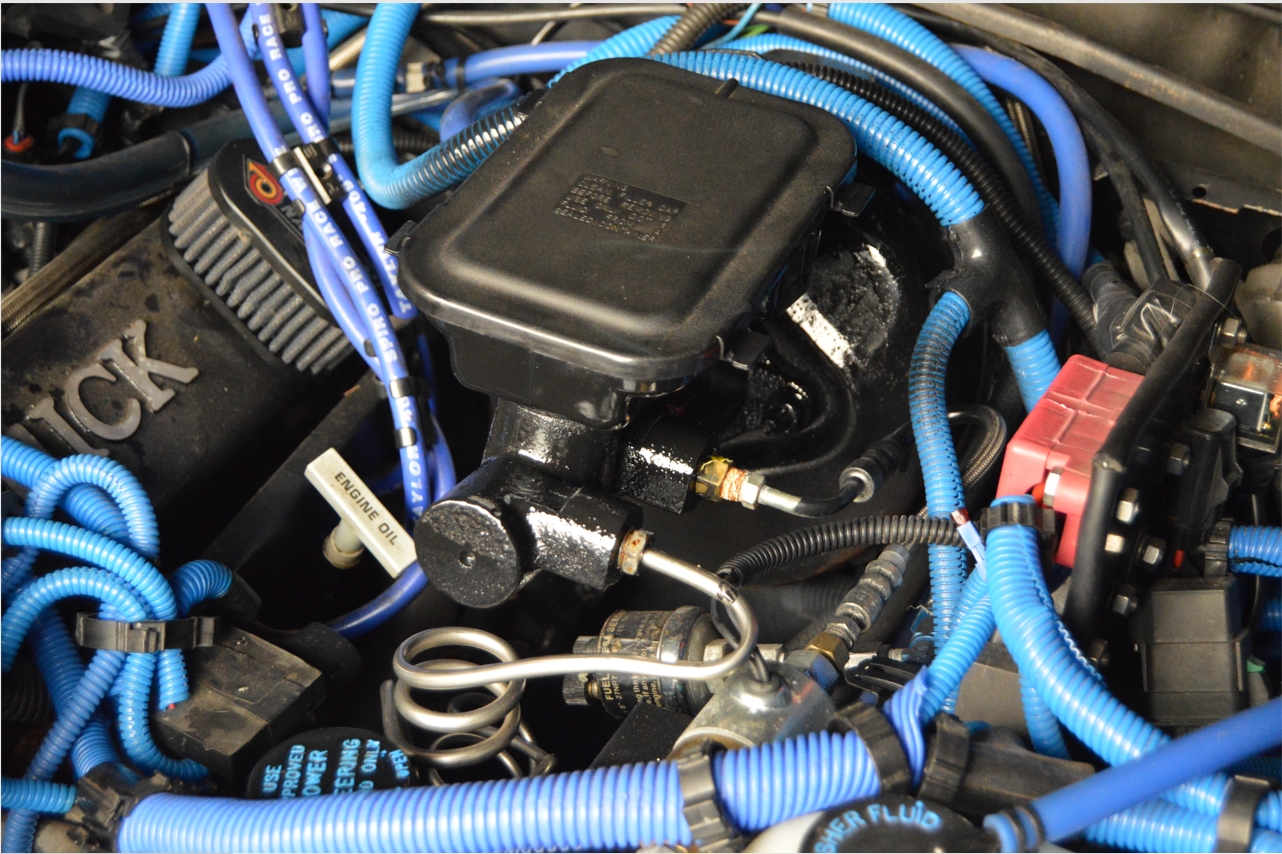
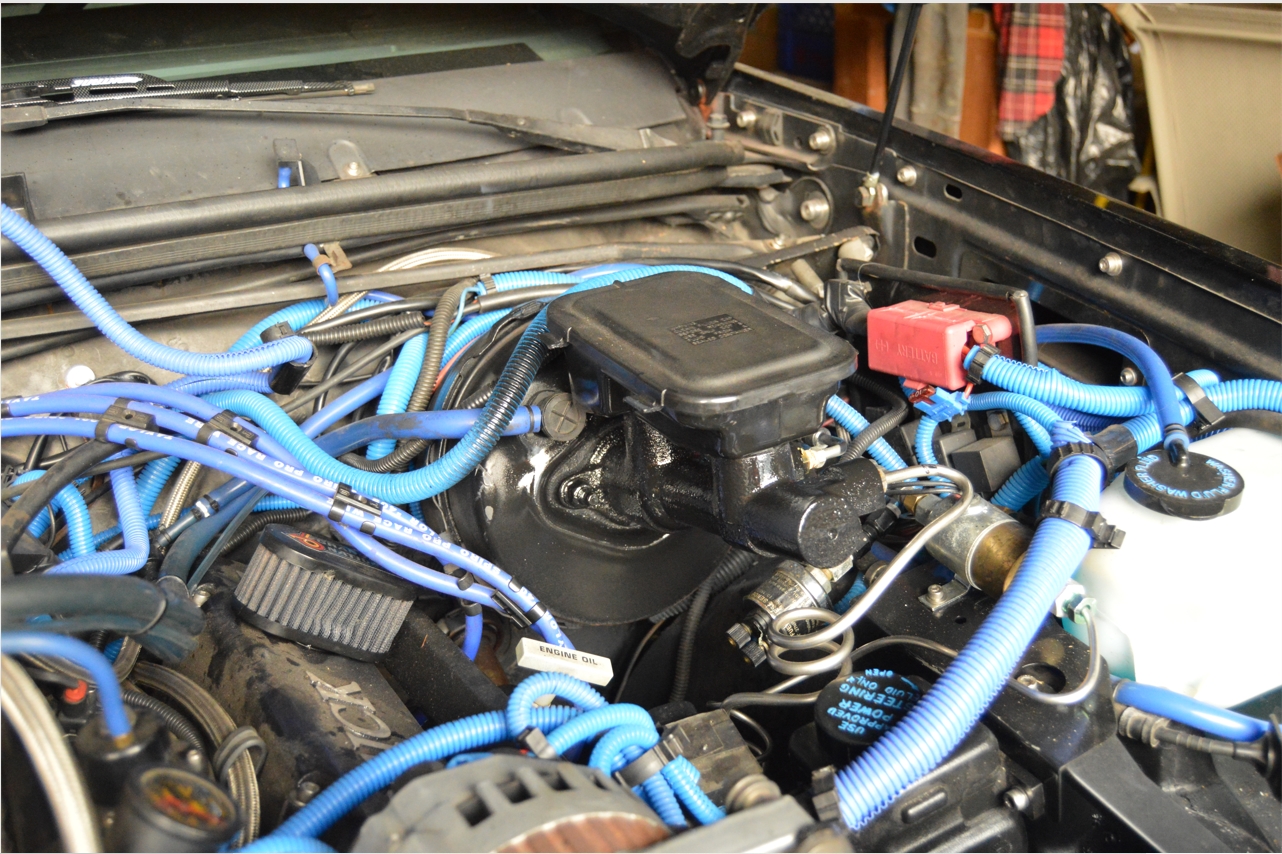
The brake system on this 1987 Buick Grand National has been converted from the OEM powermaster system to a vacuum brake setup.
It has a different master cylinder and an added vacuum booster in the engine compartment than what originally came on this Gbody Regal.
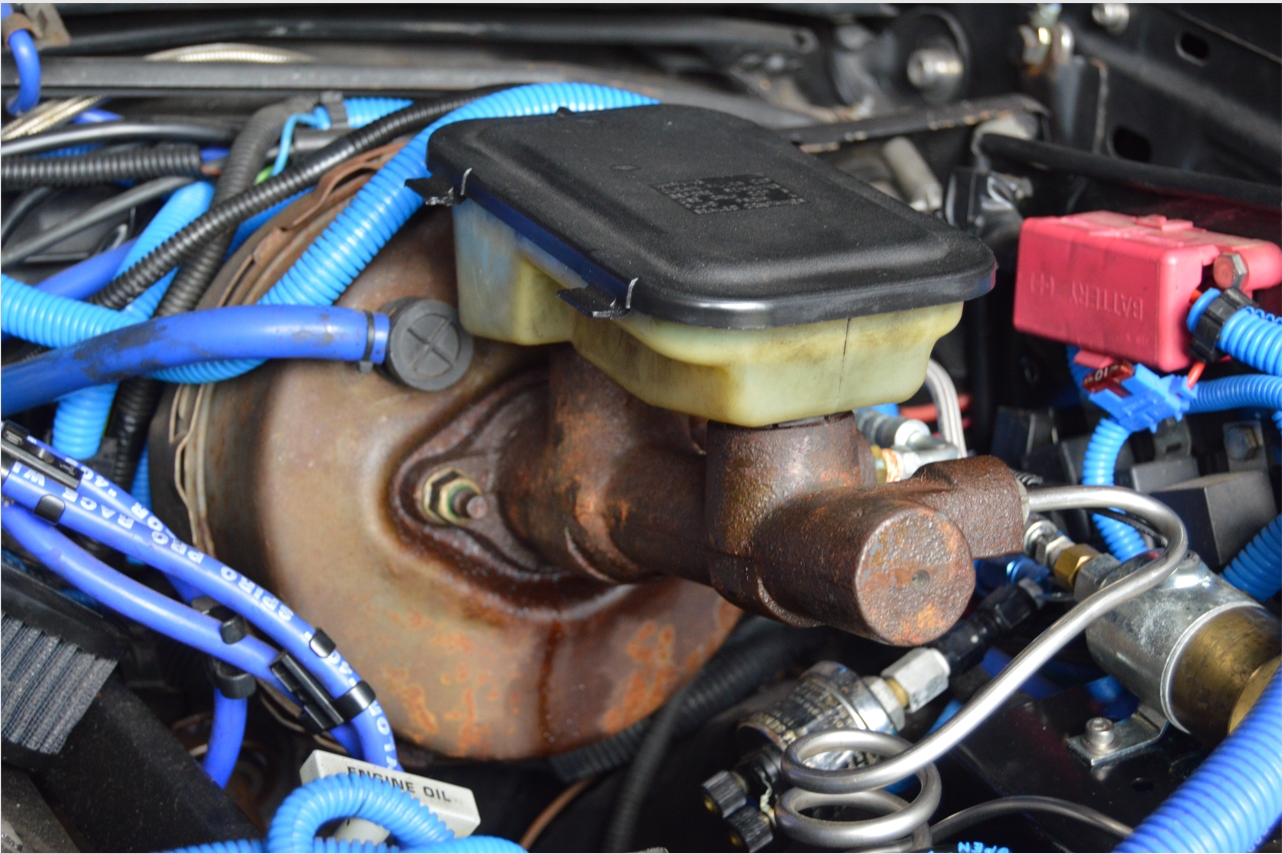
Over time, the shine &/or paint wore off both of these items.
[or perhaps they never were painted at all, as they were already installed on this Turbo Buick long before we acquired it, and everything pretty much looks now like it did at first]
At any rate, they need freshening up.
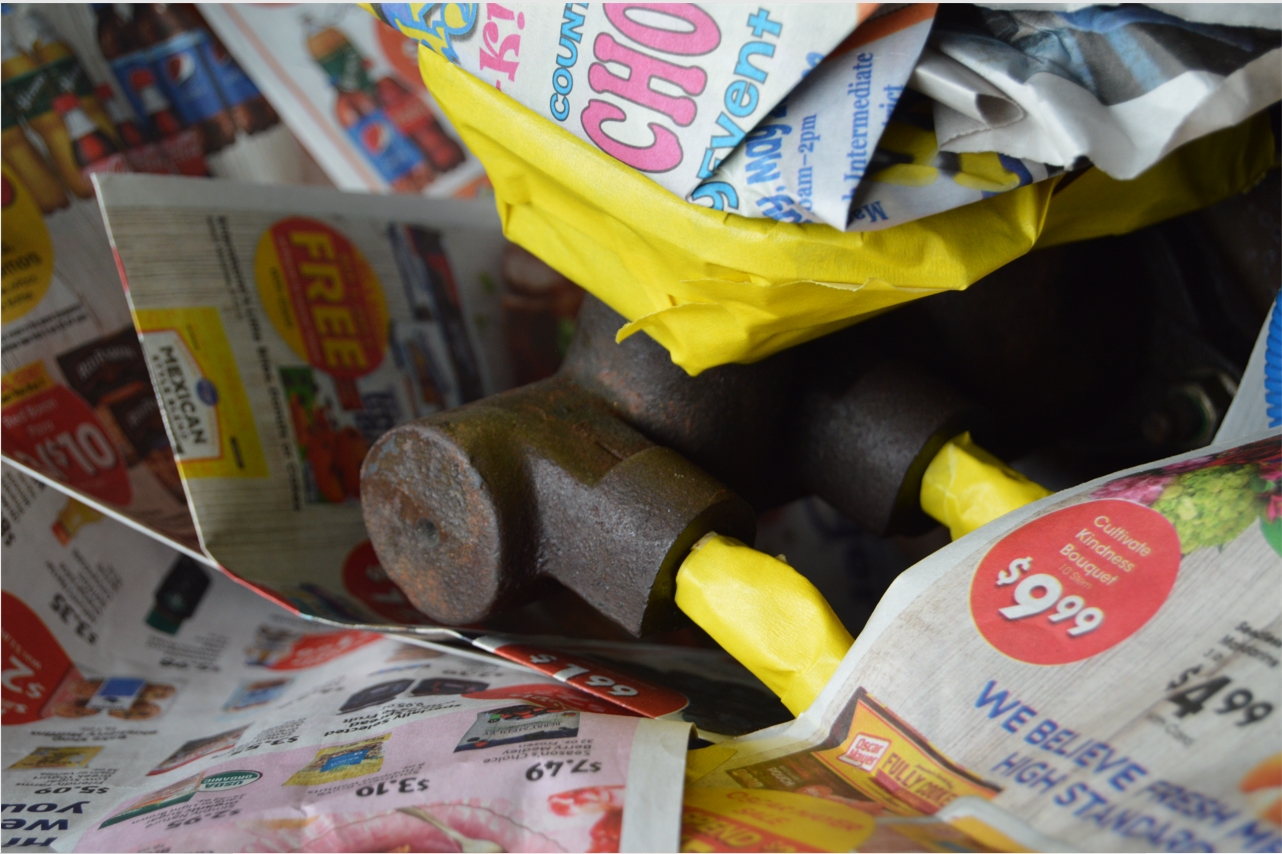
We don’t intend on removing these components from the vehicle, so lots of prep work needs to be performed because of that. And what a PITA that is (might have been easier and look better to just remove them from the car to do this job).
The first thing we did was use paint thinner on the master cylinder & booster, to make sure any spilled brake fluid wasn’t remaining on it, to ensure the primer/paint will stick.
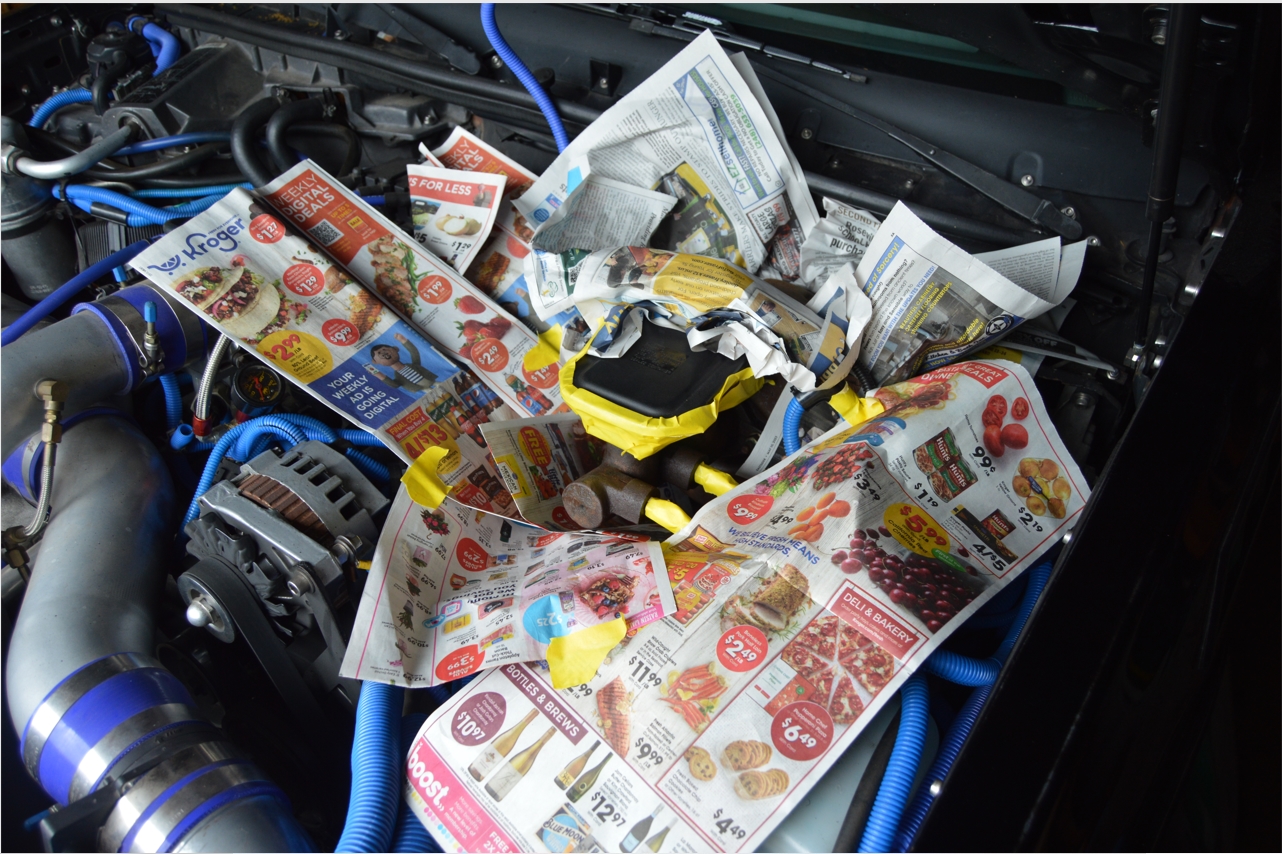
All of the brake lines coming off the MC need to be taped up.
The wire looms behind the vacuum booster need to be pulled up and out of the way, along with taping off the studs and nuts plus the vacuum line and grommet.
The areas below and around these units needs to be masked off too, to prevent overspray.
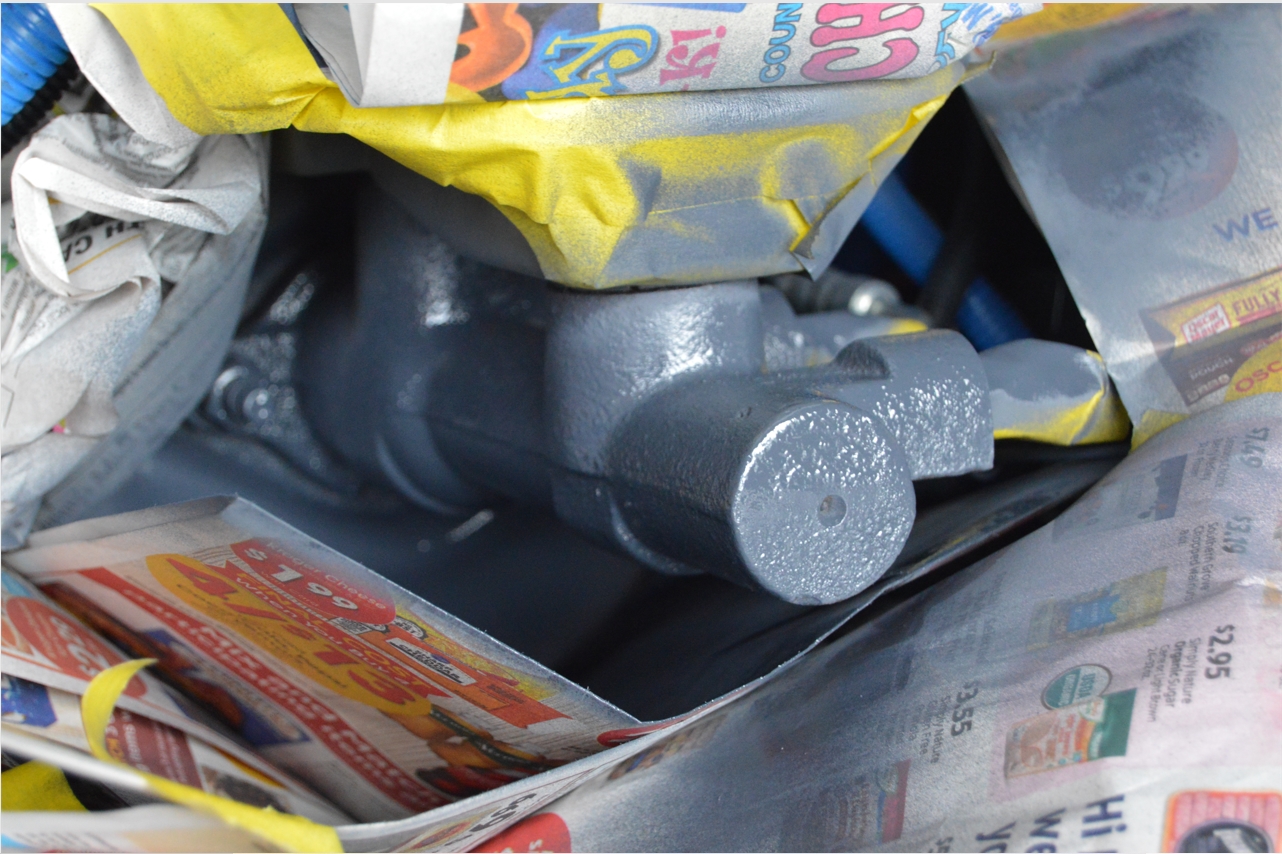
The reservoir will get a coat of black too, since it’s kind of dingy.
The lid will remain the stock black plastic molded piece as-is.
After 20 minutes of taping everything off, we were ready to apply primer, then rattle can them in glossy black paint.
The curing time was about 20 minutes for the primer and a few hours for the paint (while we went and did other stuff).
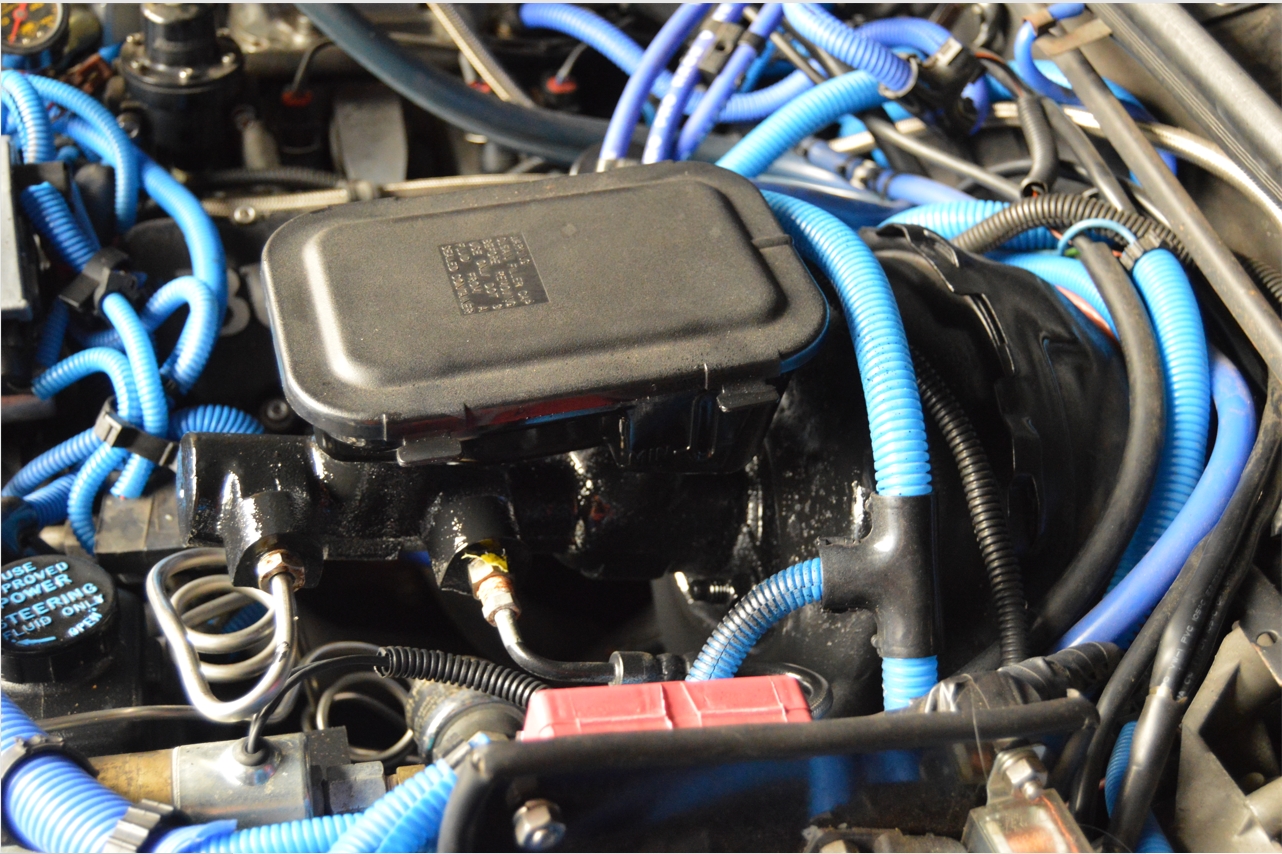
Peeling off the masked areas revealed a nicer looking under the hood section.
(although we did have to touch up a few areas afterwards, since these small sections were buried in between the newspaper, and in and around the things surrounding the vacuum booster)
[ this was specifically a task that we’ve been wanting to do for a really long time, but other things always seemed to come first. We’re glad this eyesore is finally taken care of! ]
Afterwards, some parts needed to be cleaned off from a bit of paint overspray, but we expected that since there’s so much stuff around this section.
Not too bad overall considering spray paint was used, it’s much gooder than it was.
And it didn’t cost any money to do, since we had all the supplies here already.
(paint thinner, rags, masking tape, newspaper, primer, paint)
Another elbow grease only type of job.
And another mission accomplished.
.

.

.


