


.

.
This is a continued lighting upgrade project on the 1986 Buick Grand National we’ve been working on.
Today’s new adventure:
Stock hood with underhood light?
No problem.
Simply replacing the factory GM bulb with an upgraded LED unit?
No problem.
However, once you upgrade to a lighter fiberglass Buick hood…
problem!
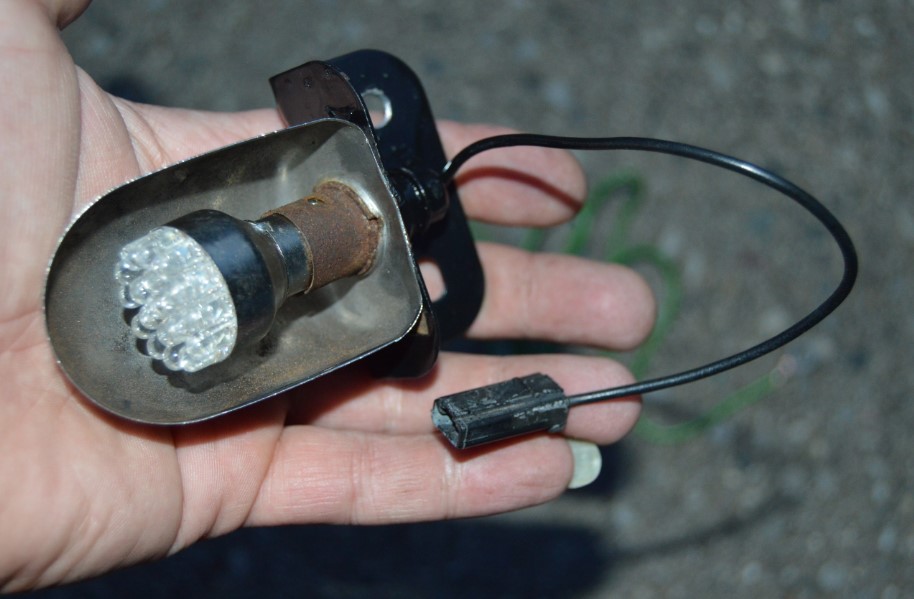
You see, the only 1 wire that runs to the light, is a positive-only wire
(even though it’s black in color).
The light fixture is normally grounded through the hood.
Which now means the fiberglass isn’t going to work as a negative conductor any longer.
Solution?
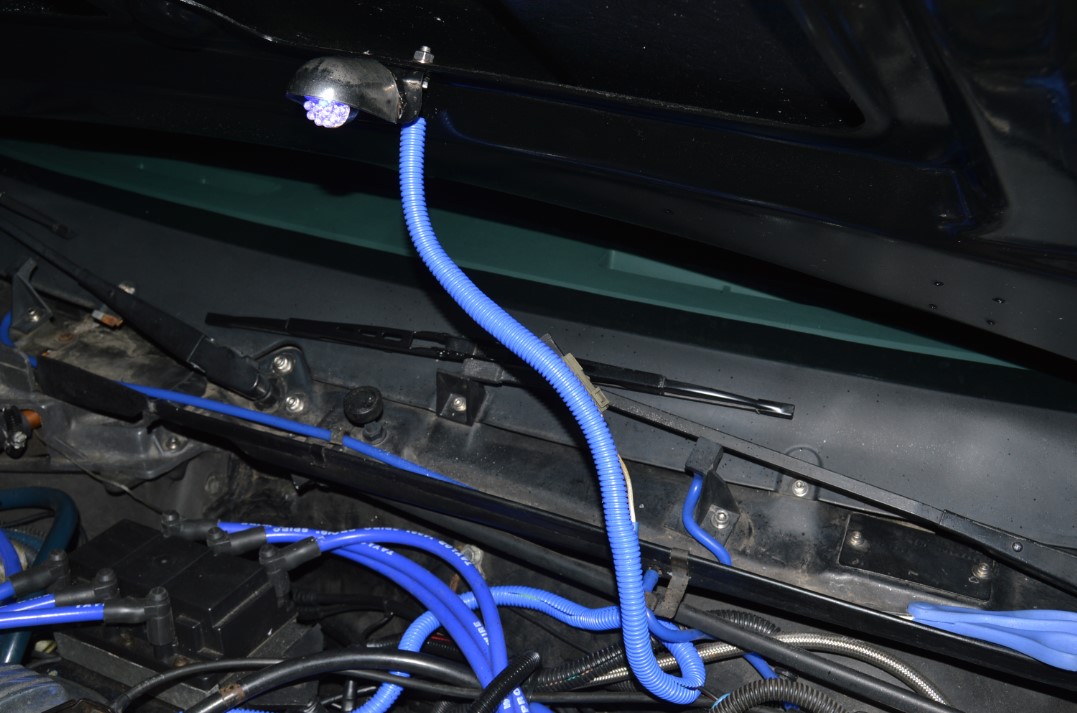
Simply install a new ground wire attached to one of the bolts that secure it to the fiberglass hood.

(they’re inexpensive & light up the engine compartment MUCH better!)
PARTS:
* underhood light fixture (this Buick GN was missing it. $20 on ebay).
* 2 bolts, 2 nuts & 4 lock washers to secure to hood (1/4″ x 3/4″ long stainless steel, home depot, about $1.50)
* LED bulb (varies depending on which version you get. $3-$10 on ebay).

[note: 36″ may seem like its too long, but we ran it through existing/added wire loom & since the wire runs from the light then down, then left, then over to the mounting point, it’s just the right length.
You may need more/less depending on where you mount/ground it.]
TIME TO INSTALL:
* less than 1/2 hour.
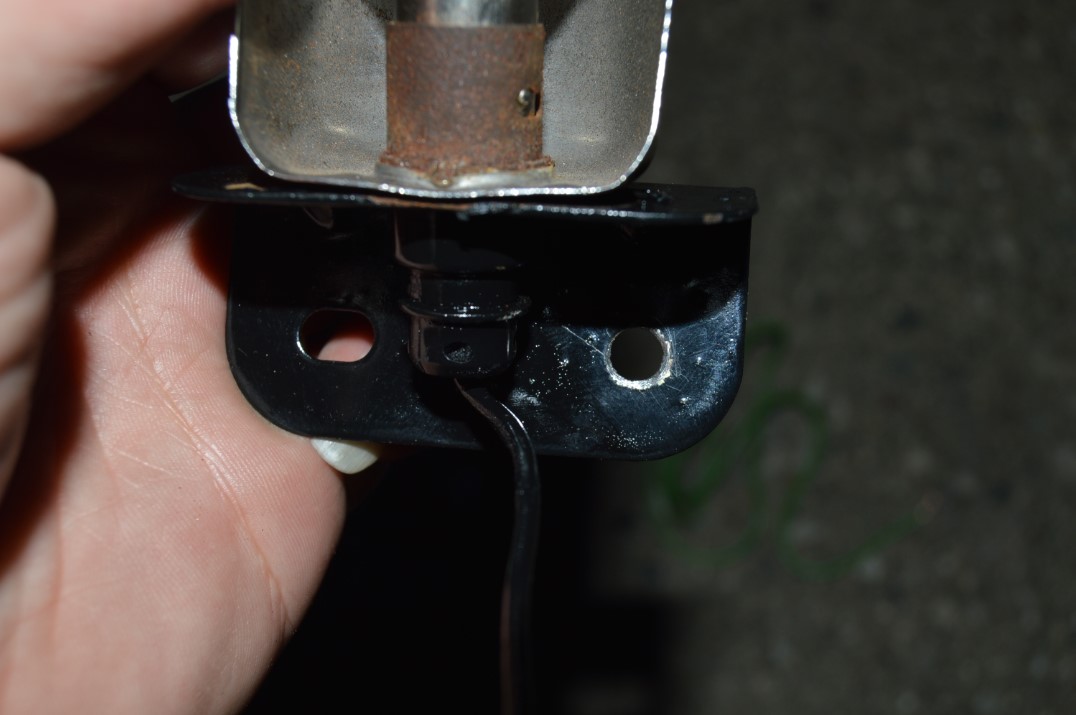
[note: the fixture we bought had a slightly rusty base, so we sanded it down & painted it black.
On the drivers side hole we took a round file to it so as to have a good connection for the ground wire]
1. remove old bulb (if applicable) & insert new LED bulb.
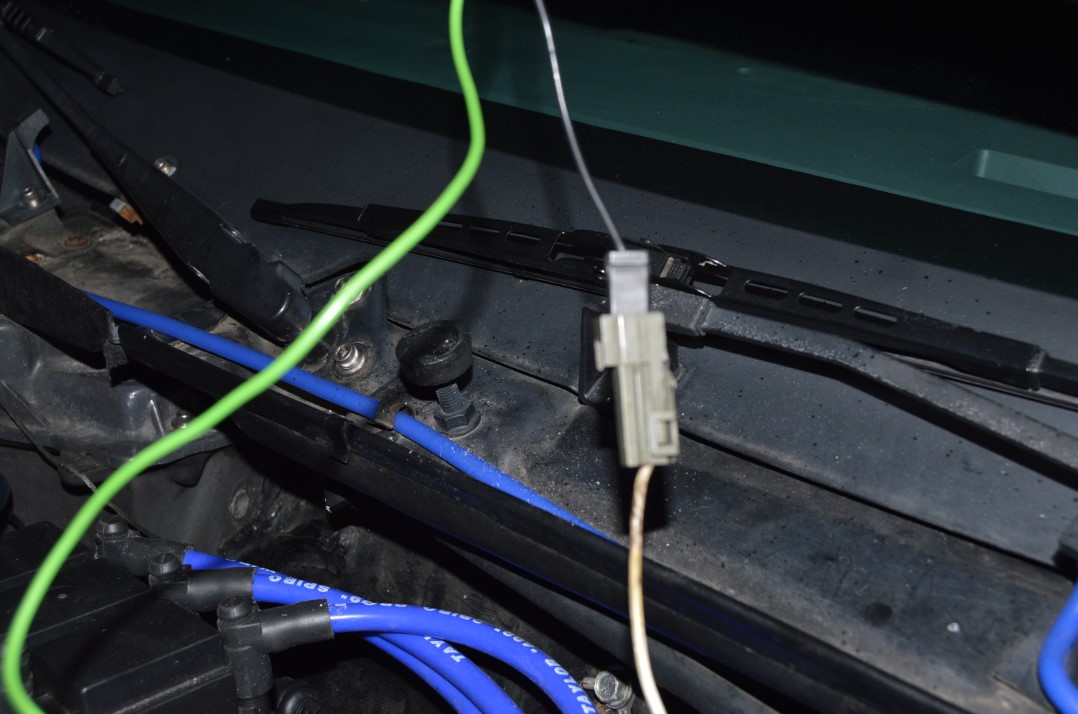
2. figure out where you are going to mount the light fixture.
3. drill 2 5/16″ holes in hood
(aligned to the mount holes in the light fixture).
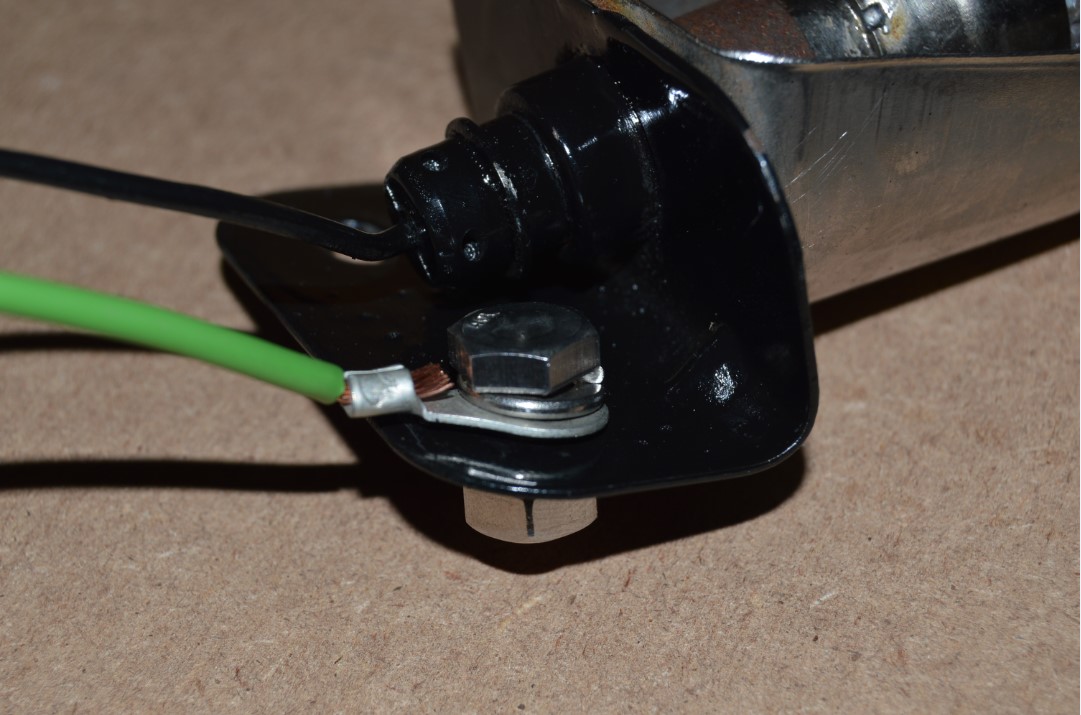
4. make the new ground wire.
5. place a washer on 1 bolt, attach ground wire, insert thru the drivers side hole of light fixture, stick bolt thru hood hole & secure with a washer & nut.
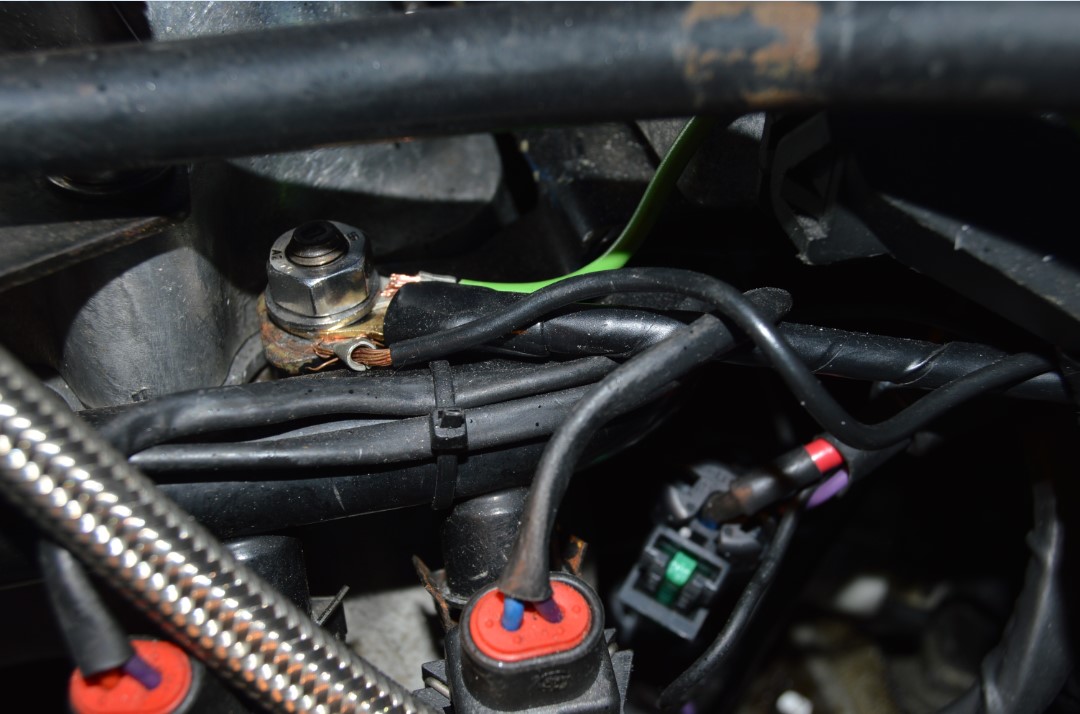
7. take the end of the ground wire & mount it to a good ground.
(we used the coil bracket intake bolt on the drivers side).
8. plug in the hotwire to the original wire connector.
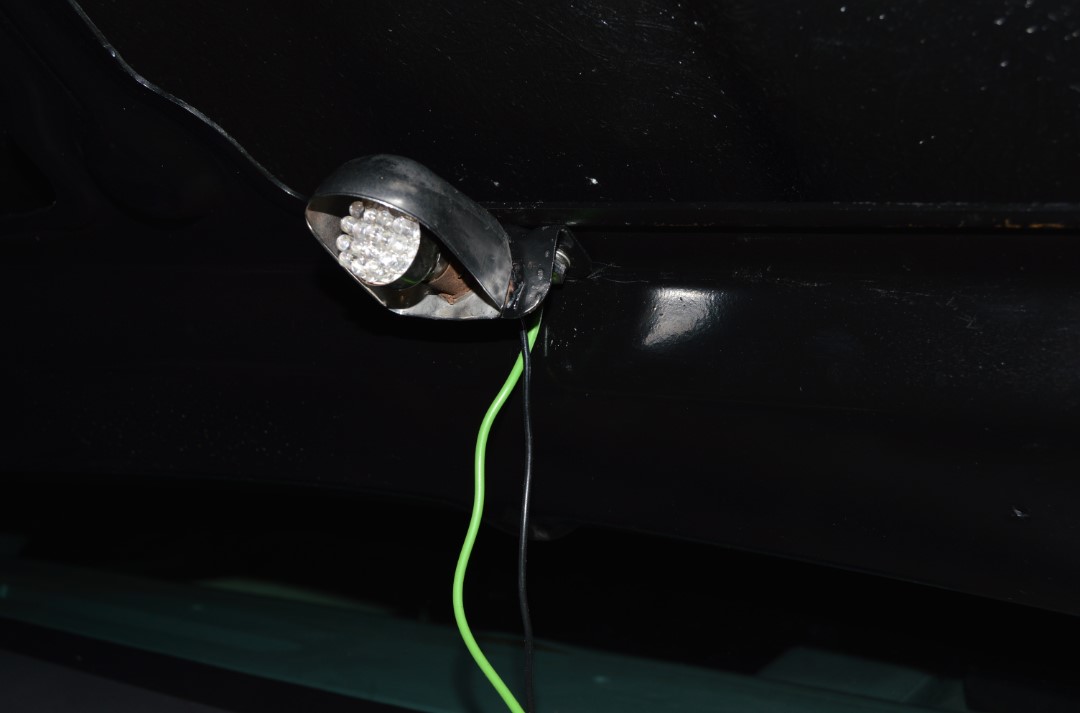
9. cover wires with engine loom.
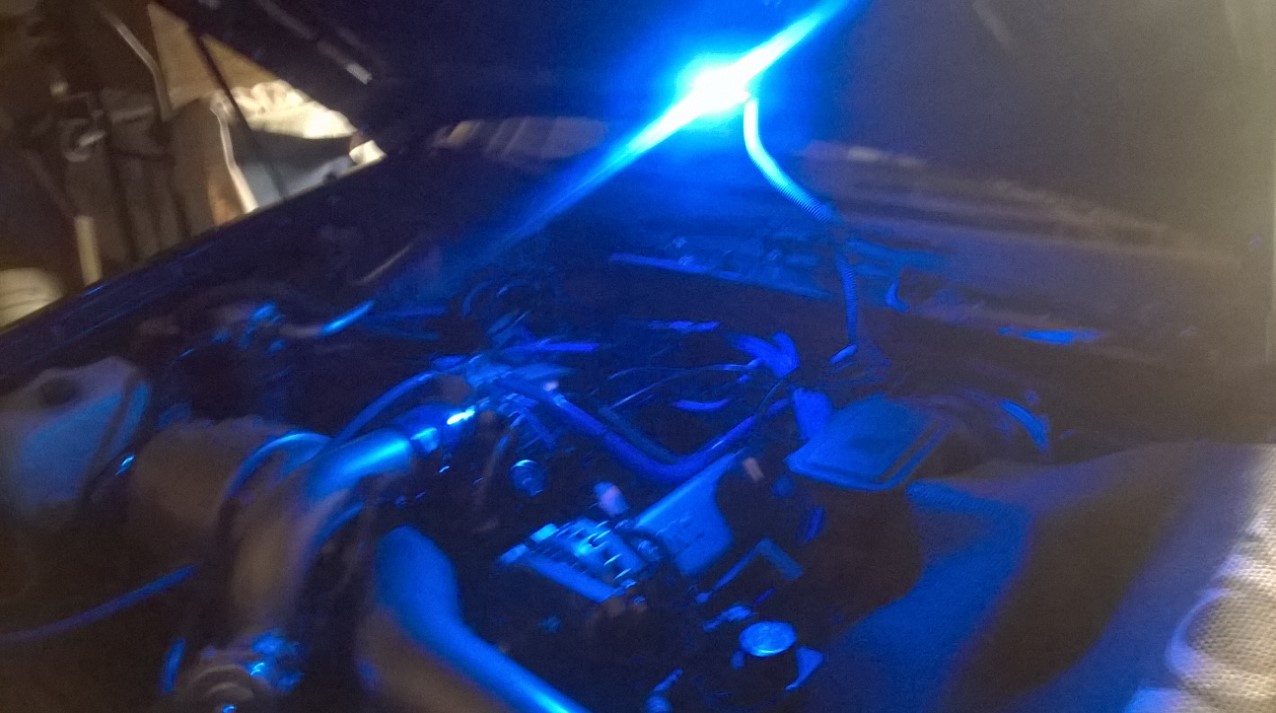
I have seen the light….
Fascinating upgrade, huh?
Perhaps not, but when your turbo buick doesn’t have an underhood light at all, this is a tremendous improvement!
(same goes for the difference of the stock light vs the LED bulb!)
.


