


Strengthening the mounts attached to your G-body Regal frame is sometimes just as important as the components that are installed on it.
Yesterday we installed lower control arm reinforcement support braces, today we are going to install the upper ones, since we have everything still out and ready to go.
Not to mention that if you are going to do 1 set of these, you might as well go ahead and do both of them.
You can purchase separately the uppers, or lowers, or you can just buy the complete set of both like we did.
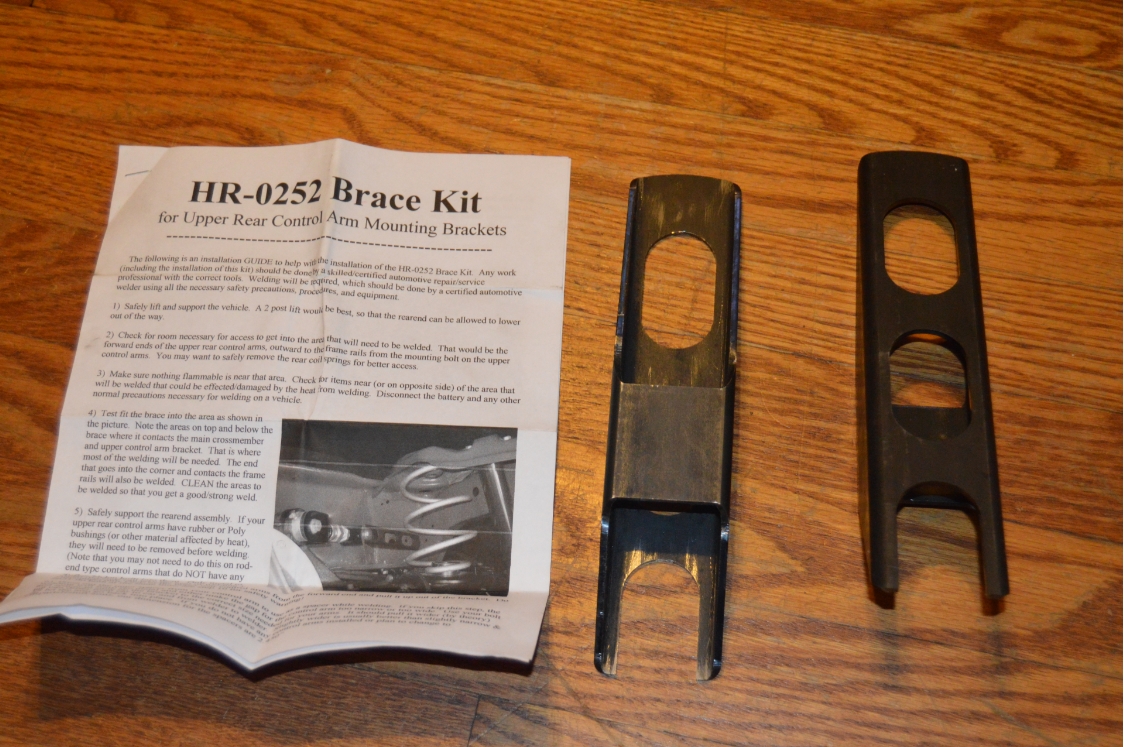
HR Parts n Stuff creates the pieces that we’re installing.
Other manufacturers make similar units.
Instructions are included, with photos, so you get the general idea of where you’re suppose to put these.
.

.
These parts are also known as “control arm braces” or “control arm mount braces.”
Different manufacturers call these items by different names, but they all basically do the same thing.
This isn’t one of those glorious “noticeable” improvements you make to your Buick Regal where it stands out in the crowd, or other people really notice them, considering it’s under the vehicle, so no one will probably ever see it, but YOU will know it’s there, and you can feel confident that they are doing the job they are suppose to do.
(so next time you win a race, you can tell them its because of these braces… 😉 )
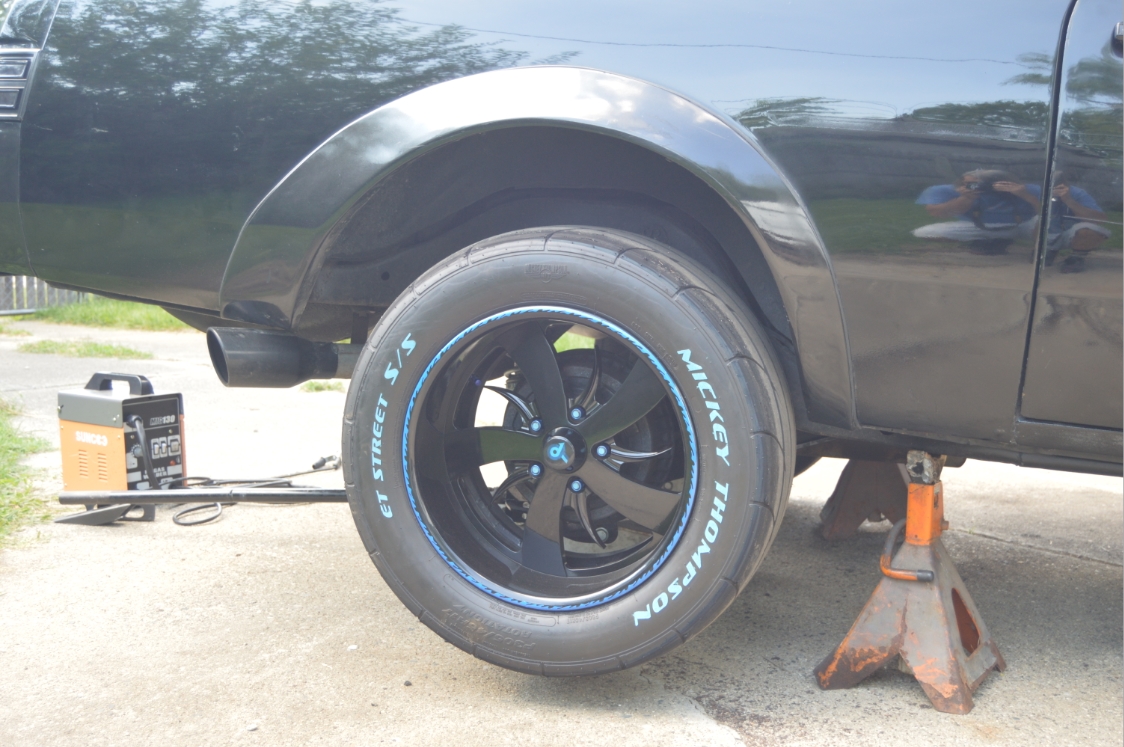
The pictures show the drivers side of the Buick Grand National.
.
COMPLETION TIME: about 2 hours (with prep & welding cool down time & painting included)
.
PARTS:
– HR Parts n Stuff upper control arm reinforcement support braces (#HR-0252, about $42 + shipping)
– can of black paint (we used the same can from yesterday)
.
TOOLS:
– welder
– dremel / grinder / wire cup brush on a drill, etc. (to clean off frame)
.
.
A lift is desirable, however, placing the frame on jack stands and letting the rear end droop down may give you better access to the areas needed.
Your exhaust pipes WILL probably still be in the way somewhat.
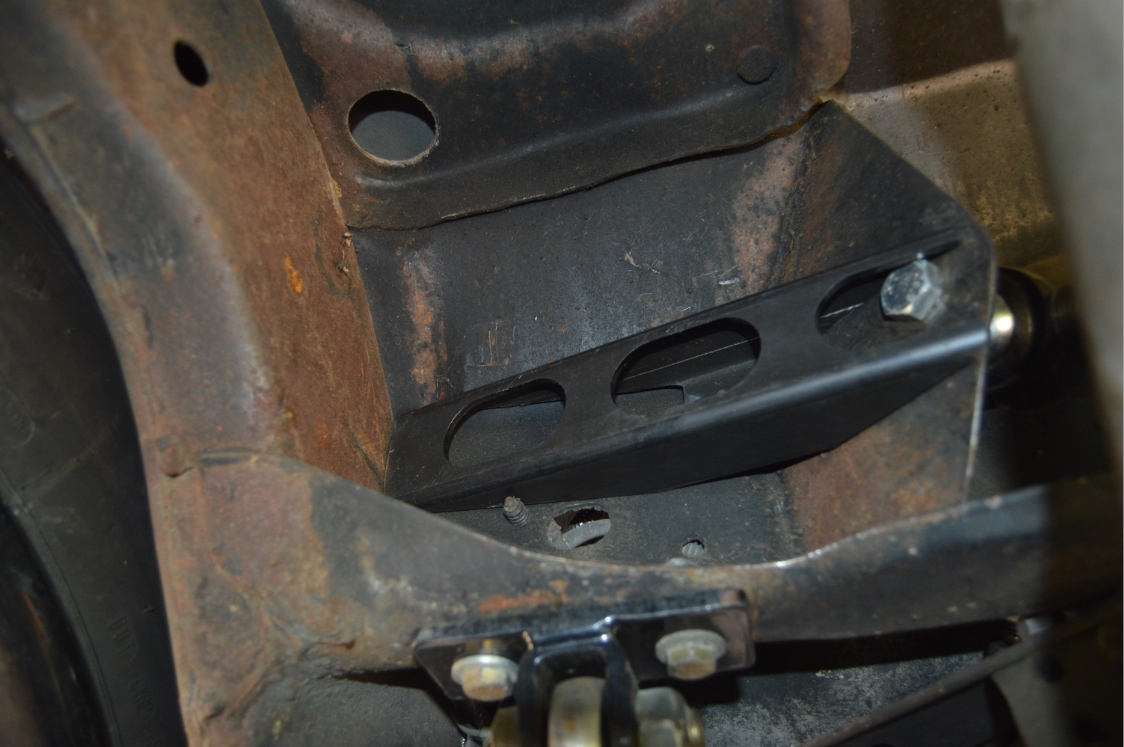
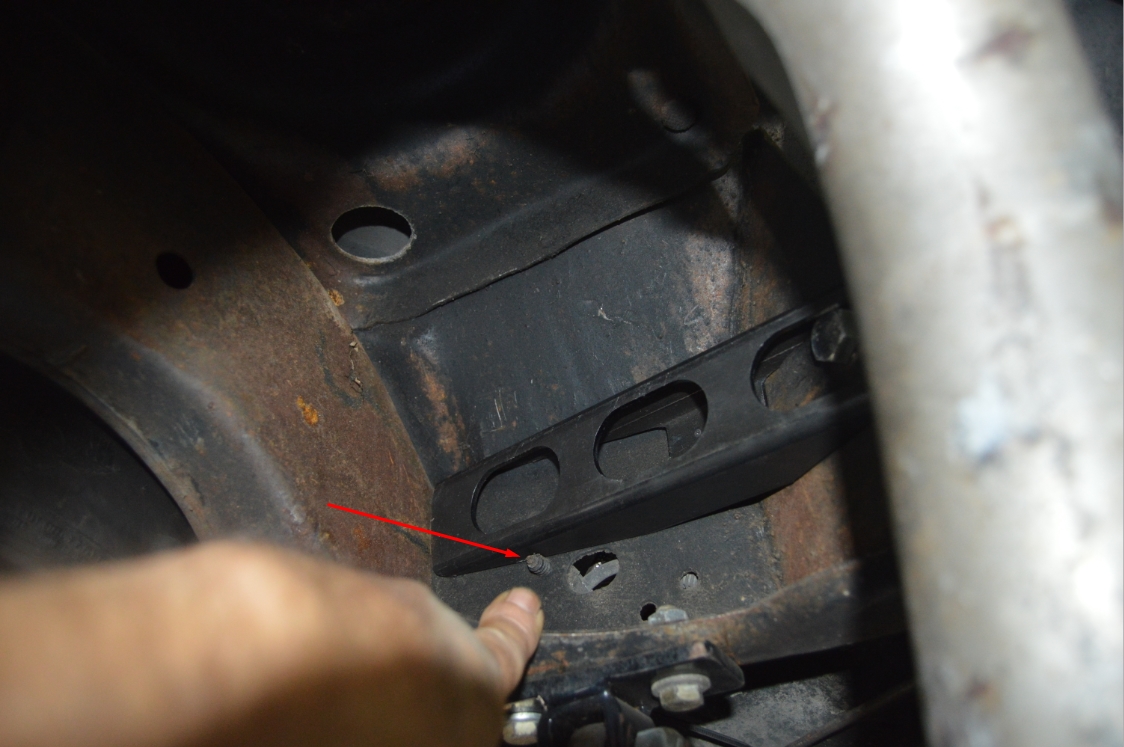
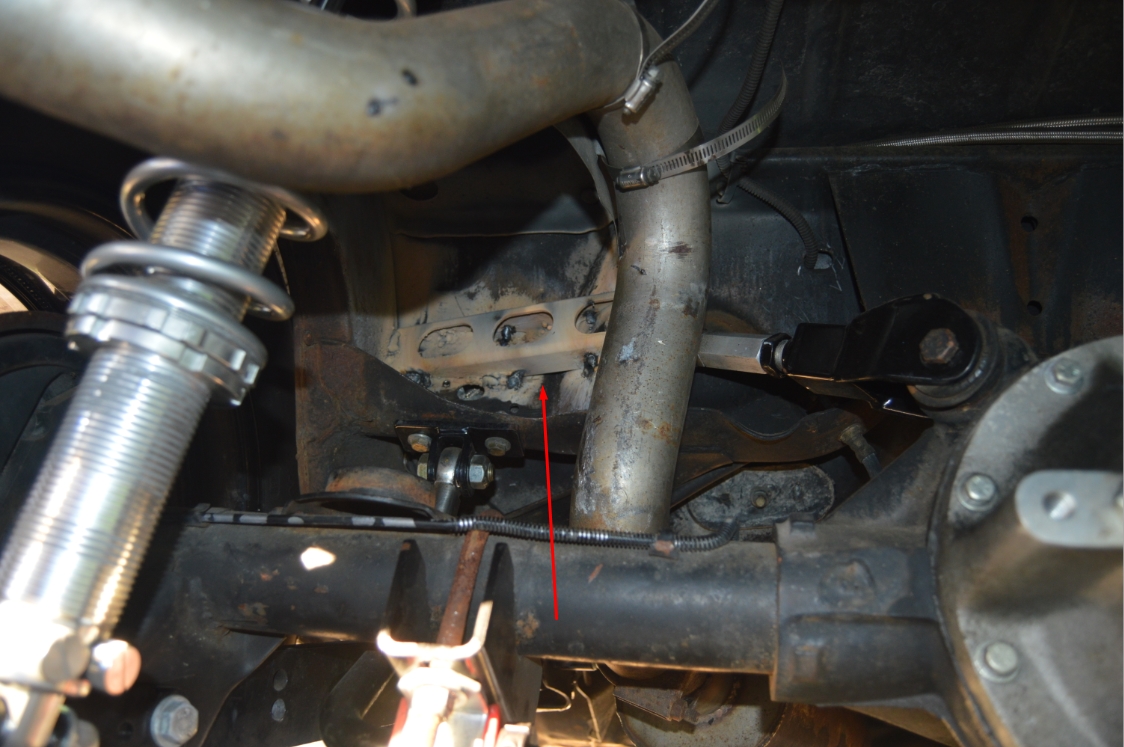
These parts get welded onto the downward panel (on the frame) that’s located behind the rear seat (from under the Turbo Buick) AKA “crossmember panel.”
They go on the outsides of each upper control arm.
Meaning, the driver side piece gets attached to the left side of the upper control arm mount bolt.
The passenger side one goes on the right side of the bolt.
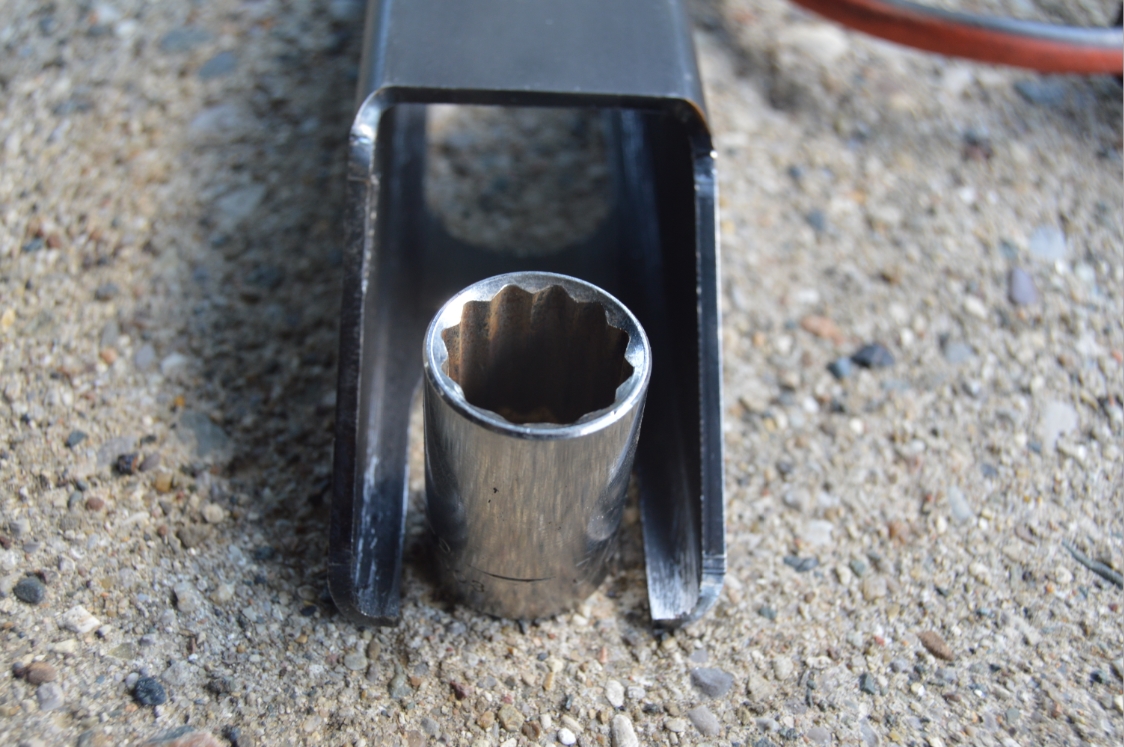
When you install them, make sure you leave enough space around the bolts so that a socket can still fit in there after you get done welding!
(the bolts on this Buick GN are 3/4″ – as it has aftermarket upper arms on it, which leaves 1/8″ on each side of the socket within the brace – see pic)
(we actually placed the socket on the bolt when we welded in the brace to make sure it was properly spaced out)
.
.
The instructions say you should remove the upper control arm before you weld, so you don’t melt the rubber or poly bushing. You also should only do ONE side at a time, to prevent the rear end from falling out!
You should beware of your gas tank, gas lines, brake lines etc., that may be in the way, or sticking out. Cover them up with something non-flammable, to prevent weld sparks from hitting them.
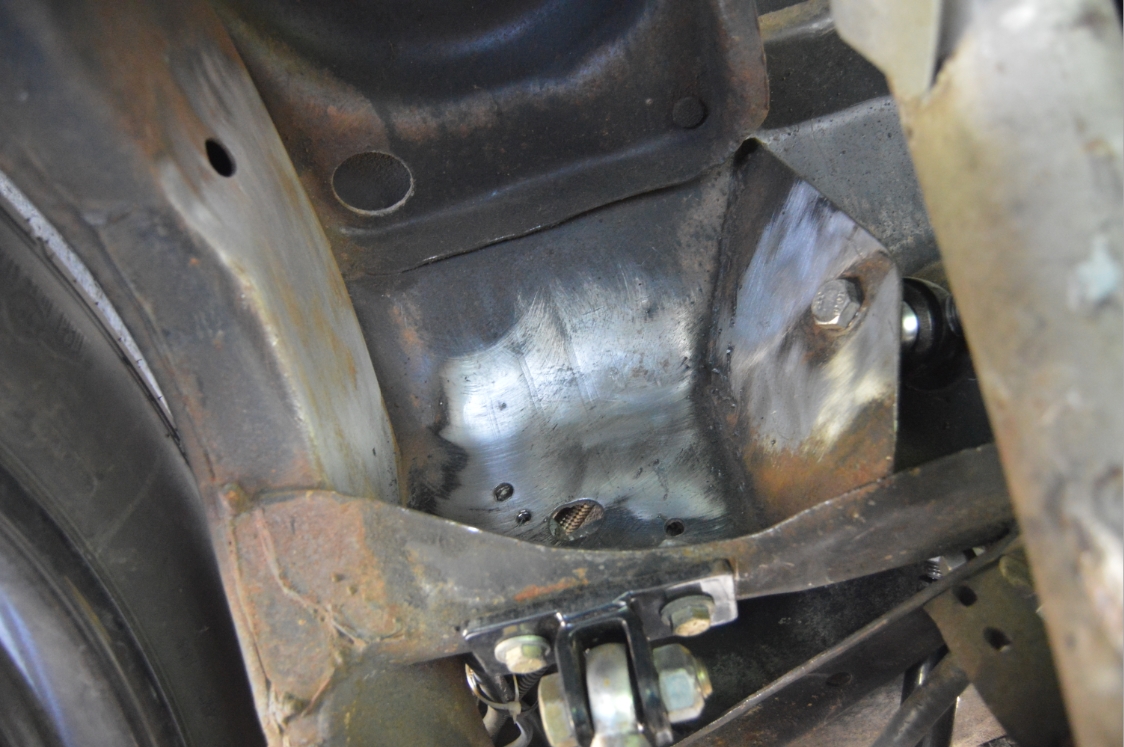
The braces should be relatively level and run straight across.
There is an inside corner on the crossmember panel, in the middle (of the panel) where the top angle meets the bottom flat portion (see pic). Roughly, that is where the top of the brace should be.
On the drivers side, beware that the brake line runs right there behind the panel, the (threaded portion) of the bolt that you see is for the clamp that holds it onto this panel (see pic).
The brace should be above this bolt.
(might be a good idea to unbolt it & move the brake line away from the panel while you weld the brace in)
.

.
Test fit them first thing.
On this specific 1987 Buick Grand National, the drivers side fit well all the way around as is.
The passenger side however, the (not bolt) side, the top of the brace fit snug on the panel, the bottom of the brace did not. There was a 3/16″ gap between it and the panel.
According to the instructions, this is ok. weld it on the very end (far right side of the brace) nearest the frame.
(or you could always weld some bridges between the panel and the brace)
Time to begin prepping to install them.
We cleaned up the areas (on both sides of the Turbo Regal) that we intend to weld on (down to bare metal), using a dremel with a wire brush bit.
Once that’s ready, place the drivers side brace into position and tack weld it into place.
Inspect it’s location. If all looks good all the way around, proceed stitch welding the brace on.
Alternate top to bottom and left to right while welding, which will prevent warping on the frame panel.
Let the welds cool down a bit between stitches.
Stop and take a look around as well every so often! Make sure nothing is on fire!
After the brace is fully welded in place, move to the passenger side and repeat.
.

.
When it cools down, clean up the area and braces.
Then paint it all.
Sweet! No more worries about your control arms coming off your frame from all that horsepower that your Buick Turbo Regal is throwing out!
.

.


