


More frame rigidity is usually a good thing on these G-body Regals.
The steering box puts pressure on the frame opposite the box.
Heavy front ends, and high horsepower engines put stress on the frame.

And even the bumper doesn’t totally prevent frame twisting.
Meaning anything you can do to prevent the twisting effect will be a benefit for drag racing, street racing, corner carving, autocross activities, etc.
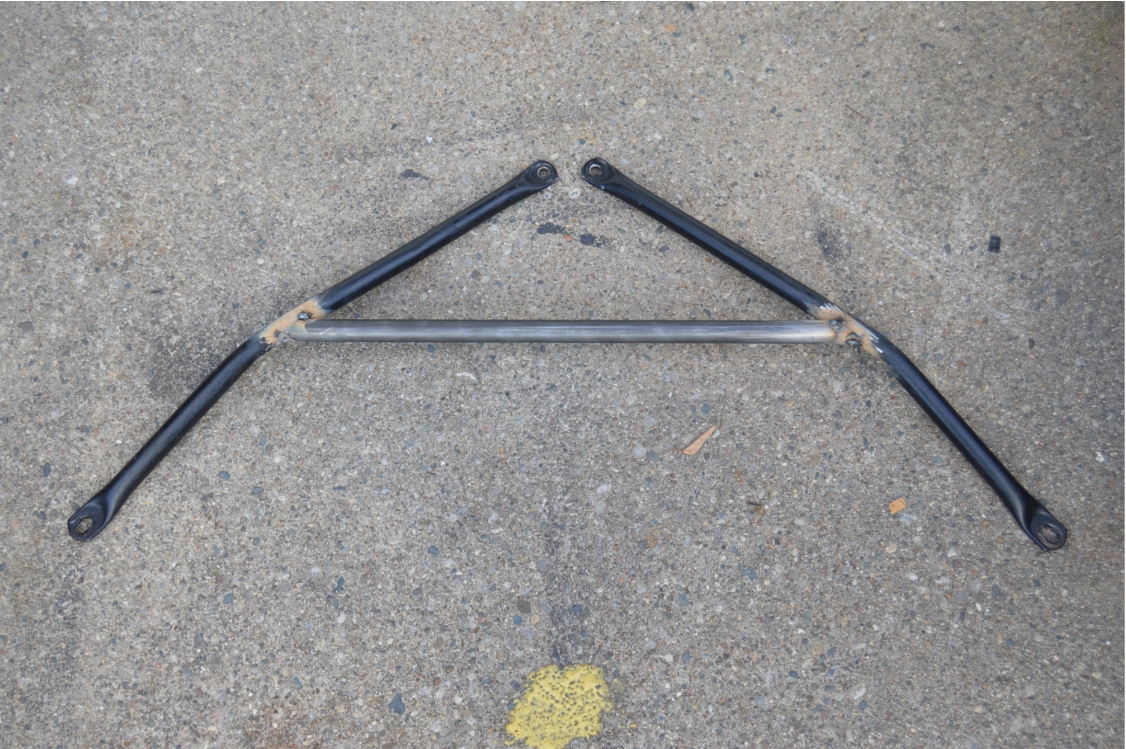
Many Turbo Buick owners have a set of the 2 diagonal bars that run from the center of the vehicle to the outer ends of the frame.
(Kirban and many others sell these type of bars)
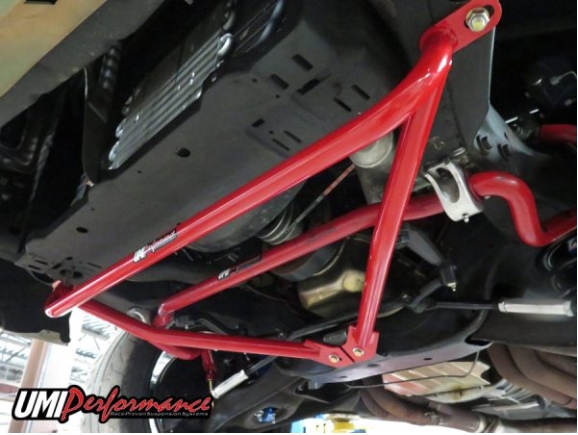
(UMI, SC&C, amongst lots of others offer this type)
.
Some vendors sell a separate crossbar, which ties into the 2 diagonal bars (at the front of the car), and those are pretty strong as well.
You have to be aware however, WHICH triangular bar you acquire.
There are several factors that will determine what you can use.
Stock intercooler in the factory location, most triangular bars will work.
FMIC, most will not work, as the pipes will hit the crossbar.
Aftermarket sway bar? depends on which one you have.
Make SURE you look into all these aspects BEFORE you purchase just any triangular bar.

They make one where the cross bar is set back from where the front bolts attach.
Their cross bar is almost in the middle of the 2 diagonal bars.
.
It’s a decent bar, BUT, you still have to make sure it clears your sway bar.
There is only 2 or 3 sway bars that will work with this specific triangular bar, other than the factory one, which works too.
Most sway bars point down in the very center of the car.
When this is the case, the SC&C bar will NOT work.
.
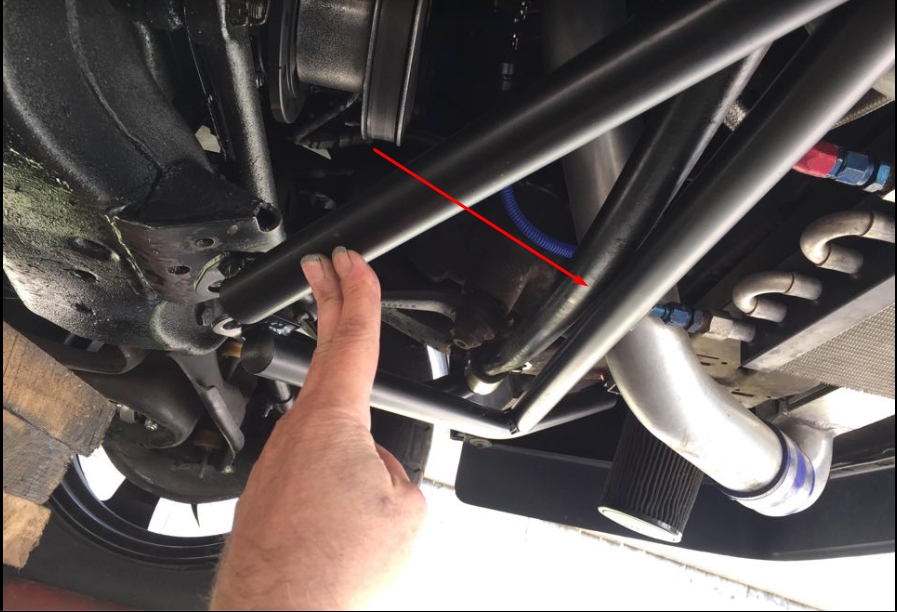
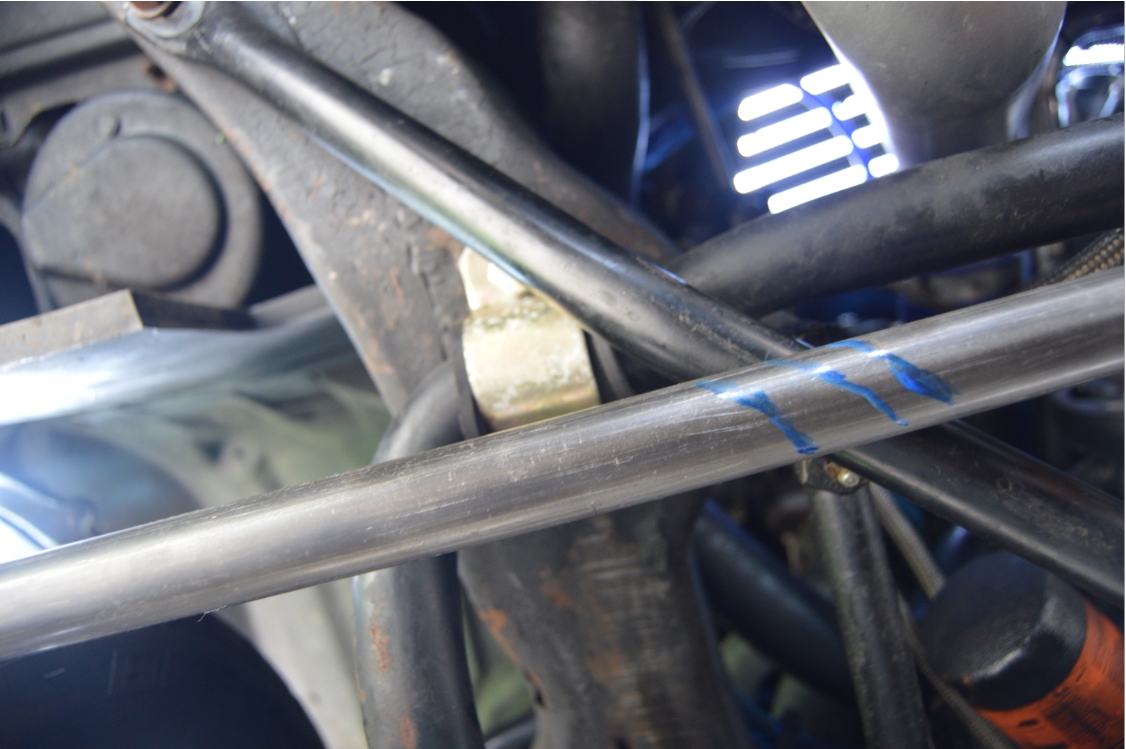
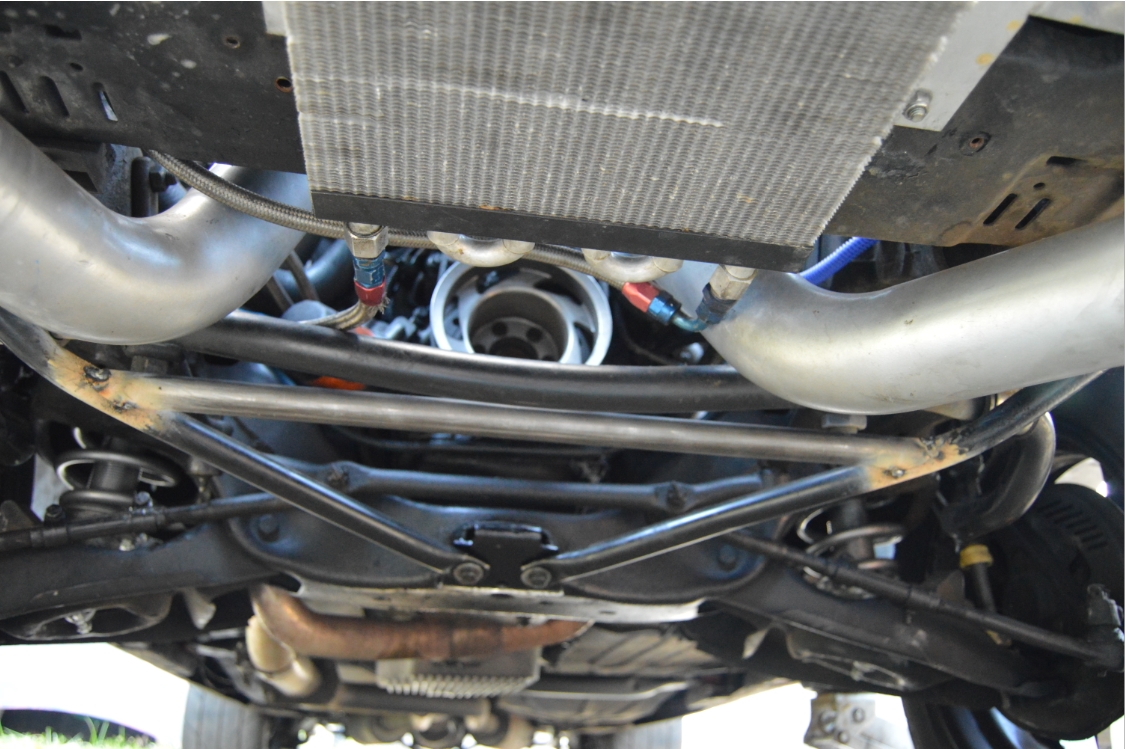
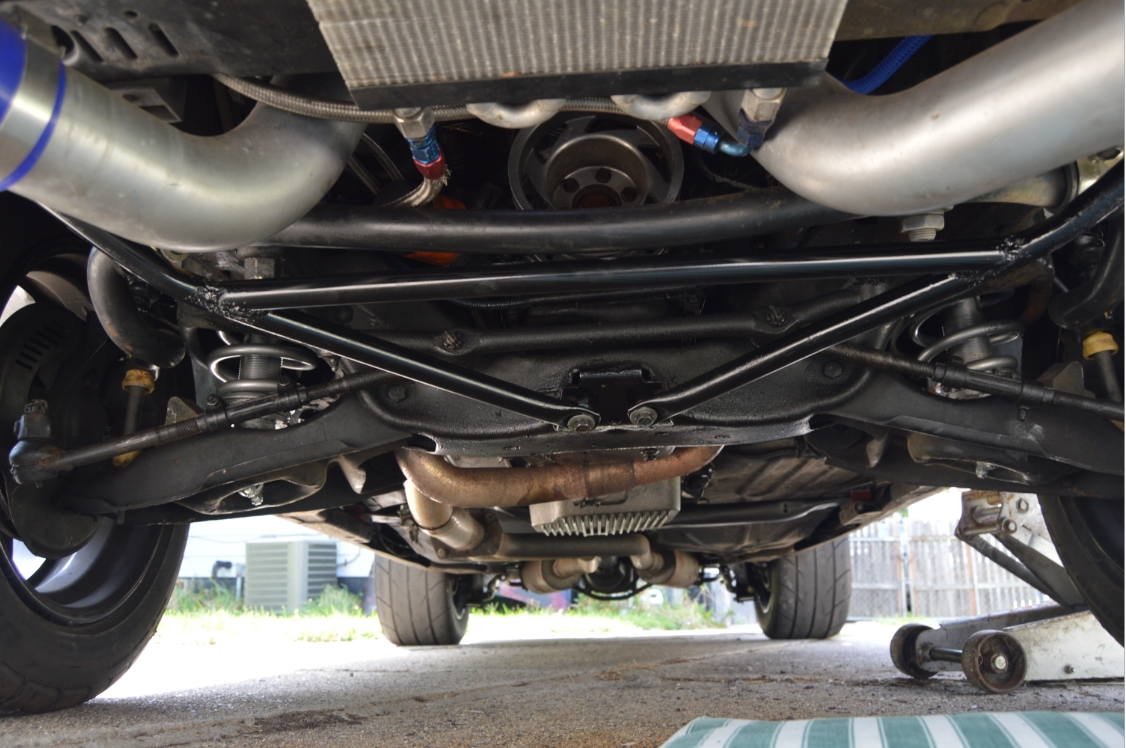
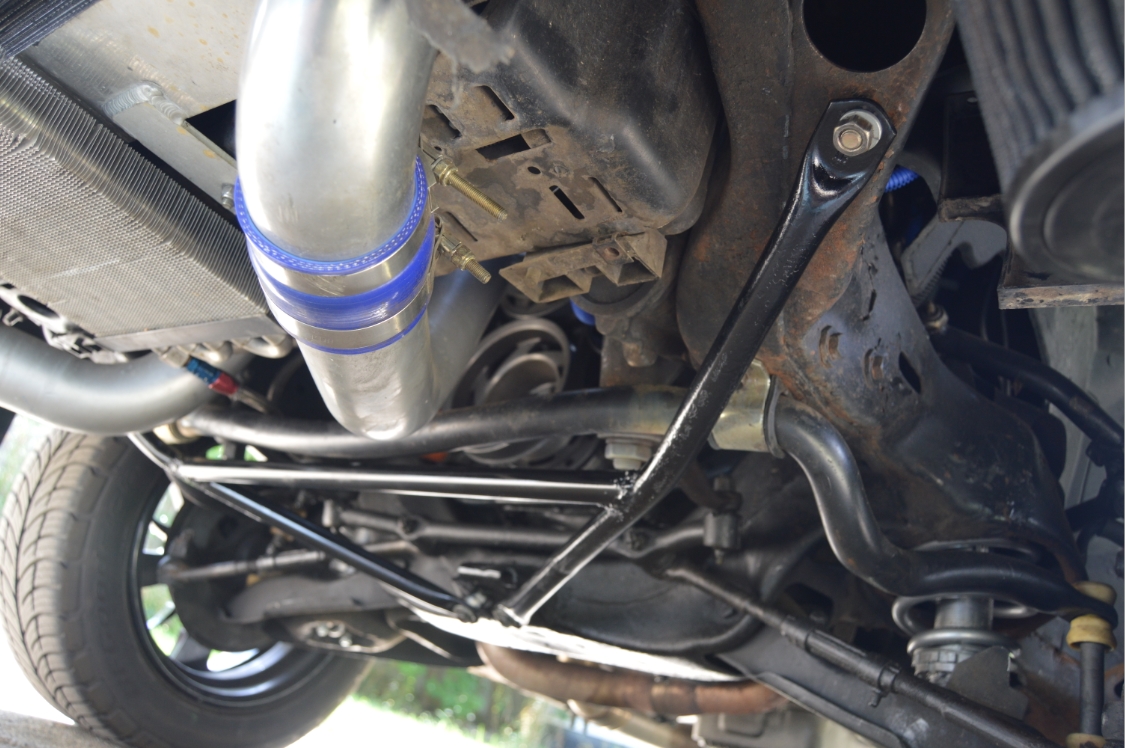
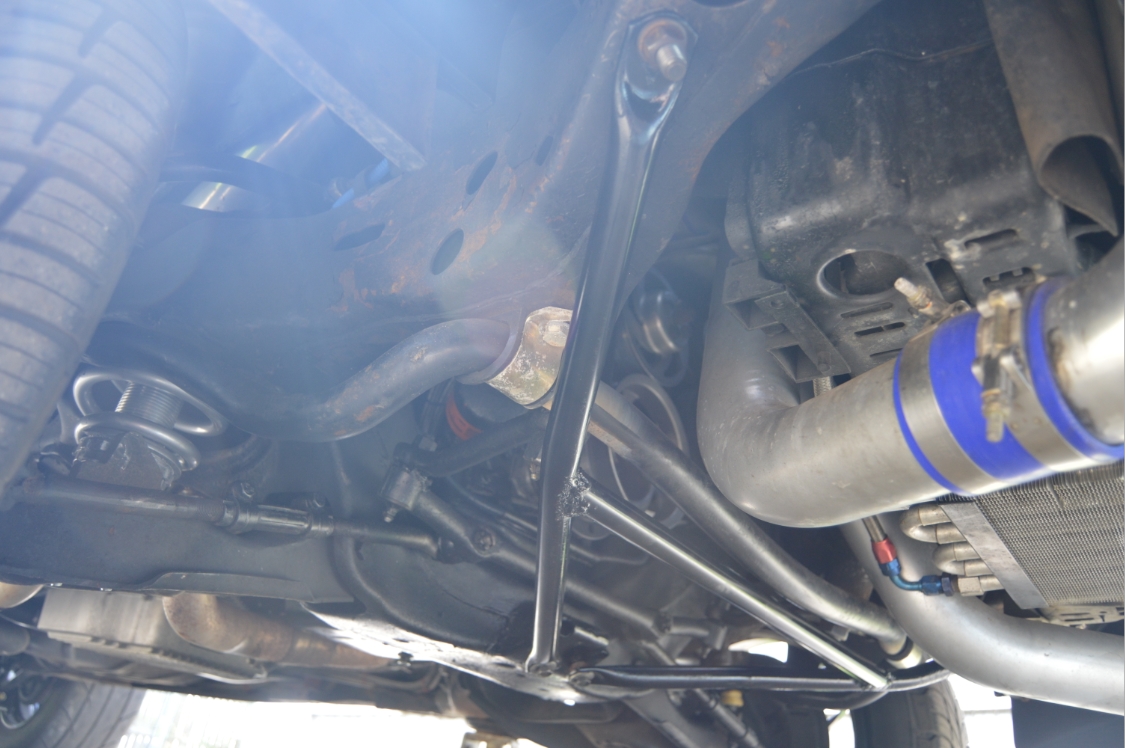
We have a 34mm F-body sway bar on this particular 1987 Buick Grand National.
Not to mention a big FMIC.
To be able to have a triangular bar brace installed on this Turbo Regal, it will have to be custom made, since no one offers one that will work with this setup.
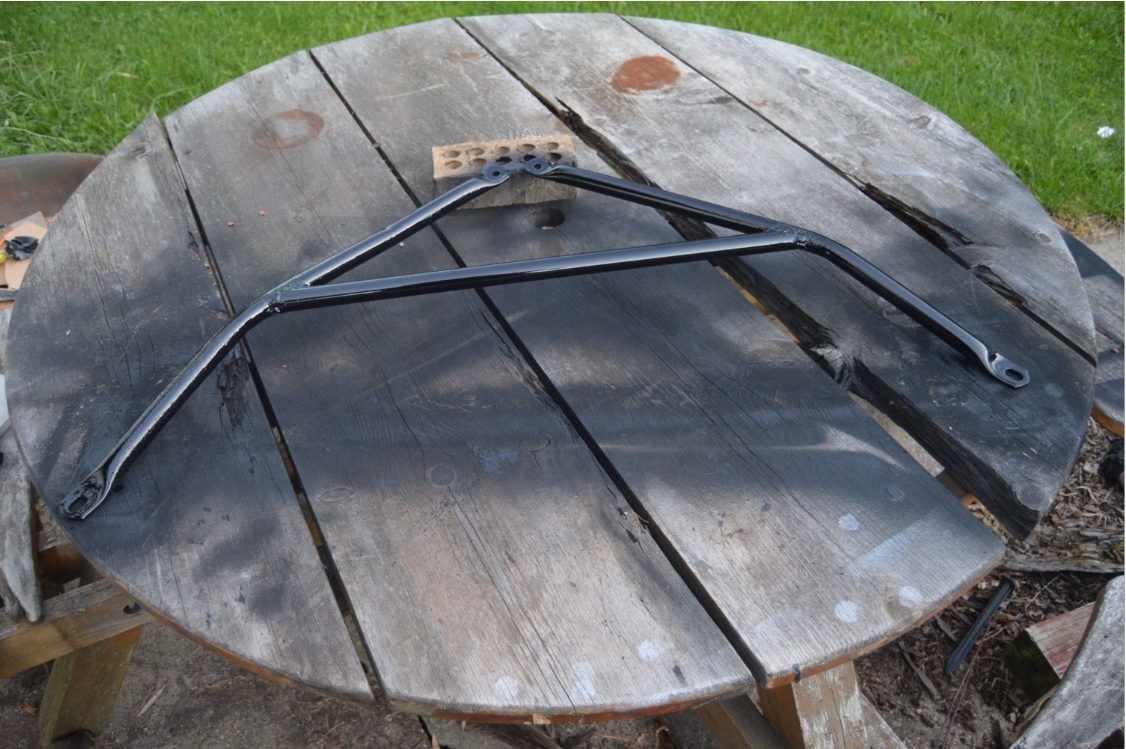
No problem, the Buick GN already has the 2 (kirban style) diagonal bars installed on it.
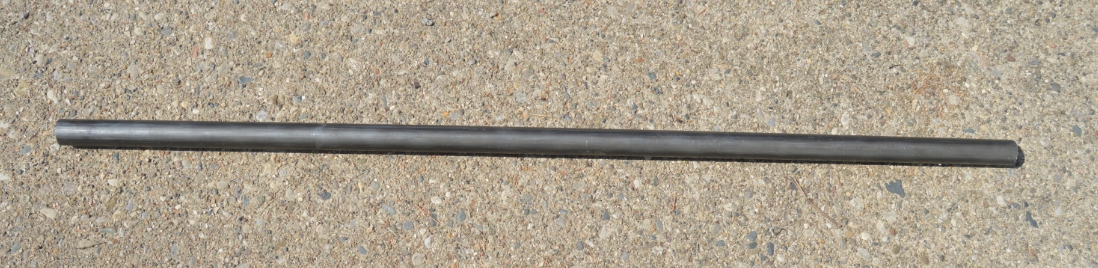
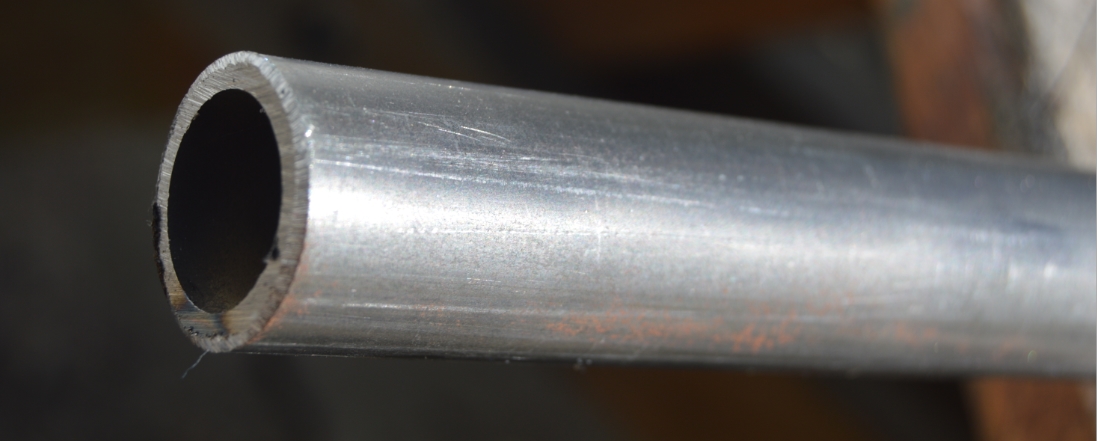
These bars measure 1″ diameter, which is slightly smaller than most of the aftermarket bars of this type which use 1 1/8″ or 1 1/4″ tubing.
We ordered a 36″ piece of 1″ tube to use as the crossbar.
(the closest size to what we need is only available in 24″ or 36″ lengths, and you need about 25″)
.
.
[note: now that we have finished this project, we could have got the 24″ tube & just slid it closer to the k-member]
.
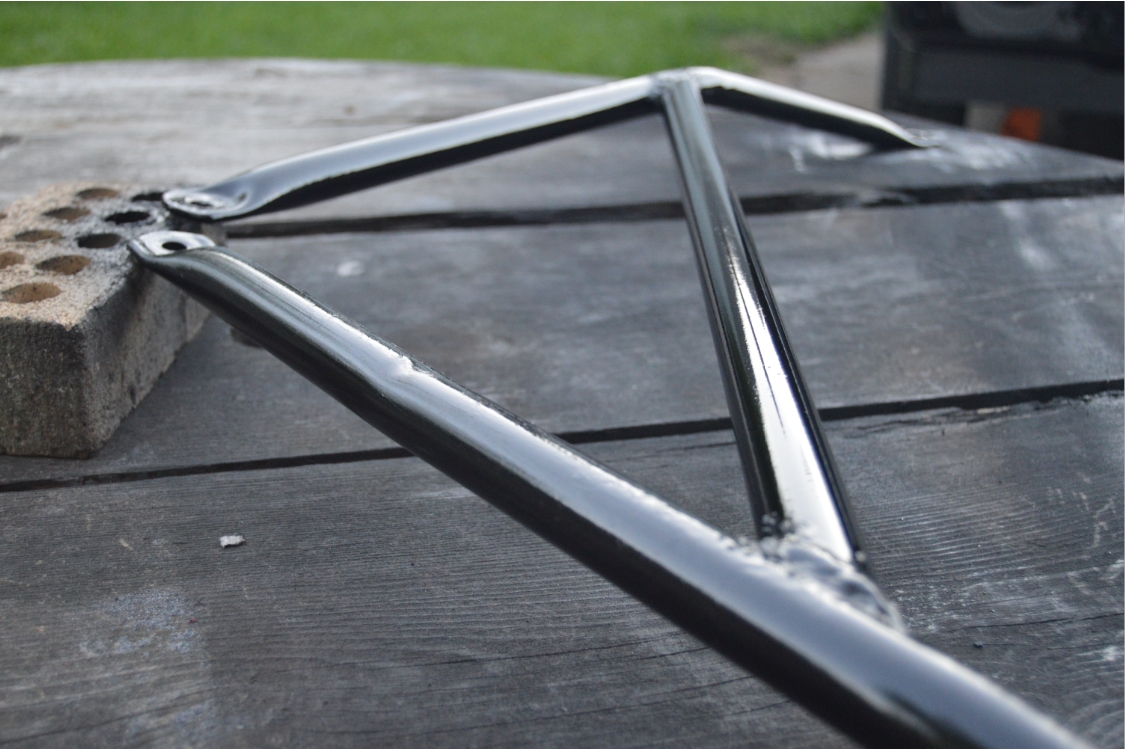
It will have to be cut to fit, as well as making the ends notched to fit into the diagonal bars.
Once that’s done, it will be fully welded all the way around.
Then painted black.
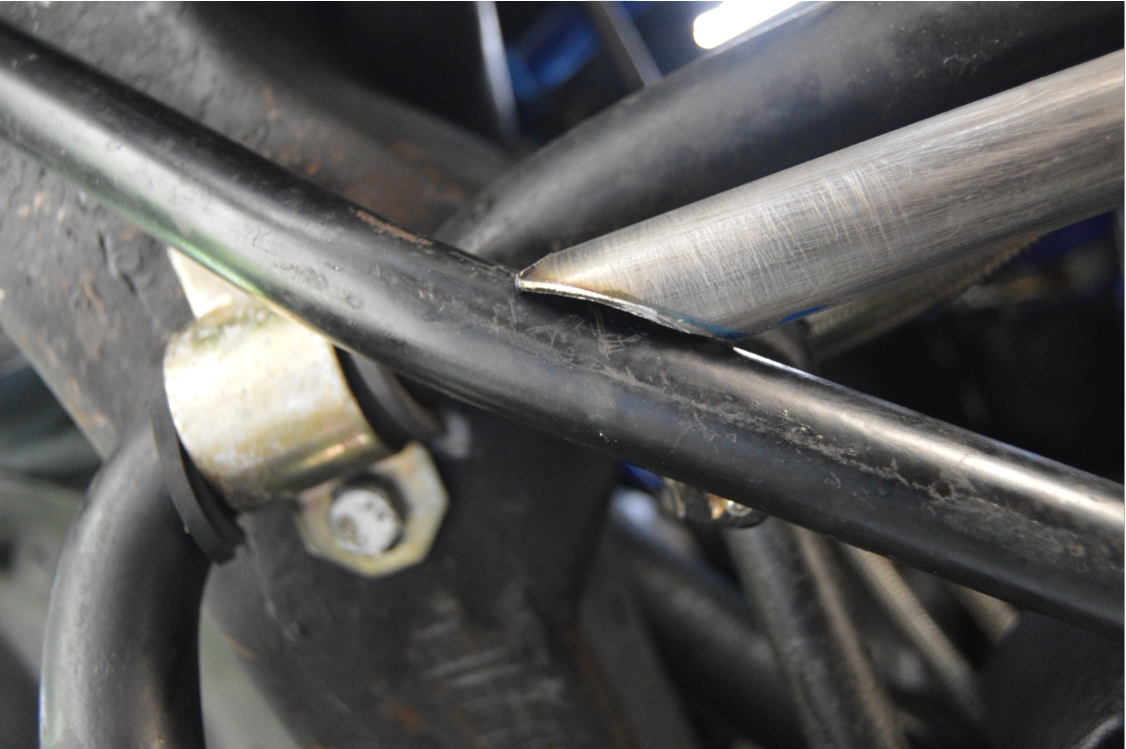
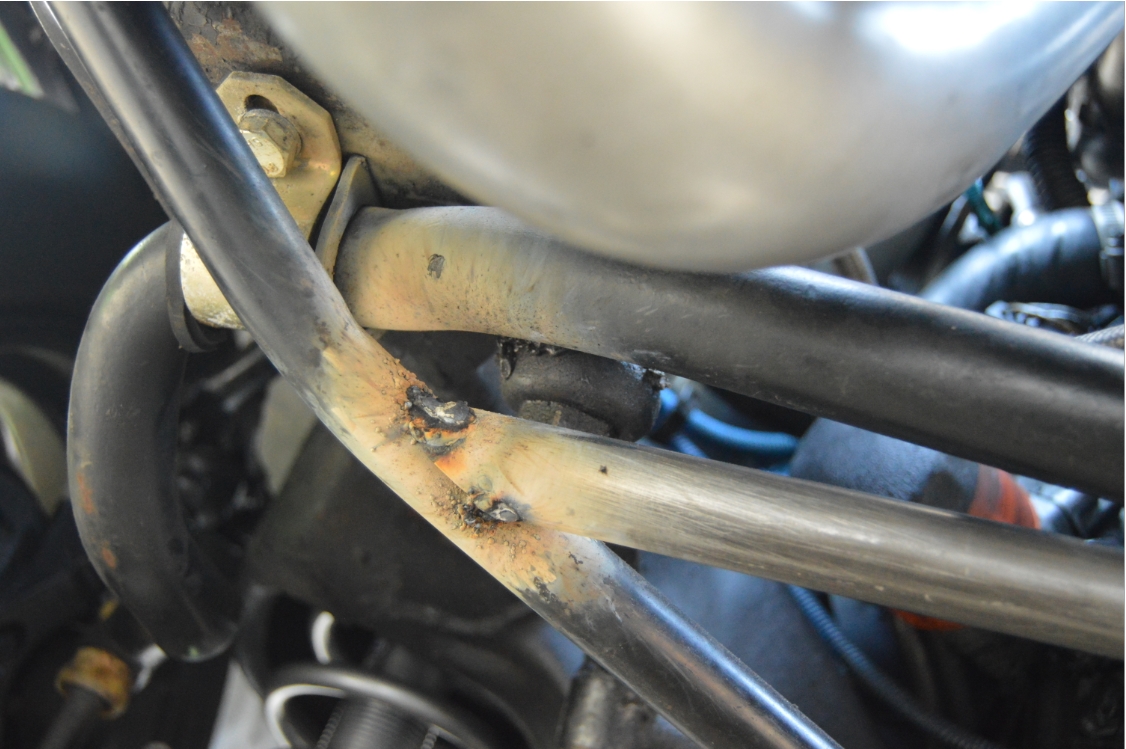
Now, the distance between the FMIC pipes and the 34mm F-body sway bar is about 1″ so placement of the crossbar between those isn’t an option, since it would hit both.
On that SC&C bar, the crossbar is directly underneath the sway bar (for either a stock bar OR an aftermarket version), but since that was hitting the sway bar (in the center, where it droops down), the only option we have to attach this new crossbar, is about 2″ further back than the sc&c bar.
(which puts the crossbar about an inch behind this sway bar; looking from the front of the car)
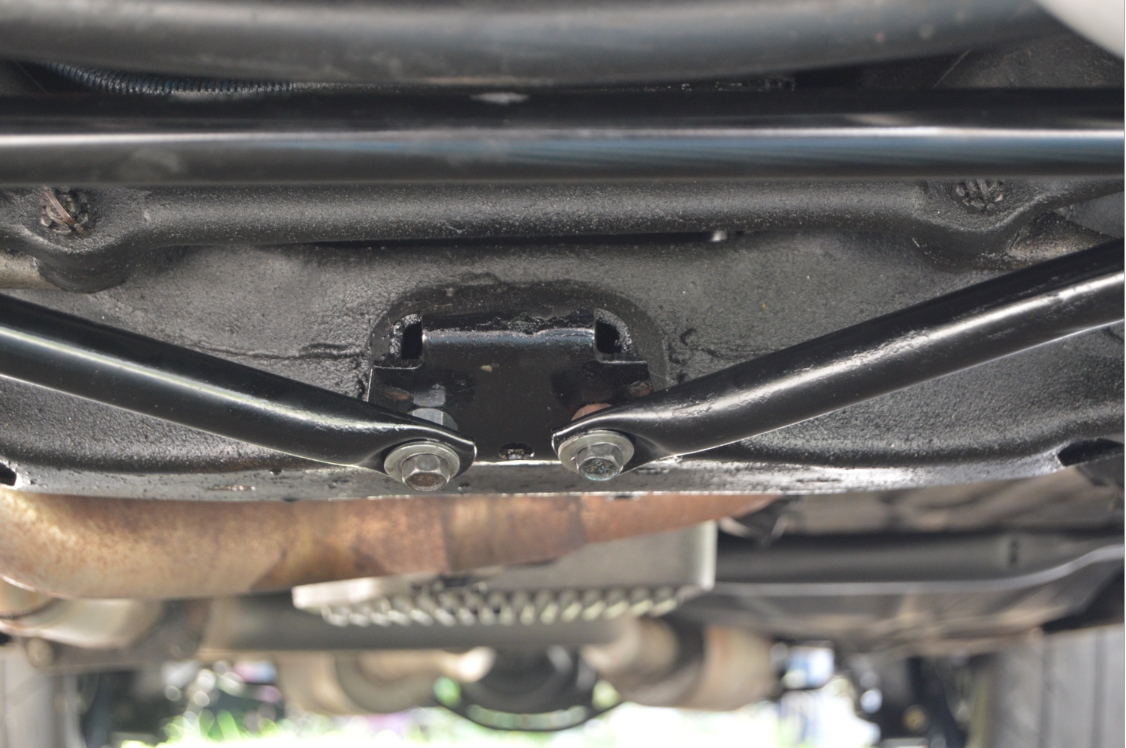
This is actually fine, as it puts it right underneath the steering gear box, lending that area some support.
This new crossbar gets welded onto the diagonal bars (if you look at it from directly underneath), parallel to where the sway bar goes thru the rubber bushings (where it’s mounted to the frame).
[the sway bar juts forward after that mounting point]
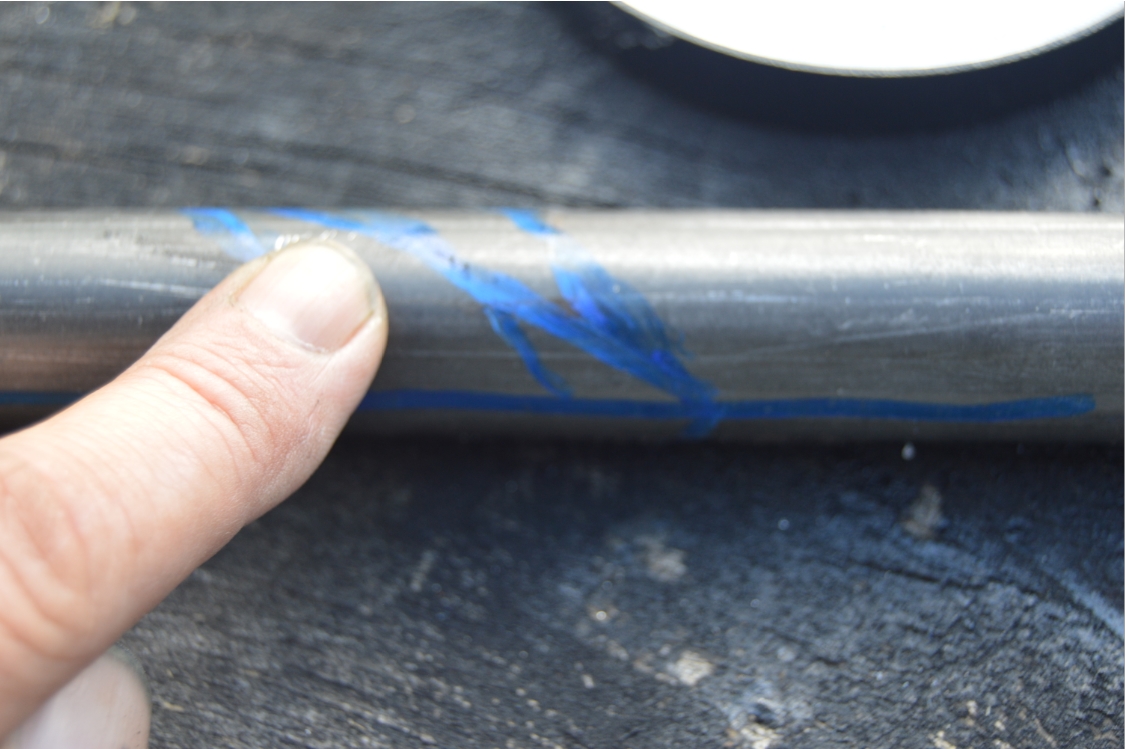
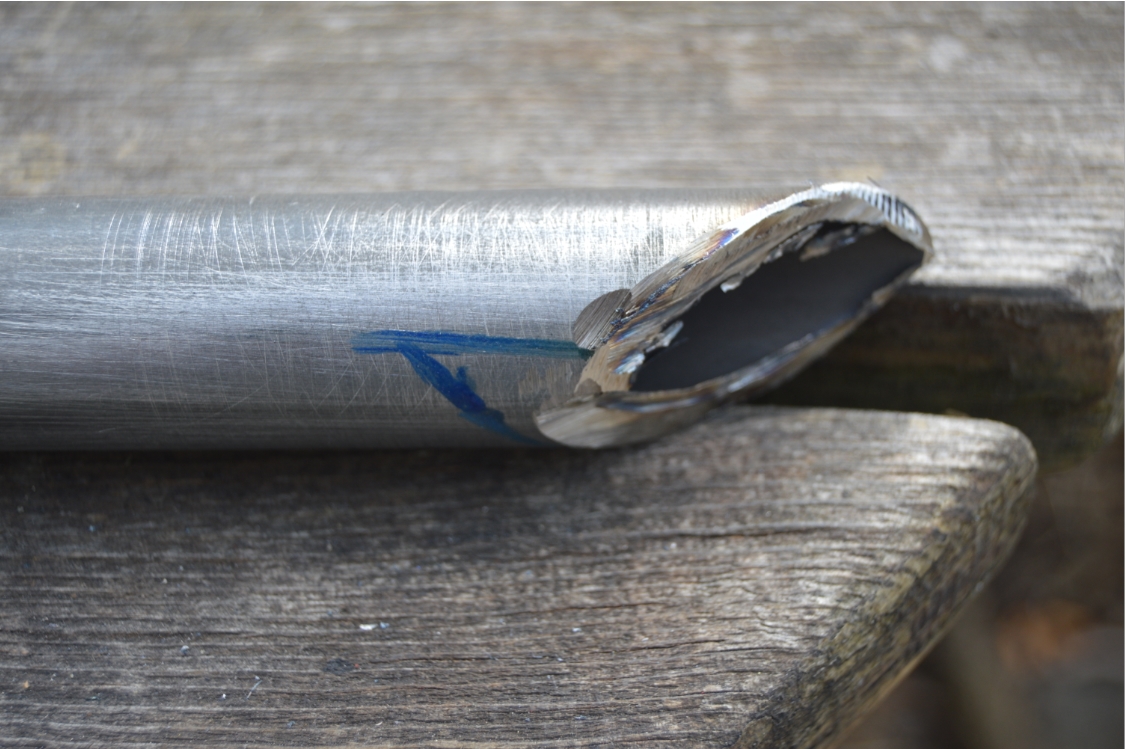
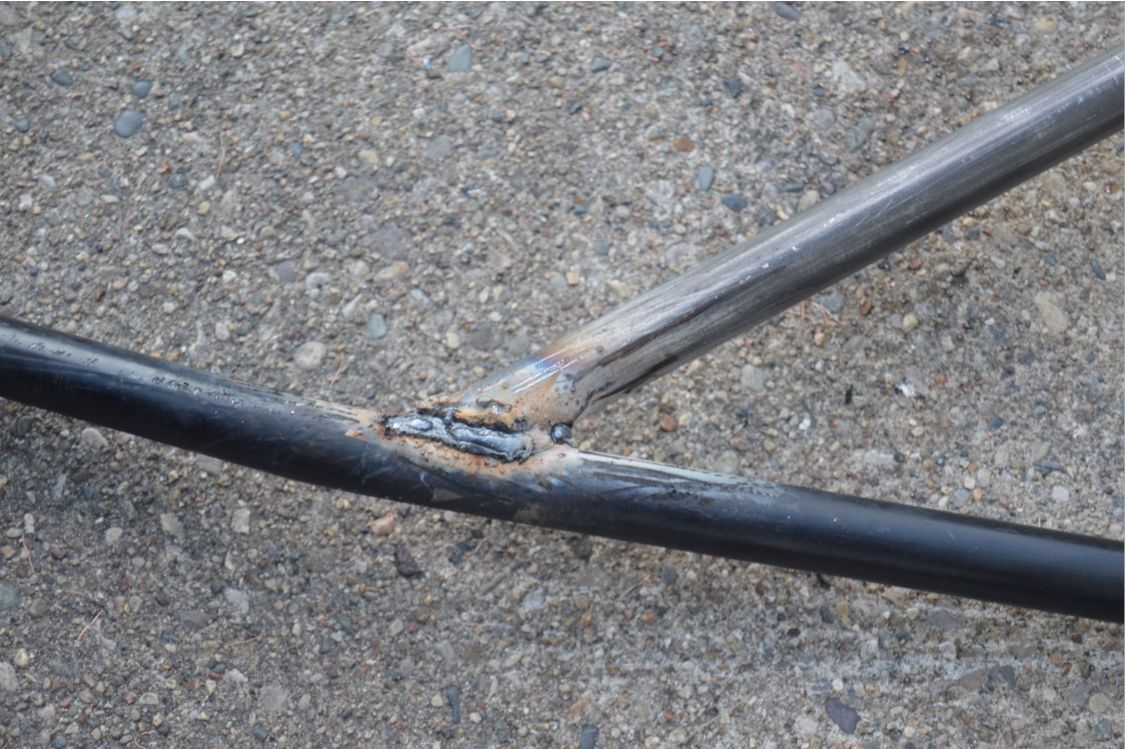
We started off notching one end, then fitting the crossbar on the drivers side.
Try to get as perfect a fit as possible here before proceeding below (since this will be the final fit before welding).
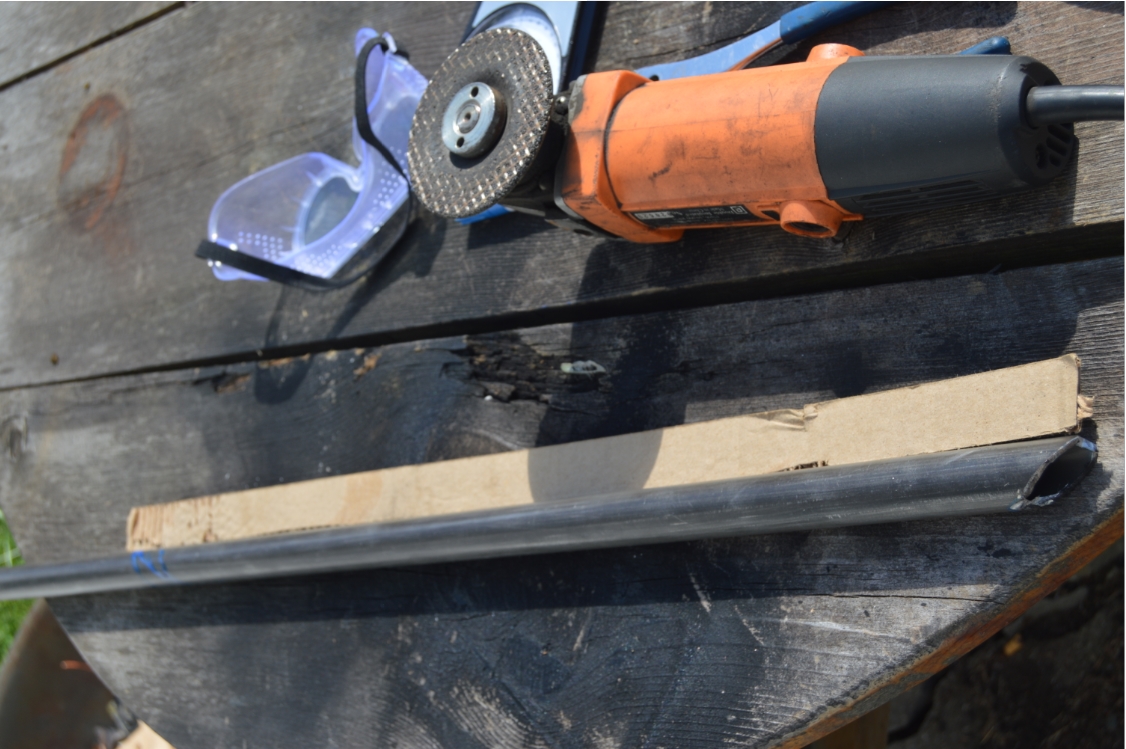
We didn’t have a tube notcher, so it’s being done by hand with a grinder.
We guesstimated the correct angle, got close, then trimmed it down until it fit.
[it took 2 trims after cutting the angle to get it to fit right]
.

.
.
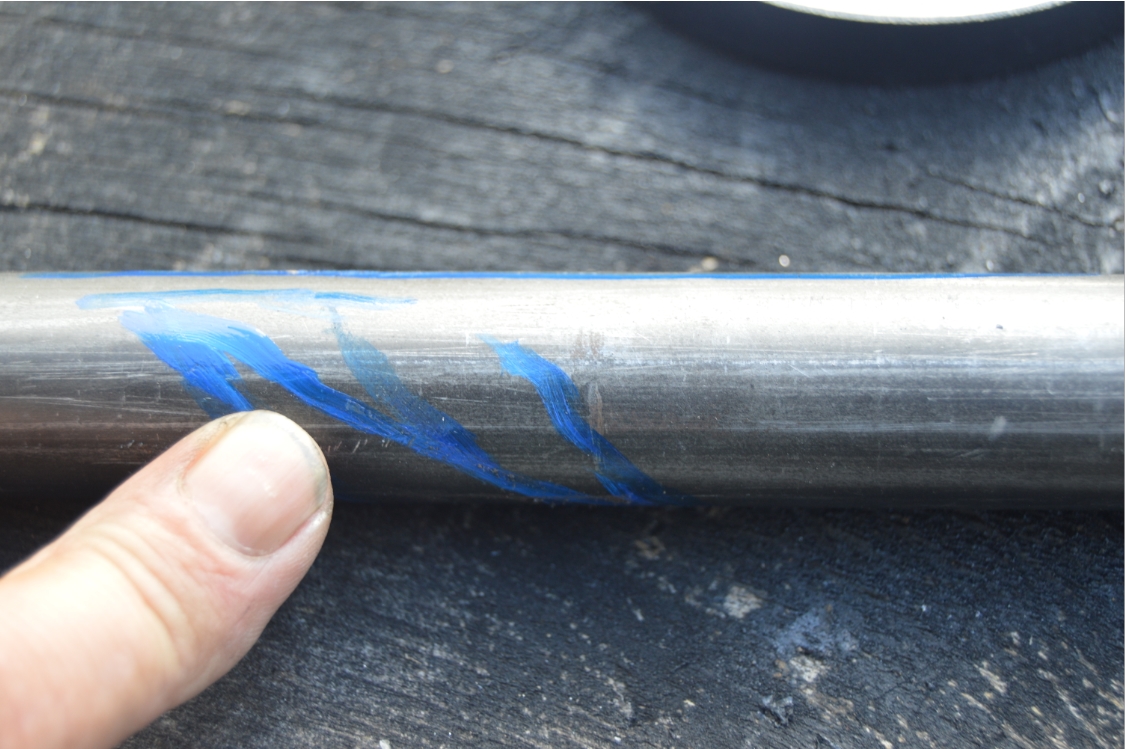
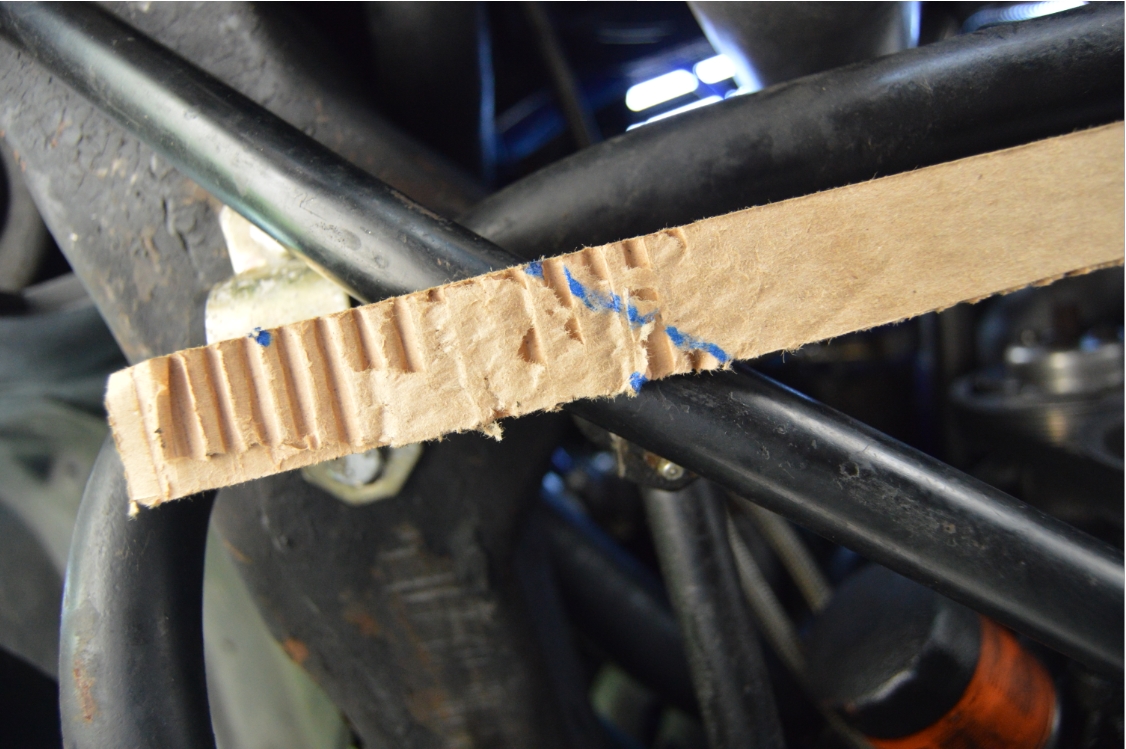
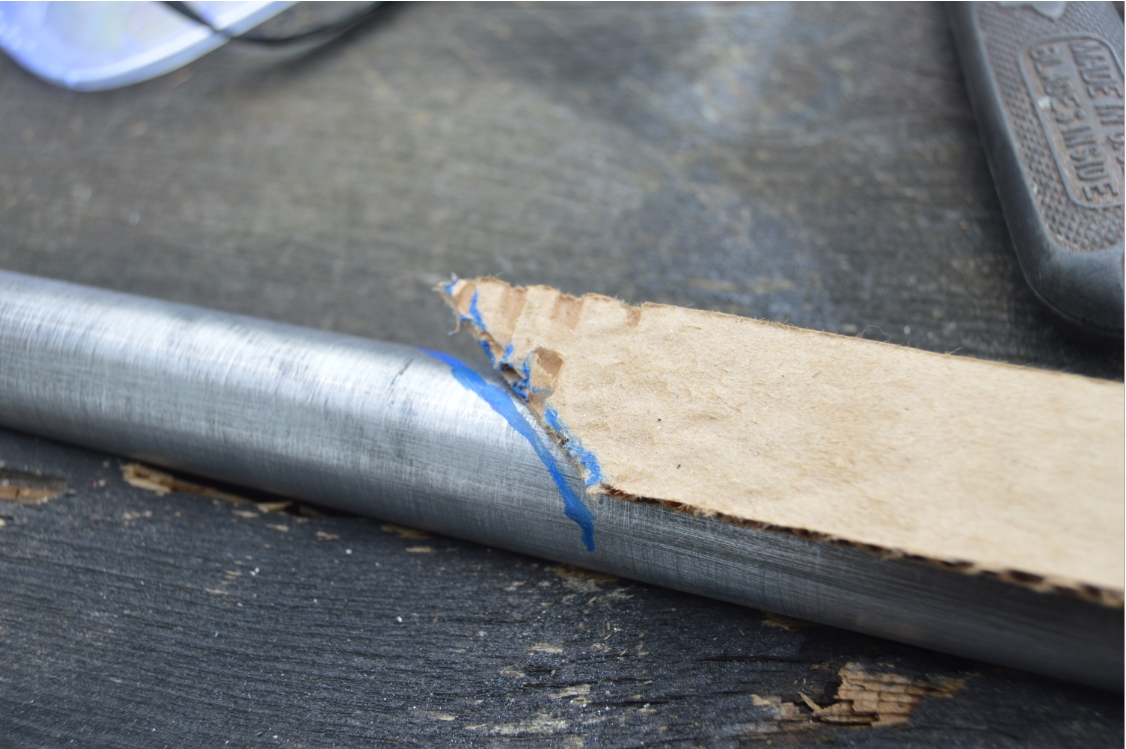
With the passenger side end of the crossbar hanging below the diagonal bar, we drew a line on the crossbar, parallel to the center of where the diagonal bar is. This will represent basically where the crossbar needs to be cut & notched at.
We double checked this by making a cardboard template.
We placed one end in the center of the diagonal bar (driver side), then marked the inside of the diagonal bar on the passenger side (see pics).
Then we placed the cardboard template on the crossbar & marked it, then cut it down.
It may take a few tries at notching to get the bar to fit it the way you want it.
Start with small notches! Then work your way down notching it to get the perfect fit.
[the passenger side took 4 trims to get it to fit the way we wanted]
.


.

.

.
Sand down the areas on the diagonal bars where you intend to weld (do it while it’s on the car, we used a dremel).
Tack weld it into place, then remove & fully weld it all the way around.
Test fit the unit on the car and make sure it fits ok before you finally finish it with your favorite paint or powdercoat.
Once that’s done, reinstall it on your Buick Regal.
Now you’re good to go!
.
![]()
.
.
A great investment for less than 100 bucks and a few hours!
(and cheaper than buying one)
You’ll notice the difference on turning (or changing lanes quickly).
.
PARTS:
– 2 diagonal bars ($65, kirban)
– 1″ diameter 36″ long .120 wall DOM carbon steel tubing ($20, ebay)
– can of black paint ($5, local hardware store)
.
TOOLS:
– 15mm, 18mm sockets (for installing the diagonal bars)
– 3/4″ wrench (for front bolts inside the frame)
– grinder (for cutting & notching the crossbar)
– tubing notcher (better than the grinder, if you have one)
– welder (for attaching the crossbar to the diagonal bars)
– angle finder (handier than trying to guess)
– dremel with sanding drum
.
.
NOTES:
– the crossbar ended up measuring 24.50″ end to end (outer most points).
– the (center of the) crossbar is 14.50″ from the (k-member) ends on the diagonal bars.
.

.


