


If you’ve replaced the stock rubber OEM rubber hoses on your 4 wheel disc calipers with braided line, (like we did on the front hoses and rear lines), you should also probably swap out the chassis line rubber piece as well, with a new stainless version to complete the set.
This eliminates all of the rubber sections in the brake line system, which in turn, should make your overall brake system feel more firm.
This is a basically cheap and easy upgrade for any Turbo Regal.
It’s beneficial, noticeable, and can be performed in less than 30 minutes.
But yes, you will need to bleed your brakes afterwards.
(that’s why you should do all 3 sections [5 pieces] in one go)
Having a friend handy when doing the bleeding of the brakes is convenient, or use a rubber hose inside a pop bottle partially filled with brake fluid to perform this task.
[speed bleeders also make doing this job easier]
.

.
Another step in our conversion from rear drum brakes to disc brakes is done on the 1987 Buick Grand National that we’re working on.
.
This is an ongoing 7-part series:
1st, overview on rear disc brake setup, prepare axles.
2nd, paint brackets and calipers & add turbo 6 arrows on them! (same like we did up front).
3rd, removal & installing the new rear disc brakes setup.
4th, installing stainless steel braided caliper hoses on rear calipers.
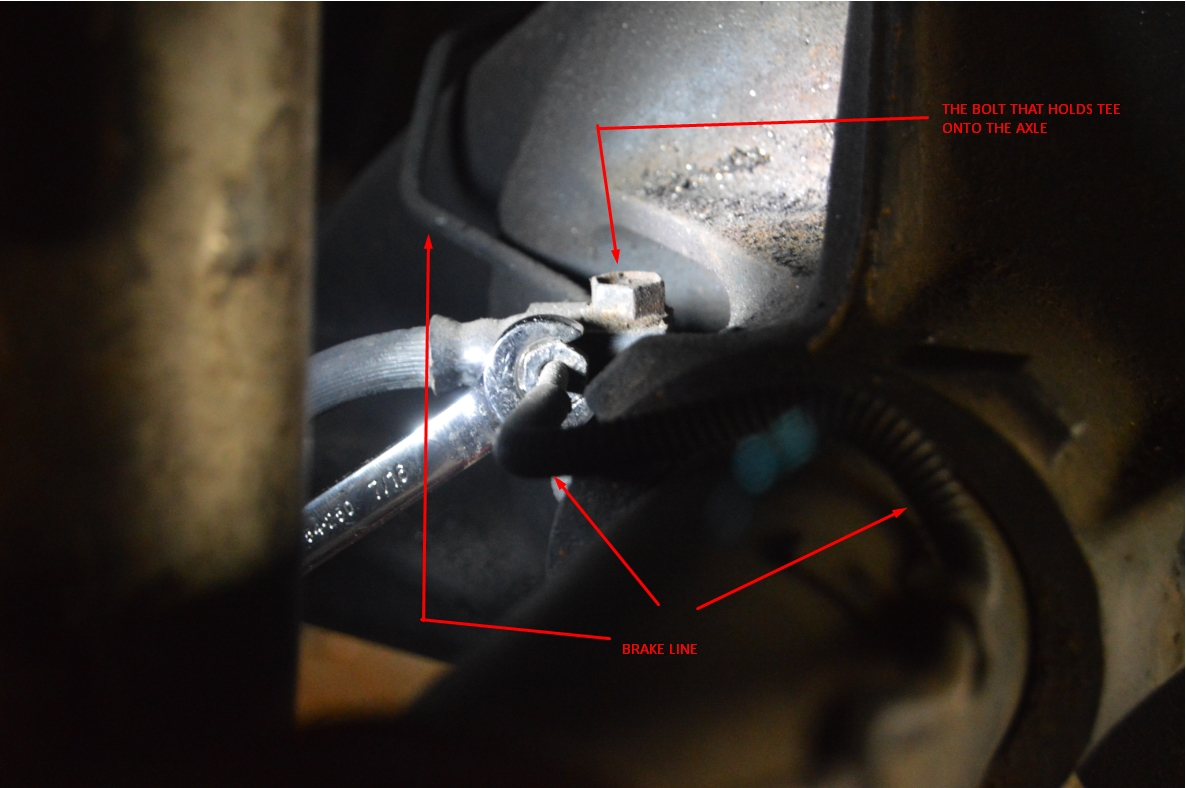
5th, installing the main rear tee connecting braided hose (chassis to axle, with Tee).
6th, installing all new stainless steel brake lines from Inline Tube, complete, from the master cylinder to the proportioning valve to the calipers in front, and master cylinder to prop valve to the Tee on the rear axle housing to the rear calipers.
7th, remove & replace OEM proportioning valve with 4-wheel disc prop valve (also from Inline Tube).
YOU ARE ON PART 5 HERE.
.
PARTS:
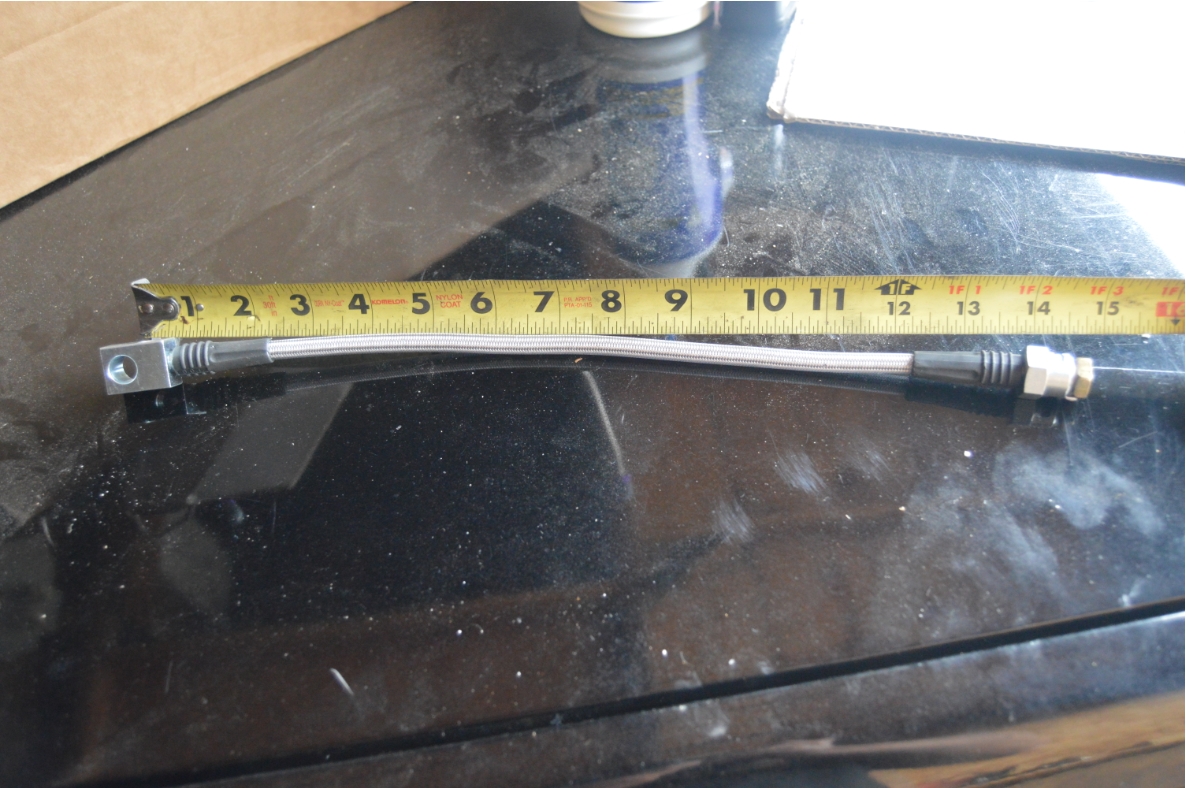
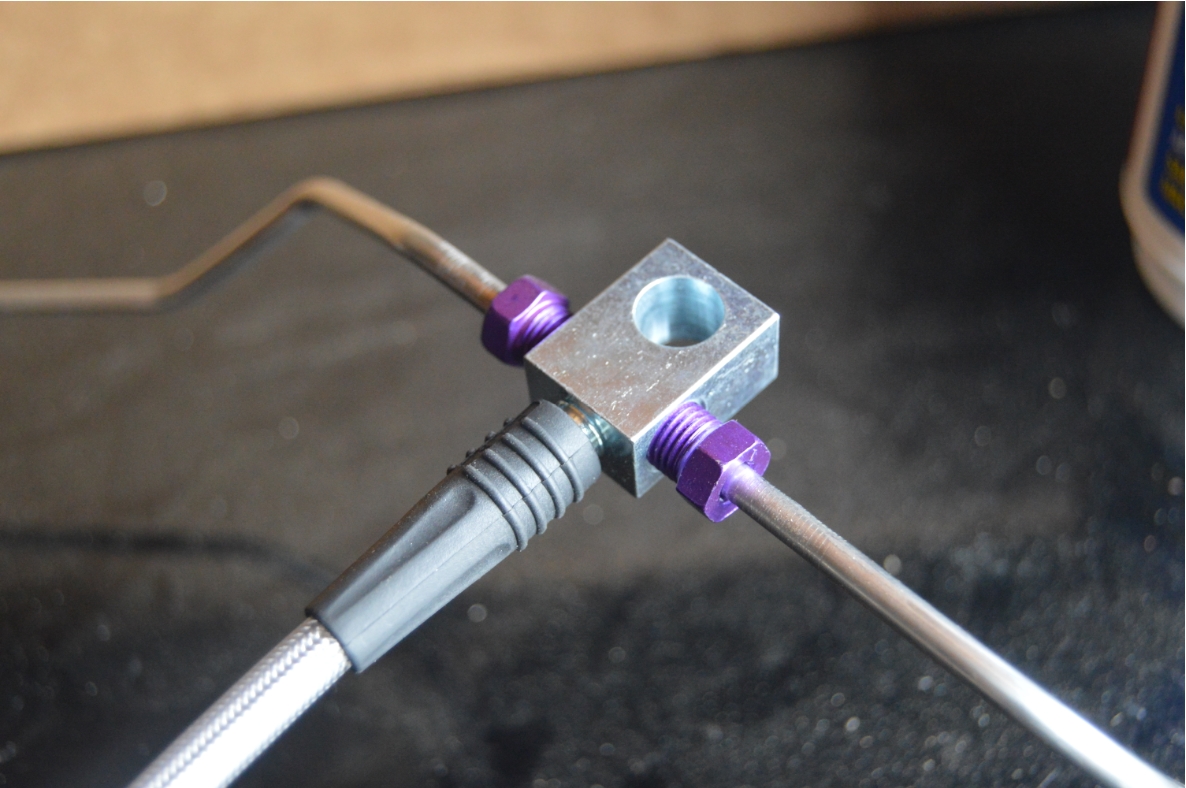
* main rear connection braided hose (chassis line with TEE, 14.5″ overall, $18 ebay)
.
TOOLS:
– 1/2″ socket (main rear connection hose tee bolt)
– 7/16″ & 9/16″ line wrenches (brake fittings)
.
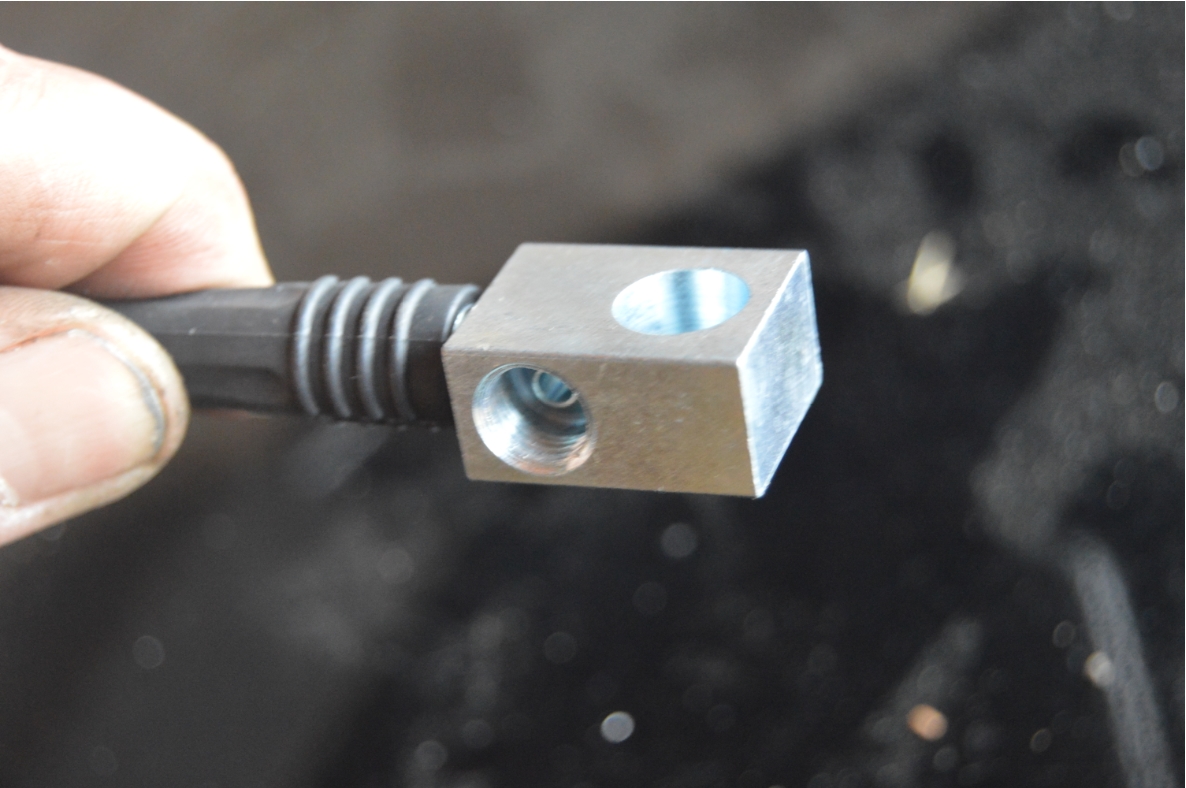
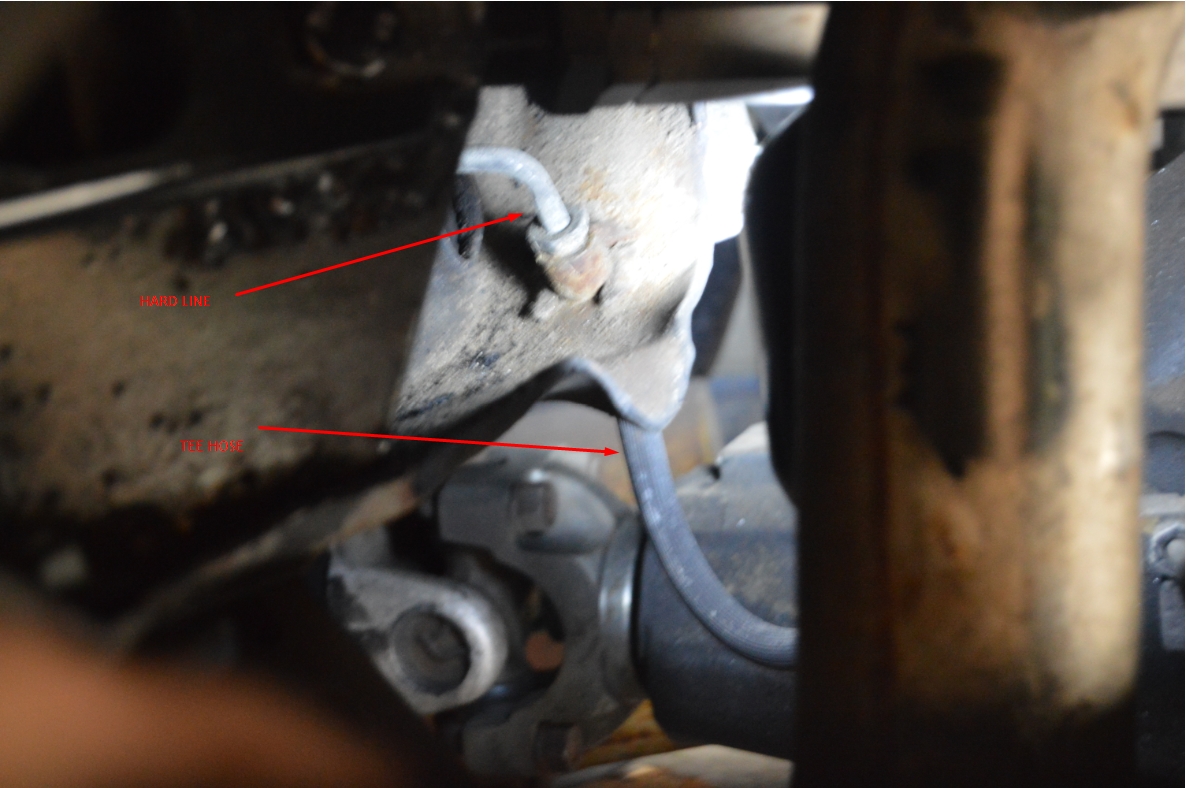
Old brake TEE on Gbody Regal (driver’s side):
.
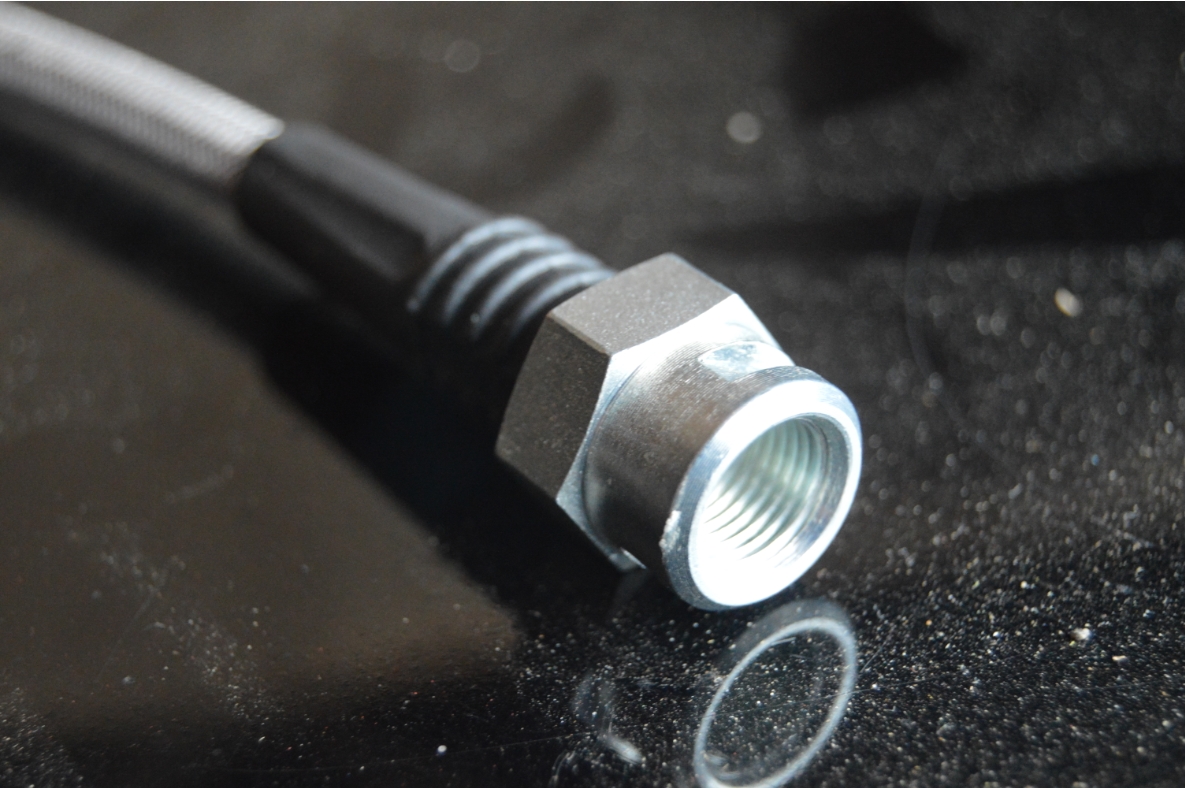
Chassis side of TEE hose:
.
HOW TO:
1. put the rear end of the Turbo Buick up on jack stands.
2. unscrew brake line fitting coming from (chassis side) on main connection piece.
3. there’s a u-shaped clip holding the end of the hose onto the chassis (same like the front caliper hoses have holding them onto the chassis tabs.). remove it.
4. disconnect both lines from TEE. (going to brakes)
5. unbolt the 1 bolt from the tee and remove entire hose.
6. bolt the new TEE onto the axle housing.
7. reconnect both brake lines into the TEE.
8. reconnect the other end of the new braided hose.
9. check for leaks, and bleed the entire brake system.
10. remove jack stands from Turbo Regal.
11. TEST your brakes CAREFULLY before driving! bleed again if necessary.
.
NOTES:
On the TEE side, both brake line fittings are 7/16″.
The bolt that holds the TEE to the axle is 1/2″.
For the other side of this (TEE) hose:
The hard line that connects to it is a 9/16″.
A clip holds this end of the hose to the chassis.
.
The new TEE connects like this:
(the new hose doesn’t come with a new bolt, so you have to reuse your original one)
.


