Sometimes it’d be nice, especially on those dark nights, to have a bit of extra light in your trunk. More than that which the single existing bulb supplies.
You see, the owner of the 1986 Buick Regal Grand National to which this next upgrade is being performed on, has gotten spoiled by all the LED lighting upgrades that were previously done on the car.
I figured adding an extra trunk light would suffice, not to mention placing LED bulbs in (both of) the sockets… and I’d be correct.
Here’s how this was accomplished.
PARTS/COSTS:
* shrink wrap/tube (pkg from the dollar store)
* 14 gauge wire {1-36″ piece & 2- 4″ pieces} (had laying around garage)
* 4 female connectors (had laying around garage)
* 4 male connectors (had laying around garage)
* factory OEM trunk light (from ebay, less than $10 shipped)
* LED bulb {blue in color, matches the rest of the lights in the car} (ebay $3-10 depending on which style you buy)
TIME:
* less than 1/2 hour
HOW-TO:
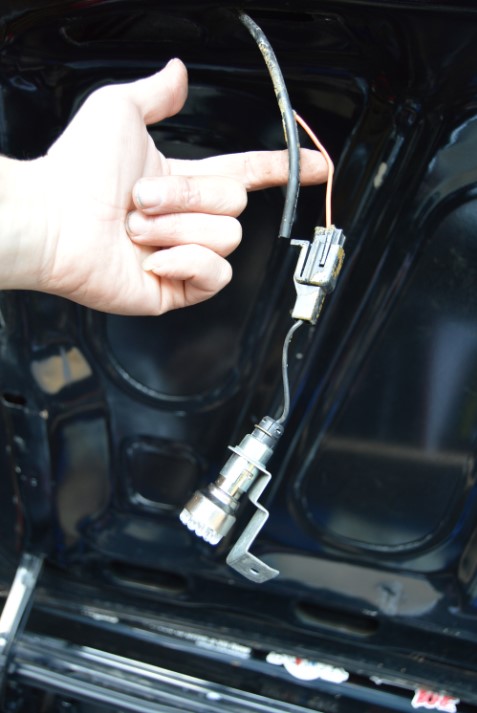
1. I’m a risk taker, so I performed this task while the electrical was “live” – you may not be so brave, so disconnect the power to this circuit.
{note that there is only 1 wire on the original light & this is a “positive” wire, even though it is black in color! The fixture is grounded thru the trunk itself using the bracket/bolt!}
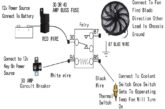
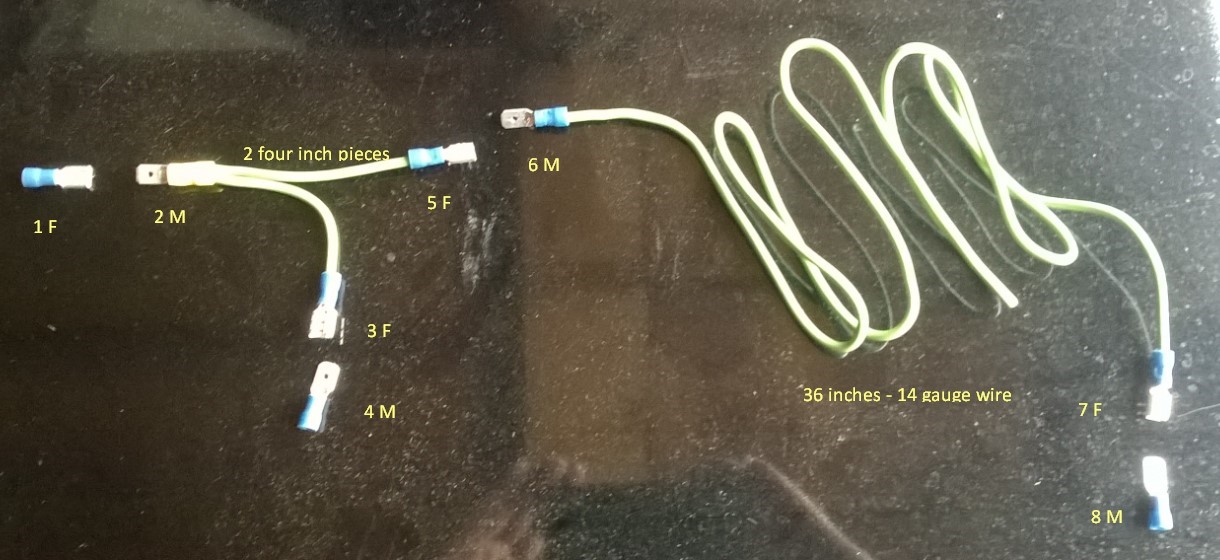
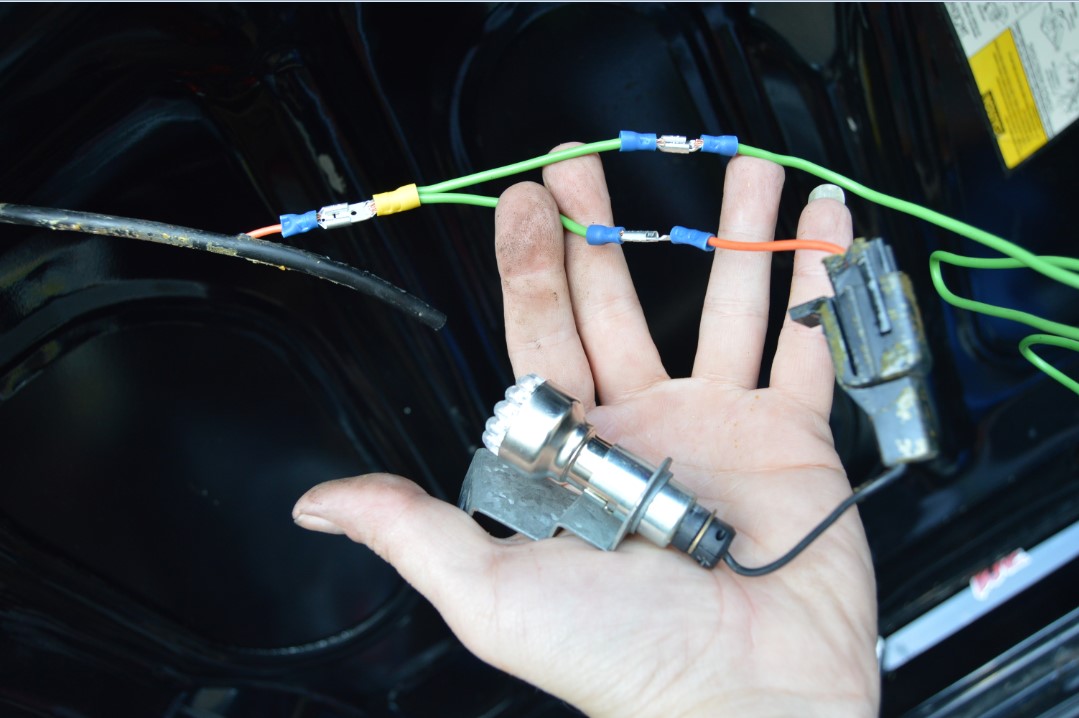
2. make up a new wire harness as shown in the picture. (F= female M=male)
{there’s so many disconnects to make removal easier if ever needed}
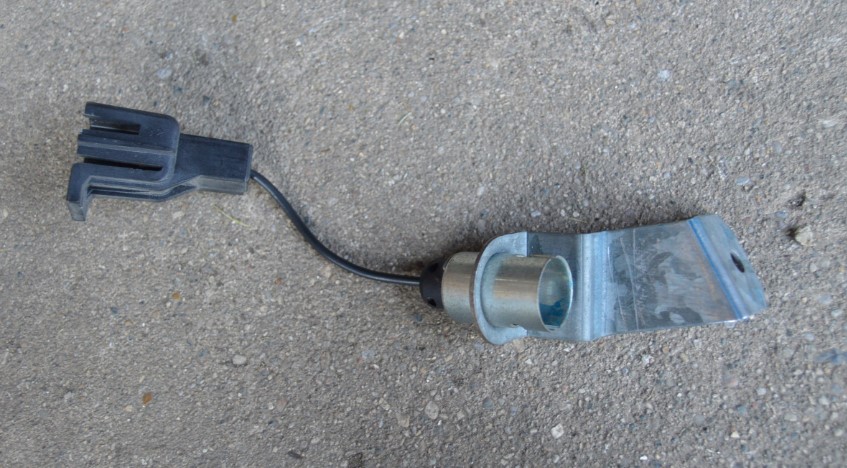
3. the new bulb socket I bought didn’t come with any wiring other than the short factory piece (with the connector on it) that I didn’t need.
{if you get one that has the complete wiring, you can eliminate most of the harness I had to make}
So I cut off the connector end & attached the (#8M) terminal from the picture.
[we weren’t that concerned with keeping everything original on the turbo regal. If you ARE, you might want to adjust the splicing area / methods for these next steps!]
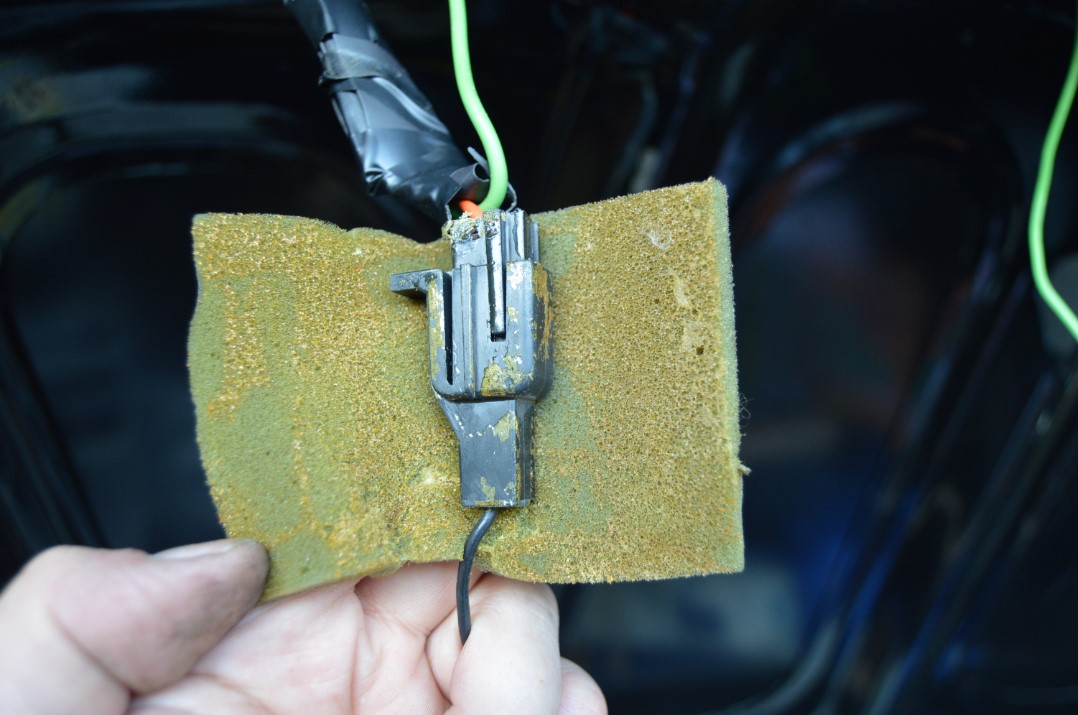
4. Pull out the factory wiring from the big hole next to the light.
From the existing (drivers side) light, cut the stock wiring BEFORE the factory connector.
{you may have to trim back some of the OEM black wire protector}
4A. Terminal (#1F) is going to connect to the (cut) wire towards the trunk.
4B. Terminal (#4M) is going to connect to the (cut) wire towards the light.
[don’t forget to place the shrinkwrap over the wires afterwards!]
5. TAPE over terminal (#7F) since the wire is live! Then fish the 3 foot wire over from the drivers side to the passengers side.
6. place the shrinkwrap over the wire then connect terminal (#7F) to (#8M) on the new light.
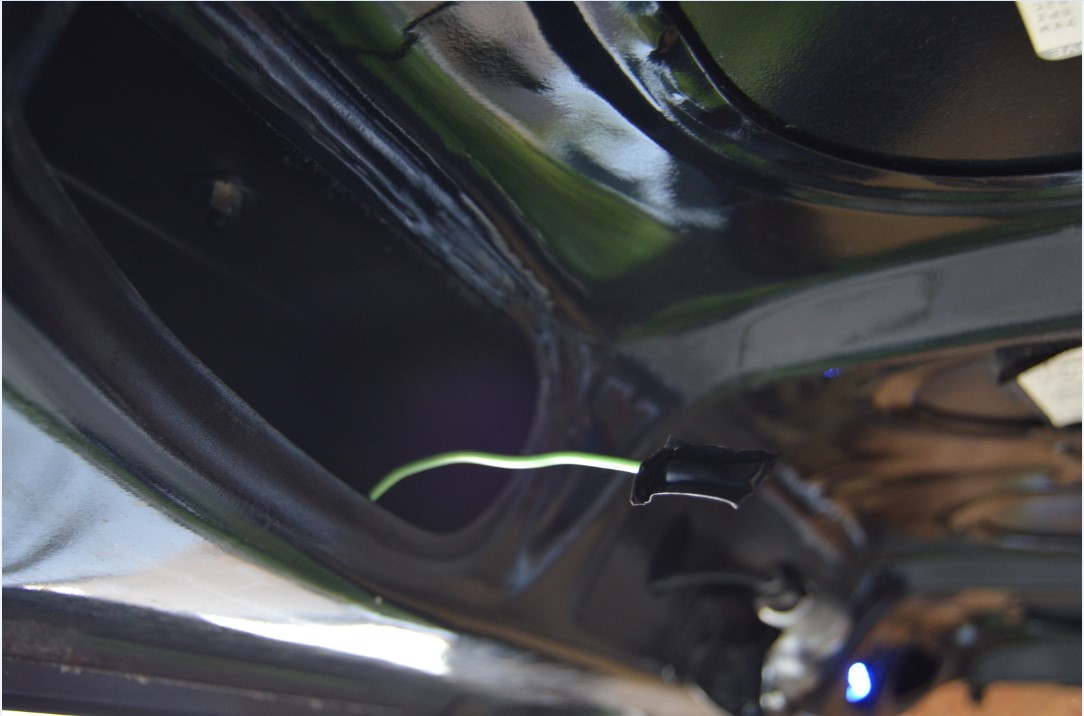
7. figure out where you want to position the new light fixture, then drill a 11/64″ size hole in the trunk lid on the passenger side of the opening (see pic).
[originally, I was going to place the new fixture on the (trunk lock) side of the hole, figuring it would generate more light, but then realized you’d have to flip the fixture around, meaning the light switch wouldn’t ever turn off!]
7A. The light I bought didn’t have a way to secure it using a bolt only, so I used a standard GM clip I had, mounted over the hole.
7B. place the new light fixture inside the opening & secure it down with a bolt thru the hole you made.
{make sure you position the fixture in the same direction as the factory one, since the fixture has a mercury switch in it, & it won’t shut off otherwise!}
[note: it may be easier to first install the new LED bulb in the socket before you mount it to the trunk]
8. If you haven’t already, tuck all the wiring inside the channels of the trunk lid.
9. if you disconnected the power, restore it to this electrical circuit.
Tada! Your new light, as well as the original one, should now be lit!
Be sure to lower/raise the trunk lid (several times) to verify that BOTH lights turn on & off properly!
10. celebrate another well done task!


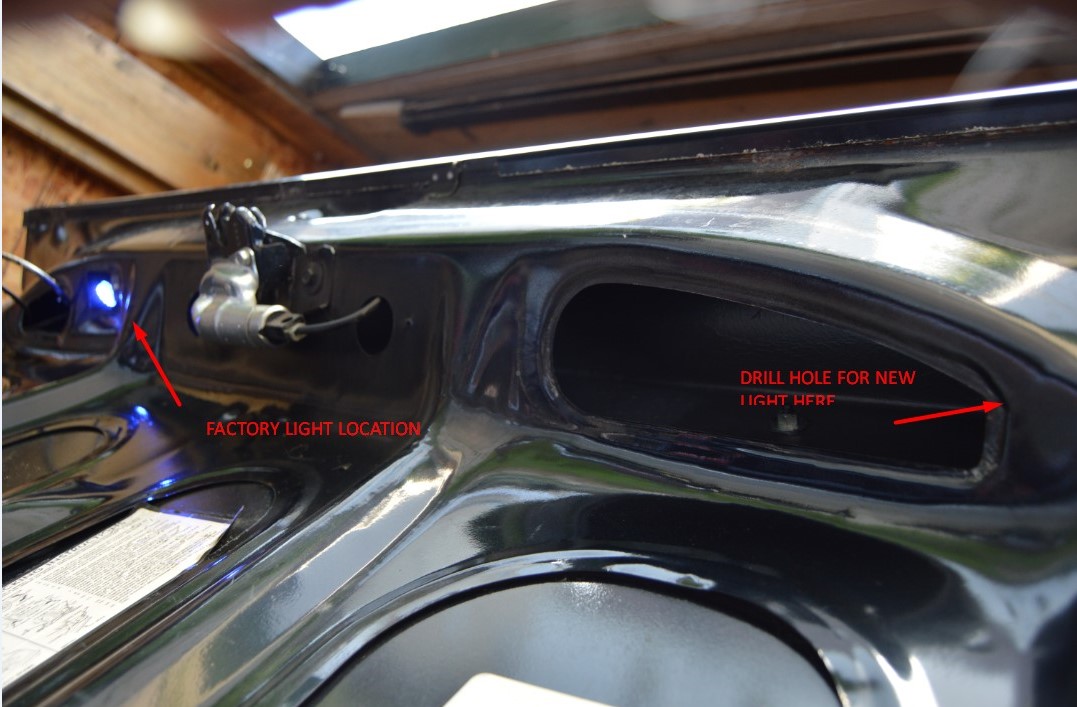
This first photo shows you how much light exists with just the factory fixture + an LED bulb.
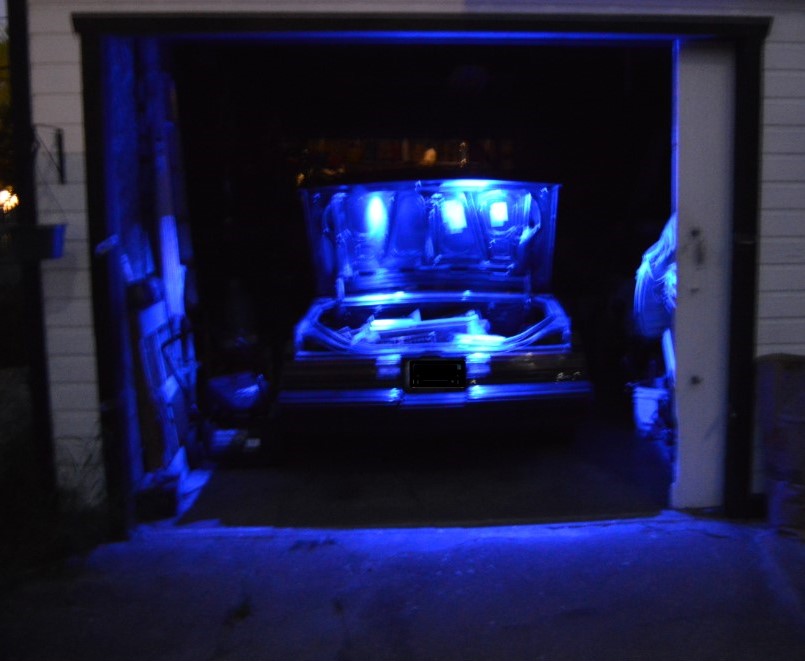
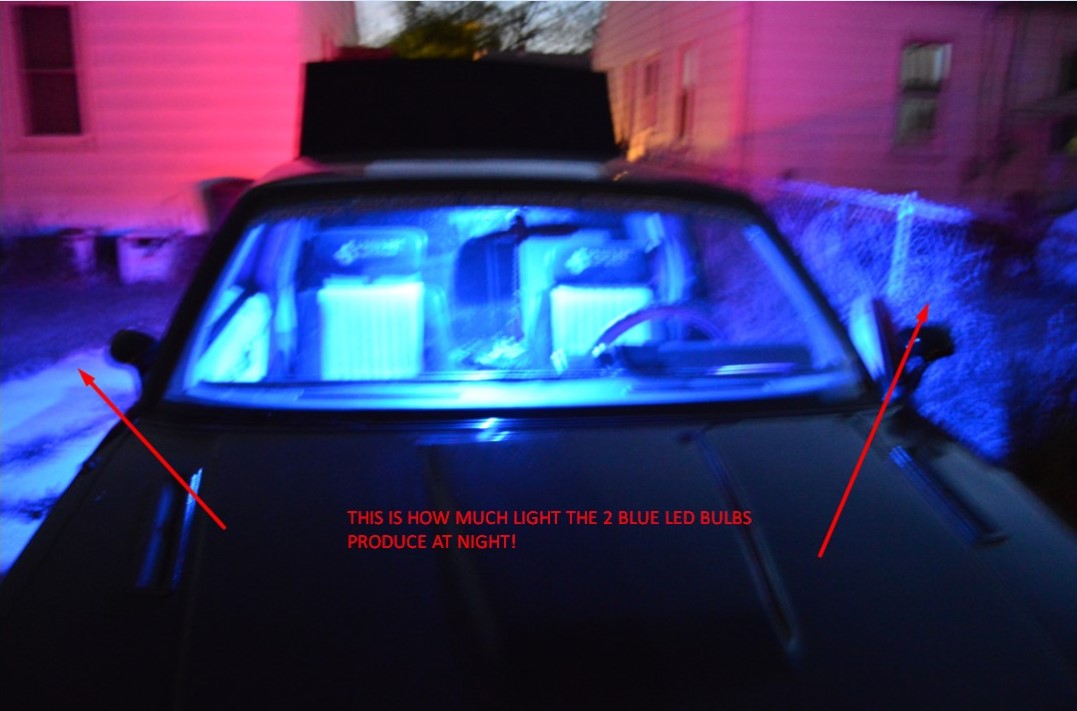
The second & third photos shows you how much more light you get with both fixtures with LED bulbs!


.