


In this third of fourth segment, it’s time to create & install the front frame brace, so we can replace the OEM front bumper and mount on the new lightweight front fiberglass unit.
(because not only is it lighter, but we think the FG bumper looks cool)
Once you remove your metal factory bumper, you lose some of the rigidity that it created (for the frame), so adding a brace like this restores some of that rigidity.
(not to mention the safety factor of losing the steel bumper in case of front impact)
The short story:
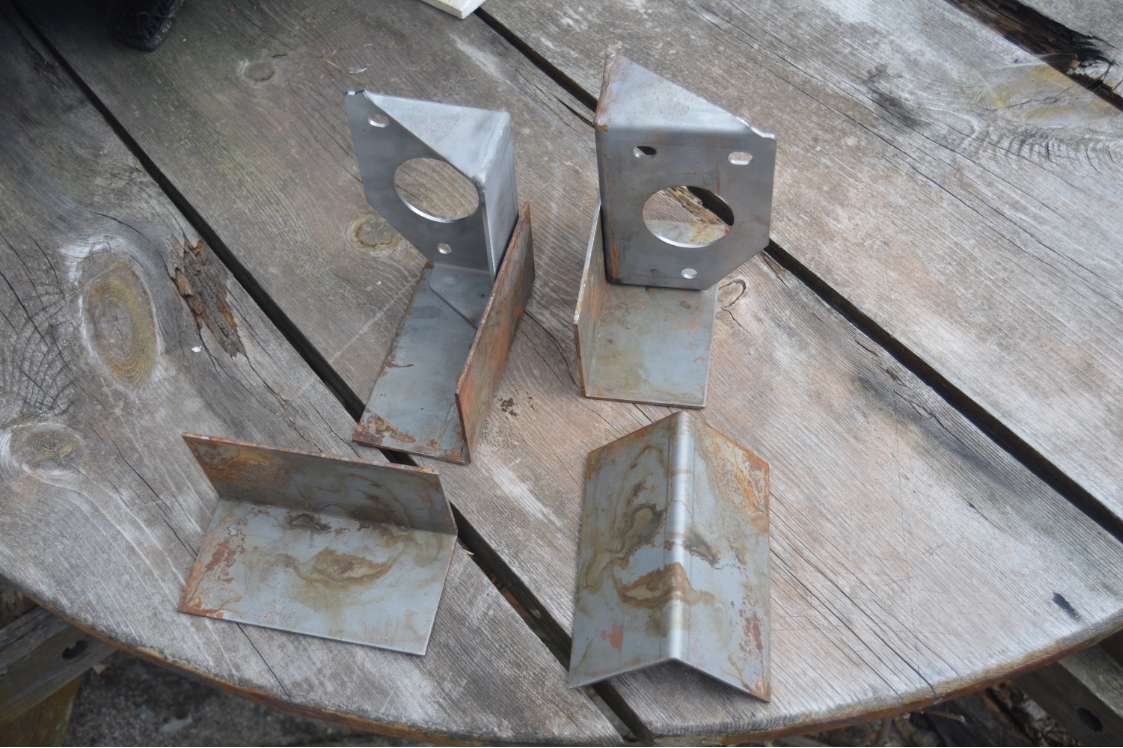
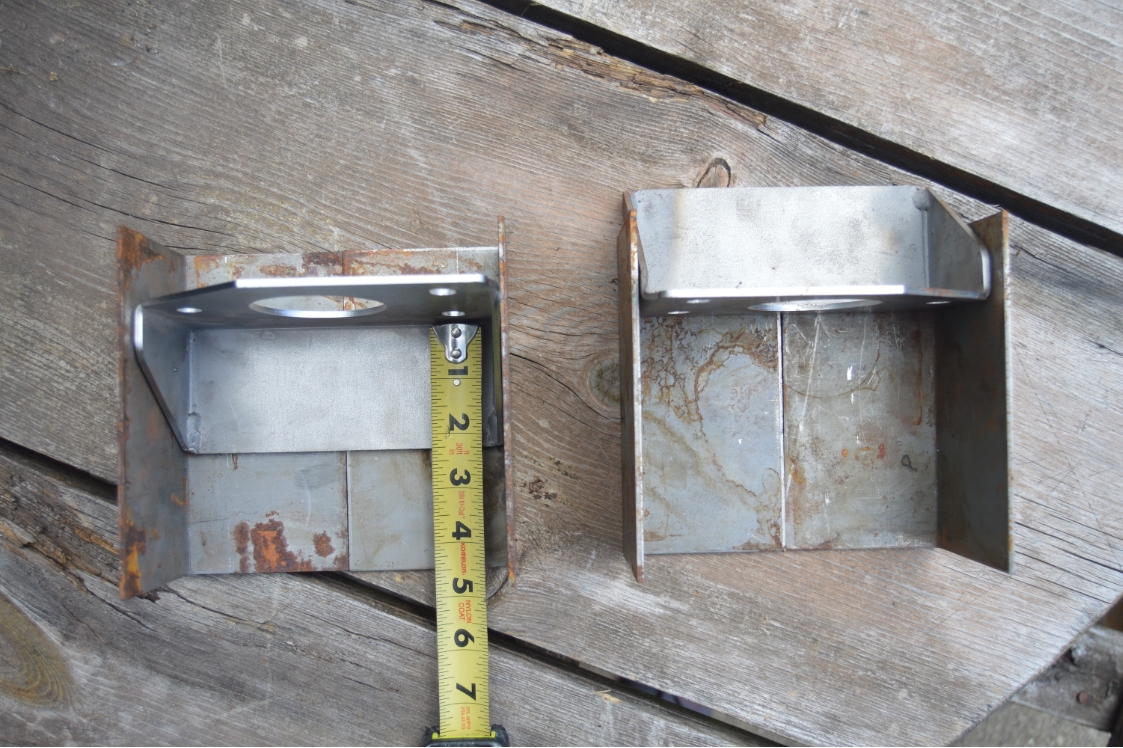
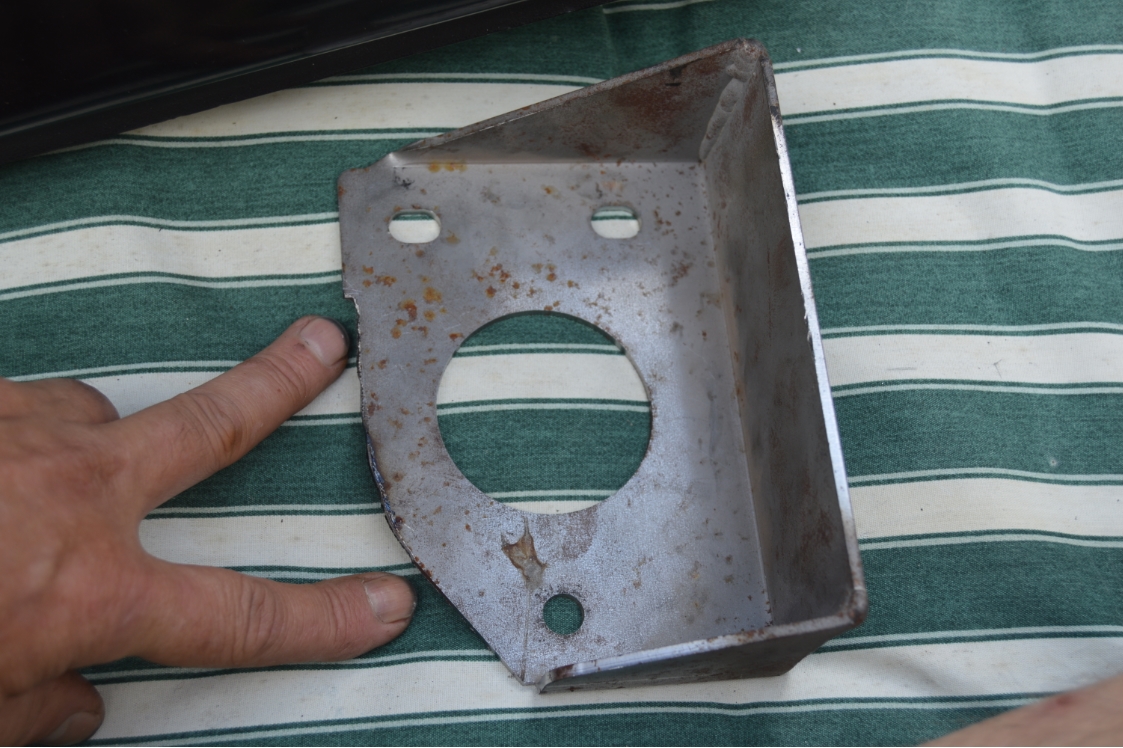
We’re starting off with the same type of GNS brackets that we used on the rear.
They weren’t really made for the front, but it’s not real hard to convert them to be able to do so.
You have to acquire some plate steel & have them bent, then weld them onto the brackets.
After that, it’s pretty much add a crossbar, weld it on, paint (or powdercoat) and install.
.
You can get the brackets & crossbar HERE:

.
The long story:
(a lot of description and steps, be sure to read this story in its entirety, including the notes below, BEFORE you start to make this unit!)
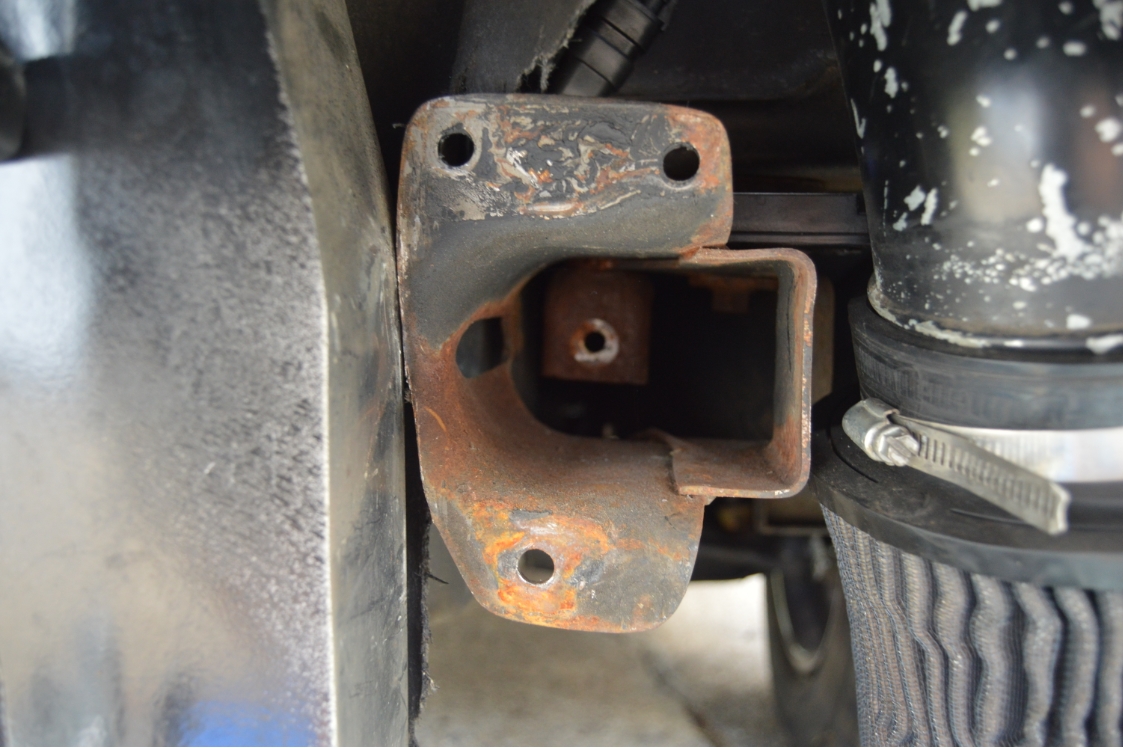
The factory front frame ends are different than the rear frame ends.
The rear brackets, drivers side has the 2 holes on top; passenger has the 2 holes on bottom.
The front ones, the 2 holes are on top, on both sides of the Turbo Regal.
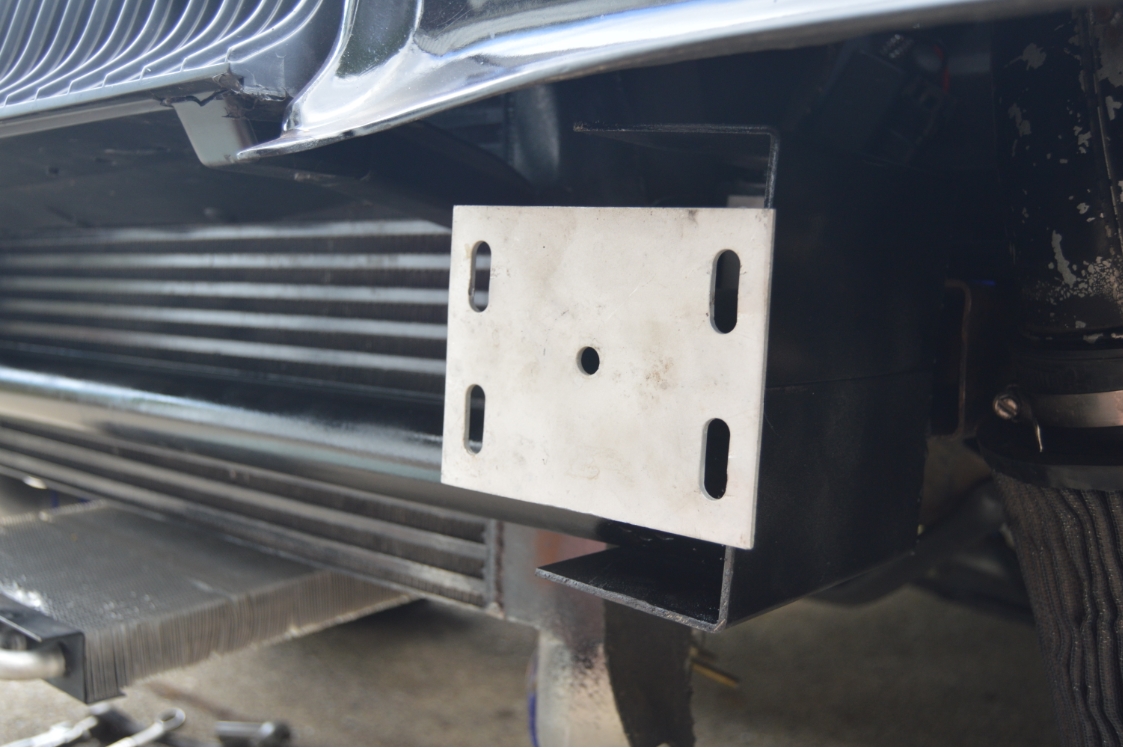
So that means you have to mount the drivers side bracket facing backwards (compared to how you mount the passenger side), and then figure out a way to bring the mounting surface of the bracket forward so you can attach a crossbar.
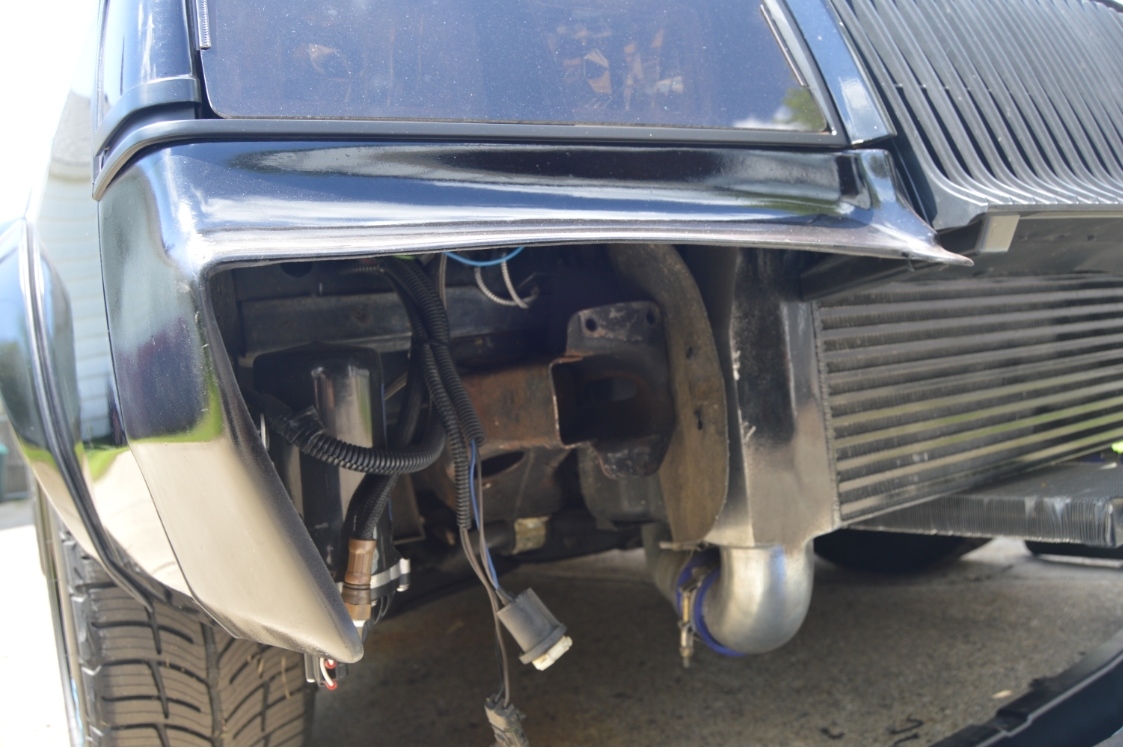
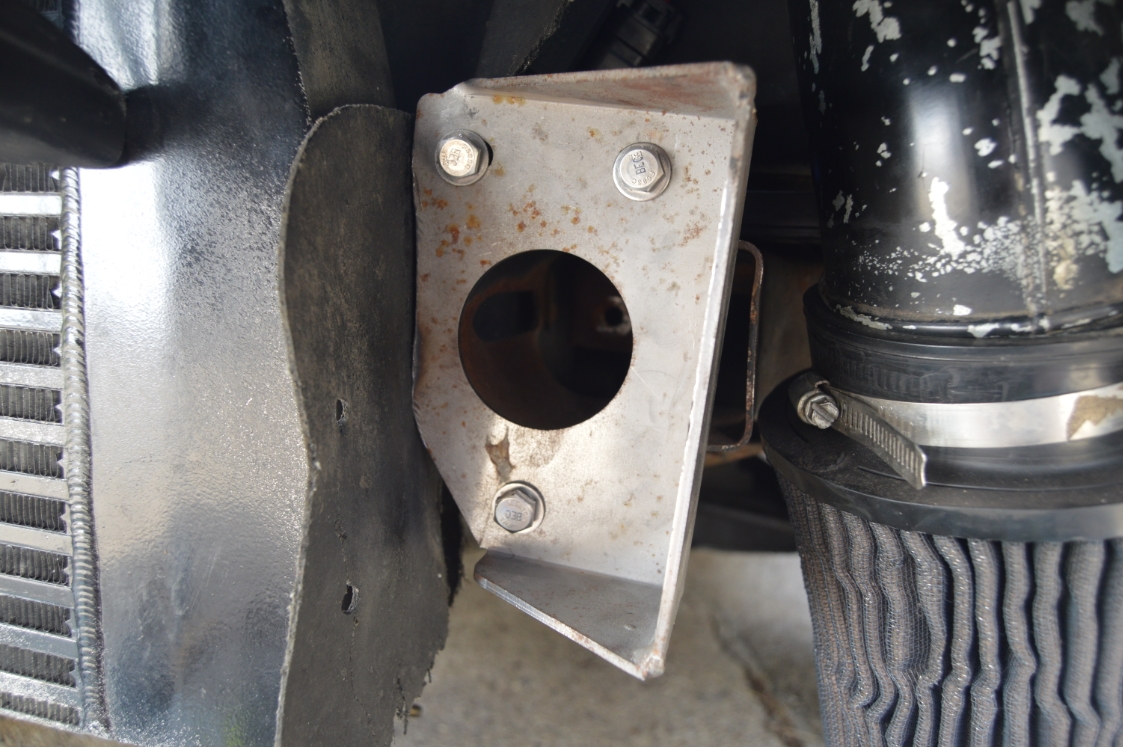
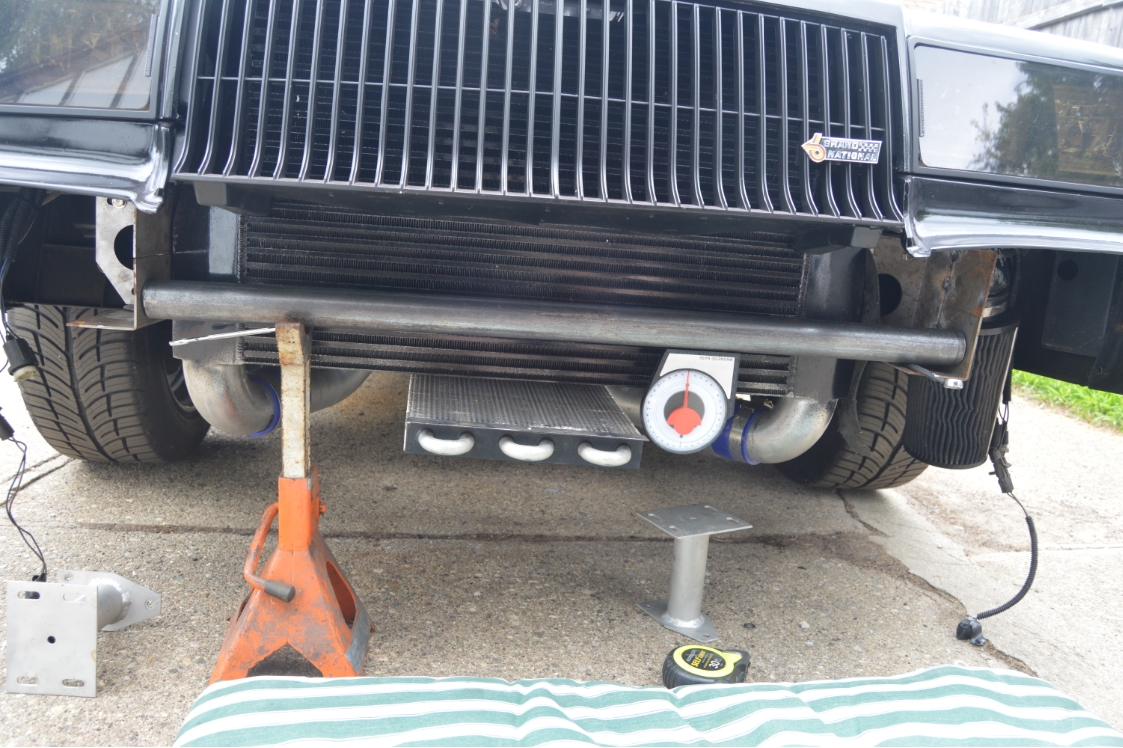
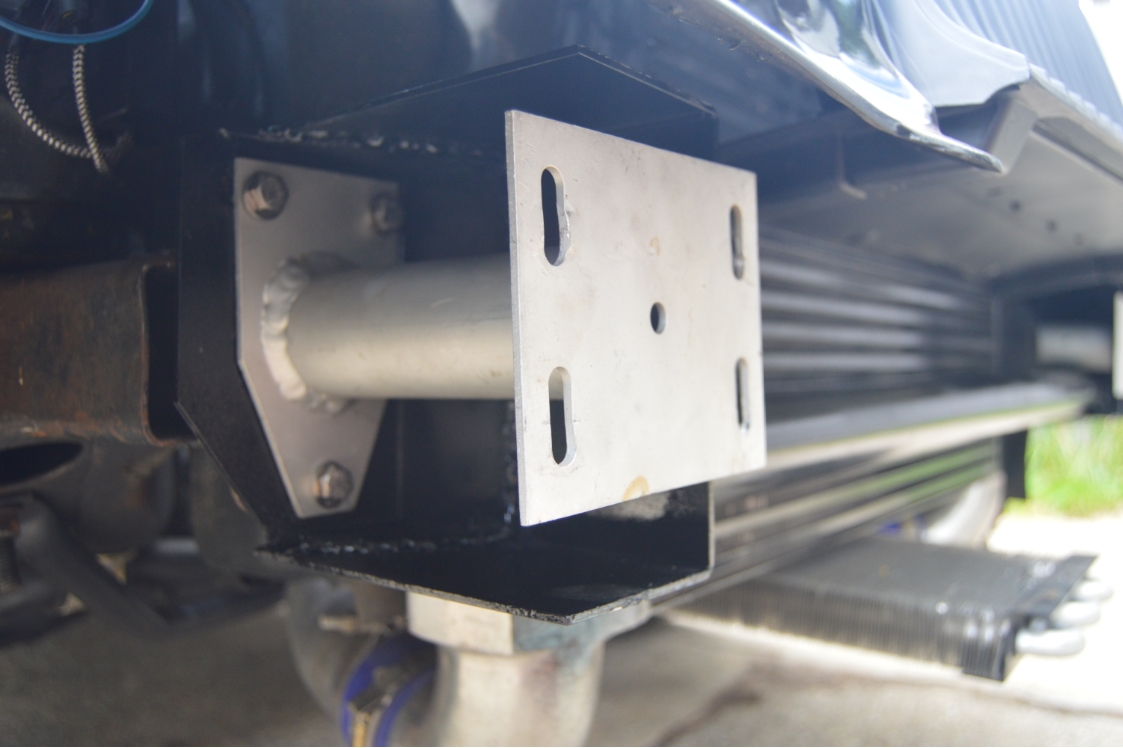
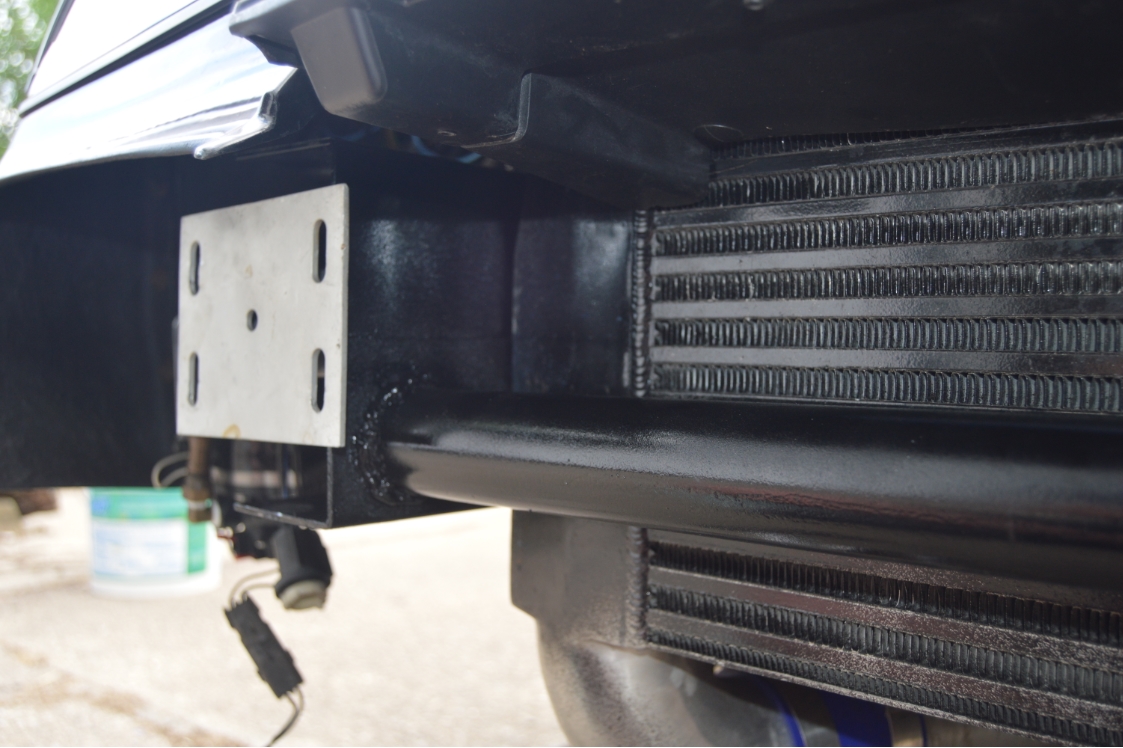
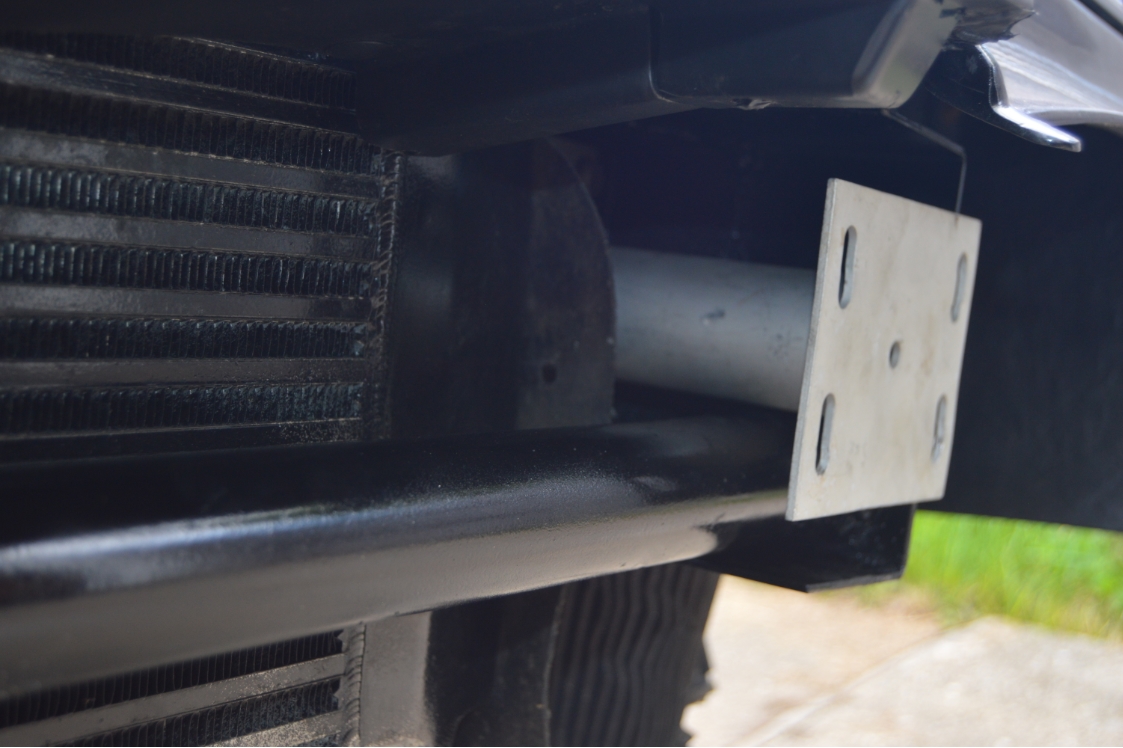
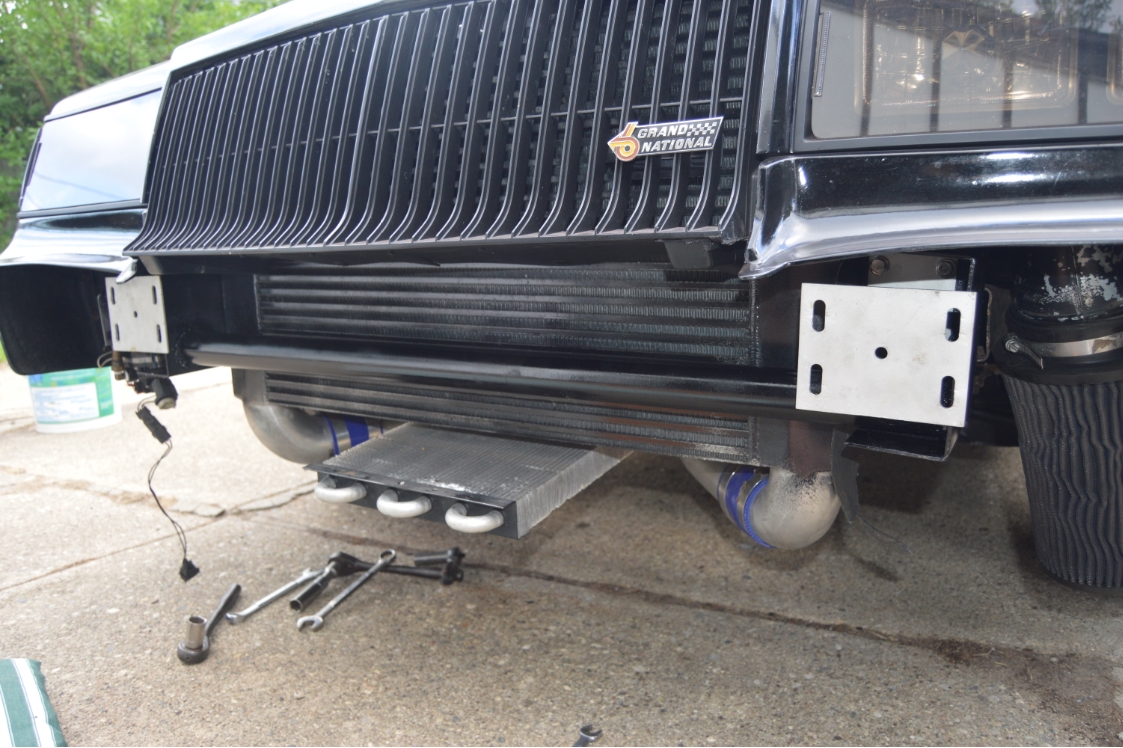
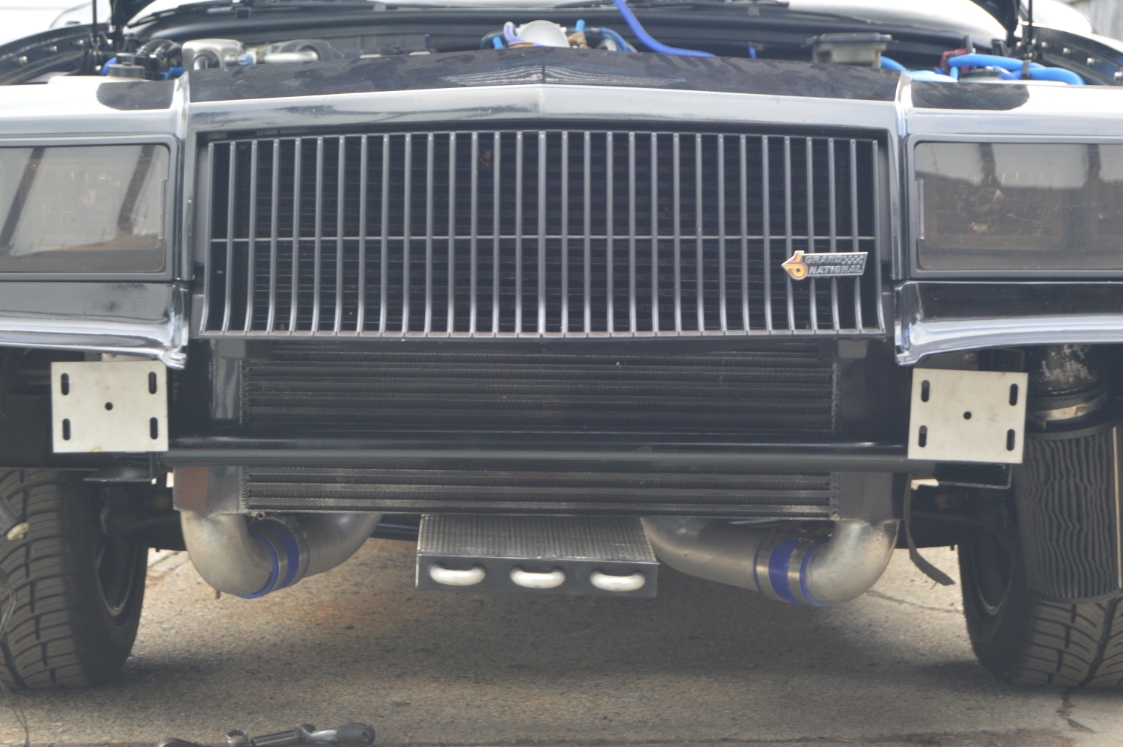
This particular Buick Grand National has a front mount intercooler on it, so modifications are needed on both of the brackets to make the cross bar fit.
Not only is the drivers side bracket flipped around (from how you would normally install the bracket on the frame end), but it needs an extended flat surface (coming out toward the nose of the G-body Regal), so that there is enough clearance in front of the FMIC so the crossbar will fit across the width of the G-body (without hitting anything).
The passenger side needs an extension forward as well, because of the FMIC.
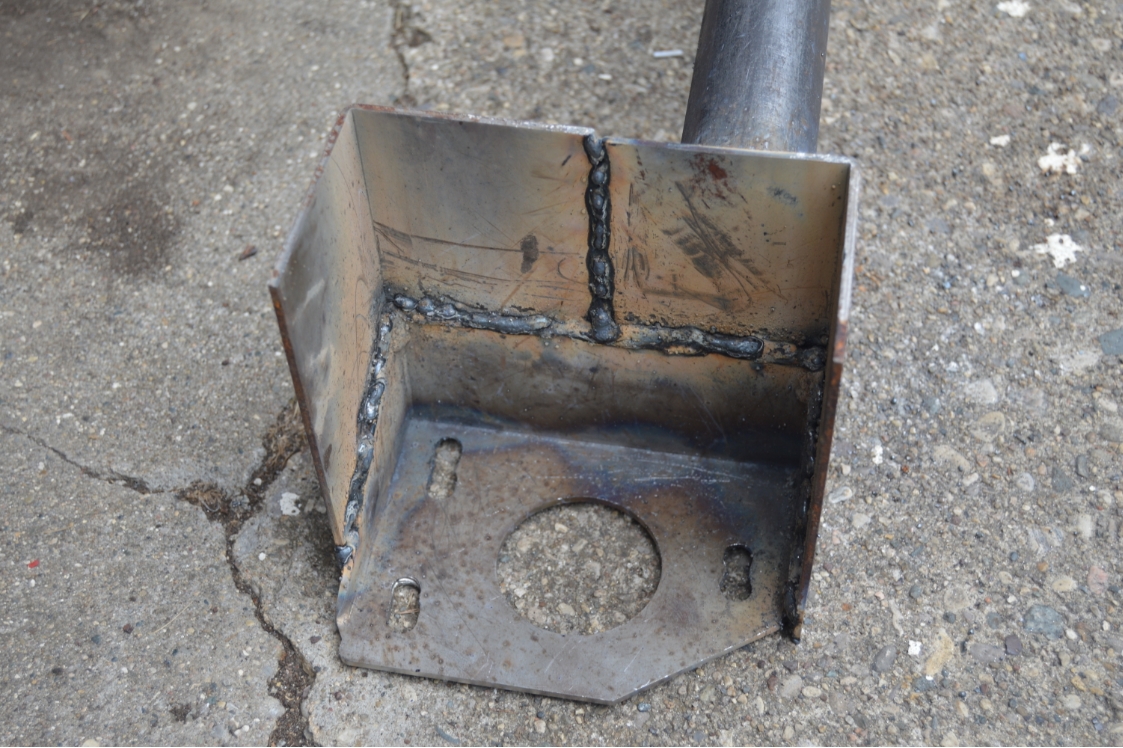
We also needed to oval out all 3 holes on the brackets (about another bolt holes worth) in the direction of the middle of the Buick Regal, to get it to line up with the OEM frame end bolt holes.
[Note, if your Turbo Buick doesn’t have a FMIC, you will still need the extension piece on the drivers side (just not as much as we are using here), since the bracket is mounted in a flipped position, and you need that extension to be able to weld on the crossbar]
[Note: we show you in the below pics how the drivers side should be done if you DO NOT have a front mount intercooler. being as we have a BIG FMIC on this Buick Grand National, there isn’t really enough room to do it that way, so we added pics of both that way AND the way we ended up actually doing it]
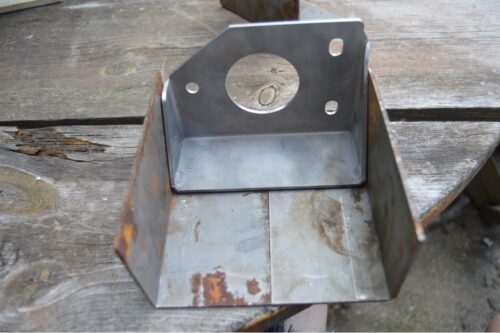
You should still use 2- 6×6 plates (or 1- 6×12) like we use (further below), but here’s the basic idea of how to setup the brackets for use with NO Front Mount InterCooler.
Left side in pics is passenger side, right side is driver side.
.

.
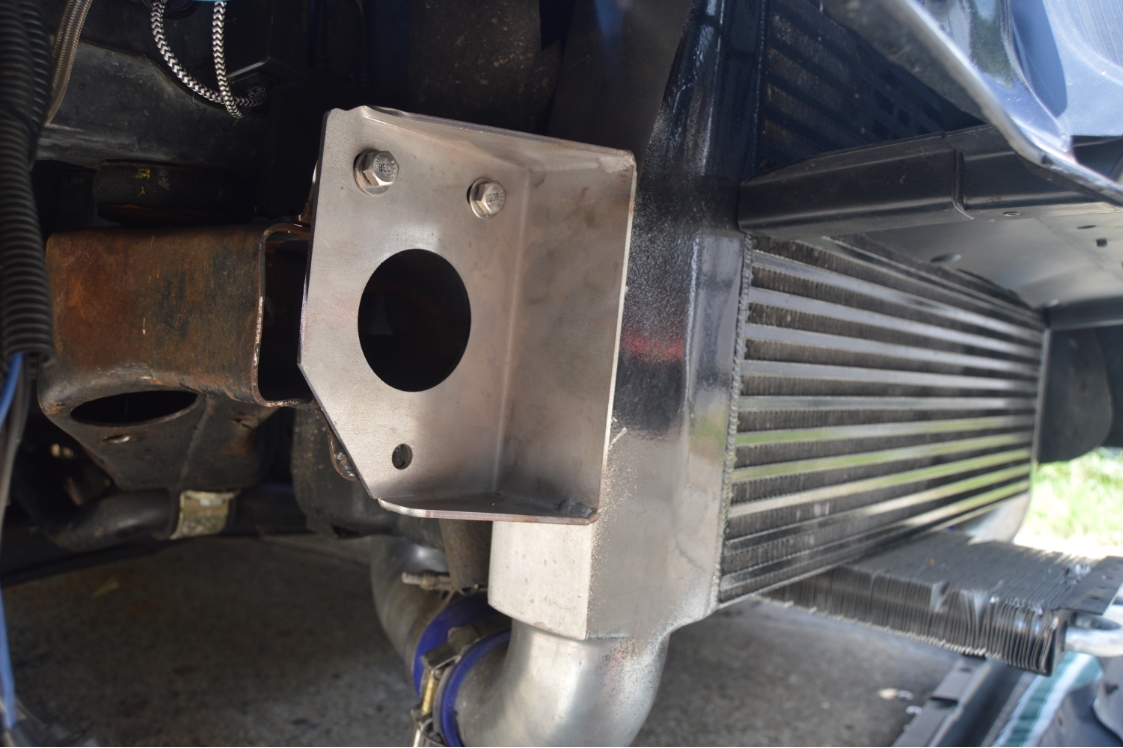
You will need (at least) 1/4″ clearance (on both the driver and passenger sides) between the frame ears and the FMIC, but with this specific FMIC (the big RJC unit), there is only 1/4″ total, and it happens to be ONLY on the passenger side. There literally is no clearance on the drivers side (on this car).
Sure, it looks like the FMIC isn’t really mounted in the center on this Buick GN, but that wouldn’t have really mattered, since there isn’t enough total clearance anyways.
So the way we had to perform this job is shown in the pics, but explained below somewhat.
[we could have trimmed the factory frame end ear, but we felt that would have weakened this area too much, so we opted for the solution below]
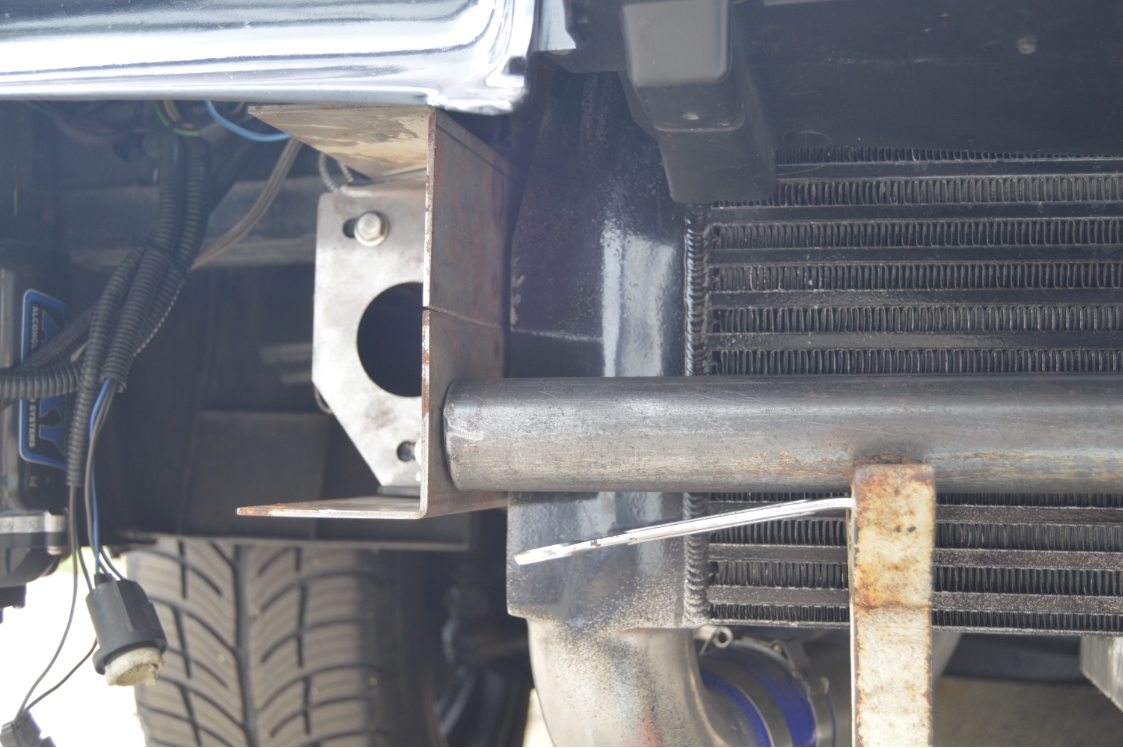
This is for the drivers side only:
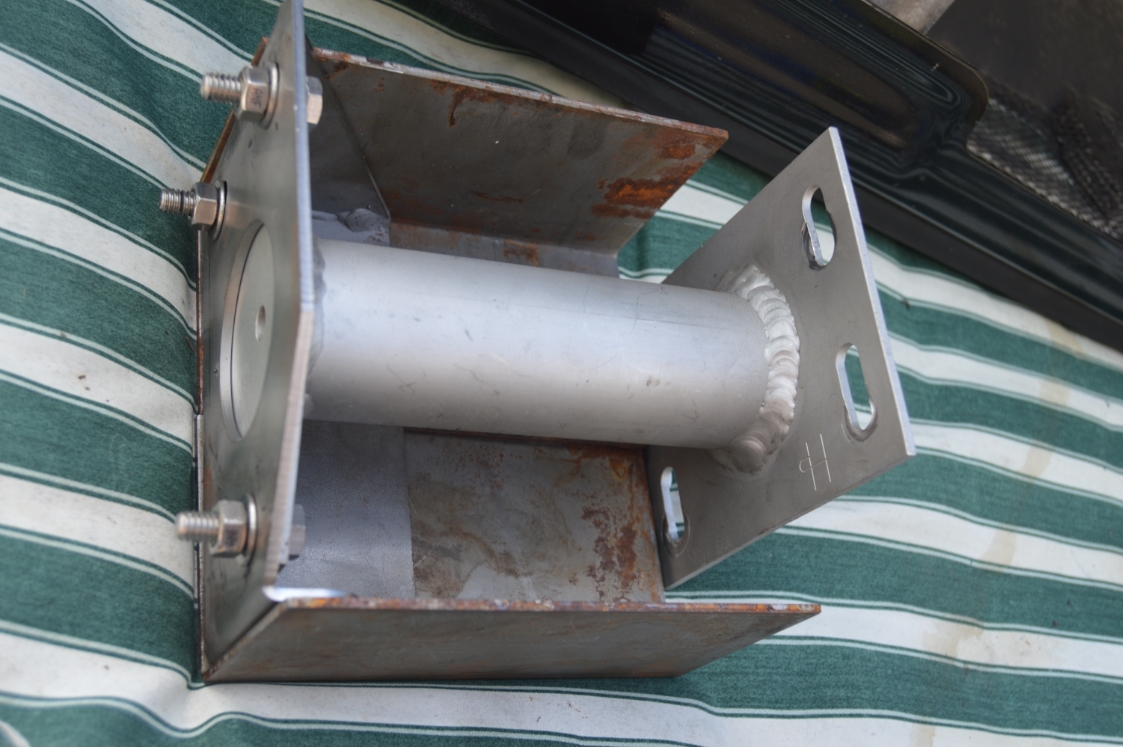
We mounted the GNS bracket pointed forwards, with the surface where the crossbar would normally be mounted, facing the fender (instead of the center of the car).
We still welded on the 2- 6×6 plates the same way we did the passenger side.
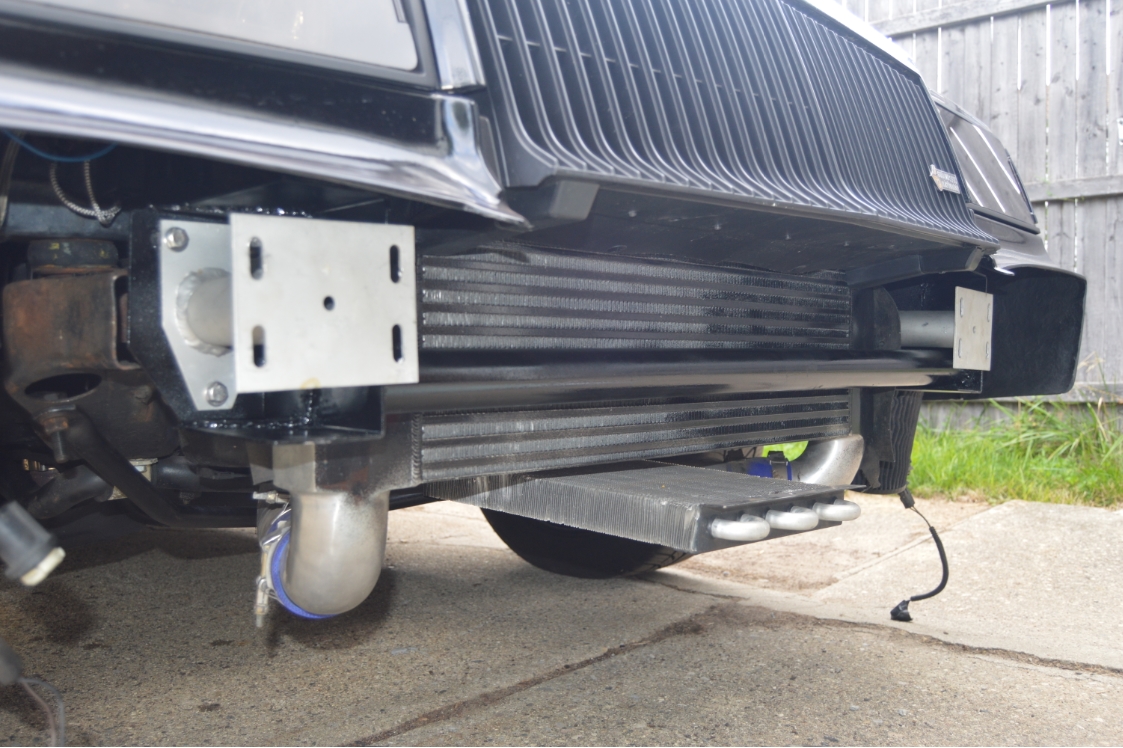
The crossbar will go UNDER the bumper mount (under the tube), and then be welded onto the inside of the plate (meaning the opposite side from how the passenger side is done).
The 2 plates being entirely welded onto the GNS bracket should give enough overall strength to this unit to support the crossbar, even though this is kind of a backwards configuration (compared to how the crossbar fits on the passenger side).
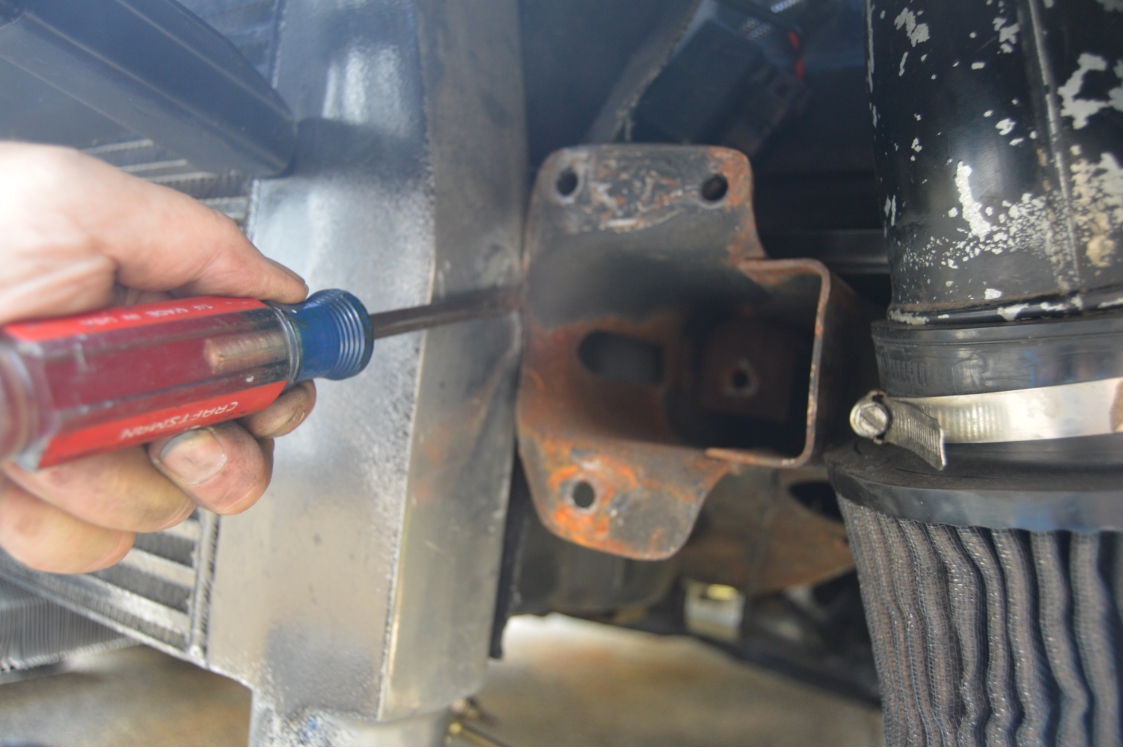
We did have to modify the bracket itself to get this to work.
A little bit (about 1/4″) was trimmed off the side nearest the intercooler to get the bolt holes to line up with the factory frame end holes. see the pic.
(because the bracket was hitting the FMIC and we needed the bracket to be positioned more toward the center of the car)
.
.
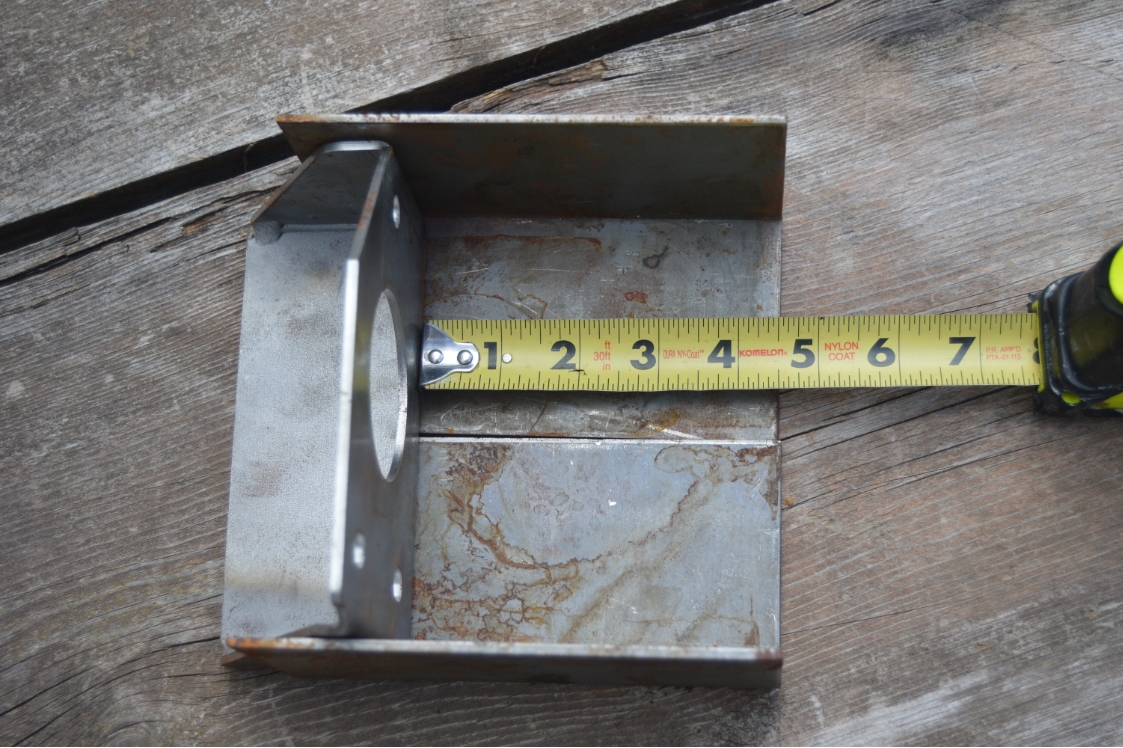
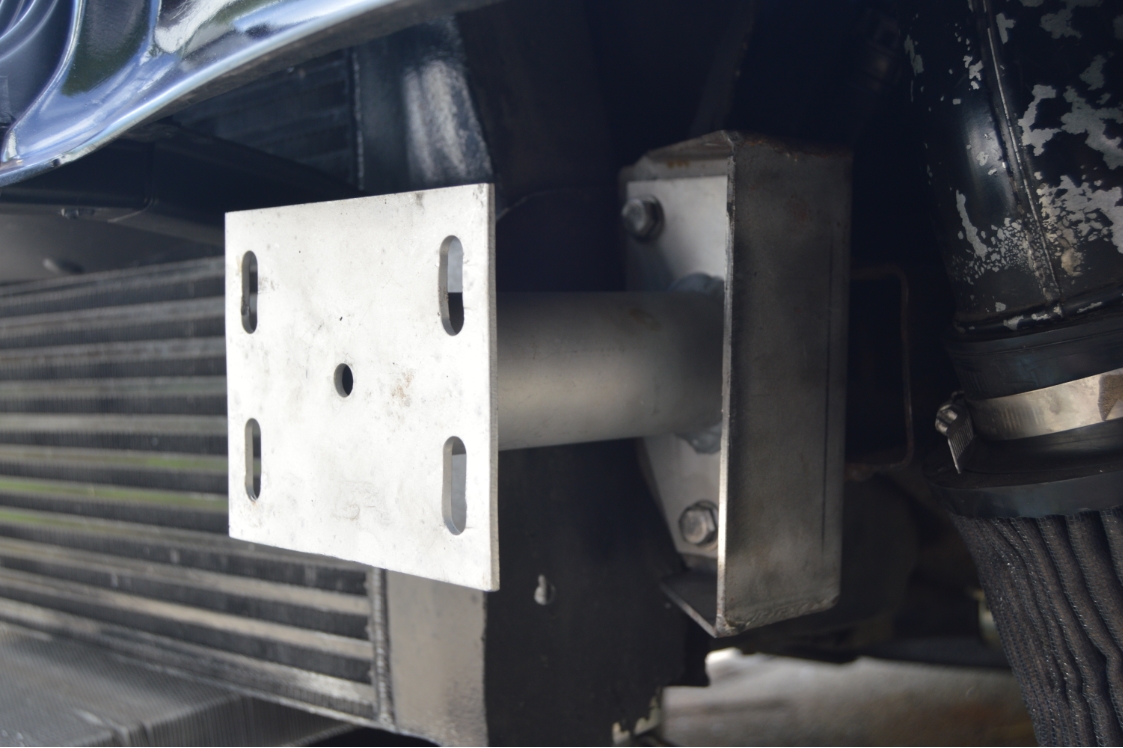
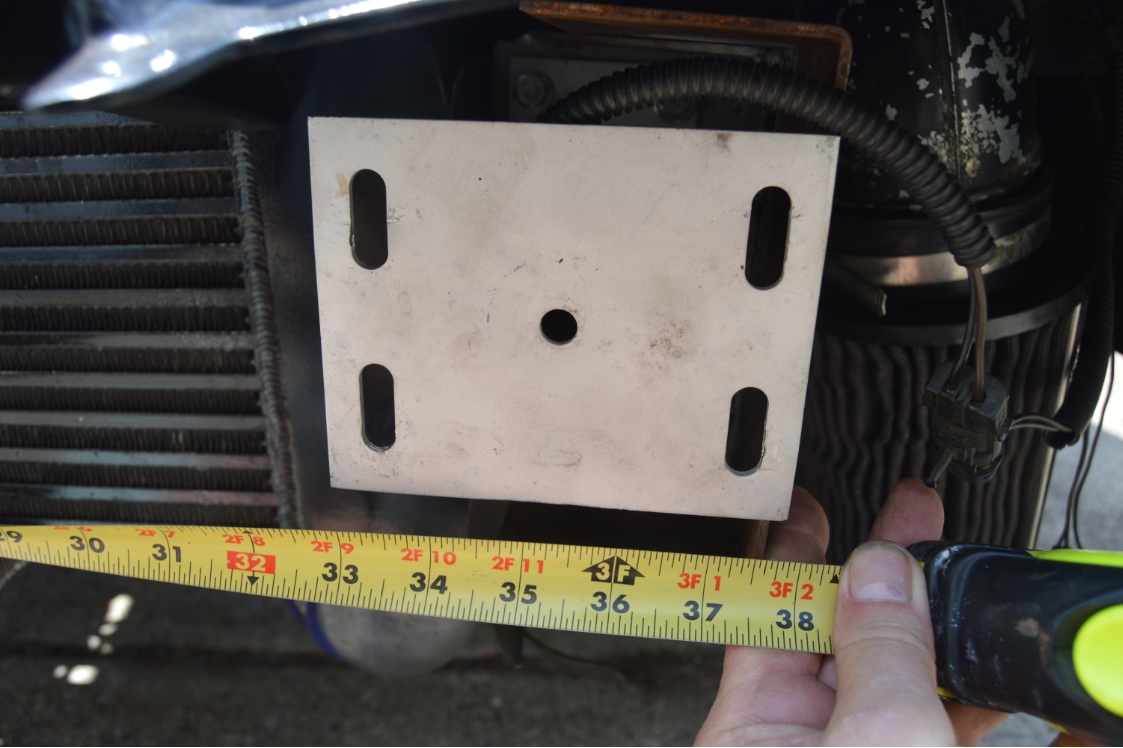
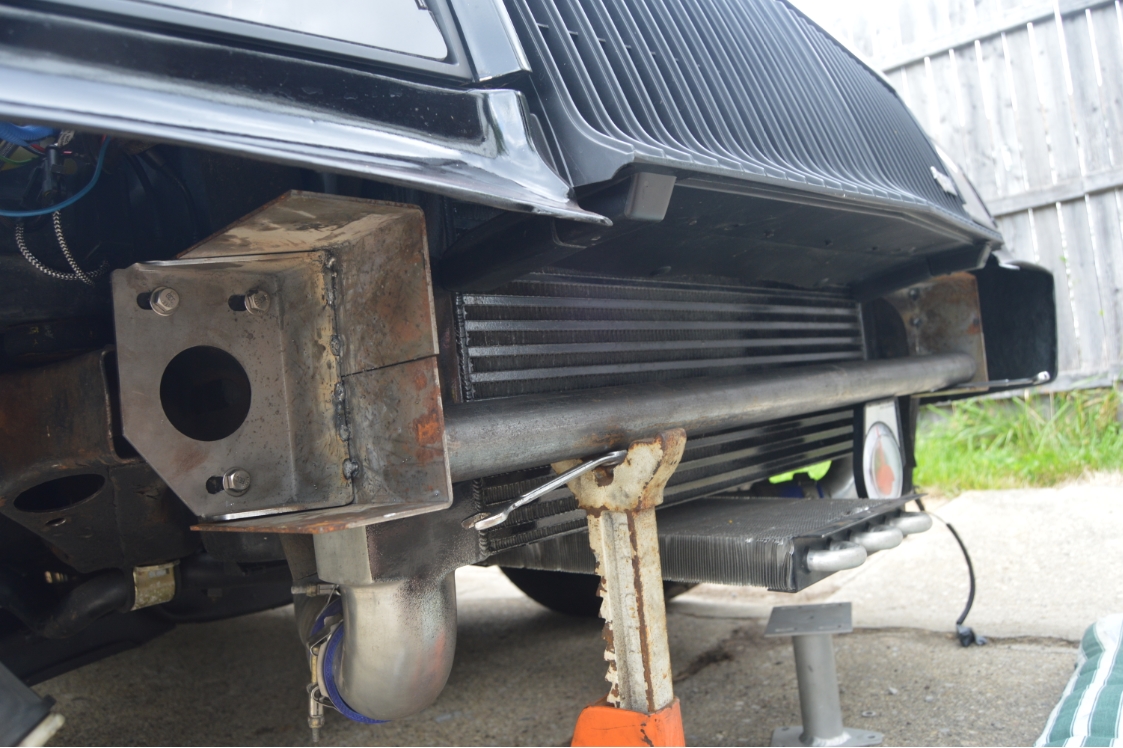
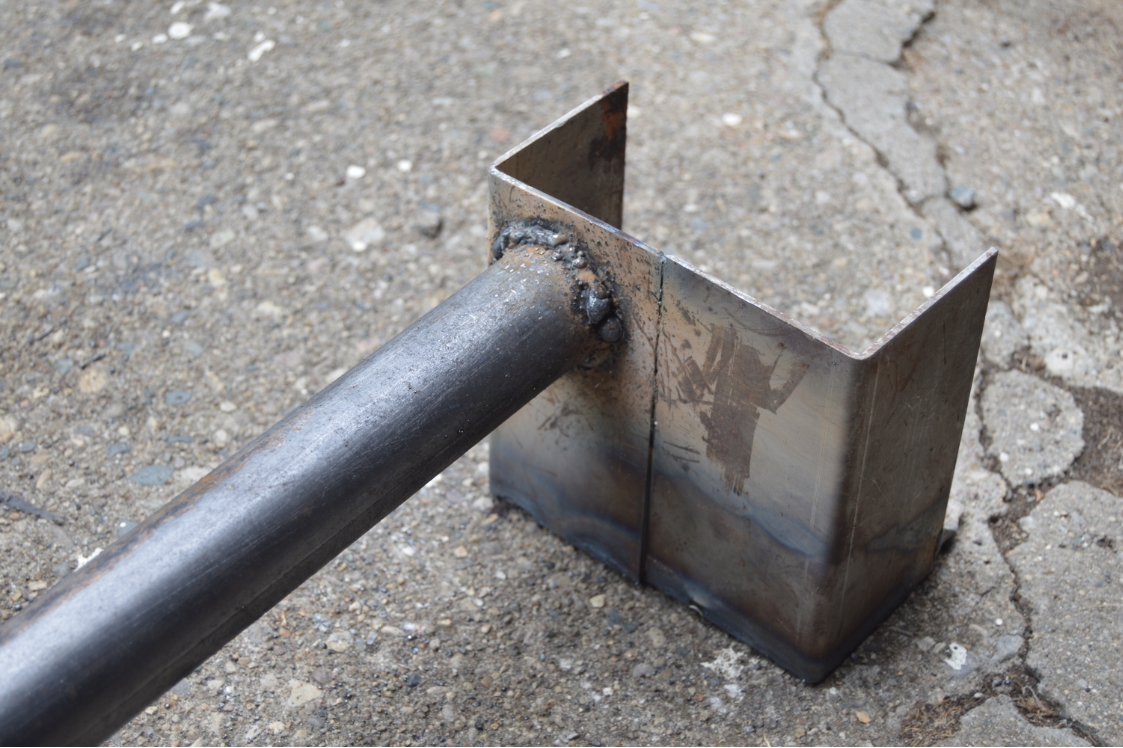
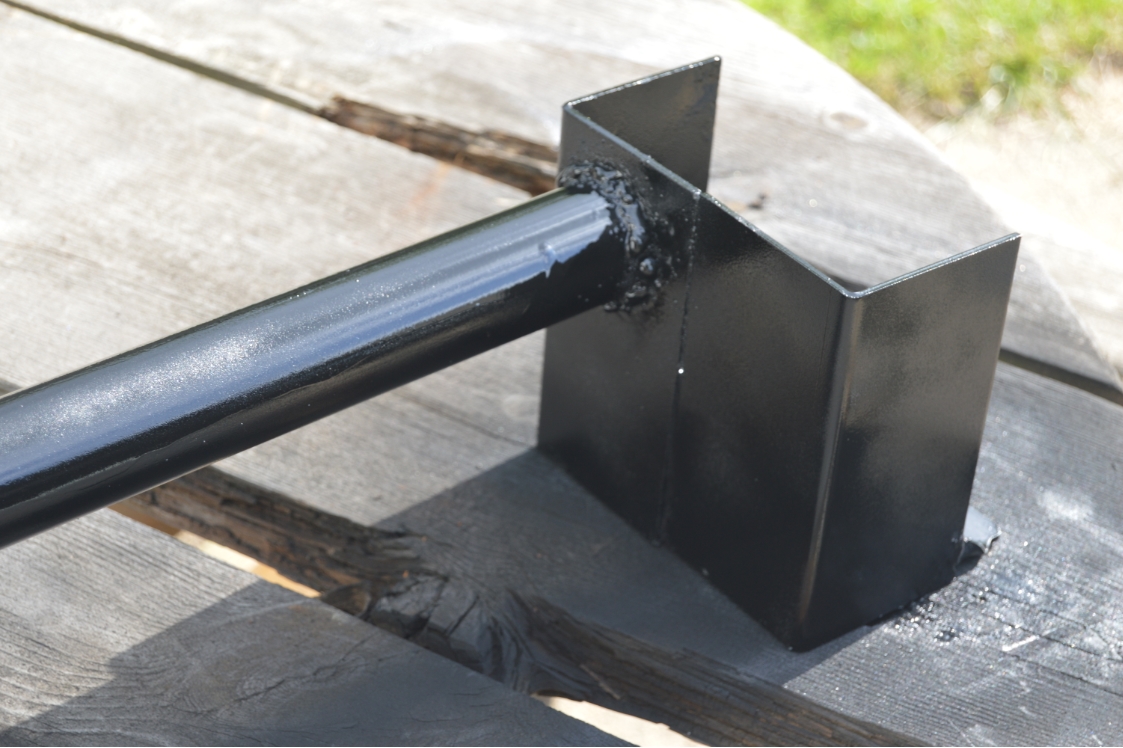
We are using 1.75″ rollbar tubing as the crossbrace.
Both braces need 4.5″ in front of the mounting surface (on the bracket) to clear the FMIC.
(2.25″ forward from the brace surface clears the FMIC, then 1.75″ for the crossbar, plus 1/2″ in front of the crossbar = 4.5″)
[our crossbar measured 37.25″ to fit in between the plates]
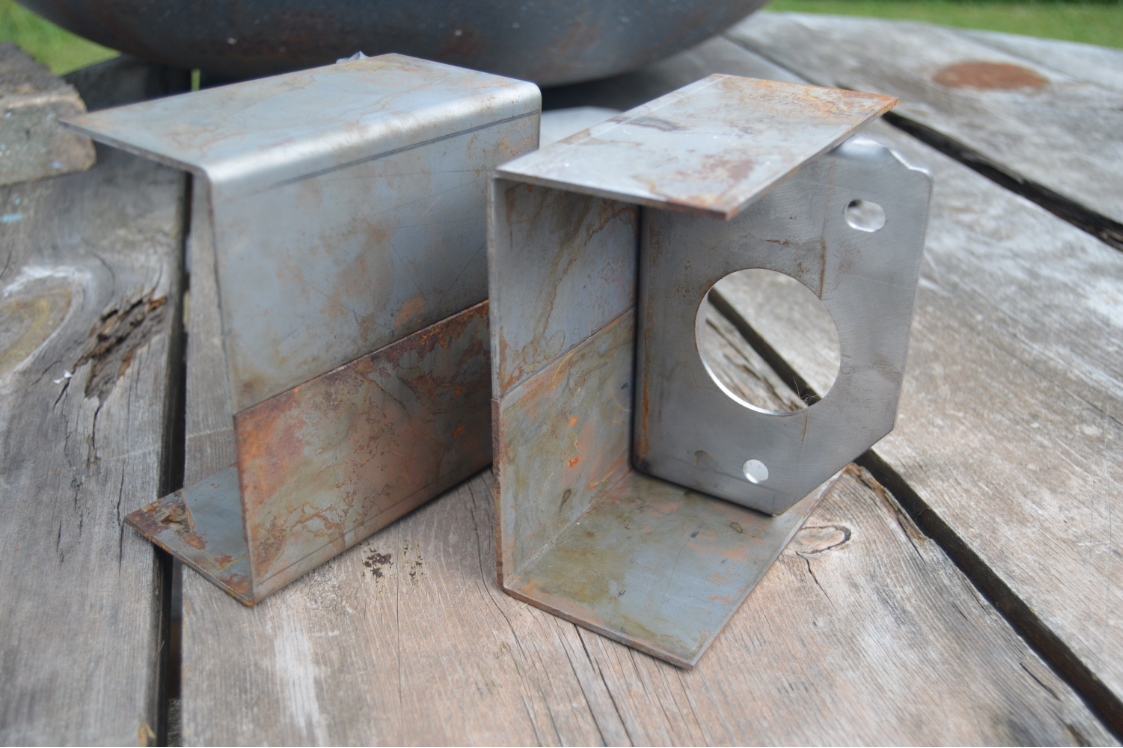
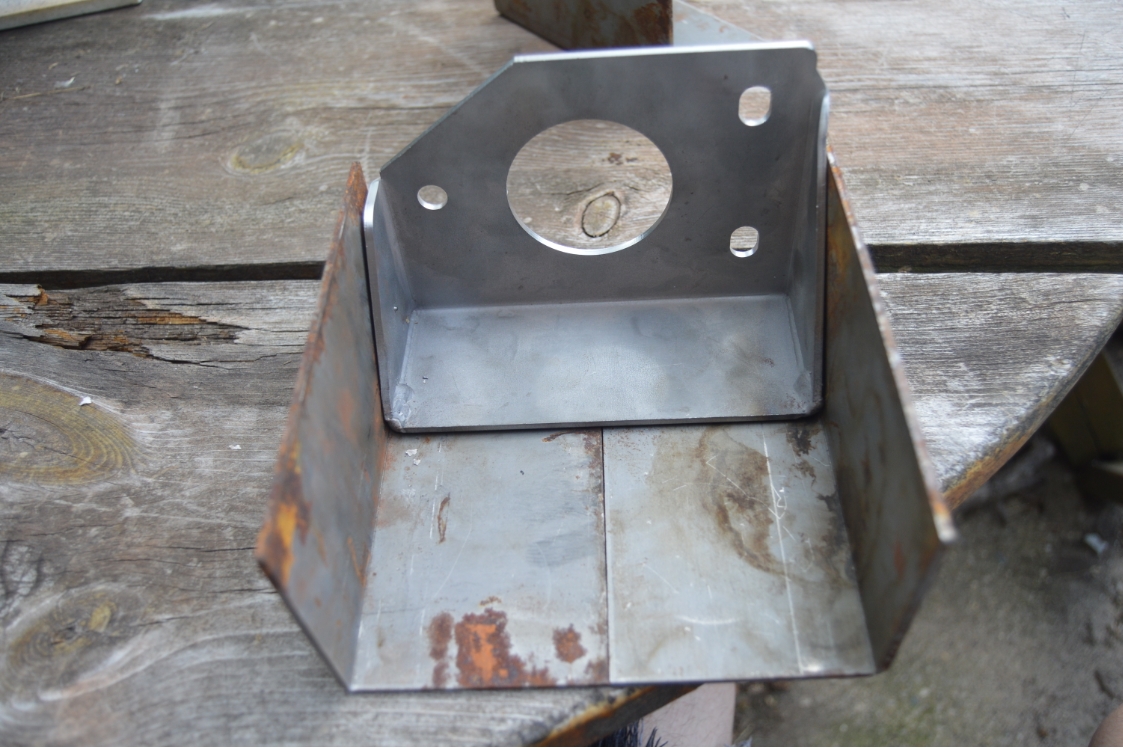
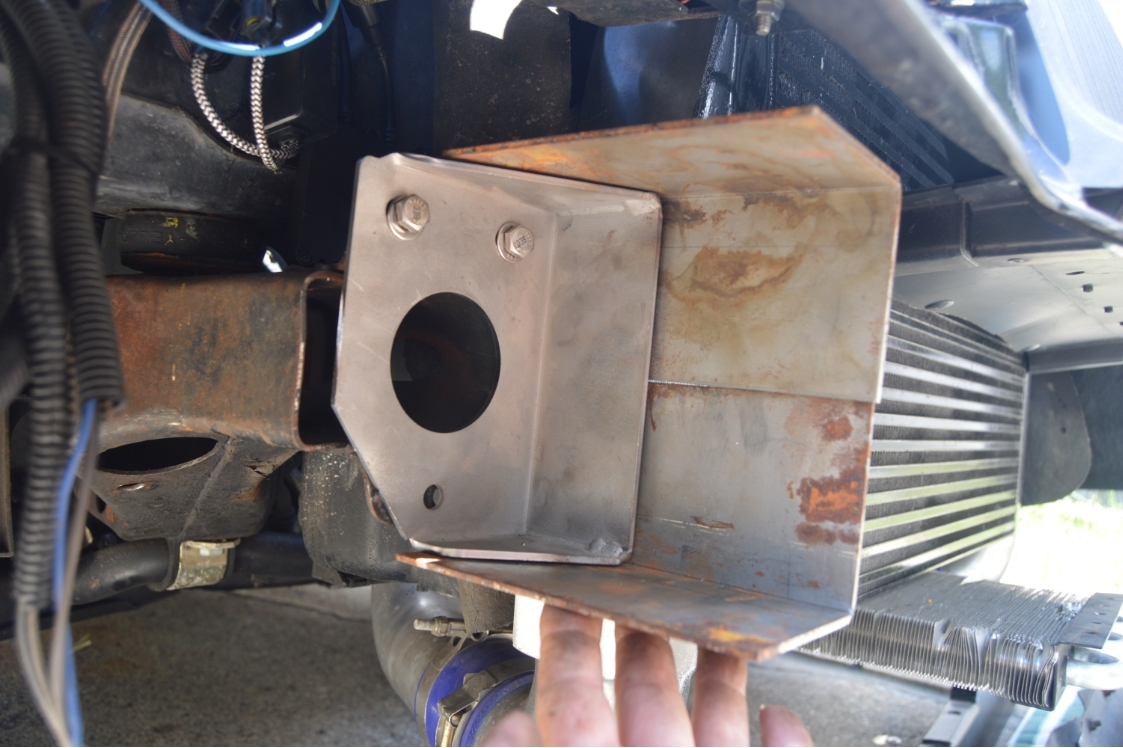
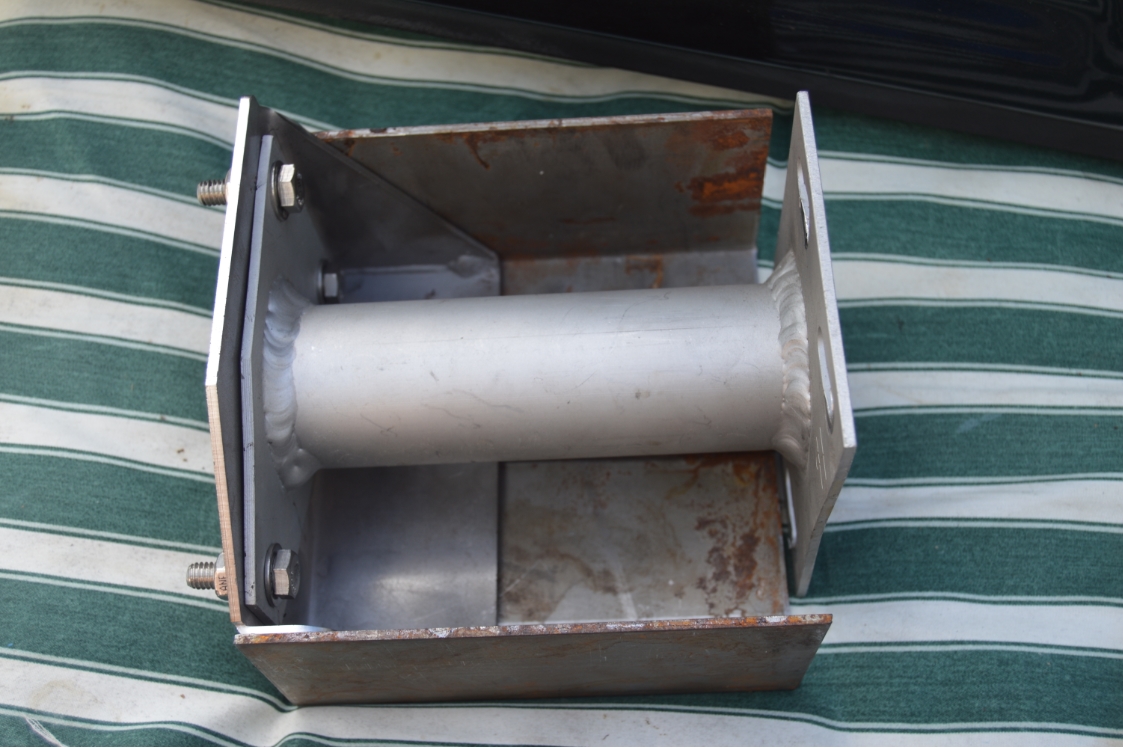
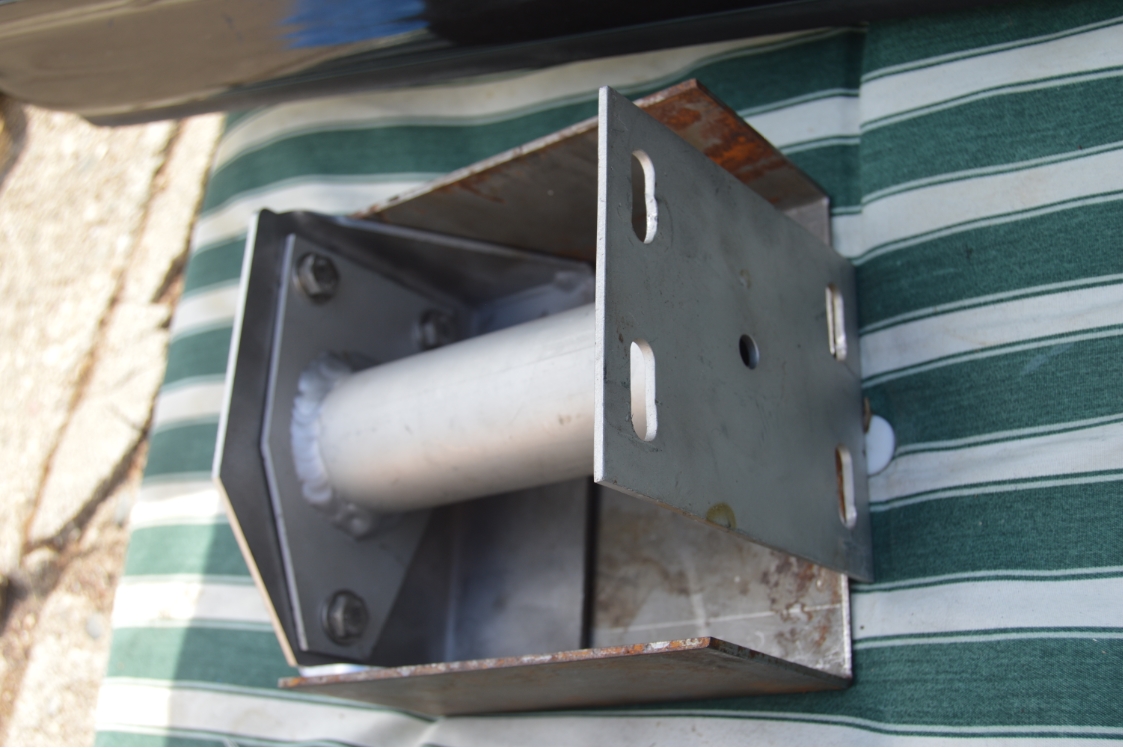
We used 2 pieces of 6″ x 6″ thick plate steel (from a rollbar kit, which is the same thickness as the GNS brackets), which we bent in half to a 90* angle, and then welded them (completely all the way around) to the frame bracket. The fold-over (the top & bottom) sections gives this entire area some strength.
[a single 6″ x 12″ piece would be better/easier, with a 3″ bend on the top & botttom, but we had 6×6’s handy, so thats what we used]
The 6×6’s got trimmed down on an angle on the top & bottom to resemble the angles on the brackets. This makes sure they don’t hit anything, and are not in the way in the future if you have to access that area for some reason.
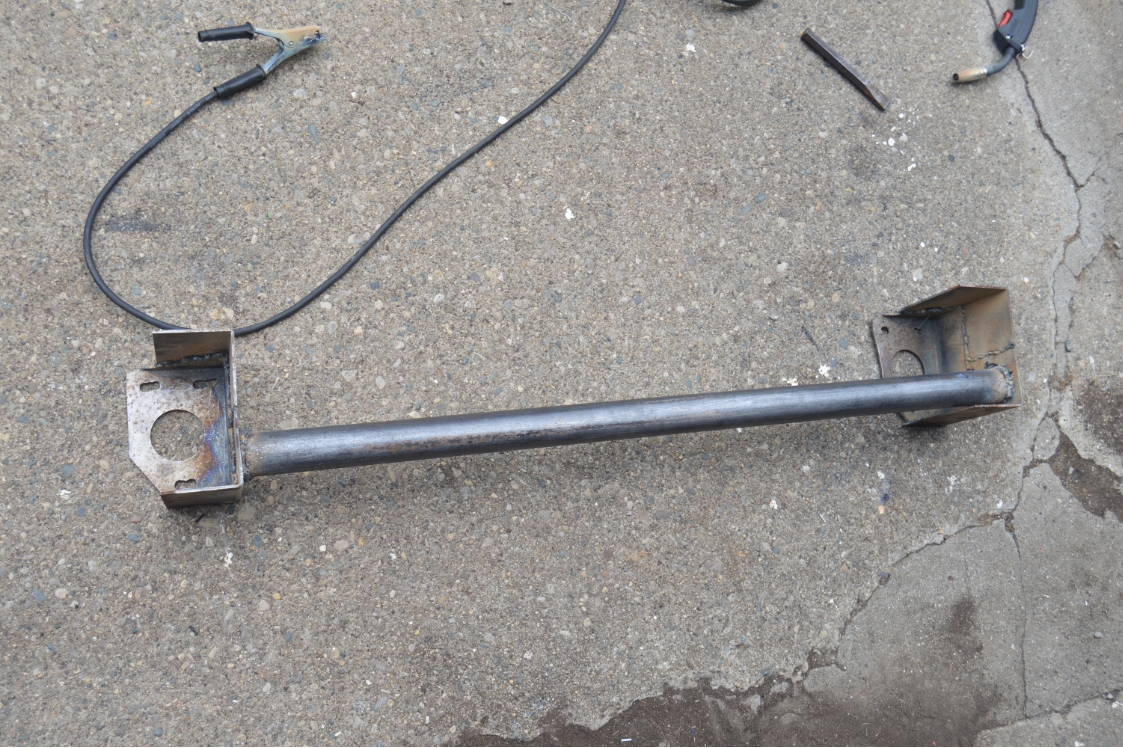
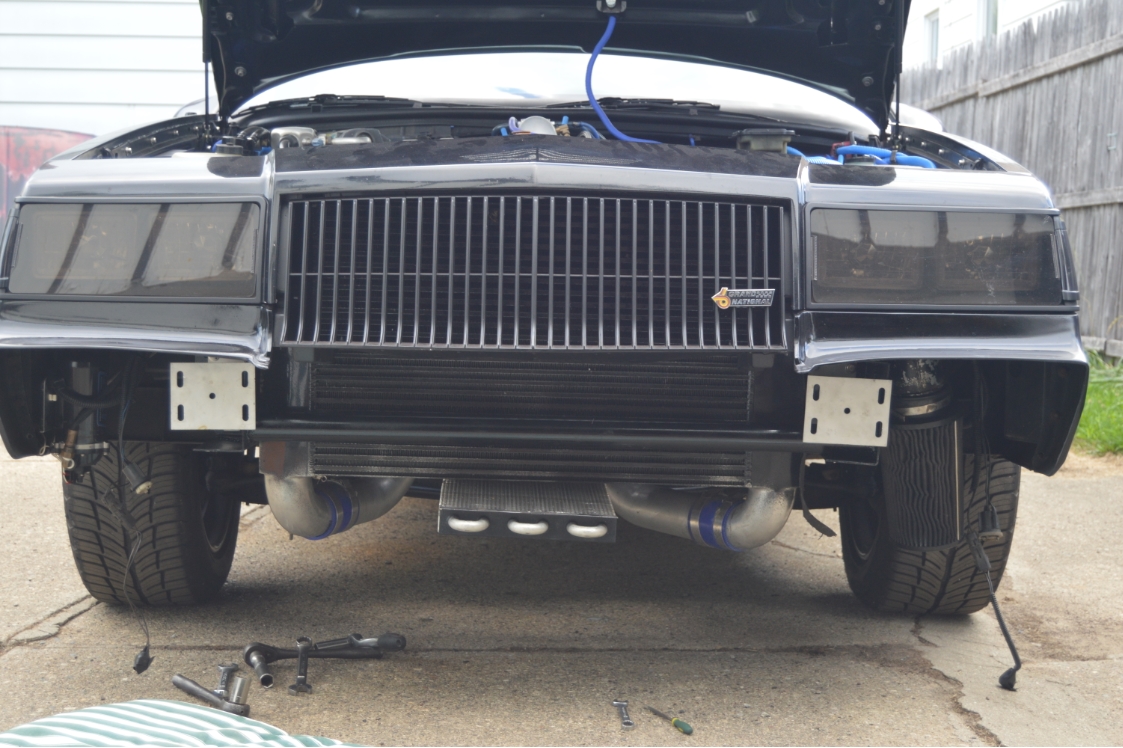
After doing that, the remaining process is the same as the rear.
Measure the length for crossbar, cut it, tack weld it in place, remove from car, then fully weld around the bar.
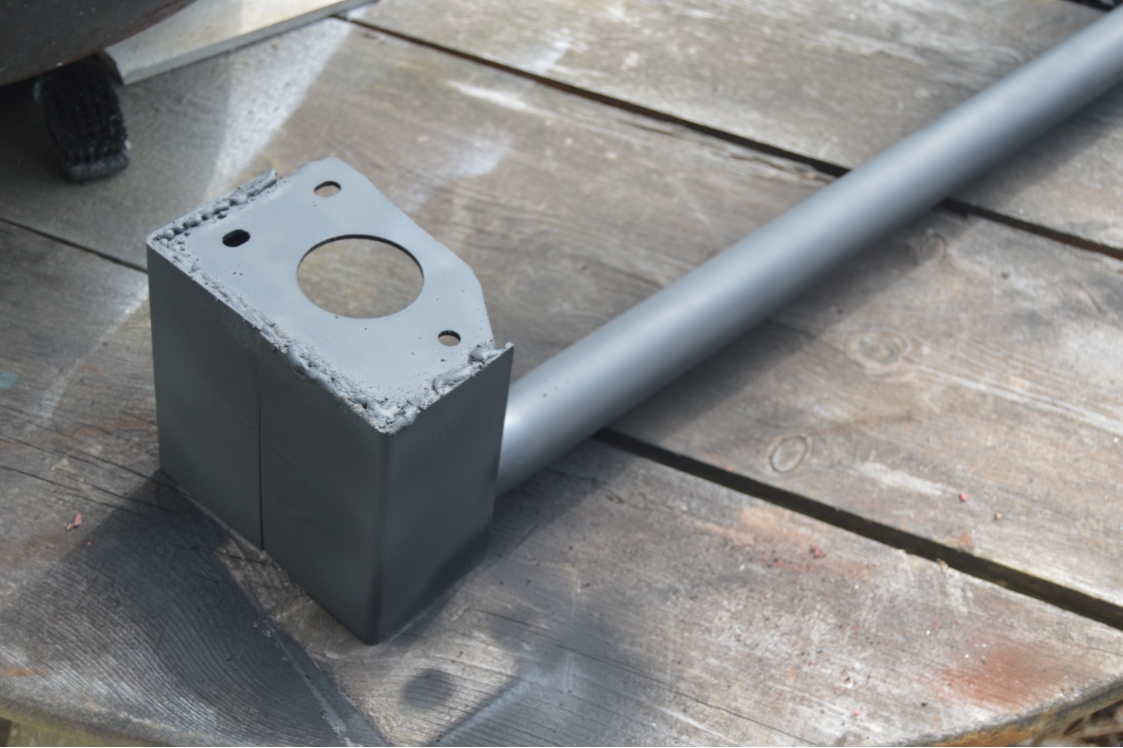
Paint it or powdercoat it to finish it.
Then reinstall.
.
.
NOTES:
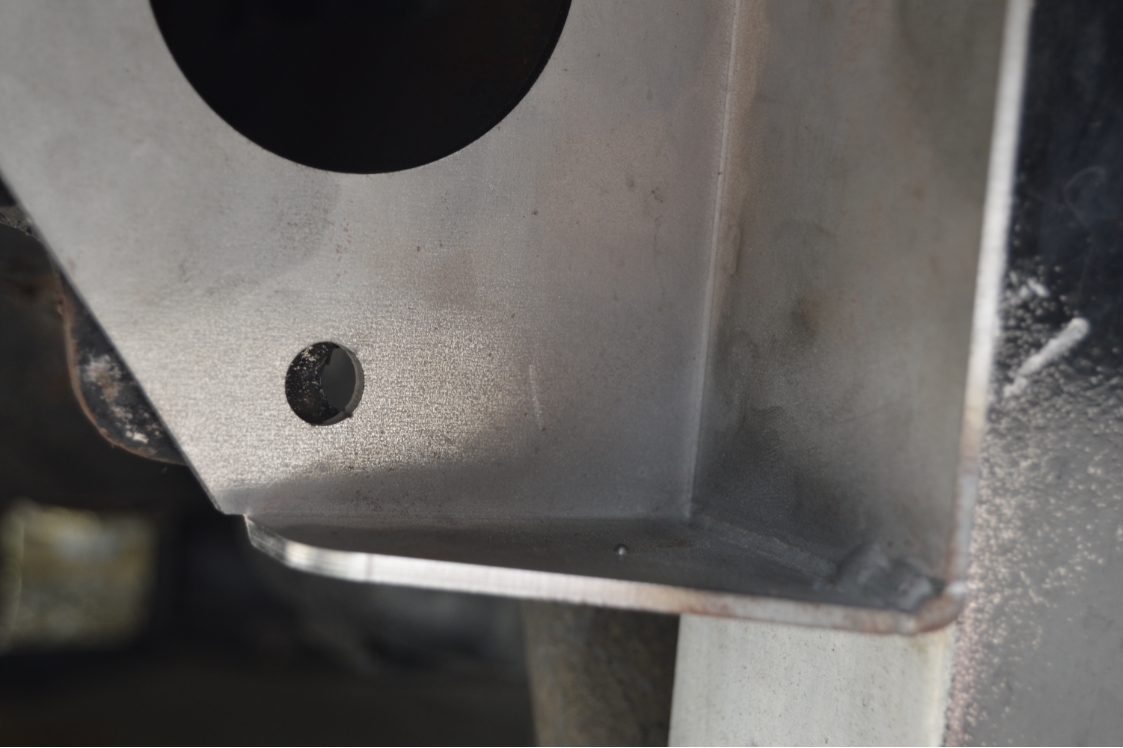
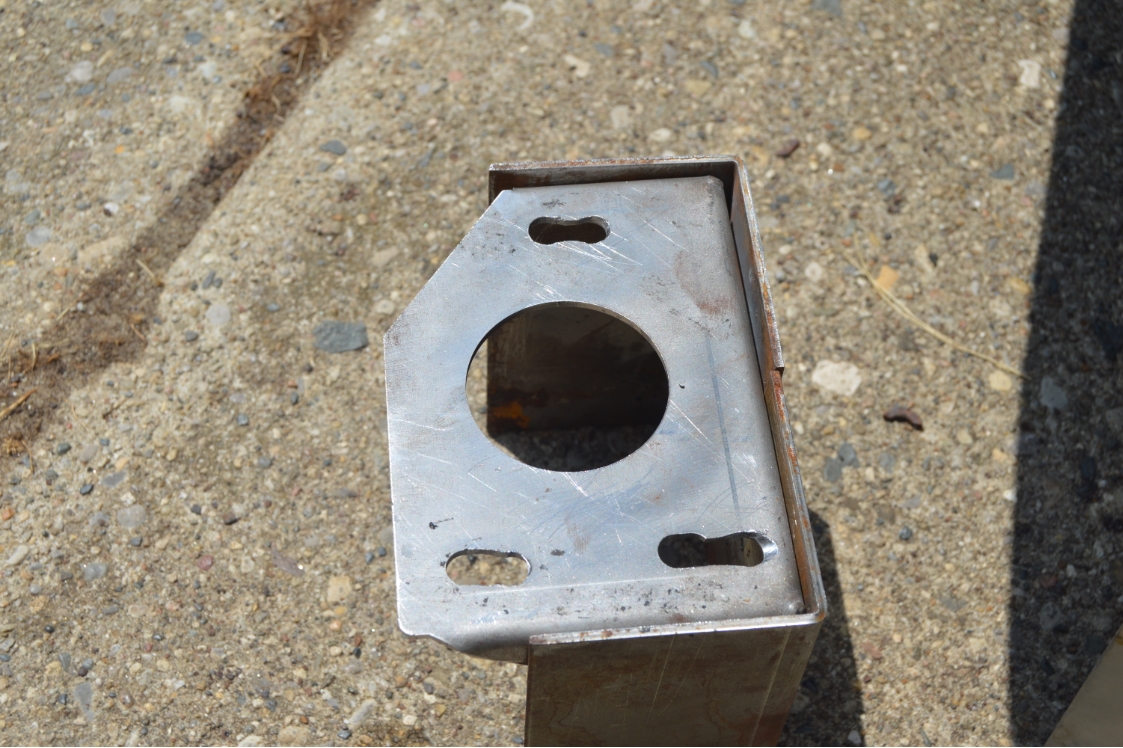
Be sure to drill a small hole in one bracket end for a vent hole before welding the crossbar on. or if you did like we did with the 6×6 plate, a small gap between them will suffice for this purpose.
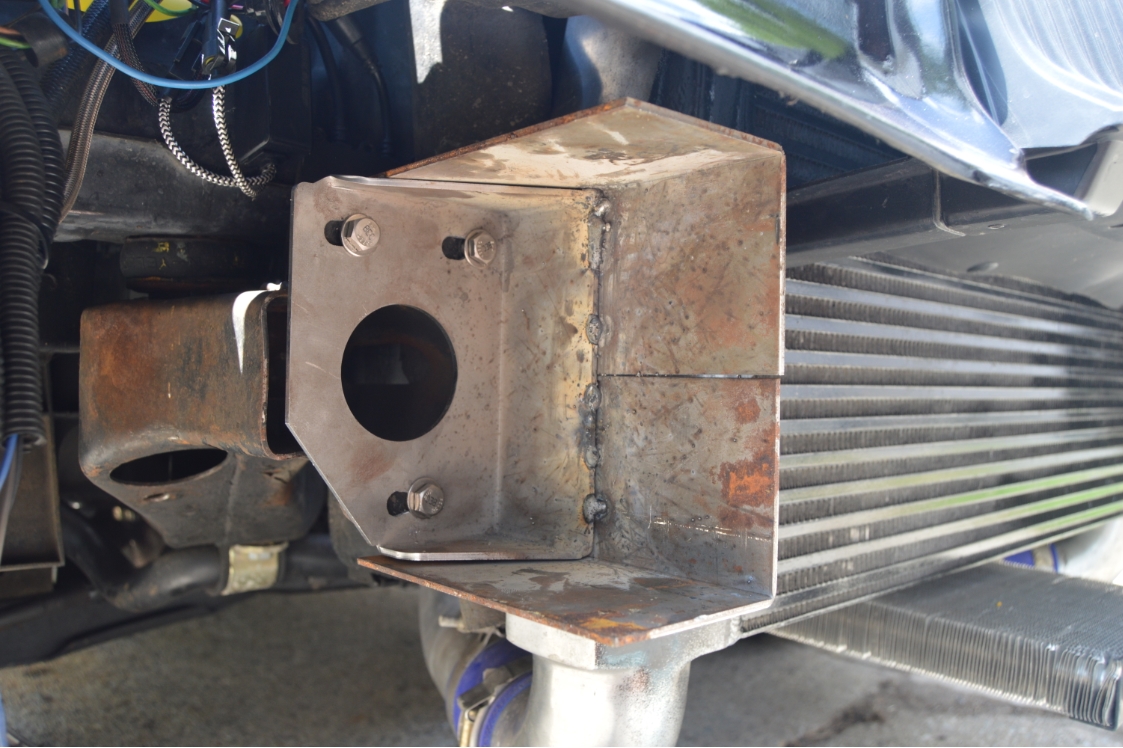
If you have a radiator box in kit, you may have to modify that (somehow) so this new brace will fit.
You will have to remove the front bumper to perform this job, so make sure you remove/disconnect the bumper lights, air dams, grill springs, and anything else that is connected!
While we had all these items removed, it was a good time to replace all the nuts & bolts with stainless steel versions. more pretty stuff, and easier future removal should the need arise.
If you’re duplicating the front end brace here, and WITH the aftermarket aluminum bumper supports, just a note that it’s a close fit between where the 6×6 plate ends and the (bumper side) of the bumper support. A slim gap of about 3/16″.
Another thing to keep in mind, is that the 4 bolts where the bumper attaches, 2 of them are going to be really close to where the 6×6 plate ends. You may have to grind out an access hole so you can tighten those bolts! (something to keep in mind as you are building this new brace)
[for now, we only have 2 bolts on each side holding the bumper on, seems to be ok for now]
.
(front mount version)
I thought of an easier way to describe making this unit.
Start with completely making the passenger side piece, weld the 2 plates on.
Now make an exact duplicate, for the drivers side.
BOTH pieces are made the same identical way, and get mounted, visually, the same way.
It’s just how the crossbar is mounted on them being the only difference.
.
.
This is a 4-part story:
A= create rear frame brace
B= install rear fiberglass bumper
C= create front frame brace – YOU ARE HERE
D= install front fiberglass bumper
.


