


After making the custom center console for Buick Grand National, we decided to create another similar looking (2 tone color) piece, this time around for the rear deck shelf (AKA “parcel shelf” – “package tray” or “speaker shelf”).
Was it a piece that really needed to be replaced? No.
But we did think it would be a neat addition into our already custom modded Turbo Buick.
And probably a fun project to boot, along with giving our readers something else to check out and consider for their own Gbody vehicles, as an idea generator on the cool things that can be implemented or created for a Turbo Regal.
(this part too is a simple bolt-in, and could be changed back to stock if/when needed)
We aren’t simply making a copy of the existing factory piece.
A couple turbo 6 logos will be cut out, and used as the speaker holes on each side of the Gbody Regal.
 We used the leftover mesh material from this project, to insert under the holes left by the turbo 6 arrows we cut out. This prevents junk from falling into the trunk, as well as lends support to the center sections of the turbo 6 cutout from cracking off (from the vibrations of the stereo speakers).
194 bulbs, like the style used for the HVAC lights (and similar) were placed on the underside of the unit, inside the new light sockets we installed, to shine light thru the Turbo 6 cutouts, adding a neat, but subtle, glow effect. These blue-colored LED lights (matching the other blue lights inside the car) only come on when the vehicles running lights are on. They aren’t so bright as to make them a distraction while driving down the road, but noticeable enough to look cool when they are on.
It will have a gray vinyl covering on the exposed top side (sort of mimicking the OEM color).
(this is the same matching material as used on the new center console)
The stock size for the rear deck shelf is approximately 5.5″ x 57″ (it’s actually a bit bigger because of the downward curves that tuck it in on the front & rear sides), however, the front & rear sides are curved on an angle to shape it around the rear glass window and back seat.
We are just basically copying that measurement by tracing the proper angles needed.
The third brake hole (which is a 2 5/8″ square as made from the factory) is centered (width-wise) within the 57″ piece (with the centerline at 27.5″ from each end). It’s located 3/4″ back, from the front of the panel (nearest the rear seat).
The speaker hole centerline is 12.5″ from each end.
We are replicating those measurements on the new rear package shelf.
For the 3rd brake light hole area, initially we were just going to make an additional square box to sit on top of this area, cover it with the black vinyl material, and secure it to the top of the package tray.
However, as we were creating all of the pieces, we thought it would be cool, and match the graphic theme that’s already going on within the car, and make 2 lightning bolts that stick out from each side of the box (one on the left side, one on the right)!
So that’s what we did, and it’s going to look very neat, a nice subtle touch that works well with the other lightning features this Gbody Regal already has.
.
Here’s what an OEM rear package tray looks like when it’s out of the car:
.


.
New stock-style reproductions of this part are available for around $150 if your Turbo Buick needs one.
(GbodyParts, Classic Industries, and others, have them)
(you might be able to find a used one for less, but the condition of it probably won’t be any better than your current one!)
Creating your own can be accomplished for much less, making this a viable option.
.
COMPLETION TIME to build: about 2 hours
.
TOOLS:
– saw (for cutting the mdf)
– drill with 1/2″ bit (starting the holes for 3rd brake light & turbo 6 symbol)
– jigsaw (cut out hole for 3rd brake light & turbo 6 symbol)
– file (or dremel tool) – (to smooth out and final shape the turbo 6 cutout)
– knife/scissors (cutting the vinyl)
– phillips screwdriver (remove/install the third brake light)
– pliers/crimp tool (for tapping the lights into existing OEM wires)
– 10mm socket (removing third brake light bracket)
– 50 torx (seat belt bolts, located under the bottom portion of the back seat)
.
PARTS:
– MDF (1/2″ thick, 4′ x 8′ sheet, $50, OR, 1/4″ MDF like we used, from the scrap pieces we had laying around)
– outer covering (gray vinyl, we used pieces from a previous project, but the original piece we bought was 72″ x 54″ for $34)
– outer covering (black vinyl, we used pieces from a previous project)
– 3M tack spray (holds vinyl to board, $11 home depot)
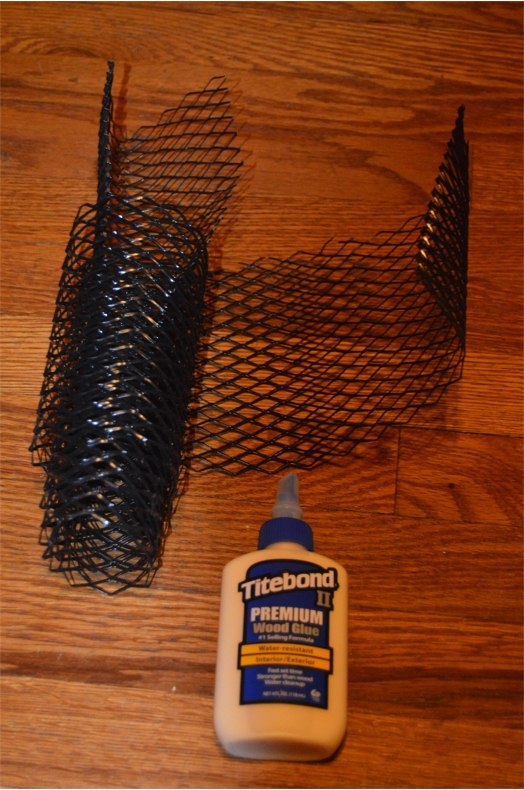
– mesh (we used pieces from a previous project)
– some kind of glue (to attach mesh and light sockets to the board)
– 2 lights & bulb sockets (2 194 blue LED bulbs $2, 2 sockets $4)
– 2 wire taps, 2 butt connectors
– 18 gauge wire (for the above lights, 1 red 1 black about 4′ each)
.
Here’s the new rear deck shelf that we built:
.


.
ABOUT THE MDF BOARD WE USED:
.
We had some leftover 1/4″ MDF (from the custom center console we built), so instead of buying another full sheet to make this rear speaker shelf out of, we just used that.
(and saved weight at the same time, as opposed to using the 1/2″ thick MDF)
Of course, the piece we had leftover was 48″ wide (by about 12″ tall), and with the OEM rear package tray size needing to be about 57″ (left to right in the car), this means it’s short by about 9 inches.
But that’s ok, as we have a plan!
We intended on making a raised piece in the center, wrapped with the black vinyl, to offset the gray material that’s used on the actual shelf.
This sort of mimics the two-tone black and gray colors that already exist in the interior compartment of the Buick GN.
Since we now need a couple more pieces, to fill in the gaps left by the short main part, we are simply going to center the main piece in the car, and make 2 add-on pieces, that we will put on the ends of this board.
They will attach on the top of the main piece, raised up, just like that extra center part we will add. These will all match, both being raised up off the shelf, so it looks like an intended purpose.
These end caps will be covered in the black material, again legitimizing the dual color scheme.
The material being short for the main board actually worked out well (a total coincidence), as these end caps match approximately the same width (4.5″) of the black cloth material on the back seat (on the outside ends).
.
BE SURE to come back tomorrow to see the “HOW-TO” and watch us actually build the new rear speaker shelf!
.


