


When we recently switched over to rear disc brakes on our 1987 Buick Grand National, we chose to completely replace the stock proportioning valve with a brand new one (4 wheel disc brake prop valve) from Inline Tube since our OEM unit is 34 years old.
Not because the old one didn’t work properly, but simply because we believe that since we were basically swapping out the entire brake system (new brake lines and all), we might as well go ahead & do this component too.
It’s part of a long term plan to pretty up the entire G-body Regal (one section at a time).
Every single mod that we have done to this Buick GN, while the job is being performed, all of the parts that go along with that procedure are replaced (nuts/bolts and all).
So eventually, just about all of the separate items on the entire car will have been replaced (extreme and unnecessary? Maybe, but that’s what we wanted to do).
.
If your prop valve is still in good shape (it’s working, has no bad threads, not all rusted out, warning switch still functions, no leaks, etc.) you may choose to want to just convert the factory proportioning valve to be able to use it on your new four wheel disc brake setup.
.
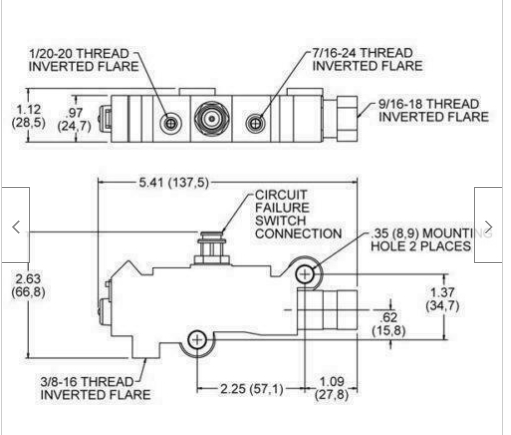
The below photo shows you the sizes of the threads on the stock prop valve, that the brake lines fit into.
(a great reference pic in case you ever need to replace your brake lines)
.
.
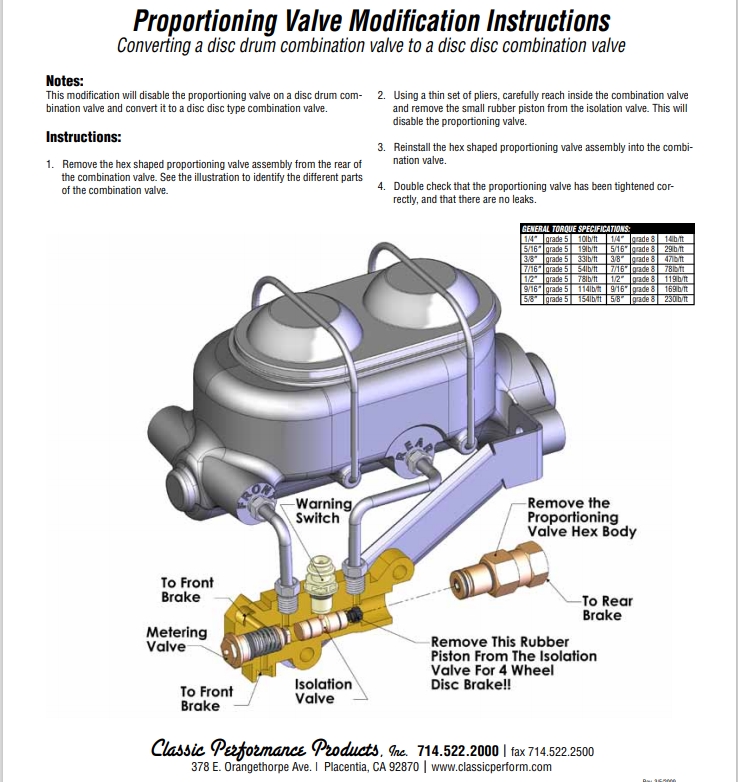
This pic below shows you in detail how to convert your OEM Buick proportioning valve (front disc, rear drum) into a style that will work for a new 4 wheel disc brake setup (front disc, rear disc) on your Buick Regal.
.
(Note that in this pic, not shown, on a POWERMASTER or VACUUM brake setup, on the master cylinder, the REAR line is for the FRONT brakes)
Classic Performance Products reveals how easy this conversion is to do (see pic below from their supplied PDF).
Basically disconnect proportioning valve hex body from the rear side, remove the rubber piston from the isolation valve, and then reassemble. Voila! Conversion complete!
.
.


